
Все способы:
- Способ 1: Встроенное средство устранения неполадок
- Способ 2: Запуск службы диспетчера печати
- Способ 3: «Командная строка»
- Способ 4: Переустановка драйвера
- Способ 5: Редактирование реестра
- Вопросы и ответы: 0
Способ 1: Встроенное средство устранения неполадок
Ошибка «Не был произведен вызов StartDocPrinter» на компьютере с Windows 10 говорит о том, что в системе произошел сбой, связанный с принтером (чаще всего у владельцев устройств HP), и причин ему может быть множество – от проблем со службами до неисправности программного обеспечения оборудования.
В Windows 10 встроено средство устранения неполадок, которое в автономном режиме проверяет систему на возможные проблемы, связанные с принтером или другим печатающим оборудованием, после чего предлагает пути решения или исправляет ситуацию самостоятельно, если вмешательство пользователя не требуется.
- Нажмите на «Пуск» и выберите запуск штатного приложения «Параметры».
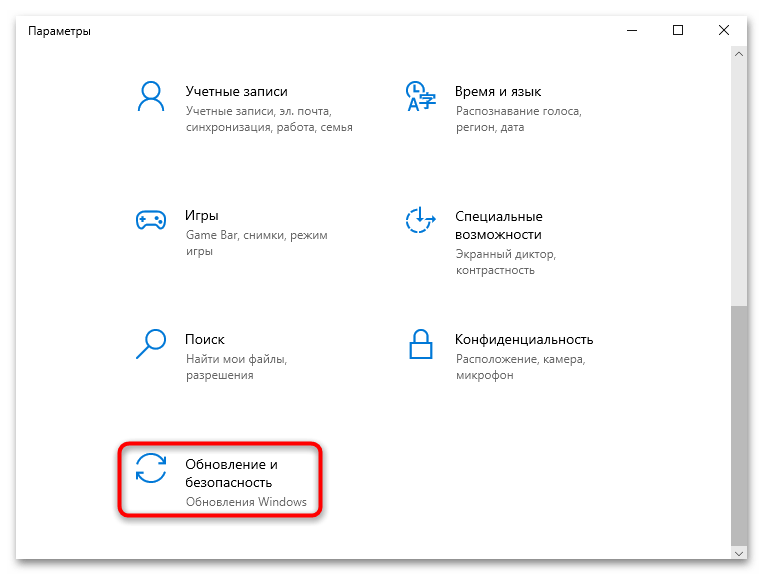
- Перейдите в раздел «Обновление и безопасность».
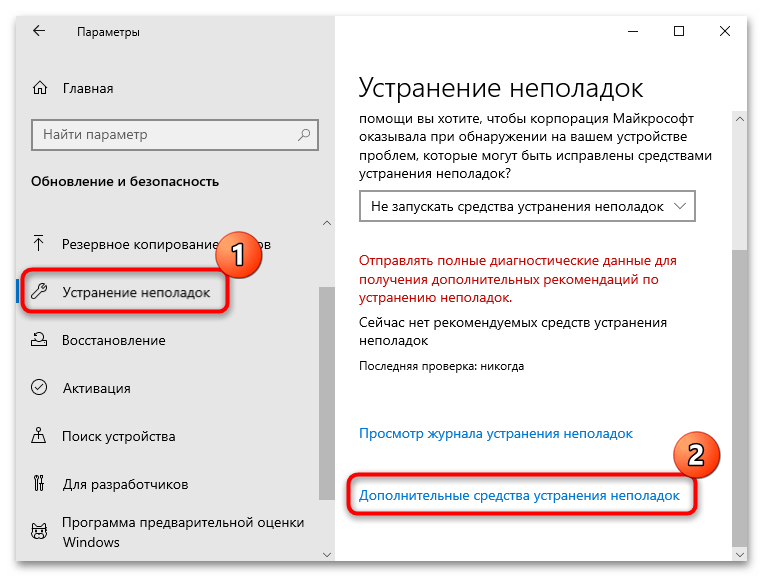
- Далее на панели слева щелкните по вкладке «Устранение неполадок», затем в основной части окна кликните по строке «Дополнительные средства устранения неполадок».
- В списке инструментов найдите строку «Принтер», нажмите на нее, затем запустите встроенное средство устранения неполадок.

Встроенный инструмент начнет проверять систему на наличие возможных неполадок, которые могли стать причиной появления рассматриваемой ошибки. Если ничего не было найдено либо способ не помог, переходите к следующим рекомендациям, которые несут более узконаправленный характер.
Способ 2: Запуск службы диспетчера печати
Следует убедиться, что «Диспетчер печати» включен и работает нормально. В случае если он выключен, его потребуется активировать, чтобы нормализовать работу устройства и непосредственную печать документов и файлов. Для этого можно воспользоваться оснасткой «Службы» (поскольку запустить потребуется именно службу):
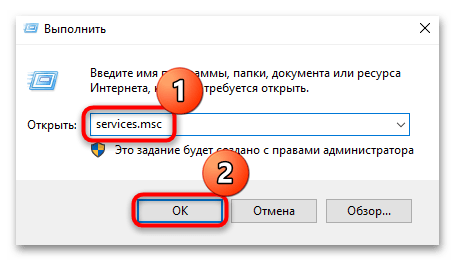
- Используйте сочетание клавиш «Win + R», чтобы вызвать окно «Выполнить», где нужно ввести
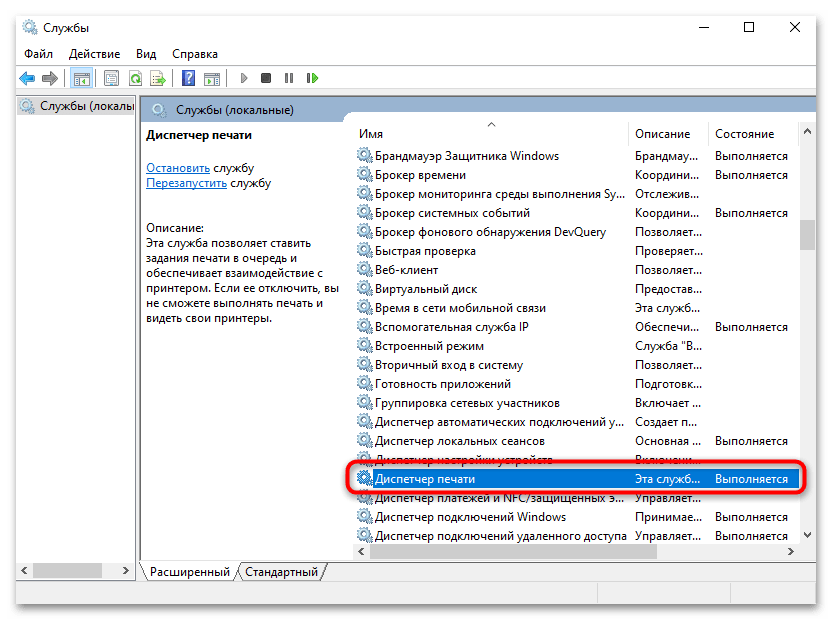
services.mscи нажать «ОК». - В списке служб найдите «Диспетчер печати» и убедитесь, что на данный момент установлено состояние «Выполняется». Если нет, то дважды кликните по строке левой кнопкой мыши.
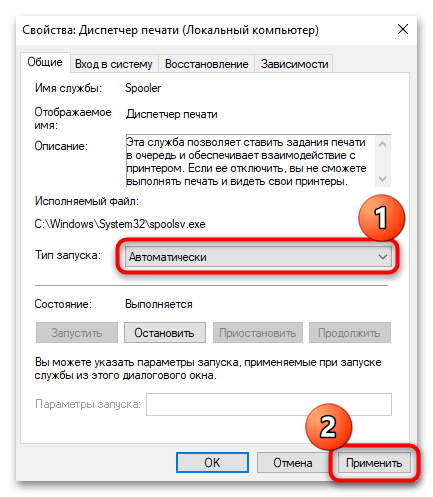
- На вкладке «Общие» в меню «Тип запуска» выберите «Автоматически», затем примените действие.
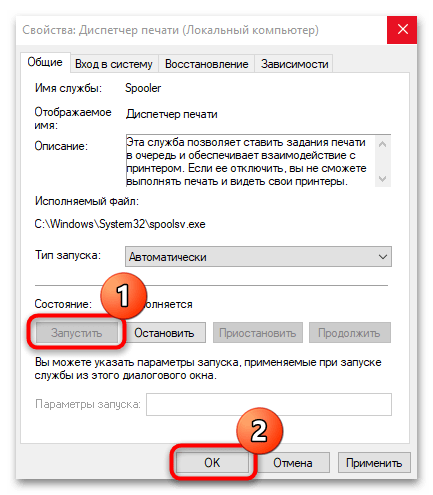
- Запустите службы и сохраните настройки, нажав на «ОК».
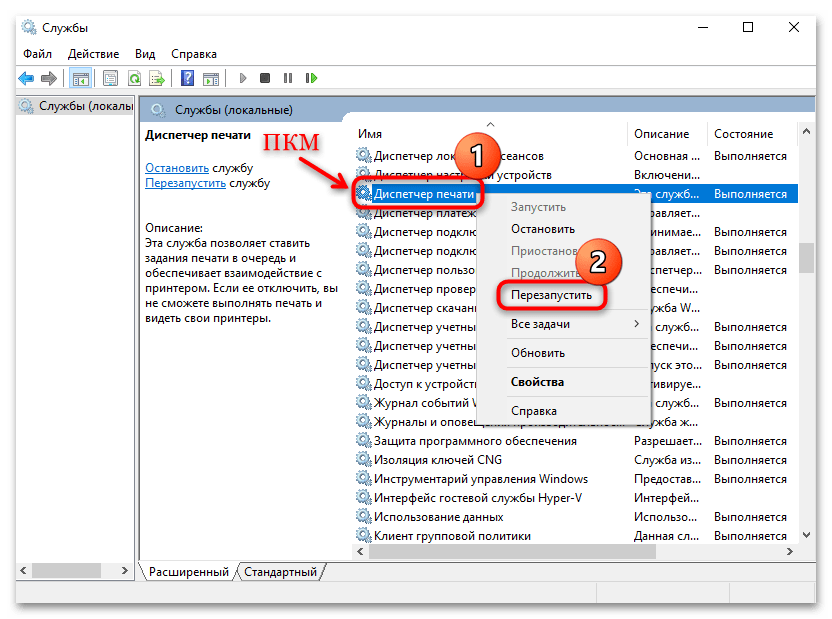
Также можно попробовать перезапустить службу, даже если она работает. Иногда случаются системные сбои, из-за которых «Диспетчер печати» не может корректно функционировать. Кликните по строке с ним правой кнопкой мыши и из контекстного меню выберите пункт «Перезапустить».
После запуска службы или ее перезапуска потребуется перезагрузить компьютер, после чего можно проверить, пропала ли ошибка «Не был произведен вызов StartDocPrinter».
Способ 3: «Командная строка»
Случается, что системные файлы, отвечающие за работу вышеупомянутой службы, повреждены или не отвечают, например вследствие различных сбоев или вмешательства стороннего софта, в том числе вирусов. Скорее всего, тогда понадобится произвести восстановление службы, и выполнить его можно с помощью специальных команд:
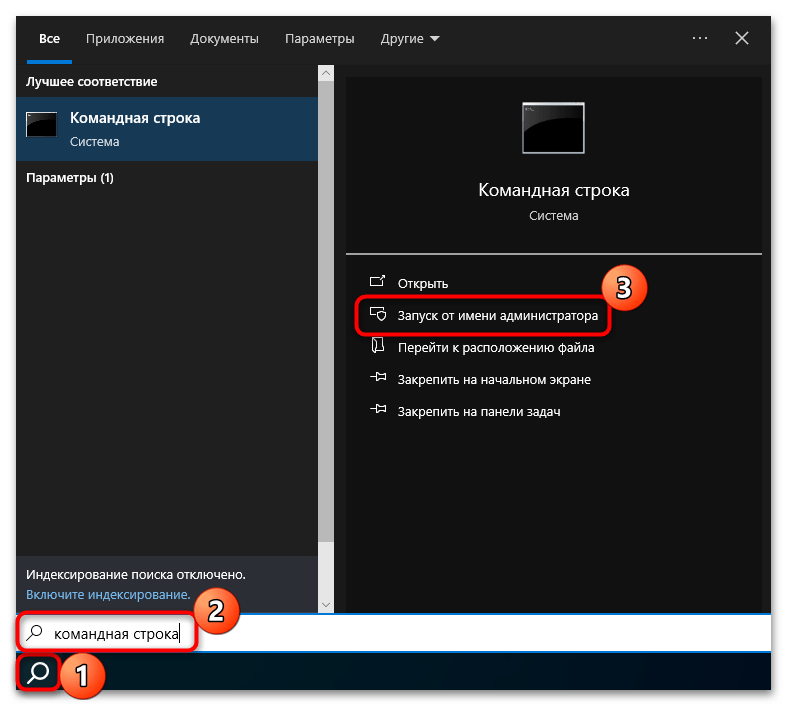
- Запустите «Командную строку» от имени администратора любым удобным методом.
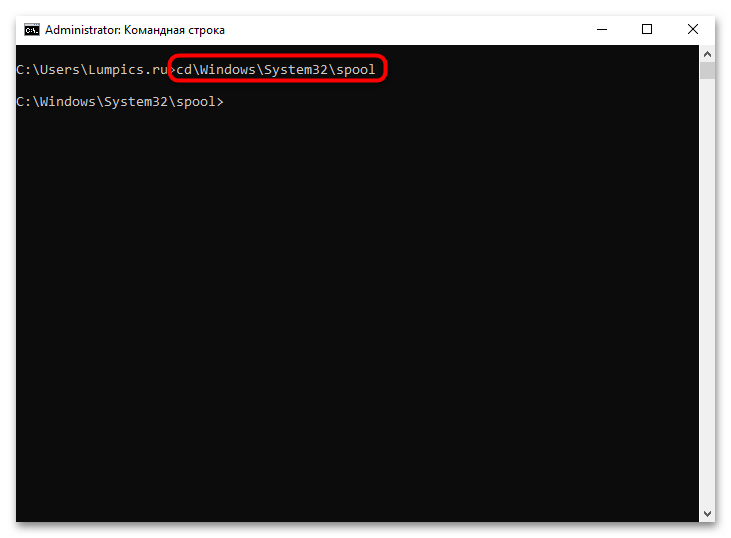
- Введите команду
cd\Windows\System32\spoolи нажмите на клавишу «Enter». - Следующей выполните команду
cacls.exe PRINTERS /E /G administrator:C.
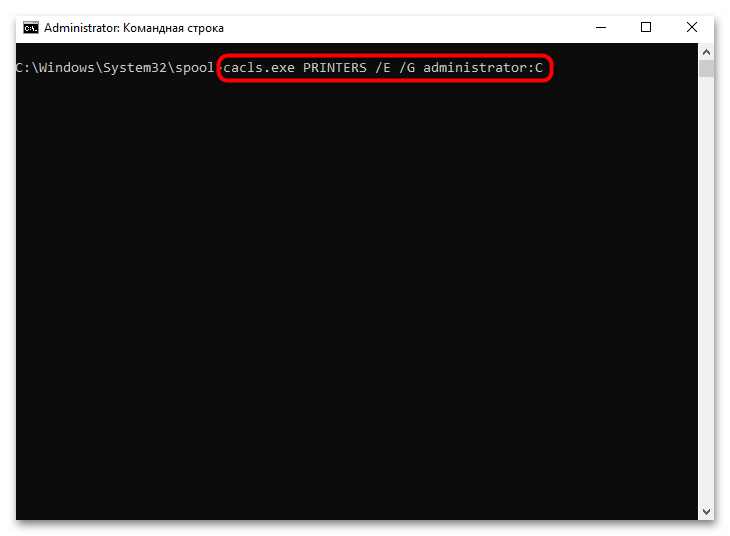
После выполненных действий закройте окно консоли и перезагрузите компьютер, а потом уже можно проверять, решена ли проблема.
Способ 4: Переустановка драйвера
Если в работе программного обеспечения принтера возникли проблемы, может потребоваться переустановка драйвера, но для этого нужно предварительно удалить старое ПО, потенциально содержащее ошибки или повреждения.
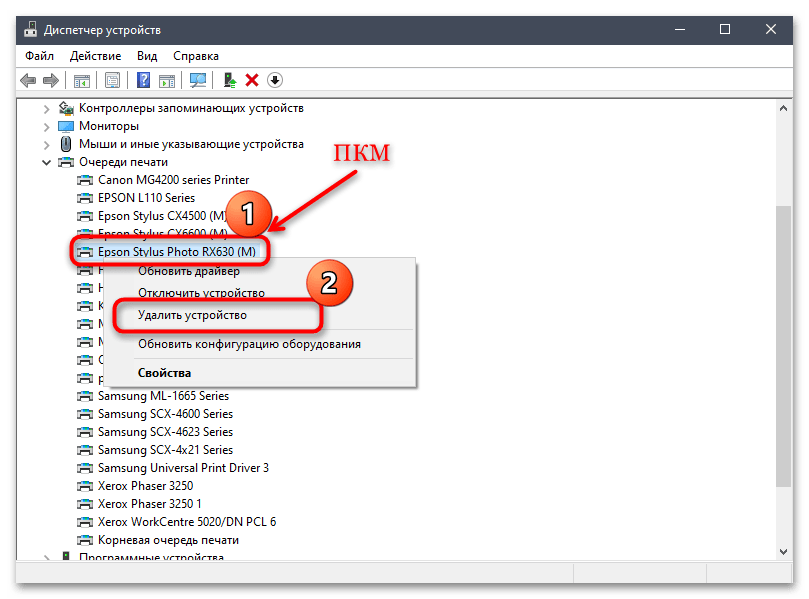
- Кликните правой кнопкой мыши по «Пуску», вызовите «Диспетчер устройств», выбрав средство из появившегося меню. Также можно использовать строку поиска, чтобы отыскать эту оснастку.
- Разверните меню «Принтеры», в списке кликните правой кнопкой мыши по названию оборудования и выберите пункт «Удалить устройство».
- Подтвердите действие в окне с предупреждением, затем перезагрузите компьютер.
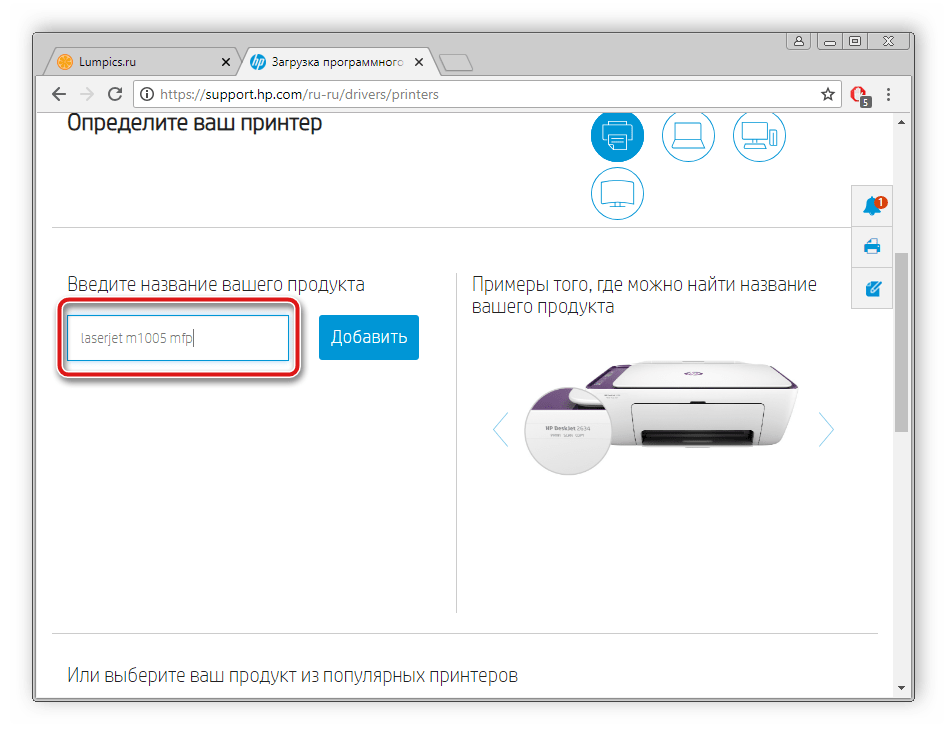
Как правило, у современных принтеров при подключении к компьютеру автоматически устанавливается программное обеспечение, поэтому для инсталляции драйвера достаточно вновь подсоединить устройство. Также иногда для установки драйвера принтера могут потребоваться другие способы, например скачивание нужной версии программного обеспечения с официального сайта производителя печатающего оборудования или использование специализированного софта. Более подробно о методах инсталляции ПО для принтера можно узнать из нашего отдельного материала.
Подробнее: Установка драйвера для принтера
Способ 5: Редактирование реестра
Также стоит проверить, остались ли в системном реестре «следы» от других принтеров, которые ранее подключались к компьютеру. Если да, то их нужно удалить, но предварительно создайте точку восстановления системы, так как неправильные действия могут привести к системным сбоям различной степени.
Читайте также: Инструкция по созданию точки восстановления Windows 10
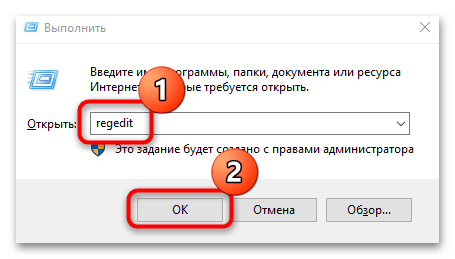
- Откройте окно «Выполнить» (клавиши «Win + R»), затем введите запрос
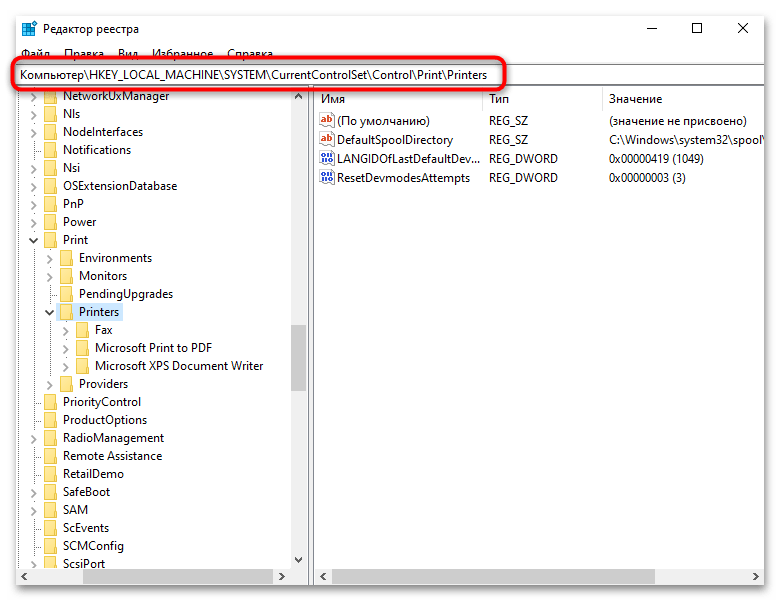
regeditи нажмите на кнопку «ОК» или клавишу «Enter». - Разверните ветку
Компьютер\HKEY_LOCAL_MACHINE\SYSTEM\CurrentControlSet\Control\Print\Printers(путь можно вставить также в адресную строку редактора вверху и нажать на клавишу «Enter»). - Удалите все разделы, которые могут принадлежать другим принтерам, щелкнув правой кнопкой мыши по строке и выбрав «Удалить», потом подтвердите действие.

Обратите внимание, что в этом же разделе есть и другие ключи, принадлежащие фирменному программному обеспечению Microsoft. Их удалять не нужно, потому что они важны для работы системы. К ним относятся:
- «Fax»;
- «Microsoft Print to PDF»;
- «Microsoft XPS Documents Writer»;
- «Microsoft Shared Fax Monitor»;
- «OneNote»;
- «Send to OneNote2016».
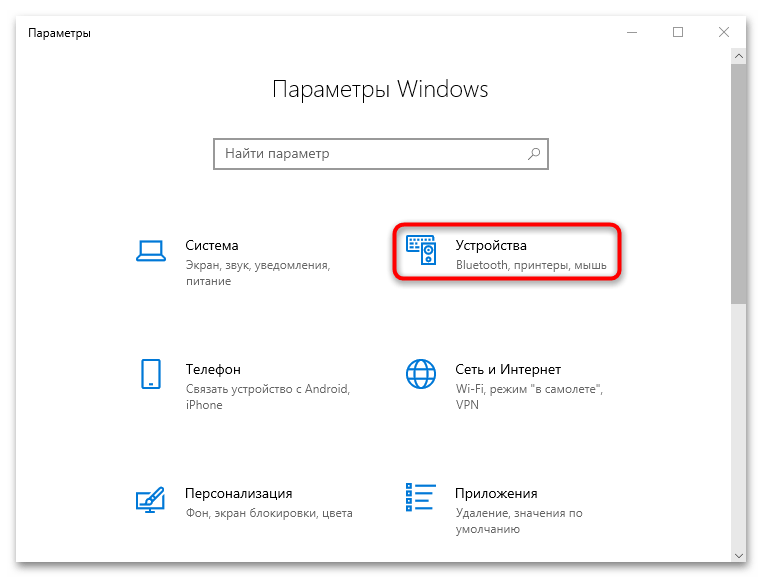
- Следующее, что нужно сделать, — это открыть раздел с устройствами штатных «Параметров» и удалить оборудование от других производителей. Нажмите на «Пуск» и вызовите «Параметры», затем перейдите в раздел «Устройства».
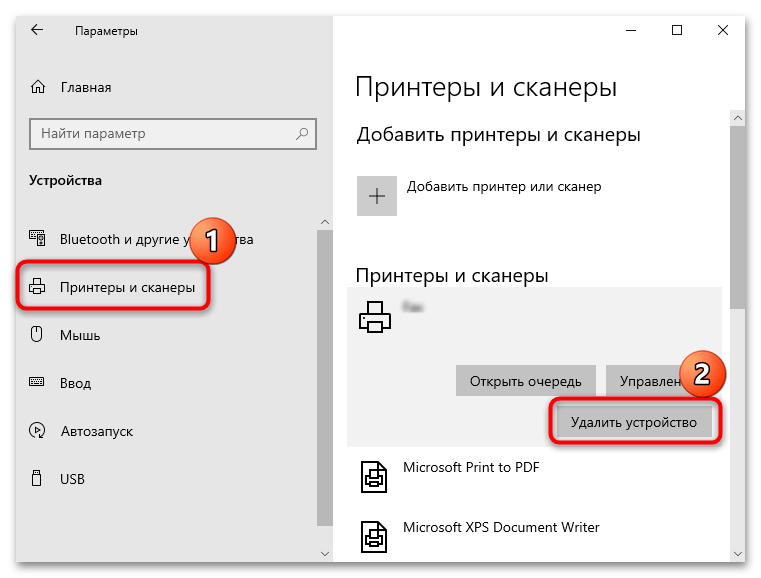
- Через панель слева переключитесь на вкладку «Принтеры и сканеры», в центральной части окна выберите то устройство, которое нужно удалить, и кликните по соответствующей кнопке.
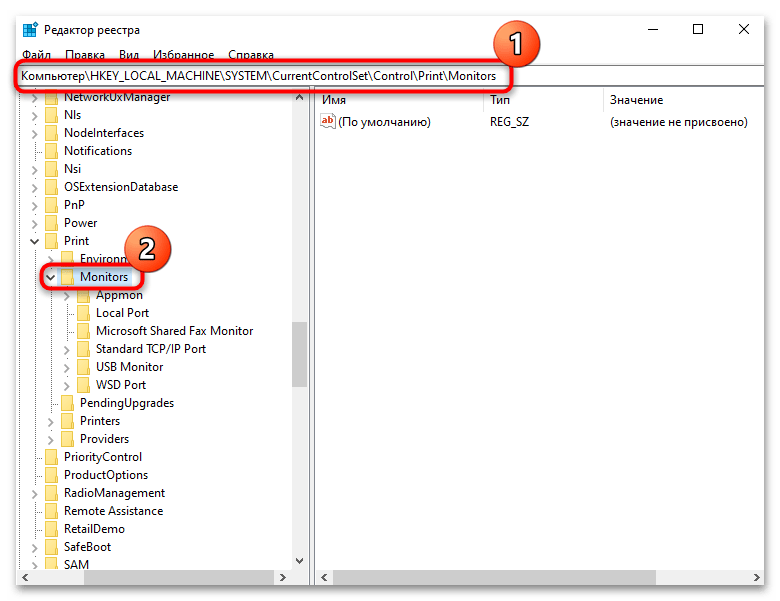
- Вернитесь к «Редактору реестра» — теперь тут нужно стереть записи о софте, контролирующем печатающее устройство стороннего производителя. В ветке
Компьютер\HKEY_LOCAL_MACHINE\SYSTEM\CurrentControlSet\Control\Print\разверните каталог «Monitors» и удалите все подразделы, кроме:- «Appmon»;
- «Local Port»;
- «Standard TCP/IP Port»;
- «USB Monitor»;
- «WSD Port».

После удаления ключей в системном реестре перезагрузите компьютер и выполните повторную установку программного обеспечения для проблемного принтера.
Наша группа в TelegramПолезные советы и помощь
In this article, we are going to discuss on How to fix A StartdocPrinter call was not issued error in Windows 10. You are provided here with easy steps/methods to resolve the issue. Let’s starts the discussion.
‘A StartdocPrinter call was not issued’ error: It is common Windows Problem considered as printing issue. This error is usually appeared when you try to print anything/document in your Windows 10 computer. Some users reported they faced this issue with the printer that is connected to network. They explained the issue is occurred when they tried to print from other programs like MS word, Acrobat Reader and even Notepad.
There could be several reasons behind the issue including the issue with Printer queue, issue with print spooler service, required access permission is not given, improper printer prompts and other issues. It is possible to fix the issue is with our instructions. Let’s go for the solution.
How to fix A StartdocPrinter call was not issued error in Windows 10?
Method 1: Fix A StartdocPrinter call was not issued with ‘PC Repair Tool’
‘PC Repair Tool’ is easy & quick way to find and fix BSOD errors, DLL errors, EXE errors, problems with programs/applications, malware or viruses infections in computer, system files or registry issues, and other system issues with just few clicks.
Method 2: Run Printer troubleshooter
You can run Windows built-in Printer troubleshooter to fix the issue.
Step 1: Open ‘Settings’ app in Windows PC via Windows Search Box and go to ‘Update & Security > Troubleshoot > Additional Troubleshooters’
Step 2: Find and select ‘Printer’ troubleshooter, and click ‘Run the troubleshooter’ and follow on-screen instructions to finish the troubleshooting and once finished, check if the issue is resolved.
Method 3: Restart Print Spooler service
You can restart Print Spooler service in computer in order to fix the issue.
Step 1: Open ‘Services’ app via Windows Search Box in Windows PC
Step 2: Find and double-click ‘Print Spooler Service’ to open its Properties. Select ‘Automatic’ from ‘Startup Type’ dropdown, and hit ‘Start’ button under ‘Services Status’ section, and then hit ‘Apply > Ok’ button to save the changes and then restart your computer and check if the issue is resolved.
Method 4: Repair Print Spooler Service via CMD
Step 1: Type ‘cmd’ in Windows Search Box and press ‘SHIFT + ENTER’ keys on keyboard to open ‘Command Prompt as Admisntrator’
Step 2: Type the following command and hit ‘Enter’ key after each to execute.
cd\Windows\System32\spool
cacls.exe PRINTERS /E /G administrator:C
Step 3: Once executed, restart your computer and check if the issue is resolved.
Method 5: Re-install all printer ports
Another way to fix the issue is to reinstall all printer ports in Windows computer.
Step 1: Open ‘Device Manager’ in Windows PC via Windows Search Box and expand ‘Printers’ or ‘Print Queues’ category
Step 2: Right-click on each printer driver one-by-one and select ‘Uninstall’ to uninstall them.
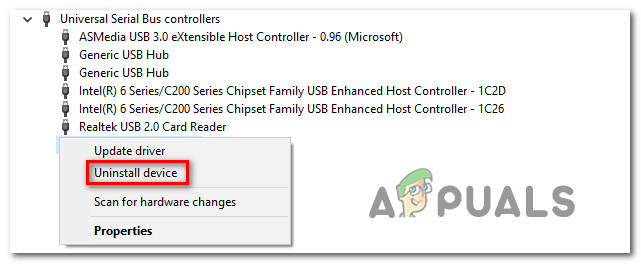
Step 3: Once each primer driver have been uninstalled, expand ‘Universal Serial Bus Controllers’ category, right-click on each list of installed items and select ‘Uninstall’ to uninstall it.
Step 4: Once done, restart your computer and restarting computer will automatically reinstall all necessary drivers in computer.
Download or reinstall device drivers update in Windows PC [Automatically]
You can also try to update all Windows drivers including printer drivers using Automatic Driver Update Tool. You can get this tool through button/link below.
Conclusion
I hope this post helped you on How to fix A StartdocPrinter call was not issued error in Windows 10 with easy ways. You can read & follow our instructions to do so. That’s all. For any suggestions or queries, please write on comment box below.
Introduction
Windows 10/11 is a popular operating system used by millions of users worldwide. However, like any other software, it is not without its flaws and errors. One common error that users encounter is the «a Startdocprinter call was not issued» error. This error can be frustrating and can prevent users from printing documents from their computer. In this tutorial, we will discuss what causes this error and provide step-by-step instructions on how to fix it.
What Causes the ‘a Startdocprinter Call Was Not Issued’ Error?
Before we delve into the solutions, it is important to understand what causes the «a Startdocprinter call was not issued» error. This error typically occurs when there is a problem with the printer spooler service on your computer. The printer spooler service is responsible for managing all print jobs sent to the printer. If there is an issue with this service, you may encounter this error when trying to print a document.
Another common cause of this error is outdated or corrupt printer drivers. Printer drivers are software that allows your computer to communicate with the printer. If the printer drivers are outdated or corrupt, it can cause conflicts and errors when trying to print.
How to Fix the ‘a Startdocprinter Call Was Not Issued’ Error on Windows 10/11
Now that we have discussed the possible causes of the «a Startdocprinter call was not issued» error, let’s move on to the solutions. Below are some step-by-step instructions on how to fix this error on Windows 10/11:
Solution 1: Restart the Print Spooler Service
The first step in fixing this error is to restart the print spooler service. Here’s how to do it:
- Press the Windows key + R on your keyboard to open the Run dialog box.
- Type «services.msc» and press Enter to open the Services window.
- Scroll down and locate the Print Spooler service.
- Right-click on the Print Spooler service and select Restart from the context menu.
- Try printing a document again to see if the error has been resolved.
Solution 2: Update Printer Drivers
As mentioned earlier, outdated or corrupt printer drivers can cause the «a Startdocprinter call was not issued» error. To update your printer drivers, follow these steps:
- Press the Windows key + X on your keyboard and select Device Manager from the menu.
- Expand the Print queues category to see a list of installed printers.
- Right-click on the printer that is causing the error and select Update driver from the context menu.
- Choose the option to search automatically for updated driver software.
- Follow the on-screen instructions to complete the driver update process.
- Restart your computer and try printing a document again.
Solution 3: Run the Printer Troubleshooter
Windows 10/11 comes with a built-in troubleshooter that can help identify and fix common printing issues. To run the printer troubleshooter, follow these steps:
- Press the Windows key + I on your keyboard to open the Settings app.
- Click on Update & Security, then select Troubleshoot from the left pane.
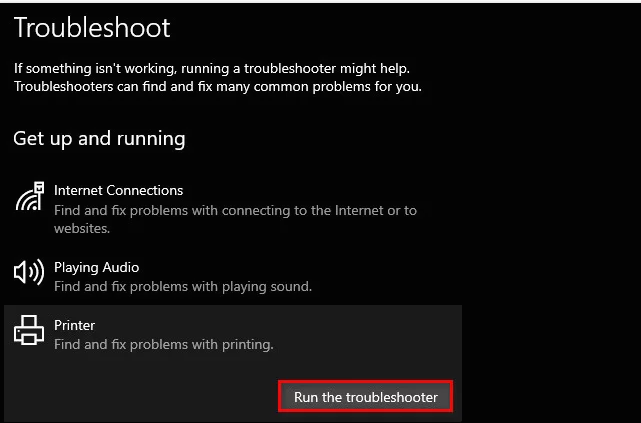
- Scroll down and click on Printer in the list of troubleshooters.
- Click on Run the troubleshooter and follow the on-screen instructions.
- The troubleshooter will scan your system for printer-related issues and attempt to fix them.
- Once the troubleshooter has completed, try printing a document to see if the error has been resolved.
Solution 4: Reset the Print Spooler Service
If restarting the print spooler service did not resolve the error, you may need to reset the service. Here’s how to do it:
- Press the Windows key + R on your keyboard to open the Run dialog box.
- Type «cmd» and press Ctrl + Shift + Enter to open an elevated Command Prompt.
- In the Command Prompt window, type the following commands one at a time and press Enter after each one:
- net stop spooler
- del /Q /F /S «%systemroot%System32spoolPRINTERS*.*»
- net start spooler
- Close the Command Prompt window and try printing a document again.
Solution 5: Reinstall the Printer
If none of the above solutions worked, you may need to reinstall the printer on your computer. Follow these steps to reinstall the printer:
- Press the Windows key + I on your keyboard to open the Settings app.
- Click on Devices, then select Printers & scanners from the left pane.
- Locate the printer that is causing the error and click on it.
- Click on Remove device to uninstall the printer.
- Restart your computer and reinstall the printer using the Add a printer wizard in the Devices settings.
- Follow the on-screen instructions to complete the printer installation.
- Try printing a document again to see if the error has been resolved.
Conclusion
The «a Startdocprinter call was not issued» error can be a frustrating issue to deal with, especially when you need to print important documents. However, by following the solutions outlined in this tutorial, you should be able to fix this error and get back to printing without any issues. Remember to restart the print spooler service, update printer drivers, run the printer troubleshooter, reset the print spooler service, and reinstall the printer if necessary. With a bit of troubleshooting and patience, you should be able to resolve this error and get your printer working again on Windows 10/11.
Several Windows users have been reaching us with questions after their HP laptop no longer prints anything. The error message that comes up is ‘A Startdocprinter Call Was Not Issued’ whenever they try to print anything. Most affected users are reporting that the issue occurs for every printer that is connected to the network. Other variations of this issue occur if they try to print from within other programs like Word, Acrobat Reader, and even Notepad. The issue is reported to occur on Windows 7, Windows 8.1 and Windows 10.

What’s causing the ‘A Startdocprinter Call Was Not Issued’ Error?
We investigated this particular issue by looking into various user reports and at the repair strategies that are most commonly used to fix this particular error message. As it turns out, several different scenarios are known to lead to the apparition of the ‘A Startdocprinter Call Was Not Issued‘ error. Here’s a shortlist of potential culprits that might trigger this error message:
- Printer Queue is glitched – In certain situations, this issue can occur due to an interruption when the Spooling service was preparing to send the file to the printer. In this case, the problem might be created by several different dependencies that contribute to the printing chore. In this case, the easiest way to resolve the issue is to run the Printer Troubleshooter.
- Glitched Print Spooler Service – This problem can also occur in a situation where the Print Spooler service has become glitched and it’s unable to facilitate the printing operation. If this scenario is applicable, you can resolve the issue by restarting the Print Spooler service using the Services screen.
- Access Control issues – As it turns out, this particular error can also occur due to a problem with how your operating system recognizes the access control list of the Print Spooler service. In this case, you will be successful in resolving the issue by using the cacls.exe utility inside an elevated CMD prompt.
- The improper printer prompts – As some users have confirmed, this problem can also occur due to inconsistent printer ports. Several users struggling to resolve the same issue have finally managed to restore the printing capabilities by reinstalling every printer port using Device Manager.
If you’re currently looking for a fix that will allow you to resolve the ‘A Startdocprinter Call Was Not Issued‘, this article will provide you with several potential repair strategies that other affected users have successfully used to resolve the issue. Each of the potential fixes featured below is confirmed to be effective by at least one use.
For the best results, we advise you to follow the methods below in the same order that we ordered them in (arranged by efficiency and severity). Eventually, you should encounter a fix that will resolve the issue, regardless of the culprit that’s causing the issue.
Method 1: Running the Printer Troubleshooter
Before we get into more advanced repair strategy, our recommendation is to start the troubleshooting quest by running a utility capable of resolving most Printer-related issues automatically by applying automated repair strategies.
With this in mind, use the Printer Troubleshooter to analyze your current printer driver situation and see if the repair tool has some predetermined repair strategies that are applicable in your situation.
As soon as you start this tool, it will begin to look for inconsistencies that might lead to printer errors. If it manages to find an applicable repair strategy, it will recommend a fix that might just resolve the ‘A Startdocprinter Call Was Not Issued‘ error.
Here’s a quick guide on running the Printer Troubleshooter:
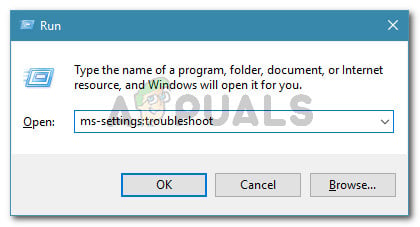
- Open up a Run dialog box by pressing Windows key + R. Next, type ‘ms-settings:troubleshoot’ inside the text box and press Enter to run open up the Troubleshooting tab of the settings app.

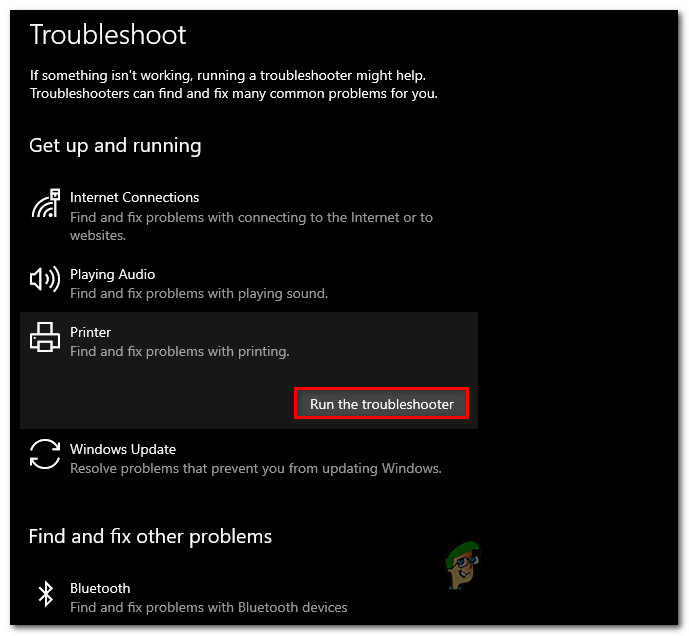
Accessing the Troubleshooting tab - Once you’re inside the Troubleshooting tab, move over to the right pane and scroll down to the Get up and running section. Once you get there, click on Printer, then click on Run the troubleshooter to launch the utility.

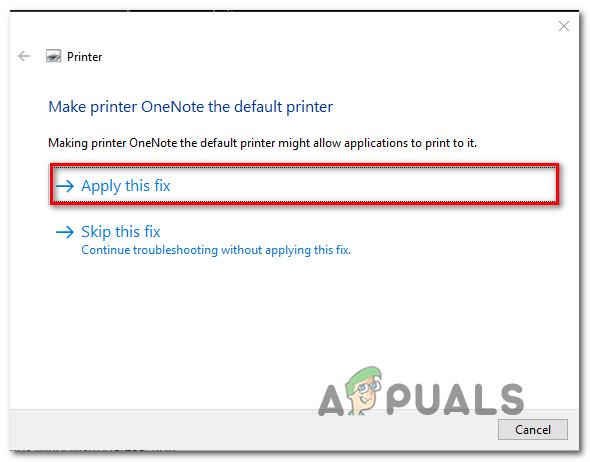
Running the Printer Troubleshooter - Once the utility is started, wait until the initial scan is complete, then click on Apply this fix if a repair strategy is recommended.

Applying the recommended Printer fix - After the fix is successfully applied, restart your computer and see if the issue is resolved by repeating the action that was causing the issue once the next startup sequence is complete.
If you’re still encountering the ‘A Startdocprinter Call Was Not Issued‘ error after applying the recommended fix or the troubleshooter didn’t find any issues with your printer configuration, move down to the next method below.
Method 2: Restarting the Print Spooler Service
As it turns out, this particular issue can also occur in situations where the Print Spooler service has become glitched and it’s unable to facilitate the printing operation. In this case, you’ll only be able to revert to the default behavior if you reset the Print Spooler Service.
Several affected users have reported that they managed to resolve the issue by using the Services screen to restart the Print Spooler service. After doing this and trying to print the same document, the majority of affected users have reported that the ‘A Startdocprinter Call Was Not Issued‘ error was no longer occurring.
Here’s a quick guide on restarting the Print Spooler Service from the Services screen:
- Press Windows key + R to open up a Run dialog box. Next, type “services.msc” and hit Enter to open up the Services screen. If you’re prompted by the UAC (User Account Control), click Yes to grant administrative privileges.
Running Services.msc - Once you’re inside the Services screen, move to the right-hand pane and scroll down through the list of Services (Local) and locate the Print Spooler Service.
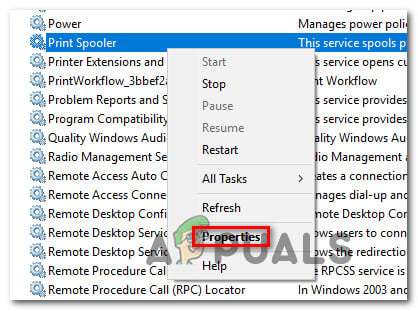
- Once you see it, right-click on the Print Spooler Service, right-click on it and choose Properties from the newly appeared context menu.

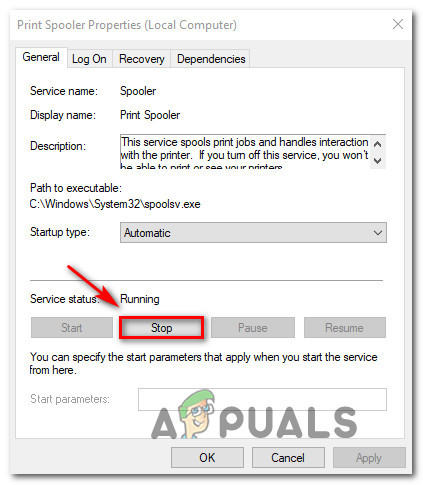
Accessing the Properties screen of the Printer Spooler service - Once you’re inside the Printer Spooler Properties screen, start by making sure you’re inside the General tab. After you confirm that you’re in the right menu, set the Startup type to Automatic, then click on Stop (under Service status)

Restarting the Print Spooler service - Wait a couple of seconds, then click on Start to essentially restart the Print Spooler service.
- After you manage to restart the service, restart your computer and see if the issue is now resolved.
If the same issue is still occurring, move down to the next potential fix below for a different approach on repairing the Print Spooler service.
Method 3: Repairing the Print Spooler service via CMD
As it turns out, another possibility that will trigger the ‘A Startdocprinter Call Was Not Issued‘ error is a scenario in which the Print Spooler service is effectively broken. In this case, you can resolve the issue by using an elevated Command prompt to modify the access control list of the Print Spooler Service.
Several affected users have reported that they manage to fix the issue completely after using an elevated Command Prompt to modify the access control of the Print Spooler service. This solution is also recommended by MS specialists to fix various Print Spooler issues.
Here’s a quick guide on repairing the Print Spooler service using an elevated Command Prompt:
- Press Windows key + R to open up a Run dialog box. Then, type “cmd” and press Ctrl + Shift + Enter to open up an elevated Command Prompt. When you see the UAC (User Account Control), click Yes to grant admin access.
Running Command Prompt - Once you’re inside the elevated command prompt, type the following command and press Enter to the location of the Spooling service:
cd\Windows\System32\spool
- Now that you are in the correct location, type the following command and press Enter to modify the access control of the Spooling service:
cacls.exe PRINTERS /E /G administrator:C
- After the command is processed successfully, restart your computer and see if the issue is resolved at the next system startup.
If this method didn’t allow you to resolve the ‘A Startdocprinter Call Was Not Issued‘ error, move down to the next method below.
Method 4: Re-installing all printer ports
The most popular fix for this particular issue is to simply reinstall all printer ports involved in the operation. This fix is reported to be successful on all the recent Windows versions including Windows 7, Windows 8.1 and Windows 10.
The majority of users encountering this issue have managed to fix this after using Device Manager to delete all ports created for this printer, then reinstalling the printer drivers (either generic or dedicated).
Here’s a quick guide on reinstalling all printer ports to resolve the ‘A Startdocprinter Call Was Not Issued‘ error:
- Press Windows key + R to open up a Run dialog box. Then, type “devmgmt.msc” inside the text box and press Enter to open up Device Manager. When you’re prompted by the UAC (User Account Control), click Yes to grant administrative privileges.
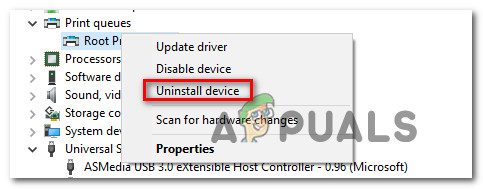
Running Device Manager - Inside Device Manager, scroll through the list of installed devices and expand the menu associated with Print queues.
- Then, right-click on each install Printer driver that you found there and click on Uninstall from the newly appeared context menu.

Uninstalling every printer driver - Once every printer driver has been uninstalled, expand the drop-down menu associated with Universal Serial Bus controllers. Next, scroll through the list of installed items and uninstall every Printer port by right-clicking on each one and choosing Uninstall from the context menu.

Uninstalling Print ports - As soon as every printer driver is uninstalled, restart your computer. At the next startup, your operating system will automatically install a set of generic drivers and ports to make the printer usable.
Note: You can try to print something with the generic drivers and stick with them if the ‘A Startdocprinter Call Was Not Issued‘ error is no longer occurring, or you can install the dedicated drivers by accessing your printer manufacturer website and downloading the compatible drivers.
Kevin Arrows
Kevin Arrows is a highly experienced and knowledgeable technology specialist with over a decade of industry experience. He holds a Microsoft Certified Technology Specialist (MCTS) certification and has a deep passion for staying up-to-date on the latest tech developments. Kevin has written extensively on a wide range of tech-related topics, showcasing his expertise and knowledge in areas such as software development, cybersecurity, and cloud computing. His contributions to the tech field have been widely recognized and respected by his peers, and he is highly regarded for his ability to explain complex technical concepts in a clear and concise manner.
Товарищи, я в замешательстве, помогите разобраться. Мне не понятна сама суть произошедшешо…
1) Есть образ windows 10 1803 (взят из ЛК с Microsoft)
2) Установлен на ПК
3) Через WSUS проапргрейжен до windows 10 1909
4) Установлен «оффисный» софт (офис, акробат, 7зип) + symantec антивирус.
5) sysprep
6) Снятие образа акронисом.
7) Раскатываем образ на точно такой же ПК
 Вводим ПК в домен, подключам сетевой принтер
и….. при попытке печати получам ошибку: «Не был произведен вызов StartDocPrinter»
Как!????? Система «нулевая» мухи не сношались……
В инетах есть похожие случаи, но уже на давно работающих ПК. Но тут…… На каком этапе? Почему? Вроде бывсе учел при формировании «золотого» образа. Никакой тюнинг не делал, ничего не удалял и не отключал….
-
Вопрос задан
-
3097 просмотров