
Все способы:
- Способ 1: Запуск игры от имени администратора
- Способ 2: Завершение зависших процессов Riot
- Способ 3: Установка обновлений для VALORANT
- Способ 4: Проверка целостности игровых файлов
- Вариант 1: Клиент Riot
- Вариант 2: Epic Games Launcher
- Способ 5: Очистка логов игры
- Способ 6: Обновление драйвера видеокарты
- Способ 7: Установка системных обновлений
- Способ 8: Управление режимом игры в Windows
- Способ 9: Включение безопасной загрузки
- Способ 10: Переустановка VALORANT
- Вопросы и ответы: 0
Способ 1: Запуск игры от имени администратора
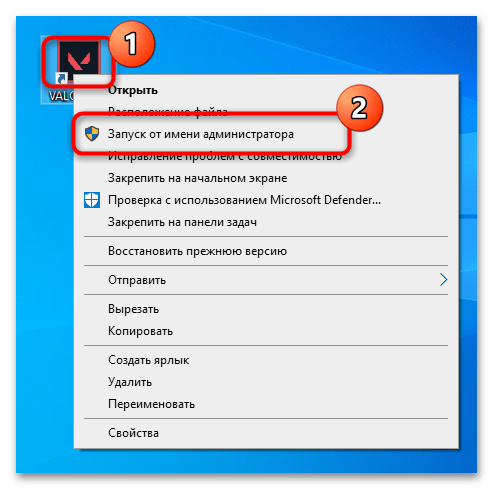
Часто проблемы с запуском VALORANT вызваны отсутствием прав администратора у активной учетной записи. Они необходимы для того, чтобы предоставить разрешения брандмауэру и в тех случаях, когда файлы игры установлены на системном разделе жесткого диска. Для проверки этого метода решения щелкните по ярлыку правой кнопкой мыши и выберите из контекстного меню пункт «Запуск от имени администратора».
Если данное действие помогло решить проблему, можно либо изменить параметры учетной записи, что займет какое-то время, либо просто настроить дальнейший постоянный запуск с повышенными правами, чтобы не вызывать контекстное меню VALORANT каждый раз при открытии.
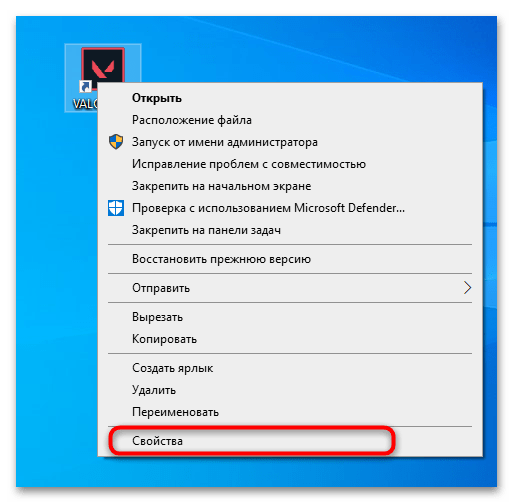
- Для этого через то же самое контекстное меню перейдите в «Свойства».
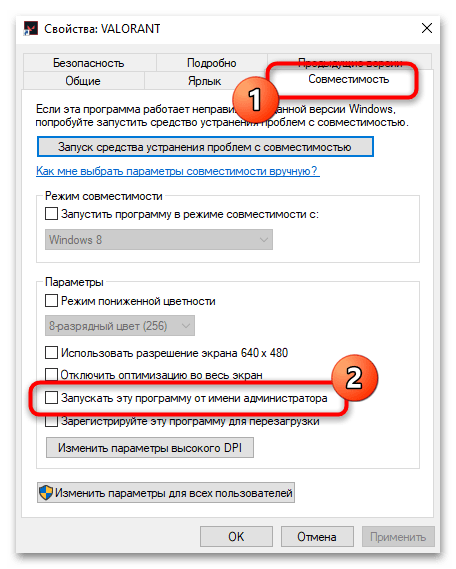
- Выберите вкладку «Совместимость» и поставьте галочку возле пункта «Запускать эту программу от имени администратора».
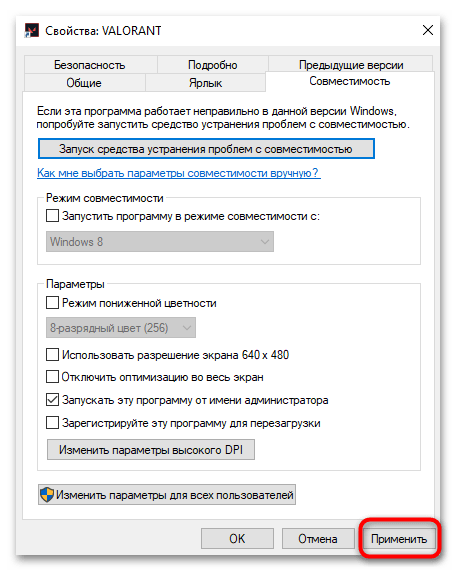
- Обязательно примените изменения, и только после этого закрывайте окно. Снова запустите VALORANT и убедитесь в том, что все работает корректно.
Способ 2: Завершение зависших процессов Riot
Для запуска VALORANT на компьютере используются службы Riot, которые активны вместе с клиентом, отвечают за античит, связь с серверами и другие параметры. Если они зависли, игра может не стартовать в рамках одного сеанса операционной системы. Обычно проблема решается путем стандартной перезагрузки, но можно пойти и немного другим путем, принудительно завершив все зависшие процессы, что осуществляется следующим образом:
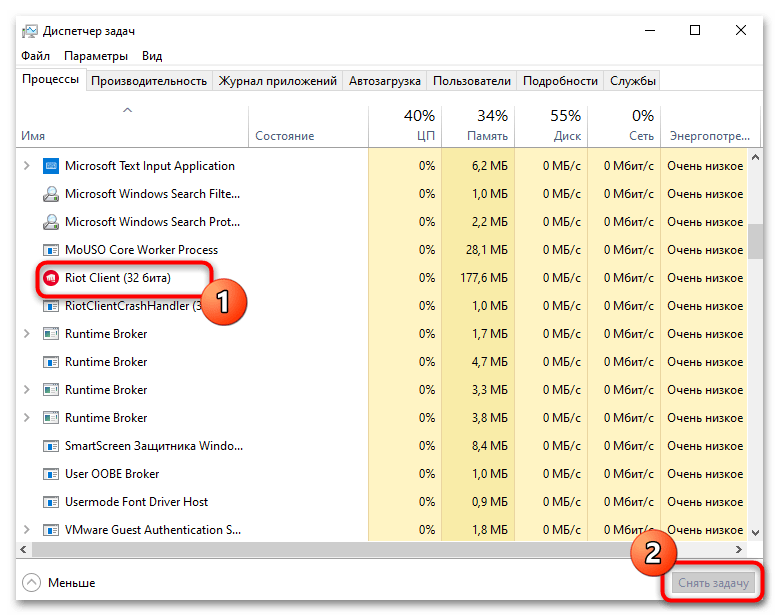
- Щелкните правой кнопкой мыши по «Пуску» и из появившегося контекстного меню выберите «Диспетчер задач».
- В основной вкладке найдите «Riot Client» и другие связанные задачи, затем снять каждую из них.
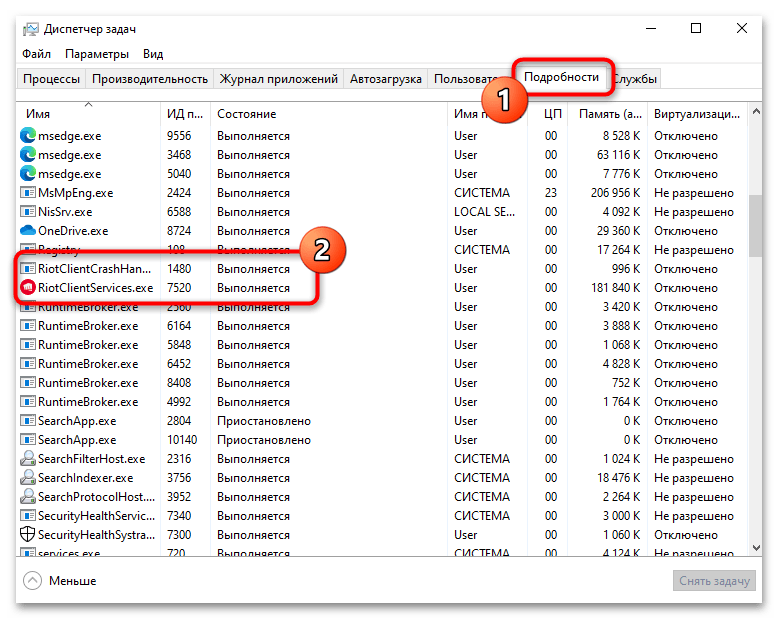
- Если с поиском возникают проблемы, сделайте то же самое, но уже на вкладке «Подробности». Удобно завершить дерево процессов можно через контекстное меню одного из них.
Способ 3: Установка обновлений для VALORANT
Отсутствие любых уведомлений, черных экранов или ошибок при запуске VALORANT может свидетельствовать о том, что действие невозможно по причине отсутствия обновления игры. В стандартной ситуации должно появиться окно клиента с предложением выполнить апдейт, однако иногда оно не открывается автоматически. Тогда проверить наличие обновлений следует самостоятельно, выполнив такие действия:
- Отыщите «Клиент Riot» через «Пуск» и запустите данный лаунчер.
- Выполните обычный вход в учетную запись, поскольку только после этого отобразится список установленных игр.
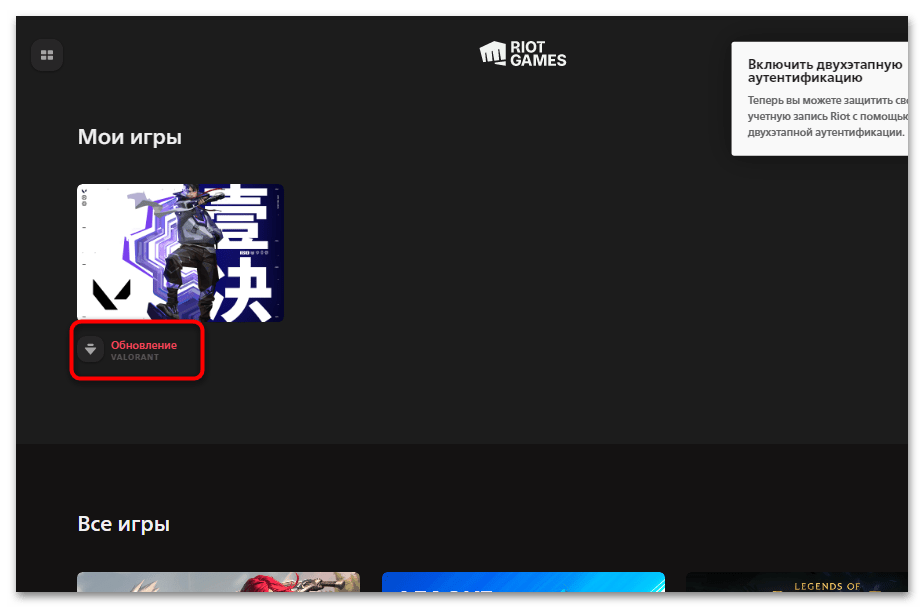
- В разделе «Мои игры» должен отобразиться VALORANT. Если внизу присутствует кнопка «Обновление», нажмите по ней для запуска соответствующего процесса.
- Вероятно, понадобится еще раз нажать по кнопке с таким же названием.
- Начнется процесс загрузки файлов, поэтому остается только ждать его конца, после чего снова попробуйте запустить шутер.


Способ 4: Проверка целостности игровых файлов
Нарушение целостности игровых файлов — одна из самых частых причин проблем с запуском VALORANT на компьютере. Связано это может быть как с неправильно установленными апдейтами, так и со сбоями, которые возникли во время игры. Принцип проверки целостности и восстановления зависит от используемого лаунчера, поэтому далее предлагаем рассмотреть два доступных.
Вариант 1: Клиент Riot
Фирменный клиент от Riot часто используется для запуска VALORANT и других тайтлов от данного разработчика. К тому же при попытке скачать игру из интернета именно этот лаунчер и будет предложен в качестве основного. Проверка целостности игровых файлов в нем осуществляется следующим образом:
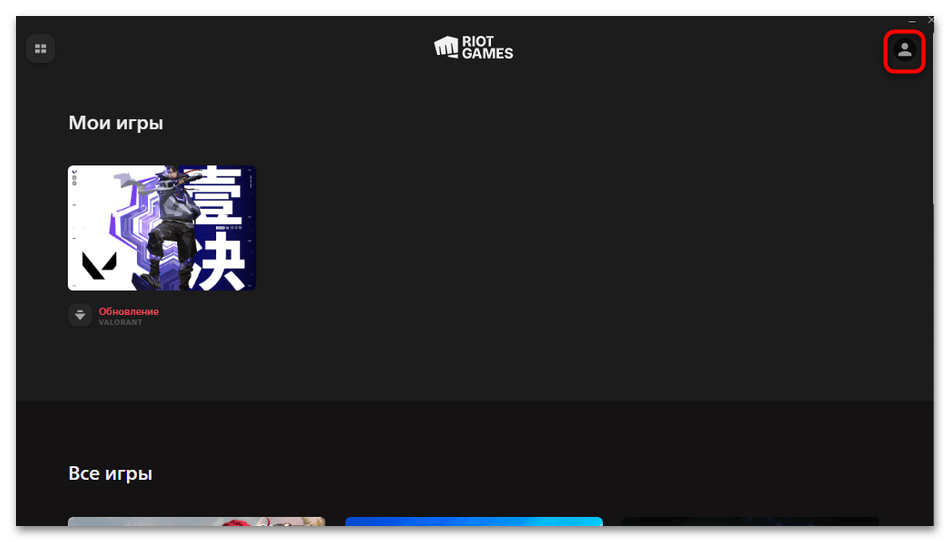
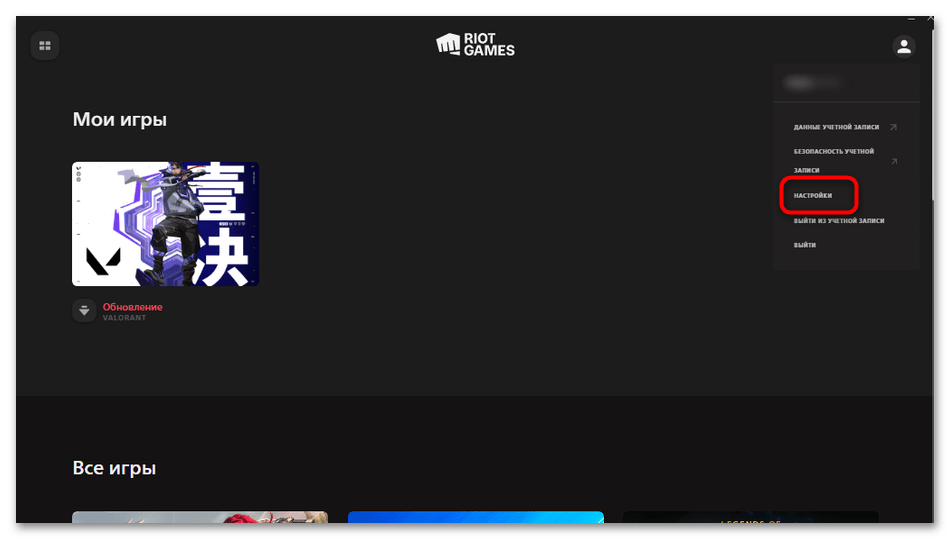
- После входа в клиент и свою учетную запись справа вверху нажмите по значку для открытия пользовательского меню.
- Из него выберите пункт «Настройки».
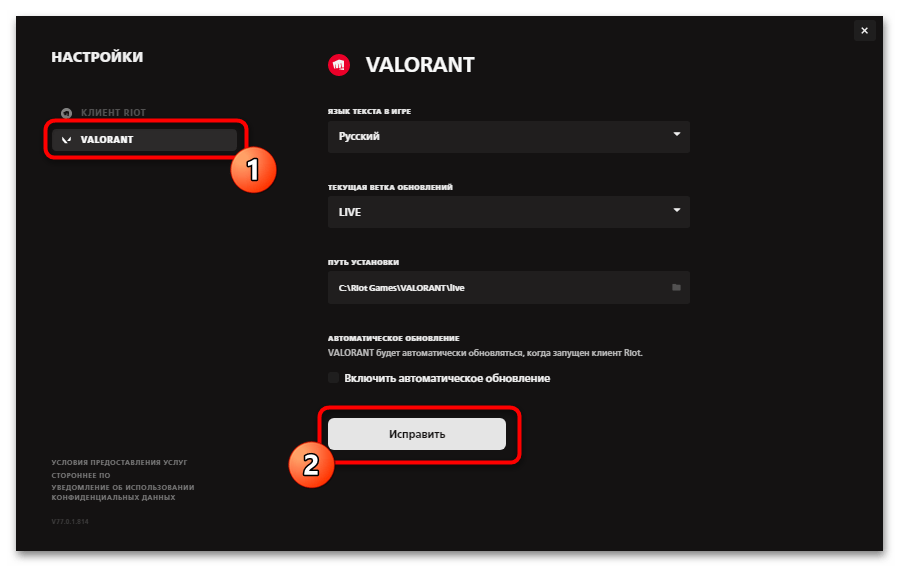
- Слева выделите игру «VALORANT» и нажмите «Исправить».
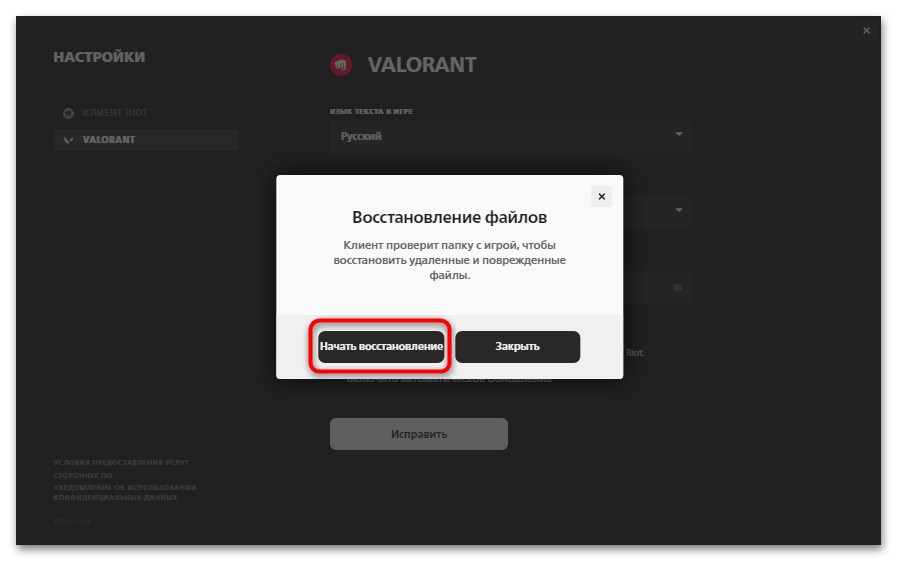
- Вы будете уведомлены о начале проверки папки с игрой, чтобы восстановить удаленные и поврежденные файлы. Подтвердите запуск этой операции.
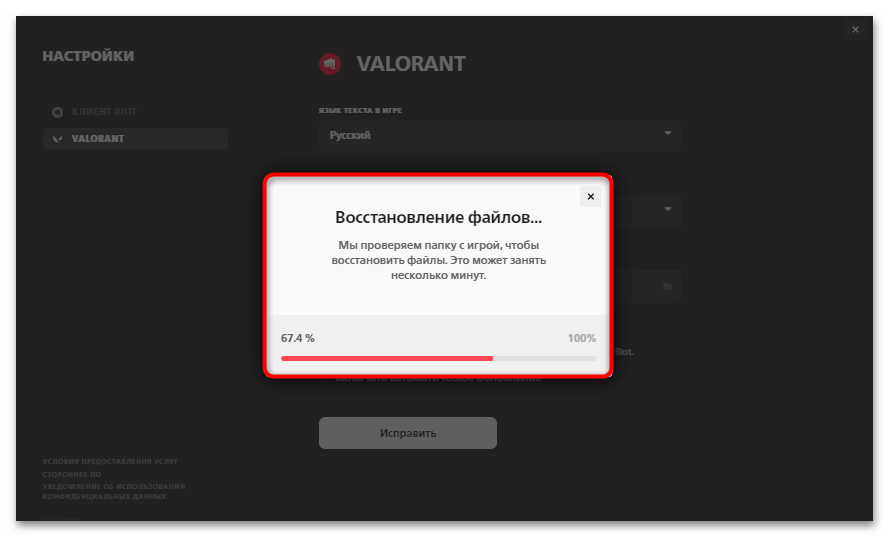
- Ожидайте окончания процесса, после которого автоматически начнется скачивание недостающих или замена поврежденных файлов, если такие обнаружатся.
Вариант 2: Epic Games Launcher
Если вы решили скачать мультиплеерный шутер через Epic Games Launcher, то фирменный клиент не будет использоваться для его запуска. Для проверки целостности файлов необходимо будет использовать текущий лаунчер, отыскав игру через библиотеку и запустив соответствующий процесс.
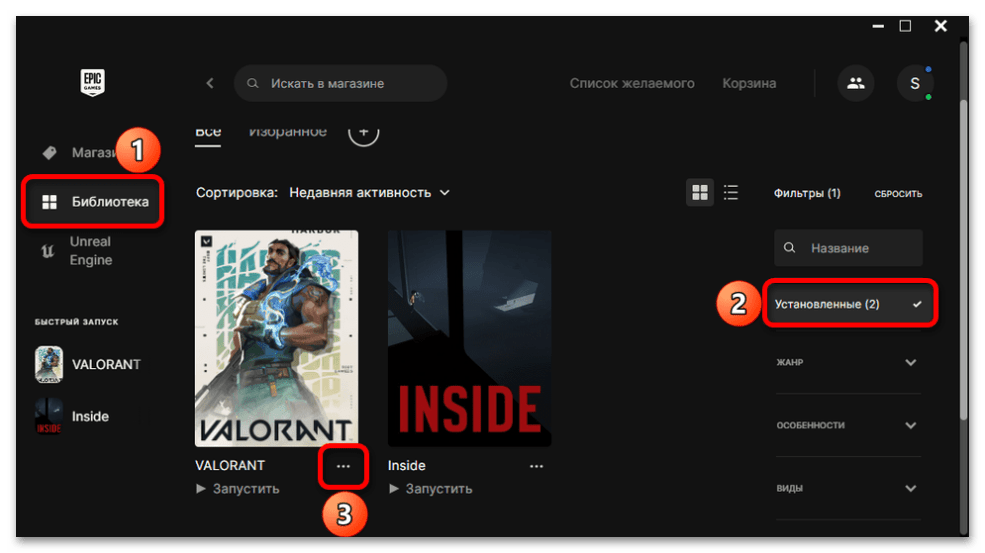
- Откройте программу и слева переключитесь на «Библиотека». Если необходимо, выполните фильтрацию, чтобы отобразить только установленные игры, найдите Валорант и кликните по трем точкам возле значка с игрой.
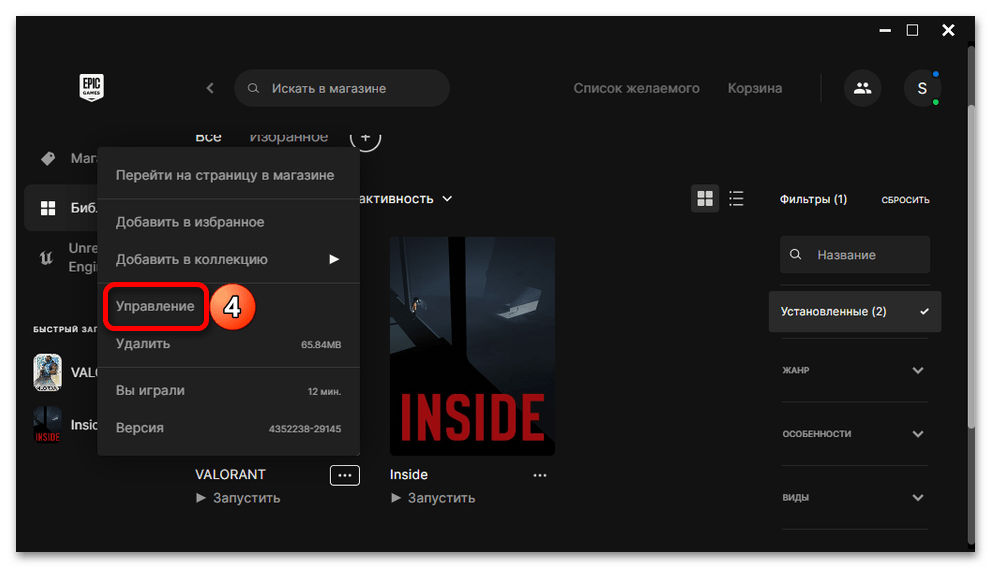
- Из появившегося меню выберите действие «Управление».
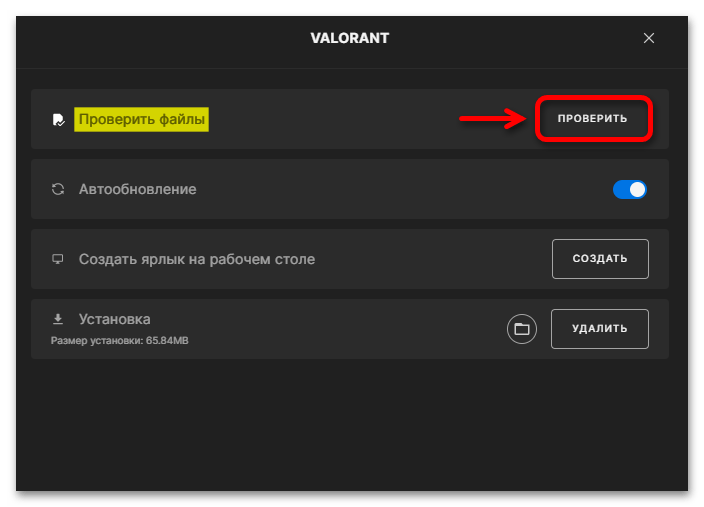
- Вы должны увидеть доступное действие «Проверить файлы», после чего можете запустить эту операцию, используя кнопку с соответствующим названием.
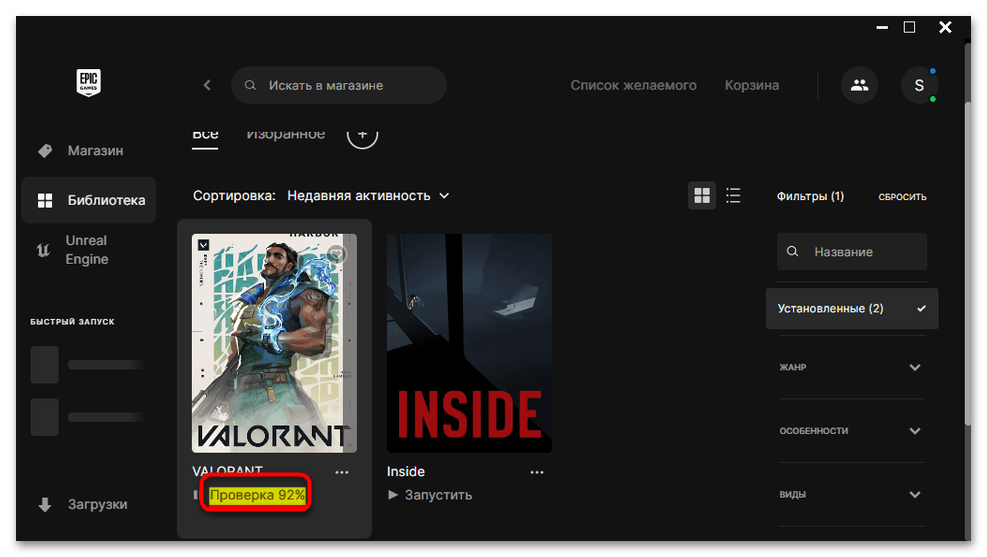
- Ожидайте окончания проверки и загрузки недостающих файлов. После этого повторите попытку запуска.
Способ 5: Очистка логов игры
Ошибки в сохраненных логах тоже могут сказаться на запуске VALORANT. Эта проблема не решается путем проверки целостности файлов, поэтому придется разобраться с ней вручную. Однако сделать это не сложно, поскольку понадобится только перейти по одному расположению и удалить хранящиеся в нем файлы.
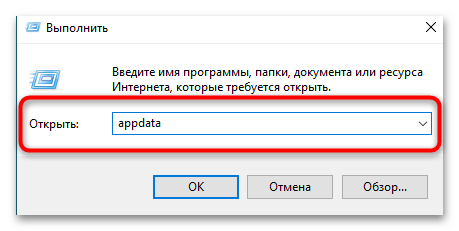
- Щелкните правой кнопкой мыши по «Пуску» и из меню выберите пункт «Выполнить».
- Введите команду
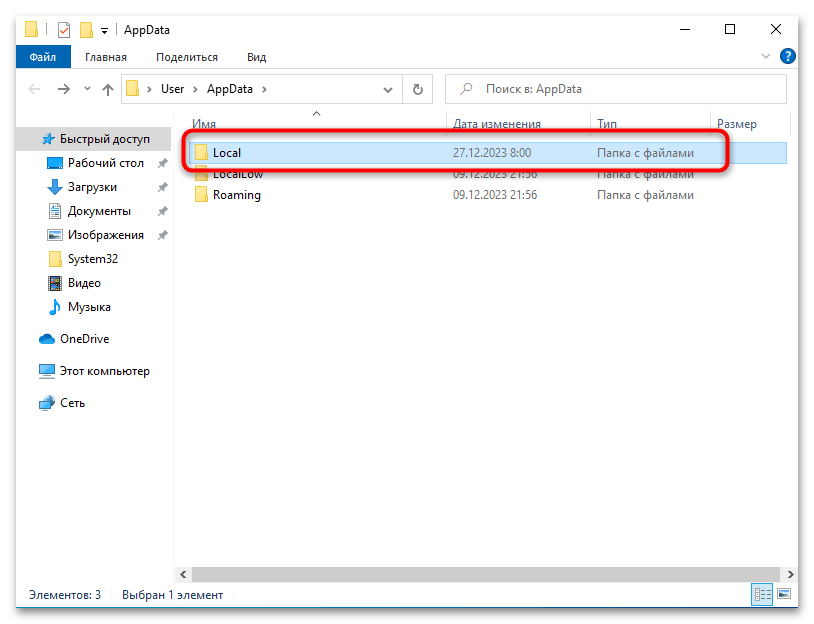
appdata, чтобы перейти к расположению данной системной папки. - В ней откройте каталог «Local».
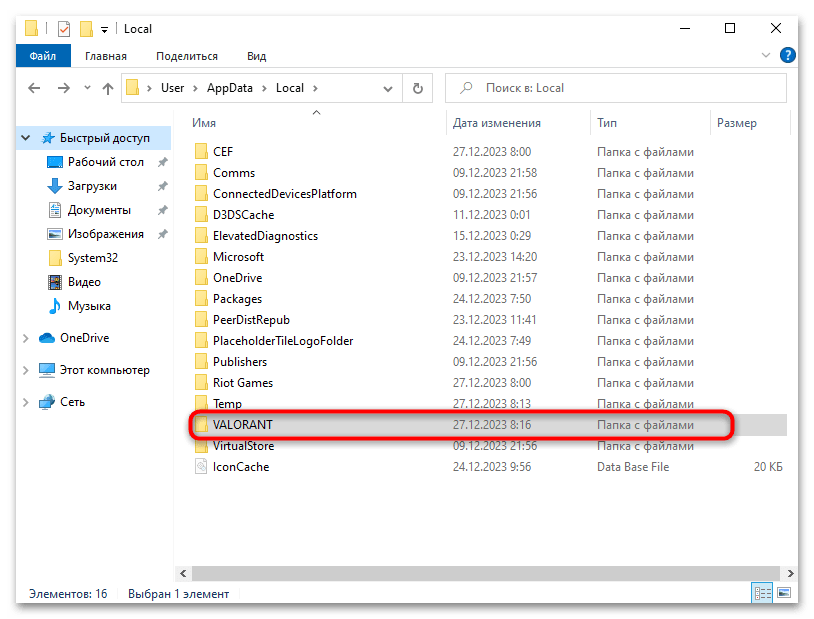
- Отыщите папку «VALORANT» и перейдите в нее. Можно, конечно, попробовать удалить ее полностью, но в таком случае, возможно, понадобится еще раз запустить проверку целостности файлов.
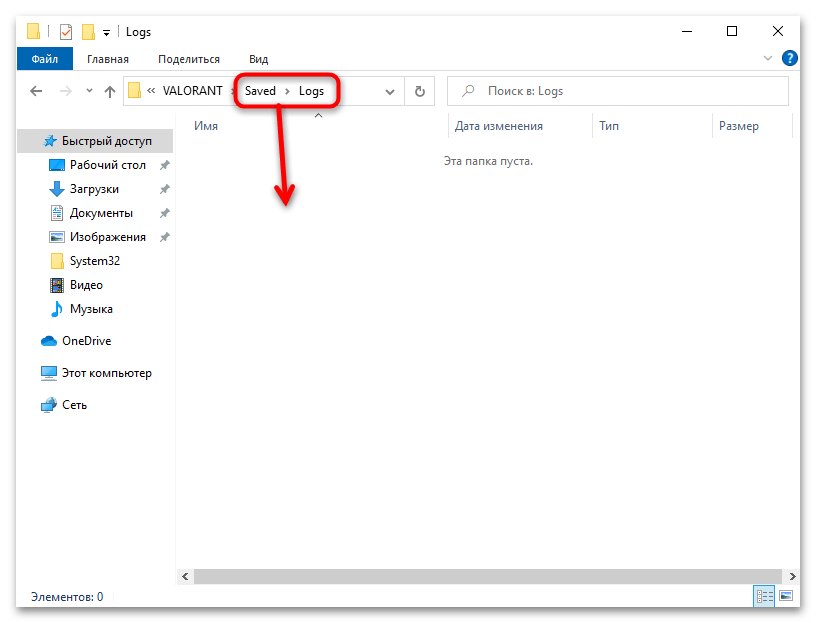
- Поэтому сначала лучше открыть «Saved», затем «Logs» и удалить все содержимое отсюда.
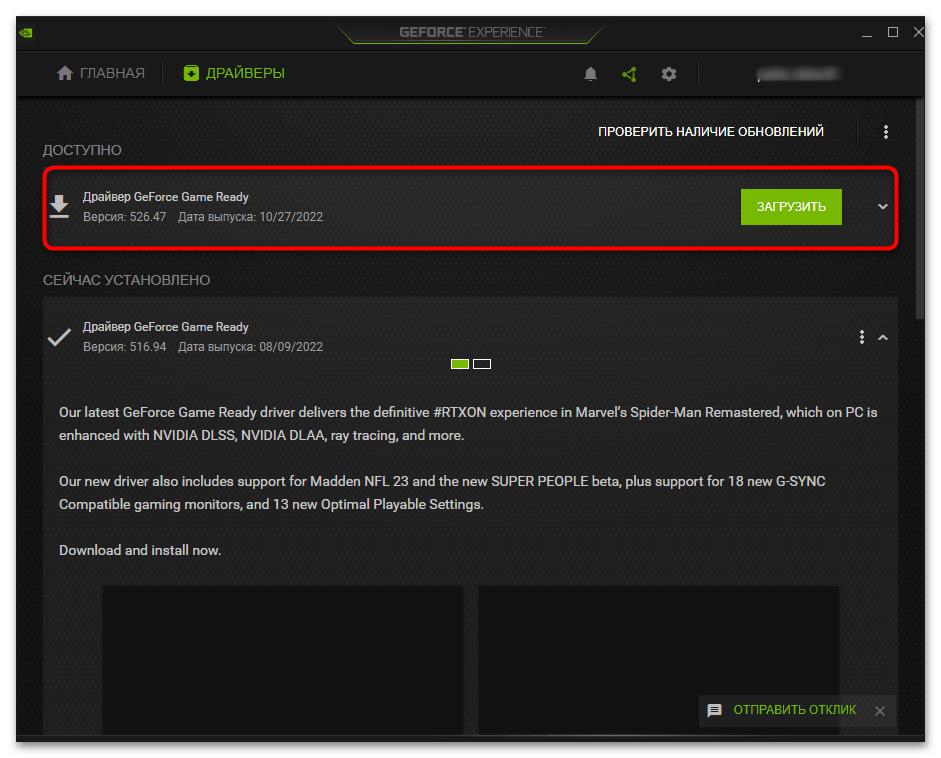
Способ 6: Обновление драйвера видеокарты
Для корректной работы игр на ПК обязательно должен быть установлен актуальный драйвер видеокарты. Конечно, устаревшие версии тоже часто работают вполне корректно, но при появлении любых ошибок стоит проверить наличие апдейтов для данного комплектующего. В большинстве случаев это происходит через фирменное программное обеспечение от производителя, однако некоторые пользователи предпочитают иные методы обновления. Обо всех доступных предлагаем прочитать в другой статье на нашем сайте по ссылке ниже.
Подробнее: Способы обновления драйверов видеокарты на Windows 10
Способ 7: Установка системных обновлений
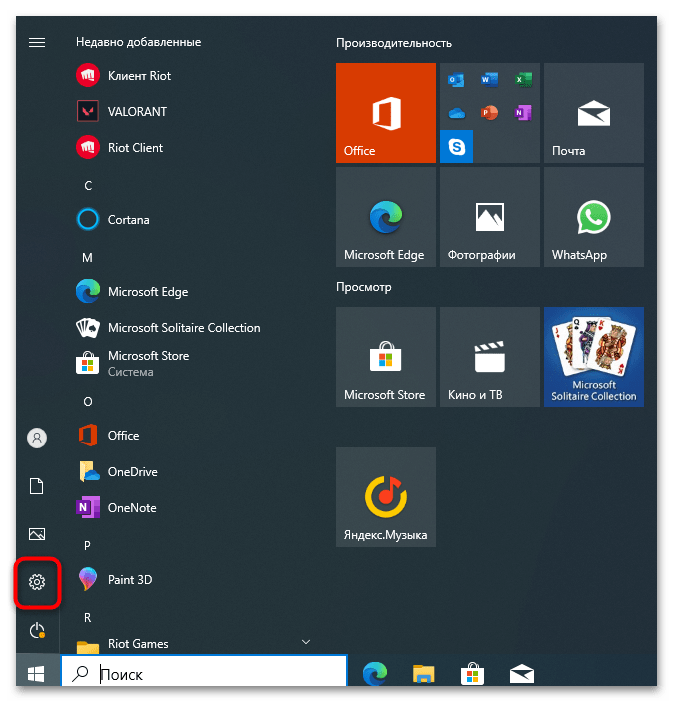
Примерно то же самое относится и к системным обновлениям, которые выходят для Windows 10 регулярно. У вас могут отсутствовать апдейты дополнительных компонентов или безопасности операционной системы, из-за чего возникают трудности при взаимодействии со сторонним ПО и играми. Проще всего проверить наличие обновлений через «Параметры».
- Вызовите меню «Пуск» и на панели слева нажмите по значку с шестеренкой.
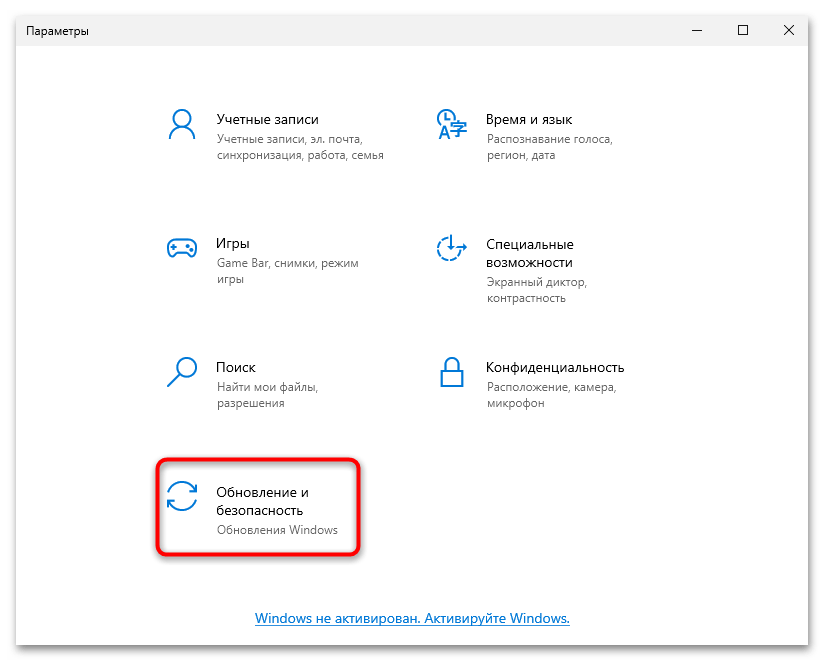
- Прокрутите список с разделами и нажмите по «Обновление и безопасность».
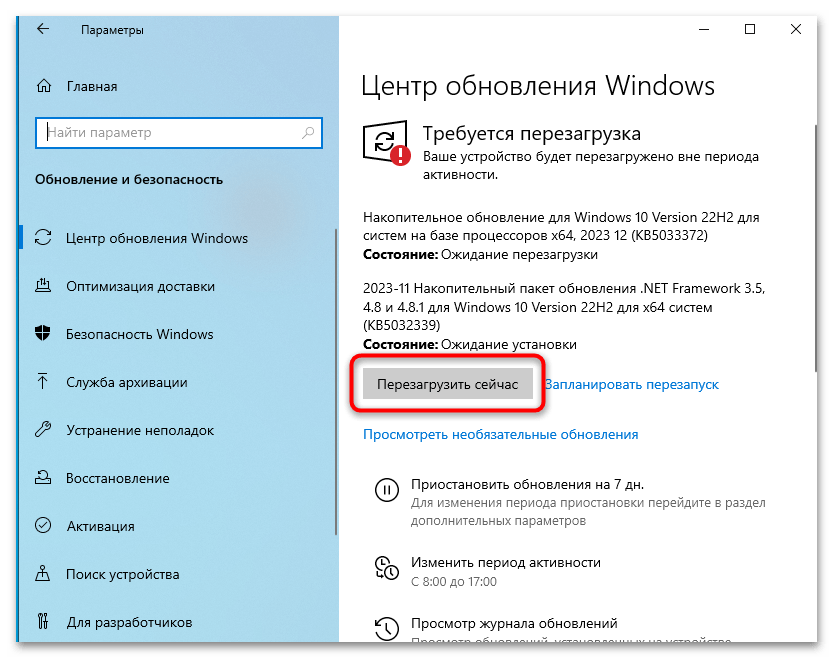
- Запустите поиск обновлений, установите найденные, после чего обязательно перезагрузите компьютер, чтобы изменения вступили в силу.
Если вам нужно больше информации по поводу установки апдейтов, что может быть связано с проблемами при поиске или инсталляции, щелкните по следующему заголовку. Он перенаправит вас в тематическую статью, где полностью описаны все нюансы, связанные с обновлениями Windows 10.
Читайте также: Установка обновлений Windows 10
Способ 8: Управление режимом игры в Windows
По умолчанию в Windows 10 включен режим игры, который распознает запускаемые приложения и оптимизирует работу операционной системы так, чтобы повысить производительность внутри игры. Однако иногда эта функция работает не совсем корректно или же из-за ее отключения тоже возникают проблемы. Вам понадобится самостоятельно проверить текущее состояние функции, деактивировать ее или, наоборот, включить с соответствующими настройками под VALORANT.
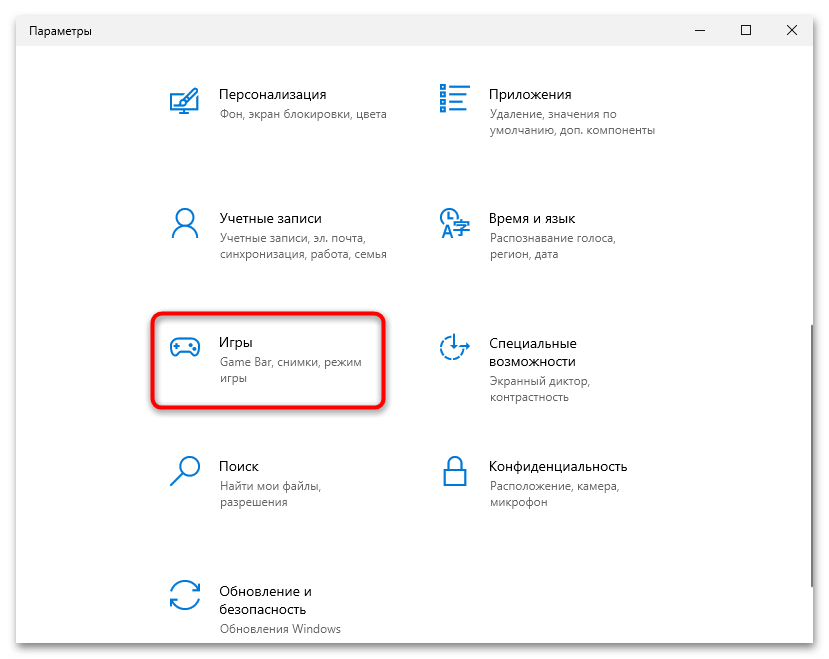
- В «Параметрах» выберите раздел «Игры».
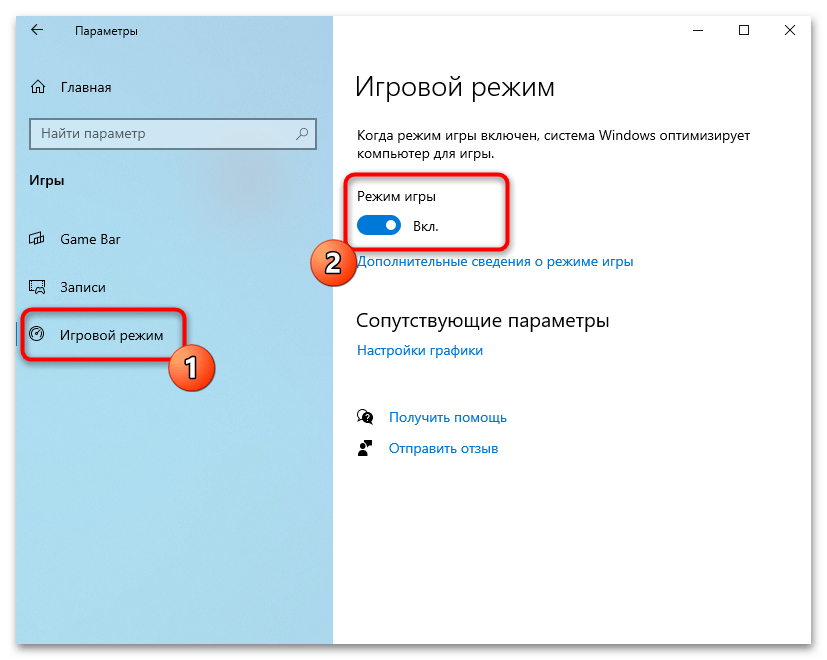
- Откройте раздел «Игровой режим» и измените состояние у «Режим игры».
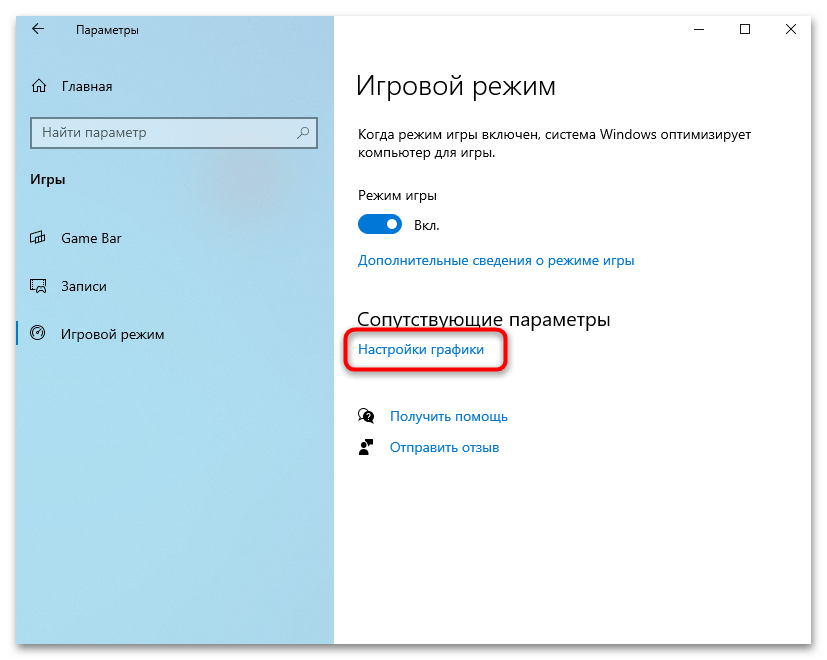
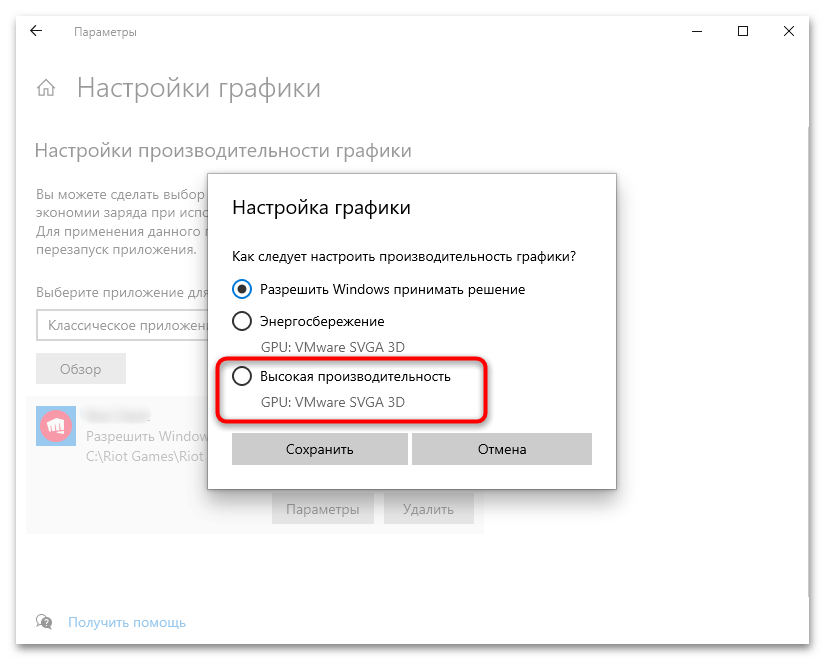
- Если вы включили этот режим, понадобится дополнительно кликнуть по ссылке «Настройки графики».
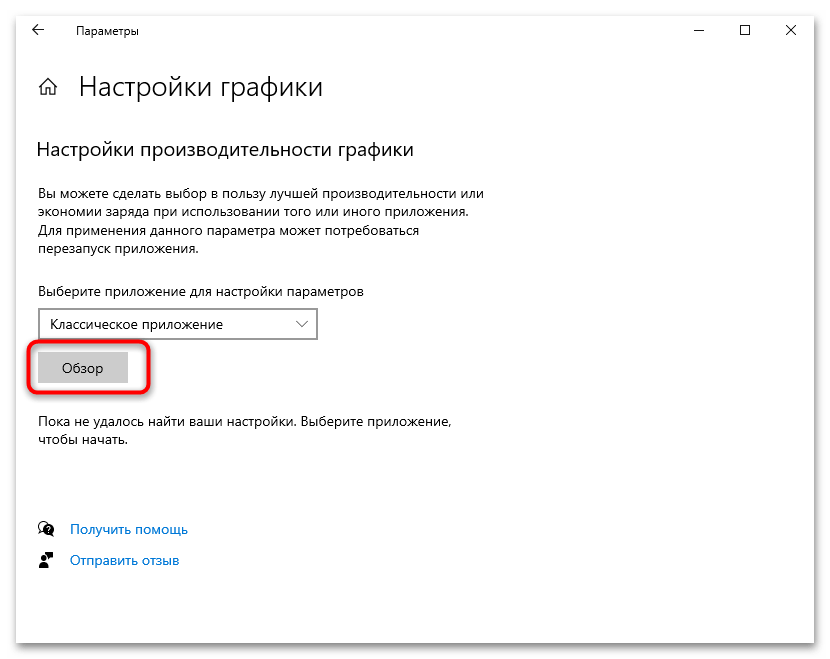
- Нажмите «Обзор» и добавьте VALORANT в список, если он по умолчанию тут отсутствует.
- Перейдите параметры этой игры и выберите для нее настройку графики «Высокая производительность». Сохраните изменения и попробуйте снова поиграть в VALORANT.
Способ 9: Включение безопасной загрузки
Некоторые пользователи жалуются, что не могут нормально играть в VALORANT по причине отключенной функции безопасной загрузки в BIOS. Это может быть связано как с сетевыми ограничениями, так и работой античита, поэтому рекомендуется параметр включить. Перед этим проверьте его активность следующим образом:
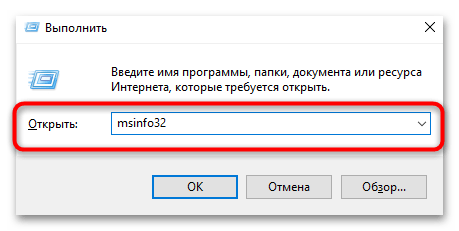
- Откройте утилиту «Выполнить», для чего идеально подойдет сочетание клавиш Win + R. Введите команду
msinfo32и нажмите Enter для ее применения. - Выделите левой кнопкой мыши раздел «Сведения о системе», затем посмотреть на значение «Состояние безопасной загрузки». Если она отключена, понадобится самостоятельно активировать через BIOS.

Если вы еще не знаете, как осуществляется вход в BIOS, получите дополнительные инструкции в другой нашей статье по ссылке ниже. Процесс перехода в это микропрограммное обеспечение в большинстве случаев универсален, поэтому руководство будет актуально для любых моделей материнских плат или ноутбуков.
Читайте также: Как попасть в BIOS на компьютере / ноутбуке
Теперь что касается безопасной загрузки, то это отдельный пункт в BIOS, который находится в разделе «Security». Его название — «Secure Boot», которое остается неизменным во всех версиях БИОС. Отыщите данный параметр и переключите его состояние на «Enabled». Перед перезапуском ПК не забудьте сохранить изменения, используя горячую клавишу F10.

Способ 10: Переустановка VALORANT
Если ничего из перечисленного выше так и не помогло вам решить проблему с запуском VALORANT на компьютере, остается только самый радикальный вариант — полная переустановка игры. Для этого ее нужно сначала удалить из операционной системы, затем скачать с официального сайта и при установке проверить корректность пути, где будут расположены файлы игры.
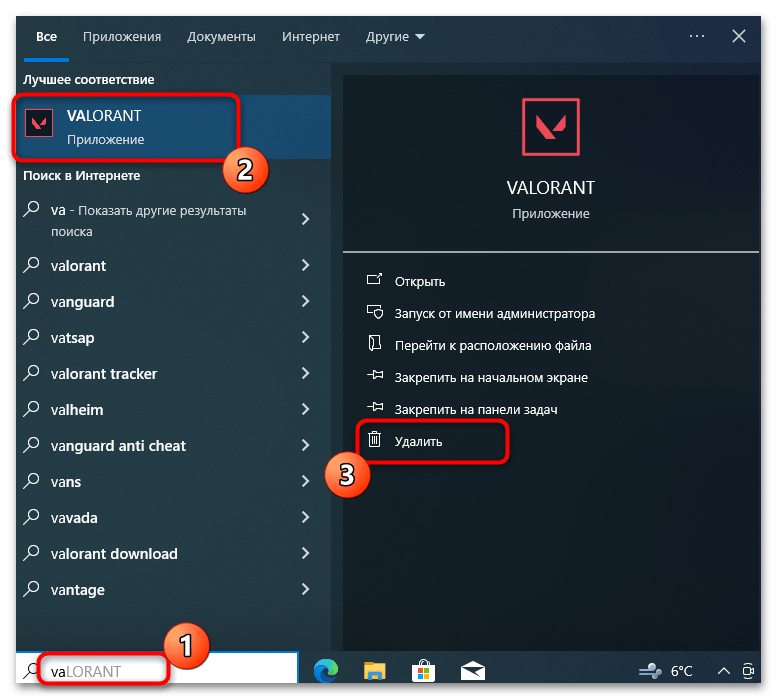
- Отыщите VALORANT на своем компьютере и выполните стандартную деинсталляцию приложения.
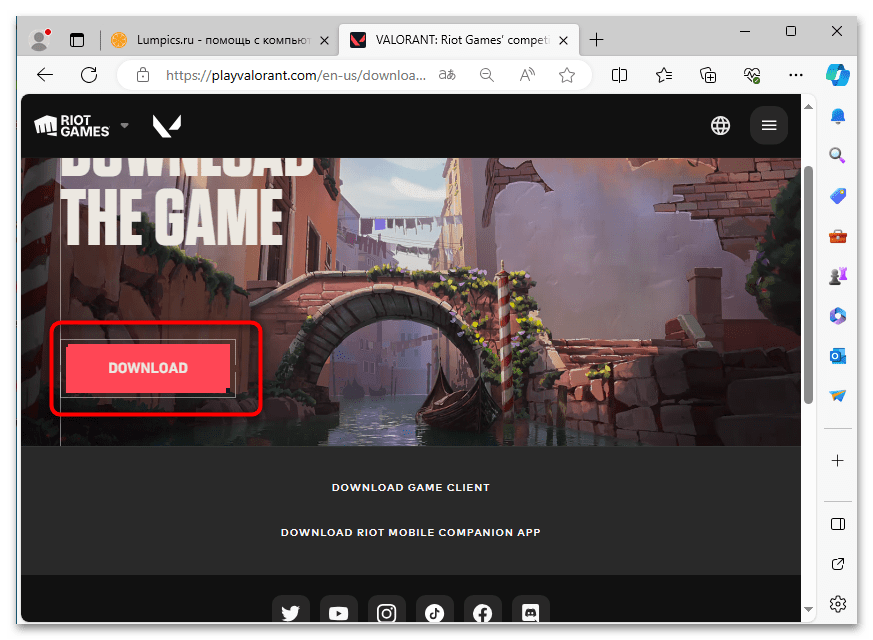
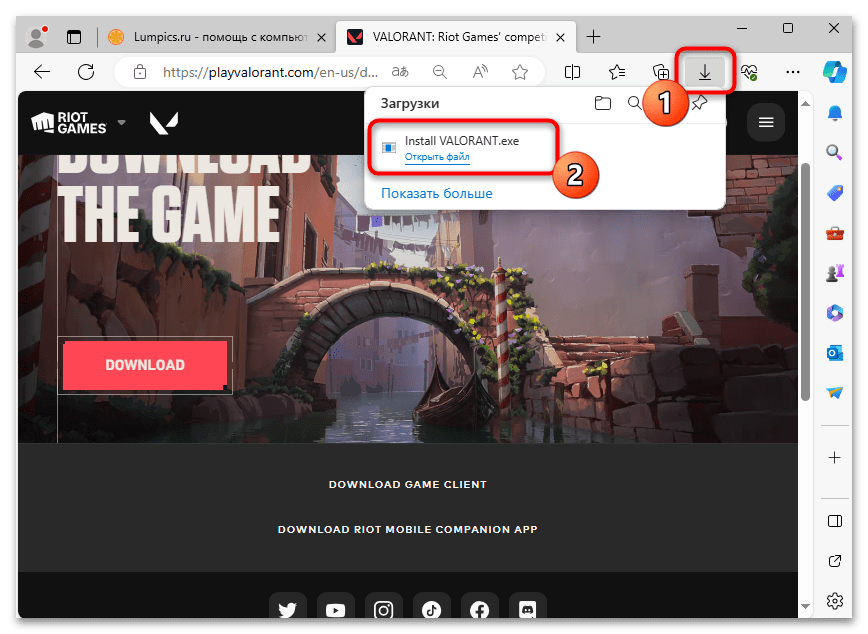
- Как только все файлы будут удалены, скачайте установщик игры с официального сайта.
- Он распространяется в виде EXE-файла, поэтому по завершении загрузки именно его и запускайте.
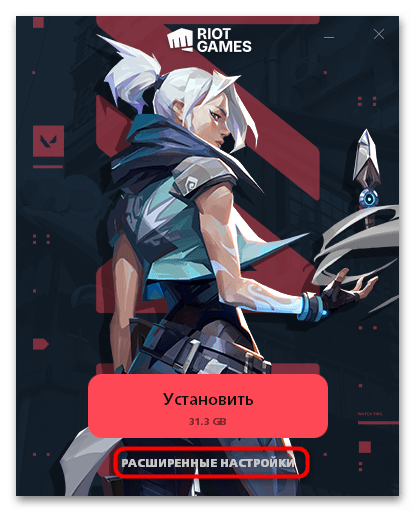
- Не начинайте установку сразу, а перейдите в «Расширенные настройки».
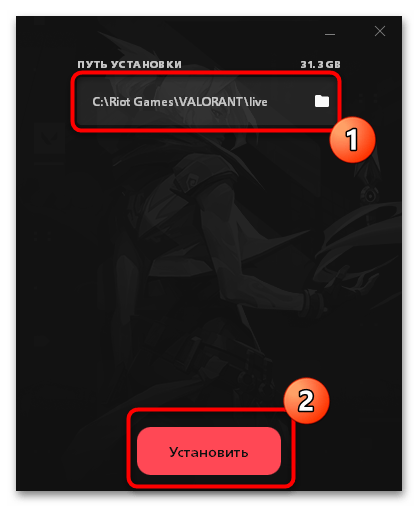
- Тут проверьте, чтобы в пути не содержались кириллические символы. Если такие присутствуют, замените путь на другой, после чего подтвердите начало установки.
Наша группа в TelegramПолезные советы и помощь

Are you trying to play your favorite game via Riot Client, but the app refuses to launch? There are various reasons this app doesn’t open on your Windows 11 or Windows 10 computer. You can apply a few fixes to possibly resolve the issue and get the client working again. We’ll show you what to do in your case.
A few reasons the app doesn’t work are that a faulty instance of the app is already running, the app doesn’t have admin rights, the app has compatibility issues, your PC’s antivirus or firewall has restricted the app’s features, and more.
1. Force Close and Relaunch Riot Client
When Riot Client refuses to launch, force the app’s already running instances to close and relaunch the app. This gives the app a fresh start, possibly fixing minor problems.
- Look for Riot Client in Windows’ system tray, right-click the app, and select Exit.

- Right-click the Start menu icon and choose Task Manager.
- Open the Processes tab, find instances of Riot Client, right-click each instance, and choose End task.

- Close Task Manager.
- Open the Start menu, find Riot Client, and launch the app.
2. Run Riot Client as an Admin
It’s possible Riot Client doesn’t have the required permissions to function. This usually happens when you run the app from a regular and not an admin account. You can fix the issue by launching the app as an administrator (without actually switching to an admin account).
- Find Riot Client on the desktop or Start menu.
- Right-click the app and select Run as administrator.

- Choose Yes in the User Account Control prompt.
If the app works in admin mode, make Windows always launch Riot Client with administrator privileges:
- Right-click Riot Client’s desktop shortcut and select Properties.
- Open the Shortcut tab and select Advanced.
- Enable Run as administrator and choose OK.

- Select Apply followed by OK on the Properties window.
To launch Riot Client with admin rights the next time, double-click the app shortcut on your desktop.
3. Run Program Compatibility Troubleshooter for Riot Client
One reason Riot Client fails to launch is that the app has compatibility issues with your Windows version. In this case, use Program Compatibility Troubleshooter to find and fix the app’s compatibility problems.
- Right-click Riot Client on your desktop and select Properties.
- Open the Compatibility tab
- Select Run compatibility troubleshooter.

- Allow the tool to find and fix the app’s issues.
4. Restart Windows
If the issue persists, your Windows PC might be experiencing minor glitches. In this case, give your PC a reboot to possibly fix those problems.
- Open Start by selecting the menu icon or pressing the Windows key.
- Select the Power icon in the menu.
- Choose Restart to turn your PC off and back on.

5. Temporarily Turn Off Your PC’s Antivirus and Firewall
It’s possible your PC’s antivirus or firewall has restricted Riot Client’s services, causing the app not to open. This usually happens when the antivirus or firewall deems your app unsafe. If you’ve downloaded the app from an official source, turn off both the antivirus and the firewall and see if that fixes the problem.
How you disable those items depends on the programs you’re using. You can turn off Windows’ built-in antivirus and firewall as follows.
- Open Start, find Windows Security, and launch the app.
- Select Virus & threat protection.
- Choose Manage settings under the Virus & threat protection settings header.
- Turn off Real-time protection.

- Select Yes in the User Account Control prompt.
- Select Firewall & network protection in the left sidebar.
- Choose the network that says (active).
- Turn off Microsoft Defender Firewall.

- Select Yes in the User Account Control prompt.
- Launch Riot Client.
If Riot Client launches, re-enable the antivirus and add the app to the firewall’s exclusion list as follows:
- Open the Windows Security app.
- Select Firewall & network protection.
- Choose Allow an app through firewall.
- Select Change settings at the top.
- Enable both Private and Public checkboxes next to Riot Client on the list. If you don’t find the app on the list, select Allow another app and add the app to the list.

- Select OK at the bottom to save your changes.
6. Update Graphics Card Drivers
If Riot Client continues to refuse to launch, your PC’s graphics card drivers might be outdated. Many modern apps and games require the latest drivers, and the absence of those drivers causes those items not to launch.
In this case, update the graphics card drivers installed on your system. Here are the ways to do that.
Update Drivers via Windows Update
One way to update device drivers (including graphics card drivers) on Windows is by using Windows Update.
On Windows 11
- Open Settings using Windows + I.
- Select Windows Update in the left sidebar.
- Choose Check for updates on the right pane.
- Download and install the available updates.
- Select Advanced options on the right pane.
- Choose Optional updates.
- Enable all the displayed options and select Download & install.

- Restart your PC.
On Windows 10
- Right-click the Start menu icon and select Settings.
- Select Update & Security > Windows Update in Settings.
- Choose Check for updates and download and install the available updates.
- Select View all optional updates.
- Activate the checkboxes for all the displayed updates and select Download and install.

- Reboot your PC.
Manually Update NVIDIA Drivers
If Windows Update failed to install the latest drivers for your NVIDIA graphics card, manually grab the drivers as follows:
- Launch a web browser and head to the NVIDIA Driver Downloads site.
- Select your graphics card using the drop-down menus and choose Search.

- Select Download to download the latest drivers.
- Run the downloaded file to begin installing the drivers.
Manually Update AMD Drivers
If yours is an AMD graphics card and Windows Update didn’t install the latest drivers, manually obtain and download the drivers as follows:
- Open a web browser and launch the AMD Drivers and Support site.
- Select your graphics card in the Find Drivers and Support by Selecting Your Product section and choose Submit.

- Select your operating system and choose Download.
- Open the downloaded file to install the drivers.
Make Riot Client Working Again on Your Windows 11 or Windows 10 PC
Riot Client denying to launch disrupts your gaming session and prevents you from accessing your favorite games. If the app continues not to launch, apply the solutions above. These methods find the underlying problem and fix that problem to make the app working again. We hope the guide helps you out.
Related Posts
- How to Optimize Your Windows 11 PC for Gaming
- Computer Freezes When Playing Games? 6 Ways to Fix
- How to Change Screenshot Button in Steam or Steam Deck
- How to Fix Error Code INST-14-1603 in the EA App
- Top 7 Ways to Fix Steam Error Code 107
Could you please help me troubleshoot this? I have about 8GB of storage remaining on my laptop and am attempting to free up some space. I don’t play Valorant anymore, and it’s taking up 47.7GB of space. When I try to uninstall it via system settings, I receive the notice that ‘Riot Client is running. We could not uninstall it because the Riot Client is still running. Please close the Riot Client and try again.’
Best Answered by
Cici· Answered on Apr 01, 2025
To solve can’t uninstall Valorant Because Riot Client is running, you can check this step-by-step guide:
1. Exit Riot Client
Step 1. Open the Riot Client and go to Settings.
Step 2. In the Close Window tab, select the Exit Application option and confirm all the prompts that appear.
Step 3. Press Ctrl + Shift + ESC to open the Task Manager and check for any Riot Client-related processes running.
If you don’t need Riot Client, you can check this comprehensive tutorial to remove it from your PC fully:
📌More Details: How to Uninstall Riot Client from Your PC
2. Disable and Uninstall Riot Vanguard
Step 1. Press the Windows + I keys to run Windows Settings. Open the App tab.
Step 2. Locate Riot Vanguard from the installed Apps and choose Uninstall.
3. Uninstall Valorant
After exiting Riot Client and disabling Riot Vanguard, you can now uninstall Valorant via Windows Settings, Control Panel, and Command Prompt. However, these methods are a bit complicated. To simplify the uninstallation process, I recommend a free and solid tool: EaseUS Todo PCTrans Free. The post below covers all the four ways to uninstall Valorant:
🧰Refer to How to Uninstall Valorant and Disable Riot Vanguard
Riot Clients Services
Riot Client Services are services that monitor the game files and make sure no problems happen and all files are valid, those services doesn’t need much RAM and CPU as many think, but sometimes the riot client services itself missing or doesn’t work, that’s why it need a to be fixed, let’s see more details about riot client services how to enable it disable it fix it install and uninstall it.
Riot Clients Services Ram And Cpu
To monitor riot client services ram usage in windows, after the riot client services start, open task manager go Details and there will be 8 processes 4 RiotClientCrashHandler.exe and 2 RiotClientUxRender.exe a RiotClientUx.exe and a RiotClientServices.exe if you calculate RAM usage for those 8 processes you will find average 160 megabyte after you go in there will be only RiotClientCrashHandler.exe and RiotClientServices.exe with average RAM 110 megabyte.
To monitor riot client services cpu usage, while in task manager under Performance go to Open Resource Monitor and in the Resource monitor interface go to CPU tab next you will find the same 8 services and with CPU usage 0
conclusion the riot client service is not problem and it doesn’t need much RAM or CPU.
Disable Riot Client Services
I don’t know why you want uninstall or disable riot client services maybe you don’t like or something but it really so much useful and it fix so much errors, there is a way to do that you can get the old client interface without riot client services and this is sometimes work and sometimes not, just rename C:/Riot Games/Riot Client/ to example C:/Riot Games/Riot Client_renamed/ next you will get the old client interface.
Reinstall Riot Client Services
If riot client services doesn’t work at all or you removed all it files and you have no way to fix it, then you can still download the Riot Client Services Installer And install only The (150 megabyte + ) interface.
Riot Client Services Problem And Errors
Sometimes riot clients services doesn’t work and it show some errors, below some possible problems and errors that may happen and how to fix them.
Video: Fix Riot Client Services Errors and Problems
This video show step by steps how to fix Riot Client Services errors and problems step by steps
We Can’t Launch The Game This Way
We Can’t launch the game this way. Please launch the game directly. this is a clear error since RiotClientServices.exe is not the right file to click, it’s only services that will monitor the game so starting it without the game will make no sense, if you want launch league of legends you need to start it from LeagueClient.exe or LeagueClient-shortcut
Windows Is Searching For RiotClientServices.exe
Windows is searching for RiotClientServices.exe this error happen in windows when the icon is found but it’s target not found, and this is because you may uninstalled or changed or renamed or removed the riot client services but the icon is still found, so to fix this problem in case you uninstalled riot client services you have to reinstall it , otherwise if you changed or rename riot client services folders you have to recreate the shortcut icon, and if you uninstalled all the league of legends you have to reinstall it again.
Riot Client Services Couldn’t Update
Riot Client Services Couldn’t Update, something went wrong with the update… this error doesn’t happen a lot because it happen when you mess with riot client service configuration files, in the video above there is a fix for this.
RiotClientServices.exe Application Error
When Riot Client Services crush and show error RiotClientServices.exe — Application Error The application was unable to start correctly (0xc0000017). Click OK to close the application. That’s because riot client services corrupted and it’s not valid executable file, if you notice that time to time riot client services update itself and if you close the updating, next time when you open it will not work, because the riotclientservices.exe update not completed and it will be corrupted.
So we understand that C:/../Riot Games/Riot Client/RiotClientServices.exe file corrupted and it need to be replaced with a valid RiotClientServices.exe file, you can do that with three ways:
1- Check if there is RiotClientServices.old usually riot client services always keep a backup so check inside C:/../Riot Games/Riot Client/RiotClientServices.old if there is a RiotClientServices.old you have to delete the RiotClientServices.exe and rename RiotClientServices.old to RiotClientServices.exe
2 — Download Riot Client Services Installer you can download Riot Client Services Installer and it will fix Riot Client Services problems.
3 — Download RiotClientServices.exe in the below links you can Download RiotClientServices.exe file and replace your current RiotClientServices.exe and try to fix your problem.
Download RiotClientServices.exe
Download RiotClientServices.exe from below link and use it to fix riot client services and it’s problems
- RiotClientServices.exe 20.24.7.59404
How To Uninstall Riot Client Windows 10. The official client program for playing any Riot game called Riot Client. In order to keep its most devoted players happy, this client includes a ton of really popular games, like Legends of Runeterra, League of Legends, and Valorant, among others. These games updated frequently.
Despite their humour, these games have the potential to irritate players due to potential bugs and large disc space requirements. In addition to taking up space on the hard disc and occasionally being unreliable, Riot Client can also cause crashes and other problems.
Table of Contents
You might want to end this scenario if you are one of these users as well. You have the option to remove all Riot-related items from your Windows 10 computer, including these Riot games.
Users claim that removing games from Riot Client is simple. In addition, a common grievance regarding Riot Client for Riot Games is that it remains on your computer even after you remove a Riot game.
So, how can I remove Riot Client? For this task, use the two approaches listed below.
Two Methods for Removing Riot Client from Windows 10
Riot Client installation is a quick and straightforward procedure. But it’s a nightmare to uninstall. Many customers reported that the Control Panel was unable to used to uninstall Riot Client. Riot Client cannot uninstalled via the Control Panel’s Programs and Features box since it is an executable application.
Riot Client may only removed by erasing the installation folder. Look at how to accomplish this.
Remove the Riot Games Folder by Hand
How To Uninstall Riot Client Windows 10
- Step 1: Launch Windows 10 File Explorer.
- Step 2: Find the way by navigation RIOT Games is located at C:\Users\User_Name\AppData\Local.
- Step 3: Empty the Recycle Bin and delete this folder.
Furthermore, some leftover files could kept in different folders and function as follows:
- Step 1: In the search bar, type “Riot,” then select “Open file location” by right-clicking on Riot Client.
- Step 2: Eliminate the Riot Games folder.
Also Read: How Many NPCS Are In GTA 6

How to Use CMD to Uninstall Riot Client
A guy by the name of Moto360ing posted a method on Reddit for using CMD to uninstall Riot Client. Check out how to remove the files and folders that start with the word “riot.”
- Step 1: Open Command Prompt and log in as administrator.
- Step 2: Type the following commands into the Command Prompt window, pressing Enter after each command:
dir C:\riot*.* /s /b /a:d > %tmp%\list.txt
for /F “tokens=* delims=” %x in (%tmp%\list.txt) do rd %x /s /q
dir C:\riot*.* /s /b > %tmp%\list.txt
for /F “tokens=* delims=” %x in (list.txt) do del “%x” /s /q
After that, even if the most of the objects are OK to leave there, you must go erase a few residual Registry files. Check out how to accomplish this:
- Step 1: Click Registry Editor after typing regedit into the search bar.
- Step 2: Manually remove a few items.
- Computer\HKEY_CLASSES_ROOT\riotclient
- Computer\HKEY_CURRENT_USER\Software\Microsoft\Windows\CurrentVersion\ApplicationAssociationToasts\riotclient_riotclient
- Computer\HKEY_CURRENT_USER\Software\Microsoft\Windows\CurrentVersion\Explorer\FeatureUsage\AppSwitched\(some items contain paths to riot games)
In summary
That is the process of removing Riot Client. The Riot Client only manually removed from your Windows 10/11 PC by deleting the Riot Games folder. The Riot Client cannot uninstalled via the Control Panel. For this work, just use the two techniques that are provided.
FAQ
How To Uninstall Riot Client Windows 10?
- Step 1: Launch Windows 10 File Explorer.
- Step 2: Find the way by navigation RIOT Games is located at C:\Users\User_Name\AppData\Local.
- Step 3: Empty the Recycle Bin and delete this folder.
Furthermore, some leftover files could kept in different folders and function as follows:
- Step 1: In the search bar, type “Riot,” then select “Open file location” by right-clicking on Riot Client.
- Step 2: Eliminate the Riot Games folder.