
When installing a fresh copy of Windows 2012 or 2012R2, some of the more common items on the desktop, such as My Computer, User’s Files, Network, Control Panel are missing or no longer part of the default configuration. On a Windows 7 or 8 machine, to add these icons you could right-click on the desktop and go to Personalize. However, by default, this option is not available on a fresh copy of 2012 / 2012R2.
Although a shortcut can be added to the desktop for each of these icons, items such as My Computer will not have the same right-click drop-down menu.
Installing the Windows Desktop Experience Role
To add the Personalize option back into Windows, navigate to Server Manager. By default this will open when logging into Windows or alternatively navigate to Control Panel > Administrative Tools > Server Manager.
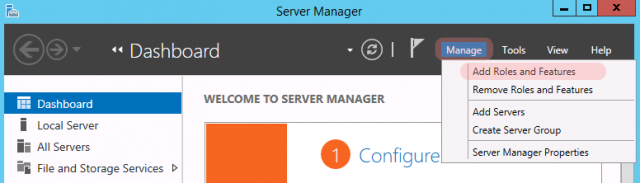
Once you have opened up Server Manager, click on Add Roles and Features.
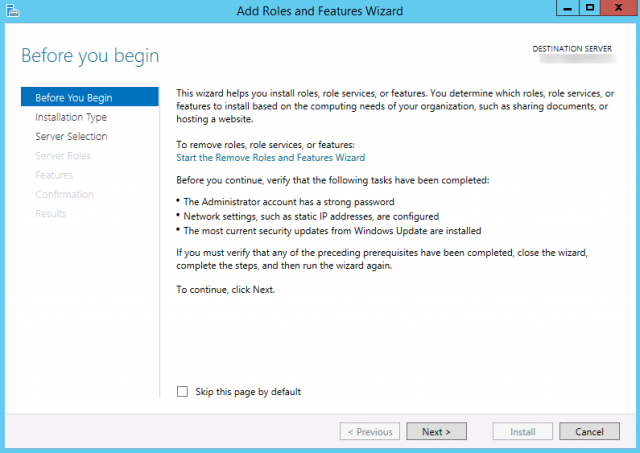
Click Next on the Add Roles and Features Wizard
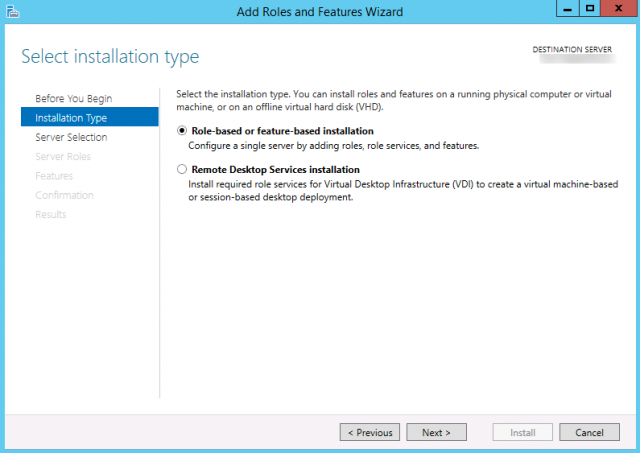
Click Role-based or feature-based installation then Next.
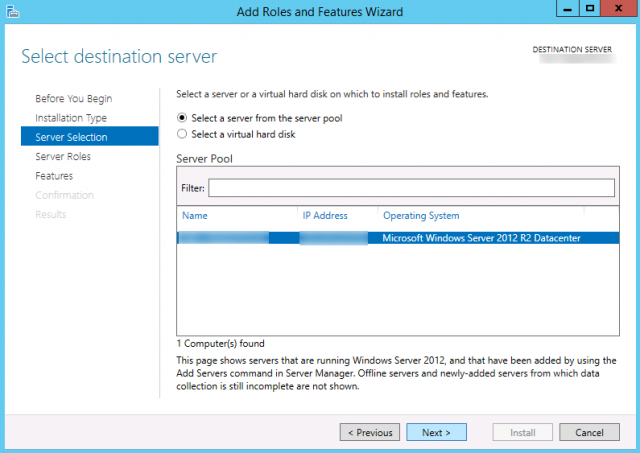
Select the server from the server pool. In my example, I am modifying a VMware template.
Note: If you performing a manual sysprep versus a vCenter template, sysrep will remove the role.
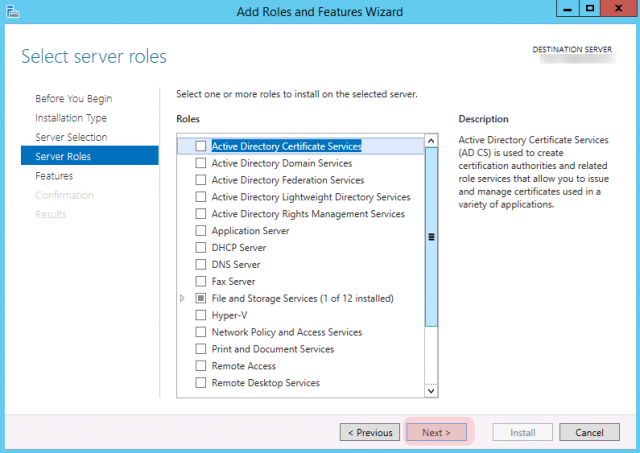
The Server Roles section can be skipped for purposes of this article.
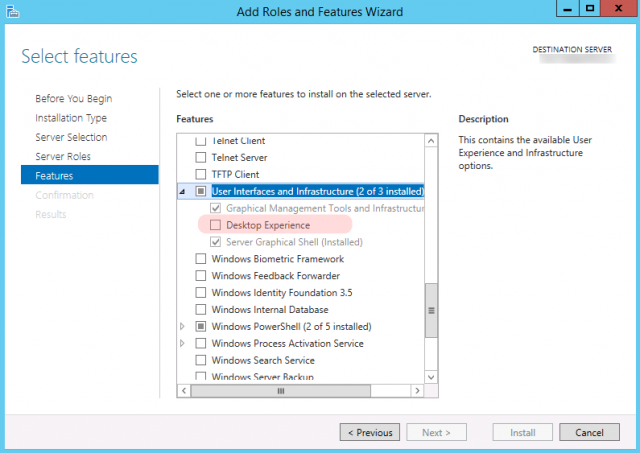
On the Select Features page, find User Interfaces and Infrastructure and click Desktop Experience.
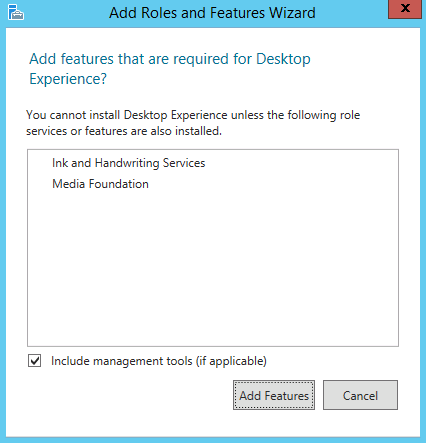
The next window will prompt for any additional roles that m ay need to be installed. Click Add Feature to install these roles.
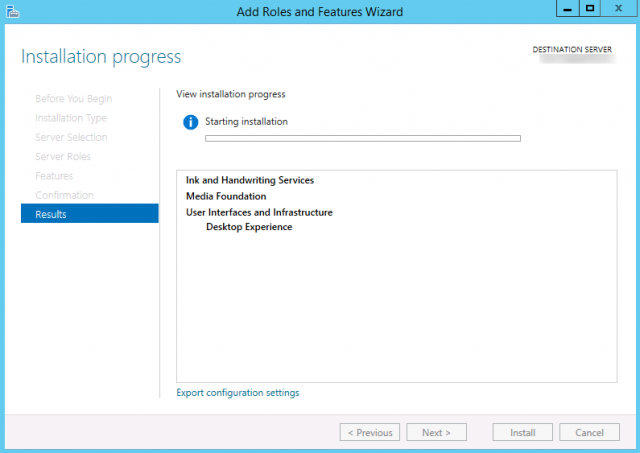
A confirmation / review page will appear with all the roles and features to be installed on the machine.
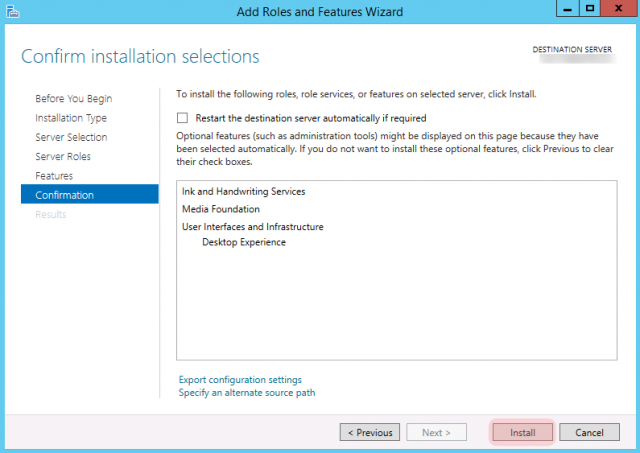
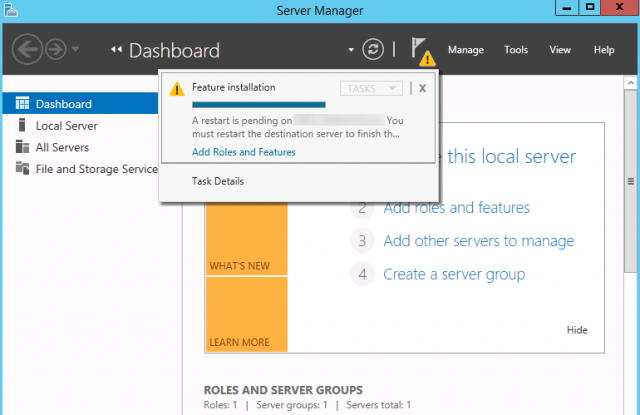
Once installation is clicked, the menu will show the progress of the installation.
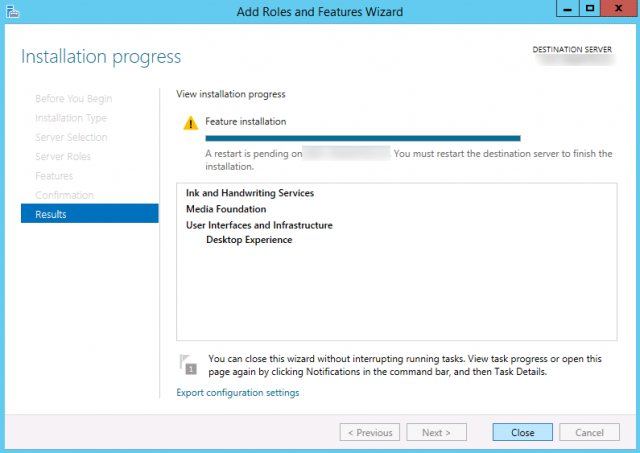
Once Windows is done installing the new features, a reboot will be required to finalize the installation.
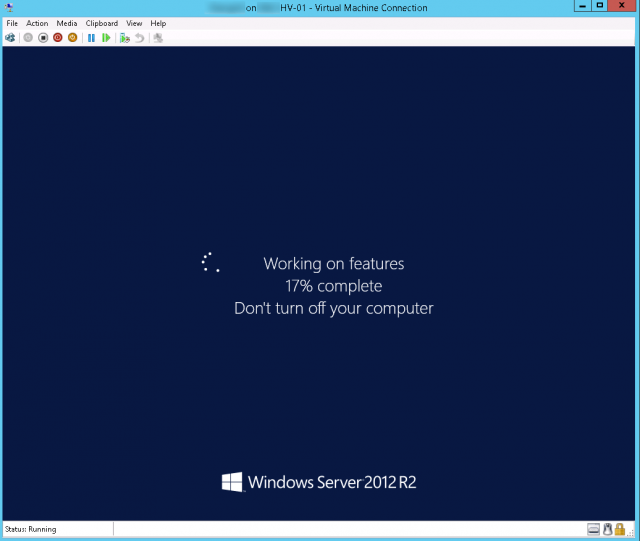
Once the machine has rebooted, it should take about a minute to install the new roles.
Once Windows has fully booted up, the Personalize option will appear when right clicking on the desktop.
A user or admin can now modify their desktop icons as needed.
Меню персонализация по умолчанию отсутствует в Windows Server 2012 R2 и нету иконок на рабочем столе.Пришлось копать реестр и меня настройки.Внизу приведен скрипт на изменения значений в реестре Windows Server 2012 R2. Может кому поможет скрипт 🙂 Необходимо сохранить файл в блокноте с кодировкой Юникод
|
Windows Registry Editor Version 5.00 [HKEY_LOCAL_MACHINE \SOFTWARE\Microsoft\Windows\CurrentVersion\Explorer\HideDesktopIcons\NewStartPanel] “{F02C1A0D—BE21—4350—88B0—7367FC96EF3C}”=dword:00000000 «{031E4825—7B94—4dc3—B131—E946B44C8DD5}”=dword:00000000 “{5399E694—6CE5—4D6C—8FCE—1D8870FDCBA0}”=dword:00000000 “{20D04FE0—3AEA—1069—A2D8—08002B30309D}”=dword:00000000 “{59031a47—3f72—44a7—89c5—5595fe6b30ee}”=dword:00000000 |
Просмотров : 3636
После первого запуска Windows Server 2012 R2 сразу полез добавлять иконки на рабочий стол – Компьютер, Панель управления. Это уже привычка выработанная годами.
Но к моему удивлению я не нашел в контекстном меню рабочего стола заветный пункт Персонализация, через который можно управлять иконками Рабочего стола.
Оказывается, что в Windows Server 2012R2 персонализация Рабочего стола вынесена, как отдельный компонент, который нужно добавить.
А сделать это можно так: Server Manager –> Manage –> Add Roles and Features.
В разделе Features (Компоненты) добавляем компонент Desktop Experience (Возможности рабочего стола).
Перезагружаем сервер. Теперь в контекстном меню есть пункт Personalize (Персонализация), через который можно добавить нужные иконки на Рабочий стол.
Это все. Всем удачи!
После первого запуска Windows Server 2012 R2 сразу полез добавлять иконки на рабочий стол – Компьютер, Панель управления. Это уже привычка выработанная годами. Но к моему удивлению я не нашел в контекстном меню рабочего стола заветный пункт Персонализация, через который можно управлять иконками Рабочего стола.
Оказывается, что в Windows Server 2012R2 персонализация Рабочего стола вынесена, как отдельная фича, которую нужно добавить. А сделать это можно так: Server Manager –> Manage –> Add Roles and Features.
В разделе Features добавляем фичу Desktop Experience.
Перезагружаем сервер. Теперь в контекстном меню есть пункт Personalize, через который можно добавить нужные иконки на Рабочий стол.
One of the first things IT Administrators and IT Managers notice after a fresh installation of Windows 2012 Server is that there are no Desktop Icons apart from the Recycle Bin. Desktop icons such as Computer, User’s Files, Network & Control Panel are not available by default. Desktop icons are now available through the Personalize menu, when right-clicking in an empty area on the desktop, however this menu option is not available by default.
Figure 1. Personalize Menu is not available by default on Windows 2012 Server
To bring back the Desktop icons, administrators must first install the Desktop Experience feature on Windows 2012 Server.
Running Windows 2012 Server in a virtual environment? Get an award-winning backup solution for Free!! Download Now!
Note: Once the Desktop Experience Feature is installed, the server will require a restart.
To do so, click on the Server Manager icon on the taskbar:
Figure 2. Server Manager icon on Windows 2012 Server taskbar
Now select Add Roles and Features:
Figure 3. Selecting Add roles and features in Windows 2012 Server
Now, click Next on the Before you Begin page and at the Installation Type page select Role-based or feature-based installation. Next, select your server from the server pool and click Next:
Figure 4. Selecting our destination server
At the next window, click on Features located at the left side, do not select anything from the Server Roles which is displayed by default. Under Features, scroll down to User Interfaces and Infrastructure and click to expand it. Now tick Desktop Experience:
Figure 5. Selecting Desktop Experience under User Interfaces and Infrastructure
When Desktop Experience is selected, a pop up window will ask us to confirm the installation of a few additional services or features required. At this point, simply click on Add Features. Now click on Next and then the Install button.
This will install all necessary server components and add-ons:
Figure 6. Installation of server components and add-ons — Windows 2012 Server
Once complete, the server will require a restart. After the server restart, we can right-click in an empty area on our desktop and we’ll see the Personalize menu. Select it and then click on Change desktop icons from the next window:
Figure 7. Selecting Change desktop icons — Windows 2012 Server
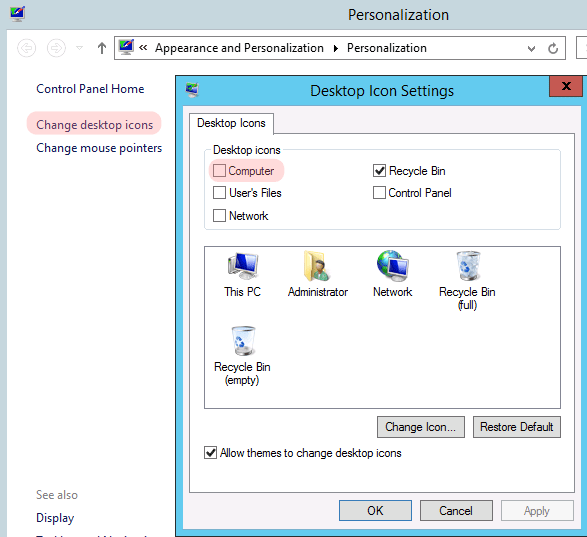
Now simply select the desktop icons required to be displayed and click on OK:
Figure 8. Select Desktop icons to be displayed on Windows 2012 Server Desktop
Free Award-Winning Backup solution for VMware and Hyper-V virtualization environments. Click here!
This article showed how to enable Desktop Icons (Computer, User files, Network , Control Panel) on Windows 2012 Server. We explained this process using a step-by-step process and included all necessary screenshots to ensure a quick and trouble-less installation. For more Windows 2012 Server tutorials, visit our Windows Server Section.