
Все способы:
- Процедура настройки наушников
- Способ 1: Управление аудиокартой
- Способ 2: Штатные средства ОС
- Заключение
- Вопросы и ответы: 2
Многие пользователи предпочитают подключать к компьютеру наушники вместо колонок, хотя бы из соображений удобства или практичности. В некоторых случаях такие пользователи остаются недовольно качеством звука даже в дорогих моделях – чаще всего такое происходит, если девайс настроен неправильно или не настроен вовсе. Сегодня мы расскажем о способах конфигурации наушников на компьютерах под управлением Windows 10.
Процедура настройки наушников
В десятой версии Виндовс отдельное конфигурирование устройств вывода звука обычно не требуется, но эта операция позволяет выжать максимум из возможностей наушников. Проделать её можно как посредством интерфейса управления звуковой картой, так и системными средствами. Давайте разберёмся, как это делается.
Читайте также: Настройка наушников на компьютере с Windows 7
Способ 1: Управление аудиокартой
Как правило, диспетчер карты вывода звука предоставляет возможность более тонкой настройки, чем системная утилита. Возможности данного инструмента зависят от типа установленной платы. В качестве наглядного примера воспользуемся популярным решением Realtek HD.
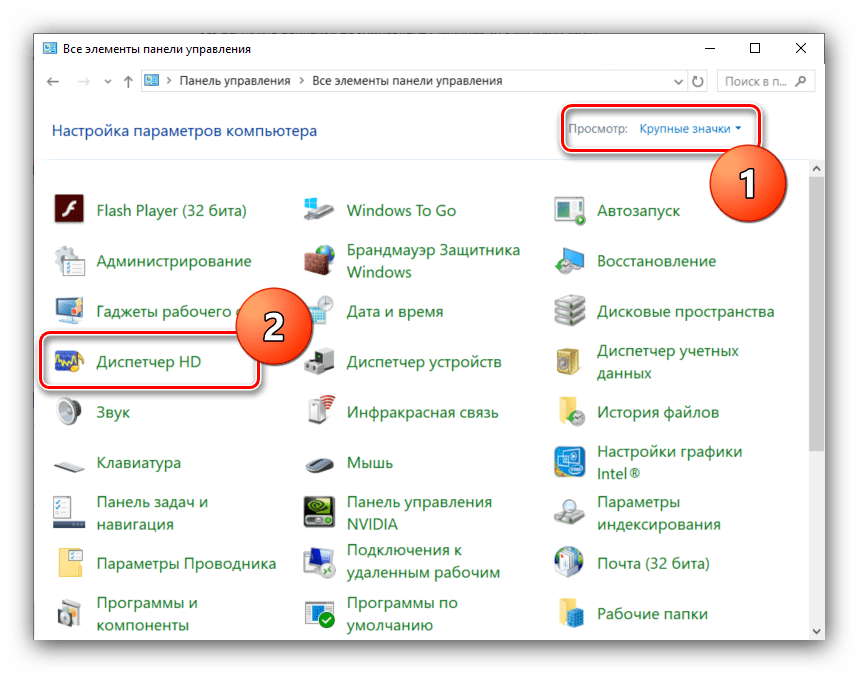
- Вызовите «Панель управления»: откройте «Поиск» и начните набирать в строке слово панель, после чего кликните левой кнопкой мыши по результату.
Подробнее: Как открыть «Панель управления» на Windows 10
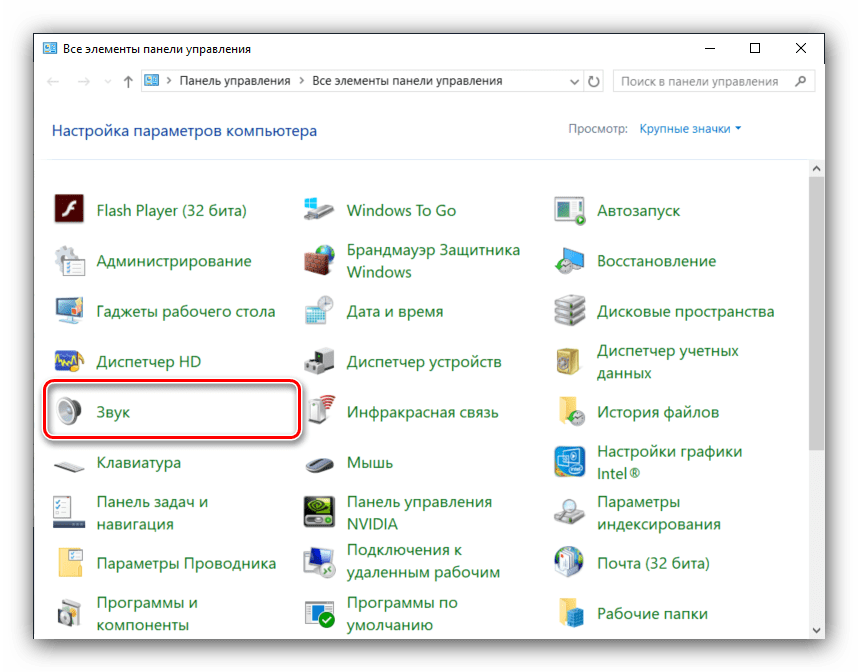
- Переключите отображение значков «Панели управления» в режим «Крупные», после чего найдите пункт под названием «Диспетчер HD» (может также называться «Диспетчер Realtek HD»).

Читайте также: Скачиваем и устанавливаем звуковые драйвера для Realtek
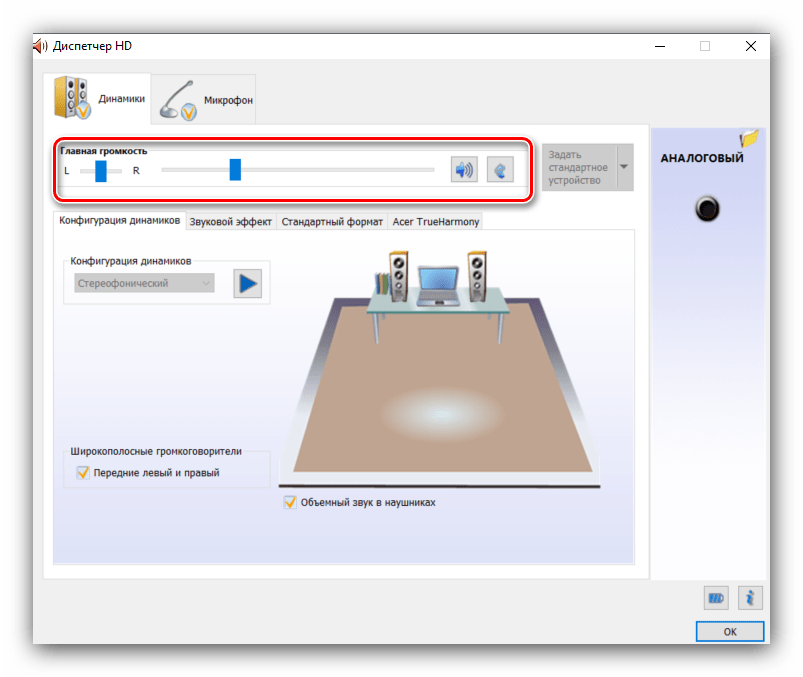
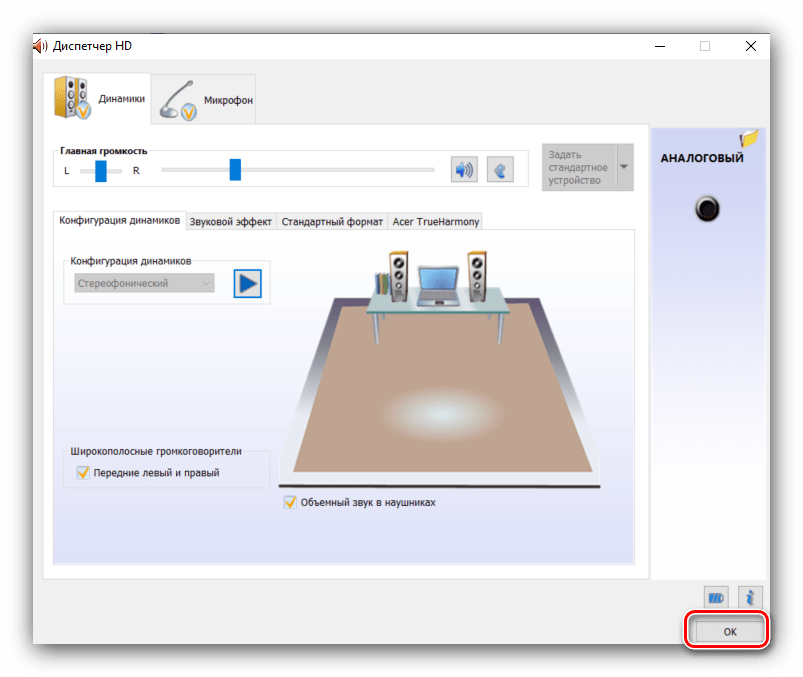
- Настройка наушников (равным образом как и колонок) производится на вкладке «Динамики», открытой по умолчанию. Основными параметрами являются установка баланса между правым и левым динамиками, а также уровень громкости. Маленькая кнопка с изображением стилизованного человеческого уха позволяет установить ограничение максимальной громкости для защиты слуха.

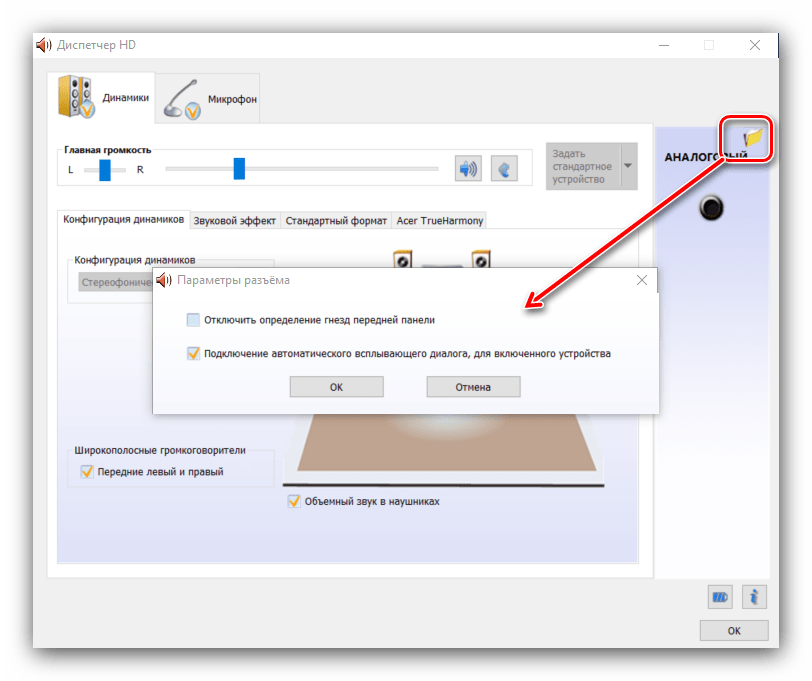
В правой части окна находится настройка разъёма — на скриншоте отображена актуальная для ноутбуков с совмещённым входом для наушников и микрофона. Клик по кнопке с иконкой папки вызывает параметры гибридного звукового порта.
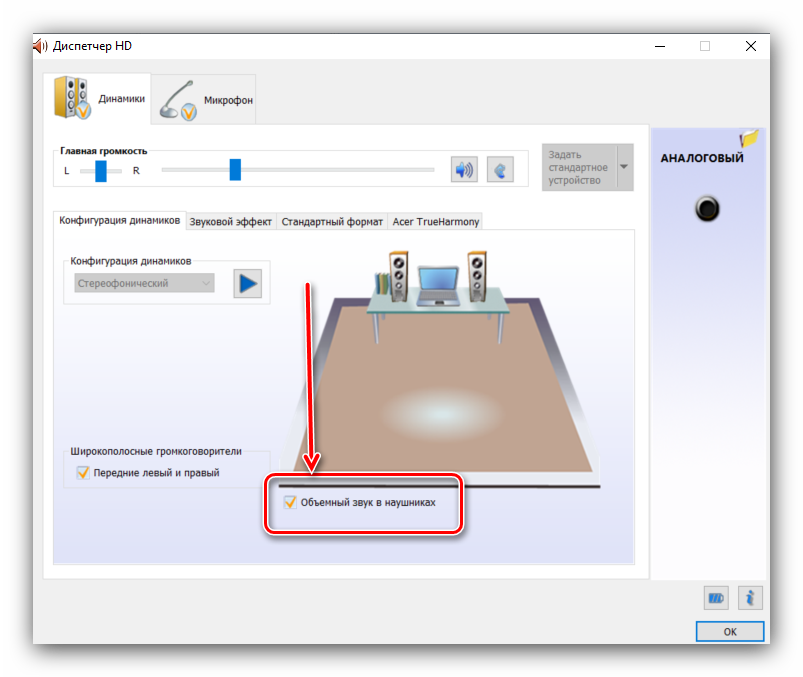
- Теперь переходим к специфичным настройкам, которые располагаются на отдельных закладках. В разделе «Конфигурация динамиков» расположена опция «Объёмный звук в наушниках», которая позволяет довольно правдоподобно имитировать звучание домашнего кинотеатра. Правда, для полноты эффекта потребуются полноразмерные наушники закрытого типа.
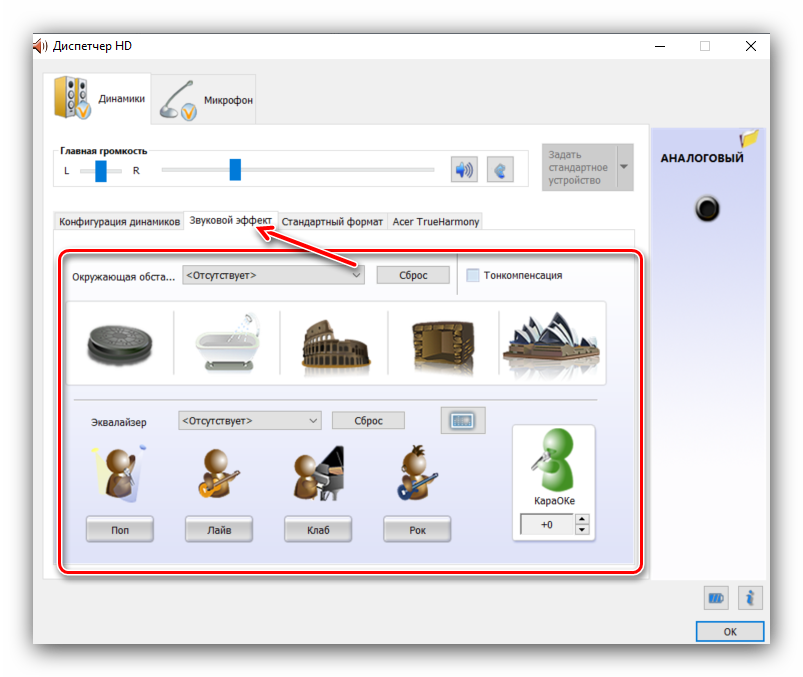
- Вкладка «Звуковой эффект» содержит в себе настройки эффектов присутствия, а также позволяет воспользоваться эквалайзером как в виде пресетов, так и путем изменения частоты в ручном режиме.
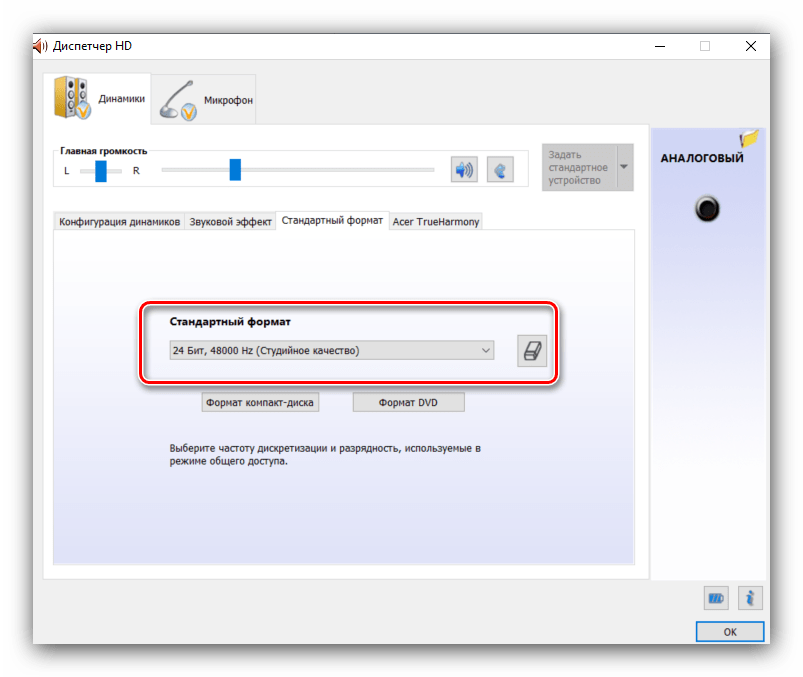
- Пункт «Стандартный формат» пригодится меломанам: в этом разделе можно установить предпочитаемую частоту дискретизации и разрядность воспроизведения. Наилучшее качество получается при выборе варианта «24 бит, 48000 Гц», однако не все наушники могут его адекватно воспроизводить. Если после установки этой опции вы не заметили улучшений, имеет смысл выставить качество пониже для экономии ресурсов компьютера.
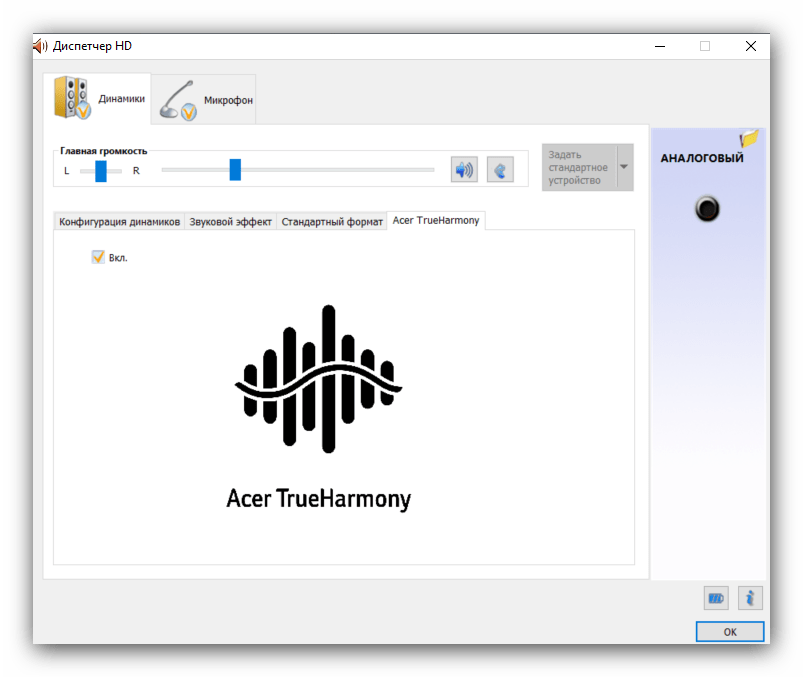
- Последняя вкладка специфична для разных моделей ПК и ноутбуков, и содержит в себе технологии от производителя устройства.
- Сохранить настройки можно простым нажатием кнопки «ОК». Обратите внимание, что для применения некоторых опций может потребоваться перезагрузка компьютера.
Отдельные звуковые карты предоставляют собственное ПО, но ничем принципиальным оно не отличается от диспетчера аудиооборудования Realtek.
Способ 2: Штатные средства ОС
Простейшую настройку звукового оборудования можно произвести как с помощью системной утилиты «Звук», которая присутствует во всех версиях Виндовс, так и с помощью соответствующего пункта в «Параметрах».
«Параметры»
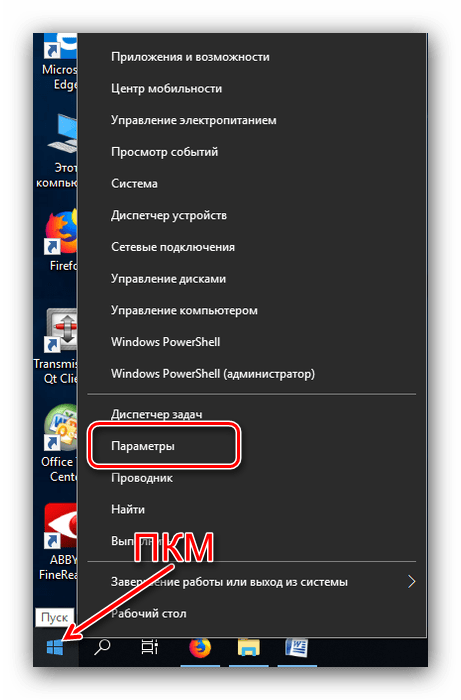
- Открыть «Параметры» проще всего с помощью контекстного меню «Пуска» – наведите курсор на кнопку вызова этого элемента, кликните правой кнопкой, затем щёлкните левой по нужному пункту.

Читайте также: Что делать, если не открываются «Параметры» в Windows 10
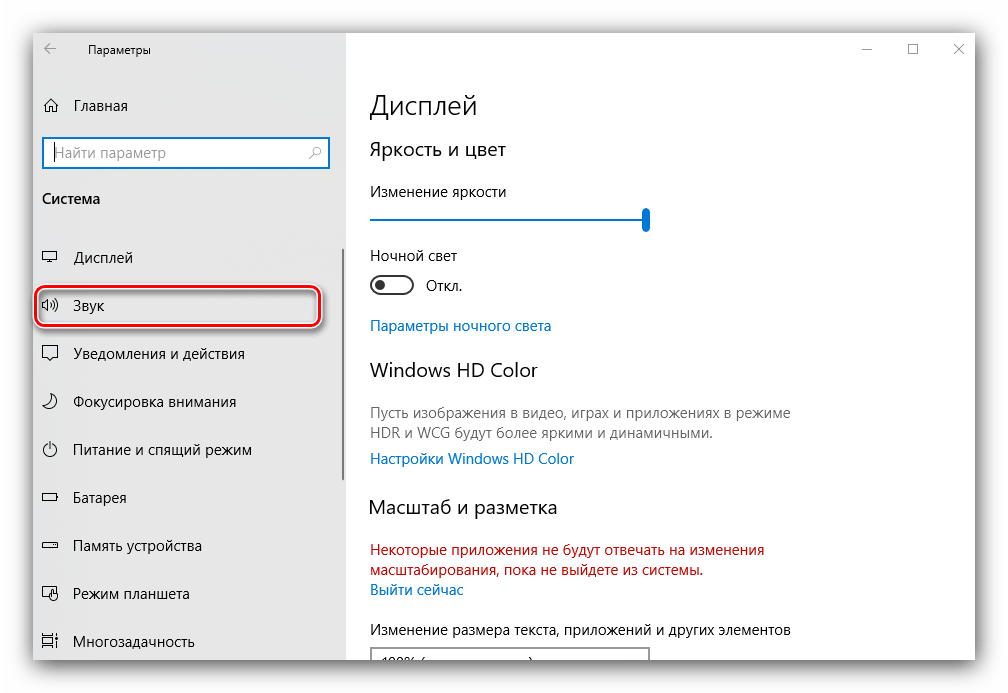
- В главном окне «Параметров» кликните по варианту «Система».
- Затем с помощью меню слева перейдите к пункту «Звук».
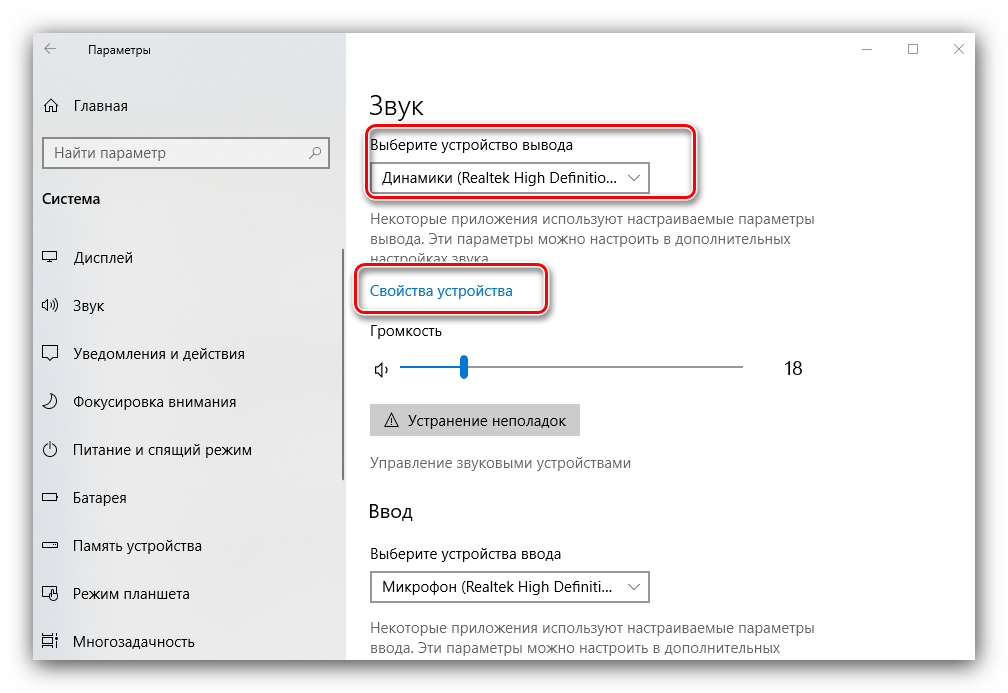
- Настроек здесь на первый взгляд немного. Первым делом из выпадающего списка сверху выберите ваши наушники, затем кликните по ссылке «Свойства устройства».
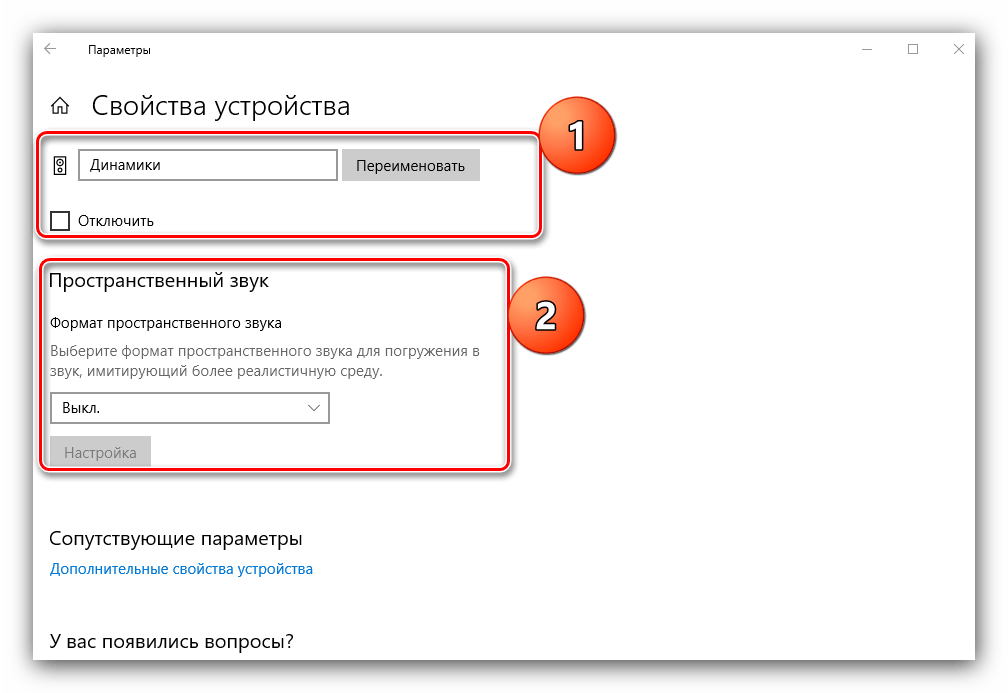
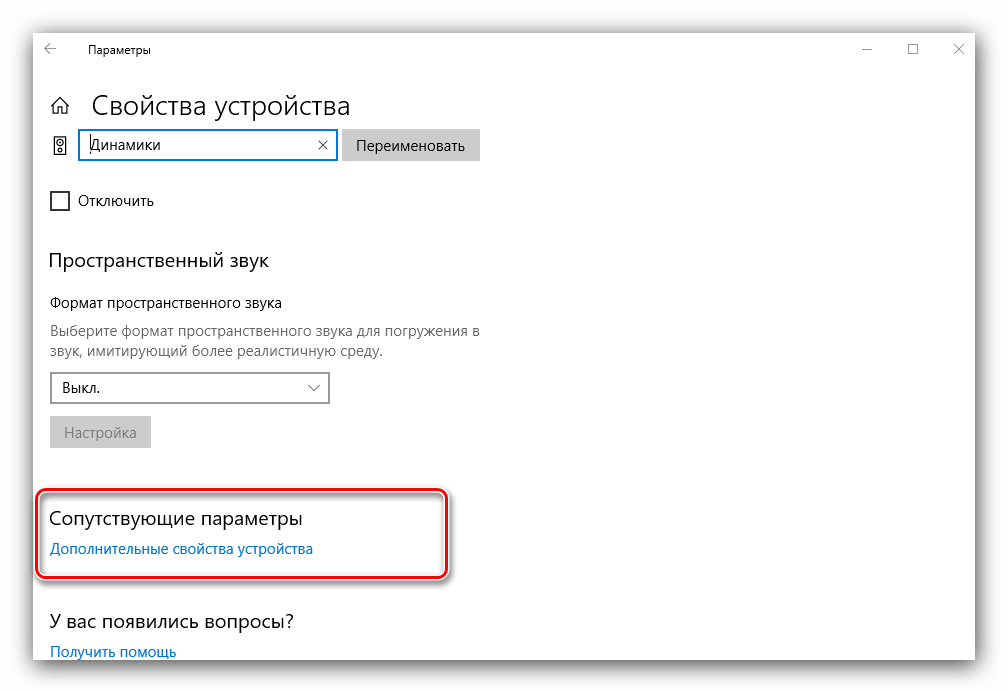
- Выбранное устройство можно переименовать или отключить, отметив чекбокс с наименованием этой опции. Также доступен выбор движка пространственного звука, который может улучшить звучание на дорогих моделях.
- Самый важный пункт находится в разделе «Сопутствующие параметры», ссылка «Дополнительные свойства устройства» — кликните по ней.

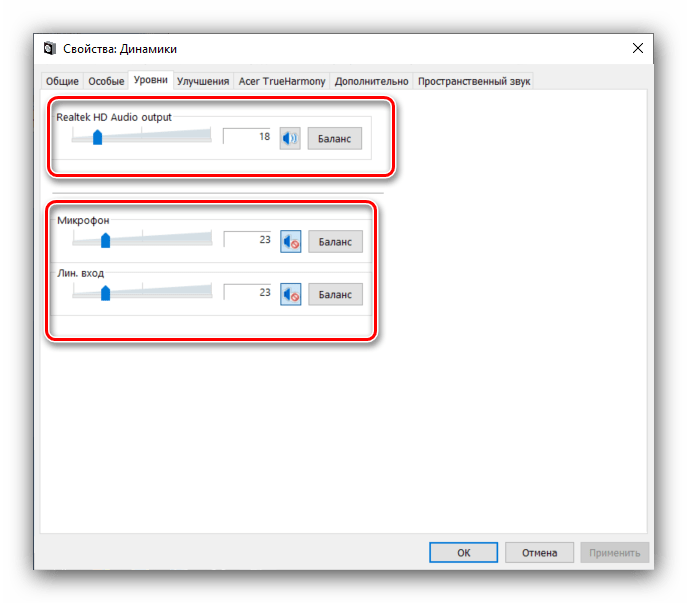
Откроется отдельное окошко свойств девайса. Перейдите ко вкладке «Уровни» – здесь можно задать общую громкость вывода наушников. Кнопка «Баланс» позволяет отдельно настроить громкость для левого и правого каналов.
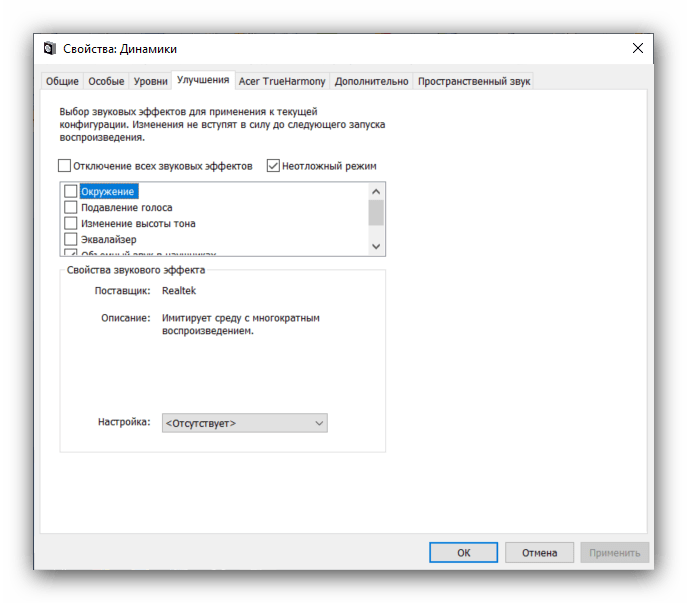
- Следующая вкладка, «Улучшения» или «Enhancements», выглядит по-разному для каждой модели звуковой карты. На аудиокарте Realtek настройки имеют следующий вид.
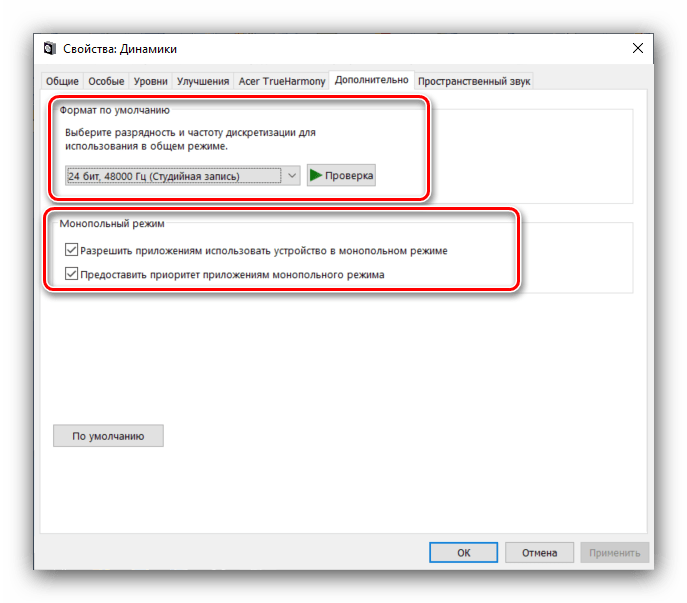
- Раздел «Дополнительно» содержит уже знакомые нам по первому способу параметры частоты и битности выводимого звука. Однако в отличие от диспетчера Реалтек, здесь можно прослушать каждый вариант. Кроме того, рекомендуется отключить все опции монопольного режима.
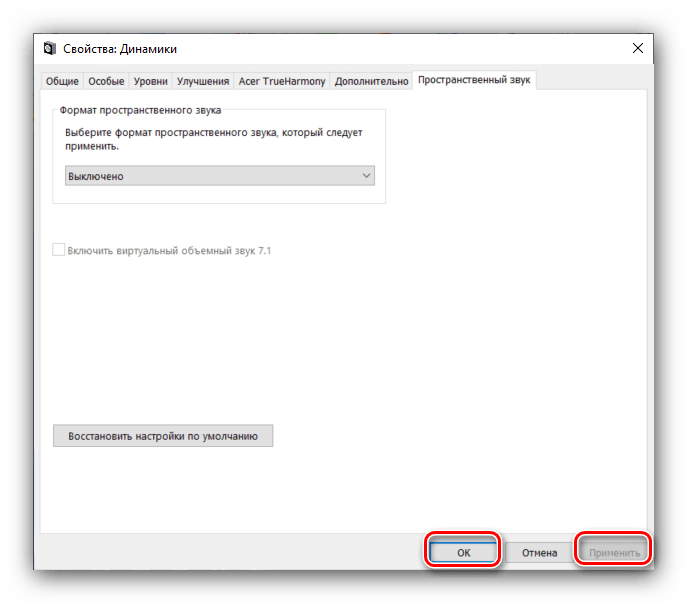
- Вкладка «Пространственный звук» дублирует такую же опцию из общего средства «Параметров». После внесения всех желаемых изменений воспользуйтесь кнопками «Применить» и «ОК» для сохранения результатов процедуры настройки.

«Панель управления»
- Подключите наушники к компьютеру и откройте «Панель управления» (см. первый способ), но на этот раз найдите пункт «Звук» и перейдите в него.
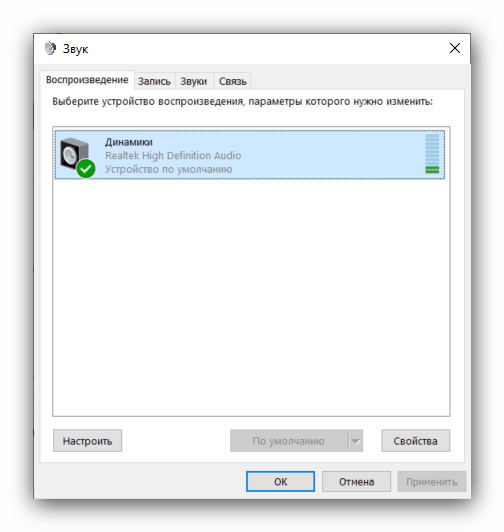
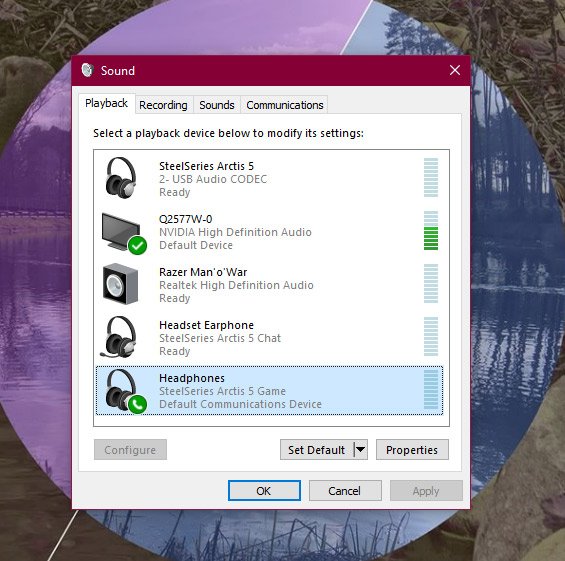
- На первой вкладке под названием «Воспроизведение» находятся все доступные устройства вывода звука. Подключённые и распознанные подсвечены, отключённые отмечены серым цветом. На ноутбуках дополнительно отображаются встроенные динамики.

Убедитесь, что ваши наушники установлены как устройство по умолчанию – под их наименованием должна отображаться соответствующая надпись. Если таковая отсутствует, наведите курсор на позицию с девайсом, нажмите правую кнопку мыши и выберите вариант «Использовать по умолчанию».
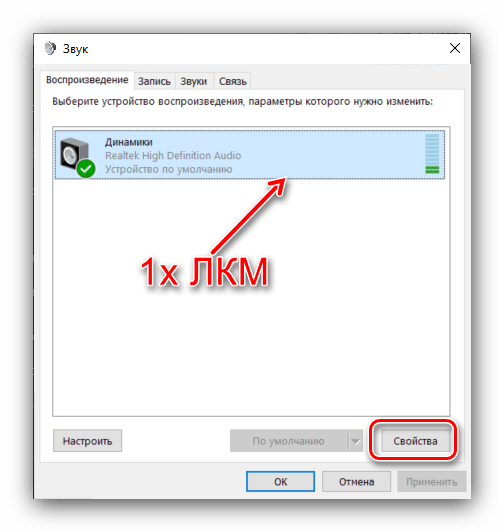
- Для настройки элемента выделите его однократным нажатием левой кнопки, после чего воспользуйтесь кнопкой «Свойства».
- Появится то же окошко с вкладками, что и при вызове дополнительных свойств устройства из приложения «Параметры».
Заключение
Мы с вами рассмотрели методы настройки наушников на компьютерах под управлением Windows 10. Подводя итоги, отметим, что некоторые сторонние приложения (в частности, музыкальные проигрыватели), содержат в себе настройки наушников, которые не зависят от системных.
Наша группа в TelegramПолезные советы и помощь
1. Plug the USB plug into the USB port.
Make sure the USB plug is completely plugged into the USB port.
2. Double check the headset mute button.( If the headset has a mute button.)
If the USB headset has a mute button on its inline controls, please double check that the mute is not turned on. If your usb headset doesn’t have that feature no worries.
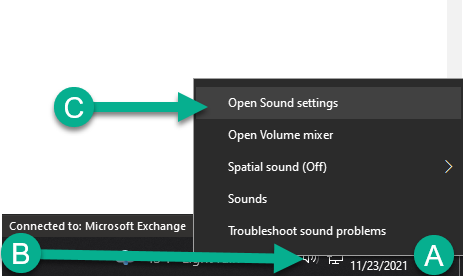
3. Open Sound Settings.
A. Locate the speaker icon in the right hand corner of the screen by the time and date.
B. Right Click the speaker icon.
C. Hover the mouse above sound settings, & left click sound settings.
4. Set the USB headset as the output device.
Next go here to “Output” and under “choose your output device” left click the down carrot and select the USB Headset.
Double check that the master volume is on and check for sound.

5. Set the USB headset as the input device.
Next go to “Input” and under “choose your input device” left click the down carrot and select the USB Headset.
Now here where it says “Test your microphone” lets speak into the microphone. If the microphone is working this blue bar should be reactive.
Go to device properties and let’s set the microphone input volume down to somewhere in the range of 65 and 85. This way we aren’t too loud for our next virtual meeting.

Summary & Trouble Shooting
Now your USB headset is setup on Windows 10. Thank you for taking the time to setup your headset with us and have a great day! If you are still having troubles with the headset feel free to reach out to us using the contact form below.
Windows 10 USB Headset Setup
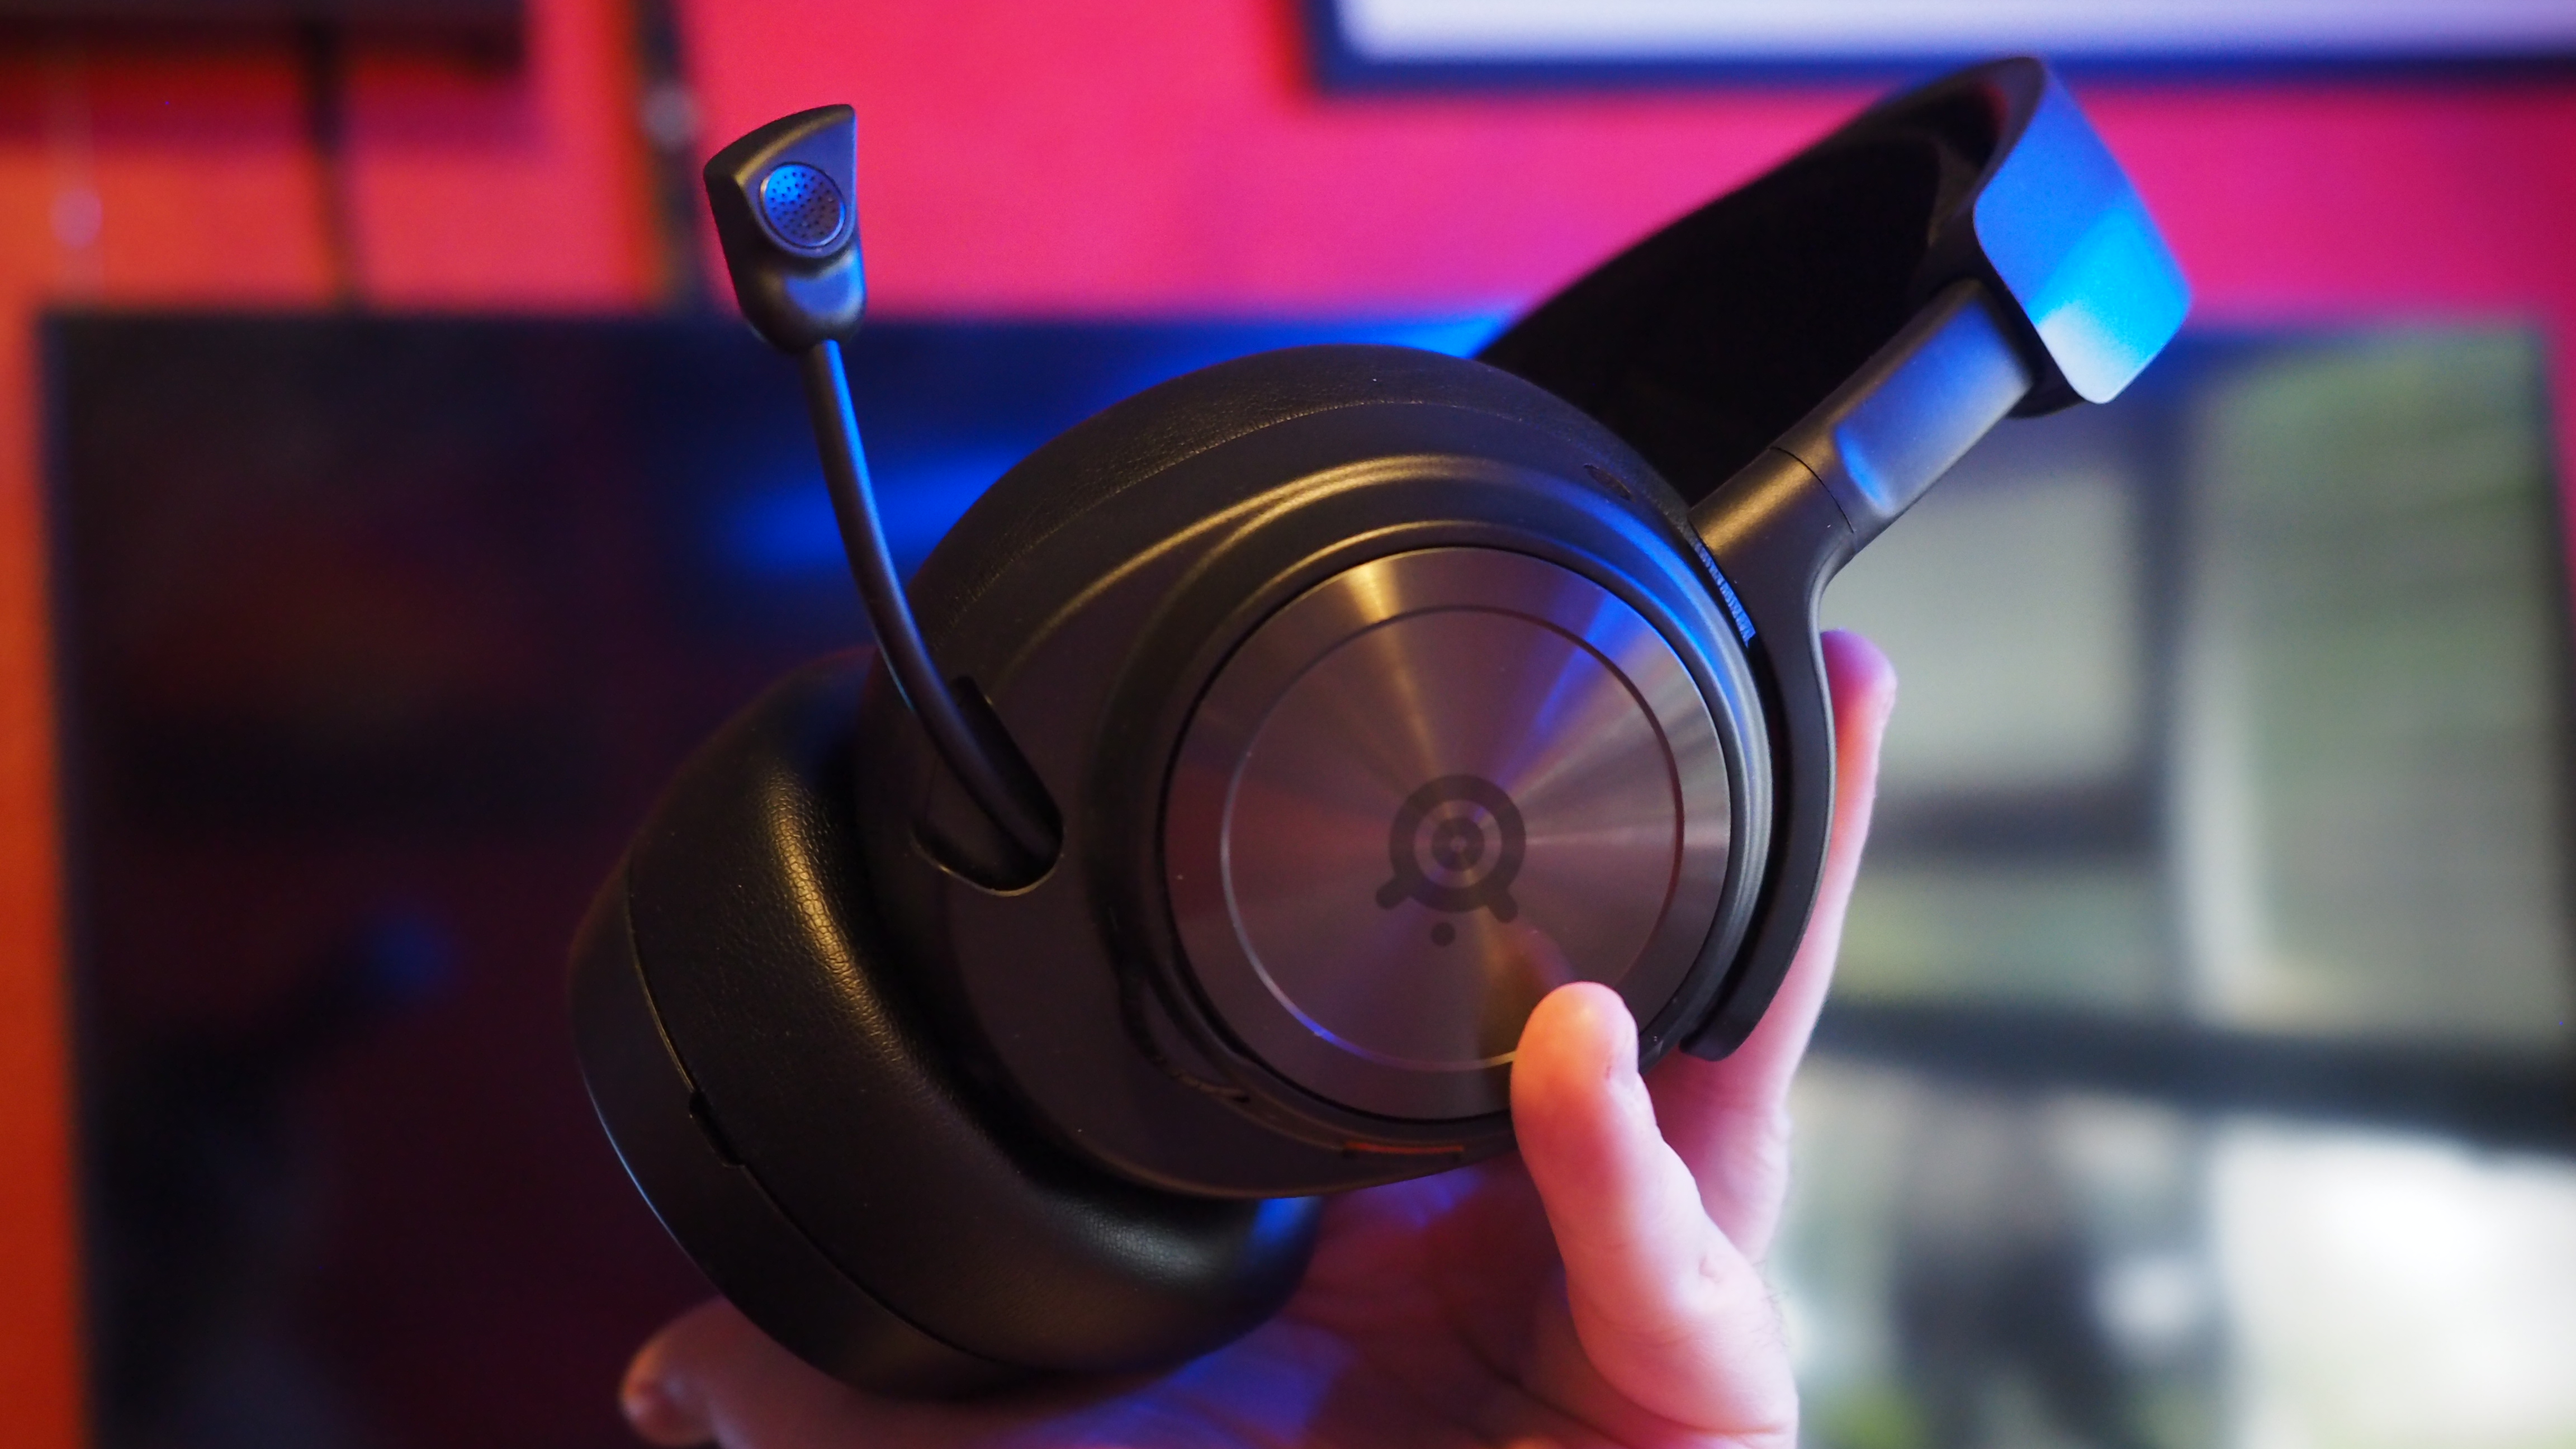
(Image credit: Jez Corden | Windows Central)
Knowing how to set up and use a headset on Windows is essential for the modern age of communication, especially with the rise of working from home. Sets with noise cancellation are perfect for blocking out distracting sounds around the house and serve multiple uses outside productivity.
Gamers generally have a particular affinity for wired and wireless headsets, whether to keep in contact with friends during online multiplayer games or to be immersed in atmospheric soundscapes.
Unfortunately, not every headset is as simple as plug-and-play and might seem a little unusual if you connect them without adjusting settings. Our tips will walk you through selecting your new headset in Windows and some adjustments to get the best quality sound.
How to set up your headset on Windows 10

To use a headset, you’re going to have to plug it in. Simple, we know, but it’s easy to get this step wrong if you’re unfamiliar with available ports for audio on a PC. It’s a relatively simple process; hook up the cable on the headset to a spare port on your PC or connect it wirelessly. Here are the options for headset owners:
- 3.5mm jack: Older and more affordable headsets usually have the cable split at the end with two 3.5mm jacks, one for audio out and the other for the microphone. (Pink for the microphone, green for the headset.)
- USB: USB-powered headsets offer enhanced experiences thanks to inline amps, controls, and other features, though, in terms of quality, there isn’t a massive gap between USB and 3.5mm jacks.
- Wireless: Whether it be Bluetooth or requires a dedicated USB wireless receiver, these headsets remove all cables between your computer, allowing you to sit more comfortably without fear of creating a tangled mess.
Depending on the case and motherboard installed on a desktop PC, there may be available ports on or near the front of the chassis, perfect if you have a short cable or have no free ports on the rear. The most significant factor in sound quality will be the soundcard on your motherboard, comparing it against a dedicated digital-to-analog converter (DAC).
Checking sound output in Windows 10
Once you have the headset connected to the PC, it’s time to make sure Windows has sound levels and the like set up and configured correctly. Firstly, we need to check Windows has the headset selected as the default output device.
- Left-click the sound icon in the taskbar.
- Select the sound device in the drop-down menu.
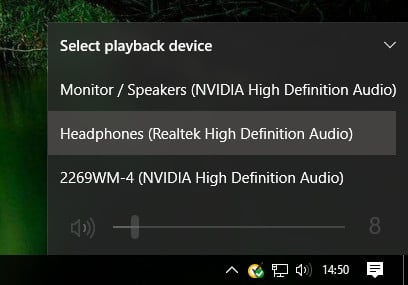
- Choose the connected headset.
This could have in brackets either USB or the brand and model of the onboard motherboard audio — it depends on which connection type the headset utilizes. It’s possible to rename each entry on this list to make it easier for you to decipher which is which. (See below how to rename a connected sound output.)
All the latest news, reviews, and guides for Windows and Xbox diehards.
Now we’ll need to test the output to make sure we’ve selected the correct device, and everything is working perfectly. You can do this by firing up some media on the PC or utilize the test function in Windows.
- Right-click the sound icon in the taskbar.
- Select Open sound settings.
- Choose Sound control panel on the right.
- Select the headphones (should have a green tick).
- Hit Properties. (You can rename this sound output right here to make it easier at switching.)
- Select the Advanced tab.
- Hit the test button.
If you hear sound through the headphones, you’re good to go. If not, check if you have the correct device selected for sound output and that the headset itself is plugged in (we’ve all be in the position where something doesn’t work because it isn’t physically connected).
Recording your own voice
After that, we need to select the microphone as the default input device and make sure the volume is turned up. To do this, we run through similar steps carried out for the headphones.
- Right-click the sound icon in the taskbar.
- Select Open sound settings.
- Choose Sound control panel on the right.
- Select the Recording tab.
- Choose the microphone.
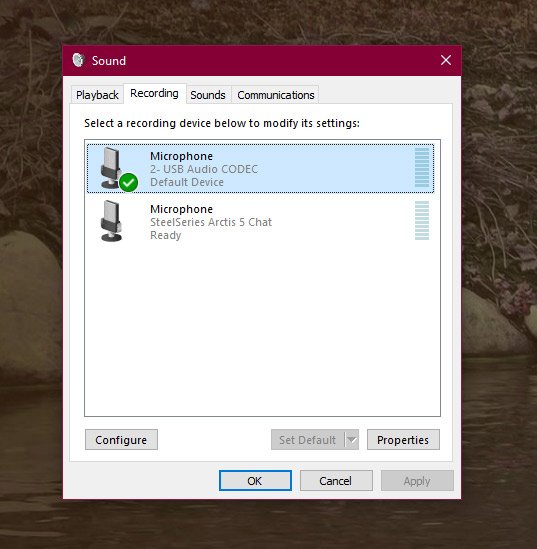
- Hit Set as default.
- Open the Properties window.
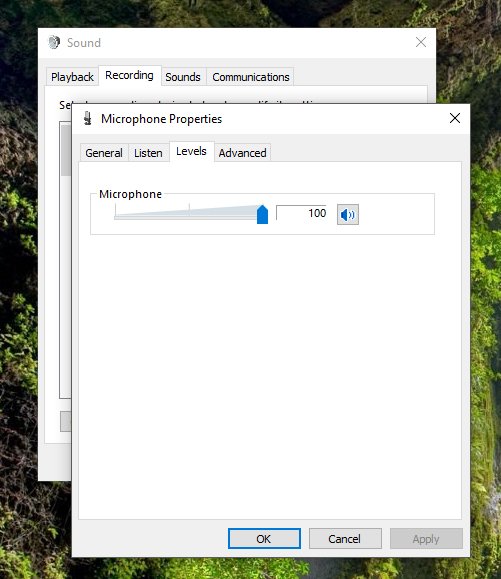
- Select the Levels tab.
- Adjust the volume accordingly.
Be sure to fire up your favorite VoIP app (Discord is a great option) or recording software to test the microphone out. Some applications can take full control of the microphone and adjust levels accordingly. In contrast, others allow you to manipulate the software suite’s volume to save you from opening this recording window each and every time.
Troubleshooting Windows headset issues
Make sure you use the right ports
Is it plugged in? Have you utilized the correct port? For 3.5mm jacks, it’s generally green for output and pink for input, depending on the available sound card. Mix those two up, and nothing at all will happen. Newer motherboards come with numerous ports for surround sound, so you might need to hit up the manual for more details.
Auto-detection could be playing up
OEM software could be interfering here. Should you have software like Realtek’s HD Audio Manager, try disabling jack detection and see if that helps.
Re-installing drivers
If your headset isn’t working, the problem might be in the drivers. Head to Device Manager and uninstall the drivers for the connected headset. Reboot the PC and connect the headset once again to let Windows reinstall them. Yes, it’s the tried and true «turn it off and on again» process, but it works.
Select different formats
If you’re still unable to get anything, try selecting a different input/output format in the property window (use the headset steps above).
Don’t be muted
Depending on the brand and model of the headset, it may support controls located on the cable. Volume sliders and mute buttons are easily accessible here, but be sure they’re set for use.
Try a different headset/device
To check whether the issue is with the headset (and not your PC), try using it on another PC or device. You could also try plugging in another headset if you have one at hand.
Properly setting up your headset means you’ll enjoy all the intended features and avoid the most common issues in the future. There are varying connection methods, but Windows handles them almost the same way. Any of our picks for the best PC gaming headsets will abide by the steps in our guide and will suit all-day work and all-night play, but here are a couple of choices to get you started.
Windows Central recommends
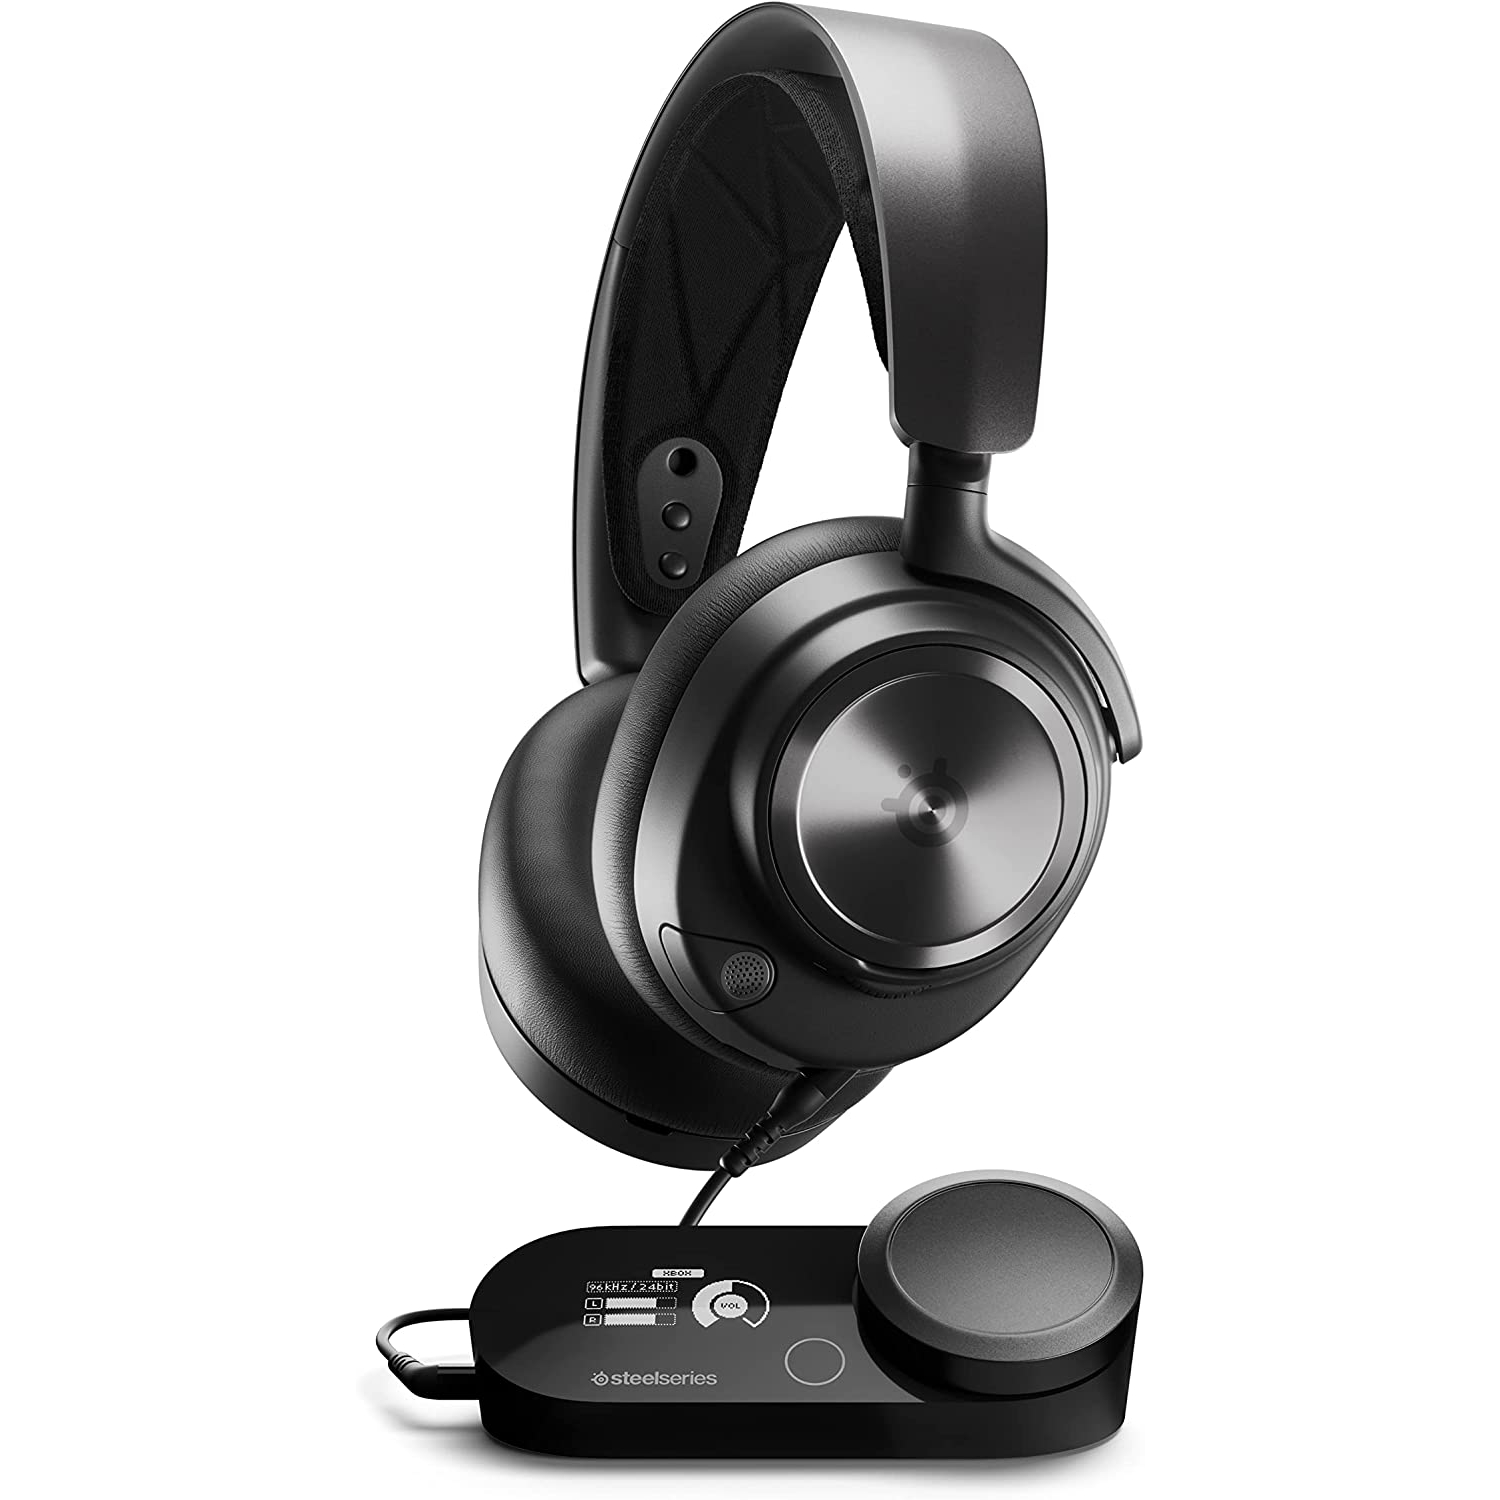
SteelSeries Arctis Nova Pro
Best overall
Unparalleled comfort paired with an included DAC for crystal clear sounds makes the Arctis Nova Pro our favorite PC gaming headset. It’s not the cheapest, but it packs every feature you need for all-day audio.
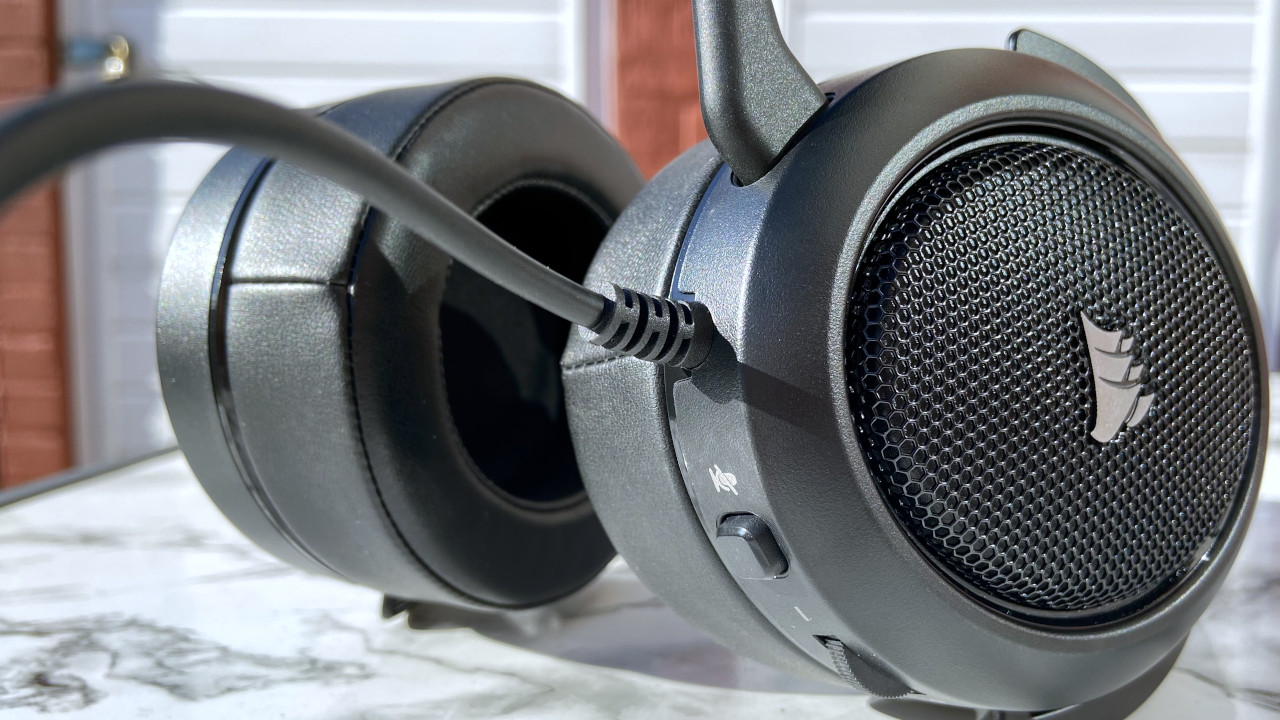
Budget option
Corsair delivers comfort and convenience with a detachable microphone and memory foam cups. The wired HS50 Pro Stereo beats out most alternatives that can’t compete with the cushioned faux leather.
Rich Edmonds was formerly a Senior Editor of PC hardware at Windows Central, covering everything related to PC components and NAS. He’s been involved in technology for more than a decade and knows a thing or two about the magic inside a PC chassis. You can follow him on Twitter at @RichEdmonds.
Table of contents
- Why Are My Headphones Not Working on Windows 11/10?
- How to Fix the USB Headset Not Working on Windows 10/11
- Solution 1: Boot your PC with your headphones disconnected
- Solution 2: Check if the system volume is on mute
- Solution 3: Check if your headset has physical damages
- Solution 4: Run the Hardware and Devices troubleshooter
- Solution 5: Change your default audio device to the USB headphones
- Solution 6: Update your audio driver
- Solution 7: Adjust your privacy settings
- Solution 8: Update Windows
- Solution 9: Reset your headphones
- Additional Troubleshooting Tips for Your USB Headset
- USB Headset Not Working on Windows 10/11: Fixed
- FAQ
Is your U SB headset not workin g? This article is for you! These devices are a necessity in our everyday lives, so we can’t afford them to malfunction, especially since it can affect the flow of work.
We’ll walk you through effective means to permanently fix the problem. Go through the guide and choose the method that best works for your situation.
By the end of this article, the “USB headset not detected” issue should be fixed!
Let’s begin.
Why Are My Headphones Not Working on Windows 11/10?
A lot of things can cause your headphones to malfunction. Let’s go briefly through them:
- Connection issues. For instance, c onnectivity problems with your Bluetooth may come from pairing errors, interferences from other devices, or low battery. If you’re connected via USB and your USB-C headphones are not workin g, t he cable may be damaged or simply not fully or properly plugged in.
- System errors. Your system files could be corrupted , or recent software updates may be conflicting with your audio settings. There can also be a conflict between different hardware components.
- Incorrect configuration settings. Sometimes, if your audio settings are not set correctly, your c omputer USB headse t might not work the way you want. For example, if you use the wrong output device or if the volume is too low , the device may appear like it’s not functioning properly, but deep down, there’s nothing wrong with it.
- Your headset is damaged. Over time, wear and tear can break the connectors, fray the wires, or damage the speakers. And this can lead to the U SB headphones not working .
- Your drivers are old. If the drivers are out-of-date, they may not be compatible with the system. And this can cause the sound to distort or Bluetooth options to disappear .
Further reading: How to Download, Install, and Update Bluetooth Drivers
How to Fix the USB Headset Not Working on Windows 10/11
In this section, we’ll walk you through different effective ways to fix the problem:
Solution 1: Boot your PC with your headphones disconnected
One of the reasons why your USB headset is not detected is because it may be interfering with other peripheral devices connected to your system. To fix this, remove the devices and restart your computer.
When that is done, check to see if your headphones are working.
Solution 2: Check if the system volume is on mute
For some weird reason, it could be that your sound is muted, especially if your keyboard has volume keys on it. Quickly check your taskbar right now if it’s muted. If that’s not the case for you, proceed to the next method.
Solution 3: Check if your headset has physical damages
When headphones with a USB connection get worn out, you could have a hard time hearing your music or video game sounds properly. So, analyze if your device has sustained any damage somewhere.
You can also connect it to another device to see if the problem is coming from your computer or headset.
Solution 4: Run the Hardware and Devices troubleshooter
Windows 10 and 11 have a built-in feature to check for any issues with your hardware and various devices.
Important bit
Windows is retiring the Hardware and Devices troubleshooter . They’ve redirected some of the troubleshooters to the new Get Help troubleshooting platform (if you’re using Windows 11). So, if the steps below don’t work for you, check the other solution.
Run the troubleshooter on Windows 10
- Go to your Control Panel (Win + S, type “Control Panel,” and hit Enter) and click the drop-down arrow beside View by and select and choose Large icons .
- From there, search for Troubleshooting .

- Select Hardware and Sound.
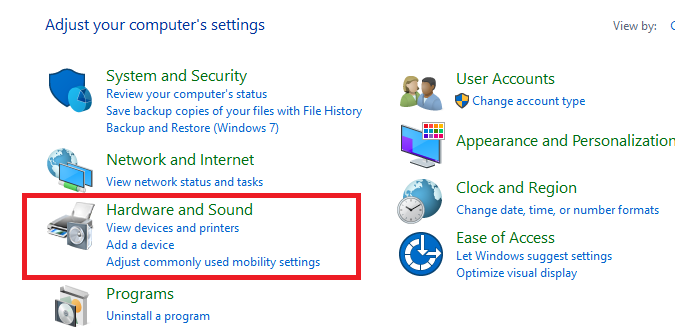
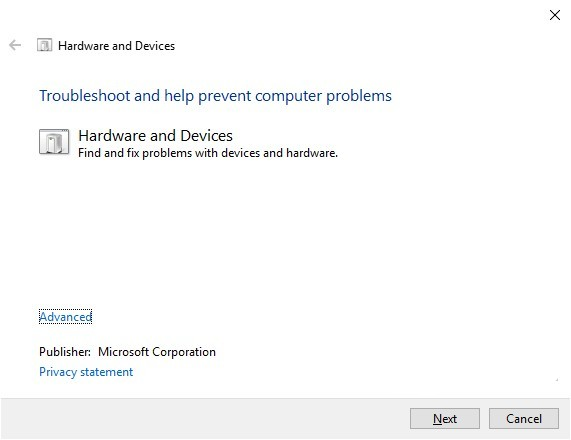
- Finally, select Hardware and Devices and click Next to begin the scanning.
The troubleshooter will search your system for any issues and try to fix them. If the problem is indeed from your headset, it’ll try to correct the issue. You’ll know the result when the scan is complete.
If you’re running Windows 10 build 1809, you won’t find the Hardware and Devices troubleshooter in the Control Panel. However, you can still open the problem using the Windows Powershell .
Don’t forget to run it as an administrator. When it opens, just enter the command “msdt.exe -id DeviceDiagnostic” and the troubleshooter will open. This also works for Windows 11.
Run the troubleshooter on Windows 11
- Open your Settings window by pressing
Windows + I. - After that, click on System and select Other troubleshooters.
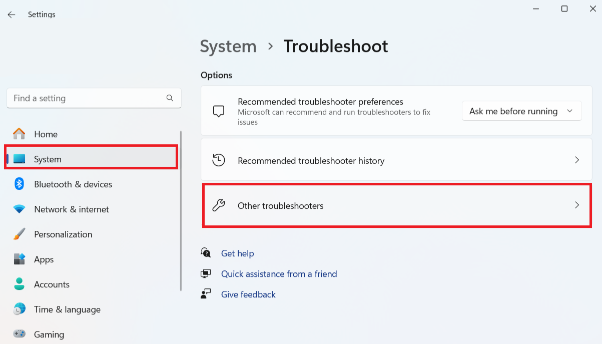
- Click the Run button next to Audio to initiate the issue detection process.
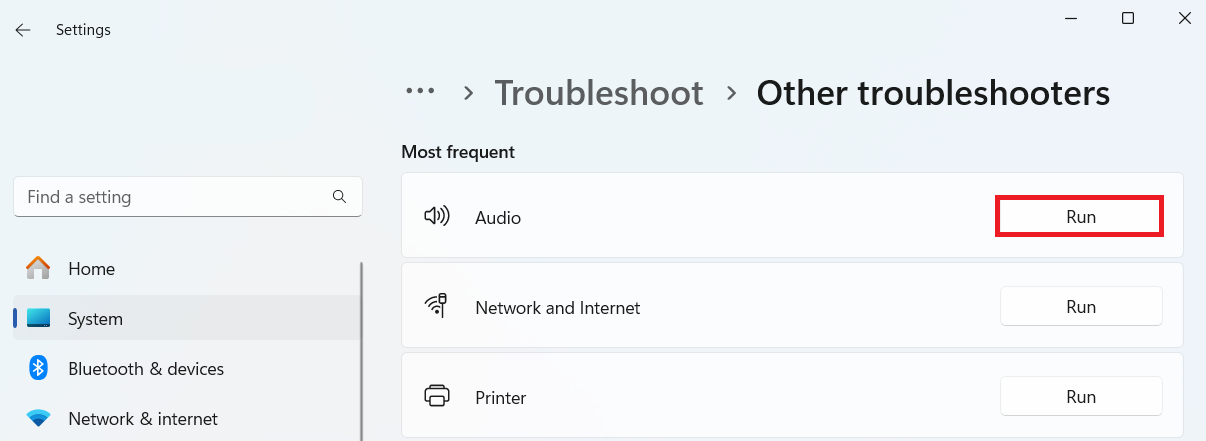
The system will search for any issues with your audio and suggest ways to fix them. If the U SB headphones are not detected , proceed to the next solution.
Solution 5: Change your default audio device to the USB headphones
Setting the device as a default can sometimes do the trick. Let’s try that if that works for you:
Windows 10
- Go to the bottom-right of your taskbar and right-click the speakers or headphones icon.
- Select Open Sound settings from the options.
- Click the Sound Control Panel under Related Settings.
- When the Sound settings window pops up, choose your USB headset.
- Click Set Default, then select OK to save the changes.
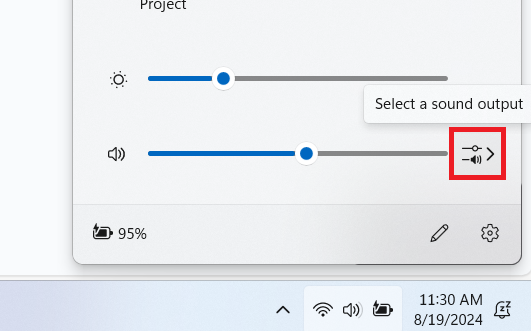
Windows 11
-
Click the speaker icon on the far right-hand corner of your screen and click on the Select a sound output button.
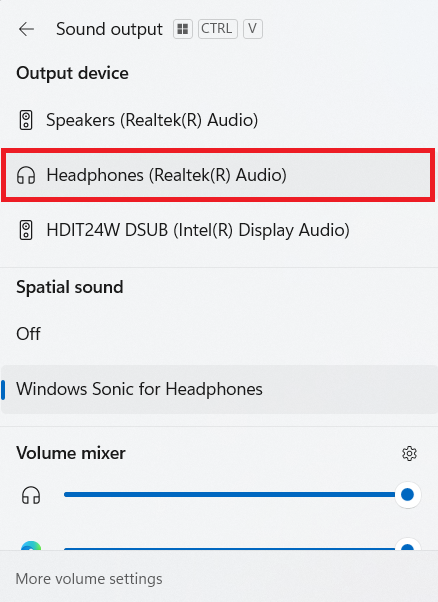
-
Select your headphones under the Output device section.
Is your USB headset still not working? Go to the next solution.
Also read: How to Fix Bluetooth Audio Delay on a Windows PC?
Solution 6: Update your audio driver
Another reason why your USB headset not working because the audio driver may be obsolete, corrupted, or just not found.
You can easily resolve this by updating them. One option is to download the new driver updates from the manufacturer’s website, but that is a hassle, especially if you’re not tech-savvy.
Well, let me save you the trouble and show you two easy ways to update your drivers . The last one is particularly simple!
Update drivers with Device Manager
- Tap Windows + R to open the Run dialog box.
- Type “devmgmt.msc” when the window opens and press Enter.
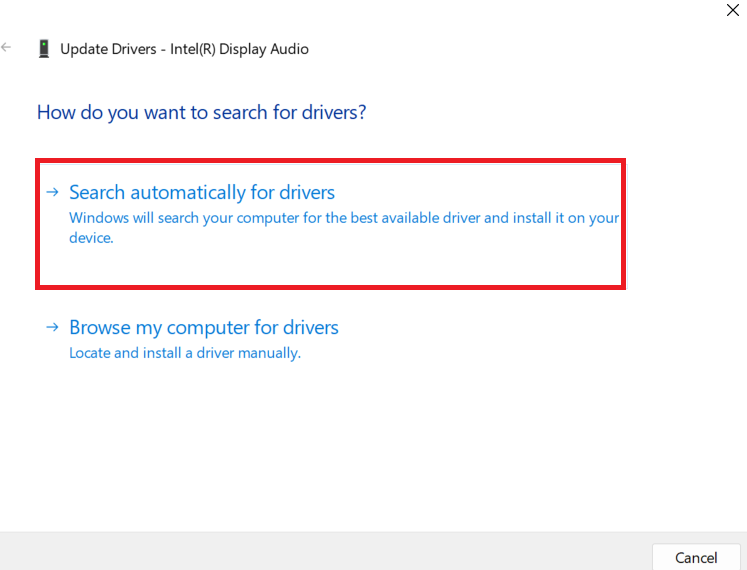
- Expand Sound, video and game controllers , right-click your USB headset, and select Update driver from the list.
- Click the Search automatically for drivers and wait for the process to complete.
Restart the computer. If your h eadphones with USB connecti on are still not functioning, check out the next solution.
Use Auslogics Driver Updater
Device Manager can be a bit of a pain. It’s unreliable and may not even fix the problem. But there’s a better way to fix problems with drivers.
You can use a tool such as Auslogics Driver Updater to take care of everything for you. Just download, install, and run the program.
It’ll automatically analyze your OS version and processor type. From there, you can update all your drivers with just a few clicks.
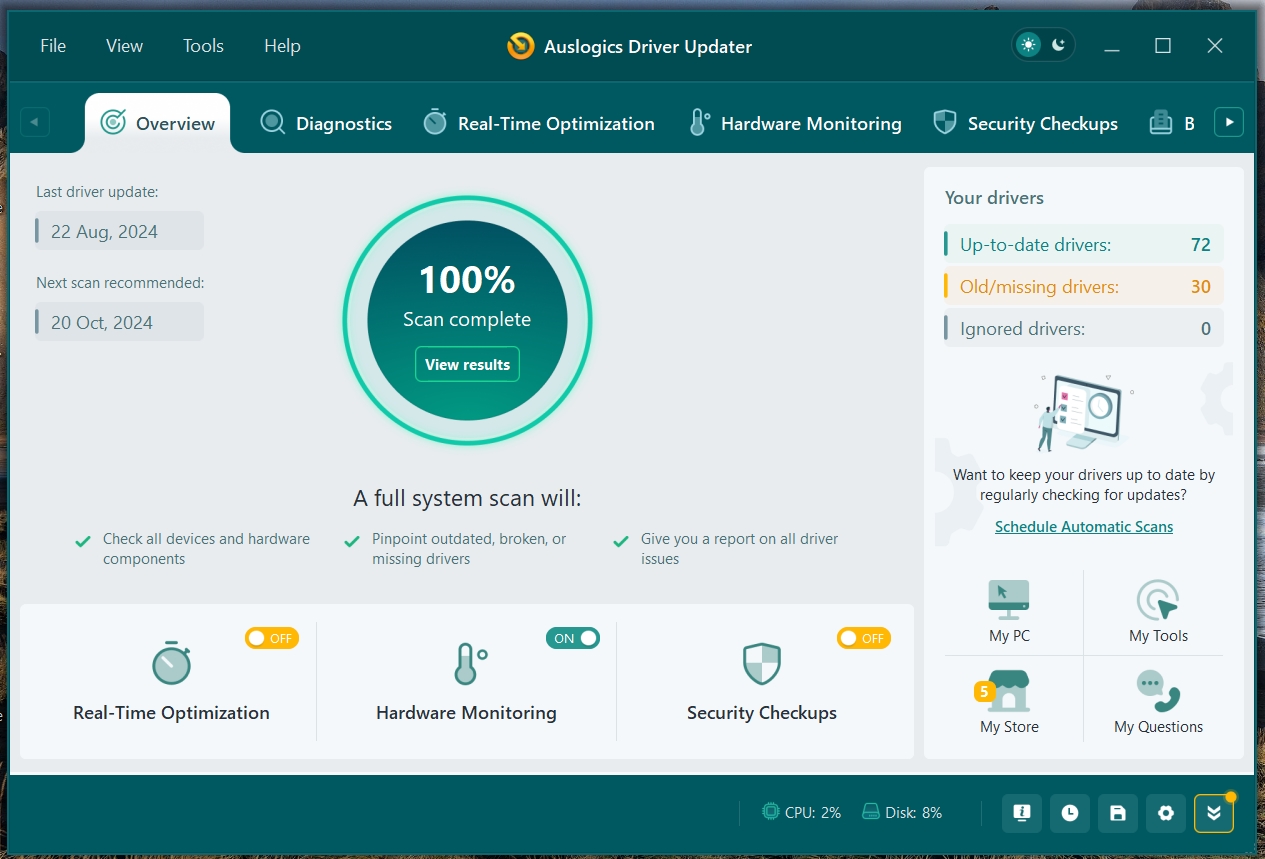
What’s great about Auslogics Driver Updater is that it addresses all driver-related problems on a computer. So, once the process is complete, you can expect a noticeable improvement in your PC’s performance. You can check the review of Driver Updater before making a decision!
PRO TIP
Auslogics have just released Driver Updater 2.0 , which offers more comprehensive driver updates.
Now, you can check your CPU, GPU, and disk temperature in real time! On top of that, you can analyze drivers for viruses, use smart algorithms to precisely install only the official manufacturer-recommended updates, and much more!
Solution 7: Adjust your privacy settings
Have you tried configuring your privacy settings? Sometimes, when your USB headset not working it is the fault of this setting.
So, if you want your computer to recognize a USB headset, you need to adjust your privacy settings for peripheral devices.
Here are the steps:
- Press
Win + Ito launch the Settings app. - Next, click Privacy and choose Microphone from the options.
- Check and make sure to allow apps to access your microphone. You can also verify the programs individually to determine the ones you want to grant access to.
Windows 11
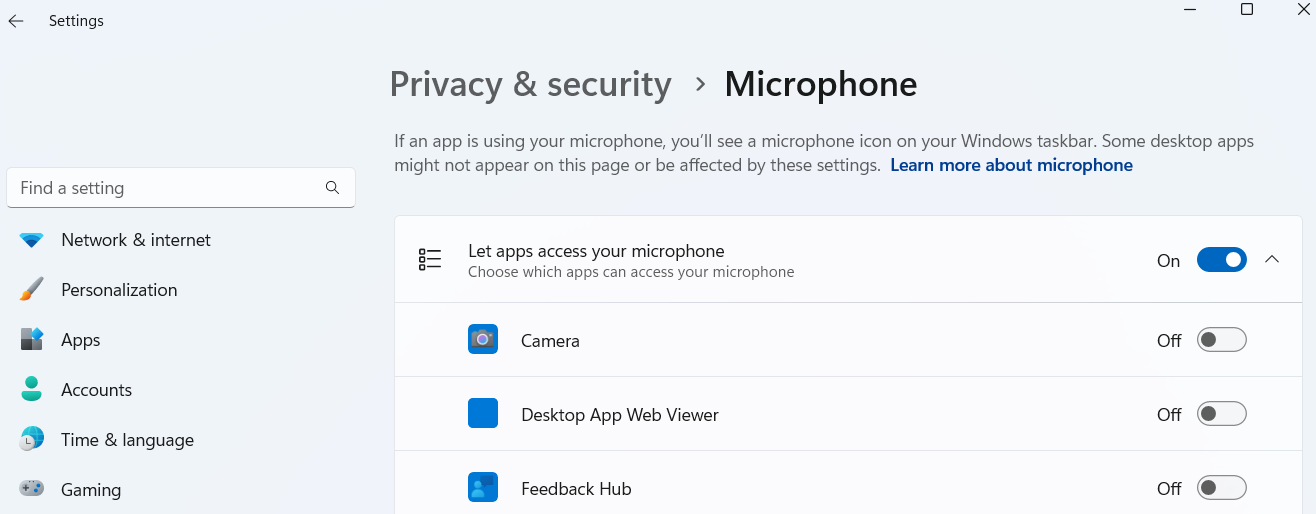
- In the Settings window, select Privacy & security on the left pane and select Microphone .
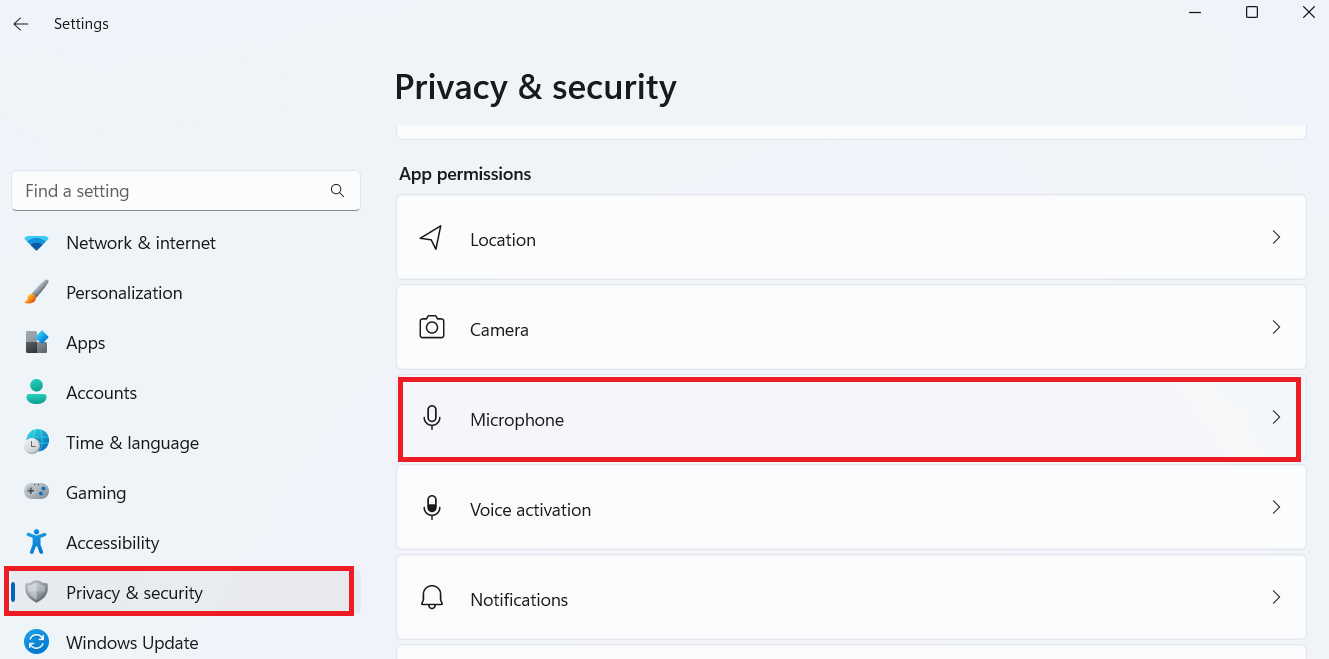
- You can scroll through the various apps and grant or deny access to the programs you want.
Solution 8: Update Windows
Updating Windows can sometimes fix the issue. Here’s how to get Windows 10 and 11 updated:
- Open the search bar and type “Windows update.”
- Select the appropriate result that appears.
- When the Settings window opens, click Check for updates .
- The system will start searching for updates automatically and install any pending updates.

If the issue doesn’t resolve, try the next method.
Solution 9: Reset your headphones
Some settings may be causing the USB headset to malfunction. The best option is to reset the sound settings to their default state:
Windows 10
- Right-click the speaker icon on your taskbar and select Sounds .
- Go to the Playback tab.
- Right-click your headset and select Properties .
- You’ll see Restore Defaults in the Advanced tab. Click on it.
- Go to the Spatial sound tab and click Restore defaults to reset the headset.
Windows 11
- Click on the search icon on your taskbar, type “Sound settings,” and press Enter.
- Then choose More sound settings .
- Look for your headset among the listed audio devices, right-click it, and select Properties .
- Open the Enhancements tab and click the Restore Defaults
- Repeat the same process in the Advanced and Spatial sound tabs .
- After that, click Apply and select OK to save the changes.
Resetting your headphones should fix the headphones not working on Windows 11 or 10.
Also read: [FIXED] Windows 10 Computer Is Not Recognizing Headphones
Additional Troubleshooting Tips for Your USB Headset
Although it’s essential to know how to enable USB headphones on Windows 10 or 11, making sure the device works at 100% is a different ball game.
We’ve included some steps you can take:
- Click on the sound icon on your taskbar.
- Select your USB headphones from the drop-down menu.
- If you set the sound output device to your headset, test it. To do that, right-click the sound icon on your taskbar.
- Click Open Sound settings .
- Select the Sound Control Panel link, and select your USB headset.
- At the bottom-right portion of the window, click Properties .
- Go to the Advanced tab, then click the Test button.
If you hear the sound coming from your headphones, you’ve successfully fixed the problem.
And what should you do if your Windows computer isn’t recognizing your headphones? Check out this video for a quick fix:
USB Headset Not Working on Windows 10/11: Fixed
If your USB headset is not working, the solutions we’ve gone through should rectify the problem once and for all. We hope that one of these solutions can help you resolve the problem.
Are there other troubleshooting tips you can recommend? Let us know in the comments below!
Also, share this article with your friends who might find it useful!
FAQ
Your drivers may be missing or just plain outdated. Another reason is that the settings are not compatible or there are issues with your system hardware.
Whatever the case, you can use Device Manager to update them. The quickest and most effective way, however, is to use Auslogics Driver Updater.
There are a few reasons why your USB headset mic is not working. What I’d recommend, regardless of the cause, is to troubleshoot the problem and use Device Manager to reinstall or update your drivers.
Your headset jack may be faulty, or it could be a hardware issue. So, check if that’s the case. If not, the problem may be simply an outdated driver, incorrect audio settings, or software conflicts.
Readers help support Windows Report. We may get a commission if you buy through our links.
Read our disclosure page to find out how can you help Windows Report sustain the editorial team. Read more
Many people use USB headsets, but it seems that some users are having issues with their USB headsets. If your USB headset is giving you trouble today we’ll show you how to fix those issues on Windows 10.
Users are reporting distorted sound on their USB headsets and replacing the USB headset with the exact same model doesn’t fix the issue. So if the problem isn’t the USB headset what can you do to fix this problem?
USB headsets are great, but sometimes you might encounter certain issues with them. Speaking of USB headset issues, here are some problems that users reported:
- USB headset mic not working – Sometimes the microphone on your USB headset isn’t working properly. This can be a big problem, but you might be able to fix it by changing your microphone settings.
- USB headset not working Windows 10, 8, 7, on Skype – This problem can appear on any version of Windows, and if you encounter it, you should be able to fix it using the solutions from this article.
- USB headset not detected, not showing up in playback devices, not working with YouTube – Sometimes your headset might not be detected at all. To fix this issue, be sure to reinstall your USB headset and check if that works.
- USB headset audio, sound not working – If your USB headset isn’t working, the issue might be a third-party application. To fix the problem, you need to find and remove this application from your PC.
- USB headset noise problem, static, crackling, buzzing – These are some common problems that can appear with USB headsets. To fix the problem, temporarily disable your headset and enable it again.
- USB headset is not working – If your USB headset isn’t working, you might have to reinstall your USB drivers. Once your drivers are installed, check if the problem is still there.
How to fix USB headset not detected or working on Windows 10?
1. Unplug the headset while Windows 10 boots
Users report that there might be some conflicts with your USB headset and other USB devices, and in order to fix this issue, it’s required that you unplug your USB headset while your system boots. When your Windows 10 starts you can plug in your USB headset and it should work without any problems.
2. Update your BIOS and reset CMOS
Some users report that updating BIOS and resetting CMOS fixes the distorted sound issue. Updating your BIOS is an advanced process and it’s different for each motherboard. If you don’t know how to do it properly maybe hire a professional to do it for you if you want to avoid any potential damage to your system.
3. Don’t use your headset as default playback device
This solution applies to headsets that come with built-in sound card and connect to both USB and audio port on your computer. The issue with these headsets is that you’re hearing sound only from one speaker when gaming, and in order to fix it you need to do the following.
- Right-click the Sound icon in the Taskbar and choose Open Sound settings from the menu.
- Select Sound control panel.

- The sound window will now appear. Right-click your headphones and choose Properties from the menu.

- Set Device usage to Don’t use this device (disable) and click Apply and OK to save changes.


By doing this you will make the sound card process your audio instead of the card that is built in your USB headset.
4. Uninstall your USB drivers
According to users, sometimes USB headset issues can occur due to your USB drivers. Several users reported issues with USB 3 drivers, but after reinstalling them, the problem was permanently resolved. To do that, you just need to follow these steps:
- Press Windows Key + X to open Win + X menu. Now choose Device Manager from the list.
- When Device Manager opens, locate your USB 3 driver, right-click it and choose Uninstall device.
- Confirmation dialog will now appear. Choose Uninstall from the menu.
- After the driver is uninstalled, click Scan for hardware changes icon.


Windows will now search for the default driver and install it. Once the default USB driver is installed, be sure to check if the problem is resolved. Keep in mind that this solution works for both USB 2 and USB 3 drivers, so you can use it regardless of the USB type you’re using.
The default drivers should work without issues, but sometimes it’s better to use a dedicated driver. You can download the appropriate drivers from your motherboard’s manufacturer’s website. Simply visit the website, enter the model of your motherboard and download the latest drivers for it.
If searching for drivers manually seems a bit complicated to you, there are automated tools that can download the necessary drivers with just a single click.
5. Remove the problematic applications
Sometimes third-party applications can install their own drivers, and that can lead to USB headset issues. To fix the problem, it’s advised to remove the problematic application from your PC.
Some users reported that Etron software caused this problem to appear, and in order to fix the issue, you need to remove the software. You can remove the application using the Settings app, but this method isn’t always effective since it can leave certain leftover files that can still interfere with your USB headset.
To fix the problem, it’s advised to use an uninstaller software. This is a special application that can remove any application from your PC along with all of its files and registry entries.
By using an uninstaller application, you’ll remove all files and registry entries associated with the problematic application and prevent any future issues from occurring.
Once you remove the problematic application, the issue should be permanently resolved.
6. Temporarily disable your USB headset
Sometimes there might be a glitch in your system, and that glitch can cause various USB headset issues to appear. One of the fastest ways to fix this problem is to temporarily disable your USB headset. To do that, you just need to do the following:
- Open Device Manager.
- Locate your USB headset, right-click it and choose Disable device from the menu.
- Now right-click your USB headset and choose Enable device.
After doing that, your USB headset will start working again. Keep in mind that this is just a workaround, so you’ll have to repeat it if the issue reappears.
7. Disconnect the headset and turn off Razer Synapse software
Sometimes USB headset issues can be caused by a software such as Razer Synapse. According to users, they managed to fix the problem simply by unplugging the headset and closing the Razer Synapse. After doing that, you just need to connect the headset again and restart Razer Synapse software.
Keep in mind that this is just a workaround, so you’ll need to repeat it whenever the issue occurs.
- How to fix static noise in Windows 10/11 in 6 easy steps
- No sound from headphones in Windows 10/11? Try these fixes
- Headphones not detected in Windows 10 or 11 [Easy Fix]
8. Check your privacy settings
According to users, USB headset issues can occur due to your privacy settings. Users reported that apps weren’t allowed to use the microphone on their USB headset due to certain settings. However, you can fix that issue by doing the following:
- Open the Settings app. You can do that quickly by pressing Windows Key + I.
- Navigate to the Privacy section.

- In the left pane choose Microphone. In the right pane, make sure that Allow apps to access your microphone is enabled. In addition, be sure to check the list below and allow individual applications to access your microphone.


After enabling your microphone the issue with your USB headset should be completely resolved.
9.Uninstall any old USB headset drivers
Several users reported USB headset issues after purchasing a new headset. According to them, the problem was caused by drivers from an older USB headset. To fix the problem, it’s advised to remove the older driver since it might interfere with your new headset. To do that, just follow these steps:
- Open Device Manager.
- Now go to View > Show hidden devices.
- Locate your old USB headset driver, right-click it and choose Uninstall device.
- If available, check Remove driver software for this device and click Uninstall.
After removing the older driver, the issue should be completely resolved, and you should be able to use your USB headset without any problems.
In case none of these solutions worked for you, go and check out our article about sound problems in Windows 10, maybe it will be helpful.
However, we hope this article helped you to solve the problem with your USB headset in Windows 10. If you have any comments or questions, just reach for the comments, below.
Milan Stanojevic
Windows Toubleshooting Expert
Milan has been enthusiastic about technology ever since his childhood days, and this led him to take interest in all PC-related technologies. He’s a PC enthusiast and he spends most of his time learning about computers and technology.
Before joining WindowsReport, he worked as a front-end web developer. Now, he’s one of the Troubleshooting experts in our worldwide team, specializing in Windows errors & software issues.