
Preface
The Virtual Private Network installation in Windows Server 2019 is like a breeze after the Secure Socket Tunneling Protocol (SSTP) becomes more popular over recent years. The SSTP protocol makes the VPN configuration much easier as the configuration of the firewall needs to open only SSL over Http port 443. The port 443 is used mostly for web servers, and it is common on the networking world organizations to open this port for accessing the https services.
Today I’m going to demonstrate the enablement of this
service by installing and configuring the new and robust server from Microsoft,
which is no other than Windows Server 2019. When we talk about security, we
cannot disregard the concept certificate from certification authority which can
be either an internal CA server or third party one. We need to install a
Certification Authority certificate on the Internet Information Services (IIS),
and the web site installed when we implement Remote Access Services.
There are two parts we need to take into consideration, which setup a Secure VPN (SSTP) on Windows Server 2019 and the VPN client configuration on client operating systems such as Windows 10. On the outset, while we talk about Windows servers and Clients, we can also use this step by step guide to install VPN services on Windows Server 2016 and the Windows 8 and 8.1 client to connect to the Server. There are some minor changes we need to take care of while we do this configuration on earlier operating systems like Windows Server 2016 and Windows 8 and 8.1.
The following steps are involved in Setup a Secure VPN (SSTP) on Windows Server 2019. We see one by one and complete Routing and remote Access implementation for Virtual Private Network Service using Secure Socket Tunneling Protocol (SSTP). We are going to dive deeper into this ‘How to Setup a Secure VPN (SSTP) on Windows Server 2019’, so be with me until we complete the setup.
- Add Remote Access Server Role
- Configure Remote Access with VPN Access
- Limit number of VPN Ports
- Configure Remote Access Settings for VPN
- Configure Dian-in connection on the user object
- Create a VPN network Connection
- Connect to the VPN Server over internet
Add Remote Access Server Role
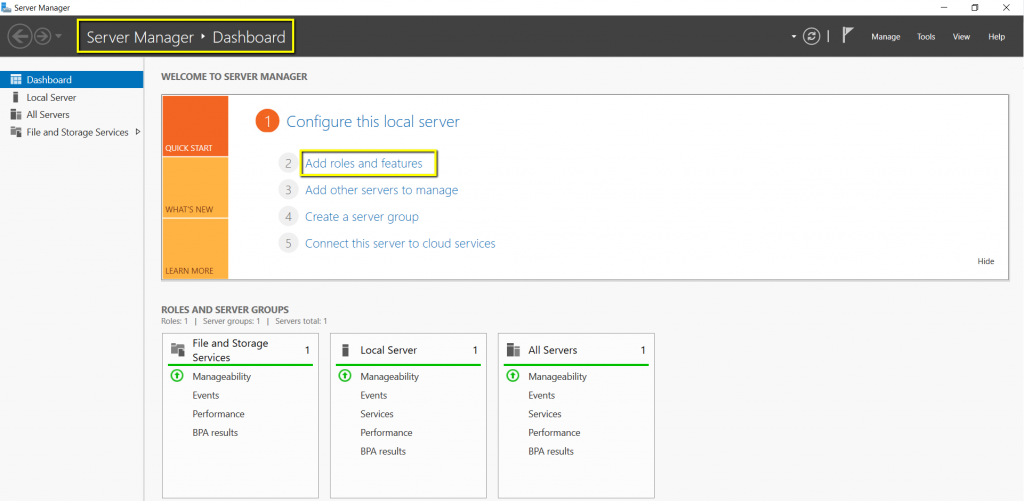
The first step in Setup a Secure VPN (SSTP) is Adding the Remote Access Server Role on the server. The remote access server role to be installed by going to the Server Manager Dashboard. Once the Server Manager windows would open, click on the Add Roles and Features, and the ‘Add Roles and Features’ wizard would start, and we can go through this wizard to complete the Remote Access role installation.
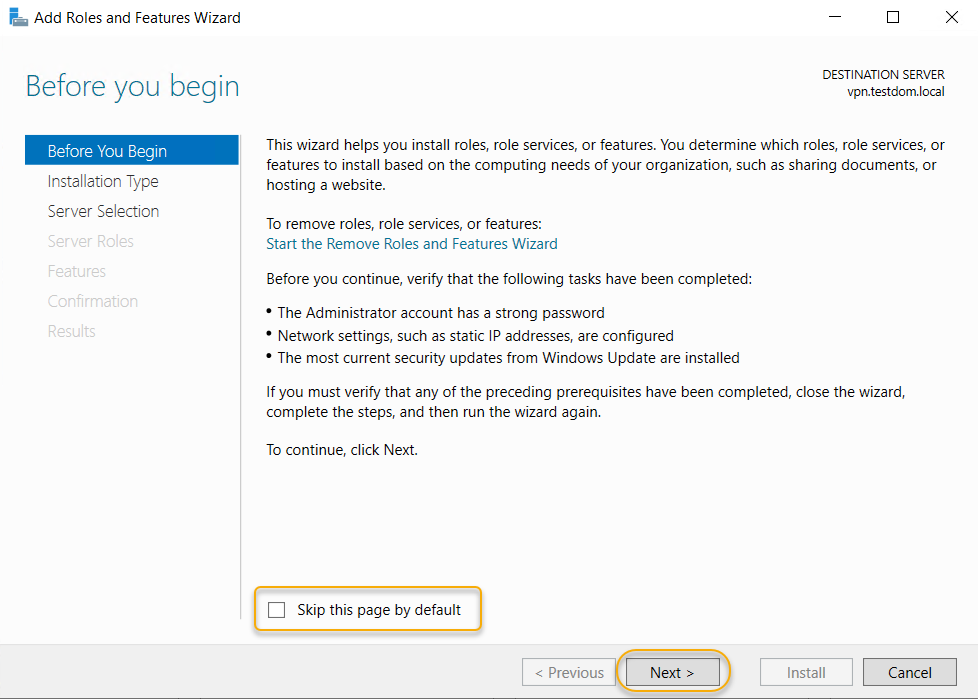
The wizard will start with instructions on using this tool
to add the roles and features. If you don’t want to see this page, you can
click the checkbox next to ‘Skip this page by default,’ and you won’t be
prompted with this page anymore.
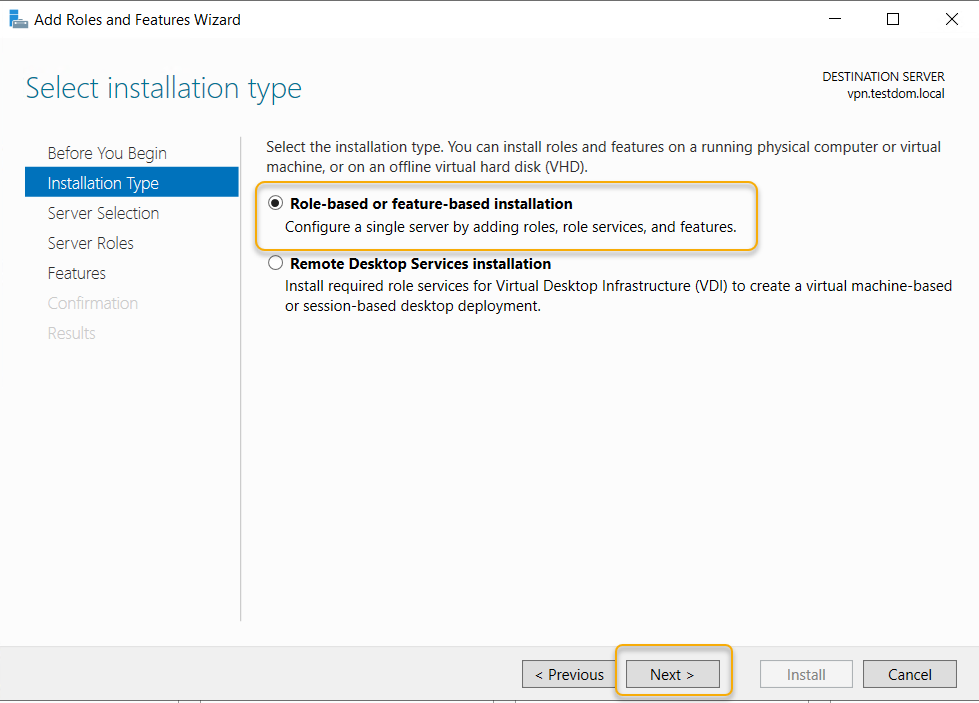
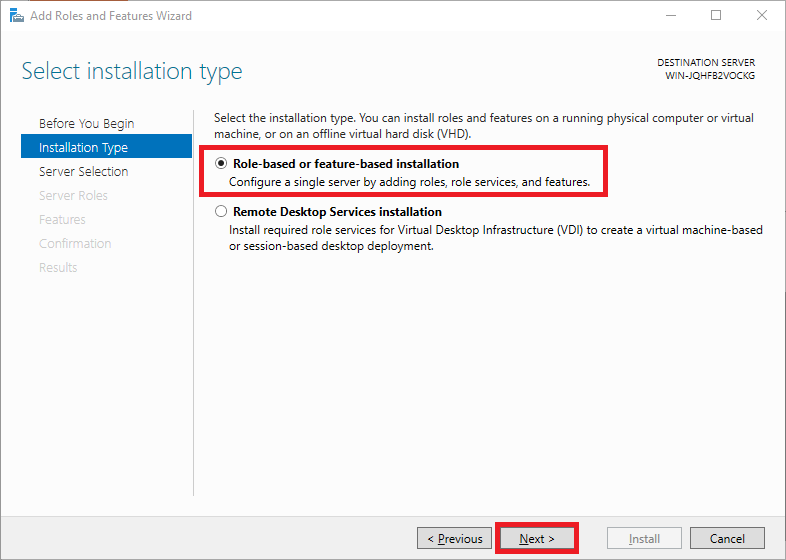
In this wizard, we are going to use the role-based
installation to add this role, so select Role-based or Feature-based
Installation to begin with and click Next to continue.
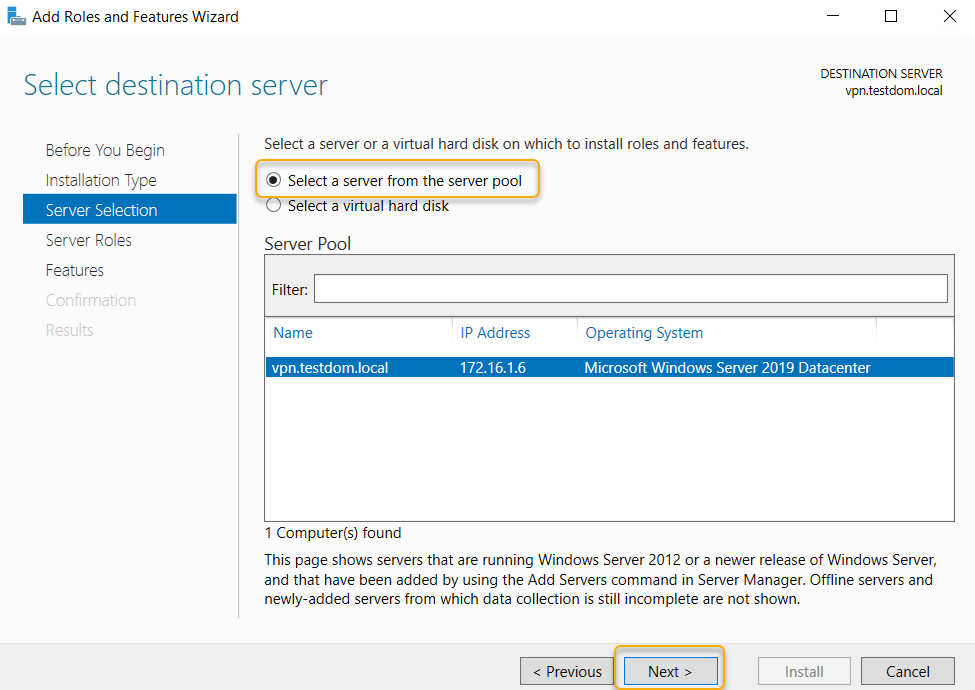
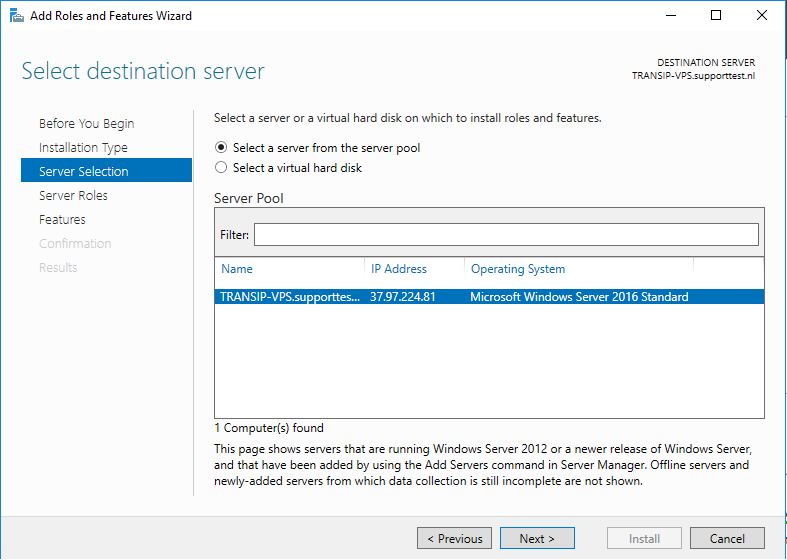
Make sure the local server in the server pool and select it
and click Next.
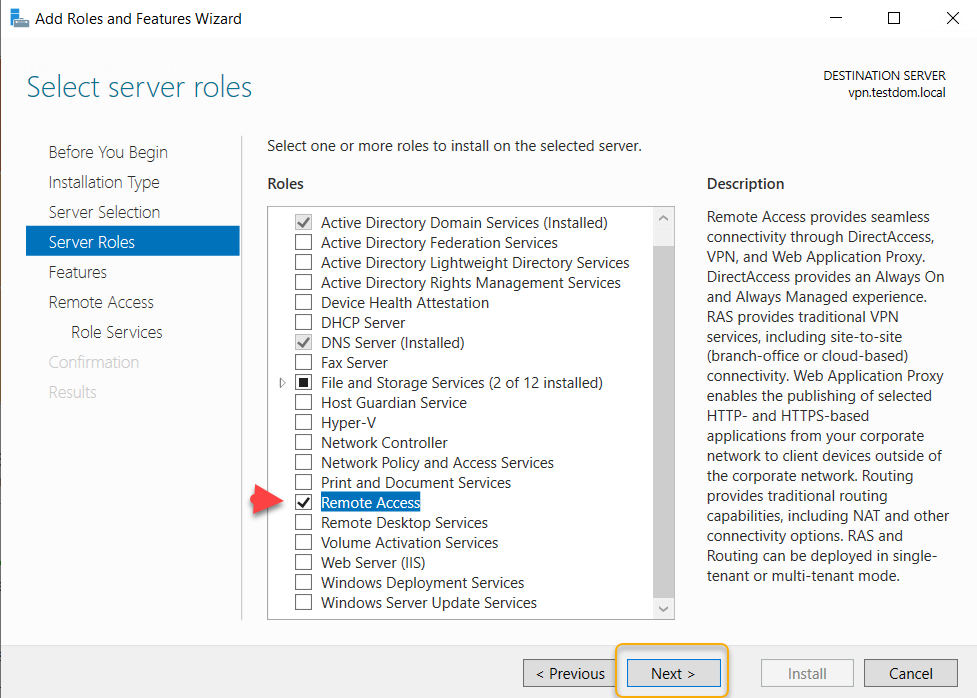
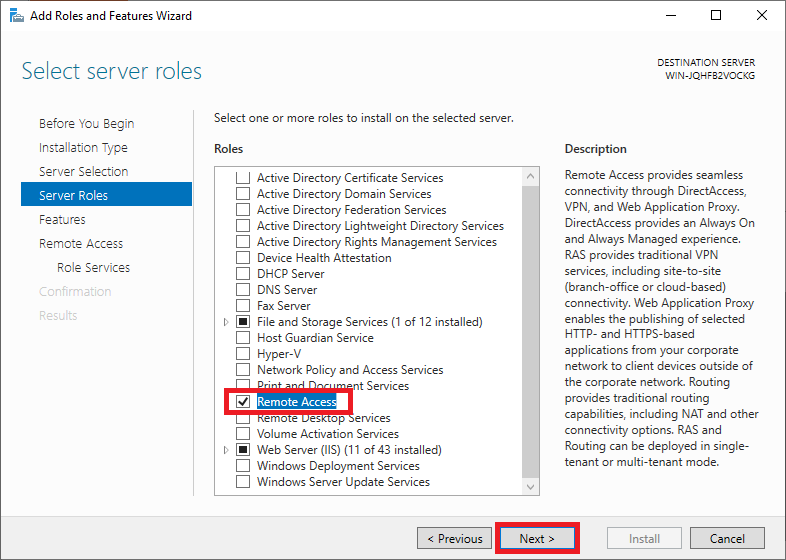
In the Select Server Role page, select Remote Access
checkbox, and click Next.
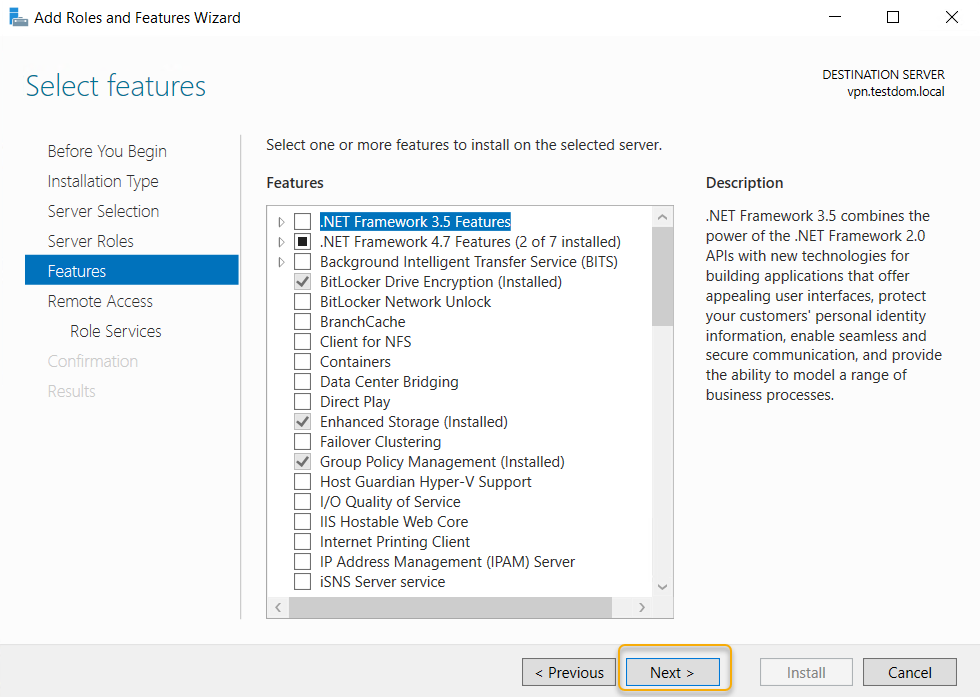
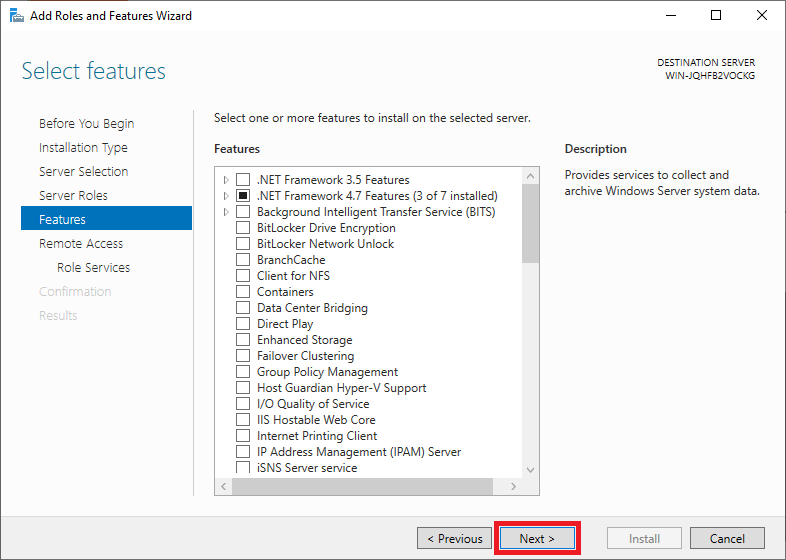
On the next page, leave the Features as it is and click Next.
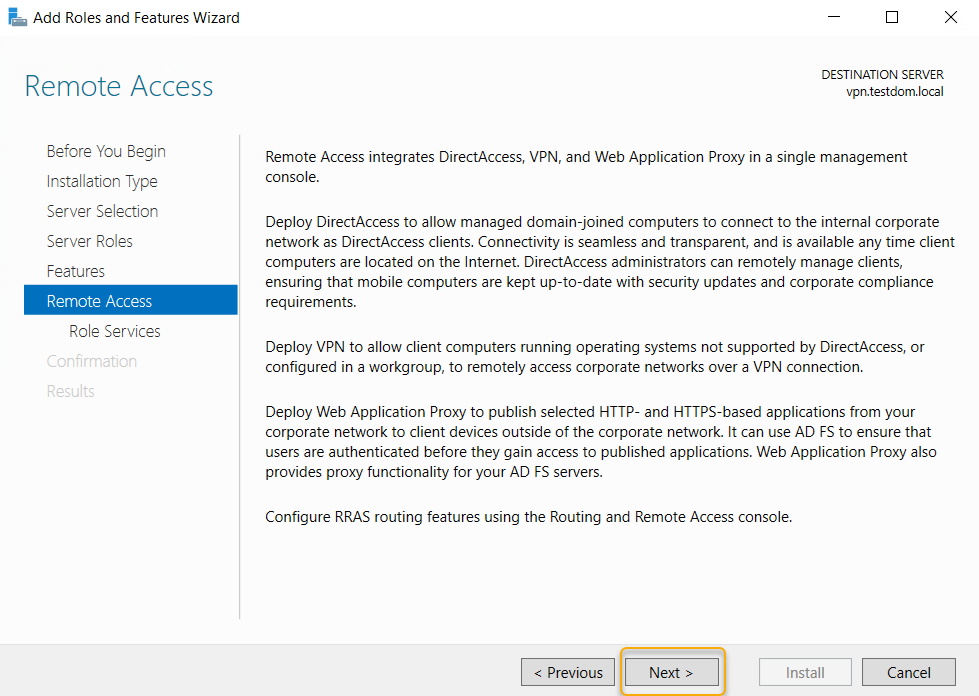
If you need more details, you may go through the details
about remote access on this page, and once you are ready to move, click Next.
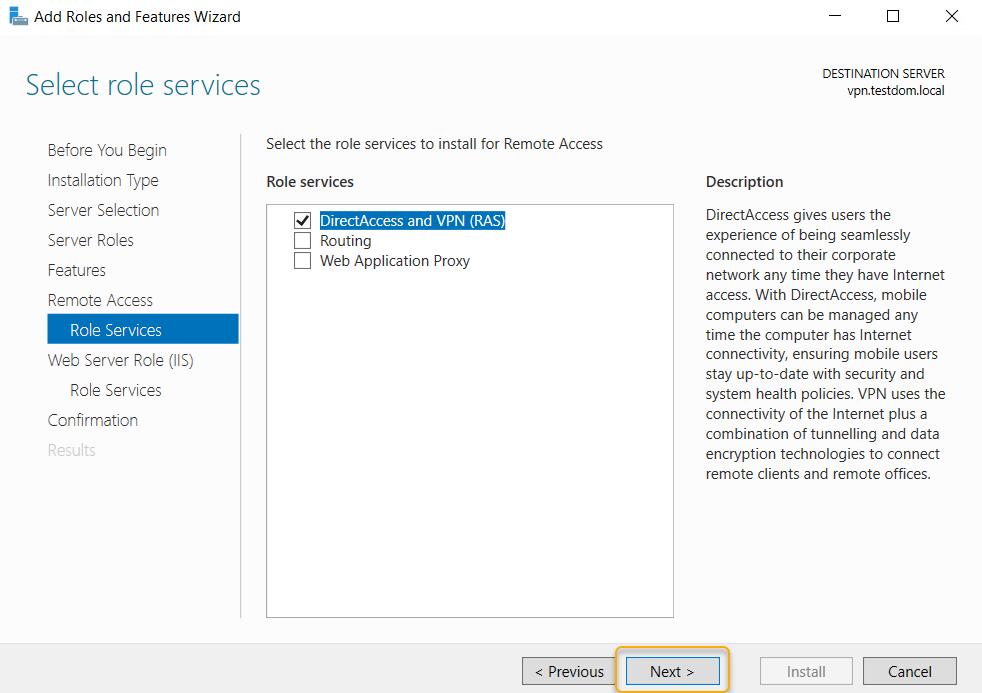
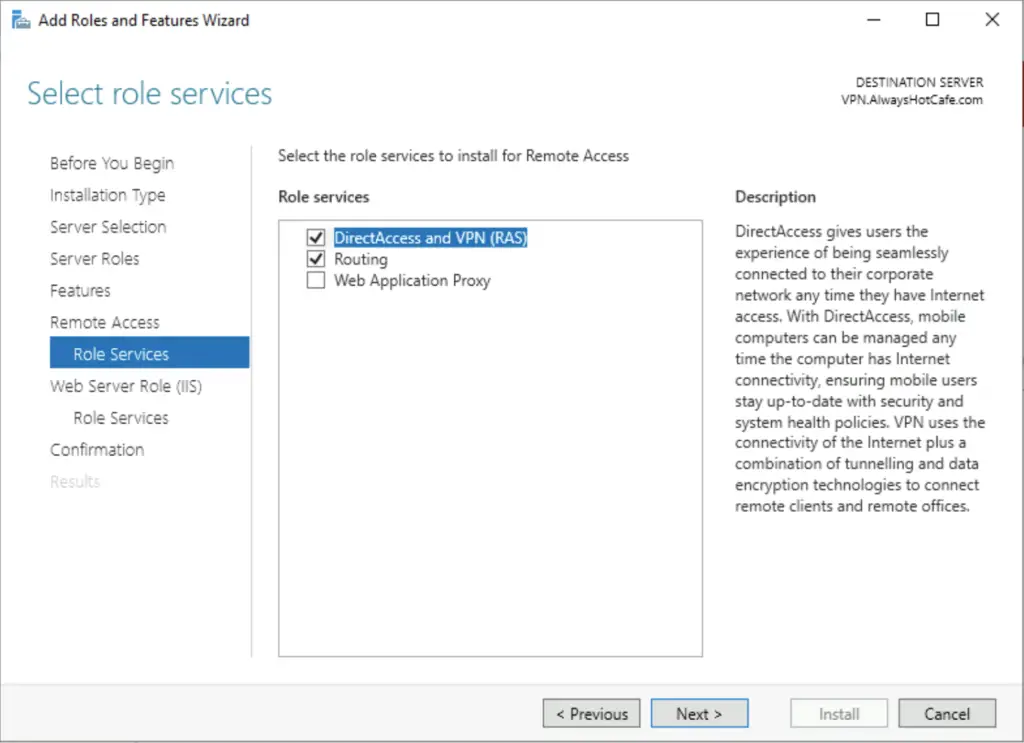
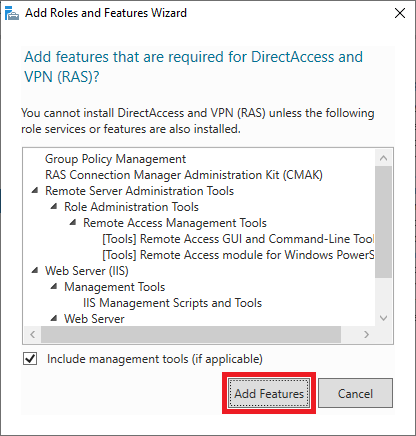
This step is very important, select the Direct Access and
VPN (RAS) alone, and you would be prompted with related features on the pop-up
and click Add Features, which will return to select the role services page.

We have selected the roles services and its feature, and we
are good to move to continue, click Next.
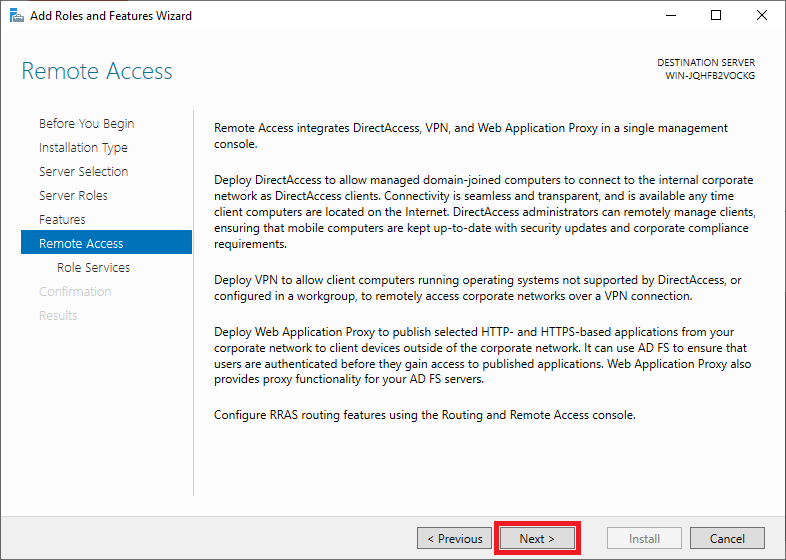
The next page is an information page and it describes that adding
this role service also install the Web Server (IIS) role, Click Next to
continue.
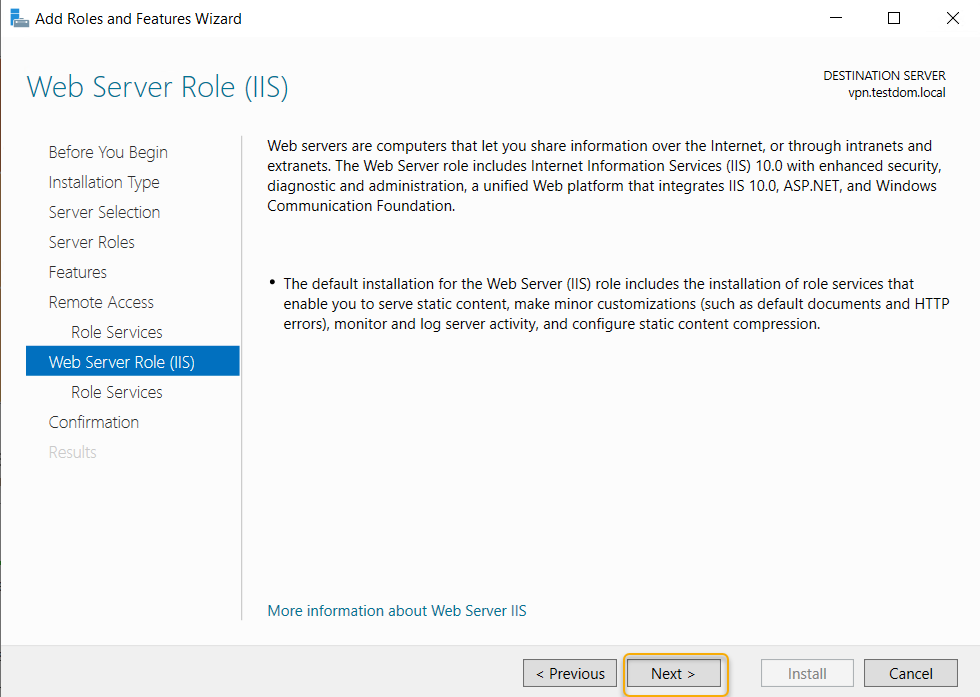
The Web Server(IIS) role will install this role services,
leave the default selection, and click Next.

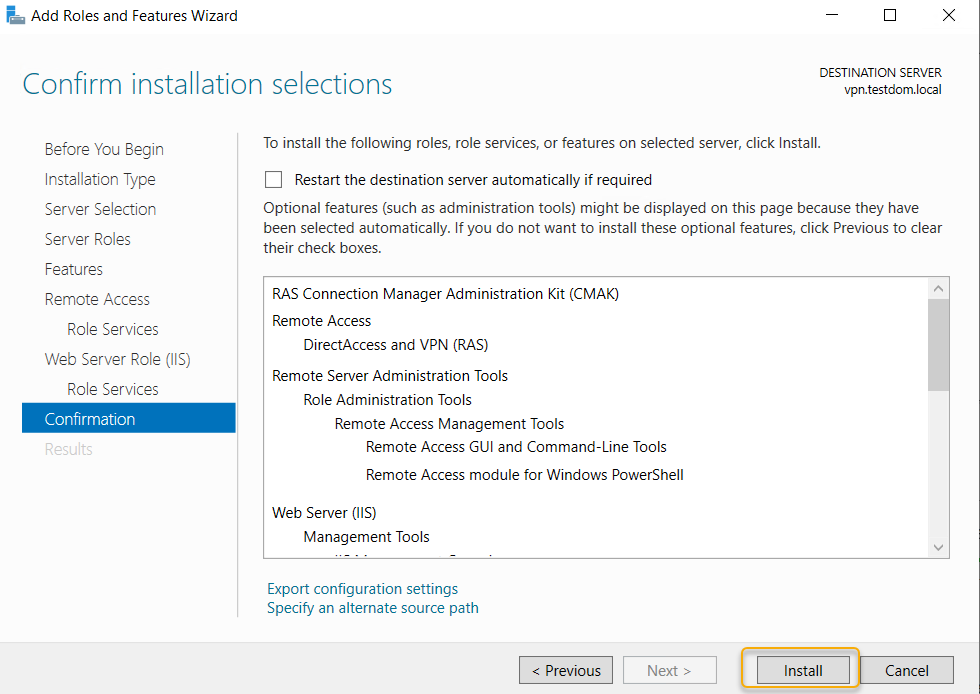
On the confirmation page, verify that the Roles mentioned above and Role Services are correct and click Install to start the Remote Access role installation. Sit back and relax for a few minutes to get the installation to complete.
You would notice the installation succeeded message and also
there is a link to open the getting started wizard to start the configuration
of the Remote Access Role, click the link.
Configure Remote Access with VPN Access on Setup Secure VPN (SSTP)
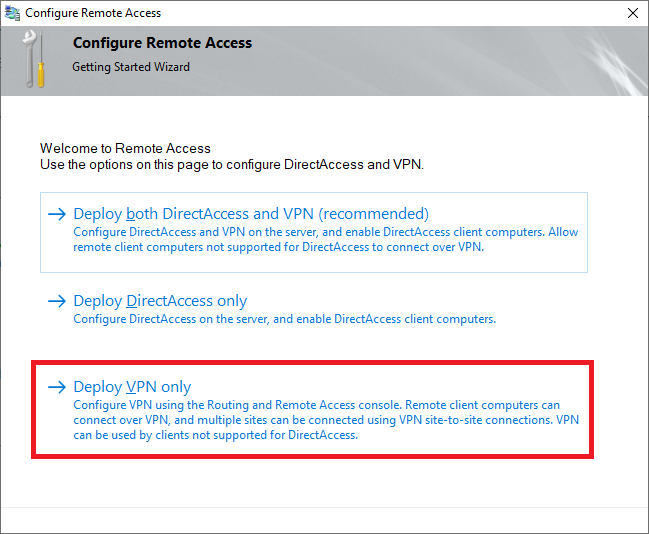
Clicking the link will start Configure Remote Access Wizard,
on the wizard click Deploy VPN only tab as in the screen below.

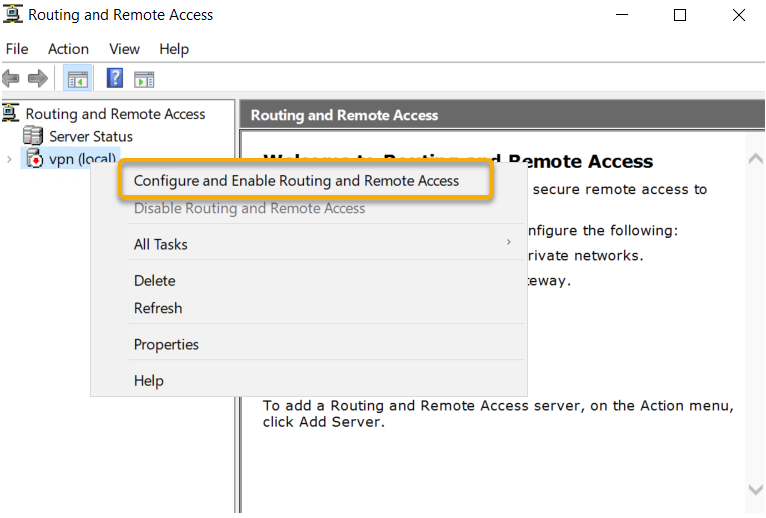
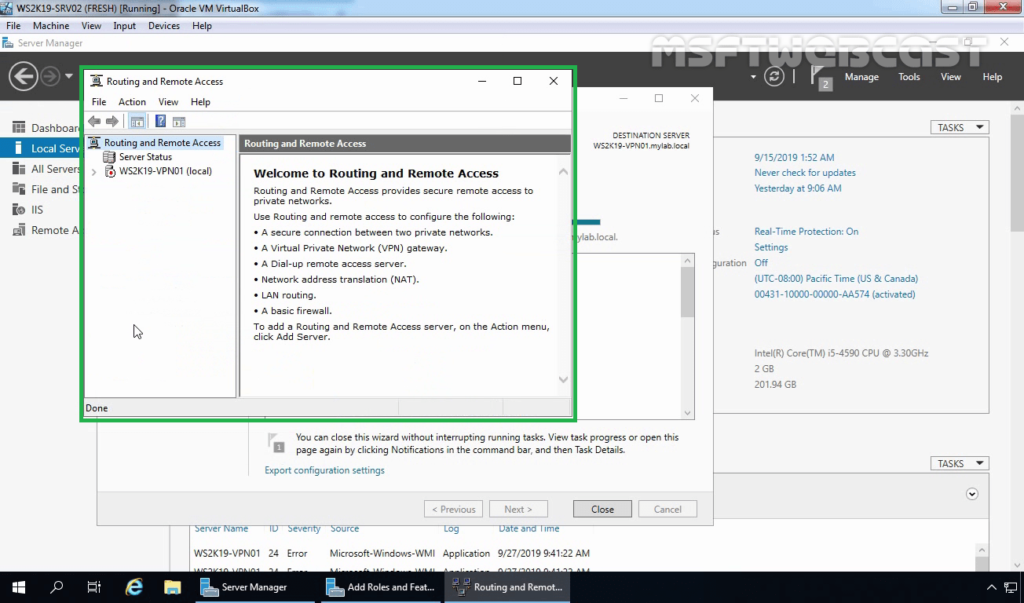
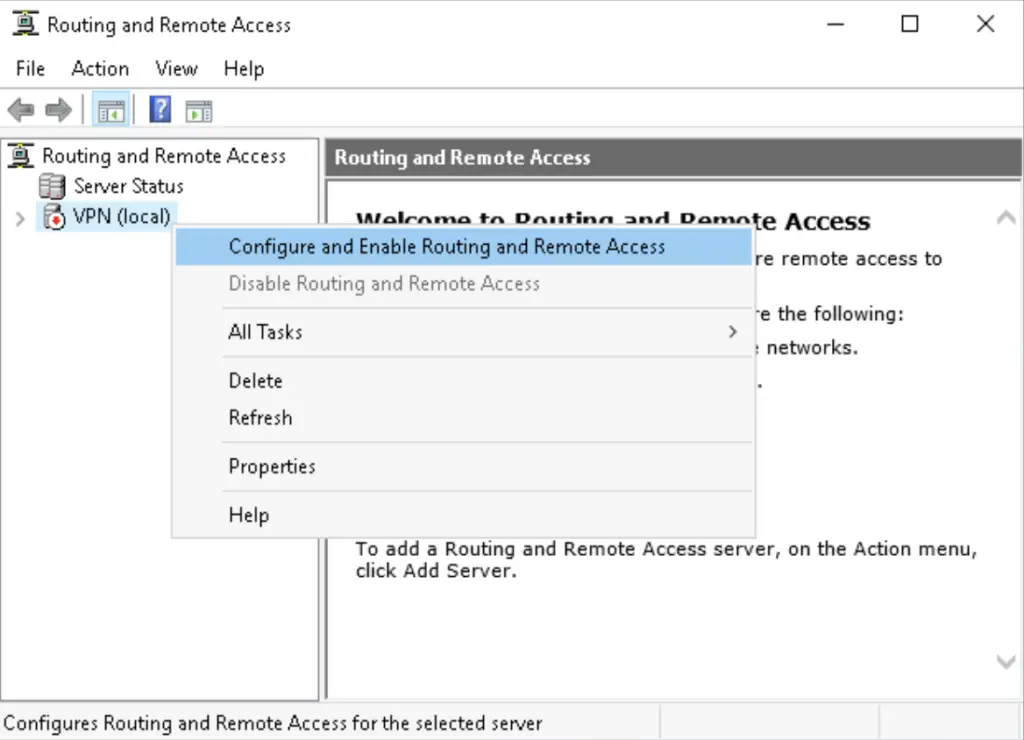
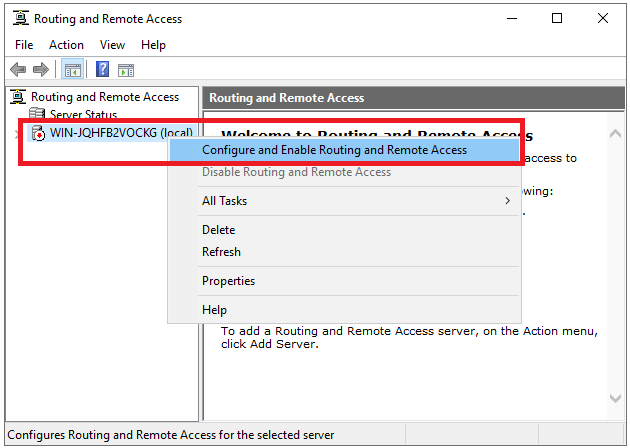
The Routing and Remote Access management console will be
opened and right-click on the server node and click ‘Configure and Enable
Routing and Remote Access.’
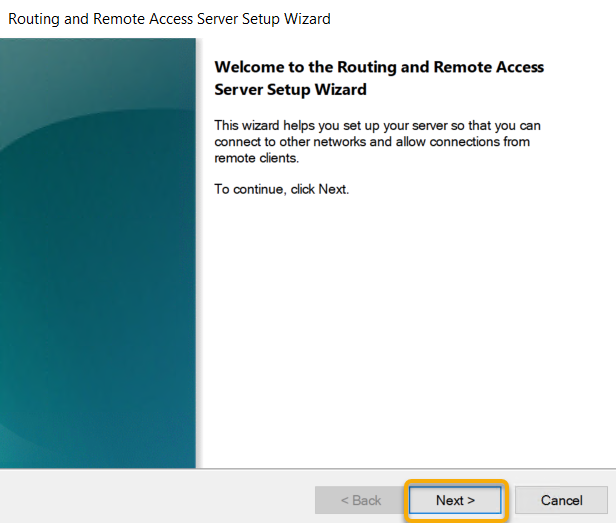
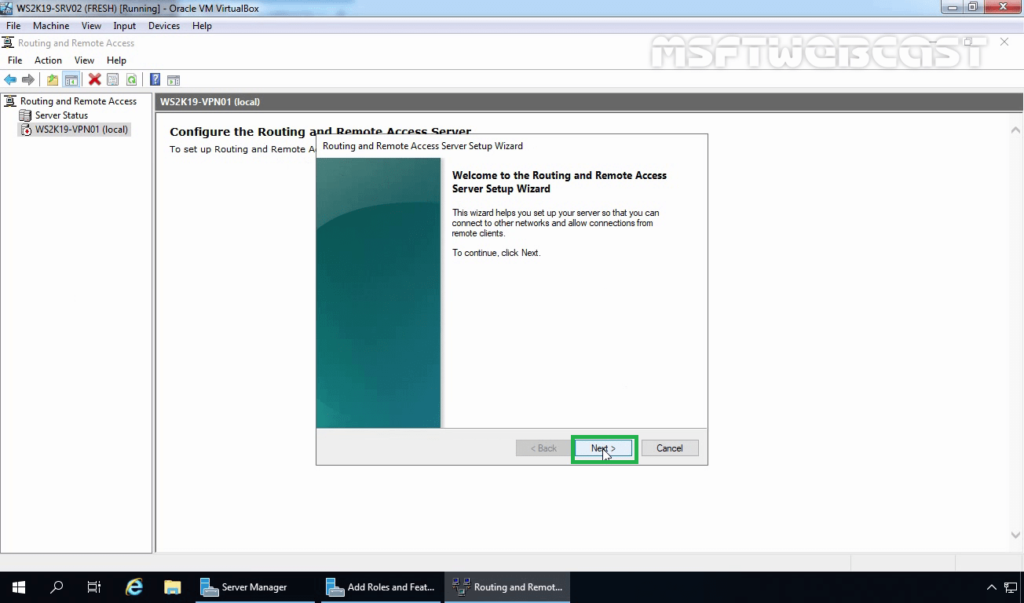
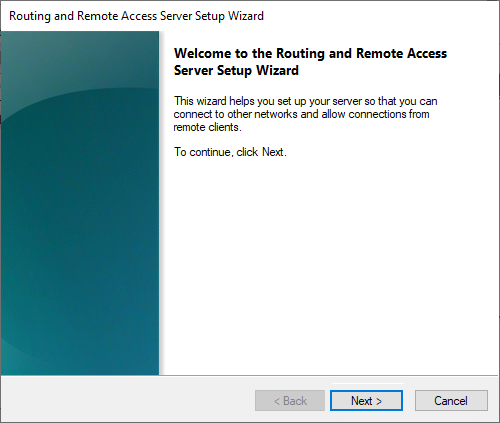
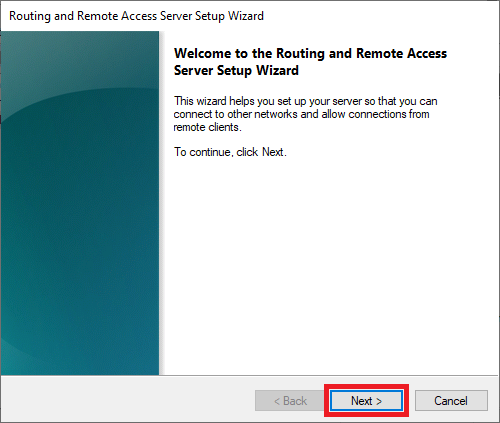
The Routing and Remote Access Server Setup Wizard will start
with a Welcome Screen, Click Next to begin the Wizard.
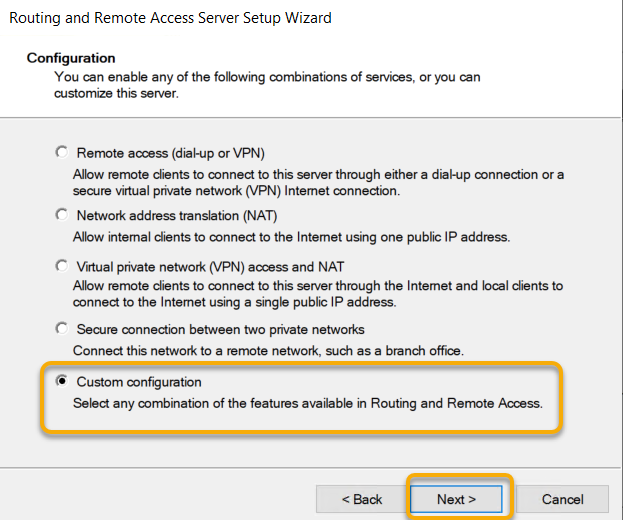
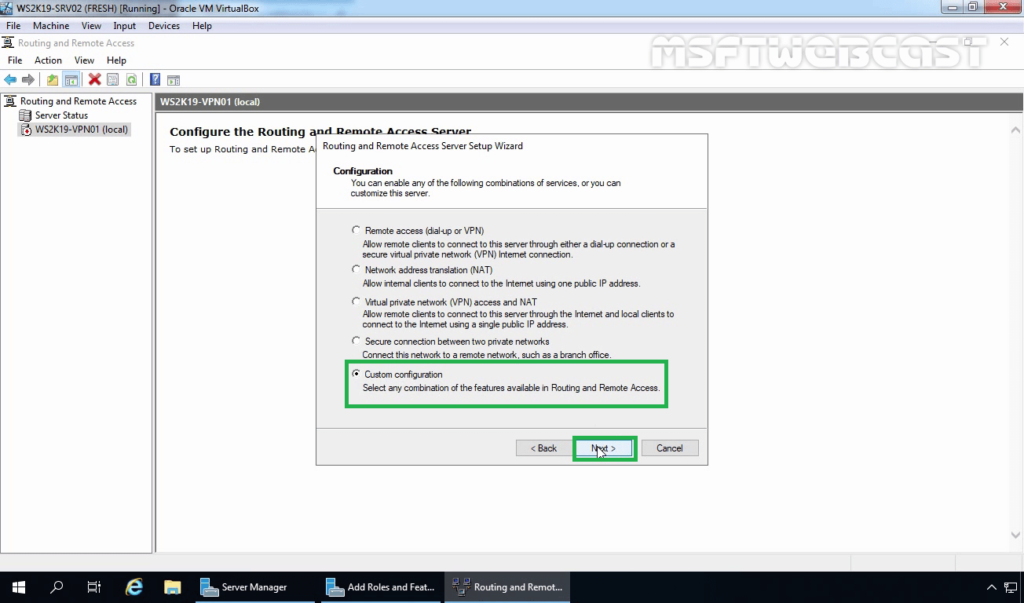
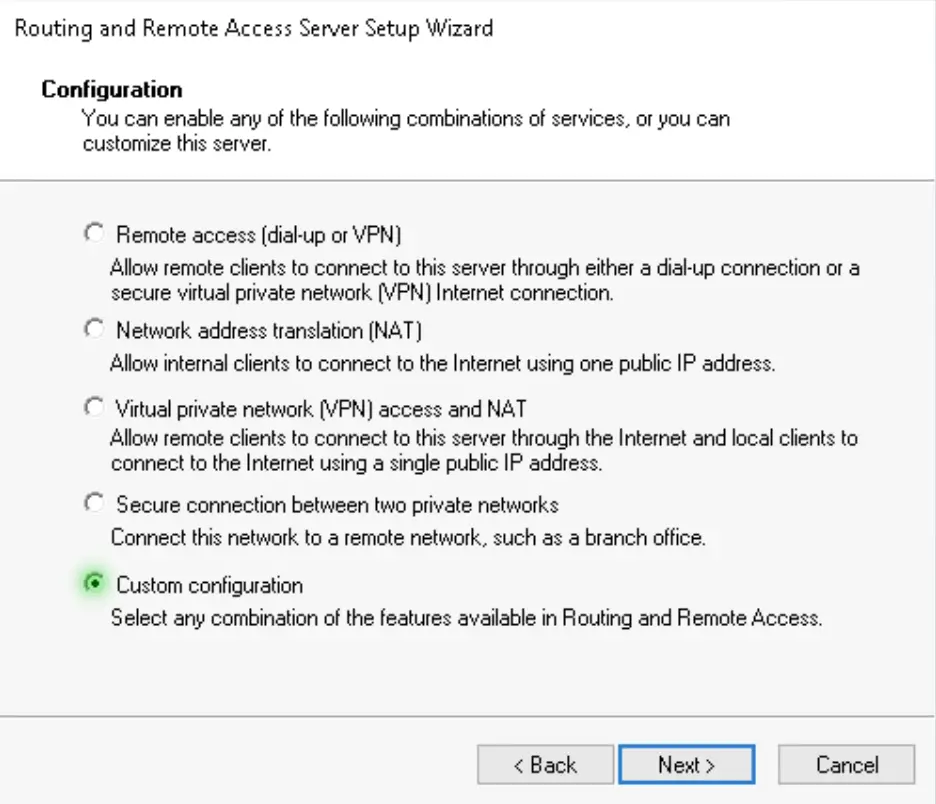
Select the Radio button next to Custom Configuration and
click Next.
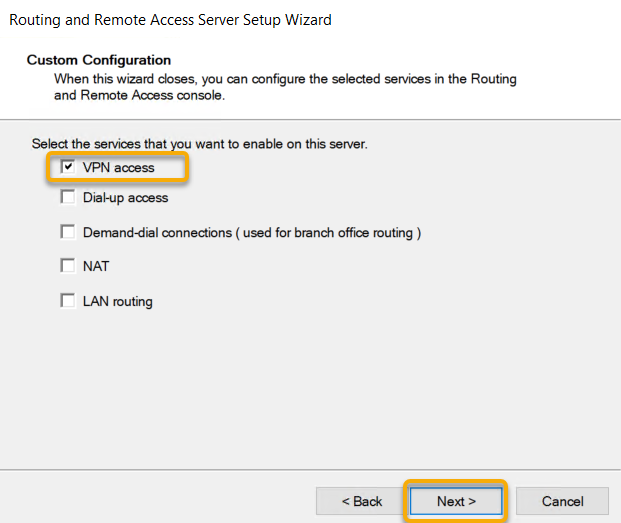
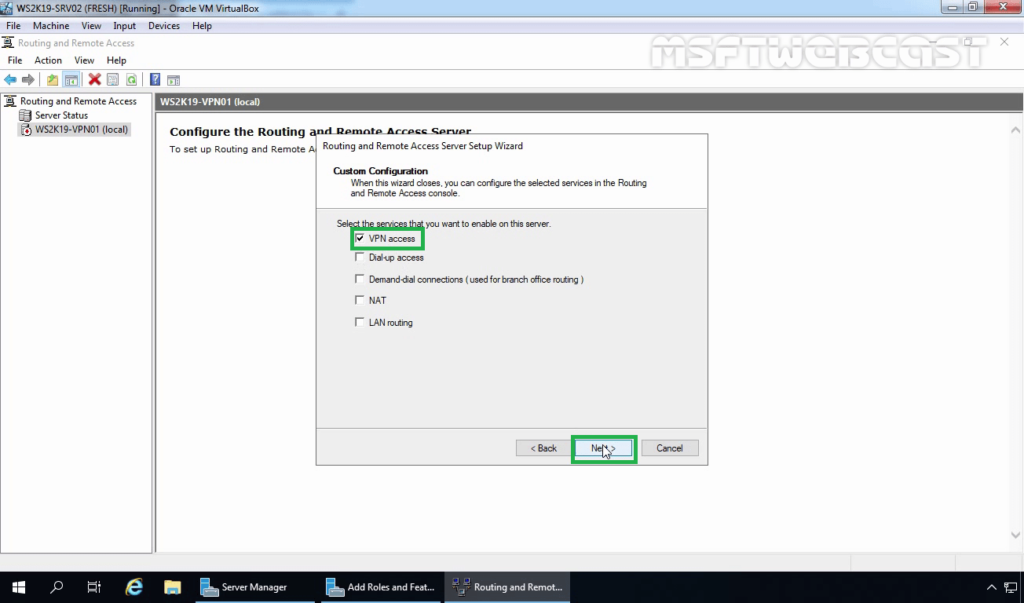
On the Custom Configuration page, select the checkbox next
to VPN Access and click Next.
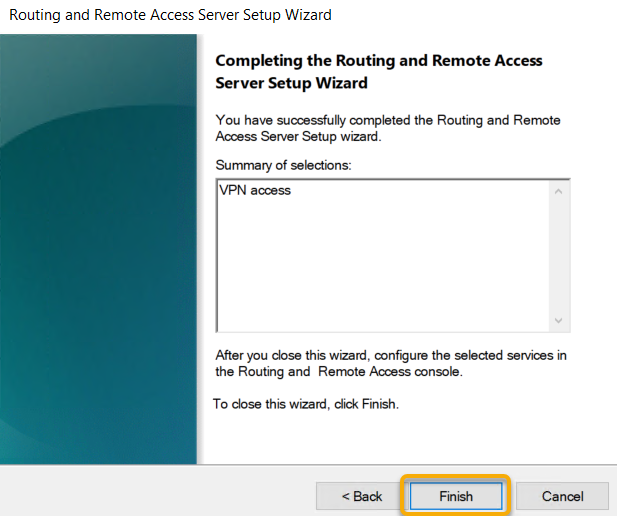
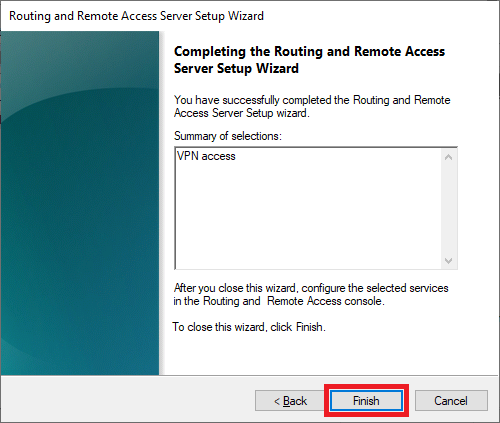
The VPN Access configuration selected on the wizard, and
that is the end of the wizard and click Finish.
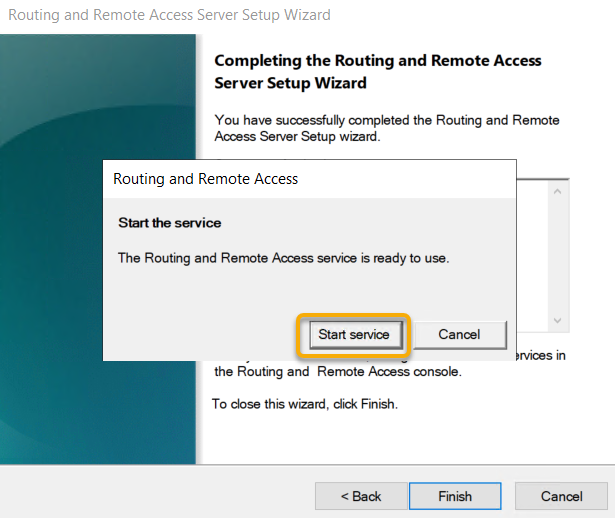
As we have configured Routing and Remote Access services
with VPN Access and the wizard will end by prompting to start service.
Once the Routing and Remote Access Service Started, you will
see a green arrow on the server node implying that the service started and running.
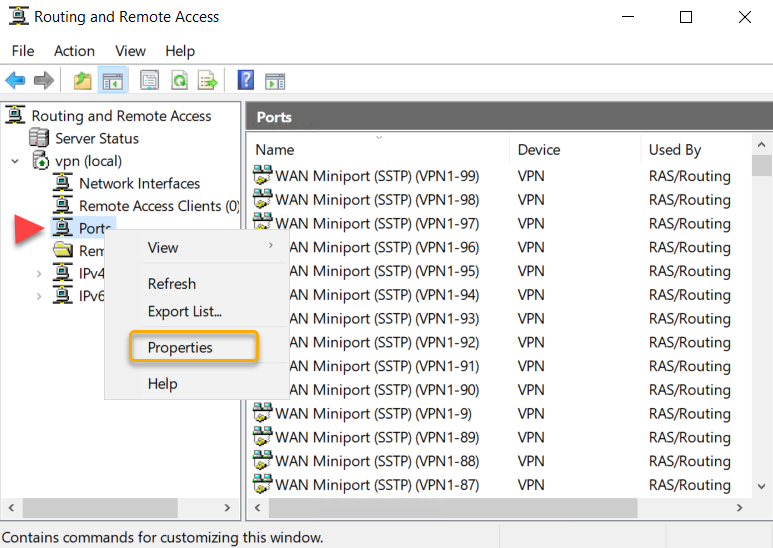
Limit number of VPN Ports
Based on our requirement, we are going to limit the number
of connections on the remote access service. To limit the number of ports, right-click
on Ports and select Properties.
We are going to limit the ports to 15 in this example.
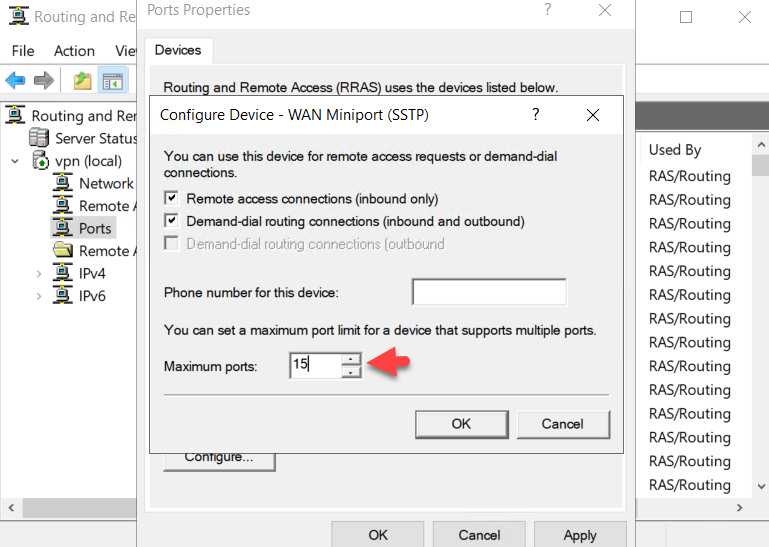
Select Yes to the warning that shows that we are reducing the number of ports.

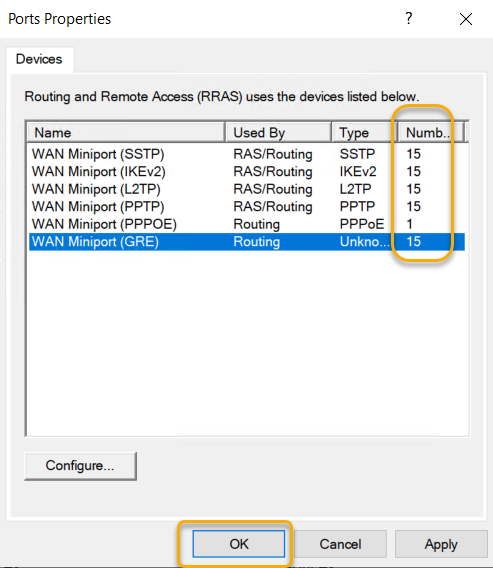
Once we set all ports to 15 and confirm the numbers and
click OK.
Configure Remote Access Settings for VPN To Secure VPN (SSTP)
There are certain settings we need to update to set the VPN
to function securely and get the IP4 IPs to the client system.
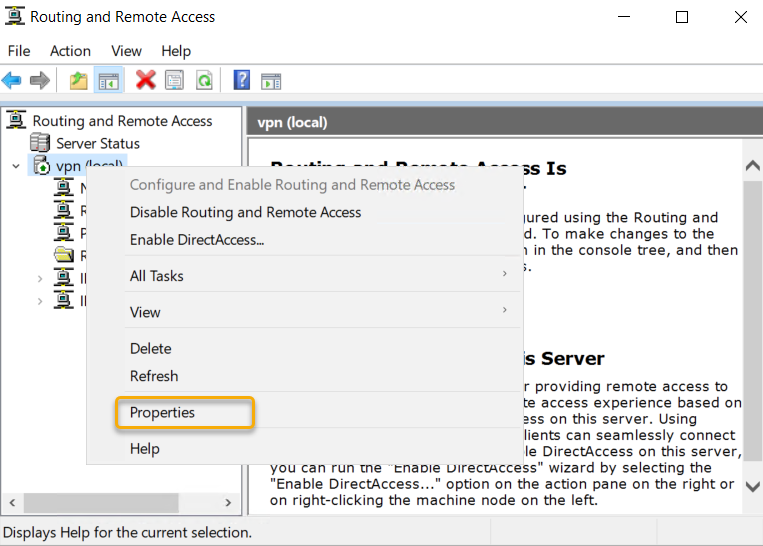
Right-click the server node and click properties as in the
screen below.
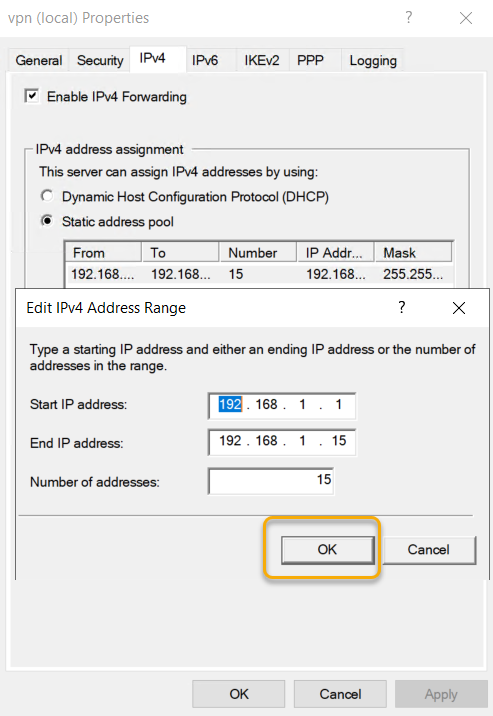
On the Remote Access, Server Properties go to the IPV4 tab
and Select the Static Address pool radio button under IPv4 Assignment and click
add to add IP address pool. Choose an IP address Pool and type start and end IP
address of the pool. The IPV4 address pool is a static one, and if you are
running the DHCP server on the server, you can leave the IP address to assign
from the DHCP server. As we are not running a DHCP service, we are creating a static
address pool in this example.
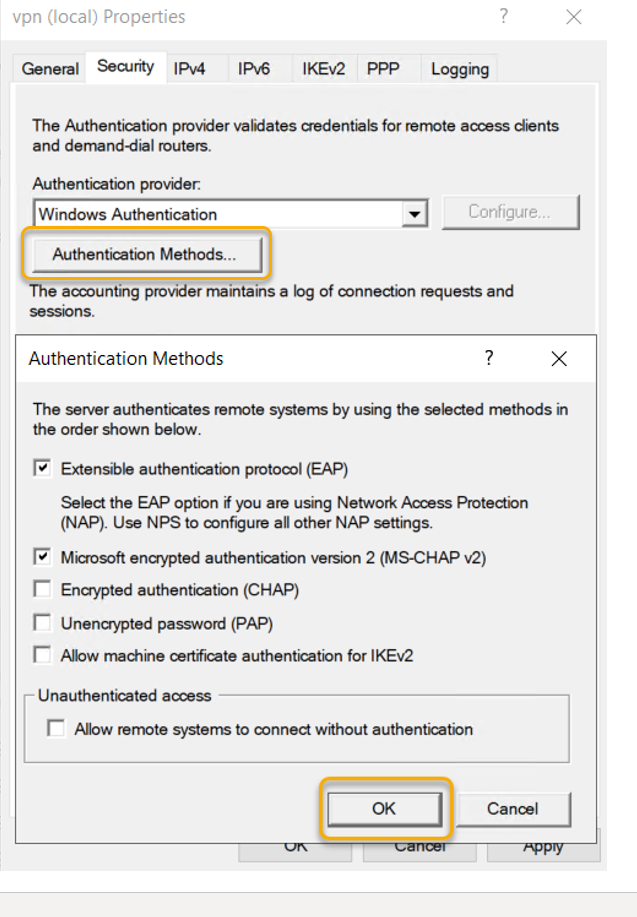
On the Remote Access, Server Properties select
‘Authentication Methods’ check ‘EAP’ and ‘MS-CHAP v2’ selected and click OK.
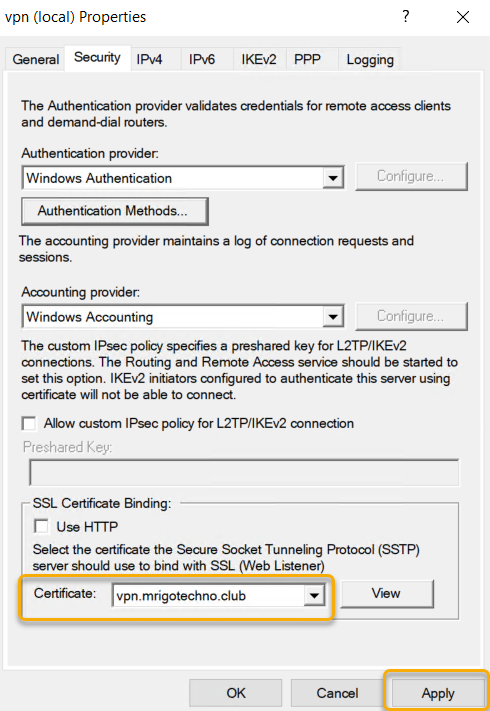
Before starting this installation, I have configured Public
DNS of the domain with a hostname record and assigned the server public IP
address to it. Also, I have generated a certificate from third-party CA. At the
bottom of the page, you can select the certificate that you have installed for
the hostname that you have selected.
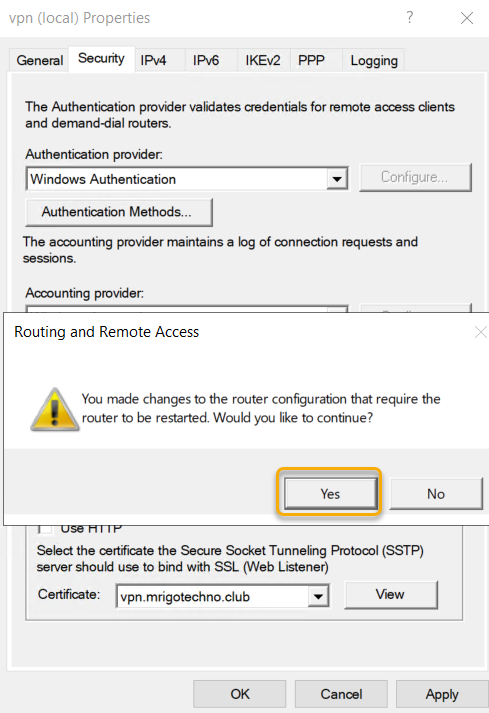
Applying configuration changes will require a restart of the
Remote access service for the configuration to take effect.
We have completed the Routing and Remote Access
configuration. To connect to the VPN Server from the VPN client, we need to
allow the users who are all needed access. Go to Active Directory Users and
Computers and select the User objects that you want to Allow Dial-in to VPN and
go to Dian-in on the properties of the user object and select the radio button
next to ‘Allow Access.’
Configure Dian-in connection on user object

Create VPN Network Connection to Secure VPN (SSTP)
So, we have completed all server configurations, now is the time to create a VPN connection on the Windows 10 client computer on Setup a secure VPN (SSTP).
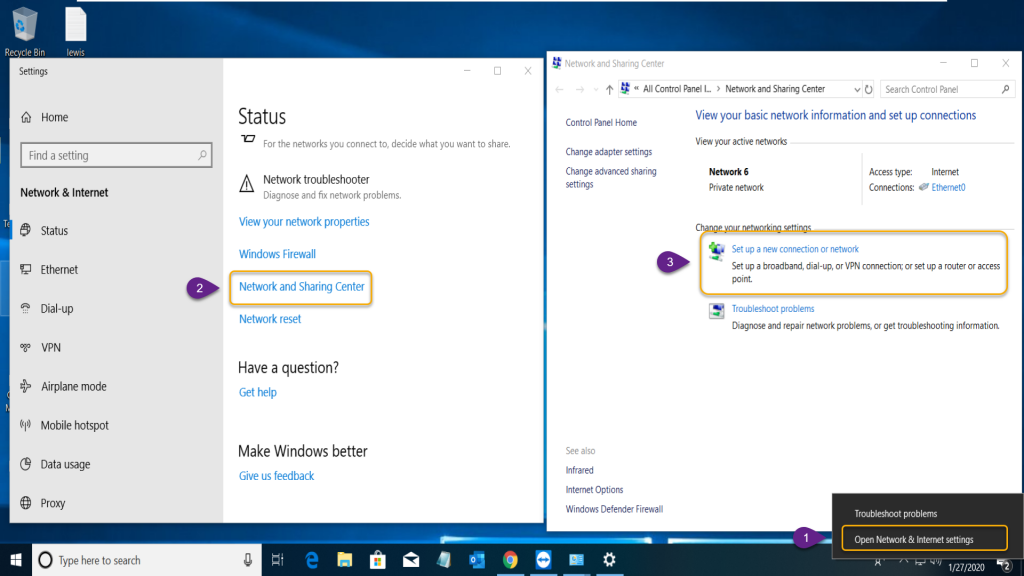
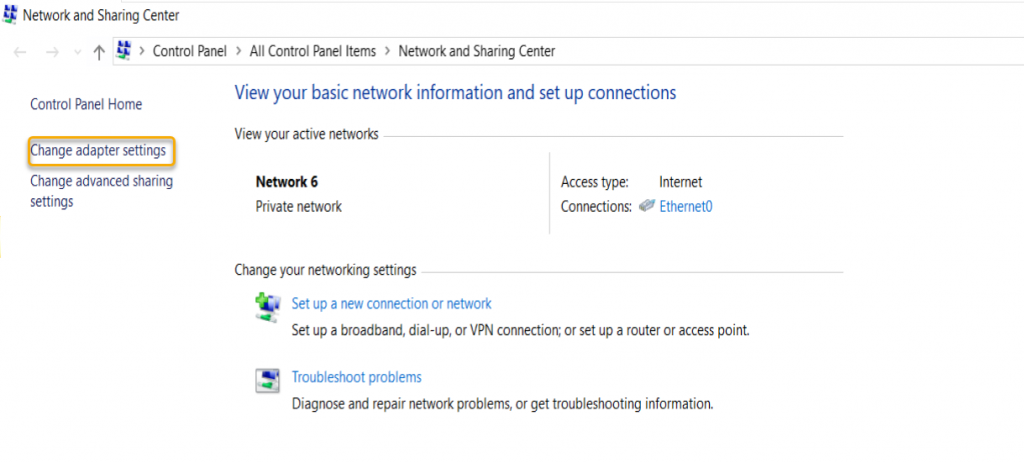
Right-click network Icon on the taskbar and select ‘Open
Network & Connection Sharing.’ On settings, windows click ‘Network and
Sharing Center’ that will open the ‘Network and Sharing Center’ where we need
to select ‘Set up a New Connection or Network’ as in the steps provided on the
screenshot below.
Select the steps as in the steps below.
- Open Network & Internet Sharing
- Network Sharing Center
- Set up a New Connection or network
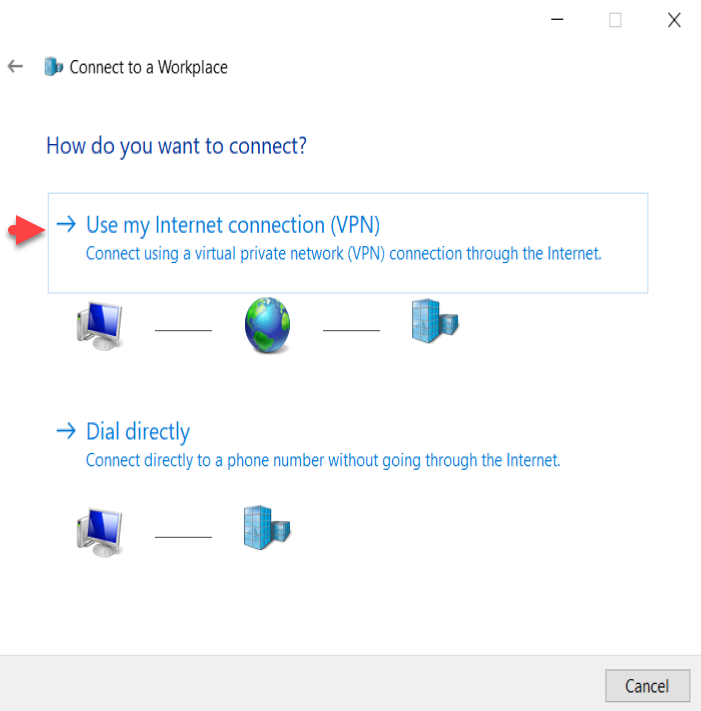
There is a Wizard start, and in the connection options,
select ‘Connect to a workplace’ and click Next.

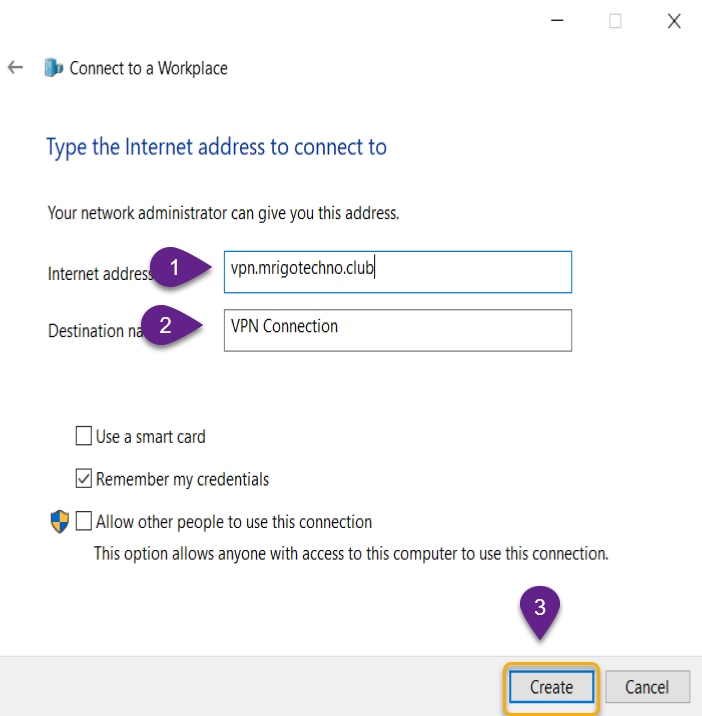
On the How do you want to connect options, select ‘Use my
Internet connection (VPN). Type internet address as I told you earlier I have
created a hostname called ‘vpn.mrigotechno.club’ on my domain for this VPN
configuration.
In the destination name type, a name implies the connection
purpose. I left the default name in this example.
Leave the selection of ‘Remember my credentials’ and click
create.
- Type the VPN server’s internet hostname or IP
address. - Give a name to the VPN Connection.
- Click Create to create a workplace connect.
Connect to the VPN Server over internet
The VPN connection network adapter has been created and now
click change adapter settings to change the VPN network adapter settings to
connect to the VPN server.
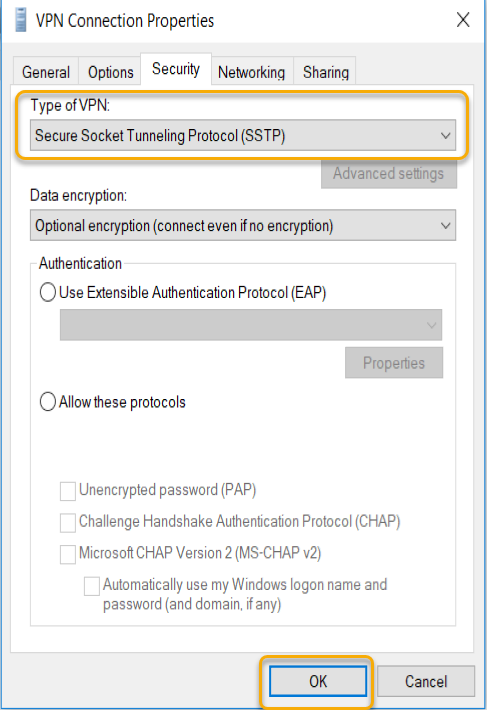
Right-click newly created adapter for VPN Connection and
select properties.
On the Security tab, select Secure Socket Tunneling Protocol
(SSTP) and click OK.
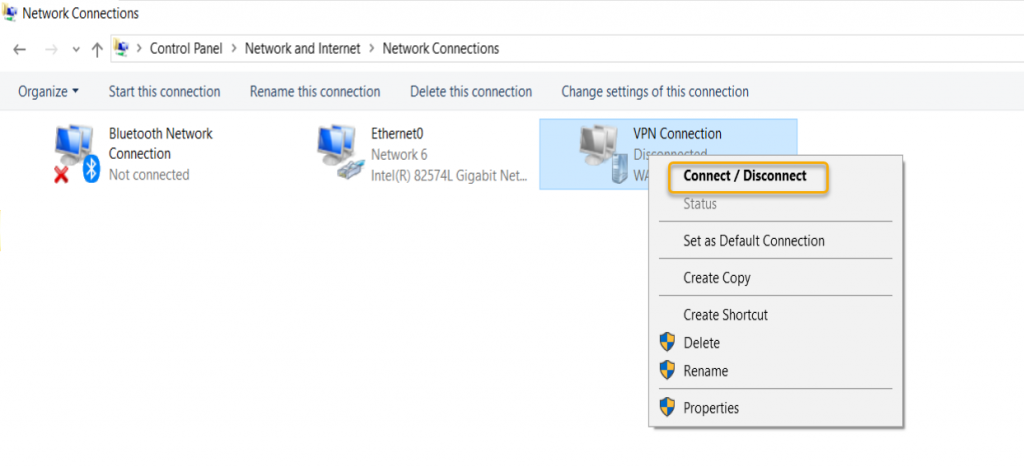
Right-click the adapter one more time and click Connect /
Disconnect
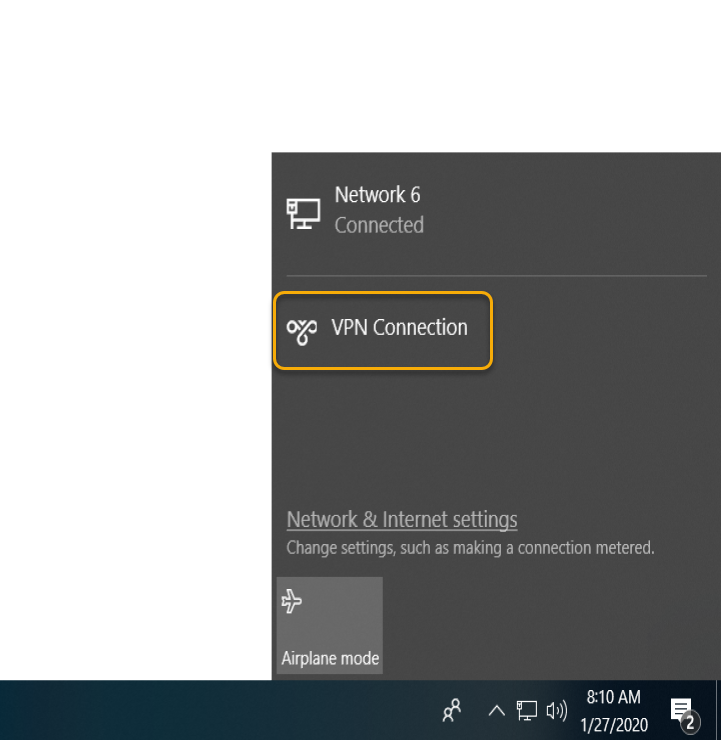
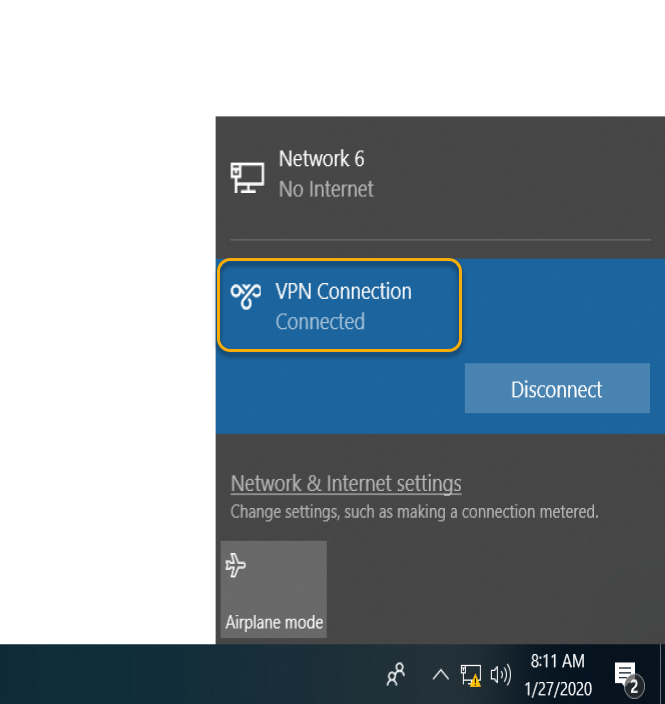
The VPN Connection will popup on the taskbar; now click on
the VPN Connection.
Type the domain credentials and click OK.
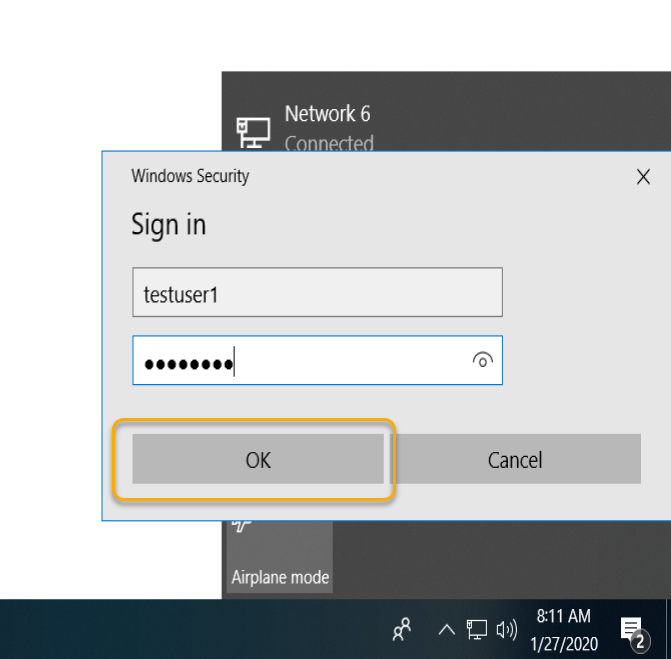
The VPN Connection completed, and you would see the
Connected prompt on the VPN Connection.
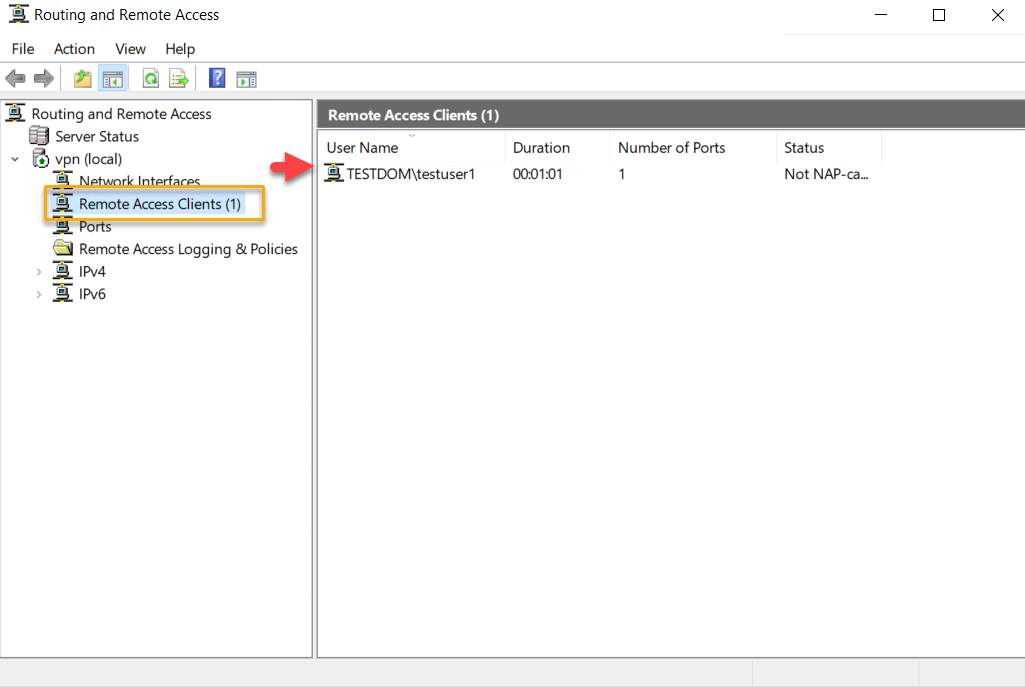
The connection made can be verified on the Routing and
Remote Access management console, as in the screen below.
Conclusion
In this article, we have gone through how to set up a secure
VPN (SSTP) on Windows Server 2019. We have covered Installation of Remote
Access Role, after the installation, we have configured Remote Access with VPN
access, and we limit the number of SSTP ports so only maximum allowed
connections possible to connect. We configured Dial-In property of the Active
Directory domain users and we also covered the Windows 10 client computer to
connect the VPN server with the VPN connection adaptor.
I hope this article gives all the details to set up an
environment to implement Virtual Private Network using Secure Socket Tunneling
Protocol (SSTP). You may have some questions or feedback to share with me,
please click the comments below and share your thoughts. I’m so happy to answer
your questions.
In this post, we will learn the steps to configure SSTP VPN on Windows Server 2019 using a Self-signed certificate.
Secure Socket Tunneling Protocol (SSTP):
Secure Socket Tunneling Protocol (SSTP) is a tunneling protocol developed by Microsoft. SSTP uses a TCP connection (port 443) for tunnel management.
SSTP provides a mechanism to encapsulate PPP traffic over the SSL channel of the HTTPS protocol. The use of PPP allows support for strong authentication methods such as EAP-TLS. SSL or TLS provides transport-level security with enhanced key negotiation, encryption, and integrity checking.
Note: You should use a certificate from public CA in the production environment. As we are just testing the SSTP configuration, so we will use a self-signed certificate in this guide.
Understanding the SSTP Test Lab:
- WS2K19-DC01: Domain Controller and DNS.
- WS2K19-VPN01: Member Server.
- WS10-CLI01: Windows 10 Client Machine.
Step:1 Install Remote Access Server role on Windows Server 2019:
1. The first step is the installation of the Remote Access Server role. Open Server Manager Console and start role and feature installation wizard. Select the Remote Access Server role.

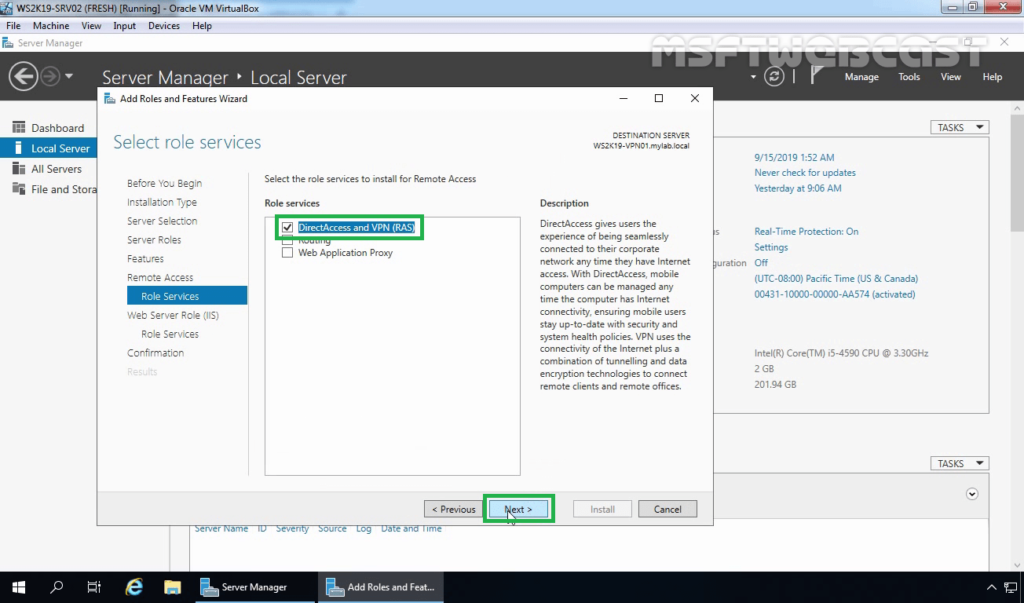
2. On select role services, select DirectAccess and VPN (RAS) role service. Click Next and finish the installation.
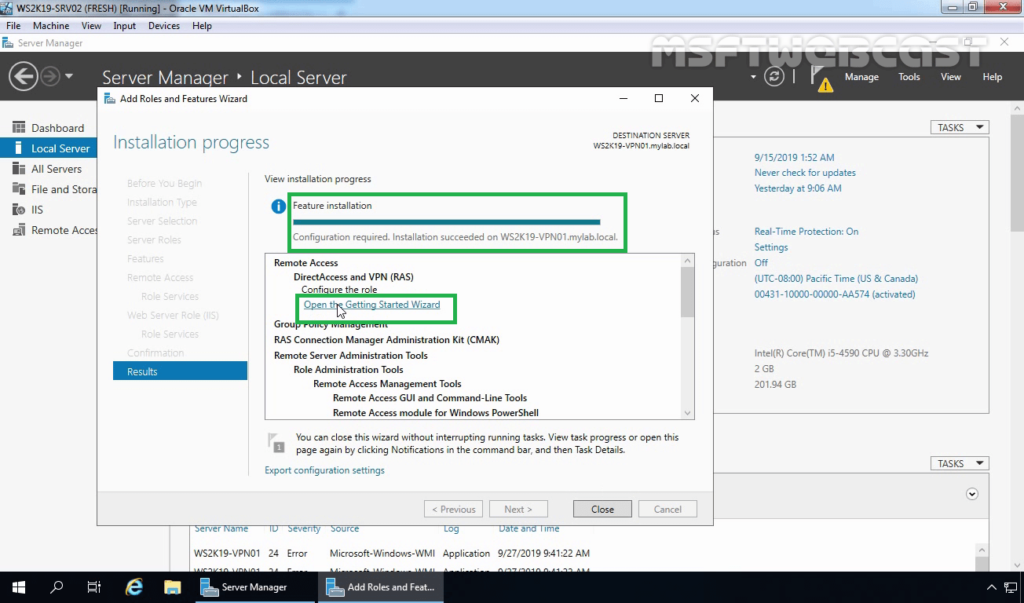
3. When the installation finished, click on Open the Getting Started Wizard. Leave the console open, and move to the next step to create a self-signed certificate.
Step:2 Create a Self-signed Certificate using the IIS manager.
4. On the member server, open the Server Manager console. Click on Tools and select Internet Information Services (IIS) Manager.

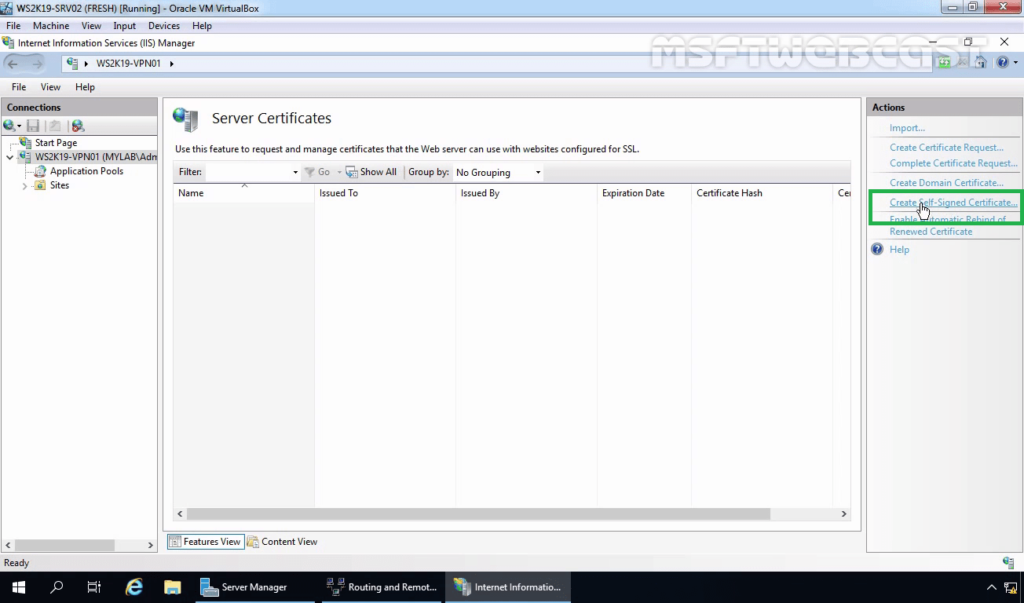
5. Click on the server name (WS2K19-VPN01) in the connections column on the left and double-click on Server Certificates.
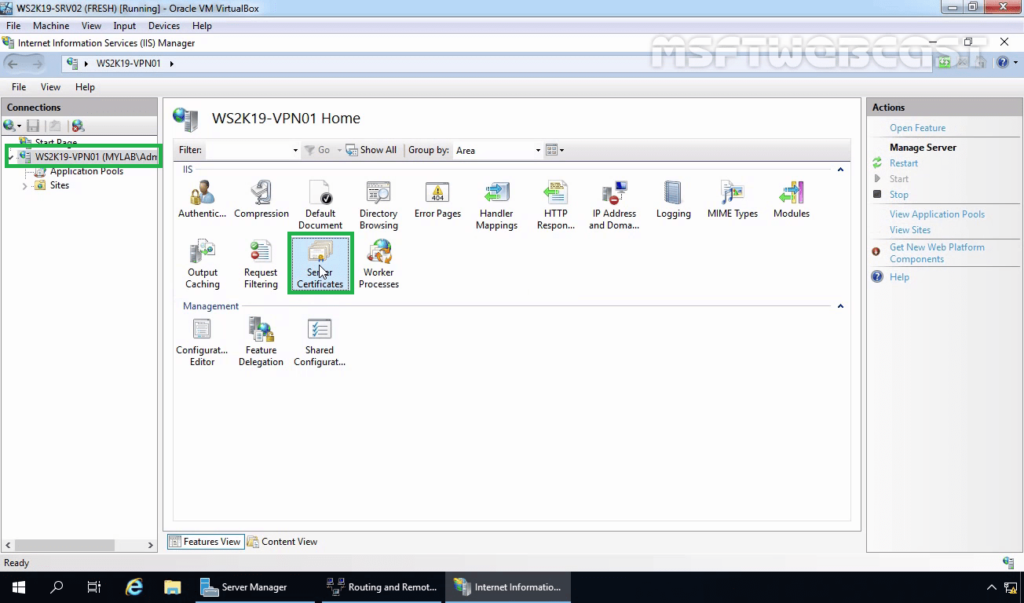
6. Click on Create Self-Signed Certificate in the Actions column on the right.
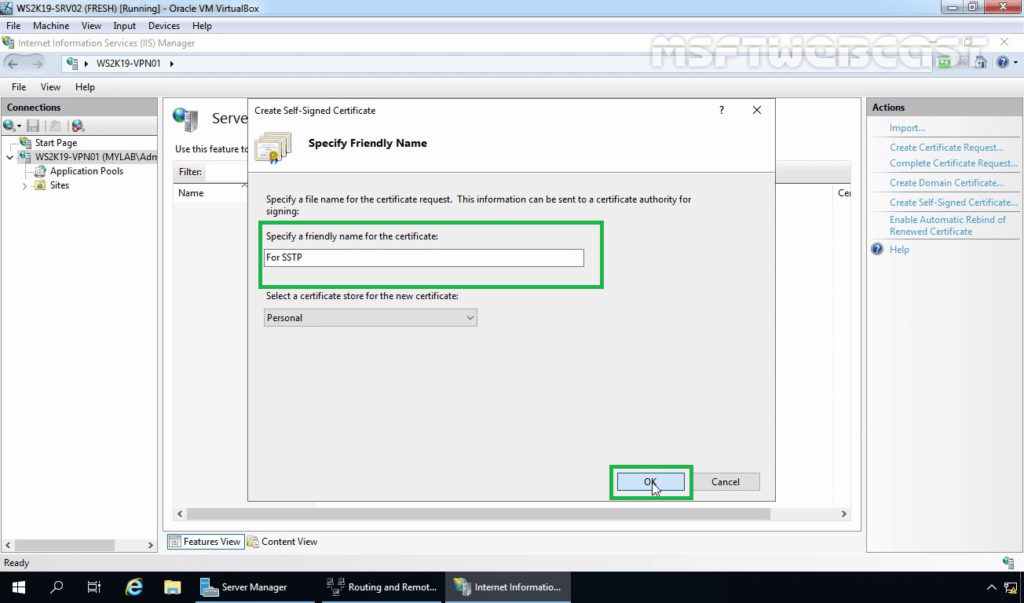
7. Enter the friendly name you wish to use to identify the self-signed certificate, and then click OK to complete the process.
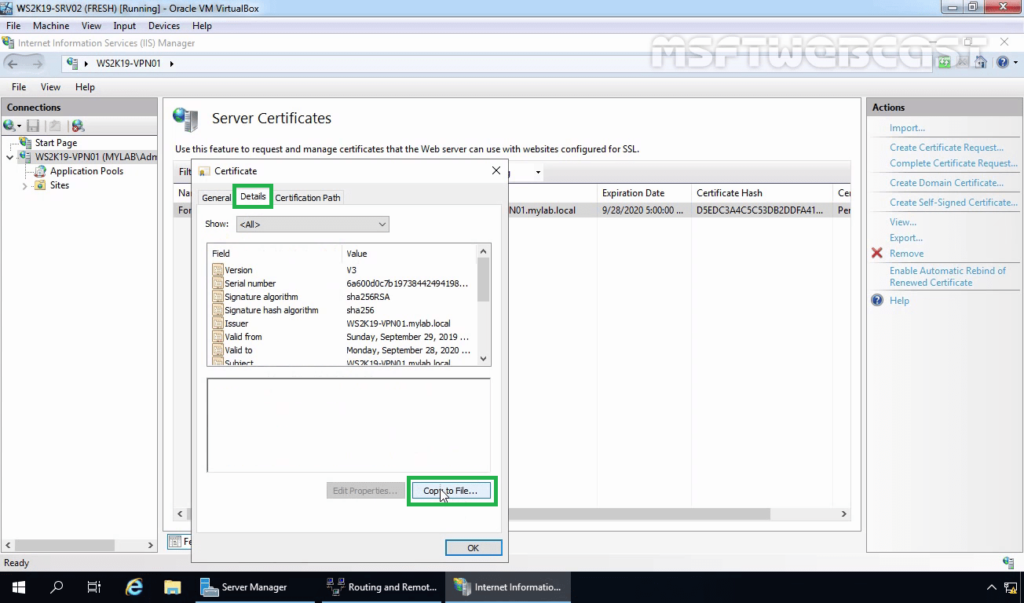
8. You now have an IIS Self Signed Certificate listed under Server Certificates. Double-click on Certificate. The validity of the Self Signed Certificate is one year.

Step:3 Export a self-signed certificate:
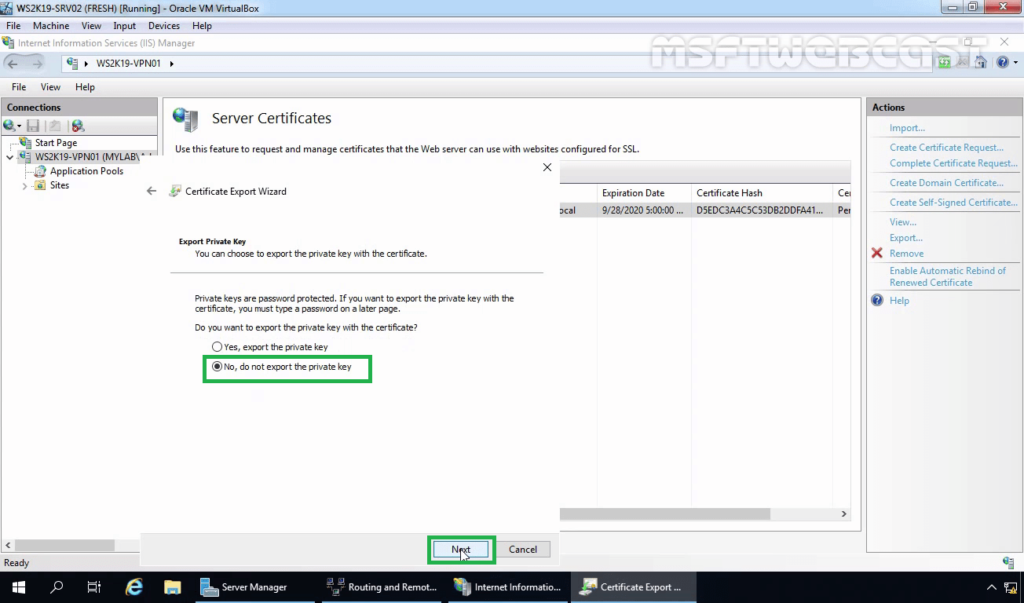
9. Click on the Details tab. Click on Copy to File.
10. Select No, do not export the private key. Click Next.
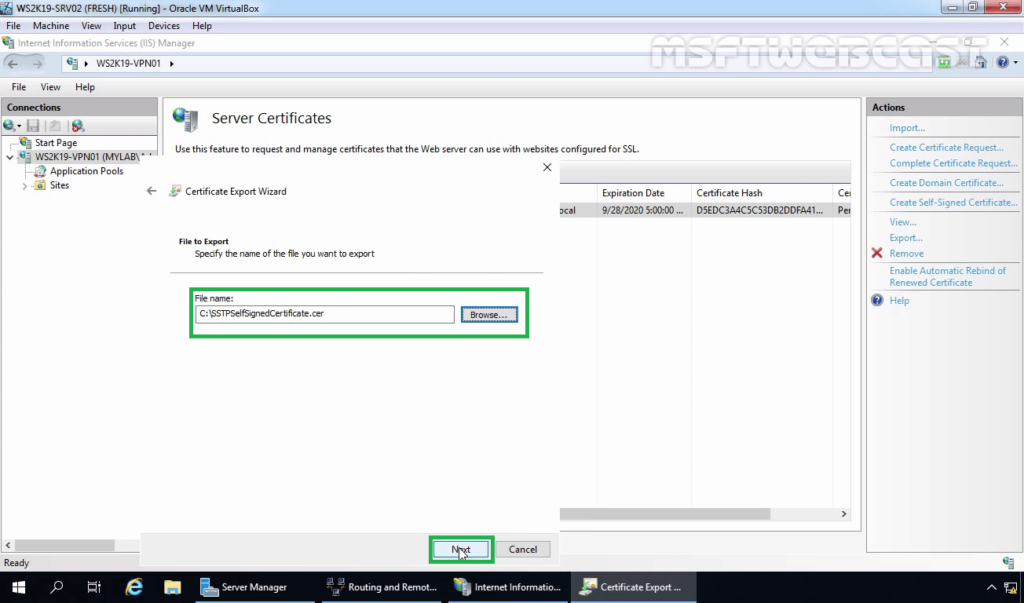
11. Specify the location to save the file. Click Next.
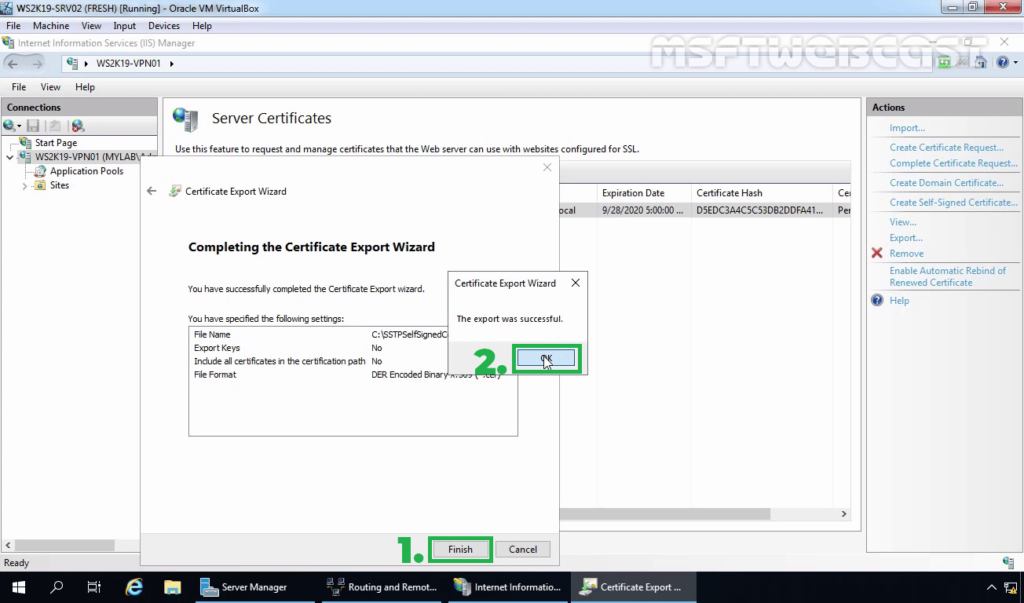
12. Click on Finish. Click on OK on the confirmation message console.
Note: You need to copy this .cer certificate file to Windows 10 machine. The simple way to do this is by sending this .cer file using an email.
Step:4 Configuring Remote Access Service and SSTP VPN:
13. On configure Remote Access page, click on Deploy VPN only.
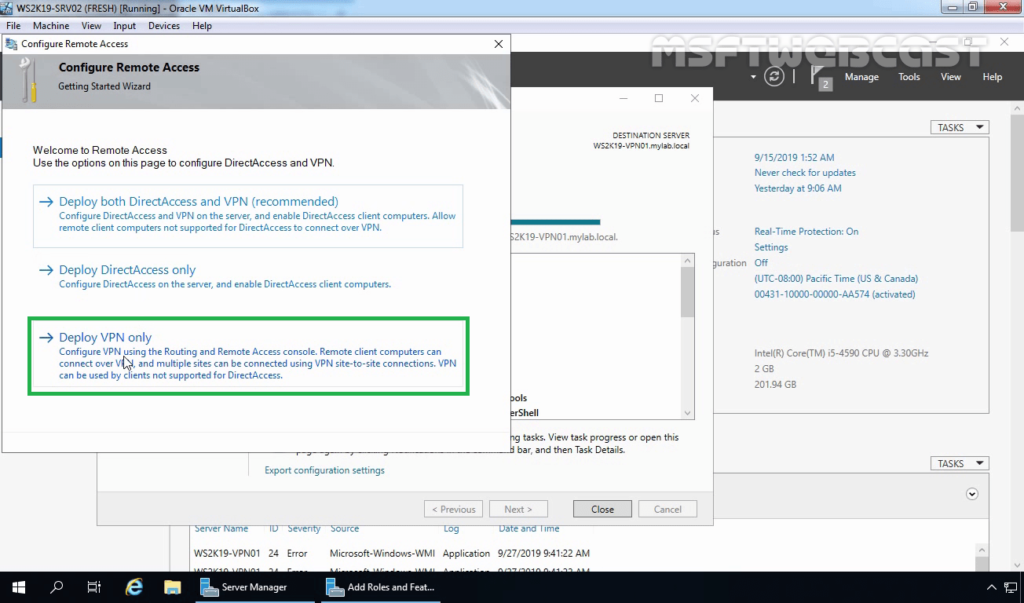
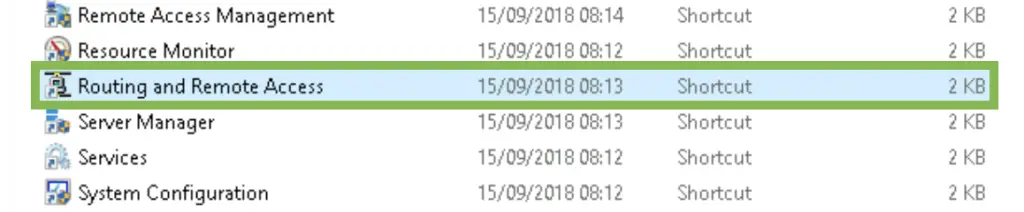
14. That will open the Routing and Remote Access Management Console. You can also open the management console from the Tools menu.
15. Right-click on the Server name and select Configure and Enable Routing and Remote Access.

16. On Welcome screen, click Next.
17. On the Configuration page, select the Custom configuration radio button. Click Next.
18. On select the service page, select VPN Access. Click Next.
19. After clicking on the Finish, it will ask you to start the service. Click on Start service.
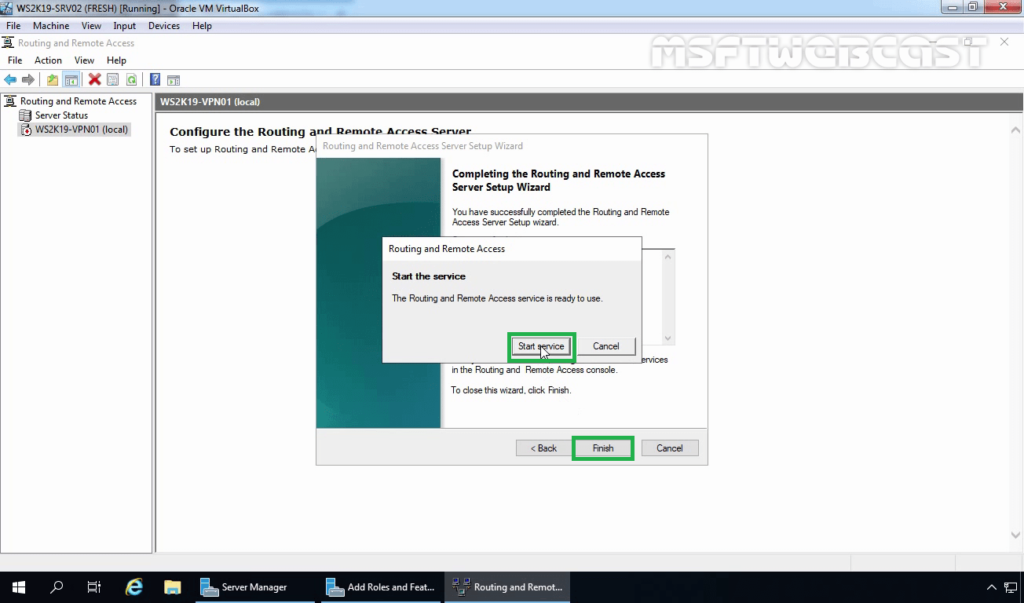
20. Now you will see a green up arrow beside your server name.
Step:5 Configure SSTP settings and specify the IP Address range:
To configure SSTP VPN, we need to set up specific settings in the VPN server’s properties section.
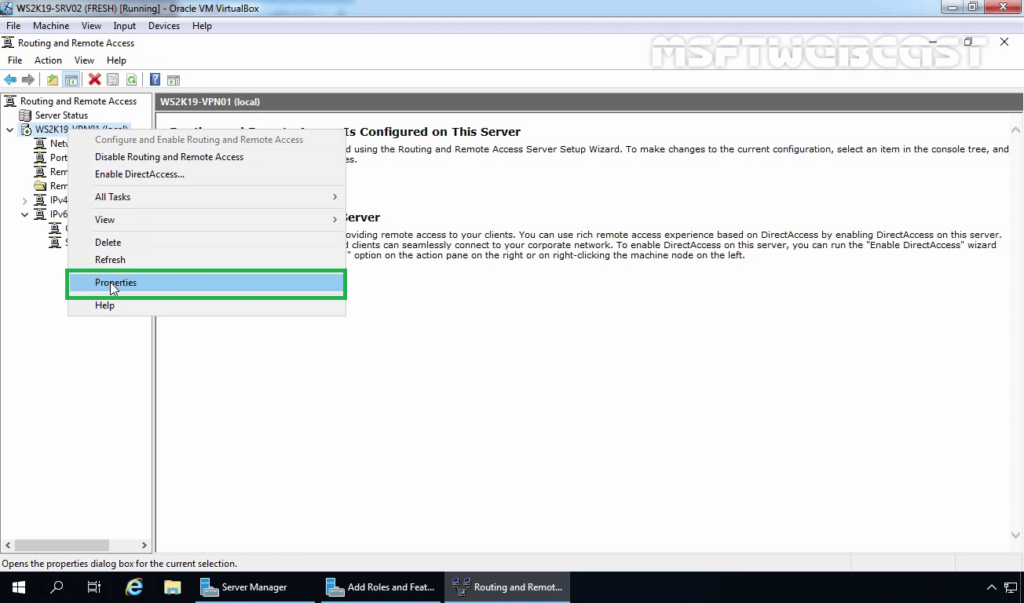
21. Right-click on the server name and click on Properties.
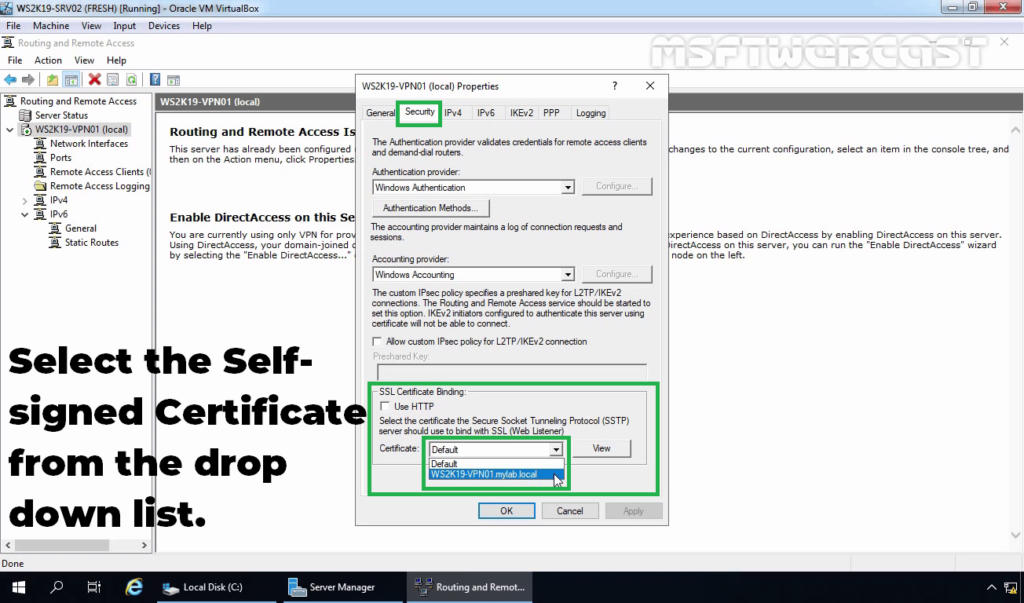
22. Click on the Security tab. Under SSL Certificate Binding, select the self-signed certificate that you just created earlier.
23. Click on IPv4 Tab. Select the Static Address Pool radio button.
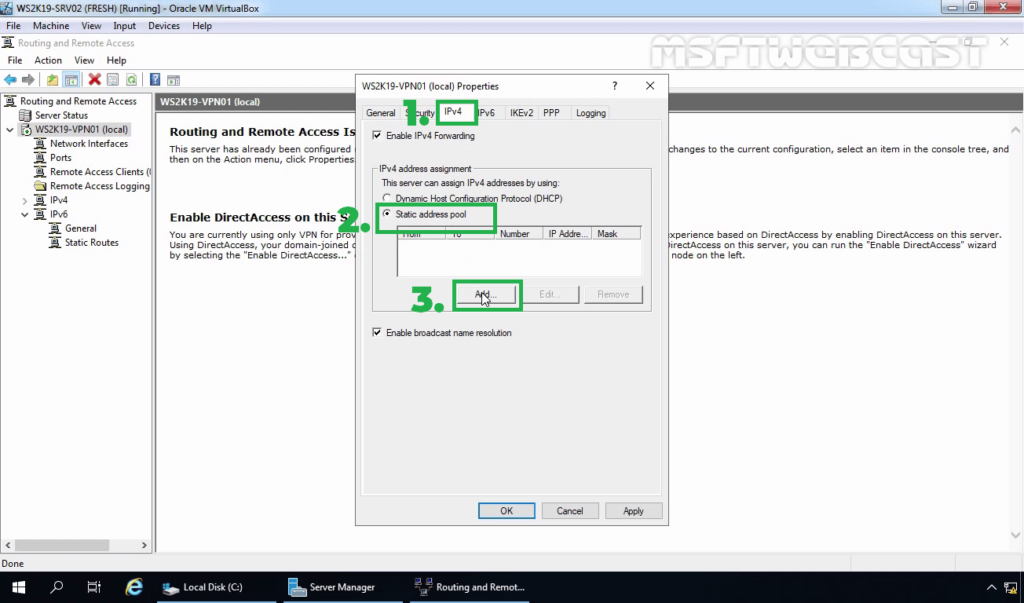
24. Click on Add and specify the IP address range. Click on OK.
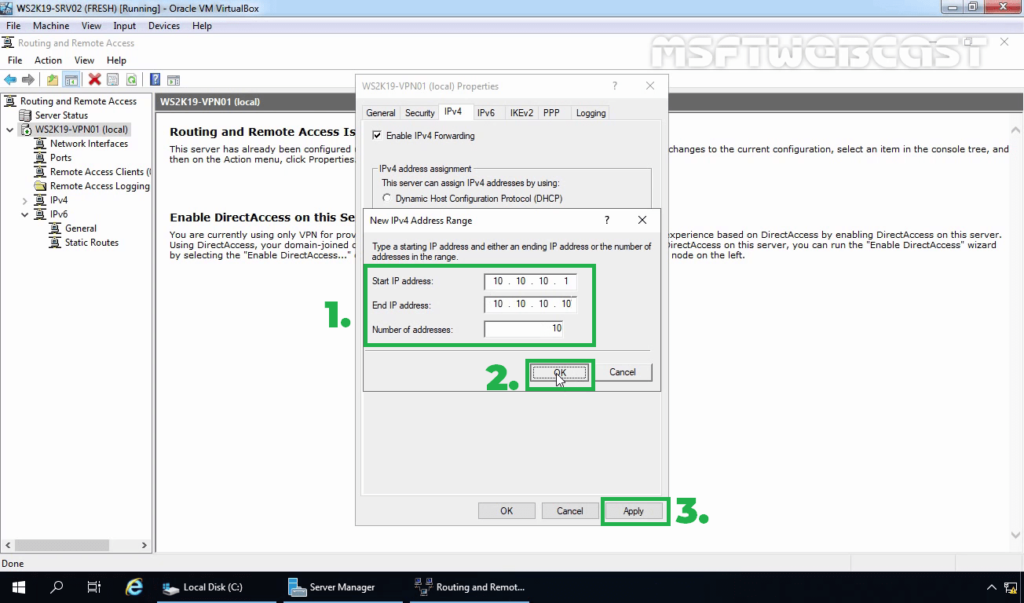
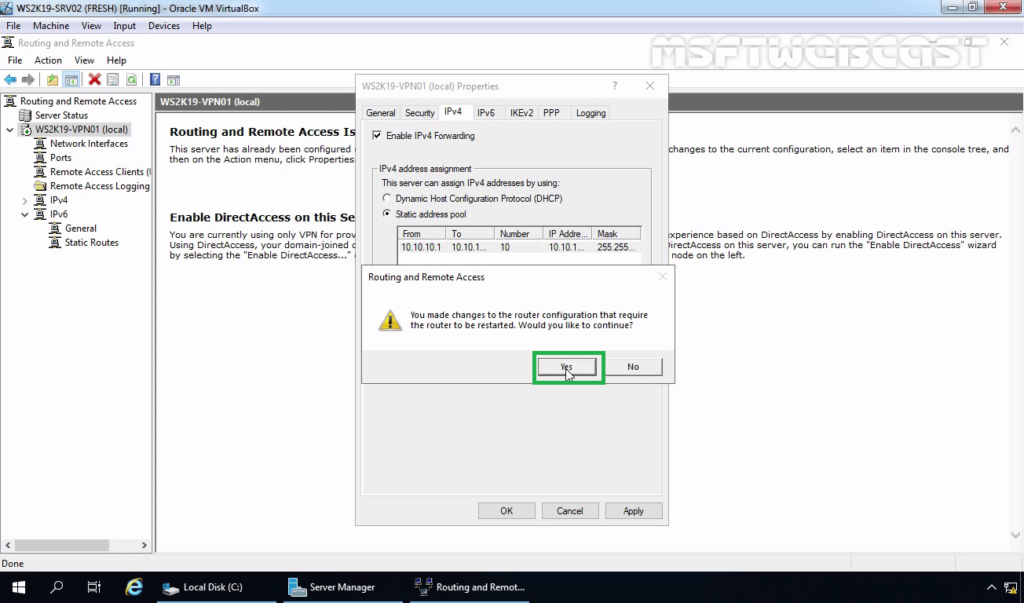
25. Click on Apply to save the changes to the VPN server. It will ask to restart the Routing and Remote Access service. Click on yes to do so.
Step:6 Create AD User and allow dial-in access:
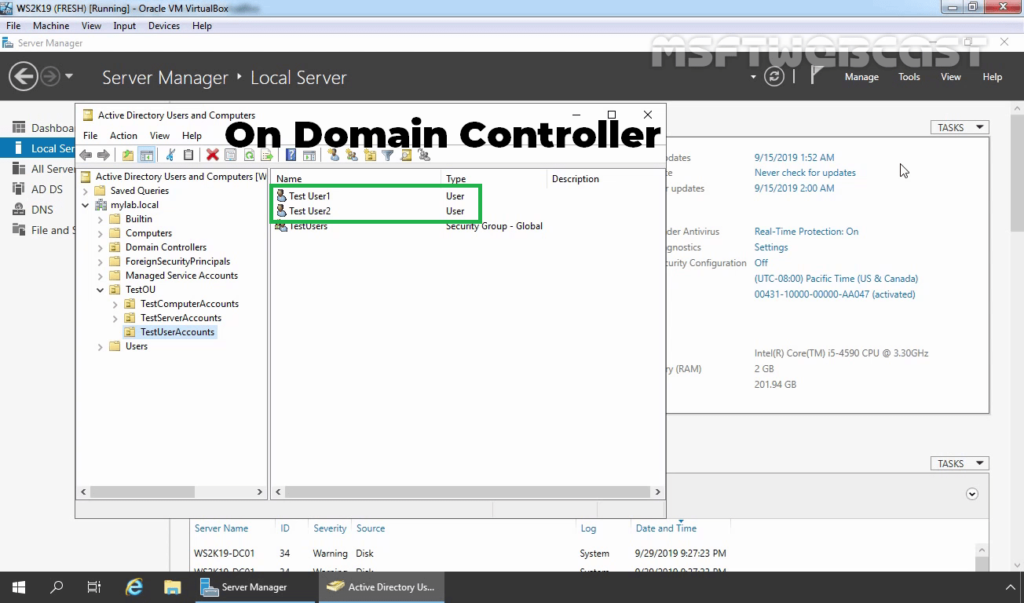
26. On Domain Controller, Open Active Directory Users and Computers snap-ins. Create AD users name Test User1 and Test User2.
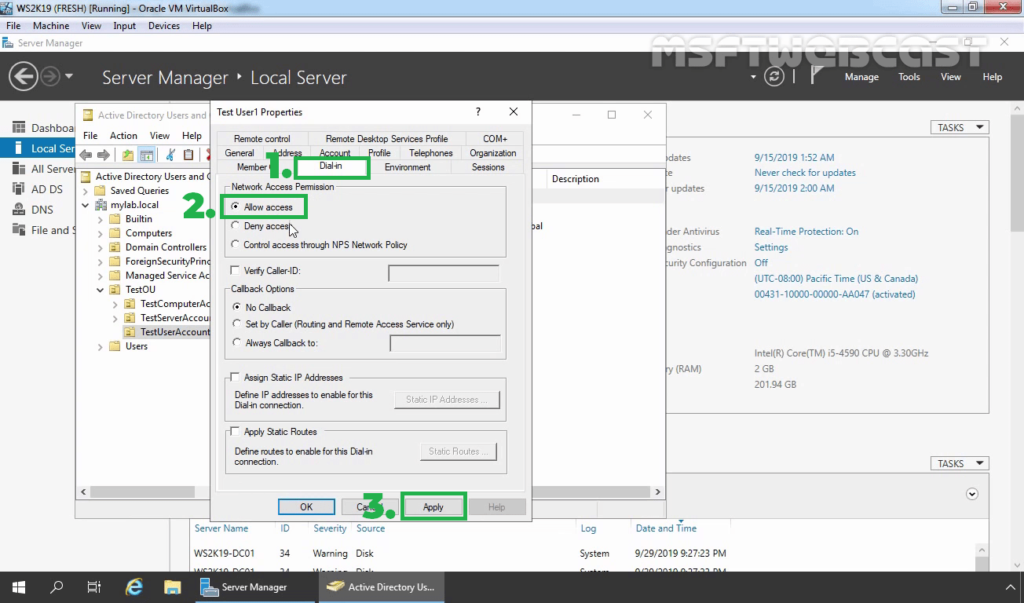
27. Enable dial-in access for selected VPN users by opening the user properties and selecting Allow access on the tab Dial-in.
Note: If you want, you can configure Network Policy Server to allow VPN users to connect to the VPN server running on Windows Server 2019.
Step:7 Import a self-signed certificate on Windows 10 machine:
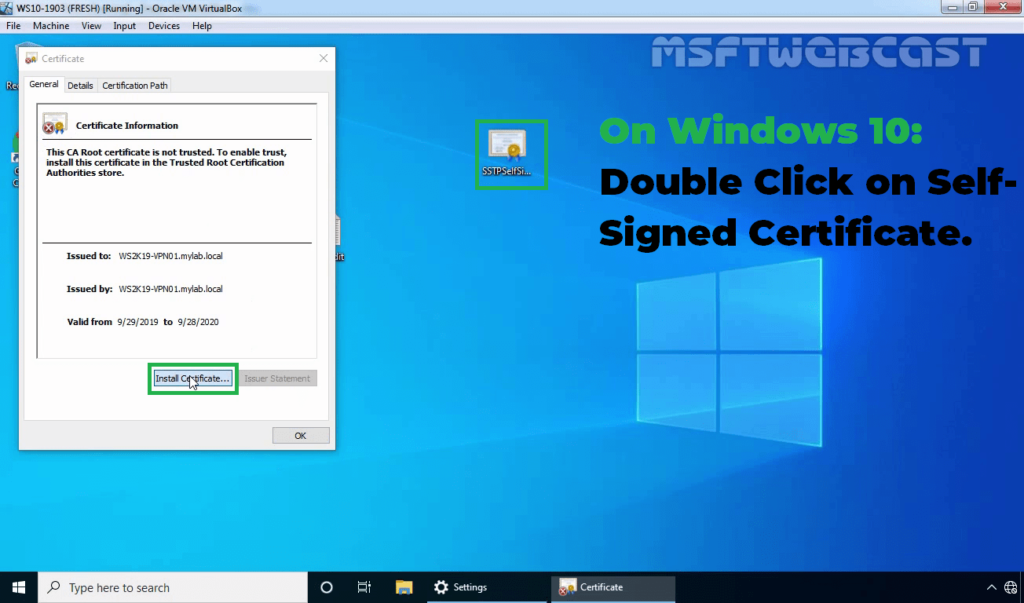
Once you get a .cer certificate file, you need to import the certificate on the local computer. You need to store the certificate under the Trusted Root Certification Authorities store.
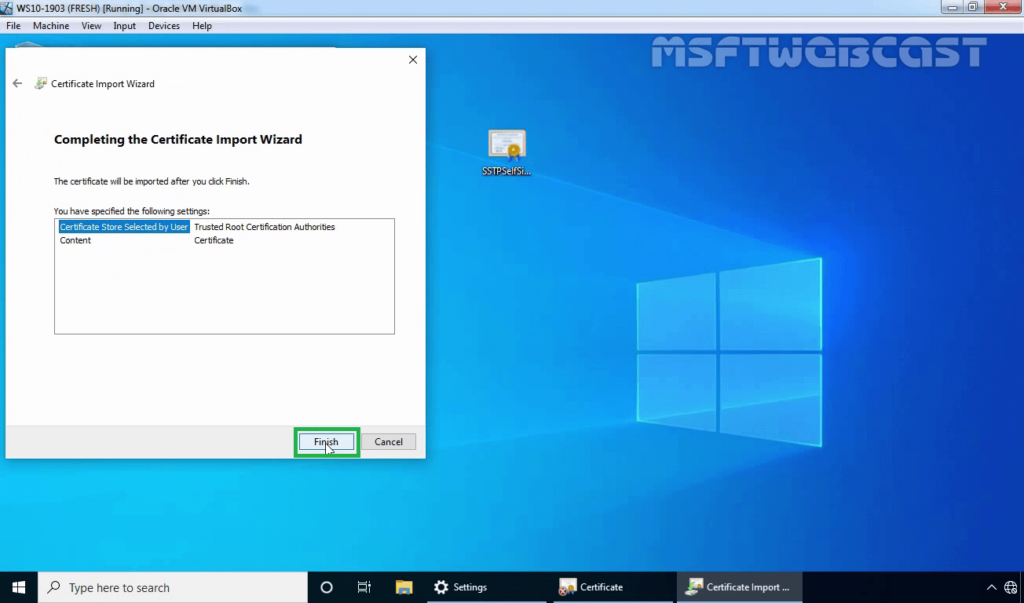
28. Double-click on SSTPselfsigned.cer file. Click on the Install certificate.
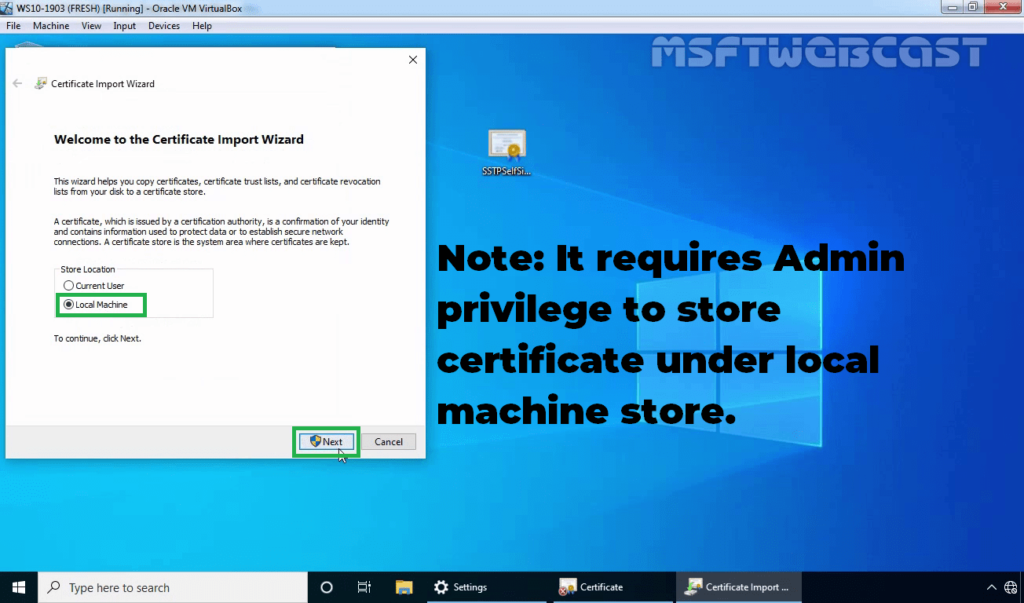
29. Select Local Machine and click Next.
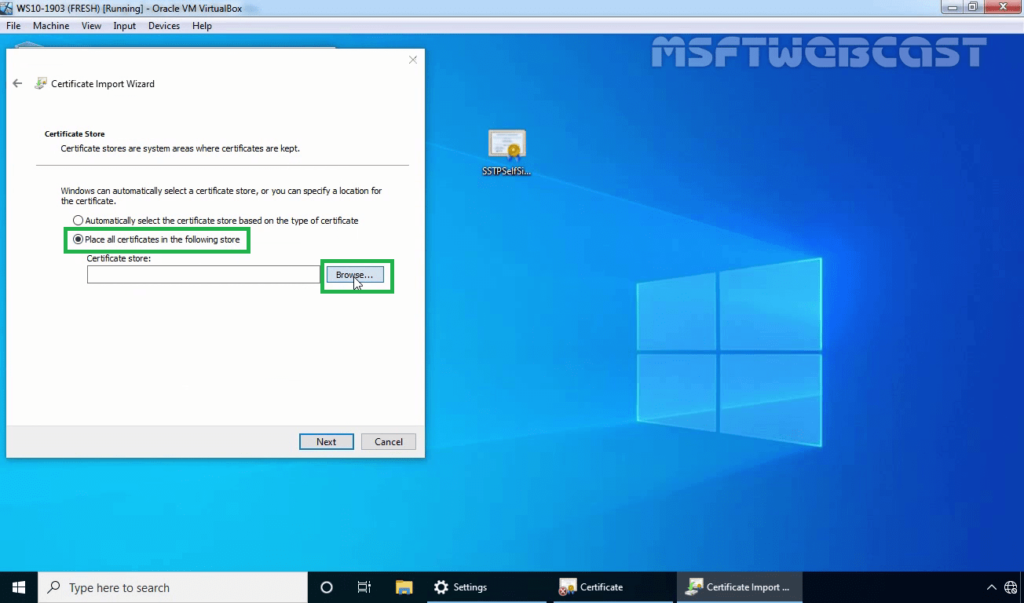
30. Select Place certificates in the following store radio button and click on Browse.
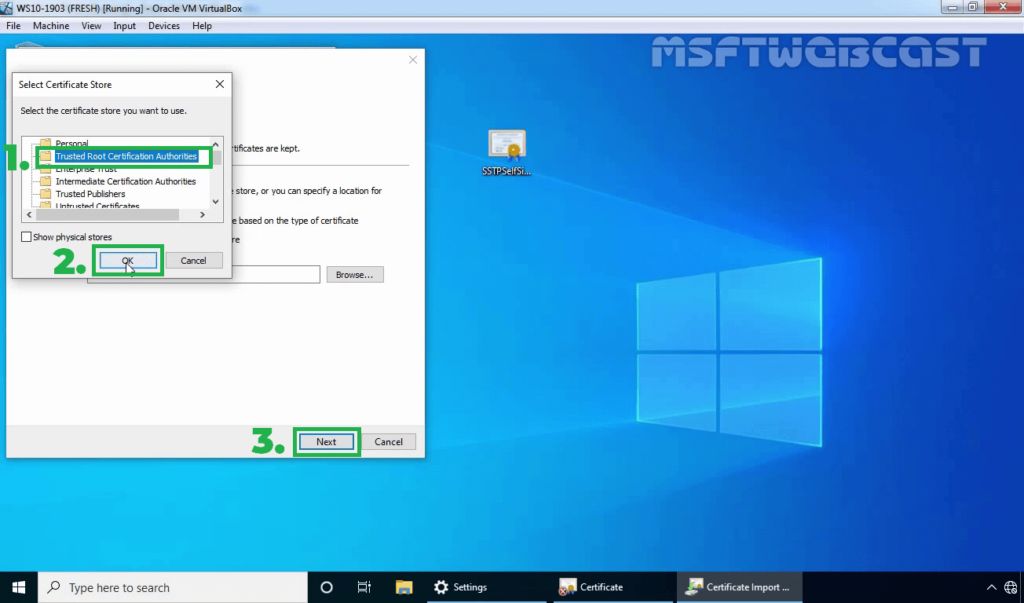
31. Select the Trusted Root Certification Authorities store and click OK. Click Next.
32. Click on Finish to complete the import process.
Step:8 Test SSTP VPN configuration:
On Windows 10 client machine, we need to create a new VPN connection.
33. Right-click on the Start button and select Network Connections.
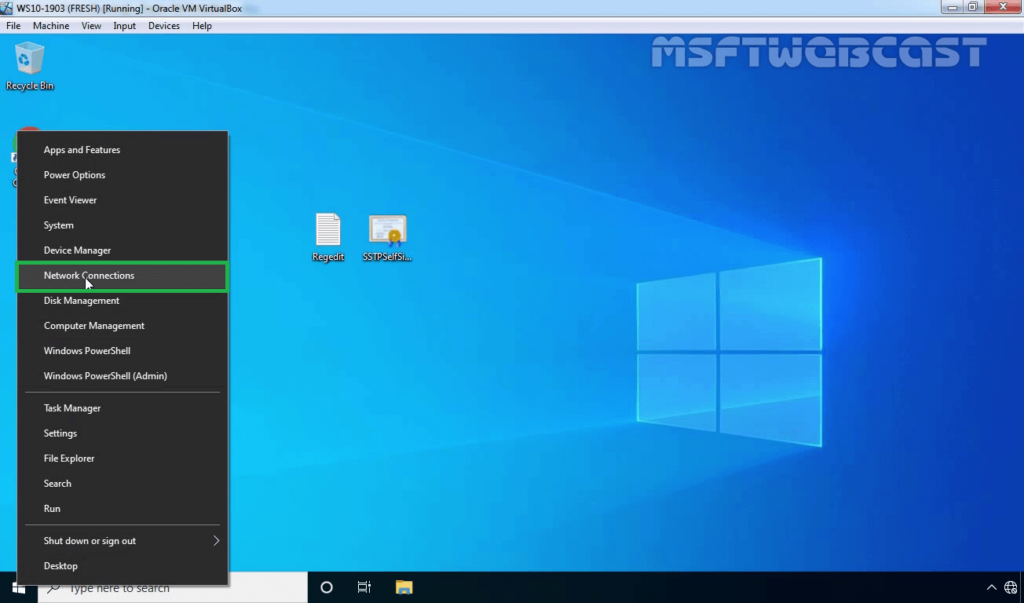
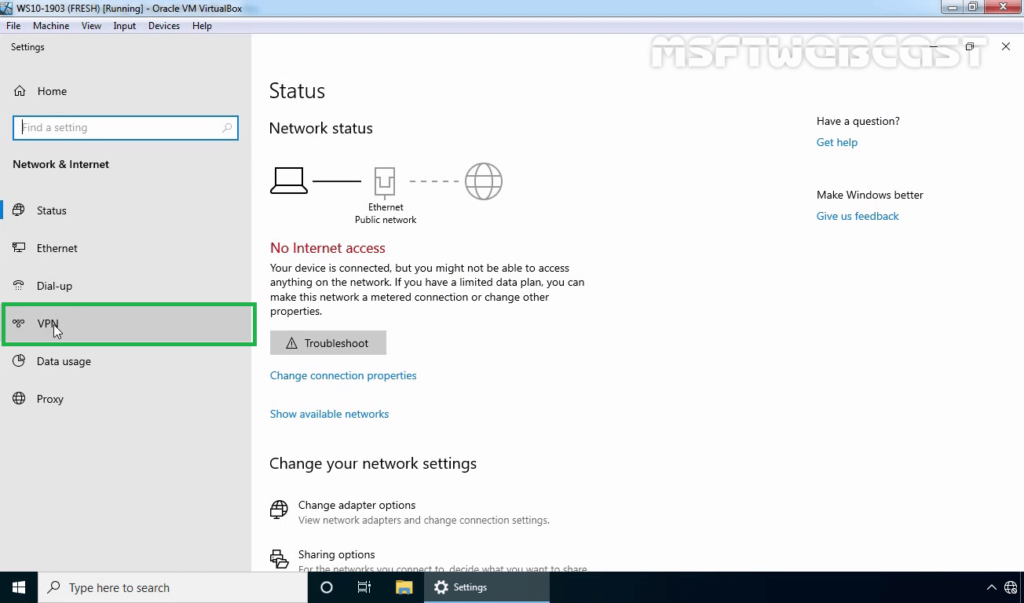
34. On left-pane, click on VPN.
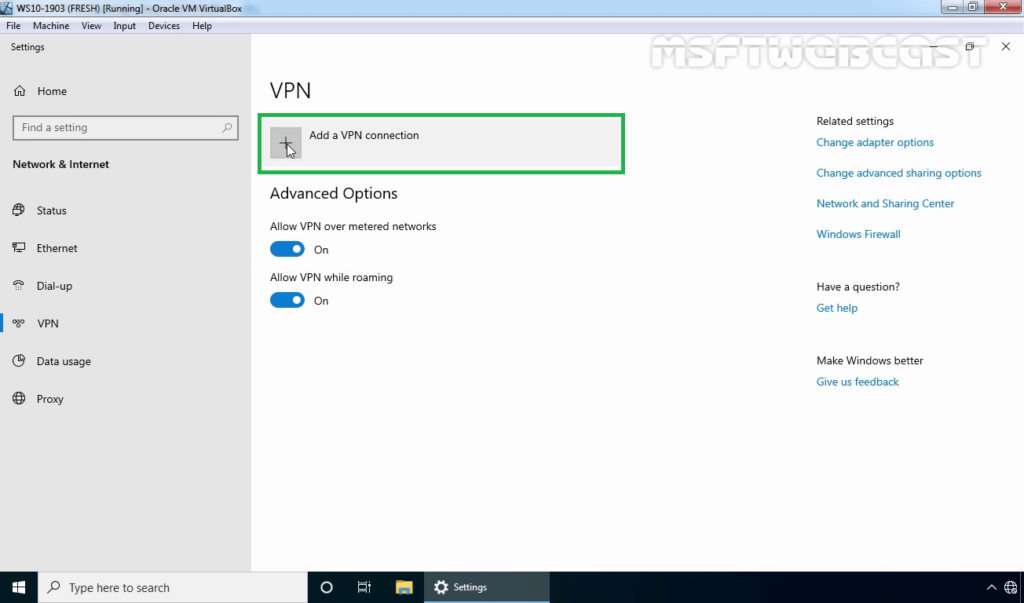
35. Click on add a new VPN connection.
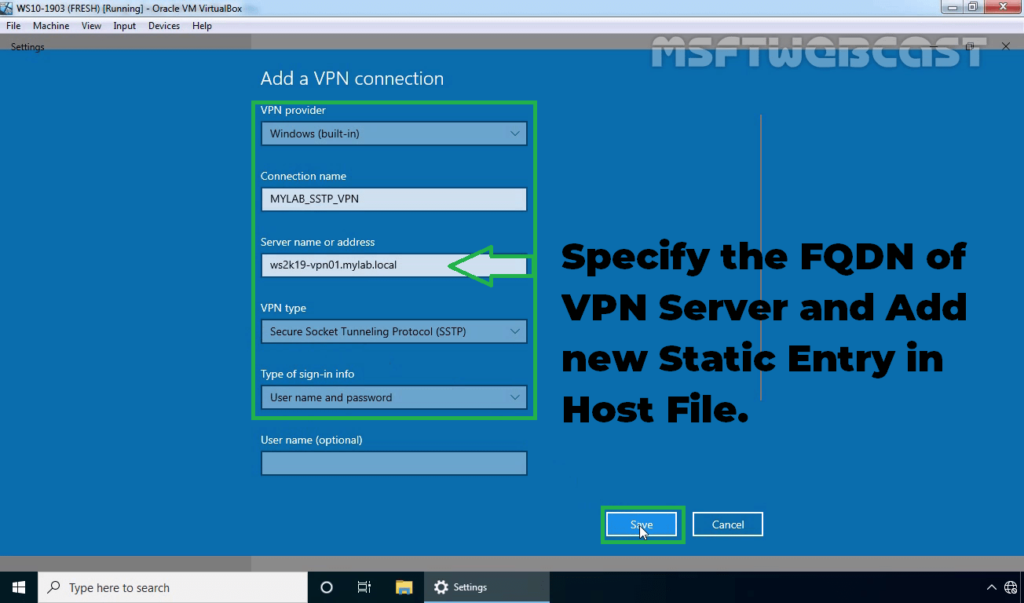
36. Specify the required information for the VPN connection.
- VPN Provider: Windows (Built-in)
- Connection Name: Name of your choice
- Server Name or IP Address: FQDN of VPN server
- VPN Type: SSTP (Secure Socket Tunneling Protocol)
Click on Save.
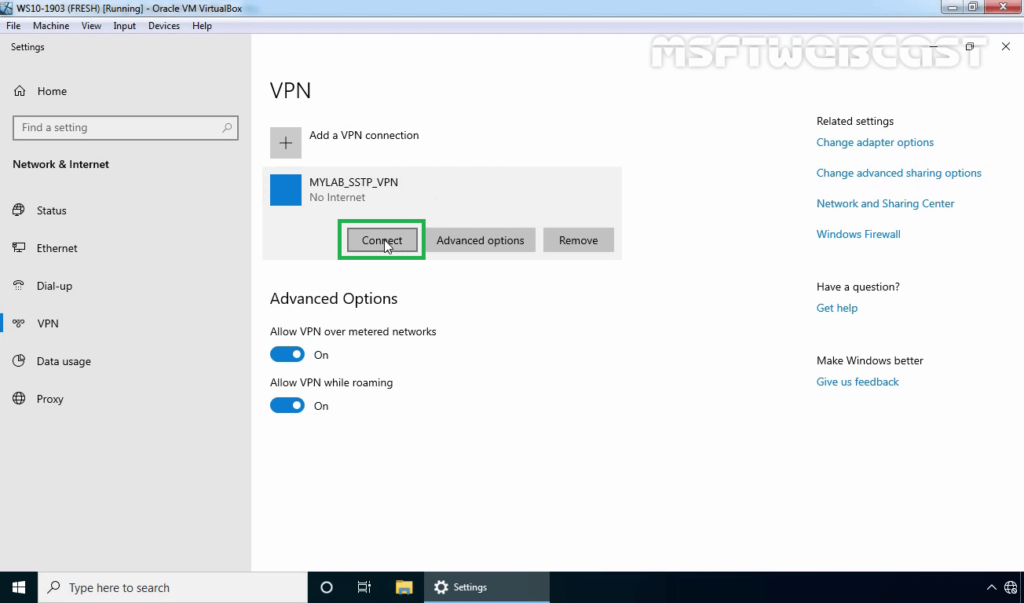
37. Select VPN connection and click on Connect.
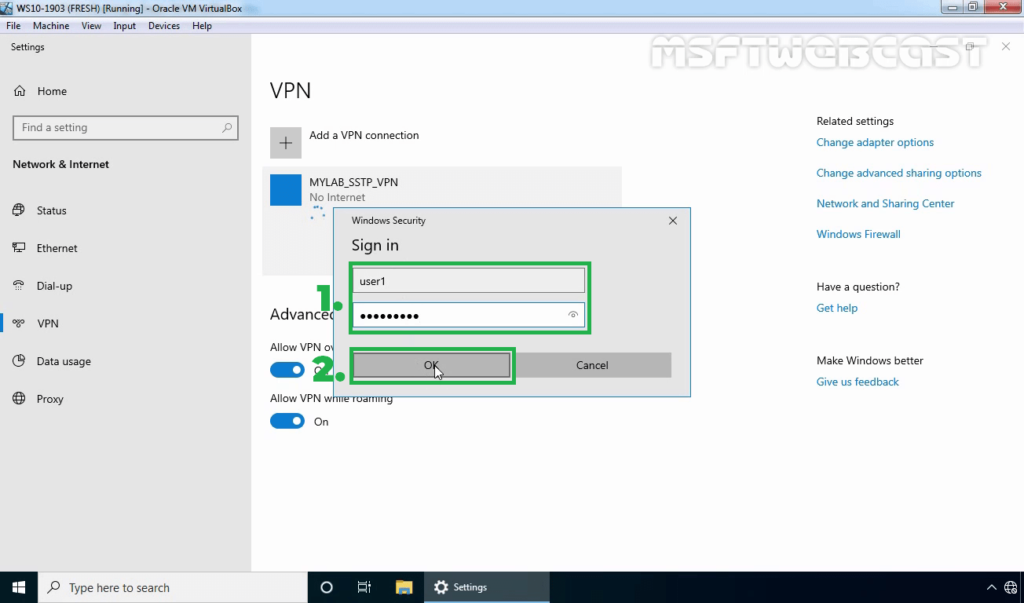
38. Specify a username and password to connect the VPN server. Click OK to connect.
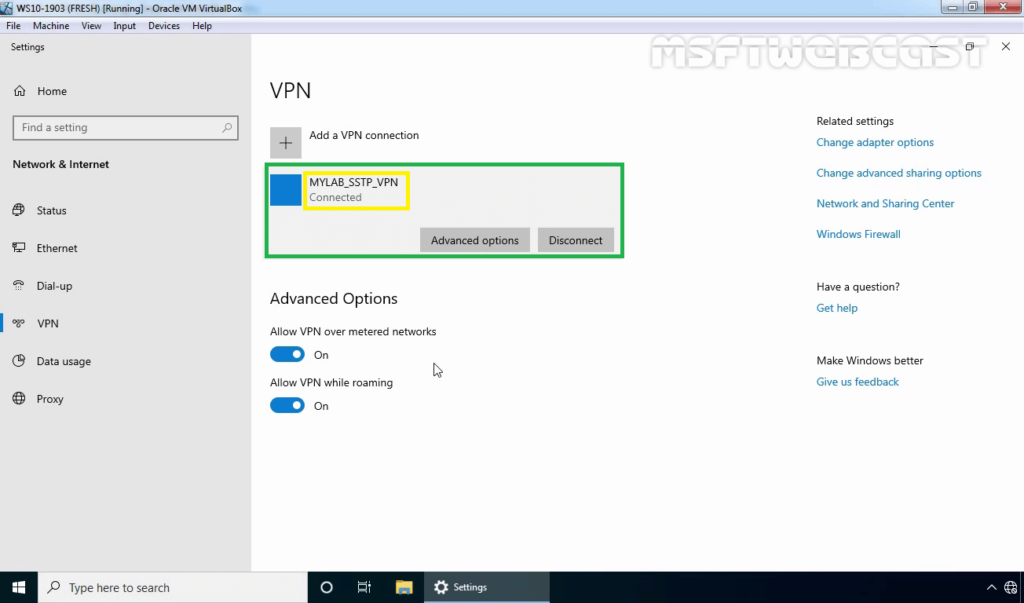
39. Verify the VPN connection is successfully connected with the VPN server using SSTP protocol.
On Windows 10 Client Machine:
40. Press Windows Key and R key together. At Run menu type ncpa.cpl and press enter to open Network Connection console.
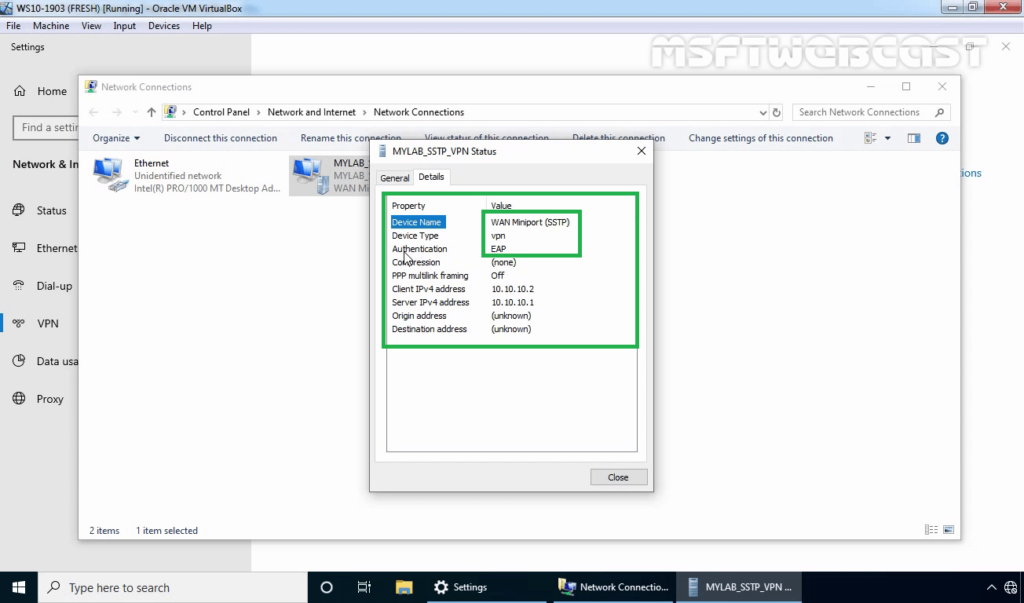
41. Right-click on VPN connection and click on the Status button.
42. Click on details to see information about VPN connection like Authentication Method etc.
In this article, we have seen the steps to Install and Configure SSTP VPN using Self-signed Certificate on Windows Server 2019 and Windows 10.
Thank you for reading.
Related Articles:
- PART-1 How to Install Remote Access Service on Windows Server 2019
- PART-2 How to Install and Configure VPN in Windows Server 2019
- PART-3 Configure Network Policy Server (NPS) for VPN in Windows Server 2019
- PART-4 Configure Port Forwarding and Test VPN Connection on Windows 10
Post Views: 5,697
Home » Windows 2019 SSTP Server with only ONE NIC – Quick Guide
In this short guide we deploy a Windows-based SSTP server for clients. For details about the protocol and the way to deploy a linux-based implementation of the server that has auto-renewing SSL certificates, visit my guide HERE.
Our test VM has only one network card to simulate a low-budget real-life scenario. That means we’ll configure a separate subnet for connected clients and use NAT to give then network access. If the server has multiple NICs, clients can be relayed to use the local DHCP service to get unique IP addresses. Further on that later.
Before You Start
We start with a fresh install of Windows Server 2019, and join it to the alwayshotcafe.com domain.
The server is publicly accessible as vpn.alwayshotcafe.com.
As a side note: if security is a concern, only port 443/tcp needs to be allowed/forwarded to the VPN server for SSTP.
1. Install the RRAS role on the server
We need the RRAS role on the VPN server, also the NPS (Network Policy Services) role to control who is allowed to connect and when to the service.
Via PowerShell:
To install the RRAS role (VPN and Routing services) we use the following PowerShell cmdlet
PS C:\> Install-WindowsFeature RemoteAccess, DirectAccess-VPN, Routing, RSAT-RemoteAccess-PowerShell, RSAT-RemoteAccess-Mgmt, RSAT-NPAS
Alternatively, use the GUI:
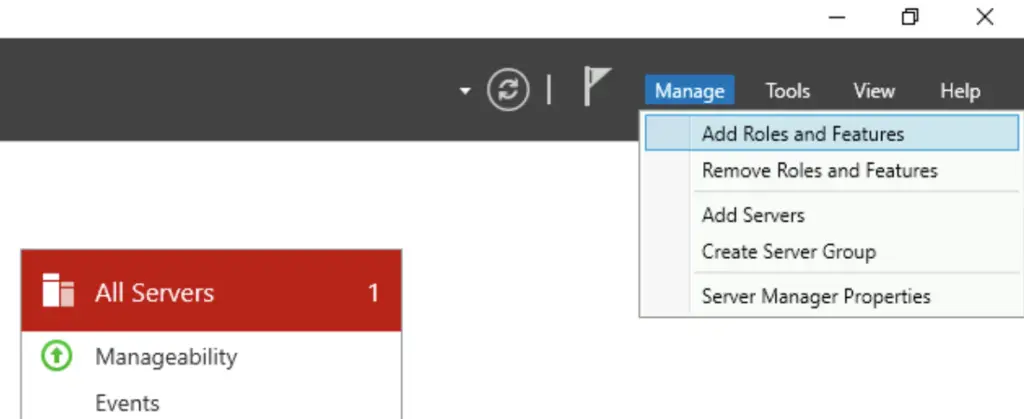
1. If you prefer the GUI, open the Server Manager, and select the «Add Roles and Features» option
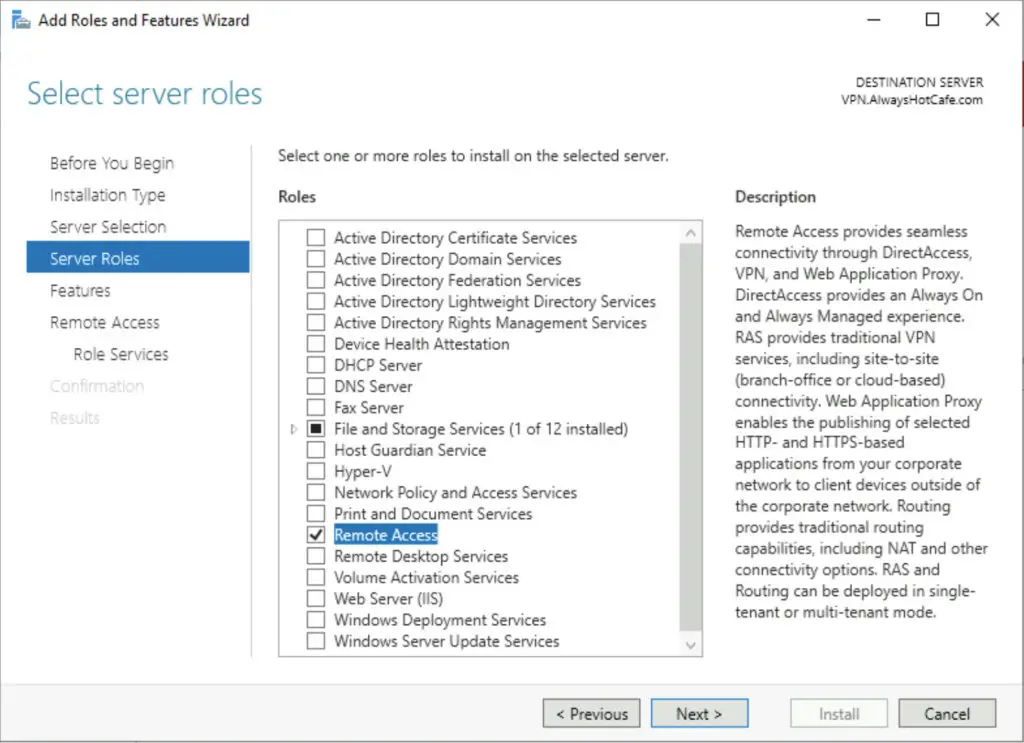
2. Check the «Remote Access» role, hit Next
3. Pass the next two pages
4. Select the RAS role service, also the Routing option that will be handy if NAT-ing is needed (to conserver IP addresses in your current subnet, a separate one is created for VPN clients). It is a necessity on a server with only one NIC.
5. Accepting the defaults on the following pages, finally click on Install

Configure the RRAS service
1. Open the RRAS console by running rrasmgmt.msc, or open it in the Administrative Tools folder.
2. Right-click on the local server name (here VPN), then select the «Configure and Enable Routing and Remote Access» option
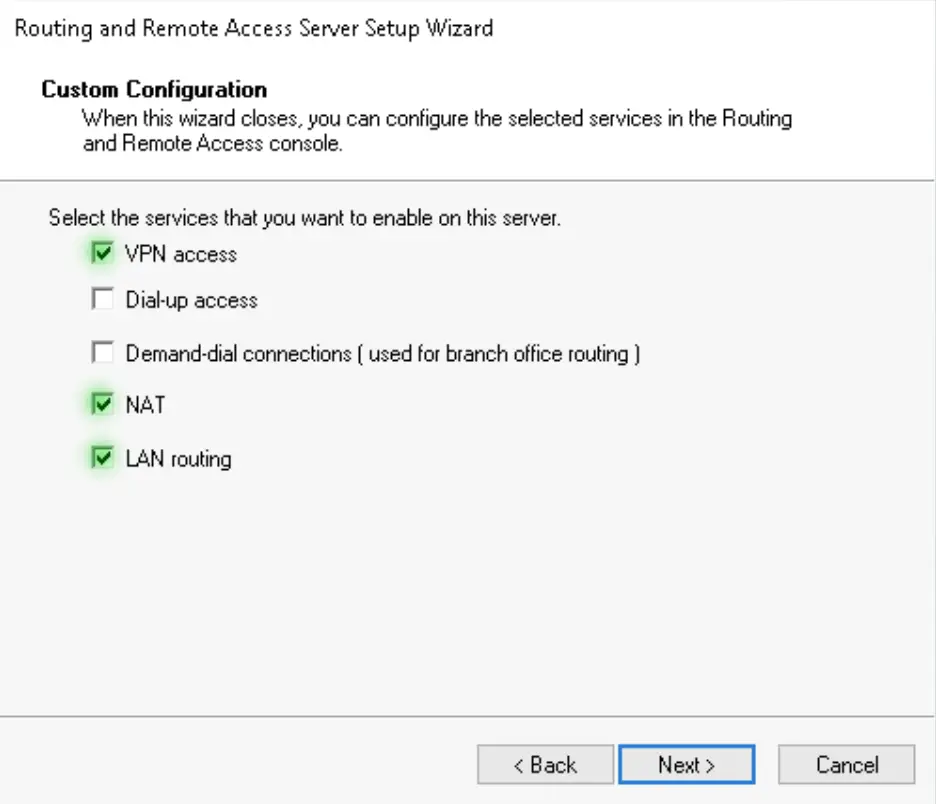
3. Choose the Custom option. If your server has only one NIC, this is the only option you have anyway, all the other will throw you errors as by default Windows RRAS servers are expected to have multiple network interfaces.
Note: it is understandable as RRAS servers should have their public interface in a DMZ subnet and the internal should be used to assign users local IP addresses to follow best practices
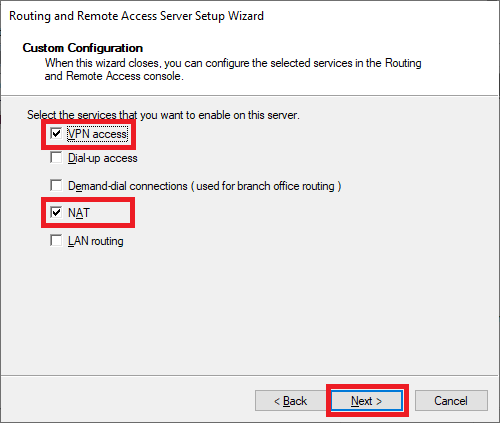
4. We need the VPN access, NAT and LAN routing services to be added to the server
Enable SSTP
To enable SSTP we need a valid SSL certificate with the subject (alternative) name which matches the FQDN of the VPN server. The client will use this FQDN to make the VPN connection. Here it is vpn.alwayshotcafe.com, and we use our wildcard certificate that covers our requirements. For a guide on how to generate an SSL certificate for Windows, click here.
1. Right-click on the server name (VPN) in the RRAS console. Switch to the Security tab and select the correct certificate from the drop-down list.

2. Then restart the service
Set up NAT for connected clients
Clients can now connect, but they are not able to communicate with any other devices yet. The 10.255.255.0/24 is a new subnet the rest of the network isn’t aware of. We use NAT to effectively masquerade client requests as if they were originating from the VPN server itself, that the rest of our network know.
It’s great for flexibility, as we can expand the client IP pool as large as we want. The downside is this way it’s trickier if we want to initiate connections to a client from our network and not the other way around.
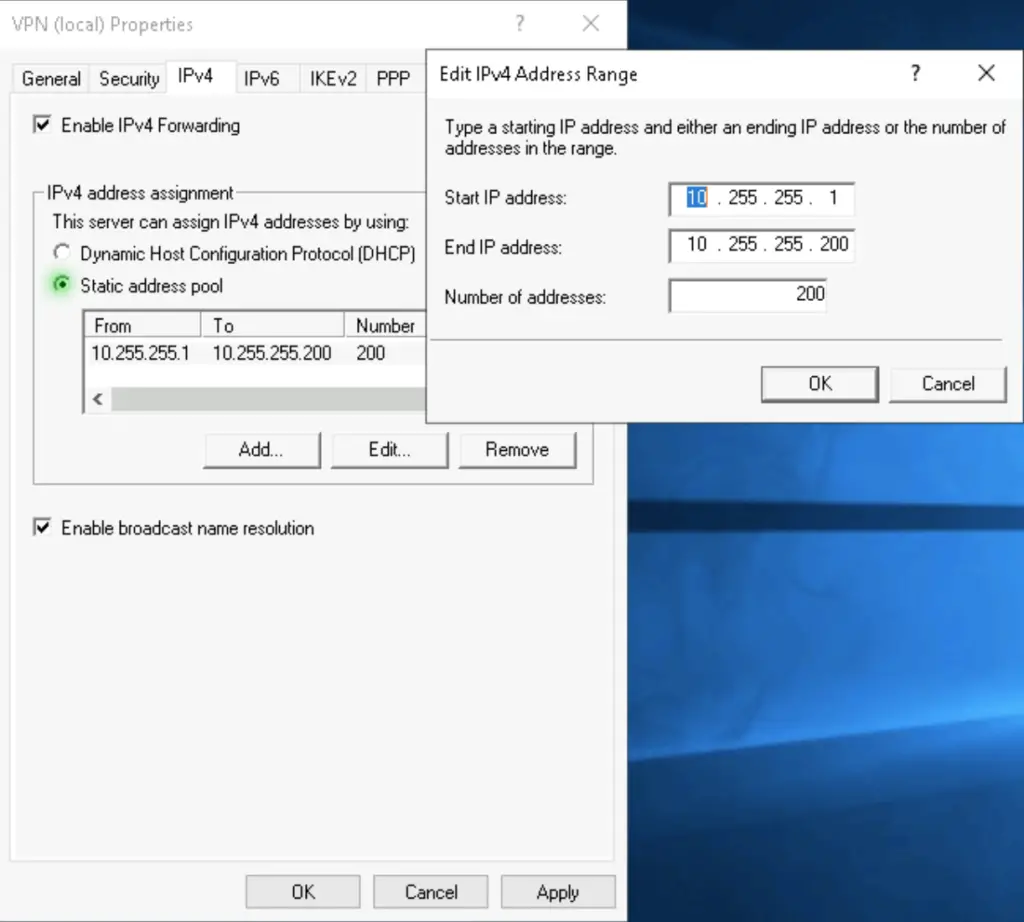
1. Open the Properties of our VPN server again. Under the IPv4 settings create a static address pool for connecting clients. In our example, the pool spans from 10.255.255.1 to 10.255.255.200, making it available for 200 clients to connect to the server at the same time.
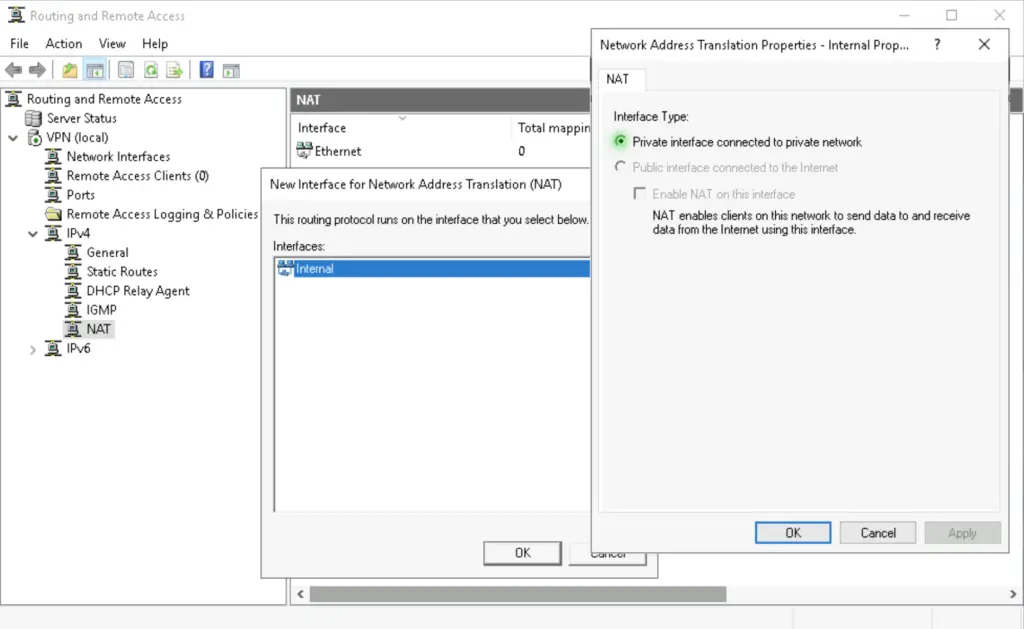
2. Highlight the NAT option in the left-side menu, and create two new interfaces as follows
3. Add «Ethernet» as the public interface and enable NAT on it. This interface will be the our local outside interface.

4. Add the «Internal» interface as a private interface. This means it becomes our local inside interface.
Set the Network Policies
Network policies are controlling who can use the VPN service and when. You can declare if only machines running Windows operating systems are allowed, or if any kind of devices are accepted. You can lock down the service so only a member of a certain security group will be able to authenticate to the server. You can even specify a certain time period when the service is accepting incoming VPN connections.
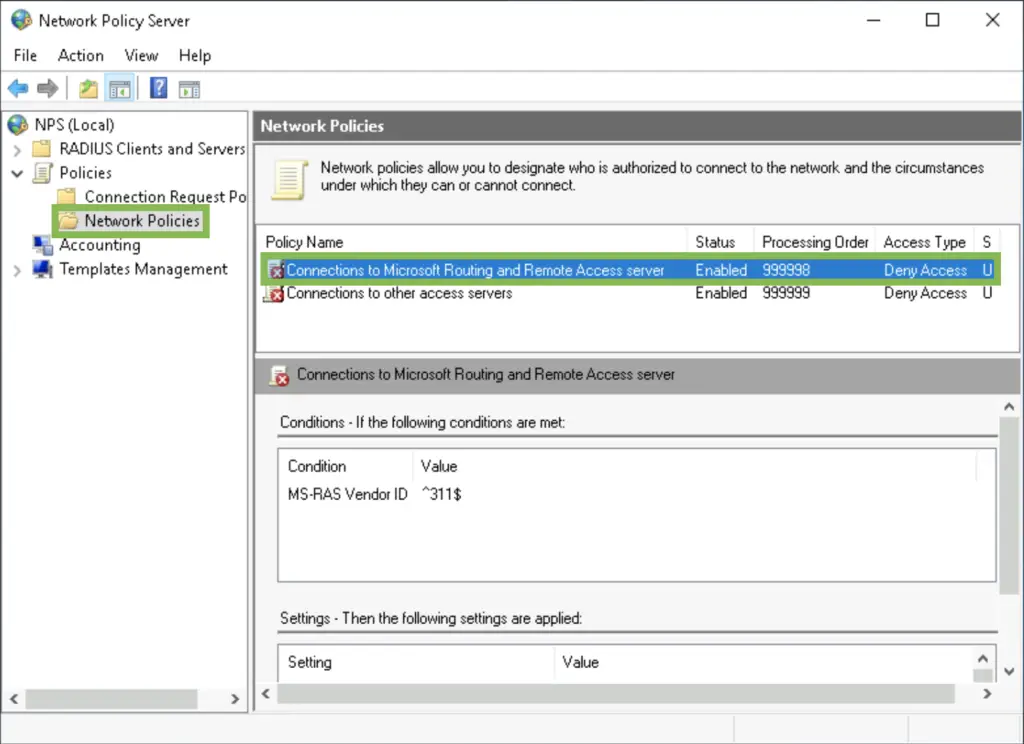
1. Open the Network Policy Server console in the Admin Tools, or use the nps.msc command.

2. Under Network Policies double-click on the «Connections to Microsoft Routing and Remote Access server«
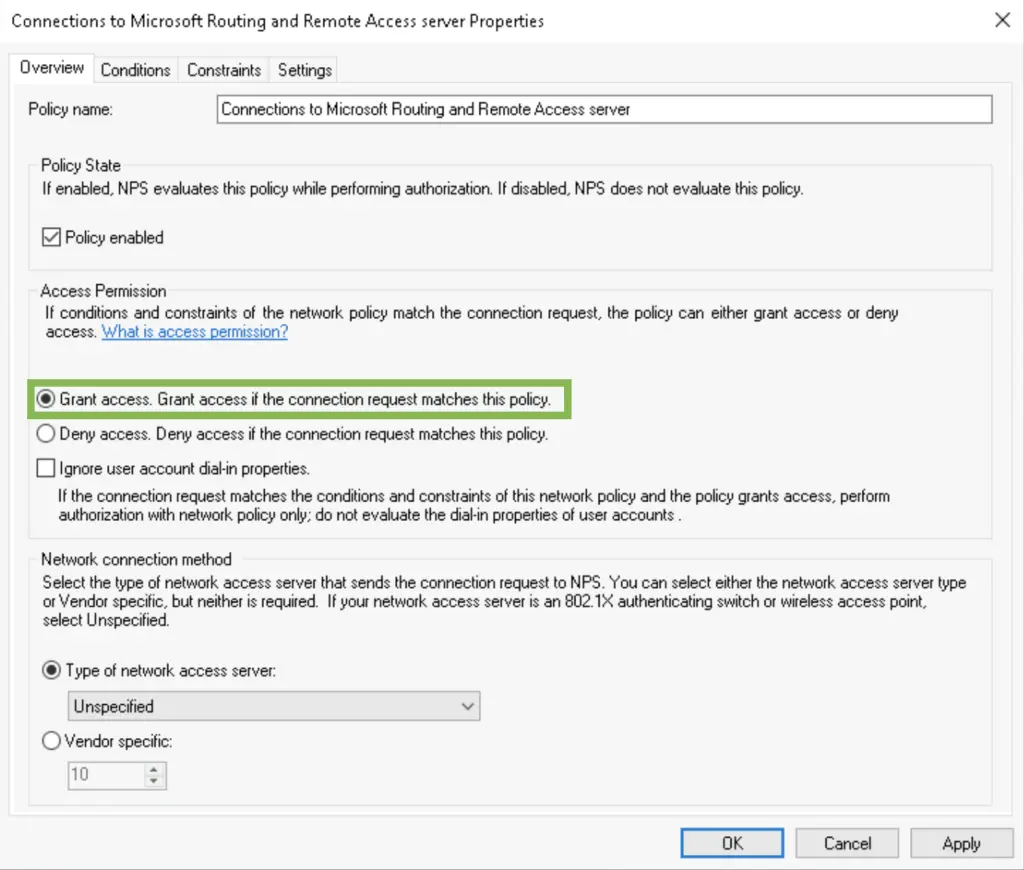
3. Select «Grant access» to specify this policy is for allowing users to connect. In the following tabs you can specify the requirements the client needs to meet in order to be allowed in.
4. We want only the ALWAYSHOTCAFE.COM domain users to be remote access enabled, so we add the «Domain Users» group in the Conditions list. Ideally you can have a separate security group that only contains the remote workers. This is great for tighter security and it makes adding or removing users to a group really easy.
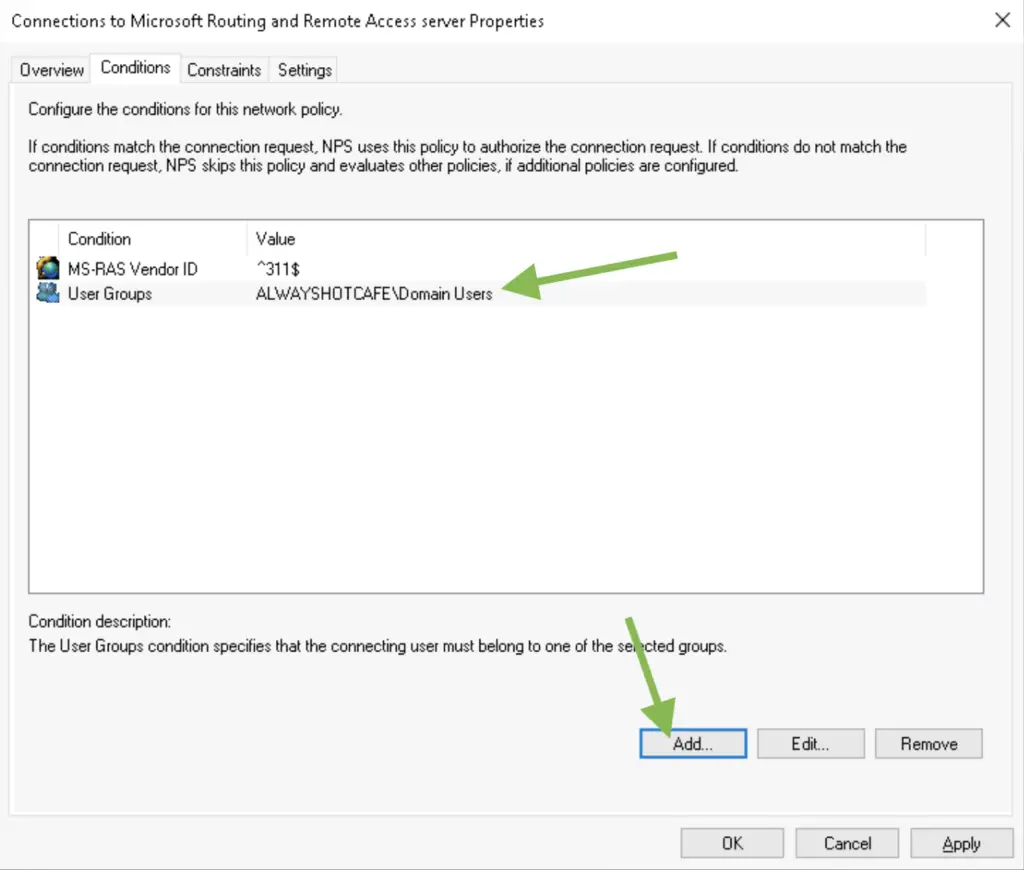
5. We leave the default settings in the Constraints and Settings tab.
Alice is now ready to connect!
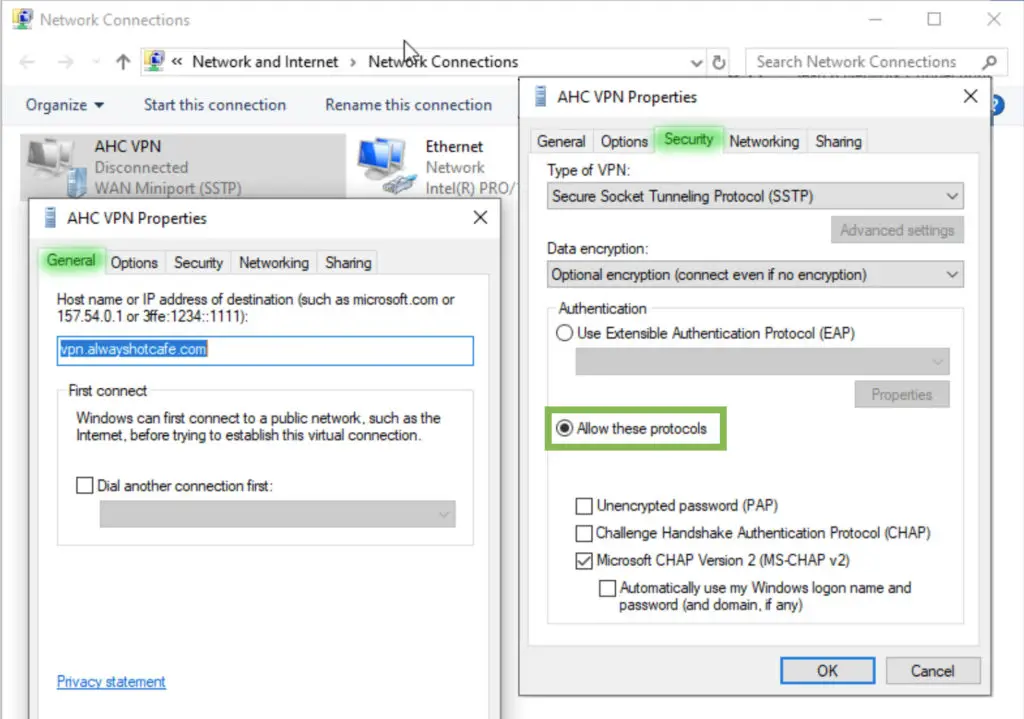
Client Connection Test
To verify that our service is up and running, create the connection for Alice. Use the vpn.alwayshotcafe.com server address, with her SamAccountName (alice) as username. Select the protocol: SSTP.
Make sure to select an authentication method, otherwise the client will throw an error message!

Reader Interactions
A Virtual Private Network (VPN) connection is a private network that connects multiple devices remotely through the Internet. Traffic over the VPN network is sent encrypted. With a VPN connection, you add an extra layer of security to your (company) network. For a more detailed explanation of VPN networks, see our in-depth blog post «What is a VPN connection?».
In this tutorial, we show you how to install a VPN server in Windows Server 2019 and make a VPN connection from another computer, for example, your computer at home.
The steps in this tutorial require an SSL certificate via IIS on your VPN server.
Installing a VPN server
Step 1
Connect to your Windows Server via Remote Desktop or the VPS console.
Step 2
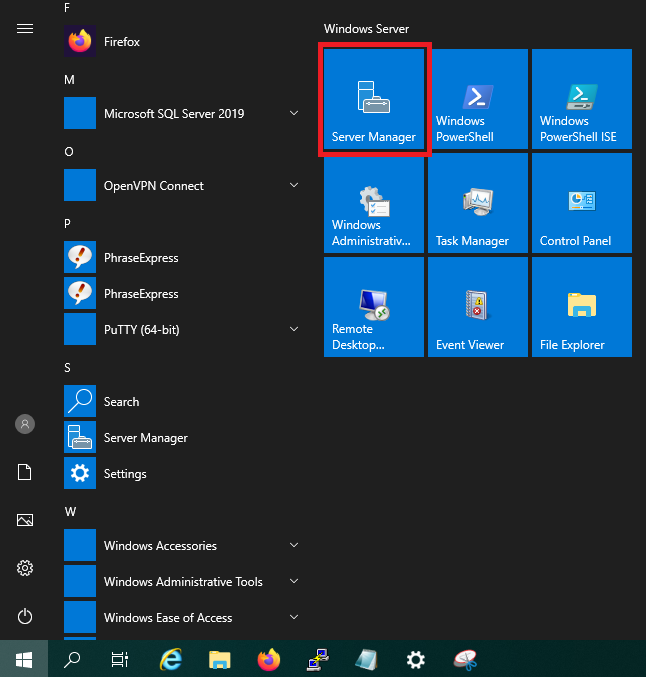
Open the ‘Server Manager‘ via the Windows Start button > Server Manager.
Step 3
Click on ‘Add roles and features‘ in the dashboard of the Server Manager.

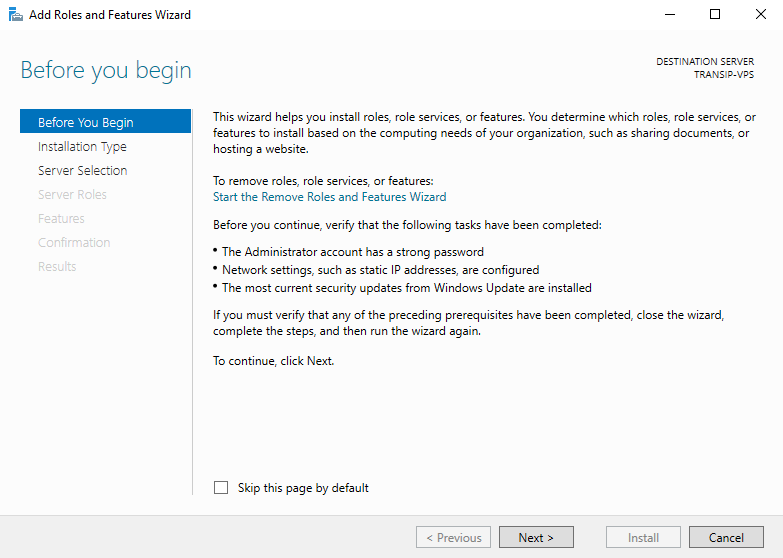
Step 4
You will now see the ‘Before You Begin‘ page. You can select not to see this page again when you add roles & features in the future. Click on ‘Next‘ after you have read the points under ‘before you continue‘.
Step 5
Under ‘Installation Type‘ you can choose between ‘Role-based or feature-based‘ and ‘Remote Desktop Services installation‘. Choose ‘Role-based or feature-based‘ and continue to the next step.
Step 6
Select the desired VPS on which you want to perform the installation. If you use an Active Directory and it contains several VPSs, these are listed in this overview. If you do not use Active Directory, you will see the VPS on which you go through this tutorial.
Step 7
On the next page, you can select a ‘Server Role‘. Select ‘Remote Access‘ (including responsible for VPN) and click on ‘Next‘. You do not have to adjust any other options already checked.
Step 8
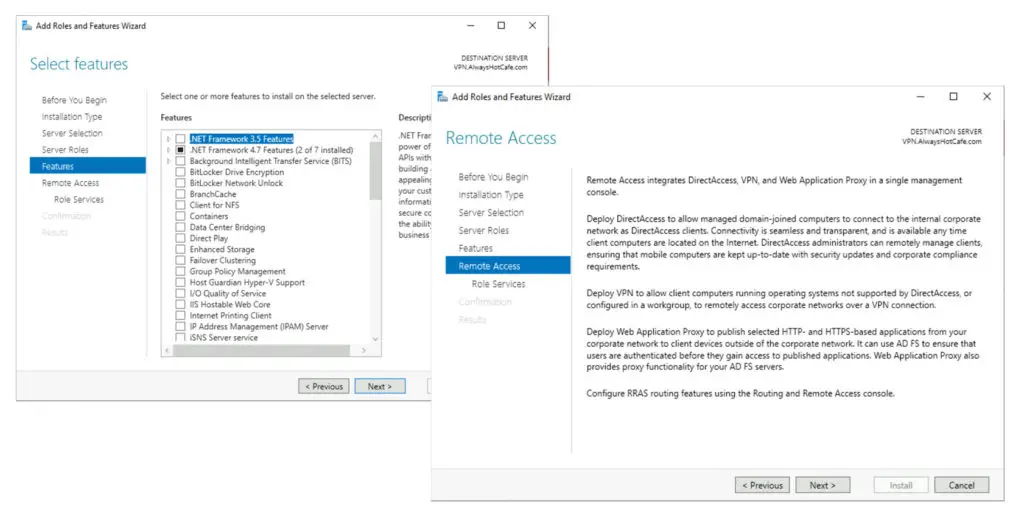
You do not have to select or adjust features. Click immediately on ‘Next‘ to continue.
Step 9
You will see a description of the Remote Access role. Click on ‘Next‘ to continue.
Step 10
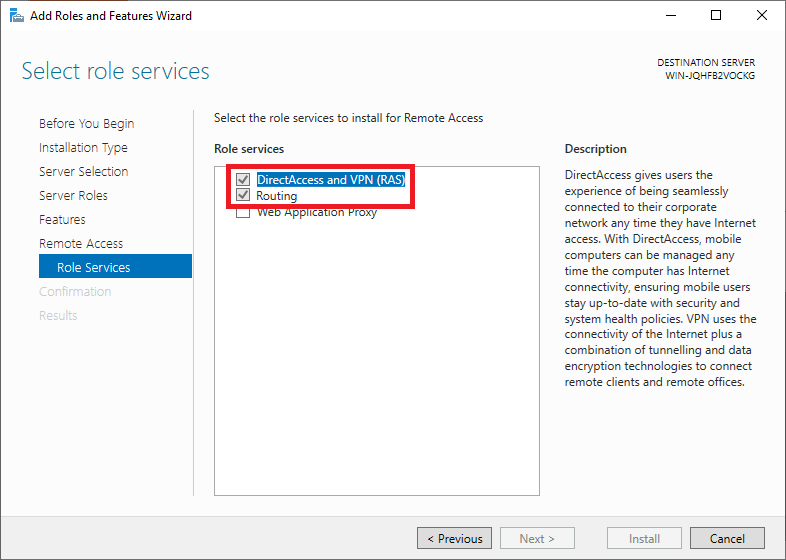
Then select the ‘role services‘ of the Remote Access role you want to use. Click here on ‘DirectAccess and VPN (RAS)‘.

You should probably see a pop-up with an overview of role services and features that need to be added to use the DirectAccess and VPN (RAS). Click on ‘Add Features‘ to have it added automatically.
After this, you return to the ‘Role Services‘ screen and the option ‘DirectAccess and VPN (RAS)‘ is checked. Also, check the ‘Routing’ option and click ‘Next‘ to proceed to the next step.
Step 11
Before the installation starts, you will see a confirmation of the options you selected in the previous steps.
Check ‘Restart the destination server automatically if required‘: it is always important (if an installation requires it) to restart your server to ensure the proper functioning of the role/feature.
Finally, click on ‘Install‘. The installation itself takes a few minutes, so feel free to grab a cup of coffee before proceeding to the next step.

Step 12
Do not close the confirmation screen after installation, but click on ‘Open the Getting Started Wizard‘. It may take a minute to open. If not, click in the Server Manager on ‘Tools‘> ‘Remote Access Management‘.

Step 13
You are greeted by the screen below. Before proceeding with the wizard, it is useful to first open the necessary ports in your firewall; otherwise, you will get an error after going through this wizard.
Do not close the wizard and click the Windows Start button, type ‘firewall‘ and click ‘Windows Defender Firewall with Advanced Security‘ in the search results.
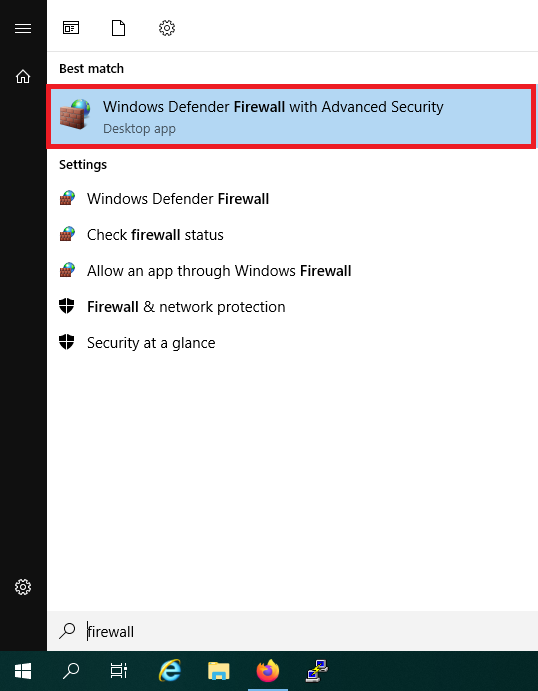
Step 14
Click on ‘Inbound rules‘ and scroll down to the ‘Secure Socket Tunneling Protocol (SSTP-in)‘. This rule is probably already on. If not, right-click on the line and select ‘Enable rule‘.
There are several protocols you can use for a VPN server. For this tutorial, we choose the best of all worlds: a combination of security (256-bit encryption), stability and speed. The SSTP protocol using the HTTPS port 443 is the best fit, see this page for more information.

Step 15
Then close Windows Defender Firewall with Advanced Security and return to the ‘Remote Access Server Setup Wizard‘ and click ‘Next‘.
Step 16
Click on ‘Deploy VPN only‘.
Step 17
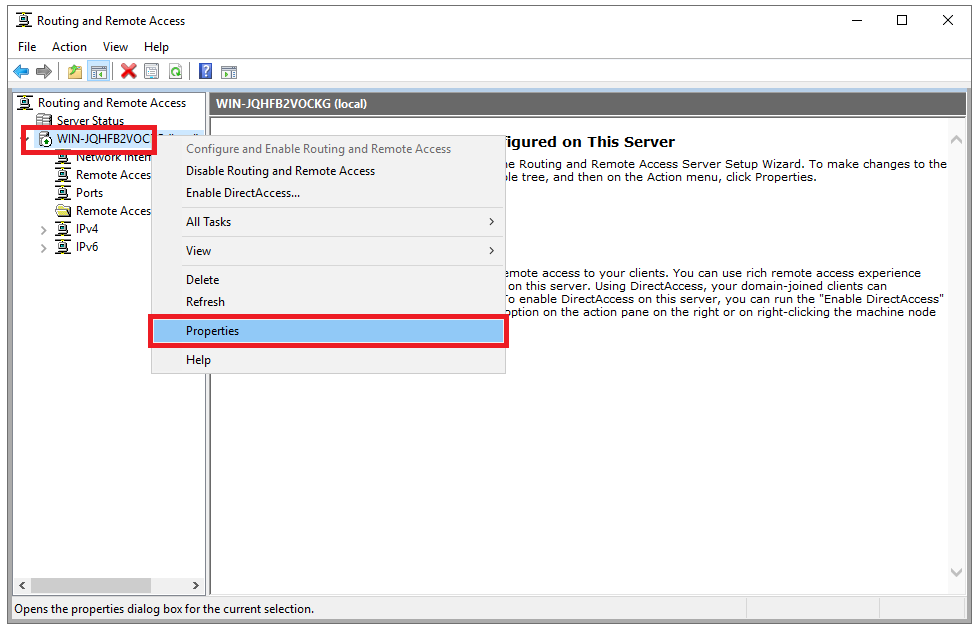
The ‘Routing and Remote Access Management Console‘ now opens. Right-click on the name of your VPS and click on ‘Configure and Enable Routing and Remote Access‘.
Step 18
Click on ‘Custom configuration‘> ‘Next‘ in the Configuration screen. This gives you the option to specifically configure a VPN server instead of installing services that you don’t need.

Step 19
Select ‘VPN Access‘ and ‘NAT‘ and click ‘Next‘.
Step 20
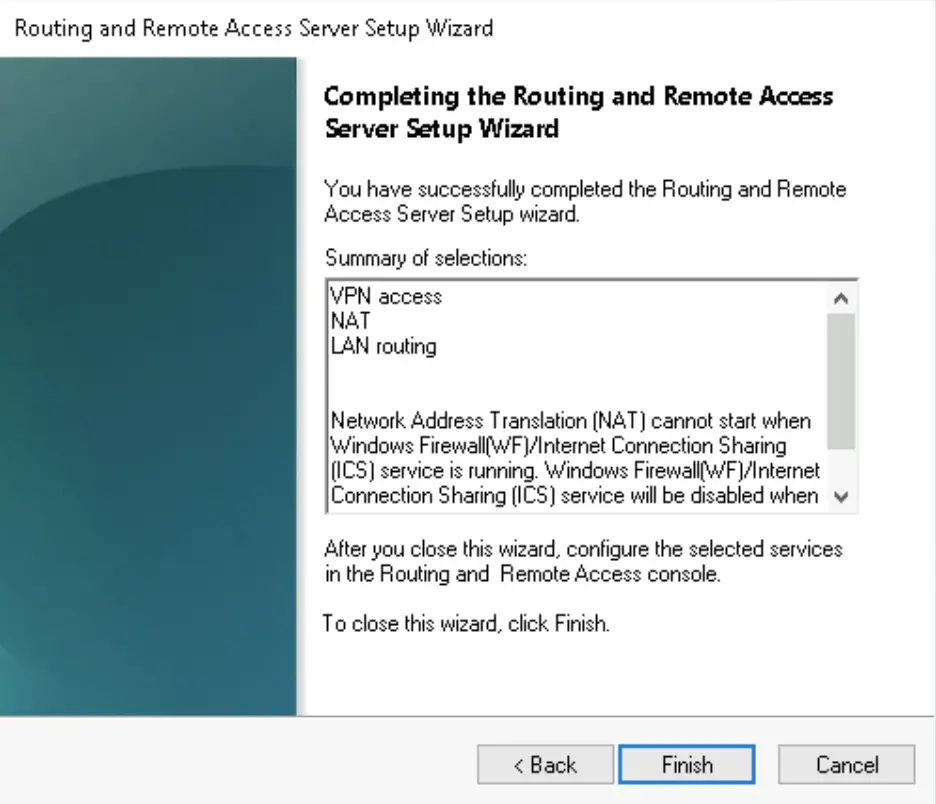
That brings you to the end of the configuration wizard. Click on ‘Finish‘ to complete the configuration.
Finally, you will be given the option to start your VPN server. Click here on ‘Start service‘.
Step 21
You are now back in the ‘Routing and Remote Access Management Console‘, see step 17. Right-click on your VPN server and then ‘Properties‘.
Step 22
Check both ‘IPv4 Router’ and ‘IPv6 Router‘ with both the option ‘LAN and demand-dial routing‘ and the options ‘IPv4 Remote access server‘ and ‘IPv6 Remote access server‘.
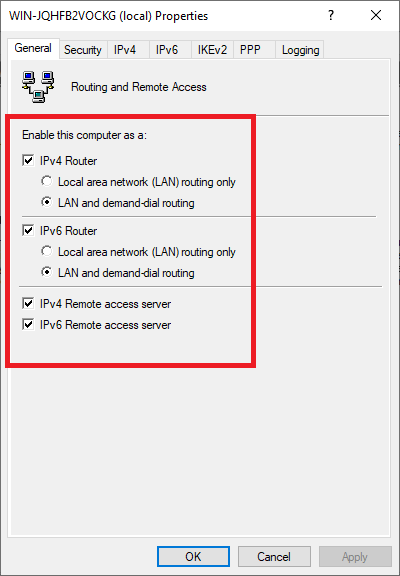
Then, click on the ‘IPv4‘ tab and select ‘Static address pool‘ > ‘Add‘.
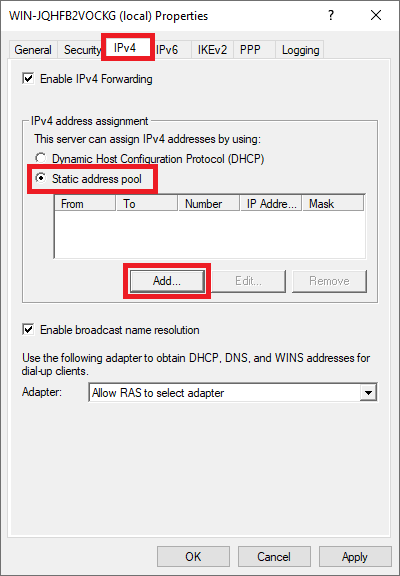
Step 23
Enter the IP range for your VPN network, for example from 10.10.0.0 to 10.10.255.255 and click ‘OK‘ (a smaller range is of course also possible, such as 10.10.10.0 to 10.10.10.255).
Step 24
You will now return to the screen from the previous step. Now click on the ‘IPv6‘ tab and enter an IPv6 prefix assignment, for example, fe80: 7c8: 7c8: f866::
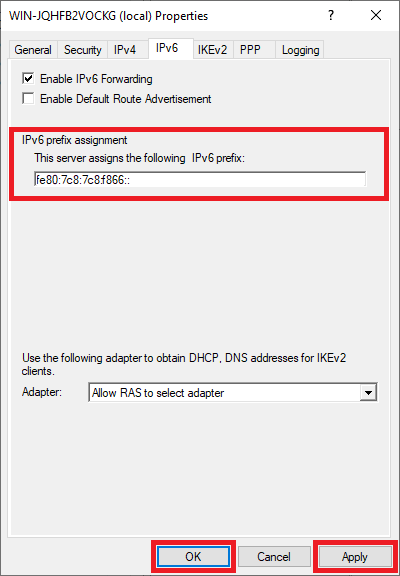
Then click ‘Apply‘ and ‘OK‘ to apply the changes.
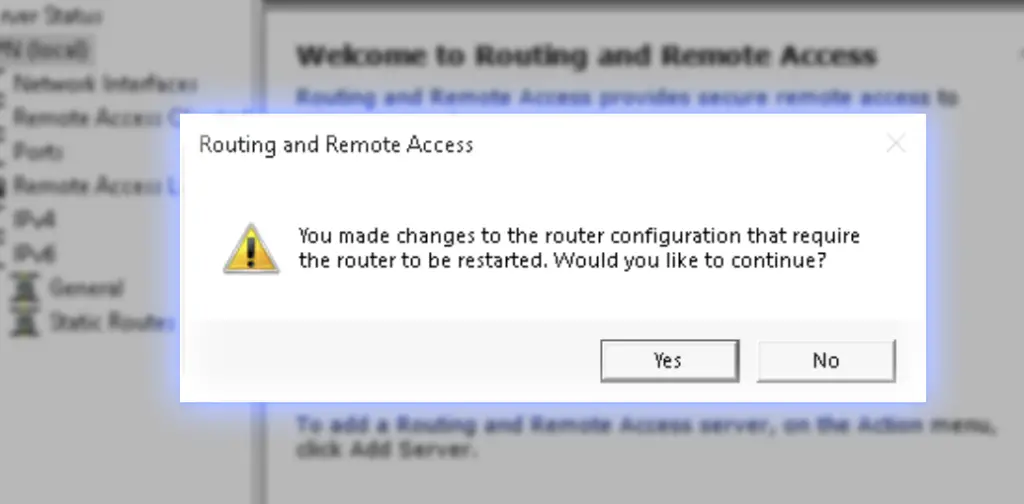
You will probably now receive a message that RRAS (Routing and Remote Access) must restart. Allow this and after restarting proceed to the next step.
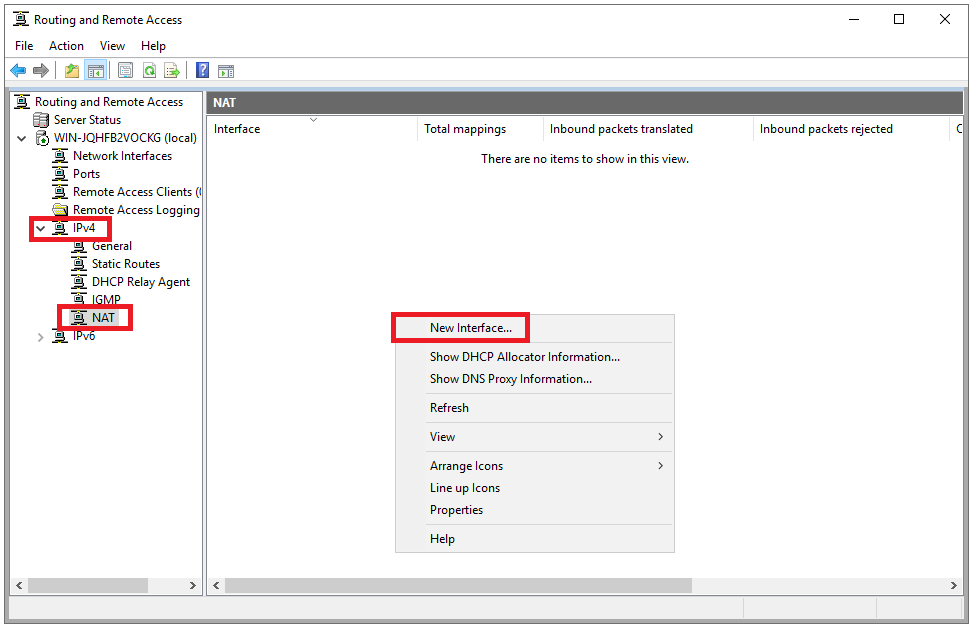
Step 25
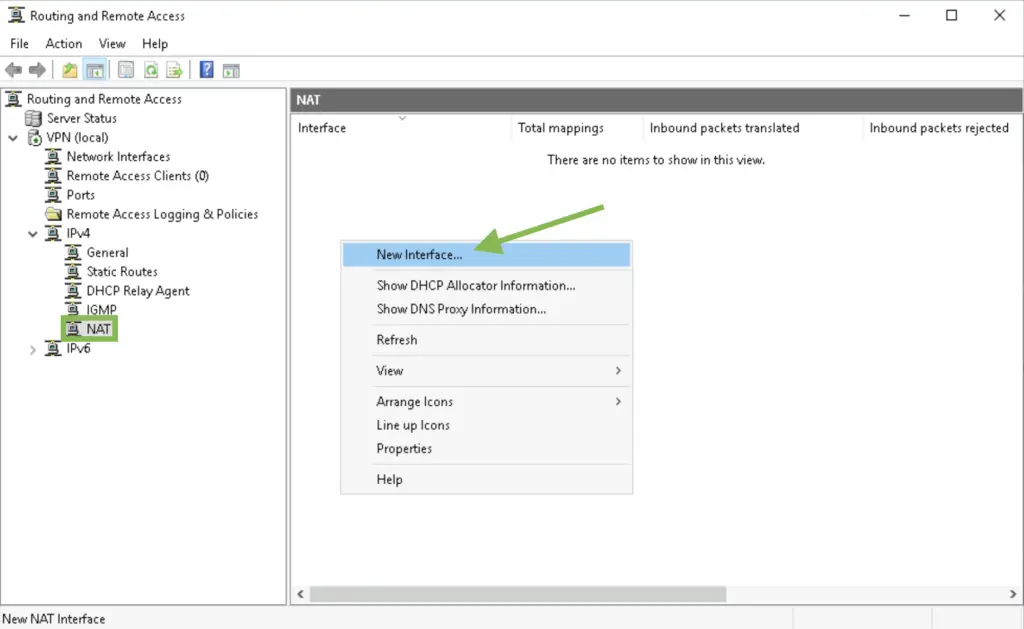
Expand ‘IPv4‘ and select ‘NAT‘. Then right-click on an empty spot on the right side of the screen and select ‘New Interface …‘
Step 26
Select ‘Ethernet‘ as the interface for the routing protocol and click ‘OK‘.
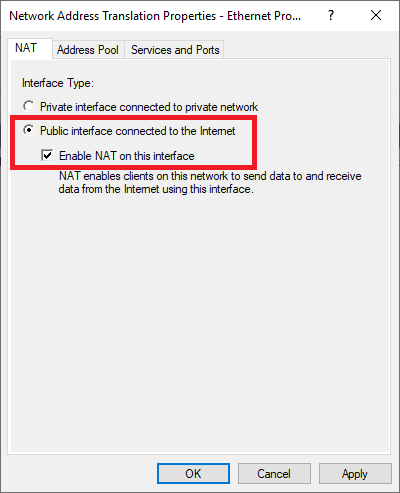
Step 27
Double click on ‘Ethernet‘ and check ‘Enable NAT on this interface‘.
Step 28
Click on the ‘Services and Ports‘ tab and check the options below one by one. When you click on them, a pop-up will appear with information about the service. Adjust the ‘Private Address‘ value to 127.0.0.1 for:
- IP Security (IKE)
- IP Security (IKE NAT traversal)
- Remote Desktop
- Secure Web Server (HTTPS)
- VPN Gateway (L2TP / IPsec — running on this server)
- VPN Gateway (PPTP)
- Web Server (HTTP)
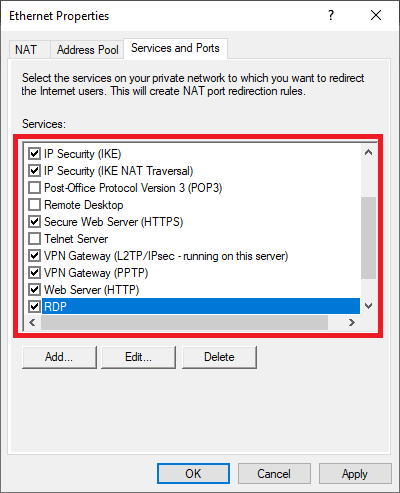
Do you use a custom port for Remote Desktop? Click on ‘Add‘ and add a TCP line for the correct port and also use 127.0.0.1 as a Private address.
Finally, click on ‘Apply‘ and ‘OK‘.
Step 29
You should now be prompted to restart RRAS. If not, right-click on your VPN server > ‘all tasks‘ > ‘restart‘ in the ‘Routing and Remote Access console‘ to process the changes.

Your VPN server is now ready to accept VPN connections. Great! but what next? In the following sections, we explain how to authorize users, connect to your VPN server and what you can use it for.
Step 1
Before a user can connect to your VPN server, that user must be authorized for Remote Access.
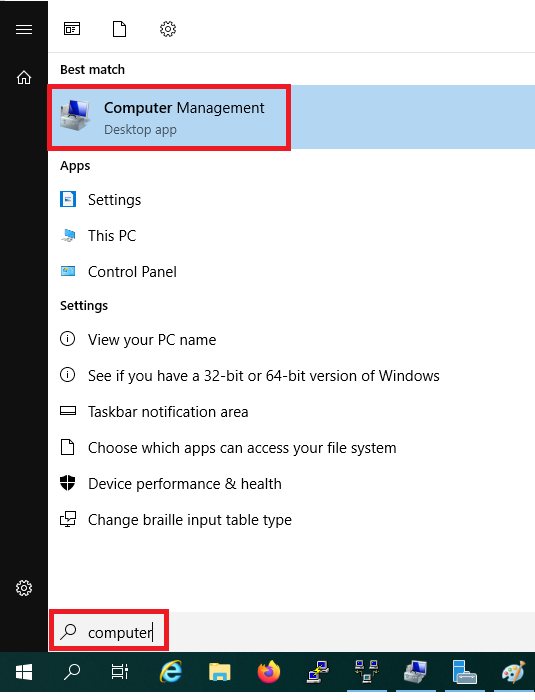
Not using Active Directory? Then click on the Windows start button, search for ‘computer‘ and click on ‘Computer Management‘ in the results.
Do you use an Active Directory? Then click on the Windows start button, search for ‘group‘ and click on ‘Group Policy Management‘ in the results.
Step 2
You are free to create a new user for your VPN connection or use an existing one. Click on ‘Local Users and Groups‘ > ‘Users‘.
-
Existing user: Click on the name of the user
- New user: Right-click on an empty piece and then ‘New User‘. Enter the name of the new user, optionally disable ‘User must change password at next logon‘, and enter a password.
After creating the new user, close the ‘New User‘ screen and double click on the name of the account.
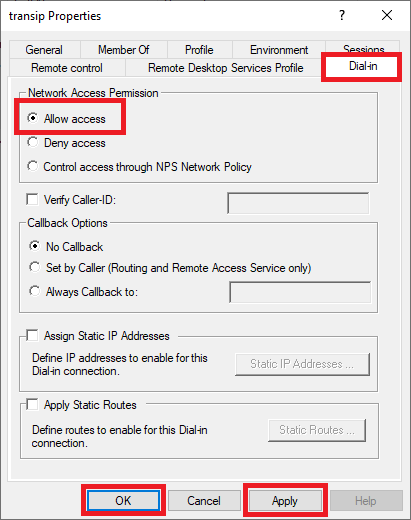
Step 3
Click on the ‘Dial-in‘ tab, under ‘Network Access Permission‘ check the option ‘Allow access‘ and finally click ‘Apply‘ and ‘OK‘ to confirm your changes.
That’s it! You can now connect to your VPN server. We explain how this works in the next section.
Connect to your VPN network
- This tutorial assumes a Windows computer/laptop. For MacOS, you can use this guide from Apple. To connect to your VPN server, enter the IP address of your VPS and as VPN type ‘SSTP‘.
- You go through the steps once per computer. You only need the last step to connect to your VPN server from now on.
Step 1
Now that your VPN server is ready and your user is authorized, it’s time to connect to your VPN server. First, you need to add the VPN connection to your (client) computer/laptop once.
Click the Windows Start button and the Settings icon.
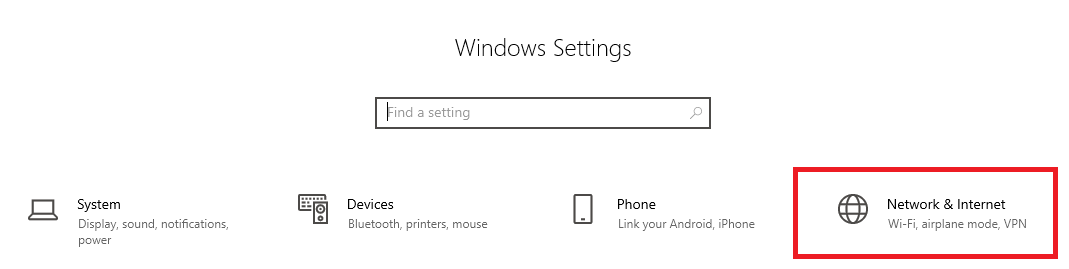
Step 2
Then click on ‘Network & Internet‘.
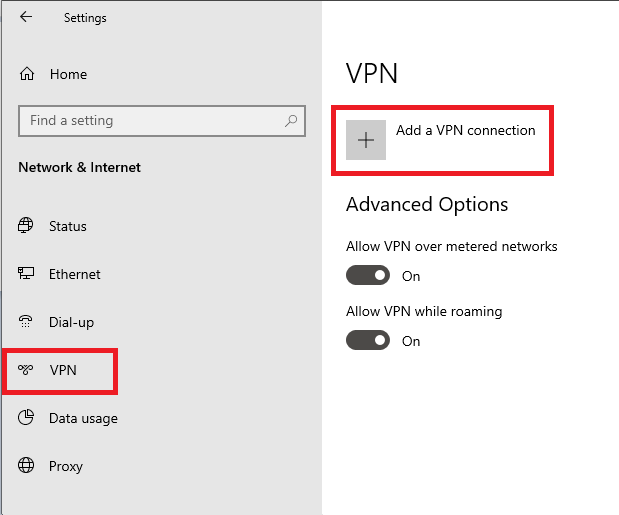
Step 3
Click on ‘VPN‘ on the left and then on ‘Add a VPN connection‘.
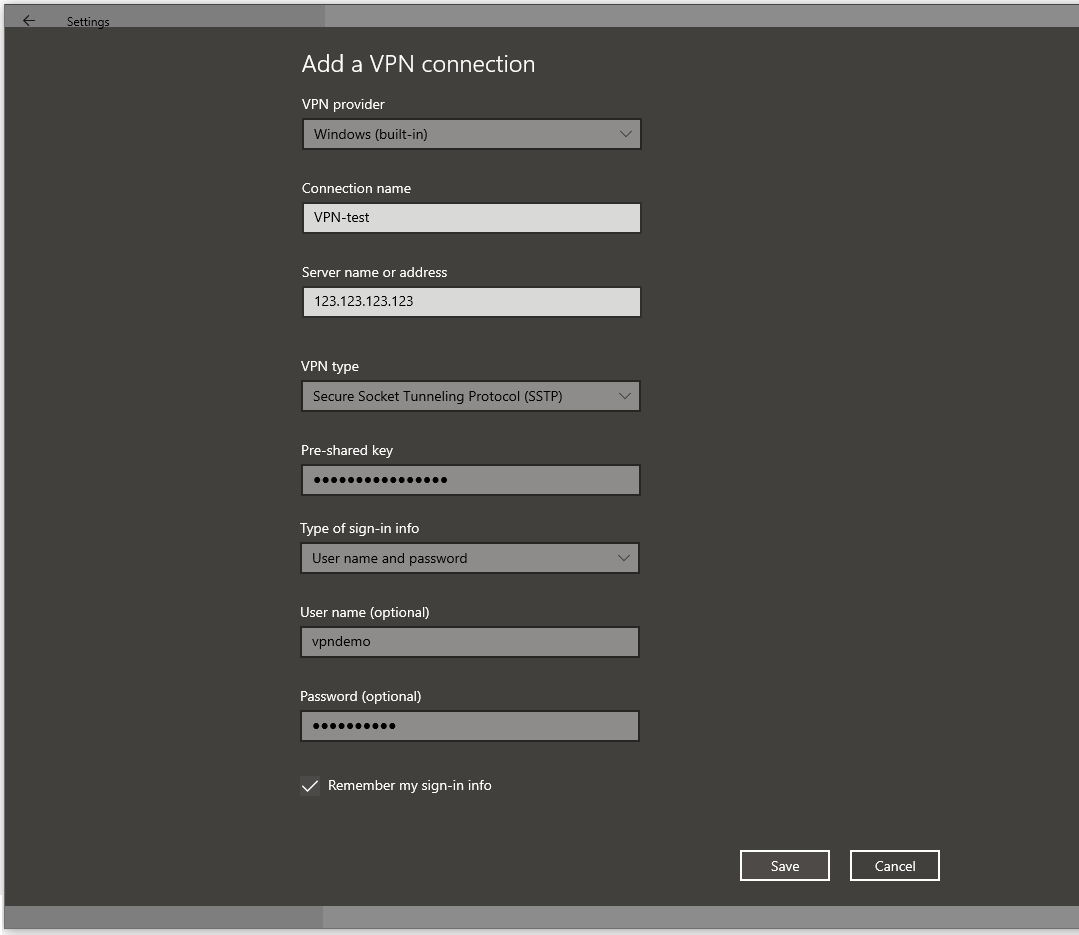
Step 4
Enter the details on the ‘Add a VPN connection‘ screen that appears. Mind the following:
- Select ‘Windows (built-in)‘ as the VPN provider
- As ‘Server name or address‘, use the IPv4 address of your server, or a domain name that refers to your VPS.
- Choose as VPN type: ‘Secure Socket Tunneling Protocol (SSTP)‘.
Step 5
All your internet traffic is standard over the VPN and uses the default gateway of the VPN server. This means that if you navigate on a client computer in a browser, you are using the connection of your VPS.
We assume in this tutorial that for your regular internet traffic you would like to use your own connection. You can achieve this by setting your own connection as the default gateway for your VPN as follows:
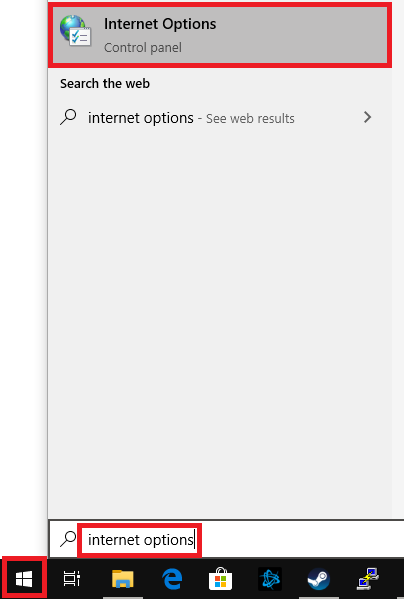
Click on the Windows Start button, type ‘Internet Options‘ and click on the top result.
Step 6
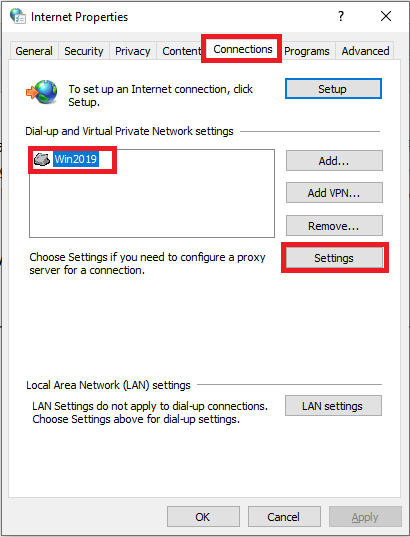
Go to the ‘Connections‘ tab, select your VPN connection and click ‘Settings‘.
Step 7
In the window that appears, click on ‘Properties‘.
Step 8
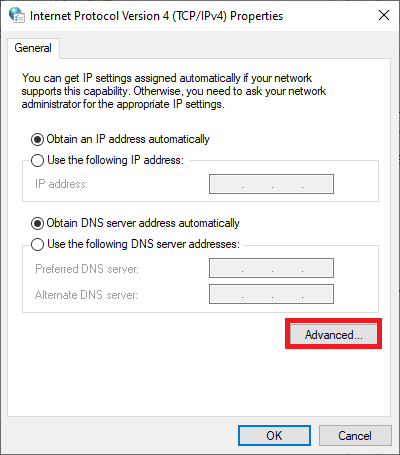
Go to the ‘Networking‘ tab and select ‘Internet Protocol Version 4 (TCP / IPv4)‘ followed by ‘Properties‘.
Step 9
Click on ‘Advanced‘.
Step 10
Uncheck ‘Use default gateway on remote network‘ and click ‘OK‘.
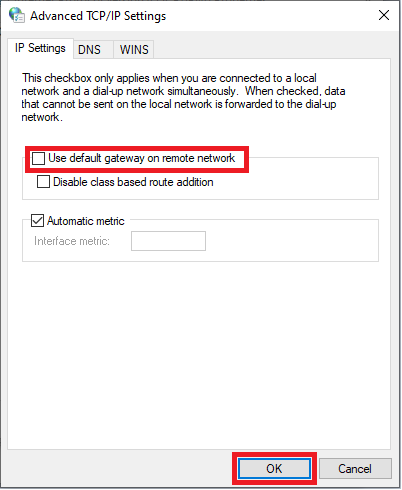
You will now return to the window from step 9. Click on ‘OK‘ there as well and repeat steps 8 to 10, but then for ‘Internet Protocol Version 6 (TCP / IPv6)‘.
Then click ‘OK‘ at each screen where you return until you return to the ‘Internet Properties‘ screen from step 6 and click ‘Apply‘ and ‘OK‘ there.
Step 11
Finally, click on the network icon at the bottom right of your screen and click on the name of your VPN connection, followed by ‘Connect‘. From now on, this is the only step you need to go through to reconnect to your VPN server.
Use Cases
Now that your VPN connection is working, you may be wondering what you can do with it. A VPN connection is powerful in combination with a firewall. You can set a scope for a rule in most firewall software, for example in Windows Defender Firewall with Advanced Security, see for example our tutorial on changing the Remote Desktop port.
By only allowing the range or specific addresses of your VPN connection as Remote IP address in the scope of your firewall rule, you limit access to the associated service to those IP addresses. Some examples of applications are:
- Restrict access to the Remote Desktop port to the IP range of your VPN network (10.10.0.0/24 for example).
- Restrict access to a website that you host on a server in your VPN network. This is useful, for example, for an internal administration system that can be reached via a web interface/website. You achieve this by limiting access to ports 80 and 443 on the server hosting your website to the IP range of your VPN network.
- Restrict access to an SMB server by restricting access to port 445 on the SMB server to the IP range of your VPN network.
That brings us to the end of this tutorial for setting up a VPN server in Windows Server 2019.
If you have any questions regarding this article, please do not hesitate to contact our support department. You can reach them via the button ‘Contact us‘ at the bottom of this page.
Skip to content

“In this comprehensive tutorial, we delve deep into the process of setting up an SSTP VPN on Server 2019. Whether you’re a seasoned IT professional or just starting out, this guide will provide you with a clear, step-by-step walkthrough to ensure a seamless and secure VPN installation.
🔹 Why SSTP VPN?
SSTP (Secure Socket Tunneling Protocol) offers an advanced security mechanism, ensuring encrypted communication and a safer environment for your data. With Server 2019’s enhanced features, setting up SSTP VPN has never been more straightforward.
If you found this video helpful, please consider liking, sharing, and subscribing for more in-depth tutorials and tech insights. For any questions or feedback, drop a comment below or reach out via our social channels. Happy networking!”
#SSTPVPN
#Server2019
#VPNSetup
#WindowsServer
#NetworkingTutorial
#SecureConnection
#ITGuide
#ServerConfiguration
#TechTutorial
#NetworkSecurity
source
windows server
Alice AUSTIN
Alice AUSTIN is studying Cisco Systems Engineering. He has passion with both hardware and software and writes articles and reviews for many IT websites.