
В Windows 10 и Windows Server 2019 появился встроенный SSH клиент, который вы можете использовать для подключения к *Nix серверам, ESXi хостам и другим устройствам по защищенному протоколу, вместо Putty, MTPuTTY или других сторонних SSH клиентов. Встроенный SSH клиент Windows основан на порте OpenSSH и предустановлен в ОС, начиная с Windows 10 1809.
Содержание:
- Установка клиента OpenSSH в Windows 10
- Как использовать SSH клиенте в Windows 10?
- SCP: копирование файлов из/в Windows через SSH
Установка клиента OpenSSH в Windows 10
Клиент OpenSSH входит в состав Features on Demand Windows 10 (как и RSAT). Клиент SSH установлен по умолчанию в Windows Server 2019 и Windows 10 1809 и более новых билдах.
Проверьте, что SSH клиент установлен:
Get-WindowsCapability -Online | ? Name -like 'OpenSSH.Client*'

В нашем примере клиент OpenSSH установлен (статус: State: Installed).
Если SSH клиент отсутствует (State: Not Present), его можно установить:
- С помощью команды PowerShell:
Add-WindowsCapability -Online -Name OpenSSH.Client* - С помощью DISM:
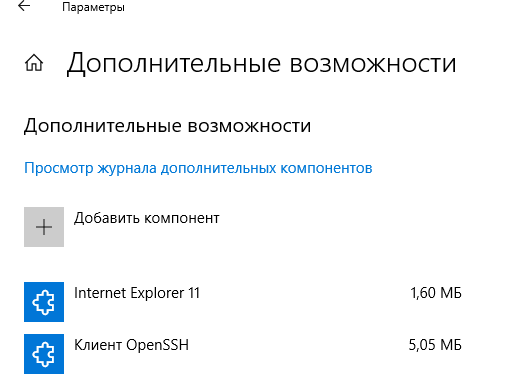
dism /Online /Add-Capability /CapabilityName:OpenSSH.Client~~~~0.0.1.0 - Через Параметры -> Приложения -> Дополнительные возможности -> Добавить компонент. Найдите в списке Клиент OpenSSH и нажмите кнопку Установить.
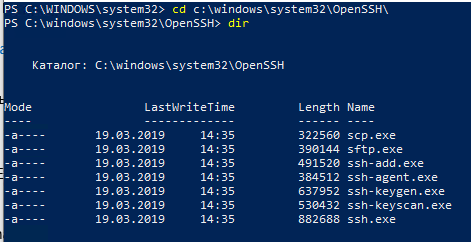
]Бинарные файлы OpenSSH находятся в каталоге c:\windows\system32\OpenSSH\.
- ssh.exe – это исполняемый файл клиента SSH;
- scp.exe – утилита для копирования файлов в SSH сессии;
- ssh-keygen.exe – утилита для генерации ключей аутентификации;
- ssh-agent.exe – используется для управления ключами;
- ssh-add.exe – добавление ключа в базу ssh-агента.
Вы можете установить OpenSSH и в предыдущих версиях Windows – просто скачайте и установите Win32-OpenSSH с GitHub (есть пример в статье “Настройка SSH FTP в Windows”).
Как использовать SSH клиенте в Windows 10?
Чтобы запустить SSH клиент, запустите командную строку
PowerShell
или
cmd.exe
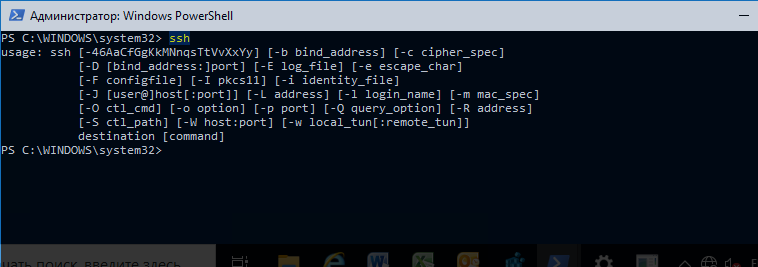
. Выведите доступные параметры и синтаксис утилиты ssh.exe, набрав команду:
ssh
usage: ssh [-46AaCfGgKkMNnqsTtVvXxYy] [-b bind_address] [-c cipher_spec]
[-D [bind_address:]port] [-E log_file] [-e escape_char]
[-F configfile] [-I pkcs11] [-i identity_file]
[-J [user@]host[:port]] [-L address] [-l login_name] [-m mac_spec]
[-O ctl_cmd] [-o option] [-p port] [-Q query_option] [-R address]
[-S ctl_path] [-W host:port] [-w local_tun[:remote_tun]]
destination [command]
Для подключения к удаленному серверу по SSH используется команда:
ssh username@host
Если SSH сервер запущен на нестандартном порту, отличном от TCP/22, можно указать номер порта:
ssh username@host -p port
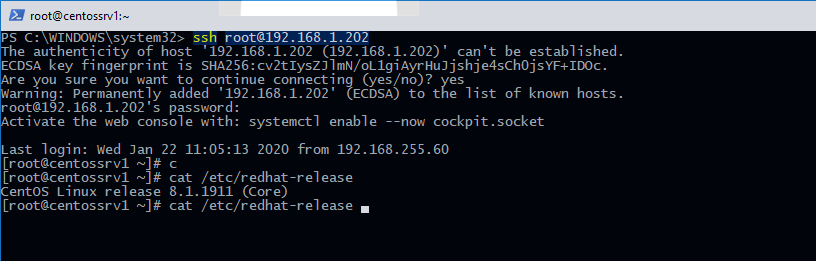
Например, чтобы подключиться к Linux хосту с IP адресом 192.168.1.202 под root, выполните:
ssh [email protected]
При первом подключении появится запрос на добавление ключа хоста в доверенные, наберите yes -> Enter (при этом отпечаток ключа хоста добавляется в файл C:\Users\username\.ssh\known_hosts).
Затем появится запрос пароля указанной учетной записи, укажите пароль root, после чего должна открытся консоль удаленного Linux сервера (в моем примере на удаленном сервере установлен CentOS 8).
С помощью SSH вы можете подключаться не только к *Nix подобным ОС, но и к Windows. В одной из предыдущих статей мы показали, как настроить OpenSSH сервер на Windows 10 и подключиться к нему с другого компьютера Windows с помощью SSH клиента.
Если вы используете SSH аутентификацию по RSA ключам (см. пример с настройкой SSH аутентификации по ключам в Windows), вы можете указать путь к файлу с закрытым ключом в клиенте SSH так:
ssh [email protected] -i "C:\Users\username\.ssh\id_rsa"
Также вы можете добавить ваш закрытый ключ в SSH-Agent. Сначала нужно включить службу ssh-agent и настроить ее автозапуск:
set-service ssh-agent StartupType ‘Automatic’
Start-Service ssh-agent
Добавим ваш закрытый ключ в базу ssh-agent:
ssh-add "C:\Users\username\.ssh\id_rsa"
Теперь вы можете подключиться к серверу по SSH без указания пути к RSA ключу, он будет использоваться автоматически. Пароль для подключения не запрашивается (если только вы не защитили ваш RSA ключ отдельным паролем):
ssh [email protected]
Еще несколько полезных аргументов SSH:
-
-C
– сжимать трафик между клиентом и сервером (полезно на медленных и нестабильных подключениях); -
-v
– вывод подробной информации обо всех действия клиента ssh; -
-R
/
-L
– можно использовать для проброса портов через SSH туннель.
SCP: копирование файлов из/в Windows через SSH
С помощью утилиты scp.exe, которая входит в состав пакета клиента SSH, вы можете скопировать файл с вашего компьютера на SSH сервер:
scp.exe "E:\ISO\CentOS-8.1.1911-x86_64.iso" [email protected]:/home

Можно рекурсивно скопировать все содержимое каталога:
scp -r E:\ISO\ [email protected]:/home
И наоборот, вы можете скопировать файл с удаленного сервера на ваш компьютер:
scp.exe [email protected]:/home/CentOS-8.1.1911-x86_64.iso e:\tmp
Если вы настроите аутентификацию по RSA ключам, то при копировании файлов не будет появляться запрос на ввод пароля для подключения к SSH серверу. Это удобно, когда вам нужно настроить автоматическое копирование файлов по расписанию.
Итак, теперь вы можете прямо из Windows 10 подключаться к SSH серверам, копировать файлы с помощью scp без установки сторонних приложений и утилит.
Уровень сложностиПростой
Время на прочтение5 мин
Количество просмотров304K

Программистов, сисадминов, devops’ов, тестировщиков часто объединяет использование некоторых общих технологий. Например, возможность иметь удалённый доступ к серверу пригодилось бы любому из указанной выше анекдотичной компании. Поэтому в этой статье мы рассмотрим основы работы с протоколом SSH на базовом уровня (без генерации ключей, подписей, мам, пап и кредитов). «Продвинутое» использование посмотрим уже отдельно, в следующий раз. Материал подготовил Макс, автор YouTube-канала PyLounge. Поехали!
Введение
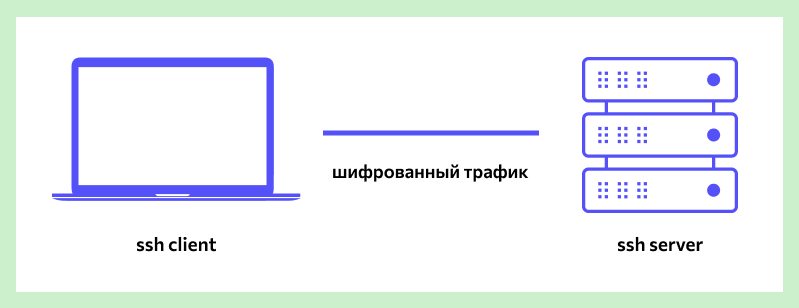
SSH (Secure SHell — защищенная оболочка) — сетевой протокол прикладного уровня, предназначенный для безопасного удаленного доступа к различным системам (Linux, Windows, Mac).
Данный протокол шифрует всю передаваемую информацию по сети. По умолчанию, используется 22-й порт. В основном он нужен для удаленного управления данными пользователя на сервере, запуска служебных команд, работы в консольном режиме с базами данных.
Эта служба была создана в качестве замены не зашифрованному Telnet и использует криптографические техники, чтобы обеспечить, что всё сообщение между сервером и пользователем было зашифровано.
Чтобы установить SSH-соединение, необходимы два компонента: SSH-сервер и SSH-клиент. Сервер прослушивает определенный порт (по умолчанию это порт 22) и при успешной аутентификации дает доступ пользователю. Все команды, которые используются на SSH-клиенте, отправляются через защищенный канал связи на SSH-сервер, на котором они выполняются и откуда отправляют результат работы обратно клиенту.
SSH-сервер
Устанавливается на управляемой операционной системе и принимает входящие подключения от клиентских машин, проверяя соединение одним из способов:
-
по IP-адресу клиента, что не слишком безопасно из-за риска подмены;
-
по публичному ключу клиента и имени пользователя. Нужно создать приватный (закрытый) и публичный (открытый) ключ. Зашифровав информацию одним ключом, можно расшифровать ее только другим;
-
по паролю клиента, который передается в зашифрованном виде. Это один из наиболее распространенных вариантов. Вводить его нужно при каждом подключении.
Платные и бесплатные SSH-серверы есть для всех распространенных ОС:
-
BSD — OpenSSH;
-
Linux — dropbear, lsh-server, openssh-server;
-
Windows — freeSSHd, copssh, WinSSHD, OpenSSH и т. д.
SSH-клиент
Используется для входа на удаленный сервер и выполнения команд. Через клиент выполняется управление удаленным компьютером.
SSH-клиенты разработаны для всех ОС. Имеют платные и бесплатные версии:
-
Linux/BSD — openssh-client, putty, ssh, Vinagre;
-
Windows — PuTTY, SecureCRT, ShellGuard;
-
Android — connectBot.
Встроенный SSH-клиент Windows, основанный на OpenSSH, предустановлен в ОС, начиная с Windows 10 1809.
Установка OpenSSH на Ubuntu
Установка с помощью менеджера пакетов apt-get:
sudo apt-get install openssh-serverПроверка SELinux
Security Enhanced Linux, или SELinux – это усовершенствованный механизм контроля доступа, встроенный в большинство современных дистрибутивов Linux. Первоначально он был разработан Агентством национальной безопасности США для защиты компьютерных систем от вторжения злоумышленников и взлома. SELinux также может помешать работе с ssh. Поэтому необходимо убедиться, что он отключен, либо отключить его.
Устанавливаем доп. инструменты для работы с сетью и настройками безопасности:
sudo apt-get install policycoreutils
sudo apt-get install net-tools
Проверяем статус SELinux. Состояние должно быть disable.
sestatusПодключение к виртуальной машине с типом подключения NAT
Если виртуальная машина использует тип сетевого подключения NAT, то первоначально необходимо настроить проброс портов. Пробросим порт хоста 2222 (или любой свободный) на гостевой порт виртуальной машины номер 22 (порт ssh по умолчанию).
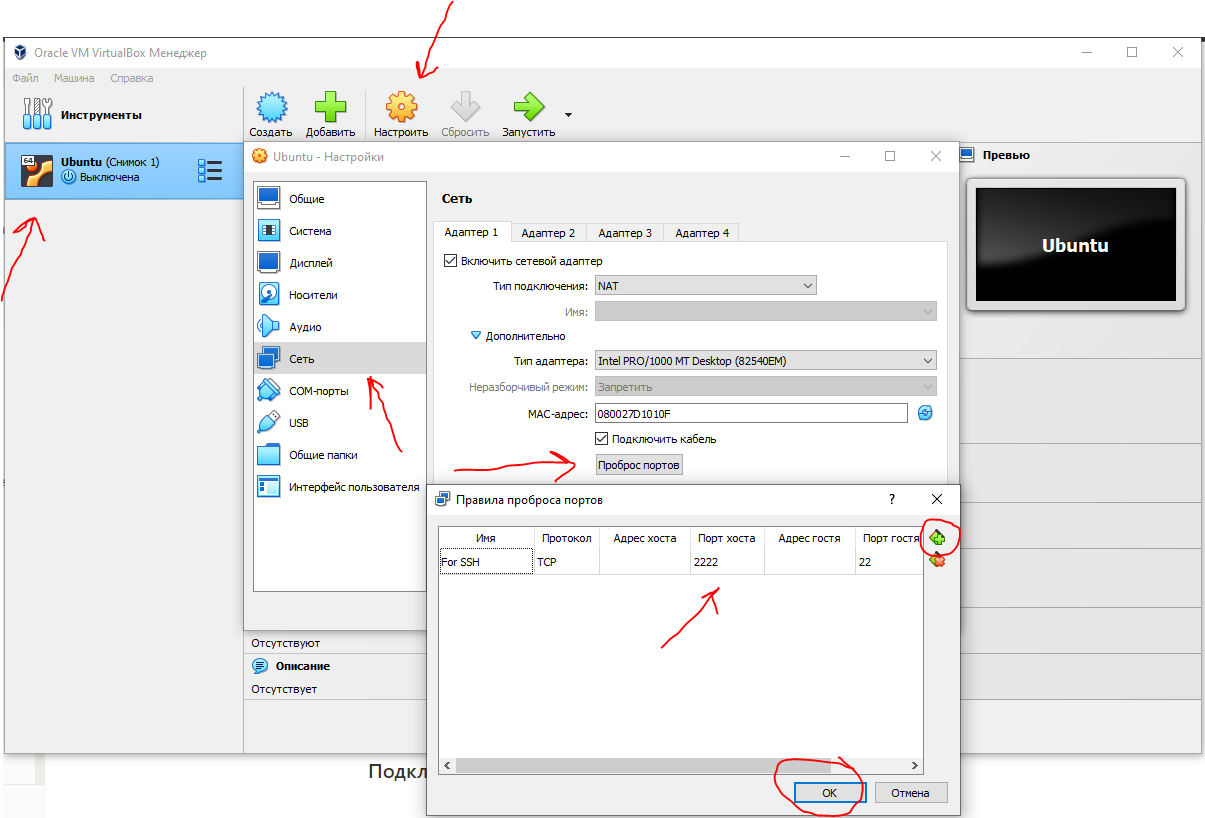
После этого мы можем подключиться из Windows к нашей виртуальной машине.
Подключение по ssh через PuTTY
Т.к. в качестве сетевого подключения у виртуальной машины используется NAT, при подключении мы будем указывать петлевой адрес localhost (127.0.0.1) c портом, на который был назначен проброс.

После этого вводим имя пользователя (пользователь должен существовать в linux!!!) и пароль от этого пользователя.
Подключение по ssh через Командную строку Windows (cmd)
Запускаем командную строку сочетанием клавиш Win + R . В открывшемся окне указываем cmd. Нажимаем OK.
В общем видео подключение по ssh имеет вид:
ssh имя_пользователя@ip_адрес_компьютера_к_которому_подключаемся -p портЕсли для подключения используется стандартный порт ssh — 22, то порт можно не указывать.
В открывшемся окне вводим команду:
ssh student@127.0.0.1 -p 2222Вводим пароль пользователя. Всё. Вы великолепны!
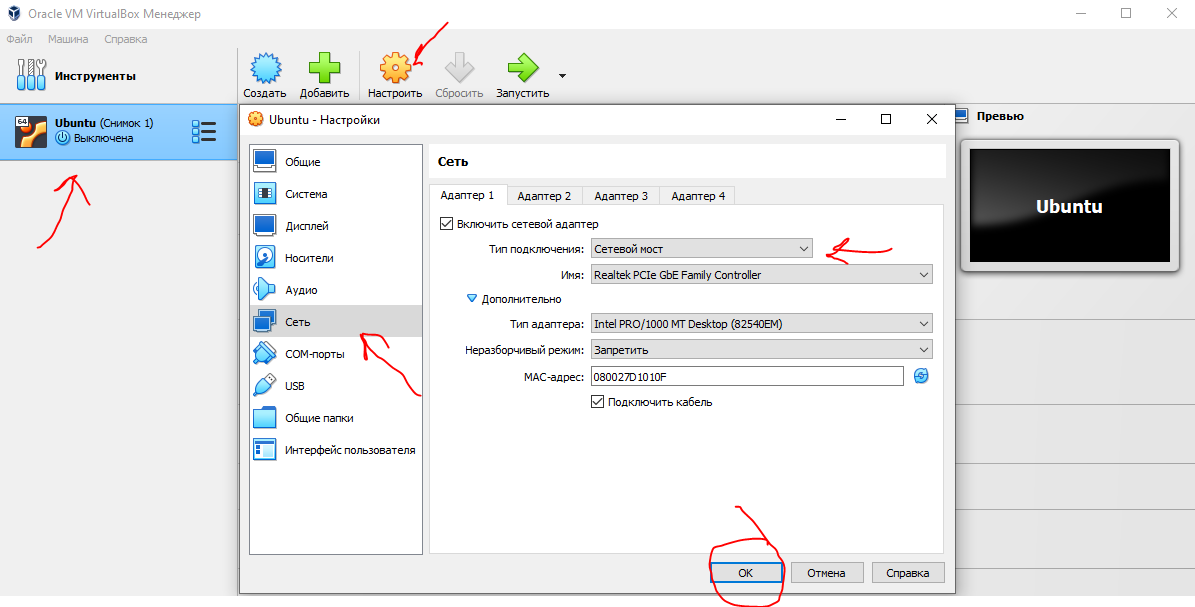
Подключение к виртуальной машине с типом подключение Сетевой мост
С типом подключения Сетевой мост необходимо выдать статический ip для Linux системы. Дальнейшее подключение будет уже по этому, выданному ip, а не через localhost.
Установка статического ip
Начиная с выпуска Ubuntu 17.10 NetPlan теперь это инструмент настройки сети по умолчанию для управления настройками сети, заменяющий файл конфигурации /etc/network/interfaces, который использовался в предыдущих версиях.
Файлы конфигурации для Netplan находятся в каталоге /etc/netplan и написаны на языке YAML. В этом каталоге вы найдете файлы конфигурации YAML.
Откроем конфигурационный файл:
sudo nano /etc/netplan/*.yamlОтредактируем конфигурационный файл:
network:
  version: 2
  renderer: NetworkManager
  ethernets:
      enp0s3:
          dhcp4: false
          addresses: [10.40.0.224/24]
          gateway4: 10.40.0.1
          nameservers:
              addresses: [10.2.0.8, 10.2.0.3]
Здесь:
-
ethernets — указывает на проводное Ethernet подключение;
-
enp0s3 — имя сетевого интерфейса (можно узнать командой ifconfig);
-
dhcp4 — автоматическая выдача ipv4-адреса с помощью службы dhcp (для ipv6 указывать dhcp6);
-
addresses — ip-адрес и маска сети, которые назначаются компьютеру;
-
gateway4 — шлюз по умолчанию;
-
nameservers — список dns-серверов.
Посмотреть настройки можно с хостовой машины на Windows с помощью команды ipconfig /all.
Чтобы применить изменения и перезагрузить сеть, вводим команду:
sudo netplan applyПодключение по ssh
Запускаем командную строку сочетанием клавиш Win + R . В открывшемся окне указываем cmd. Нажимаем OK.
В открывшемся окне вводим команду:
ssh student@10.40.0.224Вводим пароль пользователя. Всё. Вы великолепны (2)!
Заключение
Несмотря на высокую защиту протокола, использование стандартного порта значительно повышает риск взлома сервера. Например, это можно сделать при помощи brute-force (атака полным перебором). Порт 22 — открытый, поэтому злоумышленнику нужно только подобрать логин и пароль к серверу. Это сложно, но возможно. Чтобы максимально ограничить доступ к серверу для злоумышленников (настроить брандмауэр, iptables), можно сменить SSH-порты.
Ресурсы, которые использовал
-
Как включить SSH в Ubuntu 20.04 (Routerus):https://routerus.com/how-to-enable-ssh-on-ubuntu-20-04/
-
Коротко об SSH / Хабр: https://habr.com/ru/sandbox/166705/
-
Что такое SSH (блог REG.RU): https://help.reg.ru/support/hosting/dostupy-i-podklyucheniye-panel-upravleniya-ftp-ssh/chto-takoye-ssh
Provide feedback
Saved searches
Use saved searches to filter your results more quickly
Sign up
Прочитано: 3 747
В виду того факта, что теперь рабочая система на работе – это как правило Windows 10 Pro x64, то нужно как-то выходить из ситуации когда нужно подключаться к оборудованию или системам Ubuntu Bionic по безопасному каналу. Можно это делать, либо скачивать и использовать клиент Putty, либо же обойтись тем что имеет в своем распоряжении сама система Windows 7 Pro amd64
Текущая система:
- Windows 10 Pro x64 Russian
- Version 10.0.17134.112
Запускаю консоль PowerShell с правами локального администратора:
Win + X → Power Shell (Admin)
PS C:\Windows\system32> get-windowscapability -online | ? Name -like 'OpenSSH*'
Доступна клиентская часть SSH для установки если нужно
Name : OpenSSH.Client~~~~0.0.1.0State : Installed
Доступна серверная часть SSH для установки если нужно
Name : OpenSSH.Server~~~~0.0.1.0State : NotPresent
Мне нужен клиент, потому и устанавливаю:
PS C:\Windows\system32> Add-WindowsCapability -online -name OpenSSH.Client~~~~0.0.1.0
Path :Online : TrueRestartNeeded : False
Из вывода видно, что клиент SSH установлен, перезагружать систему не требуется:
PS C:\Windows\system32> ssh
usage: ssh [-46AaCfGgKkMNnqsTtVvXxYy] [-b bind_address] [-c cipher_spec]
[-D [bind_address:]port] [-E log_file] [-e escape_char]
[-F configfile] [-I pkcs11] [-i identity_file]
[-J [user@]host[:port]] [-L address] [-l login_name] [-m mac_spec]
[-O ctl_cmd] [-o option] [-p port] [-Q query_option] [-R address]
[-S ctl_path] [-W host:port] [-w local_tun[:remote_tun]]
destination [command]
Пробую подключиться к Ubuntu 18.04 Server amd64 с Windows 10 используя установленный нативный ssh клиент:
PS C:\Windows\system32> ssh -l ekzorchik 192.168.100.143 -p 22
The authenticity of host '192.168.100.143 (192.168.100.143)' can't be established.
ECDSA key fingerprint is SHA256:BQTN+Vc7LxC1zGeHc9oZRskg1ECaI/bELDUL8L3GJsw.
Are you sure you want to continue connecting (yes/no)? yes
Warning: Permanently added '192.168.100.143' (ECDSA) to the list of known hosts.
ekzorchik@192.168.100.143's password:
Welcome to Ubuntu 18.04.1 LTS (GNU/Linux 4.15.0-29-generic x86_64)
* Documentation: https://help.ubuntu.com
* Management: https://landscape.canonical.com
* Support: https://ubuntu.com/advantage
System information as of Wed Oct 31 11:20:42 MSK 2018
System load: 0.16 Processes: 96
Usage of /: 7.6% of 48.02GB Users logged in: 1
Memory usage: 8% IP address for enp0s3: 192.168.100.143
Swap usage: 0%
28 packages can be updated.
7 updates are security updates.
Last login: Wed Oct 31 11:20:05 2018
ekzorchik@srv-bionic:~$
Работает. Можно и не ставить/скачивать клиент Putty. Правда в Putty больше возможностей чем в средствах операционной системы Windows 10 Pro или я не прав и это только по моему не знанию. Ладно, заметка имеет место быть, как расширение кругозора. На этом я прощаюсь, с уважением автор блога Олло Александр aka ekzorchik.
In this article I’m going to show you can use SSH on Windows machines. We’ll go over the installation of OpenSS, basic SSH configuration, as well as connecting to and from a Windows and Linux machine.
The Secure Shell (SSH) Protocol is a network protocol that allows secure access to interact with remote network resources over port 22. SSH is commonly used for remote login and command-line execution for administrative purposes. Microsoft Windows uses an implementation of OpenSSH to implement the SSH protocol and actively maintains this software project on GitHub under the openssh-portable repository.
Did you know that you can even use SSH to mount a filesystem with SSHFS, create a transparent proxy with SSHuttle, and copy files back and forth between systems using SCP? There are many amazing uses that includes the SSH protocol! If you’re curious about more implementations of the SSH protocol you can learn more here.
Installation
In order to use OpenSSH we need to first install the Microsoft.OpenSSH.Beta package using Microsoft Package Manager (winget). For those unfamiliar with the Windows Package Manager, I wrote a blog post on winget.
Searching For the OpenSSH Package
In order to find the OpenSSH package to install we are going to use the Windows Package Manager through a PowerShell terminal to search for available packages.

winget search openssh
Once we have the name of the package, Microsoft.OpenSSH.Beta we can verify this package by showing package details using winget.
Is OpenSSH Already Installed?
We can check if OpenSSH is installed or not using the winget list command.
winget list Microsoft.OpenSSH.Beta

winget list Microsoft.OpenSSH.Beta
If OpenSSH is already installed we can skip the installation process.
OpenSSH Package Metadata
When searching for applications and packages using Microsoft winget it’s a good idea to show the package metadata before installing, especially if this package is not something you’re familiar with.
winget show Microsoft.OpenSSH.Beta

winget show Microsoft.OpenSSH.Beta
Using the show command allows us to see critical information regarding this package including: publisher, source, release notes, and security fixes. Keeping up with package security is essential!
Installing the OpenSSH Package
Once we’ve found and verified the OpenSSH package we can move on to installing the package using winget. During the installation we can verify the Installer Url is indeed the URL we saw from the previous show command. The Windows Package Manager will also verify the hash for us!

winget install Microsoft.OpenSSH.Beta
Enabling the ssh-agent Service
Once installed we can ensure that the ssh-agent service is enabled and started on our Windows machine using a powershell terminal. It’s important to note that this must be done through an Administrator terminal.
Elevate Terminal
I suggest using gsudo to elevate the current terminal. The tool gsudo is the Windows equivalent of the Linux sudo command. If you don’t have gsudo already installed you can use this guide to setup gsudo.
If gsudo is already installed we can elevate the current terminal window with the following command.
Enable ssh-agent Service
Once the current terminal is elevated with Administrator privileges we can run use the Set-Service command to enable the ssh-agent service to be a persistent service which starts up automatically.
Set-Service ssh-agent -StartupType Automatic
Start ssh-agent Service
Once we have our ssh-agent enabled as a persistent service we can start this service directly with the Start-Service command.
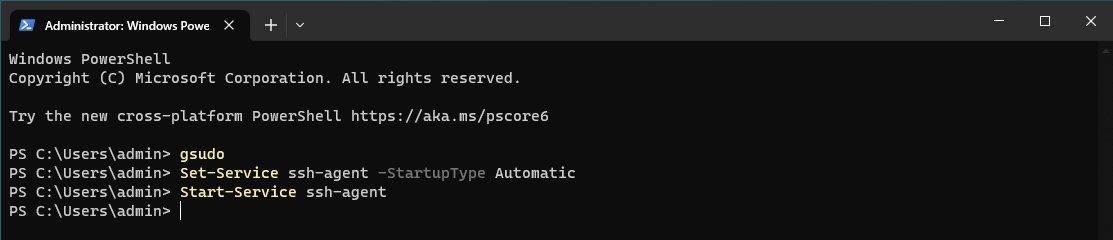
Sequence of commands to enable & start ssh-agent service
Generate SSH Keys
After we have enabled and started the ssh-agent service we can move onto generating an ssh keypair. This can be accomplished using the ssh-keygen command. In our terminal run the following command.
This command will generate a new ssh key-pair for us and will ask us to provide the file to save the key as. Additionally, we will be asked to provide a key password, we can hit enter twice to use a passwordless key.

Generating a new ssh key-pair using the ssh-keygen command
Adding the SSH Key to the Authentication Agent
Once our ssh key-pair has been generated we can move onto adding our private key to the ssh agent using the ssh-add command. This important step adds our key to the authentication agent which we need in order to authenticate with our key-pair.
ssh-add 'C:\Users\admin\.ssh\win_id_rsa'

Connecting to Windows From Linux
After we’ve successfully added our ssh key to the authentication agent with ssh-add we are ready to test ssh authentication using our .pub public key.
In this example I’m going to connect to my Windows machine from my Linux machine. First we need to ensure that the public key we just generated is on the machine we want connect from. Since I’m using virtual machines I’ll simply move my key over using a shared folder from my host.

The Windows public ssh key located on my Linux machine
We also need to know the IP address of our Windows machine, we can find this information out easily with PowerShell with the Get-NetIPAddress command.
Get-NetIPAddress -AddressFamily IPv4 | Format-Table

Get-NetIPAddress command output
Once we have our public key on our Linux machine and the IP address of our Windows machine we are ready ssh to our Windows machine.
To confirm we are on a Linux machine we can use the uname -a command.
Running the uname -a command
To ssh to our Windows machine we can run the following command providing our username, IP address, as well as public key.
ssh admin@172.16.186.151 -i win_id_rsa.pub
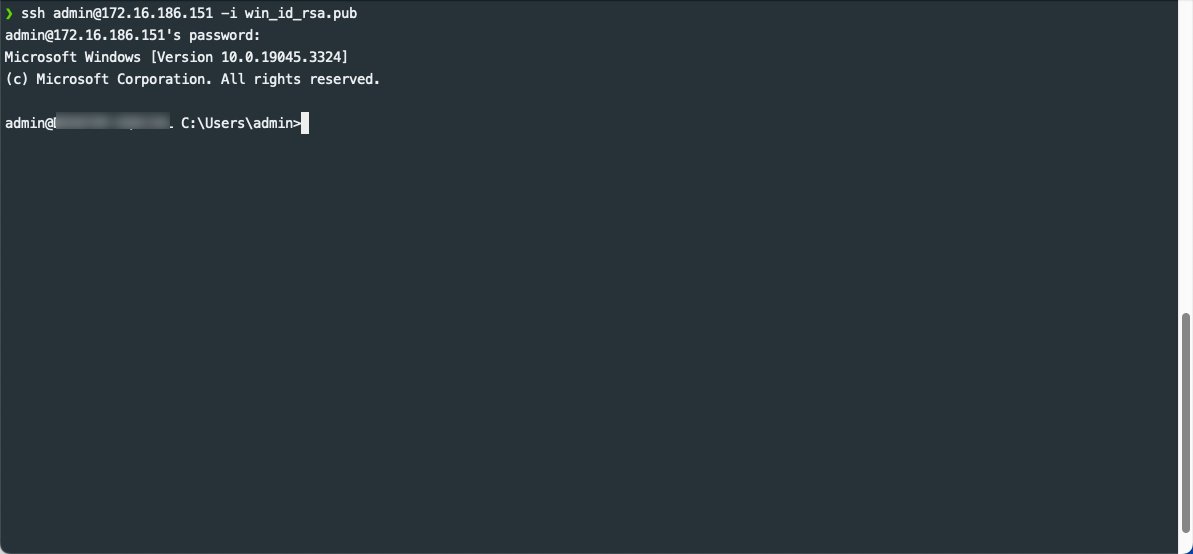
Running the SSH command to connect to Windows from Linux
If successful you’ll see a Microsoft Windows command-line terminal from your Linux.
Connecting to Linux From Windows
If we would like to connect to our Linux machine from our Windows machine we can perform the opposite steps. Similar to the above we need to do the following (if you already have a key-pair for your Linux machine setup feel free to skip the “Ensuring SSH Is Installed on Linux” section).
Ensuring SSH Is Installed on Linux
In this section I will use an Ubuntu Desktop as my Linux machine. We need to perform some administrative tasks to ensure that we are able to connect to our Linux machine from Windows
Install SSH
If SSH is not already installed we can install using apt install.

Running the sudo apt install -y ssh
Start & Enable the SSH Service
Once the ssh package as well as dependant packages are installed we can start the ssh service using the following the systemctl command.
You can also ensure that the ssh starts in a persistent manner when the Ubuntu machine boots.
sudo systemctl enable ssh
Generate SSH keys
Similar to how we generated a key-pair on Windows, we can use the same command on Linux to generate a new SSH key-pair. We can do so with the ssh-keygen command.
Like when we did with Windows we’ll be required to give the output location of our key-pair as well as provide an optional password.
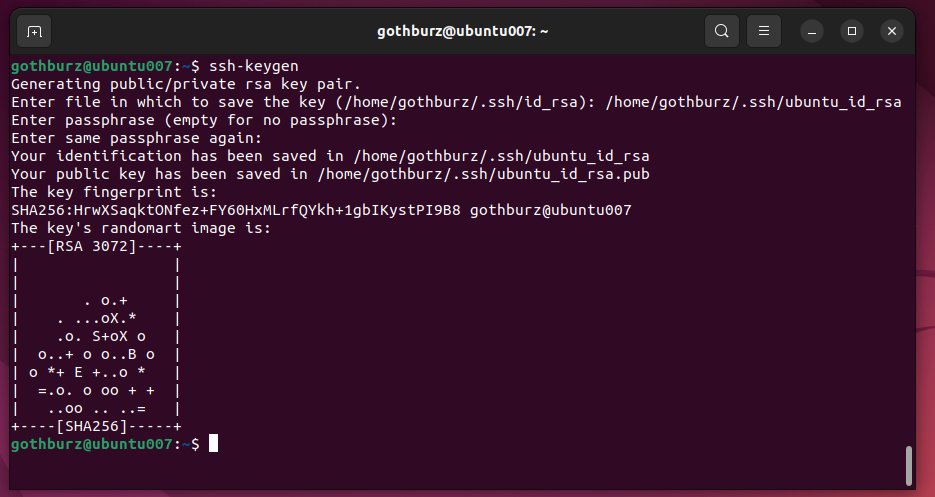
Running the ssh-keygen command
Adding the SSH Key with ssh-add
Once we’ve generated the ssh key we can proceed to add the private key to the ssh authentication agent using ssh-add command by running.
ssh-add /home/gothburz/.ssh/ubuntu_id_rsa
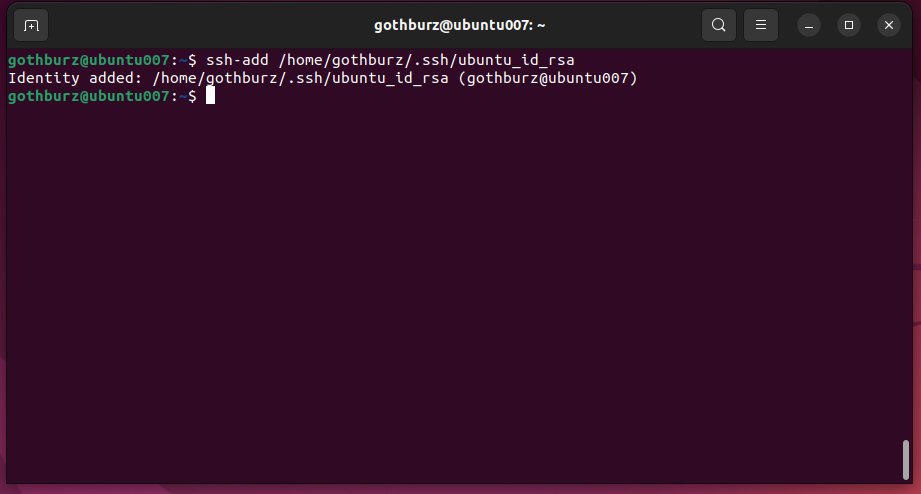
Running the ssh-add command
Copy SSH Public Key to Windows Machine
Once we have ensured that ssh is properly up and running including adding our key-pair to the ssh authentication agent we need to ensure we copied our public key over to our Windows machine
Since I’m using virtual machines I’ll simply move my key over using a shared folder from my host.
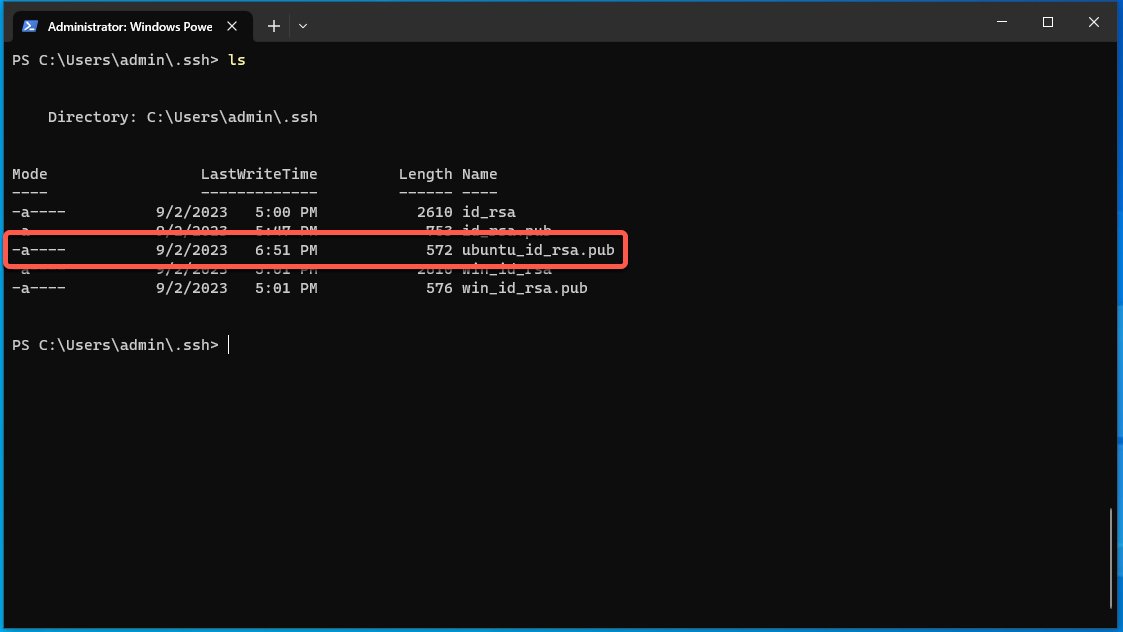
Verifying the Linux SSH public key with the ls command
Connecting to Linux from Windows Machine
Once we have ensured that our Linux machine is properly configured with SSH and that our public ssh key is on our Windows machine we can go ahead and initiate an SSH connection.
We can use the ssh command to initiate the connection from Windows to Linux using powershell.
Be sure to change your username@host as well as the path to the public key.
ssh gothburz@172.16.186.163 -i .\ubuntu_id_rsa.pub

Connecting to our Linux machine from Windows with the ssh command
Depending on your configuration you might be asked for a password as well. Once you’ve ran the ssh command and entered the correct password you should enter a new Linux terminal from Windows. Congrats!
Learn More About SSH
If you’d like to add a definitive guide to SSH to your library then I highly recommend the following book. Written for a wide audience, this book covers the Secure Shell (SSH) in great detail by providing a comprehensive guide for a plethora of use cases, features, and even contains in-depth case studies on large, sensitive computer networks.
Conclusion
In this blog post we looked at how to use the SSH protocol on Microsoft Windows using OpenSSH. We went through the following:
-
The OpenSSH installation process with the Windows Package Manager (WinGet)
-
The SSH configuration process
-
How to connect to Windows from Linux
-
How to connect to Linux from Windows
I hope you found this post insightful and useful in your day-to-day operations.
Let me know if you have any questions regarding SSH and happy connecting! 