
Все способы:
- Способ 1: Установка корректного разрешения
- Способ 2: Изменение масштабирования
- Способ 3: Настройка функции ClearType
- Вопросы и ответы: 0
Способ 1: Установка корректного разрешения
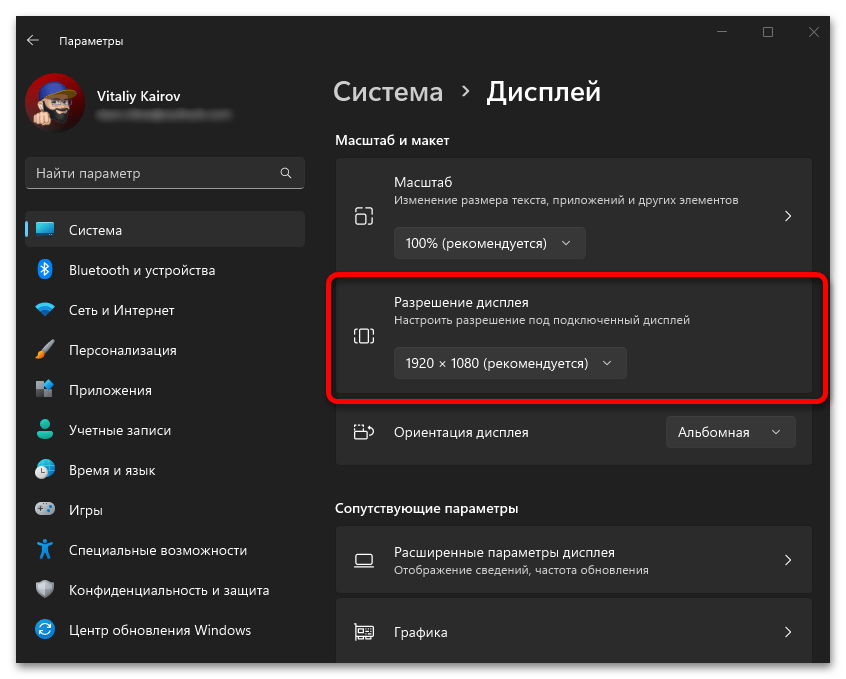
Нормальное отображение шрифтов, текста и в целом любого изображения на компьютере или ноутбуке возможно лишь в том случае, если на нем будет установлено правильное разрешение, соответствующее характеристикам монитора. В Windows 11 необходимое значение можно задать через «Параметры» и/или панель управления видеокартой – фирменное приложение от NVIDIA, AMD или Intel, в зависимости от того, устройство какого производителя используется. Все возможные способы решения этой задачи ранее рассматривались нами в отдельной статье, ссылка на которую дана ниже.
Подробнее: Как поменять разрешение экрана в Виндовс 11
Способ 2: Изменение масштабирования
Еще одним параметром, который в значительной степени влияет на качество изображения на экране, включая шрифты, является масштабирование – если оно больше или меньше от рекомендуемого (чащ всего это 100%), текст вполне может и наверняка будет отображаться некорректно. Для того чтобы проверить, является ли это причиной рассматриваемой проблемы и по необходимости ее устранить, выполните следующее:
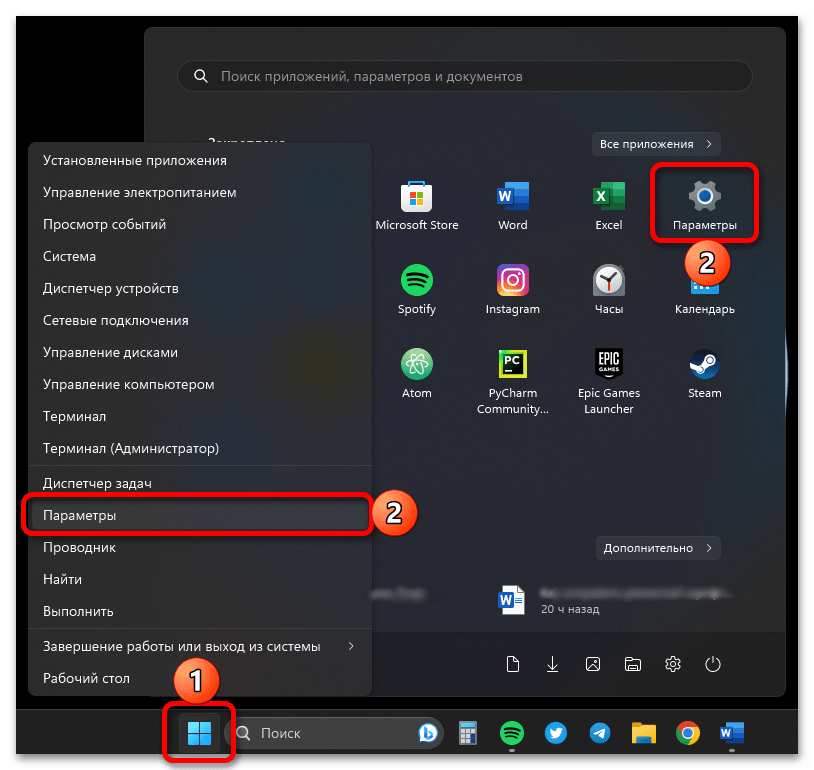
- Откройте «Параметры» Windows 11. Сделать это можно с помощью клавиш «Win+I» или через меню «Пуск».
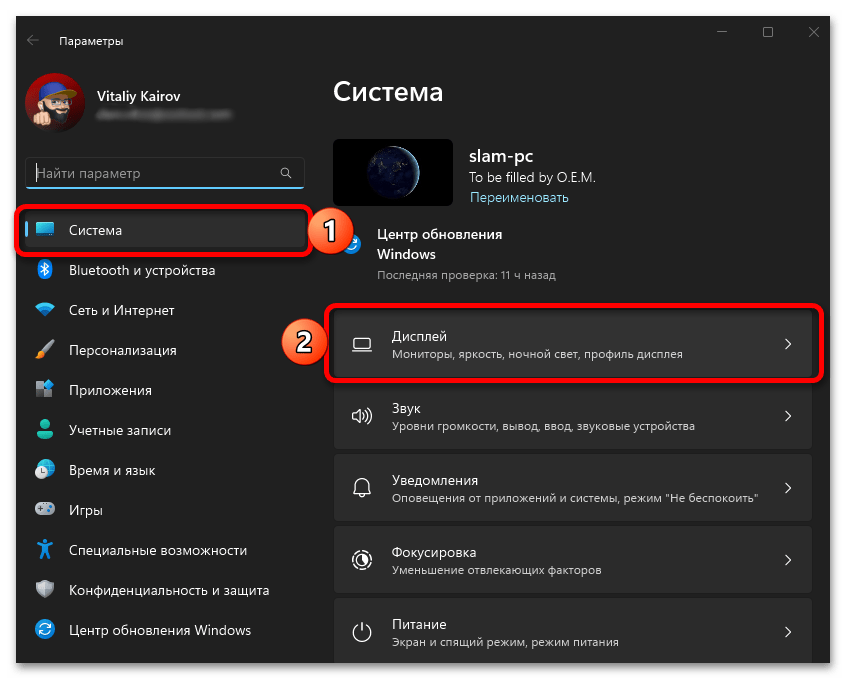
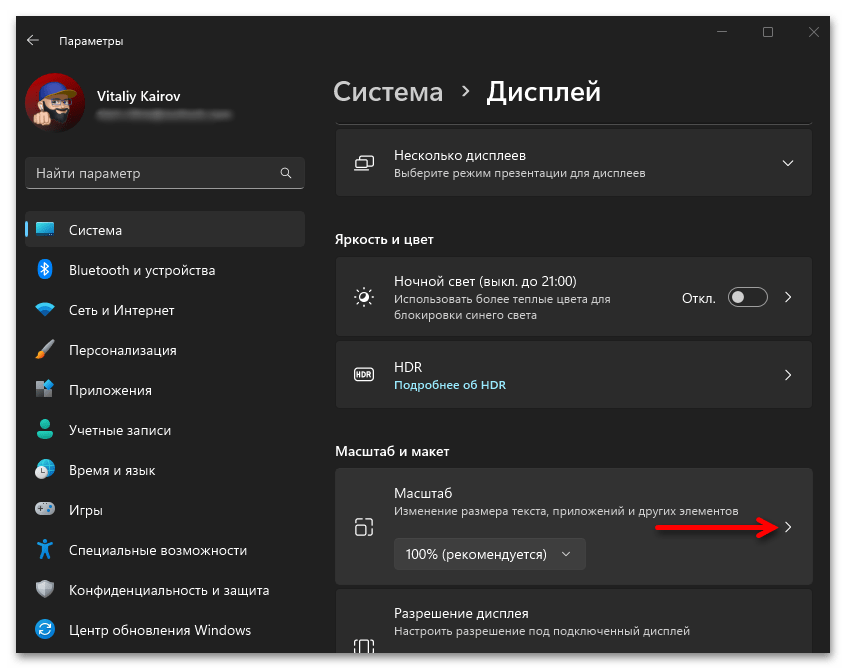
- Во вкладке «Система» перейдите к разделу «Дисплей».
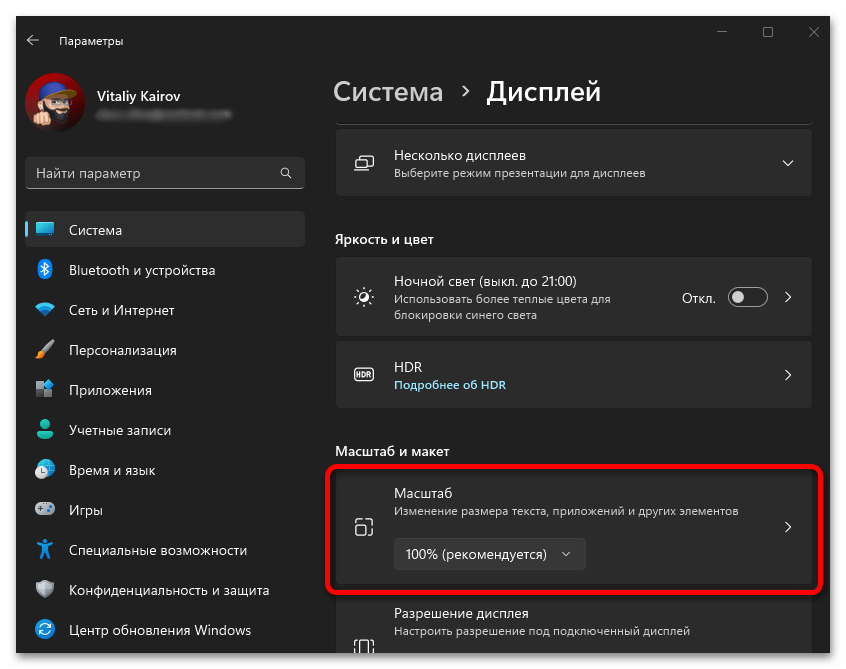
- Разверните выпадающий список, доступный в блоке «Масштаб», и выберите в нем «100% (рекомендуется)». Если потребуется, подтвердите внесение изменений.
- В ряде случаев (например, когда в системе принудительно установлено отличное от стандартного масштабирование), изменение его значения предложенным выше способом может быть недоступно. Если и вы столкнетесь с такой проблемой, перейдите к подразделу «Масштаб», кликнув по расположенной справа от этого наименования стрелочке.

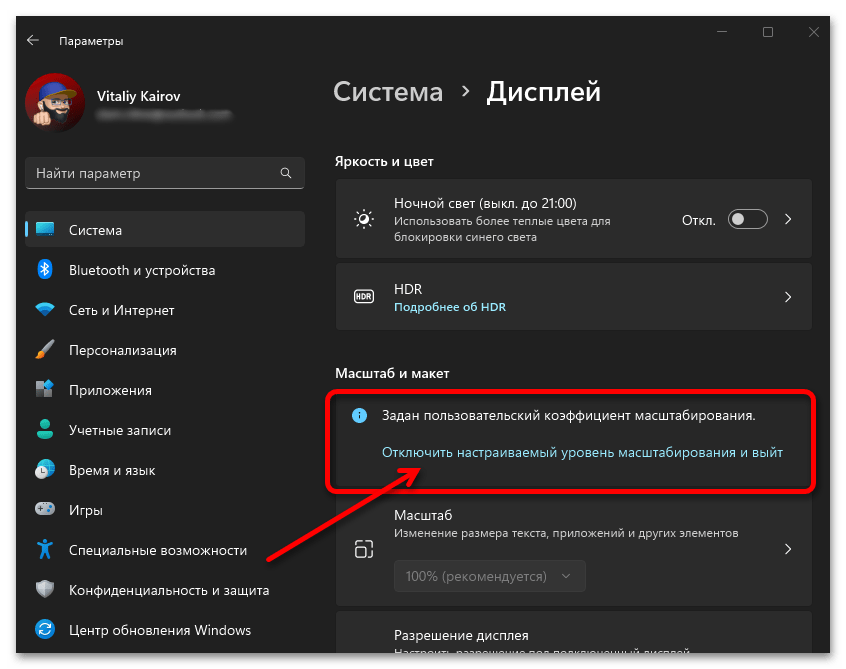
Примечание: Если в указанном разделе «Параметров» отображается уведомление «Задан пользовательский коэффициент масштабирования», кликните по расположенной под ним ссылке для отключения. После подтверждения данного действия будет выполнен автоматический выход из системы, потребуется повторная авторизация. Следующий шаг инструкции при этом можно не выполнять.
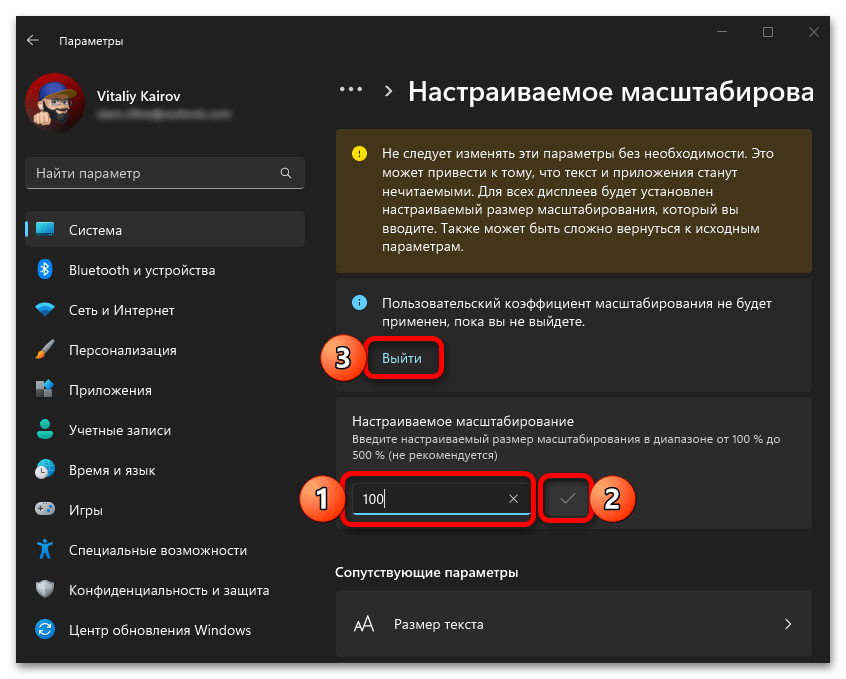
- Введите в поле «Настраиваемое масштабирование» значение «100», кликните по расположенной справа галочке, а затем воспользуйтесь появившейся выше ссылкой «Выйти», чтобы применить внесенные изменения.
Как уже было сказано выше, корректное отображение шрифтов зачастую возможно при 100% масштабировании, однако на дисплеях с большой диагональю и высоким разрешением (2К или 4К) или, наоборот, с небольшой диагональю, но высоким разрешением, вполне может потребоваться задать иное значение.
Читайте также: Как увеличить шрифт в Виндовс 11
Способ 3: Настройка функции ClearType
В Windows 11, как и в предыдущих версиях ОС от Microsoft, есть функция ClearType, которая отвечает за корректное отображение шрифтов, в первую очередь, их читабельность. Возможно, рассматриваемая в рамках настоящей статьи проблема возникает из-за ее отсутствующей или неправильно выполненной настройки.
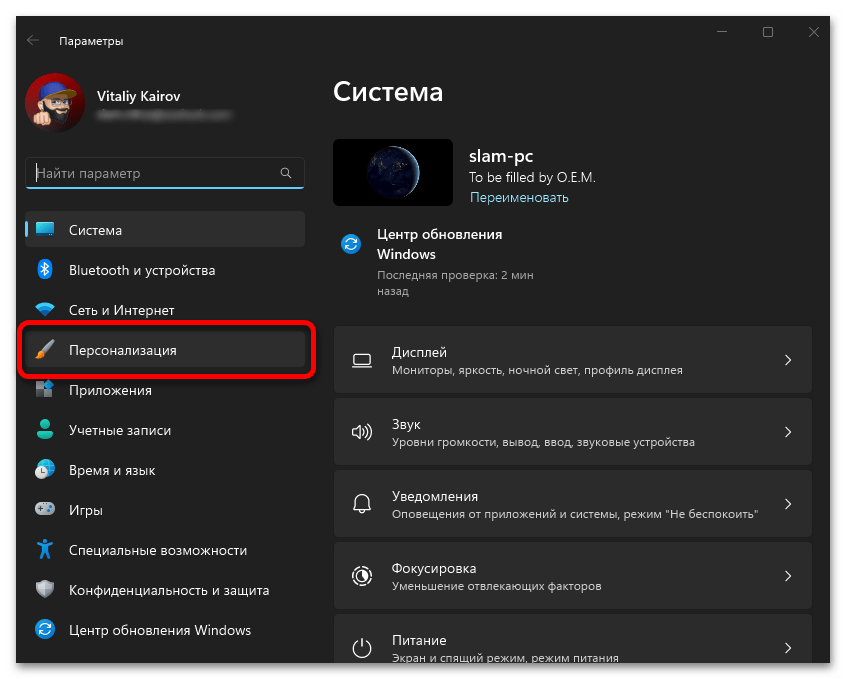
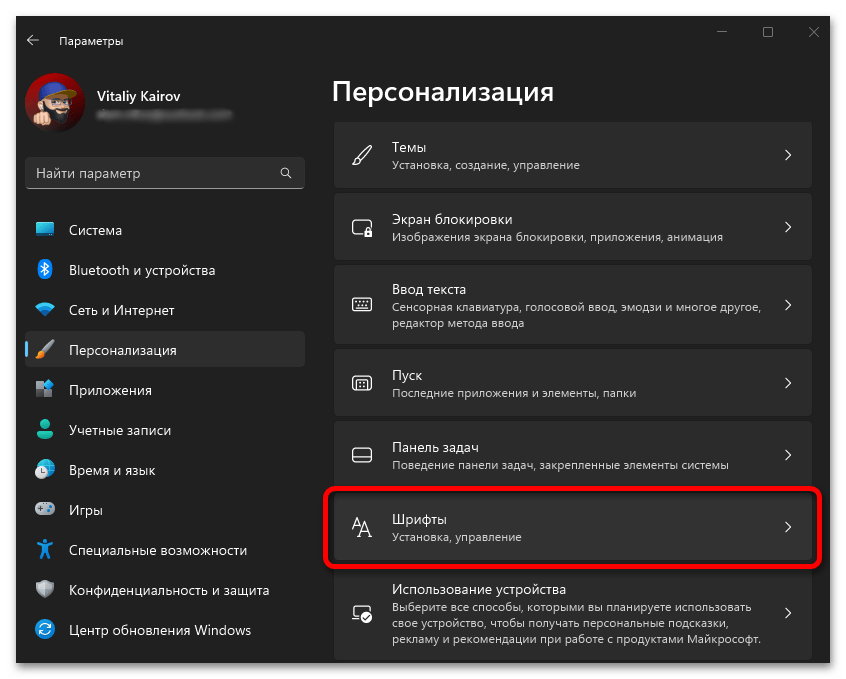
- Вызовите «Параметры» и перейдите во вкладку «Персонализация».
- Откройте раздел «Шрифты».
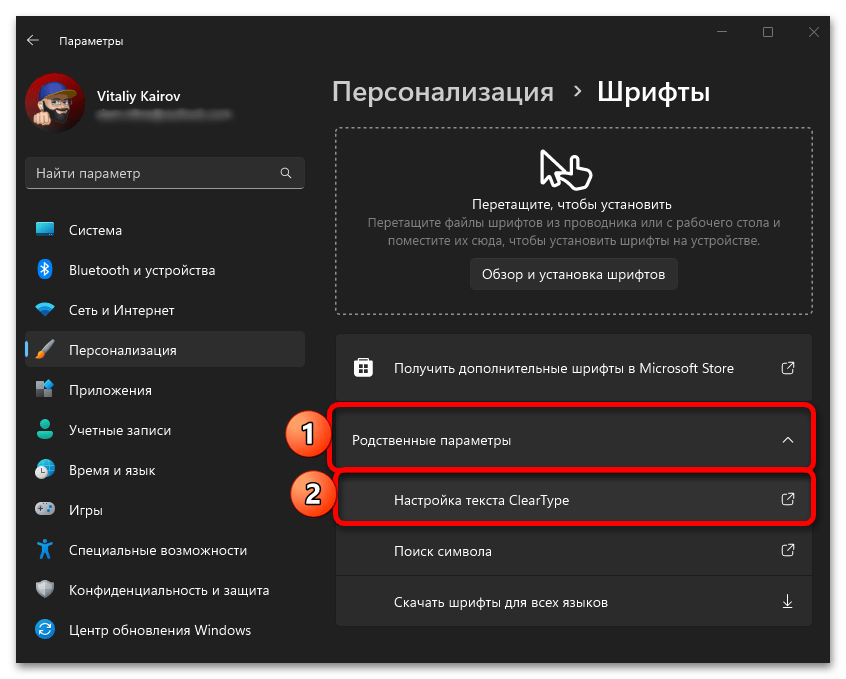
- Далее разверните блок «Родственные параметры» и кликните по пункту «Настройка текста ClearType».
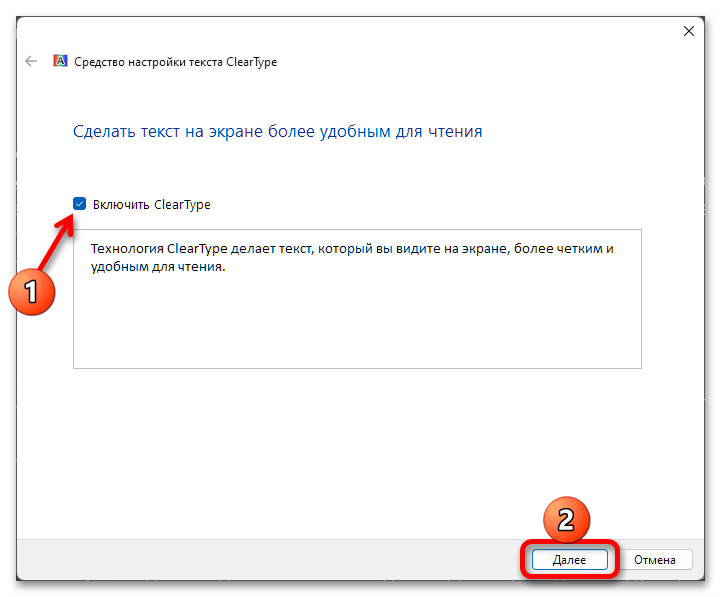
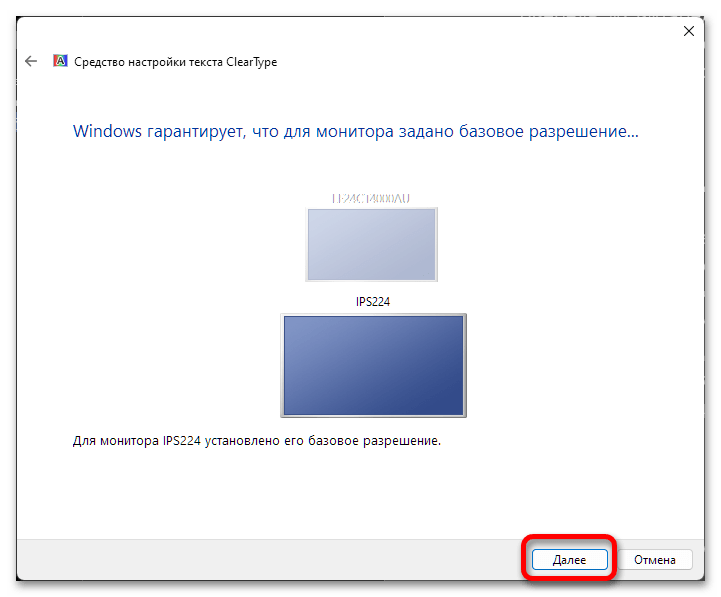
- В окне, которое будет запущено, убедитесь в наличии галочки около пункта «Включить ClearType», после чего нажмите на кнопку «Далее».
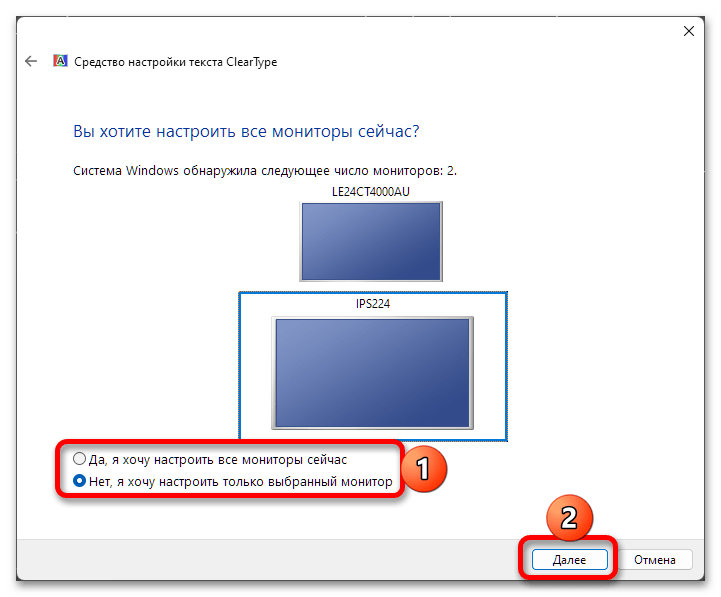
- В нашем примере используется компьютер с двумя мониторами, поэтому предварительно предлагается выбрать, будет ли выполняться настройка для каждого из них или одного. Для перехода к следующему шагу необходимо воспользоваться кнопкой «Далее»

дважды.
Читайте также: Как настроить два монитора в Windows 11
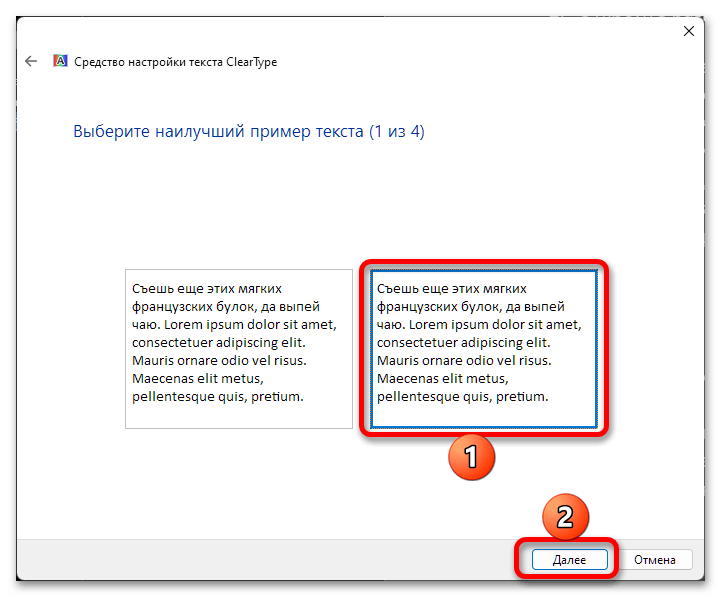
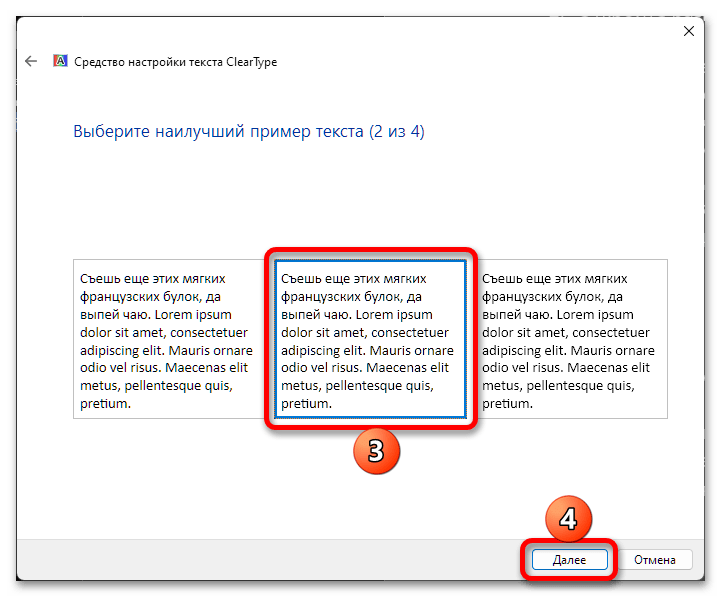
- Затем в четырех или пяти (зависит от устройства) последовательных окнах потребуется выбрать среди демонстрируемых примеров тот, текст в котором (на ваш взгляд) отображается наилучшим образом.
Сделайте это, каждый раз нажимая «Далее» для перехода к следующему шагу.
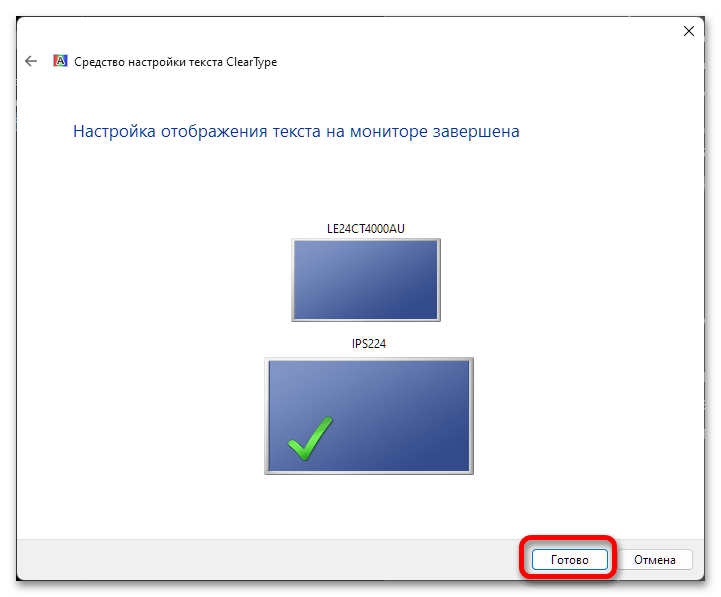
- По завершении настройки текста ClearType кликните по кнопке «Готово», чтобы применить внесенные изменения и закрыть окно.
Наша группа в TelegramПолезные советы и помощь
Владельцы ПК и ноутбуков с высоким разрешением монитора и использующие масштабирование в параметрах дисплея могут обратить внимание, что в некоторых программах шрифты и другие элементы интерфейса выглядят размытыми.
В этой инструкции о том, чем это вызвано и как исправить ситуацию с нечётким текстом и элементами управления отдельных программах Windows 11 и Windows 10.
Поддержка определения DPI в программах
Прежде чем начать, одно примечание: в этом материале рассмотрена ситуация, когда речь идёт лишь об отдельных программах. Если проблема наблюдается в целом, независимо от того, какое приложение используется, на эту тему есть отдельная инструкциях про размытое изображение на экране и размытые шрифты в Windows.
Проблема с нечёткими шрифтами в отдельных программах обычно связана с тем, что используется какое-то старое ПО, либо приложение, в котором задействованы нестандартные библиотеки для отрисовки интерфейса и оно не поддерживает определение DPI (уровня масштабирования) в современных версиях Windows.
Вы можете посмотреть, поддерживает ли запущенная программа определение DPI с помощью диспетчера задач:
- Откройте диспетчер задач, сделать это можно из меню по правому клику на кнопке «Пуск», в Windows 11 перейдите на вкладку «Сведения», в Windows 10 — «Подробности».
- Нажмите правой кнопкой мыши по заголовку любого столбца и нажмите по пункту «Выбрать столбцы».
- Включите показ столбца «Поддержка определения DPI».

- В результате, если для процесса, соответствующего программе, с которой возникла проблема, в столбце отображается «Неизвестно» или «Недоступно», причина, вероятно, именно в отсутствии поддержки определения DPI.


Попробовать решить проблему можно с помощью параметров совместимости программы, изменив параметры высокого DPI:
- Нажмите правой кнопкой мыши по исполняемому файлу или ярлыку программы, выберите пункт «Свойства».
- Перейдите на вкладку «Совместимость» и нажмите кнопку «Изменить параметры высокого DPI».

- Отметьте пункт «Переопределите режим масштабирования высокого разрешения» и выберите опцию «Система (Расширенная)».

- Примените настройки и перезапустите программу.


Пример результата для старой версии текстового редактора, запущенного в Windows 11 при 4k разрешении и с масштабированием 200%: сверху — до переопределения параметров, внизу — после:

На скриншоте результат может быть не совсем явным, но проблема с чёткостью текста была решена.
Переопределить те же параметры можно в реестре:
- Откройте редактор реестра: нажмите клавиши Win+R, введите regedit и нажмите Enter
- Перейдите к разделу реестра
HKEY_LOCAL_MACHINE\SOFTWARE\Microsoft\Windows NT\CurrentVersion\Image File Execution Options
- Создайте новый подраздел с тем же именем, которое имеет исполняемый файл программы и выберите его.
- Нажмите правой кнопкой мыши в правой панели редактора реестра и создайте новый строковый параметр с именем DpiAwareness
- Дважды нажмите по созданному параметру и установите значение system. Также можно попробовать результат со значением PerMonitorV2
Выполнив изменения, закройте редактор реестра и попробуйте снова запустить программу.
Дополнительная информация
Некоторые дополнительные нюансы, касающиеся размытых и нечётких элементов в программах:
- Иногда может помочь запуск программы в режиме совместимости с предыдущей версией Windows.
- В некоторых случаях описанные выше действия решают проблему только со шрифтами, но не со значками и графическими элементами. Причина чаще всего в том, что в программе не предусмотрены ресурсы с изображениями в более высоком качестве и при их масштабировании появляется размытость, «лесенки» и другие артефакты.
- Если вы только что меняли масштабирование в Windows, некоторые элементы могут масштабироваться неправильно до перезагрузки компьютера.
- Если вы настраивали масштабирование вручную (не выбирая из предустановленных вариантов в параметрах дисплея, а вручную вводя значение в поле «Настраиваемое масштабирование»), учитывайте, что этот вариант работает иначе, чем масштабирование в параметрах дисплея. Решить проблему может отключение настраиваемого масштабирование с ручным указанием масштаба и выбор из доступных значений.
Надеюсь, информация будет полезной, а проблема с размытыми элементами решится.
-
-
#2
In my version of Windows 11, I don’t have the legacy box for Performance Options.; Perhaps you can share with us how to get that back?
-
- OS
- Windows 11
- Computer type
- Laptop
- Manufacturer/Model
- Lenovo
- Graphics Card(s)
- NVIDA 1650 Ti
- Monitor(s) Displays
- Lenovo C32q-20
-
-
#3
In my version of Windows 11, I don’t have the legacy box for Performance Options.; Perhaps you can share with us how to get that back?
Hello Sammy,
Does running the SystemPropertiesPerformance.exe file in Run (Win+R) open it?
-
- OS
- Windows 11 Pro for Workstations
- Computer type
- PC/Desktop
- Manufacturer/Model
- Custom self build
- CPU
- Intel i7-8700K 5 GHz
- Motherboard
- ASUS ROG Maximus XI Formula Z390
- Memory
- 64 GB (4x16GB) G.SKILL TridentZ RGB DDR4 3600 MHz (F4-3600C18D-32GTZR)
- Graphics Card(s)
- ASUS ROG-STRIX-GTX1080TI-O11G-GAMING (11GB GDDR5X)
- Sound Card
- Integrated Digital Audio (S/PDIF)
- Monitor(s) Displays
- 2 x Samsung Odyssey G75 27″
- Screen Resolution
- 2560×1440
- Hard Drives
- 1TB Samsung 990 PRO M.2,
4TB Samsung 990 PRO M.2,
8TB WD MyCloudEX2Ultra NAS
- PSU
- Seasonic Prime Titanium 850W
- Case
- Thermaltake Core P3 wall mounted
- Cooling
- Corsair Hydro H115i
- Keyboard
- Logitech wireless K800
- Mouse
- Logitech MX Master 3
- Internet Speed
- 1 Gbps Download and 35 Mbps Upload
- Browser
- Google Chrome
- Antivirus
- Microsoft Defender and Malwarebytes Premium
- Other Info
- Logitech Z625 speaker system,
Logitech BRIO 4K Pro webcam,
HP Color LaserJet Pro MFP M477fdn,
CyberPower CP1500PFCLCD
Galaxy S23 Plus phone
-
- Operating System
- Windows 11 Pro
- Computer type
- Laptop
- Manufacturer/Model
- Surface Laptop 7 Copilot+ PC
- CPU
- Snapdragon X Elite (12 core) 3.42 GHz
- Memory
- 16 GB LPDDR5x-7467 MHz
- Monitor(s) Displays
- 15″ HDR
- Screen Resolution
- 2496 x 1664
- Hard Drives
- 1 TB SSD
- Internet Speed
- Wi-Fi 7 and Bluetooth 5.4
- Browser
- Chrome and Edge
- Antivirus
- Windows Defender
-
-
#4
-
- OS
- window 11 home
- Computer type
- PC/Desktop
- Manufacturer/Model
- Dell Inc.
- Motherboard
- Enhanced (101 — or 102-key)
-
-
#5
Thanks for the guide, wish you would add in parenthesis ClearType as it took me a while to realize that it’s the same as font smoothing, also, helps the search algorithms.
Enable or Disable Font Smoothing (ClearType) in Windows 11
-
- OS
- Windows 11 Education
- Computer type
- Laptop
- Manufacturer/Model
- Razer Blade 16
- CPU
- AMD Ryzen AI 9 HX 370
- Motherboard
- Razer
- Memory
- 64 GB LPDDR5X 8000 MHz RAM
- Graphics Card(s)
- GeForce RTX 5090 24 GB GDDR7 VRAM
- Sound Card
- Six Speaker System THX Spatial Audio
- Monitor(s) Displays
- AOC Q27G3XMN 27″ QHD Mini LED Monitor
- Screen Resolution
- QHD (2560×1440)
- Hard Drives
- WD_BLACK SN850X 4TB+8TB SSD
- PSU
- 280W AC Power Adapter
- Cooling
- Noctua NT-H2 + Fujipoly Extreme Thermal Pads + Razer Laptop Cooling Pad
- Keyboard
- Razer BlackWidow V4 X
- Mouse
- Razer Basilisk V3 X HyperSpeed
- Internet Speed
- 1 GBPS Down / 330 MBPS Up
- Browser
- Google Chrome
- Antivirus
- McAfee AntiVirus
-
- Operating System
- Windows 11 Pro
- Computer type
- Laptop
- Manufacturer/Model
- Dell XPS 15 9500
- CPU
- Intel i7-10875H
- Memory
- Kingston FURY Impact 64 GB 3200 MHz DDR4 RAM
- Graphics card(s)
- nVIDIA GeForce GTX 1650 Ti Max-Q w/ 4 GB GDDR6
- Sound Card
- Realtek
- Monitor(s) Displays
- 15.6 UHD+ Touch, InfinityEdge, 500-nits, Anti-Reflecitve
- Screen Resolution
- 3840 x 2400
- Hard Drives
- Samsung 990 PRO 2TB + 4TB SSDs
- PSU
- Dell 130W Laptop Charger USB C Type C AC Adapter
- Cooling
- Noctua NT-H2 Thermal Paste on CPU + GPU
- Mouse
- Logitech MX Anywhere 3
- Internet Speed
- 1 GBPS Down / 350 MBPS Up
- Browser
- Google Chrome
- Antivirus
- Avast Free Antivirus
-
-
#6
Thanks for the guide, wish you would add in parenthesis ClearType as it took me a while to realize that it’s the same as font smoothing, also, helps the search algorithms.
Enable or Disable Font Smoothing (ClearType) in Windows 11
According to Copilot:
ClearType and font smoothing are both techniques used to improve the readability of text on digital screens, but they work in slightly different ways.
ClearType
ClearType is a technology developed by Microsoft specifically for LCD screens. It uses subpixel rendering, which takes advantage of the individual red, green, and blue subpixels within each pixel on an LCD screen. By manipulating these subpixels, ClearType can create smoother and more readable text, especially at smaller font sizes. This method significantly reduces the jagged edges that can appear on text, making it look more like printed text.
Font Smoothing
Font smoothing, on the other hand, is a broader term that includes various techniques to make text appear smoother on screens. The most common method is antialiasing, which softens the edges of text by adding shades of gray or color to the pixels around the edges of each character. This helps to reduce the jagged appearance of text, but it can sometimes make text look slightly blurry, especially at smaller sizes.
Key Differences
- Technology: ClearType uses subpixel rendering, while font smoothing often relies on antialiasing.
- Target Devices: ClearType is optimized for LCD screens, whereas font smoothing techniques can be applied to various types of displays.
- Effectiveness: ClearType generally provides sharper text on LCD screens, while font smoothing can sometimes result in a softer, less sharp appearance.
-
- OS
- Windows 11 Pro for Workstations
- Computer type
- PC/Desktop
- Manufacturer/Model
- Custom self build
- CPU
- Intel i7-8700K 5 GHz
- Motherboard
- ASUS ROG Maximus XI Formula Z390
- Memory
- 64 GB (4x16GB) G.SKILL TridentZ RGB DDR4 3600 MHz (F4-3600C18D-32GTZR)
- Graphics Card(s)
- ASUS ROG-STRIX-GTX1080TI-O11G-GAMING (11GB GDDR5X)
- Sound Card
- Integrated Digital Audio (S/PDIF)
- Monitor(s) Displays
- 2 x Samsung Odyssey G75 27″
- Screen Resolution
- 2560×1440
- Hard Drives
- 1TB Samsung 990 PRO M.2,
4TB Samsung 990 PRO M.2,
8TB WD MyCloudEX2Ultra NAS
- PSU
- Seasonic Prime Titanium 850W
- Case
- Thermaltake Core P3 wall mounted
- Cooling
- Corsair Hydro H115i
- Keyboard
- Logitech wireless K800
- Mouse
- Logitech MX Master 3
- Internet Speed
- 1 Gbps Download and 35 Mbps Upload
- Browser
- Google Chrome
- Antivirus
- Microsoft Defender and Malwarebytes Premium
- Other Info
- Logitech Z625 speaker system,
Logitech BRIO 4K Pro webcam,
HP Color LaserJet Pro MFP M477fdn,
CyberPower CP1500PFCLCD
Galaxy S23 Plus phone
-
- Operating System
- Windows 11 Pro
- Computer type
- Laptop
- Manufacturer/Model
- Surface Laptop 7 Copilot+ PC
- CPU
- Snapdragon X Elite (12 core) 3.42 GHz
- Memory
- 16 GB LPDDR5x-7467 MHz
- Monitor(s) Displays
- 15″ HDR
- Screen Resolution
- 2496 x 1664
- Hard Drives
- 1 TB SSD
- Internet Speed
- Wi-Fi 7 and Bluetooth 5.4
- Browser
- Chrome and Edge
- Antivirus
- Windows Defender
-
-
#7
I found changing the antialiasing settings in the graphics panel such as in Nvidia improves fonts a bit but at the expense some sites like Google Photos in editing mode doesn’t work. I wouldn’t be surprised if that’s true within Windows.
-
- OS
- Windows 11
- Computer type
- Laptop
- Manufacturer/Model
- Lenovo
- Graphics Card(s)
- NVIDA 1650 Ti
- Monitor(s) Displays
- Lenovo C32q-20
-
-
#8
Hello Sammy,
Does running the SystemPropertiesPerformance.exe file in Run (Win+R) open it?
Oh, sorry. Missed this last year. No. It’s one of the many limitations in the Windows Home version.
-
- OS
- Windows 11
- Computer type
- Laptop
- Manufacturer/Model
- Lenovo
- Graphics Card(s)
- NVIDA 1650 Ti
- Monitor(s) Displays
- Lenovo C32q-20
-
-
#9
Oh, sorry. Missed this last year. No. It’s one of the many limitations in the Windows Home version.
Odd. SystemPropertiesPerformance.exe should be available in all editions.

-
- OS
- Windows 11 Pro for Workstations
- Computer type
- PC/Desktop
- Manufacturer/Model
- Custom self build
- CPU
- Intel i7-8700K 5 GHz
- Motherboard
- ASUS ROG Maximus XI Formula Z390
- Memory
- 64 GB (4x16GB) G.SKILL TridentZ RGB DDR4 3600 MHz (F4-3600C18D-32GTZR)
- Graphics Card(s)
- ASUS ROG-STRIX-GTX1080TI-O11G-GAMING (11GB GDDR5X)
- Sound Card
- Integrated Digital Audio (S/PDIF)
- Monitor(s) Displays
- 2 x Samsung Odyssey G75 27″
- Screen Resolution
- 2560×1440
- Hard Drives
- 1TB Samsung 990 PRO M.2,
4TB Samsung 990 PRO M.2,
8TB WD MyCloudEX2Ultra NAS
- PSU
- Seasonic Prime Titanium 850W
- Case
- Thermaltake Core P3 wall mounted
- Cooling
- Corsair Hydro H115i
- Keyboard
- Logitech wireless K800
- Mouse
- Logitech MX Master 3
- Internet Speed
- 1 Gbps Download and 35 Mbps Upload
- Browser
- Google Chrome
- Antivirus
- Microsoft Defender and Malwarebytes Premium
- Other Info
- Logitech Z625 speaker system,
Logitech BRIO 4K Pro webcam,
HP Color LaserJet Pro MFP M477fdn,
CyberPower CP1500PFCLCD
Galaxy S23 Plus phone
-
- Operating System
- Windows 11 Pro
- Computer type
- Laptop
- Manufacturer/Model
- Surface Laptop 7 Copilot+ PC
- CPU
- Snapdragon X Elite (12 core) 3.42 GHz
- Memory
- 16 GB LPDDR5x-7467 MHz
- Monitor(s) Displays
- 15″ HDR
- Screen Resolution
- 2496 x 1664
- Hard Drives
- 1 TB SSD
- Internet Speed
- Wi-Fi 7 and Bluetooth 5.4
- Browser
- Chrome and Edge
- Antivirus
- Windows Defender
hdmi
Jack of all trades – master of none
-
-
#10
To fix the common problem of some text appearing too fuzzy/blurred, as an easy alternative to choosing to completely disable font smoothing, or font antialiasing it also is possible to tame the amount of font smoothness being applied, i.e. by increasing the contrast of the font rendering while still keeping the font antialiasing enabled. Here’s how it can be achieved:
-
- OS
- 11 Home
- Computer type
- Laptop
- Manufacturer/Model
- Asus TUF Gaming F16 (2024)
- CPU
- i7 13650HX
- Memory
- 16GB DDR5
- Graphics Card(s)
- GeForce RTX 4060 Mobile
- Sound Card
- Eastern Electric MiniMax DAC Supreme; Emotiva UMC-200; Astell & Kern AK240
- Monitor(s) Displays
- Sony Bravia XR-55X90J
- Screen Resolution
- 3840×2160
- Hard Drives
- 512GB SSD internal
37TB external
- PSU
- Li-ion
- Cooling
- 2× Arc Flow Fans, 4× exhaust vents, 5× heatpipes
- Keyboard
- Logitech K800
- Mouse
- Logitech G402
- Internet Speed
- 20Mbit/s up, 250Mbit/s down
- Browser
- FF
-
- Operating System
- 11 Home
- Computer type
- Laptop
- Manufacturer/Model
- Medion S15450
- CPU
- i5 1135G7
- Memory
- 16GB DDR4
- Graphics card(s)
- Intel Iris Xe
- Sound Card
- Eastern Electric MiniMax DAC Supreme; Emotiva UMC-200; Astell & Kern AK240
- Monitor(s) Displays
- Sony Bravia XR-55X90J
- Screen Resolution
- 3840×2160
- Hard Drives
- 2TB SSD internal
37TB external
- PSU
- Li-ion
- Mouse
- Logitech G402
- Keyboard
- Logitech K800
- Internet Speed
- 20Mbit/s up, 250Mbit/s down
- Browser
- FF
-
-
#11
Odd. SystemPropertiesPerformance.exe should be available in all editions.
View attachment 107556
Thank you! I didn’t paste the .exe file correctly, lol.
But the above is one of the first sections I go into Windows after installation. Fonts look the pits on both Windows 11 and Windows 10 but are worse in W11. To compensate, I have my theme set to dark mode. I also use a 32 inch monitor and recommened resolution to 2560 x 1440. I tried all the other lower settings too.
-
- OS
- Windows 11
- Computer type
- Laptop
- Manufacturer/Model
- Lenovo
- Graphics Card(s)
- NVIDA 1650 Ti
- Monitor(s) Displays
- Lenovo C32q-20
-
-
#12
To fix the common problem of some text appearing too fuzzy/blurred, as an easy alternative to choosing to completely disable font smoothing, or font antialiasing it also is possible to tame the amount of font smoothness being applied, i.e. by increasing the contrast of the font rendering while still keeping the font antialiasing enabled. Here’s how it can be achieved:
I hate Github. I have no idea how to download and install files since they appear to be in raw format without an executable. I have no idea why these lads on Github like making things difficult, much like Linux users.
Edit: here is the link to the executable: Releases · bp2008/BetterClearTypeTuner; however, I don’t know how to use the application.
-
- OS
- Windows 11
- Computer type
- Laptop
- Manufacturer/Model
- Lenovo
- Graphics Card(s)
- NVIDA 1650 Ti
- Monitor(s) Displays
- Lenovo C32q-20
hdmi
Jack of all trades – master of none
-
-
#13
I hate Github. I have no idea how to download and install files since they appear to be in raw format without an executable. I have no idea why these lads on Github like making things difficult, much like Linux users.
Edit: here is the link to the executable: Releases · bp2008/BetterClearTypeTuner; however, I don’t know how to use the application.
It’s a portable app so you just need to unzip the .exe file BetterClearTypeTuner.exe from the downloaded zipfile to a folder, then right-click on this .exe file in this same folder and choose Run as administrator.
The GUI is pretty much self-explanatory, with not a lot of options to explore. Increasing the Contrast of the font rendering makes the font antialiasing appear sharper (less fuzzy, and less smooth).
My Sony Bravia XR-55X90J uses BGR sub-pixel layout (i.e., as opposed to the more common/widespread RGB sub-pixel layout) so, as an additional fix, I have selected the BGR option in the app. (If you don’t know what a sub-pixel layout is, scroll down to PIXELS in this article.)
GitHub makes me feel like McGuyver in a duct tape store. I use duct tape to fix broken Windows a lot, and, Windows with no duct tape is the only thing worse than a pub with no beer.
-
- OS
- 11 Home
- Computer type
- Laptop
- Manufacturer/Model
- Asus TUF Gaming F16 (2024)
- CPU
- i7 13650HX
- Memory
- 16GB DDR5
- Graphics Card(s)
- GeForce RTX 4060 Mobile
- Sound Card
- Eastern Electric MiniMax DAC Supreme; Emotiva UMC-200; Astell & Kern AK240
- Monitor(s) Displays
- Sony Bravia XR-55X90J
- Screen Resolution
- 3840×2160
- Hard Drives
- 512GB SSD internal
37TB external
- PSU
- Li-ion
- Cooling
- 2× Arc Flow Fans, 4× exhaust vents, 5× heatpipes
- Keyboard
- Logitech K800
- Mouse
- Logitech G402
- Internet Speed
- 20Mbit/s up, 250Mbit/s down
- Browser
- FF
-
- Operating System
- 11 Home
- Computer type
- Laptop
- Manufacturer/Model
- Medion S15450
- CPU
- i5 1135G7
- Memory
- 16GB DDR4
- Graphics card(s)
- Intel Iris Xe
- Sound Card
- Eastern Electric MiniMax DAC Supreme; Emotiva UMC-200; Astell & Kern AK240
- Monitor(s) Displays
- Sony Bravia XR-55X90J
- Screen Resolution
- 3840×2160
- Hard Drives
- 2TB SSD internal
37TB external
- PSU
- Li-ion
- Mouse
- Logitech G402
- Keyboard
- Logitech K800
- Internet Speed
- 20Mbit/s up, 250Mbit/s down
- Browser
- FF
-
-
#14
The GUI is pretty much self-explanatory, with not a lot of options to explore. Increasing the Contrast of the font rendering makes the font antialiasing appear sharper (less fuzzy, and less smooth).
I’m glad you like Github and find the GUI is self-explanatory. I have no idea how to accomplish what you’re asking, I am not going to mess with something so complex. Some of these tweaks can be destructive. I’ve had issues with fonts on certain websites which were corrupted and only a complete fresh reinstall of Windows resolved that. Besides, my mind isn’t wired for Github or Linux.
-
- OS
- Windows 11
- Computer type
- Laptop
- Manufacturer/Model
- Lenovo
- Graphics Card(s)
- NVIDA 1650 Ti
- Monitor(s) Displays
- Lenovo C32q-20
hdmi
Jack of all trades – master of none
-
-
#15
I’m glad you like Github and find the GUI is self-explanatory. I have no idea how to accomplish what you’re asking, I am not going to mess with something so complex. Some of these tweaks can be destructive. I’ve had issues with fonts on certain websites which were corrupted and only a complete fresh reinstall of Windows resolved that. Besides, my mind isn’t wired for Github or Linux.
What do you mean? You do not need to change the font. If your LCD monitor uses the RGB sub-pixel layout (which is what most LCD monitors use like I said) you only need to see if increasing the Contrast value to something higher than its default setting improves the readability of ClearType text. I.e., by looking at the Normal-Scale sample that appears in the GUI. When you hover your mouse over the > set button it actually even shows a yellow tooltip so, the GUI control that lets you change this Contrast value really is self-explanatory. It’s one of the simplest GUIs that I have ever seen:

-
- OS
- 11 Home
- Computer type
- Laptop
- Manufacturer/Model
- Asus TUF Gaming F16 (2024)
- CPU
- i7 13650HX
- Memory
- 16GB DDR5
- Graphics Card(s)
- GeForce RTX 4060 Mobile
- Sound Card
- Eastern Electric MiniMax DAC Supreme; Emotiva UMC-200; Astell & Kern AK240
- Monitor(s) Displays
- Sony Bravia XR-55X90J
- Screen Resolution
- 3840×2160
- Hard Drives
- 512GB SSD internal
37TB external
- PSU
- Li-ion
- Cooling
- 2× Arc Flow Fans, 4× exhaust vents, 5× heatpipes
- Keyboard
- Logitech K800
- Mouse
- Logitech G402
- Internet Speed
- 20Mbit/s up, 250Mbit/s down
- Browser
- FF
-
- Operating System
- 11 Home
- Computer type
- Laptop
- Manufacturer/Model
- Medion S15450
- CPU
- i5 1135G7
- Memory
- 16GB DDR4
- Graphics card(s)
- Intel Iris Xe
- Sound Card
- Eastern Electric MiniMax DAC Supreme; Emotiva UMC-200; Astell & Kern AK240
- Monitor(s) Displays
- Sony Bravia XR-55X90J
- Screen Resolution
- 3840×2160
- Hard Drives
- 2TB SSD internal
37TB external
- PSU
- Li-ion
- Mouse
- Logitech G402
- Keyboard
- Logitech K800
- Internet Speed
- 20Mbit/s up, 250Mbit/s down
- Browser
- FF
Adjusting display or resolution setting is the first thing Windows users will do when the fonts are looking pixelated. If you are going crazy with blurry pixelated text display in Windows PC, enabling font smoothing will probably fix your problem. This will help to ease the font edges and make the text appealing to your eyes especially on large monitor screen. In this article, you can find how to enable or disable font smoothing in Windows 11 PC.
Fonts With and Without Smoothing
Font smoothing affects all system text display and the content you type on apps like Word. I use Windows 11 Virtual Machine on iMac’s 21-inch retina monitor and below is how the fonts look without smoothing in Word and File Explorer. When you look at carefully, each letter is having pixelated edges causing little blurriness thus affecting your eyes (it will be more clear on your system than in this image as it is compressed).

And below is how the display changes after enabling font smoothing with anti-aliasing.

Enable Font Smoothing in Windows 11
By default, Windows enables font smoothing unless you have customized the setup and disabled it for best system performance. Follow the below steps to enable it back:
- Right-click on Start icon on the taskbar and select “Settings” from the list of menu items that appears.
- The Settings app will open with “System” section by default. Scroll down on the right-pane and click “About” section showing at the bottom.
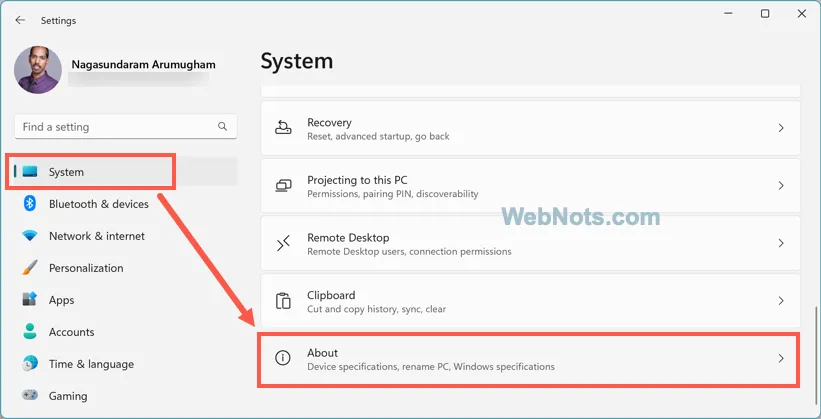
- Expand “Device specifications” section and click “Advanced system settings” showing in “Related links” section.

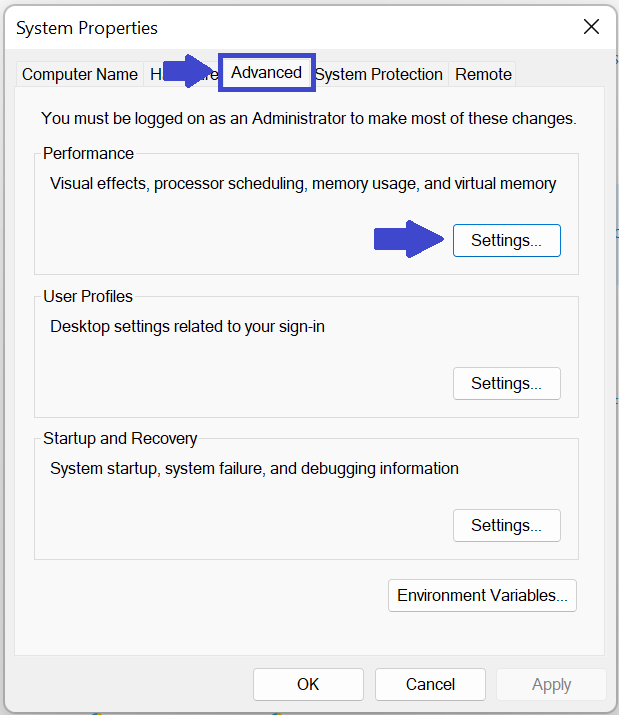
- This will open “System Properties” dialog box and go to “Advanced” tab.
- Click the “Settings” button showing in “Performance” section.
- This will open “Performance Options” dialog and go to “Visual Effects” tab.
- Select “Let Windows choose what’s best for my computer” radio button which will automatically select “Smooth edges of screen fonts” option.
- If the “Custom” radio button is selected, then you can manually check “Smooth edges of screen fonts” item and click “Apply” button to save the changes.
- Click “OK” to close all open dialog boxes and you will see all text content appear smoothened instantly.
Disable Font Smoothing in Windows 11
You can follow the same steps mentioned above to disable that option. However, there is also an easy way to open “System Properties” in Windows 11.
- Click Start icon or Search in taskbar and type “advanced system” in the search box.
- Open “View advanced system settings” Control Panel item from the search results.

- This will open “System Properties” and click “Settings” button under “Performance” section of “Advanced” tab.
- Now, you can disable “Smooth edges of screen fonts” option.
- Click “Apply” and then “OK” buttons to save your changes and close open dialog boxes.
Does Font Smoothing Affect System Performance?
As you can see “Visual Effects” section has four options in Windows 11.
- Let Windows choose what’s best for my computer
- Adjust for best appearance
- Adjust of best performance
- Custom
You can enable font smoothing when using all three options except the performance one. When you select “Adjust for performance” radio button, Windows will disable all visual effects settings including font smoothing option.
This essentially means font smoothing will affect your system’s performance. This is the only reason you may want to disable it on your PC. However, you may not feel any big improvement just by enabling or disabling font smoothing option.
Font Smoothing in Browsers
Do not confuse font smoothing in Windows 11 with the display of content in browsers. Web browsers like Edge, Chrome and Firefox will NOT follow the settings in Windows. It follows the value of CSS font-smooth property defined in the website’s source HTML code by the website owner. You can learn more about CSS font smoothing in this MDN Web Docs page.
Font smoothing, also known as anti-aliasing, is a technique used in computer graphics to improve the appearance of text on digital displays. It reduces the jagged or pixelated edges of characters by applying various algorithms to create smoother, more visually appealing text. In this article, we will explain you how to enable or disable Font Smoothing in Windows 11.
When text is displayed on a digital screen, such as a computer monitor or a mobile device, it is composed of pixels, which are the smallest units of color or light. Fonts, especially at smaller sizes, can appear jagged because the edges of the characters align with the pixel grid, resulting in uneven edges and a less sharp appearance.
Font smoothing techniques aim to address this issue by adding additional pixels or blending colors at the edges of the characters to create the illusion of smoother curves and lines. This process is achieved through various anti-aliasing algorithms implemented in software or hardware.
Page Contents
Option 1: Font Smoothing in Windows 11 using Control Panel
STEP 1: Open Control Panel in Windows 11. Click on System and Security. (See the below image )

STEP 2: Now select ‘Allow remote access’. (as below)
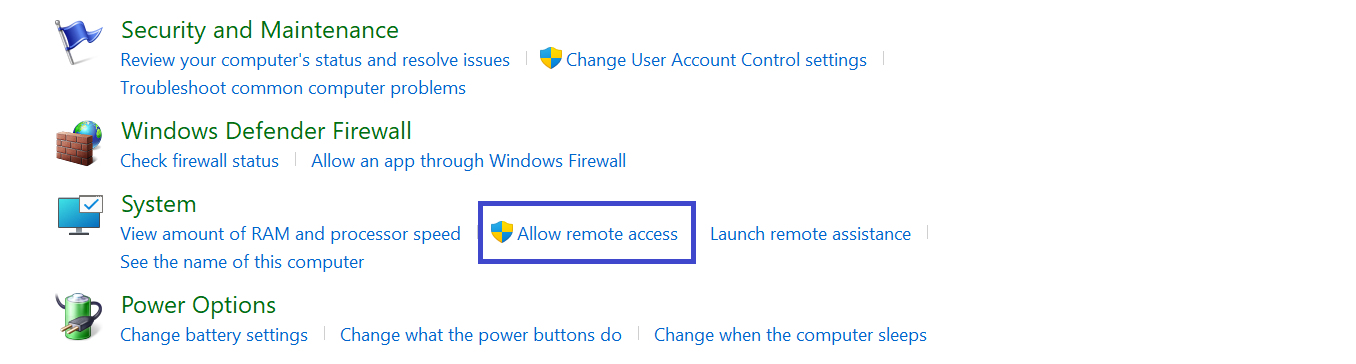
STEP 3: After clicking ‘Allow remote access’, below prompt box will appear. Go to Advanced => Settings.
STEP 4: Select Visual Effects. Below you will see the option ‘smooth edges of screen fonts’.
Check (enable – default) or uncheck (disable) Smooth edges of screen fonts accordingly.
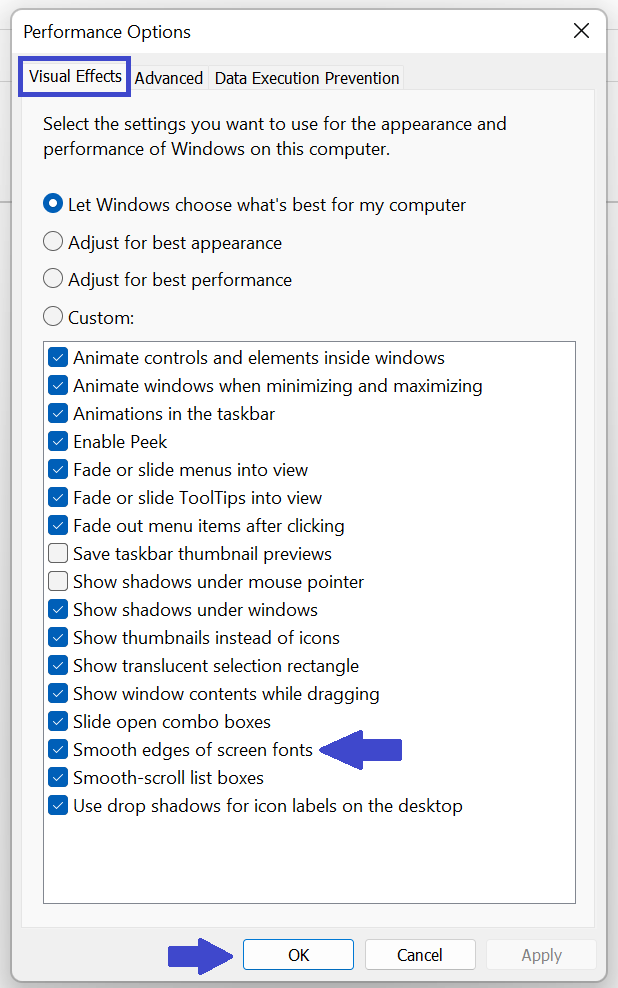
STEP 5: Click OK.
Option 2: Font Smoothing in Windows 11 using Registry Editor
STEP 1: Press Windows Key + R. Type Regedit32.exe and click OK. (See the below image)
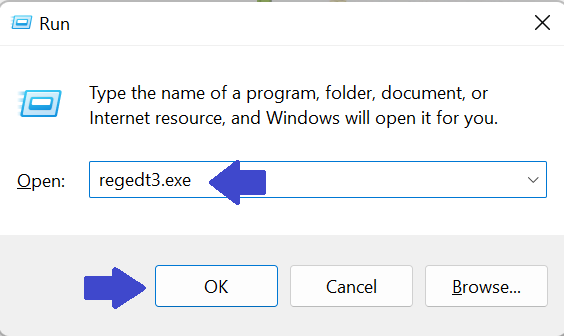
STEP 2: Navigate to the following location:
HKEY_CURRENT_USER\Control Panel\Desktop
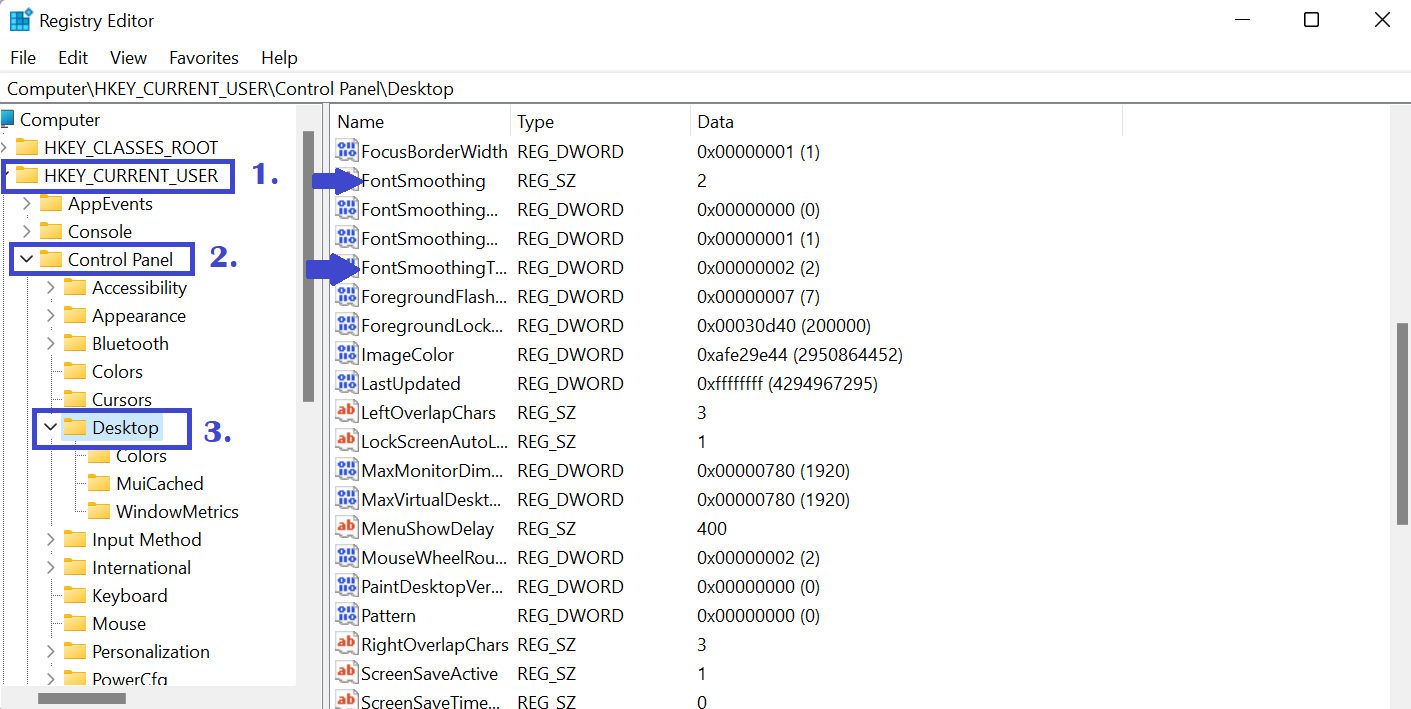
STEP 3: Right Click on FontSmoothing. Below Prompt box will appear. You just need to change the Value to 1 from 2.
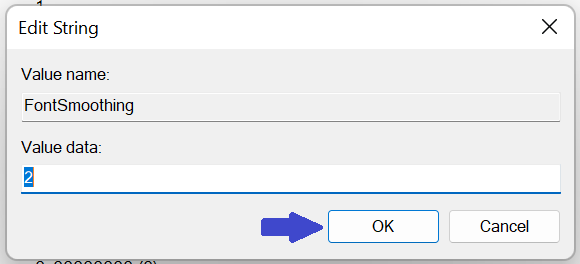
STEP 4: Click OK.
Why you should Disable Font Smoothing?
The Font Smoothing feature is beneficial to a better font appearance but it requires extra processing, and in other words, it may decrease your computer performance. So, disabling Font Smoothing can increase your computer performance.
Summary
Changing this setting only affects some parts of Windows. Most third-party apps and some Windows features, like the Settings app, use fonts that will be unaffected. However, this setting will reduce the performance impact when affected fonts are displayed on the screen.