
Applies ToWindows 11 Windows 10
Чтобы включить или отключить сенсорный экран в Windows, выполните следующие действия.
-
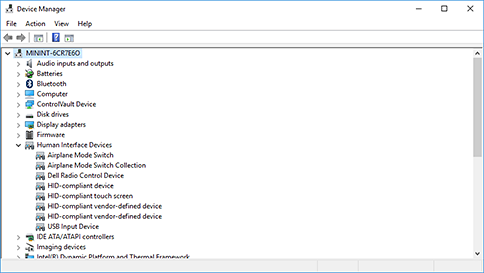
Щелкните правой кнопкой мыши меню Пуск и выберите диспетчер устройств.
-
В открывавшемся окне диспетчер устройств щелкните стрелку рядом с элементом Устройства интерфейса пользователя, чтобы развернуть ее.

-
В разделе Устройства интерфейса пользователя щелкните правой кнопкой мыши hiD-совместимый сенсорный экран и выберите Включить устройство или Отключить устройство в зависимости от того, какое действие требуется.
-
Если в списке есть несколько hiD-совместимых устройств с сенсорным экраном , повторите шаги для каждого устройства.
Если сенсорный экран не работает, см. статью Что делать, если сенсорный экран не работает в Windows.
Нужна дополнительная помощь?
Нужны дополнительные параметры?
Изучите преимущества подписки, просмотрите учебные курсы, узнайте, как защитить свое устройство и т. д.
Windows 10-powered devices with touch-enabled displays are virtually everywhere, and they help us to do away without the mouse and keyboard to interact with applications more naturally using a pen or just our fingers.
Although there have been numerous advances in display technologies to make touch more reliable, eventually no matter the computer you’re using, the screen can lose its accuracy. It may result in touch input not working at all, taps or swipes not registering, or the screen not responding with the same accuracy as it once did when the device was fresh out of the box.
The good news is that unless it’s a mechanical problem, it’s an issue that usually can get fixed by simply re-calibrating the screen. If you own a Surface Book 2, Surface Pro, Surface Pro, a Dell laptop, or any other touch-enabled device running Windows 10, you can use the built-in calibration tool to resolve this issue.
In this Windows 10 guide, we’ll walk you through the easy steps to calibrate a display that uses touch technology without having to use third-party tools.
How to fix touch input accuracy on Windows 10
If you’re having an inaccurate response using touch, use these steps to re-calibrate the device:
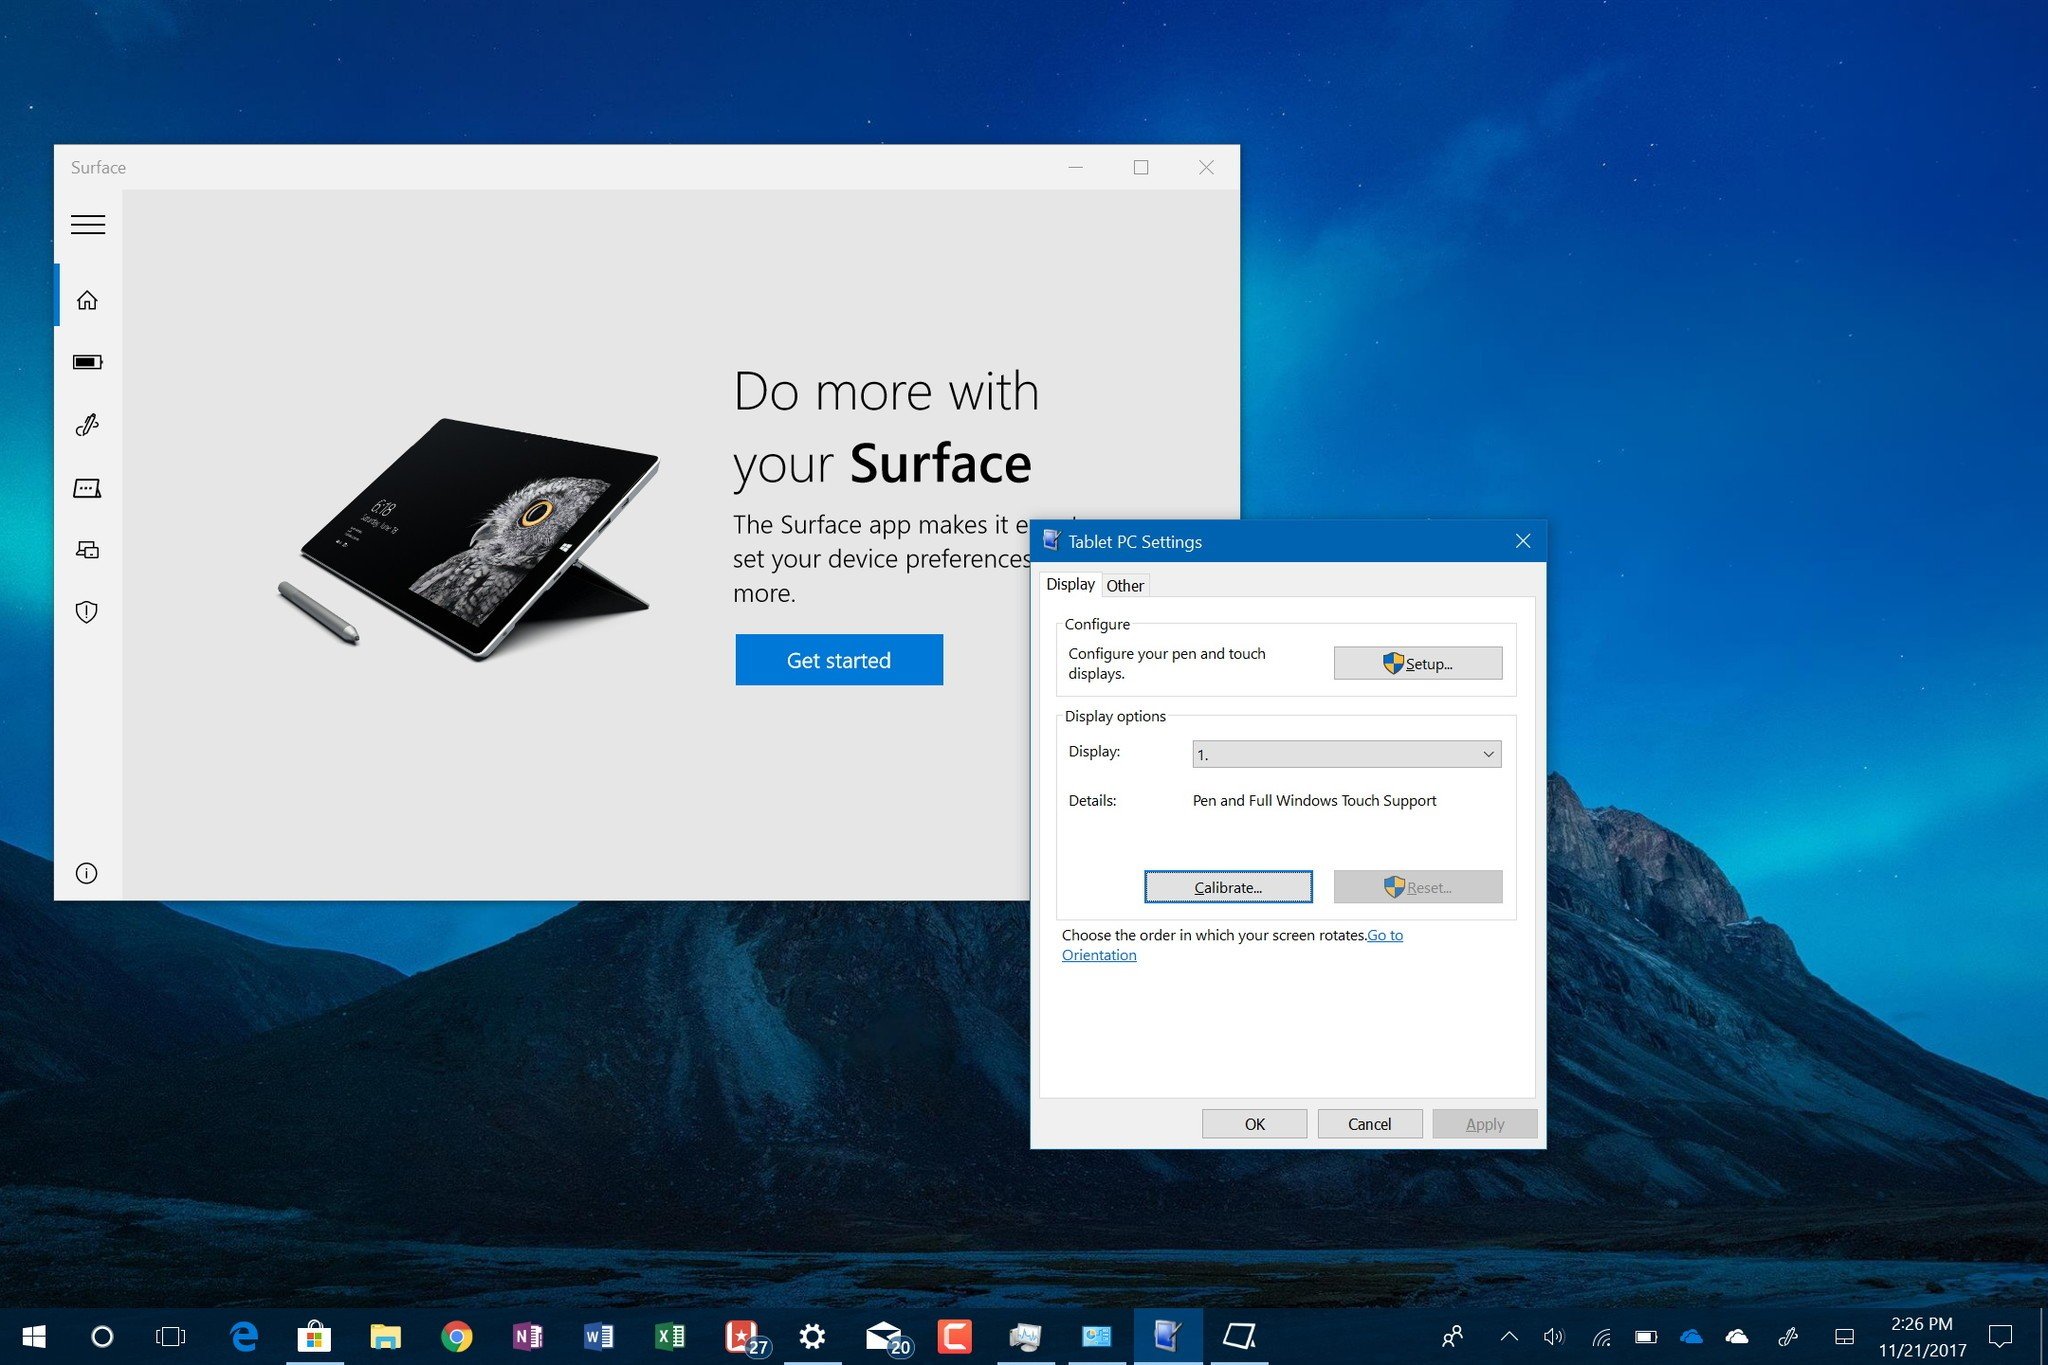
- Open Control Panel.
- Click on Hardware and Sound.
- Under «Tablet PC Settings,» click the Calibrate the screen for pen or touch input link.
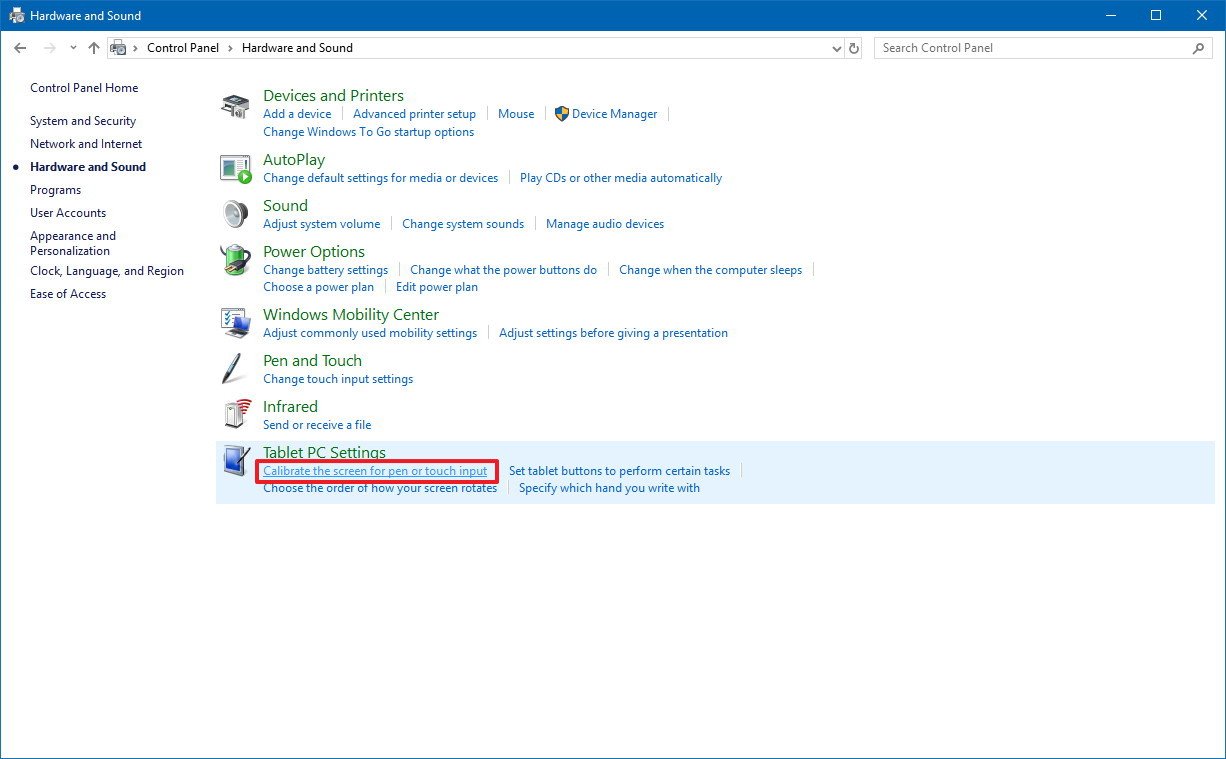
- Under «Display options,» select the display (if applicable).Quick Tip: Under «Details,» you can tell whether your screen has full support for pen and touch with Windows 10.
- Click the Calibrate button.
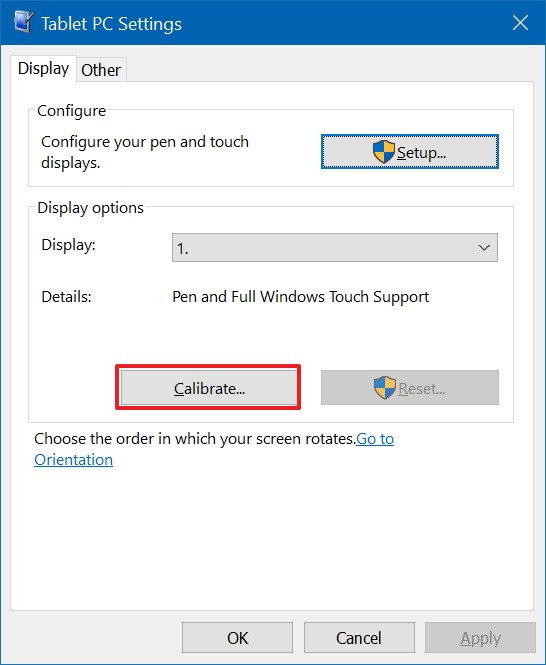
- Select the Touch input option.
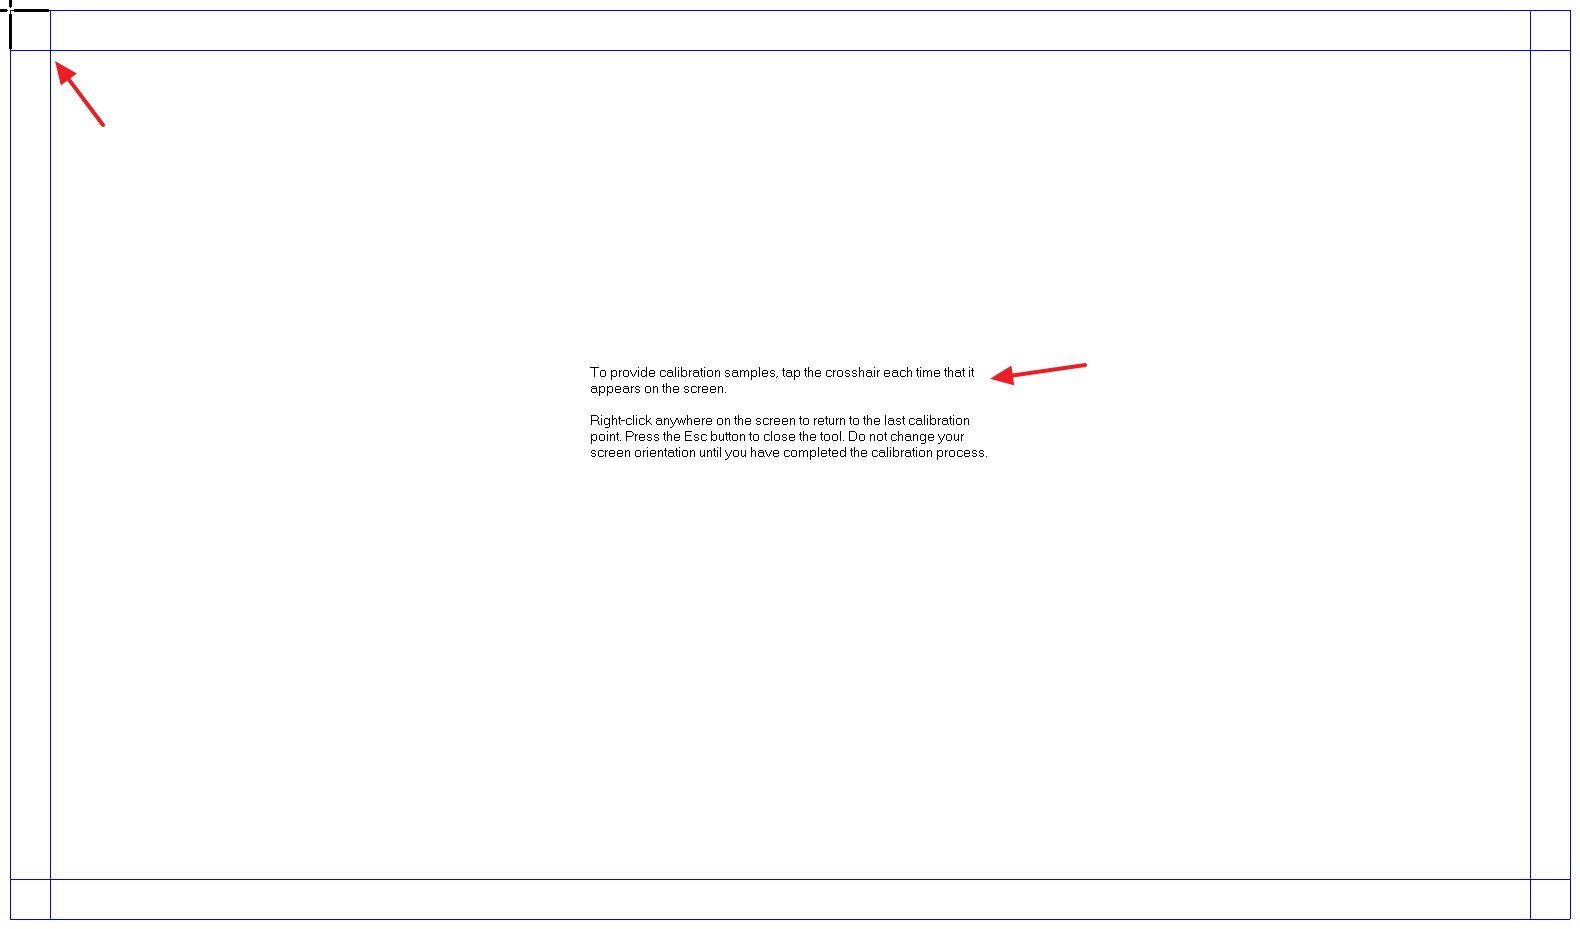
- In the white screen, tap the crosshair each time that is appears on the screen, and do not change the resolution during this process.
- After the calibration process concludes, you’ll be given the choice to save the calibration data.
Once you’ve completed the steps, your touch-enabled device should more accurately register touch inputs.
It’s worth noting that using the same calibration tool, you can calibrate the pen input with Surface or another device that includes stylus support.
All the latest news, reviews, and guides for Windows and Xbox diehards.
More Windows 10 resources
For more helpful articles, coverage, and answers to common questions about Windows 10, visit the following resources:
- Windows 10 on Windows Central – All you need to know
- Windows 10 help, tips, and tricks
- Windows 10 forums on Windows Central
Mauro Huculak has been a Windows How-To Expert contributor for WindowsCentral.com for nearly a decade and has over 15 years of experience writing comprehensive guides. He also has an IT background and has achieved different professional certifications from Microsoft, Cisco, VMware, and CompTIA. He has been recognized as a Microsoft MVP for many years.

Вас не устраивает точность с которой сенсорный экран вашего планшета или ноутбука с операционной системой Microsoft Windows на борту реагирует на ваши нажатия? Это дело поправимое.
Для того, чтобы вернуть вашему устройству «былую меткость» при распознавании места касания к экрану, вам нужно будет всего лишь откалибровать сенсор дисплея. Как это делается?
А делается это очень и очень просто. Вот вам нехитрая инструкция по калибровке сенсора на дисплее Windows 10 устройств:
Как откалибровать сенсор дисплея Windows 10 планшета или ноутбука
1. Откройте Панель управления системы:

и переключите при необходимости режим просмотра на «Категории». Затем откройте: Оборудование и Звук -> Параметры планшетного компьютера.

2. Здесь вы увидите пункт «Калибровка экрана для ввода пером или сенсорного ввода»

3. Кликните по нему, после чего откроется окно следующего вида:
4. Нажмите на кнопку «Откалибровать»
5. Разрешите запуск приложения «Средство калибровки дигитайзера», после чего на экране вашего устройства отобразится такое окно:
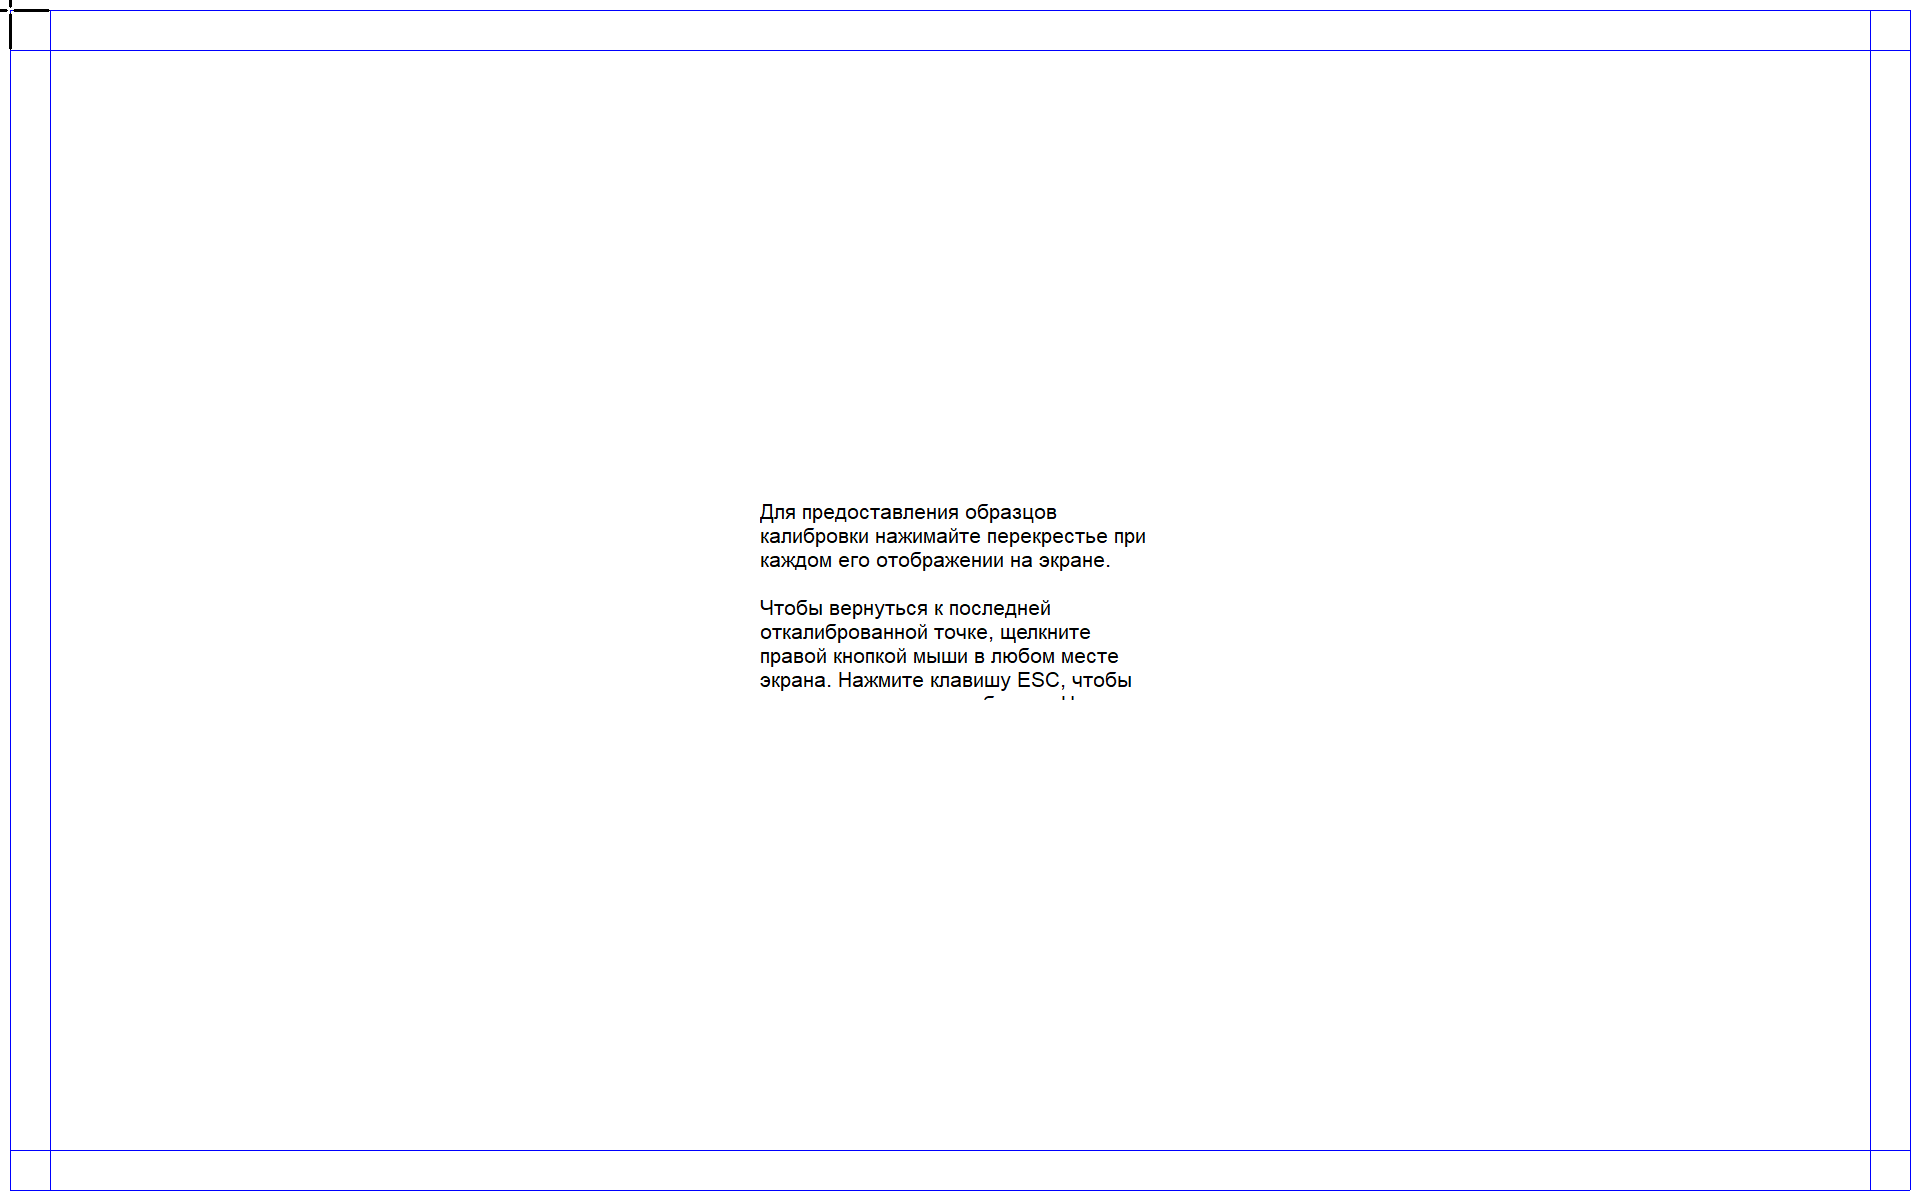
6. Здесь вам нужно будет касаться перекрестья, появляющегося в разных местах экрана, а по завершении процесса калибровки сохранить данные собранные средством для дальнейшего использования.
Всё. Теперь ваш Windows планшет или ноутбук с сенсорным экраном должен заметно точнее распознавать ваши прикосновения к дисплею.
Похожие материалы:
Как включить виртуальный тачпад в Windows 10 Creators Update
Windows 10 — советы и подсказки. Как отключить экран блокировки (локскрин)
Как включить доступ к расширенному набору эмодзи по сочетанию клавиш «Win + .» в Windows 10 Fall Creators Update
Windows 10 – советы и подсказки. Как включить или отключить отображение ярлыков «Компьютер», «Панель управления», «Сеть», «Корзина» и пр. на рабочем столе Windows 10
Теги:
- microsoft
- windows 10
- windows 10 советы и подсказки
- советы windows
- советы и подсказки
Touch function stops working suddenly when you use the touch monitor or laptop? Have troubles such as touchscreen is unresponsive, touch screen input is offset or writing is intermittent? Let’s troubleshoot these common touch issues and fix them pronto!
1. Check the Hardware ─ Connector and Wiring
If the external monitor can not work touch function properly, the common hardware issues are as follows:
When encountering touch problems, please check whether the hardware connection is correct first.(The screen of touchscreen laptop is integrated all-in-one, and the wiring is inside the case. Usually, it is not necessary to check hardware connection problems. You can move forward to next part for software settings.)

● Poor Contact of the USB Connection
External touch monitors usually adopt the USB interface to transmit touch signals. If the USB ports on either side of the computer or touch monitor is faulty, the solder pins are tin stripped, the pin tongue is loose, etc., the touch may be intermittent, unusable, or the screen may not light up at all.

● Disconnected, Mis-Plugged or Faulty Cables
This happens more likely if you plug and unplug the cables frequently. Please re-insert the cables again to ensure the cables are inserted into the right ports and the plugs are not shaky or loose. If the touch screen still does not work, try to buy a new cable from the original manufacturer!

● Clean the Screen from Dirt and Dust
Grease and dust can potentially cause poor electrical sensing on touch surfaces. Use a lens cloth to gently wipe the touch screen and wipe with a little water for the tough stains. Do not spray too much water or detergent.
2. Check the Software Settings ─ Unresponsive Touch
When touch function stops working, check whether Windows Update and BIOS are updated to the latest version. If it still does not work, follow the following settings step by step to resolve possible problems!
● Update the USB Driver
If the USB driver on Windows 10 is not successfully updated, not only the external touch screen cannot be activated, but other USB devices may encounter problems.
Right click [Start] → [Device Manager] → [Universal Serial Bus controllers], you can select [Update driver] directly or select [Uninstall device] and then restart the computer. Windows will automatically install the driver after rebooting.
")


● Update the «Human Interface Devices» Driver
Connect the monitor to the computer and go to [Device Manager] → [Human Interface Device]. If the touch monitor connection is successful, the touch screen will appear in the list of Human Interface Devices. Right click the touch screen and follow the steps to update the driver.
")
")
◆ If you can’t find the touch screen device in the Human Interface Devices, please try to enable «Show hidden devices» in the view setting.

● Make the Computer Identify the Touch Screen
Click [Start] → [Control Panel] → [Tablet PC Settings], and then click [Setup] under the display tab. When «Tap this screen with a single finger to identify it as the touchscreen» appears on the screen, just touch the screen.
")
")


3. Software Setting ─ Calibrate Touch Input When the Touch Screen Input is Offset
● Step 1. Check the Resolution Setting
If the resolution setting does not match the screen, the touch position will also be affected. For example, when you touch certain positions on the screen, it responds on correct points, but clicks on other positions may activate other areas next to them instead.
When the cursor is on the desktop, right click for the setting menu → click [Display settings ] → choose the touch screen (number 2 screen) and select the corresponding resolution(for example, On-Lap M505T resolution is 1920×1080), and then click «Apply».
")
")

● Step 2. Calibrate Touch Input
Click [Start] → [Control Panel] → [Tablet PC Settings], or search for [Calibrate the screen for pen or touch input]. Open [Tablet PC Settings] and select your external monitor from the drop-down menu of Display → Click [Calibrate] → Tap the crosshair each time that it appears on the screen. → click «Yes» to save the calibration data .
")
")
")
4. When the Stylus does Not Work or is Not Sensitive
Touchscreen laptops and smartphones usually need to be paired with a dedicated stylus. For On-Lap series touch monitors, you can choose a passive stylus with a conductive rubber or plastic disc greater than 6mm diameter. The induction of active styluses differs from brand to brand. If your writing or drawing is intermittent, it is recommended to use a stylus with stronger induction (e.g., Adonit Dash3)

5. Confirm the Main Device Supports External Touch Screen
● iMac or MacBook
The Mac OS system does not support external touch signals, and the touch monitor can only display images when connected to the computer. This is a limitation of OS compatibility. If you need an external touch monitor for Mac, you can use BootCamp, a multi boot utility that comes with Mac OS. It assists you in installing Windows 10 on Intel-based Mac computers . When you switch your MacBook to Windows 10, you can operate the external touch monitor!
")
")
● Android Smartphone
When you connect 15.6-inch On-Lap M505T touch monitor to an Android phone supporting USB Type-C DP Alt, M505T can receive touch, video and audio signals at the same time. However, in case the Android phone OS is not updated to Android 8.0 or latest, you cannot use the touchscreen function on M505T touch monitor.
Note! Not every smartphone with a USB-C connector can be connected to a touch screen. You must inquire your smartphone manufacturer about whether the model supports DisplayPort Alt mode for outputting video signals.
6. Eliminate Environmental Interference ─ Flicker or Touch Ghost Clicks
As the projected capacitive touch technology is sensitive to electricity difference, the electromagnetic interference or unstable power current input may cause touch ghost clicks—the screen responds to touches you’re not making. In this case, please eliminate the following interference from your environment :

Unstable electric current
Sockets in public spaces usually have complicated wiring and power adoption. you may experience current fluctuations occasionally. When the power input to the touch monitor comes from these sockets or extension cords, you may encounter problems of not being able to operate touch screen normally.

High-Power-Consumption Appliances
Please try to stay away from kitchen appliances in use, such as electric cookers, microwave ovens, etc. Even table lamps may emit a lot of low-frequency electromagnetic waves. These electrical appliances that emit electromagnetic interference during operation may affect the use of your touch screen.
We hope the article has helped you to solve the problems of using touch monitors. If you have any other questions about touch screens, please write to GeChic Customer Service or contact us via FB.
Владельцы ноутбуков, у которых появилась задача настроить работу тачпада, могут столкнуться с тем, что необходимые настройки отсутствуют в «Параметрах» — либо нет самого раздела «Сенсорная панель», либо он присутствует, но не содержит нужных настроек или, в некоторых случаях — все настройки не активны.
В этой инструкции подробно о том, чем может быть вызвана такая ситуация и вариантах решения проблемы.
Драйверы устройства

Первое, на что следует обратить внимание, если вы столкнулись с отсутствием настроек сенсорной панели — драйверы тачпада, причём независимо от того, работает он или нет. Для этого:
- Используя поиск в Интернете, найдите страницу поддержки вашей модели ноутбука, используя запросы вида «МОДЕЛЬ поддержка» или «МОДЕЛЬ support».
- Перейдите в раздел загрузок и драйверов, найдите драйвер тачпада (TouchPad, Pointing Device), скачайте и установите его.

- Дополнительно рекомендую установить оригинальные драйверы из раздела «Чипсет», это также может влиять на работу тачпада.

После установки необходимых драйверов перезагрузите ноутбук и проверьте, была ли решена проблема. Примечание: даже если диспетчер устройств сообщает, что наиболее подходящий драйвер уже установлен, это не обязательно так — это сообщение говорит лишь о том, что у самой Windows нет более подходящих.
Дополнительно рекомендую проверить, нет ли устройств с ошибками (с желтым восклицательным знаком) или отключенных устройств (со стрелкой) в диспетчере устройств, зайти в который можно, нажав правой кнопкой мыши по кнопке «Пуск» и выбрав пункт «Диспетчер устройств».
В первую очередь следует обратить внимание на устройства в разделе «Мыши и иные указывающие устройства» и «Устройства HID (Human Interface Devices)» (в последнем случае особое внимание на наличие и состояние пункта «HID-совместимая сенсорная панель»), но потенциально наличие любых устройств с ошибками может влиять и на работу тачпада.

Если такие устройства есть, то следует разобраться с ошибками (открыть свойства устройства, уточнить код ошибки, найти варианты решения), а если устройство отключено — включить его.
Другие варианты решения
В большинстве случаев установка оригинальных драйверов производителя вместо тех, что Windows установила автоматически, решает проблему и необходимые настройки появляются. Если этого не произошло, несколько дополнительных пунктов:
- Если помимо отсутствия настроек сенсорной панели у вас она не работает в принципе, изучите инструкцию Что делать, если не работает тачпад на ноутбуке.
- Если до недавнего времени проблем не наблюдалось, а какие-либо переустановки ОС не производились, попробуйте использовать точки восстановления системы.
- Для некоторых очень старых ноутбуков сенсорная панель с точки зрения ОС может либо считаться обычной мышью, либо иметь лишь базовые настройки, например, только настройки чувствительности.
- При наличии какого-то фирменного ПО от производителя ноутбука с возможностью управления устройствами, внимательно изучите его настройки: возможно, что-то полезное в контексте рассматриваемой темы найдётся там.
- Если настройки появляются после простой перезагрузки ноутбука (именно через опцию «Перезагрузка»), но исчезают после использования завершения работы, спящего режима или гибернации, попробуйте отключить быстрый запуск Windows, а также установить все оригинальные драйверы чипсета и, при наличии — управления электропитанием.
Возможно, ваша ситуация с настройками сенсорной панели отличается, в этом случае опишите ситуацию в деталях: возможно, какие-то закономерности и наблюдения, постараемся разобраться вместе.