
Все способы:
- Способ 1: Стандартное средство ОС
- Способ 2: Стороннее программное обеспечение
- Способ 3: Меню управления монитором
- Способ 4: Использование калибратора
- Вопросы и ответы: 0
Способ 1: Стандартное средство ОС
Основной метод настройки экрана монитора в Windows 11 будет оптимальным практически для всех пользователей, поскольку подразумевает использование только системного средства. В нем вы увидите наглядные инструкции и параметры, позволяющие изменить передачу цветов, их баланс, яркость и контраст до такого уровня, чтобы использовать монитор было комфортно.
- Сначала понадобится найти соответствующий инструмент для калибровки. Для этого откройте «Параметры» через меню «Пуск».
- В новом окне выберите раздел «Система» и перейдите к категории «Дисплей».
- Внизу вы найдете блок с названием «Сопутствующие параметры», в котором следует кликнуть по пункту «Расширенные параметры дисплея».
- Далее вас интересует ссылка «Свойства видеоадаптера для дисплея». По ней и нужно нажать в блоке с названием нужного для калибровки монитора, если их к компьютеру подключено несколько.
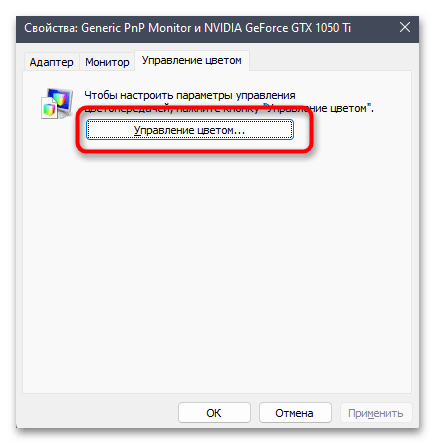
- Отобразится окно свойств монитора, в котором на вкладке «Управление цветом» понадобится нажать кнопку с одноименным названием.
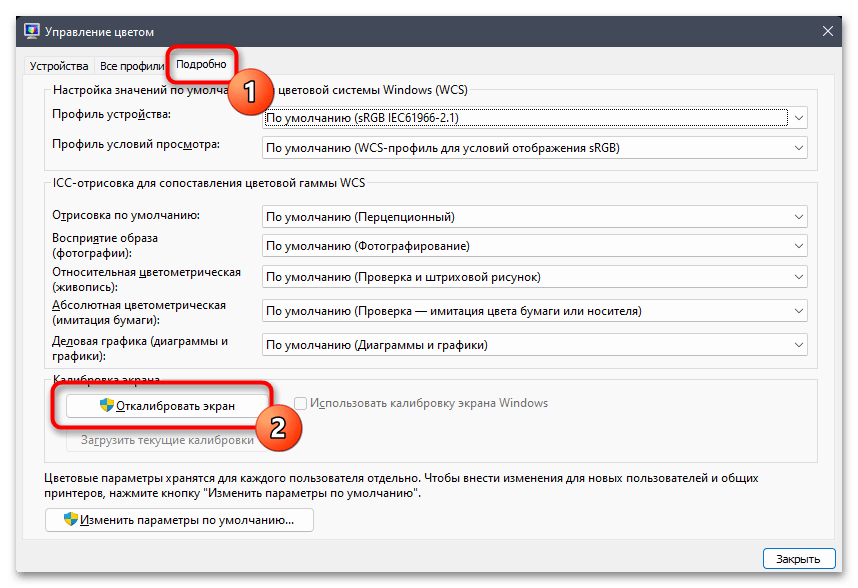
- Перейдите на вкладку «Подробно» и запустите инструмент «Откалибровать экран».
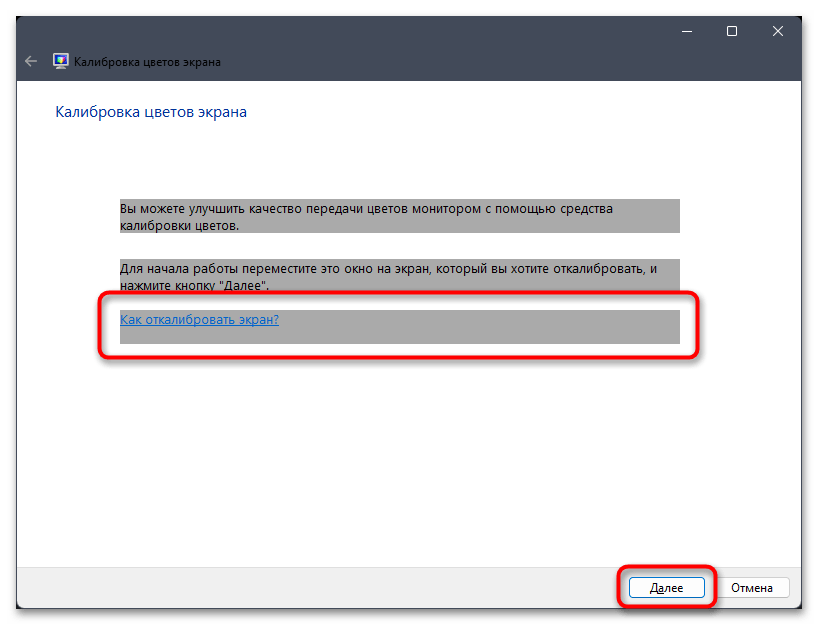
- На этом моменте и начинается сам процесс параметров дисплея. Если вы еще не знаете, какие настройки будете задавать, в новом окне нажмите «Как откалибровать экран?», чтобы получить развернутую инструкцию от разработчиков. Для перехода к следующему шагу кликните по «Далее».
- Прочитайте справку о первоначальных действиях. Их необходимо осуществить в том случае, если ваш монитор поддерживает внутренние настройки. О таких более детально мы еще расскажем в Способе 3.
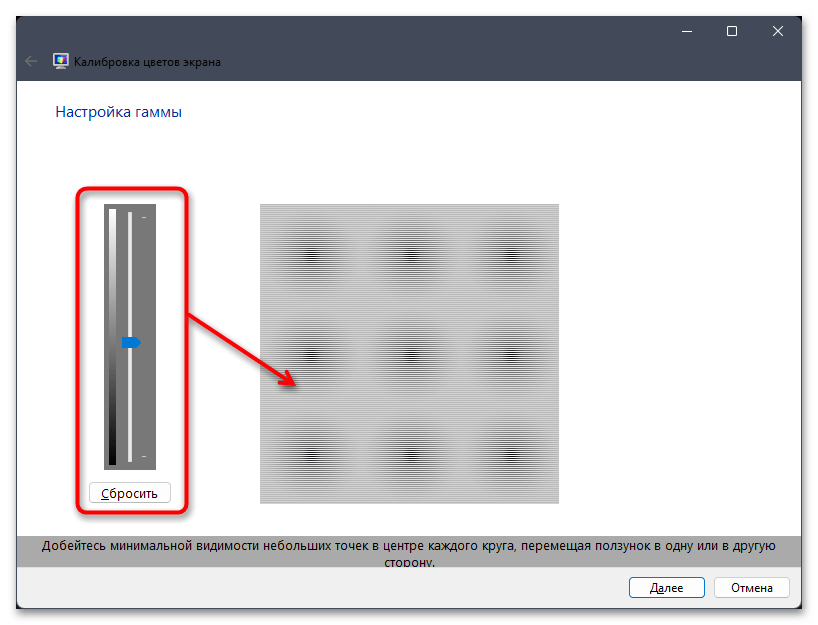
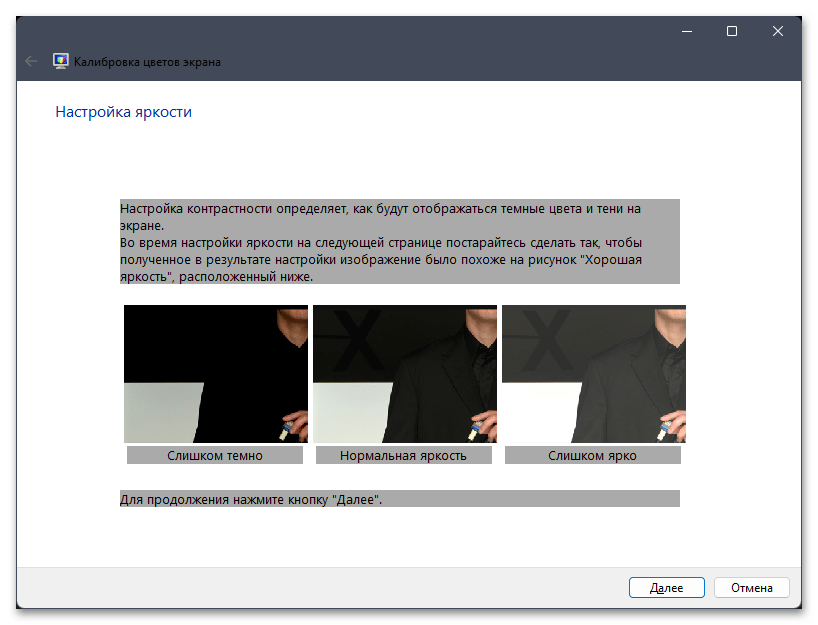
- В следующем шаге отображается информация о правильной настройке гаммы. Сравните три изображения и запомните состояние нормальной гаммы, поскольку примерно такого эффекта и придется достичь при дальнейшей настройке.
- Вы видите описанные выше изображения и имеете доступ к ползунку, который и отвечает за настройку гаммы. Регулируйте его до того момента, пока результат не будет вас устраивает или не станет таким, как было показано в предыдущей инструкции.
- Следующий этап подразумевает настройку яркости и контраста. Данные параметры можно изменить исключительно через панель управления самим монитором, поэтому если у вас нет кнопки вызова меню, этот этап стоит пропустить.
- Если настройка яркости дисплея поддерживается через меню вашего монитора, приступайте к чтению инструкции об этом и приготовьтесь при помощи кнопок на мониторе изменять значение, достигая подходящей для вас яркости.
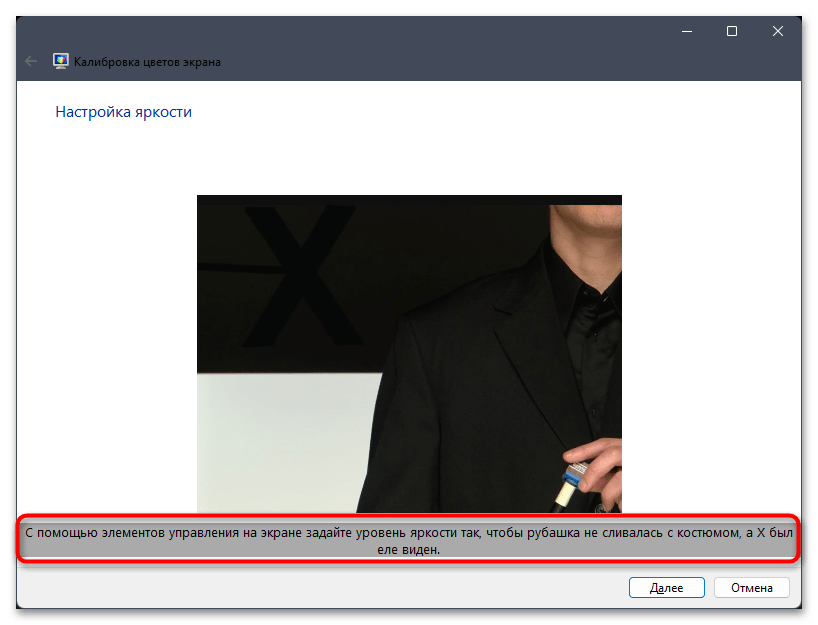
- Прочитайте информацию о том, какой из элементов на картинке должен быть еле виден при настройке яркости. Регулируйте значение через меню монитора, сохраните изменения и переходите далее.
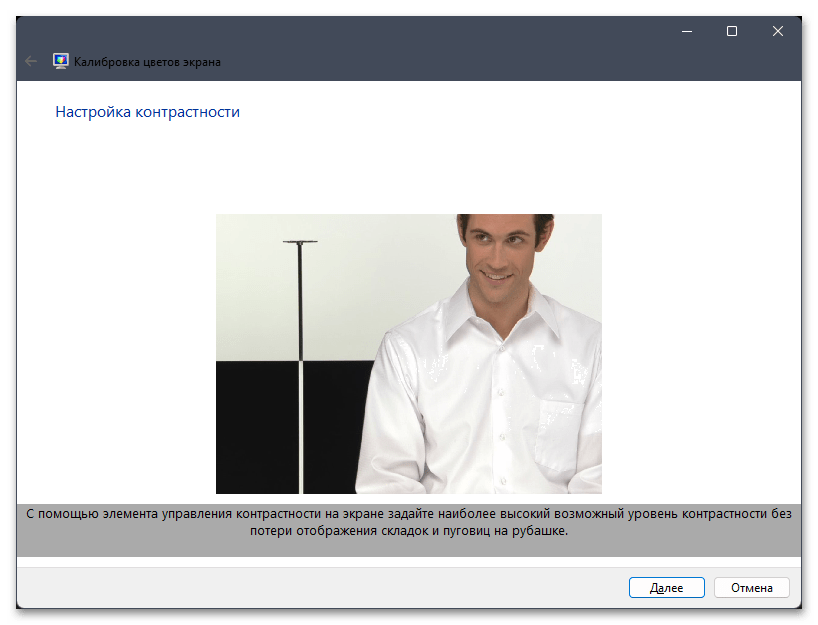
- То же самое необходимо осуществить и с контрастностью. Если ваша модель монитора не поддерживает изменение этого параметра, просто оставьте значение по умолчанию и приступайте к следующей настройке.
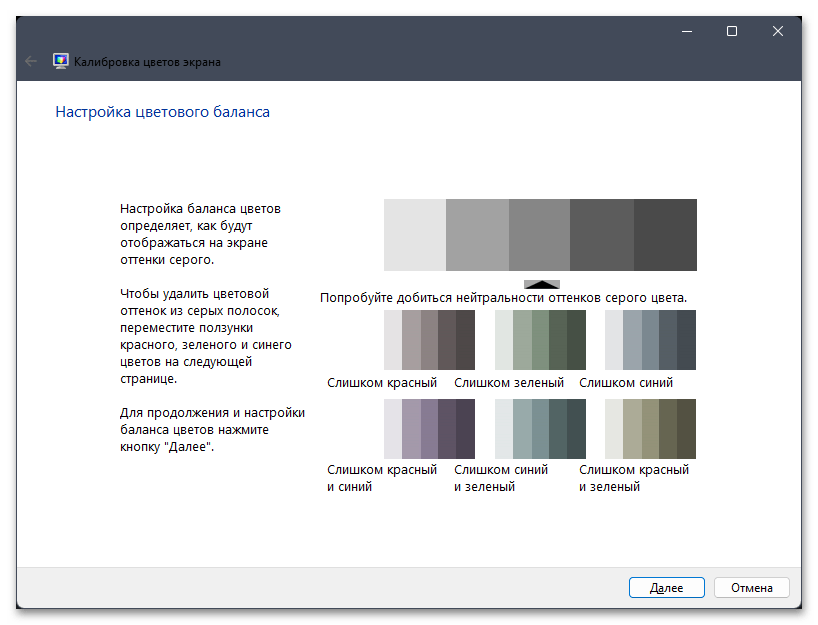
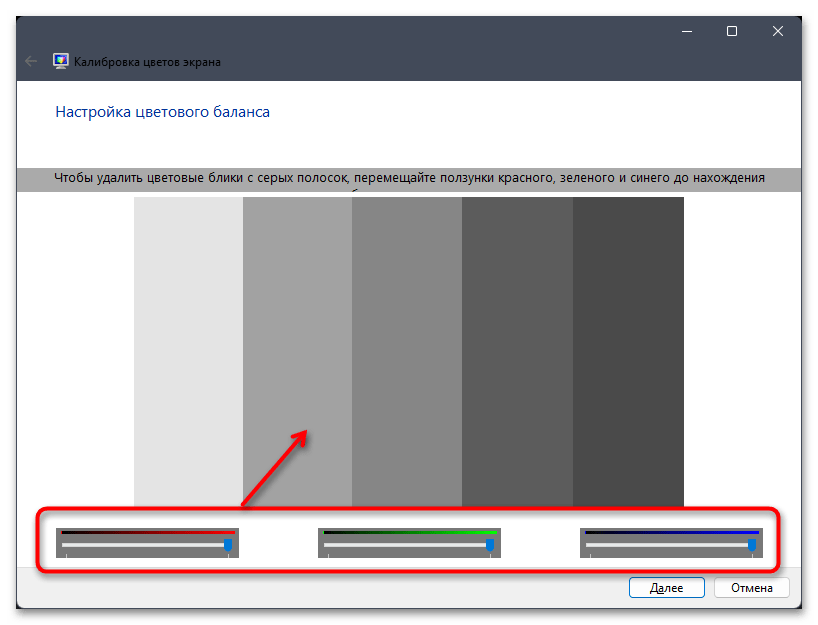
- На экране появится информация о настройке цветового баланса. В этом шаге тоже необходимо сравнить разные картинки и подобрать тот вариант, который будет вас устраивать.
- Начните регулирование отобразившихся на экране ползунков для удаления цветных бликов и серых полосок. Если у вас нет соответствующих знаний о правильной настройке цветового баланса, то лучше старайтесь максимально приблизиться к примеру от разработчиков.
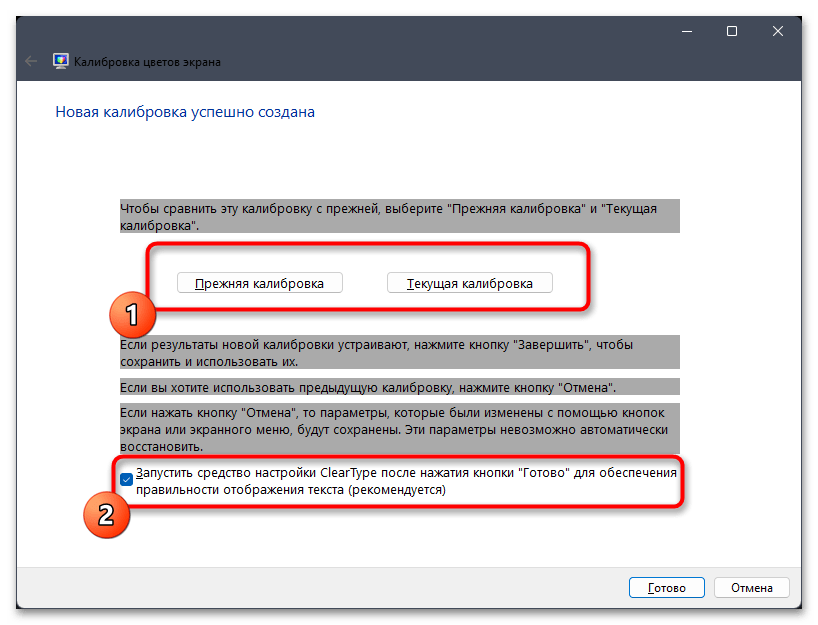
- На этом калибровка экрана при помощи стандартного средства Windows 11 завершена. В следующем окне вы увидите кнопки для сохранения изменений или возвращения к прежней калибровке. Ниже появится опция для запуска ClearType, если помимо калибровки нужно настроить и правильное отображение текста.


Способ 2: Стороннее программное обеспечение
Существует не так много программ, которые подходят для калибровки экрана монитора без использования дополнительной аппаратуры. Однако несколько подходящих вариантов все же есть, а в рамках этой статьи мы предлагаем остановиться на решении под названием QuickGamma. Эта бесплатная программа предназначена для быстрого регулирования гаммы на ПК и выбора основных цветов, что немного влияет на их баланс.
Скачать QuickGamma
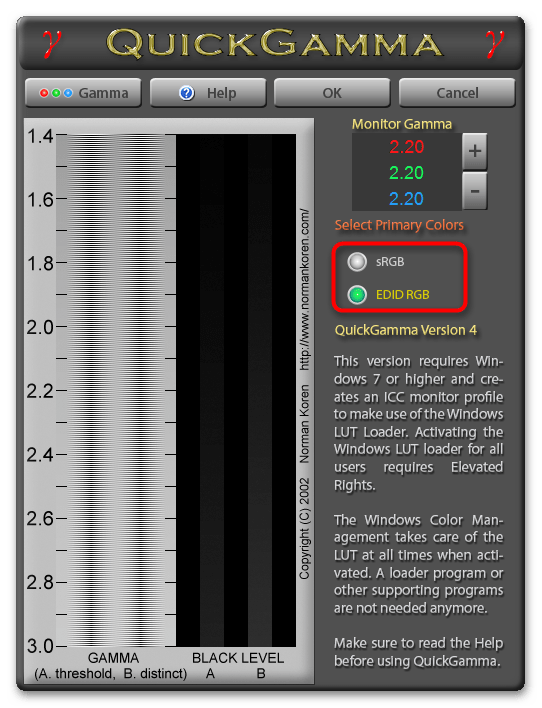
- В главном экране слева вы видите текущее значение гаммы и уровень черного. При помощи кнопок на «Monitor Gamma» осуществляется регулировка сразу трех основных цветов. Это позволит вам понизить или повысить общую гамму. Как раз эта настройка и является основной в данной программе.
- Мониторы, работающие в режиме EDID RGB, тоже поддерживаются, поэтому в случае необходимости всегда можно переключиться на другой тип предпочтительных цветов.
- Помимо общих кнопок с настройками, QuickGamma поддерживает работу с каждым цветом отдельно. Для этого на верхней панели нажмите кнопку «Gamma», чтобы перейти к соответствующему меню.
- Управление в нем максимально простое и понятное: слева отображаются три основных цвета, а справа — регуляторы для каждого из них. Увеличивайте или уменьшайте гамму до тех пор, пока не достигнете желаемого результата.
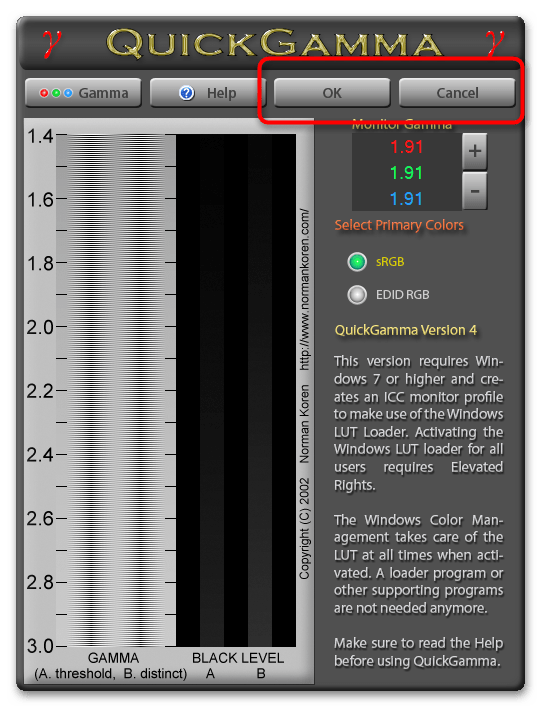
- По завершении работы с QuickGamma в главном окне нажмите «OK» для сохранения настроек или «Cancel», чтобы сбросить их до состояния по умолчанию.


На нашем сайте есть отдельная статья с обзором всех программ, подходящих для калибровки монитора. Мы рекомендуем обратить внимание на нее, если приведенный выше пример показался не совсем актуальным для вашей модели монитора.
Подробнее: Программы для калибровки монитора
Способ 3: Меню управления монитором
Вкратце остановимся на методе, который подразумевает исключительно использование меню монитора с его настройками для калибровки. Если такое поддерживается, значит, на самом мониторе сбоку или снизу должны быть кнопки, при помощи которых открывается это меню и осуществляется переключение пунктов. Значение каждой кнопки очевидно, поскольку рядом всегда есть иконка, отображающая действие.
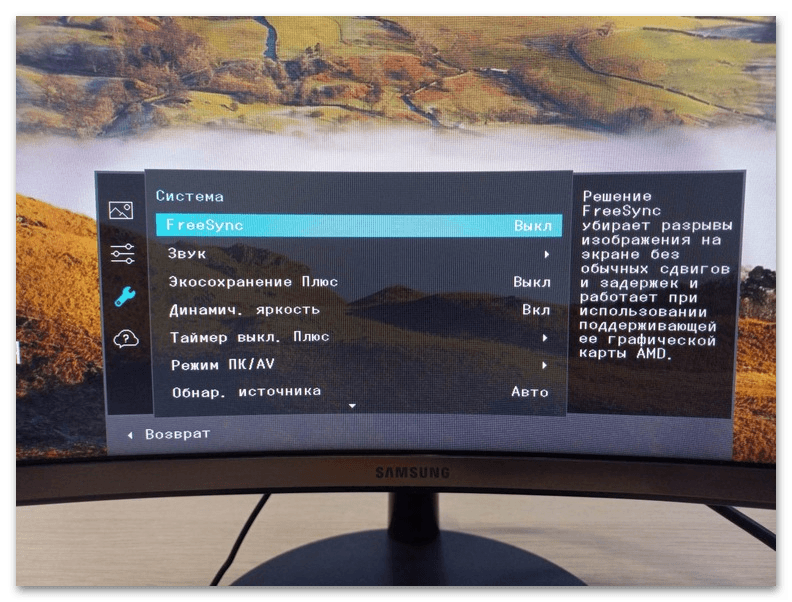
Предварительно можете открыть любое изображение для калибровки яркости, контраста, баланса цветов или гаммы, отыскав его в открытых источниках. Далее перемещайтесь по меню и находите нужные ползунки. Изменяйте их значения до тех пор, пока не добьетесь подходящего отображения. Кстати, для настройки яркости и контраста как раз можно использовать средства калибровки из Windows 11 с его примерами и инструкциями, о чем уже было рассказано выше.
Способ 4: Использование калибратора
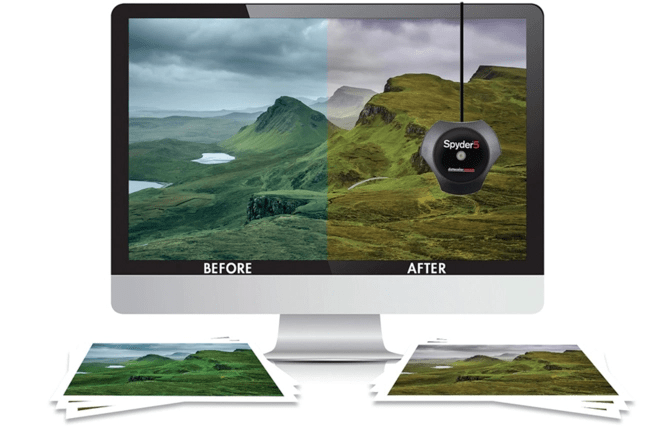
Калибровка экрана монитора при помощи специальных аппаратных средств — дорогостоящая процедура, подходящая исключительно профессионалам. На картинке ниже вы видите пример того, как выглядит одна из моделей такого устройства. Обычно оно подключается к компьютеру по USB, далее крепится к монитору и считывает цвета.
Сама калибровка происходит через фирменное программное обеспечение калибратора, соответственно, от каждого производителя оно будет разное. Мы не будем надолго останавливаться на данном методе, но примерно продемонстрируем, как выглядит взаимодействие с подобным ПО на примере DisplayCAL.
Скачать DisplayCAL с официального сайта
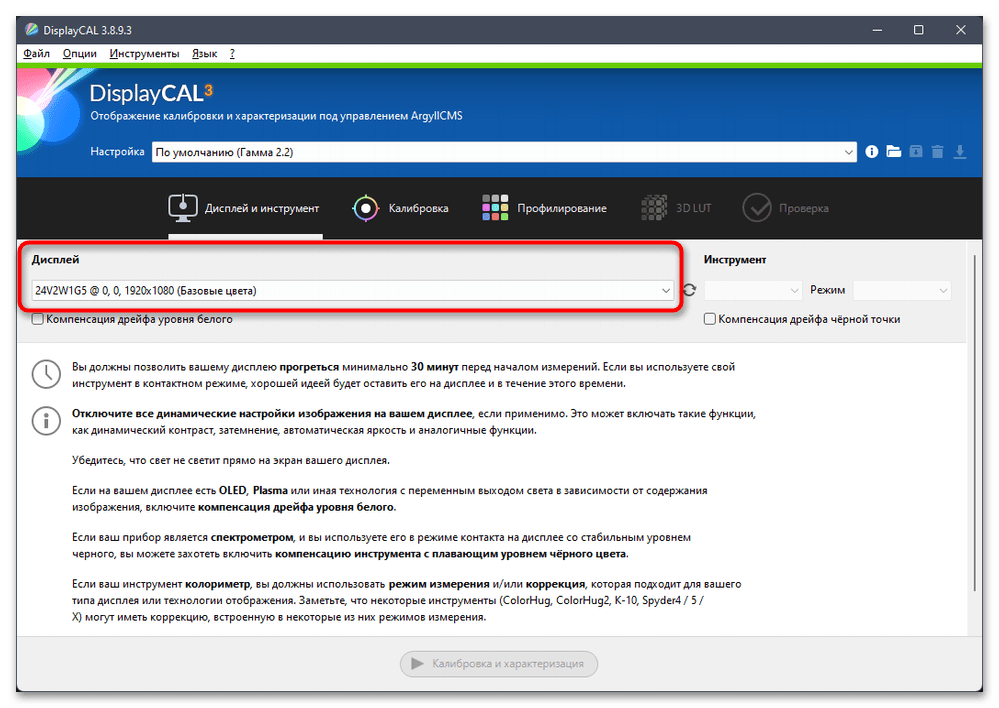
- Для работы с DisplayCAL вам понадобится приобрести калибратор от данного производителя и подключить его к компьютеру. Без устройства никакие настройки сохранены не будут. При запуске софта выберите дисплей для работы, если их подключено несколько.
- Далее прочитайте небольшую инструкцию от разработчиков о том, как происходит калибровка и что делать в случае появления различных неполадок или неточностей в считывании цветов.
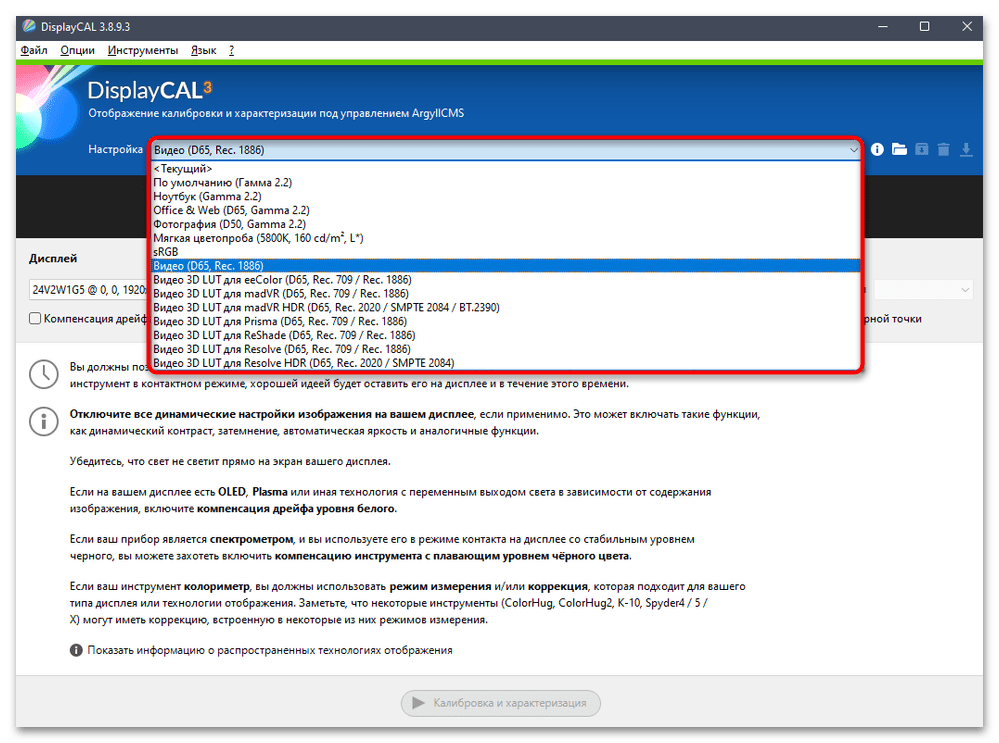
- На панели сверху будет список «Настройки», из которого вы уже можете выбрать разные заготовленные параметры цветов для разных задач. Это подходит тем юзерам, кто уже знает, для каких целей используется монитор и какие значения передачи цветов нужно выставить.
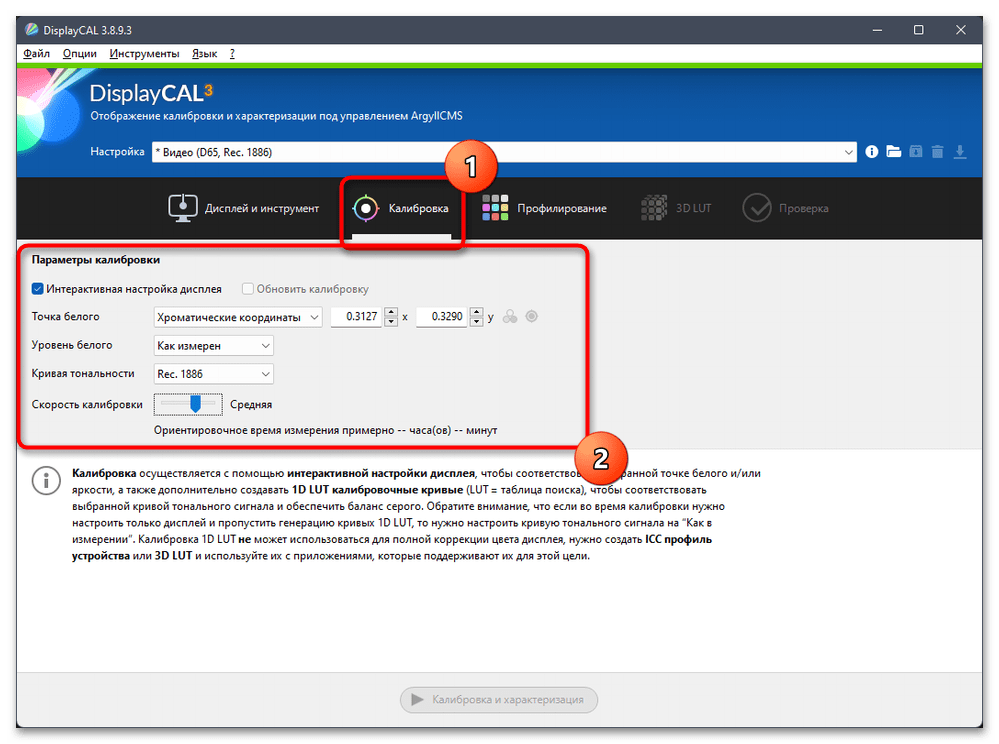
- Если шаблон найден не был, происходит переход на вкладку «Калибровка», где уже осуществляется ручная настройка точки белого, уровня белого, кривой тональности и скорости калибровки. Дополнительные настройки будут на вкладке «Профилирование».
- Как только вы завершите настройку, понадобится щелкнуть по «Калибровка и характеризация», чтобы настройки вступили в силу. Иногда это может занять до часа времени.


Это был только общий пример, демонстрирующий возможности подобного программного обеспечения. Работа с таким софтом напрямую зависит от приобретенного калибратора, поэтому обязательно читайте инструкции от производителей и еще перед покупкой ознакомьтесь с тем, для каких целей предназначен тот или иной калибратор.
Наша группа в TelegramПолезные советы и помощь
A blurry screen in Windows 11 can be frustrating and difficult to fix. Fortunately, Microsoft has included several methods in the Windows 10 and 11 operating systems to optimize display settings and fix blurry screen issues.
This article will explain the five best ways to fix Windows 11 blurry text.

1. Check Your Resolution Settings
Low-resolution displays tend to be “fuzzy” since reduced resolutions will generate bigger visible pixels. So, appropriately setting the scaling and display resolution settings can help resolve usability and image quality issues, such as a blurry screen.
To change these settings:
- Right-click the Start menu and select Settings.
- Select System, then choose Display.

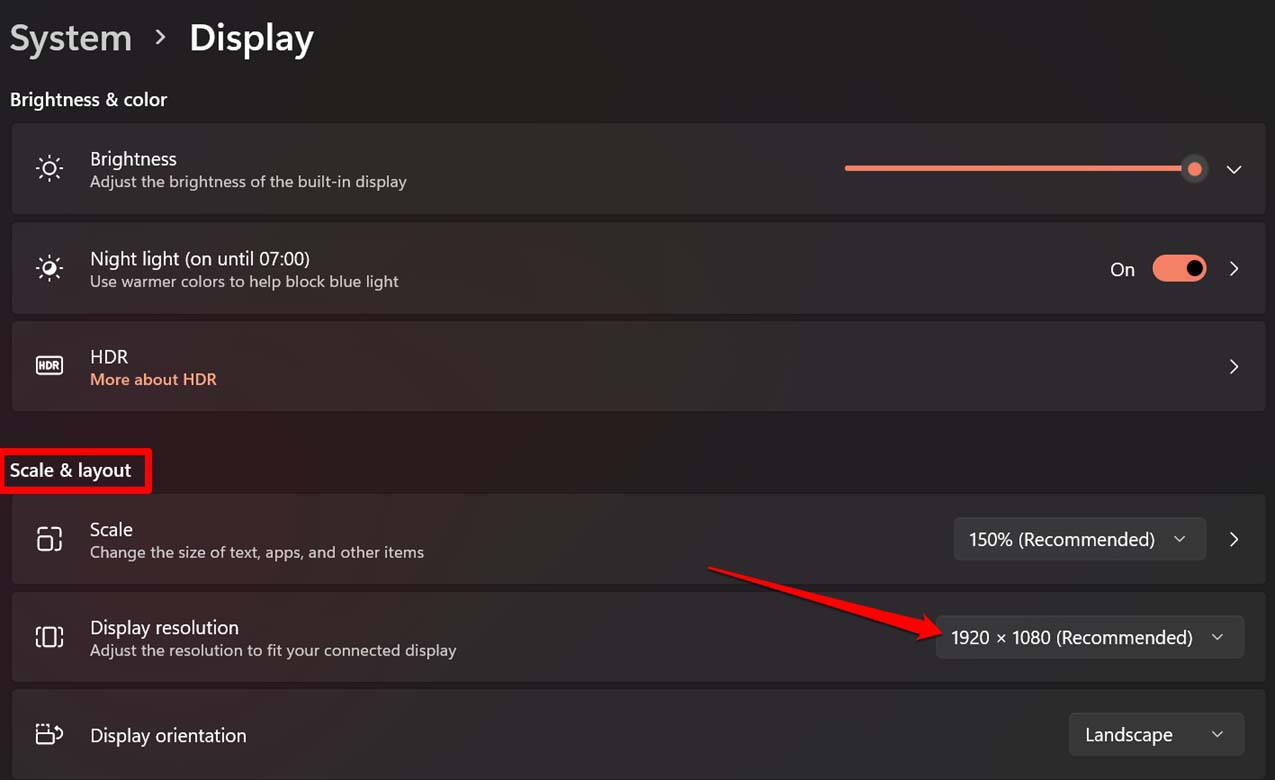
- Here, increase your screen resolution settings to match your monitor’s output. For example, if your monitor is 1920 x 1080 resolution, then set it to that for the best appearance. This should be the recommended option.

- Select Keep changes if the screen looks good or select Revert if not and try another resolution.
2. Optimize Your DPI Scaling Settings
The dots per inch (DPI) value determines how crisp your display appears. The lower your DPI, the lower your pixel density. A DPI that is too low or isn’t optimized for your display can cause blurry screen problems.
Windows can use scaling settings to modify the UI according to the monitor’s pixel density, so the UI elements will not look too small on a monitor with a high pixel density. To change your scaling settings:
- Right-click the Start menu and select Settings.
- Select System then choose Display.
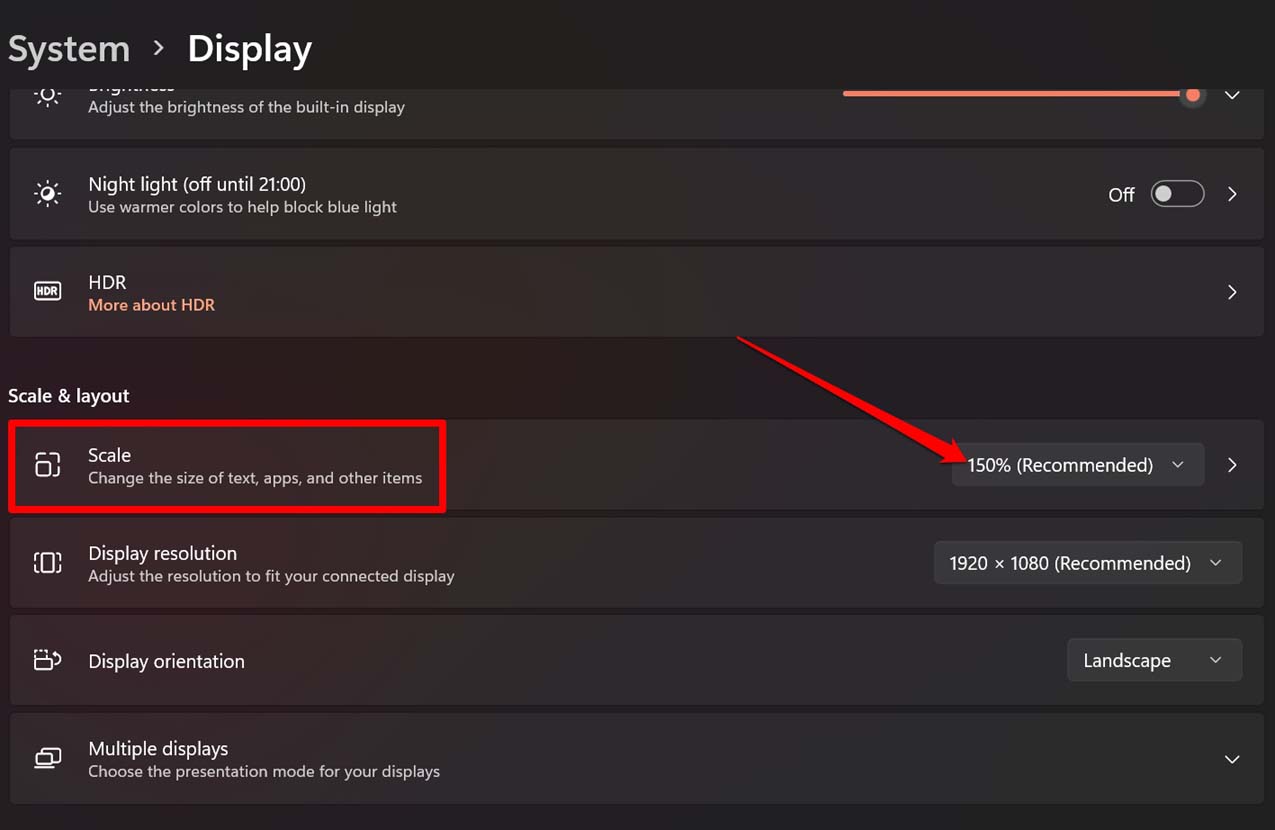
- Next, under Scale and Layout, select the drop-down box and choose a scaling setting. You may have to play around a little to find the perfect setting for your monitor.

You can also adjust the DPI differently for each app. This is useful if a single app appears blurry rather than the entire display. To adjust this:
- Right-click the app. This should be the .exe file that opens the app.
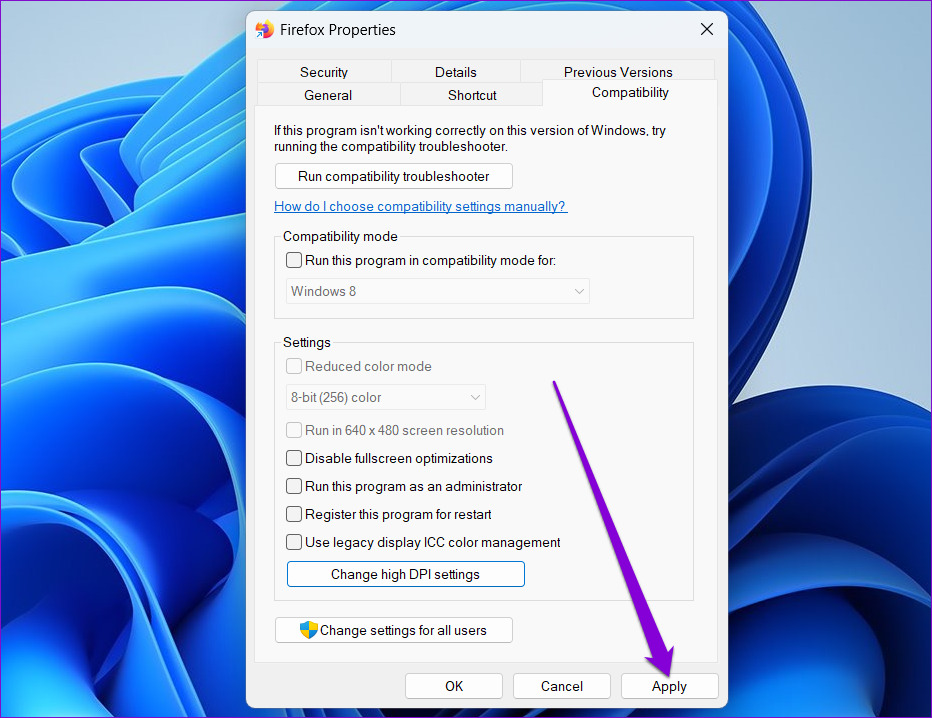
- Select Properties, then choose the Compatibility tab.

- Select Change high DPI settings.

- Tick the box next to Use this setting to fix scaling problems for this program instead of the one in Settings and experiment with the options to determine which setting renders that app best.

3. Turn on ClearType
ClearType may not be enabled if you have difficulty reading text on Windows 11. In most cases, ClearType should be enabled by default, but it is still worth checking. Enabling this setting should help improve the clarity of the text, making it easier to read.
To do so:
- Open the Settings app by pressing the Windows key + I.
- Choose Personalization, then select Fonts.

- Select the Related Settings drop-down menu and choose Adjust ClearType text.

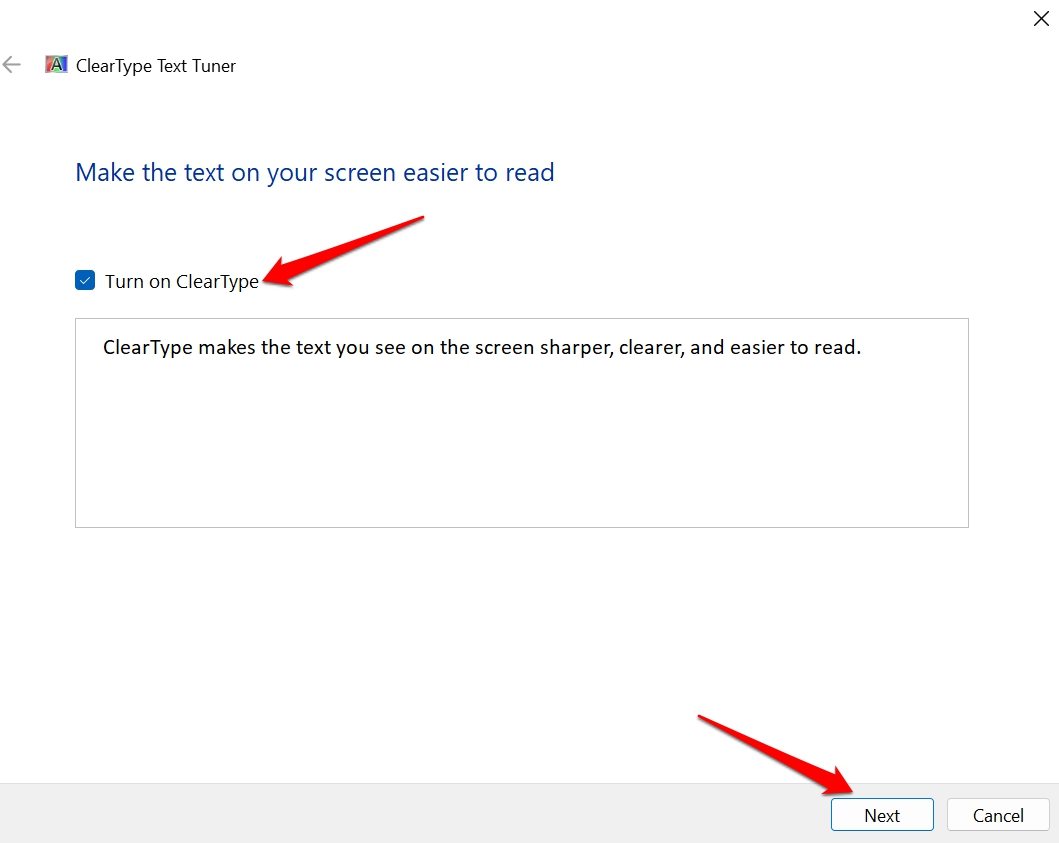
- Here, make sure Turn on ClearType is checked.

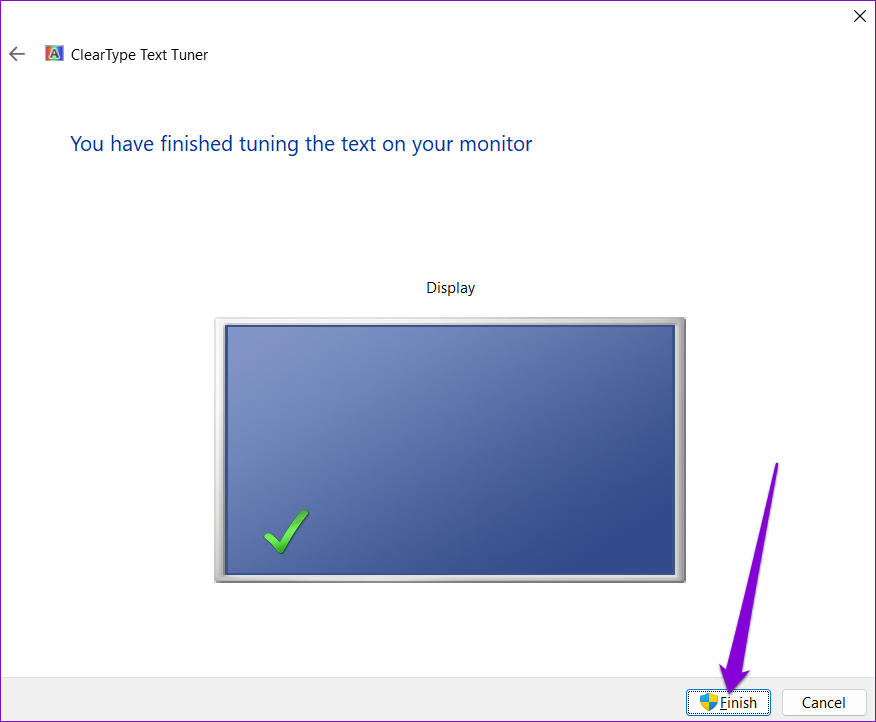
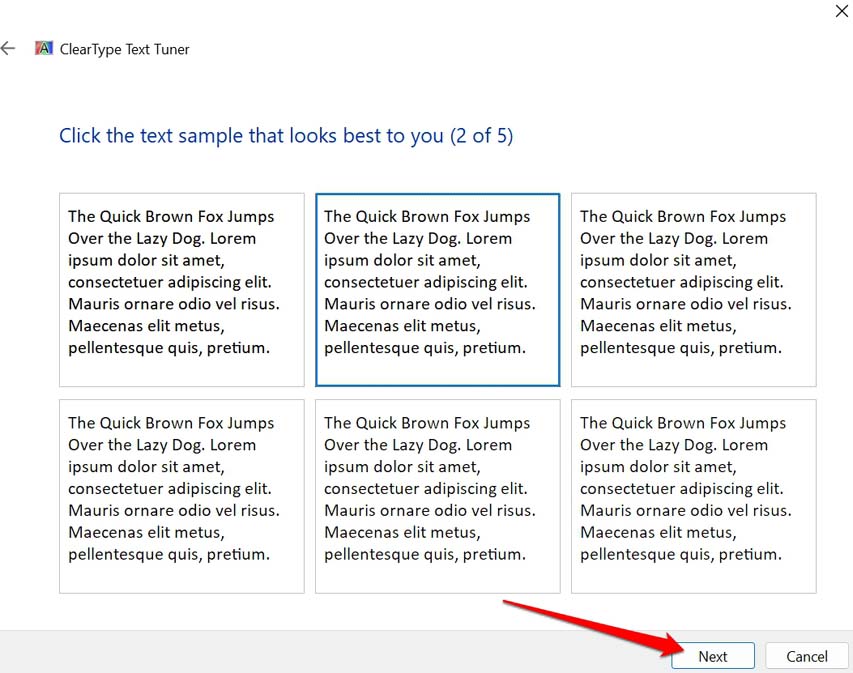
- Select Next and work through the ClearType Text Tuner instructions to optimize your screen. You’ll need to choose the text sample that is the least blurry.
4. Change the Performance Settings
If you’re experiencing certain blurry apps, but the rest of the display is fine, you can set high-performance graphics settings to improve the quality when using that app. To do so:
- Right-click the Start menu and select Settings.
- Select System and choose Display.
- Select Graphics.

- Use the search bar to find the app in question, then select it.
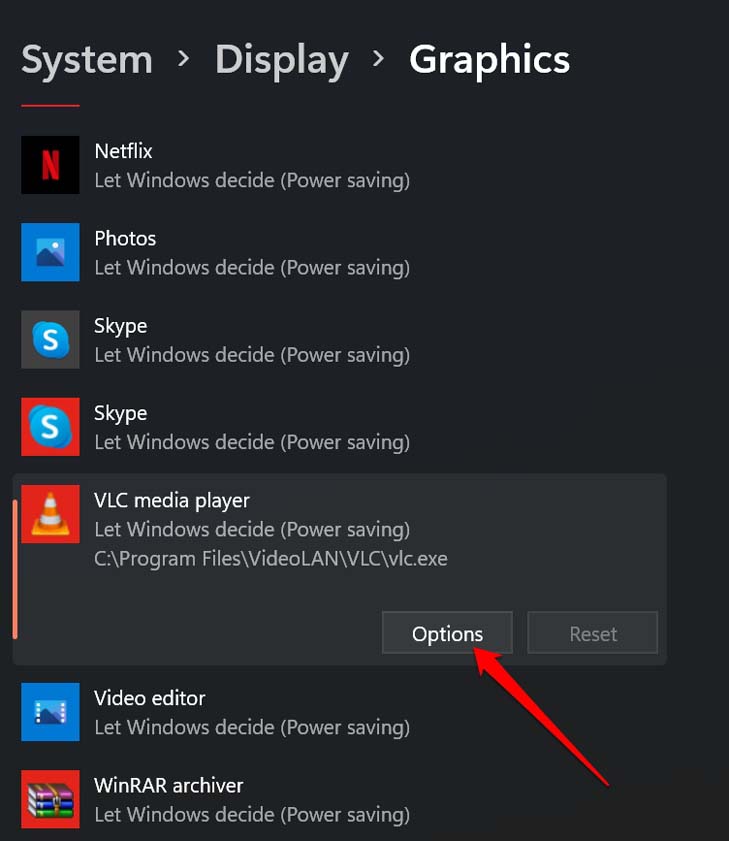
- Press Options.

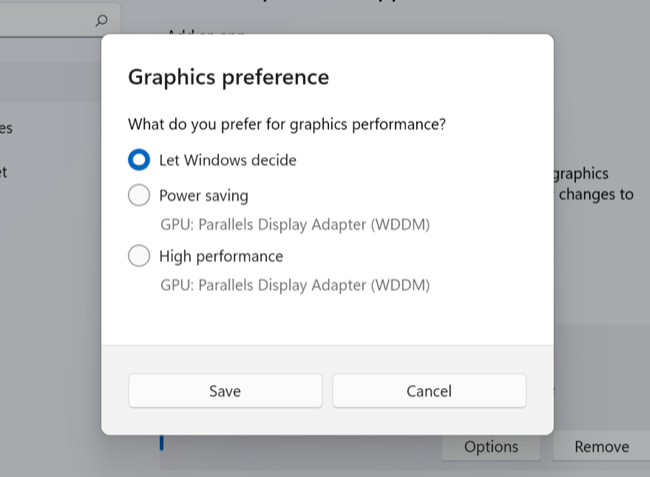
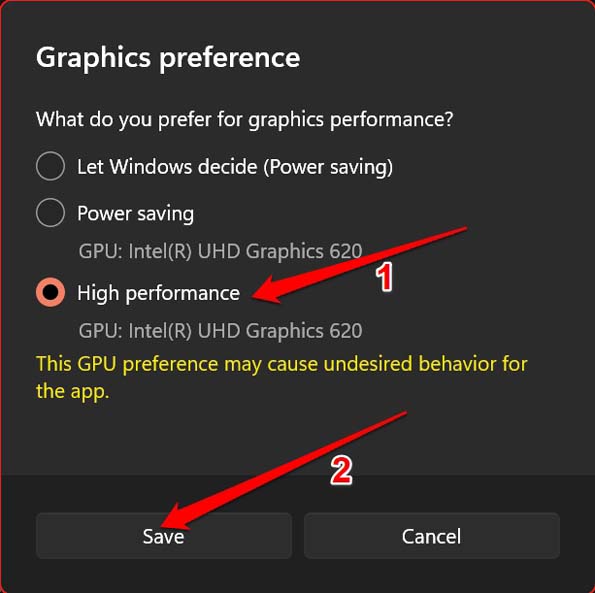
- In the Graphics preference window, select High performance.

- Select Save.
You can also force Windows to adjust the display for the best appearance in the performance settings:
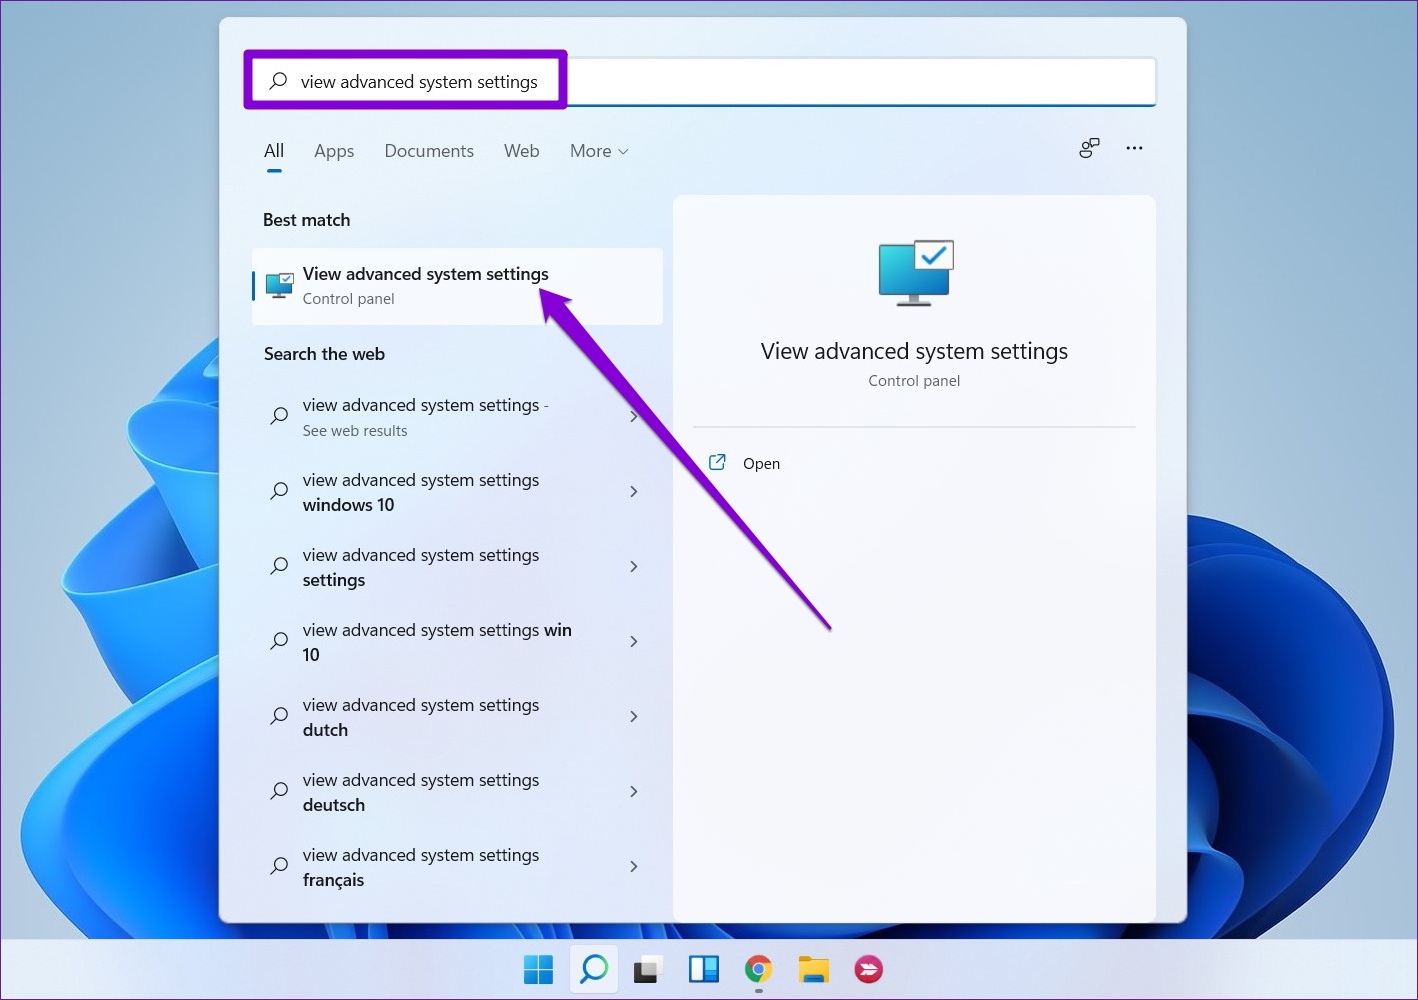
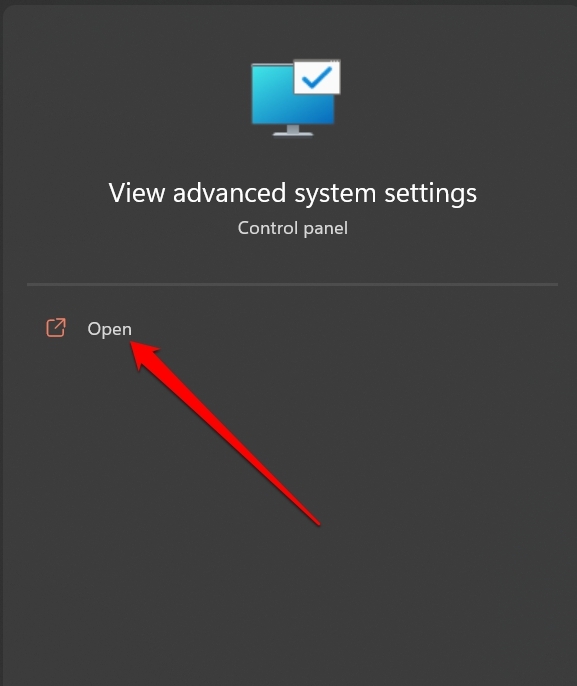
- Open the Start menu and type “view advanced system settings,” then select the first result.
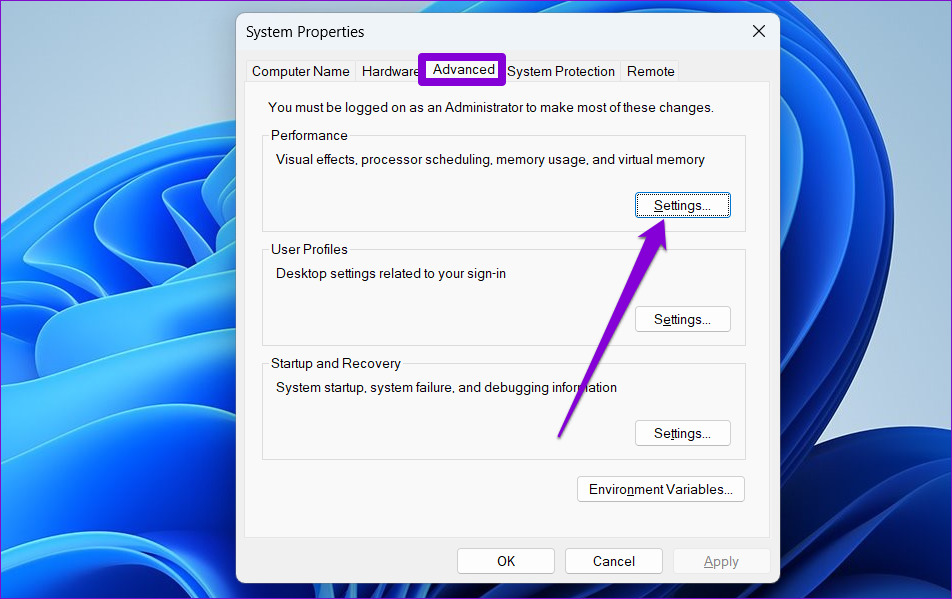
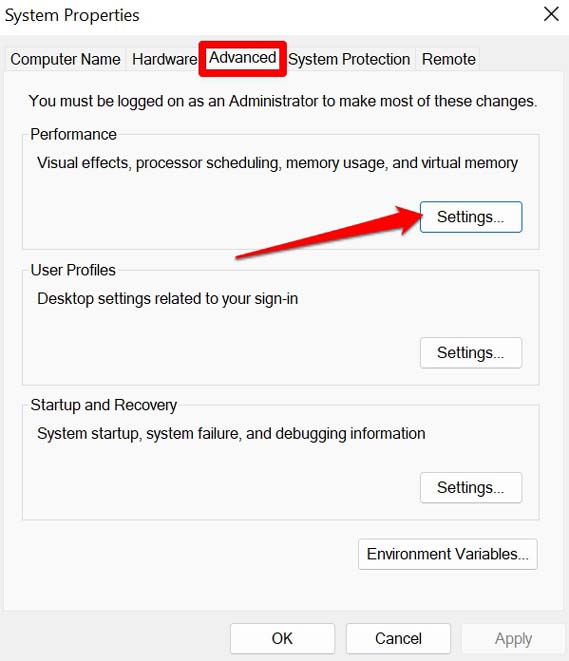
- In the System Properties window, select the Advanced tab. Then, under “Performance,” select Settings.

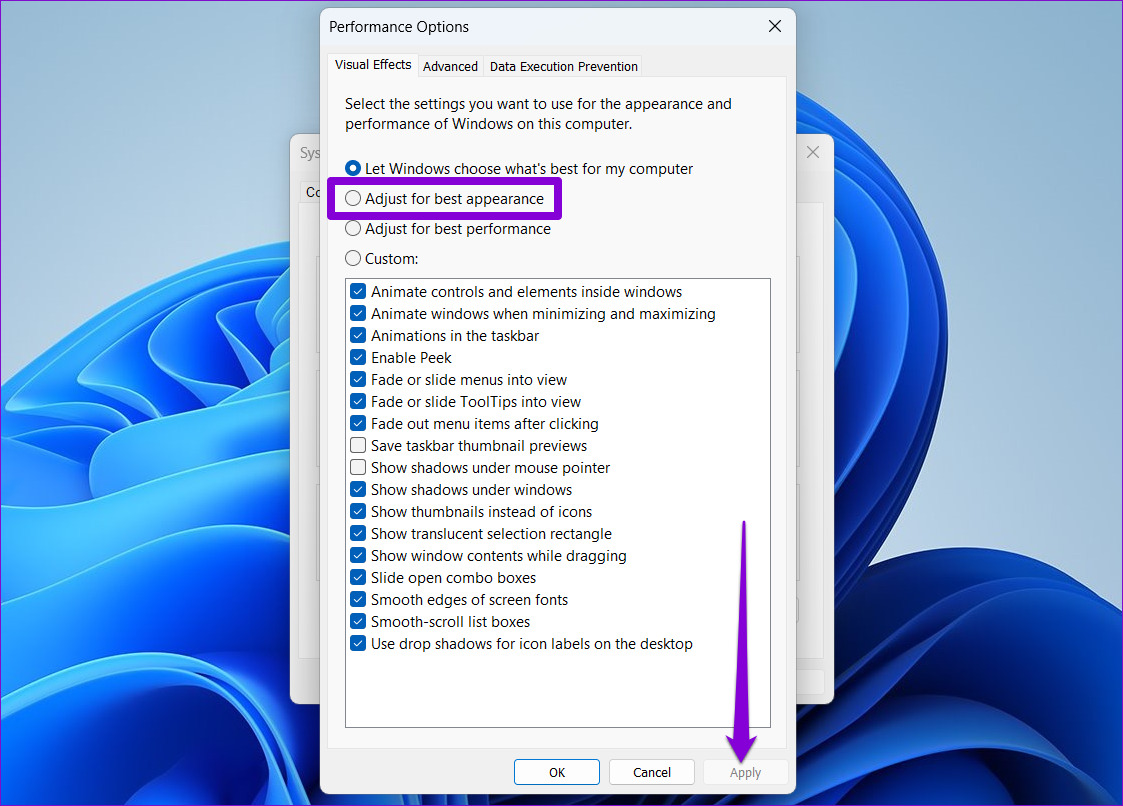
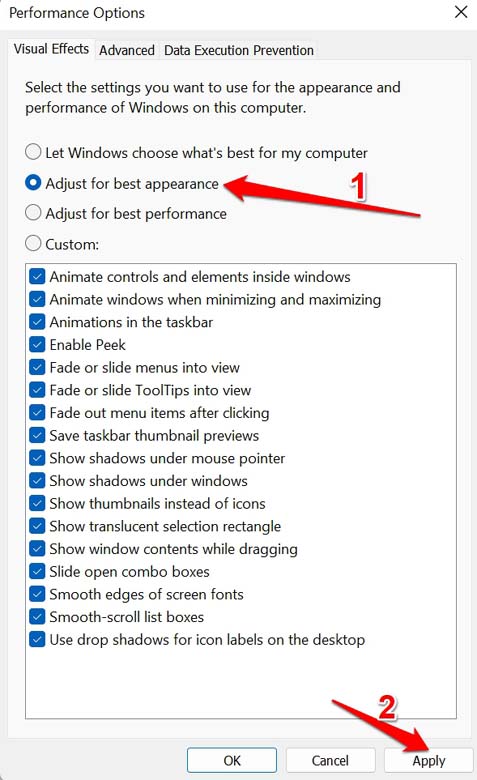
- In the Visual Effects tab, toggle on Adjust for best appearance.

5. Check Your Graphics Card Driver
Graphics card drivers ensure that your GPU is up-to-date with the latest software. Occasionally, old drivers can introduce bugs or be incompatible with newer apps and programs. Updating your drivers can resolve these issues and improve screen rendering.
You can easily update your NVIDIA graphics card by opening NVIDIA GeForce Experience and selecting Drivers > Download.
To update an AMD graphics card, open AMD’s Auto-Detect and Install utility and let it discover and install any new drivers for your GPU.
Finally, to update an Intel ARC or Intel Extreme Graphics card, use Intel’s Driver & Support Assistant.
If you aren’t sure which graphics card you have, you can easily update any as follows:
- Press the Windows key + R to open Run.
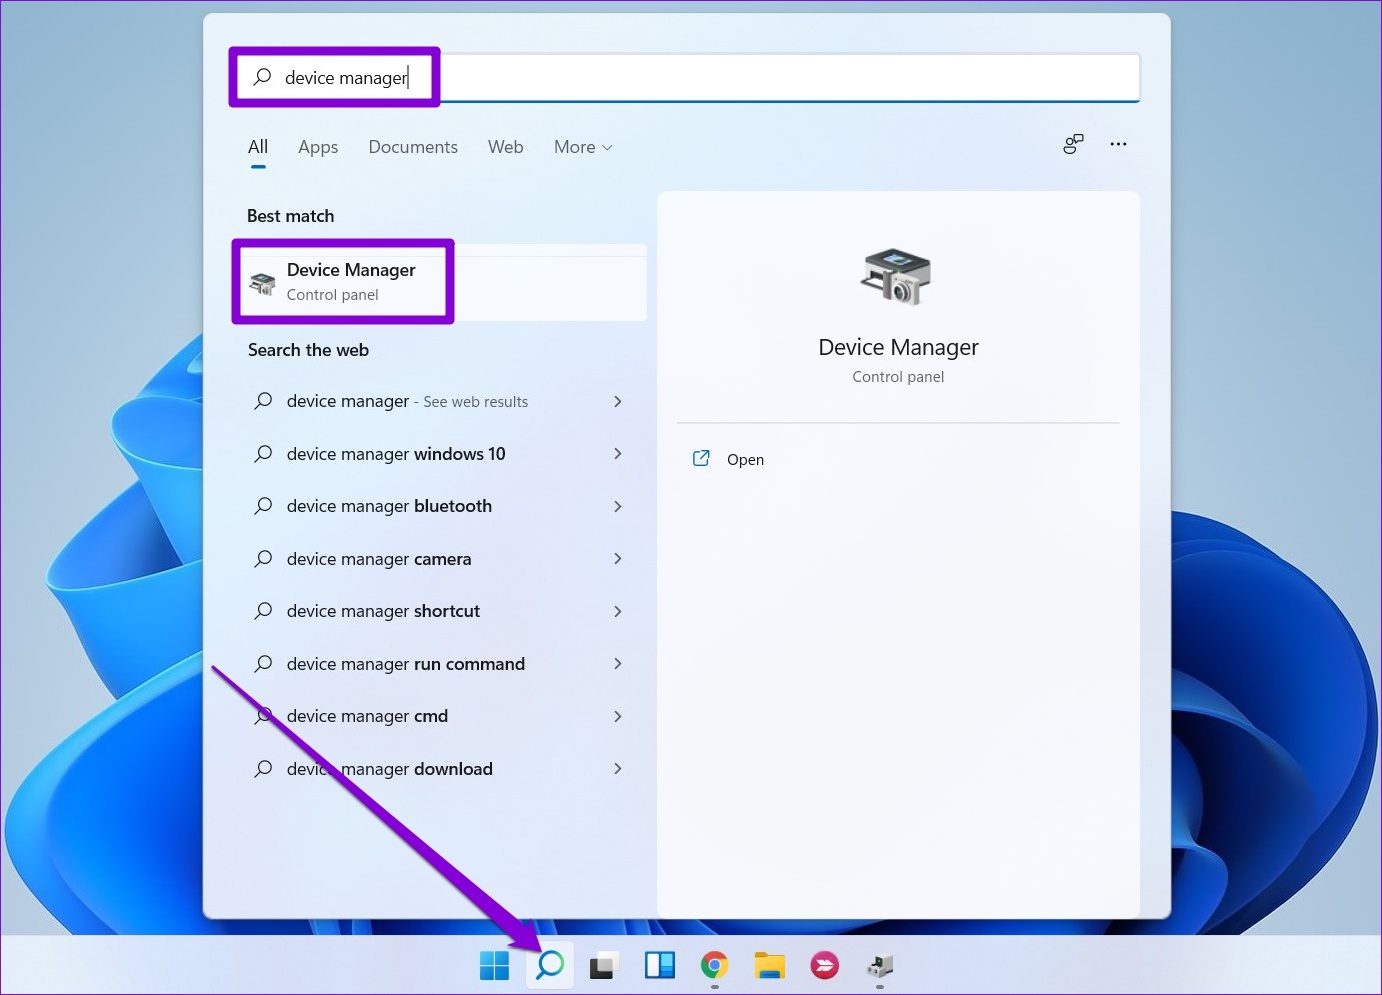
- Type “devmgmt.msc,” and press Enter to open the Device Manager.

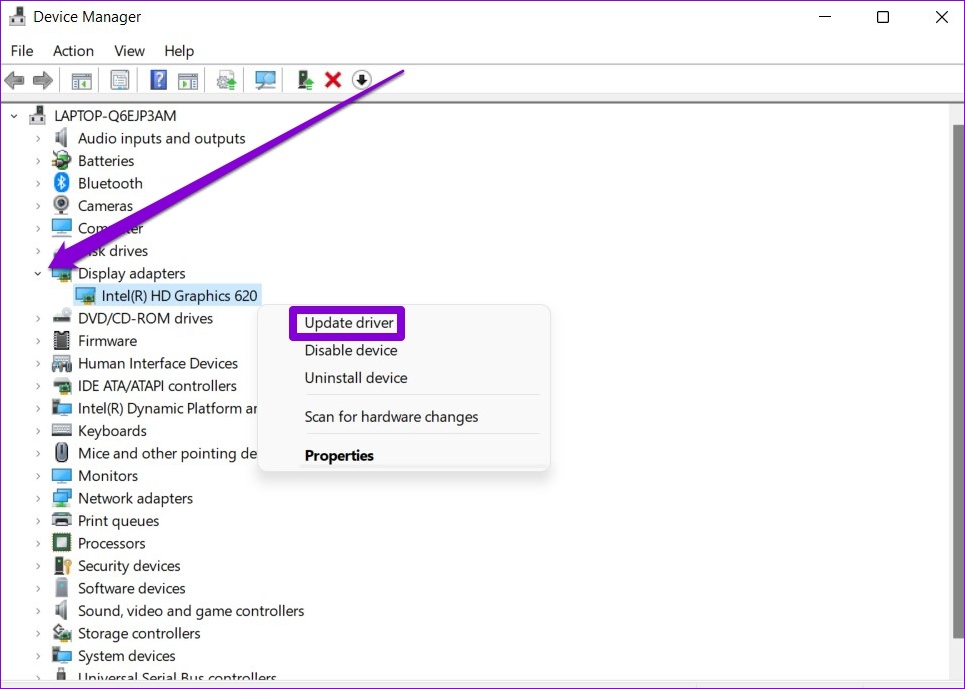
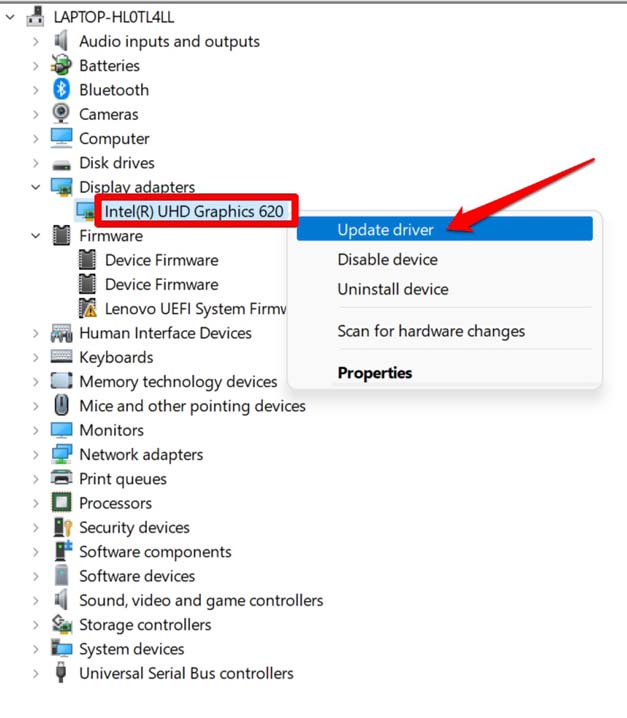
- Right-click Display adapter and select Update driver.

- Follow the on-screen instructions to complete the wizard and update your display driver.
Clear as Day
Trying to read blurry text or make sense of a blurry screen can strain your eyes, so it’s definitely something you want to fix as soon as possible. Hopefully, one of the solutions in this article has helped you fix the blurry screen problem on your Windows 11 PC.
Related Posts
- How to Fix a “This file does not have an app associated with it” Error on Windows
- How to Add OneDrive to Windows File Explorer
- How to Fix an Update Error 0x800705b4 on Windows
- How to Resolve “A JavaScript error occured in the main process” Error on Windows
- How to Fix the Network Discovery Is Turned Off Error on Windows
Sign in to your How-To Geek account
Quick Links
-
Change Resolution and Scaling Settings
-
Enable ClearType for Blurry Text
-
Blurry App? Enable High-Performance Graphics Settings
-
Consider a Graphics Driver Update
Summary
Change your Windows display resolution and scaling settings if you have a blurry screen in normal desktop conditions. Enable ClearType if text looks blurry, or throw more power at the problem by enabling «High Performance» graphics mode in affected apps. A driver update also can help remedy visual problems.
A blurry or fuzzy screen can make using the Windows 11 desktop and your applications a miserable experience. Fortunately, there are a few things you can try to fix the problem, from changing settings to updating your drivers.
Change Resolution and Scaling Settings
There’s a difference between scaling and resolution settings in Windows. Setting both correctly can fix usability and render quality problems, like a blurred screen.
A low-resolution display could be described as «blurry» since lower resolutions result in larger visible pixels. Scaling settings allow Windows to scale up or down the UI (user interface) depending on pixel density so that UI elements don’t appear too small on a monitor with high pixel density.
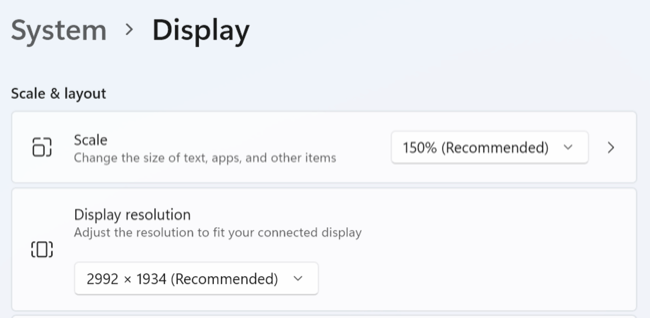
Both can be adjusted under Settings > System > Display. First, increase your screen resolution to increase pixel density (Windows will have a «recommended» setting for your display). You can then set scaling independently on any of your attached monitors.
Enable ClearType for Blurry Text
If text appears blurry, pixelated, or hard to read on Windows 11, adjusting your font settings to make sure ClearType is enabled can help. This should be enabled by default, but it’s worth checking if you’re having problems with font rendering.
Head to Settings > Personalization > Fonts and click on the «Related Settings» dropdown button. In the menu that appears, click on the «Adjust ClearType text» option then make sure «Enable ClearType» is checked in the window that appears.
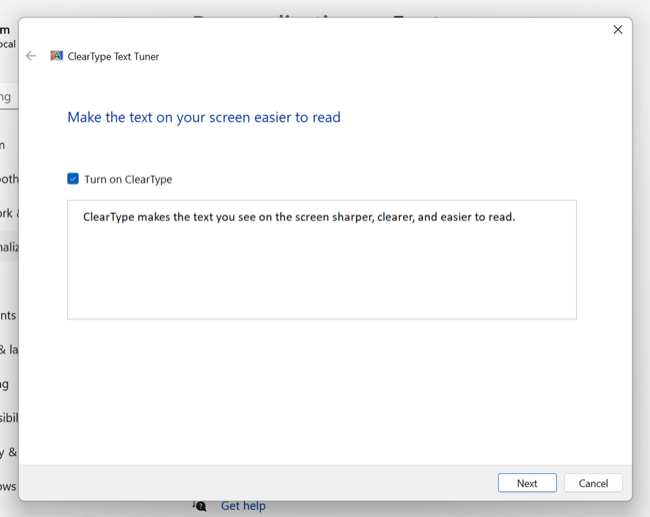
Hit «Next» and run through the ClearType Text Tuner to make sure that your display is set up for the best results. You’ll need to pick the text samples that look best to you to tune the way Windows renders fonts on your display.
Blurry App? Enable High-Performance Graphics Settings
If your screen looks blurred in a particular app, you can try forcing Windows to use high performance settings at all times. To do this, head to Settings > System > Display > Graphics and nominate an app. You can either select from the list of pre-populated apps, or hit «Browse» and find the EXE file you want to target.
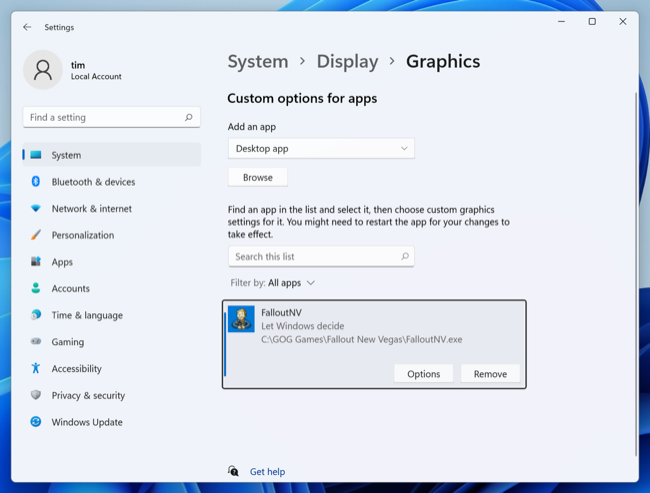
Now hit «Options» and choose «High performance» in the window that appears. Hit «Save» and try launching the app again. This should cause Windows to throw everything it has at the app, even if you’re using a laptop connected to battery power.
Primarily this will affect performance, but it may affect image clarity too. You should be able to increase graphical settings like resolution and detail levels without worrying about Windows holding back on performance.
Consider a Graphics Driver Update
Updating your graphics drivers is essential to stay up to date with the latest releases. New drivers can fix issues like poor performance, frequent crashes, glitches, and rendering issues like blurry visuals.
You can do this using the utility that came with your graphics card like NVIDIA GeForce Experience (or perform driver updates without GeForce Experience) and AMD’s Auto-Detect and Install utility. If you have Intel ARC or Intel Extreme graphics you can use Intel’s Driver & Support Assistant.
New driver updates can improve the performance of features you’re already using, especially upscaling solutions like NVIDIA’s Deep Learning Super Sampling (DLSS). This was especially true when AMD FidelityFX Super Resolution (FSR) move from spatial to temporal upscaling, yielding a better quality image.
Sometimes graphics card driver updates don’t go to plan, leaving you in a worse state than before you started. Learn how to recover from a bad GPU driver update. Lastly, if your display is blurry because it’s covered in gunk, make sure you avoid damage by cleaning it properly.
Quick Tips
- Ensure that the display resolution and scale are set to the recommended values.
- Running the ClearType Text Tuner on Windows can enhance the clarity and sharpness of text on your PC.
- If the issue persists, consider adjusting performance options and updating the display drivers on your PC.
Fix 1: Change Display Resolution and Scale
One of the most common causes of a blurry Windows 11 screen is the incorrect display resolution or scale. Hence, it’s the first thing you should check.
Step 1: Press the Windows + I keys to launch the Settings app and go to System > Display.

Step 2: Under Scale & layout, use the drop-down menu next to Display resolution > select the recommended option.
Step 3: Use the drop-down menu next to Scale to select the recommended value.

Fix 2: Turn on ClearType Text
If the text on your Windows 11 PC still appears blurry, you can make it sharper using the ClearType Text Tuner on Windows. Here’s how.
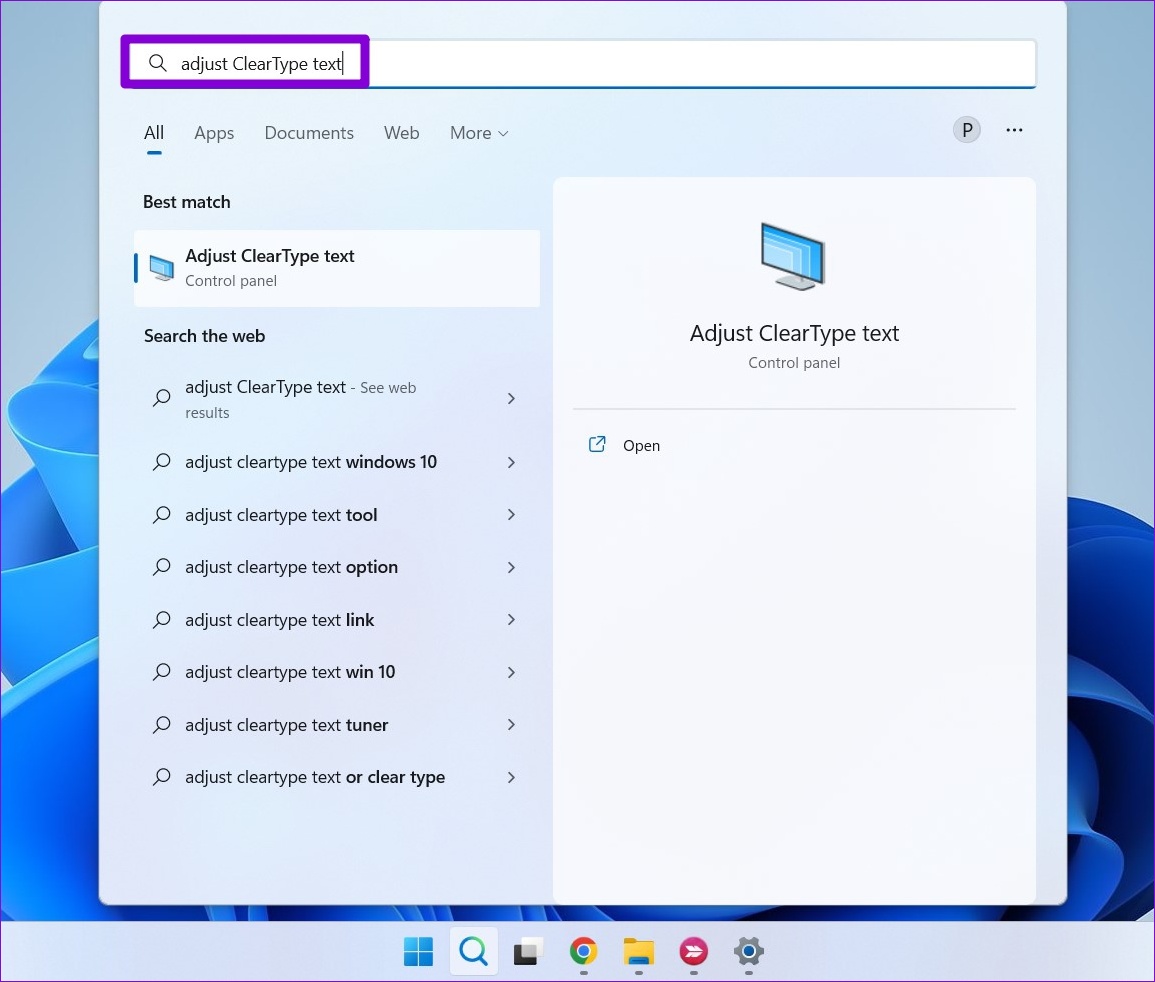
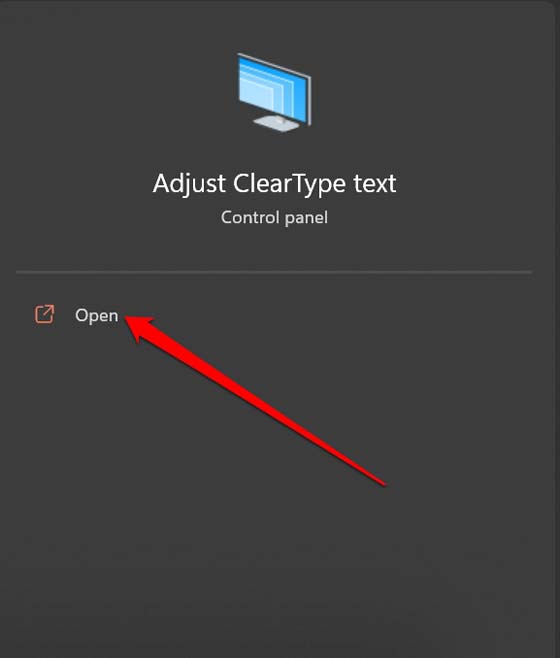
Step 1: Press the Windows + S keys to open the search menu. Type adjust cleartype text in the box and press Enter.
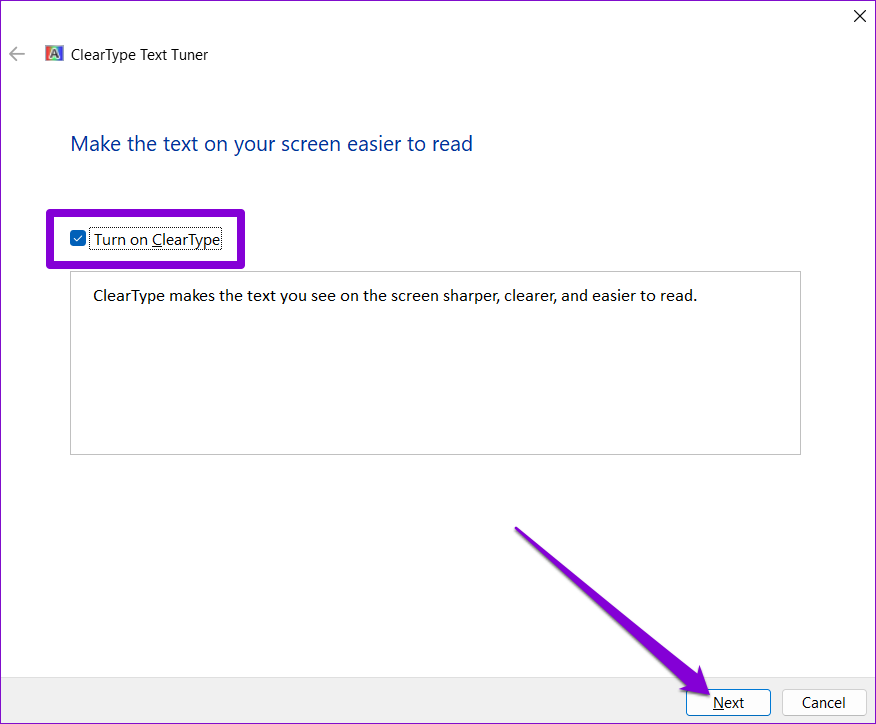
Step 2: Check the box for Turn on ClearType and click Next.
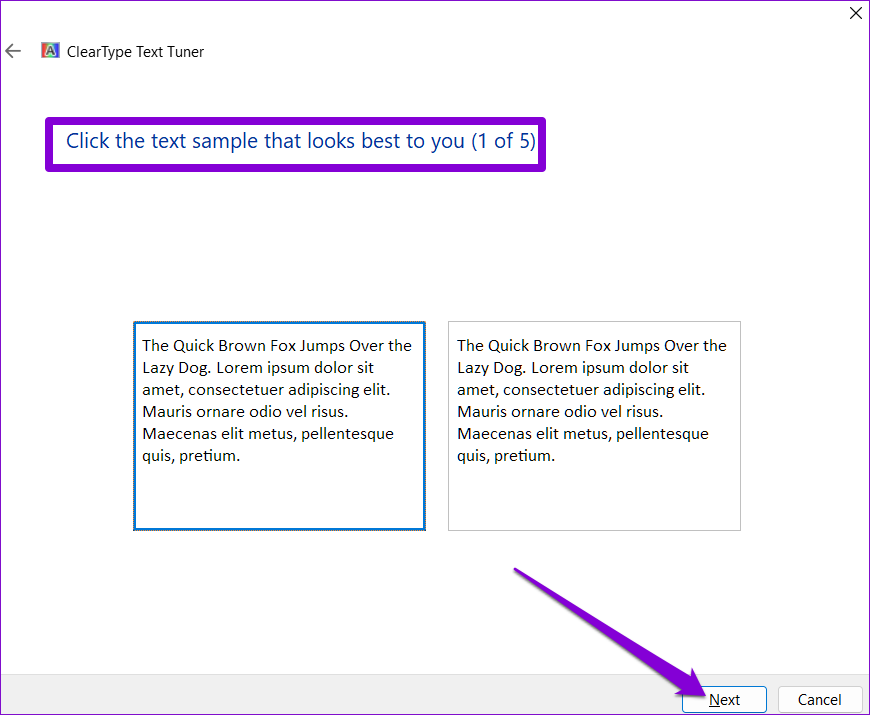
Step 3: You’ll see two samples of text. Select the one that looks best to you and hit Next. You’ll have to perform this exercise five times for different samples.
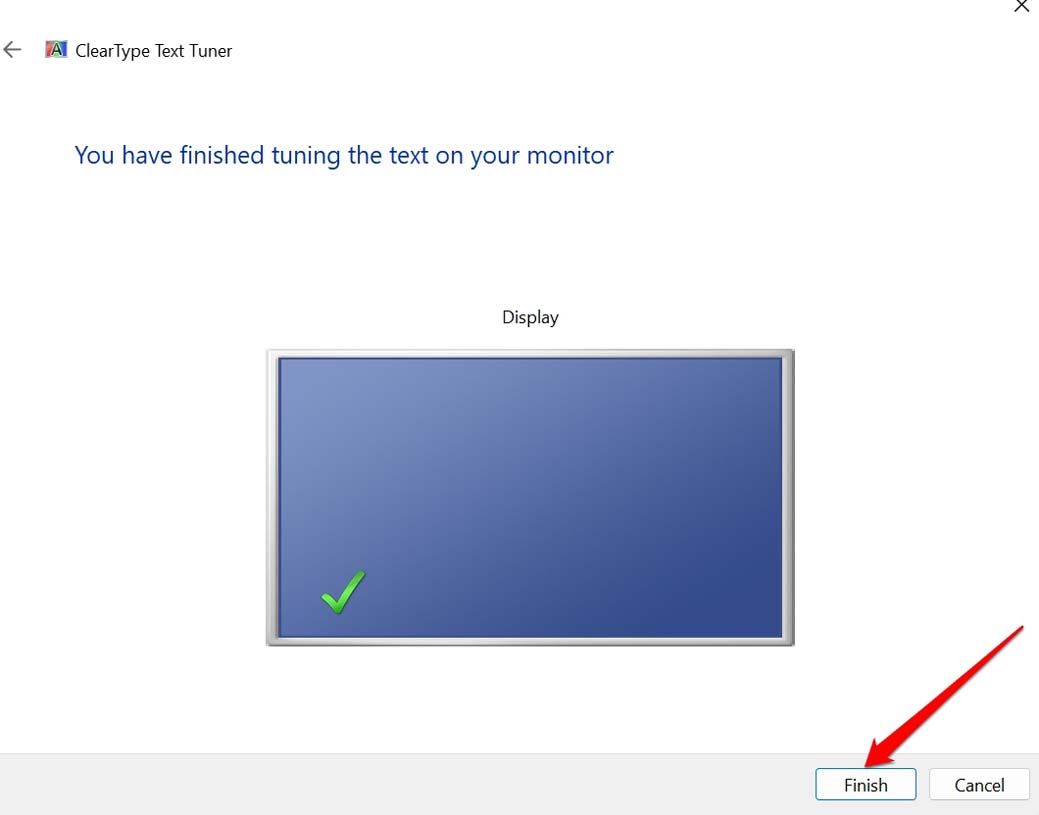
Step 4: Click Finish to apply the changes.
Fix 3: Change DPI Settings for Programs
If you face the blurry screen issue in a specific program, configure its DPI settings and see if that helps.
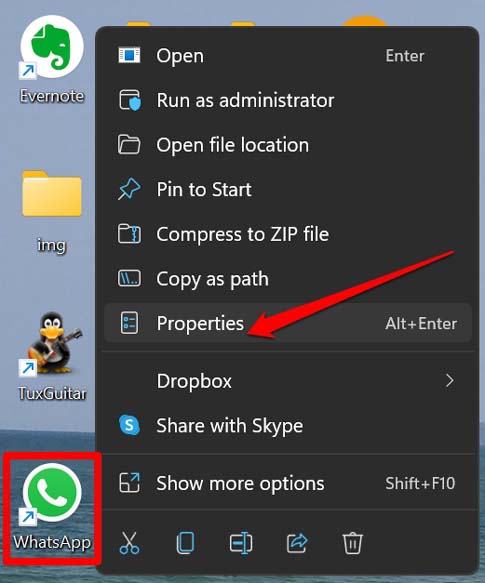
Step 1: Press the Windows key + S to open the search menu. Type the name of the program that’s appearing blurry. Right-click on the first result and select Open file location.

Step 2: In the File Explorer window, right-click on the program and select Properties.
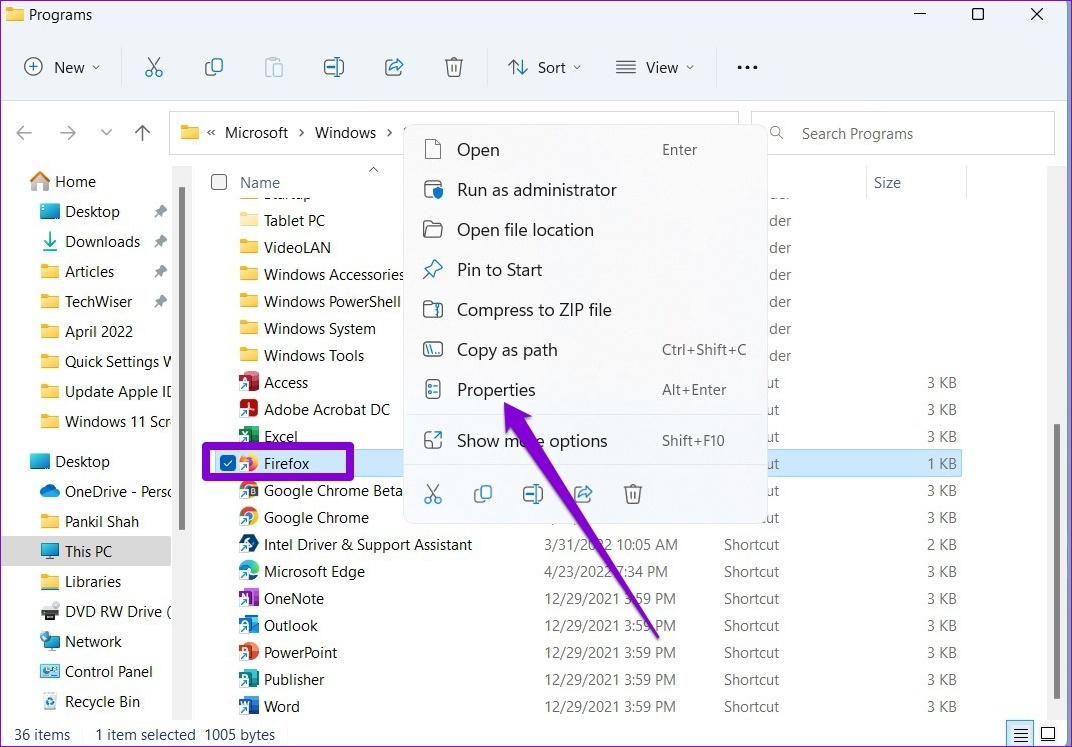
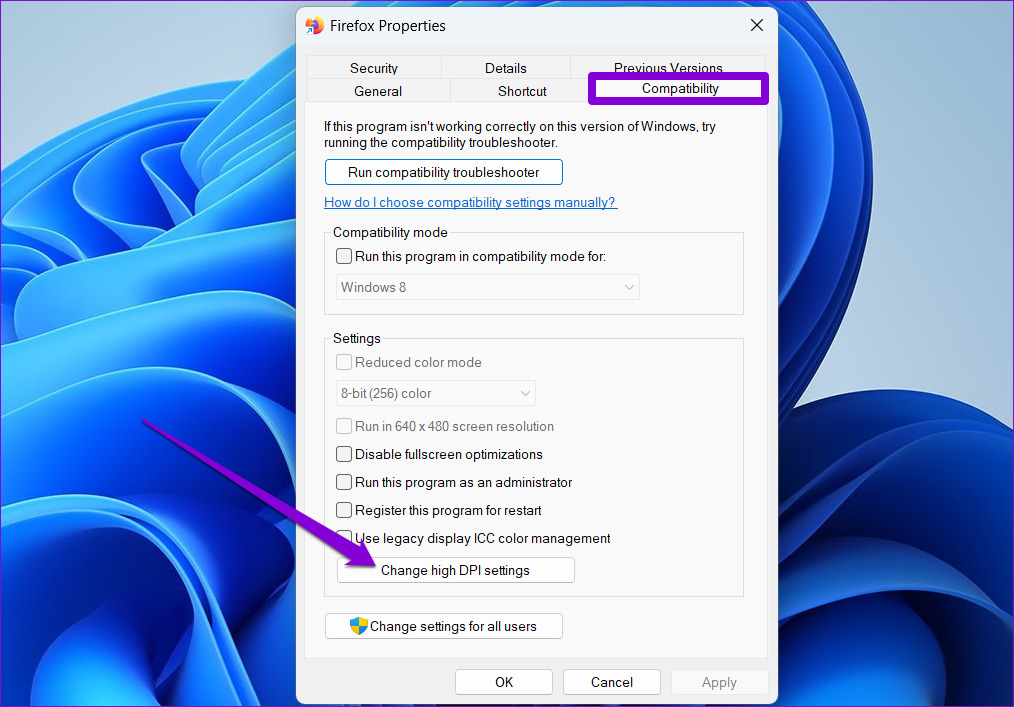
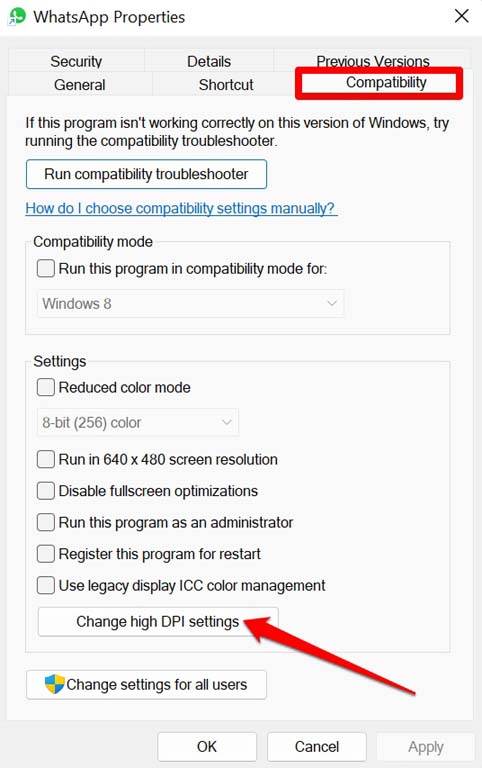
Step 3: In the Properties window, go to the Compatibility tab > click Change high DPI settings.
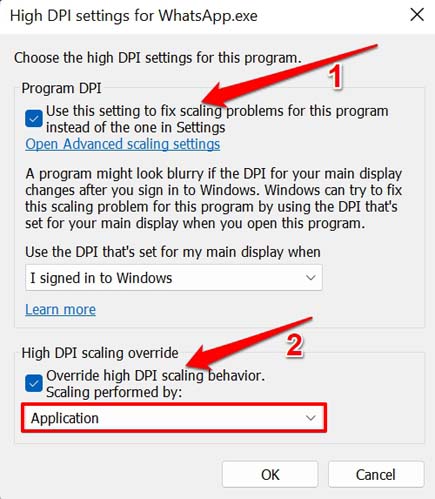
Step 4: Mark the boxes for Use this setting to fix scaling problems for this program instead of the one in Settings and Override high DPI scaling behavior.
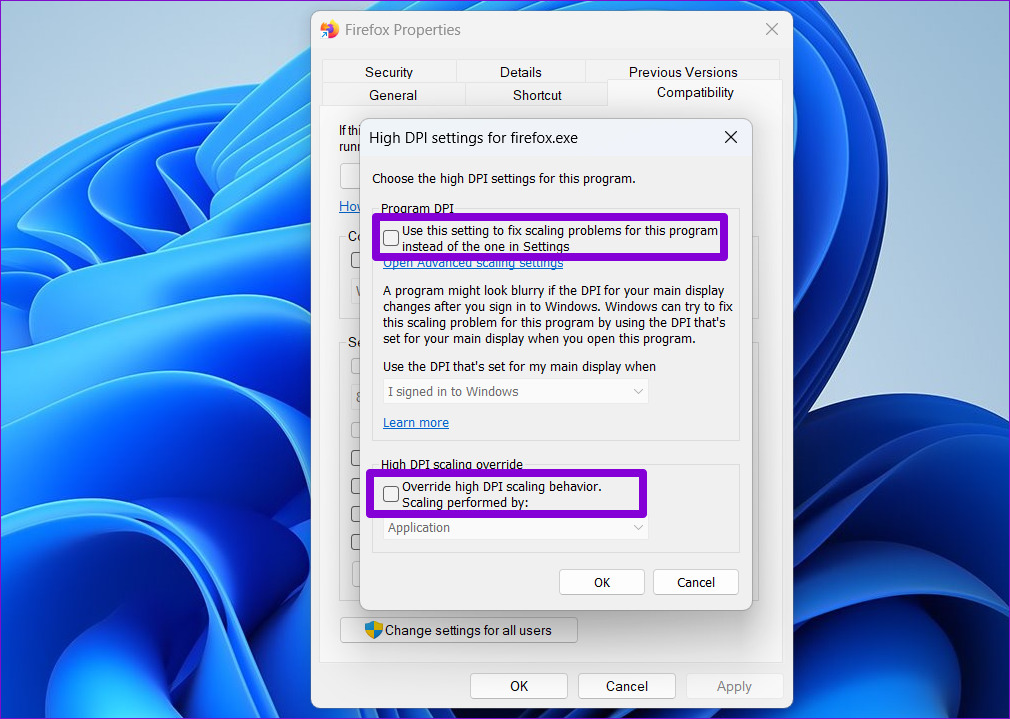
Step 5: Use the drop-down menu under Scaling performed by to select Application. Then, click OK.

Step 6: Hit Apply to save changes.
Fix 4: Tweak Performance Options
If you recently tweaked Windows performance options to disable animation or other visual effects, the text or menus may appear blurry. Here’s how to change that.
Step 1: Open the search menu, type view advanced system settings, and select the first result.
Step 2: In the System Properties window, switch to the Advanced tab and click on Settings under Performance.
Step 3: Select Adjust for best appearance under the Visual Effects tab and hit Apply to save changes.
Fix 5: Update Display Drivers
Lastly, if the screen still appears blurry on Windows 11, there might be an issue with the current display driver on your PC. In that case, update display drivers to fix the issue.
Step 1: Press the Windows + S keys to open Windows Search, type device manager, and press Enter.
Step 2: In the Device Manager window, expand Display adapters > right-click on your graphics card > select Update driver.
From there, follow the on-screen prompts to finish updating those drivers. After that, restart your PC to see if the issue is resolved.
Was this helpful?
Thanks for your feedback!
The article above may contain affiliate links which help support Guiding Tech. The content remains unbiased and authentic and will never affect our editorial integrity.
Does Windows 11 Display Looks Blurry or Monitor Display is Not Sharp. Here is the Simple Guide to Fix Blurry Screen Issue on Windows 11.
Are you experiencing a blurry screen issue on Windows 11 PC? The text or graphical elements in an app may be looking unclear or hazy when you use them. In this guide, I have explained some troubleshooting tips that you can use and fix the blurry screen on Windows OS.
Often implementing incorrect display resolution or buggy display driver can cause such glitches. If you are experiencing a blurry screen while using certain apps, then it may be due to the optimized performance of the GPU. It means the graphics unit is not putting out its full resources to run that particular app. The shortcoming results in blurry text or graphics.
If the DPI for your main display is changing after logging on to Windows or when you are starting to use any app, then the blurry screen issue will happen. Then you need to tweak the DPI scaling. You don’t have to do any manual adjusting though. You have to ensure that Windows automatically adjusts the DPI as and when you run that concerned program.
Now that we know about the various possible reasons that cause the Blurry screen issue, here are some working solutions that you can implement.
Enable the Best Appearance for Windows
Here is an option you need to enable in the Advanced system settings. This will fetch the best appearance output on Windows whenever you run any app.
- Press Windows + S keys
- In the search console, type Advanced System Settings.
- Click Open when the appropriate result appears.

- Now, when the System Properties dialog box shows up, click on the Advanced tab.
- Navigate to the Performace tab and click on Settings.

- Under the Visual Effects tab, select the option Adjust for Best Appearance.
- Click on Apply to implement the changes.

Override High DPI Scaling Behavior
The blurred screen issue occurring with a certain app on Windows can be changed by tweaking the DPI settings exclusively for that application.
- Locate the dot exe application file of any app.
- Right-click on the app and select Properties.

- Under the Compatibility tab, click on Change High DPI Settings.

- A new dialog box will open named High DPI settings for XYZ app [xyz can be any app name for which you are changing the DPI]
- In that dialog box, click on the checkbox Use This Setting to Fix scaling Problems
- Also, click on the checkbox Override High DPI Scaling Behavior.
- Then click on the dropdown and select Application. [we are making changes to a particular app]
- Click on OK and click on Apply in the High DPI settings for the XYZ app dialog box.

Update Display Driver of Windows
Make sure to upgrade the version of the display driver on your PC.
- Press Windows + X keys.
- From the menu that appears select Device Manager.
- Then navigate to Display Adapters and click to expand it.
- You will see the GPU installed on your PC.
- Right-click on the GPU name and select Update Driver.

- Next, click on Search Automatically for Drivers. [make sure the PC is connected to the internet]
- Windows OS will search for available drivers and install the same.
After installing the driver update restart your PC and now check if the blurry screen issue has been fixed or not.
Use the Recommended Display Resolution for Windows
if you are frequently facing the blurred screen issue on your Windows PC, ensure that you are using the recommended display resolution for your computer.
- Go to Windows Settings by pressing Windows + I.
- Click on System on the left-hand panel.
- Then click on Display to go to the settings.

- Under Scale Layout, navigate to Display Resolution and click on the drop-down menu.
- Select the recommended option. For example, I have selected 1920 X 1080 resolution as the recommended option for my PC.

- When the prompt Keep These Display Settings appears, click on Keep Changes.
- Also, set the recommended Scale by clicking on the dropdown menu next to Scale.

- Once you are done making the changes, restart the computer, and hopefully, the blurry screen issue on Windows 11 will be fixed. If not check out the other fixes.

Enable ClearType Text for Windows
To fix the text that may be appearing blurry on the screen of the Windows 11 PC, you need to enable these settings.
- Press the Windows key.
- In the search box, type ClearType text.
- When the proper search result shows up, click Open.

- Click on the checkbox beside Turn on ClearType.
- After that, click on Next to view a few samples of text.

- Select your choice of text in five instances.

- Finally, click on Finish to apply the changes.

Enable High Performance of GPU for Any App
If you are using an app and seeing a blurry screen, then you need to set the GPU to deliver maximum performance.
- Press Windows + I to go to the Windows Settings.
- Next, click on System and select Display.
- Navigate to Graphics and click on it.

- Next, you will see the list of apps installed on your PC.
- Scroll to any app, click on it and then click on Options.

- Set the Graphics Preference for that app to High Performance.

- Click on Save to save the changes and relaunch the app. It should fix the blurry screen issue now.

Conclusion
As a user, always aim for getting the best visual experience from your Windows PC. Now, with these troubleshooting tips, I’m sure you can fix the blurry screen issue on Windows 11 and enjoy a smooth visualization of all the apps.
If you’ve any thoughts on How to Fix Blurry Screen Issue on Windows 11?, then feel free to drop in below comment box. Also, please subscribe to our DigitBin YouTube channel for videos tutorials. Cheers!