
Overview:
Remote Authentication Dial-In User Service (RADIUS) is a client/server networking protocol that provides centralized authentication, authorization, and accounting (AAA) management for computers that connect and use a network service.
In Windows Server 2019, Network Policy Server is the Microsoft implementation of the RADIUS standard specified by the Internet Engineering Task Force (IETF).
NPS role will install automatically with the installation of Remote Access Service as a prerequisite on Windows Server 2019.
Network Policy Server (NPS) allows you to create and enforce organization-wide network access policies for connection request authentication and authorization.
NPS allows you to centrally configure and manage network access authentication, authorization, and accounting with these three following features:
- RADIUS Server: NPS performs centralized authentication, authorization, and accounting for wireless, remote access dial-up and virtual private network (VPN) connections.
- RADIUS-Proxy: NPS acts as a RADIUS proxy to forward connection requests to a remote NPS or other RADIUS servers for load balancing.
- RADIUS accounting: You can configure NPS to log events to a local log file or to a local or remote instance of Microsoft SQL Server.
In this guide, we will learn the steps to configure the Radius Server on Windows Server 2019. We will configure one NPS as a RADIUS server for VPN connection authentication and authorization.
Test Lab Setup:
Note: For this guide, we will use the virtual test lab created in VirtualBox.
- WS2K19-DC01: Domain Controller and DNS Server.
- WS2K19-RADIUS01: Member Server acts as a RADIUS Server.
- WS2K19-SRV02: Standalone Server acts as a VPN Server.
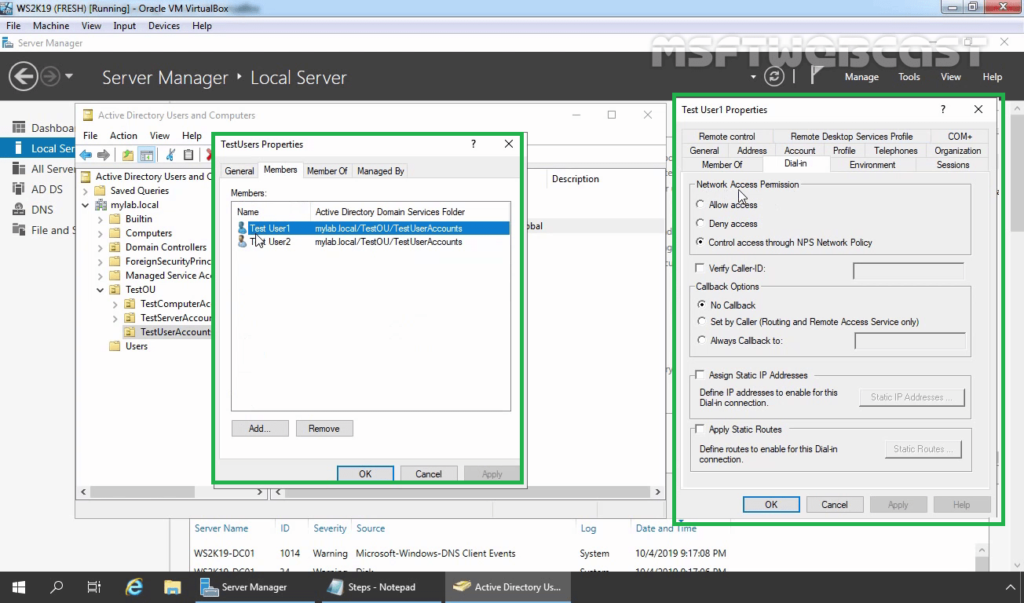
1. At first, we need to create a new security group in the Active Directory domain (for example, TestUsers) in which we will need to add all users that will be allowed to authenticate on VPN Server.
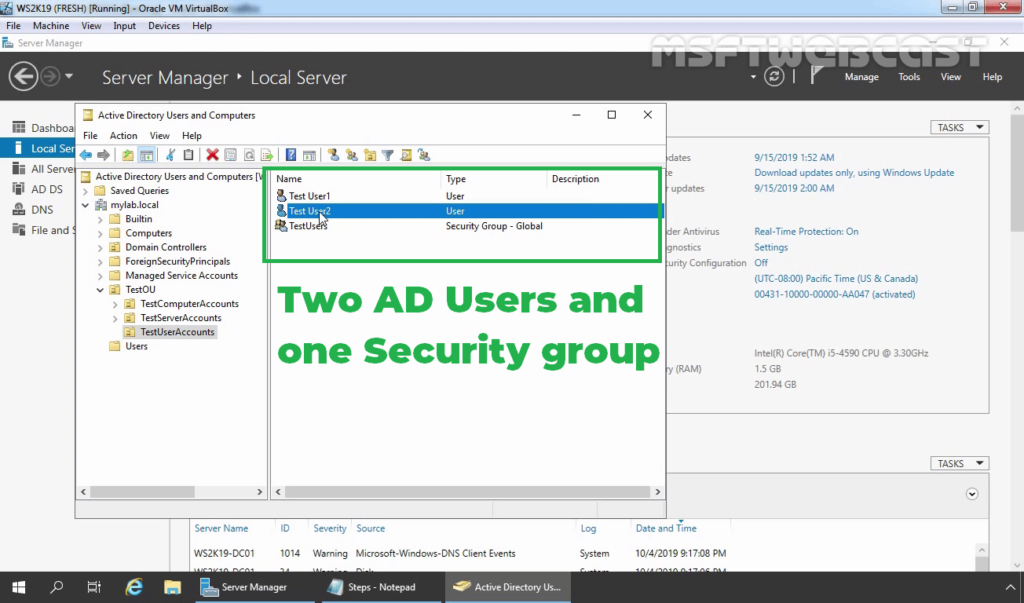
2. Check the users dial-in properties settings.
Install NPS server role on Windows Server 2019:
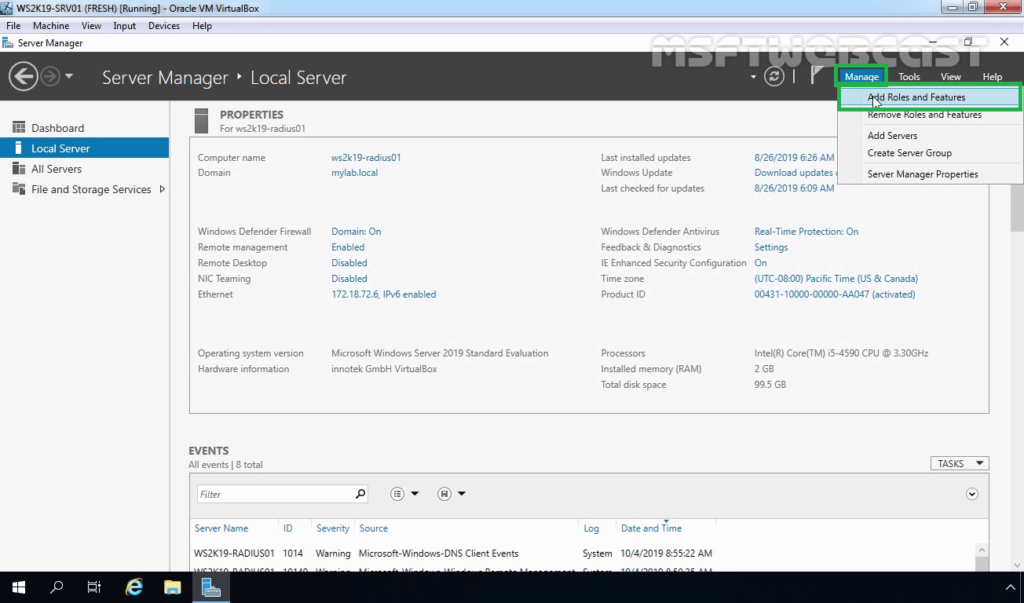
3. Logon to WS2K19-RADIUS01 server with a domain administrator account. Open Server Manager Console.
4. Click on Manage and select Add Role and Features.
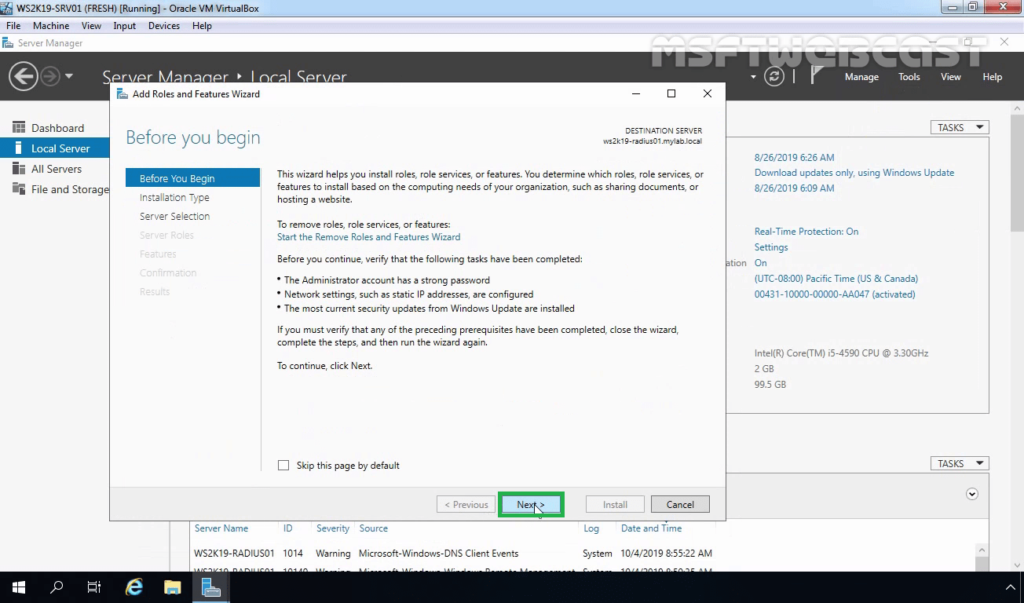
5. On the Before you begin page, click Next.
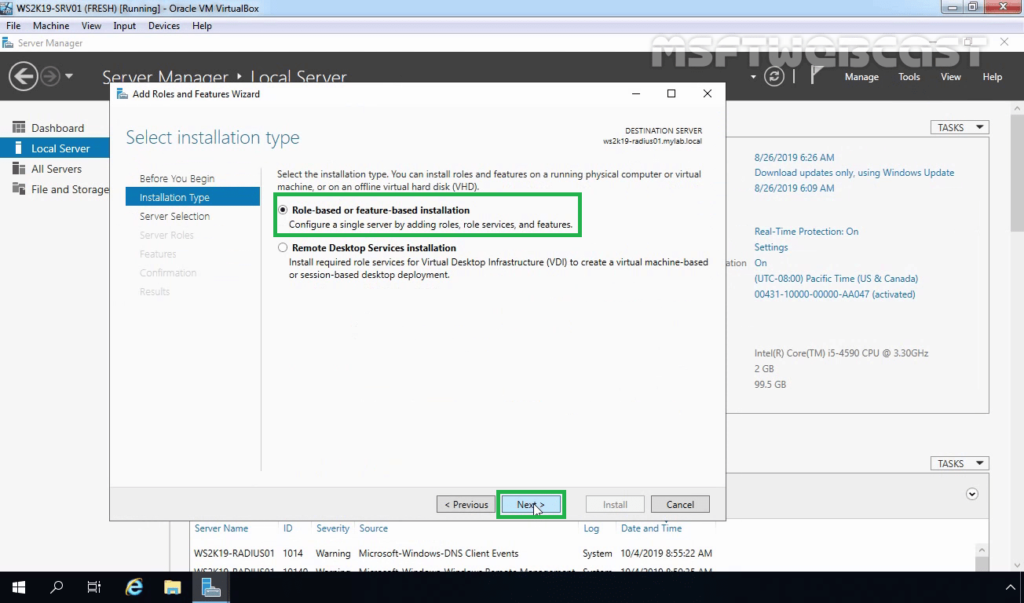
6. Select Role-based or feature-based installation and click Next.
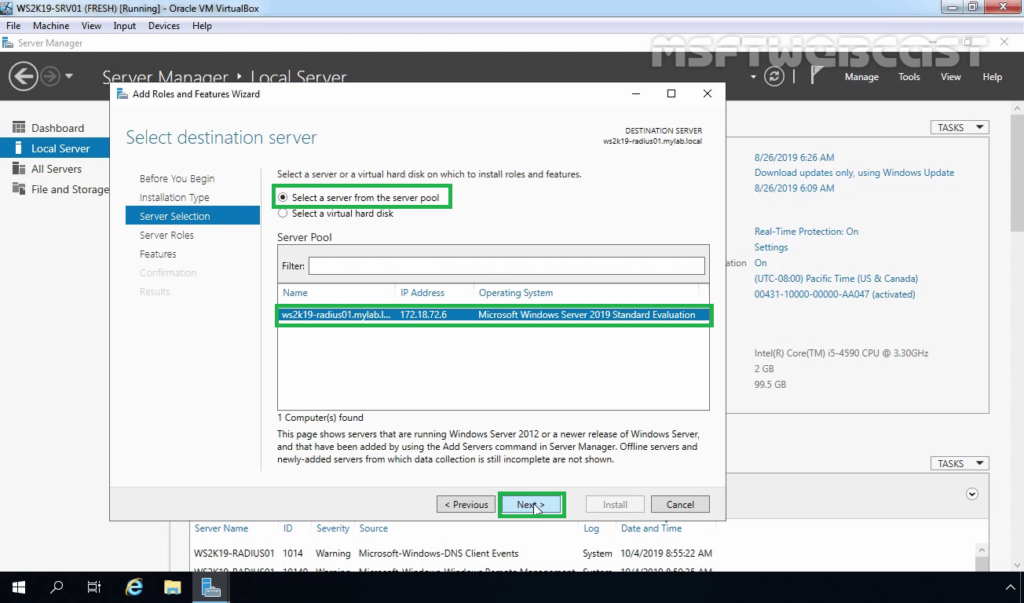
7. Select a server from the server pool on which you want to install the Network Policy and Access Service role, click Next.
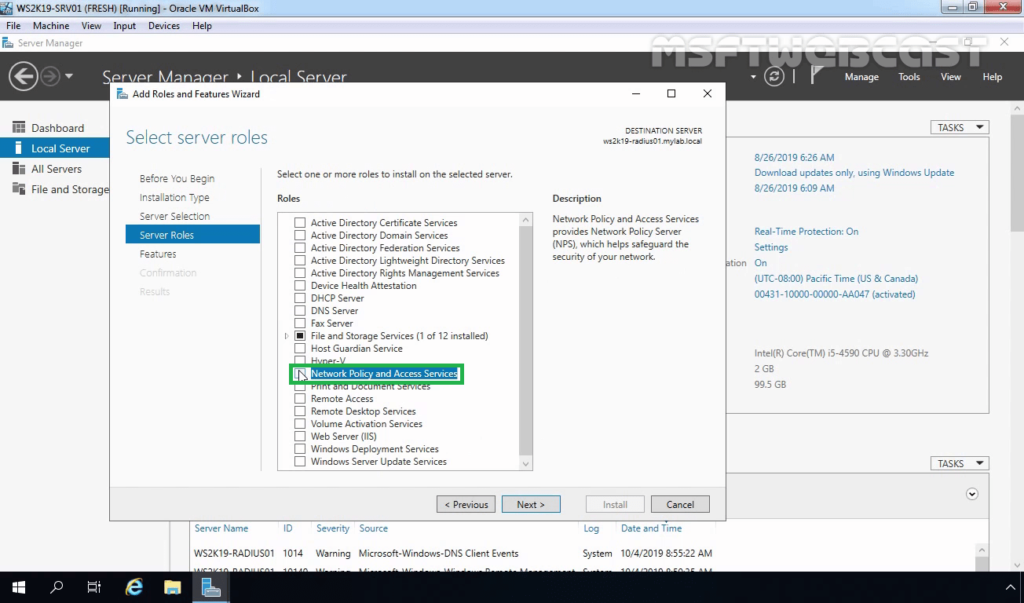
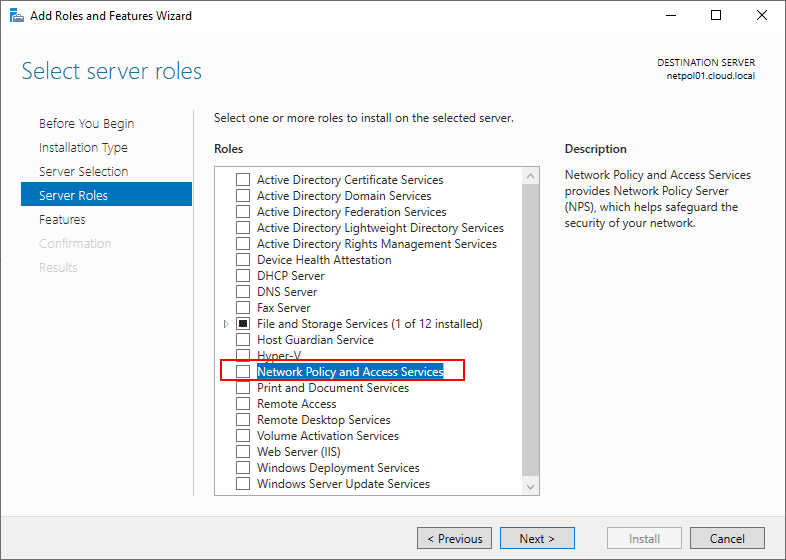
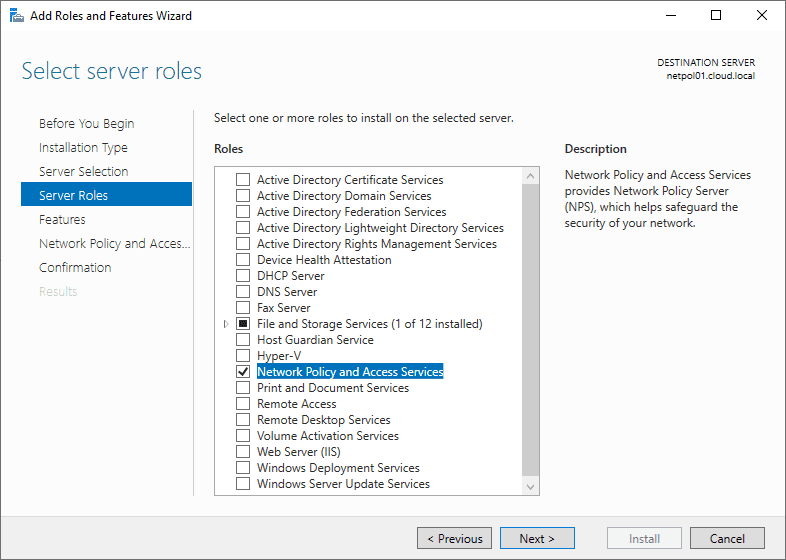
8. On select server roles page, select the Network Policy and Access Services checkbox. Click Next.
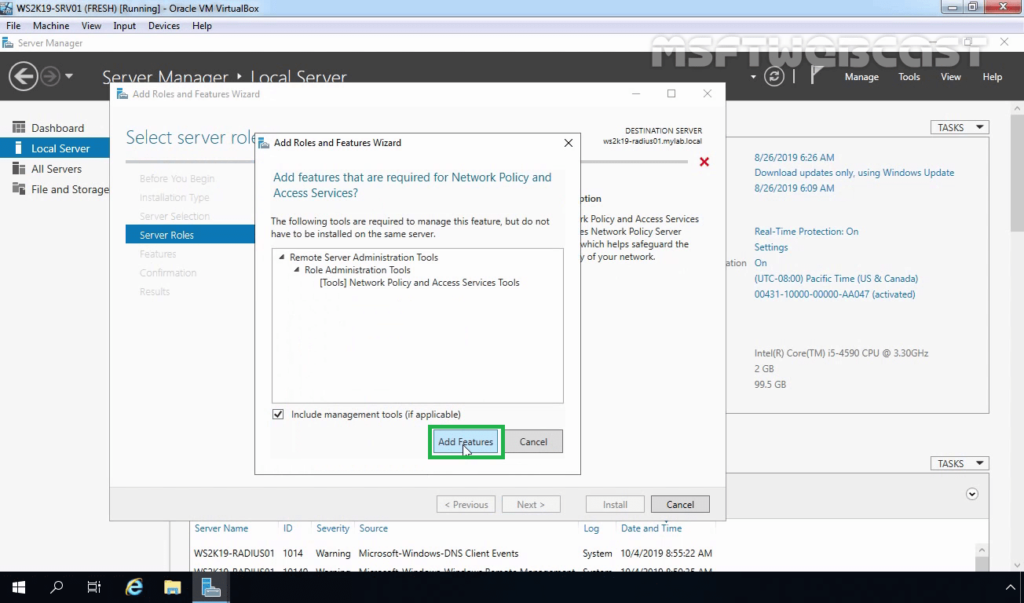
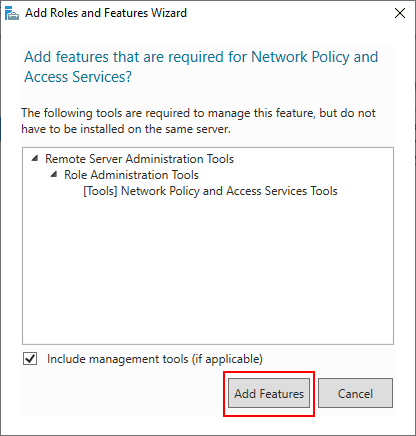
9. Click the Add Features button to add the required feature for NPS. Click Next to continue.
10. On select features, click Next.
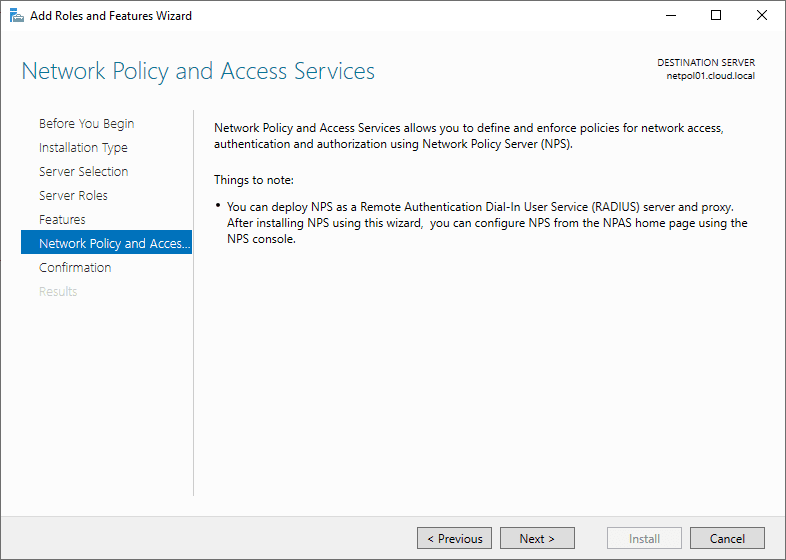
11. Read overview information about Network Policy and Access Services and click Next.
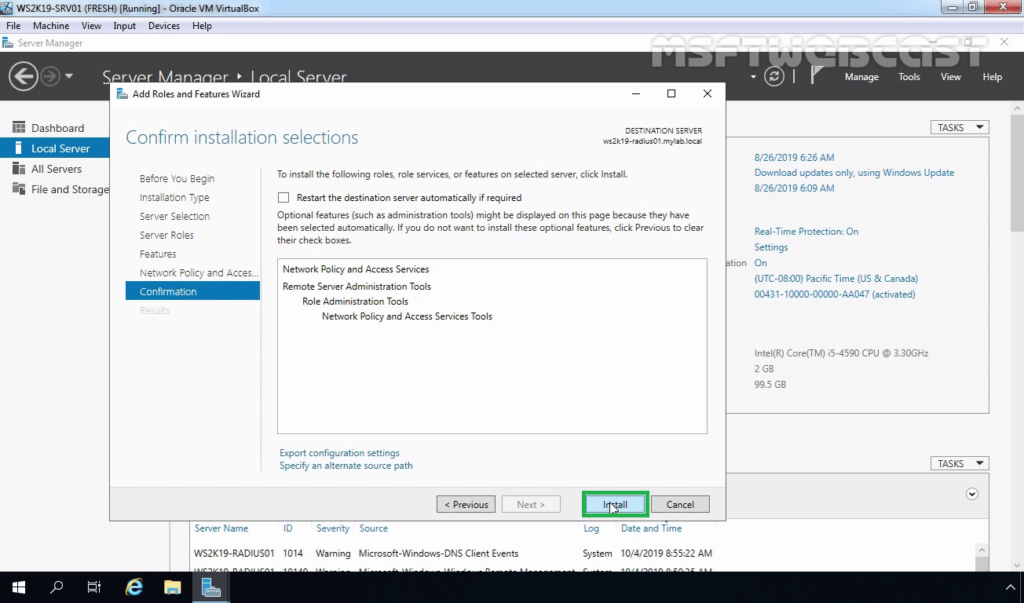
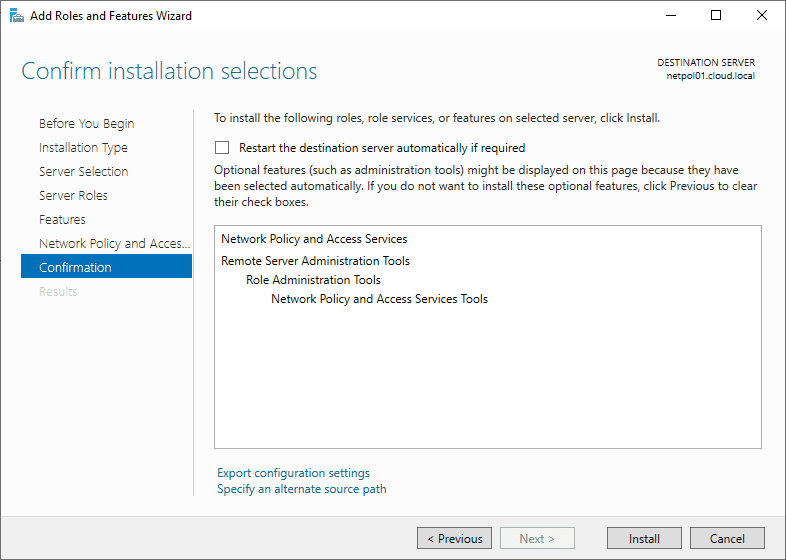
12. Click Install and complete the installation process.
Configure RADIUS Server on Server 2019:
Step:1 Register NPS Server in Active Directory:
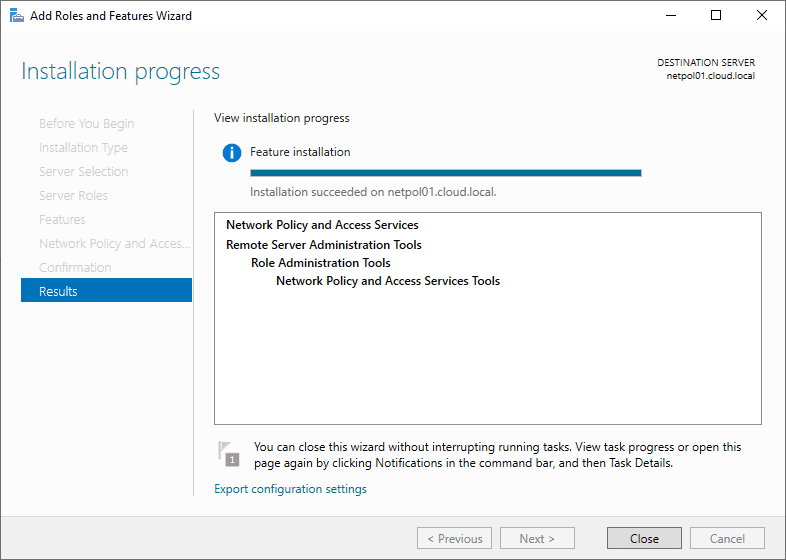
13. Click Close to finish the installation.
14. After the Network Policy and Access Services role installation is complete, open the Network Policy Server in the Tools menu.
To use the RADIUS server in the Active Directory Domain, we must register it first in the Active Directory.
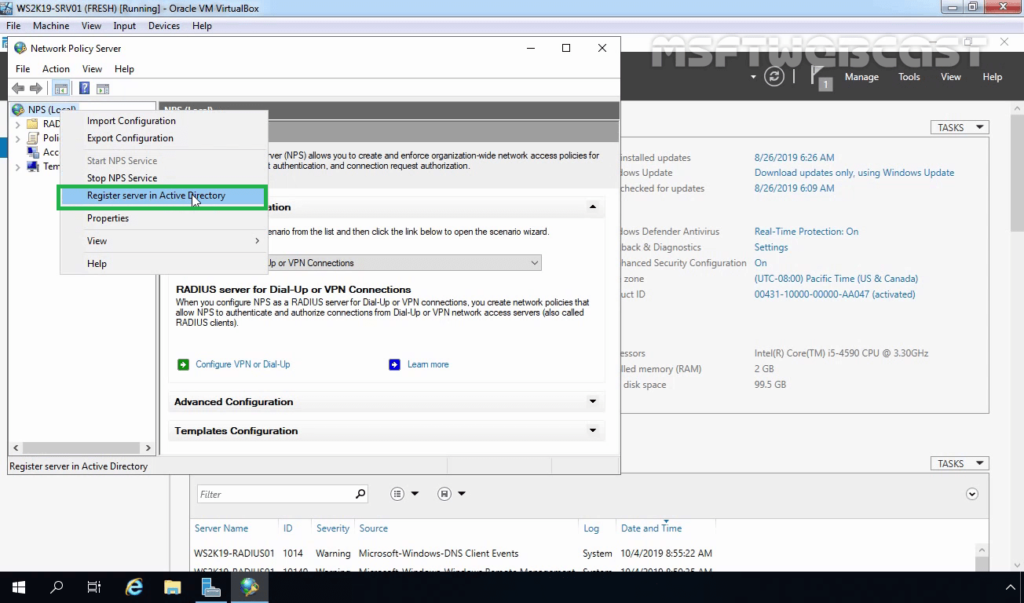
15. In the NPS management console, right-click on NPS and select Register server in Active Directory.
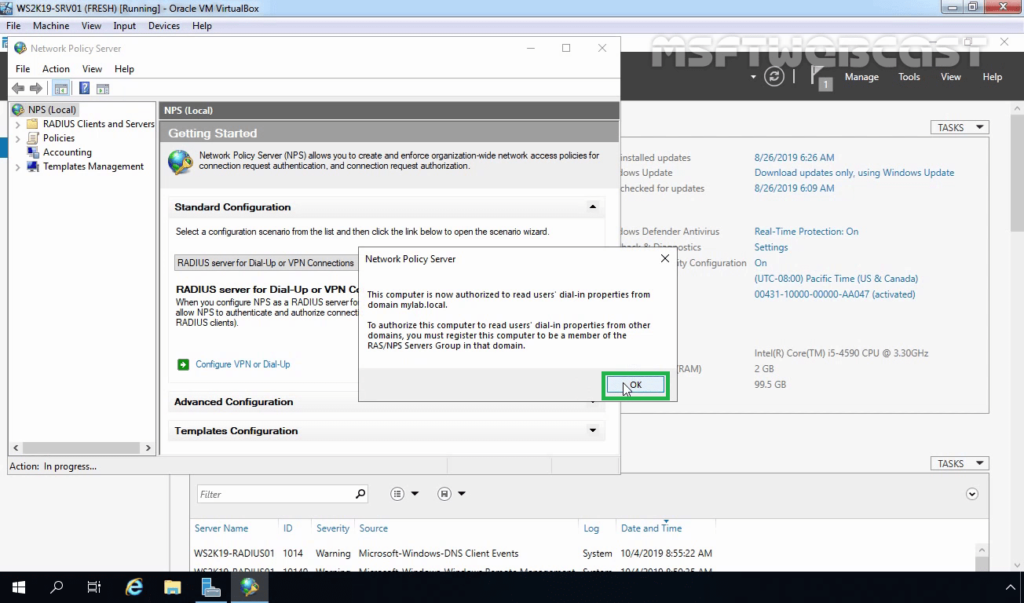
16. Click OK to confirm the successful registration of the RADIUS server in Active Directory.
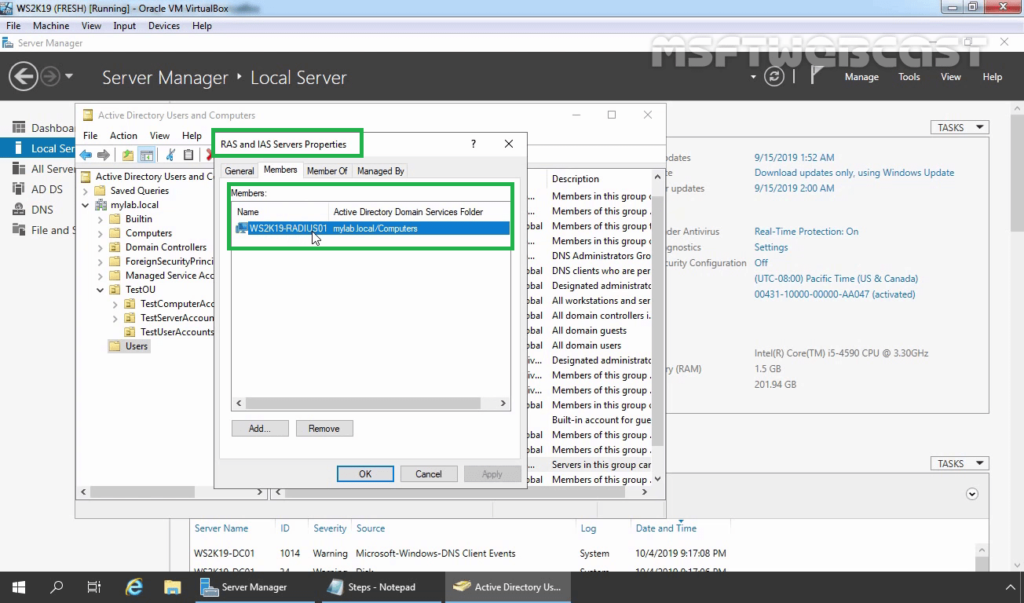
17. Now the RADIUS server has the authority to read the properties of user accounts related to the remote access. The RADIUS server will be added to the built-in domain group RAS and IAS Servers.
Step:2 Add RADIUS Client (VPN) Entry and Create NPS Policies for RADIUS Server:
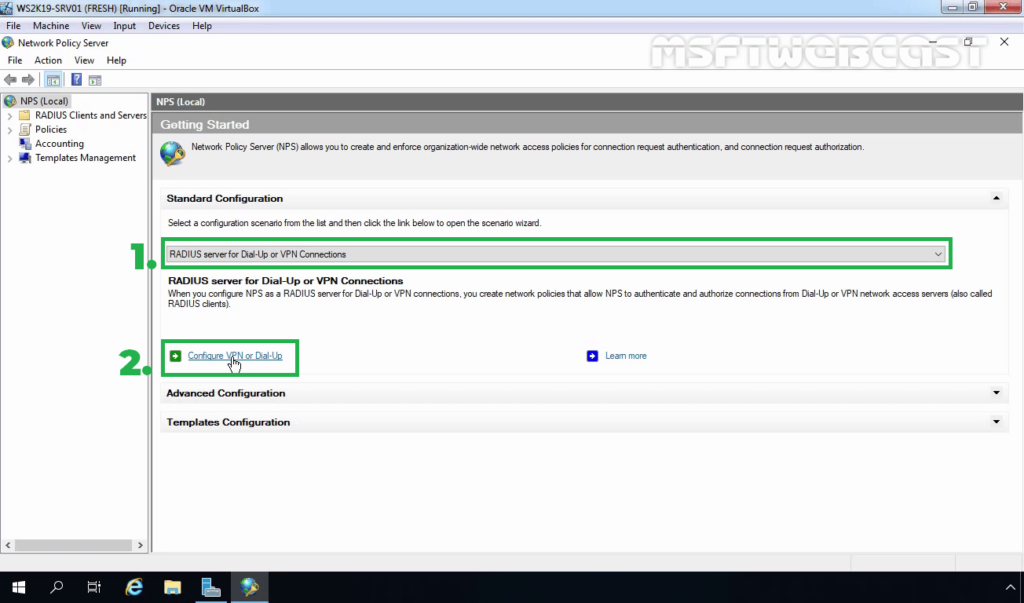
18. Under Getting Started, select RADIUS Server for Dial-Up or VPN Connection from the drop-down menu. Click on Configure VPN or Dial-Up link to add a new RADIUS client.
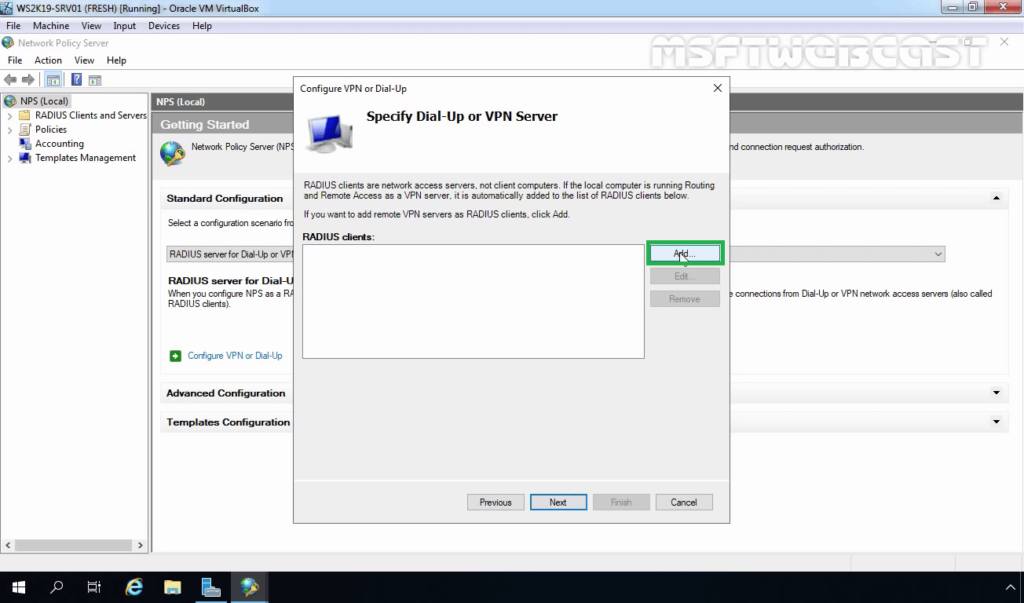
19. Select VPN Connections and specify a meaningful name. Click Next.

20. Click on the Add button to add remote VPN servers as RADIUS clients.
21. On New Radius Client console, specify the details as mentioned below:
- Friendly Name: To identify the RADIUS client.
- Address: IP Address or FQDN of VPN Server.
- Manual Shared Secret: Type the shared secret password and re-enter to confirm the password.
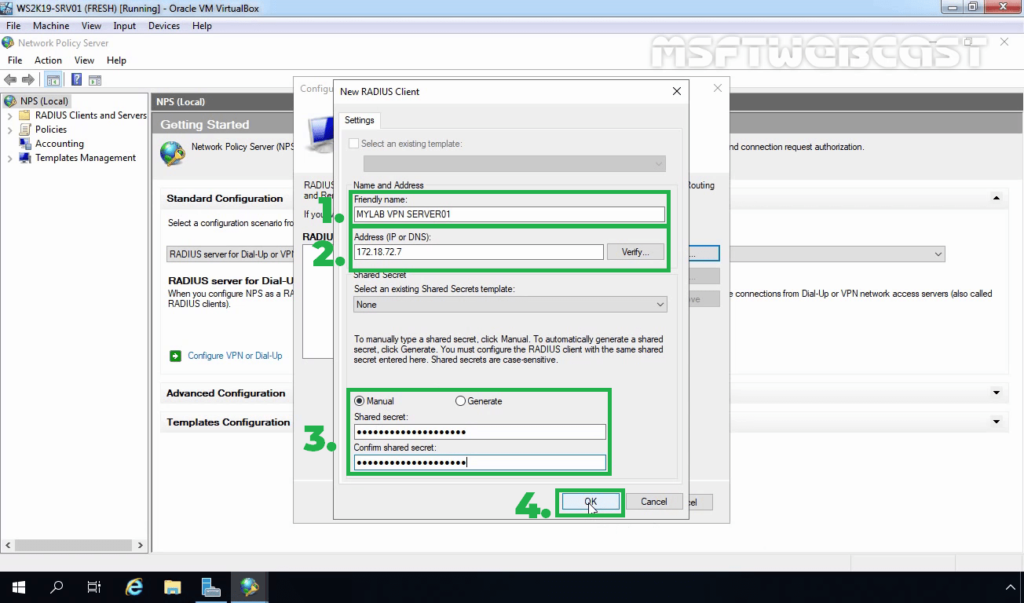
22. Click OK to save the changes.
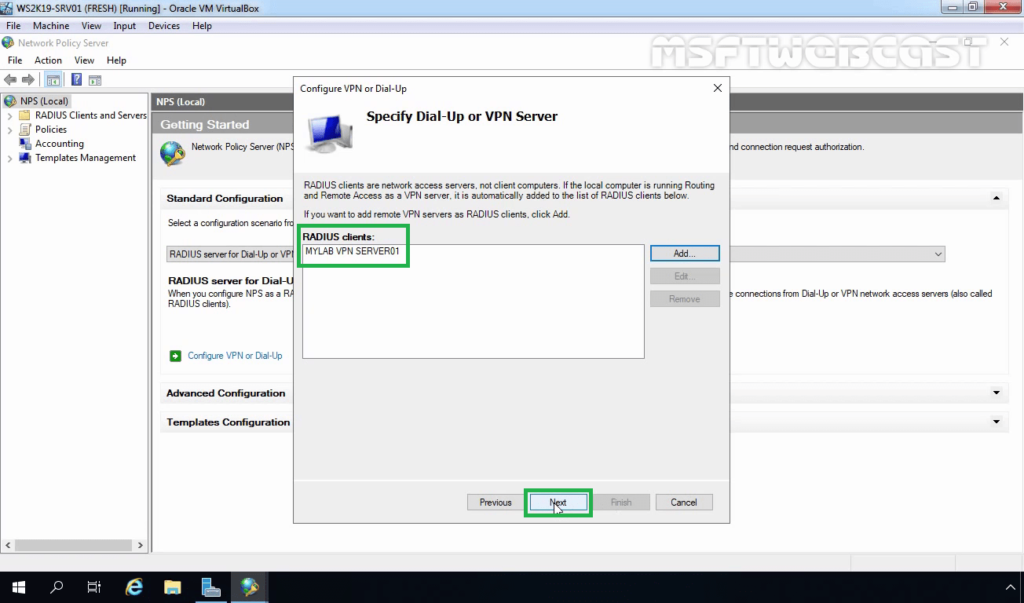
23. Verify Radius client entry and click Next.
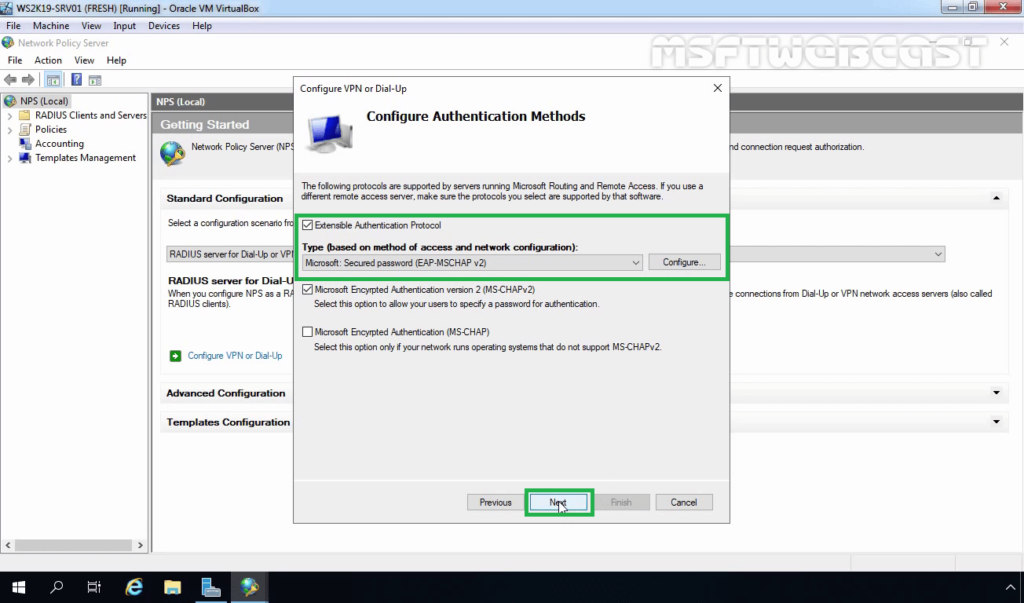
24. Select Extensible Authentication Protocol checkbox and from the drop-down menu select Microsoft: Secured password (EAP-MSCHAP v2). Click Next.
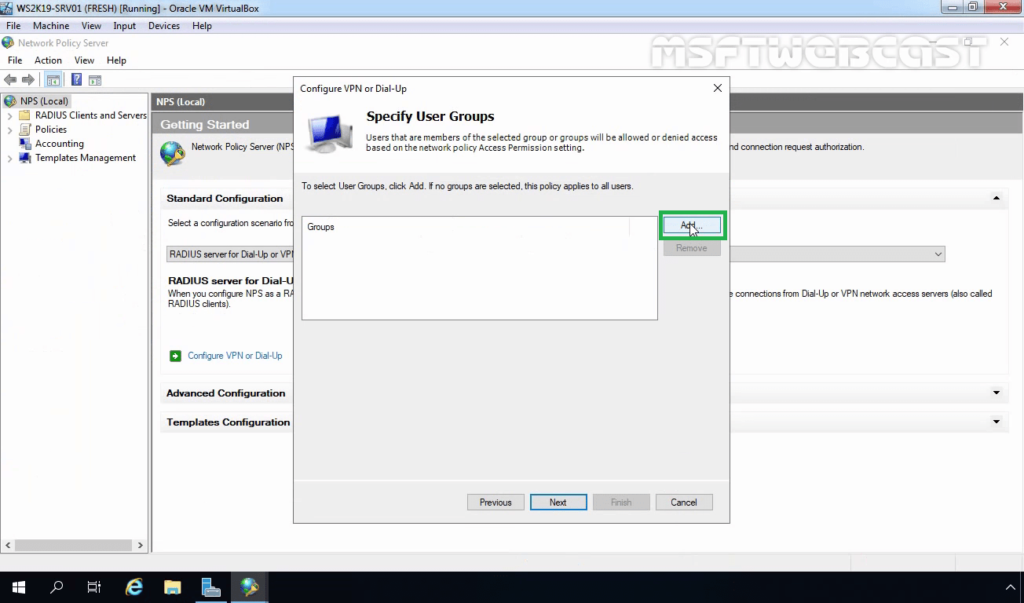
25. Click on Add to specify User Groups as a condition to apply this policy.
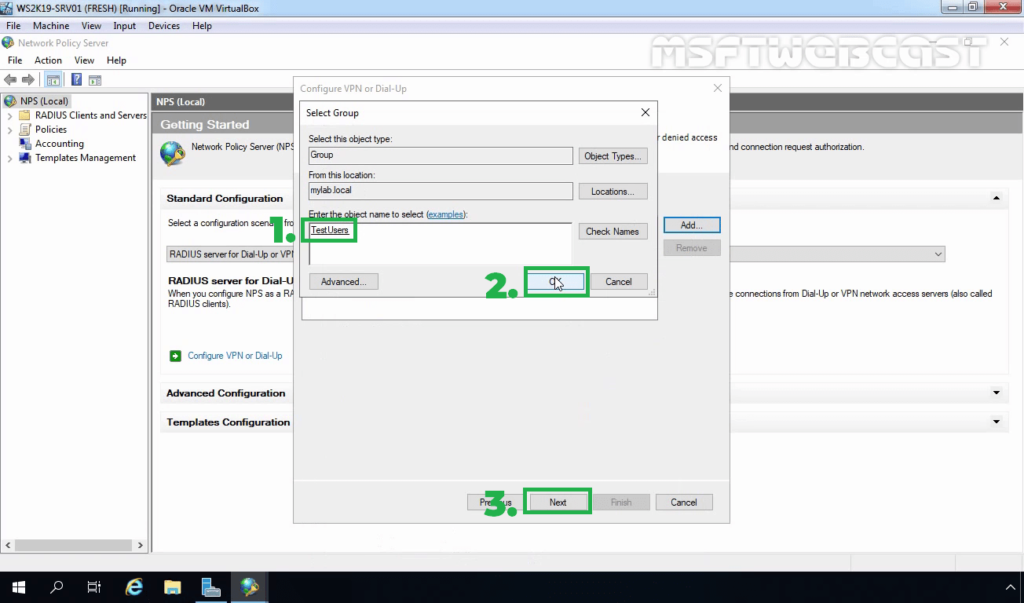
26. Add the security group TestUsers. Click on Next.
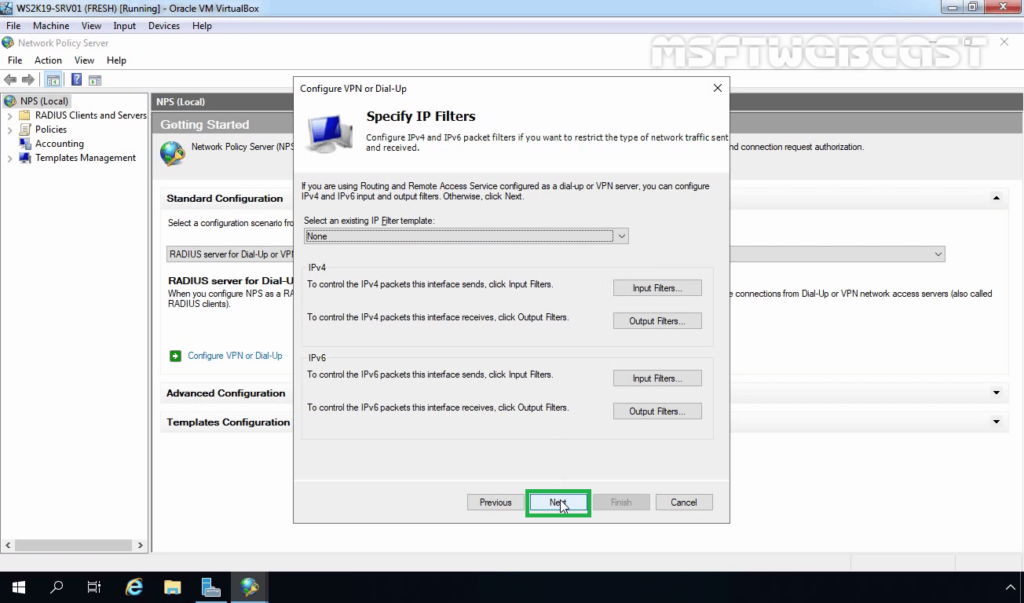
27. On Specify IP Filters console, click Next.
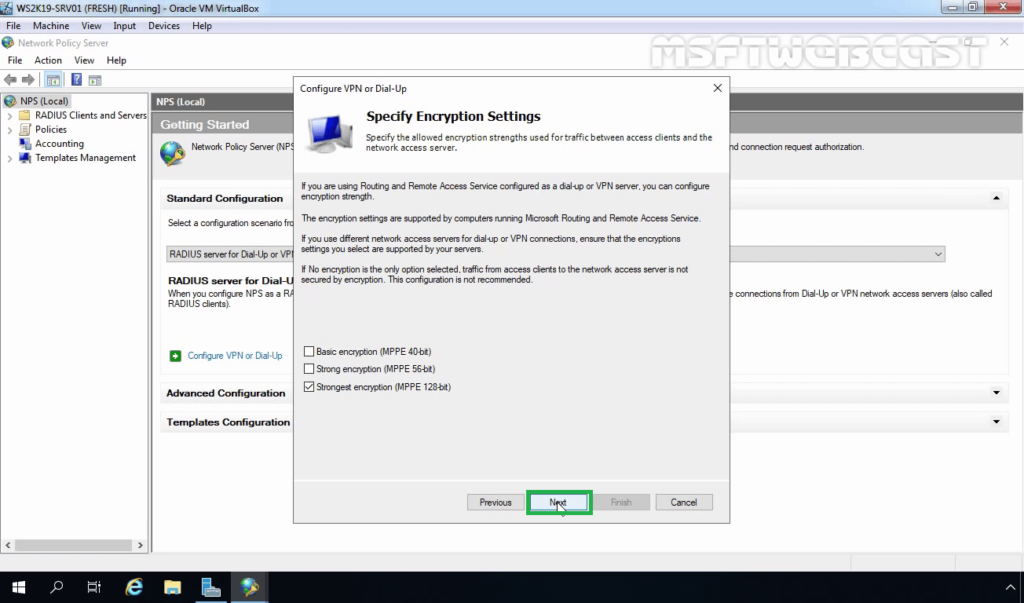
28. Choose the Strongest encryption (128 bit) and click Next.
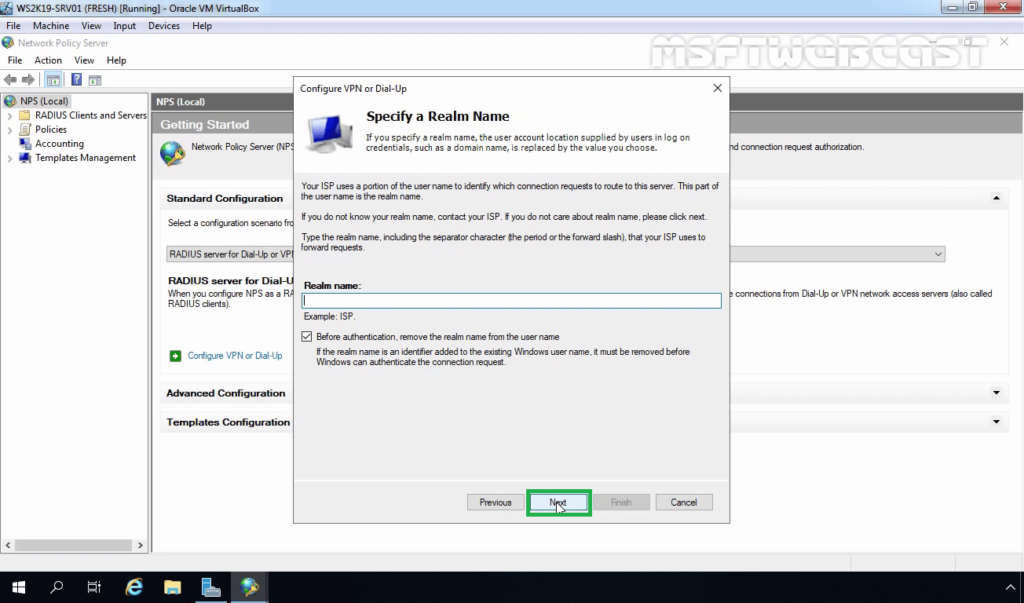
29. Click Next.
30. Click Finish to add create NPS Policies on the RADIUS Server.
Step:3 Configure RADIUS Server Settings on VPN Server:
After creating the NPS policy, we can proceed to configure our VPN server for authentication on the newly installed RADIUS NPS server.
Already we have configured the VPN server role on Windows Server 2019. You can follow this post for How to Install and Configure the VPN server role on Windows Server 2019.
31. On VPN Server, open Server Manager Console. Click on Tools and select Routing and Remote Access.
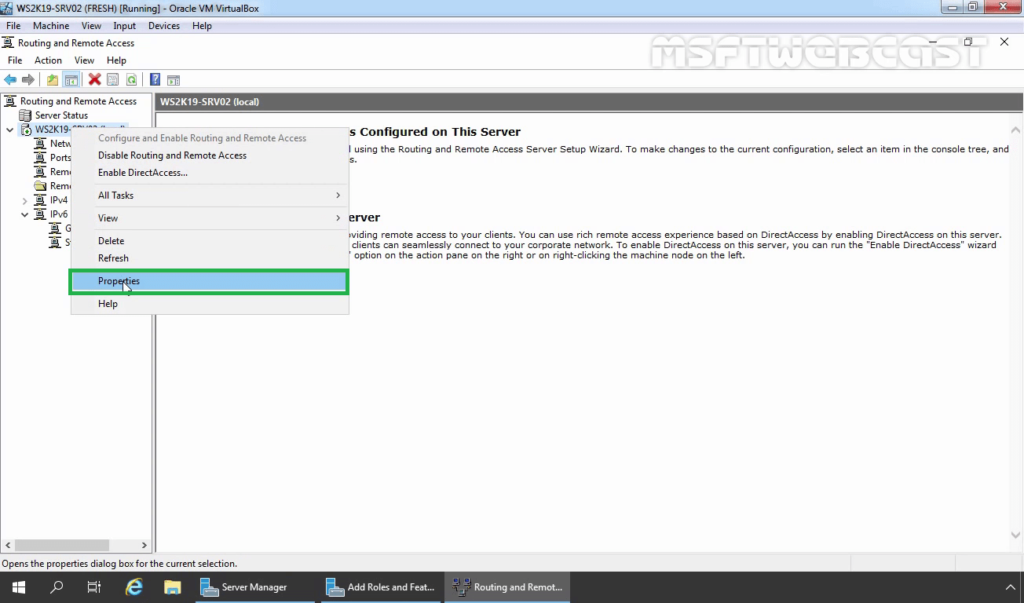
32. Right-click on the server name and select Properties.
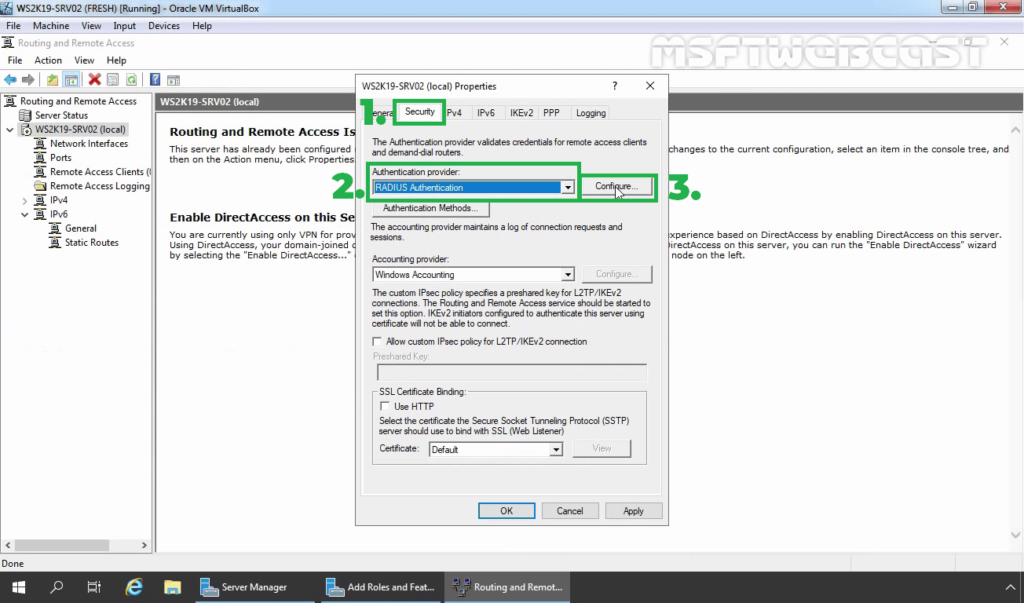
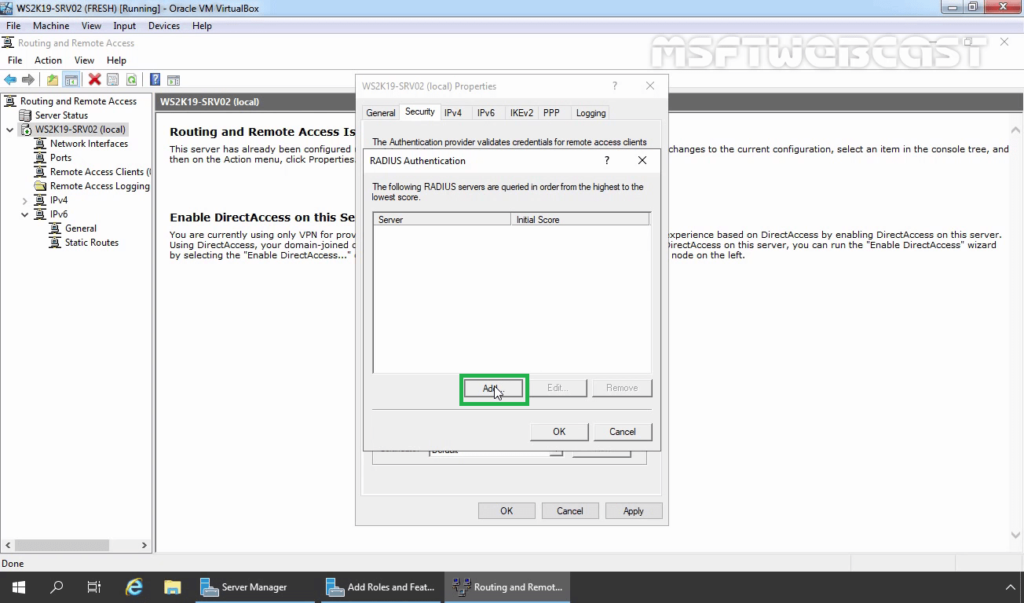
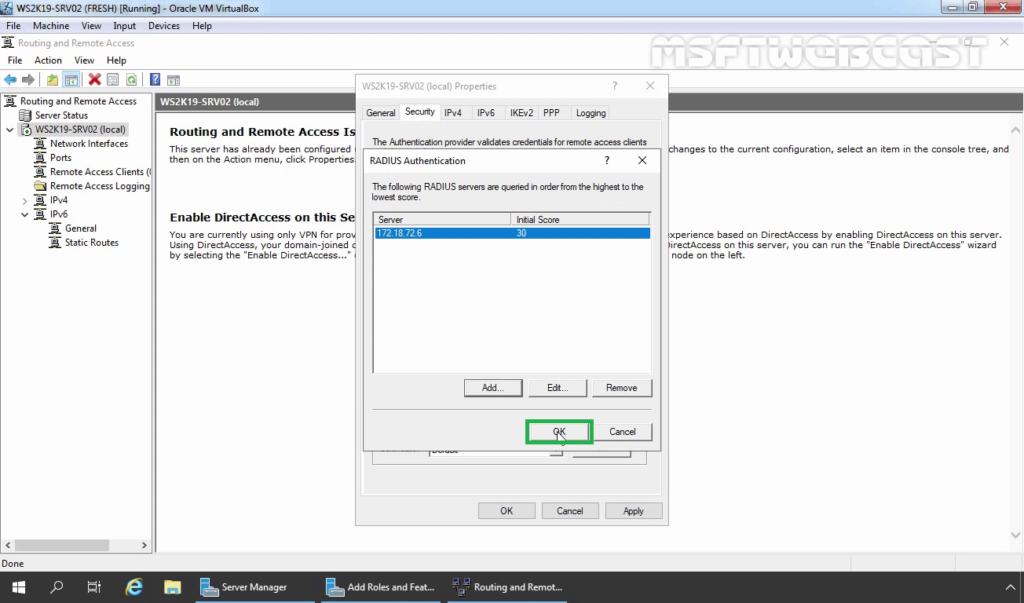
33. Click on Security Tab. Under the Authentication provider, select RADIUS authentication and then click on Configure.
34. Click Add.
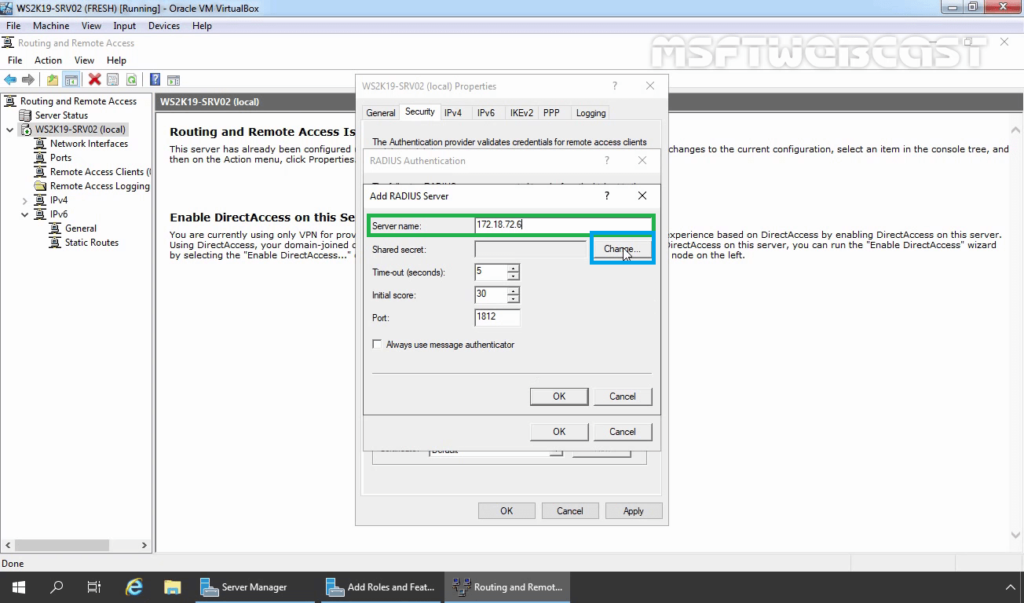
35. Specify RADIUS Server IP Address. Click on Change
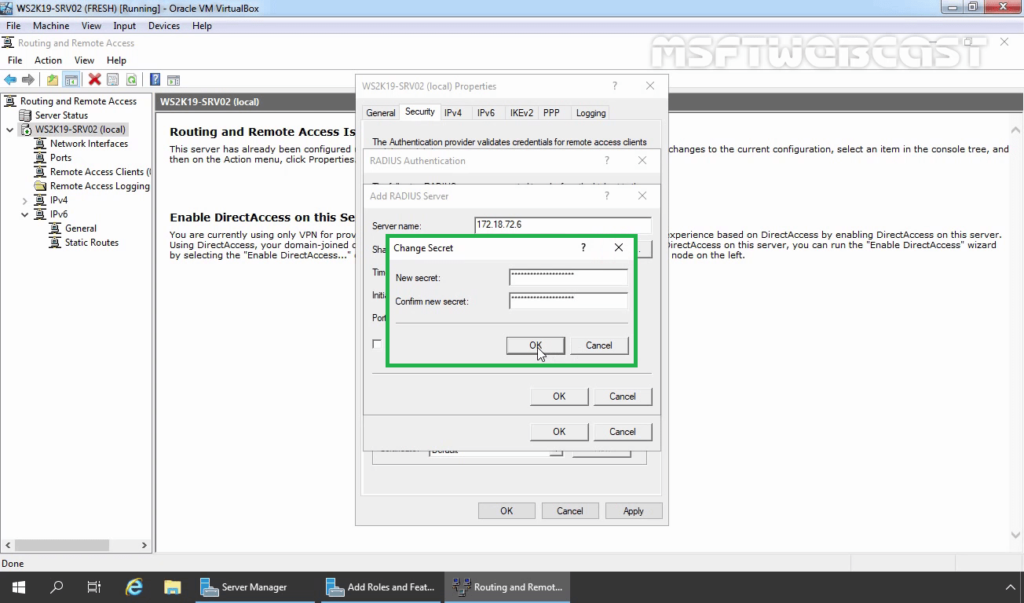
36. Specify Shared Secret password (which we have specified during adding radius client). Click OK.
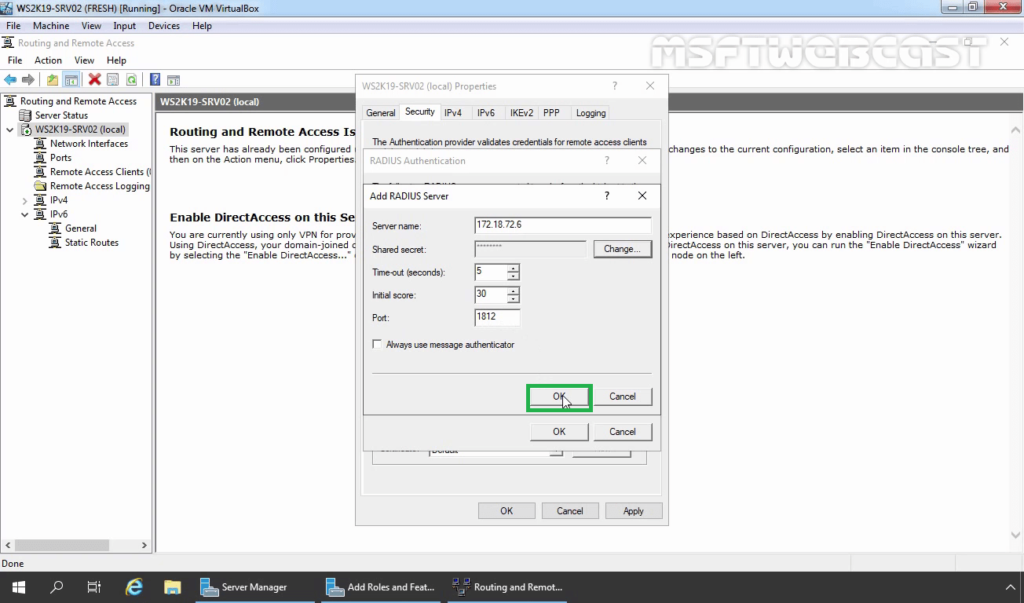
37. Click OK.
38. Click OK.
39. Under the Accounting provider, select RADIUS Accounting and then click on Configure.
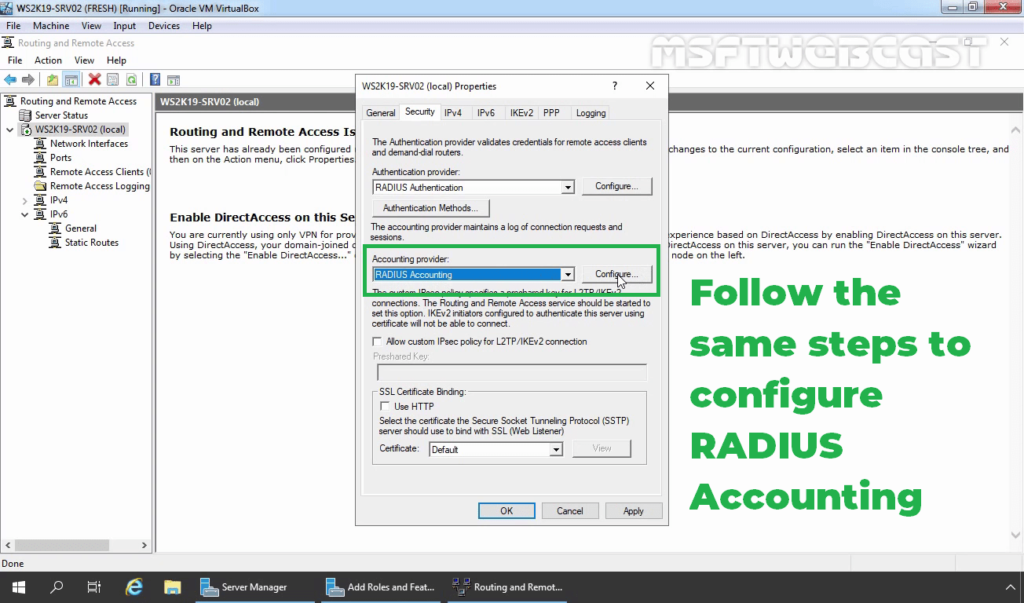
40. Follow the same steps again to specify the RADIUS Server IP Address and Shared Secret password.
41. Click on Apply and OK to save the changes.
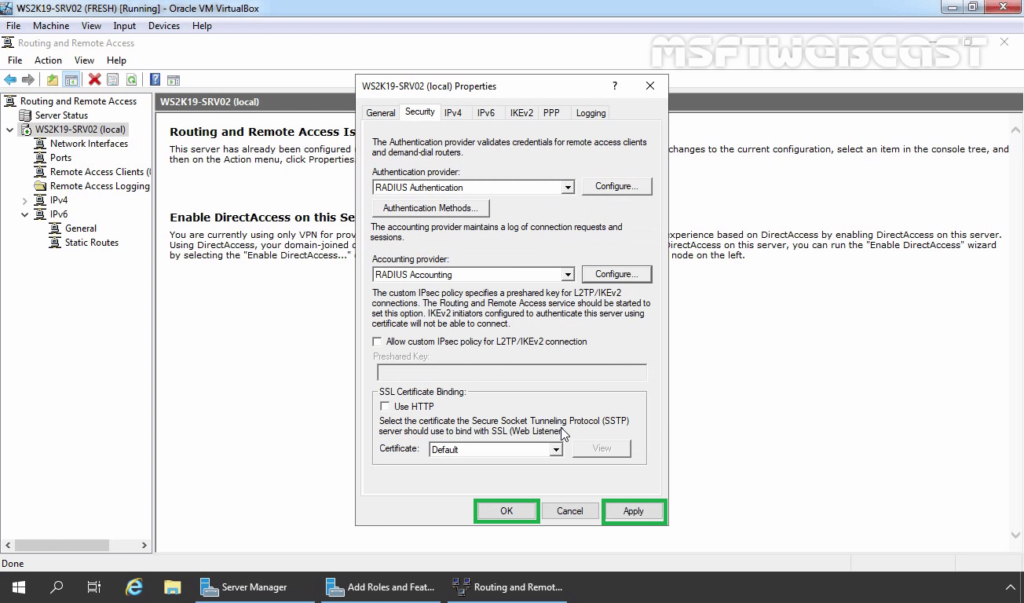
Now our VPN server can use Windows Server 2019 NPS RADIUS server for authentication and accounting without any issue.
That completes the steps on how to configure NPS RADIUS Server for VPN Authentication on Windows Server 2019.
Related Articles:
- How to Install Remote Access Service on Windows Server 2019 Part-1
- How to Install and Configure VPN in Windows Server 2019 Part-2
- Configure NPS for VPN in Windows Server 2019 Part-3
- Configure Port Forwarding and Test VPN Connection on Windows 10 Part-4
Post Views: 5,828
The term “RADIUS server” will probably be mentioned at some point in any conversation regarding wired or wireless authentication. Within a WPA-2 Enterprise network, RADIUS (also referred to as a “AAA server“), performs the crucial tasks of Authentication, Accounting, and Authorization. As you might anticipate, Microsoft has made improvements to its RADIUS server over time to satisfy the demands of its vast customer base for authentication.
Since the release of the Windows 2003 server, Microsoft has proactively updated its RADIUS servers. In our past blogs, we went into great detail on configuring Windows 2008/12/16 servers. In this blog post, we’ll help you set up Windows 2019, the ninth edition of the venerable Windows RADIUS server.
Before configuring the Windows Server 2019, ensure that you meet the following requirements for successfully configuring the Windows 2019 server.
Prerequisites for Windows RADIUS Server 2019:
❖ System Requirements:
- Processor: You need a processor of at least 1.4 GHz clock frequency for x64 processors.
- RAM: The minimum requirement of RAM is 512 MB. However, Microsoft recommends using 2GHz for smooth functioning and servers with a Desktop Experience installation option.
- Disk space: You need a minimum disk space of 32 GB or more, but Microsoft usually recommends using 40 GB or more disk space. Also, the disk space requirements vary with the processor and RAM used in the system.
❖ Active Directory Setup:
You must update the Active Directory environment before adding the domain controller.
❖ Server Core Installation:
Unlike Windows Server 2008, the admin does not need to select the Full Installation or Server Core Installation option beforehand in Windows Server 2012/16/19.
These features are merged in the 2012/16/19 version to give three optional features that the admin can install or uninstall at will.
❖ Network adapter requirements:
- An Ethernet adapter with a minimum throughput of 1 Gigabit per second.
- An Ethernet adapter that conforms to the PCI Express architectural standard.
❖ Miscellaneous Requirements:
- System and firmware that is based on UEFI 2.3.1c and support secure boot.
- A graphics card and a display with at least Super VGA (1024 x 768) resolution.
- Turn off your antivirus software, as the installation process can be hampered by virus protection software. For instance, checking each file copied locally to your computer might significantly slow the installation.
- Ensure that the Windows Firewall is enabled by default.
- Ensure that all the relevant data and information are appropriately backed up before the configuration.
Overview of Windows RADIUS Server 2019 Configuration:
- Install and set up Windows Server 2019.
- Install Active Directory Domain Services (ADDS) to configure the new domain.
- Install Certificate Authorities (CA) with Active Directory Certificate Services (ADCS).
- Install NPS ( Network Policy Server).
- Configure Certificate Authorities (CA), i.e., Active Directory Certificate Services (ADCS) for Certificates.
- Configure NPS ( Network Policy Server) for the authentication protocol.
- Configure RADIUS.
- Define Network policies for users/devices.
- Configure Access Point.
- Set up zero clients, and select 802.1x authentication.
- Configure Wireless Connection Request.
Now we will see each step involved in configuring Windows 2019 server in detail:
Install and Configure AD DS:
For configuring ADDS, follow the given instructions:
- Navigate to Windows Server 2019.
- Click Start.
- Click Server Manager.
- Navigate to Role Summary.
- Click Add Roles and Features.
- Select Role-based or Feature-based installation.
- Navigate to the Before You Begin page and click Next.
- Navigate to the Select Server Roles page.
- Select the Active Directory Domain Services.
- Click Next.
- Click Install on the Confirm Installation Selections.
- Navigate to the Installation Results page and click Close.
ADDS is installed.
Install AD CS and NPS :
For configuring ADDS, follow the given instructions:
- Navigate to Server Manager.
- Select Roles and Click Add Roles.
- Click Next on the Before you Begin page.
- Select Active Directory Certificate Services (AD CS) and Network Policy and Access Services.
- Click Next.
- Click Next on Network Policy and Access Services
- Navigate to Role Services and select Network Policy Server.
- Click Next.
- Select Create a self-signed certificate for SSL encryption and click Next.
- Click Next on the Introduction to Active Directory Certificate Services
- Select Certification Authority on the Select Role Services page and click Next.
- Select Enterprise on Specify Setup Page and Click Next.
- Select Root CA on Specify CA Type Page and Click Next.
- Select Create a new private key on the Set Up Private Key Page and Click Next.
- Click Next on Configure Cryptography for CA.
- Enter details on Configure CA Name page and click Next.
- Enter the validity period on the Set Validity Period page and click Next.
- Click Next on Configure Certificate Database page.
- Click Next on the Web Server (IIS) page.
- Click Next on the Select Role Services page.
- Click Install on the Confirm Installation Selection page.
- Click Close.
Now the AD CS (Active Directory Certificate Services), Web Server (IIS), and NPS are installed successfully.
Configure NPS ( Network Policy Server) and RADIUS authentication.
- Click on the Start button and select Administrative tools.
- Click NPS on the Network Policy Server.
- Select Register Server in Active Directory and click OK.
- Click OK.
- On the NPS (Local) page, select RADIUS server for 802.1x Wireless or Wired Connections.
- Click Configure 802.1x.
- Select Secure Wireless connections on the Configure 802.1x page.
- Type Name and click Next.
- Add RADIUS clients on the Configure 802.1x page and click Next.
- Type the following details on the New RADIUS Client page.
- Name
- IP Address
- Shared Secret (Manual)
- Click OK and click Next.
- Select Microsoft Protected EAP (PEAP) on the Configure 802.1x
- Click Configure.
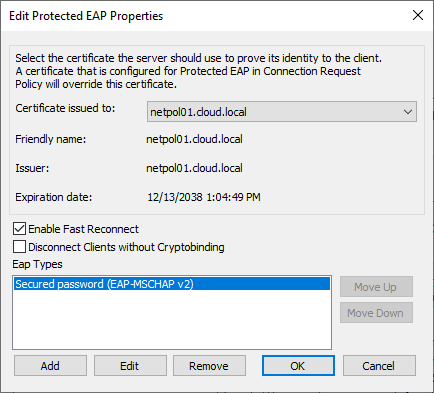
- Select Secured password on the Edit Protected EAP Properties page and click Edit.
- Enter the Number of authentication retries and click OK and click Next.
- Select Groups and click Next.
- Click Next again and click Finish.
- Restart NPS again.
Define Network Policies for users/devices.
You can follow the given steps for Defining the network policies.
- Navigate to the NPS console and click NPS (local).
- Click and expand Policies.
- Select Network Policies.
- Click New.
- Enter a Policy Name.
- Select the Type of Network Access Server to Unspecified while using Netscaler or RCdevs OpenLDAP while using OTP.
- Click Add in Specify Conditions
- Select Windows Groups and click Add.
- Click Add Groups and click OK.
- Select NAS Identifier in the Select Conditions
- Enter a Name and select Next to continue.
- Select Access Granted in Specify Access Permission
- Under Configure Authentication Method, select MS-CHAP v2 for maximum security.
- Click Next.
- Select RADIUS attributes as Standard in Configure Settings.
- Click Add.
- Enter the attribute value in String and click OK.
- Click Next and click Finish.
You can use the Network Policy Wizard to create and add new conditions, constraints, and setting to the network policies.


Administrators can define and implement a wide range of policies using our Cloud RADIUS, including lookup policies applied at the moment of authentication. For instance, depending on the time of day, you can decide whether to accept or reject people and devices. You may also restrict access to devices running a specific operating system.
Set up Zero Clients, and Select 802.1x Authentication
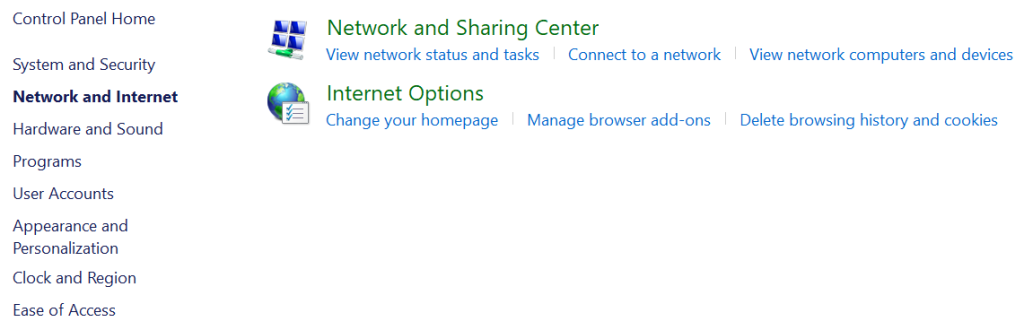
- Navigate to the Control panel and open the Network and Sharing center.
- Click Change adapter settings.
- Select Local Area Connection and click Properties.
- Select Authentication and click Enable IEEE 802.1x authentication.
- Select the desired protocol in the dropdown button.

Configure Wireless Connection Request
- Navigate to the Control panel and open the Network and Sharing center.
- Click Manage Wireless Networks.
- Select Manually Create a network profile.
- Enter your SSID in Network Name and click Next.
- Click Change Connection settings.
- Select Security and click Settings.
- Select the Trusted Root CA and click OK.
- Navigate to Advanced Settings.
- Select Specify Authentication Mode and click OK.
What On-Premise NPS with Cloud-Facing Architecture Looks Like
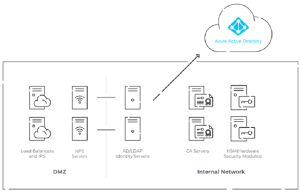
In the diagram above, you can see one possibility for the overall layout of your authentication infrastructure if you’re using on-premise NPS with cloud-based Azure AD and digital certificates for passwordless authentication.
The self-managed RADIUS architecture shown above requires hosting infrastructure in local data centers or cloud providers, using a DMZ for security, PKI/CAs, and HSMs for passwordless authentication — all of which may become difficult and expensive.
The setup for this type of infrastructure is costly and complex, and using a managed cloud-based RADIUS solution like Cloud RADIUS makes the transition to the cloud simpler.
Windows RADIUS Servers are not Cloud Compatible
NPS’s primary drawback is that it is designed to be an on-premise RADIUS solution for Active Directory environments. Cloud integration of NPS also has other significant downsides, even with other Microsoft-owned cloud-based solutions like Azure AD (Microsoft Entra ID). If you want to use Azure with NPS, you will require a separate authentication server or proxy to achieve cloud authentication. These operations are not only challenging to configure and maintain but time-consuming and relatively expensive.
Furthermore, traditional RADIUS servers installed on-site are prone to several security issues and vulnerabilities. Windows RADIUS servers have a number of vulnerabilities of their own that hackers frequently exploit in zero-day attacks. In addition, they require a lot of time and expertise to set up and maintain.
Due to its physical accessibility, the NPS server’s on-premise presence makes it vulnerable to various physical security threats, from intruders to disasters – or just power outages. Given the costs of maintaining highly-secure physical locations, there’s rarely a circumstance in which on-prem works out to be cheaper than cloud RADIUS.
Cloud RADIUS: Admins’ First Choice

For years, network administrators have relied on Windows Server for network authentication, but due to modern-day technological advancements, it is difficult to ignore its shortcomings.
There are several advantages to moving to the cloud over staying in an on-premises system, and no product exemplifies those benefits more than our revolutionary Cloud RADIUS. You can avoid the shortcoming of on-premise authentication by utilizing a cloud-based NAC like SecureW2’s Cloud RADIUS.
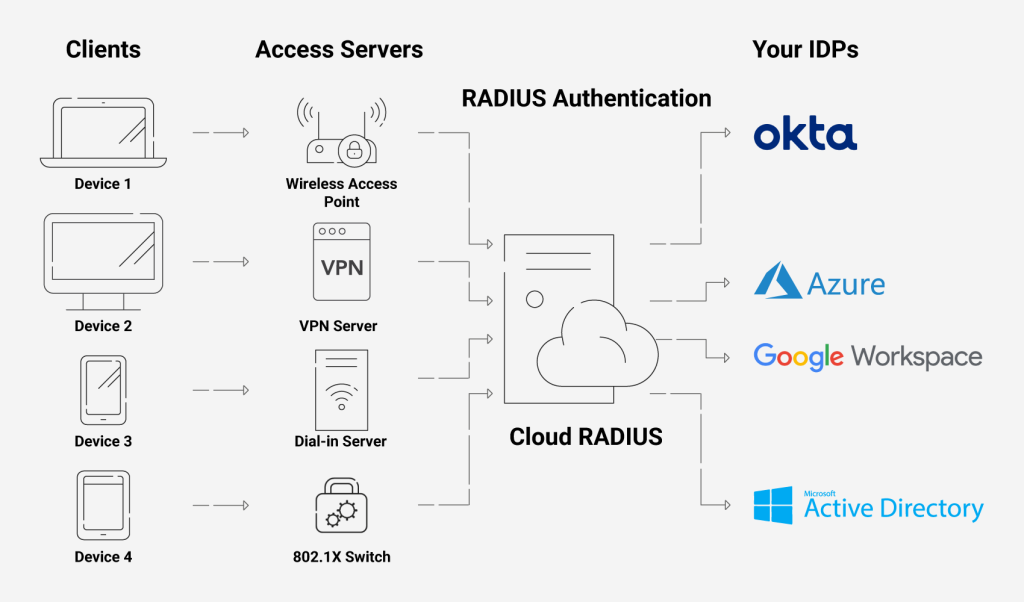
With our Cloud RADIUS, you may restrict or enable access to users depending on various factors, including user/device characteristics, time of day, and more. Additionally, you may use our Cloud RADIUS with any IDP because it is built for vendor neutrality. An industry-unique feature is the ability to enforce policies using real-time user lookups against Azure, Okta, and Google Workspace.
Integrating with Securew2 gives you more customization options through our many innovative features like Azure MFA auth, Intune auto revocation, Windows Hello for Business login, and many more. Besides not needing lengthy setups, Cloud RADIUS is resistant to on-site risks like outages and burglars. It doesn’t need to be installed at each location of your company because it is hosted in the cloud and has built-in redundancy.
If you are interested in taking that first step towards security for your organization, look no further and click here to inquire about pricing.
Over the last few days, I have been playing around with a few switches and configuring some 802.1X authentication between the switches and a Microsoft RADIUS server. I wanted to throw a quick block post out there to step through getting a Microsoft Network Policy Server configured to serve as a RADIUS server for clients on the network and how to configure this in basic terms. The configuration is not difficult, but it is tedious. If you skip one small step or configuration, you can leave yourself scratching your head for hours trying to chase down issues. However, there are some troubleshooting tools to note with RADIUS that makes life easier with figuring out what is going on if authentication requests etc. Let’s take a look at Installing Configuring Troubleshooting Windows Server 2019 NPS as RADIUS to step through the installation and configuration and look at a few troubleshooting areas to note.
The process to install the Network Policy Server in Windows Server 2019 is very straightforward. It is simply a matter of installing the Network Policy Server role in Windows Server. This is simply a next, next, finish process without even having to perform a Windows reboot. The NPS component is found under the Server Roles portion of the Add Roles and Features wizard.
Add the additional features that are required to install the role.
The role is now selected.
Click Next.
Confirm the installation of the NPS role.
The NPS Role installation finishes successfully.
Now that the role has been added successfully, we can start configuring the NPS role to serve as a RADIUS server for network devices.
Configuring and Troubleshooting Windows Server 2019 RADIUS server
One of the first things you want to do when getting the RADIUS server configured is to setup the Connection Request Policies and the Network Policies. What is the difference between the two?
Connection Request Policies – Connection request policies are sets of conditions and settings that allow designating which RADIUS servers perform the authentication and authorization of connection requests recevied from RADIUS clients. They can also determine which RADIUS servers perform the accounting functions.
- The time of day and day of the week
- The realm name in the connection request
- The type of connection being requested
- The IP address of the RADIUS client
Network policies are sets of conditions, constraints, and settings that allow designating who is authorized to connect to the network and the circumstances under which they can or can’t connect. These can be viewed as an ordered set of rules. Each network policy has a Policy State setting that allows enabling or disabling the policy. These are processed from the top down.
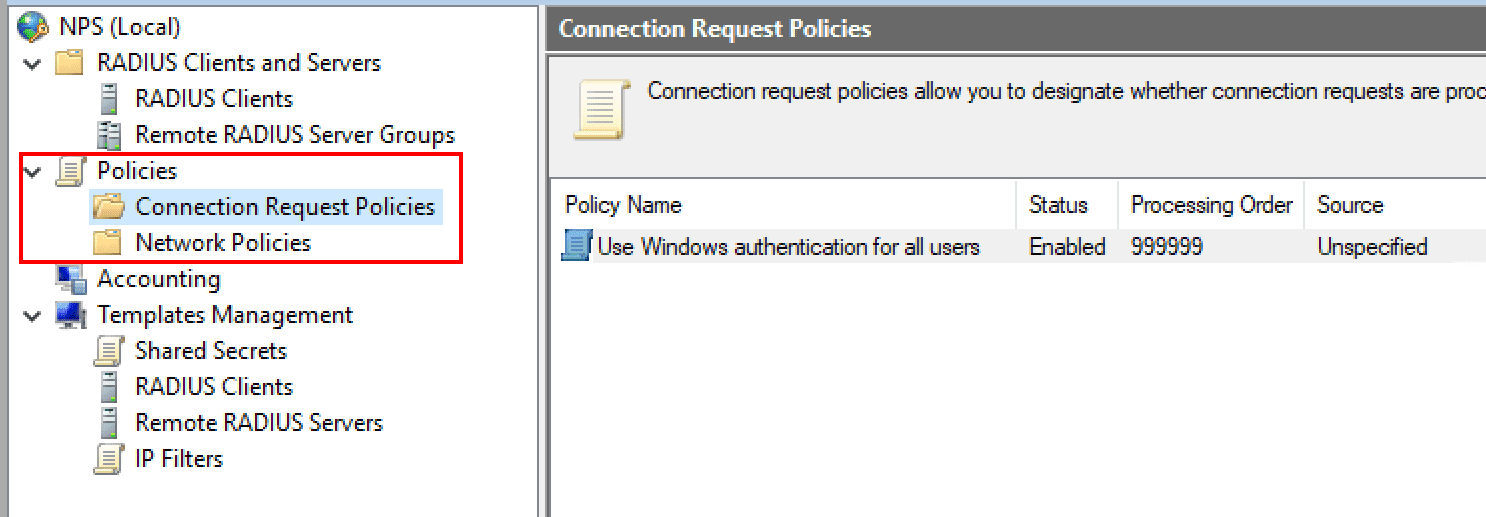
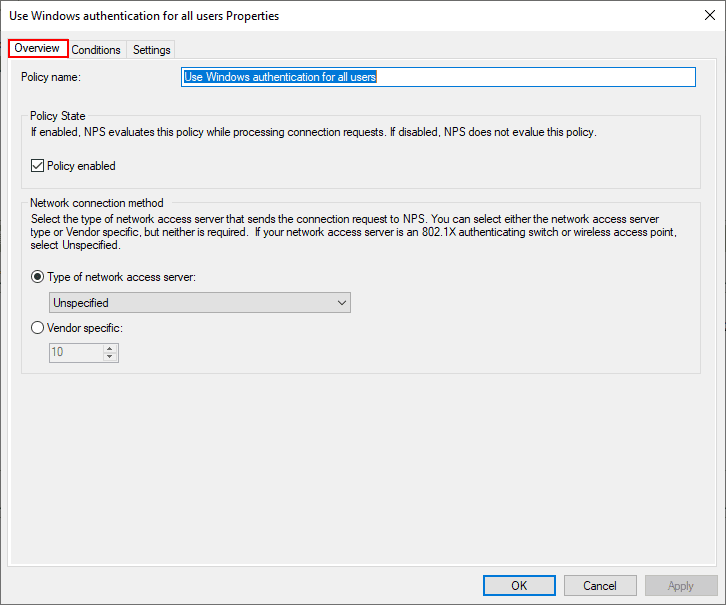
Let’s look at the properties of the default connection policy Use Windows authentication for all users to see what settings are contained. Note under the overview, the policy is set to enabled. It is perfectly ok to use the default connection policy and edit it to customize the properties as needed.
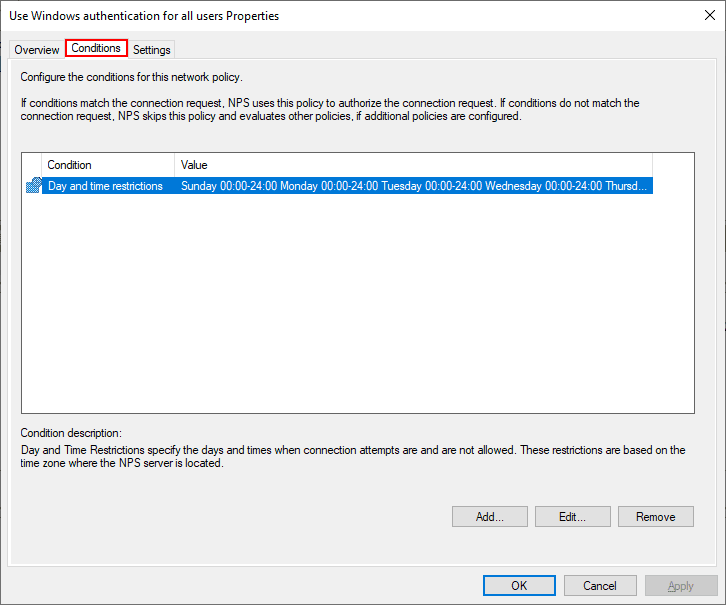
The only conditions defined in the Conditions tab is Day and time restrictions that define when connections can be made.
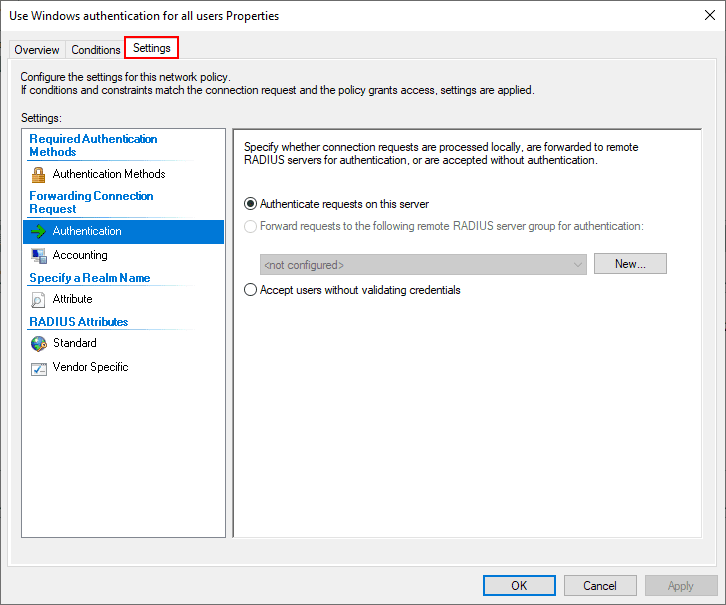
Note under the Settings tab we see the Authentication configuration that allows configuring which requests are processed locally or sent on to another RADIUS server.
I am just going to use the default connection policy. However, under the Network Policies container, I have created a new policy called TestPolicy and moved this to the top of the order for processing above the default network policies already there.
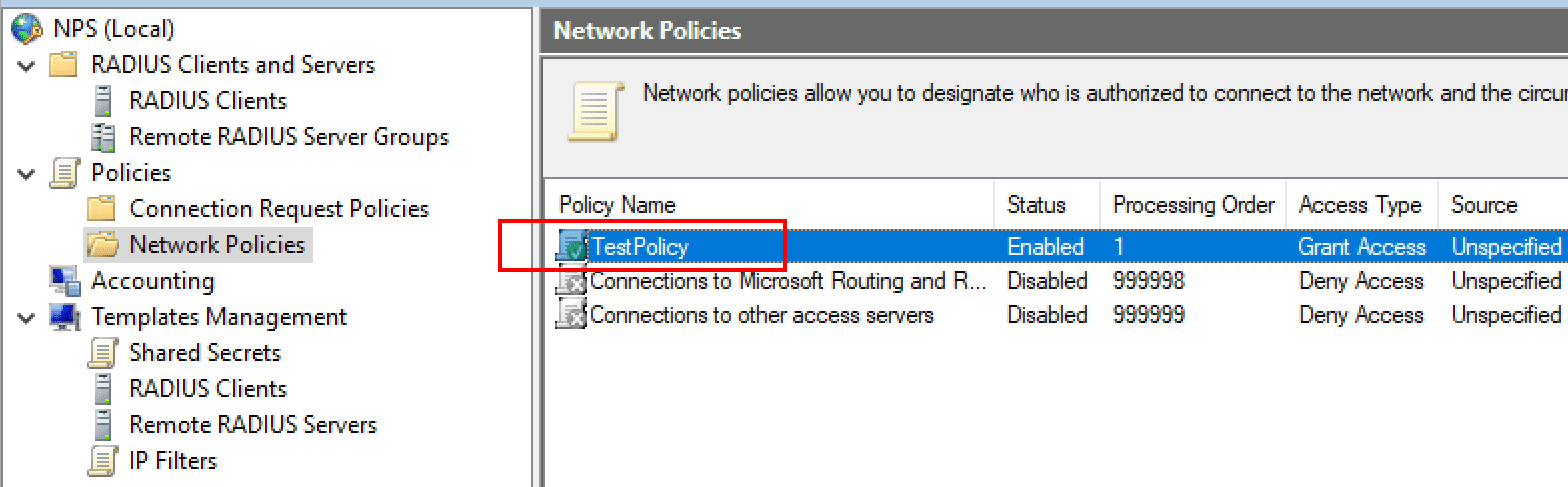
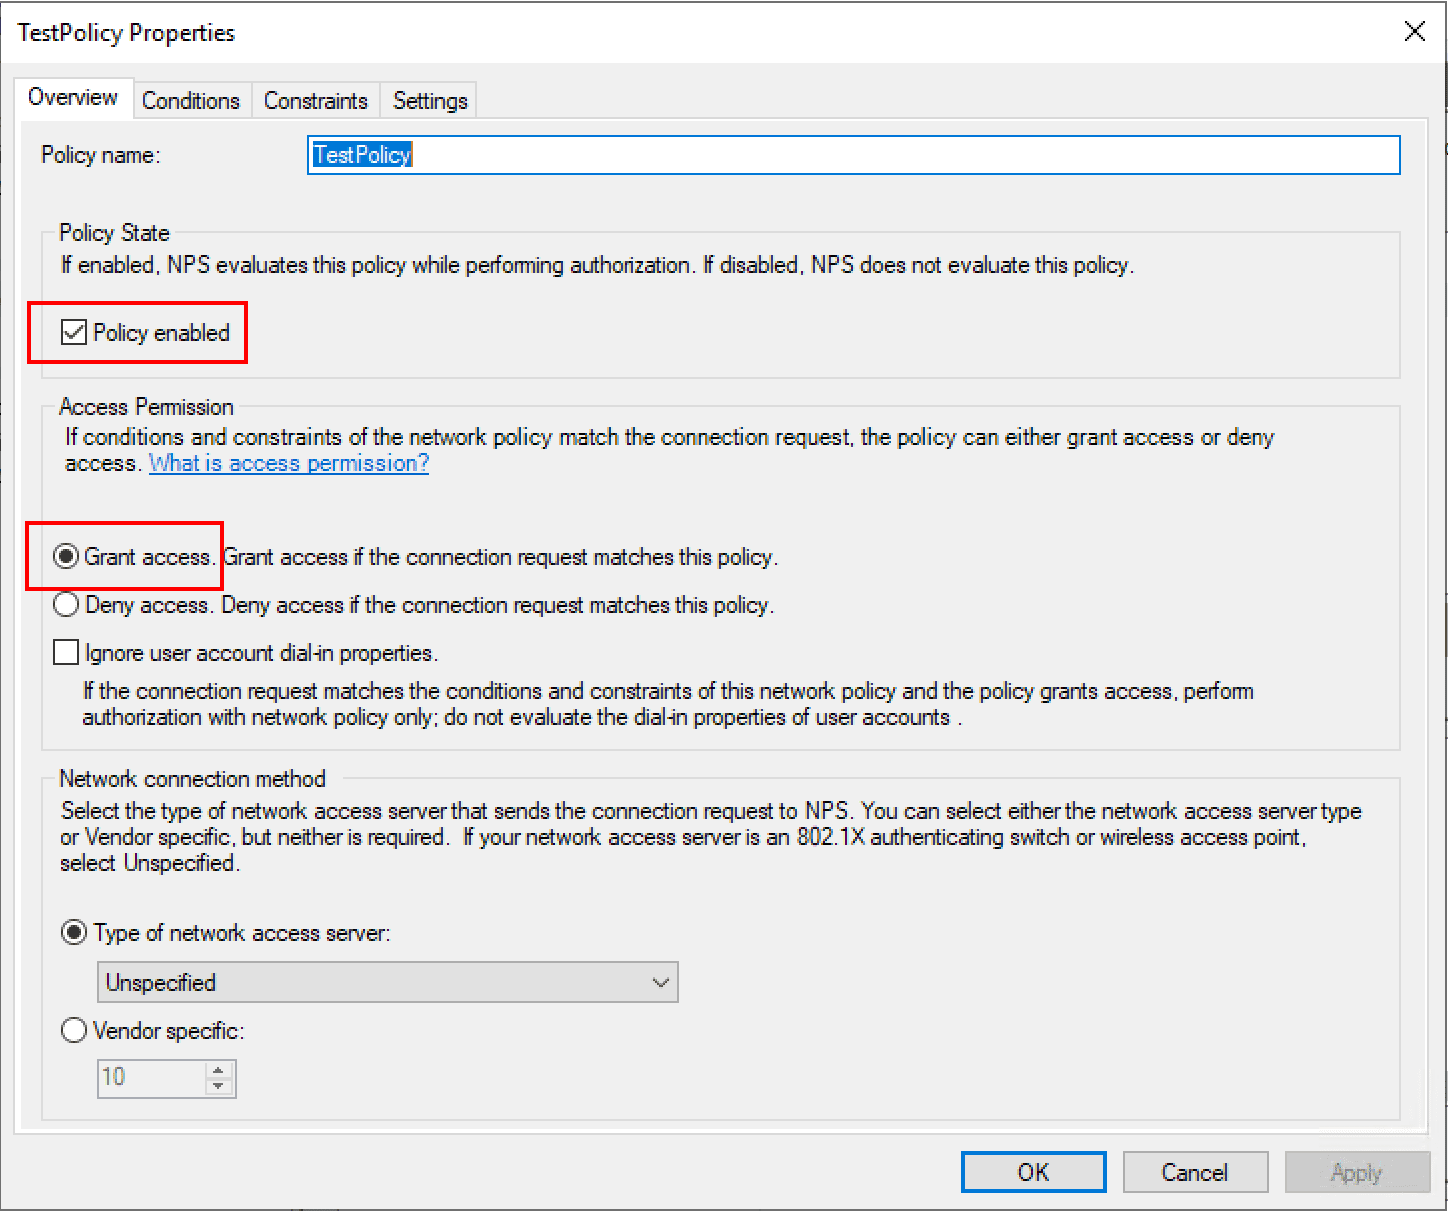
Under the TestPolicy network policy, we note it is set to enabled and the Access permission given is to Grant access.
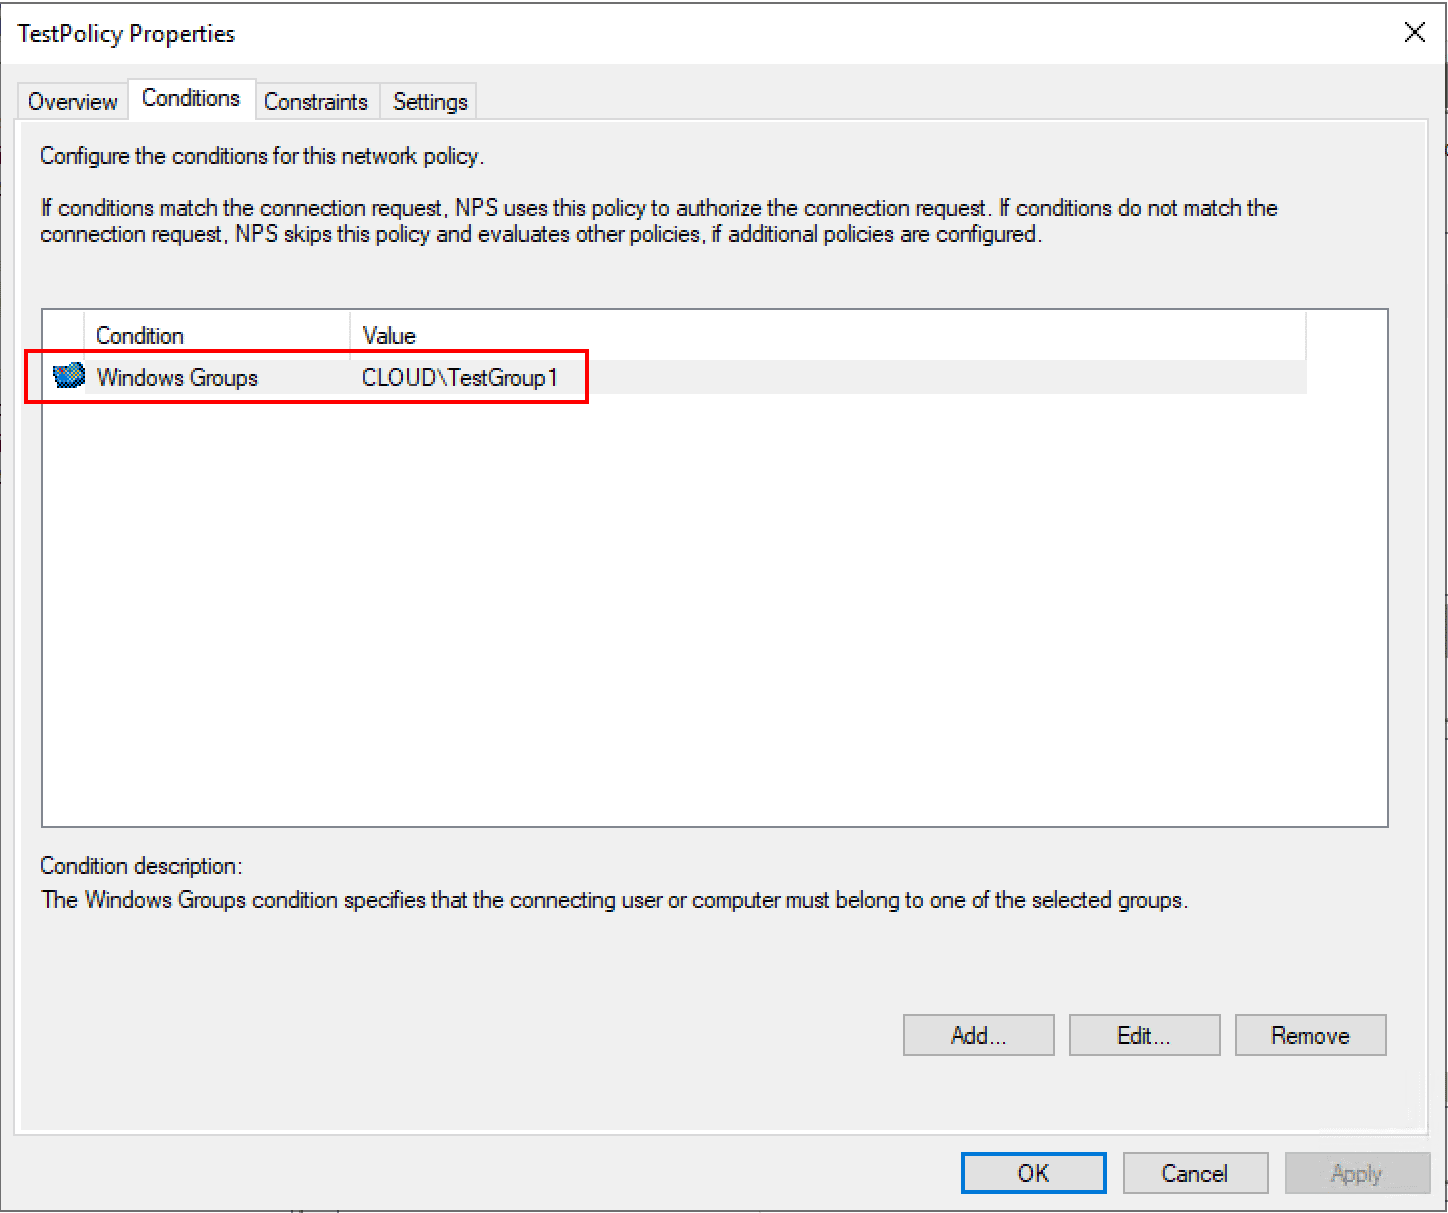
As noted above, the network policy defines who is allowed to connect. Below, I have added a Windows group under the Conditions tab to allow connection.
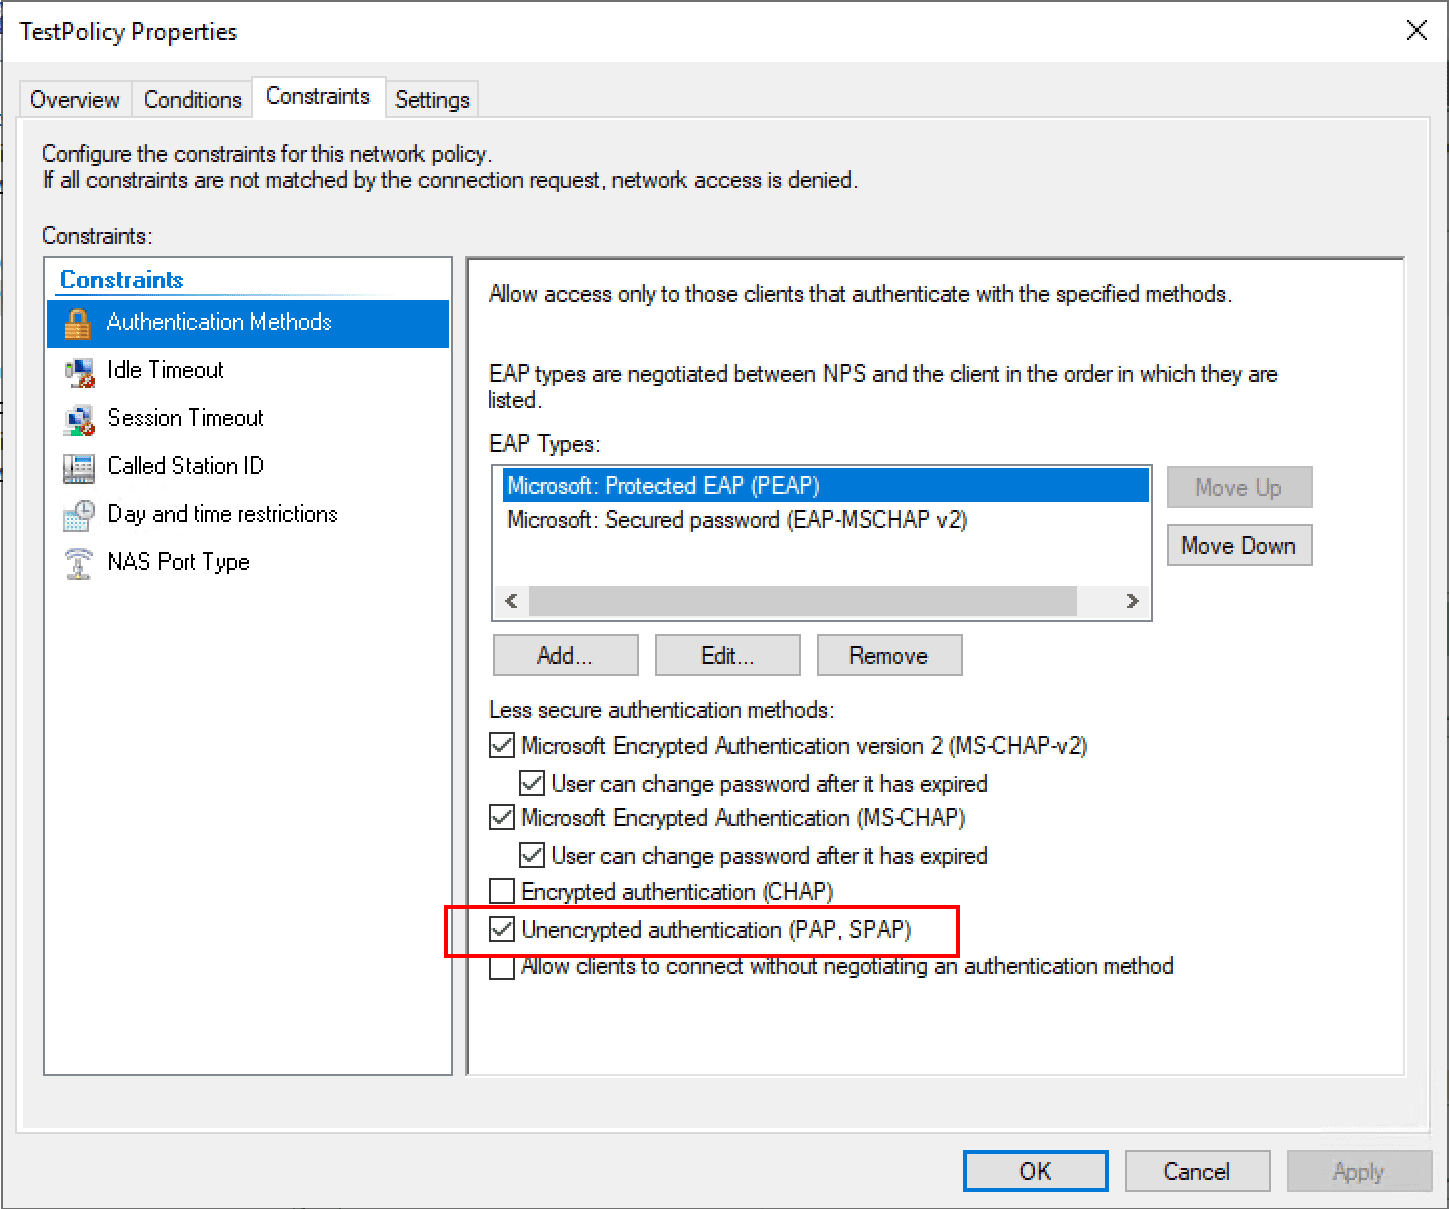
Under the Constraints tab, here is where you can define many important aspects of the network policy such as the Authentication Methods. I have added Microsoft: Protected EAP (PEAP) and Microsoft: Secured password (EAP-MSCHAP v2) as authentication protocols
PEAP authentication is a jointly developed authentication protocol by Cisco, Microsoft and RSA Security that encapsulates EAP within an encrypted and authenticated TLS encryption tunnel. this requires a certificate for providing the TLS tunnel.

Using PowerShell in Windows Server 2019, you can easily provision a self-signed certificate for use with the PEAP authentication protocol.
New-SelfSignedCertificate -dnsnae "<your server FQDN>" -KeyLength 2048 -CertStoreLocation cert:LocalMachineMy -NotAfter (Get-Date).AddYears(20)
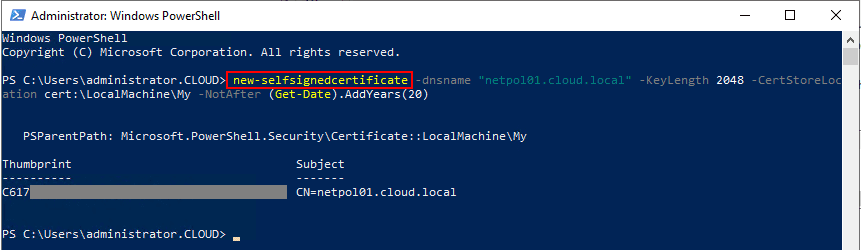
Creating a new self-signed certificate for use with PEAP authentication
Now, if we go back and edit the properties of the PEAP authentication protocol in our network policy, you will see an acceptable certificate for use with the PEAP protocol. The certificate that was just created will be used by default.
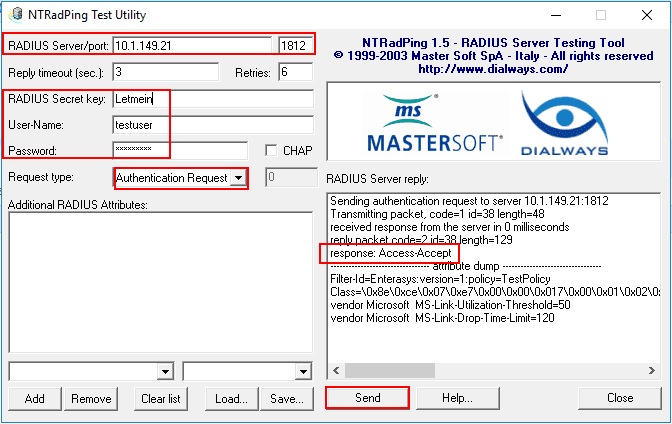
RADIUS can be time consuming and difficult to troubleshoot by trying the authentication request from a real client. Thankfully, there are great RADIUS simulators that make this process much easier. One that I really like to use is the NTRadPing utility which you can download here. This makes simulating the traffic extremely easy. One thing that needs to be done to allow testing with NTRadPing is to add the PAP authentication protocol which is unencrypted. Once you place the RADIUS server into production, you want to remove this. However, for testing, this is fine.
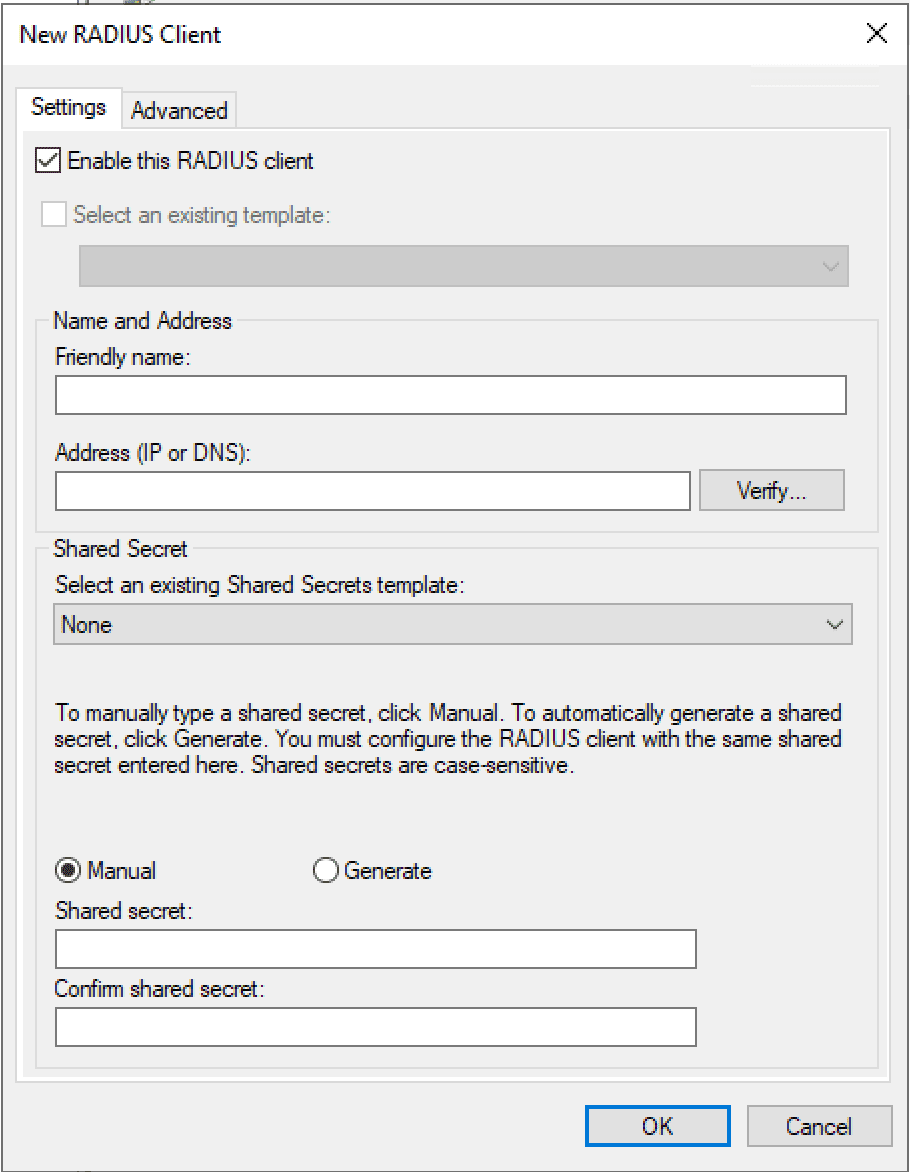
Add your workstation IP as a RADIUS client under the RADIUS Clients and Servers node. This consists of enabling the client, giving it a friendly name, entering the FQDN or IP address, and choosing a test shared secret passphrase.
After downloading and launching NTRadPing, there are several areas of the app to make note of. We need to enter the address of the RADIUS server to be tested, the port, the Shared secret key which on the screen is cleartext. Then enter the user-name and password. On the Request type choose the Authentication Request in the drop down box. Then simply click the Send button. In the RADIUS Server reply box, you should see the response: Access-Accept if you are using a user that fits both the connection and network policies configured.
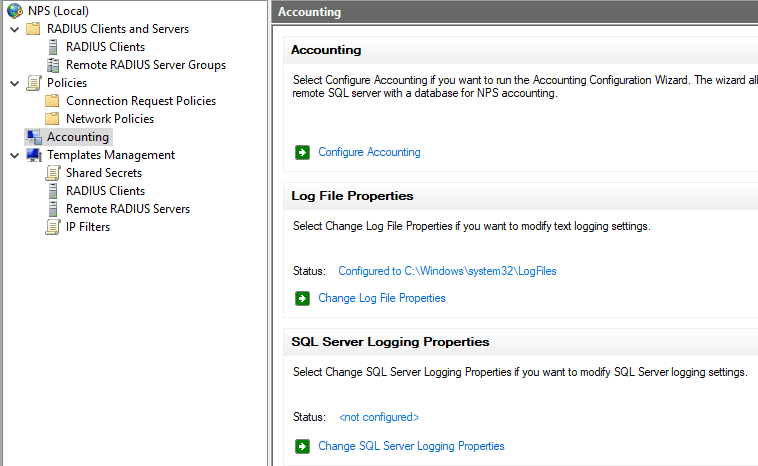
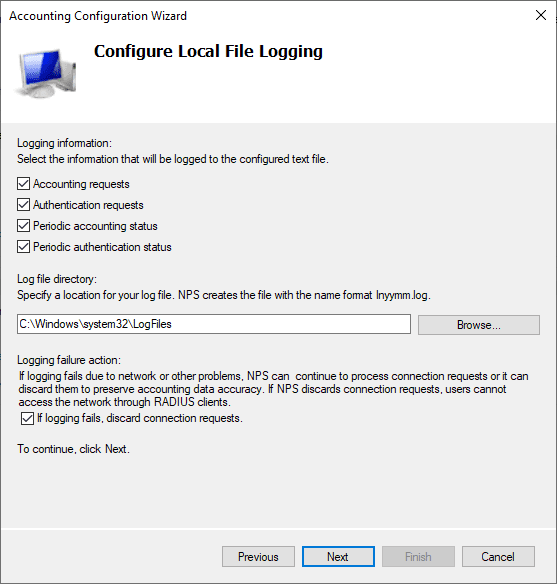
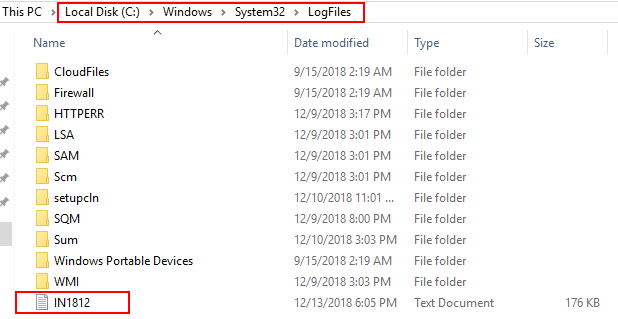
As you can see below, after enabling the RADIUS server logging under the Accounting configuration, you will start to see log files created under the default location of c:WindowsSystem32LogFiles.
Thoughts
If you are in need of utilizing a RADIUS server in your environment, Installing Configuring Troubleshooting Windows Server 2019 NPS as RADIUS server is very straightforward. The Network Policy Server role allows having a powerful RADIUS solution that allows providing authentication requests to network clients, switches, and other devices that support RADIUS server integration. Using great little tools such as NTRadPing and the built-in logging allow for easy troubleshooting of the configuration. Stay tuned for future posts where we will take this integration even further and show the process of authenticating and apply network policies to users based on RADIUS server authentication.
Radius сервер, он же Сервер сетевых политик в Windows Server он же NPS. Служит для организации доступа по доменным учетным записям к стороннему оборудованию и к сторонним сервисам при условии поддержки данной функции на них. Так при помощи radius сервера можно настроить доступ к организации посредством ВПН соединения, авторизацию на сетевые устройства и не только, плюс есть возможность настроить доступ к wi fi через авторизацию в домене (по доменным учеткам).
Установка роли NPS на Windows Server
Окрываем диспетчер серверов и выбираем Добавить роли и компоненты


Далее открываем mmc консоль в разделе Средства Администрирования -> Сервер сетевых политик

Нас встретит такая консоль. Собственно отсюда и будет происходить вся настройка

Разберемся подробнее что здесь за что отвечает:
- Radius-клиенты и серверы
- Radius-клиенты — здесь создаются все клиенты которые для авторизации на себе будут использовать наш Radius сервер
- Политики
- Сетевые политики — здесь создаются политики подключения выше созданных клиентов к нашему серверу (выполняются сверху вниз)
- Управление шаблонами
- Общие секреты — можно создать один пароль сразу для всех устройств и использовать его для авторизации на сервере. Поменяв его в шаблоне — меняется он сразу для всех устройств. Можно сразу создать назвав его например SecretPF cо значением 123456 (в бою придумать что то посложнее)
Создадим клиента OpenVPN (что бы пользователи могли для подключения через впн в нашу организацию использовать свои уже известные себе учетные данные — доменные логин/пароль)
Для этого указываем:
- Понятное имя — данное имя будет использоваться в выборке при выполнении сетевых политик исключительно для этого устройства например VPN-MSK
- Адрес (ip или dns) — адрес устройства на котором крутится ВПН сервер
- Ну в качестве Общего секрета используем ранее созданный шаблон SecretPF

Далее для корректной работы выборки по сетевым политикам (а выбирать пользователей у нас будем из группы безопасности созданной AD), создаем группу безопасности в моем случае локальную в домене , называем ее VPN_access, и добавляем в нее пользователей которые должны иметь доступ к ВПН подключению.

Теперь создаем сетевую политику. Для этого переходим на вкладу Политики -> Сетевые политики, нажимаем по ним правой кнопкой и выбираем новый документ
Далее все приводим к такому же виду как на скриншотах ниже. Особо внимание обратим на раздел с условиями. Там обязательно указываем группу пользователей имеющую доступ в нашем случае к авторизации на ВПН сервере и понятное имя клиента, точно такое же какое мы указывали в разделе Radius-клиенты. в дальнейшем это поможет не попадать не нужным пользователям на другие устройства, которые вы добавите на Radius сервер.
При добавлении других устройств на сервер, обязательно надо указывать Понятное имя клиента.


На данном этапе настройку Radius сервера можно считать завершенной. Осталось только проверить как это работает на клиенте. В нашем случае должно быть так:
Доступ должны иметь только те пользователи, которые состоят в группе VPN_access, другие доступа иметь не должны.
RADIUS (Remote Authentication in Dial-In User Service) is a network protocol that provides centralized management of authentication, authorization, and accounting (AAA), and designed to exchange of information between a central platform and client devices. RADIUS server can communicate with a central server for example, Active Directory domain controller) to authenticate remote dial-in clients and authorize them to access specific network services or resources.
The Network Policy Server (NPS) role implements the RADIUS server function in the Windows environment and allows you to authenticate remote clients against Active Directory. In this article, we’ll show how to configure a RADIUS server on Windows Server 2022/2019/2016, and how to configure RADIUS authentication on Cisco and MikroTic network devices (RADIUS clients) under AD user accounts.
Installing Network Policy Server (RADIUS) on Windows Server
Windows Server with the NPS (RADIUS) role forwards connecting user authentication requests to Active Directory domain controller, which performs user authentication. Therefore, the presence of an on-premises Active Directory is a mandatory requirement before the start of an NPS deployment.
Now you can to install the RADIUS server role on your Windows Server 2022/2019/2016. Open the Server Manager console, run the Add Roles and Features wizard > select the Network Policy and Access Services role.
Note. Also, you can install NPS role and management tools from an elevated PowerShell console:
Install-WindowsFeature NPAS –IncludeManagementTools
Check if the NPAS role is installed on your Windows Server host:
Get-WindowsFeature -Name NPAS

After the role installation is completed, open the Network Policy Server (nps.msc) in the Tools menu.

Right-click on a root node of the NPS console and click Register server in Active Directory.
Confirm the new NPS server registration in Active Directory.

Also, you can register your NPS server in Active Directory with a command:
netsh ras add registeredserver
The AD machine account on the NPS server is given permission to read the properties Active Directory user accounts to authenticate users. Your NPS host computer account will be added to the built-in domain group RAS and IAS Servers.
Next, create a new security group in the Active Directory domain (for example, RemoteCiscoUsers) and add all users who will be allowed to authenticate on Cisco routers and switches to this group.

The next step is to add the Radius client. Radius client is the device from which your server can receive authentication requests. This could be a Cisco router, switch, Wi-Fi access point, etc.
Expand the RADIUS Clients and Servers > RADIUS Clients, select New.
On the Settings tab, fill the fields Friendly name, client Address (you can specify IP address or DNS name), and Shared Secret + Confirm shared password (you will use this password in the configuration of the Cisco switch/router).
Note. The shared secret password is rarely used in large corporate networks due to the problems with the distribution of shared secrets. It is recommended to use certificates instead of shared passwords. If you have a corporate Certification Authority (CA) deployed to implement PKI infrastructure, you can request a *.p12 certificate for the Radius/NPS server. Just import the certificate to the personal certification store of the Local Machine.

In the Advanced tab, select Vendor name – Cisco.

You can use the PowerShell command instead of the NPS GUI to add a new RADIUS client. In this case, you can use the New-NpsRadiusClient PowerShell cmdlet:
New-NpsRadiusClient –Address "192.168.31.1" –Name "cisco2960" –SharedSecret "Zb+kp^JUy]v\ePb-h.Q*d=weya2AY?hn+npRRp[/J7d"
Note. On Windows Server Datacenter edition you can add RADIUS clients to NPS by IP address range. This allows to add a large number of RADIUS clients (such as wireless access points) rather than adding them individually. You can specify the IP range using the format 10.1.0.0/22.
By default, NPS uses the following UDP ports to send and receive RADIUS traffic: 1812, 1813, 1645, and 1646. When you install the NPS role on Windows Server, rules for these ports are automatically created and enabled in Windows Defender Firewall. You can list these Windows Firewall rules using PowerShell:
Get-NetFirewallRule -DisplayGroup "Network Policy Server"
If your RADIUS client is located in a DMZ network or an external security perimeter, you must create the appropriate firewall rules on your network firewall.
Configure NPS Policies on the RADIUS Server
NPS policies allow you to authenticate remote users and grant them access permissions configured in the NPS role. NPS access policies allow you to associate the RADIUS client to the domain security group that determines the user privileges on CISCO devices.
There are two types of policy on a RADIUS server:
- Connection request policies — determine which RADIUS servers should authenticate and authorize connection requests received from RADIUS clients;
- Network policies — allow you to specify who is authorized to connect to your network and a list of assigned privileges.
In our case, we will use only the NPS Network policies. Expand the Policies > Network Policies branch and select New:
Specify the Policy name, the type of network access server should remain unchanged (Unspecified).

In the Specify conditions step, you need to add the conditions under which this RADIUS policy will be applied. Let’s add two conditions — the authorized user must be a member of a specific domain security group, and the device you want to access has a specific name. Use the Add option to create a new condition by selecting the Windows Group type (add the RemoteCiscoUsers group) and specifying the Client Friendly Name (Cisco_*).
Note. The Client Friendly Name field may differ from the DNS name of your device. We will need it in the further steps to identify a specific network device when creating a Remote Access Policy. For example, you can use this name to specify a mask through which several different RADIUS clients are processed by a single access policy.

On the next screen, select Access Granted.

My Cisco switch only supports Unencrypted authentication methods (PAP, SPAP), so I’ve disabled all other options.

Skip the next configuration Constraints step.
In the Configure Settings section, go to the RADIUS Attributes > Standard section. Delete the existing attributes there and click the Add button.
Select Access type > All, then Service-Type > Add. Specify Others = Login.

Now add a new attribute in the RADIUS Attributes > Vendor Specific section. Under Vendor, select Cisco, and click Add. Here you need to add information about the attribute. Click Add and specify the following value:
shell: priv-lvl = 15
This value means that the user authorized by this policy will be granted a maximum (15) administrative access privileges on the Cisco device.

The last screen displays all selected NPS policy settings. Click Finish.

If you have created several network policies in the NPS console, please note that they are processed from top to bottom, so the order of the policies is important. Further processing will stop if all conditions in the next policy are met. You can change the priority of policies in the NPS console using the Processing Order value.

By default, all AD accounts can be used to authenticate using RADIUS. You can check this using the Active Directory Users and Computers snap-in (dsa.msc). Open any user properties, go to the Dial-In tab, and check that the Control access through NPS Network Policy option in enabled in the Network Access Permission section.

Configuring RADIUS Authentication on Cisco Devices
Once you have created the NFS policy, you can proceed to configure your Cisco routers or switches for authentication on the newly installed RADUIS server.
As it is insecure to send unencrypted user credentials over the network, you should disable the Telnet protocol on your Cisco devices. To disable Telnet and enable SSH, use the following commands in Configuration Mode on the Cisco device:
configure terminal

crypto key generate rsa modulus 1024

ip ssh version 2
You should create a local user on your Cisco device to avoid losing access to it if the RADIUS server or AD is unavailable. Create a local user with the following command:
username cisco_local password $UPerrP@ssw0rd
To make the use of SSH mandatory and disable remote access using Telnet, execute the following commands:
line vty 5 15

transport input ssh
Below is an example of the configuration for authorizing a Radius server for the Cisco Catalyst Switch:
aaa new-model

aaa authentication login default group radius local

aaa authorization exec default group radius if-authenticated

radius-server host 192.168.1.16 key Sfs34e#sf

#Specify your RADIUS server IP address and key for encryption (the shared secret that we specified on the RADIUS server)

service password-encryption

# Enable password encryption
If you have several Radius servers, add them to the group:
aaa group server radius radius_srv_group

server 192.168.1.16

server 192.168.101.16
This completes the minimum switch configuration and you can try to check Radius authentication on your Cisco device.
How to Enable MikroTik (RouterOS) User Authentication via RADIUS
In this part, we will show you how to configure RADIUS authentication for VPN user connections on a MikroTik router (RouterOS based).
Open the Network Policy Server console (nps.msc) and create a new Radius client.
Select New RADIUS Client and configure the following settings:
- Enable this RADIUS Client;
- Friendly Name — enter the name of your MikroTik router;
- Address — specific the IP address of the MikroTik router;
- Specify your Pre-shared secret key.
Create a new Network Policy with the following settings:
- User Groups — specify the name of the domain user group that is allowed to authenticate on your MikroTik router;
- Authentication Type — MS-CHAPv2;
- Tunnel Type — Point-to-Point Tunneling Protocol (PPTP);
- Access Permissions — Access granted;
- In the Configure Authentication Methods window, leave only MS-CHAPv2 and allow users to change expired passwords (User can change password after it has expired option);
- Multilink and Bandwidth Allocation Protocol (BAP) – Do not allow Multilink connections;
- In the Standard section, remove Service-Type – Framed and leave only Framed-Protocol PPP;
- Encryptions — leave only the strongest encryption (MPP 128-bit) method.

Once you have created a new policy, open the Network Policy Server settings.
Leave only the following UDP ports for the RADIUS server communications:
- Authentication — 1812;
- Accounting — 1813.

Check if these UDP ports are open in Microsoft Defender Firewall Rules. If not, open them manually.
Now you need to configure the connection settings for Windows Server RADIUS in the MikroTik configuration (we assume that PPP VPN Server is already configured on RouterOS).
Check in the PPTP server settings that only mschap2 is allowed to use for authentication.
Now we need to configure the connection to Radius NPS server. Select New Radius Server and specify the following options:
- Service: ppp;
- Address: IP address of the RADIUS server;
- Secret: pre-shared key that you specified in the network policy settings;
- Src/ Address: MikroTik IP address from which traffic will be sent to NPS;
- Authentication Port: 1812;
- Accounting Port: 1813.
Add appropriate access rules to MikroTik Firewall.
Then go to Secrets > PPP Authentication and Accounting and enable the Use Radius option.
It remains to configure a PPTP VPN connection to your MikroTik VPN on users’ computers. Users can use their Active Directory account credentials to authenticate against Mikrotik (accounts must be added to the AD group that you have specified when creating the MiktoTik Network Policy on NPS).
How to View the NPS/RADIUS Event Logs on Windows?
To enable NPS Server Radius Authentication logging, you need to enable the Network Policy Server audit policy via the local Group Policy Editor (gpedit.msc). Go to Computer Configuration > Policies > Windows Settings > Security Settings > Advanced Audit Policy Configuration > Audit Policies > Logon/Logoff > Audit Network Policy Server and check the option to audit both success and failure logon attempts.
Now you can open the Event Viewer console (eventvwr.msc), go to the Windows Logs > Security, and filter the event by the Event ID 6272.
Network Policy Server granted access to a user.

If the user has entered an incorrect password or is not authorized to log on through the RADIUS Client, Event ID 6272 is displayed:
Network Policy Server denied access to a user.
If the user has entered an incorrect user name and password, an event will be displayed in the Event Viewer:
Authentication failed due to a user credentials mismatch
If the user is not a member of the correct security group, or if Network Access Permission= Deny is set in the AD user properties on the Dial-in tab, the following event will occur:
The Network Access Permission setting in the dial-in properties of the user account in Active Directory is set to Deny access to the use
If a user enters an incorrect password multiple times, their account will be locked out in accordance with your Account Lockout Policy in AD.
Event ID: 6279
Network Policy Server locked the user account due to repeated failed authentication attempts.
If you need to find all NPS authorizations events for the specific user (Richard.Doe in this example), use the next PowerShell script:
$Query = @"

<QueryList>

<Query Id="0" Path="Security">

<Select Path="Security">

*[EventData[Data[@Name='SubjectUserName'] and (Data=theitbros\richard.doe')]] and

*[System[(EventID='6272')]]

</Select>

</Query>

</QueryList>

"@

$events = Get-WinEvent -FilterXML $Query

$ipaddr = @{ label="IP"; Expression={$_.properties[9].value} }

$events | select $ipaddr | group "IP" | format-table Count, Name -autosize