
Содержание
- 1 Общая информация
- 2 Проверка требований
- 3 Установка Samba
- 4 Настройка Samba
- 5 Проверка работы и отладка
- 6 Дополнительная настройка
- 7 Доступ к Samba из Windows 7 и 2008 r2
- 8 Работа над ошибками
- 8.1 Winbind не запускается
- 8.2 Ошибка получения билета Kerberos
- 9 Полезные комманды
- 10 См. также
- 11 Cсылки
Общая информация
Если вам нужно просто предоставить сетевой доступ к ресурсам Linux компьютера, то смотрите статью Samba.
В этой статье мы опишем как подключить Linux компьютер к домену под управлением Microsoft Active Directory и сделать из него файловый сервер.
После выполнения этой инструкции мы будем иметь в сети файловый сервер под управлением ОС Линукс, входящий в домен Windows 2003 и ничем не отличающийся от файлового сервера под Windows. Пользователи домена смогут обращаться к его ресурсам под своими учётными записями. Доступ регулируется группами домена AD.
По этой инструкции настраивались Debian (4, 5), Ubuntu 9.10, создавалась она на основе официальной документации и многих рекомендаций и инструкций из Интернета. Остальные Linux’ы настраиваются сходным образом.
Для Alt Linux написана хорошая инструкция http://freesource.info/wiki/AltLinux/Dokumentacija/SambaInWin2kDomain?v=omo&
Проверка требований
- Проверяем что Samba собрана с поддержкой Kerberos:
# smbd -b | grep KRB

   HAVE_KRB5_H
   HAVE_ADDRTYPE_IN_KRB5_ADDRESS
   HAVE_DECODE_KRB5_AP_REQ
   HAVE_KRB5
   HAVE_KRB5_AUTH_CON_SETUSERUSERKEY
   HAVE_KRB5_C_ENCTYPE_COMPARE
   HAVE_KRB5_C_VERIFY_CHECKSUM
   HAVE_KRB5_ENCRYPT_BLOCK
   HAVE_KRB5_ENCRYPT_DATA
   HAVE_KRB5_FREE_AP_REQ
   HAVE_KRB5_FREE_DATA_CONTENTS
   HAVE_KRB5_FREE_KEYTAB_ENTRY_CONTENTS
   HAVE_KRB5_FREE_KTYPES
   HAVE_KRB5_FREE_UNPARSED_NAME
   HAVE_KRB5_GET_PERMITTED_ENCTYPES
   HAVE_KRB5_GET_RENEWED_CREDS
   HAVE_KRB5_KEYBLOCK_IN_CREDS
   HAVE_KRB5_KEYTAB_ENTRY_KEY
   HAVE_KRB5_KEYUSAGE_APP_DATA_CKSUM
   HAVE_KRB5_KT_FREE_ENTRY
   HAVE_KRB5_LOCATE_KDC
   HAVE_KRB5_MK_REQ_EXTENDED
   HAVE_KRB5_PRINCIPAL2SALT
   HAVE_KRB5_PRINC_COMPONENT
   HAVE_KRB5_SET_DEFAULT_TGS_KTYPES
   HAVE_KRB5_SET_REAL_TIME
   HAVE_KRB5_STRING_TO_KEY
   HAVE_KRB5_TKT_ENC_PART2
   HAVE_KRB5_USE_ENCTYPE
   HAVE_LIBGSSAPI_KRB5
   HAVE_LIBKRB5
   HAVE_MAGIC_IN_KRB5_ADDRESS
   HAVE_TICKET_POINTER_IN_KRB5_AP_REQ
   KRB5_VERIFY_CHECKSUM_ARGS
- Также проверим что поддерживается LDAP
# smbd -b | grep LDAP

   HAVE_LDAP_H
   HAVE_LDAP
   HAVE_LDAP_ADD_RESULT_ENTRY
   HAVE_LDAP_DN2AD_CANONICAL
   HAVE_LDAP_INIT
   HAVE_LDAP_INITIALIZE
   HAVE_LDAP_SET_REBIND_PROC
   HAVE_LIBLDAP
   LDAP_SET_REBIND_PROC_ARGS
- Для корректной работы Samba в домене Windows 2003 нужны версии MIT Kerberos version >=1.3.1. Проверим:
# dpkg -l | grep krb

ii  krb5-config    1.22                       Configuration files for Kerberos Version 5
ii  libkrb53       1.6.dfsg.4~beta1-5lenny1   MIT Kerberos runtime libraries
- Для корректной работы с Windows 2008 серверами сама Samba должна быть достаточно свежая:
# smbd -V

Version 3.2.5
Установка Samba
- Устанавливаем сервер и клиент samba.
# apt-get install samba samba-client krb5-config
При настройке krb5-config лучше указывать IP адреса контроллеров домена, а не их DNS имена.
Настройка Samba
- Для подключения к домену Active Directory удобно использовать утилиту Likewise-Open.
- Для администрирования Samba удобно использовать SWAT или webmin, которые предоставляют веб интерфейс. Попасть на него можно по адресу http://server_address:901 и https://server_address:10000 соответственно, указав для соединения пользователя root. Но будьте осторожны — он полностью переписывает smb.conf и некоторые параметры может просто игнорировать. Лучше предварительно сделать резервную копию файла. Я сначала использовал SWAT, а затем дорабатывал конфигурационный файл /etc/samba/smb.conf руками. Вот, что осталось у меня не закоментированным (принтеры к этому серверу не подключены):
[global]
        unix charset = LOCALE
        realm = WORKGROUP.DOMAIN.LOCAL
        server string = Storage samba server
        interfaces = eth0
        bind interfaces only = Yes
        security = ADS
        obey pam restrictions = Yes
        passdb backend = tdbsam
        passwd program = /usr/bin/passwd %u
        passwd chat = *Enter\snew\sUNIX\spassword:* %n\n *Retype\snew\sUNIX\spassword:* %n\n *password\supdated\ssuccessfully* .
        log level = 3
        syslog = 0
        log file = /var/log/samba/log.%m
        max log size = 100
        name resolve order = lmhosts host wins bcast
        printcap name = CUPS
        local master = No
        domain master = No
        dns proxy = No
        ldap ssl = no
        panic action = /usr/share/samba/panic-action %d
        idmap uid = 10000-20000
        idmap gid = 10000-20000
        template shell = /bin/bash
        invalid users = root

[print$]
        comment = Printer Drivers
        path = /var/lib/samba/printers

[distrib]
        path = /data/distrib
        valid users = @WORKGROUP\DistribGroup
        write list = @WORKGROUP\DistribGroup
        read only = No
        create mask = 0777
        directory mask = 0777

[backup]
        path = /data/backup
        valid users = @WORKGROUP\BackupGroup
        write list = @WORKGROUP\BackupGroup
        read only = No
        create mask = 0777
        directory mask = 0777
Мы описали два общих каталога:
- backup — доступ имеют только пользователи входящие в группу BackupGroup в Active Directory. Они могут создавать и удалять файлы/каталоги
- distrib — доступ имеют все пользователи входящие в группу DistribGroup в Active Directory
В приведённой конфигурации подразумевается, что eth0 — это сетевой интерфейс в локальную сеть, где домен имеет полное имя WORKGROUP.DOMAIN.LOCAL
- редактируем /etc/nsswitch:
passwd:         compat winbind
group:          compat winbind
shadow:         compat winbind

hosts:          files dns wins
networks:       files dns

protocols:      files
services:       files
ethers:         files
rpc:            files

netgroup:       files
- Проверим, что в /etc/hosts есть корректная запись для нашего сервера, также можно добавить записи для контроллеров доменов:
10.0.0.15      storage.domain.local storage
10.0.0.85      dcwg1.domain.local dcwg1
10.0.0.245     dcwg2.domain.local dcwg2
- Удаляем если есть (или переносим в резервные копии) файл /etc/samba/secrets.tdb и все файлы из /var/lib/samba/*.tdb
- Проверяем конфигурацию (не обязательно):
- testparm -s
В Ubunto testparm находится в пакете samba-common-bin
- Проверим как Samba-3 winbind общается с контроллером домена Active Directory посредством протокола Kerberos:
# net ads info

LDAP server: 10.0.0.85
LDAP server name: dcwg1.workgroup.domain.local
Realm: WORKGROUP.DOMAIN.LOCAL
Bind Path: dc=WORKGROUP,dc=DOMAIN,dc=LOCAL
LDAP port: 389
Server time: Срд, 03 Мар 2010 13:12:14 NOVT
KDC server: 10.0.0.85
Server time offset: -5
На рассхождение времени в секундах указывает строка «Server time offset: -5». Обратите внимание, что протокол Kerberos зависим от времени, и расхождение с часами контроллера домена допускается лишь незначительное, поэтому желательно настроить NTP клиент (см. статьи по настройке NTP). В Ubuntu это указывается в файле /etc/default/ntpdate:
NTPSERVERS="10.0.0.85 10.0.0.245"
- В Debian (и его сыновьях, таких как Ubuntu и внуках вроде Linux Mint) при установке пакета krb5-cofig сразу предлагается его настройка. Лучше всего попробовать работать с этими настройками, но если ничего предложено не было или мы хотим что-то изменить, то редактируем /etc/krb5.conf (я для более стабильной работы использовал ip адреса вместо имён серверов):
[libdefaults]
        default_realm = WORKGROUP.DOMAIN.LOCAL

# The following krb5.conf variables are only for MIT Kerberos.
        krb4_config = /etc/krb.conf
        krb4_realms = /etc/krb.realms
        kdc_timesync = 1
        ccache_type = 4
        forwardable = true
        proxiable = true
#
#...
#
# The following libdefaults parameters are only for Heimdal Kerberos.
        v4_instance_resolve = false
        v4_name_convert = {
                host = {
                        rcmd = host
                        ftp = ftp
                }
                plain = {
                        something = something-else
                }
        }
        fcc-mit-ticketflags = true

[realms]
        WORKGROUP.DOMAIN.LOCAL = {
                kdc = 10.0.0.85
                kdc = 10.0.0.245
                admin_server = 10.0.0.85
        }
#
#...
#
[login]
        krb4_convert = true
        krb4_get_tickets = false
- Проверим работает ли Kerberos, постараемся получить билет и просмотреть его:
# kinit administrator@WORKGROUP.DOMAIN.LOCAL
Password for administrator@WORKGROUP.DOMAIN.LOCAL:

# klist
Ticket cache: FILE:/tmp/krb5cc_0
Default principal: administrator@WORKGROUP.DOMAIN.LOCAL

Valid starting     Expires            Service principal
03/06/10 14:51:41  03/07/10 00:51:47  krbtgt/WORKGROUP.DOMAIN.LOCAL@WORKGROUP.DOMAIN.LOCAL
        renew until 03/07/10 14:51:41
- Удалим полученный билет:
# kdestroy
- Присоединяемся к домену:
# net ads join -UAdministrator

Administrator's password:
Using short domain name -- WORKGROUP
Joined 'STORAGE' to realm 'WORKGROUP.DOMAIN.LOCAL'
Всё, компьютер включен в домен, что можно проверить на контроллере. Даже если после приведённых строк получили следующие:
[2010/03/06 15:04:00,  0] libads/kerberos.c:332(ads_kinit_password)
  kerberos_kinit_password STORAGE$@WORKGROUP.DOMAIN.LOCAL failed: Client not found in Kerberos database DNS update failed!
Проверка работы и отладка
- Для удобства отладки сделаем ссылку на каталог журналов:
# ln -s /var/log/samba /etc/samba/log
- Запускаем samba и winbind:
# /etc/init.d/samba start
# /etc/init.d/winbind start
- Для проверки правильно ли подключение к домену можно посмотреть список пользователей и групп домена (не обязательно):
# wbinfo -u
# wbinfo -g
Если нас не понимают, то подсказываем пароль для wbinfo и смотрим: список доменов в сети, информацию о домене WORKGROUP, список пользователей и групп домена:
# wbinfo --set-auth-user=root%root_password
# wbinfo --all-domains
# wbinfo -D WORKGROUP
# wbinfo -t
- Проверяем, как работает NSS. Команда getent показывает инфо о пользователе, который может быть как в домене, так и юниксовый:
# getent passwd | grep pm
pm:x:15000:15000::/home/WORKGROUP/pm:/bin/false

# getent passwd | grep pavel
pavel:x:500:500:Pavel Malahov:/home/pavel:/bin/bash
- Теперь можно использовать ресурсы на линукс-сервере, на которые мы дали доступ, как обычные доменные ресурсы.
Дополнительная настройка
- Можно также сопоставить (но это не обязательно) локальные учётные данные и из домена Windows. Для сопоставления пользователей редактируем файл /etc/samba/smbusers.conf:
root = admin administrator
- для сопоставления (мапирования от англ. Map) групп домена и групп UNIX выполняем:
# net groupmap modify ntgroup="Domain Admins" unixgroup=root
# net groupmap modify ntgroup="Domain Users" unixgroup=users
# net groupmap modify ntgroup="Domain Guests" unixgroup=nobody
- После того как всё отлажено, можно понизить уровень записи в журнал до «1». В /etc/samba/smb.conf:
log level = 1
Доступ к Samba из Windows 7 и 2008 r2
Начиная с этих версий параметры авторизации у MS поменялись. Скорее всего Samba вскоре это учтёт, а пока подружить системы можно изменив на Win7 свойства сетевой безопасности:
Пуск — Панель управления — Администрирование — Локальная политика безопасности — Локальные политики — Параметры безопасности
- Сетевая безопасность: минимальная сеансовая безопасность для клиентов на базе NTLM SSP — убрать галочку с «Требовать 128-битное шифрование». Таких параметра два — выполнить для обоих
- Сетевая безопасность: уровень проверки подлинности LAN Manager — выбрать в списке пункт «Отправлять LM- и NTML-ответы»
Работа над ошибками
Winbind не запускается
При запуске Samba обнаруживаем, что winbind не запустился:
# /etc/init.d/winbind status
 * winbind is not running
В журнале log.winbindd обнаруживаем запись:
[2010/03/06 13:54:34,  2] winbindd/winbindd_util.c:235(add_trusted_domain)
  Added domain BUILTIN  S-1-5-32
[2010/03/06 13:54:34,  2] winbindd/winbindd_util.c:235(add_trusted_domain)
  Added domain STORAGE  S-1-5-21-3963871611-1338977097-196861091
[2010/03/06 13:54:34,  0] winbindd/winbindd_util.c:782(init_domain_list)
  Could not fetch our SID - did we join?
[2010/03/06 13:54:34,  0] winbindd/winbindd.c:1385(main)
  unable to initialize domain list
Видим, что добавлен «встроенный домен» (BUILTIN) и домен «название компьютера» (STORAGE), подключиться к домену AD не удалось.
Решение: Переподключить компьютер в домен. Удалять придётся с самого контроллера, т.к. комадна net ads leave скорее всего не поможет.
Ошибка получения билета Kerberos
При попытке получить билет Kerberos получили:
kinit: KDC reply did not match expectations while getting initial credentials
Решение: указать имя домена в другом регистре. Скорее всего нужны все заглавные
Полезная ссылка: http://subscribe.ru/archive/comp.soft.win.linuxsa/200510/19115643.html
Полезные комманды
| $ smbclient -N -L 10.0.0.117 | показывает ресурсы компьютера с адресом 10.0.0.117 |
| $ smbclient //10.0.0.117/common | Вход в расшаренную директорию. Пользователь unix от которого выполняется команда должен быть зарегистрирован в домене. |
| # net ads join -U pavel -d 3 | Добавить в домен пользователя pavel |
| # winbindd -d 3 -i | Режим отладки (-d), winbindd запускается не как демон (-i) |
| # wbinfo -a mydomain\\myuser%mypasswd | авторизируемся в домене (через winbindd, wbinfo входит в этот пакет) |
| # ldapsearch | запросы к LDAP серверу, в нашем случае к MS Active Directory |
| # tdbdump /etc/samba/secrets.tdb | просмотреть содержимое файла *.tdb |
См. также
- Статья Samba даёт краткий общий обзор пакета Samba утилит для него, а также описывает простой (без авторизации в домене) способ предоставления каталогов в общий доступ.
Cсылки
- http://linux.yaroslavl.ru//docs/serv/samba/samba-win2000.html — Samba и доменная аутентификация Windows2000
- http://us6.samba.org/samba/docs/man/Samba-Guide/unixclients.html#adssdm- Active Directory Domain with Samba Domain Member Server — подробная инструкция как подключить Linux сервер с помощью Samba 3 к домену под управлением AD Windows 2003.
- http://us6.samba.org/samba/docs/man/Samba-Guide/kerberos.html#id397375 — пример настройки доступа для пользователей Active Directory
- Samba-HOWTO-Collection.pdf, стр.54-57 (поставляется с исходниками) или
- http://jcifs.samba.org/ntstatus.txt — описание статусов
Интеграция Linux-серверов в домен Windows Active Directory (AD) позволяет централизованно управлять пользователями и упростить аутентификацию. В этой статье мы рассмотрим, как добавить Debian в домен Windows AD, используя realmd и SSSD.
Описание используемых служб:
Realmd (Realm Discovery)– сервис D-Bus, позволяющий производить настройку сетевой аутентификации и членства в домене (Active Directory) без сложных настроек. Информация о домене обнаруживается автоматически. Для аутентификации и проверки учетных записейrealmdиспользуетSSSD(через Kerberos и LDAP) илиWinbind.SSSD (System Security Services Daemon)— это клиентский компонент централизованных решений для управления идентификацией, таких как Microsoft Active Directory, Kerberos, OpenLDAP и других серверов каталогов. SSSD обслуживает и кэширует информацию, хранящуюся на удаленном сервере каталогов, и предоставляет услуги идентификации, аутентификации и авторизации хост-машине.
Исходные данные:
- Контроллер домена (DC1) на Windows Server 2019, домен JAKONDA.LOCAL (IP — 192.168.1.100)
- Linux система (debian) на Debian 11 Bullseye (IP — 192.168.1.10)
Подготовка системы
Перед началом убедитесь, что ваша система Debian обновлена:
apt-get update && apt-get upgrade -yУказываем FQDN (Fully Qualified Domain Name) имя системы, в файле /etc/hostname:
/etc/hostname
debian.jakonda.localФайл /etc/hosts приводим к виду таким образом, чтобы в нём была запись с полным доменным именем компьютера и с коротким именем, ссылающаяся на один из внутренних IP хоста:
/etc/hosts
127.0.0.1	localhost
192.168.1.10	debian.jakonda.local debian
Настраиваем клиент DNS на хосте. Файл /etc/resolv.conf приводим к виду с учетом ваших данных:
/etc/resolv.conf
domain jakonda.local
search jakonda.local
nameserver 192.168.1.100
Настройка синхронизации времени
Для корректной аутентификации по протоколу Kerberos необходимо синхронизировать время сервера и клиента. Если системные часы расходятся более чем на 5 минут, то аутентификация не будет выполнена.
Установим NTP сервер и выполним синхронизацию времени с контроллером домена:
apt-get install ntp ntpdate -y

ntpdate dc1.jakonda.local
Установка необходимых пакетов
Устанавливаем необходимые пакеты:
apt-get install realmd sssd sssd-tools libnss-sss libpam-sss adcli samba-common-bin oddjob oddjob-mkhomedir packagekit -yПроверка доступности домена
Проверим, доступен ли домен для обнаружения через DNS:
realm discover jakonda.local -v

 * Resolving: _ldap._tcp.jakonda.local
 * Performing LDAP DSE lookup on: 192.168.1.10
 * Successfully discovered: jakonda.local
jakonda.local
  type: kerberos
  realm-name: JAKONDA.LOCAL
  domain-name: jakonda.local
  configured: no
  server-software: active-directory
  client-software: sssd
  required-package: sssd-tools
  required-package: sssd
  required-package: libnss-sss
  required-package: libpam-sss
  required-package: adcli
  required-package: samba-common-bin
jakonda.local
  type: kerberos
  realm-name: JAKONDA.LOCAL
  domain-name: jakonda.local
  configured: no
Команда realm discover возвращает полную конфигурацию домена и список пакетов, которые необходимо установить, чтобы система была зарегистрирована в домене.
Предварительная настройка
Перед вводом в домен, можно настроить realmd переопределив настройки по-умолчанию. Это делается путем размещения настроек в файле /etc/realmd.conf1.
Настройки в этом файле применяются только в момент присоединения к домену или области.
Для примера зададим атрибуты системы для объекта компьютера в Active Directory (атрибуты operatingSystem и operatingSystemVersion) и укажем в какую OU поместить объект:
/etc/realmd.conf
[active-directory]
os-name = Debian GNU/Linux
os-version = 11.8 (Bullseye)

[jakonda.local]
computer-ou = OU=Linux Computers,DC=jakonda,DC=local
Ввод в домен
Для ввода системы в домен выполните команду:
realm join jakonda.local -U Administrator
Password for Administrator:
Замените Administrator на учетную запись с правами на добавление компьютеров в домен.
Проверим, что система находится в домене:
realm list

jakonda.local
  type: kerberos
  realm-name: JAKONDA.LOCAL
  domain-name: jakonda.local
  configured: kerberos-member
  server-software: active-directory
  client-software: sssd
  required-package: sssd-tools
  required-package: sssd
  required-package: libnss-sss
  required-package: libpam-sss
  required-package: adcli
  required-package: samba-common-bin
  login-formats: %U@jakonda.local
  login-policy: allow-realm-logins
Инструмент realmd после ввода системы в домен, создает файл конфигурации — /etc/sssd/sssd.conf:
/etc/sssd/sssd.conf
[sssd]
domains = jakonda.local
config_file_version = 2
services = nss, pam

[domain/jakonda.local]
default_shell = /bin/bash
krb5_store_password_if_offline = True
cache_credentials = True
krb5_realm = JAKONDA.LOCAL
realmd_tags = manages-system joined-with-adcli
id_provider = ad
fallback_homedir = /home/%u@%d
ad_domain = jakonda.local
use_fully_qualified_names = True
ldap_id_mapping = True
access_provider = ad
Этих параметров достаточно для авторизации доменных пользователей в системе.
Важно помнить, что файл /etc/sssd/sssd.conf должен иметь разрешения 600 и root:root, иначе демон sssd не будет запускаться.
В случае внесения каких то изменений в файл конфигурации, то после этого всегда необходимо перезапускать SSSD:
Проверка работы
Проверим, что учетные записи из домена доступны. Получим информацию о доменном пользователе — jakonda@jakonda.local.
getent passwd jakonda@jakonda.local
jakonda@jakonda.local:*:1851201887:1851200513:Jakonda:/home/jakonda@jakonda.local:/bin/bash
Проверим в каких группах пользователь jakonda@jakonda.local состоит:
groups jakonda@jakonda.local
jakonda@jakonda.local : domain users@jakonda.local domain admins@jakonda.local
Если вы только что изменили членство пользователя в группе, может пройти некоторое время, прежде чем sssd заметит это из-за кэширования.
Попробуем войти в систему:
sudo login

debian.jakonda.local имя пользователя: Jakonda
Пароль:
Linux debian.jakonda.local 5.10.0-23-amd64 #1 SMP Debian 5.10.179-3 (2023-07-27) x86_64

The programs included with the Debian GNU/Linux system are free software;
the exact distribution terms for each program are described in the
individual files in /usr/share/doc/*/copyright.

Debian GNU/Linux comes with ABSOLUTELY NO WARRANTY, to the extent
permitted by applicable law.
Создание каталога /home/jakonda@jakonda.local.
Автоматическое создание домашнего каталога
Чтобы доменным пользователям создавался их домашний каталог при входе в систему, выполним команду:
pam-auth-update --enable mkhomedirРезультатом выполнения команды будет, добавление в /etc/pam.d/common-session строки:
session optional pam_mkhomedir.so umask=0022 skel=/etc/skelУправление разрешениями на вход для пользователей домена
Чтобы задать правила доступа, используйте следующие две команды:
realm denyrealm permit
Глобальные разрешения
Чтобы предоставить или запретить доступ для всех пользователей, используется команда с параметром --all:
realm permit --all
realm deny --all
Разрешения по пользователям
Чтобы предоставить доступ указанным пользователям, используется команда:
realm permit user@jakonda.local
realm permit 'JAKONDA.LOCAL\user'
Разрешения по группам безопасности
Для пользователей доменных групп безопасности, используется команда:
ream permit -g %Domain\admins@jakonda.localЗапрещающие правила
Чтобы запретить доступ указанным пользователям, используется команда с параметром -x:
realm permit -x user@jakonda.localSUDO разрешения
Для разрешения определенным доменным пользователями возможность выполнения sudo, создадим отдельный файл в котором укажем доменную группу безопасности в которую уже будут входить нужные пользователи.
Создаем файл /etc/sudoers.d/admins со следующим содержанием:
/etc/sudoers.d/admins
%ServerAdmins ALL=(ALL) ALLХочу заместить если группа безопасности содержит пробелы, например — Domain admins, то указывать ее нужно в формате — %Domain\admins
Вывод из домена
Опишу так же процедуру вывода системы из домена, на случай если такая возникнет необходимость.
Сперва выводим список сконфигурированных доменов:
realm list

jakonda.local
  type: kerberos
  realm-name: JAKONDA.LOCAL
  domain-name: jakonda.local
  configured: kerberos-member
  server-software: active-directory
  client-software: sssd
  required-package: sssd-tools
  required-package: sssd
  required-package: libnss-sss
  required-package: libpam-sss
  required-package: adcli
  required-package: samba-common-bin
  login-formats: %U
  login-policy: allow-realm-logins
Для вывода системы из домена, выполняем команду:
realm leave -v -U Administrator@jakonda.localЗамените Administrator на учетную запись с правами на удаление компьютеров в домен и jakonda.local на свой домен.
Если в выводе сконфигурированных доменов присутствует две записи (две записи присутствуют при использовании двух client-software — winbind и sssd), к примеру вот так это выглядит:
realm list

jakonda.local
  type: kerberos
  realm-name: JAKONDA.LOCAL
  domain-name: jakonda.local
  configured: kerberos-member
  server-software: active-directory
  client-software: winbind
  required-package: winbind
  required-package: libpam-winbind
  required-package: samba-common-bin
  login-formats: JAKONDA\%U
  login-policy: allow-any-login
jakonda.local
  type: kerberos
  realm-name: JAKONDA.LOCAL
  domain-name: jakonda.local
  configured: kerberos-member
  server-software: active-directory
  client-software: sssd
  required-package: sssd-tools
  required-package: sssd
  required-package: libnss-sss
  required-package: libpam-sss
  required-package: adcli
  required-package: samba-common-bin
  login-formats: %U
  login-policy: allow-realm-logins
Тогда нужно выполнить две команды, для вывода системы из домена:
realm leave -v --client-software=sssd -U Administrator@jakonda.local
realm leave -v --client-software=winbind -U Administrator@jakonda.local
Очистка системы
После вывода системы из домена, удаляем кеш SSSD и Kerberos.
Останавливаем SSSD демон:
Удаляем SSSD кеш:
Удаляем Kerberos кеш:
- Подробное описание realmd-conf — https://www.freedesktop.org/software/realmd/docs/realmd-conf.html ↩︎
ПОНРАВИЛАСЬ ИЛИ ОКАЗАЛАСЬ ПОЛЕЗНОЙ СТАТЬЯ, ПОДДЕРЖИ АВТОРА ДОНАТОМ
This tutorial will describe how you can join machines that run Linux Mint 17.1 OS to Windows 2012 Active Directory Domain Controller in order to authenticate remote accounts from AD back end identity provider to local Linux workstations with the help of SSSD service and Realmd system DBus service.
The System Security Services Daemon (SSSD) is a relative new service which provides cross-domain compatible methods for Active Directory users to authenticate to local machines using a combination of usernames and domain back end name to create the login identity, even if the Domain Controller goes offline (SSSD caches credentials).
REQUIREMENTS
- Windows Server 2012 configured as an Active Directory Domain Controller
- A Linux Mint 17.1 client machine which will be integrated to Windows PDC
Domain Settings:
- Domain Name:
caezsar.lan - Windows Server 2012 AD FQDN:
server.caezsar.lan - Windows Server 2012 AD IP Address:
192.168.1.130 - Linux Mint Hostname:
mint-desktop - Linux Mint IP Address: automatically assigned by DHCP
- Linux Mint first DNS IP Address: Manually assigned to point to AD PDC –
192.168.1.130
STEP ONE – Linux Mint Network Configuration
1. Before starting with installing the required services in order to integrate the local machine to the PDC Server, first we need to assure that Windows Domain Controller is reachable through DNS resolution on Linux Mint host by adding the DNS PDC IP Address on our Network Configuration. To achieve this goal, first open Network Settings, go to the Network Interface Card (in this case is the Wired Connection, but you can use a Wireless Connection also), open it for editing (hit the settings icon from bottom right) and add your PDC IP Address on IPv4 DNS filed (switch Automatic DNS to OFF) as illustrated in the following screenshots:

network settings
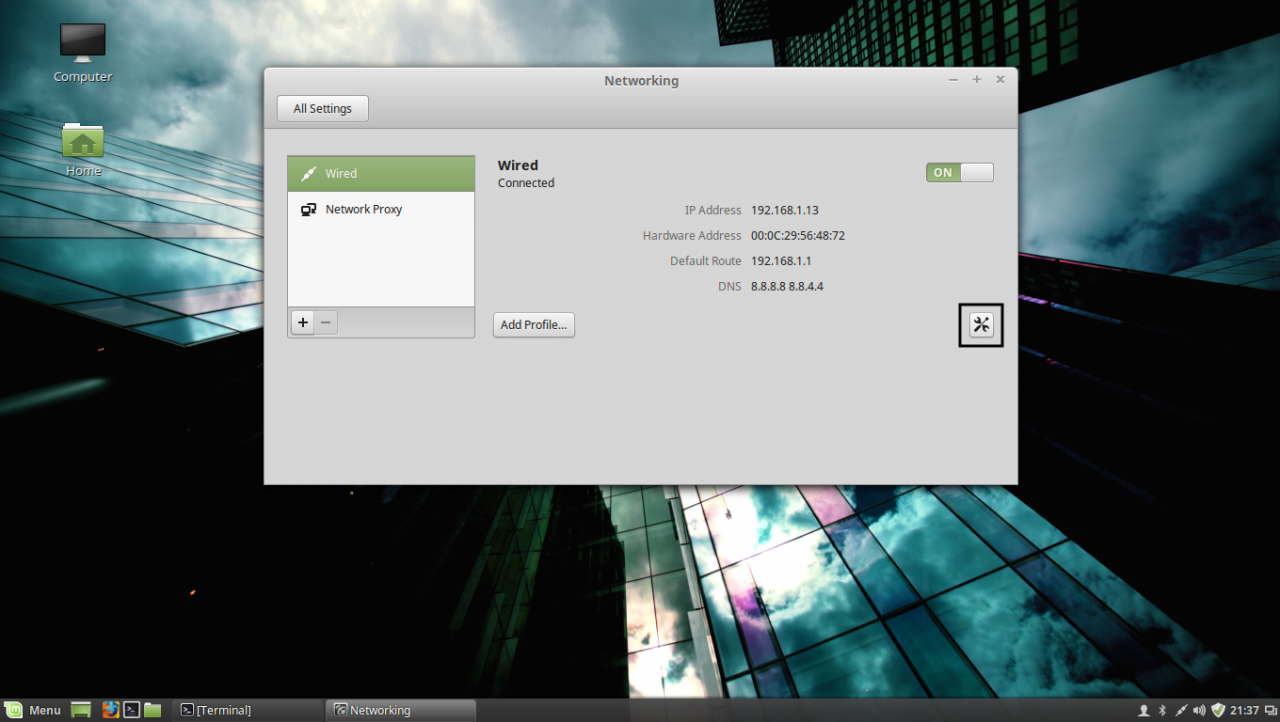
edit network interface settings
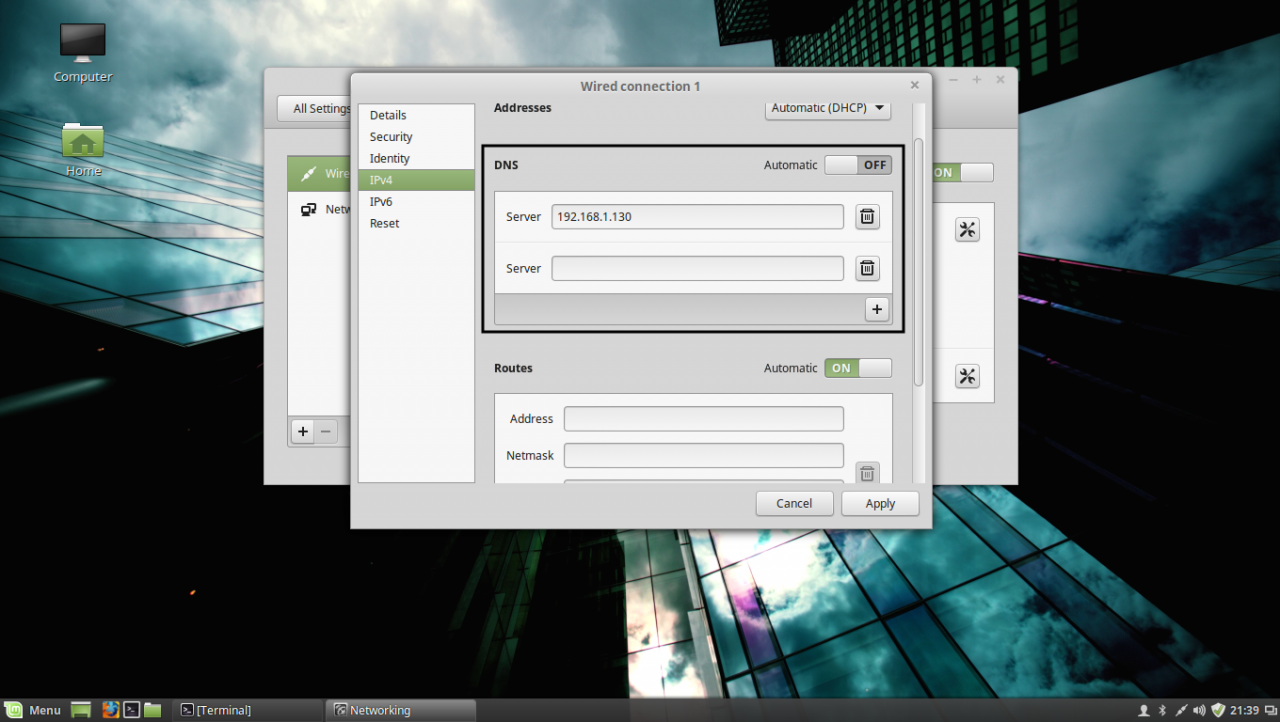
add DNS IP Address
If multiple Domain Controllers machines exists on your network then you can also add their IP Addresses on IPv4 DNS settings fields.
2. After you’re done, hit on Apply button and switch the edited Network Interface from ON to OFF and then back to ON in order to apply the new settings. After the network interface is started again, open a Terminal console and issue a ping command against your PDC domain name in order to verify if the settings are successfully applied and the domain name responds with the correct IP Address and FQDN of the PDC.
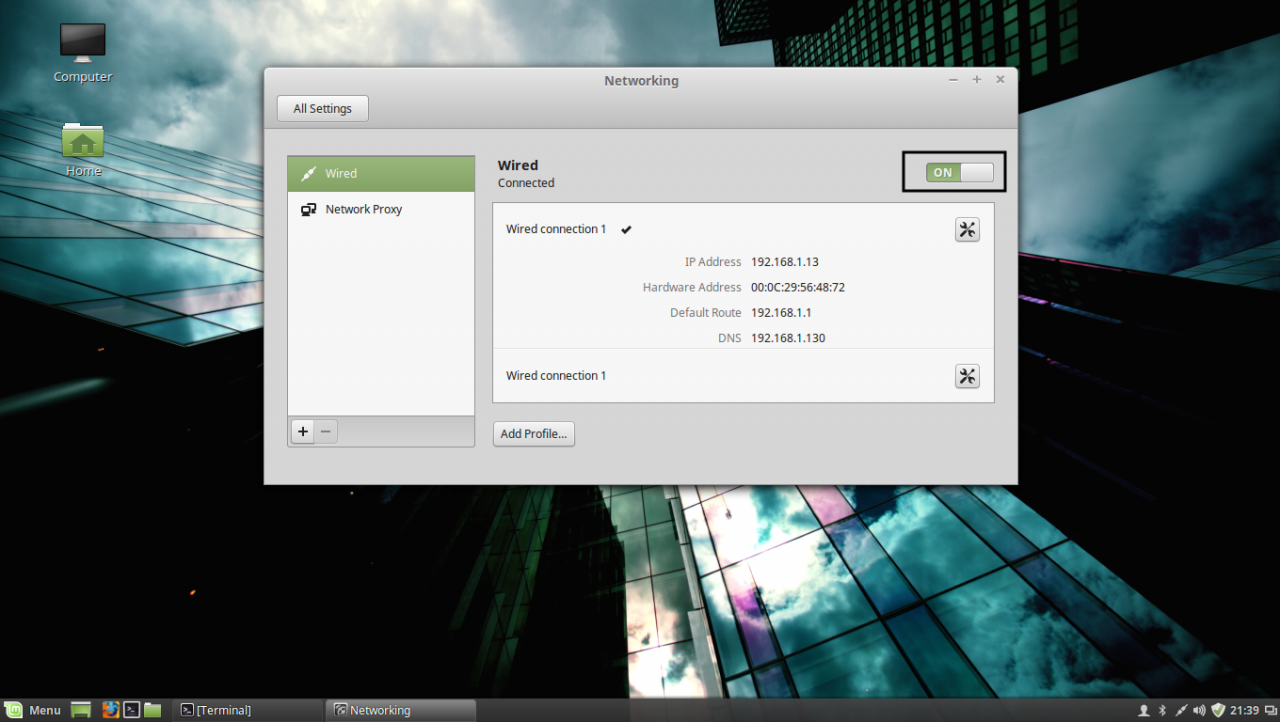
apply network settings
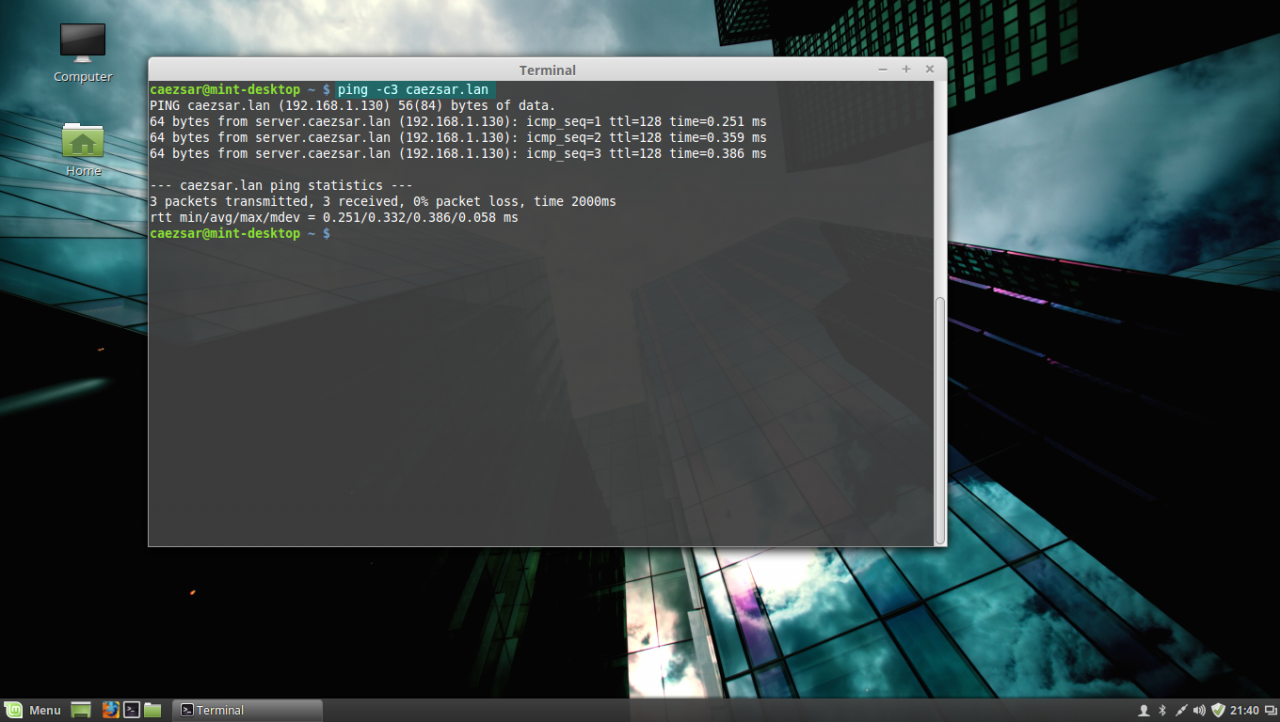
ping domain controller
If you want to avoid all this manual settings, then configure a DHCP server at your premises to automatically assign network settings, especially DNS entries, that will point to your Windows PDC IP Addresses needed for DNS resolution in order to reach the AD PDC.
STEP TWO – Install Required Software Packages
As presented at the beginning of this tutorial, in order to integrate a Linux Mint machine to an Active Directory Domain Controller you need to install the SSSD service along with the following software packages and dependency:
– SSSD service (responsible with back end realm authentication) with the following dependencies: sssd-tools (optional, but useful for sssd cache, user and groups manipulation), libpam-sss (PAM modules for local authentication) and libnss-sss (NSS modules for local DNS resolution)
– Realmd (system DBus service which manages domain integration and local resources permissions)
– The following Samba Modules: samba-common-bin and samba-libs (File sharing compatibility between Windows and Linux machines)
– Krb5-user (Client network authentication and communication with the PDC server)
– ADcli (Tools for joining domain and perform other actions on an AD)
– PackageKit (Linux cross-platform packages management for interoperabillity and user privileges for software installations)
3. Now, let’s start installing the above enumerated packages by opening a Terminal console on Linux Mint and issuing the following commands with sudo privileges:
First install Realmd and SSSD service:
sudo apt-get install realmd sssd sssd-tools libpam-sss libnss-sss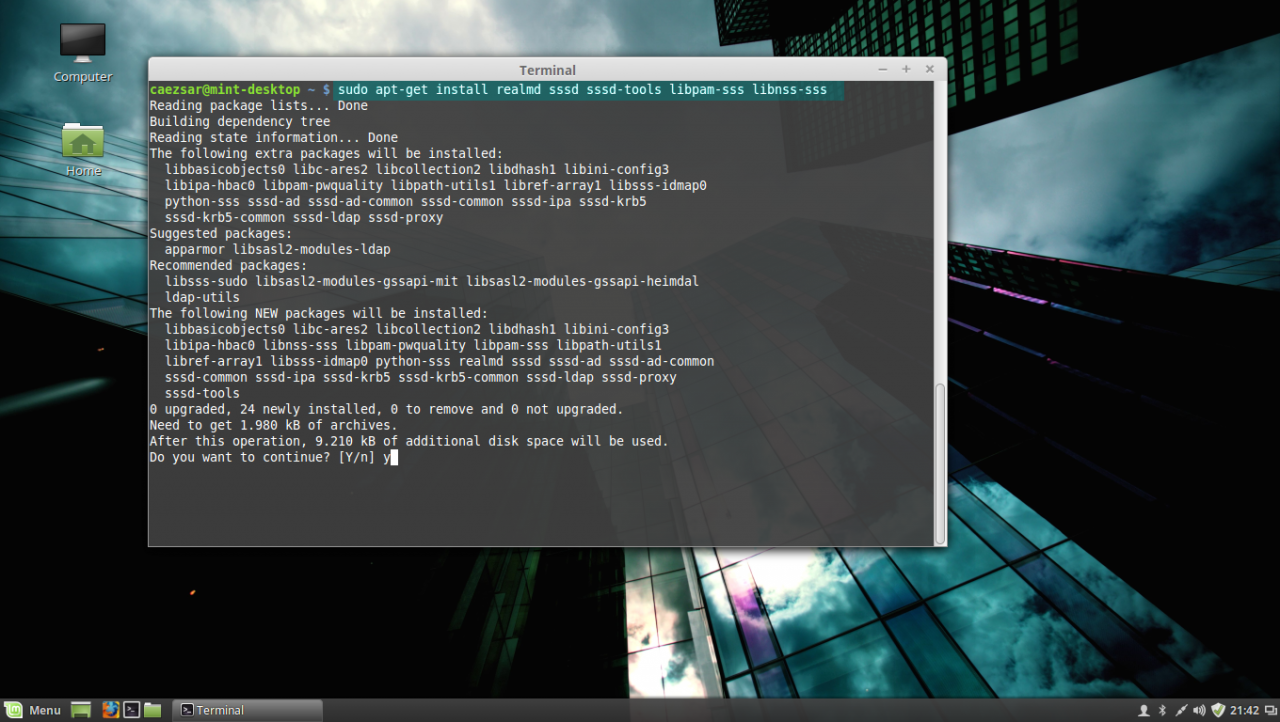
install realmd and sssd service
4. Next install Samba modules (by default this modules might be already installed on your system):
sudo apt-get install samba-libs samba-common-bin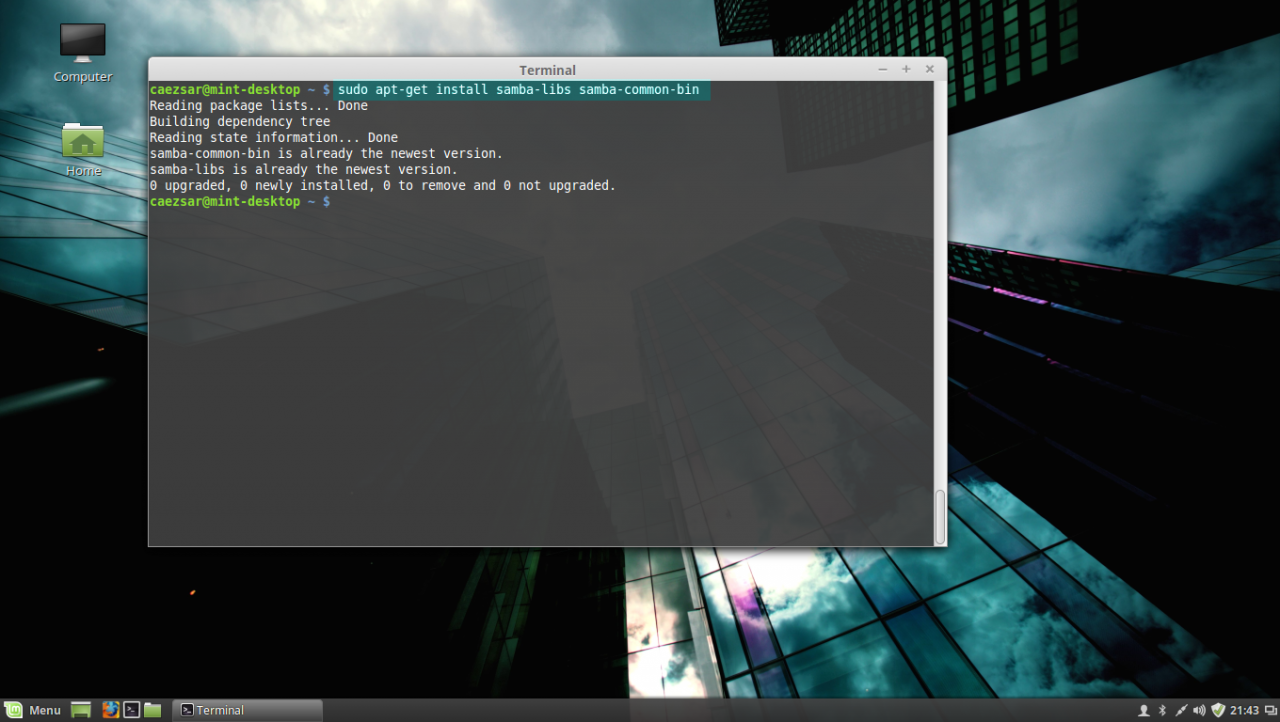
install samba modules
5. Last, install the other remained packages: krb5-user, adcli and packagekit. On krb5-user package, the installer will prompt you to enter the realm that will be used for Kerberos authentication. Use the name of the domain configured for your PDC with UPPERCASE (in this case the domain is CAEZSAR.LAN), then hit Enter key to continue further with the installation packages.
sudo apt-get install krb5-user adcli packagekit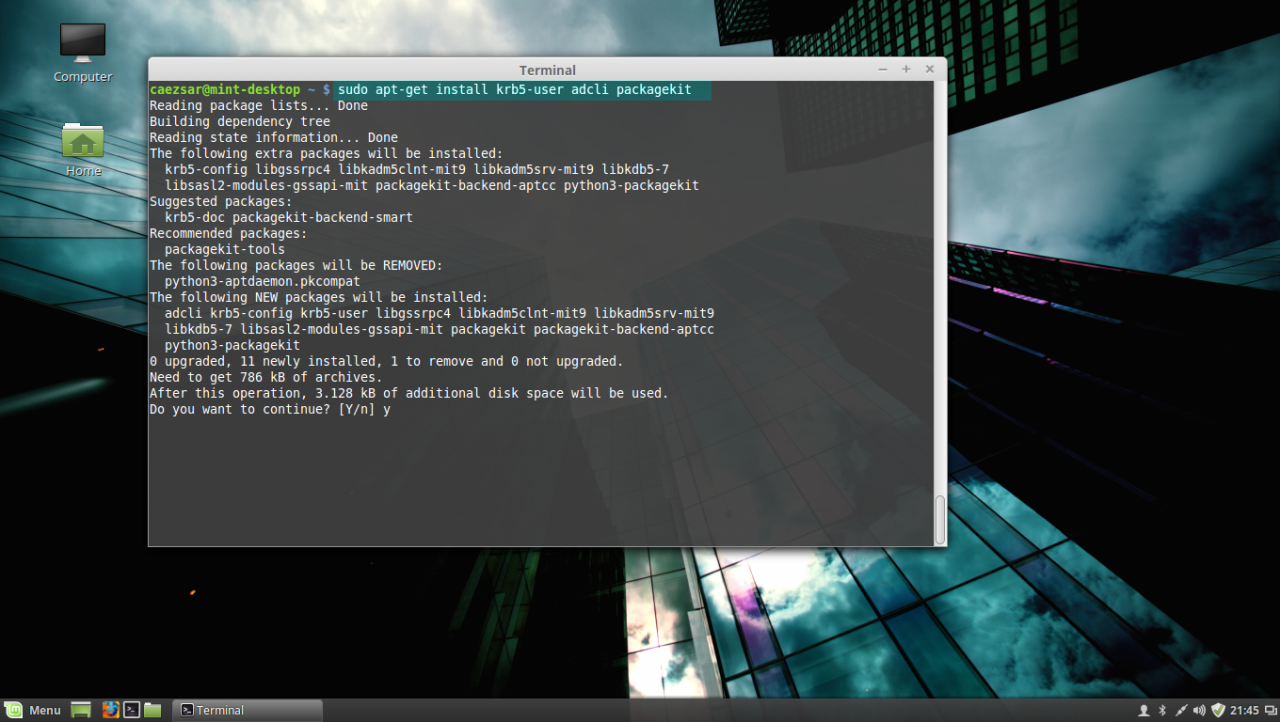
install kerberos, adcli and packagekit packages
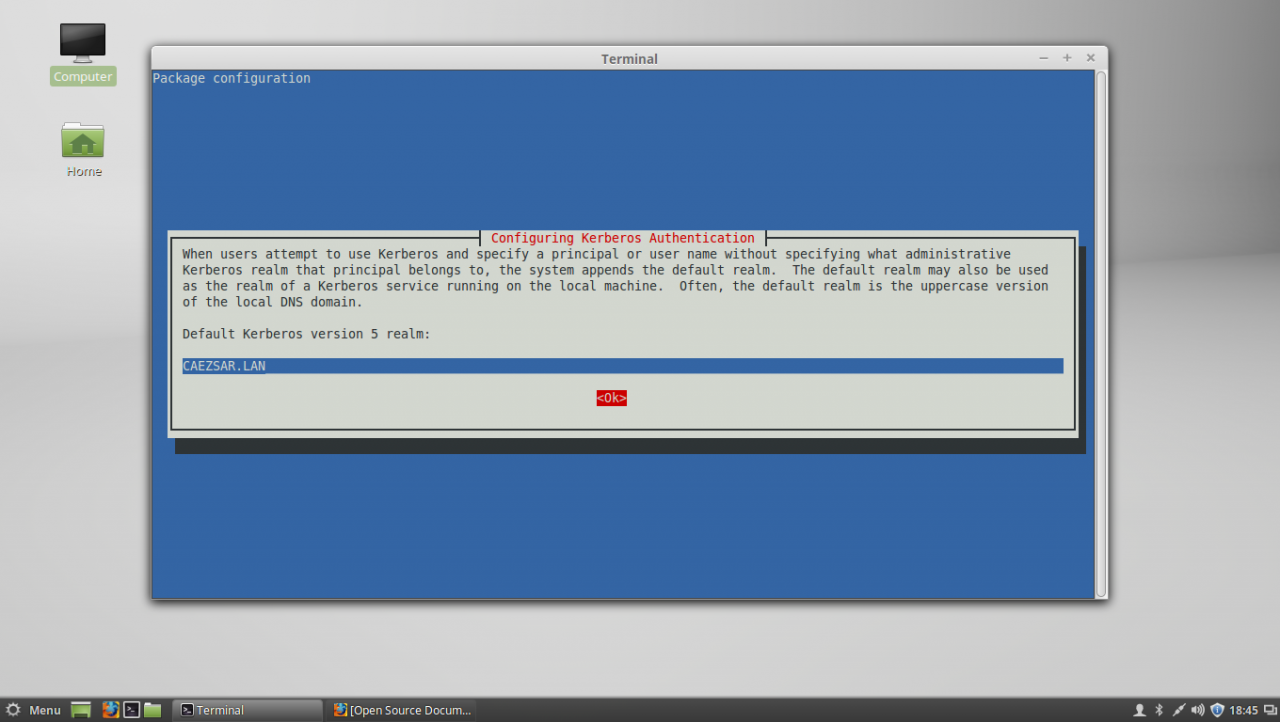
Configure Kerberos realm
STEP THREE – Edit Configuration Files for SSSD, Realmd and PAM
6. Next step before starting joining Linux Mint to Windows Server AD PDC is to configure the local services for AD network authentication. By default the SSSD service has no configuration file defined on /etc/sssd/ path. In order to create a default configuration file for SSSD service, issue the following command to create and simultaneous edit the file:
sudo nano /etc/sssd/sssd.confSSSD configuration file excerpt:
[nss]
filter_groups = root
filter_users = root
reconnection_retries = 3

[pam]
reconnection_retries = 3

[sssd]
domains = CAEZSAR.LAN
config_file_version = 2
services = nss, pam

[domain/CAEZSAR.LAN]
ad_domain = CAEZSAR.LAN
krb5_realm = CAEZSAR.LAN
realmd_tags = manages-system joined-with-adcli
cache_credentials = True
id_provider = ad
krb5_store_password_if_offline = True
default_shell = /bin/bash
ldap_id_mapping = True
use_fully_qualified_names = False
fallback_homedir = /home/%d/%u
access_provider = ad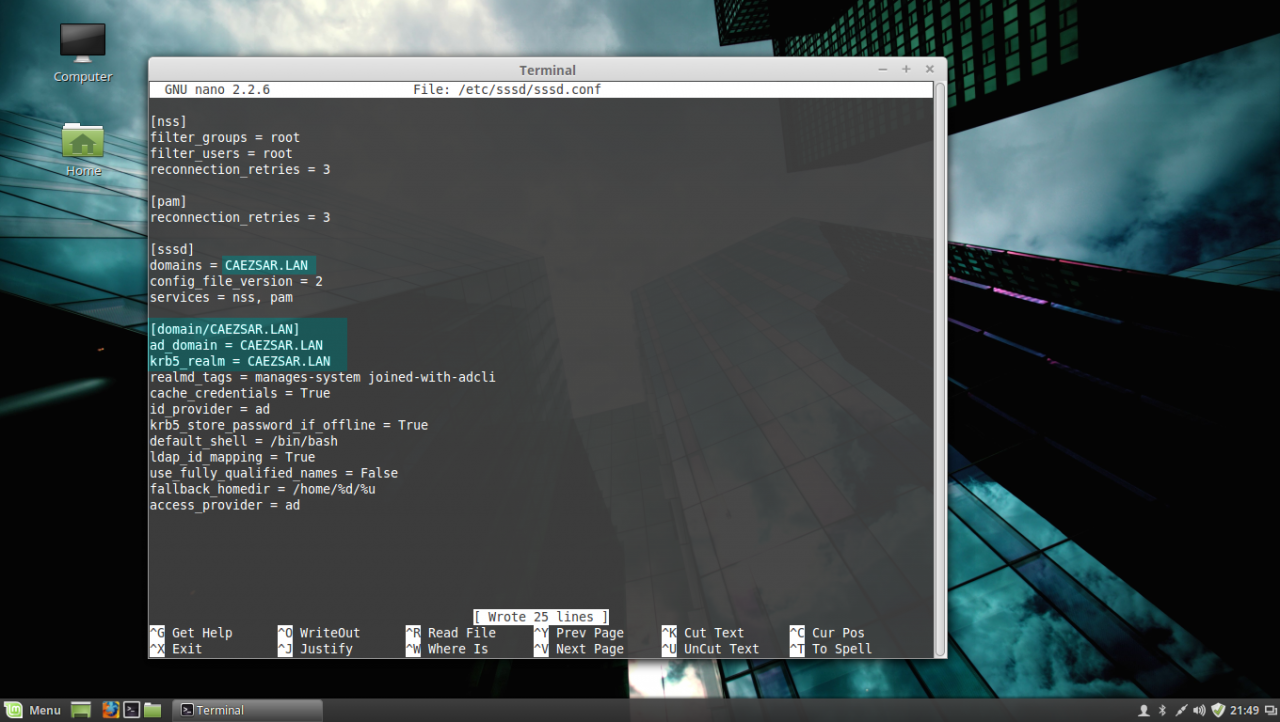
sssd configuration file
While editing the file make sure you replace domains, [domain/], ad_domain and krb5_realm parameters accordingly. Use the UPPERCASES as the above file excerpt suggests.
The fallback_homedir = /home/%d/%u parameter will cause the system to create home directories for all domain logged in users with the following path: /home/domain_name/domain_user, so practically all your domain users homes will be stored into a single directory named after your domain name on /home path. If you want to change this behavior so all domain users homes should be created as normal system users, /home/username, just remove %d variable and you’re done.
For other options and parameters concerning sssd.conf file run man sssd command.
After you finish editing the file, save it with CTRL+O , close it with CTRL+X and proceed further with the below instructions.
7. The next step is to create and edit a configuration file for Realmd in order to avoid some eventual package dependency problems by issuing the following command:
sudo nano /etc/realmd.confUse the following configurations for realmd file:
[service]

automatic-install = no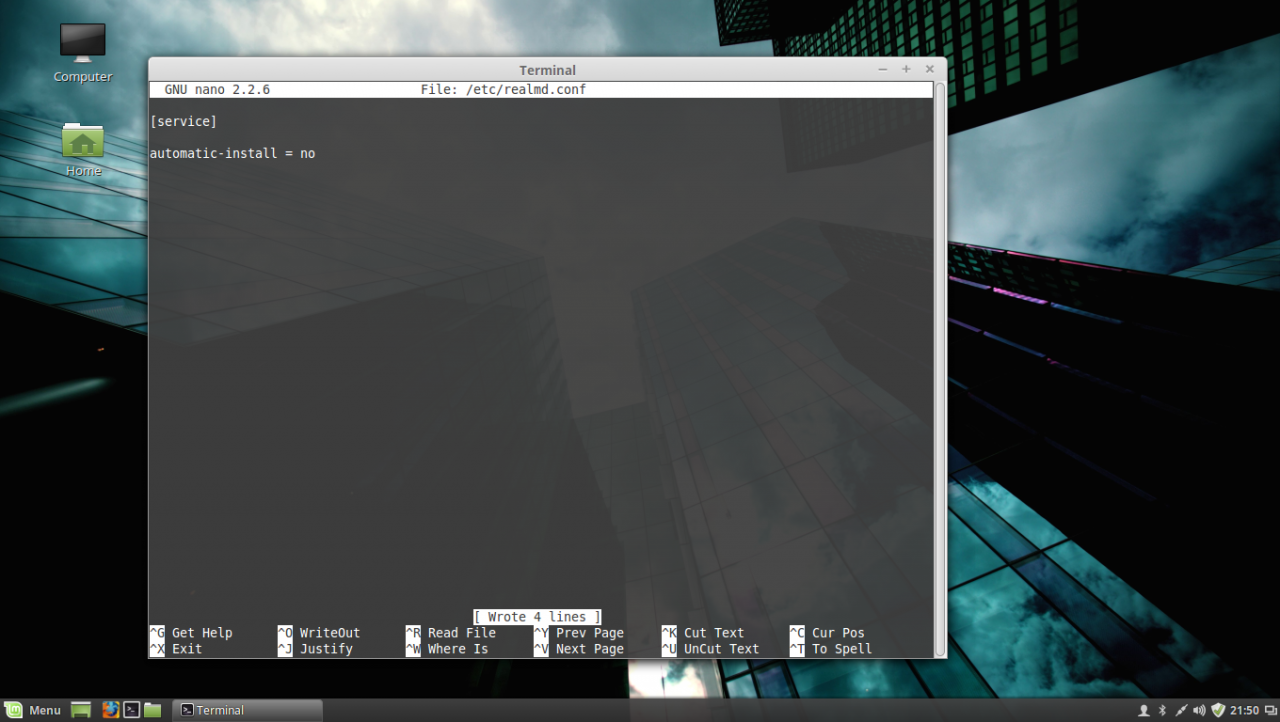
realmd conf file
After you add the above lines, save the file and close it.
8. The last file that you need to edit before joining the domain is the common-session PAM file. So, open this file for editing by running the below command and add the following line after the session optional pam_sss.so line in order for the system to automatically create home directories for the new authenticated AD users .
sudo nano /etc/pam.d/common-sessionAdd the following line as presented on the below screenshot:
session optional pam_mkhomedir.so skel = /etc/skel/ mask=0077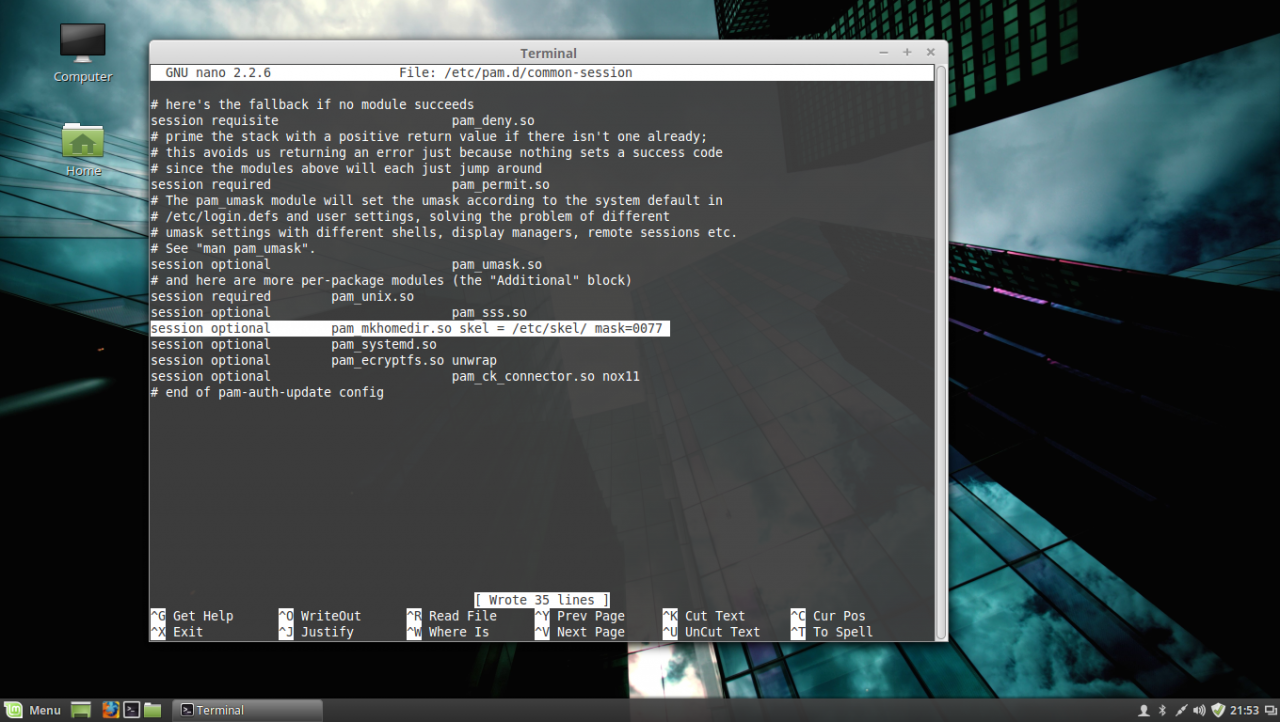
PAM common-session file
After you have edited the file, save it and close it, and proceed to the next step in order to make Linux Mint a part of the Windows Domain Controller.
STEP FOUR – Join Linux Mint to Windows Server 2012 Active Directory Domain Controller
9. Before joining the Linux Mint client to Windows PDC, first issue the discovery command against your domain name in order to view the complete realm configurations and a package list of software that must be installed on the client machine before you enroll it in the realm.
sudo realm discover domain.tld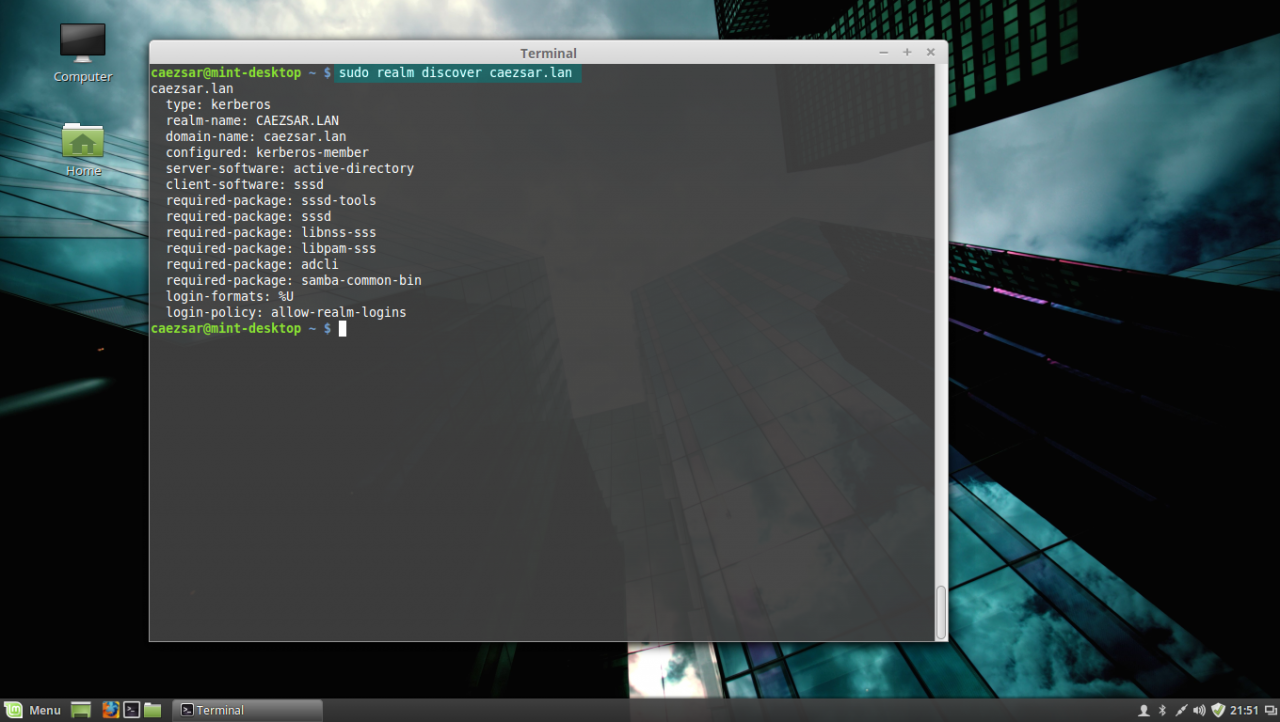
realm discover domain
10. If everything is correctly setup at the client side and the domain controller responds, issue the following command in order to integrate Linux Mint client machine to Windows Server 2012 AD PDC.
sudo realm join domain.tld -U domain_administrator --verbose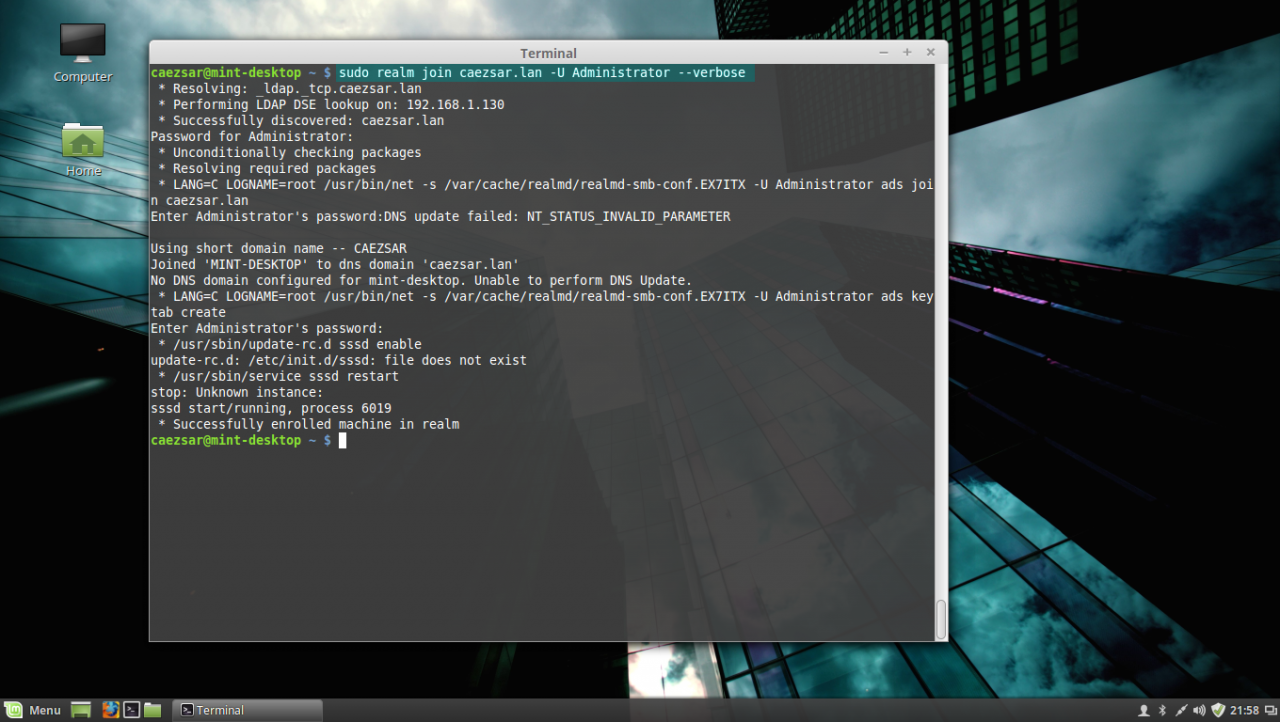
join AD domain
Use the -U option to specify an Active Directory administrative user with privileges to add machines on the server and the --verbose option to get debug output in case something goes wrong with the integration process.
Once the command returns successfully status and ads Linux Mint to AD you can use the sudo realm list command to view full details and the default configurations for your domain.

list realm
To manage sssd service use the following command switches (you don’t need to manually start the sssd service because it’s automatically started by the realmd when the machine is enrolled to realm):
sudo service sssd status|start|stop11. To check if the machine appears on the Domain Controller, go to your Windows Server 2012, open Active Directory Users and Computers utility and search your Linux Mint hostname.
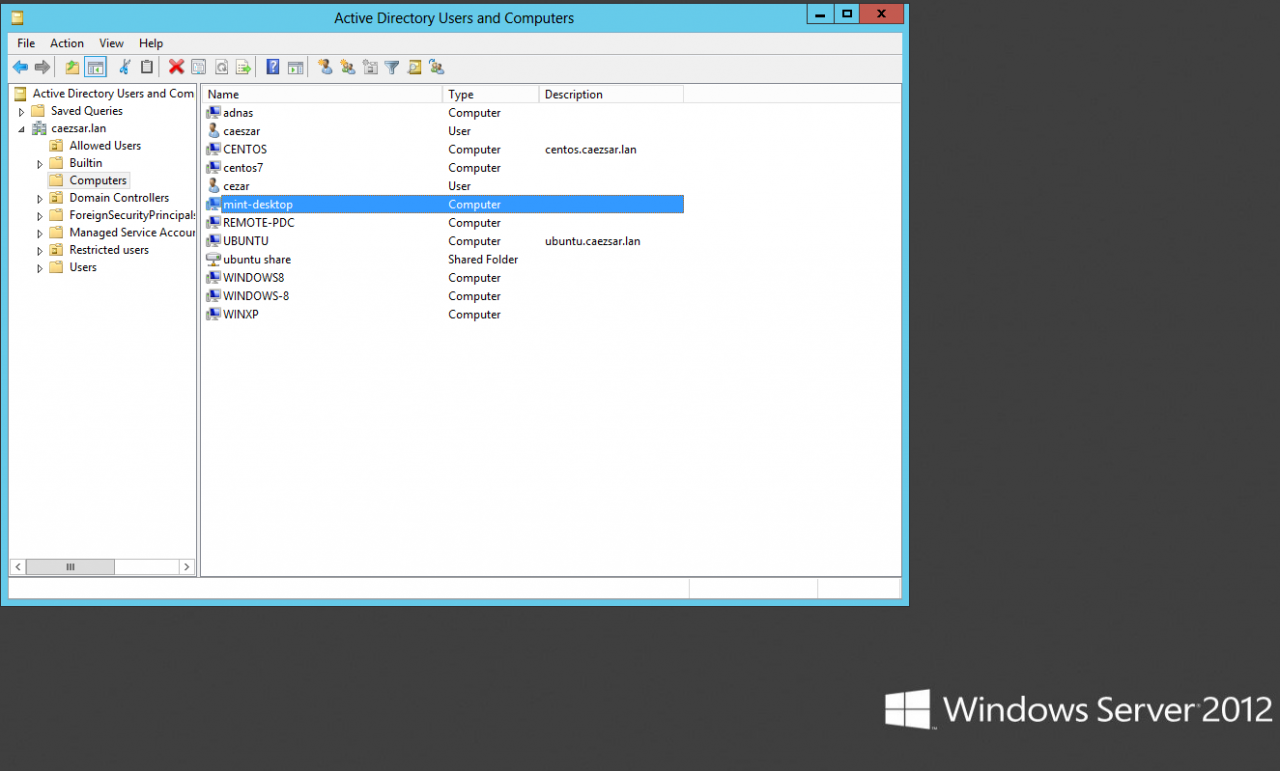
Active Directory Users and Computers
STEP FIVE – Log In on Linux Mint with Active Directory Accounts
12. To authenticate on Linux Mint with and an Active Directory user, first you need to add a permit rule on local policies in order to grant access for all realm users on local machine, by issuing the following command:
sudo realm permit --allTo grant access just for a specific AD user or group use the following command syntax:
sudo realm permit -u AD_usernamesudo realm permit -g AD_groupTo withdraw access for a user use the command with --x switch:
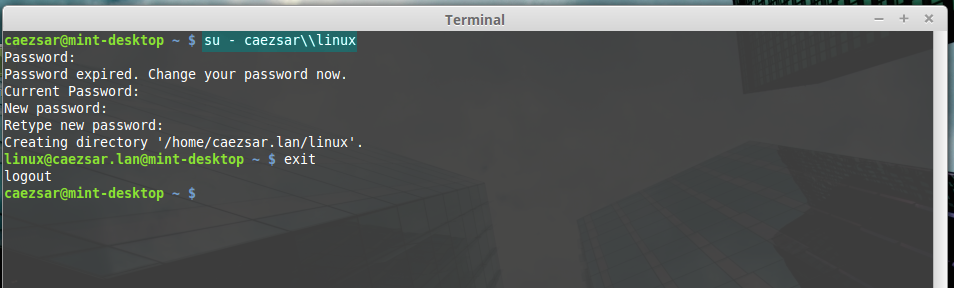
sudo realm permit domain --x domain\AD_username13. To perform Terminal console command line authentications on Linux Mint host with an Active Directory account, use double backslashes to escape the backslash which separates the domain string from user, as shown in the below syntax (you can append the dot domain or use just the domain string):
su - domain.tld\\AD_usernameor
su - domain\\AD_username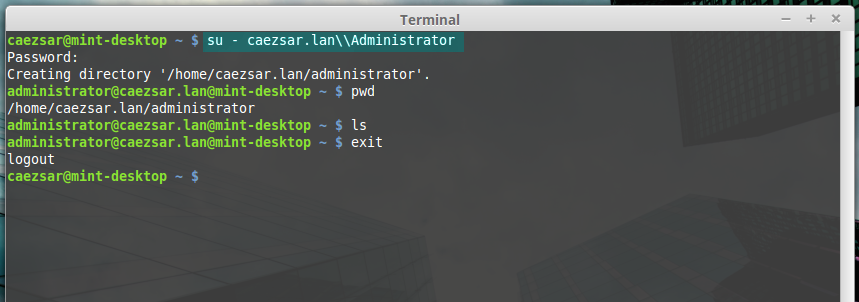
AD user login
ad user login without dot domain
14. To log in with an AD account on Linux using Putty or to perform Linux Mint MDM GUI logins use the following syntax:
domain\AD_username

domain.tld\AD_username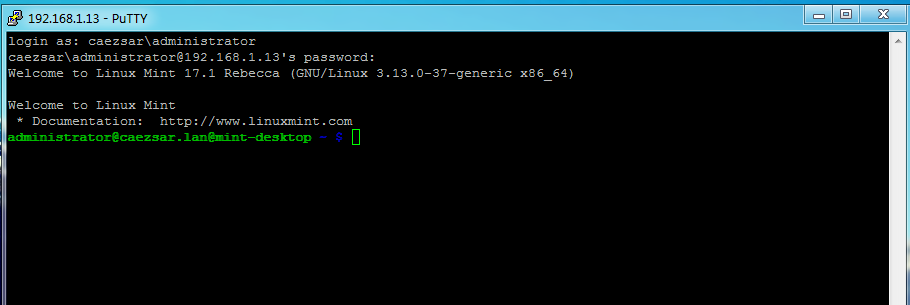
AD user Putty login
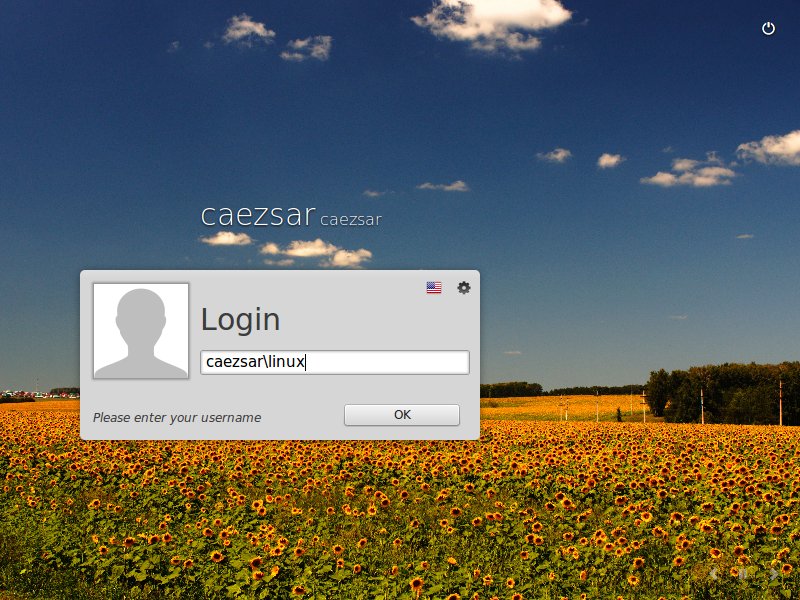
Ad user GUI login
15. In case you have issues with AD users authentication on Linux Mint Logon Screen, log in with a local user account and change the Login Window Theme from an HTML theme to a GDM theme, log out, hit Escape key is case the last logged in user appears on username Login filed and continue the authentication process with a AD account as presented above.
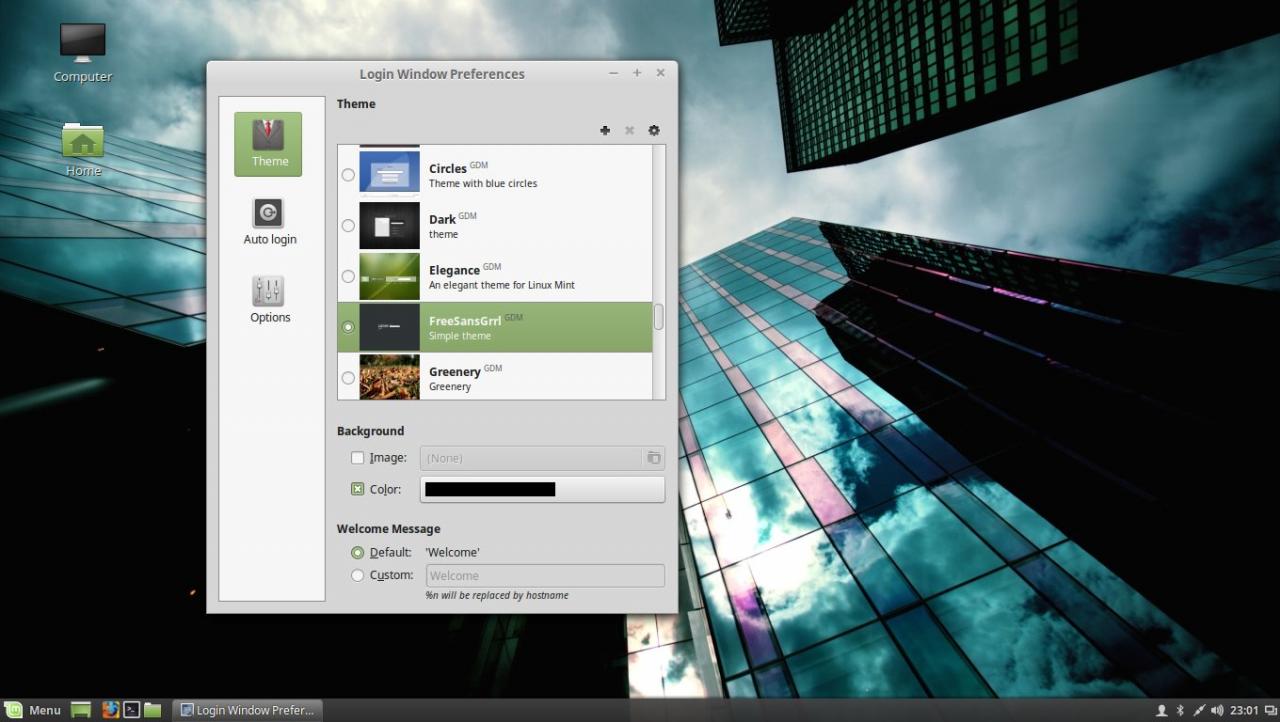
Use GDM theme

GDM login screen
STEP SIX – Add Root Permissions to AD Domain Admins Users
16. In case you want to allow all Active Directory Domain Admins to have full administrative permissions in order to execute any command with root privileges on the Linux Mint machine, open the local sudoers file for editing and add the following line:
sudo nano /etc/sudoersor
sudo visudoAdd this line after %sudo line:
%domain\ [email protected] ALL=(ALL) ALL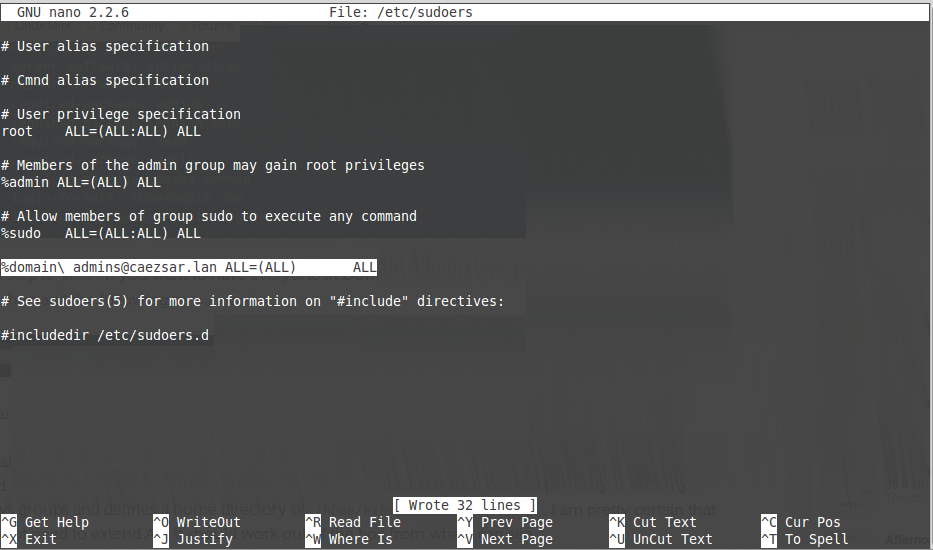
add domain admins root privileges
17. In case you don’t want your Linux Mint machine to be a part of the domain anymore, issue the following command to leave the domain:
sudo realm leave domain.tld -U AD_admin_user --verbose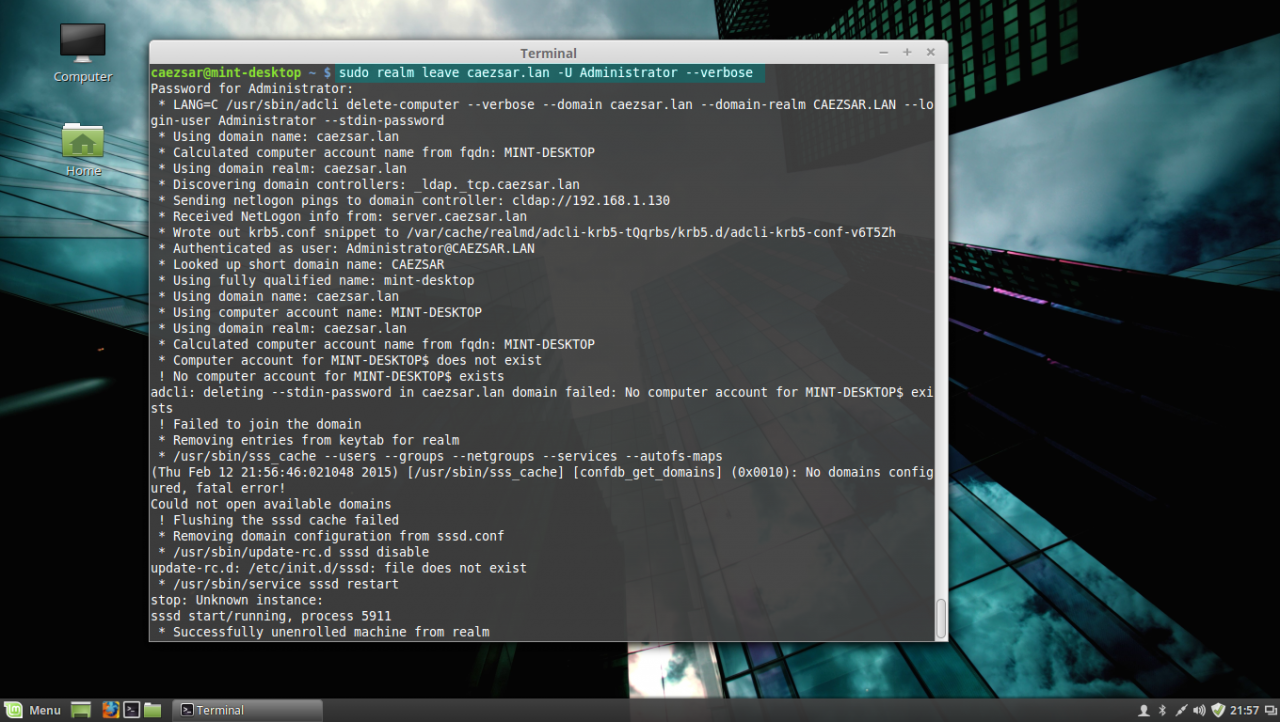
leave AD PDC
That’s all! Now, the machine running Linux Mint 17.1 is integrated as a part of Windows Active Directory Domain Controller and can successfully replace your old Windows XP machine, for which Microsoft has stopped its support, but keep in mind that some features and, especially, a huge part of Active Directory Group Policy, don’t apply on Linux systems.
Red Hat Enterprise Linux 9
Joining RHEL hosts to AD and accessing resources in AD
Abstract
You can join Red Hat Enterprise Linux (RHEL) hosts to an Active Directory (AD) domain by using the System Security Services Daemon (SSSD) or the Samba Winbind service to access AD resources. Alternatively, it is also possible to access AD resources without domain integration by using a Managed Service Account (MSA).
Providing feedback on Red Hat documentation
We appreciate your feedback on our documentation. Let us know how we can improve it.
Submitting feedback through Jira (account required)
- Log in to the Jira website.
- Click Create in the top navigation bar
- Enter a descriptive title in the Summary field.
- Enter your suggestion for improvement in the Description field. Include links to the relevant parts of the documentation.
- Click Create at the bottom of the dialogue.
Chapter 4. Managing direct connections to AD
After you connect your Red Hat Enterprise Linux (RHEL) system to an Active Directory (AD) domain using System Security Services Daemon (SSSD) or Samba Winbind, you can manage key settings such as Kerberos renewals, domain membership, user access permissions, and Group Policy Objects (GPOs).
Prerequisites
- You have connected your RHEL system to the Active Directory domain, either with SSSD or Samba Winbind.
4.1. Modifying the default Kerberos host keytab renewal interval
SSSD automatically renews the Kerberos host keytab file in an AD environment if the adcli package is installed. The daemon checks daily if the machine account password is older than the configured value and renews it if necessary.
The default renewal interval is 30 days. To change the default, follow the steps in this procedure.
Procedure
-
Add the following parameter to the AD provider in your
/etc/sssd/sssd.conffile:ad_maximum_machine_account_password_age = value_in_days -
Restart SSSD:
# systemctl restart sssd
-
To disable the automatic Kerberos host keytab renewal, set
ad_maximum_machine_account_password_age = 0.
4.2. Removing a RHEL system from an AD domain
Follow this procedure to remove a Red Hat Enterprise Linux (RHEL) system that is integrated into Active Directory (AD) directly from the AD domain.
Prerequisites
- You have used the System Security Services Daemon (SSSD) or Samba Winbind to connect your RHEL system to AD.
Procedure
-
Remove a system from an identity domain using the
realm leavecommand. The command removes the domain configuration from SSSD and the local system.# realm leave ad.example.comWhen a client leaves a domain, AD does not delete the account and only removes the local client configuration. To delete the AD account, run the command with the
--removeoption. Initially, an attempt is made to connect without credentials, but you are prompted for your user password if you do not have a valid Kerberos ticket. You must have rights to remove an account from Active Directory. -
Use the
-Uoption with therealm leavecommand to specify a different user to remove a system from an identity domain.By default, the
realm leavecommand is executed as the default administrator. For AD, the administrator account is calledAdministrator. If a different user was used to join to the domain, it might be required to perform the removal as that user.# realm leave [ad.example.com] -U [AD.EXAMPLE.COM\user]'
The command first attempts to connect without credentials, but it prompts for a password if required.
Verification
-
Verify the domain is no longer configured:
# realm discover [ad.example.com]
ad.example.com
    type: kerberos
    realm-name: EXAMPLE.COM
    domain-name: example.com
    configured: no
    server-software: active-directory
    client-software: sssd
    required-package: oddjob
    required-package: oddjob-mkhomedir
    required-package: sssd
    required-package: adcli
    required-package: samba-common-tools
Additional resources
-
realm(8)man page on your system
4.3. Setting the domain resolution order in SSSD to resolve short AD user names
By default, you must specify fully qualified usernames, like ad_username@ad.example.com and group@ad.example.com, to resolve Active Directory (AD) users and groups on a RHEL host connected to AD with the SSSD service.
This procedure sets the domain resolution order in the SSSD configuration so you can resolve AD users and groups using short names, like ad_username. This example configuration searches for users and groups in the following order:
-
Active Directory (AD) child domain
subdomain2.ad.example.com -
AD child domain
subdomain1.ad.example.com -
AD root domain
ad.example.com
Prerequisites
- You have used the SSSD service to connect the RHEL host directly to AD.
Procedure
-
Open the
/etc/sssd/sssd.conffile in a text editor. -
Set the
domain_resolution_orderoption in the[sssd]section of the file.domain_resolution_order = subdomain2.ad.example.com, subdomain1.ad.example.com, ad.example.com
- Save and close the file.
-
Restart the SSSD service to load the new configuration settings.
[root@ad-client ~]# systemctl restart sssd
Verification
-
Verify you can retrieve user information for a user from the first domain using only a short name.
[root@ad-client ~]# id <user_from_subdomain2>
uid=1916901142(user_from_subdomain2) gid=1916900513(domain users) groups=1916900513(domain users)
4.4. Managing login permissions for domain users
By default, domain-side access control is applied, which means that login policies for Active Directory (AD) users are defined in the AD domain itself. This default behavior can be overridden so that client-side access control is used. With client-side access control, login permission is defined by local policies only.
If a domain applies client-side access control, you can use the realmd to configure basic allow or deny access rules for users from that domain.
Access rules either allow or deny access to all services on the system. More specific access rules must be set on a specific system resource or in the domain.
4.4.1. Enabling access to users within a domain
By default, login policies for Active Directory (AD) users are defined in the AD domain itself. You can override this default behavior and configure a RHEL host to enable access for users within an AD domain.
It is not recommended to allow access to all by default while only denying it to specific users with realm permit -x. Instead, Red Hat recommends maintaining a default no access policy for all users and only grant access to selected users using realm permit.
Prerequisites
- Your RHEL system is a member of the Active Directory domain.
Procedure
-
Grant access to all users:
# realm permit --all
-
Grant access to specific users:
$ realm permit aduser01@example.com
$ realm permit 'AD.EXAMPLE.COM\aduser01'
Currently, you can only allow access to users in primary domains and not to users in trusted domains. This is due to the fact that user login must contain the domain name and SSSD cannot currently provide realmd with information about available child domains.
Verification
-
Use SSH to log in to the server as the
aduser01@example.comuser:$ ssh aduser01@example.com@server_name [aduser01@example.com@server_name ~]$
-
Use the ssh command a second time to access the same server, this time as the
aduser02@example.comuser:$ ssh aduser02@example.com@server_name Authentication failed.
Notice how the aduser02@example.com user is denied access to the system. You have granted the permission to log in to the system to the aduser01@example.com user only. All other users from that Active Directory domain are rejected because of the specified login policy.
If you set use_fully_qualified_names to true in the sssd.conf file, all requests must use the fully qualified domain name. However, if you set use_fully_qualified_names to false, it is possible to use the fully-qualified name in the requests, but only the simplified version is displayed in the output.
Additional resources
-
realm(8)man page on your system
4.4.2. Denying access to users within a domain
By default, login policies for Active Directory (AD) users are defined in the AD domain itself. You can override this default behavior and configure a RHEL host to deny access to users within an AD domain.
It is safer to only allow access to specific users or groups than to deny access to some, while enabling it to everyone else. Therefore, it is not recommended to allow access to all by default while only denying it to specific users with realm permit -x. Instead, Red Hat recommends maintaining a default no access policy for all users and only grant access to selected users using realm permit.
Prerequisites
- Your RHEL system is a member of the Active Directory domain.
Procedure
-
Deny access to all users within the domain:
# realm deny --all
This command prevents
realmaccounts from logging into the local machine. Userealm permitto restrict login to specific accounts. -
Verify that the domain user’s
login-policyis set todeny-any-login:[root@replica1 ~]# realm list example.net type: kerberos realm-name: EXAMPLE.NET domain-name: example.net configured: kerberos-member server-software: active-directory client-software: sssd required-package: oddjob required-package: oddjob-mkhomedir required-package: sssd required-package: adcli required-package: samba-common-tools login-formats: %U@example.net login-policy: deny-any-login
-
Deny access to specific users by using the
-xoption:$ realm permit -x 'AD.EXAMPLE.COM\aduser02'
Verification
-
Use SSH to log in to the server as the
aduser01@example.netuser.$ ssh aduser01@example.net@server_name Authentication failed.
If you set use_fully_qualified_names to true in the sssd.conf file, all requests must use the fully qualified domain name. However, if you set use_fully_qualified_names to false, it is possible to use the fully-qualified name in the requests, but only the simplified version is displayed in the output.
Additional resources
-
realm(8)man page on your system
4.5. Applying Group Policy Object access control in RHEL
A Group Policy Object (GPO) is a collection of access control settings stored in Microsoft Active Directory (AD) that can apply to computers and users in an AD environment. By specifying GPOs in AD, administrators can define login policies honored by both Windows clients and Red Hat Enterprise Linux (RHEL) hosts joined to AD.
4.5.1. How SSSD interprets GPO access control rules
By default, SSSD retrieves Group Policy Objects (GPOs) from Active Directory (AD) domain controllers and evaluates them to determine if a user is allowed to log in to a particular RHEL host joined to AD.
SSSD maps AD Windows Logon Rights to Pluggable Authentication Module (PAM) service names to enforce those permissions in a GNU/Linux environment.
As an AD Administrator, you can limit the scope of GPO rules to specific users, groups, or hosts by listing them in a security filter.
Limitations on filtering by groups
SSSD currently does not support Active Directory’s built-in groups, such as Administrators with Security Identifier (SID) S-1-5-32-544. Red Hat recommends against using AD built-in groups in AD GPOs targeting RHEL hosts.
Additional resources
- For a list of Windows GPO options and their corresponding SSSD options, see List of GPO settings that SSSD supports.
4.5.2. List of GPO settings that SSSD supports
The following table shows the SSSD options that correspond to Active Directory GPO options as specified in the Group Policy Management Editor on Windows.
Table 4.1. GPO access control options retrieved by SSSD
| GPO option | Corresponding sssd.conf option |
|---|---|
|
Allow log on locally |
|
|
Allow log on through Remote Desktop Services |
|
|
Access this computer from the network |
|
|
Allow log on as a batch job |
|
|
Allow log on as a service |
|
Additional resources
-
sssd-ad(5)man page on your system
4.5.3. List of SSSD options to control GPO enforcement
You can set the following SSSD options to limit the scope of GPO rules.
The ad_gpo_access_control option
You can set the ad_gpo_access_control option in the /etc/sssd/sssd.conf file to choose between three different modes in which GPO-based access control operates.
Table 4.2. Table of ad_gpo_access_control values
| Value of ad_gpo_access_control |
Behavior |
|---|---|
|
|
GPO-based access control rules are evaluated and enforced. |
|
|
GPO-based access control rules are evaluated but not enforced; a |
|
|
GPO-based access control rules are neither evaluated nor enforced. |
The ad_gpo_implicit_deny option
The ad_gpo_implicit_deny option is set to False by default. In this default state, users are allowed access if applicable GPOs are not found. If you set this option to True, you must explicitly allow users access with a GPO rule.
You can use this feature to harden security, but be careful not to deny access unintentionally. Red Hat recommends testing this feature while ad_gpo_access_control is set to permissive.
The following two tables illustrate when a user is allowed or rejected access based on the allow and deny login rights defined on the AD server-side and the value of ad_gpo_implicit_deny.
Table 4.3. Login behavior with ad_gpo_implicit_deny set to False (default)
| allow-rules | deny-rules | result |
|---|---|---|
|
missing |
missing |
all users are allowed |
|
missing |
present |
only users not in deny-rules are allowed |
|
present |
missing |
only users in allow-rules are allowed |
|
present |
present |
only users in allow-rules and not in deny-rules are allowed |
Table 4.4. Login behavior with ad_gpo_implicit_deny set to True
| allow-rules | deny-rules | result |
|---|---|---|
|
missing |
missing |
no users are allowed |
|
missing |
present |
no users are allowed |
|
present |
missing |
only users in allow-rules are allowed |
|
present |
present |
only users in allow-rules and not in deny-rules are allowed |
Additional resources
- Changing the GPO access control mode
-
sssd-ad(5)man page on your system
4.5.4. Changing the GPO access control mode
This procedure changes how GPO-based access control rules are evaluated and enforced on a RHEL host joined to an Active Directory (AD) environment.
In this example, you will change the GPO operation mode from enforcing (the default) to permissive for testing purposes.
If you see the following errors, Active Directory users are unable to log in due to GPO-based access controls:
-
In
/var/log/secure:Oct 31 03:00:13 client1 sshd[124914]: pam_sss(sshd:account): Access denied for user aduser1: 6 (Permission denied) Oct 31 03:00:13 client1 sshd[124914]: Failed password for aduser1 from 127.0.0.1 port 60509 ssh2 Oct 31 03:00:13 client1 sshd[124914]: fatal: Access denied for user aduser1 by PAM account configuration [preauth]
-
In
/var/log/sssd/sssd__example.com_.log:(Sat Oct 31 03:00:13 2020) [sssd[be[example.com]]] [ad_gpo_perform_hbac_processing] (0x0040): GPO access check failed: [1432158236](Host Access Denied) (Sat Oct 31 03:00:13 2020) [sssd[be[example.com]]] [ad_gpo_cse_done] (0x0040): HBAC processing failed: [1432158236](Host Access Denied} (Sat Oct 31 03:00:13 2020) [sssd[be[example.com]]] [ad_gpo_access_done] (0x0040): GPO-based access control failed.
If this is undesired behavior, you can temporarily set ad_gpo_access_control to permissive as described in this procedure while you troubleshoot proper GPO settings in AD.
Prerequisites
- You have joined a RHEL host to an AD environment using SSSD.
-
Editing the
/etc/sssd/sssd.confconfiguration file requiresrootpermissions.
Procedure
-
Stop the SSSD service.
[root@server ~]# systemctl stop sssd -
Open the
/etc/sssd/sssd.conffile in a text editor. -
Set
ad_gpo_access_controltopermissivein thedomainsection for the AD domain.[domain/example.com] ad_gpo_access_control=permissive ...
-
Save the
/etc/sssd/sssd.conffile. -
Restart the SSSD service to load configuration changes.
[root@server ~]# systemctl restart sssd
4.5.5. Creating and configuring a GPO for a RHEL host in the AD GUI
A Group Policy Object (GPO) is a collection of access control settings stored in Microsoft Active Directory (AD) that can apply to computers and users in an AD environment. The following procedure creates a GPO in the AD graphical user interface (GUI) to control logon access to a RHEL host that is integrated directly to the AD domain.
Prerequisites
- You have joined a RHEL host to an AD environment using SSSD.
- You have AD Administrator privileges to make changes in AD using the GUI.
Procedure
-
Within Active Directory Users and Computers, create an Organizational Unit (OU) to associate with the new GPO:
- Right-click the domain.
- Choose New.
- Choose Organizational Unit.
- Click the name of the Computer Object that represents the RHEL host (created when it joined Active Directory) and drag it into the new OU. By having the RHEL host in its own OU, the GPO targets this host.
-
Within the Group Policy Management Editor, create a new GPO for the OU you created:
- Expand Forest.
- Expand Domains.
- Expand your domain.
- Right-click the new OU.
- Choose Create a GPO in this domain.
- Specify a name for the new GPO, such as Allow SSH access or Allow Console/GUI access and click OK.
-
Edit the new GPO:
- Select the OU within the Group Policy Management Editor.
- Right-click and choose Edit.
- Select User Rights Assignment.
- Select Computer Configuration.
- Select Policies.
- Select Windows Settings.
- Select Security Settings.
- Select Local Policies.
- Select User Rights Assignment.
-
Assign login permissions:
- Double-Click Allow log on locally to grant local console/GUI access.
- Double-click Allow log on through Remote Desktop Services to grant SSH access.
-
Add the user(s) you want to access either of these policies to the policies themselves:
- Click Add User or Group.
- Enter the username within the blank field.
- Click OK.
4.5.6. Additional resources
- Connecting RHEL systems directly to AD using SSSD
Legal Notice
Copyright © 2025 Red Hat, Inc.
The text of and illustrations in this document are licensed by Red Hat under a Creative Commons Attribution–Share Alike 3.0 Unported license («CC-BY-SA»). An explanation of CC-BY-SA is available at http://creativecommons.org/licenses/by-sa/3.0/. In accordance with CC-BY-SA, if you distribute this document or an adaptation of it, you must provide the URL for the original version.
Red Hat, as the licensor of this document, waives the right to enforce, and agrees not to assert, Section 4d of CC-BY-SA to the fullest extent permitted by applicable law.
Red Hat, Red Hat Enterprise Linux, the Shadowman logo, the Red Hat logo, JBoss, OpenShift, Fedora, the Infinity logo, and RHCE are trademarks of Red Hat, Inc., registered in the United States and other countries.
Linux® is the registered trademark of Linus Torvalds in the United States and other countries.
Java® is a registered trademark of Oracle and/or its affiliates.
XFS® is a trademark of Silicon Graphics International Corp. or its subsidiaries in the United States and/or other countries.
MySQL® is a registered trademark of MySQL AB in the United States, the European Union and other countries.
Node.js® is an official trademark of Joyent. Red Hat is not formally related to or endorsed by the official Joyent Node.js open source or commercial project.
The OpenStack® Word Mark and OpenStack logo are either registered trademarks/service marks or trademarks/service marks of the OpenStack Foundation, in the United States and other countries and are used with the OpenStack Foundation’s permission. We are not affiliated with, endorsed or sponsored by the OpenStack Foundation, or the OpenStack community.
All other trademarks are the property of their respective owners.
1. Конфигурационные файлы.
Мы будем настраивать только доступ к серверу GNU/Linux с использованием Samba. Авторизация пользователей останется локальной, с использованием /etc/passwd.
Мы присвоим нашему новому серверу статический IP-адрес. Пусть им будет 192.168.7.9.
Для начала нужно проверить, какой сервер у нас используется в качестве DNS. Им в нашей сети должен быть контроллер домена. У нас адрес сервера определен как 192.168.7.2. Правим файл /etc/resolv.conf. Он должен выглядеть следующим образом:
search lab.local
nameserver 192.168.7.2
Проверим, все ли работает:
#host 192.168.7.2
2.7.168.192.in-addr.arpa domain name pointer lab-dc1.lab.local.
#
Естественно, в Вашем случае имена будут другими. Обязательно сделайте в домене lab.local запись в DNS, ссылающуюся на наш новый сервер. Запись в DNS не означает того, что наш GNU/Linux сервер включен в домен. Проверим:
linux-test:~ # host 192.168.7.9
9.7.168.192.in-addr.arpa domain name pointer test-linux.lab.local.
linux-test:~ # host test-linux
test-linux.lab.local has address 192.168.7.9
linux-test:~ #
Для корректной работы в домене Windows требуется несколько служб: Kerberos, LDAP и Samba. В общем случае требуется только настройка Samba, настройка других служб не является обязательной. Но будет лучше, если мы их настроим – они могут пригодиться в будущем.
Kerberos настраивается просто – через один файл /etc/krb5.conf. Основными параметрами является REALM, указывающий на наш домен и адрес сервера Kerberos – это адрес контроллера домена. Файл /etc/krb5.conf выглядит примерно так:
linux-test:~ # more /etc/krb5.conf
[libdefaults]
        default_realm = LAB.LOCAL
        clockskew = 300
#       default_realm = EXAMPLE.COM

[realms]
LAB.LOCAL = {
        kdc = 192.168.7.2
        default_domain = lab.local
        admin_server = 192.168.7.2
}
#       EXAMPLE.COM = {
#                kdc = kerberos.example.com
#               admin_server = kerberos.example.com
#       }

[logging]
        kdc = FILE:/var/log/krb5/krb5kdc.log
        admin_server = FILE:/var/log/krb5/kadmind.log
        default = SYSLOG:NOTICE:DAEMON
[domain_realm]
        .lab.local = LAB.LOCAL
[appdefaults]
pam = {
        ticket_lifetime = 1d
        renew_lifetime = 1d
        forwardable = true
        proxiable = false
        minimum_uid = 1
        external = sshd
        use_shmem = sshd
        clockskew = 300
}
Секция [libdefaults] указывает на домен по умолчанию. У нас это LAB.LOCAL. Далее, в секции [realms] указываются параметры для LAB.LOCAL – имя домена и адрес сервера Kerberos. В нашем случае, в качестве сервера Kerbeors выступает контроллер домена. В секции [logging] указывается местоположение лог-файлов. Эти файлы пригодятся для процедуры поиска неисправности, если что-то пойдет не так.
Проверим работу Kerberos:
linux-test:~ # kinit Administrator@LAB.LOCAL
Password for Administrator@LAB.LOCAL:
linux-test:~ # klist
Ticket cache: FILE:/tmp/krb5cc_0
Default principal: Administrator@LAB.LOCAL

Valid starting     Expires            Service principal
04/05/12 11:22:23  04/05/12 21:22:35  krbtgt/LAB.LOCAL@LAB.LOCAL
        renew until 04/06/12 11:22:23
linux-test:~ #
Команда kinit получает от сервера тикет, а klist показывает полученные тикеты от сервера. Выполнение kinit не является обязательным, но ведь нужно как-то проверить работу Kerberos?
Настройка LDAP тоже не является обязательной – Samba сама построит необходимые файлы и сделает нужные запросы. Но LDAP может пригодиться в дальнейшем. Конфигурация OpenLDAP хранится в файле /etc/openldap/ldap.conf. Обратите внимание – в системе может быть два файла ldap.conf. У них разные предназначения и даже немного разный синтаксис. В каталоге /etc/openldap лежит файл ldap.conf для OpenLDAP (и для Samba), а в файле /etc/ldap.conf хранится конфигурация для разрешения имен через LDAP (для nss_ldap). К файлу /etc/ldap.conf мы вернемся в других статьях, сейчас настроим /etc/openldap/ldap.conf
linux-test:~ # cat /etc/openldap/ldap.conf
#
# LDAP Defaults
#

# See ldap.conf(5) for details
# This file should be world readable but not world writable.

#BASE   dc=example,dc=com
#URI    ldap://ldap.example.com ldap://ldap-master.example.com:666

#SIZELIMIT      12
#TIMELIMIT      15
#DEREF          never
uri     ldap://192.168.7.2
base    DC=lab,DC=local
linux-test:~ #
Как видите, все очень просто – нужно указать URI сервера LDAP (это наш контроллер домена) и базу для поиска.
Теперь переходим к самому сложному – настройке Samba.
В состав Samba входят 3 демона – smbd, nmbd и winbind. Все они берут настройки из файла /etc/samba/smb.conf.
Smbd отвечает за доступ клиентов к службе SMB/CIFS (собственно это и есть сервер Samba). Nmbd – это служба разрешения имен для Netbios. Winbind – служба разрешения имен (и компьютеров и пользователей) через доменные службы Windows.
Во многих руководствах можно встретить упоминание того, что кроме Samba требуется настраивать и winbind – службу, отвечающую за отношения между GNU/Linux и контроллером домена Windows. В частном случае, когда нужно настроить только Samba, настройки winbind можно опустить. Winbind обеспечивает авторизацию в домене Windows самых различных служб, обеспечивая интерфейс между модулями PAM и контроллером домена Windows. При неработающем winbind Samba остается работоспособной. Но настроив winbind мы делаем возможным дальнейшее расширение нашего сервера за счет добавления различных служб, авторизующихся через контроллер домена.
Мы сделаем самый простой сервер, открыв всем пользователям доступ к некоторому общему каталогу файлов и к домашнему каталогу пользователей. Более подробно о настройке доступа к серверу Samba мы будем говорить в других статьях.
В файле /etc/samba/smb.conf мы должны указать следующие строки:
[global]
        workgroup = LAB
        passdb backend = ldapsam:ldap://192.168.7.2
        printing = cups
        printcap name = cups
        printcap cache time = 750
        cups options = raw
        map to guest = Bad User
        logon path = \%Lprofiles.msprofile
        logon home = \%L%U.9xprofile
        logon drive = P:
        usershare allow guests = Yes
Здесь мы указываем сокращенное наименование нашего домена (LAB) и место, где хранятся пароли – параметр passdb backend, указывающий на то, что пароли находятся на сервере LDAP, в качестве которого выступает контроллер домена. Кстати, можно указать и несколько серверов, перечислив их через пробел. Это пригодится в том случае, если у нас несколько контроллеров домена. Строка usershare allow guests = Yes разрешает пользователям управлять доступом к своим папкам, открывая их для гостей. Остальные строки относятся к управлению печатью и процессу регистрации. В нашем случае они не являются обязательными и перекочевали из конфигурационного файла дистрибутива Samba.
Продолжим редактирование секции [global] файла smb.conf.
        domain logons = No
        domain master = No
        security = ADS
        encrypt passwords = yes
Строки domain logons и domain master разрешают использовать Samba в качестве контроллера домена. Это не наш случай и поэтому для них установлено No.
Строка security = ADS имеет ключевое значение. Тем самым мы указываем Samba, что сервер является членом домена Windows и за авторизацию отвечает AD. Строка encrypt passwords = yes означает, что используются зашифрованные пароли.
Продолжим редактировать все ту же секцию [global].
        ldap admin dn = Administrator@lab.local
        ldap delete dn = No
        ldap group suffix = ou=Groups
        ldap idmap suffix = ou=Idmap
        ldap machine suffix = ou=Computers
        ldap passwd sync = Yes
        ldap ssl = No
        ldap suffix = DC=lab,DC=local
        ldap timeout = 5
        ldap user suffix = ou=Users
Эти строки относятся к управлению соединением с LDAP сервером. Заметьте, что форма записи DN администратора имеет форму user@domain – она должна совпадать с тем, что мы указывали при тестировании Kerberos. Остальные строки указывают суффиксы различных местоположений в AD.
Следующие строки относятся уже к Kerberos:
        realm = LAB.LOCAL
        template homedir = /home/%D/%U
        winbind refresh tickets = yes
        kerberos method = system keytab
Здесь мы указываем REALM и метод аутентификации в Kerberos.
Теперь строки, которые относятся к настройке winbind:
        winbind separator = /
        winbind enum users = yes
        winbind enum groups = yes
        winbind nested groups = yes
        winbind use default domain = No
        winbind nss info = rfc2307
        winbind offline logon = yes
Здесь указаны различные параметры работы Winbind – форма разделитя имен домена и пользователя, разрешение для winbind перечислять имена пользователей и групп, разрешение оффлайновой аутентификации и т.п. Эти настройки рекомендованы разработчиками Samba.
Секция глобальных настроек закончена. Обратите внимание, что у нас нет строк password server и idmap backend, которые можно встретить в других руководствах. Samba должна сама разобраться, откуда берутся пароли.
Переходим к настройке каталогов. Здесь все просто:
[homes]
        comment = Home Directories
        valid users = %S, %D%w%S
        browseable = No
        read only = No
        inherit acls = Yes
        available = Yes
  [profiles]
        comment = Network Profiles Service
        path = %H
        read only = No
        store dos attributes = Yes
        create mask = 0600
        directory mask = 0700
[users]
        comment = All users
        path = /home
        read only = No
        inherit acls = Yes
        veto files = /aquota.user/groups/shares/
[groups]
        comment = All groups
        path = /home/groups
        read only = No
        inherit acls = Yes
[SRV]
        comment = Common files
        path = /local
        write list = Administrator
        guest ok = Yes
        hosts allow = 192.168.7.
К стандартному списку разделяемых каталогов, распространяемому вместе с дистрибутивом Samba мы добавили только секцию [SRV] – общедоступный каталог.
Конфигурирование всех необходимых файлов закончено, и мы приступаем к проверке работоспособности нашего сервера.
2. Проверка работоспособности.
Здесь мы проверим корректность наших настроек и включим наш новый сервер в домен Windows. Сначала проверим корректность настройки Samba:
l
inux-test:~ # testparm
Load smb config files from /etc/samba/smb.conf
rlimit_max: increasing rlimit_max (1024) to minimum Windows limit (16384)
Processing section "[homes]"
Processing section "[profiles]"
Processing section "[users]"
Processing section "[groups]"
Processing section "[SRV]"
Loaded services file OK.
Server role: ROLE_DOMAIN_MEMBER
Press enter to see a dump of your service definitions
Как видно, каких либо серьезных предупреждений и ошибок конфигурации у нас нет.
Теперь запустим по очереди демоны smbd, nmbd и winbindd. Сделаем это через файлы /etc/init.d/smb, /etc/init.d/nmb и /etc/init.d/winbind. Можно выполнить это и вручную, что может оказаться полезным для получения различной дополнительной информации. О том, как это сделать можно прочесть во встроенных руководствах (man) по smbd, nmbd и winbindd.
Проверим состояние нашего домена и нашего сервера в домене. Состояние домена можно получить командой net ads info
linux-test:~ # net ads info
LDAP server: 192.168.7.2
LDAP server name: LAB-DC1.lab.local
Realm: LAB.LOCAL
Bind Path: dc=LAB,dc=LOCAL
LDAP port: 389
Server time: Thu, 05 Apr 2012 13:03:47 MSK
KDC server: 192.168.7.2
Server time offset: 4
linux-test:~ #
Как видно, все в порядке. Если какие-то параметры, выводимые командой не совпадают с нашим планом – надо искать причину. Теперь проверим состояние нашего сервера в домене:
l
inux-test:~ # net ads status -U Administrator
Enter Administrator's password:
No machine account for 'LINUX-TEST' found
linux-test:~ #
Отсюда следует, что наш сервер не включен в домен. Запрос к контроллеру домена делается от имени администратора, и пароль нужно указывать от учетной записи администратора домена Windows.
Теперь мы должны включить наш сервер в домен:
l
inux-test:~ # net ads join -U Administrator
Enter Administrator's password:
Using short domain name -- LAB
Joined 'LINUX-TEST' to realm 'lab.local'
DNS Update for linux-test.lab.local failed: ERROR_DNS_UPDATE_FAILED
DNS update failed!
linux-test:~ #
Итак, наш новый сервер включен в домен, о чем свидетельствуют строки:
Using short domain name -- LAB
Joined 'LINUX-TEST' to realm 'lab.local'
Динамическое изменение DNS у нас не прошло. Это не страшно, поскольку оно и не планировалось. Теперь рекомендуется перезапустить все наши процессы – smbd, nmbd и winbindd. Заметим, что после перезапуска до дальнейших проверок должно пройти несколько минут.
Проверим статус нашего сервера в домене:
linux-test:~ # net ads status -U Administrator
Enter Administrator's password:
В ответ мы получим распечатку состояния нашего нового сервера в домене. Там будут указаны различные поля AD, относящиеся к нашему серверу. Так же наш сервер GNU/Linux мы увидим на вкладке Computers, запустив средство администратора AD на контроллере домена.
Можно проверить список пользователей домена:
l
inux-test:~ # net ads user -U Administrator
Enter Administrator's password:
Administrator
Guest
krbtgt
usertest
linux-test:~ #
И проверим работу winbind:
linux-test:~ # wbinfo -t
checking the trust secret for domain LAB via RPC calls succeeded
linux-test:~ #
И получим список пользователей в домене:
l
inux-test:~ # wbinfo -u
LAB/administrator
LAB/guest
LAB/krbtgt
LAB/usertest
linux-test:~ #
Можно проверить состояние домена через wbinfo:
l
inux-test:~ # wbinfo -D LAB
Name              : LAB
Alt_Name          : lab.local
SID               : S-1-5-21-3914562201-450990341-53424453
Active Directory  : Yes
Native            : Yes
Primary           : Yes
linux-test:~ # wbinfo -P
checking the NETLOGON dc connection succeeded
linux-test:~ #
Все в порядке. Теперь самая главная проверка – попробуем открыть каталоги на нашем новом сервере, используя рабочую станцию под управлением Windows 7. Наша рабочая станция включена в домен. Мы должны увидеть наш новый сервер на вкладке Network обозревателя Windows, либо указав имя или IP адрес:

Теперь можно переходить к дальнейшим процедурам настройки нашего сервера. В дальнейшем мы рассмотрим некоторые нюансы описанного процесса в зависимости от дистрибутива GNU/Linux и подробнее рассмотрим настройку прав доступа к серверу Samba.
Работа выполнена на базе Информационно-вычислительного центра МЭИ.
Автор: SergeyKhorkov