
Локальная групповая политика позволяет контролировать параметры текущего устройства – определять поведение операционной системы для всех пользователей и вносить отдельные настройки для каждой из учётных записей.
Для настройки групповых политик сервера без домена имеем подготовленный сервер с операционной системой Windows Server 2019.
В меню пуск, выбираем элемент «выполнить» и вводим gpedit.msc, либо через командную строку.
Открывается «Редактор локальной групповой политики»:

Рисунок 1 – Редактор локальной групповой политики
Конфигурация компьютера позволяет применять политики на весь сервер, а конфигурация пользователя позволяет применить политики на того пользователя, который запустил редактор.
Применим ограничения по времени для активных, но бездействующих и отключенных сеансов. Для этого переходим «Конфигурация компьютера» «Административные шаблоны»->«Компоненты Windows» -> «Службы удаленных рабочих столов» -> «Ограничение сеансов по времени», здесь находим две политики «Задать ограничение по времени для отключенных сеансов» и «Задать ограничение по времени для активных, но бездействующих сеансов служб удаленных рабочих столов». Включаем политику и указываем время, например, 3 часа:

Рисунок 2 – GPO ограничения времени активных, но бездействующих сеансов
Если требуется запустить редактор на группу пользователей (администраторы или «не администраторы»), необходимо запустить mmc, так же через «выполнить», либо командную строку.
Добавляем необходимую оснастку:
Нажимаем «файл», далее «Добавить или удалить оснастку».
Далее выбираем «Редактор объектов групповой политики»:

Рисунок 3 – Добавление и удаление оснасток
Нажимаем добавить, затем кнопку «обзор».
На данном этапе выбираем вкладку «пользователи» и к какой группе (или к конкретному пользователю) мы хотим применить политику:

Рисунок 4 – Выбор объекта групповой политики
Далее нажимаем «ок» и запускаем выбранную оснастку.

Рисунок 5 – Оснастка GPO группы пользователей «Не администраторы»
Сделаем блокировку рабочего стола при неактивности пользователя.
Для этого переходим в «Конфигурация пользователя» -> «Административные шаблоны» -> «Панель управления» -> «Персонализация».
Выбираем политики «Защита заставки с помощью пароля» и «Тайм-аут экранной заставки».
Включаем защиту заставки, тайм-аут включаем и выставляем время в секундах, например, 600с (10 минут):

Рисунок 6 – GPO ограничения времени отключенных сеансов.
Чтобы просмотреть текущие применённые групповые политики, нужно ввести команду
Эти и другие настройки для наших клиентов мы осуществляем в рамках ИТ-аутсорсинга.
Салимжанов Р.Д
Part 4 Basic Configuration of Windows Server 2019 (Group Policies)
Salimzhanov R.D.
В последней части базовой настройки мы рассмотрим простейшую настройку групповой политики Windows.
Групповая политика Windows (Group Policy) — это механизм управления настройками операционной системы и приложений в среде Windows. Она позволяет администраторам централизованно управлять и конфигурировать системы, пользователи и группы в домене Active Directory.
Заходим в созданную нами папку в 3 части базовой настройки Active Directory:
Создадим правило:
После создания можем переходить к настройке:
Допустим, зададим фон рабочего стола для наших пользователей
Перед тем как выбирать картинку создадим общую папку, из которой будет взята картинка.
После чего, копируем путь к папке и запишем его в политику.
Точно также мы можем, к примеру, запретить доступ к панели управления и выхода из системы:
Проверим:
Можно посмотреть все парила:
При помощи групповых политик мы можем заниматься:
1. Централизованное управление: Позволяет администраторам управлять настройками множества компьютеров и пользователей из одного места.
2. Безопасность: Позволяет применять политики безопасности, такие как требования к паролям, настройки брандмауэра, права доступа и другие меры безопасности.
3. Конфигурация системы: Автоматическая настройка параметров операционной системы и приложений для пользователей и компьютеров.
4. Управление программами: Возможность установки, обновления или удаления программного обеспечения на всех компьютерах в сети.
5. Контроль доступа: Настройка прав доступа к ресурсам сети, таким как файлы, папки и принтеры.
6. Стандартизация: Обеспечивает единообразие настроек и конфигураций на всех устройствах в организации.
7. Упрощение администрирования: Уменьшает время и усилия, необходимые для управления IT-инфраструктурой.
Групповая политика является мощным инструментом для системных администраторов, позволяя эффективно управлять IT-ресурсами в организации.
1) Администратор групповая политика в управляемом домене доменных служб Microsoft Entra // [электронный ресурс]. URL: https://learn.microsoft.com/ru-ru/entra/identity/domain-services/manage-group-policy / (дата обращения 03.09.2024).
2) Помощник Админа // [канал]. URL: https://t.me/channel_adminwinru (дата обращения 01.09.2024).
3) Редактор локальной групповой политики Windows// [канал]. URL: https://remontka.pro/group-policy-editor-windows / (дата обращения 28.08.2024).
Introduction
In this article, I’m going to show you how to create a software group policy on Windows Server 2019 using the proper and easiest method.
Before that, we need to know what The MSI file extension stands for Microsoft Software Installer. It’s a Windows Installer format that uses Microsoft’s Windows Installer service to configure installer packages.
I’m going to install the Mozilla Firefox web browser on servers and clients. I attached the Mozilla Firefox web browser MSI file extension version link: Download the Firefox Browser in English (US) and more than 90 other languages (mozilla.org).
Note: Relocated that downloaded file to the shared drive. If you want to know how to share a drive, please visit my previous article, How to Share a Drive and Mapping for Client User? (c-sharpcorner.com)
Create Software Group Policy on Server 2019
Step 1. On your server, click «tool» after clicking «group policy management».
Step 2. Come to your server domain name and right-click on «group policy objects» after clicking «new».
Step 3. Give the name of your software policy.
Step 4. After creating, right-click on your created software policy, then click «edit».
Step 5. Double-click on «user configuration».
Step 6. Again, double-click on «policies».
Step 7. Double-click on «software settings».
Step 8. Again, click twice on «software installation».
Step 9. After right click «software installation» again, click «new» then click «package».
Step 10. Locate your downloaded MSI extension Mozilla Firefox web browser setup file on the shared drive folder and click «open».
Step 11. Once you have located, you will receive a deploy software message, here click «assigned» after clicking «ok».
Wait a few minutes, and your software will appear here.
Step 12. After coming to your «group policy management» right-click on your server’s «domain name» after clicking «link an existing GPO».
Step 13. Select your created software policy after clicking «ok».
Step 14. Finally, clients and server users restart their PCs automatically our Mozilla web browser software was installed successfully.
Conclusion
In this article, we all clearly understand how to create a software group policy on Windows Server 2019 using the proper and easiest method. If there is clarification regarding this topic, feel free to contact me.
Nothing more interesting than those tools and utilities that facilitate the task of management and control in a corporate environment and when using Windows Server we know very well that Group Policy Objectives or GPO (Group Policy Object) are one of the best options to use because thanks to them we can create a policy that can be applied either to the entire domain or to a single OU (Organizational Unit) in particular and thus restrict the use or access to certain parameters or, forcing a certain configuration on client computers..
Microsoft with its new edition Windows Server 2019 continues to offer us this functional practice to have better control over all the elements of the organization.
What are the GPOs?
The GPOs (Group Policy Object) are in themselves a set of policies that can be created in different areas of the server either to prevent users from executing an action, such as accessing the C drive or connecting devices USB, or generate that the teams perform certain actions such as applying automatic updates.
A GPO is a virtual collection of policy settings and each has a unique name, similar to a GUID. To correctly use a GPO it is necessary to take into account the following:
- The local network must be structured in AD DS, so that at least one of the servers to be used must have the AD DS (Active Directory) function installed.
- The computers to manage must be attached to the domain and users must use the domain credentials to log in to the computers.
- You will need to have permissions to edit the Group Policy in the domain, and this is achieved by being part of the group of Administrators or Group Policy Administrators.
Types of group policies
There are basically two types of group policy for Windows Server which are:
- Default Domain Policy: This default policy and within it we find policy settings that can be applied to all computers and users in the current domain.
- Default Domain Controller Policy: It is another policy that is created by default, and in it we have policy settings that are applied exclusively to available domain controllers.
Group policies are categorized into sections and each has specific elements to manage such as:
Windows settings
At the Team Configuration level we have:
- Name Resolution Policy
- Scripts (Start / Off)
- Printers deployed
- Security settings
- Policy-based quality of service (QoS)
Administrative Templates
- Control Panel
- Net
- Printers
- Server
- System
- Windows components
- All settings
Windows settings
At the User Configuration level we have:
- scripts (Start / Off)
- Printers
- Security settings
- Policy-based quality of service (QoS)
Administrative Templates
- Control Panel
- Desk
- Net
- Shared folders
- Start menu and taskbar
- System
- Windows components
- All settings
Now we will know how to create a GPO in Windows Server 2019..
1. Create the GPO in Windows Server 2019
Step 1
For this, we have two options:
- Use the following key combination and execute the gpmc.msc command and press Enter or Accept
+ R
gpmc.msc
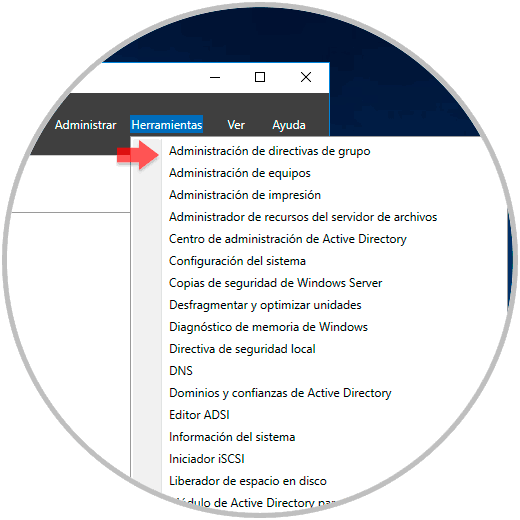
- Go to Server Manager and there go to the «Tools / Group Policy Management» path
Step 2
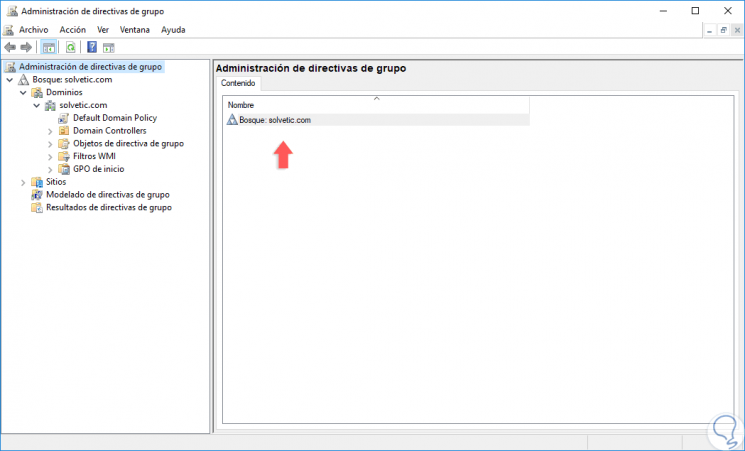
The following window will be displayed where, when deploying our forest, we will have the domain structure:
Step 3
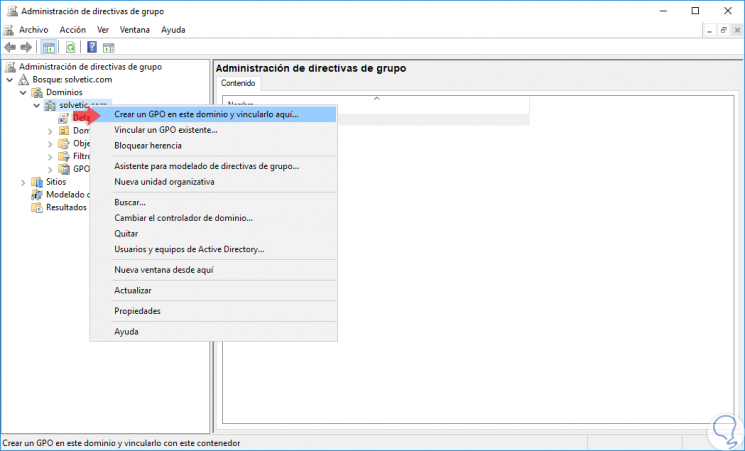
To create a new GPO we will right click on the domain and select the option “Create a GPO in this domain and link it hereâ€:
Note
We can also link a GPO to an existing OU if this is the case.
Step 4
When selecting this option we will see the following window where we will assign a name to said GPO:
Step 5
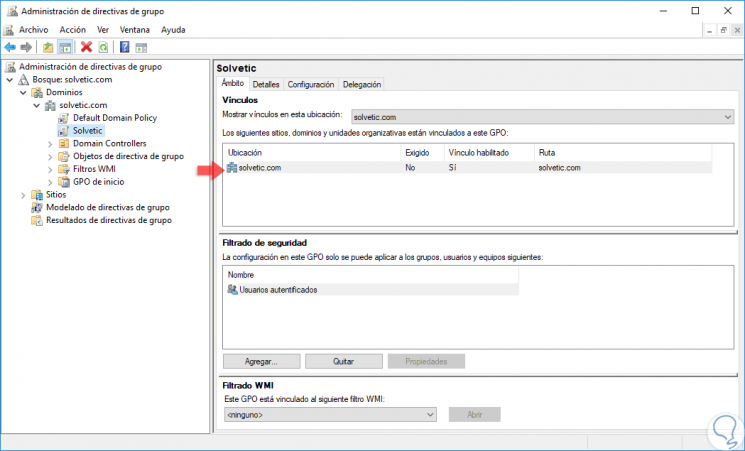
Click on Accept and we will see that our GPO has been created correctly:
2. Edit a group policy in Windows Server 2019
Step 1
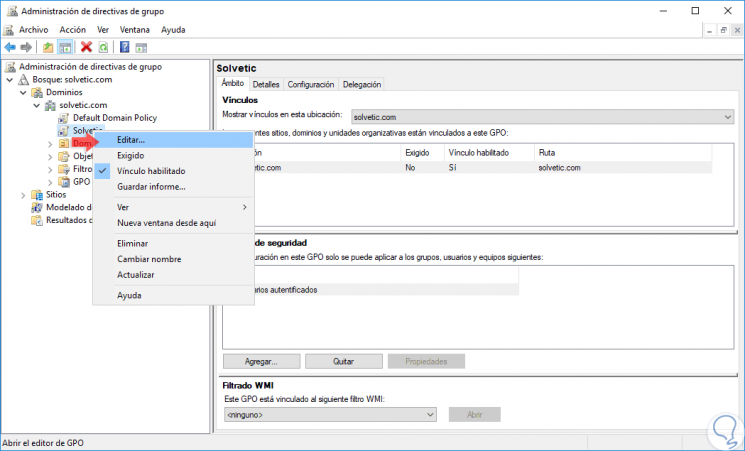
To start the editing process of our GPO we will right click on it and select the «Edit» option:
Step 2
This will lead us to the group policy console where we will see the following options:
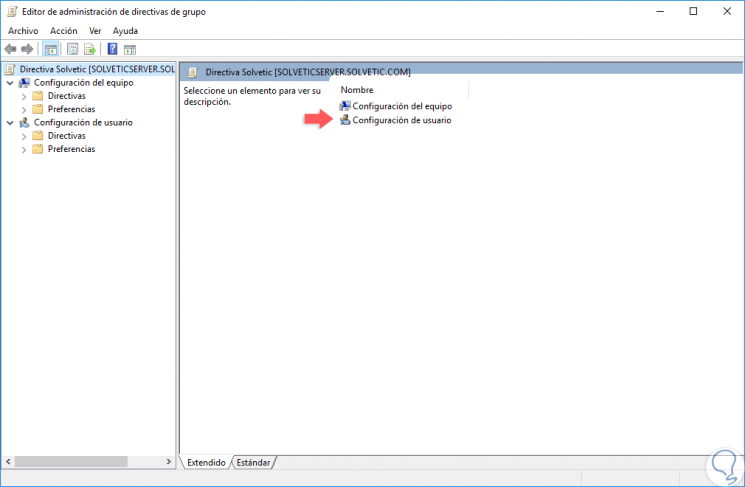
Step 3
As we see there are the sections that we have mentioned before, Computer Configuration and User Configuration.
Each of these sections has a subdivision of options to select and in each of them we find special policies:
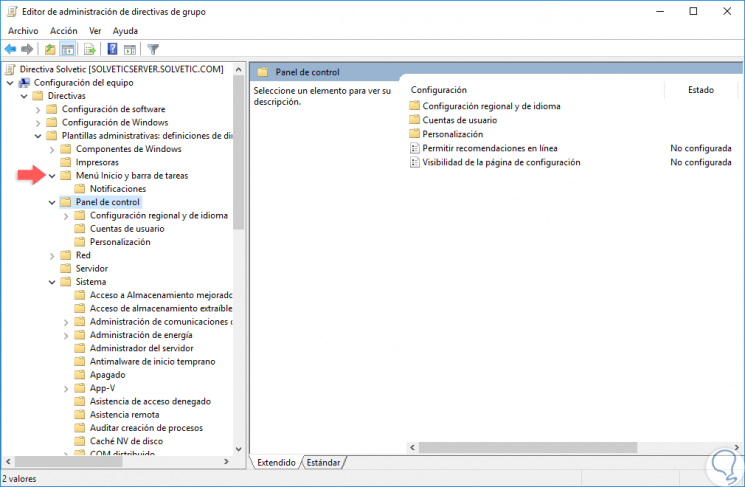
Step 5
Each section has a series of diverse policies:
Step 6
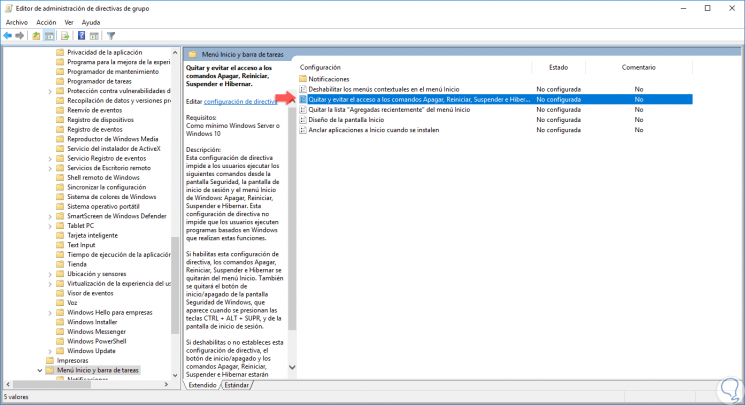
To edit and apply an action to the created GPO, for this case, we will go to the section «Computer Configuration / Windows Components / Start Menu and Taskbar» where we will select the policy called «Remove and prevent access to Shutdown, Restart, Suspend and Hibernate commands:
Step 7
We double-click on this policy and in the new window we will activate the “Enabled†box:
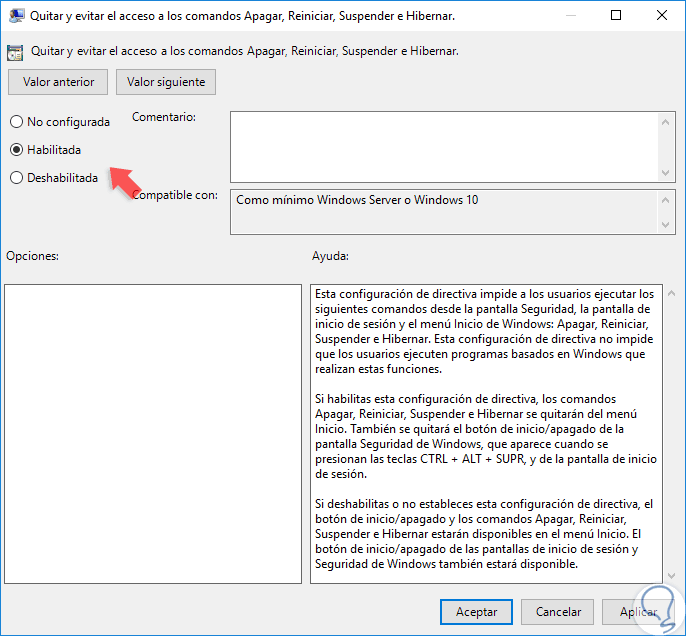
Step 8
In some special policies, additional options for its configuration will be displayed. Click on the «Apply and Accept» button to save the changes. Now, on all computers in the domain, including the server, we will see that the shutdown buttons are not available:
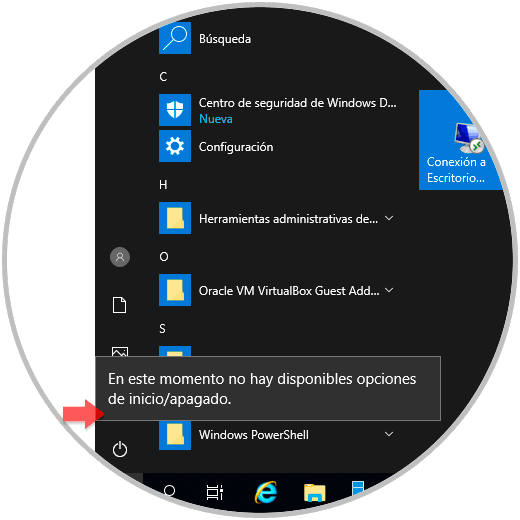
Step 9
This is because the GPO was created in the domain directly and not in a single OU. At the level of GPO management we have some options such as:
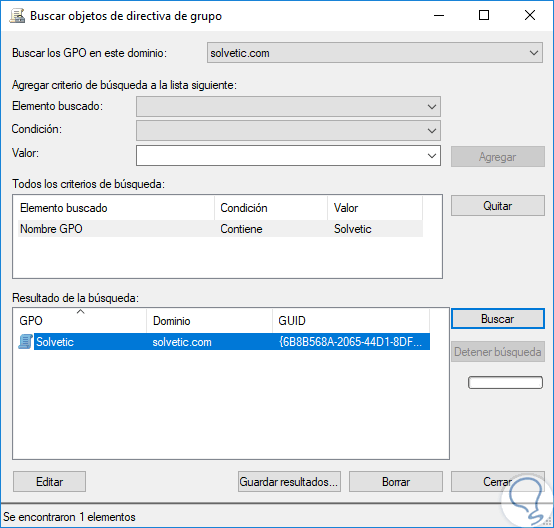
Look for
By right clicking on the domain we can select the «Search» option to find a GPO based on the parameter we define and it is useful when we have numerous policies created
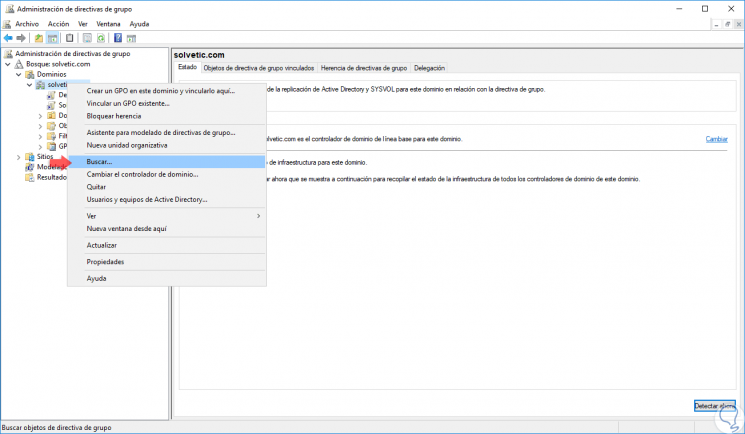
In the window that opens we will enter the search parameters to obtain the best results:
General configuration
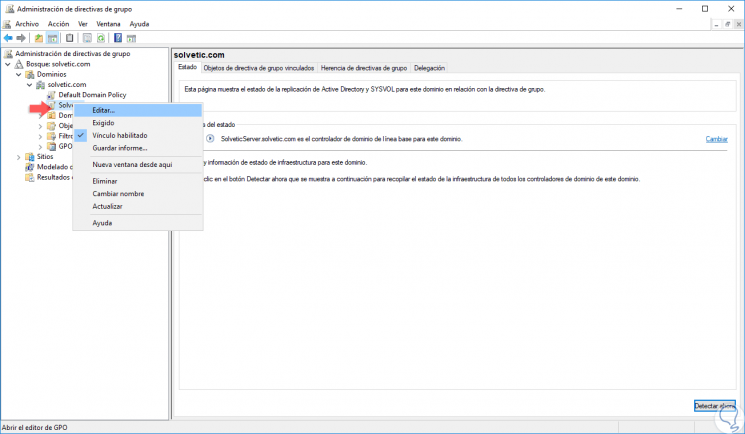
By right clicking on our policy we can see a series of options to use as:
- Edit: Allows us to make changes to the selected GPO
- Required: Forces the value of the selected GPO
- Link enabled: This option allows us to create a link of this GPO with a domain or other existing GPOs in the local network
- Save report: This option is responsible for creating and storing an HTML file with details of the policy created.
- Rename: Modify the name of the current policy
- Delete: Deletes the selected GPO
- Update: Refresh the changes made to the policy
- Help: Deploy GPOs help in Windows Server 2019
3. Delete a GPO in Windows Server 2019
Step 1
When we consider that a GPO will no longer be necessary to have that GPO there, we can remove it and for this we will right click on it, once we access the policy manager, and select the Delete option :
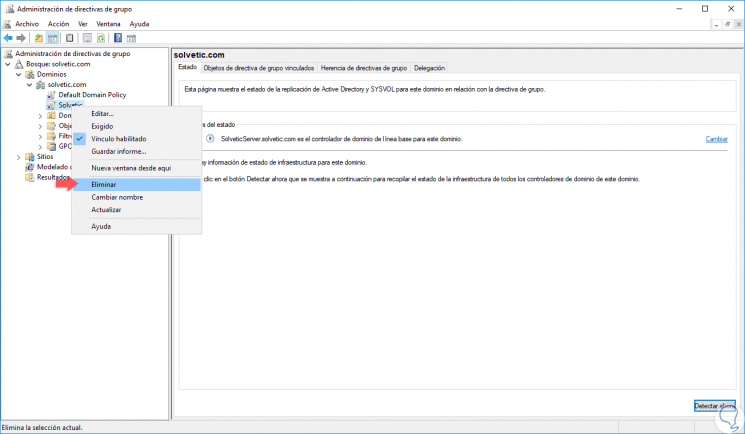
Step 2
The following message will be displayed. There we click on OK to confirm the elimination of this GPO.
The GPOs have been developed with the objective of being an ally in the entire administration and control process on the various elements of the system both at the software and hardware level, thus allowing a central control of all these steps without resorting to waste of time or of unnecessary resources.
In the previous articles, we have described the steps on How to Install and Configure the WSUS server role on Windows Server 2019. In this post, we will configure the group policy settings to deploy automatic updates for client computers.
Overview:
After installing and configure the WSUS server role, the next step is to configure group policy settings to determine how WSUS clients will receive the updates.
We need to direct each client to communicate with WSUS Server to check for new updates instead of using Microsoft Update over the Internet. Using group policy, you can point your client machines to use the local WSUS server instead of Microsoft Update Server.
With an active directory environment, you can use Group Policy to specify the WSUS server. You can create the group policy and apply it at the domain level. You can also apply the GPO to a specific OU if you want to target specific computers only.
Steps to create a new GPO:
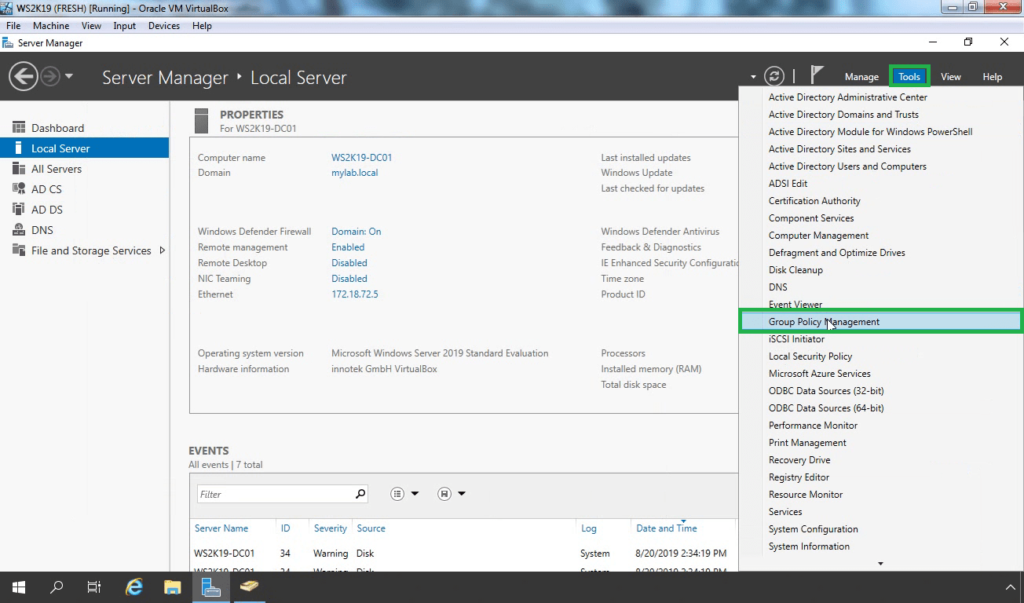
Login to your domain controller and open Server Manager.
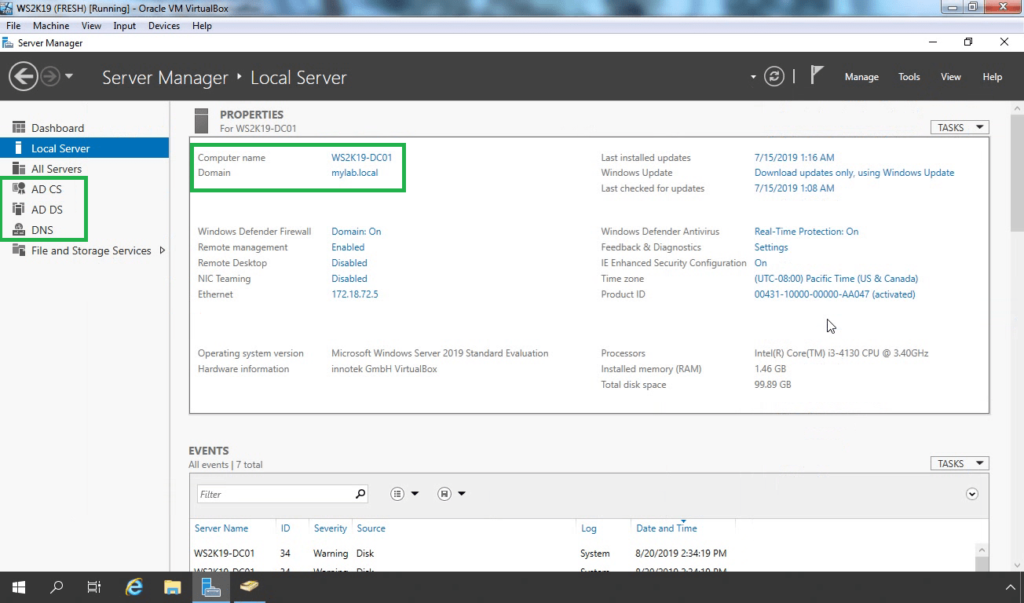
From Server Manager, click on Tools. Then select Group Policy Management.
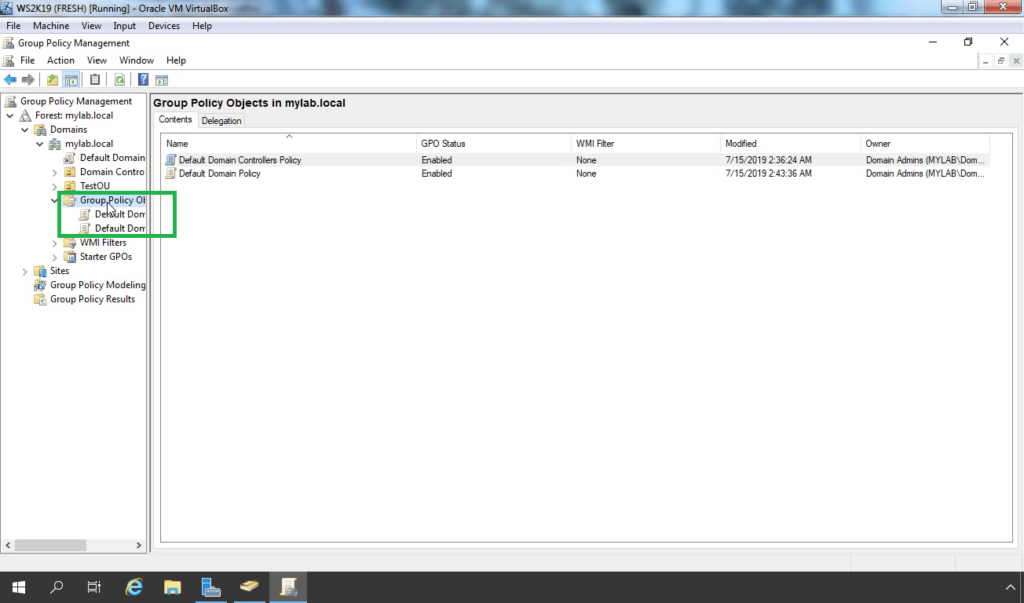
Expand your domain name. Then expand the Group Policy Objects container.
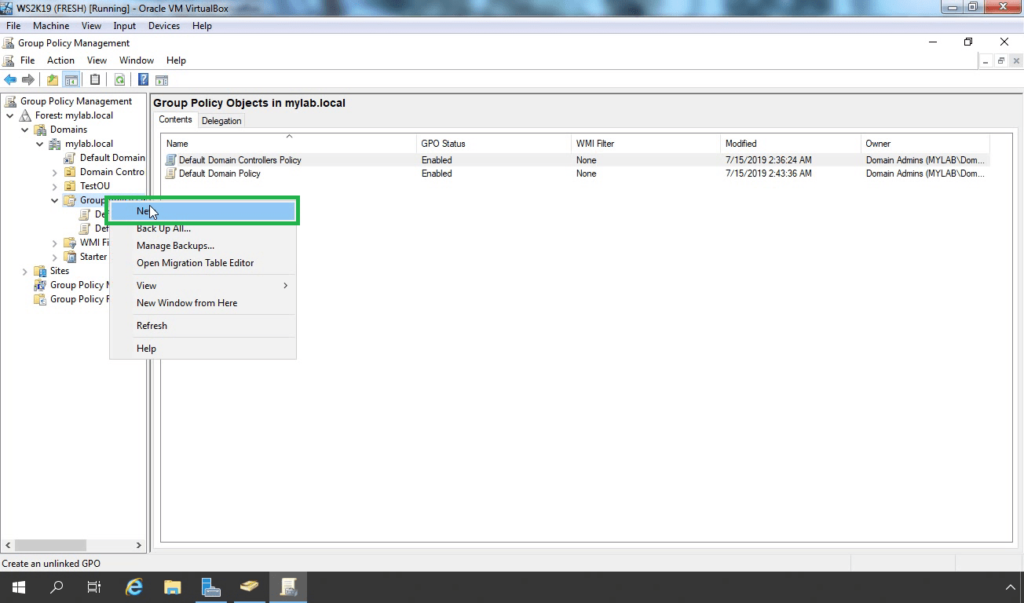
To create a new GPO, Right-click on the Group Policy Objects and select new.
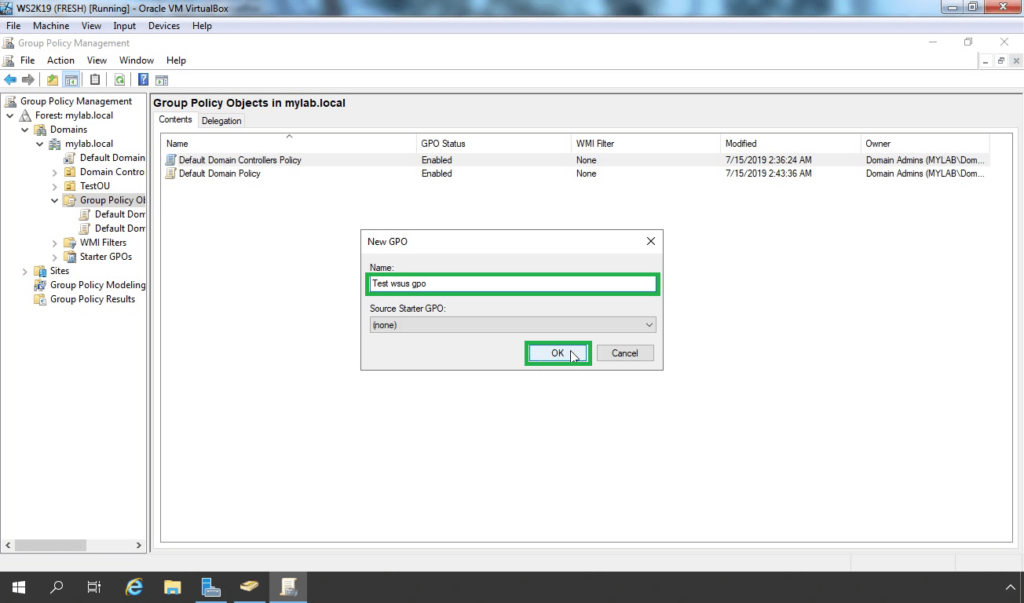
Give a meaningful name to the new GPO. For example, Test WSUS GPO. Click on OK.
Steps to setup the WSUS group policy settings:
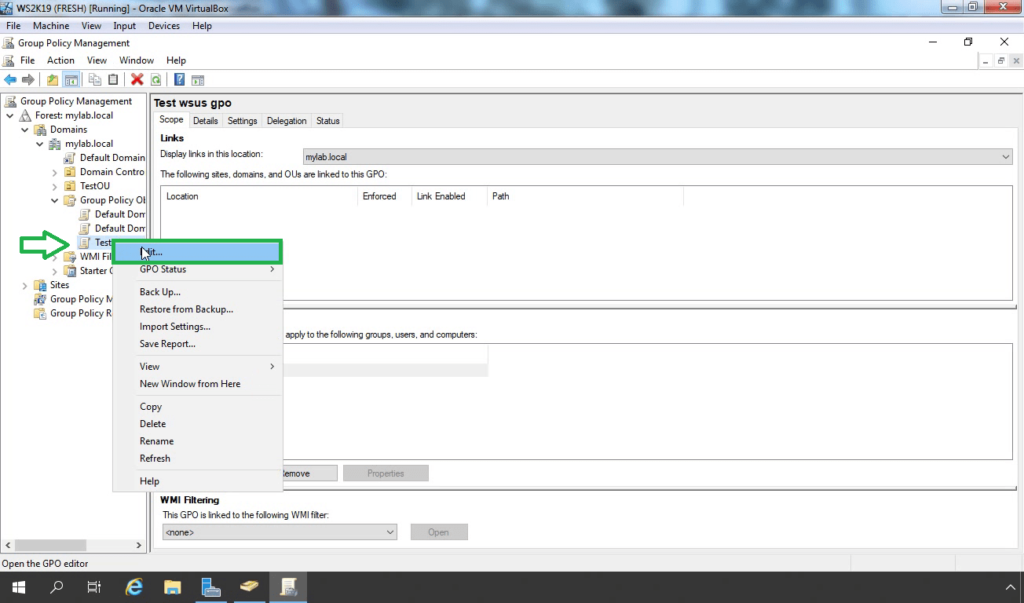
Right-click on newly created GPO and select edit.
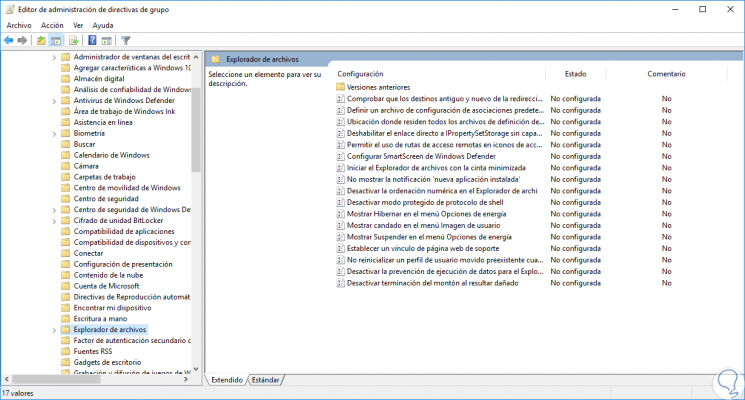
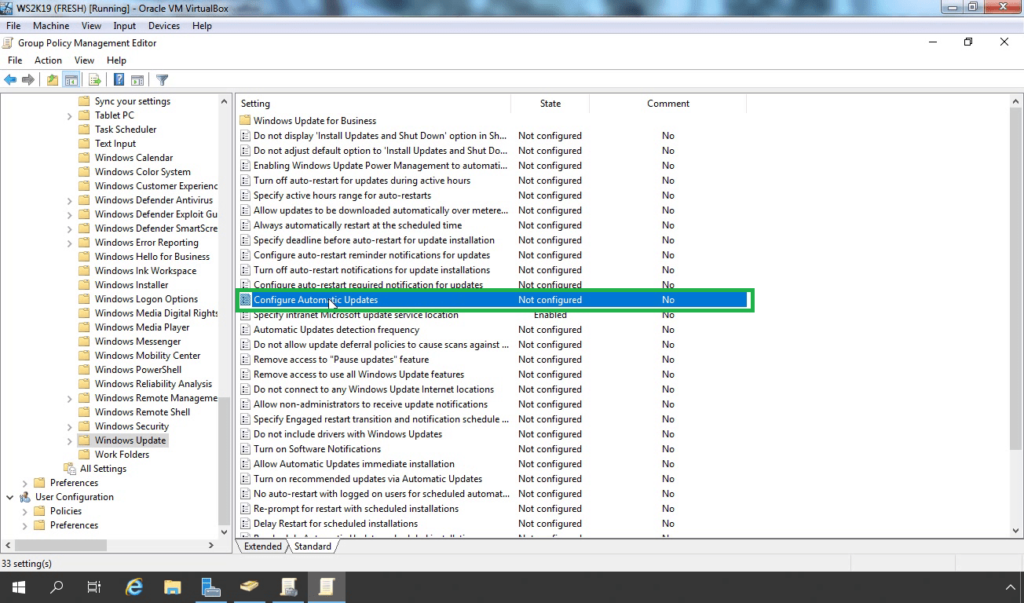
Navigate to Computer Configuration > Policies > Administrative Templates > Windows Components > Windows Update.
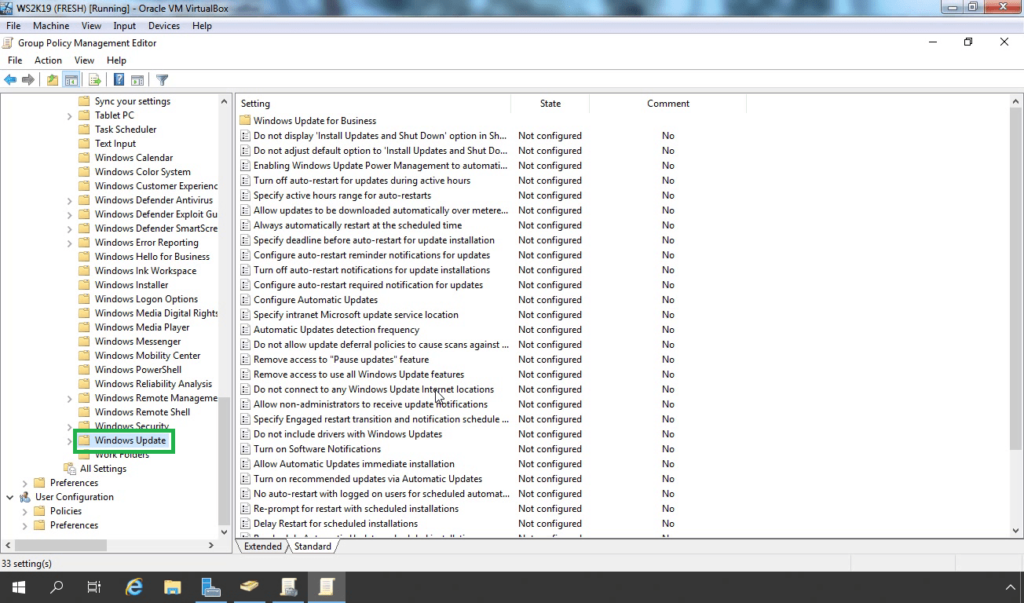
There are several policies related to WSUS settings. Of course, you do not have to enable all of them.
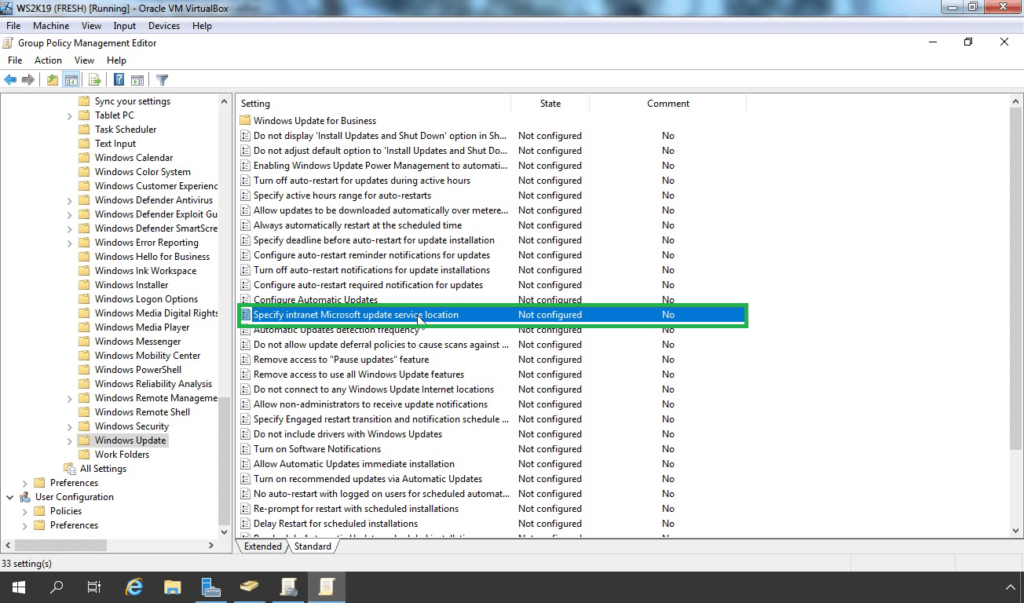
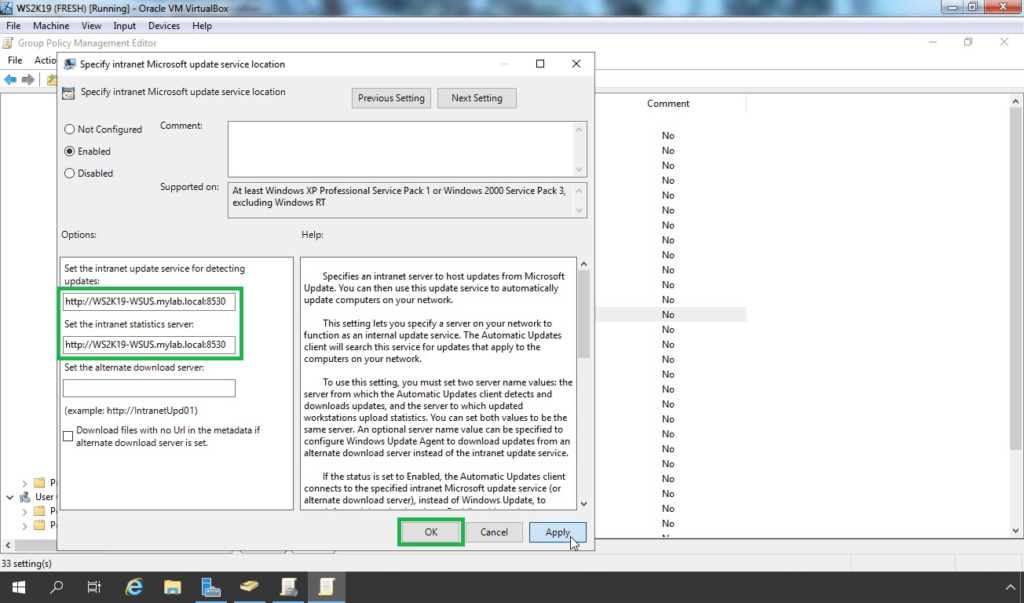
Locate and double-click a policy name “Specify Intranet Microsoft Update Service Location”.
To enable the policy, select the Enabled radio button.
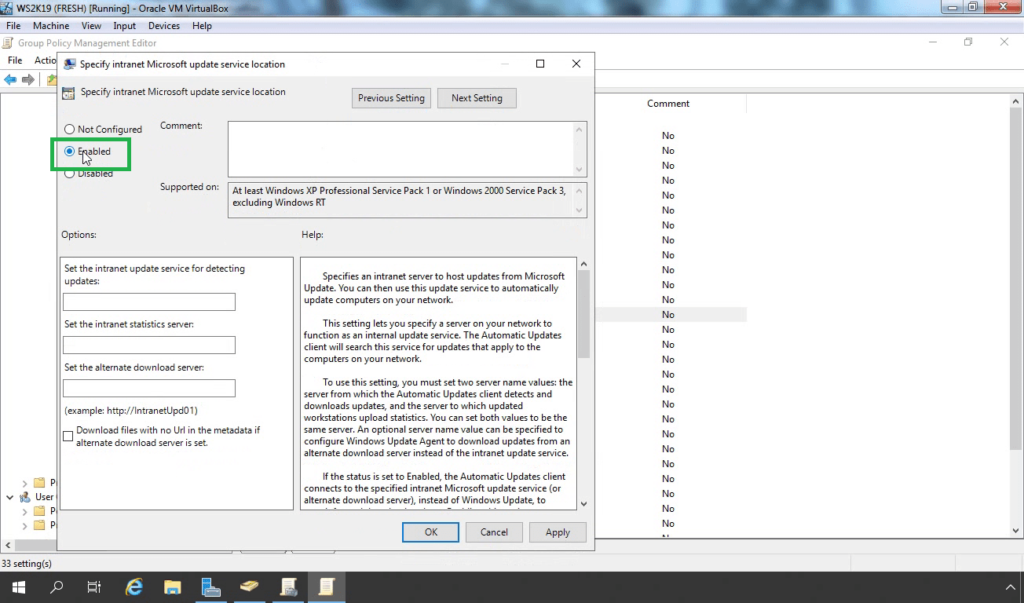
Specify the intranet update service and intranet statistics server. In our case, the location will be http://ws2k19-wsus.mylab.local:8530. Click Apply and OK.
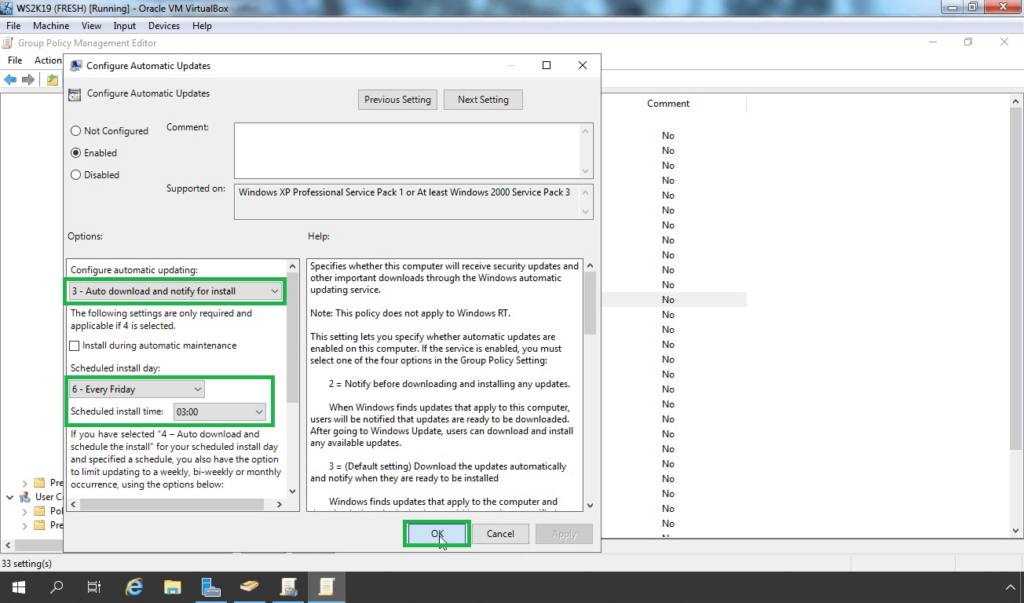
Locate and double-click on a “Configure Automatic Updates policy”.
Click Enabled and select one of the following options:
Notify for download and auto-install: This option notifies a logged-on administrative user before the download and before the installation of the updates.
Auto download and notify for install: This option automatically begins downloading updates and then notifies a logged-on administrative user before installing the updates.
Auto download and schedule the install: If Automatic Updates is configured to perform a scheduled installation, you must also set the day and time for the recurring scheduled installation.
Allow local admin to choose setting: With this option, the local administrators are allowed to use Automatic Updates in Control Panel to select a configuration option of their choice. For example, they can choose their own scheduled installation time. Local administrators are not allowed to disable Automatic Updates.

Once you ready, click on Apply and OK.
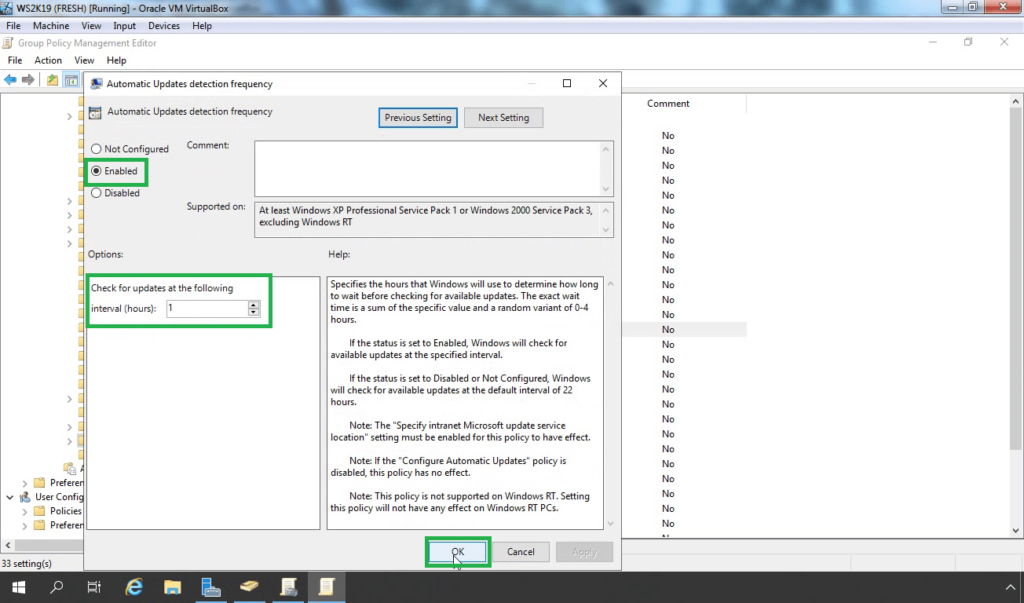
Automatic Update detection frequency policy specifies the hours that Windows will use to determine how long to wait before checking for available updates.
Double click on “Automatic Update detection frequency” policy.
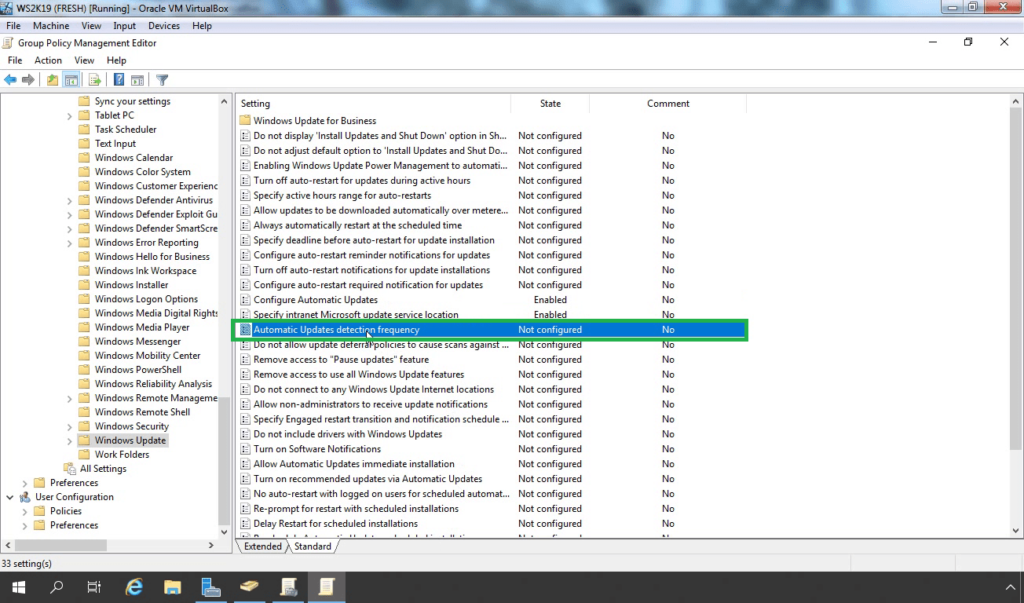
Set the option as per your requirement. Click on Apply and OK.
Close the group policy editor console.
At a minimum, we need to configure these three policies for WSUS server.
Link the GPO to the OU containing computer accounts.
Steps to link the WSUS GPO to OU:
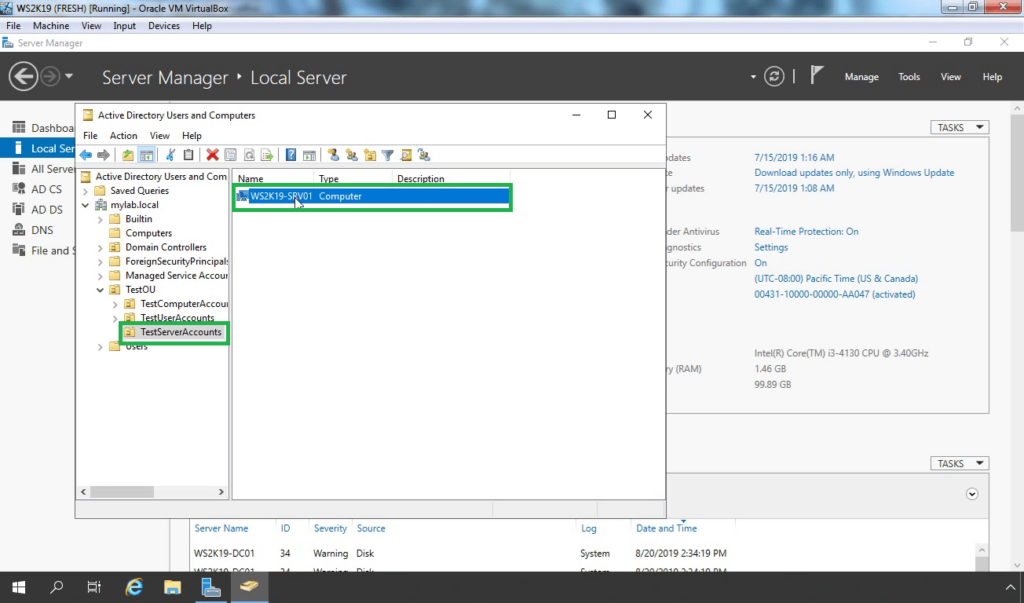
For this article, we have created one OU name TestServerAccounts. Under the OU we have stored the computer account of our member server WS2K19-SRV01. For testing purposes, we will link the GPO to this OU and check the result on the WS2K19-SRV01 server.
Right click on TestServerAccounts OU and select Link an existing GPO option.
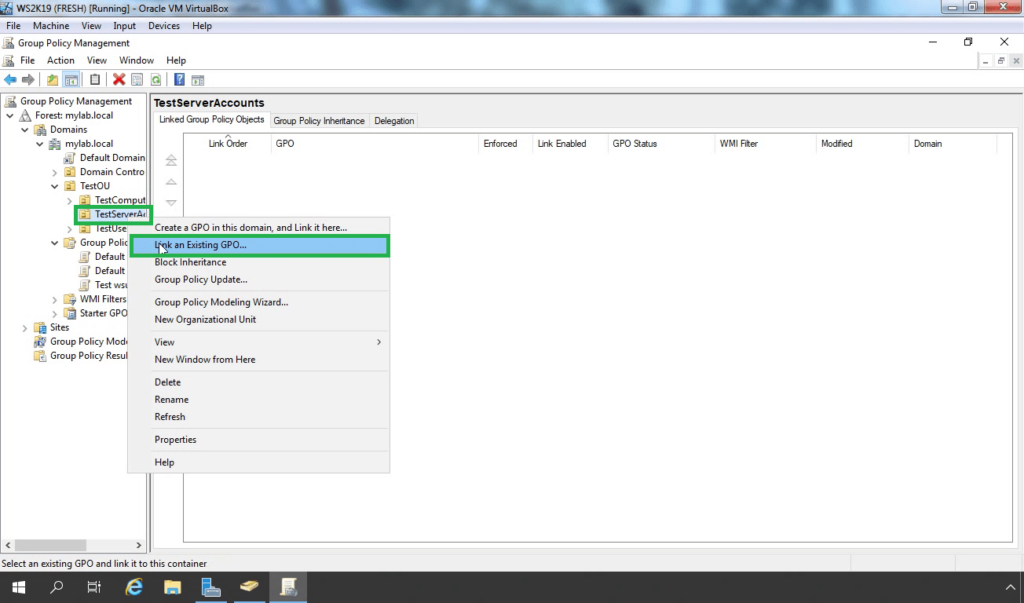
Select the GPO which we have created earlier. Click on OK.

Test the GPO settings:
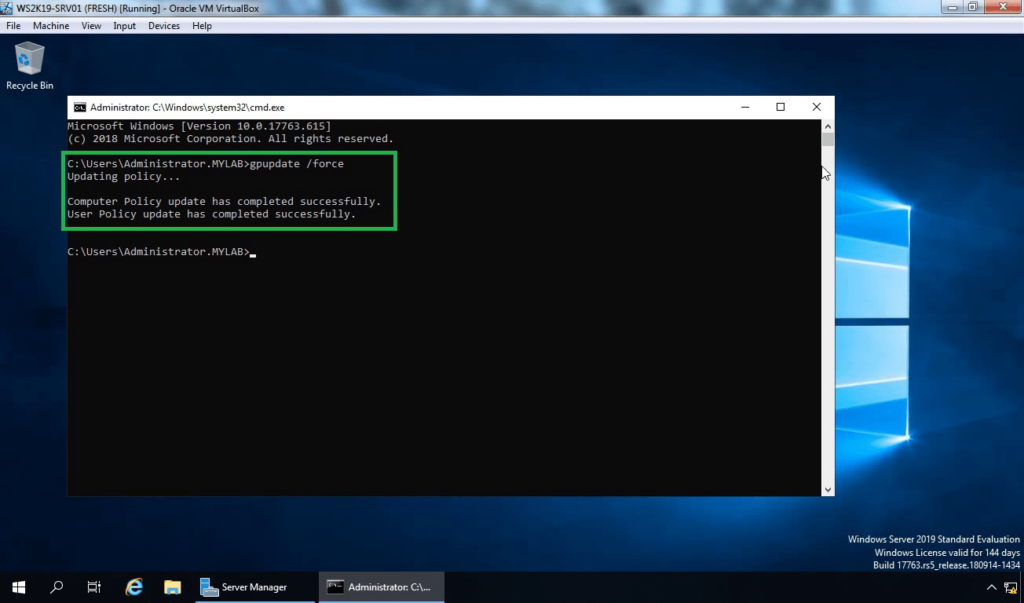
It will take about 20 minutes after Group Policy refreshes the new settings to the client computer. By default, Group Policy refreshes in the background every 90 minutes, with a random offset of 0 to 30 minutes. If you want to refresh Group Policy sooner, you can go to a command prompt on the client computer and type: “gpupdate /force”.
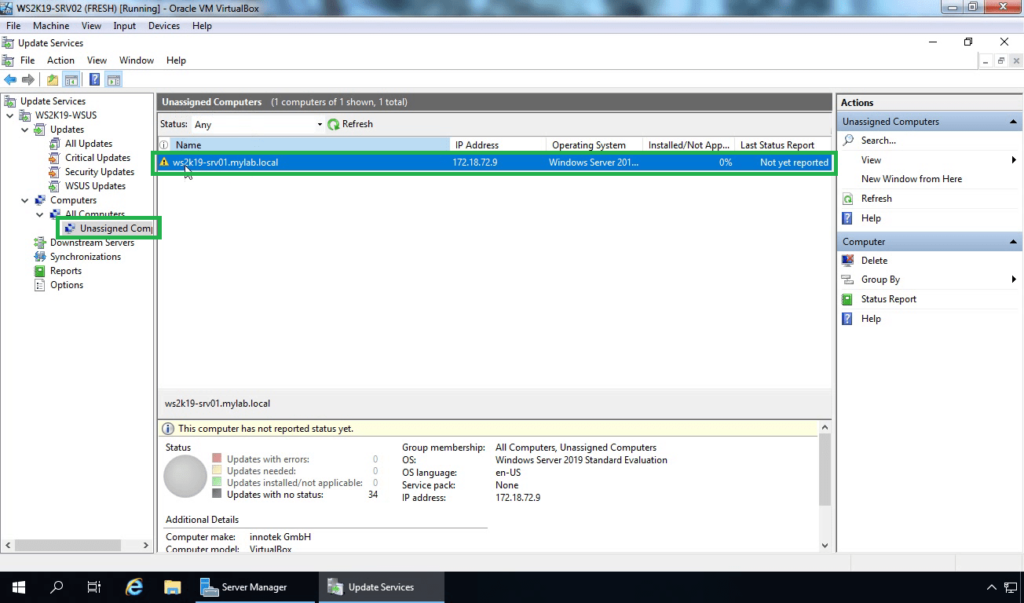
If you’ve followed this article, you should see your servers or computers under the Unassigned Computers group.
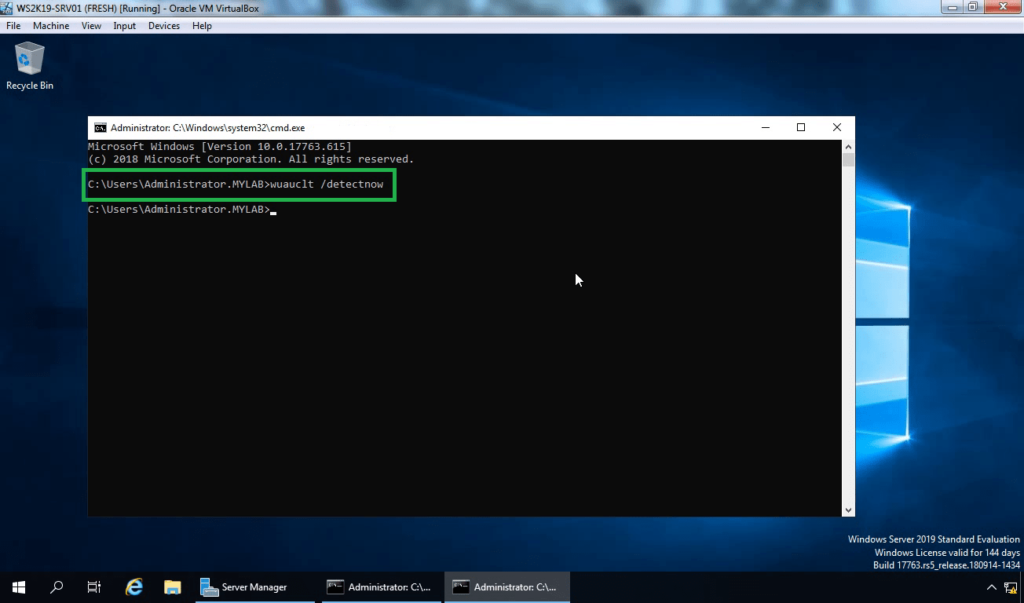
In case, your computer account does not appears in WSUS console, you can run command “wuauclt /detectnow” and “wuauclt /reportnow” on client PCs.
That command will force client PC to contact the WSUS server immediately.
This completes the steps to configure the Group Policy Settings for WSUS in Windows Server 2019. I am sure this guide will help you to set up the WSUS.
Related Articles:
- Install and Configure WSUS on Windows Server 2019 – Part 1
- Install and Configure WSUS on Windows Server 2019 – Part 2
- Configure client-side targeting in WSUS server 2019
Post Views: 6,413