
This Windows Server 2022 Tutorial covers how to Install and configure DHCP (Dynamic Host Configuration Protocol) on Windows Server 2022. Dynamic Host Configuration Protocol (DHCP) is a network management protocol, DHCP server dynamically assigns an IP address and other network configuration parameters to each device on the network. DHCP Server enables you to centrally configure, manage, and provide temporary IP addresses and related information for client computers.
Table of Contents
- Install Dynamic Host Configuration Protocol
- Configure Dynamic Host Configuration Protocol
- Configure the IP address assigned by DHCP
Install DHCP (Dynamic Host Configuration Protocol)
Steps for Install Dynamic Host Configuration Protocol
- Open Add roles and features Wizard
- Select installation type
- Select destination server
- Select server roles
- Select features
- Confirm installation selections
Server demo environment
- Computer Name: server1.test.com
- Operating System: Windows Server 2022 Datacenter
- IP Address: 192.168.0.3
1. Open Add roles and features Wizard
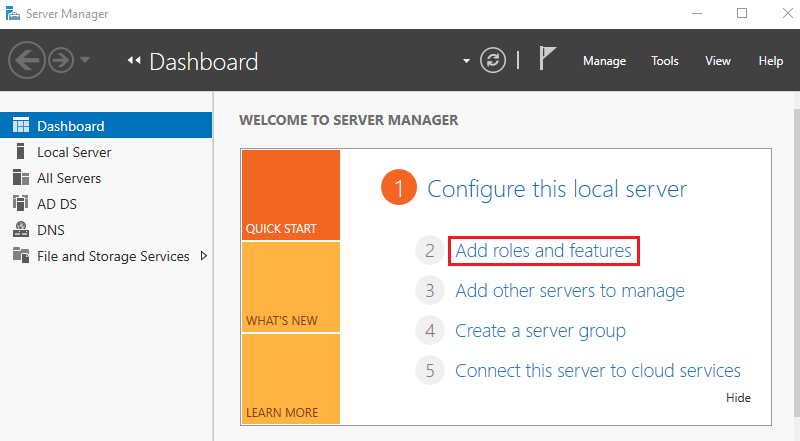
Open the Server Manager dashboard and click Add roles and features.
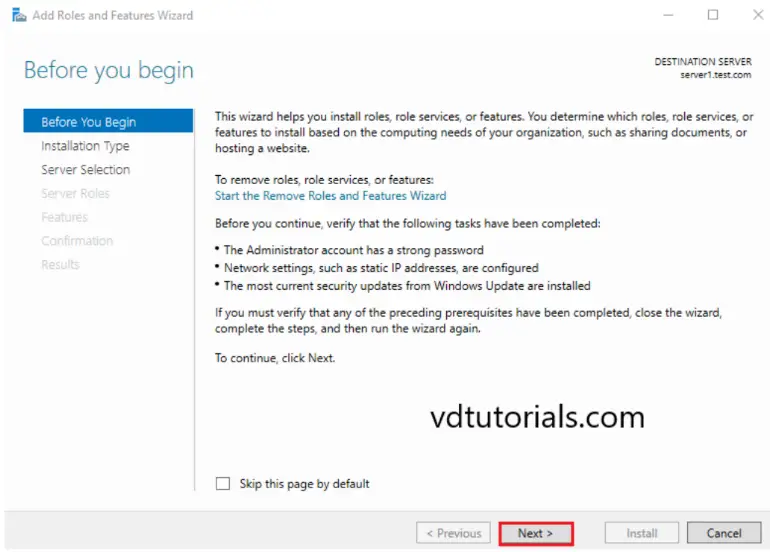
Before you begin, click Next.

2. Select installation type
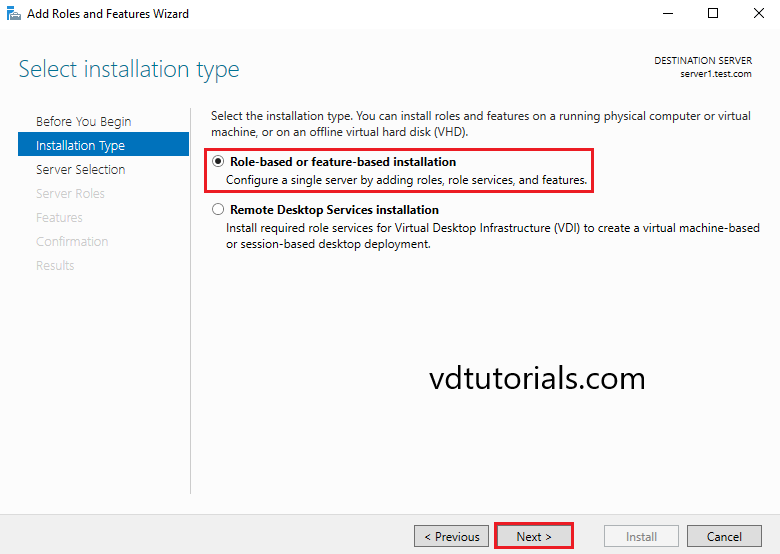
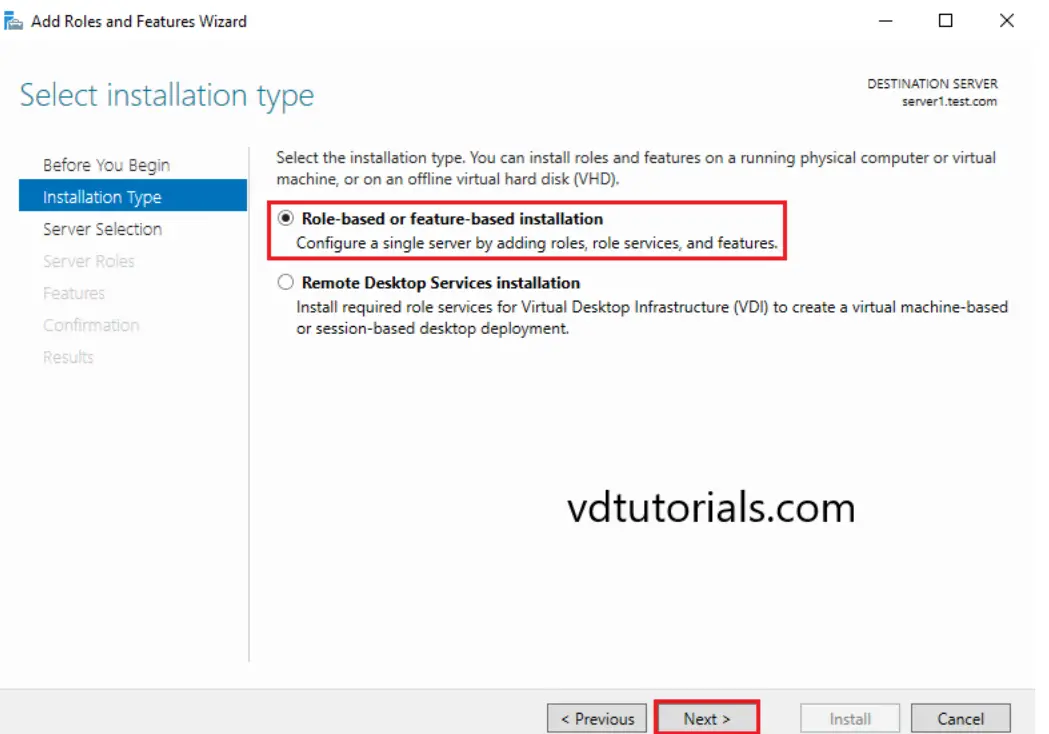
Select Role-based or feature-based installation and click Next.
3. Select destination server
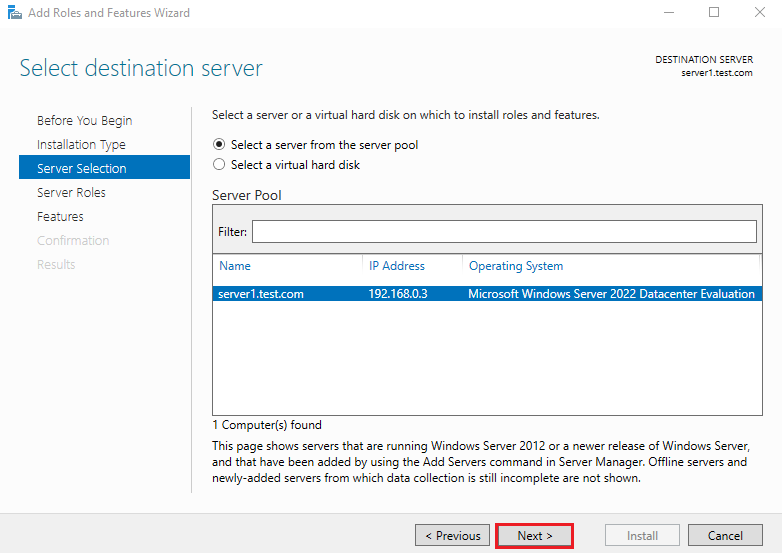
Select a Host to which you’d like to add services and click Next.
4. Select server roles
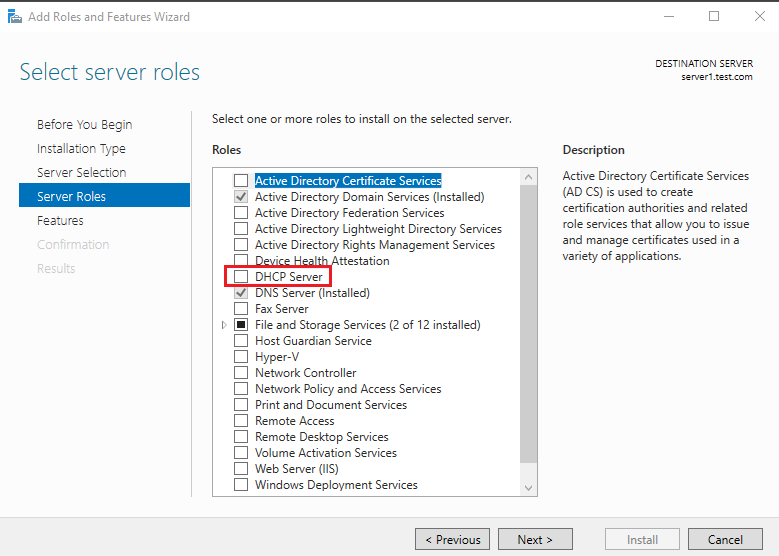
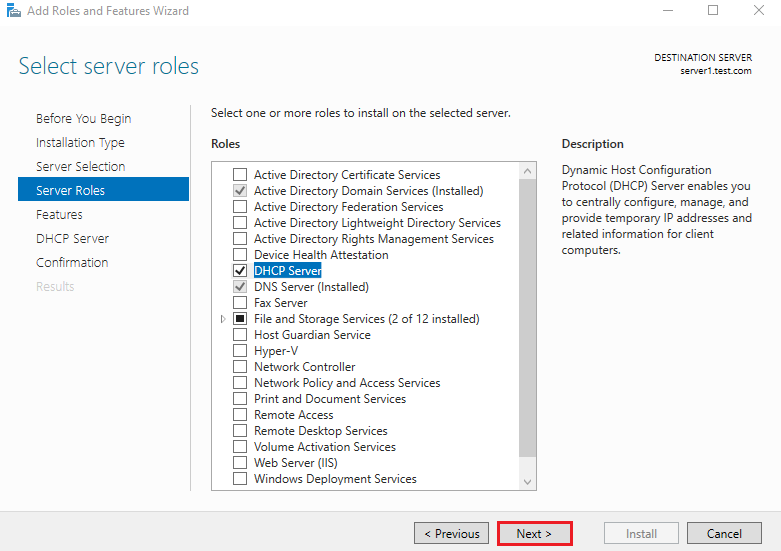
Choose the DHCP Server box from the server roles page.
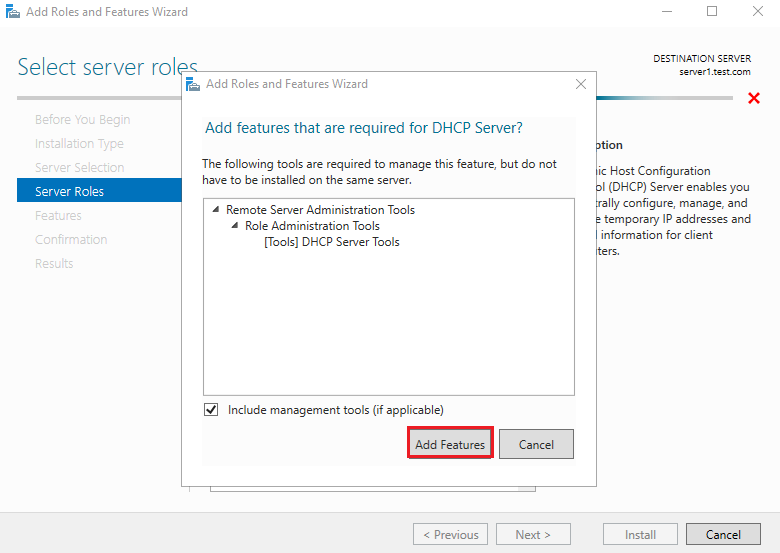
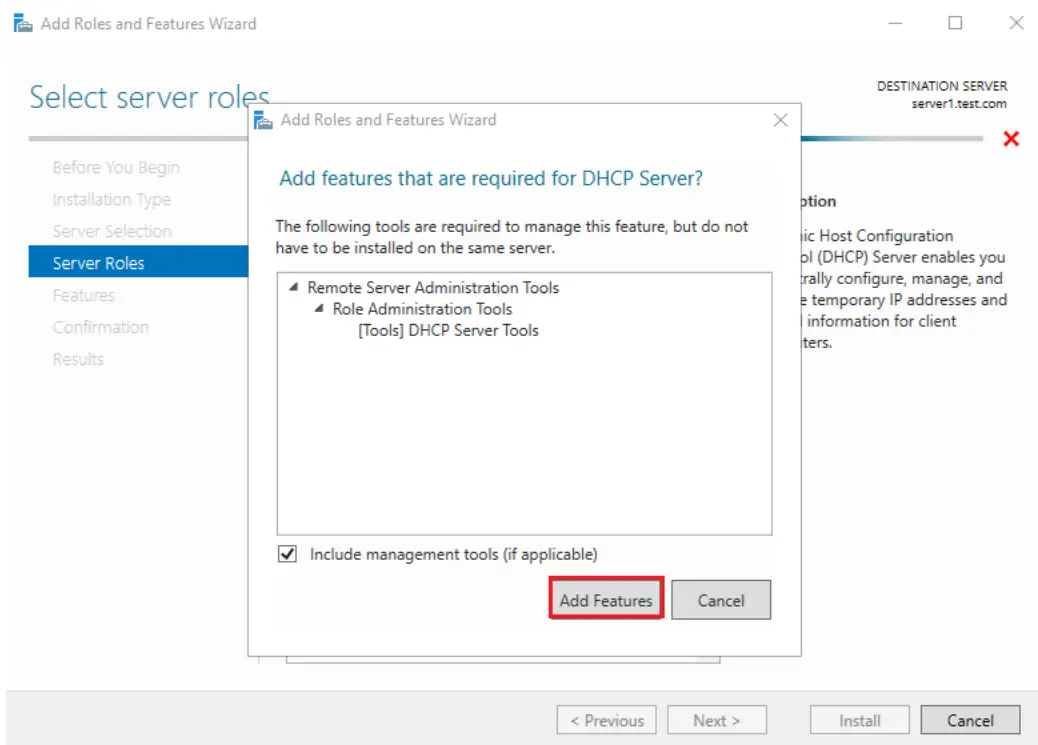
As soon as you choose DHCP Server a new window appears. Click Add Features.
Click Next to continue.
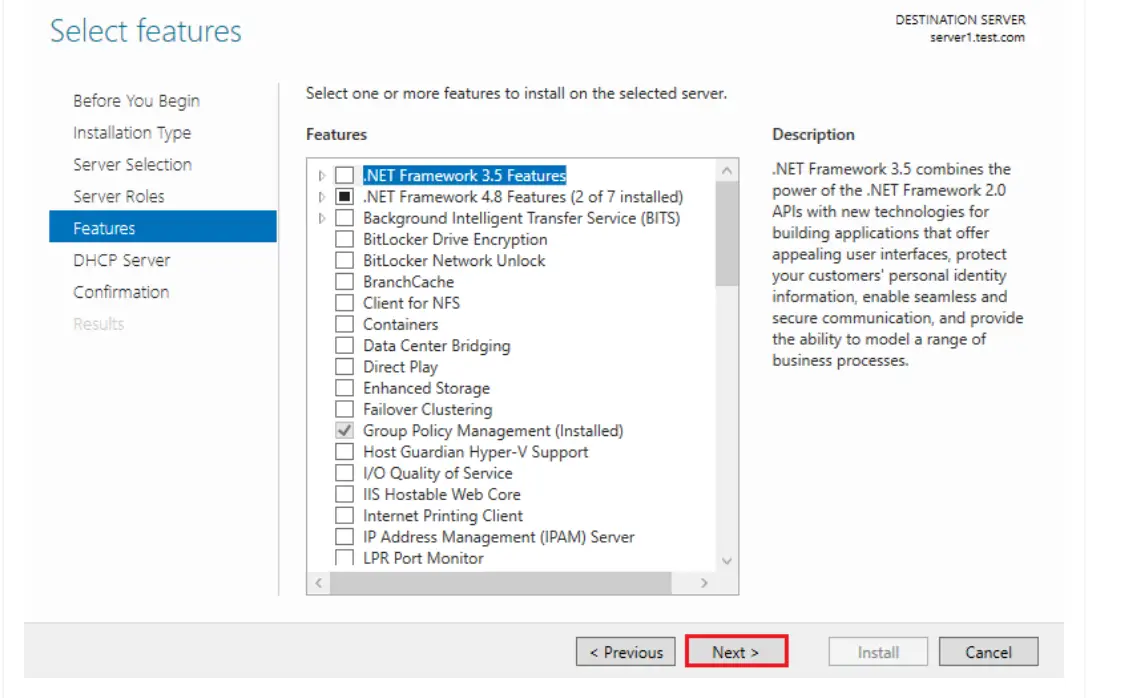
5. Select features
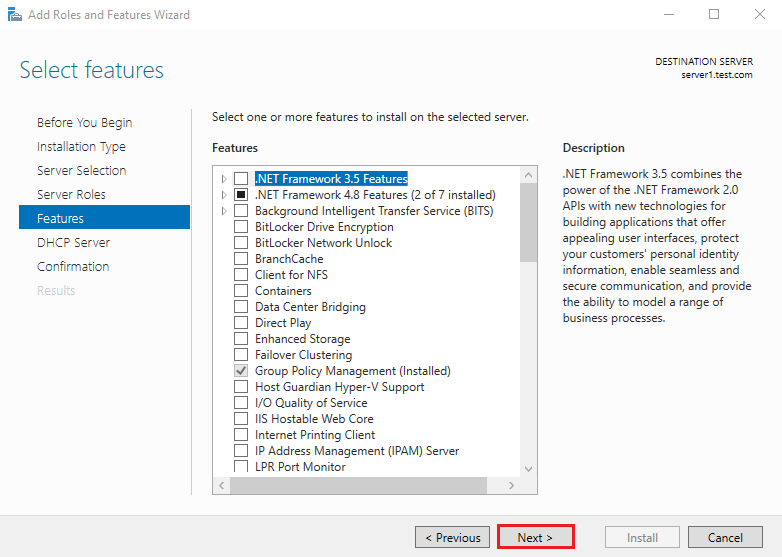
On the select features console, just click Next because we do not require any extra features at the moment.
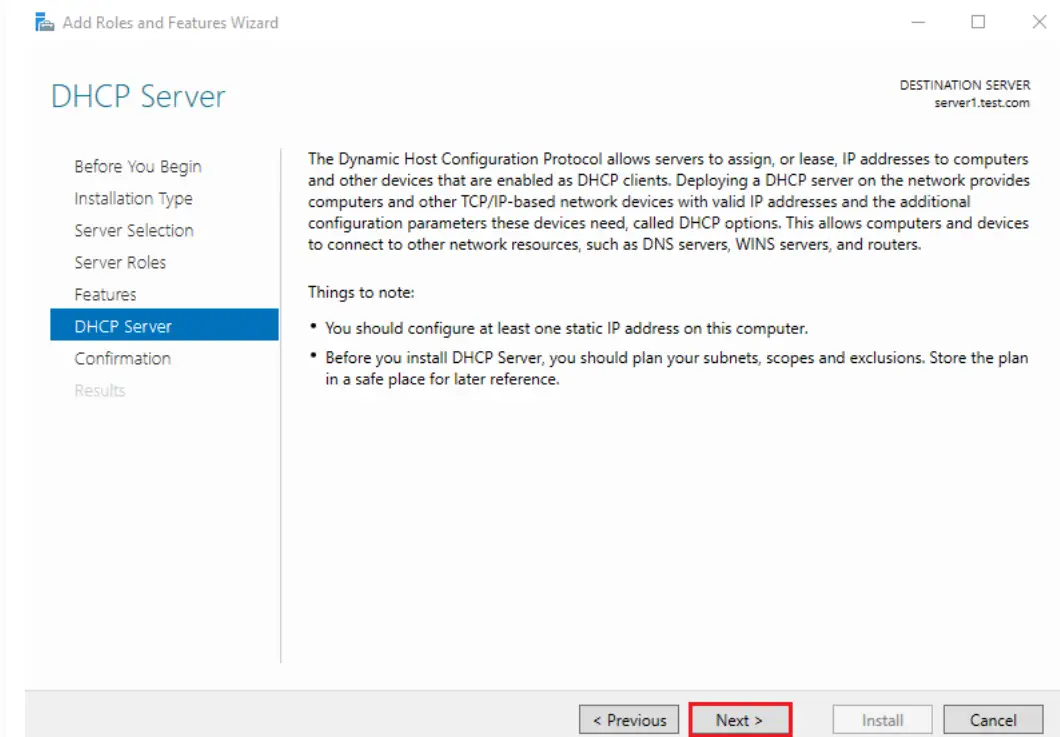
On the DHCP Server console, you can read brief information about the DHCP Server. Click Next to continue.

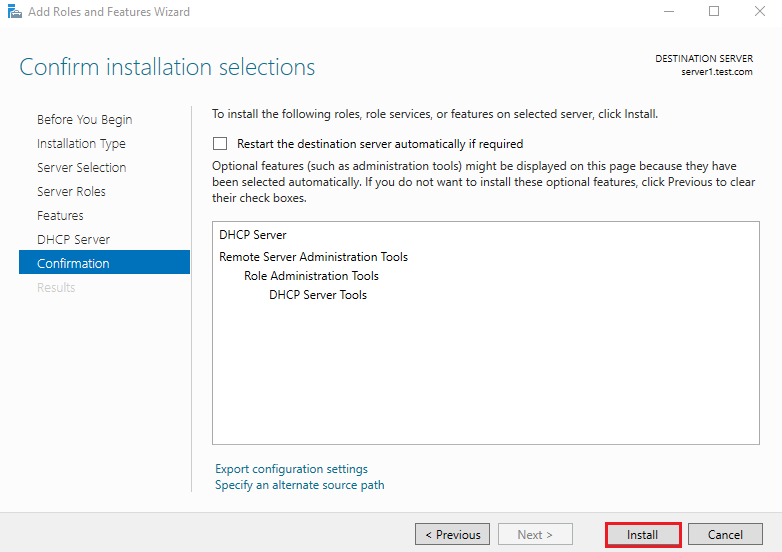
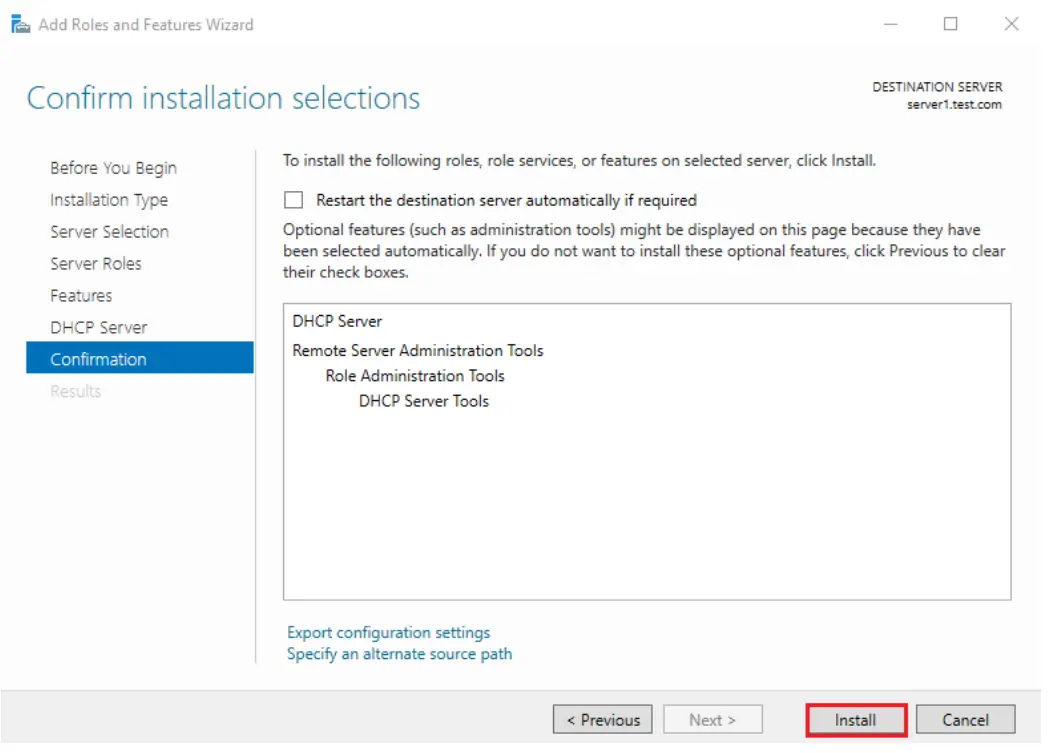
6. Confirm installation selections
Configure Dynamic Host Configuration Protocol
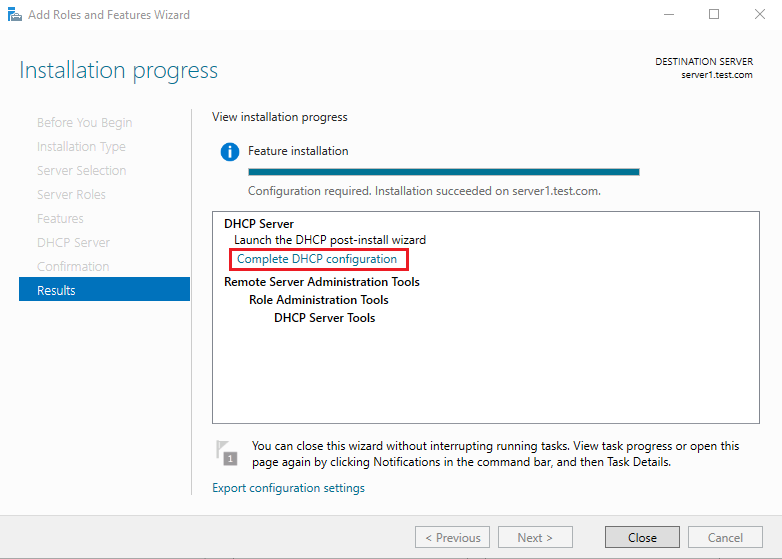
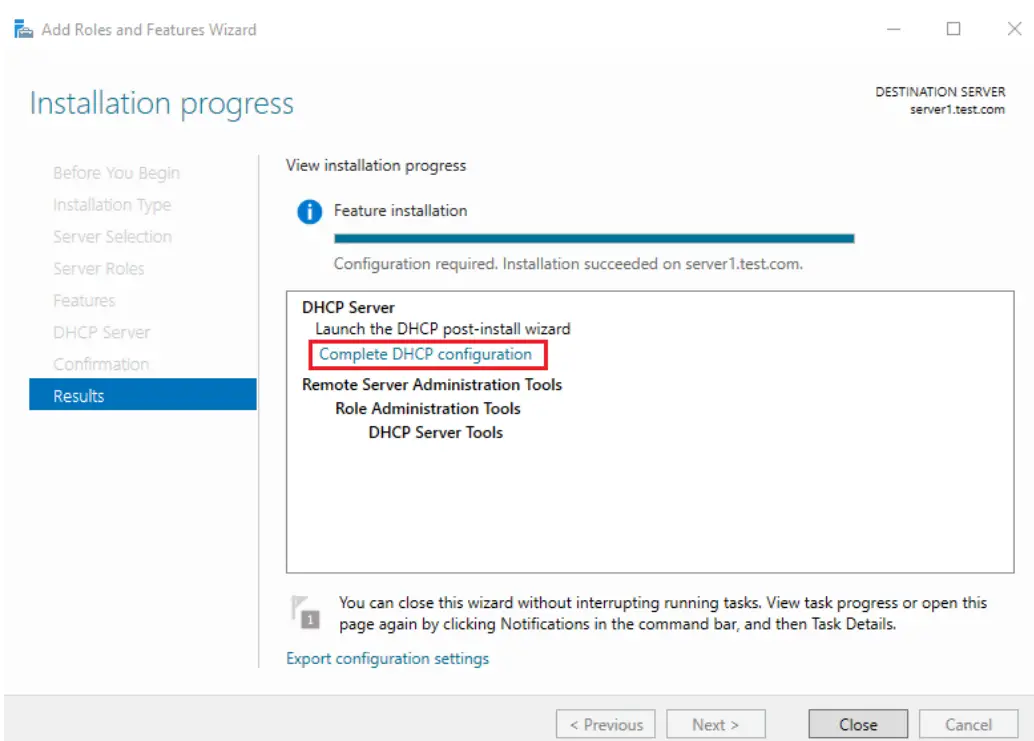
Click Complete DHCP configuration.
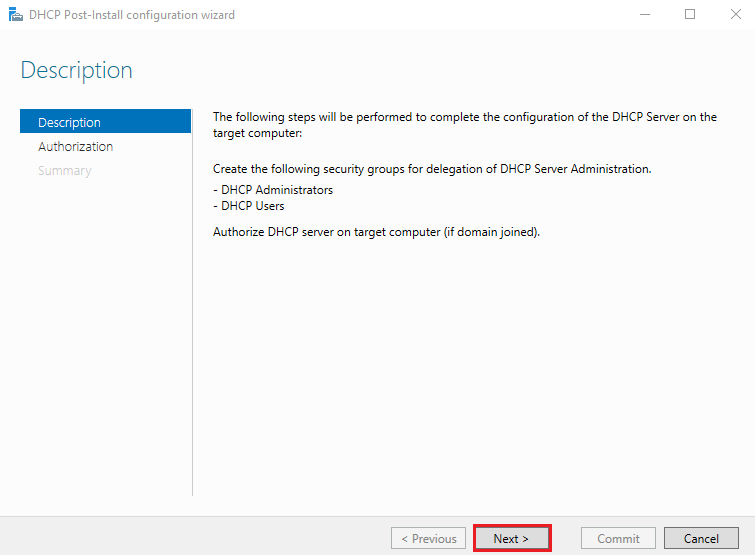
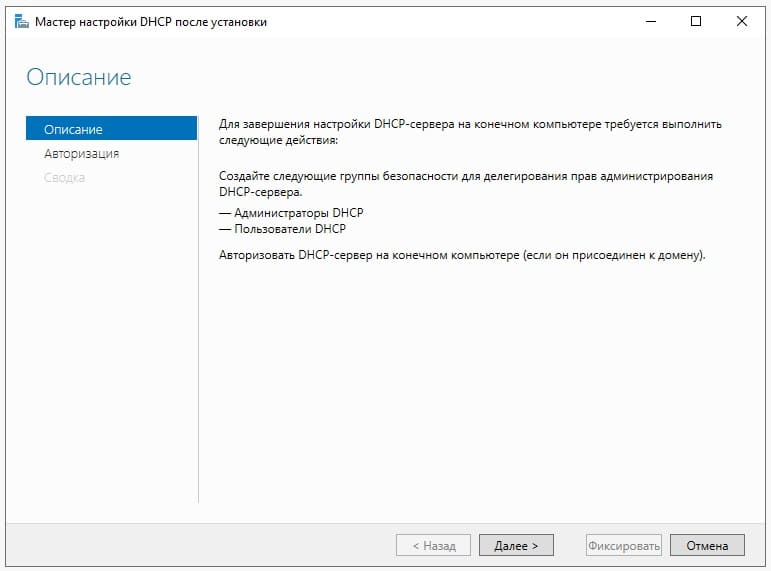
DHCP Post Insall configuration wizard
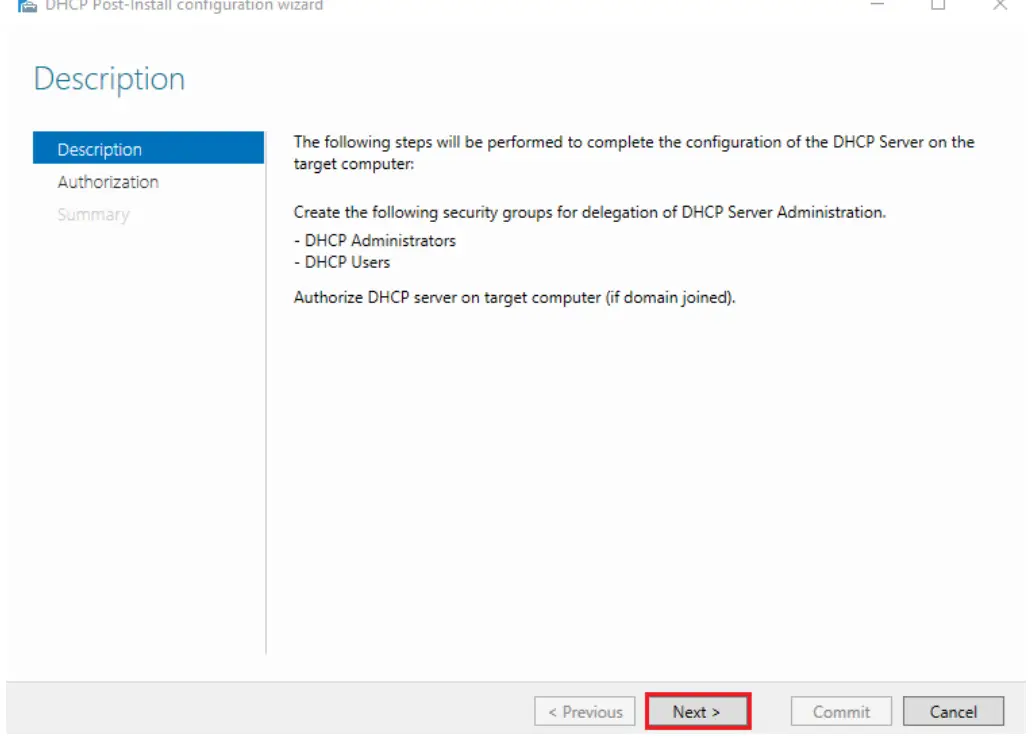
In Description,click Next to continue.
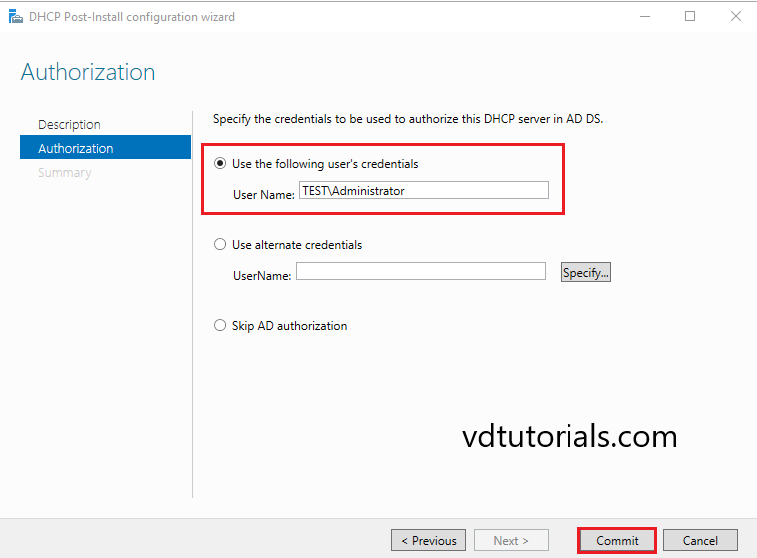
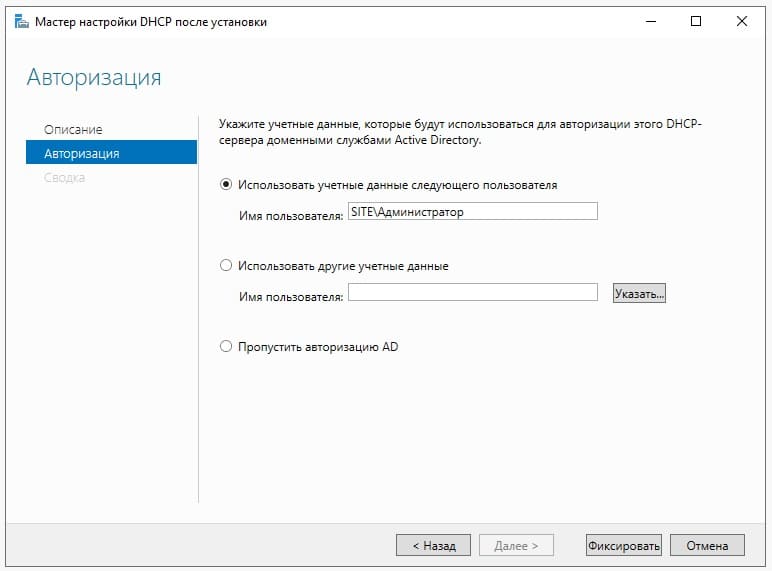
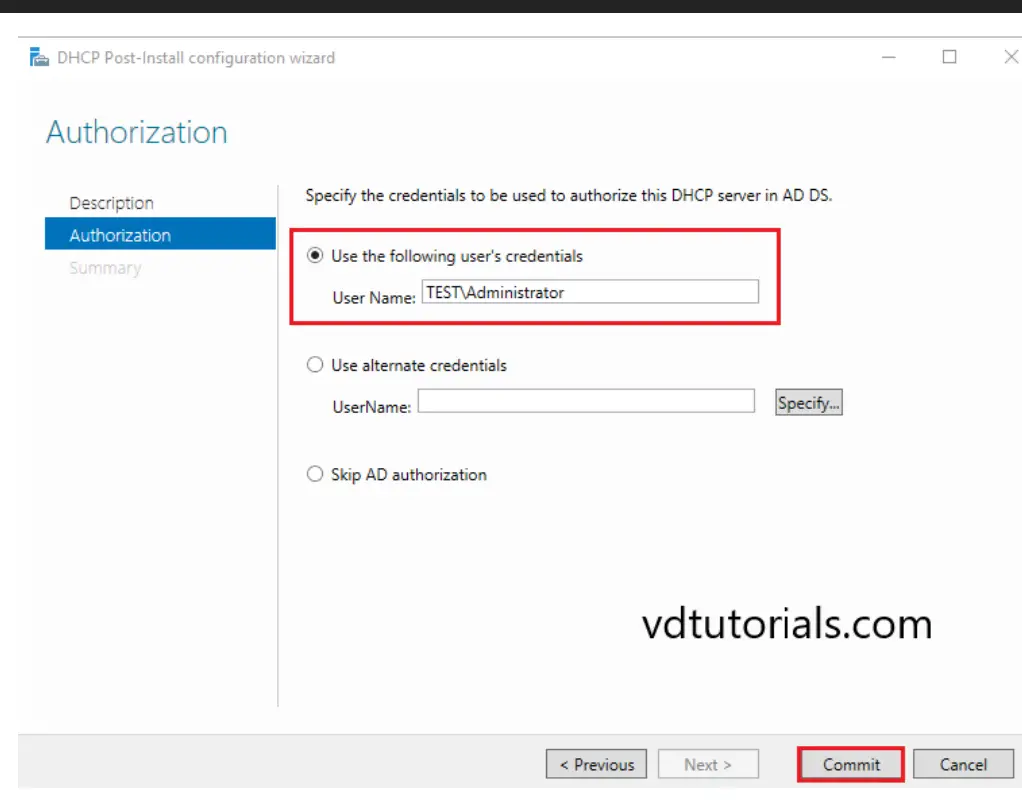
In Authorization, Click Commit.
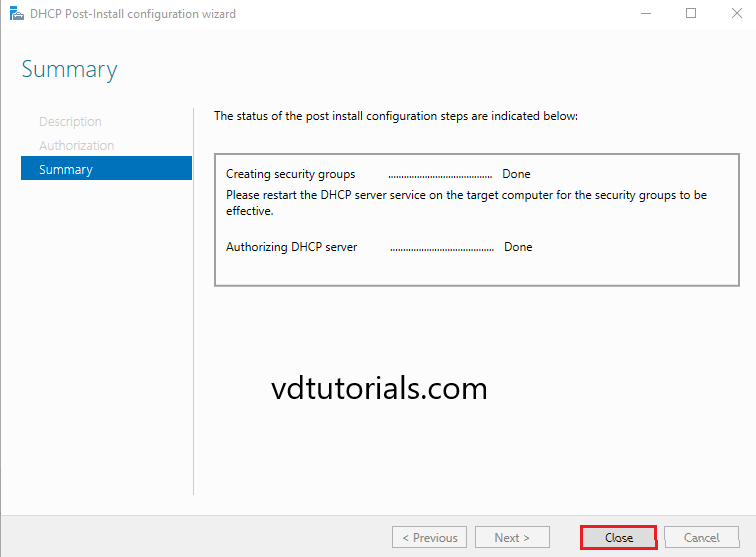
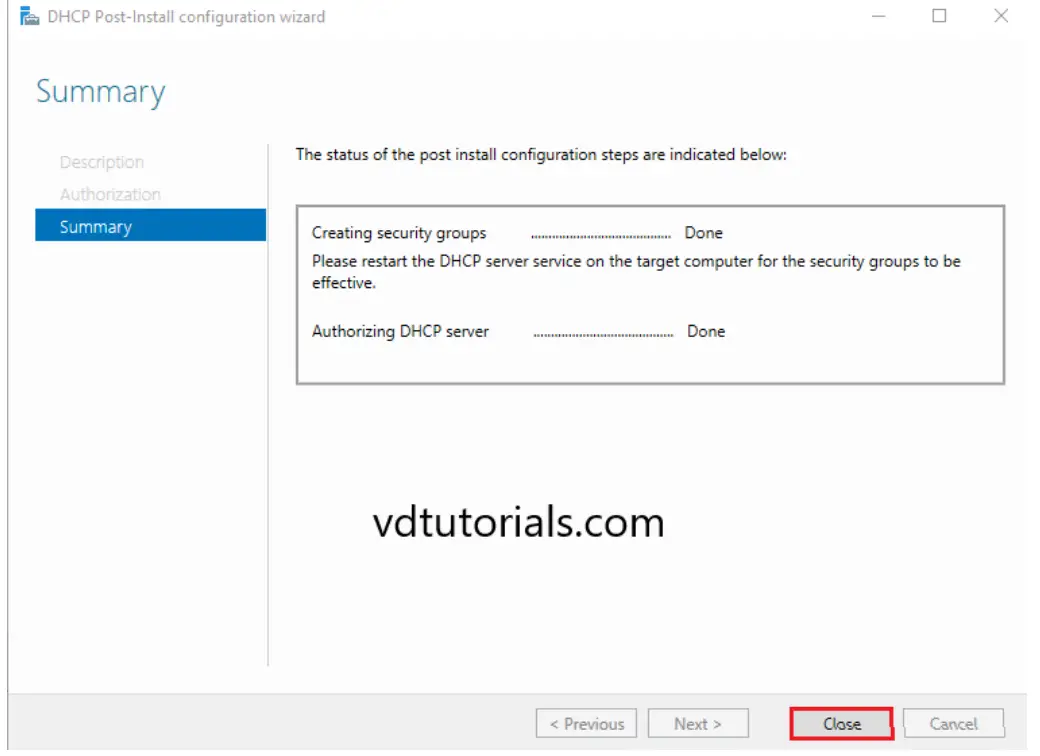
In Summary, click Close.
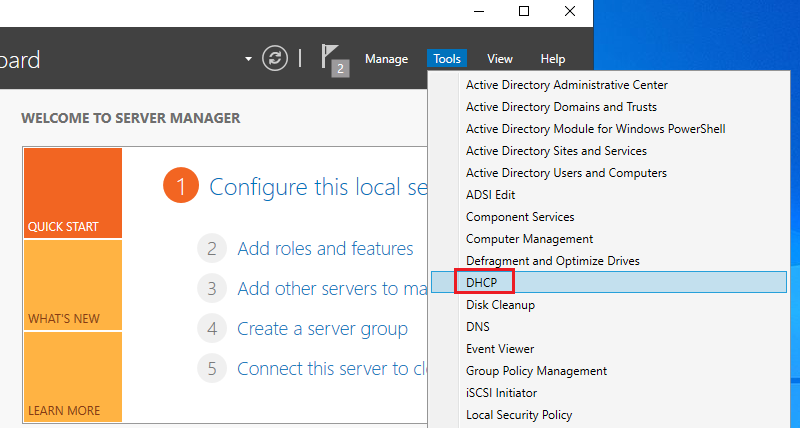
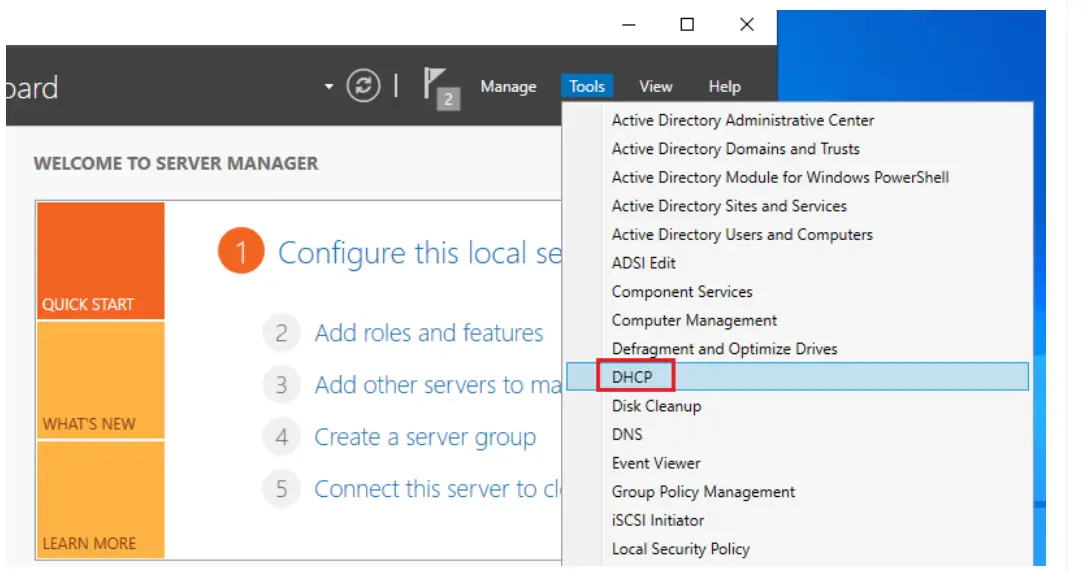
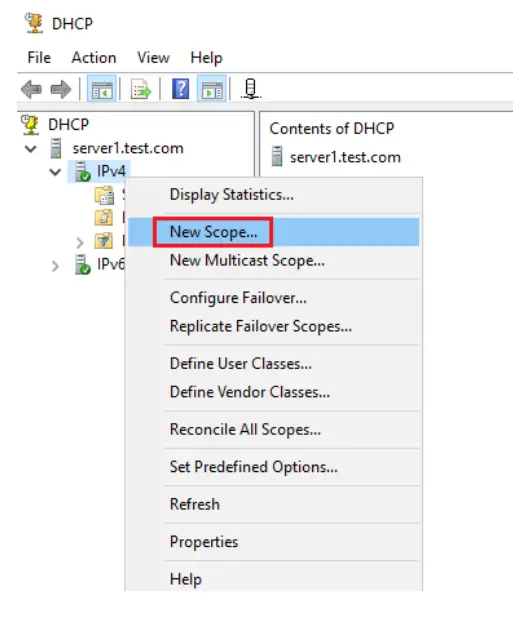
Open the Server Manager dashboard, click Tools and select DHCP.
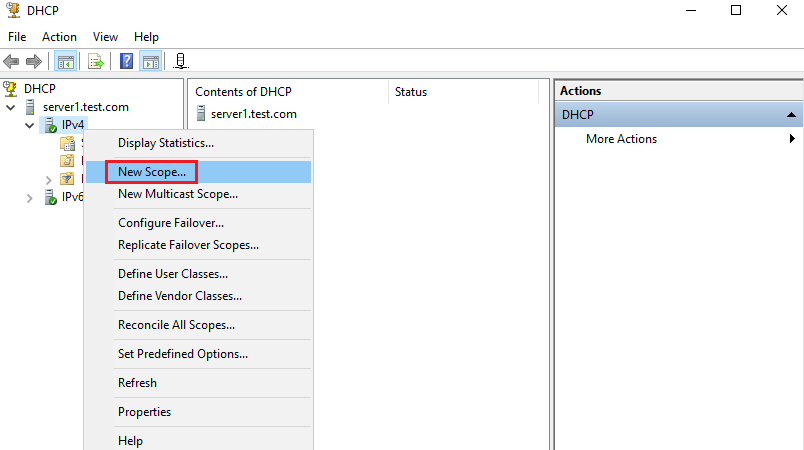
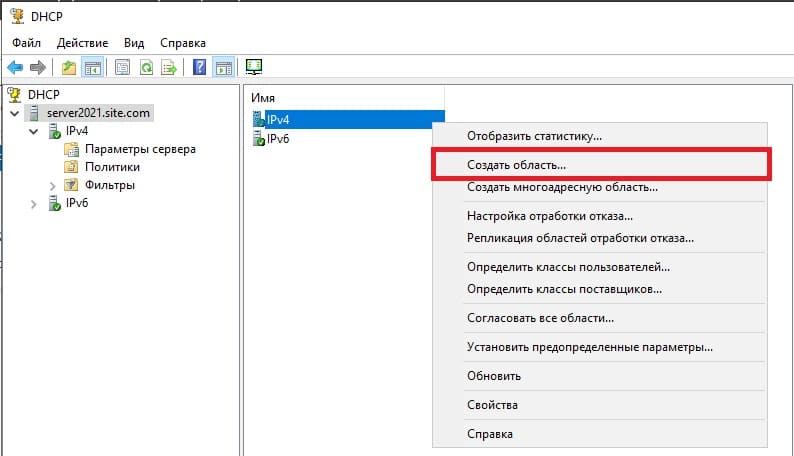
Right Click on IPv4 and select New Scope.
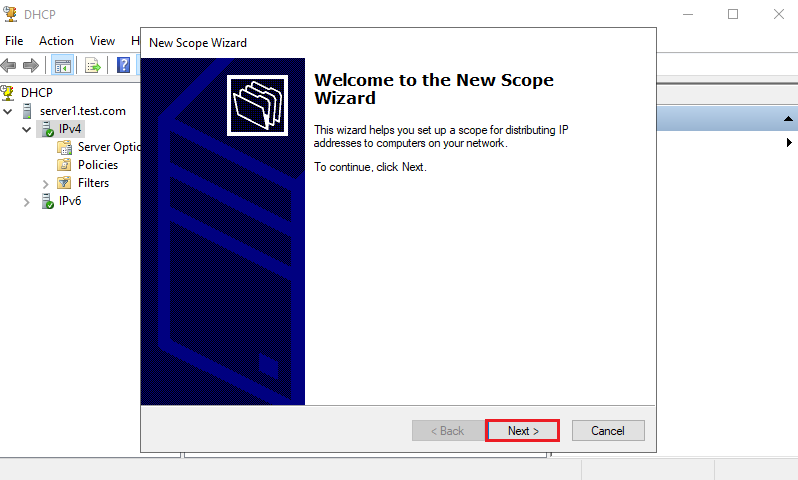
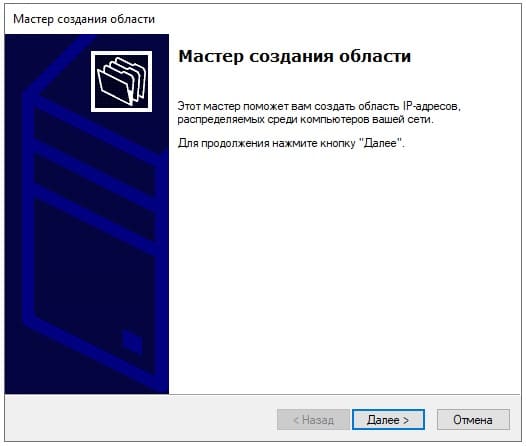
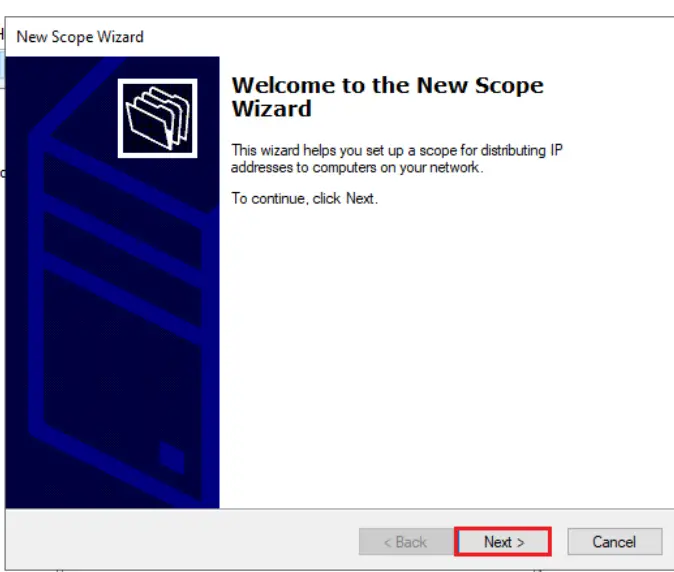
Click Next to start New Scope Wizard.
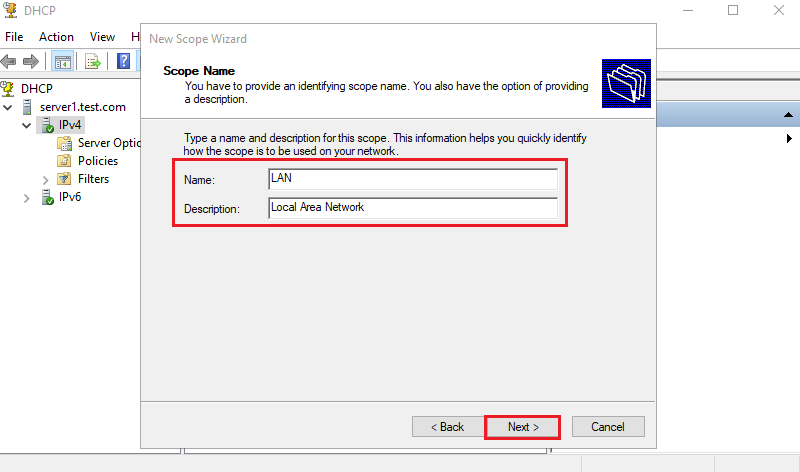
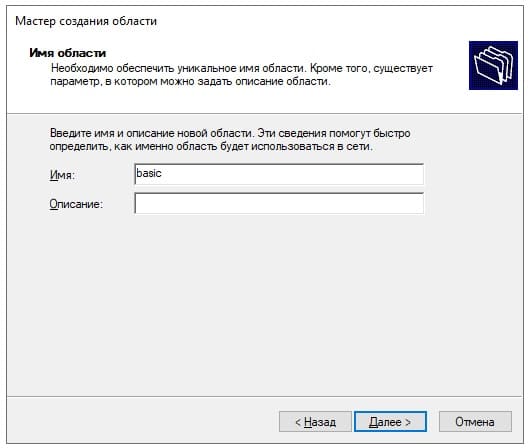
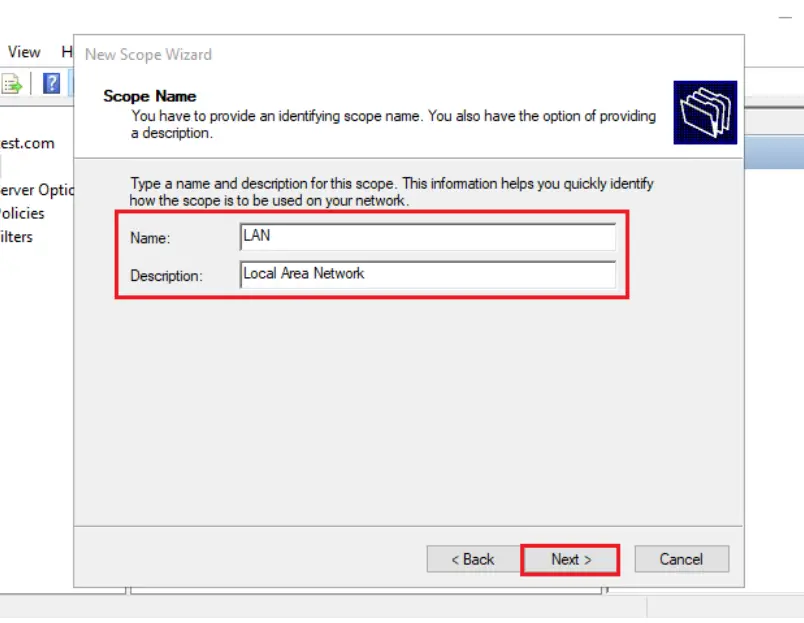
Enter the name and description for this scope and Click Next.
- Name: LAN
- Description: Local Area Network
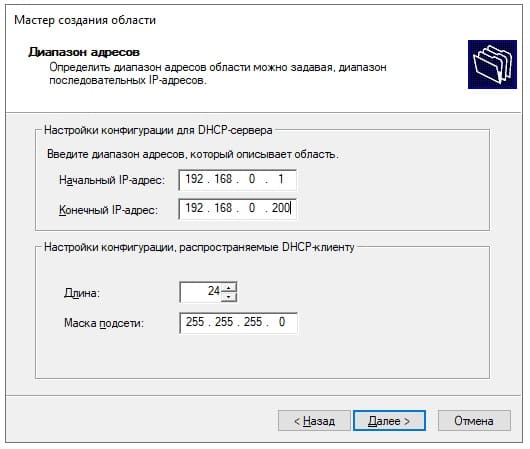
Enter the IP address range for the lease and subnet mask and click Next.
- Start IP address: 192.168.0.150
- End IP address: 192.168.0.200
- Length: 24
- Subnet mask: 255.255.255.0

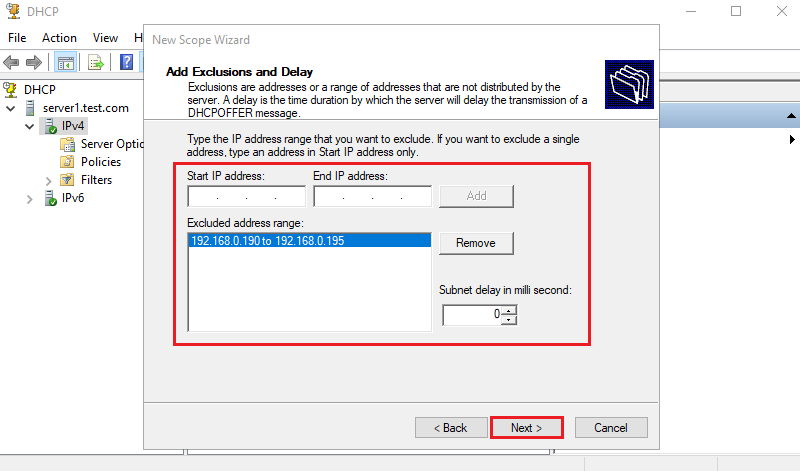
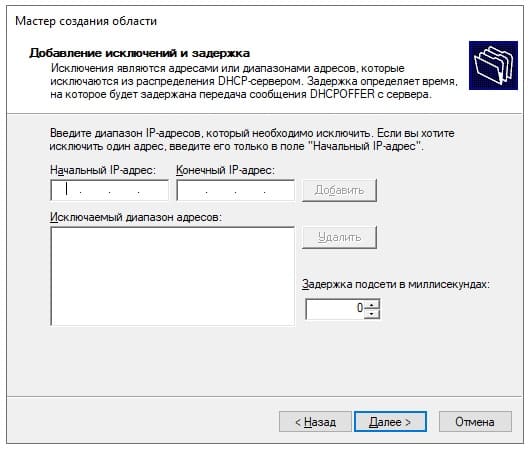
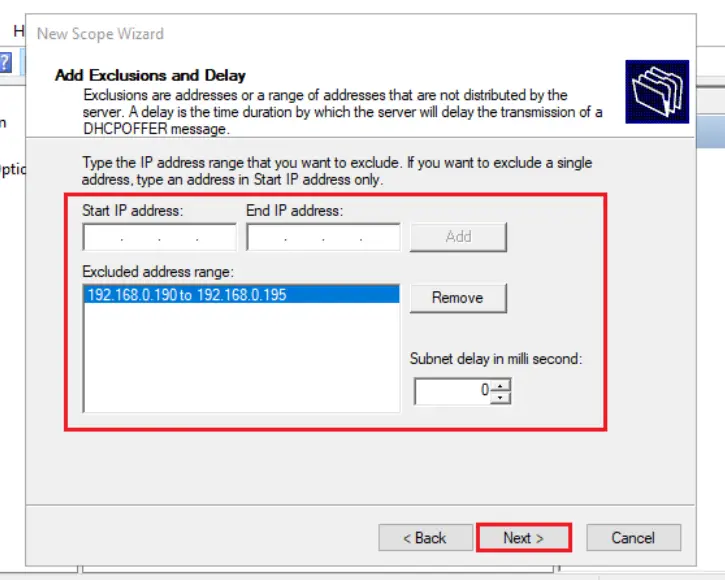
Add Exclusions and click Next.
- Excluded address range: 192.168.0.190 to 192.168.0.195
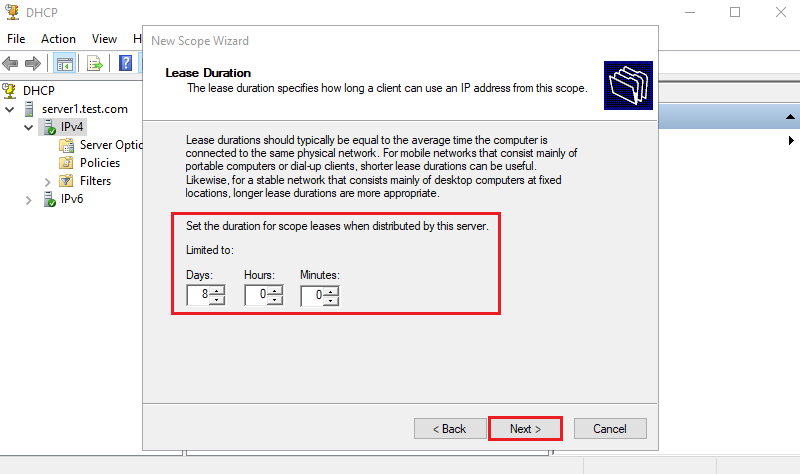
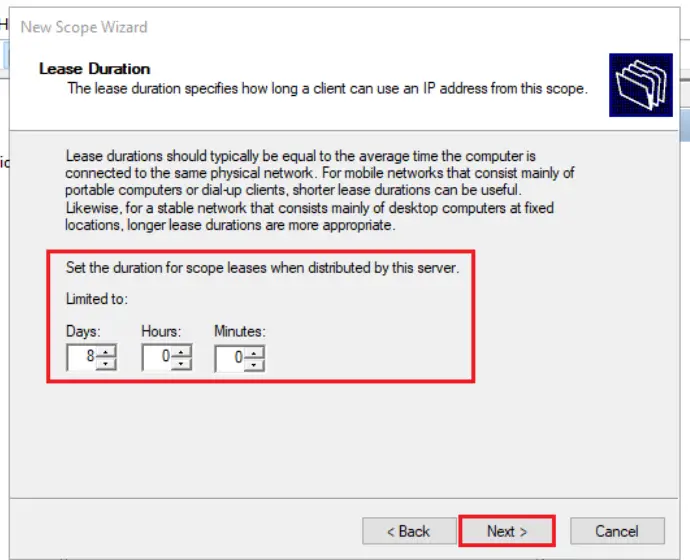
In Lease Duration, Click Next.The default lease duration is 8 days.
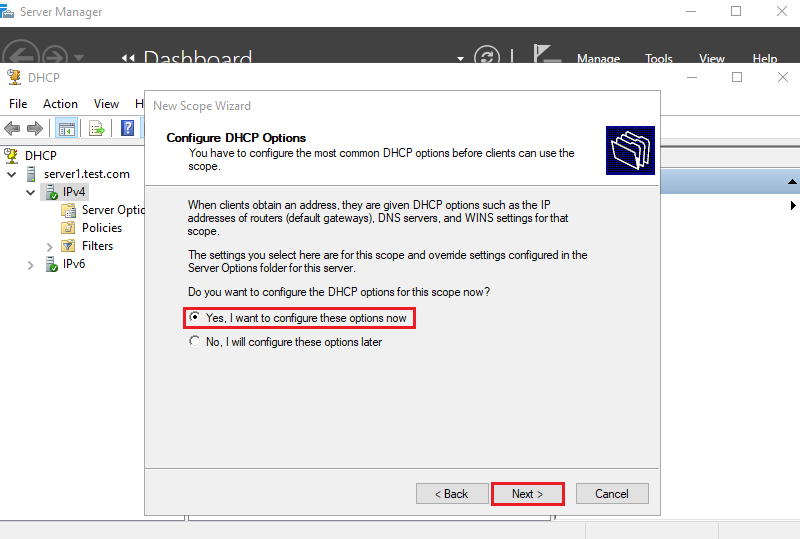
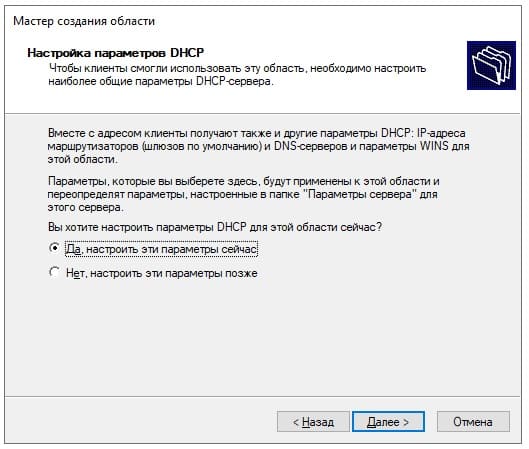
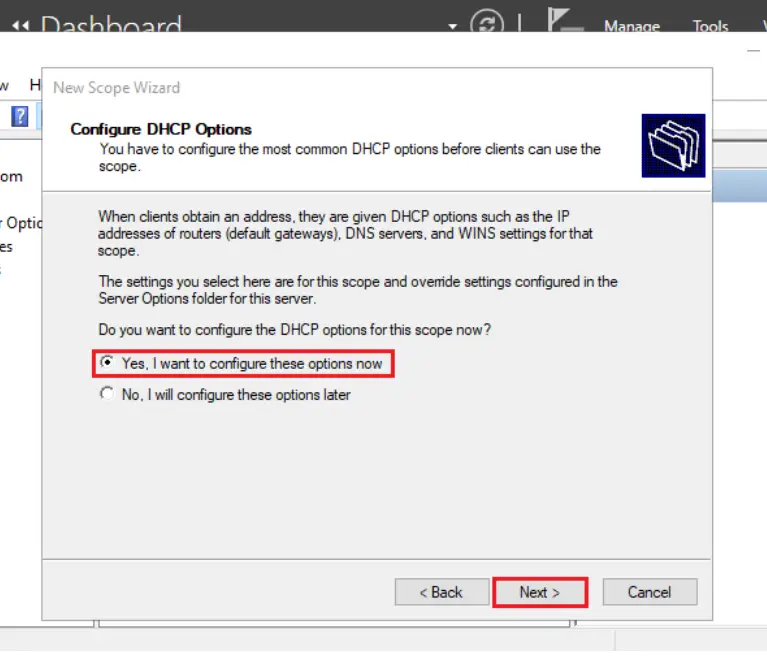
In Configure DHCP Options Choose Yes, I want to configure these options now and Click Next.
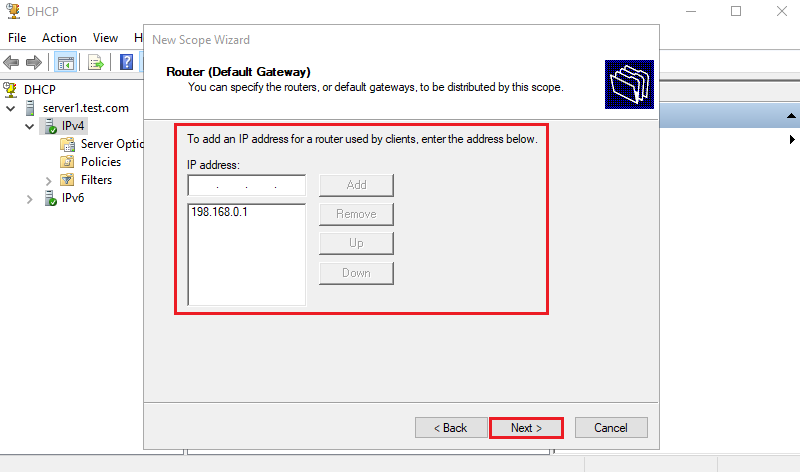
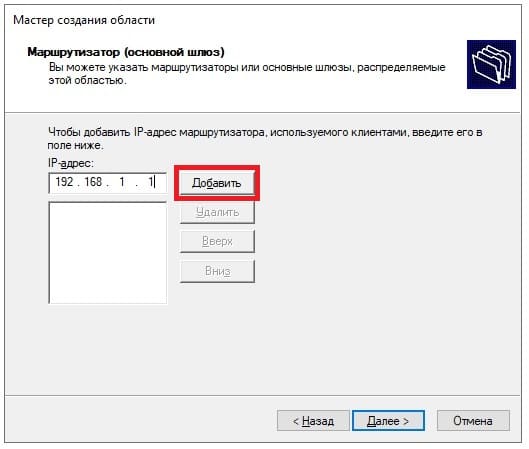
Enter the default gateway of your network and click Next.
- Default Gateway: 192.168.0.1
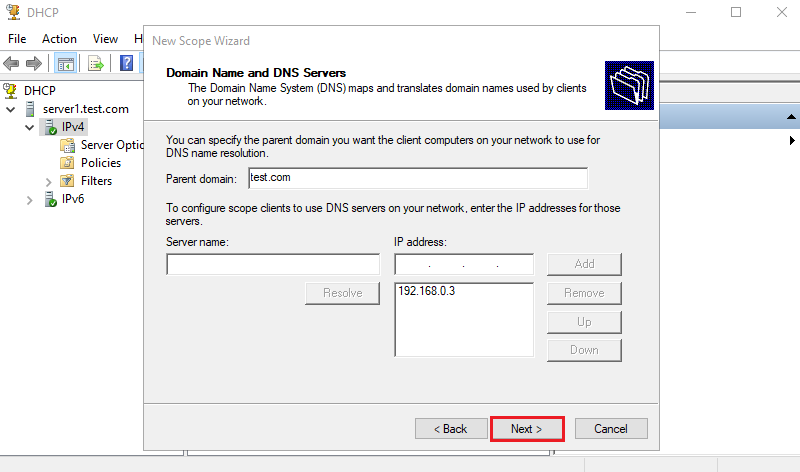
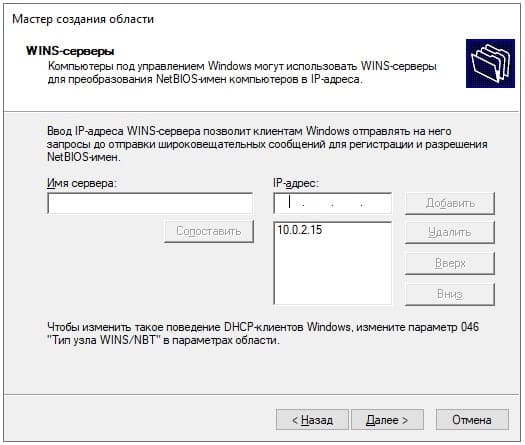
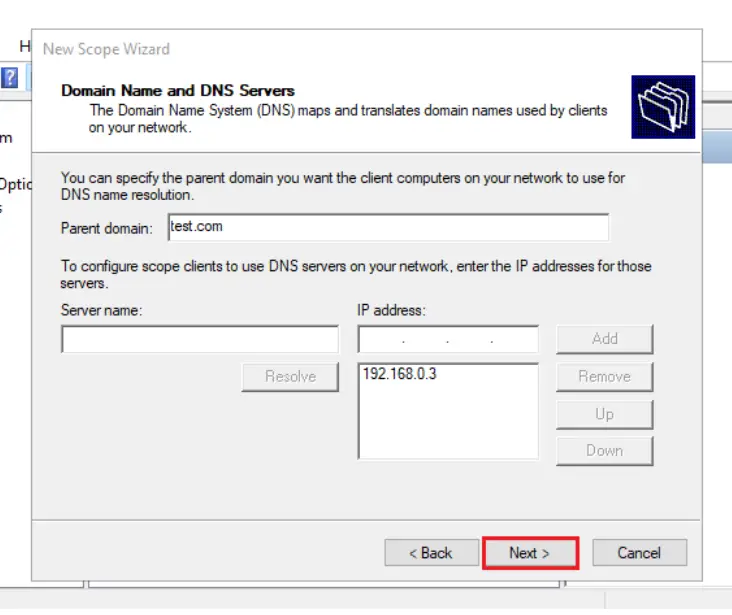
Input the Domain name and DNS server of your network. If your Server is in Active Directory Domain, it is set automatically. Click Next.
Click Next to continue.
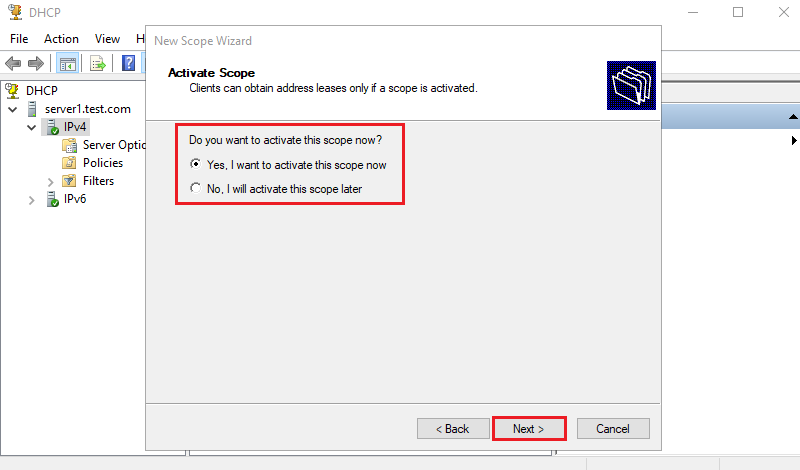
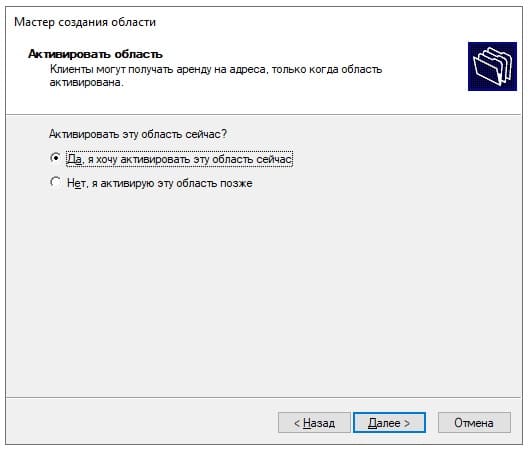
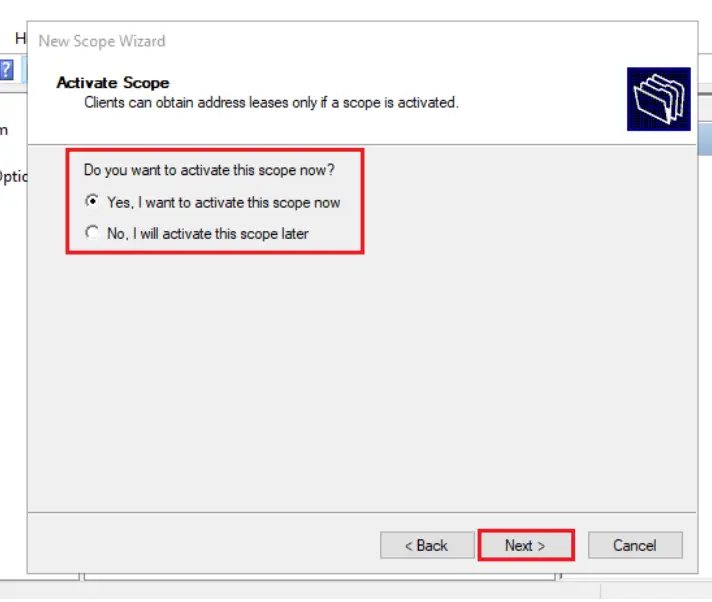
Select Yes, I want to activate this scope now and click Next to activate Scope.
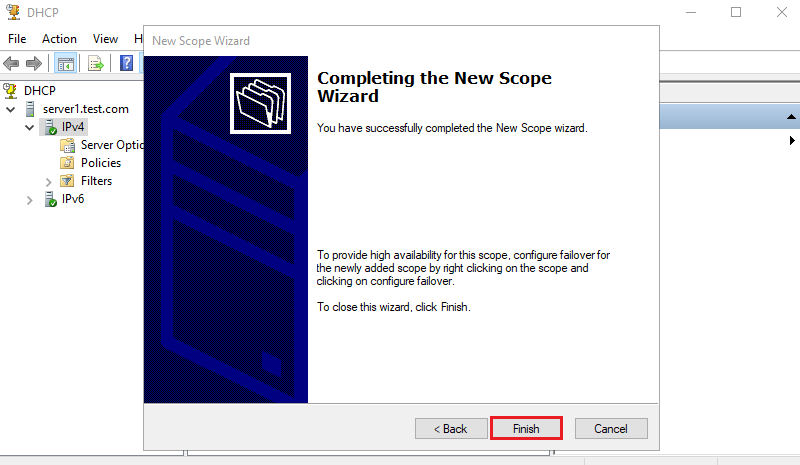
Click Finish to close the New Scope Wizard.
Configure the IP address assigned by DHCP
Make sure the client and the DHCP server are on the same network
Client demo environment
Computer Name: server2
Operating System: Windows Server 2022 Datacenter
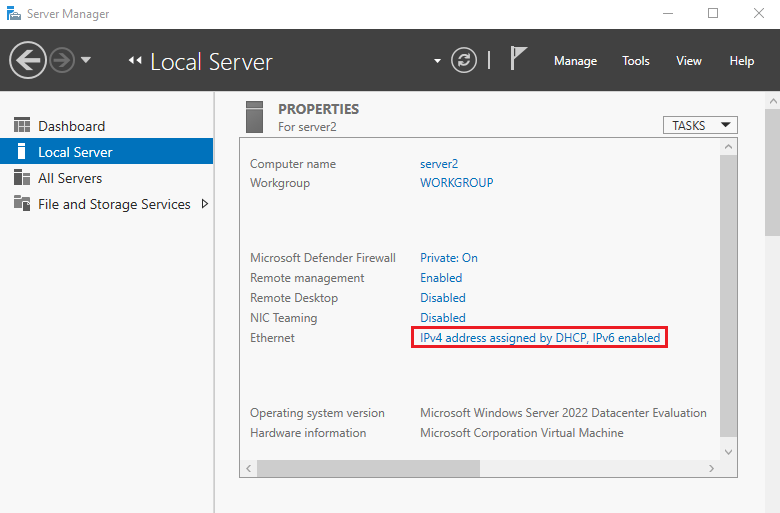
Open the Server Manager dashboard, select Local Server, and click Ethernet.
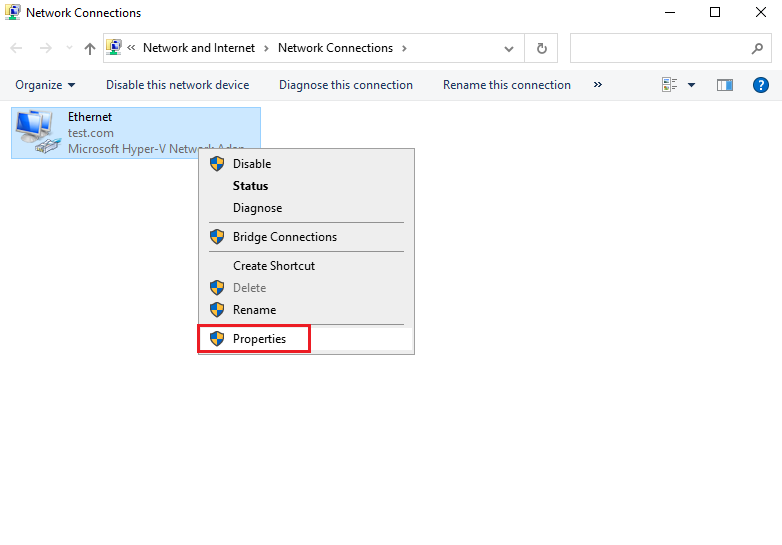
Right Click on Ethernet and click Properties.
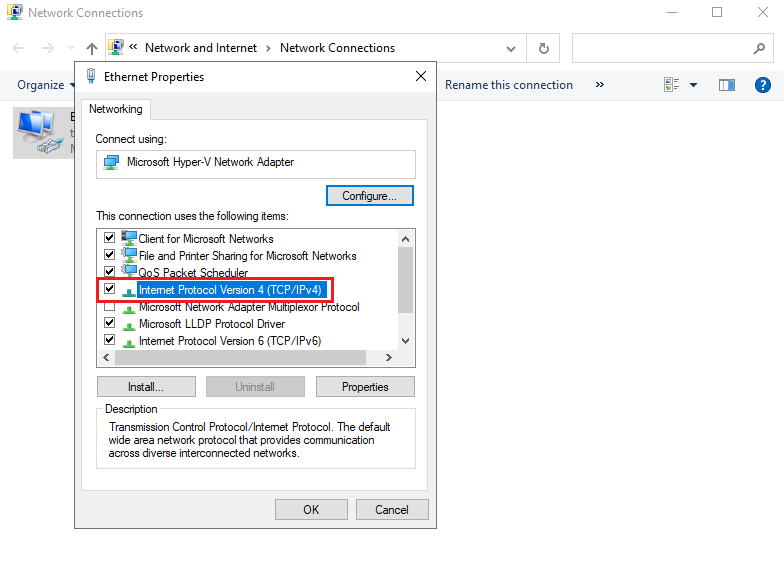
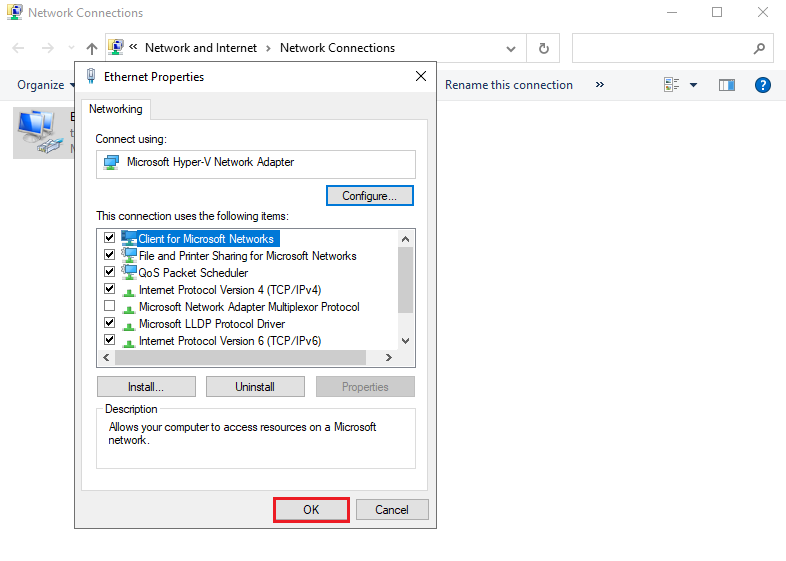
In Ethernet Properties, click Internet Protocol Version 4 (TCP/IPv4).
In Internet Protocol Version 4 (TCP/IPv4) Properties, select Obtain an IP address automatically, Obtain DNS server address automatically and click OK.
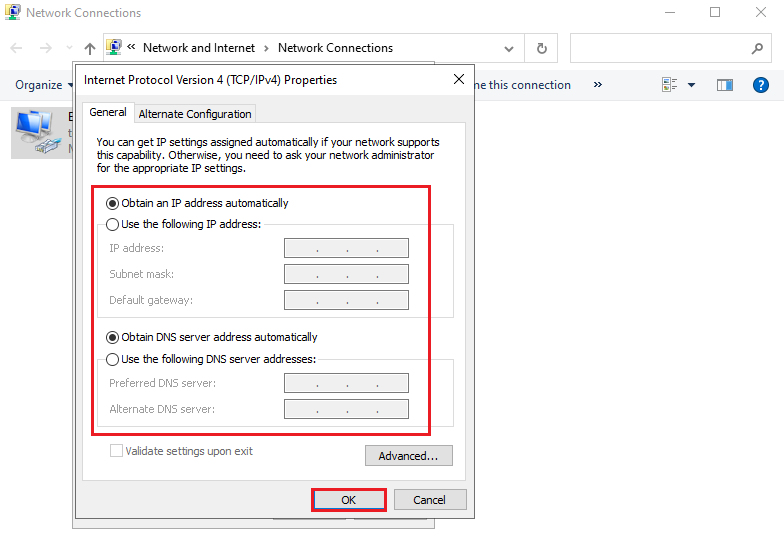
Click OK to continue.
Right Click on Ethernet and Status.
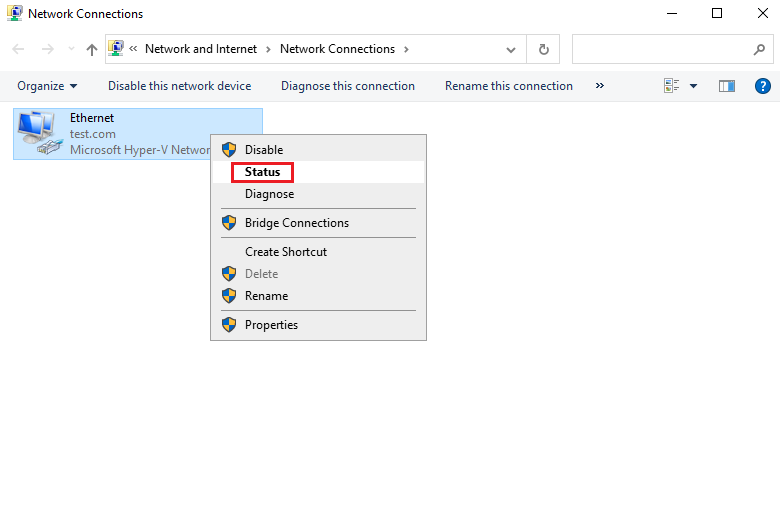
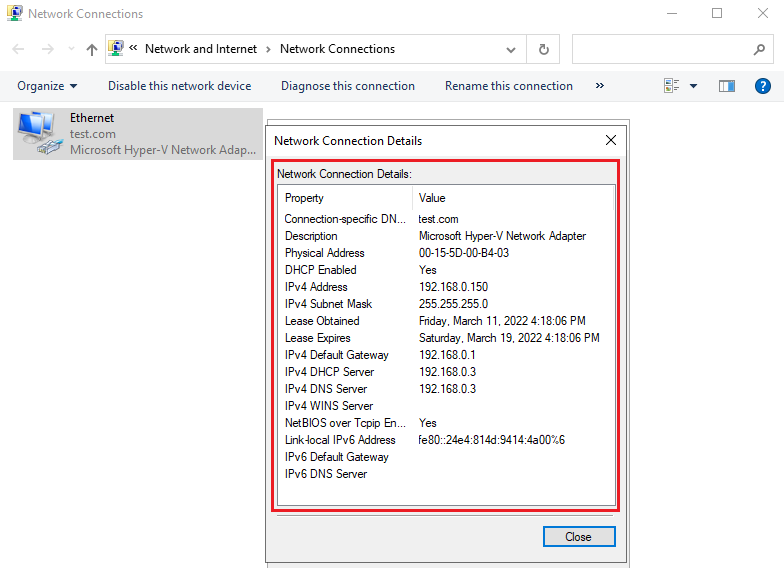
Verify the IP address and click Close.
В этой статье мы рассмотрим самые базовые настройки Windows Server 2022 — это Active Directory, DNS, DHCP, настройки терминальных лицензий, добавление пользователей… Эти настройки являются не обязательными, но как правило применяются как базовые для большинства задач.
— Скачать бесплатно дистрибутив Windows Server 2022 Standard и Datacenter можете в нашем каталоге.
— Пошаговая инструкция по установке Windows Server 2022 в нашей прошлой статье.
— Приобрести ключи активации для Windows Server 2022 Standard и Datacenter можете так же в нашем каталоге.
1) При установке Windows Server 2022 например на русском языке, добавляется по умолчанию только одна раскладка клавиатуры — «Русский язык», для настроек нам необходима еще английская раскладка клавиатуры. Добавим ее.
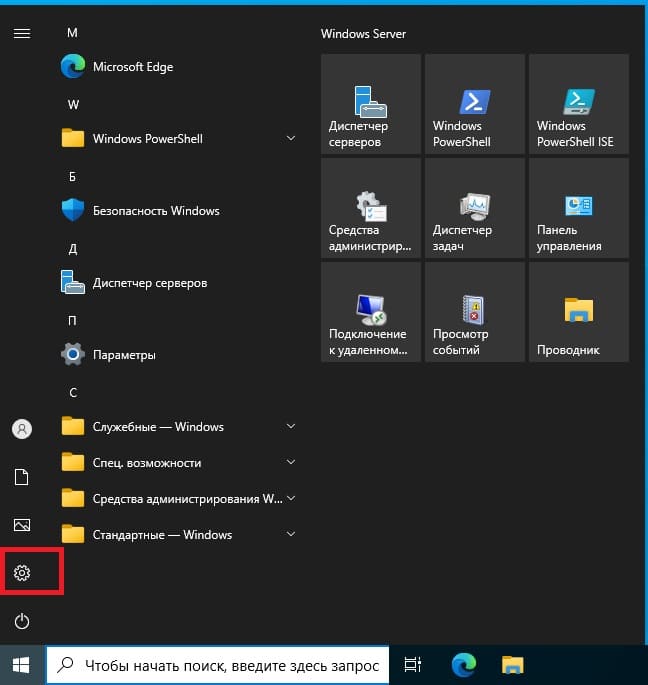
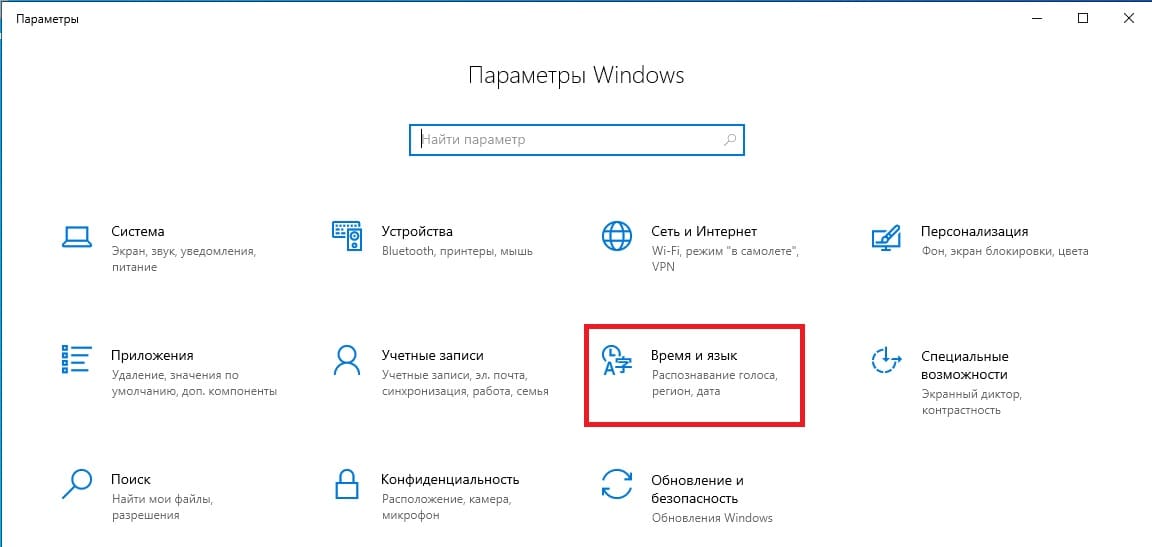
Заходим в меню «Пуск» => Параметры => Время и язык.
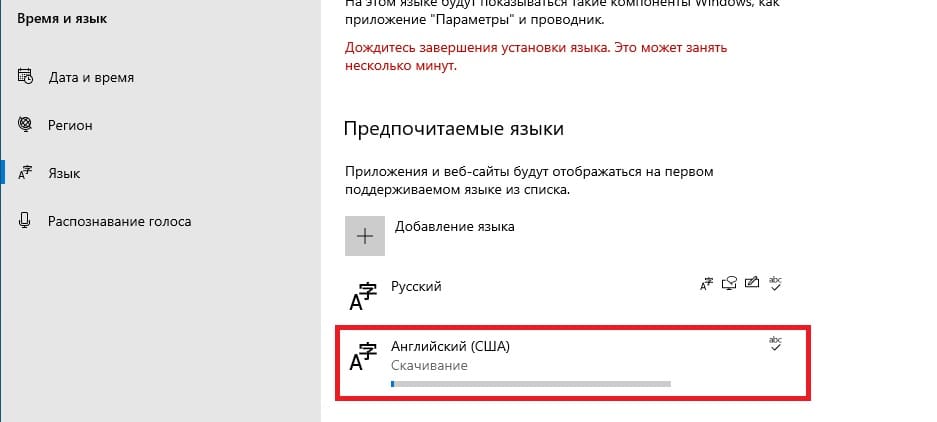
Во вкладке «Язык» нажимаем на «Добавление языка».

Выбираем «Английский» => Далее.
Можем оставить все галки, кроме назначения языком интерфейса и нажимаем «Установить».
Теперь дожидаемся установки языкового пакета, после установки можете перезагрузить сервер и у Вас появится возможность переключения языка раскладки на английский язык.
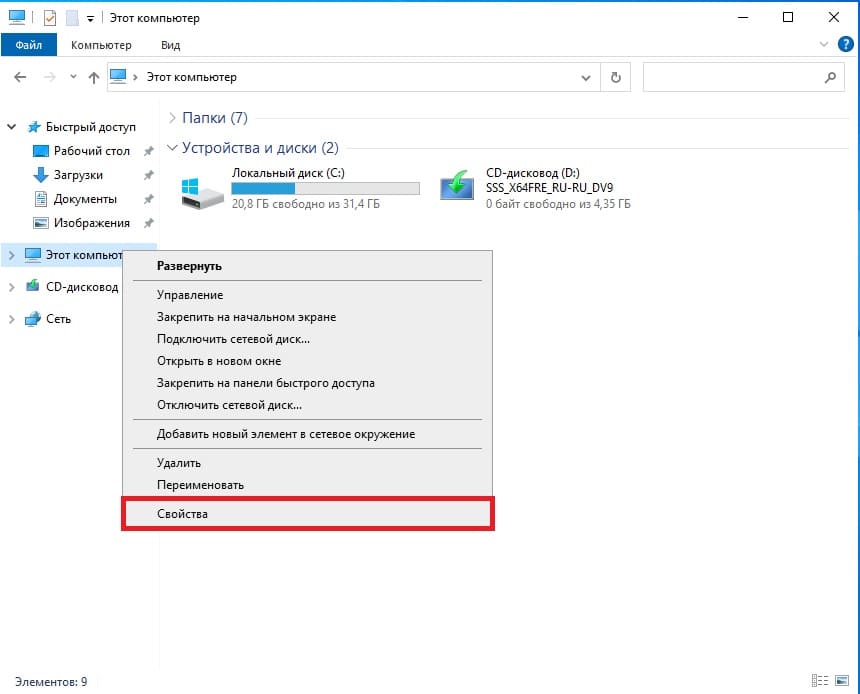
2) Следующим шагом, нам нужно задать имя серверу для более простого подключения к нему. Заходим в проводник => Слева «Этот компьютер» => Свойства.
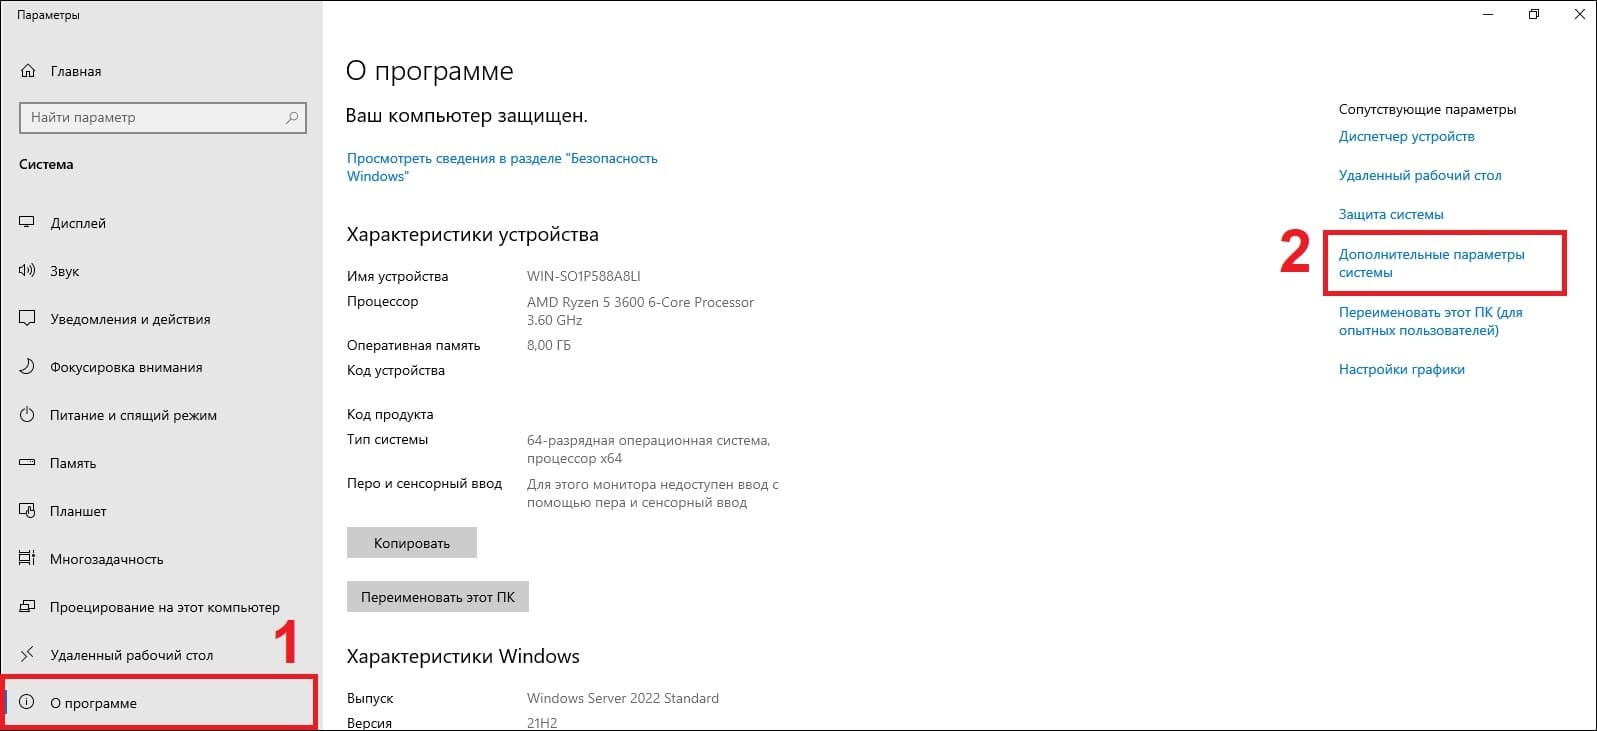
В меню «О программе» нажимаем «Дополнительные параметры системы».
В новом окне выбираем вкладку «Имя компьютера» => Изменить.
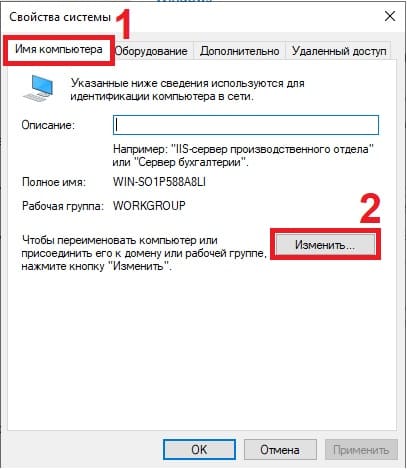
Задаем имя компьютера, имя может быть любое. Рекомендуем не использовать кириллицу, а только латиницу и цифры.
Для применения настроек — перезагружаем сервер.
3) Далее, зададим локальный статический IP адрес сервера. Это так же необходимо для бесперебойного подключения к нему. (мы рекомендуем помимо всего использовать так же статический публичный IP для корректного подключения к нему из внешней сети интернет). Так же, данная настройка обязательна для последующей настройки DHCP сервера.
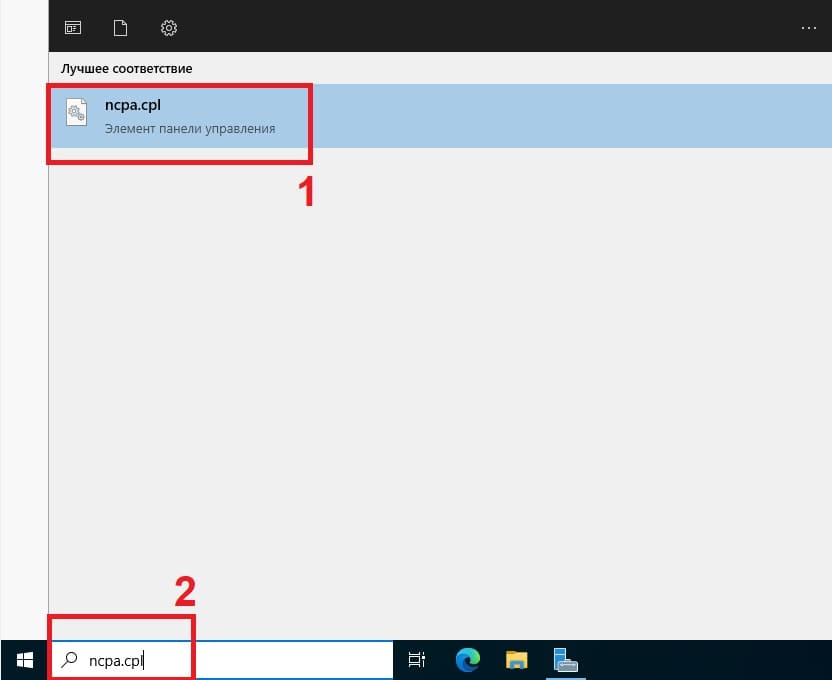
В поиск вводим ncpa.cpl
Правой кнопкой мыши на сетевую карточку => Свойства.
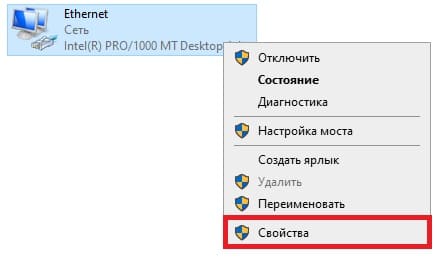
Мы будем настраивать Ipv4, выделяем его курсором и нажимаем «Свойства».
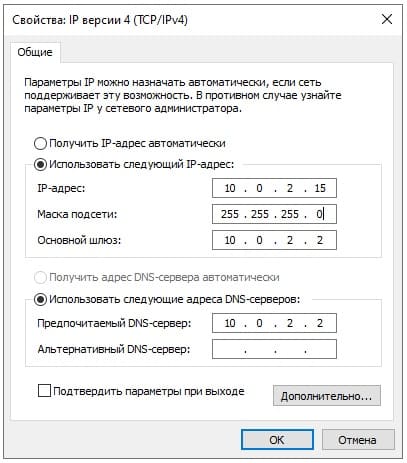
Задаем настройки IP Вашей сети. Внимание! На скриншоте ниже — это пример, у вас должны быть Ваши собственные настройки под Вашу сеть.
3) Теперь переходим к добавлению ролей и компонентов в Active Directory (Диспетчере серверов).
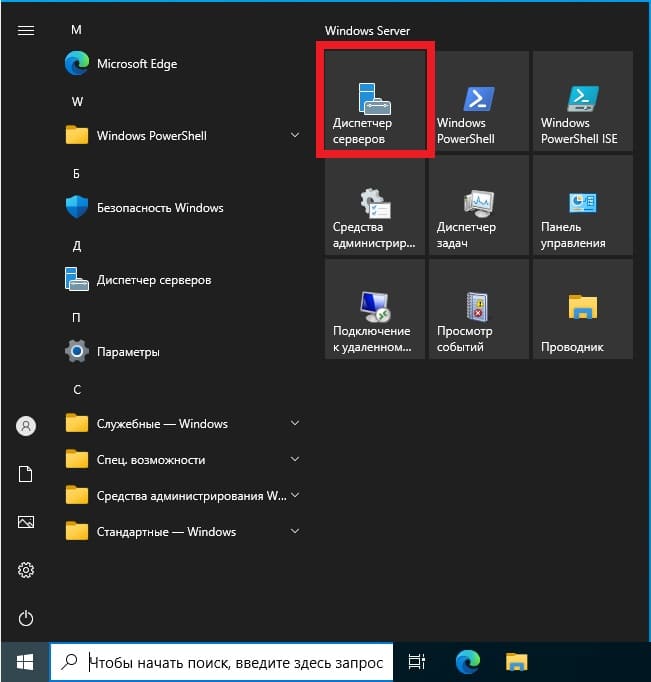
Нажимаем меню «Пуск» => Диспетчер серверов.
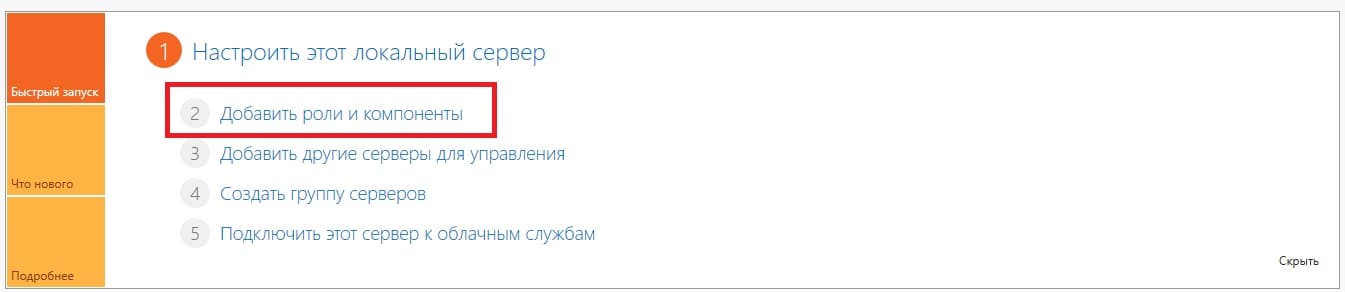
Добавить роли и компоненты.
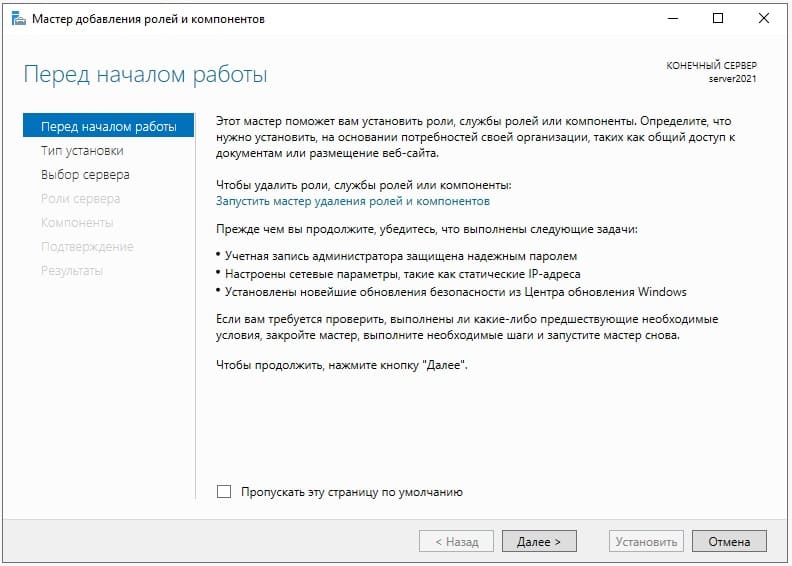
В следующем окне просто нажимаем «Далее».
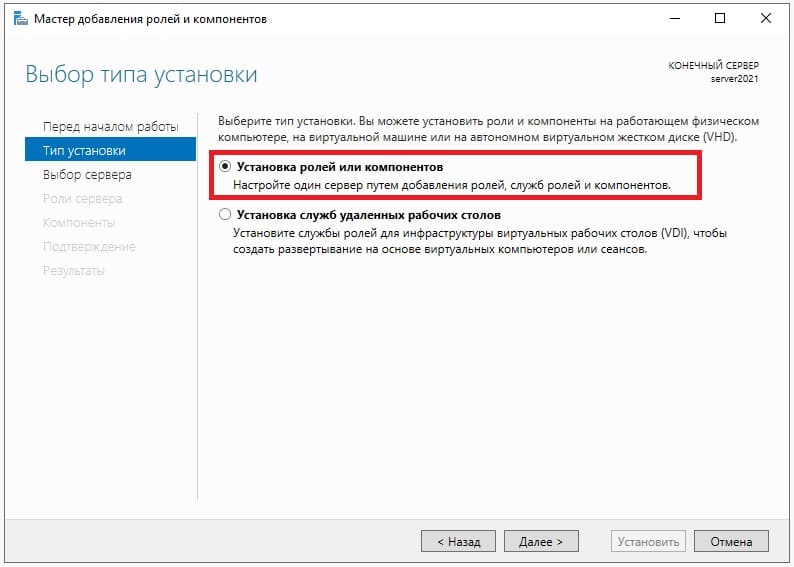
В меню «Тип установки» выбираем пункт => Установка ролей и компонентов.
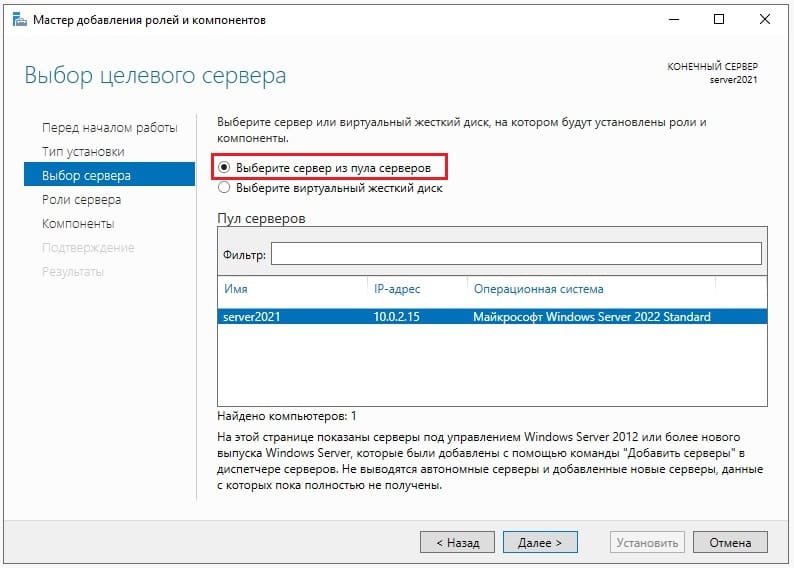
Далее «Выбираем сервер из пула». Он у нас должен быть один.
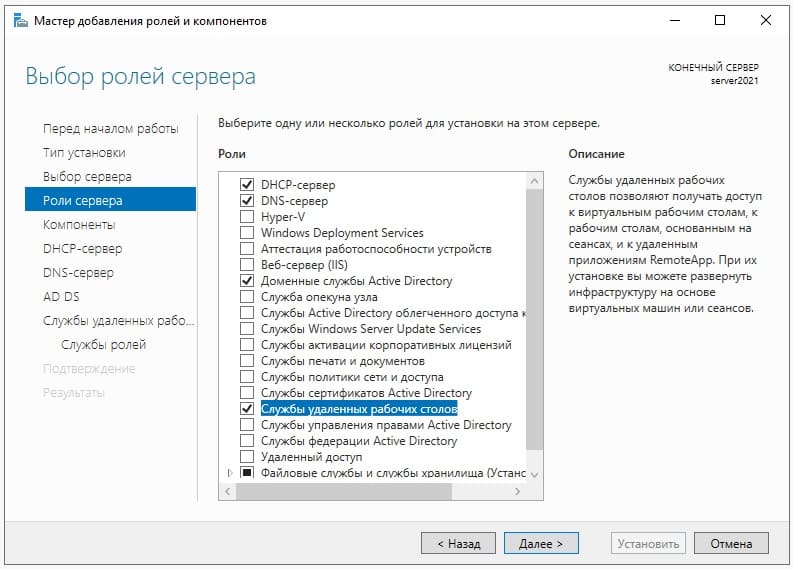
Далее, выбираем нужные Вам роли (функионал сервера), в случае чего, вы всегда сможете добавить что-либо еще, если что-то понадобится дополнительное.
Мы выберем на примере DHCP-сервер, DNS-сервер (Внимание! DNS (домен) не всегда нужен под рабочие задачи, убедитесь, что он нужен именно Вам, прежде чем его выбирать для установки. Мы его устанавливаем лишь для примера.), Доменные службы и Службы для удаленных рабочих столов (для подключения к серверу по RDP).
После выбора нужных служб идем далее.
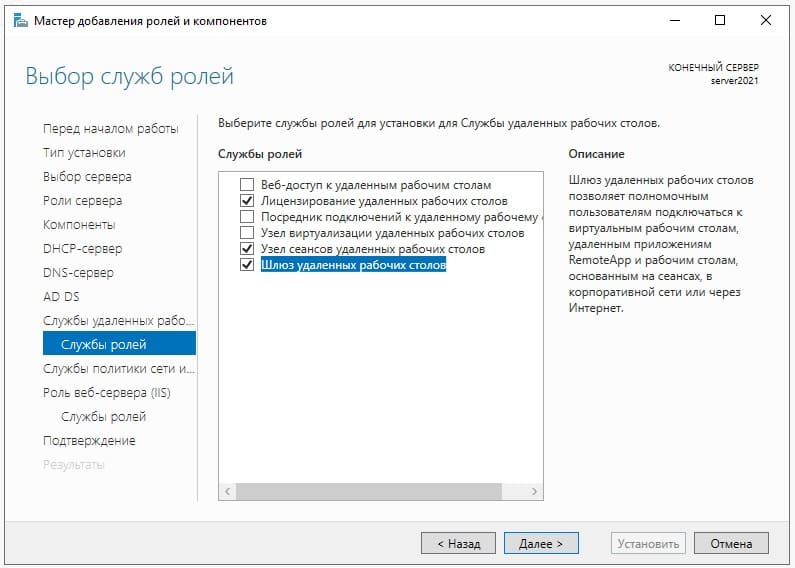
Далее, пролистываем до меню «Службы ролей» в подпункт «Службы удаленных рабочих столов» и выбираем здесь пункты «Лицензирование удаленных рабочих столов», «Узел сеансов удаленных рабочих столов» и «Шлюз удаленных рабочих столов».
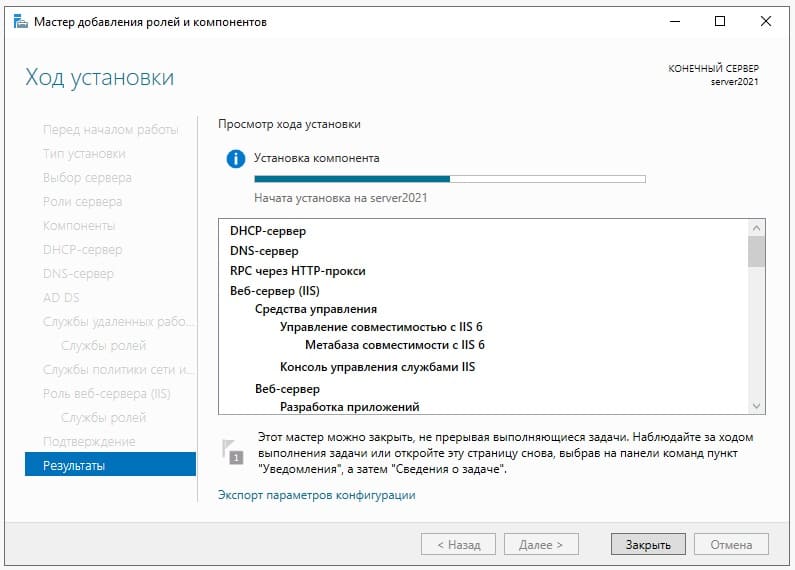
Пролистываем до конца в меню «Подтверждение», нажимаем «Установить» и дожидаемся установки служб.
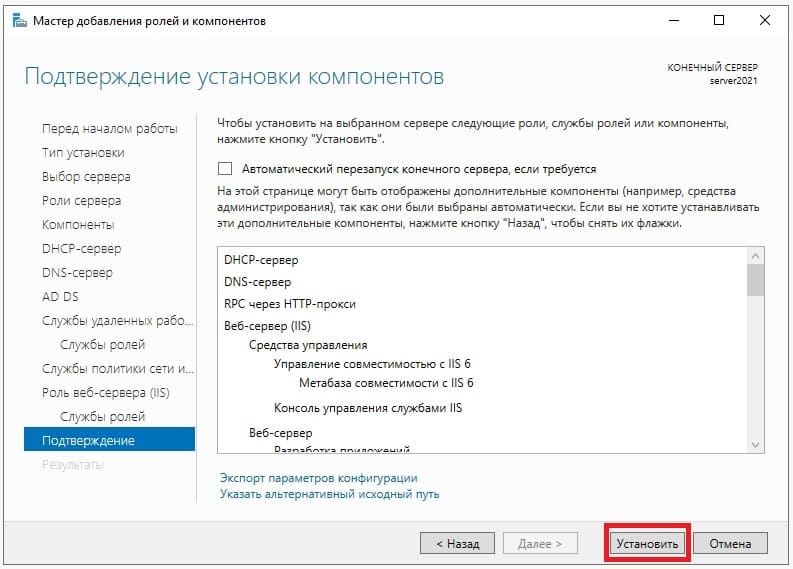
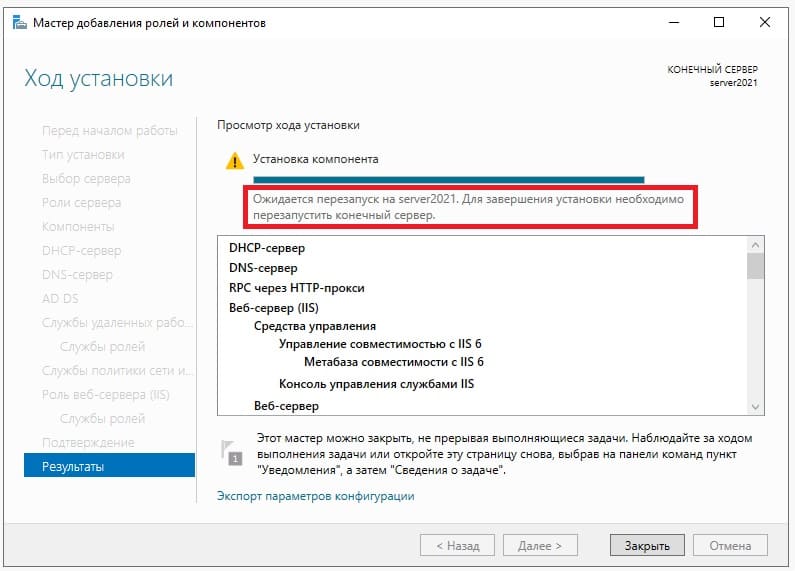
После перезагрузите сервер для применения настроек.
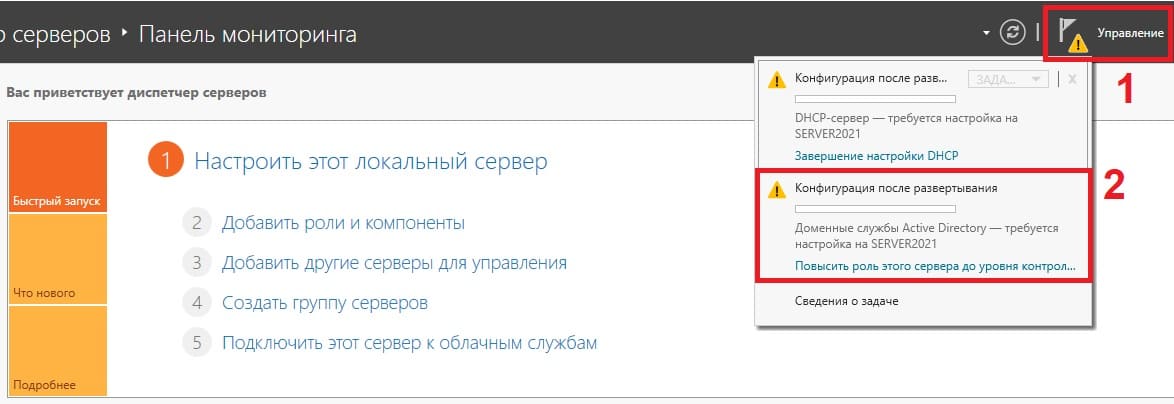
4) После перезагрузки заходим в меню Active Directory (Диспетчер серверов) и перейдем в настройки доменных служб (DNS), если вы не выбирали данную службу, то пропустите этот пункт настройки.
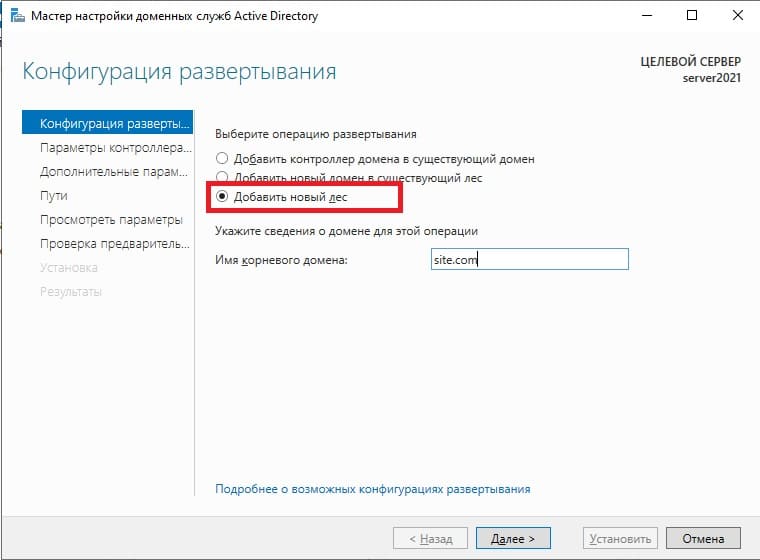
Выбираем пункт «Добавить новый лес» => и задаем имя для домена, он может быть любым, например названием вашей компании, или название вашего сайта. Настоятельно рекомендуем задавать только на латинице (или цифры).
В параметрах контроллера домена задаем пароль для Вашего домена.
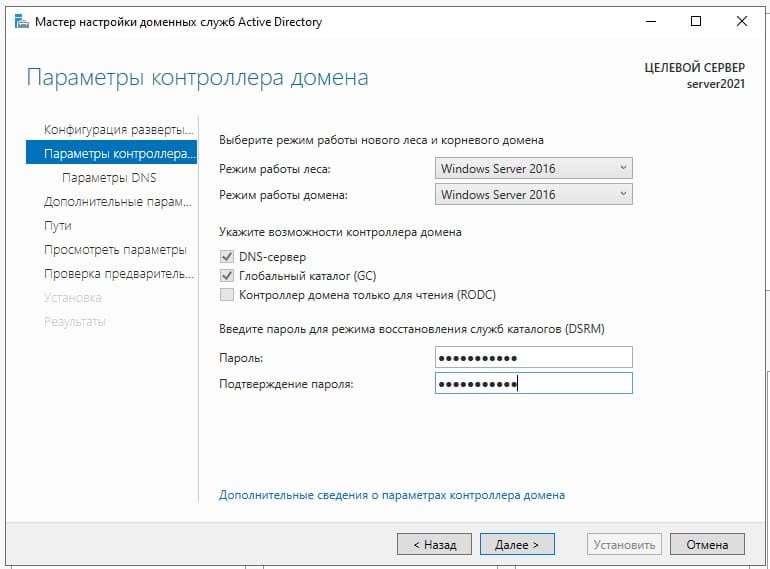
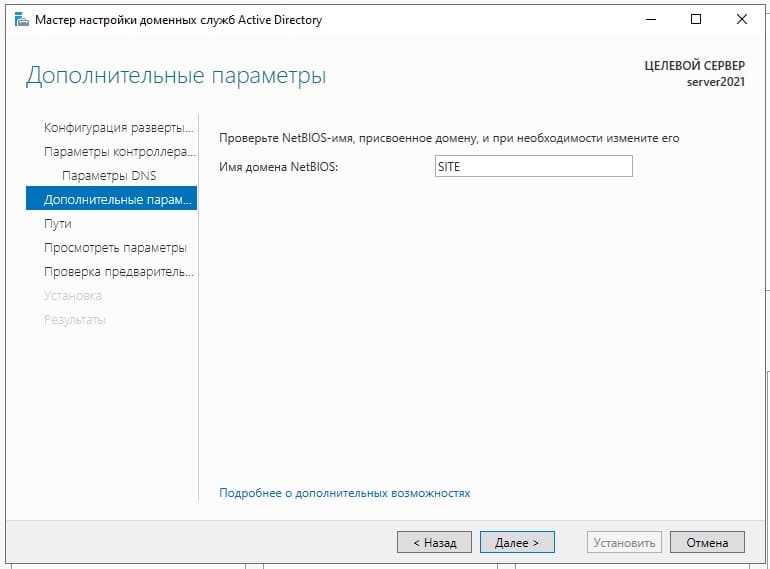
Параметр NetBIOS как правило задается автоматически от имени домена.
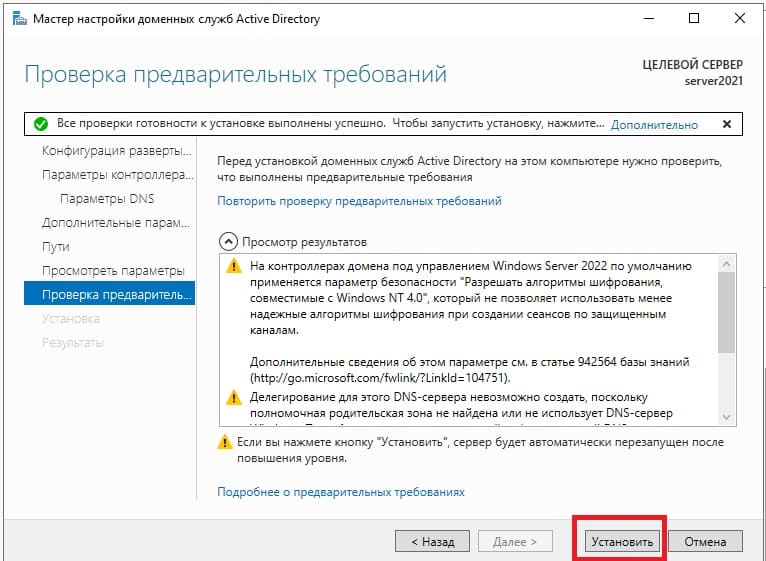
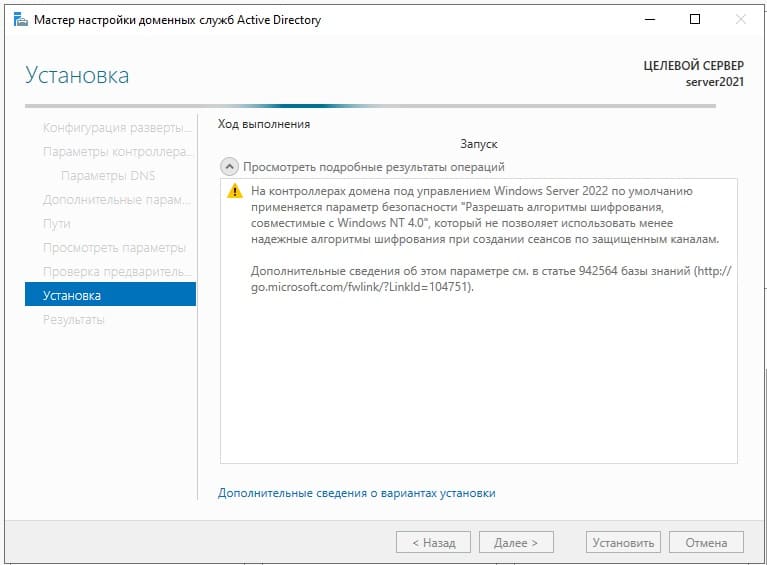
Доходим до проверки предварительных требований и нажимаем «Установить». Дождитесь установки.
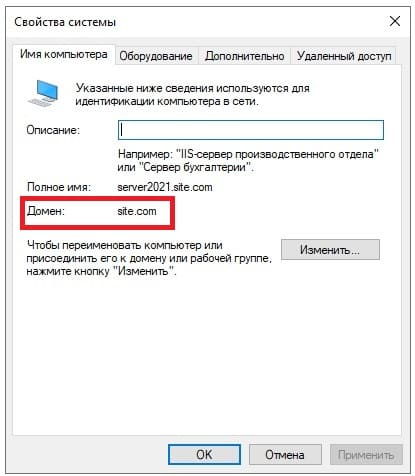
После установки домена можете проверить в свойствах системы, что Ваш сервер добавлен в домен.
5) Перейдем к настройке DHCP, чтобы сервер мог раздавать IP адреса на клиентские ПК.

Нажимаем «Далее».
Оставляем по умолчанию.
В этой настройке готово.

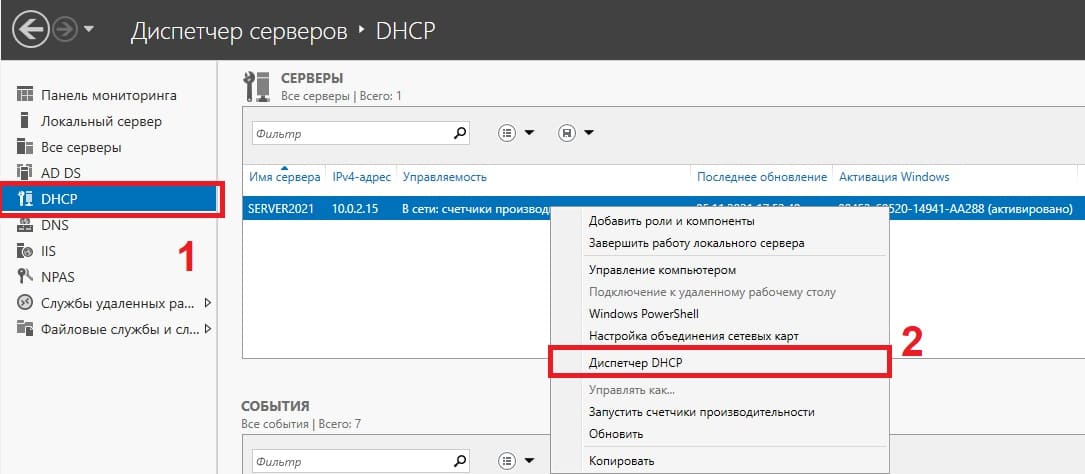
Теперь в диспетчере серверов, в меню слева выбираем пункт DHCP => Правой кнопкой мыши на Ваш сервер => Диспетчер DHCP
Раскрываем ветку DHCP => Ваш сервер => IPv4, правой кнопкой мыши на этот пункт => Создать область.
В новом окне «Далее».
Задаем любое имя области.
Далее задаем диапазон IP адресов, который будет раздавать сервер на локальные компьютеры, а так же маску подсети. (На скриншоте ниже — это пример, у вас может быть свой диапазон).
При желании, можете исключить какой-либо промежуток IP адресов, либо просто нажмите «Далее».
Задаем срок действия раздачи IP адреса на компьютеры. Мы зададим большой срок в 365 дней, у вас он может быть любой под Ваши задачи.

Выбираем пункт «Да, настроить эти параметры сейчас».
Можете добавить адрес маршутизатора (роутера) из вашей сети.
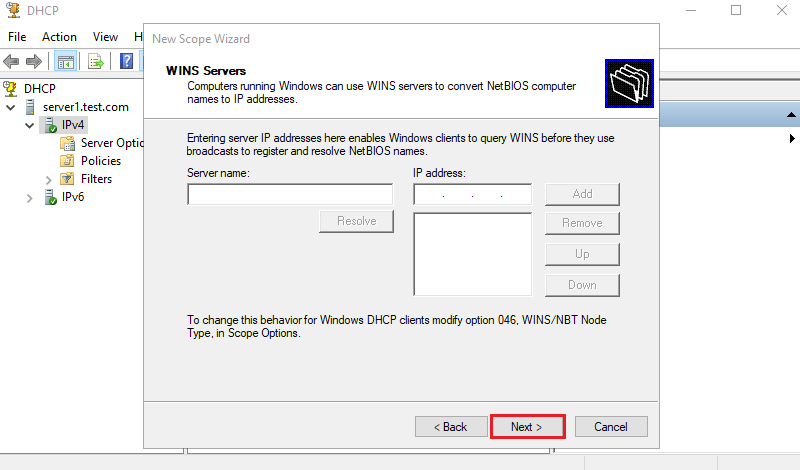
Можете добавить WINS-сервер, если у вас уже он был ранее настроен на сервере, то он добавится автоматически. Либо можете пропустить данный пункт настройки.
Активировать эту область сейчас.
Готово.
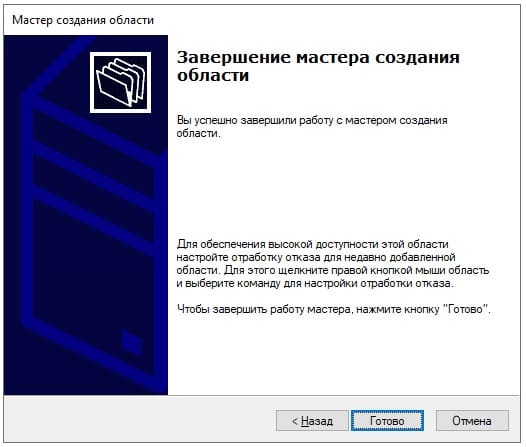
Теперь видим, что область успешно создана.

6) Теперь приступим к лицензированию удаленных рабочих столов (RDP / RDS), чтобы Вы могли подключаться к серверу с клиентских ПК по RDP.
— Первое, что для этого нужно — это ключ активации Windows Server 2022 RDS User или Device CAL. Приобрести его можете в нашем каталоге на следующей странице.
— Чем отличается User CAL от Device CAL можете ознакомиться в нашей прошлой статье.
— Для активации ключа RDS теперь можете воспользоваться следующей инструкцией по настройке и активации данного функционала в нашей прошлой статье. Инструкция является универсальной, начиная от 2012r2 версии до 2022 версии Windows Server.
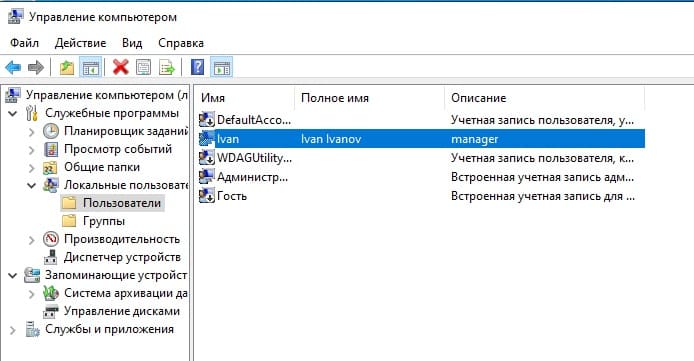
7) Следующим шагом рассмотрим как добавить пользователя в Windows Server, в случае, если Вы не устанавливали на сервер домен (DNS). С созданными пользователями Вы можете под их данными подключаться к серверу по RDP.
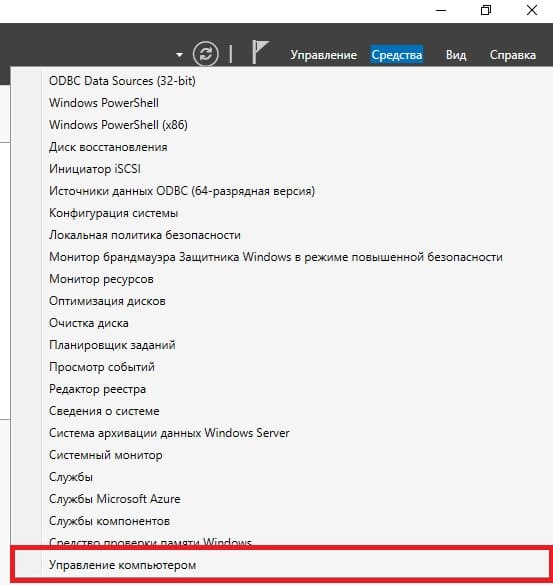
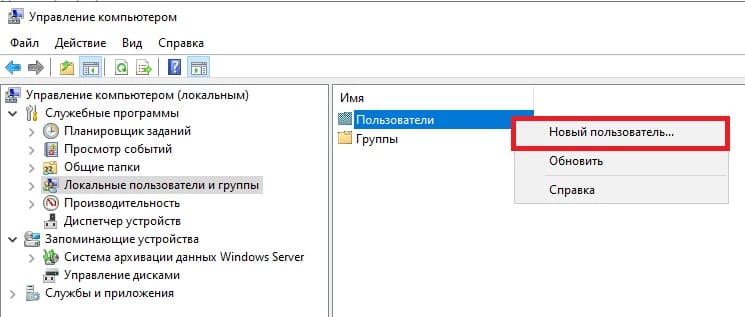
Заходим в Active Directory => Средства => Управление компьютером => Локальные пользователи и группы => Пользователи => Новый пользователь.
Задаем имя пользователя, можете так же указать его должность, или краткое описание. Обязательно задаем ему пароль для входа. При желании можете установить пункты запрета на смену пароля пользователю и отключение срока действия пароля.
Пользователь создан. Нажав на него двойным кликом курсором мыши можете задать пользователю более детальные настройки, при необходимости.
Dynamic Host Configuration Protocol (DHCP) is an essential service for managing IP address allocation in a network. By automatically assigning IP addresses to devices, DHCP eliminates the need for manual configuration, making network management more efficient and reducing errors. Windows Server 2022 includes a DHCP Server role that can be easily installed and configured to help streamline network IP management.
This guide will walk you through the steps to install and configure DHCP on Windows Server 2022, ensuring your network has reliable IP allocation services.
Prerequisites for Installing DHCP on Windows Server 2022
Before you start the installation, ensure the following prerequisites are in place:
- Windows Server 2022 is fully updated and activated.
- You have administrative privileges on the server.
- The server is configured with a static IP address.
- The network scope and IP address range for DHCP are planned out in advance, as these will be configured later.
Step-by-Step Guide to Installing DHCP on Windows Server 2022
Step 1: Open Server Manager
- Log in to your Windows Server 2022.
- Open Server Manager. You can access Server Manager by clicking on the Start menu or by searching for Server Manager in the search bar.
Step 2: Start the Add Roles and Features Wizard
- In Server Manager, click on Manage in the top-right corner.
- Select Add Roles and Features from the dropdown menu. This action will open the Add Roles and Features Wizard.
Step 3: Choose Installation Type
- In the wizard, click Next to start.
- On the Select Installation Type screen, select Role-based or feature-based installation and click Next.
Step 4: Select the Server
- On the Select Destination Server screen, choose the server where you want to install DHCP. This is usually the local server, which will appear as the default option.
- Confirm the selection and click Next.
Step 5: Choose the DHCP Server Role
- On the Select Server Roles screen, find and check the DHCP Server role.
- A pop-up window will appear asking to add required features for DHCP Server. Click Add Features to continue.
- Click Next after adding the DHCP Server role.
Step 6: Skip the Features Section
- The next section, Select Features, provides additional features that can be added to the server. You can skip this section unless specific features are required.
- Click Next to continue without selecting any additional features.
Step 7: Review DHCP Server Information
- The DHCP Server section provides information about DHCP and its functions.
- After reviewing, click Next to proceed.
Step 8: Confirm and Install DHCP
- In the Confirm Installation Selections section, review your selections.
- Check the Restart the destination server automatically if required box if you want the server to restart upon installation completion.
- Click Install to begin the installation process.
The installation will now proceed. Once completed, you’ll see a confirmation message indicating the installation was successful.
Step 9: Complete the DHCP Configuration
After installation, you must complete the DHCP configuration to finalize setup.
- In the Installation progress window, click Complete DHCP configuration.
- The DHCP Post-Install Configuration Wizard will open. Click Next to begin.
Configuring DHCP on Windows Server 2022
After completing the installation, configure the DHCP scope, DNS settings, and other parameters to ensure the DHCP server operates correctly.
Step 1: Authorize the DHCP Server
- In the Authorization screen of the DHCP Post-Install Wizard, ensure your Active Directory credentials are set. Authorization allows the server to operate within the network.
- Select the Use the following user credentials option and enter the appropriate credentials if not automatically filled.
- Click Commit to authorize the DHCP server, then click Close to complete the configuration.
Step 2: Open DHCP Management Console
- Open the DHCP Management Console by going back to Server Manager.
- In Server Manager, click Tools in the top-right corner and select DHCP. This opens the DHCP management console, where you can configure and manage DHCP settings.
Step 3: Create a DHCP Scope
The DHCP scope defines a range of IP addresses the server can assign to network clients. Each scope should be configured based on your IP range requirements.
- In the DHCP management console, expand your server’s name in the left panel.
- Right-click on IPv4 (or IPv6 if using IPv6) and select New Scope.
- The New Scope Wizard will open. Click Next to start the wizard.
Define Scope Settings
- Scope Name: Enter a descriptive name for your scope (e.g., “Office Network”).
- IP Range: Enter the Start IP address and End IP address for the range of IPs that the DHCP server will manage.
- Subnet Mask: Define the subnet mask, which determines the network size.
- Click Next after entering the IP range and subnet mask.
Exclude IP Addresses (Optional)
- Exclusions and Delay: Specify any IP addresses you want to exclude from DHCP allocation. For example, static IPs assigned to servers or network printers.
- Delay: Enter a delay time if necessary, which can prioritize certain DHCP servers in a multi-server setup.
- Click Next after setting exclusions or leave them blank.
Lease Duration
- Specify the Lease Duration, which determines how long a device can use an IP address before needing to renew it. The default is 8 days, but you can adjust it based on your network’s requirements.
- Click Next to continue.
Configure DHCP Options
- Router (Default Gateway): Enter the IP address of the network’s default gateway.
- Domain Name and DNS Servers: Specify the domain name and DNS server addresses. The DNS server address ensures that devices on the network can resolve domain names to IP addresses.
- WINS Servers: If you use WINS, enter the addresses here; otherwise, click Next.
Click Next after configuring these options.
Activate the Scope
- On the Activate Scope page, select Yes, I want to activate this scope now.
- Click Next and then Finish to complete the scope configuration.
Step 4: Verify DHCP Configuration
- In the DHCP management console, expand IPv4 and select the scope you just created.
- Review the scope’s settings, address pool, and active leases to verify that DHCP is configured correctly.
- To test the DHCP server, connect a device to the network, and ensure it receives an IP address from the DHCP scope.
Additional DHCP Configuration Tips
- Reserve IP Addresses for Key Devices: In the DHCP management console, you can reserve specific IP addresses for critical devices by right-clicking Reservations and selecting New Reservation. This is useful for devices like printers, servers, or network storage that require consistent IP addresses.
- Set Up DHCP Failover for High Availability: For networks that need reliable DHCP services, consider setting up DHCP failover on a second Windows Server 2022 instance to provide redundancy.
- Monitor DHCP Logs: Regularly monitor DHCP logs to ensure the server is operating smoothly. Logs provide insights into any IP conflicts or potential issues with address distribution.
Frequently Asked Questions Related to Installing DHCP on Windows Server 2022
What is DHCP and why is it important on Windows Server 2022?
DHCP, or Dynamic Host Configuration Protocol, automatically assigns IP addresses to devices on a network. It is essential in Windows Server 2022 for simplifying IP management, reducing configuration errors, and ensuring that network devices have the correct IP configurations to communicate effectively.
How do I install DHCP on Windows Server 2022?
To install DHCP, open Server Manager, select Add Roles and Features, and choose the DHCP Server role. Follow the setup wizard, confirm the installation, and complete DHCP configuration through the DHCP Post-Install Configuration Wizard.
What is a DHCP scope in Windows Server 2022?
A DHCP scope defines a range of IP addresses that the server can assign to devices on the network. It also includes configuration settings like subnet mask, lease duration, and default gateway, essential for organized IP address management.
How do I authorize a DHCP server in Active Directory?
During the DHCP Post-Install Configuration Wizard, select the option to authorize the DHCP server using your Active Directory credentials. This authorization step allows the server to issue IP addresses within the domain network securely.
Can I configure DHCP failover on Windows Server 2022?
Yes, DHCP failover can be configured in Windows Server 2022 to ensure high availability. You can set up a second DHCP server for load balancing or redundancy, allowing continuous DHCP service even if one server fails.

Setting Up DHCP on Windows Server 2022
This tutorial outlines the implementation of a Dynamic Host Configuration Protocol (DHCP) server within a Hyper-V Virtual Machine. DHCP is the protocol that leases IPs from a scope of addresses configured in the system. I go over the procedure, starting from deployment to validation. I also review DHCP’s DORA (Discover, Offer, Request, Acknowledgement) process in obtaining an address from the server to gain a better perspective of how it functions behind the scenes. DHCP can be an afterthought for us when we connect our devices to the internet. We rarely think of how this system is done and the expediency it offers to our lives.
Environments and Technologies Used
- Microsoft Hyper-V (Virtual Machines/Compute)
- Server Manager
Operating Systems Used
- Windows 11 Home (23H2)[HOST]
- Windows Server 2022
- Windows 11 Pro
High-Level Deployment and Configuration Steps
- Setup DHCP Role on Server Manager
- Post DHCP Configuration
- Setting a DHCP Scope
- Client DHCP Set Up
- DORA Process
- Client DHCP Verification
- DHCP Server Verification
Deployment and Configuration Steps
Infrastructure Summary
For this project, I used Windows Server 2022 and Windows 11 Pro on a virtual machine in Hyper-V. These virtual machines are on a private switch and, therefore isolated from the internet. Windows Server 2022 plays the DHCP server role, while Windows 11 Pro acts as the client receiving an automatic IP address assignment from the server. The network ID I configured for this network is 192.168.0 /24 using only IPv4 addressing. The scope of the configuration will range from 192.168.0.50-192.168.0.100.

Setup DHCP Role on Server Manager
Before setting up the role, I verified my server had a human-readable computer name. I also verified it was in a workgroup environment for file sharing and network connectivity. Static IP assignments for DHCP servers are essential for consistent, reliable communication, and in this case, I set it up with an IP address of 192.168.0.10 by the name of DNS-IRONMAN.

The first step is to click on the «Dashboard» tab in the Server Manager console. I clicked on the «Add roles and features» to create a DHCP role.

This brings up the Wizard that details the prerequisites I explained earlier. In the next window, I selected a «role-based or feature-based installation».


In the next window, I made sure the computer name and the static IP address were accurate.

After pressing next, I selected the DHCP server and added the management features.


In this window, it asks if you would like the system to automatically restart if it needs to update. I didn’t check the box because production systems need to stay on for performance and reliability. Then I clicked «Install» to confirm.


Post DHCP Configuration
Once the role finished downloading it appeared as a tab on the left panel of the Server Manager console. I clicked on it and it prompted me to finish the configuration. This includes the creation of security groups for the DHCP administration. After hitting «Commit», it should be ready for IPv4 configuration.


Setting a DHCP Scope
A scope is the pool of IP addresses utilized by the DHCP server to assign its network devices. Depending on the network, one might want to use a wide range of IP addresses to support an enterprise, or the network might be small and only need a small range. Networks can employ a system where the first 10 addresses can be reserved for vital production devices such as the server, default gateway, switches, access points, etc. This method can streamline any upgrades, changes, or troubleshooting to those devices in the future. In this project, I decided to use a limited pool of IPs (192.168.0.25-192.168.0.50). I right-clicked on the Server DNS-IRONMAN, and chose the «DHCP Manager”. This opened a snap-in on the MMC (Microsoft Management Console).

I clicked on DNS-IRONMAN in the left panel to open the IPv4 options. I then right-clicked the IPv4 icon and selected the «New Scope» option that brought up the Wizard to start the process. After pressing on the «Next» button, it asked to name the scope to make it easier to identify and an option to add a description. This is useful in large enterprise environments. I named mine «ProjectLAN».

It then asks to set the beginning and ending of the IP pool. In the same window, it asks to set the length of the network ID and subnet mask to help distinguish it from the host ID.

In the next window, it gave me the opportunity to set any exclusions I might want to set. Exclusions are useful when the entire range of the host IDs are in the pool, but there are certain IPs you might want to exclude so the DCHP server doesn’t lease them out. For example, you wouldn’t want it to hand out your server’s IP or default gateway’s IP address.

In the next window, I got to set up the duration of the leases on the IP addresses assigned. The default length is 8 hours, but if you were in a library environment, you would want to shorten the timeframe. You wouldn’t want to run out of IP addresses quickly by leasing IPs longer than needed. This project doesn’t require a specific duration, so I left it at its default.

After clicking «Next», it asked to set any additional DHCP configuration options such as setting IP addresses for routers, default gateways, DNS servers, or WINS. After choosing to add them, I can set my default gateway and DNS servers. This project is a private network with no access to the Internet, however, I just wanted to exhibit the configuration steps for demonstration purposes.


WINS (Windows Internet Name Service) is the older brother of DNS and was used in older systems. In this case, I didn’t need to configure this step, so I clicked on «Next» and chose to activate the scope by pressing «Next» and «Finish».

The MMC gives me a view of the contents, including the address pool, current leases, reservations, scope options, and policies of the ProjectLAN scope I created.


Client DHCP Set Up
I want to set up my client PC to be able to receive an automatic IP address anytime it boots up. I ran a Windows 11 Pro and the first thing I did was click on the Windows logo in the taskbar, then went to the «Settings» option with the gear icon. I navigated to «Network and Internet» in the left panel and found «Advanced network settings». I went over to the «Ethernet» tab and under «More adapter options», I clicked on «Edit». This brought up a window that gave the option to change IPv4 settings and within that option, I chose the two options to «Obtain an IP address automatically» and «Obtain DNS server address automatically» and I applied the changes by pressing «OK».


DORA Process
The process that happens in the background is between the client and the DHCP server. The client PC will send out a broadcast message to the DHCP server and this is called the «Discover» phase. Once the message to the server is reached, the DHCP server will send an «Offer» of an IP address to the client so it can be used in the network. The client will then officially «Request» this IP address to the server and finally the server will then send back an «Acknowledgment» message back to the client.


Client DHCP Verification
I wanted to verify that the DHCP was working properly so I opened the command line. I typed in ipconfig and as expected it displayed the first IP address in the DHCP address pool along with the DNS servers and default gateway I configured in the manager.

DHCP Server Verification
I wanted to validate the settings in my DHCP server, so I opened the DHCP snap-in and under my leases, I was able to verify that the address 192.168.0.25 was leased to my Windows 11 Pro PC for 8 days.

If I wanted to keep this IP address in reservation for future use indefinitely, I can make use of the feature in the same window by right-clicking the address and selecting «Add to Reservation». This will create an entry in my Reservation tab.

Conclusion
DHCP is a system that can save users in a network a lot of time by automatically assigning IP addresses to traverse other subnets or within its network. It uses the DORA process to assign from a pool of addresses and administrators can add in reservations, exclusions, length of leases, etc. DHCP is just another tool in our arsenal for productivity.
This article provides information about how to install and configure a highly available and secure DHCP server on Windows 2022 server.
DHCP (Dynamic Host Configuration Protocol) provides each device available on a network with a unique IP address to communicate with the network. It has a range of IP addresses from which it provides different IP’s to each device or computer.
Contents
Install DHCP 1
Configuring DHCP 6
Configuring DHCP failover 12
MAC binding in DHCP server 14
Install DHCP
Following are the steps provided to install a DHCP server.
- Open the server manager dashboard
- Open Add roles and features
- Select installation type
- Select destination server
- Select server roles
- Select features
- Confirm installation selections
On the server manager dashboard click on “Add Roles and Features”.

This will take you to the before you begin page click on “Next” at the bottom.
Now you have to select the installation type which in most cases is “Role-based or feature-based installation”. After selecting the desired options click on next.
Now in the server selection section opt for the host on which you would like to add all the services and click next.

In Server roles, select the “DHCP Server”.

As you select the DHCP server option a new window pop’s up. Here click on “Add features”. Then click “next” to continue.
On the Select features windows just click next as currently, we do not require any extra feature. If somehow we needed something in the future, we can always add features as per our choice.
After this DHCP server window will appear on which information is given that you can read. Click on next.
After this confirmation installation console appears. Simply press install on the right bottom of the console.
Configuring DHCP
Now after installing the DHCP, the next step is to configure it. After all the features are installed in the result console press “complete DHCP configuration”.
A description window appears simply click next.
Now an authorization window appears. Opt for the first option which is user credential and add a username. Then press commit.
In summary, simply click close.
Now open the server manager dashboard open tools and select the DHCP option.
Right-click on IPv4 present on the right side and click on the new scope.
A new scope wizard window appears. Click next to create a new scope.
Enter the credentials and click next.
Enter the starting and ending IP address i.e range of IP address and then enter the subnet mask and click next.

Then add exclusions and click next. Exclusions are the address that are not distributed by the server.
Now lease duration tab appears. Set the duration as per choice or otherwise it is set to 8 days as default. Click next.
Now configure DHCP options window appears. Click on yes I want to configure the options now.
Now enter the default gateway of your router then click next.

Input the Parent Domain name and DNS server of your network. In case your server is in Active Directory Domain, it is set automatically. Simply click Next.
Select yes I want to activate the scope now. Click next.
In the end, click finish to end the process and close new scope wizard.
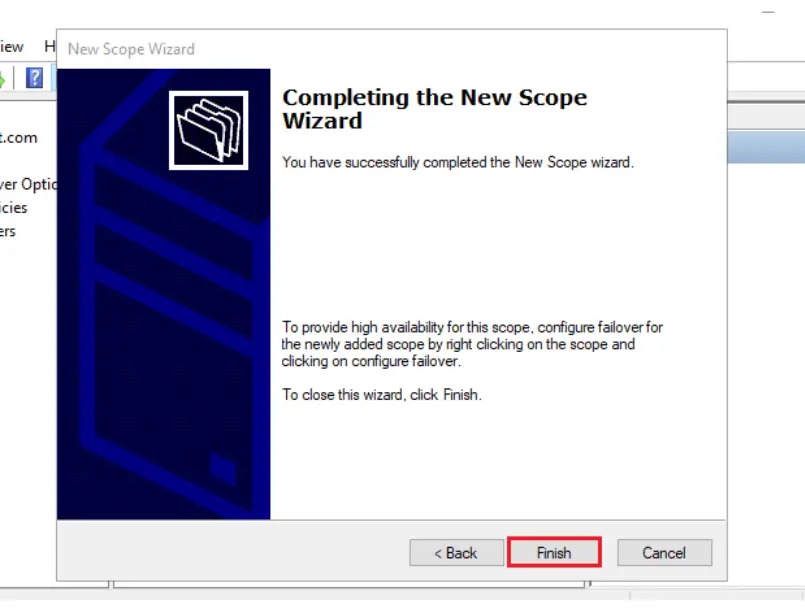
DHCP is installed and configured successfully.
Dynamic Host Configuration Protocol (DHCP) is a client/server protocol that automatically provides an Internet Protocol (IP) host with its IP address and other related configuration information such as the subnet mask and default gateway.
Configuring DHCP failover
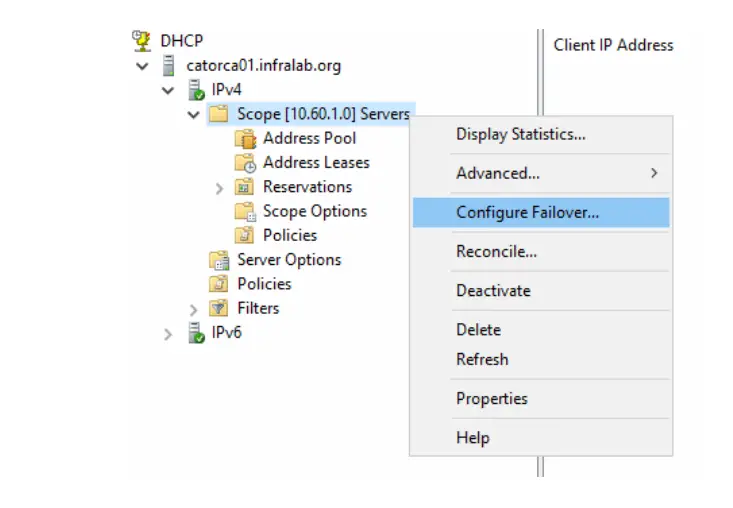
Making two DHCP servers communicate with one another in order to provide redundancy and high availability is termed as DHCP failover. It can be configured by right-clicking on any existing scope and then pressing Configure Failover…
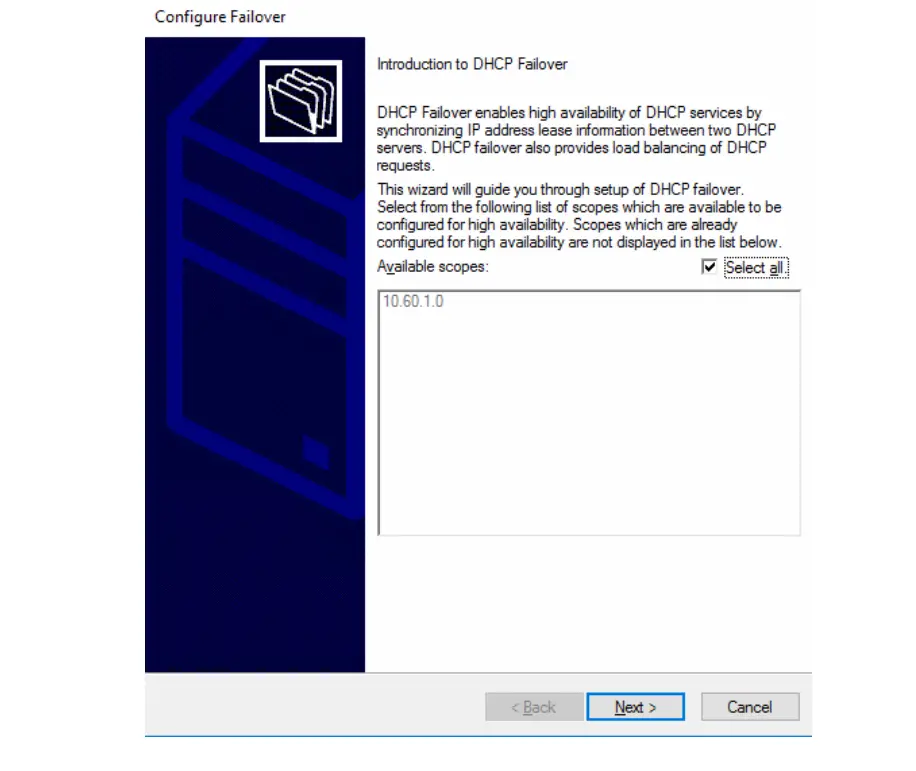
A DHCP Failover intro window appears which gives basic info. It also allows you to select any specific scope or leave it as default (select all). Then click next
In the Specify the partner server to use for the failover page, add or search for the second server that will be part of the DHCP Failover feature, and click Next
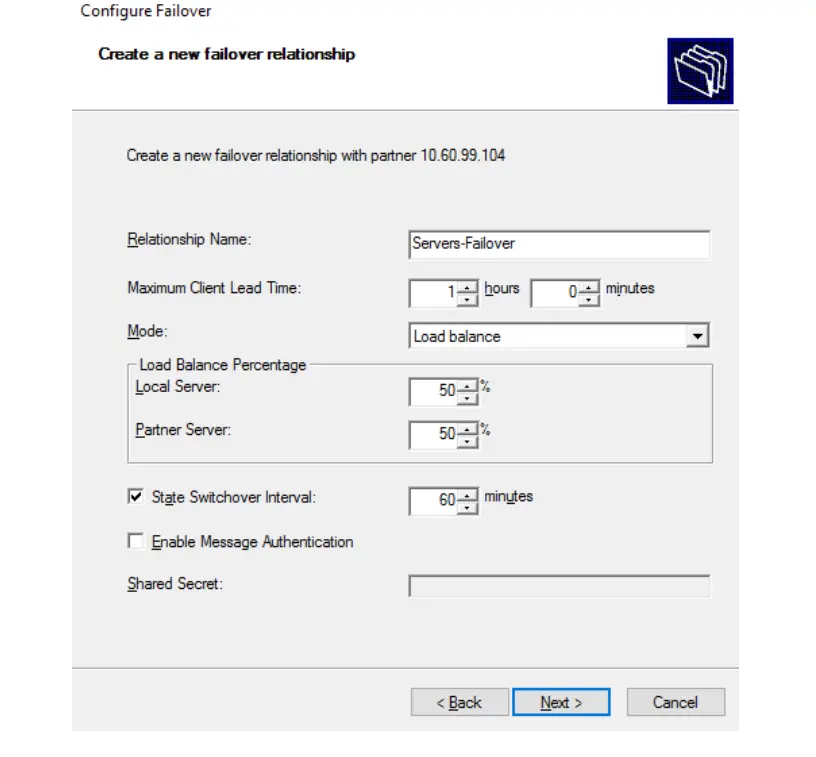
Now create a new failover relationship window pops up. It is where the focus is needed. You have defined different credentials like relationship name, max. clients, load balance, and message authentication. After this click next
All changes that you made will be displayed. Click on Finish, and a new dialog box with the status of each task will be displayed.
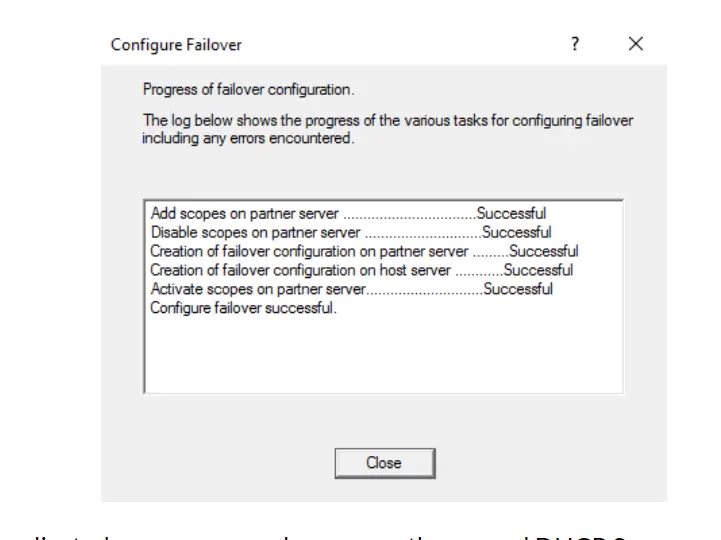
You are done. On the second DHCP server could be seen the copied scope.
MAC binding in the DHCP server
Security is one of the biggest concerns in any company or organization. Static MAC binding can allow the network administrator to identify the user so that any user cannot harm the network anonymously.
The steps to configure MAC binding are as follows:
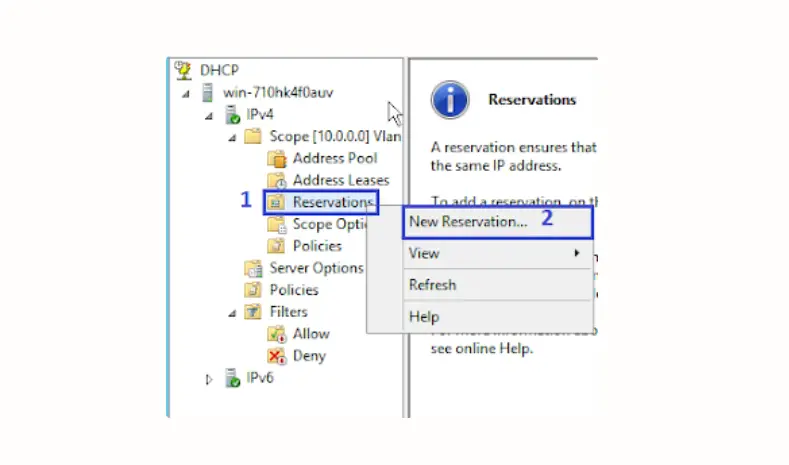
In any desired scope right click on reservations and choose new reservation.
Now a window pops up. Here enter the reservation name, IP address, MAC address, and description, and in the end select supported types both. Click Add.
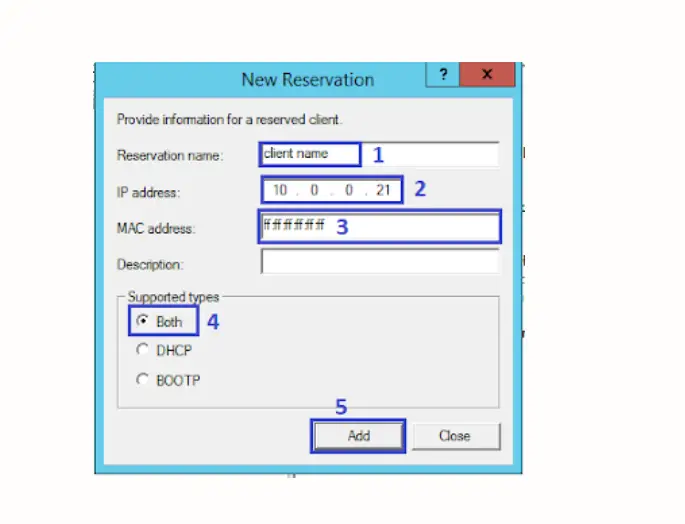
Your static MAC address is bonded successfully now every user is well-recognized by the network administrator.