
Неделю назад, мы познакомились с протоколом DHCP и узнали об основных принципах его функционирования. Теперь настало время попрактиковаться в его использовании, и начнем мы данную практику с настройки DHCP сервера в ОС Windows Server 2003.
Хотя ОС Windows Server 2003 уже сильно устарела, она продолжает использоваться на многих серверах в самых различных компаниях. Поэтому настройку DHCP серверов мы начнем разбирать именно с данной ОС, а позже перейдем к ее приемникам Windows Server 2008 и Windows Server 2012.
Для отработки навыков работы с DHCP сервером в данной статье будет использоваться следующая сетевая топология:

|
| Вот так будет выглядеть наша тестовая сеть |
В качестве DHCP сервера будет использоваться компьютер под управлением Windows Server 2003, в качестве компьютера пользователя компьютер под управлением Windows XP. DHCP сервер имеет статически заданный IP адрес192.168.1.1, компьютер пользователя автоматически получает настройки от DHCP сервера. Данная сетевая топология может быть создана как на базе реального оборудования, так и с использованием виртуальных машин. В данной статье будет рассматриваться вариант с использованием виртуальных машин созданных при помощи Windows Virtual PC, настройки сети обоих виртуальных машин заданы в соответствии с рисунком.

|
| Параметры сети виртуальных машин |
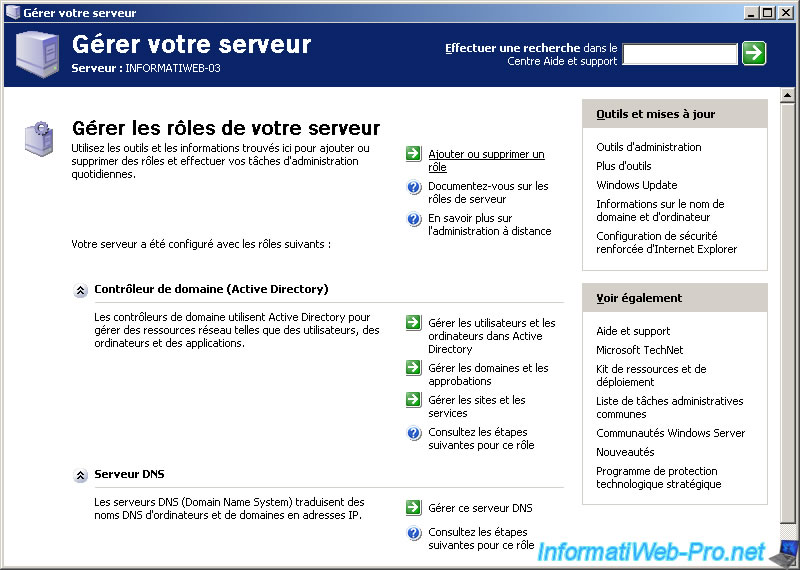
После того, как мы обговорили некоторые нюансы реализации тестовой площадки для создания DHCP сервера, перейдем к непосредственной его настройке. Для этого на сервера с Windows Server 2003 в меню «Пуск» выберите пункт «Управление данным сервером».

|
| Открываем оснастку «Управление данным сервером» |
После данного действия откроется оснастка управления вашим сервером, в данной панели отображаются все роли, которые в данный момент выполняет ваши сервер (так как мы пока еще не настраивали роли, то ничего не отображается). Для добавления новой роли серверу нажмите на кнопку «Добавить или удалить роль».

|
| Добавляем роль в Windows Server 2003 |
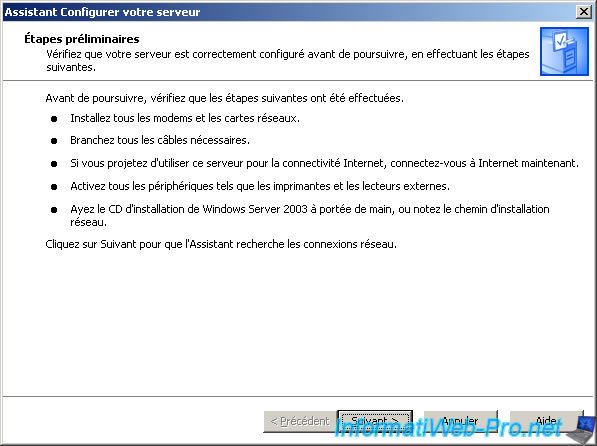
Откроется окно, которое предупреждает вас о том, что для выполнения дальнейших действий необходимо иметь сетевое подключение, сконфигурированное в соответствии с вашими потребностями (в данном случае необходимо лишь убедиться, что на нашем сервере функционирует сеть и что он имеет статический адрес 192.168.1.1). Нажимаем на кнопку «Далее»

|
| Предупреждение перед добавлением роли |
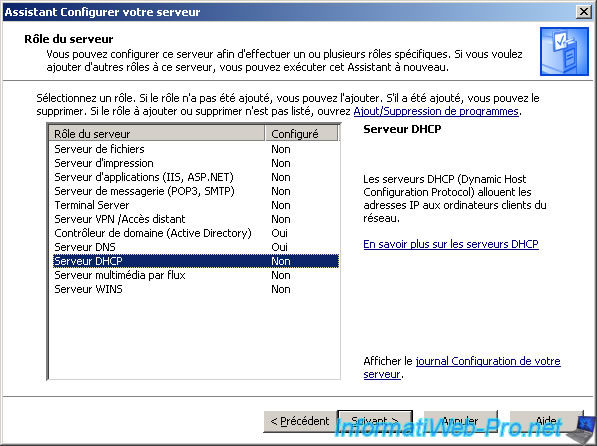
В следующем окне нам предлагается выбрать роль, которую мы хотим установить на данном сервере, так как мы хотим настроить DHCP сервер, то соответственно выбираем роль DHCP сервера.

|
| Выбор роли для установки в Windows Server 2003 |
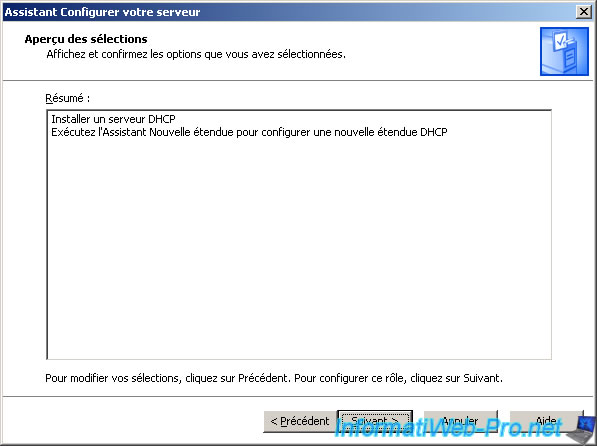
В следующем окне отображаются действия, выбранные для выполнения, просто нажмите «Далее».

|
| Действия которые будут выполняться |
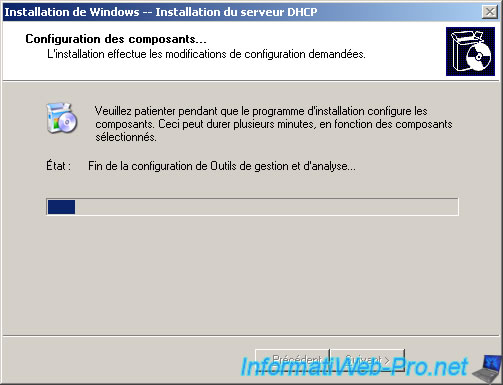
Начнется процесс установки DHCP сервера.

|
| Наблюдаем за установкой роли DHCP сервера |
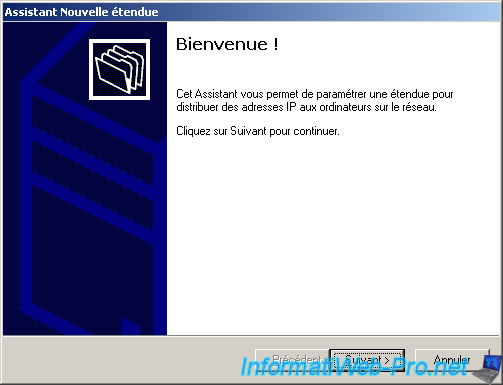
После завершения установки основных файлов DHCP сервера, откроется окно мастера, предлагающее сконфигурировать DHCP сервер в соответствии с вашими потребностями. Нажмите «Далее».

|
| Мастер настройки DHCP сервера |
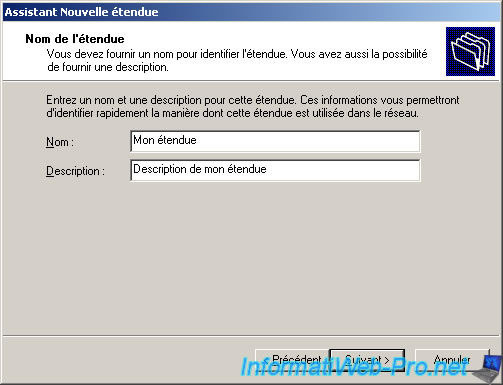
Введите имя области IP адресов, которые вы будете раздавать клиентам. Можно ввести что угодно, главное чтобы это было понятно именно вам.
| Задаем имя и описание области |
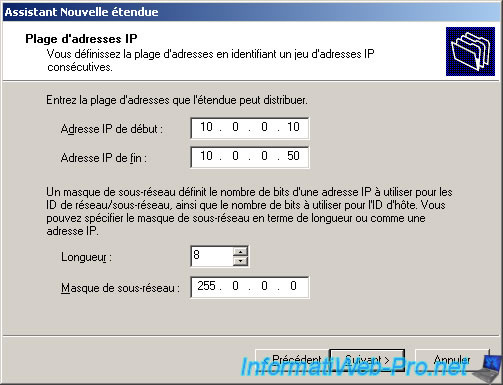
Укажите в каком диапазоне выдавать IP адреса клиентам, и какую маску подсети им задавать. В данном случае будут раздаваться IP адреса из диапазона 192.168.1.100-200 c маской подсети 255.255.255.0.

|
| Диапазон IP адресов, раздаваемый DHCP сервером |
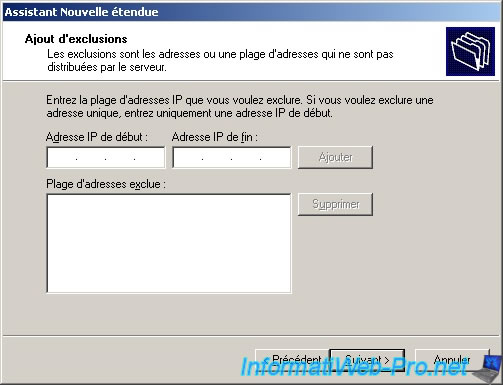
Если необходимо добавить какие либо исключения для выбранной области, то указываем их в следующем окне. В данном случае ничего не меняем и нажимаем кнопку «Далее».

|
| Добавляем исключение |
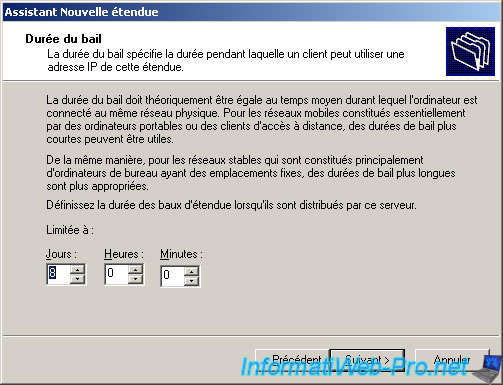
В следующем окне указываем время аренды IP адреса DHCP клиентом у сервера. По умолчанию данное время равно 8 часам, это означает что клиент, получивший IP адрес у DHCP сервера, будет обращаться к нему каждые 8 часов для получения разрешения на дальнейшие использование данного IP адреса, или же для его смены.

|
| Задаем время аренды IP адреса |
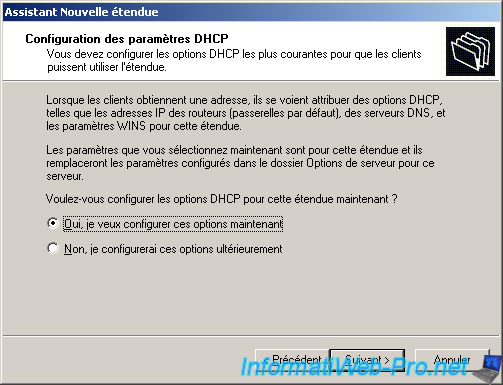
Как мы знаем с помощью DHCP сервера можно раздавать компьютерам не только IP адреса, но и еще ряд параметров, таких как адрес основного шлюза, адрес DNS сервера и д.р. Если мы хотим чтобы наш сервер раздавал данные параметры своим клиентам выбираем пункт «Да, настроить эти параметры сейчас» и последовательно задаем их в следующих трех окнах.

|
| Настройка дополнительны параметров раздаваемых DHCP сервером |

|
| Задаем основной шлюз |

|
| Задаем адрес DNS сервера |

|
| Задаем адрес WINS севера |
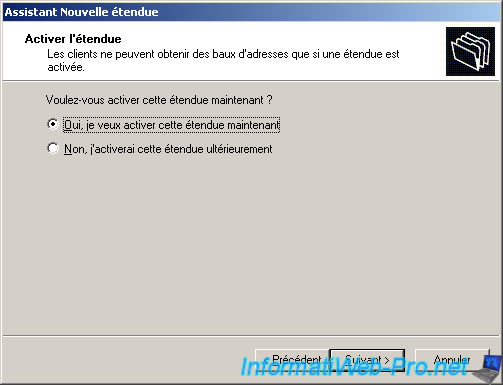
После задания всех настрое вас спросят хотите ли вы активировать данную область IP адресов на данном DHCP сервере – соглашаемся и нажимаем далее.

|
| Хотите ли вы активировать данную область? |
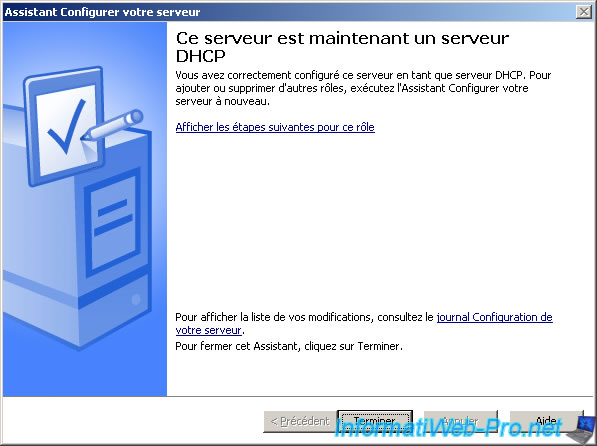
После этого вас порадуют сообщениями о том, что ваш DHCP сервер сконфигурирован и готов к работе.

|
| Завершение работы мастера настройки DHCP сервера |

|
| Роль успешно добавлена |
После этого включите виртуальную машину, на которой установлена Windows XP. Выполните в командной строке ipconfig. Если DHCP сервер настроен правильно, компьютер должен получить IP адрес из диапазона 192.168.1.100-200.

|
| Компьютер пользователя получил IP адрес |
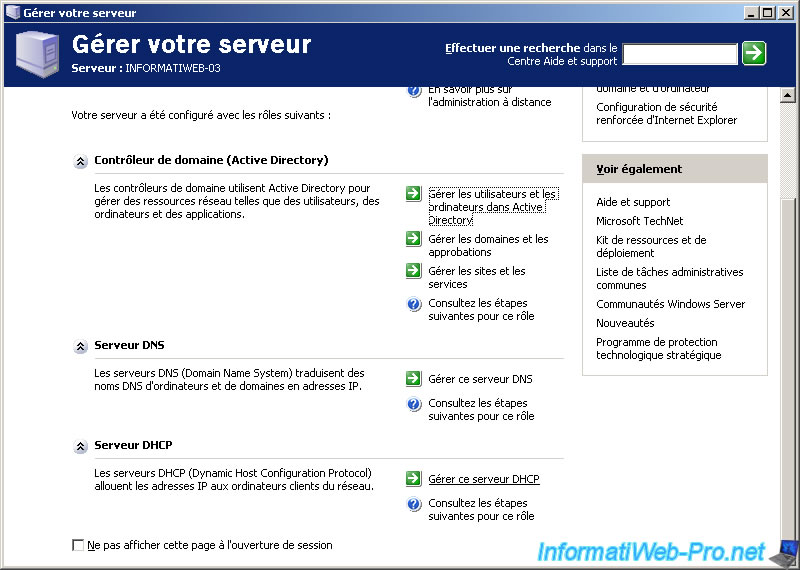
В данном случае DHCP сервер последовательно раздает IP адреса заданного диапазона запрашивающим клиентам. Но иногда бывает нужно сделать так, чтобы определенный компьютер получал строго заданный IP адрес. Как же это сделать? Для этого снова вернемся на наш сервер, и перейдем в оснастку «Управление данным сервером». Как вы можете заметить, в ней теперь отображается только что созданная роль DHCP сервера. Для настройки DHCP сервера кликните по надписи «Управление этим DHCP сервером».

|
| Оснастка управление сервером с одной ролью |
В созданной области выберите пункт резервирование. Щелкните по нему правой кнопкой мыши и создайте правило, с помощью которого компьютер с определенным MAC адресом будет получать определенный IP адрес. В данном случае в качестве MAC адреса указываем MAC виртуальной машины с Windows XP.

|
| Резервирование IP адресов DHCP сервером |

|
| Привязка IP адреса к заданному MAC адресу |
Перейдем на виртуальную машину с Windows XP. Отключим и снова включим сетевое подключение на ней. После чего в командной строке снова выполним команду ipconfig. Если все сделано верно, клиентский компьютер получит IP адрес 192.168.1.177.

|
| Компьютер получил IP привязанный к его MAC адресу |
Ну вот так, довольно несложно настраиваются основные возможности DHCP сервера в ОС Windows Server 2003.
P.S. Лично у меня при использовании DHCP сервера на виртуальных машинах, созданных в Windows Virtual PC, возникла следующая проблема – клиентские компьютеры не в какую не хотели получать IP адреса от DHCP сервера. Что я делал для решения данной проблемы:
- Выключил все виртуальные машины.
- Открыл файл %localappdata%\microsoft\Windows Virtual PC\Options.xml
- Нашел в нем фрагмент:
<dhcp>
<enabled type=»boolean»>false</enabled>
<ending_ip_address type=»integer»>2851998462</ending_ip_address>
<network type=»integer»>2851995648</network>
<network_mask type=»integer»>4294901760</network_mask>
<starting_ip_address type=»integer»>2851995664</starting_ip_address>
</dhcp>
- Заменил в нем строку <enabled type=»boolean»>true</enabled> на <enabled type=»boolean»>false</enabled>
После этого все стало прекрасно работать =) Удачи вам! Если у вас что то не получается, то не стесняйтесь спрашивать.
DHCP (Dynamic Host Configuration Protocol) is a protocol that allows clients on a network to request network configuration settings from a server running the DHCP server service which, in our case, will be Windows Server 2003. Additionally the protocol allows the clients to self-configure those network configuration settings without the intervention of an administrator. Some of the settings that a DHCP server can provide to its clients include the IP addresses for the DNS servers, the IP addresses for the WINS servers, the IP address for the default gateway (usually a router) and, of course, an IP address for the client itself.
This article will discuss and walk you through the steps of installing and configuring DHCP on a Windows Server 2003 member server, specifically focusing on setting up a scope and its accompanying settings. The same configuration can be applied to a standalone server even though the step-by-step details differ slightly. The upcoming ‘Advanced DHCP Server Configuration on Windows 2003‘ article will discuss other DHCP options and features such as superscopes, multicast scopes, dynamic DNS, DHCP Backup and more.
While our articles make use of specific IP addresses and network settings, you can change these settings as needed to make them compatible with your LAN – This won’t require you to make changes to your LAN, but you’ll need to have a slightly stronger understanding of DHCP and TCP/IP.
Assigning the Server a Static IP Address
Before we install the DHCP server service on Windows Server 2003, we need to assign the Windows server a static IP address. To do this:
1. Go to Start > Control Panel > Network Connections , right-click Local Area Connection and choose Properties .
2. When the Local Area Connection Properties window comes up, select Internet Protocol (TCP/IP) and click the Properties button.
3. When the Internet Protocol (TCP/IP) window comes up, enter an IP address , subnet mask and default gateway IP address that is compatible with your LAN.
We’ve configured our settings according to our network, as shown below:
4. Enter 192.168.0.252 for the Preferred DNS server and 192.168.1.252 for the Alternate DNS server. The Preferred and Alternate DNS server IP addresses are optional for the functionality of the DHCP server, but we will populate them since you typically would in a real-world network. Usually these fields are populated with the IP addresses of your Active Directory domain controllers.
5. After filling out those fields, click OK and OK to save and close all windows.
Install DHCP Server Service on Windows Server 2003
Our server now has a static IP address and we are now ready to install the DHCP server service. To do this:
1. Go to Start > Control Panel > Add or Remove Programs .
2. When the Add or Remove Programs window launches, click Add/Remove Windows Components in the left pane.
3. When the Windows Components Wizard comes up, scroll down and highlight Networking Services and then click the Details button.
4. When the Networking Services window comes up, place a check mark next to Dynamic Host Configuration Protocol (DHCP) and click OK and OK again.
Note that, during the install, Windows may generate an error claiming that it could not find a file needed for DHCP installation. If this happens, insert your Windows Server 2003 CD into the server’s CD-ROM drive and browse to the i386 directory. The wizard should automatically find the file and allow you to select it. After that, the wizard should resume the installation process.
Configure DHCP on Windows Server 2003
DHCP has now been successfully installed and we are ready to configure it. We will create a new scope and configure some of the scope’s options. To begin:
1. Launch the DHCP MMC by going to Start > Administrative Tools > DHCP .
Currently, the DHCP MMC looks empty and the server node in the left pane has a red arrow pointing down. Keep that in mind because it will be significant later on.
2. Right-click the server node in the left pane and choose New Scope . This will launch the New Scope Wizard.
3. On the New Scope Wizard, click Next .
4. Specify a scope name and scope description. For the scope Name , enter “ Building A, Floor 1 .” For the scope Description , enter “ This scope is for Floor 1 of Building A .” Afterwards, click Next .
The scope name can be anything, but we certainly want to name it something that describes the scope’s purpose. The scope Description is not required. It is there in case we needed to provide a broader description of the scope.
5. Specify an IP address range and subnet mask. For the Start IP address enter 192.168.0.1, for the End IP address enter 192.168.0.254 . Finally, specify a subnet mask of 255.255.255.0 and click Next.
Specifying the IP address range of a scope requires some knowledge of subnetting. Each scope in a DHCP server holds a pool of IP addresses to give out to clients, and the range of IP addresses must be within the allowed range of the subnet (that you specify on the subnet mask field).
For simplicity we entered a classful, class C IP address range from 192.168.0.1 to 192.168.0.254. Notice that the range encompasses the IP address of our server, the DNS servers and the default gateway, meaning that the DHCP server could potentially assign a client an IP address that is already in use! Do not worry — we will take care of that later.
6. Specify IP addresses to exclude from assignment. For the Start IP address , enter 192.168.0.240 and for the End IP address enter 192.168.0.254 , click Add , and then click Next.
Certain network devices, such as servers, will need statically configured IP addresses. The IP addresses may sometimes be within the range of IP addresses defined for a scope. In those cases, you have to exclude the IP addresses from being assigned out by DHCP.
We have the opportunity here to define those IP addresses that are to be excluded. We specified IP addresses 192.168.0.240 to 192.168.0.254 to ensure we’ve included our servers plus a few spare IP addresses for future use.
7. Specify the lease duration for the scope. Verify that Days is 8 and click Next.
The lease duration is how long clients should keep their IP addresses before having to renew them.
There are a few considerations at this point. If a short lease duration is configured, clients will be renewing their IP addresses more frequently. The result will be additional network traffic and additional strain on the DHCP server. On the other hand if a long lease duration is configured, IP addresses previously obtained by decommissioned clients would remain leased and unavailable to future clients until the leases either expire or are manually deleted.
Additionally if network changes occur, such as the implementation of a new DNS server, those clients would not receive those updates until their leases expire or the computers are restarted.
As Microsoft states, “lease durations should typically be equal to the average time the computer is connected to the same physical network.” You would typically leave the default lease duration in an environment where computers are rarely moved or replaced, such as a wired network. In an environment where computers are often moved and replaced, such as a wireless network, you would want to specify a short duration since a new wireless client could roam within range at any time.
8. Configure DHCP Options. Make sure “ Yes, I want to configure these settings now ” is selected and click Next to begin configuring DHCP options.
DHCP options are additional settings that the DHCP server can provide to clients when it issues them with IP addresses. These are the other settings that help clients communicate on the network. In the New Scope Wizard we can only configure a few options but from the DHCP MMC we have several more options.
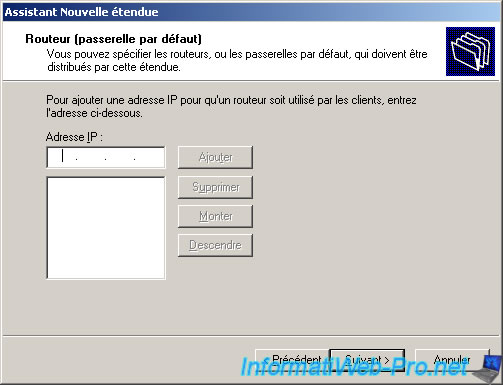
9. Specify the router IP address. Enter 192.168.0.254 as the IP address of the subnet’s router, click Add , and then click Next .
The first option we can configure is the IP address for the subnet’s router for which this scope is providing IP addresses. Keep in mind that this IP address must be in the same network as the IP addresses in the range that we created earlier.
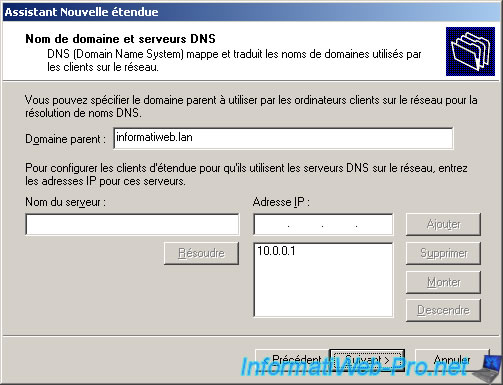
10. Configure domain name and DNS servers. On the next page, enter “firewall.cx» for the domain name. Then enter 192.168.0.252 for the IP address of a DNS server, click Add , enter 192.168.1.252 as the IP address for another DNS server, and click Add again. When finished, click Next.
If you had a DNS infrastructure in place, you could have simply typed in the fully qualified domain name of the DNS server and clicked Resolve .
The DNS servers will be used by clients primarily for name resolution, but also for other purposes that are beyond the scope of this article. The DNS domain name will be used by clients when registering their hostnames to the DNS zones on the DNS servers (covered in the ‘Advanced DHCP Server Configuration on Windows 2003‘ article).
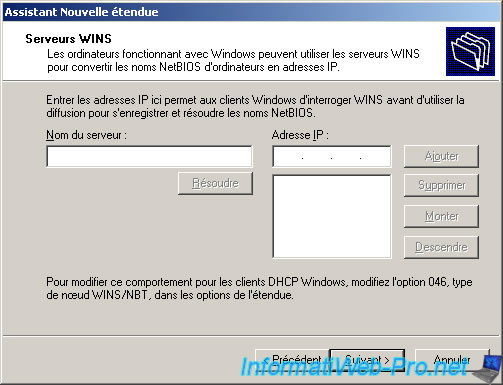
11. Configure WINS servers. On the next screen, enter 192.168.0.251 as the IP address for the first WINS server, click Add , enter 192.168.1.251 as the IP address for the second WINS server, click Add again, and then click Finish .
12. Finally, the wizard asks whether you want to activate the scope. For now, choose “ No, I will activate this scope later ” and click Next and then Finish to conclude the New Scope Wizard and return to the DHCP MMC.
At this point we almost have a functional DHCP server. Let us go ahead and expand the scope node in the left pane of the DHCP MMC to see the new available nodes:
Address Pool – Shows the IP address range the scope offers along with any IP address exclusions.
Address Leases – Shows all the leased IP addresses.
Reservations – Shows the IP addresses that are reserved. Reservations are made by specifying the MAC address that the server would “listen to” when IP address requests are received by the server. Certain network devices, such as networked printers, are best configured with reserved IP addresses rather than static IP addresses.
Scope Options – Shows configured scope options. Some of the visible options now are router, DNS, domain name and WINS options.
Server Options – Shows configured server options. This is similar to scope options except that these options are either inherited by all the scopes or overridden by them (covered in ‘Advanced DHCP Server Configuration on Windows 2003‘ article).
Earlier, we only defined exclusions for our servers, router plus a few more spare IP addresses. In case you need to exclude more IP addresses, you can do it at this point by following these instructions:
13. Select and right-click Address Pool and choose New Exclusion Range.
14. When the Add Exclusion window comes up, enter the required range and then click Add. In our example, we’ve excluded the addition range 192.168.0.230 — 192.168.0.232.
Notice that the server node and scope node still has a red arrow pointing down. These red arrows pointing down mean that the server and scope are not “turned on”.
The concept of “turning on” the scope is called “activating” and the concept of “turning on” the server for DHCP service is called “authorizing”. Security has some influence in the concept of authorizing a DHCP server and, to authorize a DHCP server, you must be a member of the Enterprise Admins Active Directory group.
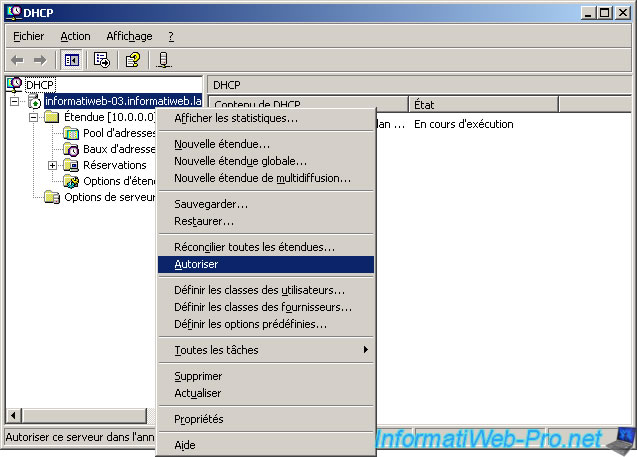
15. Right-click the server (server001.firewall.cx) and choose Authorize , then right-click the scope (Building A, Floor 1) and choose Activate . If the red arrows remain, refresh the MMC by going to Action > Refresh .
Congratulations! At this point, you should have a working DHCP server capable of providing IP addresses!
Install and Configure DHCP in Windows Server 2003
As services go, DHCP is easy to both install and configure. However, because there are so many settings in so many places, I am willing to bet that my tutorial will unearth at least one new option that will improve your DHCP performance.
Tutorial to Install and Configure DHCP Servers
- DHCP Install
- Address Leases
- Scope Options
- Address Reservations
- Authorize – DHCP Server in Active Directory
- Activate – DHCP Scope
- DHCP Server for Windows 2012
‡
DHCP Install
This tutorial will guide you through the steps needed to get your DHCP server installed and configured correctly. Let us begin with a straightforward job to install DHCP. Get your Windows Server CD ready, then navigate to: Add Remove Programs, Windows Components, Networking Services.
Whilst adding the DHCP service is easy, configuring the scope options needs thought. For instance, if you make a mistake with the subnet mask, you cannot amend that scope, you would have to delete and start afresh. However, you can add and change the options such as Type 006 DNS server, or Type 015 Domain name.
DHCP Address Leases
Lease is a good name for a DHCP IP property. Take for example the 8 day default lease; if the client is shutdown for 2 days, when it restarts it will continue to have the same IP address. Halfway through their lease clients attempt to renew their lease. IPCONFIG /all will show you the lease, while /renew will do what it says, top up the lease.
Only reduce the duration if you are short of IP addresses. For example, if you only have 250 IP addresses but 300 possible clients. It also makes sense to set short leases if you are likely to discontinue a scope in the near future.
Here is a table summarising how a DHCP service results in clients getting an IP address. If you are interested in seeing these packets, use Network monitor to capture DHCP in action. Here are the classic 4 packets that clients exchange during a lease negotiation.
|
Client |
Server |
|
DHCPDiscover –> |
<— DHCPOffer |
|
DHCPRequest –> |
<— DHCPack |
| DHCPInform Server check that it is Authorized in Active Directory |
Note 1: DHCPRequest may seem strange, but it comes into play if there are two DHCP servers and both make an offer to a potential client.
Note 2: DHCPack. Once in a blue moon you see DHCPNack this is a negative acknowledgement which mean, ‘ I do no know you’. The most likely cause of Nack is the client is trying to renew an IP address from the wrong DHCP server.
Guy Recommends: A Free Trial of the Network Performance Monitor (NPM) v12
SolarWinds’ Network Performance Monitor will help you discover what’s happening on your network. This utility will also guide you through troubleshooting; the dashboard will indicate whether the root cause is a broken link, faulty equipment or resource overload.
Perhaps the NPM’s best feature is the way it suggests solutions to network problems. Its second best feature is the ability to monitor the health of individual VMware virtual machines. If you are interested in troubleshooting, and creating network maps, then I recommend that you give this Network Performance Monitor a try.
Download your free trial of SolarWinds Network Performance Monitor.
Scope Options.
Take the time to investigate Scope Options, this the most likely place that I will win my bet that you will find a new setting which will improve your network performance. These options can be set at the Scope Level, Server Level, Reservation Level or at the Class Level (Tricky). So find all four places and make up your mind which would be the best level for your network.
Examples of DHCP Scope Options:
- Router (Default Gateway), DNS Servers (006)
- Domain Name (015) WINS (044 and 046)
Classes (Advanced Tab)
- Vendor Class – Windows 98 Machines
- User Class – Routing and Remote Access
- Creating your own User Class – See more here.
Address Reservation
Reserving IP addresses is useful in two situations, for file and print servers and for important machines where leases are in short supply. How does DHCP know which machine to lease a particular IP? The answer is by its MAC address (also called NIC or Physical address). In Windows 2003 when you enter the MAC address DHCP strips out the hyphens if you absentmindedly include them amongst the HEX numbers. To find the MAC address ping the machine then type arp -a.
Remember that you can set DHCP Options for the reservations; after all, that may have been the very reason why you decided to make reservations in the first place.
Authorize – DHCP Server
In a Windows Server 2003 (or 2000) domain all DHCP servers need to be authorized in Active Directory. This is an example of Microsoft’s new security initiative, and an attempt to eliminate rogue DHCP servers set up junior administrators in a large company. So, you need to logon (or RunAs) a member of the Enterprise Admins group. Then right-click the DHCP server icon, and Authorize.
Incidentally, The RIS service also needs to be Authorized before it becomes active.
Activate – DHCP Scope
Even after you Authorize a server, each scope must be activated individually. So, right-click the scope to activate (or deactivate). Keep your eye on the red or green arrows to judge your success. Note you may have to Refresh from the server icon, often pressing F5 is not enough. See how to configure DHCP scopes with Powershell.
Guy Recommends: SolarWinds Network Topology Mapper (NTM)
NTM will produce a neat diagram of your network topology. But that’s just the start;Network Topology Mapper can create an inventory of the hardware and software of your machines and network devices. Other neat features include dynamic update for when you add new devices to your network. I also love the ability to export the diagrams to Microsoft Visio.
Finally, Guy bets that if you test drive the Network Topology Mapper then you will find a device on your network that you had forgotten about, or someone else installed without you realizing!
Download your 14 day free trial ofSolarWinds Network Topology Mapper
Summary of Configuring DHCP
Installing DHCP is easy. Authorizing and Activating are straightforward. The toughest part is investigating all the Scope options and decide whether to implement them at the Server or Scope level. This page will provide a step-by-step tutorial on getting the most from your DHCP Server.
Here is a major strategic decision – what use will you make of DHCP reservations?
If you like this page then please share it with your friends
Related DHCP Server topics
- Benefits of DHCP – Saves Work
- DHCP Strategies – Client and Server
- DHCP – Install and Configure Server Options
- DHCP – Relay Agents
- APIPA – When all else fails
- DHCP – User Classes
- DHCP – Database, Backup, Reconcile and Audit
- DHCP – Troubleshooting
Exceptionally, before starting the tutorial, we will first change the server’s IP for the IP we give it’s in the same range of IP address that clients will receive IP from your DHCP server.
Windows Server 2003 End of Support
Windows Server 2003 is no longer supported by Microsoft since July 2015.
We therefore recommend that you upgrade to a more recent version, such as : Windows Server 2012.
To create a DHCP server on Windows Server 2012, refer to our «Create a DHCP server on Windows Server 2012» tutorial.
Important :
— So that your customers receive only IP from your DHCP server, you must have your server and your clients are connected to a switch and NOT a router. If you want to use a router, you need to disable the DHCP and routing functions (NAT).
— If you want your clients to access the Internet, you need at least two network cards. One connected to the switch and the other an other switch (or a router or a modem) where there is Internet.
To do this, go to : start menu -> Control Panel -> Network Connections and right-click on «Local Area Connection».
For the tutorial, we will create a range of IP addresses of class A (10.x.x.x).
Here is the configuration of the Local Area connection that we will put :
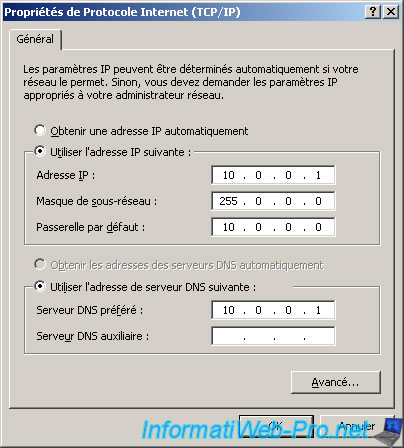
Summary :
— Server IP (internal network side of the Switch) : 10.0.0.1
— The gateway 10.0.0.0 doesn’t exist but it’s just not leave the box blank and be in the same IP class.
To install a «DHCP Server», you must first click on «Add or remove a role» in the «Manage Your Server» window.
Select «DHCP Server» and click «Next».
Windows installs the «DHCP» component. You may need the CD «Windows Server 2003» to install it.
The wizard for creating a new scope appears.
Enter a name and description for your scope.
Set an IP address range for this scope. Clients will receive an IP from the beginning IP address and to the end of the scope.
Note : It’s advisable to make a small range and expand later if needed because it’s more difficult to reduce it. Simply because if you have a customer connected with 10.0.0.10 and the other with 10.0.0.50, you can’t reduce it without causing disconnection because they are at the ends of the range set here.
For the subnet mask, it configures itself when you specify the IP range.
Add an IP range to exclude if you wish. If you want to exclude a single IP, indicate the same IP in the two cases.
IP excluded will not be distributed by DHCP. This can be used when a network device (computer, printer, …) has a static IP address that is in the IP range that you just defined and so it avoids getting the following message: Conflict of detected on the network IP address. When this occurs the two devices lose access to the network and thus to the Internet.
The lease is the time that the server will remember what IP was given to any network device (identified by its MAC address is a unique physical address (except in the case of virtualization where you can change it)).
Once the lease expired, the network device will get a different IP than it had before where even if the chance is that the DHCP forwarding him the same.
Leave checked the box «Yes, I want to configure these options now».
For now, leave this box blank. We will configure this after adding the second NIC.
The parent is the domain name you specified when creating the Active Directory.
For the DNS server, specify the IP address of your server 2003 (internal network side).
The WINS server translates NetBIOS names to IP addresses and vice versa.
Leave the box «Yes, I want to activate this scope now» checked and click «Next».
Once the wizard is complete, click «Finish».

Then, in the «Manage Your Server», click «Manage this DHCP server».
Right click on your DHCP server (as in the picture) and click «Allow».
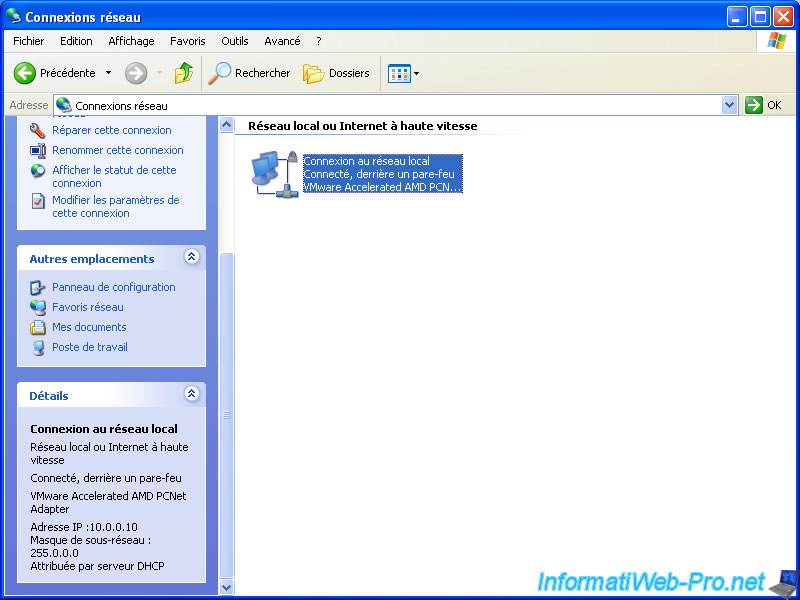
Restart your 2003 server for the changes to take effect and then connect a Windows PC to your switch and go to Control Panel -> Network Connections and right-click on the Local Area Connection.
If your connection to your LAN client is automatic (default) you should get a 10.x.x.x IP address as image.
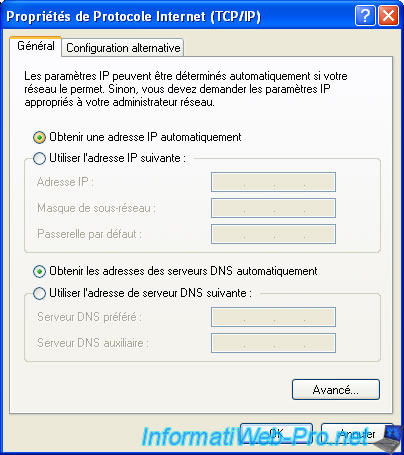
If this is not the case right click on «Local Area Connection» -> Properties. Select «Internet Protocol (TCP / IP)» and click the «Properties» button just below.
Then «Properties of Internet Protocol (TCP / IP)» opens. Verify that the 2 boxes «Obtain an IP address automatically» and «Obtain DNS server address automatically» are checked. If this isn’t the case, select them and click «OK».
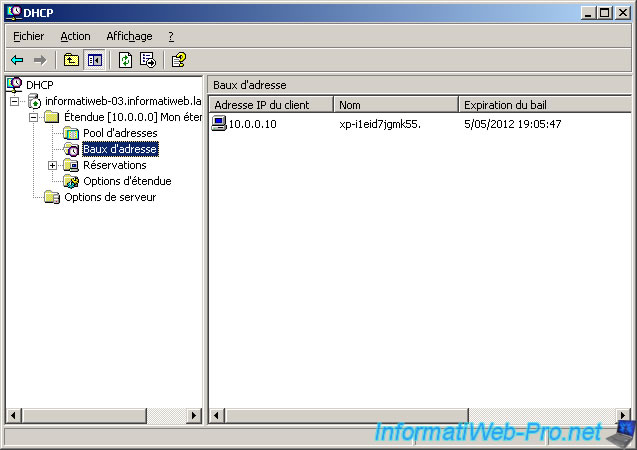
Then, on the server, return to the DHCP server by clicking «Manage this DHCP server».
Made a click on «Address Leases» to verify that your client PC has received an IP from your DHCP server and not another. If a line is added as the image is that your DHCP server is working properly and that your client received an IP from the DHCP server.
Now your clients get an IP from your DHCP server and the network operates between the server and clients but against your clients don’t access internet which is quite annoying these days.
In fact you often know as the Box, LiveBox, … are actually a network device that combines several things.
Box possess these features :
— Modem : with ID that allow you to have Internet at home.
— Router : that routes packets from the Internet to the PC on your network that has requested and vice versa, when a PC sends a file to the Internet, the router route the file (consisting of packets) to the Internet. Router functionality therefore used only when there are at least 2 PC in the same house who want to access the Internet.
The router also has a built-in DHCP server where the utility of the disabled and the NAT functionality for this tutorial works with router instead of the switch as you recommended in the beginning.
— Switch : is used to connect the PC network together. It’s like a strip.
If you install this DHCP server on a server acting as a gateway, you must install the routing and NAT roles to allow your users to access the Internet : Windows Server 2003 — NAT and network routing.
Benefits of DHCP
With a DHCP
server installed and configured on your network, DHCP-enabled clients
can obtain IP addresses and related configuration parameters each time
they start and join your network. DHCP servers provide this
configuration in the form of an address lease offer to requesting
clients.
One main advantage of
using DHCP is that DHCP servers greatly reduce the time required to
configure and reconfigure computers on your network. DHCP simplifies
administration not only by supplying clients with IP addresses, but also
(optionally) with the addresses of the default gateway, DNS servers,
WINS servers, and other servers useful to the client. Another advantage
of DHCP is that by assigning IP addresses automatically, it allows you
to avoid configuration errors resulting from entering IP address
information manually at every host. For example, DHCP helps prevent
address conflicts caused when the same IP address is mistakenly assigned
to two hosts.
Installing the DHCP Server Service
To
set up a DHCP server, you must first install the DHCP Server role. This
role is not installed by the Windows Server Setup Wizard by default and
can be added either through the Windows Components Wizard or through
the Manage Your Server window.
To install a DHCP
server through the Manage Your Server window, from the Start menu select
Manage Your Server, click Add Or Remove A Role, and then select the
DHCP Server role. Click Next to begin the installation process.
To launch the
Windows Components Wizard, open Control Panel and double-click Add Or
Remove Programs. Then, in the Add Or Remove Programs window, click
Add/Remove Windows Components. The Dynamic Host Configuration Protocol
(DHCP) component, like the DNS component, is a subcomponent of the
Networking Services component in the Windows Components Wizard.
Note
You
must be logged on as an administrator—for example, a member of the
domain local security group DHCP Administrators or of the global group
Domain Admins—to install and manage a Windows component such as DHCP.
Tip
Assign a static IP address to the computer on which you install the DHCP server.
After the
installation wizard has completed, you can verify that the DHCP Server
service has been installed on your computer by opening the DHCP console
administrative tool. To access the DHCP console, click Start, select
Administrative Tools, and then select DHCP.
The DHCP console, shown in Figure 1,
is the interface from which you can configure and manage virtually all
features related to your DHCP server, including scopes, exclusions,
reservations, and options.
Figure 1. DHCP console

Authorizing the Server
DHCP
servers must be authorized if they are to be integrated in Active
Directory networks. Only domain controllers and domain member servers
participate in Active Directory, and only these server types can become
authorized. When your network includes Active Directory domains, the
first DHCP server you install on the network must be an authorized DHCP
server.
Stand-alone or
workgroup DHCP servers running Microsoft Windows 2000 Server or Windows
Server 2003 cannot become authorized in Active Directory networks, but
they can coexist with these networks as long as they are not deployed on
a subnet with any authorized DHCP servers. (Note, however, that this
configuration is not recommended.)
Stand-alone DHCP servers implemented together with authorized servers are known as rogue servers.
When a rogue DHCP server running Windows Server 2003 or Windows 2000
Server detects an authorized server on the same subnet, the stand-alone
server automatically stops its own DHCP Server service and stops leasing
IP addresses to DHCP clients.
When the DHCP Server
service is installed on a domain controller, you can perform the
authorization procedure simply by right-clicking the server node in the
DHCP console and selecting Authorize. You can use the following
procedure, however, to authorize DHCP servers hosted on both domain
controllers and member servers.
Note
To
have the necessary permissions to authorize or deauthorize a DHCP
server, you must be a member of the global security group Enterprise
Admins.
To authorize a DHCP server in Active Directory, complete the following steps:
|
1. |
Open the DHCP console. |
|
2. |
In the console tree, select DHCP. |
|
3. |
From the Action menu, select Manage Authorized Servers. The Manage Authorized Servers dialog box opens. |
|
4. |
Click Authorize. |
|
5. |
When prompted, type the name or IP address of the DHCP server to be authorized, and then click OK. |
|
6. |
When |