
Enabling COM Port in Windows 10 might sound technical, but it’s actually pretty straightforward. By following some simple steps, you can make sure your computer recognizes and uses COM ports effectively. Whether you’re setting up a new piece of hardware, troubleshooting a connection, or tweaking settings for an application, enabling COM ports is a critical skill to have.
In the following steps, we’ll go through the process of enabling a COM port on a Windows 10 machine. This will involve accessing the Device Manager, modifying port settings, and ensuring your system recognizes the port.
Step 1: Open the Device Manager
First, right-click on the Start button and select «Device Manager» from the context menu.
Device Manager is your go-to tool for managing hardware and drivers on your computer. It displays all the connected devices and allows you to configure them.
Step 2: Expand the Ports Section
Once in Device Manager, find the «Ports (COM & LPT)» section and click the small arrow next to it.
This section shows you all the available COM ports. If you don’t see it, it means no COM ports are currently recognized by your system.
Step 3: Right-click on a COM Port
Right-click on any of the listed COM ports and select «Properties» from the dropdown menu.
The Properties window gives you detailed information about the selected port and allows you to adjust its settings.
Step 4: Navigate to Port Settings
In the Properties window, go to the «Port Settings» tab and click on «Advanced».
Here you can change various settings related to the COM port, such as baud rate, data bits, and more.
Step 5: Change the COM Port Number
In the Advanced Settings, you can change the COM Port number if needed. Click «OK» to save the changes.
Changing the port number can help resolve conflicts with other devices and ensure smooth operation.
Step 6: Confirm and Close
After making your changes, click «OK» to close the Properties window and then close Device Manager.
Your changes will be saved, and the COM port should now be enabled and ready for use.
After completing these steps, your COM port will be enabled, and your computer should recognize it without any issues. This means you can now connect external devices that use COM ports and configure them as needed.
Tips for Enabling COM Port in Windows 10
- Check for Updates: Make sure your Windows 10 system is up-to-date to avoid compatibility issues with COM ports.
- Use the Correct Drivers: Ensure you have the right drivers installed for your hardware that uses COM ports.
- Troubleshooting: If the port doesn’t show up, try restarting your computer or checking the hardware connections.
- Port Conflicts: If you experience conflicts, try changing the COM port number in the Advanced settings.
- Backup Settings: Keep a record of your port settings before making changes, so you can revert if needed.
Frequently Asked Questions
What is a COM port?
A COM port, or communication port, is a serial port that allows for communication between the computer and external devices.
Why don’t I see any COM ports in Device Manager?
If no COM ports are visible, it could be due to a lack of relevant drivers or that no COM port hardware is currently connected.
Can I use multiple COM ports at once?
Yes, you can use multiple COM ports simultaneously, but ensure there are no conflicts in port numbers.
How do I know which COM port my device is using?
You can check the COM port assignment in Device Manager under the «Ports (COM & LPT)» section.
What do I do if my COM port isn’t working?
Check the device’s drivers, ensure no port conflicts, and verify that the hardware is properly connected and functioning.
Step-by-Step Summary
- Right-click Start button, select «Device Manager».
- Expand «Ports (COM & LPT)» section.
- Right-click on a COM port, select «Properties».
- Go to «Port Settings» tab, click «Advanced».
- Change COM Port number, click «OK».
- Confirm changes and close Device Manager.
Conclusion
Enabling a COM port in Windows 10 is easier than it seems. By following the steps outlined in this guide, you can quickly get your COM port up and running. This process involves accessing the Device Manager, tweaking settings, and ensuring the port is recognized by your system.
So, why wait? Get started right away and make the most of your hardware! For further reading, you can explore more about device management in Windows 10 or delve into troubleshooting common COM port issues. Now that you know how to enable COM port in Windows 10, you’re well-equipped to handle any related challenges that come your way.
Matt Jacobs has been working as an IT consultant for small businesses since receiving his Master’s degree in 2003. While he still does some consulting work, his primary focus now is on creating technology support content for SupportYourTech.com.
His work can be found on many websites and focuses on topics such as Microsoft Office, Apple devices, Android devices, Photoshop, and more.
Check COM Ports in the Device Manager
The Device Manager is the easiest way to see the list of your available ports. Generally, if you want to inspect your PC’s components, it’s the first place to look. There are multiple ways to open the Device Manager to see Windows 10 COM ports:
• Press Win+X, and select it from the newly opened menu.

• Press Win+R to open the Run prompt, and type in devmgmt.msc.

• Simply type “Device” into the search bar, and find it in the search results.

If you have problems with COM ports not showing in Device Manager, this could be caused by a different version of Windows that hides them by default, a technical issue with your motherboard, or a lack of drivers for a USB-to-serial adapter.
How to Find COM Ports on Windows 10
- Open the Device Manager.

- Optionally, enable “View” → “Show Hidden Devices”.
- Locate “Ports (COM and LPT)”.

You can now right-click any individual port to view their Windows 10 COM port settings, and possibly disable them or update their drivers.
List COM Ports — Windows 10 Command Line Solution
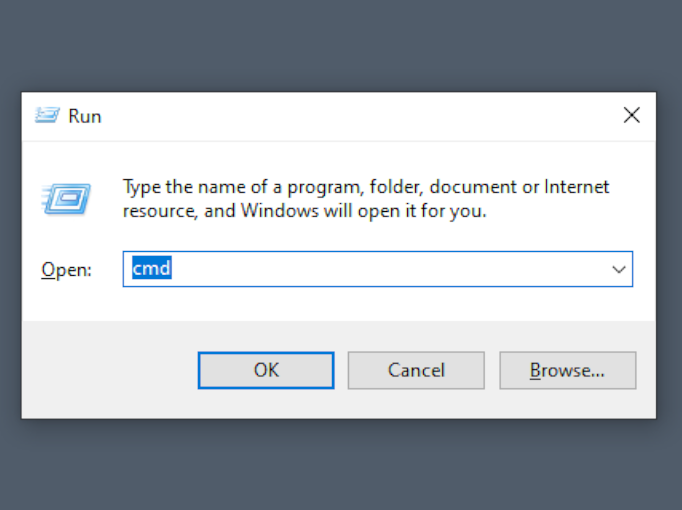
If you’d want to know how to view COM ports in Windows 10 through the Command Prompt, it’s easy, but first you need to launch CMD. This is done by entering “cmd” in the Run prompt, which is opened with Win+R.
Once the terminal is opened, type mode and confirm by pressing Enter. You will get data on the available ports and their settings.

Some details on how to check COM port in Windows 11 are different, since the addition of the Windows Terminal.
What Port Am I Using?
COM ports are simple — unlike USB, the devices won’t identify themselves. Thus, the only way to see if anything is connected to a Windows 10 COM port is to receive a message from the connected device. This can be done with PowerShell. Before trying this approach, you’ll need to find the correct settings to be used when communicating with the device, including the baud rate, parity bits, etc.
How to Find what COM Port a Device is On
- Open PowerShell by pressing Win+X and selecting “Windows PowerShell (Admin)”.

- Add the port as an object:
$port = New-Object System.IO.Ports.SerialPort [port name],[baud rate],[parity],[data bits],[stop bits] - Open the port with the
$port.Open()command.

- You can now read a single line from the port or send a message to it by running
$port.WriteLine()or$port.ReadLine().

ReadLine will keep running until it receives one line of data. If you want to read from the port continuously, this is best done with a serial terminal application.
Для просмотра и редактирования параметров настройки последовательных (COM) портов в ОС Windows необходимо запустить приложение Диспетчер устройств. Для этого требуется щелкнуть правой клавишей мыши, наведя курсор на иконку Мой компьютер, выбрать в отобразившемся на экране контекстном меню пункт Свойства. В результате экран будет выведено окно Свойства системы. Далее требуется перейти на вкладку Оборудование и нажать кнопку Диспетчер устройств.

В результате на экран будет выведено интерфейсное окно Диспетчер устройств. В данном окне необходимо раскрыть ветку оборудования Порты (COM и LPT) и выбрать COM-порт, к которому подключено настраиваемое поворотное устройство. Далее щелчком правой клавиши мыши при наведении курсора на соответствующий COM-порту объект в дереве оборудования необходимо вызвать контекстное меню и выбрать в нем пункт Свойства. В результате на экране отобразится интерфейсное окно настройки параметров COM-порта. Для просмотра и редактирования параметров Скорость и Четность необходимо перейти на вкладку Параметр порта.

To set up Com ports on your computer, first make sure the port number is not a reserved one. If it is, click on Advanced settings. There, you will see available COM port numbers. You may want to change these to match the port number of your external device. This can be useful if you have an older device or are using an application that only supports one or two COM ports. In the Advanced settings, you can also change the COM port number.
To restore the COM port configuration, you should create a backup of the registry key. This key will list all the connected COM ports. The COM port configuration will only be present if the underlying devices are ready. The SERIALCOMM subkey is a part of the HARDWARE key. Once you have the backup, you can restore the COM port configuration. Alternatively, you can try the method three, which involves editing the registry key.
How Do I Create a COM Port in Windows 10?
If you’re looking for a way to add another COM port, you’re not alone. If you own a printer, mouse, scanner, or other device with a COM port, Windows allows you to freely assign that port to other devices. If you don’t have one, you can reassign a COM port in Windows 10 manually. You can find the settings in the Advanced tab of the Control Panel.
First, connect the USB interface module to a USB port on your PC. Windows should report it as a new device and proceed to initialize it. Right-click on the MyComputer icon, and choose the “Properties” option. Click the Hardware tab and choose the USB Serial Converter. The assigned COM port number will be displayed in brackets. Next, click on the “Advanced” button.
Next, you must configure the device. The device will be automatically detected by the system and assigned a sequential COM port number. To remove an unused device, run the Device Cleanup Tool and clear the reservations on the COM port. Then, go to the Settings menu and click “Connected Devices”.
How Do I Manually Set a COM Port?
If you’re having trouble finding your serial COM port, you can reassign it manually in Windows 10. This is possible through Device Manager. To reassign a COM port, you need to select it in the Device Manager window. Note that you must make sure the COM port you’d like to use is free. You might have to use COM9 or COM10.
If you have not found your virtual COM port in Device Manager, you may need to update your driver software. The process is straightforward. Open Device Manager and navigate to Action > Add Legacy Hardware. Once there, click on the COM port you wish to add. After the installation is complete, click Next to save your changes. When the process is complete, you’ll be able to select your COM port from Devices.
To change a COM port manually in Windows 10, you must first make a backup of the registry key that controls it. This key is located in the HARDWARE directory. This registry key is used by Windows to list the COM ports connected to your computer. If a COM port is already assigned, you’ll have to disable it and make it available again. Fortunately, there are a few ways to do this.
How Do I Install a COM Port?
In Windows 10, you can use the Device Manager to reassign a COM port to a device. However, you will have to ensure that the COM port number you’ve selected is free. In some cases, you may not have access to the COM9 port. To reassign a COM port, go to the Device Manager and click on Action > Add Legacy Hardware. On the COM Port Number tab, click the dropdown list, and then choose the port number you need.
After selecting the device in Device Manager, click Properties > Port Settings. This window will open the Ports tab. You can now change the Port Name by selecting the COM10 port. You can delete specific ports by selecting the Remove button in the Port Name field. Be sure to run the program with Administrator privileges so it doesn’t affect other system settings. Alternatively, you can choose to delete the COM port.
How Do I Make a COM Port Available?
If you are unable to find a COM port, there are some ways to reassign it. One way is to use Device Manager. Click the Advanced tab and select the Ports Option. In the Ports drop-down list, select the COM port number you wish to reassign. Some COM ports might already be assigned. You can reassign another port in this way.
To do this, first identify the device you want to use. If it is an external device, it will be detected by Windows and assign it a port number between one and 255. The first COM port number is reserved for connected devices, and the next COM port number is given to the new device. This way, you can use COM ports for several different purposes, including a printer and scanner.
Once you have identified the COM port name, run a third-party application to edit the corresponding registry parameter. To prevent accidental changes to the Registry Editor, run the program with Administrator privileges. This way, you can prevent the COM port from being reassigned to an incorrect device. If the COM port number is incorrect, the device will not function properly. To fix this issue, delete the corresponding COM port and reassign it to another device.
Why are My COM Ports Not Showing Up?
If you have a hardware device that uses COM ports, it is important to know how to open them in Windows 10. This will help you locate any COM devices on your system. First, open Device Manager and click on the “Device Manager” option. From here, select the COM device, and click the “Open” button. Select the “Properties” tab to see details about your hardware device.
Click on the “Device Manager” icon and then click on the “Add Legacy Hardware” button. Next, select the COM port you want to add. Click the “+” sign next to it. Then click “Next” and follow the on-screen instructions. You should see your hardware devices and ports appear in Devices. If you have an older computer, you may need to manually add them.
COM port settings can be restored using a backup of the COM port configuration registry key. This key lists all devices connected to the system, and is stored under the “SERIALCOMM” subkey in the HARDWARE key. However, COM port configuration is only present when the underlying hardware devices are ready. If the COM port number is missing, Windows may assign it higher than it should be.
How Do I Fix Missing COM Ports in Device Manager?
If your PC’s COM ports are missing, it might be time to try to reassign them. If you do not have the COM9 port, you can click the COM Port Number drop-down menu and select the COM9 port instead. This will reassign the port to the new device. If the device still does not show up, restart your PC and you should see it again.
To do this, first open Device Manager and click Action>Add Legacy Hardware. Choose one or more ports to manually select. Once you’ve chosen which hardware you’d like to add, click the next button. Your COM ports should be listed under Devices. Click OK when you are done. Then, go back to Device Manager and check the status. If the device shows up, you can proceed to the next step.
The error message may be different for different devices, so it’s always best to check the device’s driver version. You can do this through Device Manager or the Command Prompt. The newest driver version can be found on the manufacturer’s website. You can also try updating the device’s driver using the Windows Update. It’s a great way to solve a missing COM port.
COM ports are common components in Windows devices and can be seen in Device Manager. However, sometimes these ports are no longer visible. This can happen if you encounter a problem with the device. COM stands for “Communication port,” and it was originally the name for serial port interfaces. In addition to physical ports, COM refers to emulated ones created with Bluetooth adapters and USB-to-serial adapters.
If you’re experiencing problems finding COM ports on Windows 10, you can open Device Manager and update the motherboard drivers. COM ports can be missing in the Device Manager if they’re outdated, so it’s best to update them. Make sure you delete any COM ports that are already used. Once you’ve installed the right drivers, you can then move to the next step. If you’re still having trouble, you can also try method 3 to see if that works for you.
If the COM port isn’t displayed in Device Manager, you can use dedicated motherboard information software. This program will show you the specifications of your motherboard and detect problems. Often, missing COM ports can be resolved by updating antiquated motherboard drivers. Download DriverFix to scan your computer for missing or outdated drivers. You can use the free version of the software. When you download the driver, you’ll be able to choose the best one based on your motherboard’s hardware and operating system.
Learn More Here:
1.) Windows Help Center
2.) Windows – Wikipedia
3.) Windows Blog
4.) Windows Central
I hope that this blog post is found and helps someone. I wasn’t sure what to title it. Hope Google Juice got you here!
Read this whole post, there’s a lot initially but there’s really just two or three small pieces. It’ll be worth it because you’ll be able to have a nice one click menu and drop directly into a serial port terminal on Windows in the Windows Terminal
Often when you’re doing embedded systems development you’ll want to monitor or talk to the COM/Serial Port just like you SSH into remote system. Folks ask questions like «How to connect to a serial port as simple as using SSH?»
On Linux you’ll use things like «screen /dev/ttyS0» for COM0. With Windows, however, the historical guidance has always been to use Putty. It’ll work but it’s somewhat old, quirky, and it doesn’t integrate well with the Windows Terminal and a more modern workflow.
Say I have a small embedded microcontroller device that talks over a COM Port (usually via a USB->COM bridge) like an Arduino.
Let’s assume this device talks to the COM port as if it were a terminal and it’s outputting stuff I want to see. I’ll use this great little CLI example app for Arduino from Mads Aasvik to simulate such a device.
Here’s what it looks like under Arduino’s Serial Monitor, for example. This is a Windows app doing serial communication with its own interface wrapping around it. I want to do this at a command line, and bonus points if it’s in Windows Terminal.

Setup WSL1
If you have Windows 10 you can the Windows Subsystem for Linux quickly with this command at a Admin prompt:
dism.exe /online /enable-feature /featurename:Microsoft-Windows-Subsystem-Linux /all /norestart
Then go to the Windows Store and get any small Linux. Ubuntu or Kali will do for our purposes. Run it and set your user and password. (I tried Alpine but it still has issues with screen and /dev/null/utmp)
NOTE: If you are using WSL2 and have set it as default, run wsl —list -v and ensure that your new distro is using WSL1 as only WSL1 will let us talk to the COM Ports. You can change it to WSL1 with «wsl —set-version DISTRONAME 1» from any command prompt.
To test this out now, run your new distro from any command line prompt like this. Add the «screen» app with sudo apt update» and «sudo app install screen«.
You can see here that my Arduino serial device is on COM4. On Linux that device is /dev/ttyS4
That means that I should be able to talk it from any WSL1 Linux Distro on Windows like «screen /dev/ttyS4 9600» where 9600 is the speed/baud rate.
> wsl --list -v
  NAME                   STATE           VERSION
* Ubuntu-18.04           Stopped         2
  kali-linux             Stopped         1
  Ubuntu-20.04           Stopped         2
  WLinux                 Stopped         2
Get Minicom on your WSL1 distro
Screen is somewhat persnickety for Serial Port work so try Minicom. Minicom is a nice little text com program. Install with apt install minicom and run for the first time with «sudo minicom -s» to set your default. Note I’ve change the default port from /dev/modem to /dev/ttyS4 and the speed, in my case, to 9600.

Then I hit enter and save settings as the dft (default) in minicom. You can also turn on Local Echo with «Ctrl-A E» and toggle it if needed. Now I can talk to my Arudino with minicom.
Ensure dialout permissions to talk to the COM port
NOTE: If you get «cannon open /dev/ttyS4: Permission denied, you may need to add your user to the dialout group. This way we don’t need to sudo and get no prompt when running minicom!
> wsl -d kali-linux minicom
minicom: cannot open /dev/ttyS4: Permission denied
> wsl -d kali-linux
$ groups scott
scott : scott adm cdrom sudo dip plugdev
$ sudo gpasswd --add scott dialout
[sudo] password for scott:
Adding user scott to group dialout
I can now run minicom on my configured COM port 4 (/dev/ttyS4) with wsl -d DISTRONAME minicom without sudo.
Here I’m talking to that Arduino program. This embedded app doesn’t need to me hit enter after I type, so remember your own embedded devices will vary.

Make a nice menu
Bonus points, now I’ll add a menu item for Minicom by changing my Windows Terminal settings AND I’ll get more points for adding a nice serial port icon!

I hit settings and add a new profile like this at the top under profiles in the «list.» Again, your distro name will be different.
{
    "guid": "{61c54bbd-a2c6-5271-96e7-009a87fa45cf}",
    "name": "Minicom on Serial COM4",
    "hidden": false,
    "commandline": "wsl -d kali-linux minicom",
    "startingDirectory": "%USERPROFILE%",
    "icon": "C:/Users/scott/Desktop/serial_port_icon_138204.png"
},
To review:
- Use a WSL1 distro
- Install minicom, run with minicom -s once to make settings
- Make sure you are using the right /dev/ttyS0 device for your situation
- Ensure your flow control, baud, etc are all correct in minicom
- Add your user to the dialout group so you don’t have to sudo minicom
- Make a menu item in Windows Terminal
- or run minicom manually in your WSL1 instance whenever you like
Hope this helps!
Sponsor: Suffering from a lack of clarity around software bugs? Give your customers the experience they deserve and expect with error monitoring from Raygun.com. Installs in minutes, try it today!
About Scott
Scott Hanselman is a former professor, former Chief Architect in finance, now speaker, consultant, father, diabetic, and Microsoft employee. He is a failed stand-up comic, a cornrower, and a book author.
About Newsletter
Hosting By