
Высокая частота процессора, Turbo Boost, гигагерцы и прочее — это отлично, но не во всех случаях. К примеру, при работе на ноутбуке преимущественно от батареи с не особенно ресурсоемкими приложениями, отключив повышение частоты и ограничив максимальную частоту процессора вы получите более тихую работу системы охлаждения и продолжительное время работы от аккумулятора, не особенно потеряв в производительности.
В этой инструкции подробно о способах ограничить максимальную частоту процессора в Windows 11 и Windows 10, используя встроенные средства управления схемами электропитания, не прибегая к сторонним утилитам.
Установка опции «Максимальное состояние процессора» в дополнительных параметрах схемы электропитания
Первый способ — настроить схему электропитания, используемую при работе от батареи, задав максимальное состояние процессора ниже 100% — это отключит ускорение Turbo Boost (когда частота может повышаться выше номинальной частоты процессора) и, даже если мы выставим 99% в значительной мере повлияет на расход заряда и нагрев. Шаги будут следующими:
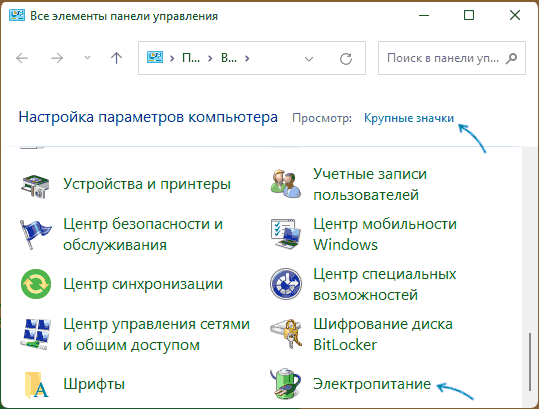
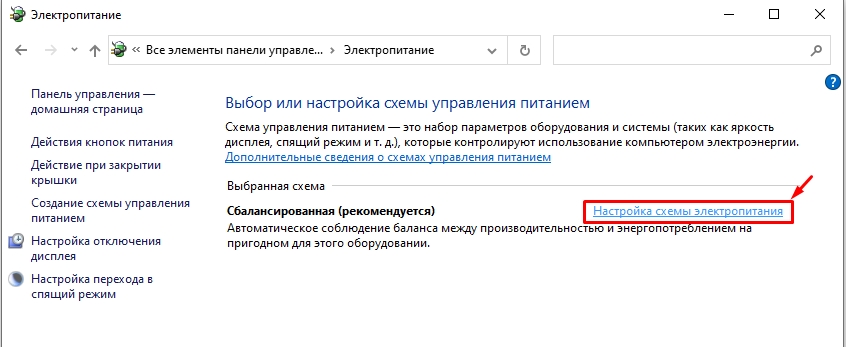
- Откройте Панель управления, для этого в Windows 11/10 можно использовать поиск в панели задач. В поле «Просмотр» установите «Значки» и откройте пункт «Электропитание».

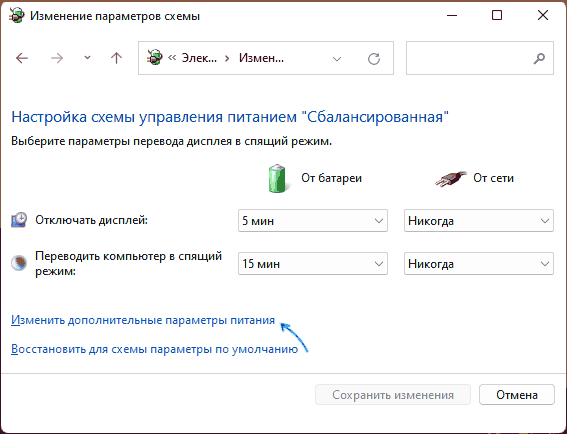
- Нажмите по пункту «Настройка схемы электропитания» у той схемы, которую вы используете при работе от батареи (при условии, что это ноутбук и вы переключаете схемы питания).

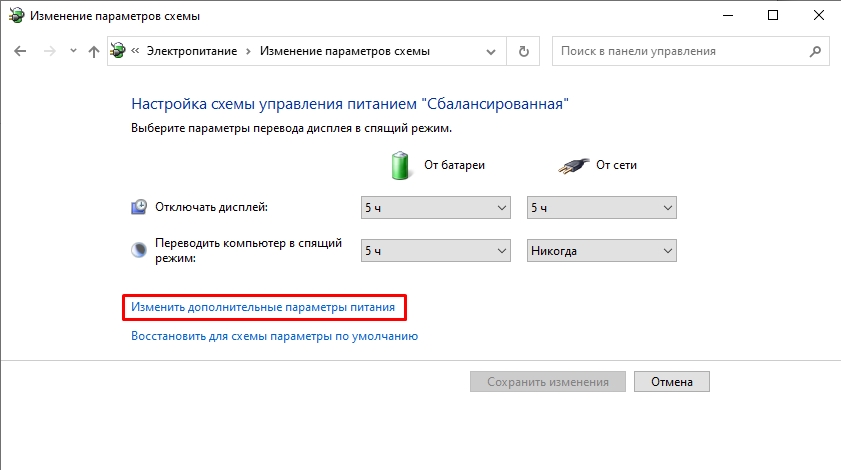
- В следующем окне нажмите «Изменить дополнительные параметры питания».

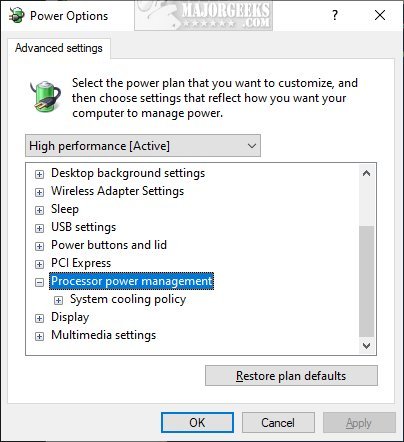
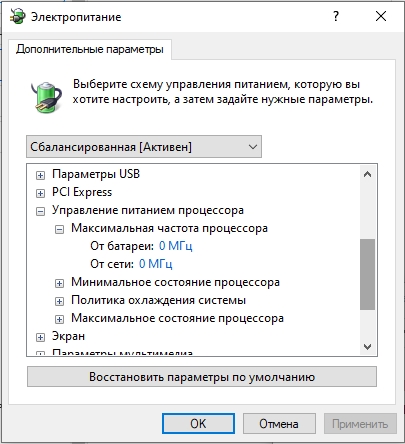
- В дополнительных параметрах раскройте раздел «Управление питанием процессора», а затем задайте собственное значение в пункте «Максимальной состояние процессора». Его можно задать отдельно для питания от батареи и электросети.

- Примените сделанные настройки.


На этом процесс будет завершен — изменения должны начать действовать сразу.
Полезным будет настроить две или более схем электропитания: одну экономичную с ограничением частоты, другую — для случаев, когда нужна высокая производительность. Также вы можете ускорить переключение между имеющимися схемами электропитания: Программы для удобно переключения схем электропитания на ноутбуке или ПК.
К примеру, я на своем основном ноутбуке с горячим Core i7-10870H пишу статьи в бесшумном режиме с ограниченной частотой, и температура процессора держится в пределах 35-40 градусов, при этом каких-либо неудобств нет. А когда необходимо монтировать видео — включаю схему электропитания с высокой производительностью.
Добавление опции «Максимальная частота процессора» в дополнительные параметры электропитания
Возможен вариант, когда ограничение «Максимального состояния процессора» не срабатывает. В этом случае можно установить максимальную частоту процессора. По умолчанию эта опция в дополнительных параметрах электропитания отсутствует.
Чтобы добавить возможность настройки максимальной частоты процессора, используйте один из следующих способов:
В Терминале Windows или PowerShell
- Запустите Windows PowerShell или Терминал Windows от имени администратора, нажав правой кнопкой мыши по кнопке «Пуск» и выбрав соответствующий пункт меню.
- Введите команду
powercfg -attributes SUB_PROCESSOR 75b0ae3f-bce0-45a7-8c89-c9611c25e100 -ATTRIB_HIDE
и нажмите Enter.


В редакторе реестра
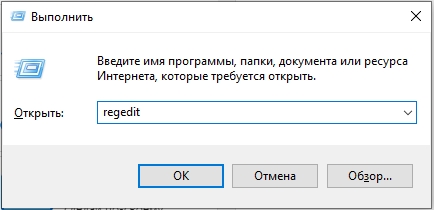
- Нажмите клавиши Win+R на клавиатуре, введите regedit и нажмите Enter.
- Перейдите к разделу реестра
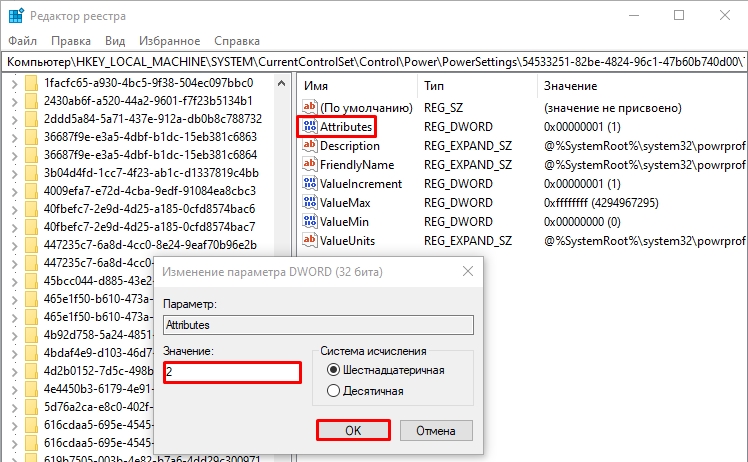
HKEY_LOCAL_MACHINE\SYSTEM\CurrentControlSet\Control\Power\PowerSettings\54533251-82be-4824-96c1-47b60b740d00\75b0ae3f-bce0-45a7-8c89-c9611c25e100
- Дважды нажмите по параметру с именем Attributes в правой панели и установите значение 2 для него. Примените сделанные настройки.


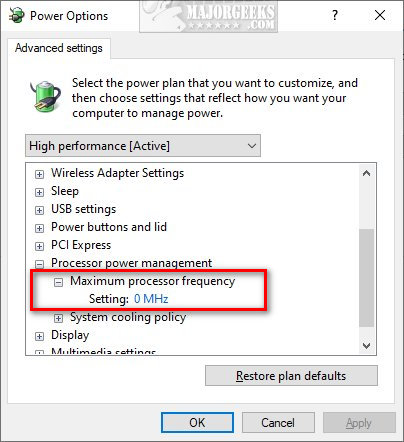
В результате, в дополнительных параметрах схемы электропитания в разделе «Управление питанием процессора» появится новый пункт «Максимальная частота процессора».

По умолчанию указано значение «0 МГц», при таком выборе частота не ограничивается. Вручную можно указать любую частоту в пределах номинальной частоты вашего процессора.
Надеюсь, для кого-то из читателей представленная информация окажется полезной. Если остаются вопросы — задавайте их в комментариях, я постараюсь ответить.
By Timothy Tibbetts |
Maximum processor frequency specifies the operating frequency of your CPU’s core. The maximum processor frequency option is hidden and set to 0 by default, which means your processor runs as fast as allowed. Advanced users can slow down the processor if your computer is running hot or consuming too much power.
Once added you will see the option Plugged in, and laptop users will also have On battery.
To edit the Maximum frequency, type in, and click on Edit power plan, and then click on Change advanced power settings.
Here’s a before and after:
1: Add or Remove ‘Maximum processor frequency’ With PowerShell
Using the Command Prompt (PowerShell) only takes seconds and is easy for anyone to try.
Open PowerShell and type in:
Add:
powercfg -attributes SUB_PROCESSOR 75b0ae3f-bce0-45a7-8c89-c9611c25e100 -ATTRIB_HIDE
Remove:
powercfg -attributes SUB_PROCESSOR 75b0ae3f-bce0-45a7-8c89-c9611c25e100 +ATTRIB_HIDE
2: Add or Remove ‘Maximum processor frequency’ In Registry
While more complicated, you can also enable or disable the Maximum processor frequency option in the registry manually or download the registry files.
Open the Registry editor and type HKEY_LOCAL_MACHINE\SYSTEM\CurrentControlSet\Control\Power\PowerSettings\54533251-82be-4824-96c1-47b60b740d00\75b0ae3f-bce0-45a7-8c89-c9611c25e100 in the search bar.
Double-click Attributes and change the Value data:
1 — Remove
2 — Add
That’s it.
Similar:
comments powered by Disqus
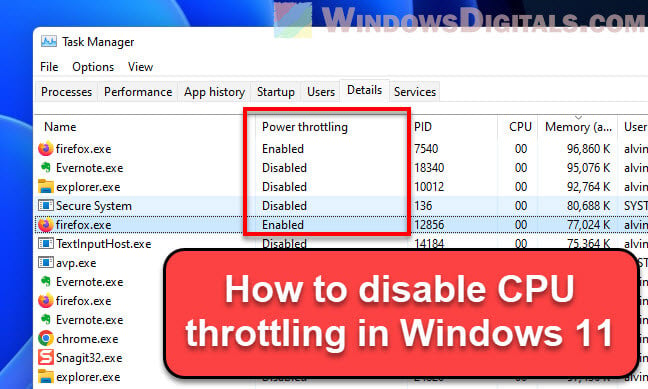
CPU Throttling, less commonly known as dynamic frequency scaling, is a built-in feature in many operating systems, like Windows 11, that reduces the processor’s speed in real time to either save power or reduce the heat generated by the processor. It sounds like something you should always keep on, but for some people who are looking to squeeze out every bit of speed their PCs can provide, like for gaming purposes, it can be a problem. This guide will talk about CPU Throttling in Windows 11 and how to turn it off.
Also see: How to test CPU throttling in Windows 11
This guide will show you different ways to turn off CPU throttling in Windows 11. Each method has its own steps, giving you options based on what you’re comfortable with and what your computer allows.
Please note: Turning off CPU throttling can make your computer use more power and get hotter. Be careful and only do this if know what you’re doing.
Linked issue: Why is my CPU overheating and how to fix it
Method 1: Change power plan settings
Windows lets you tweak power settings with different plans. The “High Performance” plan reduces power-saving actions, including CPU throttling, for better speed. Making the processor run at full speed all the time is part of this plan.
Useful tip: How to limit CPU usage of a process in Windows 11
Step 1: Get to power options
Getting to the power options in Windows 11 is pretty straightforward:
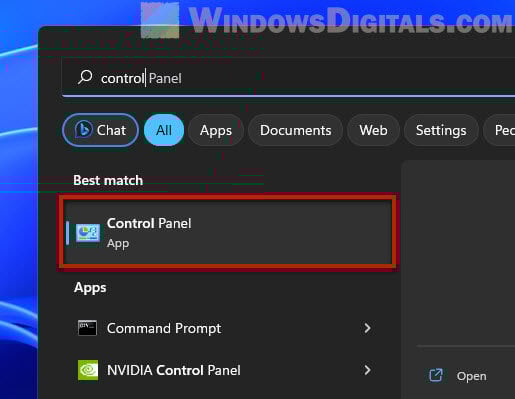
- Hit the Start menu, look up “Control Panel,” and open it.

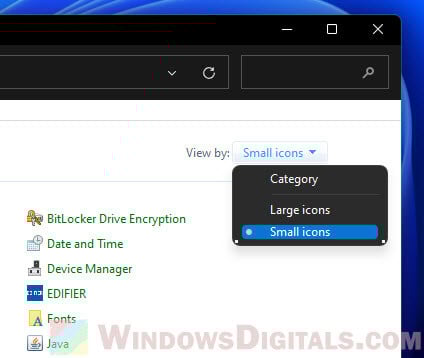
- Change “View by:” to “Small icons” or “Large icons” to show all items.

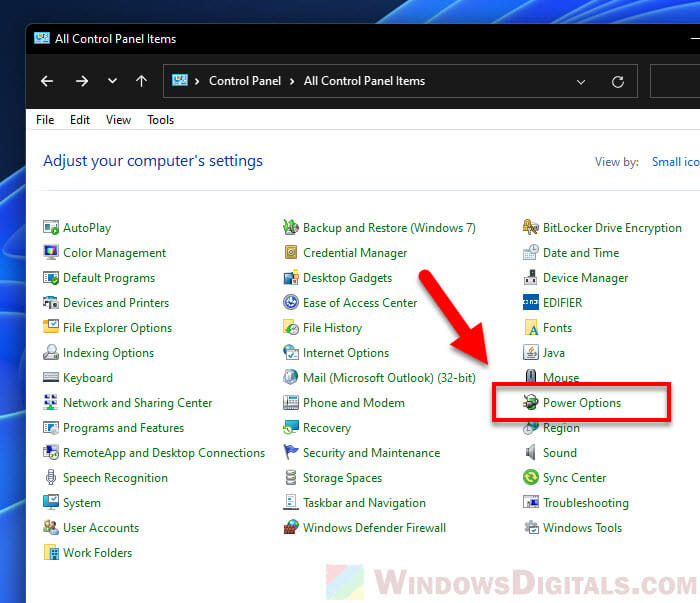
- Find and click on Power Options.

Step 2: Pick a power plan
Power plans help you balance performance and energy use:
- You’ll see a few plans like Balanced, Power Saver, and High Performance.
- Go for “High Performance” to get the best speed with fewer power-saving steps.


Step 3: Fine-tune power plan settings
Here’s how to make sure your plan fits your needs:
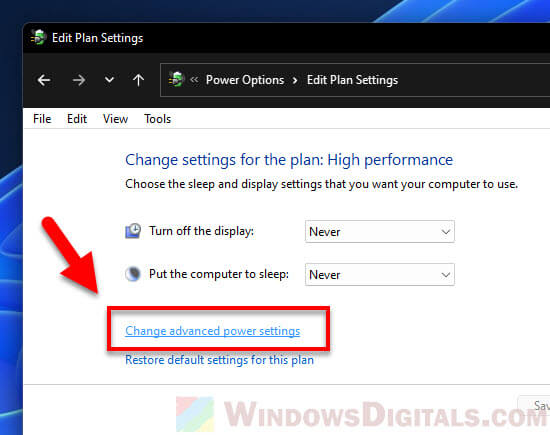
- Click “Change plan settings” next to the High Performance plan.
- Then, hit “Change advanced power settings“.

Step 4: Tweak processor power management
These settings let you control CPU throttling:
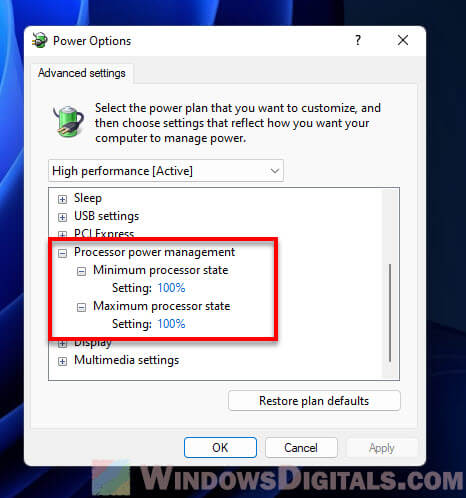
- Look for Processor power management and expand it.
- Adjust Minimum processor state and Maximum processor state to 100% to keep the CPU at full throttle.

Step 5: Lock in the changes
After tweaking, make sure to save your settings:
- Hit Apply and then OK.
Method 2: Turn off throttling for specific tasks in Task Manager
The Task Manager lets you see and adjust what’s running on your computer. You can find which tasks are being throttled and stop throttling for those you choose.
Handy guide: How to set process CPU affinity or priority permanently in Windows 11/10
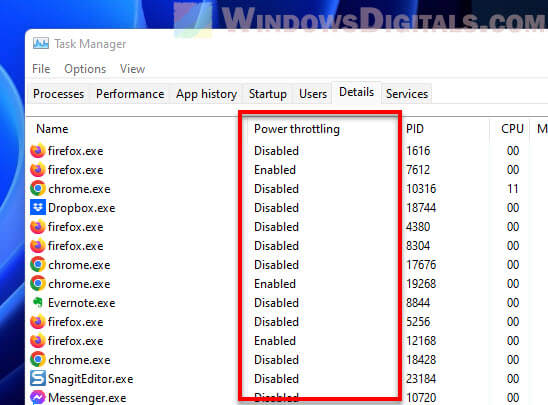
Step 1: Show the power throttling column in Task Manager
To check out which tasks are being throttled:
- Fire up Task Manager (right-click the taskbar, pick Task Manager, or press Ctrl + Shift + Esc).
- Head to the “Details” tab.
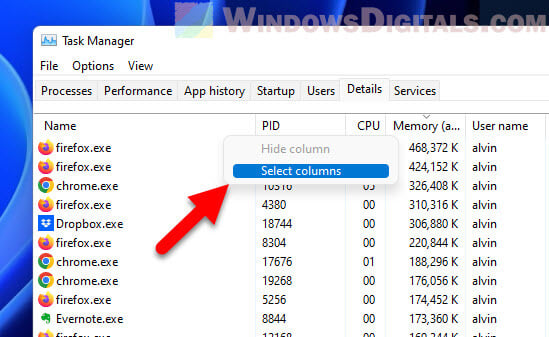
- Show the Power Throttling column by right-clicking a column header and picking “Select columns“.

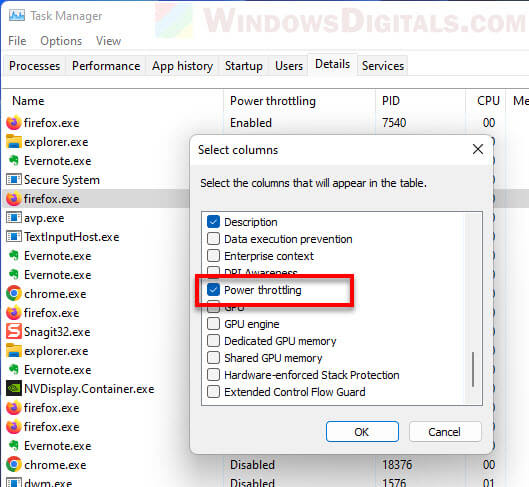
- Tick the “Power Throttling” box.

- Now you can see which tasks are getting throttled.

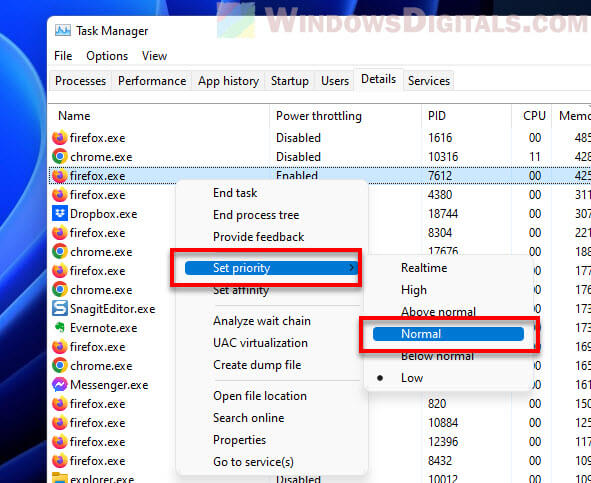
Step 2: Make a task more important
If you want a specific task to skip throttling:
- Find the task in the list, right-click it, and choose Set priority.
- Pick Normal or anything higher. This tells your computer that the task is important and should get more resources, which can help stop throttling for it.

Method 3: Use Group Policy Editor to stop power throttling
The Group Policy Editor is a tool for more advanced users, usually found in professional versions of Windows, that lets you change many system settings, including turning off CPU throttling.
Related resource: Game lag when watching YouTube or Twitch on Chrome
Step 1: Open Group Policy Editor
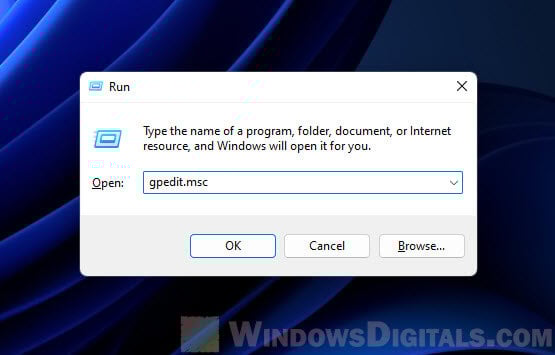
Here’s how to get into the Group Policy Editor:
- Press Win + R to open the Run dialog box.
- Type gpedit.msc and hit Enter.

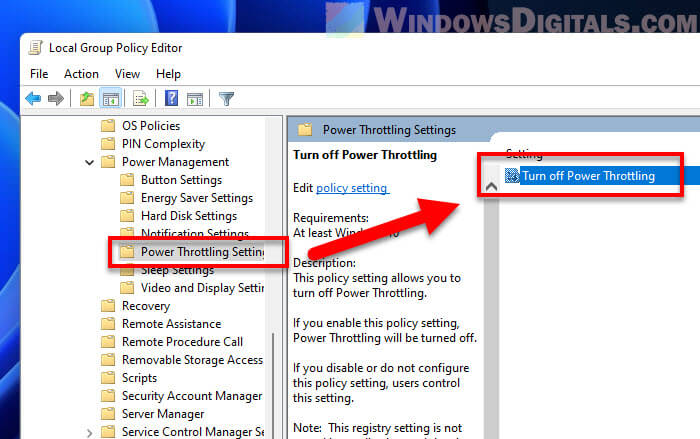
Step 2: Find the power throttling settings
In the Group Policy Editor, follow these steps:
- Go to Computer Configuration -> Administrative Templates -> System -> Power Management -> Power Throttling Settings.
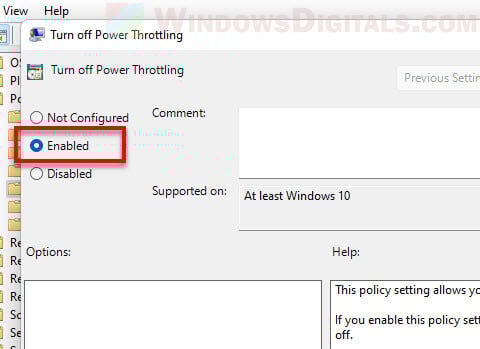
- Double-click Turn off Power Throttling.

Step 3: Stop power throttling
To turn it off:
- In the dialog box, select Enabled. This actually turns off power throttling.
- Click Apply and then OK.

Method 4: Turn off CPU Throttling using Registry Editor
The Registry Editor lets advanced users change system settings by tweaking the system registry. Be extra careful here, as mistakes can cause big problems. It’s smart to make a system restore point before you start.
Step 1: Open Registry Editor
Here’s how to open it:
- Press Win + R to bring up the Run box.
- Type regedit and press Enter.


Step 2: Go to the Power Throttling key
In the Registry Editor, follow these steps:
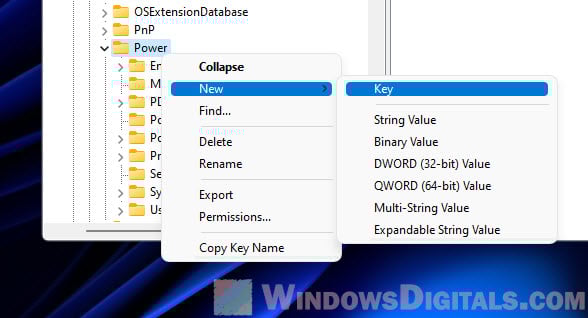
- Navigate to
HKEY_LOCAL_MACHINE\SYSTEM\CurrentControlSet\Control\Power\PowerThrottling. - If you don’t see PowerThrottling, you’ll need to make it. Right-click Power, choose New > Key, and name it PowerThrottling.

Step 3: Change or add a new value
Then, do this:
- Look for PowerThrottlingOff. If it’s not there, create a new DWORD value with that name.
- Double-click PowerThrottlingOff, set the value to 1, and click OK. This tells your computer to stop throttling power.


Step 4: Close Registry Editor and restart
After that, you just need to:
- Close the Registry Editor.
- Restart your computer to apply the changes.
These ways show how to stop CPU throttling based on what you prefer or how comfortable you are with changing system settings. By managing CPU throttling, you can choose performance over saving power, which might be better for some users.
Some final advice
Keep an eye on your system after making these changes. If you run into any issues, you can always turn CPU throttling back on by undoing what you did here. CPU throttling exists to help avoid overheating and extend the life of your computer, especially laptop. If you decide to turn it off, make sure your cooling system can handle the extra heat to avoid damage.
Turning off CPU throttling means your CPU works harder, using more power and making more heat. Always check that your hardware can deal with the extra work and heat to keep things safe and running longer.
On your Windows 11 or Windows 10 computer, you may be experiencing high CPU usage caused by an app or game, of which you want to reduce or limit how much CPU resource the process for the app or game can use. In this post, we will show you how to limit CPU usage for apps with a single process or apps with multiple processes.

In simple terms, CPU utilization is the current percentage of CPU resources consumed by all programs. If you notice that some programs are using more of your CPU cores and hogging system resources, you can limit CPU usage for the process or multiple processes of the game/app using the methods below.
- Set Process Priority and CPU Affinity
- Use third-party app
- Lower Maximum Processor State
Let’s see these methods in detail.
1] Set Process Priority and CPU Affinity
Process Priority enables Windows OS to allocate and de-allocate resources required by all the active processes. PC users can alter the process priority of any process/sub-process via Task Manager, but it should be done only for non-system processes. The process priority settings of the core system processes are best left unaltered.
CPU Affinity simply restricts the processes to use fewer CPU cores of your system. PC users can set for each process to control how many CPU cores a process is allowed to use. By changing CPU affinity, you can free up CPU cores which will become available to other processes.
To set Process priority, do the following:

- Press Ctrl + Shift + Esc key to launch Task Manager.
- In Task Manager, identify the process whose priority you want to alter.
- You can also click on the CPU column to arrange the processes in descending order of their consumption.
- Now, right-click on the process and select the Go to details option from the context menu. Alternatively, click the Details tab and look for the process you want to alter.
- On the Details section, right-click on the process and select the Set priority from the context menu.
- Then, select Below Normal (allocates slightly fewer resources when they are available) or Low (allocates the least amount of system resources when they become available).
- A warning window will pop up informing you about the effects of changing the process priority.
- Click on the Change Priority button to apply changes.
- Exit Task Manager.
To set CPU (Processor) affinity, do the following:
 affinity")
Note: For apps that has multiple processes such as msedge.exe, you will have to set the CPU affinity for each of the processes since each executable represents a different tab, window or plugin.
- Open Task Manager.
- In the Task Manager window, click on More details to expand if you can’t see any tab but only a few apps with little to no information.
- Under Processes tab, click on the app you want to limit its CPU usage to expand the list of processes the app is running.
- Next. right-click on the process you want to limit, and select Go to details. to be redirected to the Details tab.
- In the Details section, right-click on the highlighted process and select Set affinity.
- In the Processor affinity window, by default, for most processes, you should see all processors are selected, which means all processor cores are allowed to run the process.
- Now, simply uncheck the boxes of CPU cores that you don’t want the process to use.
- Click on the OK button.
- Exit Task Manager.
Remember that you can limit only one or multiple CPU cores for a process, but at least one core has to be selected. Also, with this method, Windows will reset the configuration after you close and open the program to its default which is to use all CPU cores. So, to force an app or game to always retain the allowable CPU cores (CPU affinity), you can use the workaround below.
Read: Can’t set Process Priority in Task Manager of Windows
Permanently set CPU Affinity and Priority by creating a shortcut for the process

- You begin by determining the hex value of the CPU(s) you want to use for CPU Affinity parameter by getting the binary number of the CPU cores you want to use for a process.
The length of the binary number is determined by how many CPU cores you have. In the CPU binary number, 0 means “off” and 1 means “on”. For each CPU core you want to use for the process, change 0 to 1.
For this post, we are demonstrating with 7-core CPU and will be using only CPU 0 for the application; the binary number to be used will be 0000001.
- Next, we need to convert the binary to a hexadecimal number using the converter at rapidtables.com/convert.
- Once you have the hex number, proceed to create a desktop shortcut.
- In the Create shortcut window, enter the syntax below in the Type the location of the item field.
cmd.exe /c start "ProgramName" /High /affinity # "ProgramPath"
- In the syntax, substitute the ProgramName placeholder with the actual name of the program (can be empty or any name), Low with any CPU priority (Realtime, High, Above Normal, Normal, Below Normal, Low), # with the Hexadecimal value obtained earlier, ProgramPath with the full path of the game or application.
Now, after you have created the shortcut, if you want to run the program, run this shortcut instead, and Windows will automatically launch the program with the CPU affinity and Priority you’ve set in the shortcut’s command parameters. But, keep in mind that this method will only work for apps and games that run on only one process. For apps that run on multiple processes, such as chrome.exe, firefox.exe, or msedge.exe, you need to force set the priority and CPU affinity by following the workaround below.
Read: Change Process Priority for running processes using Command line
Permanently set CPU Affinity and Priority by creating PowerShell script for the process

- You begin by creating a PowerShell script.
- Create a text file and name it any name you like but with an extension of .ps1.
- Once created, open the .ps1 file with Notepad or any other compatible text editor.
- Enter the syntax below in to the text editor:
Get-WmiObject Win32_process -filter 'name = "chrome.exe"' | foreach-object { $_.SetPriority(64) }
- Substitute chrome.exe with the name of the process you want to set priority for, and the priority value (Realtime 256, High 128, Above Normal 32768, Normal 32, Below Normal 16384, Low 64) in the SetPriority(value).
- Now, you need to determine the decimal value of the CPU core(s) you want to use for a process. As you’re using the same CPU cores above, check the decimal value in the converter above.
- Now, if you want to set the CPU affinity for only one process, enter the command line below into the PowerShell script.
$Process = Get-Process Messenger; $Process.ProcessorAffinity=1
- To set the CPU affinity for all processes with the same name, for example, chrome.exe, firefox.exe or msedge.exe, enter the command line below into the PowerShell script.
ForEach($PROCESS in GET-PROCESS chrome) { $PROCESS.ProcessorAffinity=1}
- Substitute the value 1 with the decimal value you obtained from the converter, chrome with the name of the process you want to set the CPU affinity for.
- Save the text editor.
- To run the script, right-click the file and select Run with PowerShell.
By default, Windows does not allow any script to run on the system. To allow your script to run, tsp Y when prompted. The script will then run and exit after executing all the commands. If you encounter any problem running the script due to execution policy, you can turn on PowerShell script execution or you can create a desktop shortcut pointing to the ps1 script you’ve created earlier with parameter that bypass the execution policy using the command below in the Type the location of the item field:
C:\Windows\System32\WindowsPowerShell\v1.0\powershell.exe -noexit -ExecutionPolicy Bypass -File "FullPathToPowerShellScript"
- Substitute the FullPathToPowerShellScript placeholder with the actual path to your PS1 script file. If your Windows is not in C: drive or your powershell is installed elsewhere, replace the C:\Windows\System32\WindowsPowerShell\v1.0\powershell.exe with the path to the powershell.exe on your system.
Read: Configure Processor Scheduling for better performance in Windows
2] Use third-party app

This method also solves the drawback of using Task Manager to limit CPU usage, which is, it resets your preferences after the program restarts. So, If you want a more comprehensive solution to manage the resource usage on a program, you can try third-party apps like Process Lasso, Bill2 Process Manager, and Process Tamer.
To limit the CPU usage of a process using Process Lasso, do the following:
Note: If you plan on making major tweaks with this utility or any other mentioned, we suggest you create a restore point before you proceed.
- Download and install the appropriate version of the utility on your system.
- Next, launch the application with elevated permissions.
- Right-click on the desired process and change its priority and affinity as per your requirement.
- Make changes by selecting the Always option from the context menu. If you choose the Current option, it will only be applicable until the program restarts.
- Once done, you can exit the app.
Read: How to Enable or Disable CPU Core Parking in Windows
3] Lower Maximum Processor State

This method is not as invasive as the two methods described above. This setting allows you to limit the maximum speed your CPU can attain which will consequently put less task on your processor and can potentially prevent your PC overheating.
To lower the Maximum processor state of your CPU, do the following:
- Open Control Panel.
- Click Power Options.
- Click on the Change plan settings option located next to the active power plan of your system.
- Then click on the Change advanced power settings. A new Power Options window will launch.
- Find and expand the Processor Power Management option.
- Click on the Maximum processor state option and edit the values.
- By default, the value is set at 100 percent. Change it to 80 percent for both the On Battery and Plugged in options.
- Click Apply > OK to save changes and exit the window.
With the above configuration, your CPU will run at 80 percent of its capacity during peak loads.
That’s it!
Related post: How to Check, Lower or Increase CPU usage in Windows
How to allocate more CPU to a program in Windows 11/10
CPUs are not allocated to programs. Programs create threads of execution that run simultaneously. Different CPUs support a different number of threads they can execute simultaneously. If the program creates several threads same or more as a maximum number of threads supported by the CPU it may consume more CPU.
Can I limit CPU usage of a process?
The easiest way to limit CPU usage of a process on a Windows 11/10 computer is to limit Processor power. Go to Control Panel. Maximum Processor State and lower it to 80% or whatever you want. Using software that measures CPU temperatures like ‘Speed fan’, you will see that temperatures drop.
Why is Task Manager CPU usage so high?
The worst scenario for high CPU usage when nothing pops up in Task Manager is a virus infection or malicious software that runs in the background. To stay safe from any ransomware or other type of viruses that can lead to computer damage, make sure Windows Defender is updated and running or you can install any reputable third-party AV.
Read: CPU usage spikes to 100% when opening Task Manager
Should I enable all cores in Windows 11?
They are only used when required to speed up the tasks. However, you can manually enable some or all of them. If you think that your computer is performing slow and can do better, you can manually enable all cores so the workload between them is divided, resulting in faster performance.
What does 400% CPU usage mean?
On a multi-core Unix / Linux computer, 100% utilization indicates that only one of the cores is maxed out. 150% utilization indicates that only 1.5 cores are at capacity. So, for example, on an 8-core box, 400% utilization leaves you with twice the headroom that you are actually using.
What is a good CPU usage percentage?
The best CPU usage would most likely be around 80-80% max. This means you are utilizing more of your CPU’s capabilities while giving it some leeway to handle a spike in CPU usage.
Всем привет! Сегодня в статье мы поговорим про управление питанием процессора. Данную настройку можно найти почти во всех версиях Windows 10, 11, 7 и 8. Для чего эта конфигурация вообще нужна? – давайте попробую ответить на примере.
Представим себе ситуацию, что у вас есть мощный игровой ноутбук. Если в системе стоит настройка «Максимальная производительность», то даже при работе с обычными офисными программами и браузером ноут будет работать на полную. Некоторым пользователям это не нравится, и они для этого используют «Сбалансированную» схему питания, когда на процессор подается только часть питания.
От этого процессор работает чуть слабее, но при этом он не перегревается и работает сбалансированно. Зачем работать на полную и повышать частоты процессора, для небольших задач и программ? – именно поэтому в настройках питания можно увидеть значения от 5 до 10%.
Читаем – что делать если греется ноутбук.
С другой стороны, для игр монтирования видео или работы с мощными графическими программами, нужно наоборот использовать другую более производительную схему. Настройка управления питанием процессора на Windows позволяет подавать разное питания в тех или иных ситуациях.
Содержание
- Изменение настроек
- Дополнительная настройка
- Видео
- Задать вопрос автору статьи
Изменение настроек

Настройка электропитания в Windows делается в «Панели управления», которая есть во всех версиях «Окон». Я настольно рекомендую перед изменением настроек питания процессора – обновите все драйвера на свой ноутбук. Если у вас стационарный компьютер – обновляем дрова для материнской платы.
Читаем – как обновить все драйвера.
Если у вас ноутбук от MSI, Lenovo или ASUS – дополнительно установите специализированное программное обеспечение: MSI Center (или MCI Dragon Center), LenovoVantage, Armoury Crate. Зачем это нужно? В некоторых ноутбуках только через него можно поменять или добавить режим «Высокая производительность». Просто его может и не быть в настройках.
- Зажмите клавиши:
+ R
- Введите команду в окно «Выполнить»:
control
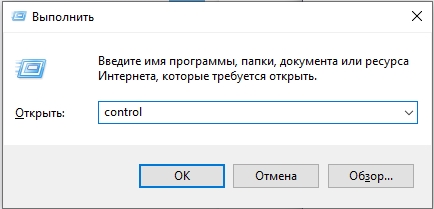
- Откройте раздел «Электропитания».
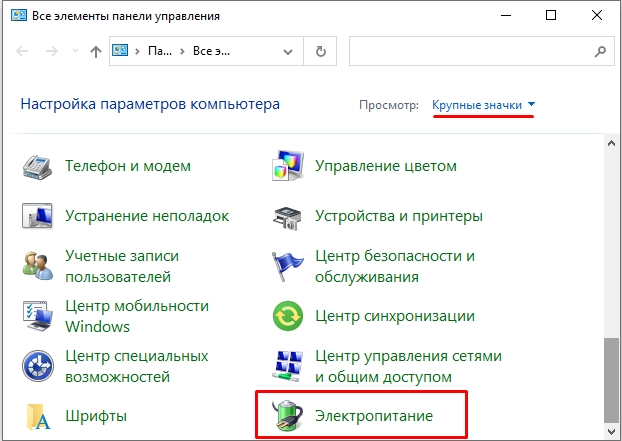
- Здесь может быть несколько схем. Например, «Сбалансированная», «Высокая производительность» и «Экономия энергии». Последняя обычно включается при работе от батареи, при отключенном блоке питания. «Высокую производительность» я обычно включаю во время игр или при работе с прожорливыми программами. В остальное время и сижу на «Сбалансированной» схеме. Напротив нужной кликните «Настройка схемы электропитания».
- «Изменить дополнительные параметры питания».
- Раскройте «Управление питанием процессора». Здесь у нас есть несколько параметров.
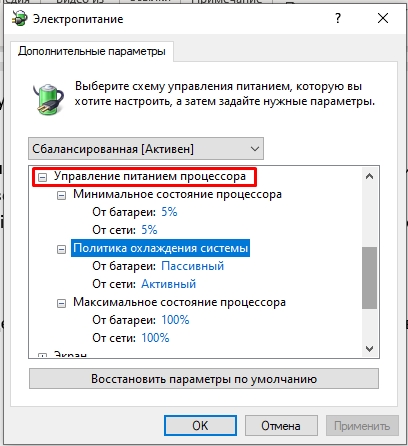
- Минимальное состояние процессора – сколько мощности будет отдано на программу в процентах на минимальной нагрузке. Сколько ставить тут? Для того чтобы ноут не закипал, можно оставить параметр 5%. Если ваш ноут постоянно работает от сети и нужна максимальная производительность, можно выставить 100%.
- Максимальное состояние процессора – противоположный параметр первому. Если вы хотите снизить потребляемую мощность CPU можете немного уменьшить этот параметр. Например, поставить 80-90%. Для игр и прожорливых программ – оставляем 100%.
Если же комп или ноутбук работает у вас постоянно от сети, и вы хотите, наоборот, увеличить производительность – ставьте все на 100%.
Дополнительная настройка
Если вы ограничили максимальное состояние процессора, но все равно видите сильный перегрев или надрыв кулеров на компе. В первую очередь я бы на вашем месте проверил температуру процессора. Если камень слишком горячий, нужно провести профилактические работы – чистим от пыли, меняем термопасту и термпопрокладки. Читаем подробные инструкции для:
- Ноутбука.
- Компьютера.
Если уже после этого останутся проблемы, можно сделать еще две вещи. Первая – выключить (или включить) Turbo Boost. Turbo Boost – это увеличение частоты процессора на 1000-1500 МГц. Как вы понимаете в таком случае увеличивается производительность, но и сам проц греется сильнее. Для сбалансированной схемы можно дополнительно уменьшить максимальную частоту процессора через редактор реестра.
- Опять жмем:
+ R
- Вводим:
regedit
- Пройдите по пути:
HKEY_LOCAL_MACHINE\SYSTEM\CurrentControlSet\Control\Power\PowerSettings\54533251-82be-4824-96c1-47b60b740d00\75b0ae3f-bce0-45a7-8c89-c9611c25e100
- Справа откройте параметр:
Attributes
- Установите значение:
2
- Теперь заходим в то же окно и смотрим – в конфигурации «Управление питанием процессора» появилась настройка «Максимальная частота процессора». 0 МГц – означает, что ограничений нет и процессор работает на полную. Вы можете уменьшить показатель вручную.
На некоторых ноутбуках, можно дополнительно немного уменьшить вольтаж для процессора. Если сделать это грамотно, то производительность в играх не упадет, а может даже немного вырасти. Почему так происходит? Такое может сработать, если изначально на данной модели немного не хватает напряжения на видеокарте. Например, на одной модели 80 Ватт, но она может работать с 120 Ваттами. В итоге мы снижаем вольтаж в BIOS на процессор, который имеет миллион ядер, и он и так не нагружается в игре.
И в итоге часть вольтажа идет на видеокарту. В этом есть два плюса. Первый – меньше греется процессор. Второй – больше вольт идет на видеокарту, и она работает с большим производительным потенциалом. Настройки можно делать только в инженерном меню BIOS. Перед этим узнайте – сколько Ватт у вас поступает на вашу видеокарту и насколько она может работать. Если она уже работает с максимальным напряжением, то ничего менять не нужно. Если же потенциал есть, то можно попробовать уменьшить вольтаж на процессоре. Ну и помните, что вы все делаете на свой страх и риск. Подобные действия с БИОС-ом моментально выводят ноутбук из гарантии. Я всего лишь указал на один интересный метод, которым пользуются некоторые «знающие инженеры».
Вот и все. Пишите свои вопросы и делитесь мнением в комментариях. До новых встреч на портале WiFiGiD.RU.