
Download Article
An in-depth guide to making a custom mouse cursor in Windows 10 or 11
Download Article
- Editing Your Cursor
- Converting Your Image
- Changing Your Cursor
- Video
- Q&A
|
|
|
|
Do you want to make and use your own unique cursor on your computer? While the default cursor on Windows does the job, it’s fairly plain. By customizing your cursor, you can choose something a lot more fun and personalized. You can use any photo or image you’d like to create this new cursor; you’ll just need to edit and convert it to a .CUR file first. This wikiHow will show you how to make and apply a custom cursor for your Windows 10 or 11 computer.
Things You Should Know
- Find a .PNG image with a transparent background. Paste it onto a transparent 45 W by 50 H canvas and save.
- Convert the .PNG file to .CUR with an online converter.
- Type «Mouse settings» into the Start menu. Click «Additional mouse options» → «Pointers» → «Browse» → select your image → «Apply».
-

This image must be in .PNG format, as this provides a transparent background. If you don’t have a transparent background, you’ll need to edit the image to make it transparent.
- Search Google for images or upload your own to your computer.
-

Go to https://ipiccy.com/ in a web browser. This is a free photo editor that works in your browser.
Advertisement
-

This will be at the top of the page.
- The photo editor will open.
-

You can find this at the very top center of the screen, next to Photo Library.
-

Enter 45 in the Width box and 50 in the Height box.
- Your canvas size should be 45 W x 50 H.
- Be sure to check the box next to Transparent.
-
This looks like three rectangles layered on top of each other. You can find this on the left panel.
-
This looks like a blue star in front of a mountain and sun picture.
-
Click Upload image in the left panel, and then select your photo from your computer. Once added, it will appear in the left panel.
-

Use the scroll wheel to zoom into your canvas if needed.
- If the image doesn’t take up most of the canvas space, click and drag a corner of the image to enlarge it. Make sure the image sits in the center of your canvas and all parts of it are visible.
-
You can find this at the top of the window. This will save your changes.
-
Your cursor image is all finished; you’ll just need to save it to your computer.
- Click Save at the top.
- Click My computer.
- Enter a name for your cursor and then set the file as .png.
- Click Save to my computer.
- Select a save location.


Advertisement
-
Go to https://convertio.co/png-cur/ in a web browser. This is a free image converter. You’ll need to convert your .png image into cursor format (.cur).
-
This is the large button at the center of the screen. Make sure to avoid clicking any surrounding ads.
-
Use the pop-up window to locate the image you created in the previous section. Select it, and click Open.
-
This will convert your image to .cur format. It should only take a few moments to convert.
-

This is the blue button to the left of your image file.
- The .cur file will be downloaded to your computer.
- In most cases, this will be found in your Downloads folder. If desired, move the file to another folder by clicking and dragging.


Advertisement
-
On Windows 10 and earlier, this will be at the bottom left corner of the screen. On Windows 11, this will be at the bottom center of the screen.
-
Results will load as you type.
-
A new window will open.
-
This will be underneath the Related settings header.
- A new window will open.
-
This is the top tab, to the right of Buttons.
-
This is below the Customize box. Make sure the Normal Select mouse option is highlighted.[1]
- Alternatively, double-click Normal Select to open the Browse window.
-
Find your saved .cur image from the previous section. Click it, and then click Open.
-
This is the button at the bottom-right corner. Your cursor will change into your new image.
- Click OK to close the window.
- If you want to change the cursor back to its default, return to the Pointers menu and click Use Default.


Advertisement
Add New Question
-
Question
Can I use Microsoft Photos or Paint instead of Gimp?
Of course, you can! Right-click on a photo in your computer. Click «Properties» in the drop-down menu. In the «General» tab, click the «Change» button. Then choose any program you want the photos to open with.
-
Question
How do I know if the files I download in this process are safe?
Paul Schofield
Community Answer
On most computers these days it will warn you beforehand if the download can cause problems with your computer. If this doesn’t show up, then you will be safe to initiate the download process.
-
Question
It doesn’t say download in the digitalcoding part. How do I do that?
You need to scroll down after converting the image on digitalcoding.com.
See more answers
Ask a Question
200 characters left
Include your email address to get a message when this question is answered.
Submit
Advertisement
Video
Thanks for submitting a tip for review!
About This Article
Thanks to all authors for creating a page that has been read 230,675 times.
Is this article up to date?
Make cursors in browser
It might look like a screenshot, but it is not. Just pick a drawing tool and start painting your
cursor directly in the browser.
my-mouse-pointer.cur — Online Cursor Creator
Close
Index
Cursor Editor Help
Table of contents
- Drawing a cursor — about pencil, eraser, line, etc.
- Blending mode — mixing drawn and previous pixels.
- Setting cursor hot spot — the «clicking-point» of a cursor.
- Selecting a color — pick color to draw with.
- Downloading a cursor — get the result of your work.
- Using templates — start making a new cursor.
- Applying effects — about colorize and drop shadow.
- Using cursor on your computer — changing mouse pointers.
Drawing tools
Hot spot
Each mouse cursor has one special pixel (called hot spot) that controls the actual position of a click. For arrows, it is usually the upper left corner, for a sniper scope-like cursor, it may be in the center.
| Select the «Hot spot» tool and then click on a pixel. The clicked pixel becomes hot spot. Look at the preview in the lower left corner — the hot spot pixel is always in the center of the cross. |
Blending mode
If the opacity of the currently selected color is less than 100%, the blending mode controls whether pixels are replaced or drawn over the previous content.
Downloading
Before you can use a cursor on your computer, you need to download it.
| Fill in a name for your cursor and then click the «Download» button in the lower area of the window. |
Important: When your browser asks you what to do with the file, do NOT try to open it. Instead, SAVE it to a folder of your choice. Only then you can make it your cursor.
Selecting color
Many of the drawing tools and effects are making use of the current color and opacity. You can select color and opacity by clicking in the color areas by the right side of the window.
Select hue by clicking in the top bar, select saturation and brightness in the middle square. Opacity (alpha) can be selected using the lower bar.
| The «Dropper» tool can be used to make color of a pixel on a canvas active. Click the tool and then the pixel. Previously active tool is re-activated automatically. |
Using templates
You can quickly delete all pixels or initialize the canvas with one of the common arrows.
Click on an image (or the empty space) in the «Templates» panel. It may take a second or more depending on your computer and internet browser (Internet Explorer is extremely slow).
Applying effects
There is a couple of effects that can be applied by clicking on them in the top toolbar. It may take a second or more depending on your computer and internet browser (Internet Explorer is extremely slow).
Switching cursors on your computer
After you have downloaded a cursor, go to your Start menu and click on Control Panel. Then find the Mouse control panel. Switch to the Pointer tab, select a role, click Browse and navigate to the downloaded file. Finally, click OK.
An alternate way of switching cursors is using the Change Cursor tool (freeware).
File name:
.cur
Tip: Click the question mark to learn how to use this tool… ->
Getting started
Do not be afraid to experiment. Start by clicking on the canvas, move your mouse while holding the left
mouse button down to draw a continuous line. Try out the other tools. When ready, hit the big Download
button and save your cursor. Also, learn how to customize your cursor.
Sharing your work
If you are logged-in you may add your cursor to the cursor library
by clicking ‘Publish’ button in the Gallery mini-panel. You can also edit your cursors that are present
in the gallery. Visit the page of your cursor and click the ‘Edit picture’ link on that page.
Need more power?
RealWorld Cursor Editor allows you to create animated cursors and is more comfortable to use. And free!
Recent comments
Show older posts

spider guille
on January 9th
0
😊 :-)hello

Rayan
on January 17th
0
oi muito bom funcionou aqui dou nota 10000000 😉 😁
JOIN MY SITE
https://tubasim.wixsite.com/zune
alisteveman12
on March 10th
0
How do I import images???

Pink_panda_lover
on March 29th
0
on April 23rd
0
THIS IS AMAZING 😁
Lucasss
on April 26th
0
como faço para utilizar uma imagem em vez de pintar?
Выберите вариант загрузки:
- скачать с сервера SoftPortal (msi-файл)
- скачать с сервера SoftPortal (портативная версия, zip-файл)
RealWorld Cursor Editor — бесплатное приложение, с помощью которого можно легко создавать красивые и качественные курсоры с различными анимационными эффектами. Программа позволяет создавать как статичные, так и анимированные курсоры, (полное описание…)

Рекомендуем популярное
IconPackager 10.03
IconPackager – одна из лучших программ для изменения иконок и курсоров Windows. Поддерживается…
IconLover 5.48
IconLover — программа для работы с иконками и курсорами. С ней вы сможете выразить свою…
IcoFX 3.8
IcoFX — мощный редактор иконок и курсоров, обладающий всеми необходимыми инструментами для…
IconoMaker 3.36
Программа, которая позволяет заниматься редактированием и созданием иконок. Она…
IconForge 7.23
IconForge — программа представляет собой приятный редактор иконок и курсоров. Список возможностей просто поражает….
Several options are available if you are bored with the normal cursor when striking the keys on your computer daily.
Thanks to custom cursor-making software, you can design an animated cursor in a custom size to make your work more fun.
Since there is a huge demand for customized cursor-making software, several free software are available to create custom cursors and multiple frames.
Almost all software provides standard drawing tools, including a pencil, eraser, brush, paint, text art, etc.
Also Read: 5 Best Drive Icon Changer Software for Windows 10
10 Best Custom Cursor Maker Software
Additional features include an alteration of animation speed and a fixed delay rate for cursor frames.
Some software also allows you to import images, such as PNG, JPG, GIF, etc., to enhance your animated cursor.
Here is a look at some of the best custom cursor-making software:
1. RealWorld Cursor Editor
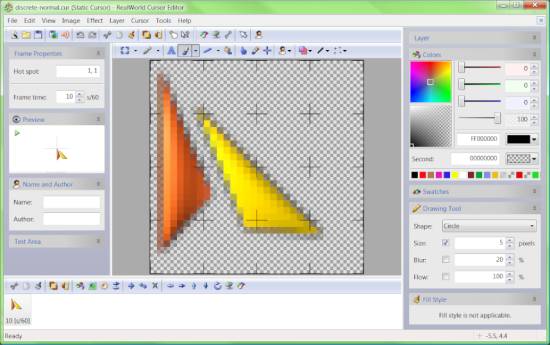
This is one of the best options currently available. It can help you create static and animated cursors using simple steps.
This enhanced photo editor works as a GIF speed changer, PSD editor, WebP editor, and more. Once you have selected the size and color depth, creating a customized cursor becomes easy.
You need to insert multiple frames and specify the animation speed for an animated cursor. Alternatively, you can draw the cursor frame or import any image to use as frames. The software supports image formats like PNG, GIF, JPEG, etc.
Additional advantage includes the presence of preloaded animated cursors that you can easily customize. Moreover, you can preview the animated cursor in real time to make changes. With the Save As option, you can save your creation easily.
Get this custom cursor maker software here.
2. IconArt
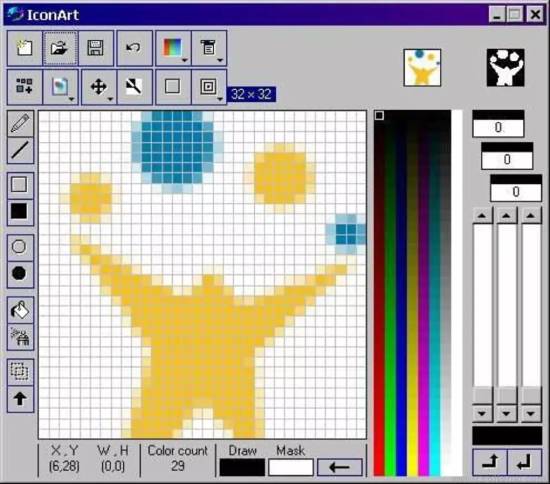
This dedicated animated cursor-making software for Windows is one of the most popular options. It is straightforward to use.
You can create your animated cursor with drawing tools (pen, line, circle, fill, change color, etc.) and customizable color depth.
Right-click on a frame to add another to the series. With multiple frames, creating an animated cursor becomes easy.
Moreover, the software allows you to set the time for every frame to control the animated cursor. However, you can only create animated cursors in select standard sizes (16×16, 24×24, 32×32, etc.).
The best part of this software is its flexibility in saving your creation. You can save the entire animation as an animated cursor or any frame as a static cursor.
Get this custom cursor maker software here.
Also Read: 8 Best Network Mapping Software for Windows
3. Chasys Draw IES
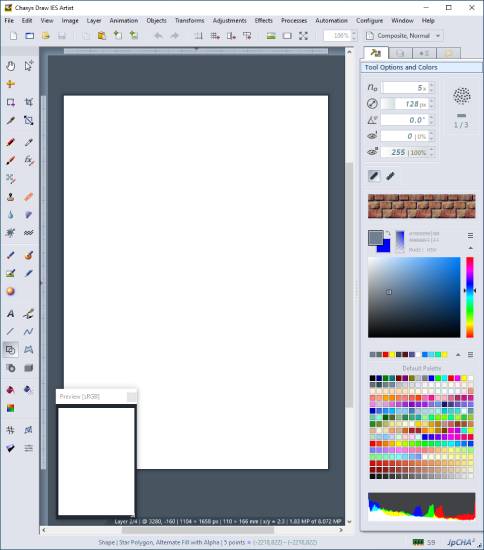
This software offers unique tools for image processing. With its Artist tool, you can quickly create animated cursors. Once the software is launched, the animated cursor mouse and all available frame options can be seen.
You can easily edit these frames or add new ones to the repository. Import image files (GIF, JPEG, PNG, etc.) to the frames with the Layer menu.
Moreover, you can also create your designs using various drawing tools, such as pencil, eraser, brush, razor, effect brush, text art, etc.
The software allows you to set the cursor animation speed as you desire. You can also edit frame properties and delay the rate of individual frames.
Once satisfied with the results, you can save the animated cursor by clicking the Save As option.
Get this custom cursor maker software here.
4. Paint.net

You can use this photo editing software for Windows to create animated cursors with the additional plugin (IcoCur Plugin). This plugin can use the animated cursor format (.ani).
Once the plugin is downloaded, you can create the desired image, select it, and drag and drop it to modify it using the software.
You can also use Paint tools, such as a pen, paintbrush, paint, shapes, text, color palette, etc., to create your desired shape.
After the changes are made, you can preview the animated cursor before editing it and later select the Save As option to store the designed cursor.
Get this custom cursor maker software here.
5. Greenfish Icon Editor Pro
Although it is an icon creator, the software can create and edit animated cursors. Once you have added the image and selected the cursor size, you can add several frames using the Layer menu to create the desired animated customized cursor.
Once you have customized the cursor, you can save it in a .ani format. Since the software supports multiple tabs, creating several animated cursors simultaneously is not a problem.
Get this custom cursor maker software here.
Also Read: 5 Best Photo Management Software With Facial Recognition
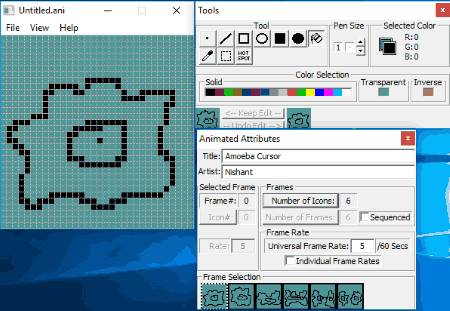
6. AniFX
If you wish to create your cursors, this free cursor-making software can help you. It perfectly creates static and animated cursors you can fill with different colors.
The software allows you to change the cursor hotspot and supports various file formats (ANI, JPG, BMP, EXE, GIF, etc.).
Drawing tools (pencil, brush, spray, shapes, lines, etc.) allow you to create customized cursors in different shapes, sizes, and colors.
The software also allows you to add special effects to the cursor and change the frame rate for animated cursors.
The Cursor Test option also allows you to preview the cursor you create, making the software one of the best tools for creating unique cursors.
Get this custom cursor maker software here.
7. AWicons Lite
This is one of the easiest-to-use software for creating the animated cursor. The interface allows you to form an animated cursor by adding several frames and icons.
With drawing tools like pen, text, paint, color picker, etc., you can draw a cursor of your choice.
The Object menu allows you to set the cursor position. You can save the animated cursor as a .ani file with the Save Object. You can also use the software to create static cursors and icons.
Get this custom cursor maker software here.
8. Icon Edit
This is an easy-to-use, simple cursor maker software for Windows that you can use to make cursors and icons.
The simple UI provides all essential tools (line, erase, freehand, selection tool, invert colors, etc.) for creating the cursor. The software supports various image formats (JPG, GIF, JPEG, BMP, etc.).
The image can be rotated quickly (clockwise and anticlockwise) and flipped in both directions (horizontally and vertically).
The software allows you to use all three mouse buttons (by defining different functions for each of them) to create the cursor.
You can even create multiple static cursors simultaneously and switch between them. Once satisfied with your creation, you can save it as a .cur file.
Get this custom cursor maker software here.
9. JustCursors
This software is ideal for creating static and animated cursors in various shapes and colors. It provides different tools, such as a line, pen, fill tool, color selection, etc., to create the cursor.
To make an animated cursor, choose the number of frames and create freehand drawings for each.
Once the delay time for the frames is selected, the work is done. The software allows you to set different frame rates for individual frames or set one for all of them.
Get this custom cursor maker software here.
10. Animated Cursor Maker
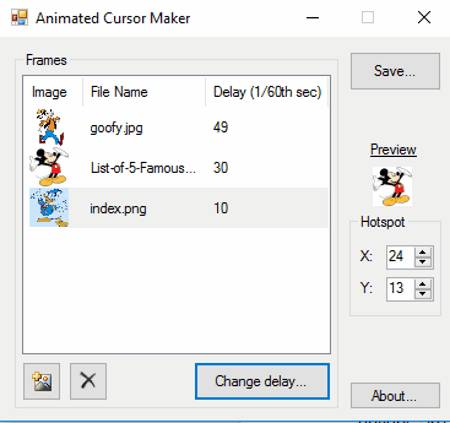
If you are looking for simple animated cursor-making software, this is one of the best options. If you are looking forward to making an animated cursor, you can import images such as PNG, GIF, BMP, JPG, etc.
You can generate the animated cursor once you set the frame rate for every image and the cursor position.
The interface also allows you to preview the output to make any changes. The Save button allows you to save the animated cursor, which you can use to customize your mouse cursor.
Get this custom cursor maker software here.
Summary
With this, we summarize our list of the 10 best free custom cursor maker software for Windows.
This great software makes your unique cursor become child’s play. Have fun creating unique shapes that make working on a system an enjoyable experience.
Create custom cursors by uploading your own images, or combine existing cursors at your discretion by dragging them to the appropriate field.
PNG, GIF or WEBP (max. 128×128px)