
The BIOS is a type of firmware used during the booting process on IBM PC compatible computers. The fundamental purposes of the BIOS are to initialize and test the system hardware components, and to load a boot loader or an operating system from a mass memory device. The BIOS additionally provides an abstraction layer for the hardware, i.e. a consistent way for application programs and operating systems to interact with the keyboard, display, and other input/output devices. Every BIOS implementation is specifically designed to work with a particular computer or motherboard model, by interfacing with various devices that make up the complementary system chipset.
More information can be found at www.wikipedia.org.
Recomended drivers page:
> www.ath-drivers.eu — Latest Atheros, Attansic and Zydas drivers
> www.realtek.cz — Realtek drivers for network, wifi, bluetooth and audio
> www.amd-drivers.com — AMD and ATI drivers for graphic and chipset
> www.usb3-drivers.com — Latest USB 3.0 drivers for ASmedia, Etron, Fresco, …
> www.via-drivers.com — VIA drivers for network, wifi and graphics card
Most MSI motherboards support three ways to update the BIOS:
- M-Flash – Update directly from the BIOS interface.
- BIOS Flashback – Recover or update the BIOS on a system that can’t boot.
- LiveUpdate – Update from Windows via the MSI Centre.
I’ll use our MAG B550M MORTAR and PRO B760M-E boards to demonstrate all three methods in this article.
MSI BIOS Update – Dos and Don’ts
MSI releases new BIOS versions for most of their lineup every few months. But that doesn’t mean you need to update just as often. You should have a specific reason to update, such as:
- Better hardware compatibility in the new BIOS version
- Critical security patches or bug fixes
- Improved system performance and stability
- Support for new features (e.g., Re-size BAR)
If you do need to update, keep the following things in mind before you begin:
- Make sure the BIOS update isn’t interrupted (use a power backup, don’t remove the USB mid-update, etc.).
- This is especially important on budget boards that don’t support BIOS Flashback or DualBIOS. Without these, it can be a major hassle to recover from a failed update.
- I recommend you use M-Flash or BIOS Flashback as LiveUpdate is not as reliable (explained later).
Download the BIOS Update File
Start by identifying your motherboard model and the current BIOS version. You can boot to the BIOS to do this, or you can open the System Info applet in Windows.
Then, follow the steps shown below to obtain the correct BIOS file:
- Visit your motherboard’s support page. Ensure the board version is an exact match before proceeding (e.g., B550M Mortar vs WiFi vs Max WiFi vs Vector).
- Expand the Drivers & Downloads > BIOS section.

- First, check your current BIOS version for reference. Note the BIOS release date as well. This will be helpful as MSI’s naming scheme can be a bit confusing.
- Compare the version and date to identify your current BIOS from the list (
7C94v18in my case). - Check all the newer BIOS versions. Read the changelogs to ensure that you don’t miss any important info (e.g. if incremental updates are required).
- Once you’ve decided on the BIOS version, download it. Go for the latest stable version if you’re unsure.
- Extract this archive and format a USB drive to FAT32.


The steps vary after this. So, continue from the appropriate section.
Updating with M-Flash
M-Flash is the standard BIOS update utility on MSI systems. It’s reliable and easy to use. Follow the steps shown below to update the BIOS with this method:
- Move the extracted BIOS file to the USB drive.
- Connect the USB drive to the system where you want to update the BIOS.
- Restart your PC and repeatedly press Ctrl + F5 to launch the M-Flash utility. You can also boot to the BIOS (press Del at startup) and launch it from there.
- Highlight the BIOS file and select Yes to start flashing the BIOS.
- The update should finish in 5 minutes or so. Your PC will restart afterward.


Performing a BIOS Flashback
BIOS Flashback is used to update systems without a CPU or to recover boards bricked by a failed BIOS update. But you can also use it for normal BIOS updates.
Most MSI boards support it as a fail-safe feature. To verify this on your board, look for the Flash BIOS port and button on the rear I/O panel. Alternatively, check the user manual.
If your board supports it, use the following steps to update your MSI BIOS with BIOS Flashback:
- Locate the BIOS file extracted earlier. Rename this file and it’s extension to
MSI.ROM.
- Move this renamed file to the FAT32 USB.
- Connect this USB to the Flash BIOS port on the motherboard.
- Besides this, you only need to connect the 24-pin ATX connector and 8-pin CPU connector to the motherboard. All other components (CPU, RAM, etc.) are optional and make no difference for BIOS Flashback.
- Turn off the system but keep the power cables connected.
- Without turning it on, press the Flash BIOS button for around 5 seconds.
- The Flash BIOS LED should start blinking. Your USB’s LED will start blinking too if it has one.
- After 5-10 minutes, the LEDs will stop blinking. This indicates that the BIOS update is complete.
- Power on your PC afterward. If prompted, boot to the BIOS and Restore Defaults. Then, press F10 to save the changes and reboot.


Using MSI LiveUpdate
MSI LiveUpdate automates the BIOS update process via utilities like MSI Center and MSI Dragon Center. While this is slightly more convenient, I do not recommend using this.
It involves the Windows environment for the first half of the update process (more variables involved, meaning a higher chance of problems).
This is proven through user feedback too. A lot of users have reported problems during and after the update with this method.
But if you prefer LiveUpdate despite its added risk, here’s how you can use it:
- On your motherboard support page, expand the Drivers & Downloads > Utility section.
- Download MSI Center or MSI Dragon Center from here.
- Install and launch the downloaded app.
- Click on Support > Live Update > Advanced.
- Select the listed BIOS version and click on Install. Press Install again to confirm and proceed.
- The system will reboot and start updating the BIOS. The process will complete in 5 minutes or so, and your PC will reboot afterward.


What If the BIOS Update Fails
If you use the recommended methods (M-Flash or BIOS Flashback) and follow the steps properly, the BIOS update should complete without a hitch.
If the BIOS update does fail somehow, you have a few ways to recover your board. First, use BIOS Flashback and try the following things:
- Clear the CMOS.
- Flash another BIOS version.
- Use another USB stick.
- USB 2.0 sticks have the best compatibility but the key detail is to use a drive of a different USB version than before.
- Convert the drive to MBR. Then, repeat the steps to flash the BIOS.
Some MSI boards also support DualBIOS (meaning your board has 2 BIOS chips). In this case, you can switch to the backup BIOS to get your board working again. The main BIOS chip should automatically recover thanks to the backup image.
If none of these steps helped, refer to our in-depth MSI BIOS Recovery guide. It covers other technical methods like using a BIOS Reprogrammer and replacing the BIOS ROM.
BIOS — это программное обеспечение, встроенное в материнскую плату и отвечающее за инициализацию оборудования при включении компьютера. Также оно играет ключевую роль в обеспечении стабильности системы и совместимости комплектующих.
В некоторых случаях обновление BIOS может повысить производительность, устранить ошибки или добавить поддержку новых процессоров и модулей памяти. Однако этот процесс требует внимательности, так как некорректное обновление может привести к неработоспособности компьютера. В этой статье рассмотрим все нюансы обновления BIOS на материнских платах MSI.
Перед тем как приступить к обновлению, важно правильно подготовиться, чтобы избежать ошибок и возможных проблем. Для этого следует выполнить несколько важных шагов:
- Определите текущую версию BIOS, чтобы понять, нужно ли вообще обновление. Сделать это можно через командную строку Windows, выполнив команду wmic bios get smbiosbiosversion. Либо посмотрите версию в самом BIOS, зайдя в его настройки при загрузке системы;
- Ознакомьтесь с изменениями в новых версиях BIOS на официальном сайте MSI. Иногда обновления включают только незначительные исправления, а в редких случаях могут даже ухудшить совместимость;
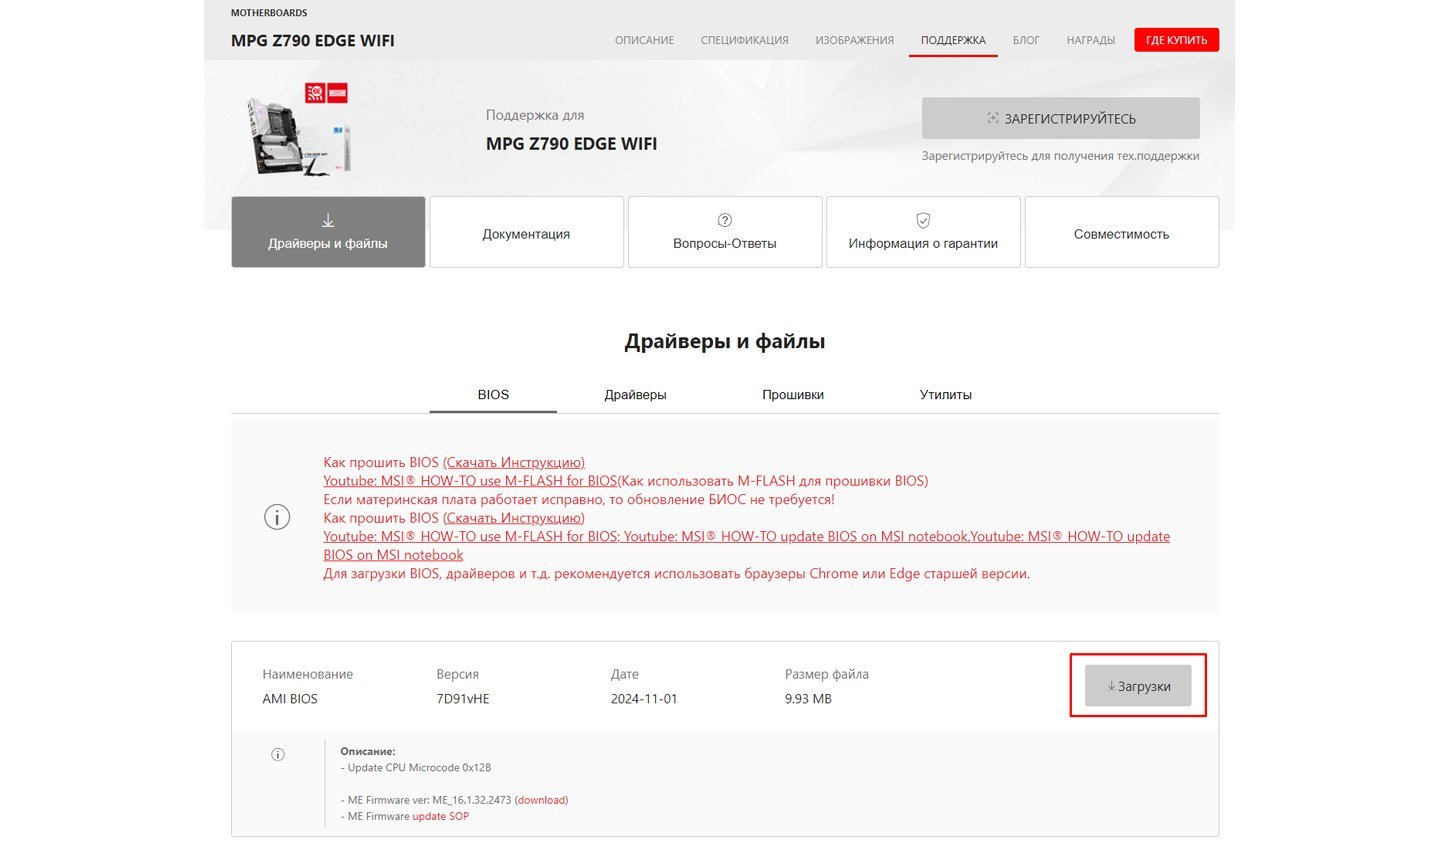
Источник: MSI / Обновление для MPG Z790 EDGE WIFI
- Скачайте последнюю версию BIOS для вашей материнской платы с официального сайта MSI. Важно убедиться, что вы выбираете файл именно для вашей модели;
- Используйте USB-накопитель емкостью от 1 ГБ, который должен быть отформатирован в FAT32. Файлы прошивки необходимо скопировать в корневой каталог флешки, чтобы BIOS мог их распознать.
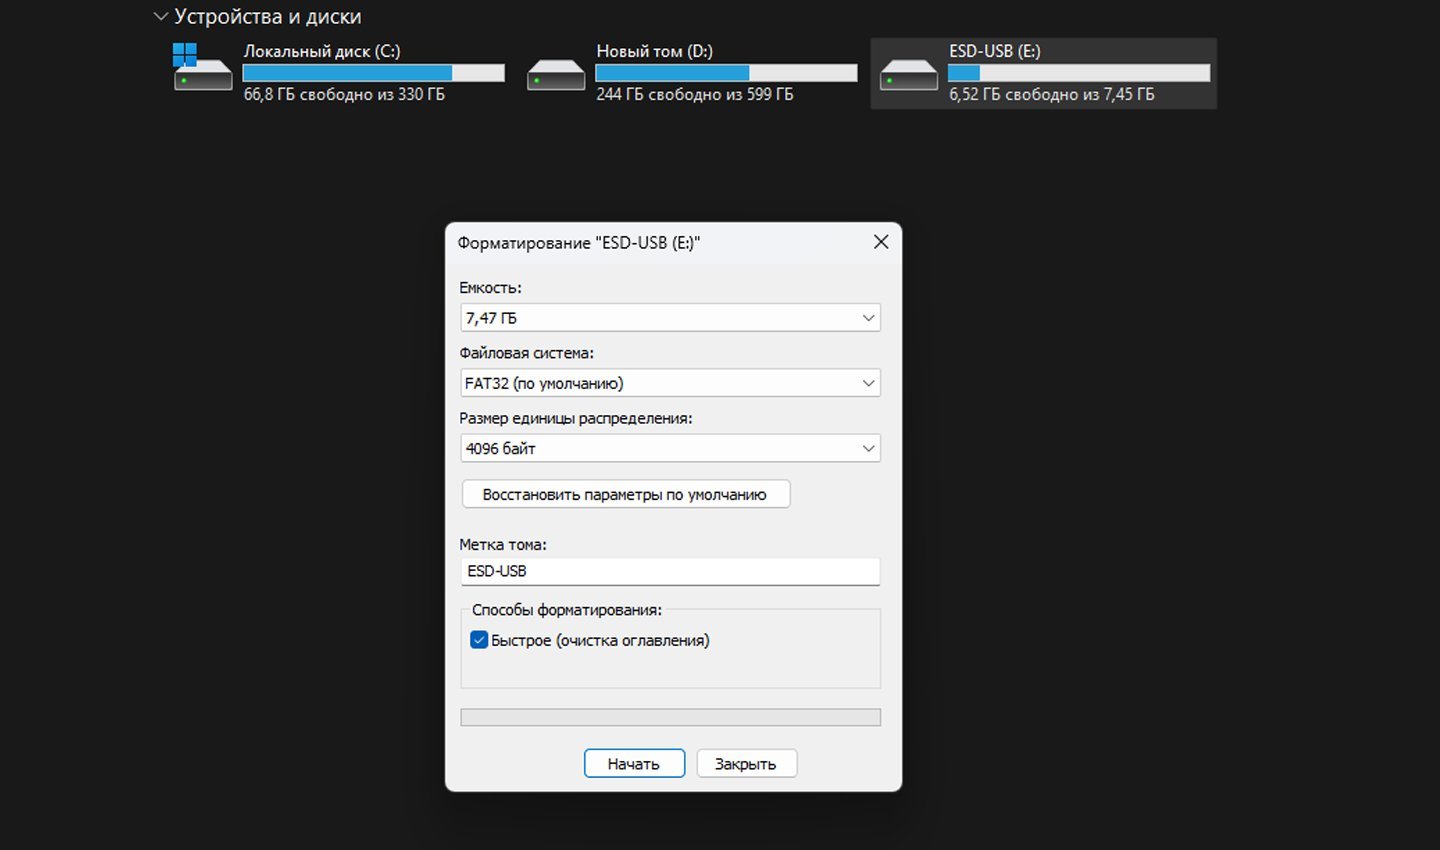
Источник: CQ / Форматирование флешки перед обновлением BIOS
Во избежание перебоев в питании во время прошивки убедитесь, что компьютер подключен к надежному источнику энергии. В случае с ноутбуками рекомендуется выполнять обновление при подключенном зарядном устройстве.
Способы обновления BIOS на материнских платах MSI
MSI предлагает несколько способов обновления BIOS, которые зависят от модели вашей материнской платы и ее функций. Выбор метода зависит от вашего опыта и состояния системы.
Источник: Salonpola / Обновление BIOS
- Обновление через M-FLASH — стандартный и наиболее безопасный способ, который используется в большинстве современных материнских плат MSI;
- Обновление через MSI Dragon Center (Live Update) — удобный способ для обновления прямо из Windows, но с высоким риском ошибок из-за возможных программных конфликтов;
- Использование BIOS Flashback+ — идеальное решение для ситуаций, когда компьютер не запускается или обновление необходимо выполнить без процессора.
Обновление BIOS через M-FLASH
Этот метод является официально рекомендуемым производителем, так как он минимизирует вероятность ошибок.
Порядок действий:
- Подключите USB-накопитель с файлами BIOS к компьютеру;
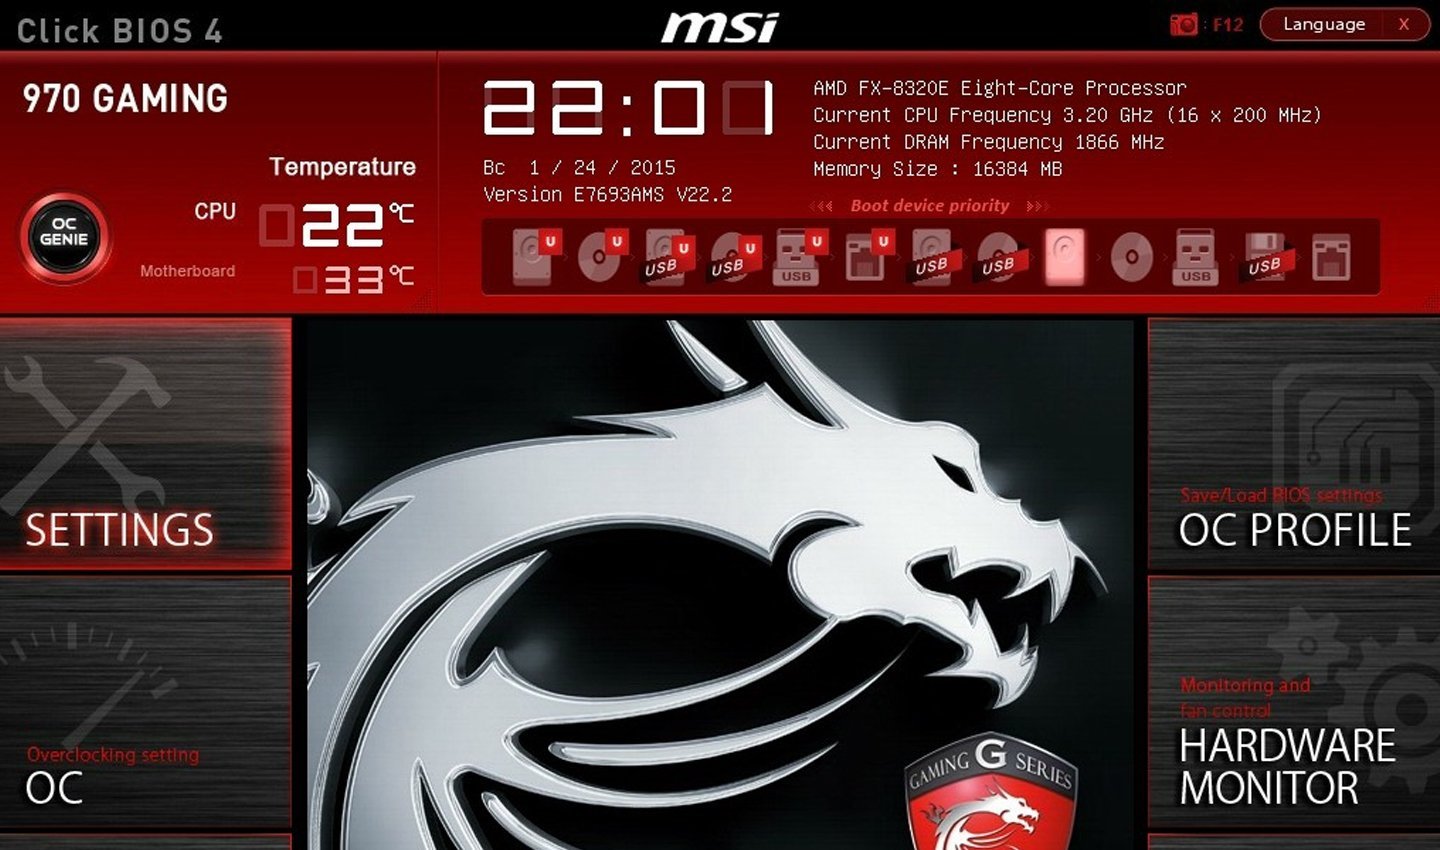
- Перезагрузите систему и во время загрузки нажмите Del, чтобы войти в BIOS;
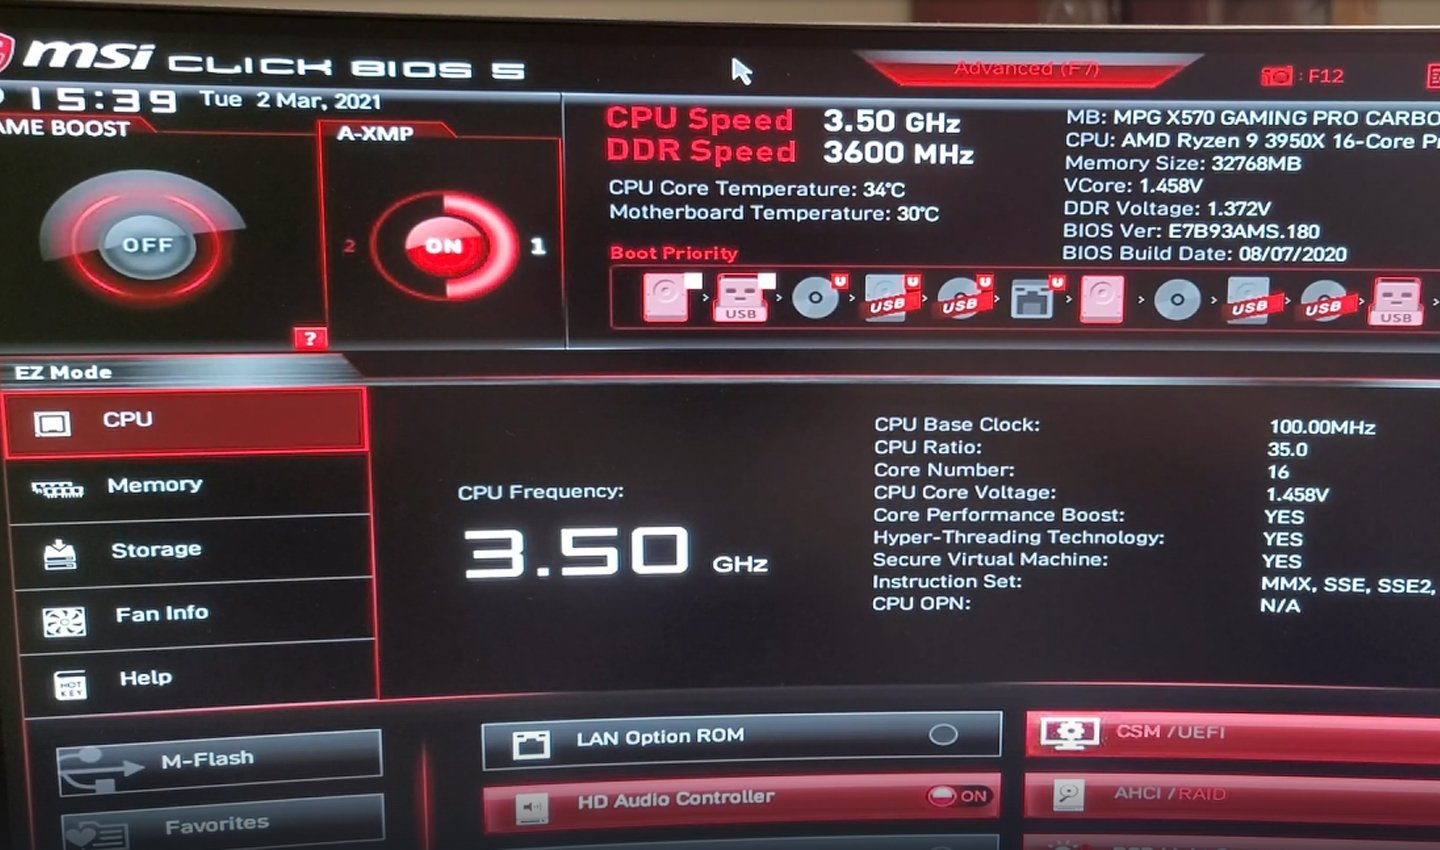
Источник: RUTUBE-канал JS Загадки / BIOS MSI
- В главном меню BIOS выберите опцию M-FLASH;
- Подтвердите перезагрузку в специальный режим обновления BIOS;
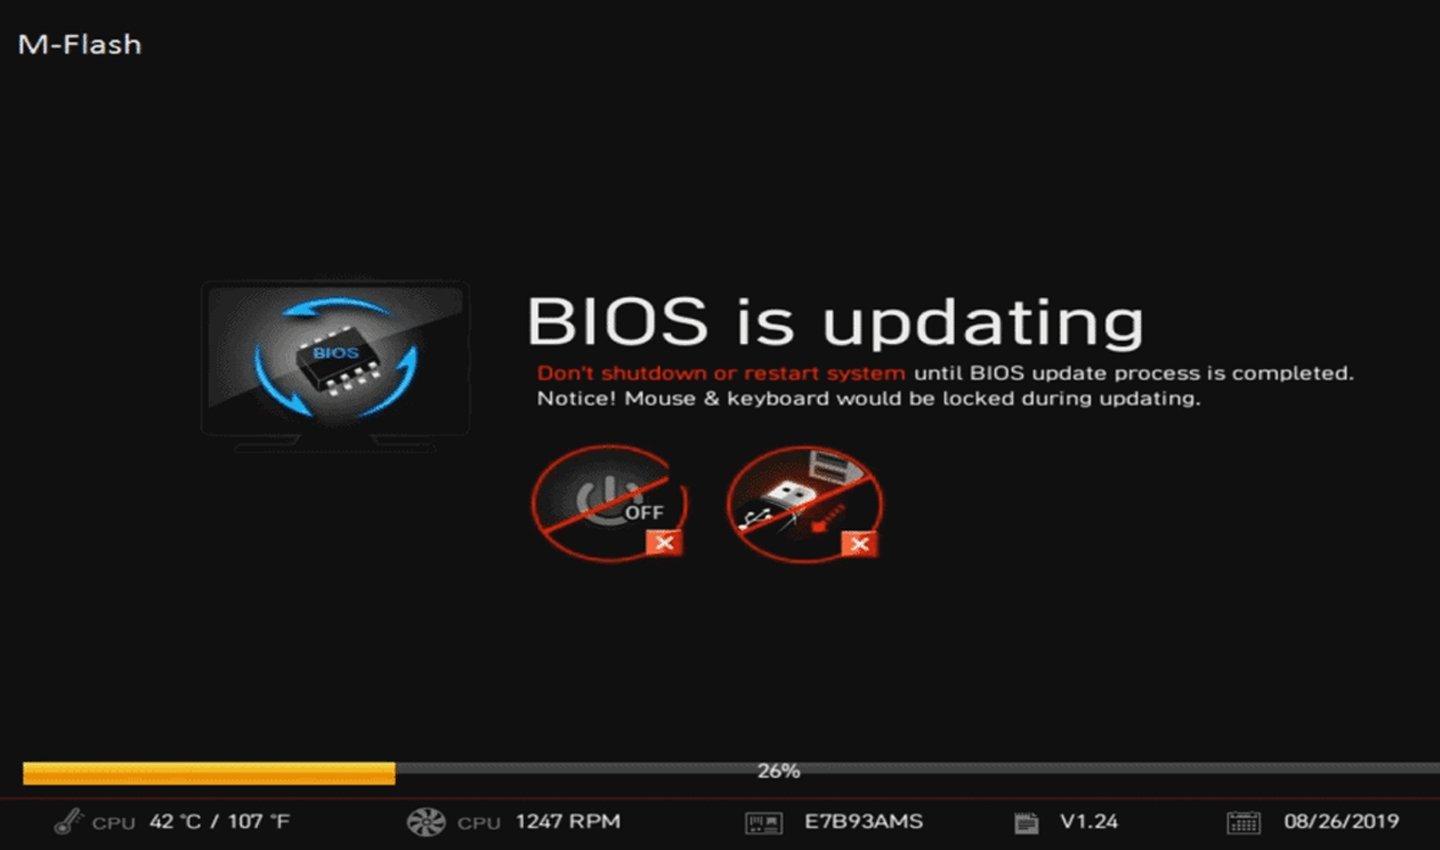
Источник: RUTUBE-канал JS Загадки / Обновление BIOS MSI
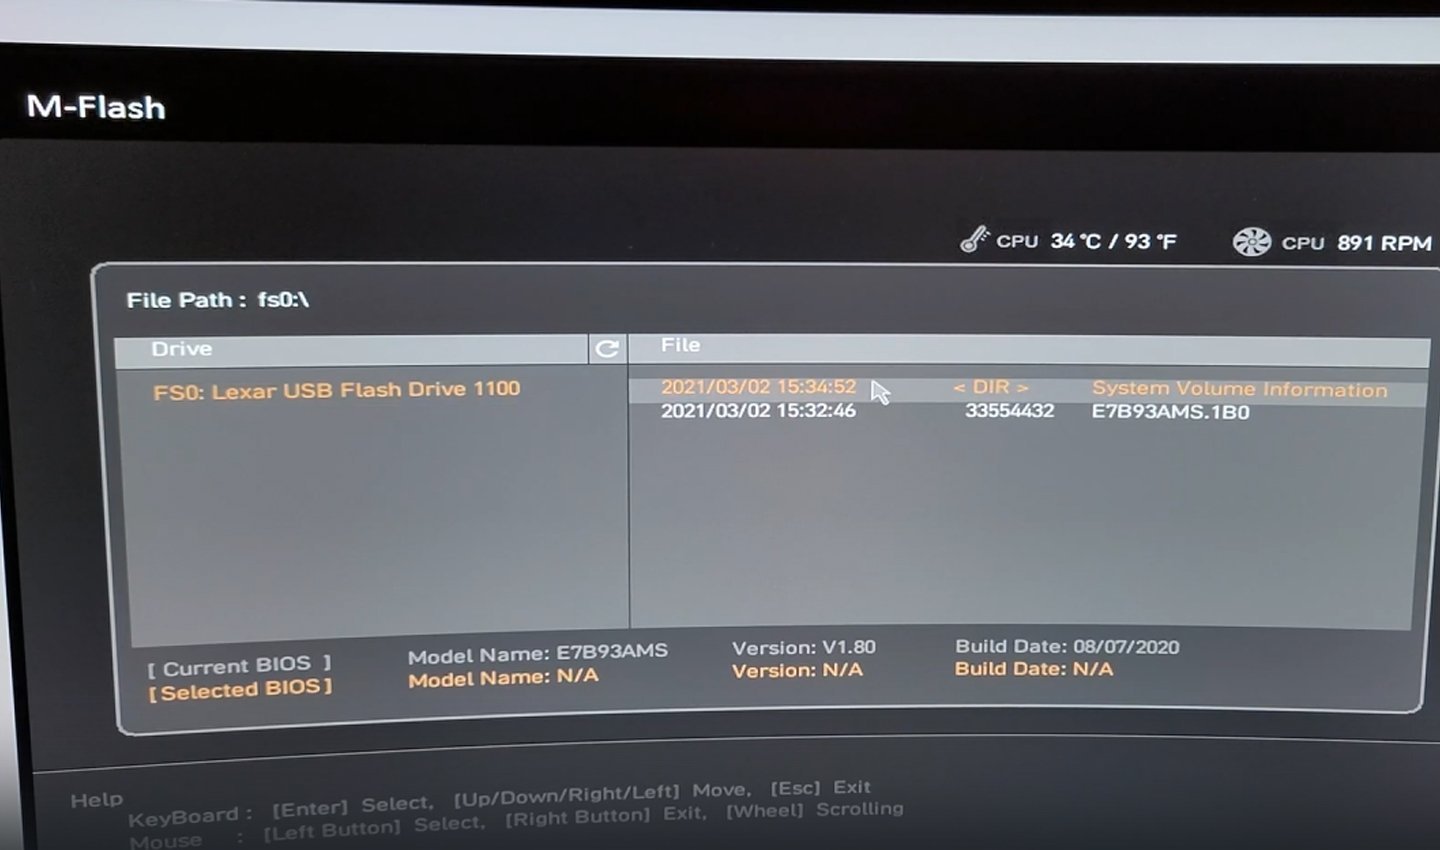
- После перезагрузки выберите USB-накопитель с прошивкой и укажите файл обновления .bin;
- Начните процесс прошивки и не выключайте компьютер до завершения обновления;
- После завершения обновления система автоматически перезагрузится, и новые параметры BIOS вступят в силу.
Обновление через MSI Dragon Center (Live Update)
Этот способ удобен, так как позволяет обновить BIOS прямо из Windows, но его использование связано с некоторыми рисками. Любой сбой операционной системы во время обновления может привести к повреждению BIOS.
Порядок действий:
- Установите MSI Dragon Center и запустите утилиту;
- Перейдите в раздел Live Update и просканируйте систему на наличие новых версий BIOS;
- Если обновление доступно, загрузите и установите его;
- Следуйте инструкциям, затем перезагрузите компьютер;
- После загрузки войдите в BIOS и убедитесь, что обновление прошло успешно.
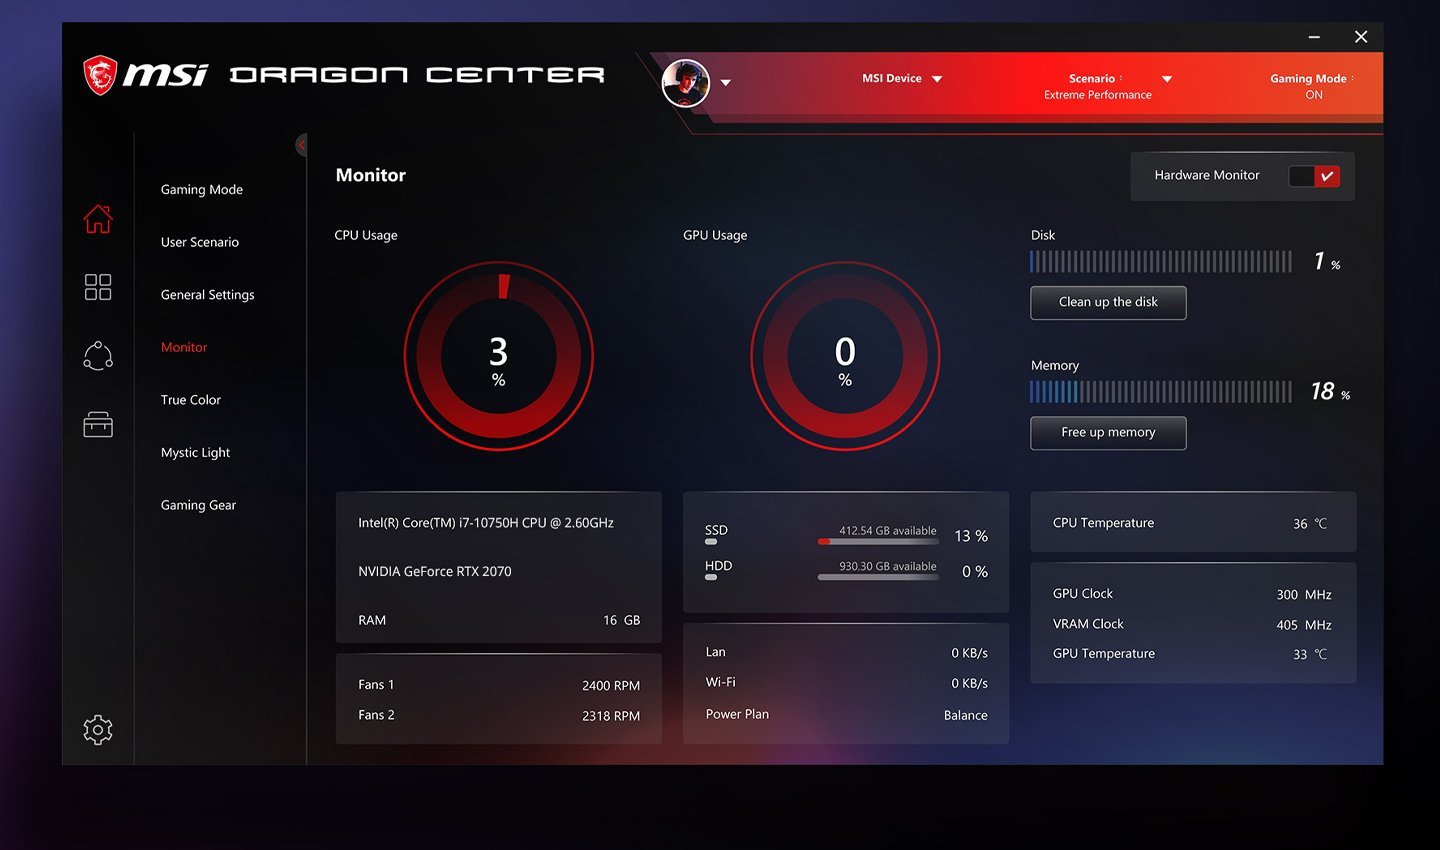
Источник: MSI / Dragon Center
Обновление через BIOS Flashback+
Этот метод предназначен для моделей, оснащённых специальной кнопкой BIOS Flashback+ на задней панели. Он полезен, если компьютер не загружается или отсутствует процессор.
- Подготовьте флешку с файлом BIOS и переименуйте файл прошивки в MSI.ROM;
- Вставьте USB-накопитель в специальный порт BIOS Flashback+;
- Подключите блок питания к материнской плате;
- Нажмите и удерживайте кнопку BIOS Flashback+ до начала мигания индикатора;
- Дождитесь окончания процесса прошивки (индикатор перестанет мигать);
- После завершения установите процессор и другие компоненты и попробуйте запустить систему.
Завершающие шаги после обновления
После завершения обновления BIOS необходимо выполнить несколько важных действий, чтобы система работала стабильно:
- Войти в BIOS (Del при загрузке системы) и сбросить настройки на оптимальные, выбрав Load Optimized Defaults;
- Проверить порядок загрузки в разделе Boot Priority, чтобы убедиться, что установлен правильный диск с операционной системой;
- Настроить XMP-профиль для оперативной памяти, если требуется работа на высоких частотах;
- Перезагрузить компьютер и протестировать стабильность работы системы.
Источник: I2hard / BIOS MSI
Соблюдая все рекомендации, можно безопасно обновить BIOS на материнской плате MSI и получить максимальную производительность и стабильность работы вашего ПК.
Заглавное фото: Нейросеть Dalle
Читайте также:
- Как обновить драйвера видеокарты
- Как обновить драйвера в Windows 11
- Как отключить автоматическое обновление Windows
- Как откатить обновление на Android
- Как откатить обновление приложения на Android
Skip to content
Introduction
I recently released a new YouTube video, called “How to Flash the MSI MAG B550M Mortar BIOS with the Flash BIOS Button“. This video walks though and demonstrates all of the steps required to use the BIOS Flash button on this motherboard.

The BIOS Flash button is a special feature that lets you flash the BIOS without having a CPU, RAM, or video card installed. This feature also works on a complete system.
The most common reason you would want/need to do this is if you had a new CPU that was not supported by the existing BIOS version on the motherboard. This feature can also be useful if a more traditional BIOS update (using the M-Flash BIOS utility or the MSI Dragon Center Windows utility) failed.
This situation is happening to a number of people with new Ryzen 5000 Series processors that require a newer BIOS version than was available when the motherboard was manufactured. As newer stock shows up for sale, this will less of a problem.
How to Flash the MSI MAG B550M Mortar BIOS with the Flash BIOS Button
Here are the high-level steps that I show in the video.

Here is the video.
Final Words
I think this is a useful video right now because the documentation on the product web site and in the motherboard manual is a little sparse. MSI also has a short video about how to do this. I think my video goes into much more detail!
I also have blog post about doing this same type of operation for several other MSI motherboards.
- Flashing Your BIOS with No CPU Installed
If you have any thoughts or questions about this post, please ask me here in the comments or on Twitter. You can also follow me on Twitter, where I am @GlennAlanBerry. Thank you for reading!
Readers help support Windows Report. We may get a commission if you buy through our links.
Read our disclosure page to find out how can you help Windows Report sustain the editorial team. Read more
BIOS is the motherboard’s OS to handle the basic I/O functions. Your PC must be running the latest version of it on your PC.
In this guide, we will discuss how you can update the MSI BIOS on your Windows PC. Notably, we will show you the different ways to update the MSI BIOS.
How do I check the BIOS version?
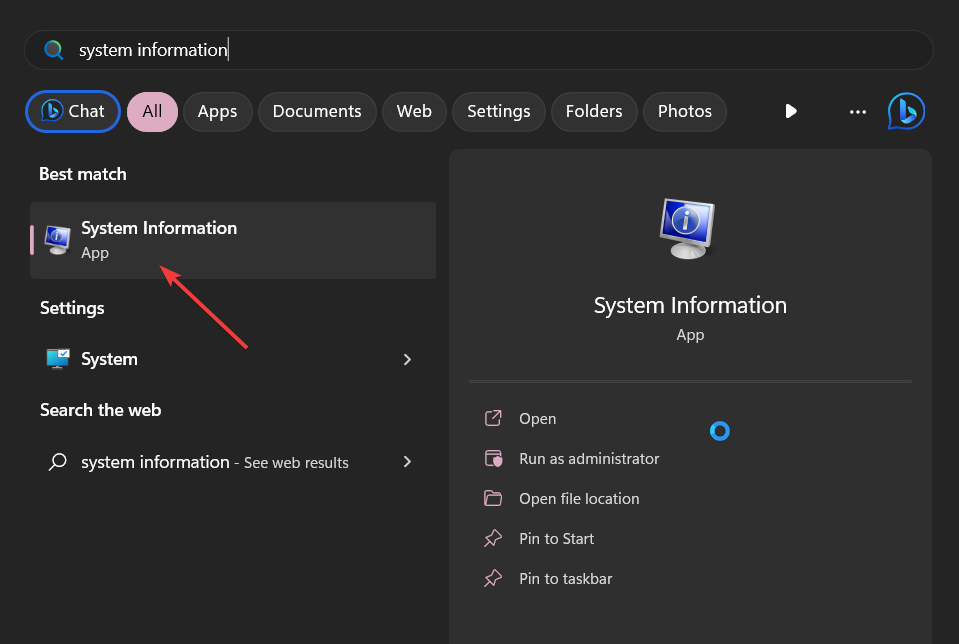
- Open the Start menu by pressing the Win key.
- Type System Information and open the top result.

- Look for BIOS Version/Date section on the right side.


Make sure to note down or take a screenshot of the BIOS settings such as default settings, whether it’s for custom overclocking, enabling XMP, or setting RAM timings of your PC. This will come in handy when things go south.
There are three different update methods that we will be discussing in this guide that will help you update the MSI BIOS.
How can I update the MSI BIOS?
1. Update the BIOS using a USB flash drive
1.1 Format the USB drive to FAT32
NOTE
The action from this solution will erase all data on your USB drive so if you have any important files, back them up first.
- Plug in the USB to your PC.
- Press Win + E to open the File Explorer.
- Right-click on the USB drive and select Format.

- Choose FAT32 from the File system dropdown.
- Click on the Start button.

1.2 Download the MSI BIOS update file
- Find your laptop’s model name, which is usually written on the lower right side of the computer where you rest your palm.
- Visit the official MSI website to download the latest BIOS version.
- Enter your laptop’s model number in the search field and hit the magnifying glass icon.

- Hit the Download button for your laptop’s model.


1.3 Update the MSI BIOS
- Paste the downloaded BIOS file to the USB drive that you have formatted to FAT32.
- Insert the USB drive on the computer on which you wish to update the MSI BIOS and restart your PC.
- When the PC is booting up, hit the Del key to enter the BIOS menu.
- Use the Arrow keys to navigate to the Advanced page.

- Use the Volume keys to move to the UEFI BIOS Update option and press Enter key.

- Again, select the UEFI BIOS Update option and hit Enter key.
- Select the location of the BIOS file, which in our case is the USB drive and press Enter.

- Select the BIOS update file from the USB drive and press Enter to select it.
- Choose Yes if a prompt appears.
- Select OK to restart your computer to begin the update process.
- After the PC boots up, it will load to the BIOS update page, here you have to select Proceed with flash update option.

- Once the update completes press OK when the Flash update completed. Press any key to reset the system prompt appears.


This is the best way to update the MSI BIOS on your PC. Following the steps correctly, you will be able to safely update the MSI BIOS, however, do not skip any step as it could prove to be fatal for your PC.
- Microsoft Office Lens: A Powerful Tool for Capturing and Organizing Information
- Swap Left/Right Speaker in Realtek Audio Console [How to]
2. Use BIOS Flashback
- Copy the downloaded BIOS update file onto a USB drive.
- Insert it inside the BIOS Flashback port. It should be right next to the dedicated button.
- Tap and hold the Flashback button of BIOS.

- It will take about 15-20 seconds to the BIOS update process. It will be indicated with blinking lights.

An alternative to updating the BIOS via USB drive is to use the Flashback button. This button isn’t found on many motherboards, but MSI has this.
The advantage of this method is that you do not need to enter the BIOS menu manually in order to update the MSI BIOS. However, that may not be the case every time.
3. Update using the Device Manager
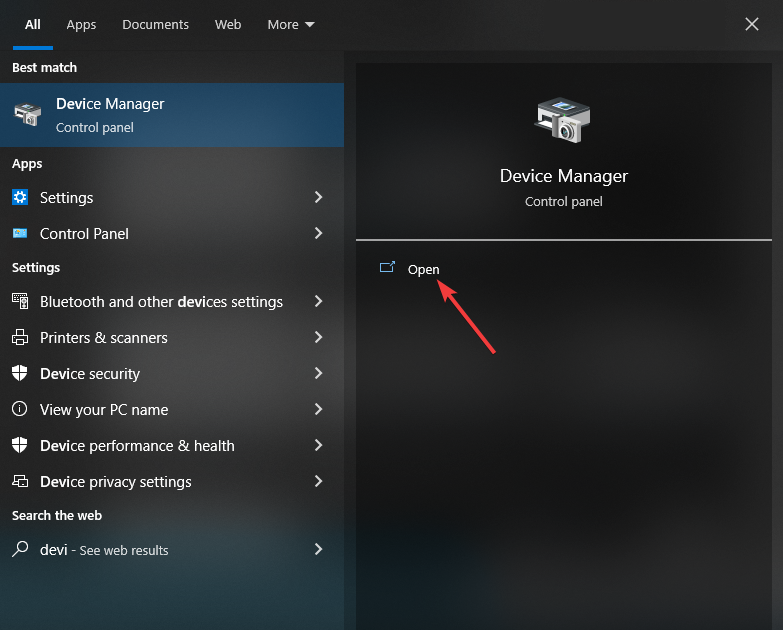
- Press the Win key to open the Start menu.
- Type Device Manager and open it.

- Expand the Firmware section.

- Right-click on your motherboard and select Update driver.
- Hit the Search automatically for driver option.
- Install the latest MSI BIOS driver is available.


This is another way of updating the motherboard firmware. However, do note that this may not be beneficial for all brand’s PCs.
That is it from us in this guide. We have a guide that properly explains what is BIOS and everything else that you need to know about it.
You can also check out our guide that lists 3 different ways to access the BIOS menu on your computer. Also, read our guide to fix the BIOS corruption issue on a Windows PC.
You can also update drivers using specialized tools from MSI. However, it might be easy to download the MSI Driver Utility Installer application. We also have a guide on how to update BIOS using MSI Dragon Center, and you might want to visit it for more information.
Let us know in the comments below, which one of the above solutions you went ahead with to update the MSI BIOS.
Sagar Naresh
Sagar is a web developer and technology journalist. Currently associated with WindowsReport and SamMobile. When not writing, he is either at the gym sweating it out or playing country music on his guitar.
He is an avid traveler and has been to 15 countries, going to more places soon. TRAVEL and WORK is his mantra for a peaceful life.