
,
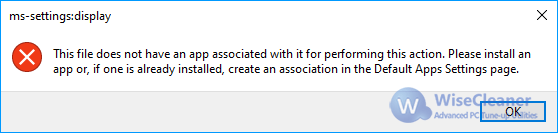
On a Windows 10 computer the following error may appear when you try to open the «Display Settings» or the «Personalize» option after Window 10 update: «ms-settings:display – This File does not have a Program Associated with it for performing this action. Please install a program or, if one is already installed, create an association in the Default Programs control panel».

This tutorial contains instructions to resolve «ms-settings:display» & «ms-personalization-background» issues in Windows 10 (This File does not have a Program Associated with it).
How to fix: «ms-settings:display This File does not have a Program Associated with it»
* Important: Before you continue below ensure that your PC is starting in «Normal Mode» with all recommended drivers and services running. To do that:
a. Press Windows + R keys to load the Run dialog box.
b. Type msconfig and press Enter.
c. At General tab check the Normal startup (if not checked) and click OK.
d. Restart your PC and check if the «MS-SETTINGS DISPLAY» problem is resolved.

Method 1. Check for Updates & Restart your Device.
Method 2. Reset Windows Store cache.
Method 3. Repair Microsoft .NET Framework.
Method 4. Create a new Account.
Method 5. Run System File Checker (SFC).
Method 6. Fix Windows corruptions with DISM Tool.
Method 7. Restore Windows to a Previous Working Point or Build.
Method 8. Repair Windows 10 with an in-place Upgrade.
Method 1. Install Updates & Restart your Device.
The first method to fix the «ms-settings:display» & «ms-personalization-background» issues in Windows 10 is to download and install all the available Windows 10 updates and then to restart your device.
Method 2. Reset Windows Store Cache
The second method to resolve the «ms-settings» personalization problem is to reset the Windows Store Cache. To do that:
1. Simultaneously press the Windows + R keys to open the Run box.
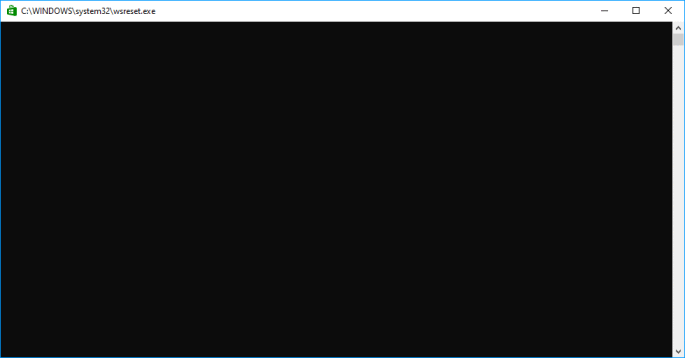
2. Type WSReset.exe and press Enter.
3. Close the Store window and then try to launch the personalization settings again.
Method 3. Repair Microsoft .NET Framework. *
* Note: Thanks to TIM and his comment below for this solution.
1. Download and run Microsoft .NET Framework Repair Tool.
2. Click Next when prompted to apply the recommended changes.

3. When the issues resolved click Finish.
4. Restart the PC and check if the problem persists.
Method 4. Create a new Account.
1. Simultaneously press the Windows + R keys to open the run command box and type:
- control userpasswords2
3. Click the Add button to create a new account.

4. Select Sign in without a Microsoft account.

5. Choose Local account at the next screen.

6. Type an account name (e.g. User1) and a password (if you want) and click Next and Finish.
7. At ‘User Accounts’ main window, click Properties and then click the Group Membership tab.
8. Place a dot at Administrator and click OK twice to exit.

Advanced.
9. Now, sign-out and sign-in using your new account.
10. Try to launch the ‘Personalization’ or the ‘Display’ settings. If the problem is resolved, then transfer your files and settings from your old account to the new one.
Method 5. Run System File Checker.
The next method to solve Windows 10 problems is to run the System File Checker (SFC) tool in order to fix Windows’ corrupted files and services. To do that:
1. Open an elevated command prompt (Command Prompt (Admin)), type the following command and press Enter.
- SFC /SCANNOW

3. Wait and do not use your computer until SFC tool checks and fixes the corrupted system files or services.
4. When SFC tool finishes, reboot your computer and check if your problem is fixed.
Method 6. Fix Windows corruptions with DISM Tool.
1. Right click at Windows start button and select Command Prompt (Admin).
2. At the command prompt window, type the following command & press Enter:
- Dism.exe /Online /Cleanup-Image /Restorehealth

3. Be patient until DISM repairs the component store.
4. When DISM operation is completed, you should be informed that the component store corruption was repaired.
5. Restart your computer.
Method 7. Restore Windows to a Previous Working Point.
1. Simultaneously press the Windows + R keys to open the Run box.
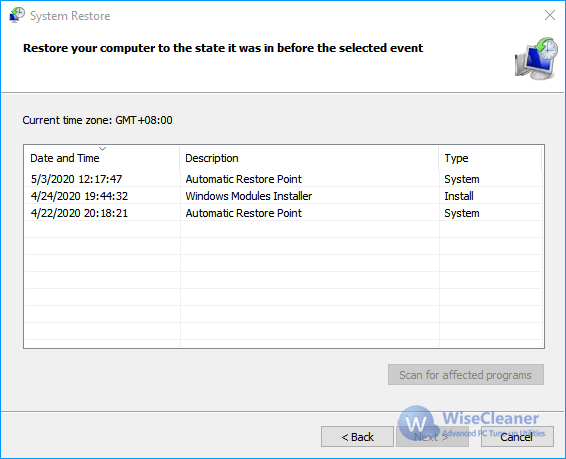
2. Type rstrui and hit OK.
3. Press Next at the first screen and then select an older restore point to restore your computer. *
* Note: If Restore points are not available, then try to restore Windows 10 to an earlier build.

Method 8. Repair Windows 10 with an in-place Upgrade.
The final method to fix Windows 10 problems, is to perform a Windows 10 Repair-Upgrade. For that task follow the detailed instructions on this article: How to repair Windows 10.
That’s it! Let me know if this guide has helped you by leaving your comment about which method is worked for you. Please like and share this guide to help others.
If this article was useful for you, please consider supporting us by making a donation. Even $1 can a make a huge difference for us in our effort to continue to help others while keeping this site free:
- Author
- Recent Posts
Konstantinos is the founder and administrator of Wintips.org. Since 1995 he works and provides IT support as a computer and network expert to individuals and large companies. He is specialized in solving problems related to Windows or other Microsoft products (Windows Server, Office, Microsoft 365, etc.).
Если при попытке открыть какой-то файл или при изменении параметров Windows 11 или Windows 10 вы получаете сообщение об ошибке «Нет приложения, сопоставленного с этим файлом для выполнения этого действия» или «Этому файлу не сопоставлена программа для выполнения этого действия» — вы по адресу, будем разбираться, что делать, как исправить ошибку и чем она может быть вызвана.
Чаще всего ошибка проявляет себя при запуске ярлыков (например, с панели задач), в этом случае в заголовке вы увидите путь к файлу .lnk или при работе с «Параметрами» Windows 10, например, когда вы открываете параметры экрана: в этом случае в заголовке сообщения об ошибке указывается ms-settings:display, ms-settings:personalization-background. В инструкции в первом разделе рассмотрим решение для ярлыков, во втором — для параметров системы. Также на сайте присутствует отдельная инструкция для той же ошибки при использовании slmgr.vbs и других .vbs сценариев.
Но прежде, чем приступить, попробуйте использовать точки восстановления системы, возможно это окажется самым быстрым способом. Для их запуска в ситуации, когда ничто не запускается можно использовать такой путь:
- Нажмите клавиши Win+R на клавиатуре (Win — клавиша с эмблемой Windows), введите rstrui.exe в окно «Выполнить» и нажмите Enter. Если с exe-файлами всё в порядке, откроется интерфейс восстановления системы. Если при этом действии вы увидите сообщение «Интерфейс не поддерживается», решение в соответствующей инструкции: Интерфейс не поддерживается при запуске EXE файлов, при этом приступать к следующим шагам, прежде чем будет решена проблема с запуском .exe не следует.
- Если восстановление системы открылось, нажмите «Далее», а затем посмотрите, есть ли точки восстановления на дату, когда проблема ещё не присутствовала. Если есть, воспользуйтесь такой точкой восстановления.


Нет приложения, сопоставленного с этим файлом при запуске ярлыков и программ

Для начала пара подсказок, которые могут оказаться полезными, в том числе в процессе исправления ошибки, если не удается запустить программы с их ярлыков из-за ошибки «Нет приложения, сопоставленного с этим файлом для выполнения этого действия»:
- Проводник можно открыть сочетанием клавиш Win+E, многие программы продолжают запускаться, если использовать поиск на панели задач. Причем, если при нажатии по программе ничего не происходит, а у вас установлена последняя версия Windows 11/10, в результатах поиска попробуйте другие действия: например, пункт «Открыть» может не работать, а если нажать «Новое окно» — всё проходит штатно.
- Запуск программ, если вы знаете их пути и имена .exe файлов возможен из диалогового окна «Выполнить», которое открывается по клавишам Win+R.
- Если нужно что-то скачать, браузер Edge обычно продолжает работать при рассматриваемой ошибке. Запуск диспетчера задач исправно работает из меню Ctrl + Alt + Delete.
Причиной проблемы при запуске ярлыков в данном контексте почти всегда являются поврежденные ассоциации файлов .lnk. Для того, чтобы исправить их, если способ с точками восстановления не помог, выполните следующие шаги (настоятельно рекомендую создать точку восстановления перед выполнением действий):
- Нажмите клавиши Win+R на клавиатуре, введите notepad в окно «Выполнить» и нажмите Enter.
- В открывшееся окно блокнота вставьте код, который будет приведет далее.
- В меню блокнота выберите «Файл» — «Сохранить», обязательно выберите «Все файлы» в поле «Тип файла», а в качестве имени файла укажите любое, но с обязательным расширением .reg

- Подтвердите добавление сведений из файла в реестр.


Код reg-файла:
Windows Registry Editor Version 5.00

[HKEY_CLASSES_ROOT\Application.Reference]
"IsShortcut"=""

[HKEY_CLASSES_ROOT\IE.AssocFile.URL]
"IsShortcut"=""

[HKEY_CLASSES_ROOT\IE.AssocFile.WEBSITE]
"IsShortcut"=""

[HKEY_CLASSES_ROOT\InternetShortcut]
"IsShortcut"=""

[-HKEY_CLASSES_ROOT\.lnk]

[HKEY_CLASSES_ROOT\.lnk]
@="lnkfile"

[HKEY_CLASSES_ROOT\.lnk\ShellEx\{000214EE-0000-0000-C000-000000000046}]
@="{00021401-0000-0000-C000-000000000046}"

[HKEY_CLASSES_ROOT\.lnk\ShellEx\{000214F9-0000-0000-C000-000000000046}]
@="{00021401-0000-0000-C000-000000000046}"

[HKEY_CLASSES_ROOT\.lnk\ShellEx\{00021500-0000-0000-C000-000000000046}]
@="{00021401-0000-0000-C000-000000000046}"

[HKEY_CLASSES_ROOT\.lnk\ShellEx\{BB2E617C-0920-11d1-9A0B-00C04FC2D6C1}]
@="{00021401-0000-0000-C000-000000000046}"

[HKEY_CLASSES_ROOT\.lnk\ShellEx\{E357FCCD-A995-4576-B01F-234630154E96}]
@="{00021401-0000-0000-C000-000000000046}"

[HKEY_CLASSES_ROOT\.lnk\ShellNew]
"Handler"="{ceefea1b-3e29-4ef1-b34c-fec79c4f70af}"
"IconPath"=hex(2):25,00,53,00,79,00,73,00,74,00,65,00,6d,00,52,00,6f,00,6f,00,\
  74,00,25,00,5c,00,73,00,79,00,73,00,74,00,65,00,6d,00,33,00,32,00,5c,00,73,\
  00,68,00,65,00,6c,00,6c,00,33,00,32,00,2e,00,64,00,6c,00,6c,00,2c,00,2d,00,\
  31,00,36,00,37,00,36,00,39,00,00,00
"ItemName"="@shell32.dll,-30397"
"MenuText"="@shell32.dll,-30318"
"NullFile"=""

[HKEY_CLASSES_ROOT\.lnk\ShellNew\Config]
"DontRename"=""

[HKEY_CLASSES_ROOT\lnkfile]
@="Shortcut"
"EditFlags"=dword:00000001
"FriendlyTypeName"="@shell32.dll,-4153"
"IsShortcut"=""
"NeverShowExt"=""

[HKEY_CLASSES_ROOT\lnkfile\CLSID]
@="{00021401-0000-0000-C000-000000000046}"

[-HKEY_CLASSES_ROOT\lnkfile\shellex\ContextMenuHandlers]

[HKEY_CLASSES_ROOT\lnkfile\shellex\ContextMenuHandlers\NvAppShExt]
@="{A929C4CE-FD36-4270-B4F5-34ECAC5BD63C}"

[HKEY_CLASSES_ROOT\lnkfile\shellex\ContextMenuHandlers\OpenContainingFolderMenu]
@="{37ea3a21-7493-4208-a011-7f9ea79ce9f5}"

[HKEY_CLASSES_ROOT\lnkfile\shellex\ContextMenuHandlers\OpenGLShExt]
@="{E97DEC16-A50D-49bb-AE24-CF682282E08D}"

[HKEY_CLASSES_ROOT\lnkfile\shellex\ContextMenuHandlers\{00021401-0000-0000-C000-000000000046}]
@=""

[HKEY_CLASSES_ROOT\lnkfile\shellex\DropHandler]
@="{00021401-0000-0000-C000-000000000046}"

[HKEY_CLASSES_ROOT\lnkfile\shellex\IconHandler]
@="{00021401-0000-0000-C000-000000000046}"

[HKEY_CLASSES_ROOT\lnkfile\tabsets]
"selection"=dword:00000705

[HKEY_CLASSES_ROOT\Microsoft.Website]
"IsShortcut"=""

[HKEY_CLASSES_ROOT\piffile]
"IsShortcut"=""

[-HKEY_CLASSES_ROOT\SystemFileAssociations\.lnk]

[HKEY_CLASSES_ROOT\SystemFileAssociations\.lnk]
"FileOperationPrompt"="prop:System.ItemTypeText;System.FileOwner;System.Author;System.Title;System.Subject;System.Comment;System.DateModified;System.Link.TargetParsingPath"
"FullDetails"="prop:System.PropGroup.Description;System.ItemTypeText"

[HKEY_CLASSES_ROOT\WSHFile]
"IsShortcut"=""

[-HKEY_CURRENT_USER\SOFTWARE\Microsoft\Windows\CurrentVersion\Explorer\FileExts\.lnk]

[-HKEY_CURRENT_USER\SOFTWARE\Microsoft\Windows\Roaming\OpenWith\FileExts\.lnk]

[HKEY_LOCAL_MACHINE\SOFTWARE\Microsoft\Windows\CurrentVersion\Explorer\Shell Icons]
"29"=-
Если это не помогло, а вы также пользуетесь программами для очистки реестра, попробуйте дополнительно использовать следующий код:
Windows Registry Editor Version 5.00

[HKEY_LOCAL_MACHINE\SOFTWARE\Classes\Folder\shell\opennewwindow]
"LaunchExplorerFlags"=dword:00000001
"MUIVerb"="@windows.storage.dll,-8517"
"MultiSelectModel"="Document"
"OnlyInBrowserWindow"=""

[HKEY_LOCAL_MACHINE\SOFTWARE\Classes\Folder\shell\opennewwindow\command]
"DelegateExecute"="{11dbb47c-a525-400b-9e80-a54615a090c0}"
При успехе процедуры, перезагрузите компьютер — скорее всего, проблема окажется решенной, а сообщений о том, что нет приложения, сопоставленного с этим файлом больше появляться, не будет.
По аналогии исправляется такая же ошибка и с другими типами файлов. Более подробно и с большим количеством методов — в инструкциях: Как исправить ассоциации файлов Windows 10.
Этому файлу не сопоставлена программа для выполнения этого действия ms-settings:display, ms-settings:personalization-background и другие
К сожалению, в случае когда об ошибках сообщают ms-settings:display, ms-settings-personalization-background и другие ms-settings, диагностировать проблему бывает сложнее, поскольку причинами могут быть:
- Простые повреждения реестра, а точнее ветки пользователя.
- Повреждение, утеря файлов из папки C:\Windows\ImmersiveControlPanel\
- Повреждение библиотек DLL, например, ошибку можно вызвать, принудительно удалив SettingsHandlers_Display.dll из System32 и это не единственная такая библиотека.
Если точками восстановления воспользоваться не удалось, то я могу предложить следующие способы исправить проблему, ни один не идеален и в разных сценариях появления ошибки «Нет приложения, сопоставленного с этим файлом для выполнения этого действия» или «Этому файлу не сопоставлена программа для выполнения этого действия» работоспособными могут оказаться разные из них.
Создание нового пользователя
Этот метод самый простой и чаще всего срабатывает, если речь не идет о повреждении системных файлов Windows 11/10. Путь выглядит следующим образом:
- Запустите командную строку от имени администратора. Для этого можно начать набирать «Командная строка» в поиске на панели задач, затем нажать правой кнопкой мыши по найденному результату и в контекстном меню выбрать «Запуск от имени администратора». Если на фоне ошибок этот способ не работает, другие описаны в инструкции Как запустить командную строку от имени администратора.
- В командной строке введите по порядку следующие команды, вместо Имя_пользователя указывая любое желаемое имя пользователя, но не то, которое уже используется, а вместо Пароль — пароль для этого пользователя.
net user Имя_пользователя Пароль /add
net localgroup Администраторы Имя_пользователя /add

- Выйдите из системы и зайдите под новым пользователем. Выйти можно, открыв меню Пуск, нажав по аватару пользователя и выбрав пункт «Выход».
- После короткой настройки нового пользователя вы увидите рабочий стол. Проверьте, появляется ли ошибка при открытии тех же параметров под этой учетной записью.

Если ошибка больше не проявляет себя, вы можете просто перенести все данные старого пользователя в новую учетную запись из папки C:\Пользователи\Имя_старого_пользователя и продолжить работать под новым аккаунтом.
Переустановка приложения «Параметры»
Параметры Windows 11 и Windows 10 — такое же приложение, как и другие приложения из Магазина, и мы его можем переустановить. Для этого запустите PowerShell от имени администратора (см. Запуск Windows Powershell) и используйте команду:
Get-AppxPackage *immersivecontrolpanel* | Foreach {Add-AppxPackage -DisableDevelopmentMode -Register "$($_.InstallLocation)\AppXManifest.xml"}
После выполнения команды, перезагрузите компьютер, а затем проверьте, была ли исправлена ошибка.
Проверка и восстановление целостности системных файлов
Если предыдущие методы не помогли, выполните проверку хранилища компонентов Windows с помощью DISM, а затем — восстановление целостности системных файлов с помощью sfc /scannow. Подробно о том, как это сделать в отдельной инструкции: Восстановление системных файлов Windows 11, Проверка и восстановление целостности системных файлов Windows 10.
Надеюсь, один из предложенных методов окажется полезным в вашей ситуации, и система заработает должным образом, не уведомляя о каких-либо ошибках.
Home > Think Tank > How to Fix MS SETTINGS DISPLAY Issue
When you try to open the «Display Settings» or the «Personalize» option from the context menu, you may receive the following error message: «ms-settings: display – This File does not have a Program Associated with it for performing this action. Please install a program or, if one is already installed, create an association in the Default Programs control panel«.
There are 4 methods that may help you solve the “ms-settings: display” issue.
- Reset Windows Store Cache
- Fix system corruption with DISM tool
- Restore System to an early point
- Delete Registry Key: ms-settings
Method 1. Reset Windows Store Cache
Please follow the steps below to reset the Windows Store cache.
(1) Press Win + R keys together to open the Run window.
(2) Type wsreset.exe and press Enter, then you will see the following window.
(3) If you see the following window, please wait for a few minutes until the Windows Store runs automatically.
(4) Close the Windows Store and try to open the Personalization settings.
Method 2. Fix System Corruption with DISM Tool
(1) Press Win + X and choose Windows PowerShell (Admin)
(2) Execute the following two commands in sequence.
DISM.exe /Online /Cleanup-image /Scanhealth DISM.exe /Online /Cleanup-image /Restorehealth
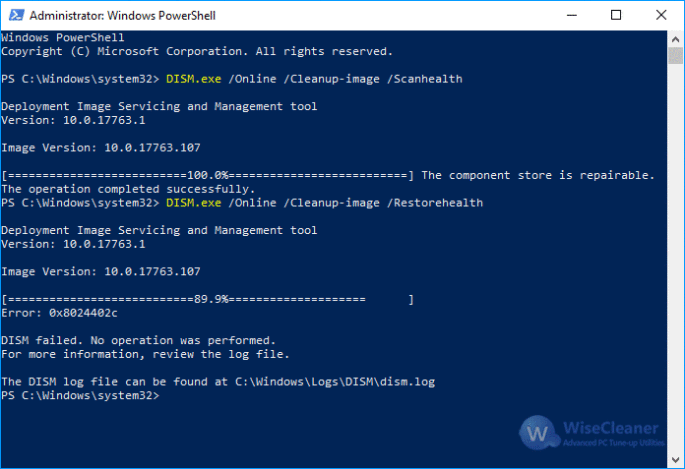
(3) Reboot the system
Method 3. Restore the System to an Early Working Point
The System Restore Point can help us solve most system problems if there is a working point.
(1) Press Win + R to open the Run window
(2) Type rstrui and click OK
(3) Press the Next button at the bottom of the opened System Restore window
(4) Select an older restore point to restore the system.
Method 4. Delete the Registry Key: ms-settings
It is necessary to do a registry backup or a system backup before deleting registry keys. After backup, please follow the steps below to delete the registry.
(1) Press Win + R to open the Run window
(2) Type regedit and click OK to open the Registry Editor.
(3) Navigate to HKEY_CURRENT_USER\software\classes\
(4) Delete or rename the key ms-settings.
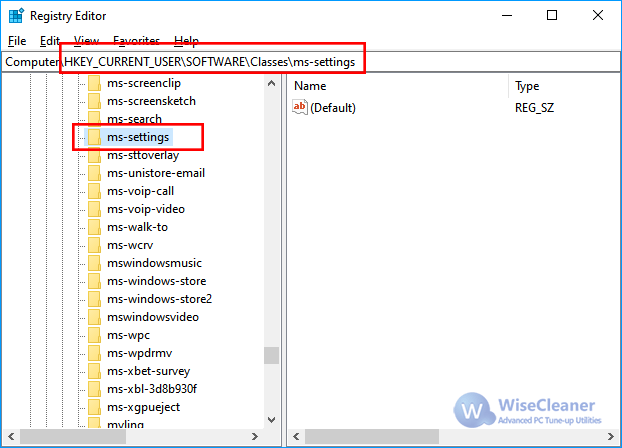
(5) Reboot the system.
Some users are unable to open the Settings app in Windows 11/10. According to them, when they try to access Display settings or open the Settings app, a blank window appears on their screen along with an error message “This file does not have an app associated with it for performing this action.” Restarting the system does not fix this problem. If you encounter the same issue while accessing the Windows 11/10 Settings, you can try the solutions provided in this article.

Some users have tried to access the Display settings by right-clicking on their desktop but received the same error message.
The complete error message is as follows:
ms-settings:display
This file does not have an app associated with it for performing this action. Please install an app or, if one is already installed, create an association in the Default Apps Settings page.
If you see this error while accessing Windows 11/10 Settings, one of the following suggestions may help you fix it.
- Run SFC and DISM scans
- Re-register UWP apps
- Scan your PC with your antivirus software
- Create a new Local Administrator account
- Try System Restore
- Perform an In-place Upgrade
Let’s see all these solutions in detail.
1] Run SFC and DISM scans
Getting an error message while accessing the Windows 11/10 Settings may be an indication of system files corruption. Windows operating system has built-in tools that repair the corrupted system image files. System File Checker is one of these tools. The System File Checker tool scans the entire system of a user for corrupted system image files and repairs them (if possible). Hence, running an SFC scan may be beneficial for you.
DISM (Deployment Image Servicing and Management) is another system image repairing tool. You can run a DISM scan if the SFC tool fails to repair the corrupted Windows image files.
The SFC and DISM scans have fixed the problem for many users.
2] Re-register UWP apps
Sometimes, apps do not start or crash unexpectedly. In such a case, re-registering the Microsoft Store apps fixes the problem. Because you cannot access Windows 11/10 Settings, you have to re-register the Microsoft Store apps by executing a command in Windows PowerShell.
After that, restart your computer.
3] Scan your PC with your antivirus software
One possible cause of this problem is the virus or malware infection. Therefore, we suggest you scan your system with your installed antivirus software or use Microsoft Safety Scanner.
Microsoft Safety Scanner scans your system and removes malware (if detected). If you have any third-party antivirus or antimalware software, you can also run a full system scan by using that software.
4] Create a Local Administrator account
If the antivirus or antimalware software does not find any threat on your system, your user profile might be corrupted. You can confirm this by creating a new Local Administrator account. To create a Local Administrator account, you have to access Windows 11/10 Settings. But due to this error, the Settings app refuses to open. Therefore, you have to create the Local Administrator account by executing a command in an elevated Command Prompt.

Now, log in to the newly created Local Administrator account and check if you can access Windows 11/10 Settings. If so, your old user account has been corrupted. Now, you have to transfer all your user data to your newly created Local Administrator account. The following steps will help you with that:
- Open File Explorer.
- Open the C drive and then open the Users folder. You will find all user profile folders there.
- Now, open your old user profile folder and copy all the contents inside it.
- Open the new user profile folder and paste all the copied contents there. This will copy the data of your old user profile to the new one.
5] Try System Restore

If you have created a System Restore point, you can restore your computer to the state just before the error has occurred.
6] Perform an In-place Upgrade
Perform an in-place upgrade if all the above solutions failed to fix your issue. The in-place upgrade installs the Windows operating system on your computer without removing the older version. If you perform an in-place upgrade, your data will not be deleted. But we recommend you backup all your data before performing the in-place upgrade.
How do you fix This file does not have an app associated with it for performing this action?
If you encounter the error message “This file does not have an app associated with it for performing this action” while opening Windows 11/10 Settings, some of your system image files might have been corrupted. Hence, running the SFC and DISM scans can help you fix the problem. If this does not help, you can try re-registering the Microsoft Store apps. Another cause of this problem is virus or malware infection. Therefore, you should also run a full system scan with your antivirus and antimalware software.
Some users have also encountered the following error message. According to them, it occurred when they were trying to open any app or software installed on their computers.
This file does not have a program associated with it for performing this action. Please install a program or, if one is already installed, create an association in the Default Programs control panel.
Some of the affected users have also reported that this error message can also appear if the Spora Ransomware has infected your computer. If you encounter this error message on your system, you should check if your Registry settings have not been corrupted.
Why is MS Settings not working?
There could be many reasons why the MS Settings app is not working, like the corrupted system image files, corrupted user account, etc. Apart from that, there could be a third-party application conflicting with the Settings app. If so, troubleshooting in the Clean Boot state will help you identify the problematic app or software.
Hope this helps.
Read next: Personalized Settings Not Responding in Windows 11/10.
The error ms-settings:display – This file does not have an app associated with it for performing this action may appear when you try to open Personalize or Display Settings on your Windows 10 device. The hint to create an association is highly annoying since this won’t be possible. Or it may return the same error. In addition, you may even not be able to open File Explorer, and you may get an error like “explorer.exe – System Warning – Unknown Hard Error” at startup.
 1")
This guide helps you fix the ms settings display error. Not every file association error can be resolved with 1 universal fix. That is why I have listed all the possible solutions below. They are listed in a logical order based on the success rate. If the first solution doesn’t work, you can proceed with the second solution without risk, and so on.
1. Reset Windows Store Cache to fix ms-settings:display
Resetting the cache of Windows Store has a high success rate on fixing your ms-settings:display problem. Follow these steps:
- Click Start and start typing WSReset.exe .
- Click WSReset.exe and press Enter.
 3")
- Wait for the black Command Prompt to disappear. A new Windows Store window will open automatically.
- Close the Store window and then try to launch the personalization settings again.
 3")
2. Install Updates and Restart your Device to fix ms-settings:display
In case you didn’t, there’s a big chance installing Windows Updates fixes your problem. In case you’re not on the latest Semi-annual release, your chances to fix are even bigger when you upgrade to the latest version.
To install latest updates
- Click Start and start typing Windows Updates.
- Let run, and install the updates
To install the latest release of Windows 10
- Go to https://www.microsoft.com/en-us/software-download/windows10
- Click the blue Update Now button.
 6")
- A file, named Windows10Upgrade####.exe, is being downloaded. Run this file and follow the steps in the wizard.
Please note that updating your Windows 10 version could take more than an hour. - After completing the Upgrade, try to launch the personalization settings again.
 6")
3. Create a new local user to fix ms-settings:display
This is not the quickest solution. But you will be able to isolate the problem to a specific user account. It could be that the user account you work with has invalid settings or has been corrupted. To make sure this is the case, you need to create a new user account and test if you are able to open the Settings in this user account. The steps below are not very extensive. But should help you on your way:
- Open Local Users and Groups (lusrmgr.msc)
- Create a new user account.
- In the same window, go to Groups and add the new user to the Administrators group.
- Login with the new user account and see if everything is working (like opening Display Settings).
- If not, you’ll probably have to roll back or reinstall Windows 10
- If that account is working, you have isolated the problem to be in the specific user account. -> continue to the next step
- Backup all your files of your original user account
- Delete the account that is experiencing the problem. Note: make sure you have backed up all your data!)
- Log in with your Microsoft account and restore all your data from step 6.
- Try to launch the personalization settings again.
Cause of association error
Most likely Windows Updates are the cause for returning this error. It is not clear which specific update(s) caused the issue, although the ms-setting:display error has been here sinds 2015, and is still occurring in 2020.
The exact error is:
This file does not have an app associated with it for performing this action. Please install an app or, if one is already installed, create an association in the Default Apps Settings page.