
Eclipse Mosquitto is one of the world’s most popular open-source MQTT brokers. Among its many installation options, it can also run on Windows. This article will explain how to install and configure a free open-source version of Mosquitto MQTT Broker on Windows, including how to install Mosquitto as a Windows service. Then, I will explain how to run Mosquitto on Windows and test it using the popular command line tools: mosquitto_sub and mosquitto_pub.
How to install Mosquitto Broker on Windows
To install Mosquitto on Windows, select the desired installation file from mosquitto.org (64-bit or 32-bit), download it, and run it.
This file is a Mosquitto Windows 10 and Windows 11 tested package (including Windows for ARM). Compatibility with older Windows versions is possible but not guaranteed.
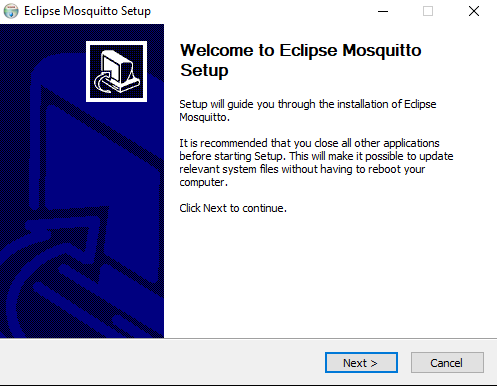
The Eclipse Mosquitto Setup wizard will start. Click Next to continue the installation.
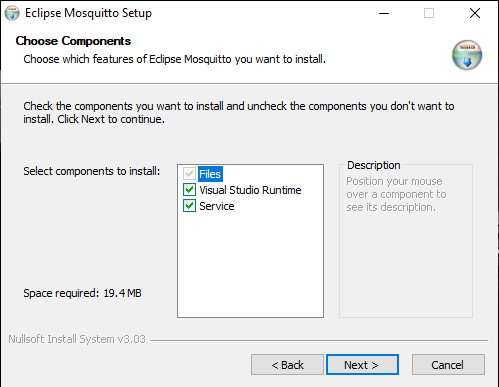
Select the components to install. If you want to start Mosquitto automatically when Windows starts, install the Service component. It will install the broker as a Windows service. See the “How to run Mosquitto MQTT Broker as a Service on Windows” section.
You will also need Visual Studio Runtime because Mosquitto depends on specific libraries and components provided by it. You might not want to install this component if you already have it, but if you are unsure, leave this option as it is and continue to the next step.
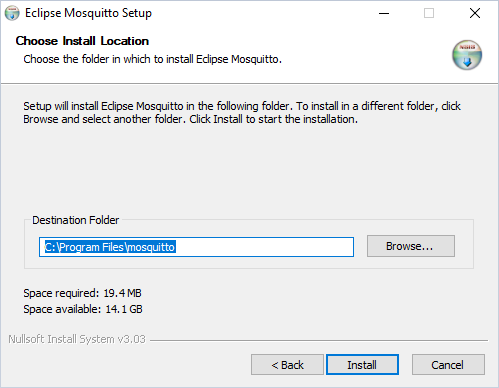
Select the installation folder for Eclipse Mosquitto or leave the default value (C:\Program Files\mosquitto for a 64-bit executable and C:\Program Files (x86)\mosquitto for 32-bit) and click Install.
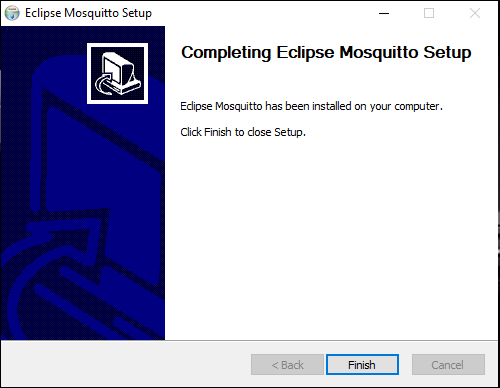
After the installation process is complete, you will see a corresponding message. All required files for operating Mosquitto will be automatically saved to your chosen installation folder.
Click Finish in the setup wizard. Now, you can start using MQTT Mosquitto Broker on Windows.
If you want to install Mosquitto broker without running the graphical part of the installer, you can do so by running the installer from the command line (also referred to as cmd or Command Prompt) with the /S switch (silent mode):
mosquitto-2.0.15-install-windows-x64.exe /SUse the /D switch to change the installation folder:
mosquitto-2.0.15-install-windows-x64.exe /S /D=:\"Program Files"\mosquittoAs an alternative to cmd, you can use PowerShell. Note that PowerShell uses a slightly different syntax than the command line. For example, running the mosquitto command in cmd (inside of the Mosquitto installation folder) has its equivalent in PowerShell, which is: .\mosquitto. This difference is, however, irrelevant as soon as you add Mosquitto to the system path (more on how to do this below). Then you can use the mosquitto command in both PowerShell and cmd.
After installing Mosquitto broker, you can check how to run it and which command line options it supports. To do this, navigate inside the folder where Mosquitto is installed (installation folder) and run the following command:
mosquitto -h
Note: Mosquitto is not automatically globally visible in cmd. So, to work with it using the mosquitto command, you must either be inside of the installation folder or add the installation folder to the PATH environment variable and restart the Command Prompt (see the following section).
Please note: There is a more powerful Mosquitto version – Pro Edition for Eclipse Mosquitto™, which is available as part of the Cedalo MQTT Platform. To test it and it advanced functionality, sign up for a free cloud or on-prem trial here.
Your Mosquitto Windows installation is now complete. The next sections will explore how to add the mosquitto command to the system path, how to run Mosquitto in foreground and background (as a daemon service), and how to test its basic capabilities using a command line MQTT client.
Making Mosquitto command globally available. Adding Mosquitto to system path
You can use Mosquitto directly from the installation folder by navigating to this folder in the Command Prompt and typing mosquitto. However, if you want to use the broker from any location in the command line, you need to add it to your system path (specifically to the PATH environment variable).
To add Mosquitto to your system path, copy the installation folder’s path, which contains mosquitto.exe.
Right-click on My Computer or This PC on your desktop or in File Explorer, and choose Properties.
Click on Advanced system settings.
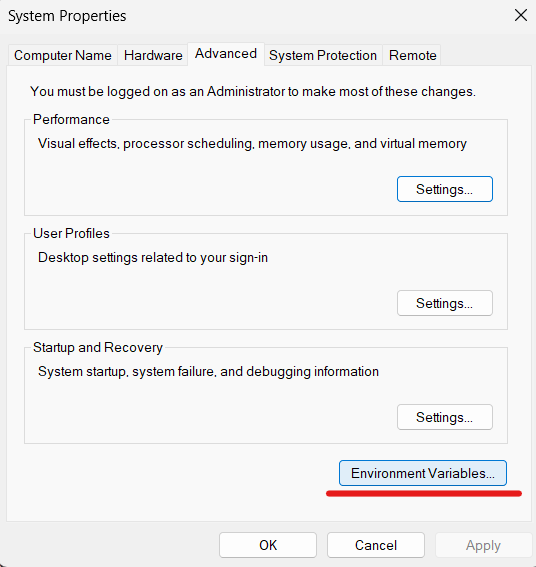
Click on Environment Variables, as you can see in the image below.
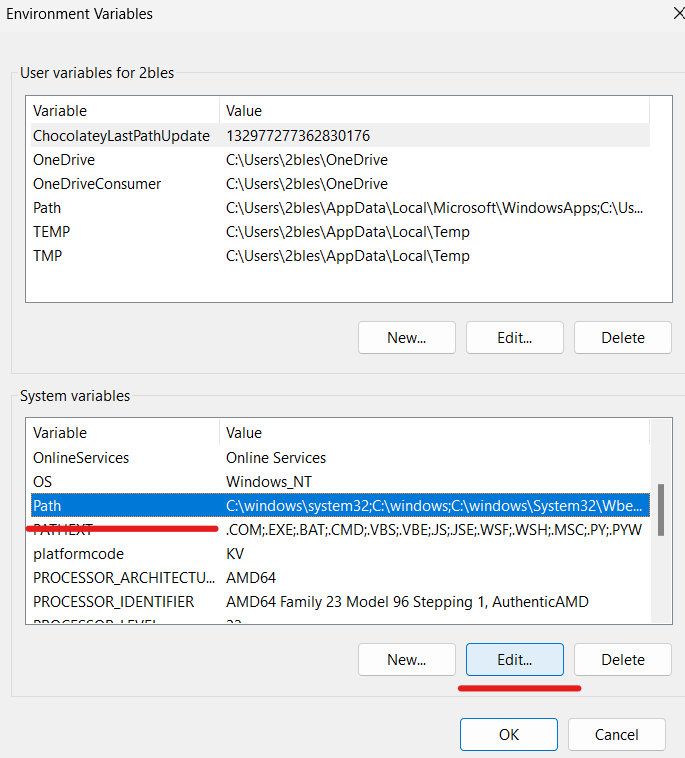
In the “System variables” section, find the variable called Path and click Edit.
Now, the “Edit environment variable” window will open. Click on New and insert the path to your Mosquitto installation folder you copied earlier. Click OK:
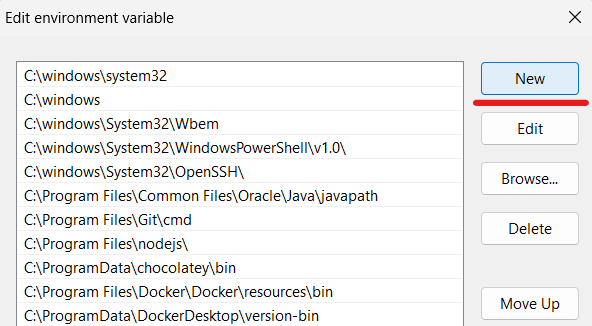
In case you don’t see the “New” button, then in the “Variable value” box, scroll to the end and add a semicolon (‘;’) in case there isn’t one. Then paste the path to the Mosquitto installation folder and click OK.
Restart your command line application (by closing and opening the cmd window), and you should be able to issue commands like mosquitto -h from any location.
Other sections of this guide assume that you have added Mosquitto to your system path as described above. If you did not, then you must run all the Mosquitto-related commands (mosquitto, mosquitto_passwd, mosquitto_pub, mosquitto_sub) from the folder where you installed the broker.
The next sections will explore how to start the Mosquitto broker in Windows.
How to Run Mosquitto MQTT Broker as a Service on Windows
Most of the commands from this section must be executed with administrative permissions. To do this, you must run Command Prompt as administrator by right-clicking on the command line icon and choosing the “Run as administrator” option.
By default (if the “Service” option was ticked during installation), Mosquitto is installed as a Windows service to run in the background and automatically start on Windows startup. It will also automatically start immediately after the installation. Note that in this case, Mosquitto will use the mosqutto.conf config file from the installation directory.
To check if Mosquitto is running in the background, execute the sc query mosquitto command in cmd. Note that PowerShell sc is not a service control command but an alias for Set-Content. Therefore, in PowerShell, you must use Get-Service -Name mosquitto instead.
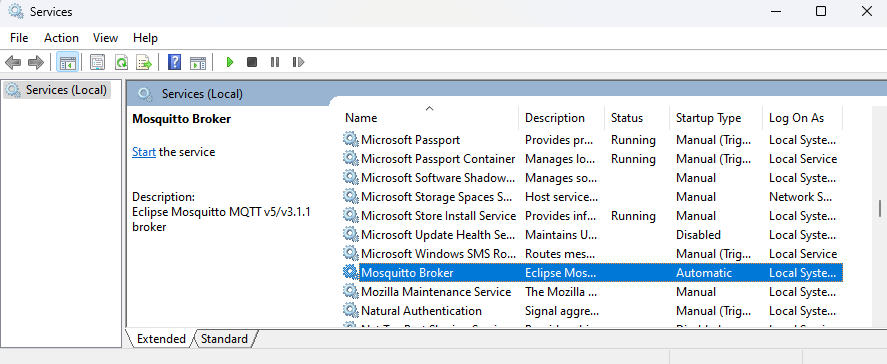
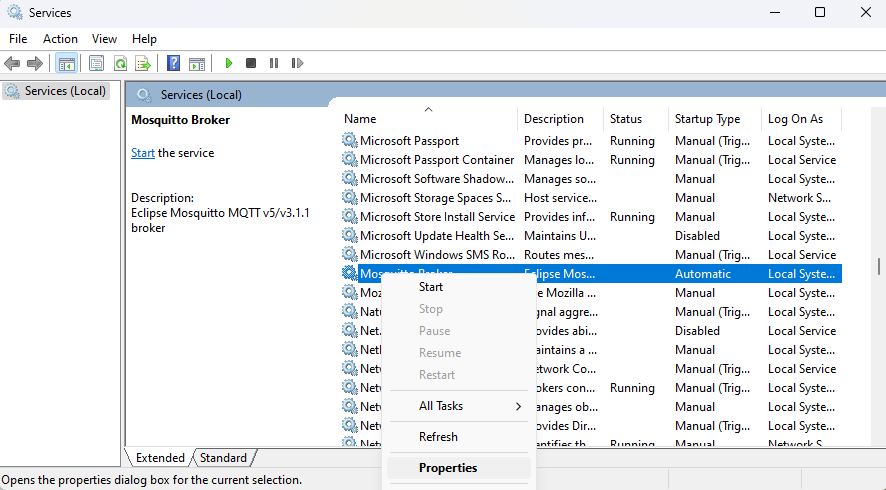
You can also view the status and manage services via a dedicated GUI application. To access the Services application: open Windows search and type services.msc or simply Services and press enter. Then, find the service named Mosquitto Broker. You will see the current state of the services in the “Status” column. In case the status is not “Running…”, right-click on it, and start it as shown below:
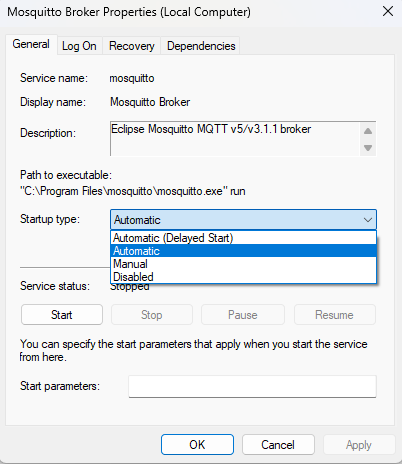
Mosquitto service is configured to start on every Windows startup automatically. You can change this behavior in service properties by right-clicking the “Mosquitto Broker” entry in “services.msc” and selecting “Properties”:
Then, change the “Startup type” field to the desired value (“Manual” will not start the service after the system restart, and “Disabled” will turn the service off completely), and press OK.
Alternatively, you can manage Mosquitto service using sc or net commands from the command line. Note that you will have to open the command line as an administrator. For PowerShell, you will have to use one of Start-Service, Stop-Service, Get-Service, Restart-Service to manage the service.
Example:
Starting the service.
With cmd:
sc start mosquittoWith PowerShell:
Start-Service mosquittoStopping the broker:
With cmd:
sc stop mosquittoWith PowerShell
Stop-Service mosquittoRemoving Mosquitto Windows service:
For cmd enter the following two commands one by one:
sc stop mosquitto
mosquitto uninstall
Alternatively:
sc stop mosquitto
sc delete mosquitto
For PowerShell:
Stop-Service -Name mosquitto
mosquitto uninstall
If you want to install the Mosquitto service again, run the following command:
mosquitto installAnd as I already mentioned, you can also view Mosquitto service status using the following command:
For cmd:
sc query mosquittoFor PowerShell:
Get-Service -Name mosquittoBy default, the Mosquitto broker service will listen on port 1883 unless you change this in mosquitto.conf file located in the installation folder. To check if Mosquitto is running on port 1883, run the following command (works for both cmd and PowerShell):
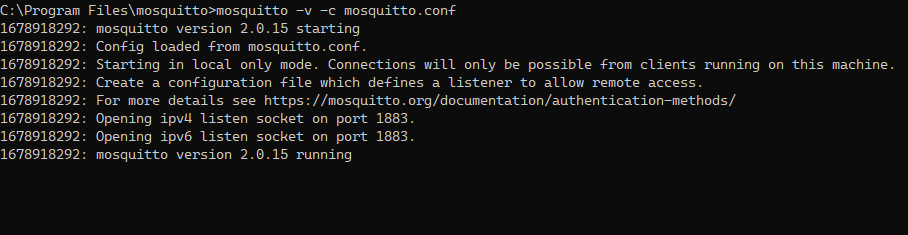
netstat -an | findstr 1883If the Mosquitto MQTT server has opened an IPv4 and IPv6 listening socket on port 1883, the output of this command will be the following two lines:
How to run Mosquitto in the foreground
There is an alternative way to run Mosquitto which will, however, run it in the foreground rather than in the background as in the case with services.
Open the command line and use mosquitto -v -c <path to mosquitto.conf> command to run the broker in a verbose mode which will allow you to see the debug messages. Using the -c option, we can pass a mosquitto.conf configuration file to the broker. If you don’t specify it, no configuration file will be used. Read more on this in the following section.
Note that the -d option (that allows us to run Mosquitto in the background) is unusable in Windows because there is no daemon process manager. So, on Windows, we use services instead, as described in the section above.
To stop Mosquitto from running in the foreground, press Ctrl + C in the cmd window where the broker is running.
In this article, we use the open-source Eclipse Mosquitto broker. However, the Pro Edition for Eclipse Mosquitto is also available. It provides advanced MQTT broker functionality, such as a rich set of MQTT bridges and metrics exporters, High Availability, OAuth 2.0 / JWT / LDAP Authentication, Audit trail loggins, Persistent Queueing, and more. To test it, sign up for a free Cedalo MQTT Platform trial.
How to Configure the Mosquitto MQTT Broker on Windows
You can configure the operation and features of the Mosquitto broker using the configuration file named mosquitto.conf located in the installation folder. This file is used only for Mosquitto running as a service. If you run Mosquitto from cmd, the mosquitto.conf file is not used, and it has to be manually specified with the -c flag:
mosquitto -c <path to your config file>For example:
mosquitto -c "C:\Program Files\mosquitto\mosquitto.conf"If you want to run Mosquitto as a service and use a non-default configuration file, the easiest way is to install the nssm command line tool. After that, ensure that the broker service is stopped and removed:
For cmd:
sc stop mosquitto
sc delete mosquitto
For PowerShell:
Stop-Service -Name mosquitto
mosquitto uninstall
And finally, execute the following commands (works for both cmd and PowerShell):
nssm install mosquitto "C:\Program Files\mosquitto\mosquitto.exe"
nssm set mosquitto AppParameters -c "<path to your config file>"
For example:
nssm install mosquitto "C:\Program Files\mosquitto\mosquitto.exe"
nssm set mosquitto AppParameters -c "C:\Users\myuser\cedalo\mosquitto.conf"
To prevent unexpected issues avoid spaces in the path to your custom config file.
After that, you can start the service with sc start mosquitto for cmd, Start-Service -Name mosquitto for PowerShell, or just continue using nssm with nssm start mosquitto. Now, Mosquitto will use the custom config file you provided.
Editing mosquitto.conf
You may want to edit the default mosquitto.conf configuration file from the installation directory or create your own and specify the needed settings.
The default mosquitto.conf file in the installation folder contains commented-out lines (lines that begin with the # symbol) with default options. To change them, you need to uncomment the lines you want (by removing the # in front of them) and specify different values. Or you might as well not bother with uncommenting – just add your configuration options anywhere in the file.
If you create your own mosquitto.conf, then start with an empty file and add your options.
Below we will explore some necessary settings of this file.
Authentication settings
To connect to the broker for the first time, you have to configure your authentication settings in the configuration file. There are a few possibilities, some of which we explore below.
You can (but not necessarily should) allow anonymous connections from any host (meaning connections without a username and a password) by adding the following options to your configuration file:
allow_anonymous true
listener 1883 0.0.0.0
This will allow any device on the network to connect to the broker, post messages and subscribe to topics without authentication. However, we recommend allowing only authenticated clients to connect to your broker for security reasons.
To achieve this, first, create a password file containing usernames and PBKDF2 (with SHA-256) hashes of the passwords in the format: username:pbkdf2_password_hash. This would look like the following (take a look at pwfile.example):
roger:$6$clQ4Ocu312S0qWgl$Cv2wUxgEN73c6C6jlBkswqR4AkHsvDLWvtEXZZ8NpsBLgP1WAo/qA+WXcmEN/mjDNgdUwcxRAveqNMs2xUVQYA==
sub_client:$6$U+qg0/32F0g2Fh+n$fBPSkq/rfNyEQ/TkEjRgwGTTVBpvNhKSyGShovH9KHewsvJ731tD5Zx26IHhR5RYCICt0L9qBW0/KK31UkCliw==
pub_client:$6$vxQ89y+7WrsnL2yn$fSPMmEZn9TSrC8s/jaPmxJ9NijWpkP2e7bMJLz78JXR1vW2x8+T3FZ23byJA6xs5Mt+LeOybAHwcUv0OCl40rA==
This can be achieved using mosquitto_passwd command. To create a password file with the initial Mosquitto user, use the following command:
mosquitto_passwd -c <path where you want your password file to be created> <user_name>For example:
mosquitto_passwd -c C:\"Program Files"\mosquitto\passwd test_userThis will create a password file with the initial user test_user.
To add another user to the password file, run the command:
mosquitto_passwd -b C:\"Program Files"\mosquitto\passwd user_name passwordNote that if you want to delete a user from the file, you can use the -D flag and specify the name of the user to be removed:
mosquitto_passwd -D C:\"Program Files"\mosquitto\passwd user_nameAfter you have created a password file with all the needed users, add the following lines to mosquitto.conf:
password_file C:\Program Files\mosquitto\passwd
allow_anonymous false
listener 1883
Don’t forget to change the password_file option to contain the path to your actual password file.
How to Handle Persistent Data and Logs
Mosquitto broker allows you to save the following types of application data among the rest:
- Information and debug logs.
- Broker system data (persistence feature).
To configure the logging of your MQTT Mosquitto Windows installation, you need to add the logging options (located in the Logging section of the default mosquitto.conf).
Add the following parameter to specify which file to store the logs in. Also, it would be best if you made sure this path exists, so manually create a log folder (‘C:\Program Files\mosquitto\log’ in the example below).
log_dest file C:\Program Files\mosquitto\log\mosquitto.logYou can also choose the events to log: debug, error, warning, notice, information, etc. To save logs for all types of events, use the following option:
log_type allIf you want to get comprehensive information on logging in the Mosquitto MQTT broker, please refer to our MQTT Logging tutorial.
To save persistence data, add the following options to the configuration file. Adjust persistence_location as needed. You need to ensure the path in persistence_location exists, so create a data directory manually if there isn’t one (‘C:\Program Files\mosquitto\data\’ in the example).
persistence true
persistence_file mosquitto.db
persistence_location C:\Program Files\mosquitto\data\
autosave_interval 60
Note that persistence data will only be saved to a file on Mosquitto shutdown or at specific intervals controlled by the autosave_interval config option.
Note that you need to restart the broker for the changes made in the configuration file to take effect. Use the command ‘sc stop mosquitto’ to stop the Mosquitto service and then execute ‘sc start mosquitto’ to start it up again.
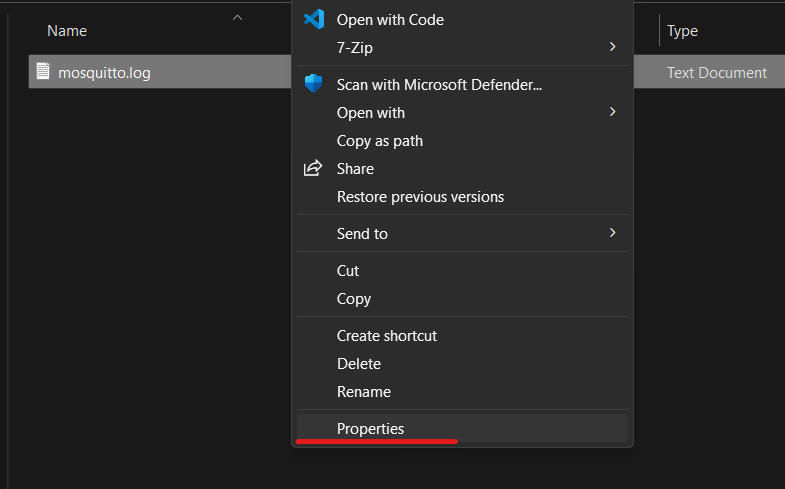
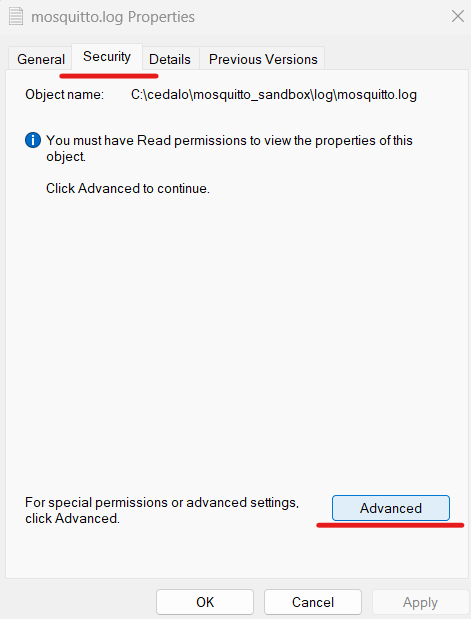
When Mosquitto runs as a service, all the files it creates will have access permissions set only for the SYSTEM Windows account. To access these files from your user account, you must go into the properties of those files and add your Windows user on the Security tab.
More specifically, right-click on the file and choose Properties:
Go to the Security tab and click Advanced:
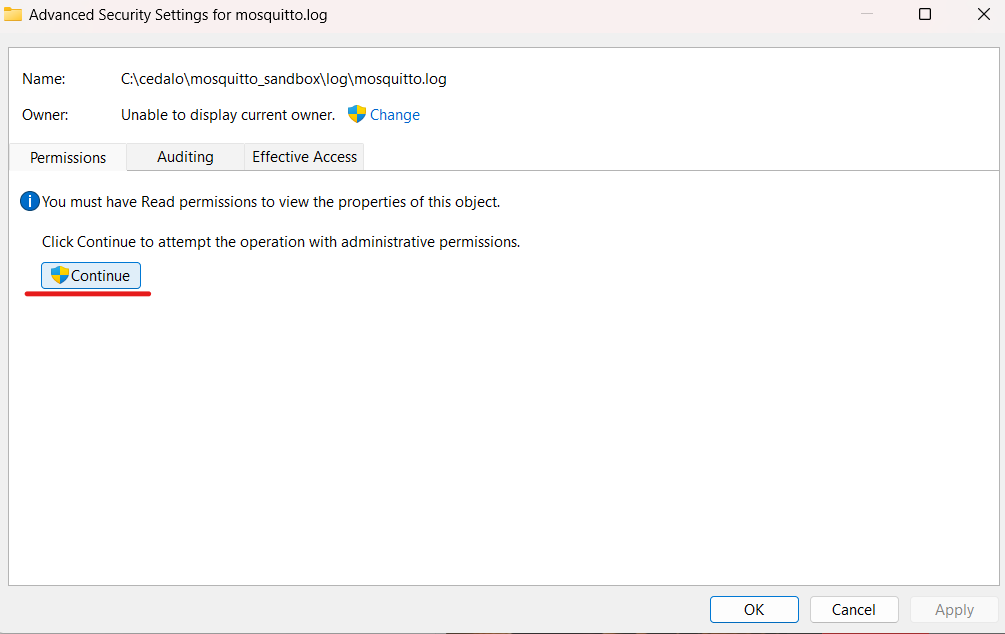
In the “Advanced Security Settings” tab, click on Continue:
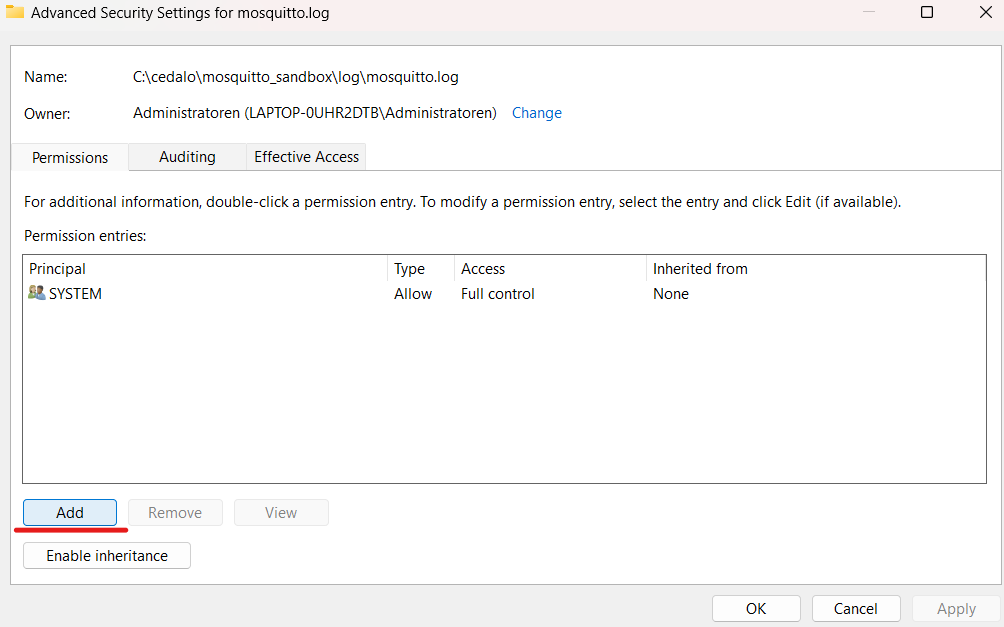
Click on the Add button:
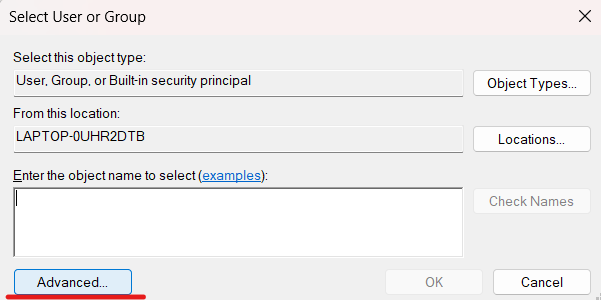
The “Permission Entry” tab will open. Click on Select a principal:
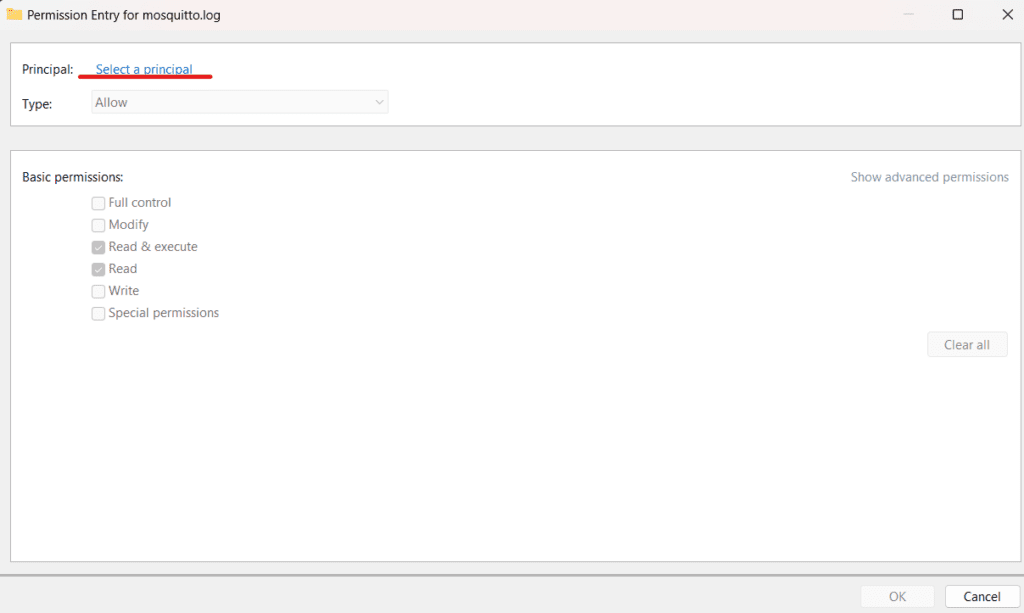
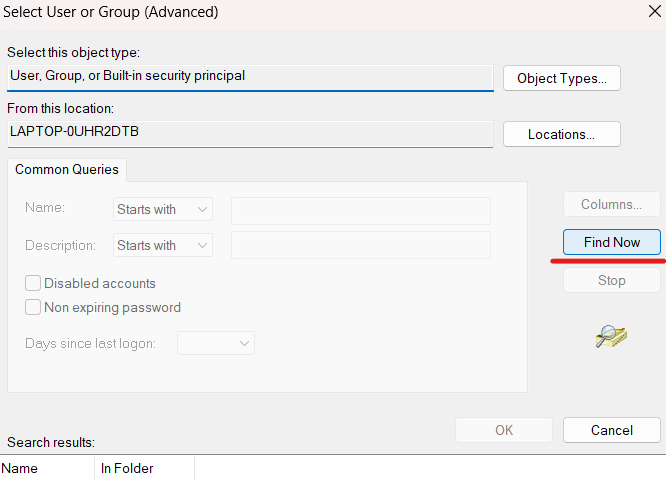
Click Advanced:
Then click on the Find Now button:
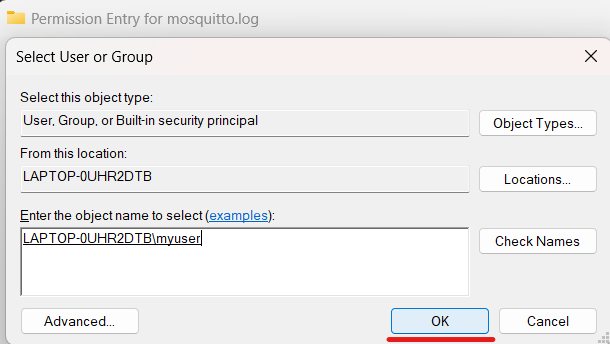
At the bottom of the window, in the Search results section, a list of users, groups, and built-in security principals will appear:
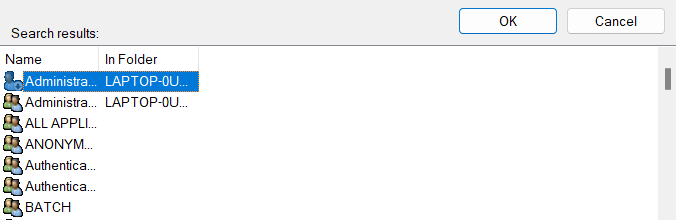
Find the user you are currently logged in as, select it, and click OK:
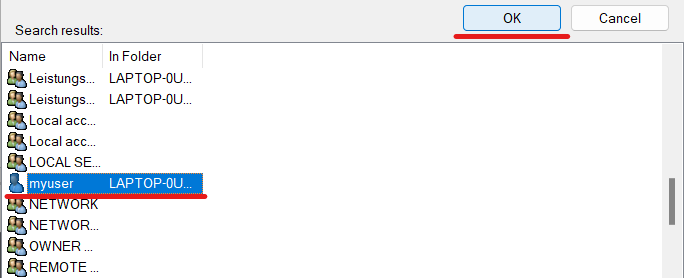
Click OK again:
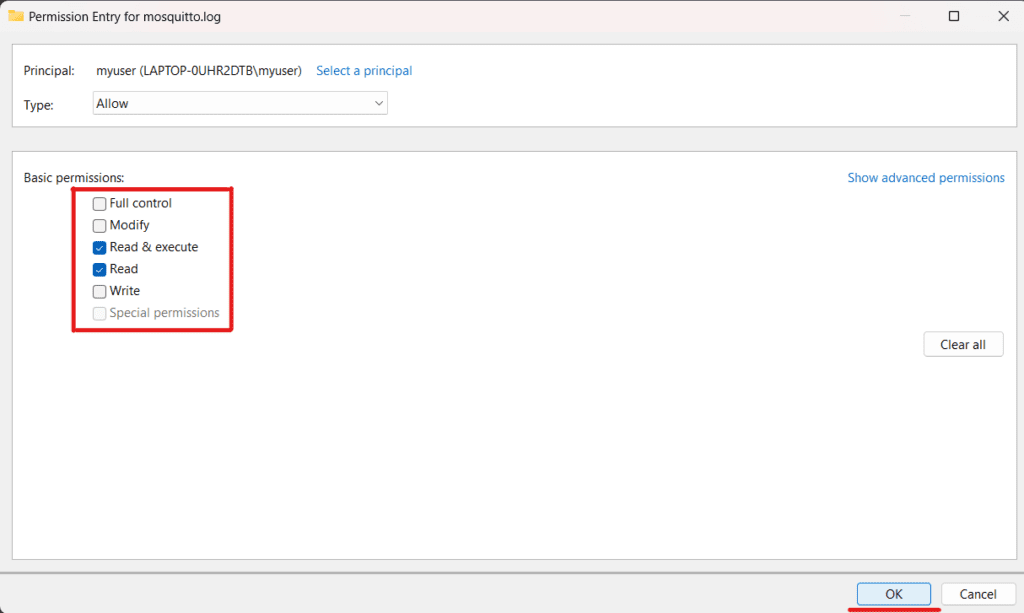
You will be sent back to the Permission Entry tab. Here select the basic permissions you want your user to have and click OK:
After that, in the “Advanced Security Settings” window, click on the OK button again:
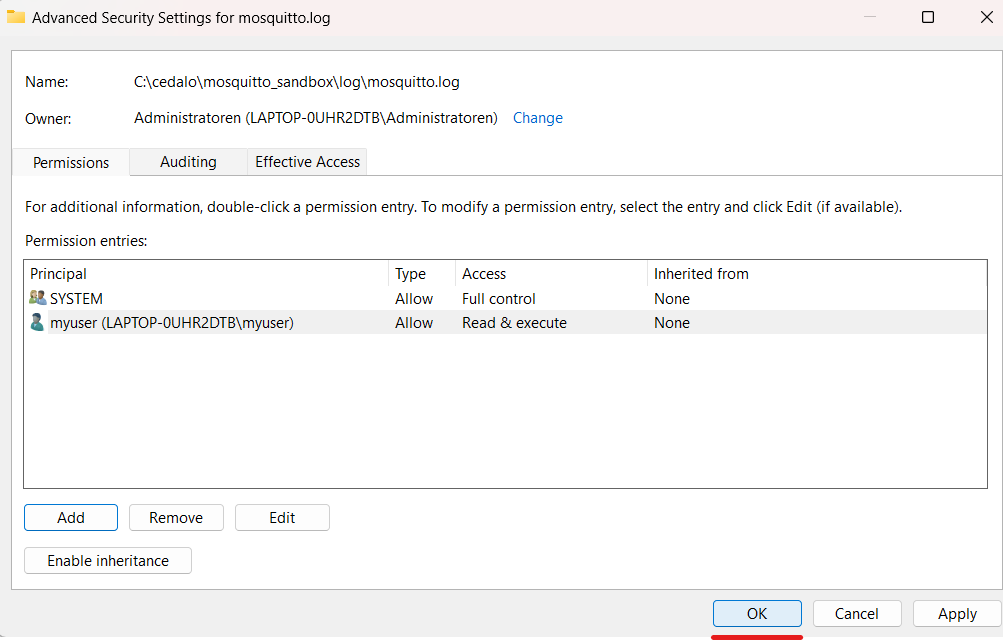
Finally, you should be able to access the file.
Example Mosquitto Configuration File
Summarizing the settings we discussed, you may find an example of the mosquitto.conf file below. Remember to change the paths to suit your environment if you want to use it for your use case.
password_file C:\Program Files\mosquitto\passwd
allow_anonymous false
listener 1883 127.0.0.1
log_dest file C:\Program Files\mosquitto\log\mosquitto.log
log_type all
persistence true
persistence_file mosquitto.db
persistence_location C:\Program Files\mosquitto\data\
autosave_interval 60
There are many other Mosquitto broker settings that you can add to your configuration file. For example, you can configure Mosquitto to listen on multiple ports, configure TLS certificates, limit message size, and more.
You can find a complete list of mosquitto.conf settings here.
How to Test the Installed Mosquitto MQTT Broker on Windows
MQTT Client for Windows
To test Mosquitto MQTT Windows installation, I will use an MQTT client for Windows. The idea is simple: using an MQTT client, I will publish and subscribe to topics to check that basic broker functionality works as expected.
For our setup, we are going to use the mosquitto_sub and mosquitto_pub MQTT clients. These clients are distributed as separate terminal commands shipped together with the broker Windows package. However, you can also use any other MQTT client, such as MQTT Explorer, which provides a friendly graphical user interface.
Subscribe to Topics Using mosquitto_sub Windows
Mosquitto_sub Windows MQTT client allows you to subscribe to topics and print the received messages. To receive a message, you should subscribe to a topic before a message is published. In this example, we subscribe and listen to a topic using mosquitto_sub while publishing the messages with mosquitto_pub.
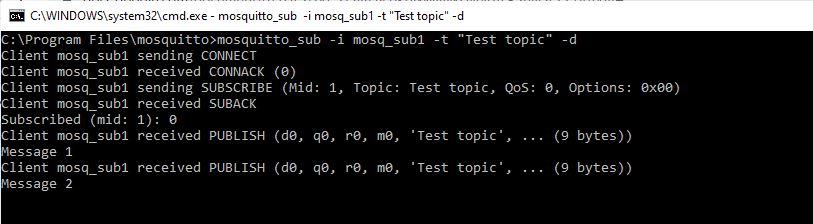
To subscribe to the topic named "Test topic", run the following command:
mosquitto_sub -i mosq_sub1 -t "Test topic" -dThis command uses the following options:
i– Client id. If this parameter is not passed, client ID is generated automatically.t– Name of the topic to subscribe to.d– Enables printing of debug messages.
After that, the MQTT client will be launched, which will notify about new messages on the “Test topic” topic and print them.
Mosquitto_sub uses localhost and 1883 port by default. Use option -h to change the host and option -p to change the port.
mosquitto_sub -i mosq_sub1 -t "Test topic" -h localhost -p 1884 -dIf you use authentication to connect to the broker, specify a username and a password using -u and -P options:
mosquitto_sub -i mosq_sub1 -t "Test topic" -u <username> -P <password> -dPublish Messages with mosquitto_pub Windows
Mosquitto_pub is a simple MQTT client that publishes one message to a topic and exits.
To publish a message, run the following command in a new cmd window:
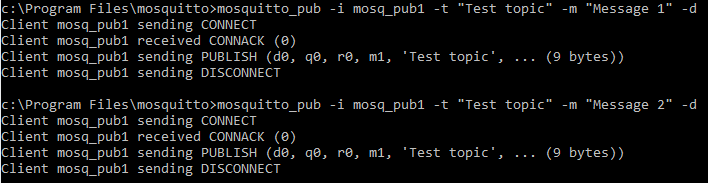
mosquitto_pub -i mosq_pub1 -t "Test topic" -m "Test message" -dThis command uses the following options:
i– Client id. If this parameter is not passed, the server generates client ID automatically.t– Name of the topic to which the message is published.m– Text payload of the message to be published.d– Enables printing of debug messages.
Below is the output of the command.
By default, messages are sent to the broker at localhost, port 1883. To publish them to a different host, use the -h option. Use the -p parameter to connect to a different port.
mosquitto_pub -i mosq_pub1 -t "Test topic" -m "Test message" -h localhost -p 1884 -dTo specify a username and password for the user authentication, use -u and -P options:
mosquitto_pub -i mosq_pub1 -t "Test topic" -m "Test message" -u <username> -P <password> -dEnsure that the publish topic is the same as the topic you have previously subscribed to (-t “Test topic”). If you did everything correctly, you would see the published messages (“Test message”) in the window where you executed the mosquitto_sub command.
Uninstalling Mosquitto MQTT Server on Windows
If you want to uninstall the Mosquitto Windows service specifically and not the broker application itself, you first need to stop the service using the sc stop mosquitto command. Then run either sc delete mosquitto or mosquitto uninstall.
Otherwise, if you want to delete both service and the application, you can use the “Uninstall.exe” executable, which is located inside the installation folder. After running it, you need to delete the installation folder, and you are done.
To run Mosquitto Uninstall executable from cmd in silent mode, type the following into the Windows Command Prompt from inside the folder where Mosquitto is installed:
Uninstall.exe /STroubleshooting Mosquitto MQTT Server on Windows
Only one user is allowed per socket address
If you receive the error message “Normally only one user is allowed per socket address (protocol/network address/port),” you may already have another application running that is listening on port 1883.
Possible Solution
Run netstat -ano | findstr :1883 (or use a different port instead of 1883 if it was configured) command and check if the specified port is already in use by another program. The occupying process’s process id (PID) will be in the last column. You can copy it and then run taskkill /F /PID <PID> replacing the <PID> with the process id value from netstat. You may also free up the port in any other way after identifying which application occupies it. Then killing the process with taskkill is not necessary.
Can’t Connect to Mosquitto Broker with Local IP Address
When connecting to the Mosquitto broker using a local IP address other than localhost, a connect ECONNREFUSED error occurs.
Possible Solution
You need to edit the configuration file to listen to addresses other than localhost. Add the listener parameter and specify the port on which you want to listen for incoming network connections as well as the desired IP address/hostname:
listener 1883 192.168.1.100 You can specify a hostname instead of the IP address (192.168.1.100 in the example above). This listener option can also be specified multiple times to bind various addresses. If we omit it, Mosquitto will be listening on localhost.
Note that having at least one listener in your config file is always a good idea. This will help avoid some problems down the road.
Additionally, for troubleshooting purposes, you can allow anonymous connections from remote addresses with the following:
allow_anonymous trueHowever, it would be best to be careful with this option as it is not recommended to allow anyone to access the broker because of security considerations. We recommend using this option for testing purposes only.
If you are using the open-source version of Eclipse Mosquitto broker for a commercial project and need advice or help to solve a problem, we offer open-source Mosquitto support. This can help you quickly solve your problems, ensure your system’s stability and security, get quick access to new patches and fixes, and be the first to receive information about new releases.
Summary
In this article, we talked about the open-source MQTT Mosquitto Broker. We learned how to install Mosquitto Windows, configure, and test it. In addition, we considered the most common problems and their solutions when using the broker.
Let’s summarize the main points:
- Use the executable file for Mosquitto MQTT broker Windows installation.
- Add the installation folder to the PATH environment variable to make the ‘mosquitto’ command globally available from the command line.
- By default, Mosquitto will be installed as a Windows service, which can run in the background and automatically start on the operating system boot.
- To configure Mosquitto broker (including authentication settings, logging, etc.), use mosquitto.conf configuration file from the installation folder or provide your own.
- You can test Mosquitto using popular MQTT clients mosquitto_pub and mosquitto_sub, which are bundled into the installation.
About the author
Serhii Orlivskyi is a full-stack software developer at Cedalo GmbH. He previously worked in the Telekom industry and software startups, gaining experience in various areas such as web technologies, services, relational databases, billing systems, and eventually IoT.
While searching for new areas to explore, Serhii came across Cedalo and started as a Mosquitto Management Center developer. Over time, Serhii delved deeper into the MQTT protocol and the intricacies of managing IoT ecosystems.
Recognizing the immense potential of MQTT and IoT, he continues to expand his knowledge in this rapidly growing industry and contributes by writing and editing technical articles for Cedalo’s blog.
TTGO esp32 LoRa Modules using MQTT
So I’ve been playing with IoT lately, using platforms such as Arduino ,ESP32, Raspberry Pi and when it comes to being able to have these devices communicate with a hub or server, the de facto standard is to use a MQTT server and protocol . Unfortunately, prior to Windows 10 finding a native Windows version is complicated.
In this post I’ll describe the super-easy steps to getting it up and running with Windows 10 . The trick on Windows 10 (yes only on Windows 10 or later) is to Install Windows Linux Subsytem (WSL)
While there are a bunch of MQTT implementations, one very popular implementation of the MQTT Broker is the Eclipse Mosquitto™ An open source MQTT broker, it runs on multiple platforms, Linux is by far the preferred platform, and while it does have a Windows variation unfortunately it requires too many dependencies to make it practical to just run the install script and get it up and running.
View / Inspect MQTT Traffic
MQTT Explorer
On a side note once you get the MQTT Mosquitto server up and running , a good way to see MQTT traffic and inspect it is with MQTT Explorer . Directly from their website ” MQTT Explorer is a comprehensive MQTT client that provides a structured view of your MQTT topics and makes working with devices/services on your broker dead-simple.”
Challenges of Running Mosquitto on earlier Windows Vista,7 ,8 …
Basically if you have a version of Windows prior to Windows 10, you will need to perform the following steps , or a variation of these (Some sites use Cygwin for the Linux layer)..
As you can see it’s a bit of an involved process., plus some of those binaries or dll’s must be a certain 32bit version for overall library compatibility so it’s a hassle, again be careful where you get the binaries/dll from , many of the links are outdated or compromised. Be careful. For complete details visit this post.
- . Download and install OpenSSL for Windows , make sure you grab the older version Win32 OpenSSL v1.0.2o as newer versions are missing critical dll.
- Download and unzip Win32 Pthread dll , and copy them to you mosquitto binary folder,
- Run and test mosquitto Server..
- WARNING : remember double check the links above , be careful and make sure these are from reputable sources, scan all downloads for malicious software, I inadvertently downloaded some malware attached to some of the DLL files. don’t just blindly clicking other sites links,..
- Just forget the above steps and do the simple steps below.
Windows 10 Runs Linux shell via Windows 10’s Windows Subsystem for Linux (WSL)
If you have Windows 10 then you’re in luck! it’s soo much easier.. the reason things are much easier in Windows 10, is because Microsoft has made it so you can install a Windows Subsytem for Linux (Basically Microsoft created a Linux friendly container/vm within Windows 10) Simply run the command below as an administrator in Powershell and then reboot.
Enable-WindowsOptionalFeature -Online -FeatureName Microsoft-Windows-Subsystem-Linux
Installing Ubuntu (or other Linux) from Microsoft Store (free)
Once your system reboots, no head on over to the Microsoft Store (a trusted source) and choose a Linux distribution, that is available and you prefer, I went with Ubuntu .
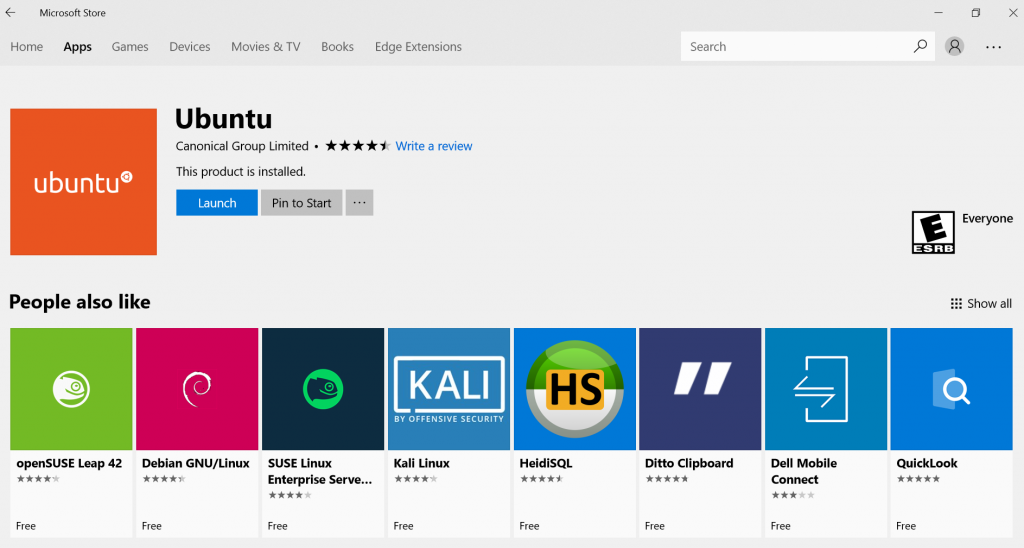
Microsoft Store available linux packages
After that installs , just run it and it will put you into the Ubuntu Linux Shell, and from here you can proceed to install good ole Linux Mosquitto MQTT, don’t forget to update the software distribution repos first..
sudo apt-get update
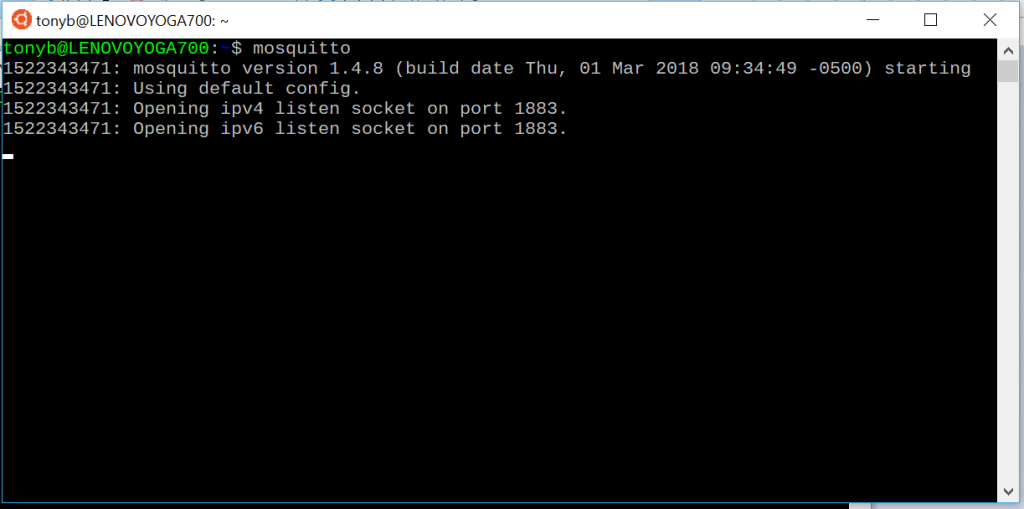
then install mosquitto.
sudo apt-get install mosquitto
and run it, it will run on the default port 1883. You can of course configure it just refer to the usual Linux Mosquitto docs.
Run Mosquitto in Windows Linux SubsystemWe’re almost done! we need to do one more step. You need to open up your ports to allow the Linux subsystem to be reachable from the outside and act as a server. Steps are…
Windows 10 Firewall Advanced settings
- Go to Windows Firewall with Advanced Security (choose Advanced Settings in Firewall prompt)
- Click Inbound Rules then on right hand pane add a New Rule
- This will bring up a New Rules wizard, just follow the prompt entering the following
- Set rule type as Port.
- Enter a Specific local port your server is running under WSL, in this case, 1883
- Choose TCP port
- in the next tab Action tab, choose Allow the connection
- next where this rule Applies choose all appropriate Domains, such as Public (entire Internet) or Private (just my local LAN traffic) or check all for complete access from outside.
- and finally just name the Rule (Mosquitto port 1883) or something similar and press Finish.
Now all MQTT traffic to this server should be responded to as expected.
Also when your run WSL you can access your normal Windows drive and folders check under the /mnt/ folder.
One drawback to be aware of… (reboots)
Note: this approach has one drawback, running it as a server after rebooting, that is the server because its part of the Windows Linux Subsystem will need to be started automatically each time windows re-boots, and this may require more fiddling,
I found a post here that may be of help. Starting a linux bash application as a service, since you need to have windows automatically boot the WSL for mosquitto to run in this environment, I gather its possible , but requires more tweaking.. if any windows folks have any good suggestions let me know.
Conclusion
While it may seem like a lot of steps , I can tell you it will only take a few minutes compared to all the time needed to try and get Mosquitto running as a native windows application.. Hope this helps some of you guys, leave comments and share your experiences.
The following installation instructions are for mosquitto MQTT, version 2.0.12 64-bit, in a Microsoft Windows environment. If you need to install a different version of MQTT software, consult the relevant installation instructions.
Contents
Installing the MQTT Broker
Configuring Usernames and Passwords
Prerequisites
Creating Encrypted Password File
Deleting Users from the Encrypted Password File
Configuring mosquitto.conf to Use the Encrypted Password File
Creating Self-Signed Certificate
Prerequisites
Installing OpenSSL and Setting up Environment Variables
Creating the Self-Signed Certificate and Keys
Create a Certificate Authority (CA) key pair
Create a CA certificate and use the ca.key to sign it
Create a server key pair for use by the broker
Create a broker certificate request
Use the CA certificate to sign the broker certificate request
Edit the mosquitto.conf file
Import a Self-Signed Certificate to a Windows Host
Unsecured connection
Related Links for Additional Information
Installing the MQTT Broker
To install the mosquitto MQTT Broker:
-
Download the mosquitto-2.0.12-install-windows-x64.exe file from https://mosquitto.org/download/.
-
Go to the directory where you downloaded the file. Double-click mosquitto-2.0.12-install-windows-x64.msi.
-
Follow the Eclipse Mosquitto Setup wizard prompts and accept all defaults.
-
If Microsoft Visual C++ is not installed, it will be installed for you as part of the mosquitto installation. Click Accept to accept the license terms, and then click Install.
-
In your desktop, open the Microsoft Services application. Check to see that “Mosquitto Broker” is in “Running” Status with “Automatic” Startup type. If Status is empty, click Start. The mosquitto Broker will automatically start after every system reboot.


Configuring Usernames and Passwords
The following instructions and examples are for the mosquitto MQTT Broker on a Microsoft Windows, 64-bit platform. Other MQTT brokers will have different instructions, configuration, importing credentials, and so forth.
Prerequisites
-
The device must have firmware version 2.29x or newer.
- Microsoft Windows 64-bit operating system
Creating Encrypted Password File
In the FAI Lite scenario, both the devices and the Agent are the clients of the broker. Therefore, the Agent and each device needs its own username and password. Do the following steps:
-
In the C:\etc folder, create a simple text file with each user’s username and password, one for each line. Separate the username and password with a colon as shown below:
-
Configure the credentials for your devices by using the AyyekaGo mobile app.
-
For every device, do the following steps:
-
-
-
-
Click Cellular Settings > MQTT SERVER ADDRESS.
-
In the MQTT Server Address window, type in the username and password of the device that will connect to the MQTT Broker.
-
-
b. Click My Devices, and then click the Export icon. A list of devices is shown.
c. Click EXPORT. Select which app to use for export. For example, you might use Gmail to send the export file to yourself.
d. In the MQTT Broker platform, open the export file, and then copy the usernames and passwords as described in step 1 into the password file.
3. Update the password file as needed.
-
- Encrypt the entire password file. Go to the directory where mosquitto was installed (by default, C:\Program Files\mosquitto).
Command: mosquitto_passwd.exe -U name_of_passwordfile
Notice that all passwords are now encrypted.
-
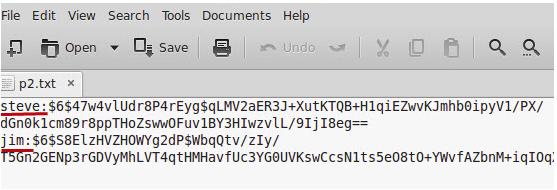
- Encrypt the password of only the first user.
Command: mosquitto_passwd.exe -c name_of_passwordfile the_first_user
In our example, the_first_user is steve.
You will be prompted to enter a password for the_first_user.
Note: The password that you type in is not echoed, so it looks like it is not being accepted — but it is.
-
- After adding the first user and password, you can add additional users.
Command: mosquitto_passwd -b name_of_passwordfile the_next_user password
4. After updating the password file, restart the MQTT broker by using the Microsoft Windows Services application.
Deleting Users from the Encrypted Password File
If needed, you can remove individual users from the password file.
Command: mosquitto_passwd -D name_of_passwordfile user_to_be_deleted
Configuring mosquitto.conf to Use the Encrypted Password File
You must configure mosquitto.conf file to use the encrypted password file. Do the following steps:
-
Copy the password file into a separate folder. For example, copy the file into C:\etc\mosquitto\.
If you use a different directory, ensure that there are no spaces in the directory path, such as in C:\Program Files\mosquitto\passwordfile”.
2. Edit the mosquitto.conf file to use the password file. Do the following steps:
-
- Set allow_anonymous to false
- Set the password_file path
The password file must not have an extension, such as “.txt”.
For example:
allow_anonymous false
password_file C:/etc/passwordfile
3. Edit the mosquitto.conf file for communication. Do the following steps, as needed:
Note: mosquitto v1.5 authentication is no longer a global setting. It can be configured on a per listener basis. You must enable the per_listener_settings setting.
Examples:
The configuration in mosquitto.conf for only secure communication will be:
#### It is recommended to have secure communication, so the listener is set to 8883
listener 8883
allow_anonymous false
password_file C:/etc/passwordfile
###
Note: If you set listener to 8883, you must embed the certificates. See Edit the mosquitto.conf file below for an example.
4. After updating the configuration or the password file, restart the mosquitto Broker service by using the Microsoft Windows Services application.
For additional information about configuring the password file, see http://www.steves-internet-guide.com/mqtt-username-password-example/
It is recommended that you use the enterprise’s signed certificate. Consult your IT department for instructions about how to use it. In this case, you can now go directly to the Edit the mosquitto.conf file section below.
Alternatively, you can create a self-signed certificate and use that for verification. In this case, continue to the «Creating Self-Signed Certificate” section below.
Creating Self-Signed Certificate
Prerequisites
-
Microsoft Windows 64-bit operating system
-
Microsoft Visual C++
Installing OpenSSL and Setting up Environment Variables
Before you create the self-signed certificate, you must install OpenSSL and set up environment variables. Do the following steps:
-
Download OpenSSL. Use the version for Win64 rather than the Lite version.
-
Run the OpenSSL Installer.
If Microsoft Visual C++ is not installed, the installer will download and install it for you. Run the OpenSSL Installer again and follow the wizard steps.
3. Set up system environment variables.
The environment variables must be set so that OpenSSL functions properly on your system. You need to set OPENSSL_CONF and Path environment variables. Do either of the following steps:
-
-
To set environment variables for the current session only, do the following commands at the command line prompt:
-
set OPENSSL_CONF=C:\Program Files\OpenSSL-Win64\bin\openssl.cfg
-
set Path=%Path%;C:\Program Files\OpenSSL-Win64\bin
-
-
To set environment variables permanently, do the following commands:
-
-
-
-
In the system tray, press the Search icon, and then type in environment.
-
Select Edit the system environment variables. The System Properties window opens.
-
Click the Advanced tab, and then click Environment Variables.
-
In the System variables section, click New.
-
In the New System Variable window, set the following variables:
-
-
-
-
-
-
set OPENSSL_CONF to be C:\Program Files\OpenSSL-Win64\bin\openssl.cfg
-
Set Path to be C:\Program Files\OpenSSL-Win64\bin
-
-
-
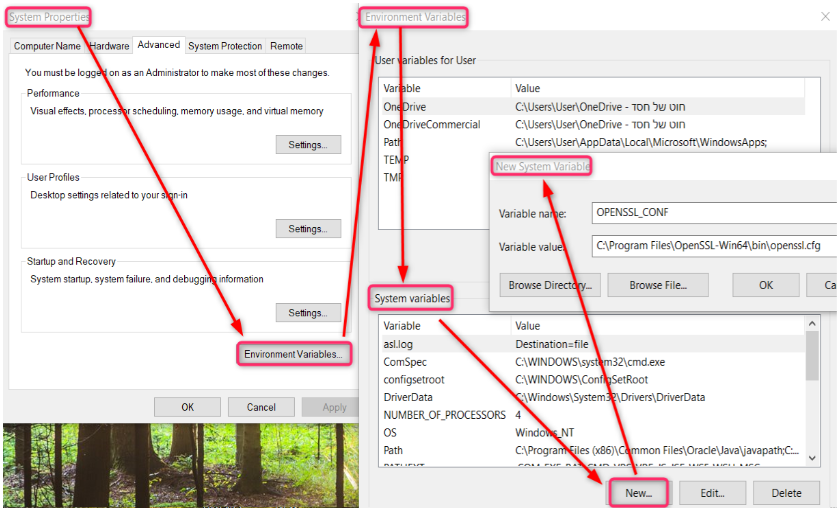
4. Click OK to close the New System Variable window, and then click OK to close the Environment Variables window.
5. Click OK to close the System Properties window.
Note: The changes that you made will take effect only when the window closes, and you open a new command prompt.
Creating the Self-Signed Certificate and Keys
Create the self-signed certificate and keys by doing the following steps at the command line prompt:
Please note that the self-signed certificate files will be created in the folder where the openssl commands will be run from.
- Create a Certificate Authority (CA) key pair.
Command: openssl genrsa -des3 -out ca.key 2048
Generating RSA private key, 2048-bit long modulus (2 primes)
....................................................................................+++
......................+++++
e is 65537 (0x010001)
Enter pass phrase for ca.key:
Verifying - Enter pass phrase for ca.key:
The purpose of the pass phrase is to encrypt the private key. To use an encrypted key, the pass phrase is also needed. In a way, they are two separate factors of authentication. Tip: Write down the pass phrase (pay attention to case) because you will need it when you sign the ca.crt and server.crt certificates.
-
Create a CA certificate and use the ca.key to sign it.
Command: openssl req -new -x509 -days 1826 -key ca.key -out ca.crt
Enter pass phrase for ca.key:
You are about to be asked to enter information that will be incorporated into your
certificate request.
What you are about to enter is what is called a Distinguished Name or a DN.
There are quite a few fields, but you can leave some blank
For some fields there will be a default value,
If you enter '.', the field will be left blank.
Country Name (2 letter code) [AU]:US
State or Province Name (full name) [Some-State]: California
Locality Name (e.g., city) []: San Diego
Organization Name (e.g., company) [Internet Widgets Pty Ltd]: Widgets
Organizational Unit Name (e.g., section) []: RND
Common Name (e.g., server FQDN or YOUR name) []: Widgets
Email Address []:
The directory now has the following files:
08/17/2021 11:51 AM 1,348 ca.crt
08/17/2021 11:50 AM 1,773 ca.key
-
Create a server key pair for use by the broker.
Command: openssl genrsa -out server.key 2048
Generating RSA private key, 2048-bit long modulus (2 primes)
..................................................................................+++++
................+++++
e is 65537 (0x010001)
The directory now has the following files:
08/17/2021 11:51 AM 1,348 ca.crt
08/17/2021 11:50 AM 1,773 ca.key
08/17/2021 11:52 AM 1,702 server.key
-
Create a broker certificate request.
When filling out the form, the Common Name is important and is usually the full domain name of the server, the IP address, or the Microsoft Windows name of the computer that is running the mosquitto broker. You must use the same name when configuring the client connection.
Command: openssl req -new -out server.csr -key server.key
You are about to be asked to enter information that will be incorporated
into your certificate request.
What you are about to enter is what is called a Distinguished Name or a DN.
There are quite a few fields, but you can leave some blank
For some fields there will be a default value,
If you enter '.', the field will be left blank.-------
Country Name (2 letter code) [AU]:US
State or Province Name (full name) [Some-State]:California
Locality Name (e.g., city) []: San Diego
Organization Name (e.g., company) [Internet Widgets Pty Ltd]:Widgets
Organizational Unit Name (e.g., section) []:RND
Common Name (e.g., server FQDN or YOUR name) []:54.72.180.67
Email Address []:
Please enter the following 'extra' attributes to be sent with your certificate request
A challenge password []:widget
An optional company name []:widget -
Use the CA certificate to sign the broker certificate request.
Use the CA key to verify and sign the server certificate. This step creates the server.crt file.
Command: openssl x509 -req -in server.csr -CA ca.crt -CAkey ca.key -CAcreateserial -out server.crt -days 360
Signature ok
subject=C = US, ST = California, L = San Diego, O = widgets, OU = RND,
CN = 54.72.180.67
Getting CA Private Key
Enter pass phrase for ca.key:
Note: If you get the message:
unable to load CA Private Key
13592:error:06065064:digital envelope routines:EVP_DecryptFinal_ex:bad decrypt:crypto\evp\evp_enc.c:610:13592:error:0906A065:PEM routines:PEM_do_header:bad decrypt:crypto\pem\pem_lib.c:461:It means that you did not enter the pass phrase for ca.key correctly. Run the openssl command again, and then type in the correct pass phrase.
The directory now has the following files:
08/17/2021 11:54 AM 1,364 ca.crt
08/17/2021 11:53 AM 1,781 ca.key
08/17/2021 11:55 AM 42 ca.srl
08/17/2021 11:55 AM 1,240 server.crt
08/17/2021 11:55 AM 1,088 server.csr
08/17/2021 11:54 AM 1,702 server.key
Edit the mosquitto.conf File
1. Edit the configuration file to use the following parameters and their values:
per_listener_settings true
listener 8883allow_anonymous false
password_file c:\Users\...\Certificates\passtest.txtprotocol mqtt
certfile c:\Users\...\Certificates\server.crtkeyfile c:\Users\...\Certificates\server.key
require_certificate false
cafile c:\Users\...\Certificates\ca.crt
use_identity_as_username false
log_dest file c:\mosquitto\mosquitto.log
log_type error
log_type warning
log_type notice
log_type information
# the following setting should be added manually after the logs settings
log_type allconnection_messages true
# the following seeing must added at the end of the file
tls_version tlsv1.2
2. After updating the mosquitto.conf file, restart the MQTT broker through the Microsoft Windows Services application. For details about parameters and syntax in the mosquitto.conf file, see mosquitto.conf man page.
Import a Self-Signed Certificate to a Windows Host
If you defined the listener in the mosquitto.conf file for unsecured communication, skip this step.
If the listener uses secure communication, you must add the self-signed certificate (ca.crt) to the Windows repository. Do the following steps:
-
On your Windows desktop, click Start > Run > MMC. The Microsoft Management Console opens.
-
Click File, and then select Add / Remove Snap In.
-
From the list of available snap-ins, select Certificates, and then click Add.
-
In the Certificates snap-in window, select Computer Account, and then click Next.
-
In the Select Computer window, select Local Computer, and then click Finish.
-
Click OK to exit the Snap-In window.
-
Click [+] next to Certificates > Trusted Root Certification Authorities.

8. Right-click Certificates, and then select All Tasks > Import. The Certificate Import Wizard window opens. Follow the wizard prompts. The self-signed certificate is now trusted by all users.
If you see the following error from self-signed certificates in the log:
2021-09-09 15:24:40.252 +03:00 [WRN] MQTT: TLS certificate has policy errors. RevocationStatusUnknown: The revocation function was unable to check revocation for the certificate.
2021-09-09 15:24:40.252 +03:00 [WRN] MQTT: Verify the certificate or ignore by changing the IgnoreCertificateRevocationErrors setting
The Agent will not work until you change the Ignore Certificate Revocation Errors check box in the Agent’s configuration file or the UI.
Unsecured Connection
If you need it, you can set the mosquitto.config file to have an unsecured connection
We recommend avoiding this kind of configuration.
The configuration in mosquitto.conf for only non-secure communication will be:
###
per_listener_settings true
# In non-secure communication, the listener is set to 1883
listener 1883
allow_anonymous false
password_file C:/.../passwordfile.txt
###
Related Links for Additional Information
-
http://www.steves-internet-guide.com/mosquitto-tls/
-
https://mosquitto.org/man/mosquitto-tls-7.html
-
http://richardn.ca/2017/06/07/mosquitto-on-windows/
-
https://mosquitto.org/documentation/authentication-methods/
-
https://mosquitto.org/man/mosquitto-conf-5.html
Skip to content
Navigation Menu
Provide feedback
Saved searches
Use saved searches to filter your results more quickly
Sign up
Appearance settings
Repository files navigation
MQTTme
Giulian Frisoni Lopez
MQTTme is a Mqtt server manager based on C# for Windows
- Clean and easy to use UI
- Start and stop MQTT server in an easy way.
- Capable of running on Windows 7+ Systems with .Net framework 4.6+
Features
- Control of MQTT server without terminal
- Log of MQTT server, see what happening in ther back end of your server.
You can also:
- Customize times of running for MQTT server.
- Choose between protocols of security.
- Export your logs of the server to and csv file.
Development
Want to contribute?
Feel free to download and use the source and if you need help with the code or else do not hesitate to ask.
Next Feautures
- Database based administrator for log.
- Add Night Mode and client control capabilities.
License
Git Distribute
Giulian Frisoni Lopez
Nowadays, it is pretty much easy to run Mosquitto MQTT broker on Windows 10 using, for example, Windows Linux Subsystem (WSL). But today, I would like to show you even easier method to run it on your Windows 10 machine.
Pre-requisites
You should have Docker installed on your PC. And because Mosquitto broker image is actually a Linux image you have to switch your Docker to Linux containers.
Run Mosquitto MQTT in a container
To run your container you have to create a Docker volume first. So, open the PowerShell windows and type the command:
docker volume create mosquitto_data
This will create a new volume that Mosquitto container will use to write its data. The new volume will be stored on your local drive on C:\ProgramData\Docker\volumes.
The next thing is to create a new text file that you will use to configure Mosquitto MQTT broker. You can do that by typing the next commands:
mkdir C:\mosquitto; New-Item C:\mosquitto\mosquitto.conf -ItemType file
These commands will create a new folder mosquitto on your drive C: and create a new empty file mosquitto.conf inside this folder.
Type the next command:
docker run -itd --name="mosquitto" --restart on-failure -p 1883:1883 -p 9001:9001 -v C:\mosquitto\mosquitto.conf:/mosquitto/config/mosquitto.conf -v mosquitto_data:/mosquitto/data -v mosquitto_data:/mosquitto/log eclipse-mosquitto
This command will pull the image eclipse-mosquitto to your PC, in case it is not there. The next thing that it will do is to use this image to create a container.
To check that your Mosquitto container is up and running you can type the command:
docker ps -a
It will show you all running containers. Make sure that the status of Mosquitto container is Up.
Configuring Mosquitto
You can stop here and start using your Mosquitto MQTT broker, but I strongly recommend to continue and setup the credentials to restrict an access to the broker. To do that just type the next command:
docker exec -it mosquitto sh
It should run the shell inside the container where you have to type the next command and change to a desired username:
mosquitto_passwd -c /mosquitto/config/pwfile <username>
After that on a new line just type your password and push [Enter] and then retype your password for confirmation and push [Enter] again. And after that push [Ctrl]+Z to return to your PowerShell.
The last thing is to say to Mosquitto that it should use the pwfile to find the password. Type the next command:
notepad C:\mosquitto\mosquitto.conf
It will open Notepad where you should enter:
password_file /mosquitto/config/pwfile
Click File -> Save and close the Notepad. Now, to apply your changes, you have to restart Mosquitto container. You can do that by typing in a PowerShell window:
docker restart mosquitto
Test Mosquitto
The easiest way to test that your Mosquitto broker works correctly is to use Windows Linux Subsystem (WSL) to install any of Linux distributable, for example, Ubuntu, where you can type the next command to install mosquitto-clients to subscribe to or post messages to the topics:
sudo apt install mosquitto-clients
After that you can open two windows of Ubuntu and type the next command in the fist window to subscribe to all topics:
mosquitto_sub -v -h 127.0.0.1 -p 1883 -t "#" -u <username> -P <password>
Then type the next command in the second window:
mosquitto_pub -d -t "test/topic1" -m "First test" -u <username> -P <password>
The last command will send the message «First test» to the topic «test/topic1». This message should be immediately visible in the first window. This simple test just proves that your Mosquitto MQTT broker was successfully installed and works correctly.
Conclusion
Using the Docker containers it is very easy to install any software nowadays. It just requires some basic knowledge of Docker and 5 minutes of your time.
I hope this post helps some of you guys. So, please leave a comment and share your experience.
Recommended content
-
Docker tutorial | What is Docker and how Docker works
February 25, 2021
-
Docker tutorial — Install Docker on Ubuntu FAST
February 15, 2021
-
Docker tutorial — Install Docker on Windows 10 fast
February 13, 2021
-
Install Podman and Buildah on Windows 10 using WSL2
February 09, 2021
-
wsl2 — Install Ubuntu on Windows 10 fast with Windows Terminal
February 07, 2021
-
Build a CI workflow in GitHub Actions with Buildah and Podman | Part 4 — How to live without Docker for developers
January 28, 2021
-
Push an image to Docker Hub and GitHub packages using Buildah | Part 3 — How to live without Docker for developers
January 17, 2021