
В блоге «Эксперимент: исправит ли сброс Windows 10 к заводским настройкам накопившиеся баги и ошибки» я применил функцию «возврат компьютера в исходное состояние» к замусоренной и забагованной Windows 10. Результат оказался противоречив, с одной стороны — все баги исчезли, с другой — процесс очень долог, а все установленные программы и игры придется переустановить.
Но эксперимент удался, что дало мне еще одну идею — обновить эту же самую систему до Windows 11 и проверить, сохраняться ли установленные программы, настройки и данные пользователя.

Надо сказать, что старт операционной системы Windows 11 не стал гладким, и был омрачен как проблемами с производительностью, так и противоречивыми системными требованиями, оставляющими за бортом большинство компьютеров с процессорами Intel старее восьмого поколения и AMD Ryzen старее второго поколения.
Впоследствии Microsoft добавила в список совместимых несколько чипов Intel седьмого поколения и мой Ryzen 5 1600 AF, который, несмотря на цифровой индекс, относится к архитектуре Zen+ и является практически аналогом Ryzen 5 2600, только с более низкими частотами. Поэтому к выбору процессора, совместимого с Windows 11, нужно отнестись с внимательностью, особенно среди бюджетных моделей.

Из ассортимента недорогих процессоров в Ситилинке можно смело брать популярные Athlon 3000G и Core i3-10100F, которые полностью совместимы с Windows 11.

Я узнал это, запустив на ПК утилиту Windows 11 PC Health Check, и нажав кнопку «Проверить сейчас». Но прежде обратите внимание на огрехи перевода — «2 лет» и на то, что утилита не может работать при масштабировании экрана в 150% — текст на кнопках «ползет». Далее подобные огрехов будет еще больше и они будут прямо влиять на процесс обновления.

Windows 11 PC Health Check показала вот такой результат. Мой процессор совместим и осталось разобраться с модулем TPM 2.0.

На материнской плате MSI B450-A PRO MAX он есть и включить его можно в BIOS, в разделе Settings — Security — Trusted Computing.

После включения модуля TPM 2.0 утилита Windows 11 PC Health Check показывает полную совместимость моего ПК с Windows 11. Казалось бы, теперь должна появиться большая кнопка «Обновиться сейчас», но ее нет.

Кнопка «Показать все результаты» открывает подробности совместимости.

А вот кнопка «Характеристики устройства» почему-то перекидывает на сайт Microsoft. Там мы видим вот такое сообщение, в котором ссылка «ПРОВЕРИТЬ НАЛИЧИЕ БЕСПЛАТНОГО ОБНОВЛЕНИЯ» открывает локальную ссылку на вашем ПК — ms-settings:windowsupdate и перебросит вас в «Центр обновления Windows» расположенный в «Параметрах».

Тут надо сделать небольшое отступление. Некоторые из нас еще помнят, как происходило обновление Windows 7 и Windows 8 до Windows 10 летом 2015 года. Многие пользователи получали с обновлениями скандально известную утилиту Get Windows 10, которая предлагала обновиться «сейчас» или «сегодня вечером», а нажатие крестика означало согласие пользователя.

Это был маркетинг самого низшего уровня, до которого обычно опускаются только разработчики мелкого программного «мусора», но в этот раз мы увидели это от огромной корпорации и такой подход к пользователям шокировал. Microsoft потом извинялась за утилиту Get Windows 10 и признала, что «переборщила», но, как говорится, «репутация создается годами, а теряется одним поступком».

В случае с Windows 11 такой агрессивной политики обновления нет, да и спорные системные требования оставляют за бортом множество ПК и ноутбуков, выпущенных за последние 10 лет, но еще вполне шустро справляющихся с Windows 10. Но, тем не менее, миграция пользователей с Windows 10 на Windows 11 идет довольно шустро и по статистике компании Adduplex на ноябрь 2021 года 8.6% пользователей уже перешли на новую ОС.

Но вернемся к моему ПК и обновлению. Перейдя в «Центр обновления Windows» я увидел ссылку «Проверка требований к оборудованию» и никаких кнопок «Обновиться».

Ссылка опять перебрасывала на сайт Microsoft, но уже с сообщением «Мы работаем над этим».

Попробовав сделать этот цикл действий еще раз, я понял что обновиться до Windows 11 самым простым и логичным способом не получится. К счастью, есть второй способ обновиться до Windows 11, для этого надо перейти на страницу загрузки Windows 11 на сайте Microsoft и скачать приложение «Помощник по установке Windows 11».

Но прежде чем запускать его, я установил на ПК несколько программ, чтобы убедиться, что обновление не затронет не только данные пользователи и настройки, но и программы и игры. Утилиты freeshooter и HWiNFO, прописывающиеся в автозагрузку, отлично для этого подойдут.
Запускаем «Помощник по установке Windows 11» и следуем указаниям.

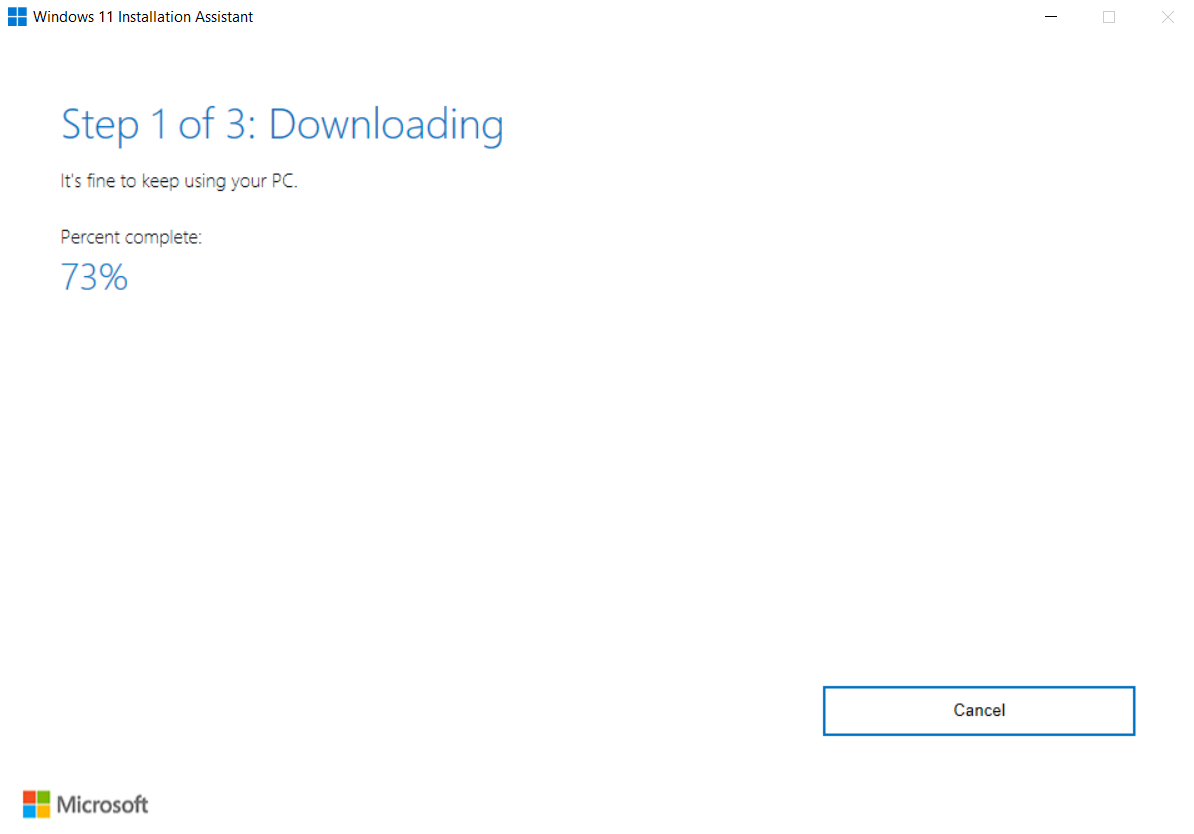
Начинается загрузка новой ОС.

Установка происходит в фоновом режиме и довольно быстро, гораздо быстрее, чем сброс Windows 10 к заводским настройкам. При этом можно пользоваться ПК.

Окно завершения установки.

После перезагрузки ПК еще несколько минут идет процесс обновления.

Этот процесс гораздо быстрее обычной установки и через несколько минут мы получаем обновленную систему. Сразу заметно, что обои Рабочего стола «слетели», но все ярлыки на месте.

Сведения о системе рапортуют о том, что у нас установлена самая свежая версия Windows 11.

Установленные еще в Windows 10 программы корректно запускаются.

Есть они и в «Приложениях и возможностях».

Все файлы пользователя на месте, как и настройки проводника.

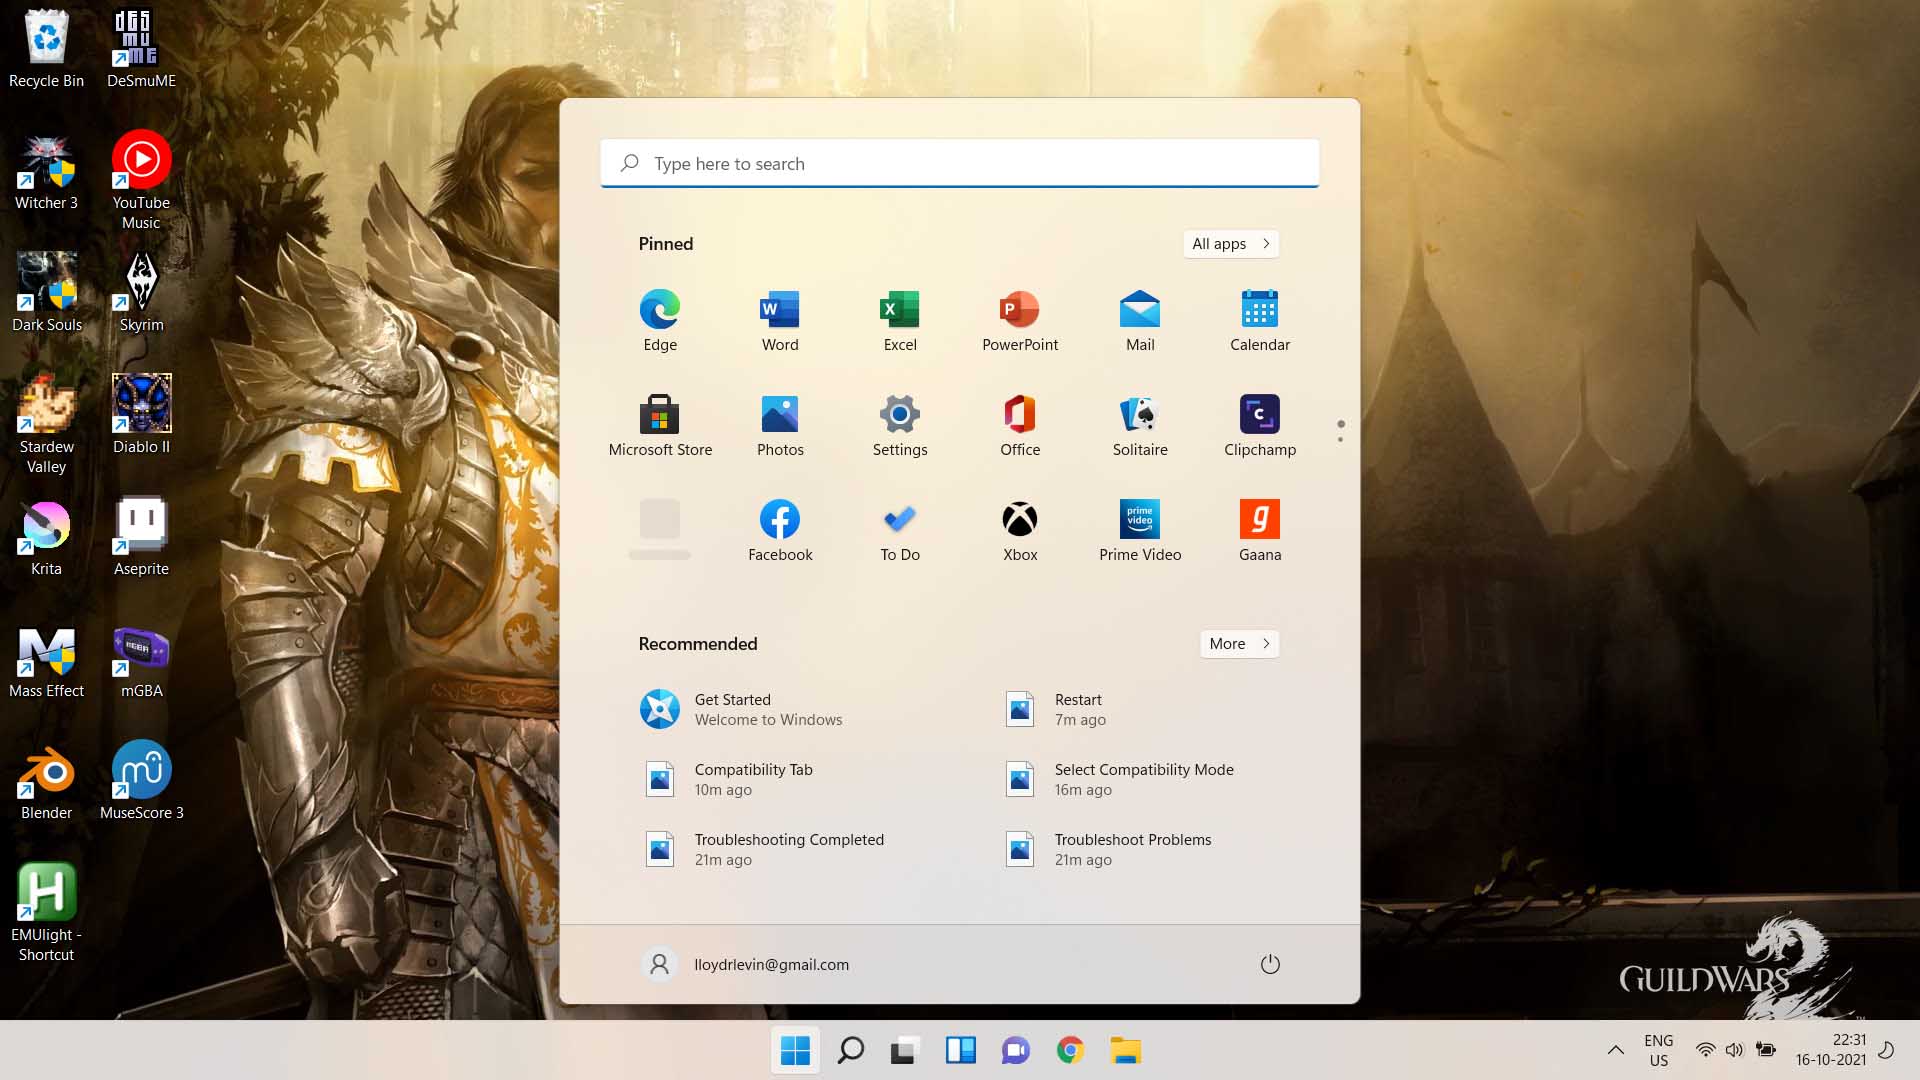
В обновленном меню «Пуск» остались не только старые ярлыки, но и список документов с недавним доступом.


Специфические настройки Windows 10, реализуемые в реестре, сохранились и работают. Например, старое средство просмотра фотографий Windows.

Сохранились и настройки Microsoft Defender с исключениями файлов и папок.

Итоги
Несмотря на неразбериху с обновлением через «Центр обновления Windows» в моем случае и откровенно недоработанное средство Windows 11 PC Health Check процесс обновления Windows 10 до Windows 11 довольно быстр и безболезнен. Все настройки и программы пользователя остаются на месте, а слетевшие обои — не критичная проблема.
С другой стороны, быстрый процесс обновления и то, что от старой ОС остаются в рабочем состоянии даже настройки, сделанные через реестр, показывают, что под капотом у Windows 11 старая добрая Windows 10, которой скоро исполнится уже семь лет, и у которой просто поменяли интерфейс. Но ведь Microsoft заявляли, что Windows 10 станет последней Windows и других не будет, так что придраться не к чему.
Пишите в комментарии, а вы будете обновляться до Windows 11?
Telegram-канал @overclockers_news — теперь в новом формате. Подписывайся, чтобы быть в курсе всех новостей!
With Windows 11 finally out, everyone wants to upgrade their system to the latest version. But usually, installing an operating system means having to re-format the hard drive. Is there any way to update to the new version of Windows without losing any of your data?
Turns out there is. You can easily turn your Windows 10 PC into a Windows 11 computer without having to delete a single file or application already installed on it. How? Let’s find out.
Most common reasons for data loss during Windows 11 installing process
💿 Installing from an ISO File
The most common way of installing an operating system on your computer is through an image file. Usually distributed as an ISO file, this image can be used to create a Windows installation disk.
The problem with installing Windows through such a disk is that it needs an empty partition. Unless you have your important files already segregated into a different drive or partition, you will end up losing all your data.
Moreover, using the ISO file excludes you from official Microsoft support and future updates. Downloading the ISO file needs you to accept a waiver, which can prove to be an issue in the long run.
⏏️ Installing from Installation Media
Microsoft also provides a media creation tool to easily create a bootable USB stick (or DVD) that can be used to install Windows 11. It works similar to the ISO file but is easier to use since you don’t have to install any additional software to make it work.
Similar to the image file method, it also wipes the drive clean, so it is an unsuitable method if you don’t want to lose your data. Creating installation media is only useful if you are looking to perform a clean install, removing all existing files and applications.
How to Check if Your PC Can Support Windows 11
Before you try installing Windows 11 on your computer, you should confirm that your PC can actually support the new version. Unlike the previous iterations of the operating system, Windows 11 is more restrictive with its system requirements, and will not run on all machines.
Here is an easy way to verify whether your computer can run Windows 11.
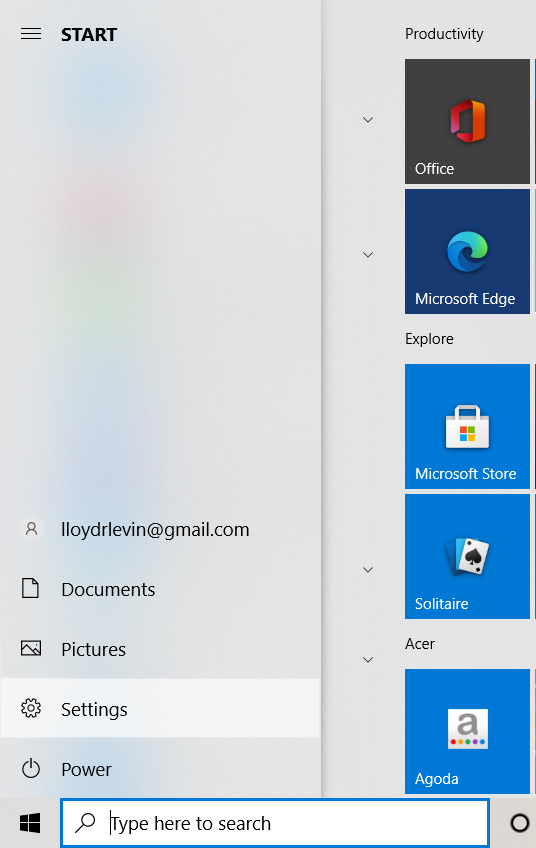
- Open Settings from the Start menu.

- Head to Windows Update.

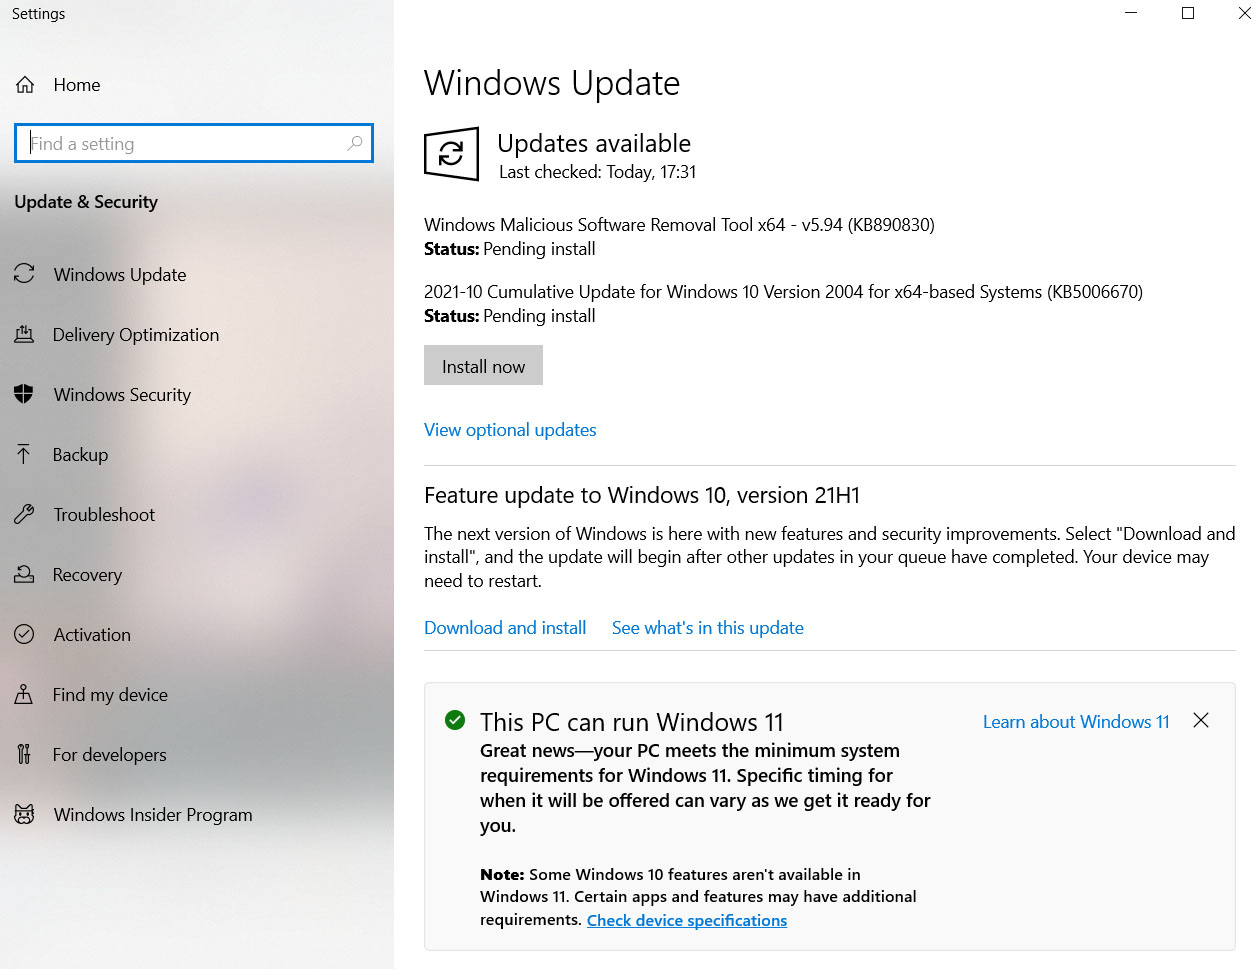
- In this window, you can see whether your computer is compatible with the new version of Windows. You will see a message informing you if your system meets the system requirements. The download button might still be missing, as the rollout is likely to take some time.

How to Install Windows 11 without Data Loss
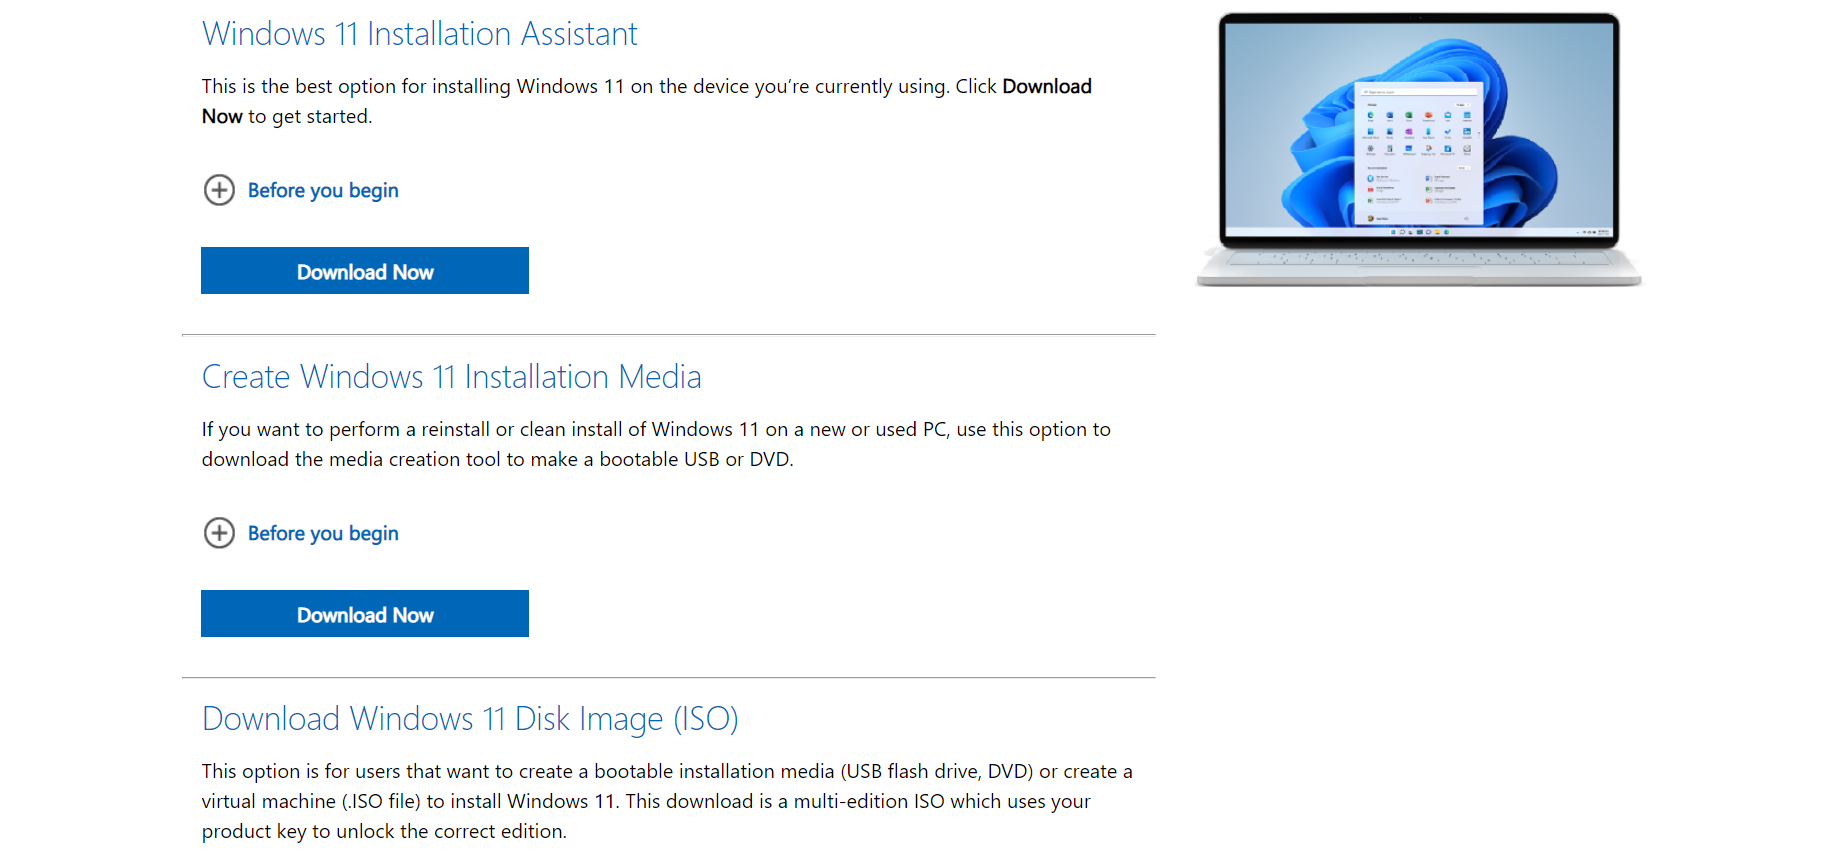
To install Windows 11 on your computer without losing your existing data, you should use the Windows Installation Assistant. Available for download on Microsoft’s webpage, the installer updates the existing Windows installation to the new version, without changing any of the files or applications already present on the PC.
Obviously, the installer will only work if your computer is otherwise eligible for Windows 11. This includes both hardware compatibility as well as the possession of a valid Windows 10 license. In case your PC meets the requirements, you can use the installer to upgrade to Windows 11 without having to format your hard drive or reinstall any applications.
How can I install Upgrade from Windows 10 to Windows 11 without data loss
- Head to Microsoft’s official download page to grab the Windows 11 Installation assistant. The page also lists options to get an ISO file or create an installation media, though we will not be using those methods.

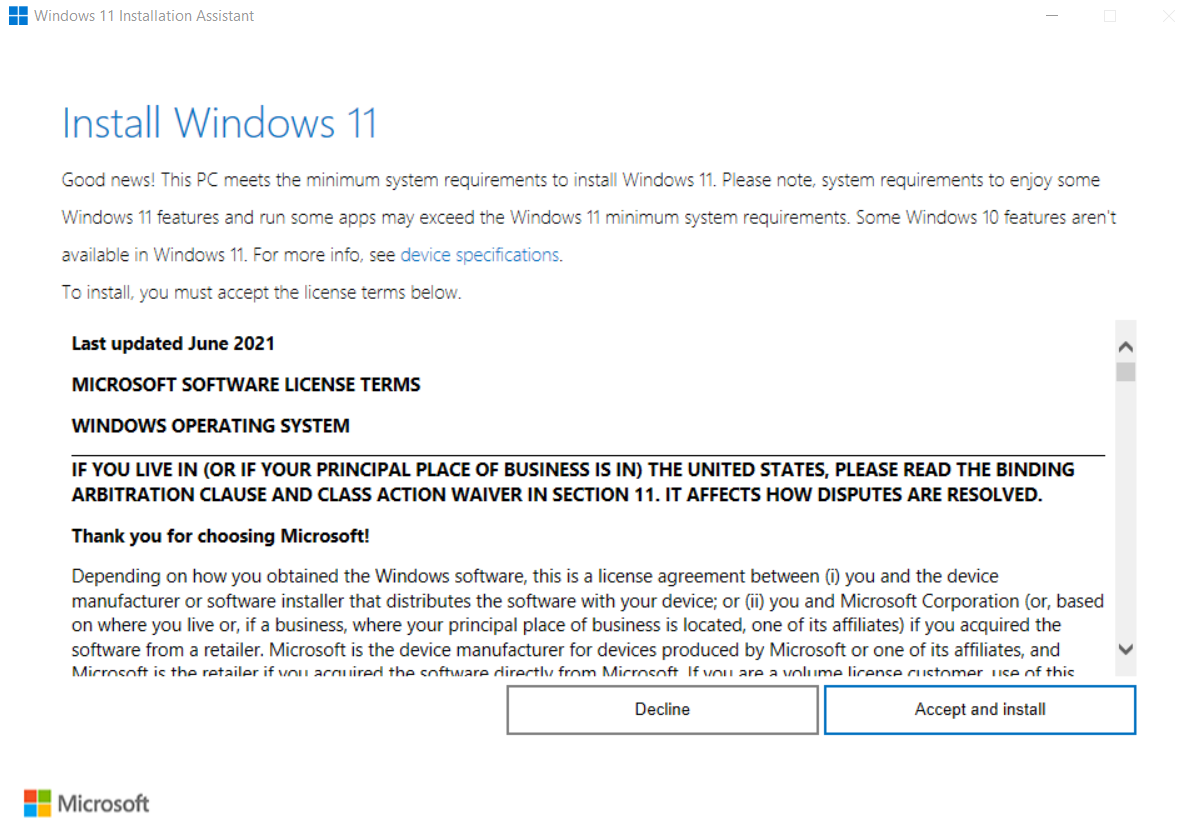
- Run the Installation Assistant and agree with the license agreement. If your PC supports Windows 11, you will be able to proceed with the installation.

- Before it actually gets to the installation, the app will download the files needed for the setup. This can take some time, as around 4 GB of data will be downloaded. You can keep working on your PC during this time.

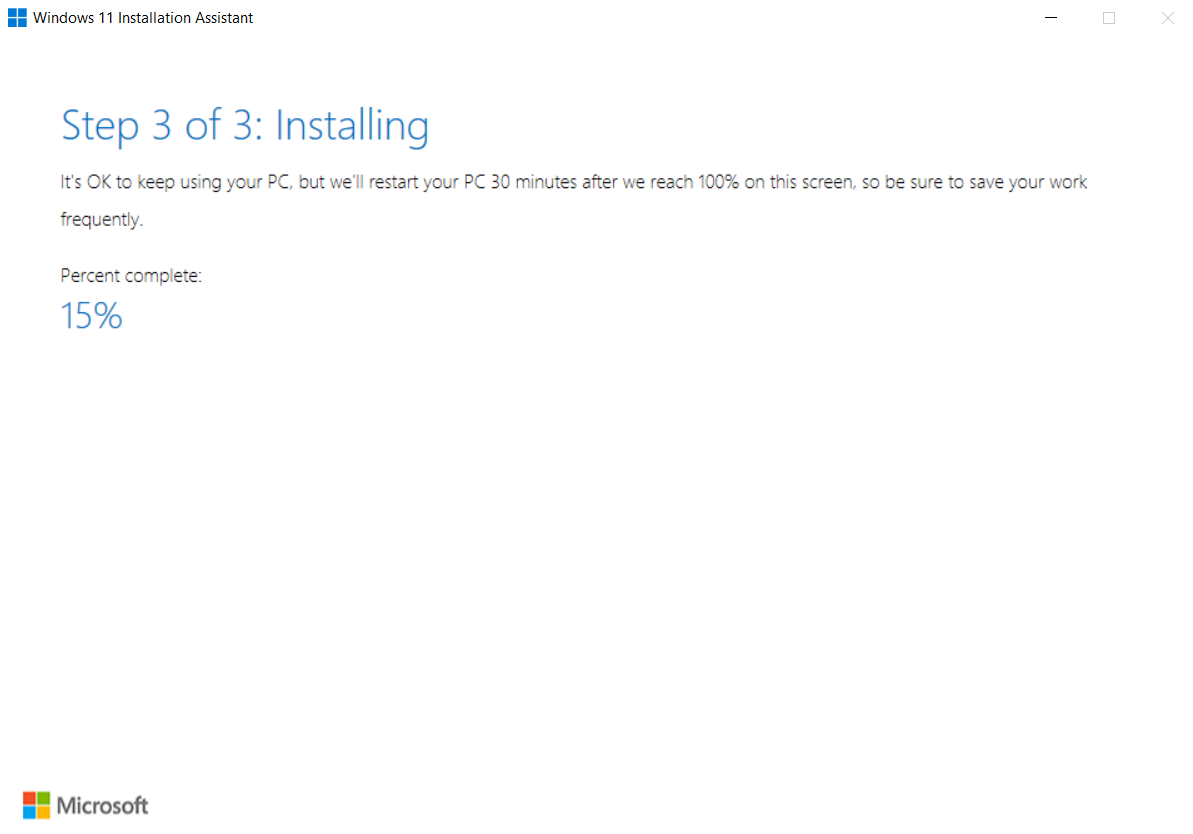
- Once the necessary files have been downloaded, the application will verify them and then proceed with the installation. In a departure from other methods, you can continue using your PC through the first phase of the installation, without having to shut down.

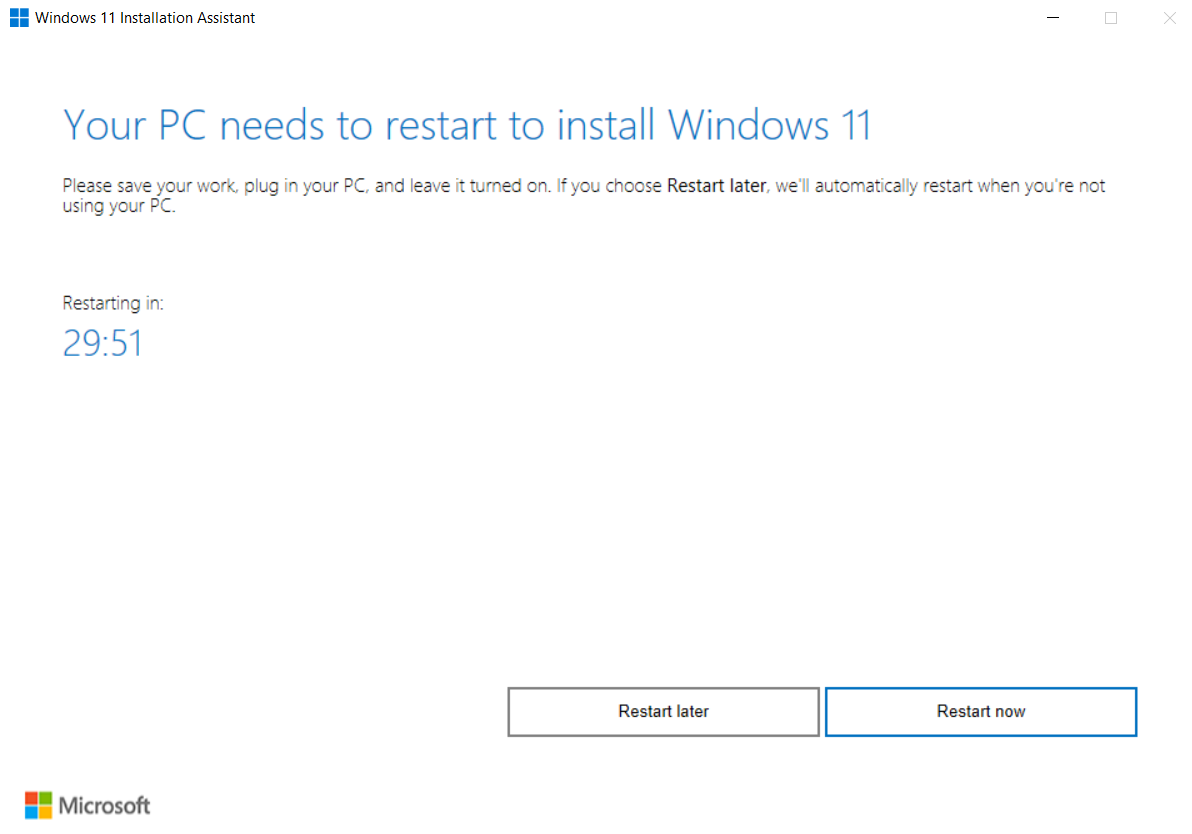
- When this phase of installation is complete, you will be prompted to restart your computer. You can choose to restart at a later time too, and the installation will simply continue from there. In case you had left the PC unattended during the installation, it will restart automatically in thirty minutes.

- After your computer restarts, it will finish the installation. The process is actually pretty quick since the bulk of the setup was completed when the computer was still running. And when it is done, you will be able to log into your Windows 11 computer, complete with all of its files and applications from before.

How to prevent losing data in Windows 11
The best way to prevent data loss during the upgrade to Windows 11 is to use the Installation Assistant. Doing so keeps all of your files intact, seamlessly transitioning your PC to the new OS.
But in case you used another method (like an ISO file) and need to get your data back, that is possible too. Using a data recovery tool, you can restore most of that lost data, provided it hasn’t been overwritten yet.
In this guide, we will demonstrate the steps using Disk Drill. It is a constantly updating data recovery tool that works perfectly in Windows 11. It also has a free version that you can utilize to recover the most important files and photos.
- To get started, download Disk Drill from the official website and run the setup.

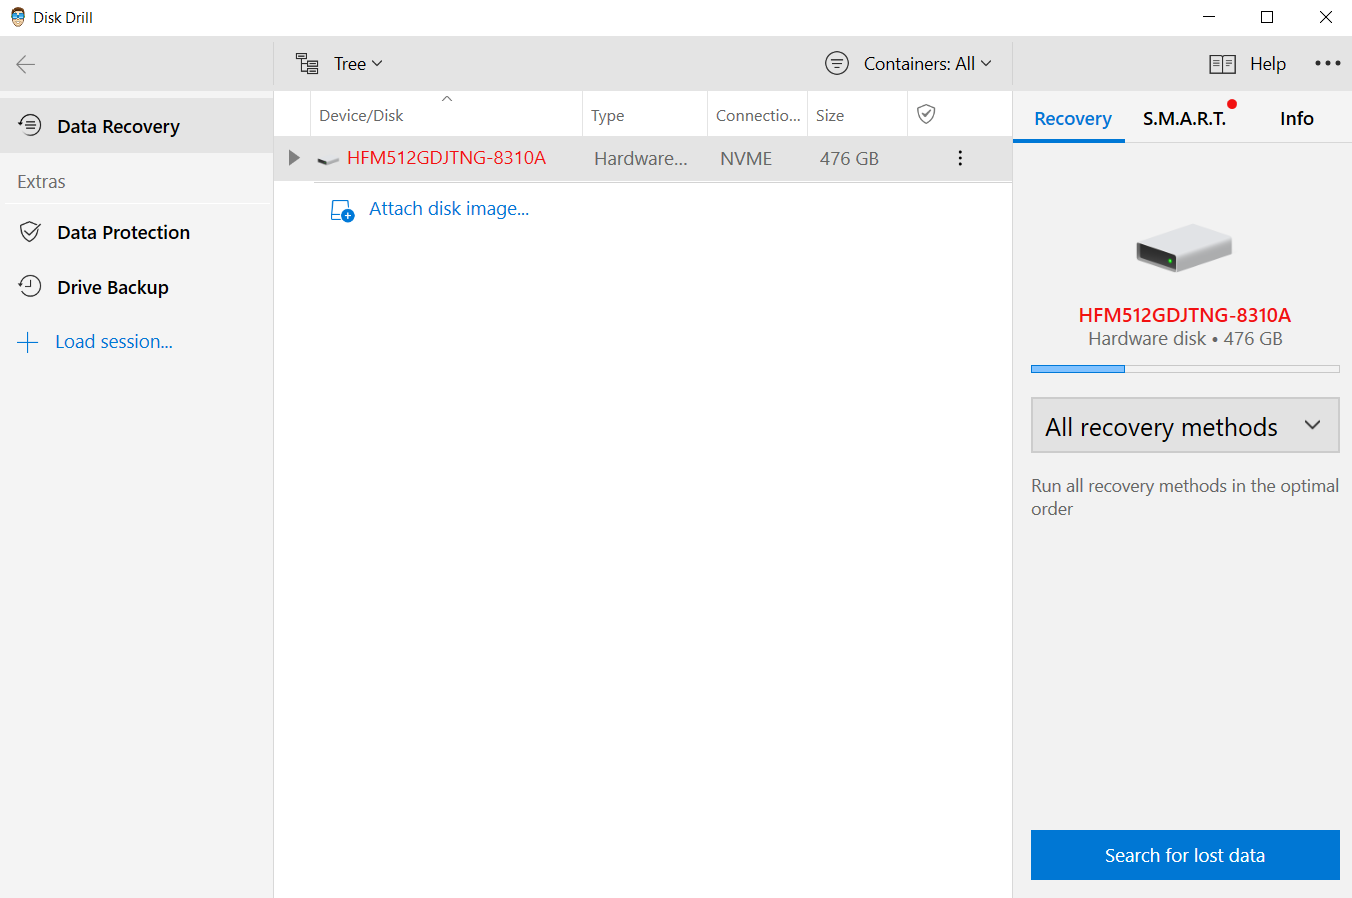
- After the application has been installed you can view all the drives connected with your computer. Choose the main disk and hit Search for lost data.

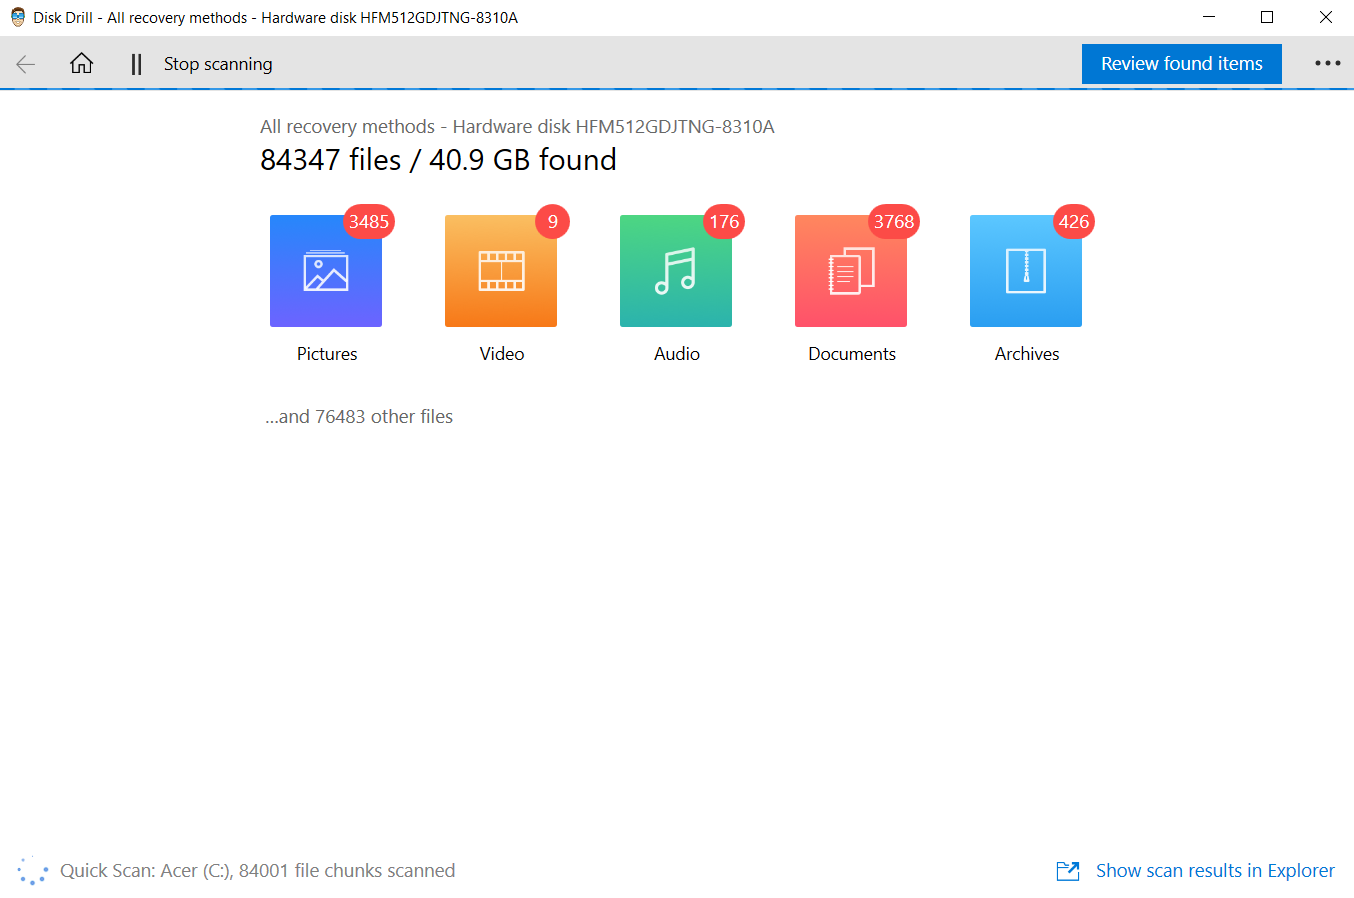
- Disk Drill will scan through the drive, giving a brief overview of the types of files found. To actually view the files located, use the Review found items button.

- In this new window, all the discovered files are displayed, neatly sorted by their folder structure and type. You can browse through this list, or use any of the filters to narrow down the results.

- If you come across any image files, you will notice an option to Preview this item. Click on this option to view a preview of the picture. This will not eat up your free recovery quota, letting you see the photos without having to recover them first.

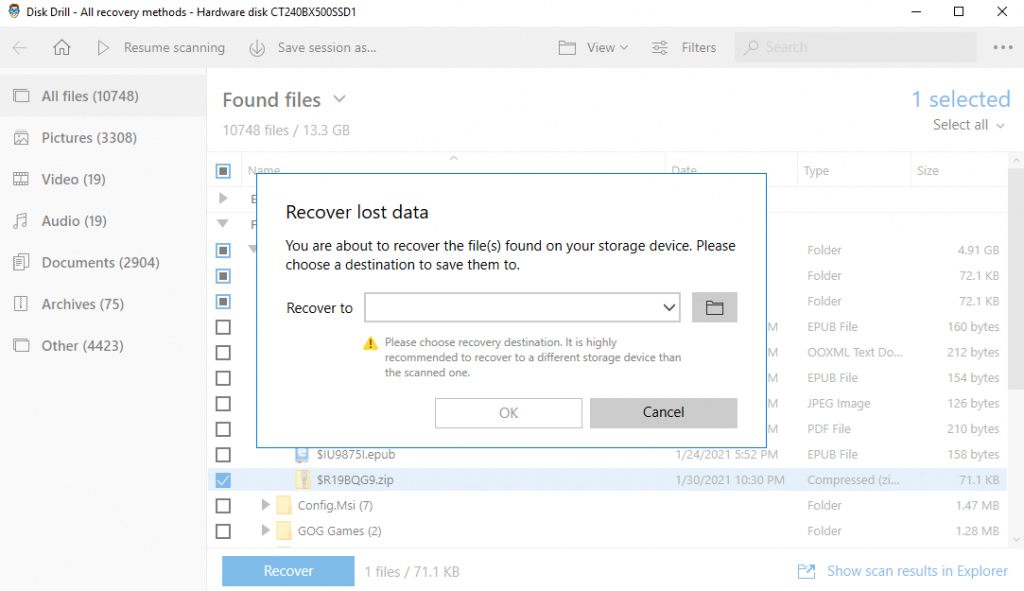
- Keep selecting files to recover by enabling their checkbox from the left. Once you have decided on the files that you wish to keep, you can use the Recover button to start the restoration process. Just specify a recovery destination and Disk Drill will take care of the rest for you.


Conclusion
With the Windows Update not offering to install Windows 11 on many computers, there is much confusion about how exactly one is to get the latest version on their PC. Sure, you can always download an ISO file and create a bootable USB drive, but installing from such means requires you to lose your files and apps.
But with the official Windows 11 installation assistant, you can update your existing operating system without any changes to your data. Your files, applications, even the programs currently running on your PC – everything is left untouched.
And if you just have to use installation media, you can always backup your data beforehand. Without backups, you have to resort to using a data recovery application to recover all the lost data before it can get overwritten.
FAQ
Yes. For anyone possessing a Windows 10 license, Windows 11 is a free upgrade. This includes further updates and technical support as well. Of course, the upgrade is only offered to machines that can actually support the new version – otherwise, you cannot even buy it.
Certainly. Windows 11 has been rolled out as an upgrade to Windows 10, with Microsoft offering a seamless process to simply transition to the new version without losing your data. Again, this update is only available to computers that meet the minimum system requirements and are running a licensed version of Windows 10.
While Microsoft has started releasing Windows 11, it is being done in a phased manner. It can take months for the new version to be actually available as a Windows update on your computer. On most systems, you will just get a message about being able to run Windows 11, without a specific timeframe mentioned.
In case your PC is selected for the current phase of the rollout, you can install it automatically from the Windows Update option in the settings. Otherwise, you will need to use the Windows 11 installation assistant.
Levin Roy
A frontend developer turned writer, Levin brings his in-depth knowledge to bear in breaking down complex technical topics into a layman’s perspective. A believer in emergent technologies, Levin writes about Machine Learni…
Read full bio
A frontend developer turned writer, Levin brings his in-depth knowledge to bear in breaking down complex technical topics into a layman’s perspective. A believer in emergent technologies, Levin writes about Machine Learni…
Read full bio
Approved by
Brett Johnson
This article has been approved by Brett Johnson, Data Recovery Engineer at ACE Data Recovery. Brett has a Bachelor’s Degree in Computer Systems and Network, 12 years of experience.
This article has been approved by Brett Johnson, Data Recovery Engineer at ACE Data Recovery. Brett has a Bachelor’s Degree in Computer Systems and Network, 12 years of experience.
More and more users seem to be interested in upgrading their OS. In these terms, they frequently asked if it is possible to install Windows 11 without data loss, and the answer is yes!
Before anything else, ensure that you get it correctly, so do not hesitate to check out our complete guide on how to download Windows 11.
However, if you notice that your PC can’t run Windows 11, discover some methods on how to solve this error with ease.
Data loss is a serious problem, especially in the business environment, because it consumes time and sometimes even money to restore or recover information. But let’s take a look at some popular causes of losing data.
What are the most common reasons for data loss?
Many different factors can cause data loss, and each poses a unique problem for data recovery:
- Human errors – We all make mistakes, some bigger than others. Without realizing it, you can overwrite important files or delete essential information.
- Malware and viruses – These can sometimes corrupt your operating system, stealing important data. Thus, you should keep your antivirus software constantly updated.
- Hardware damage – Plenty of data loss cases happened because of hardware malfunctions. Hard drive failure is the most common explanation for this, and there are signs you should consider, such as frequent hard drive crashes, slow processing speeds, files not opening, or being randomly corrupted.
- Software corruption – It seems like unexpected or improper software shutdowns can cause serious issues for your data. These will lead to data corruption or will simply delete your progress, wasting time and losing valuable information.
- Hard drive formatting – Last, but not least, consider that you can accidentally format your hard drive, which instantly causes losing data. Note that reformatting may also occur during system updates and result in related troubles.
Before getting into the steps on how to install the new OS without losing data, you should check if your PC is eligible for Windows 11.
We have an excellent guide on how to download Windows 11 ISO or update from Windows 10 that also will help you find out if your PC is ready for the new OS.
Also, although the solutions we provide here were tested and work, there are a lot of other problems you may encounter, so before starting, you should create a backup of all your data to be on the safe side.
That being said, we’re going to show you some easy ways to install Windows 11 without data loss.
How can I upgrade to Windows 11 without losing data?
1. Use Windows Update to upgrade Windows 10 to 11
-
1. Click the Start button and select Settings.

-
2. Select Update & Security.

-
3. Click on the Check for updates button.
-
4. Locate the Windows 11 update.
-
5. Click to download and install it. It will start to download and then, the installation will begin. You will also be prompted for a restart.
-
6. Watch the process carefully and when asked if you want to keep your files, you should stay on that path.


The easiest way to upgrade from Windows 10 to Windows 11 without losing data is via Windows Update. Basically, you need to go to the Windows Update section and install Windows 11 from it as if it were a regular Windows 10 update.
2. Download the Windows 11 ISO
- Navigate to the official Windows 11 Downloads page and click on Select download from Download Windows 11 Disk Image (ISO), then pick Windows 11.

- Now click on the Download button.
- Select the language, then click the Confirm button. You will receive a download link and you will be able to click on the 64-bit Download button to get the Windows 11 ISO.
- Now you can create a bootable USB or DVD, or just right-click the ISO and select the Mount option.
- You will see a virtual drive in the File Explorer window. Just click on it and then double-click the setup.exe file to start the installation process.


The installation process will start, and along the way, you will be asked if you want to keep your files, so that’s what you need to choose.
3. Use the Windows 11 Installation Assistant
- Go to the Windows 11 Downloads page and click on Download now right below Windows 11 Installation Assistant.
- You will get an executable file and running it will start the installation process. Select Accept and install after you read the terms of agreement.
- Windows 11 will start downloading and installing so wait patiently until the process is over, then proceed with the instructions on the screen to finish.


This is the easiest way to install Windows 11 if your PC is meeting all the requirements because the Installation Assistant will perform all the tasks for you.
However, along the installation process, you will be asked if you want to keep your files so make sure you do that in order to preserve your data.
We also have a guide on how to install Windows 11 without using the Assistant so if you have any reasons to avoid this path, you will find out how to do that.
4. Use the Media Creation Tool
NOTE
For this solution, a USB drive with at least 8 GB of free space is required.
- Access the Windows 11 Downloads page and click on Download now under Create Windows 11 Installation Media, to get the Windows 11 Media Creation Tool.
- Run the file to start the Media Creation Tool app and accept the license terms to move forward.
- Uncheck the Use recommended box if you want to change the Windows language, then hit the Next button.
- Next, you can choose whether you want to create a bootable USB drive or just to save the Windows 11 ISO and use it later. If you select the first option, make sure you inserted a USB drive before clicking Next. We will select the first option because you already know how to download the Widows 11 ISO from the previous step.
- The only thing left to do is to select the drive you prepared and click the Next button.
- The app will start downloading Windows 11, then verify the download and ultimately create your Windows 11 bootable media you can use to install the new OS.


Although we already mentioned this in the previous steps, we can’t stress enough the fact that during the installation you will be asked whether you want to keep your files so you should follow that path.
If your PC is not prepared with TPM 2.0 and Secure Boot, this solution will not work for you because when the installation starts, those requirements will be checked.
However, we have a complete guide on how to install Windows 11 without TPM and Secure Boot that will help you avoid this issue.
5. Use a Virtual Machine software
- Download VMware Workstation.

- Install it by following the on-screen instructions, then restart your PC.
- Use the Windows 11 ISO you downloaded in Solution 2.
- Setup your Virtual Machine.

- Open Command Prompt to check your PC’s virtualization, then enable it.
- Install Windows 11 on your Virtual Machine and power it on.


This is only a brief explanation of how to go through the process. For more detailed information, check out this guide on how to run Windows 11 on VM and test it to the limit.
- Microsoft releases Windows 11 (KB5058411, KB5058405) May 2025 Patch Tuesday
- You can now share an app/browser window with Copilot Vision to help you with different tasks
- Windows 11 24H2’s Settings now bundles FAQs section to tell you more about your system
- You can now remove Android/iPhone from Phone Link app & Mobile devices setting
- Microsoft shares a glimpse of rejected Windows 11 Start menu designs
How to update Windows 7 to Windows 11 without losing data?
We’re afraid that we don’t have great news in that department. If you’re still running Windows 7, you can’t just cross over to Windows 11 straight away.
Unfortunately, you will have to proceed with a fresh install of Windows 11. It’s not even possible to upgrade to Windows 10 for free.
However, you can purchase Windows 10 and then upgrade it to Windows 11 for free but if you want things to go smoothly, we strongly advise switching to the new OS directly.
We have a guide on how to upgrade your PC from Windows 7 to Windows 11 that will provide you with more details about this matter.
How can I prevent data loss in Windows 11?
You’ve seen at the beginning of this article some of the most common reasons for data loss, so here’s how to prevent such annoying situations:
➡ Use antivirus software – Be sure to use and constantly update the antivirus software on your OS. If you can’t decide which one is the most efficient, check these antivirus options for Windows 11 that you should try out today.
➡ Always keep your computer clean and dry – As we mentioned before, you might be losing data due to hardware and hard drive crashes. Thus, to maintain them safely and running properly, you have to ensure that your PC is avoiding any liquids or dirt.
➡ Back up your data – This option might be the most useful one because it guarantees success in any situation, no matter how scary it is. There are plenty of methods to do that, such as using a USB stick, an external hard drive, or Cloud Storage.
Also, we can suggest going through our list including the best local data backup software, and keeping your files secured at all times.
As you can see, there are some available and simple ways to install Windows 11 without losing important data. We ensured to deliver only the most secure options, so you won’t get into trouble.
In case you’re on Linux distribution, we have a guide on how to change from Endless OS to Windows 11 that can help you make the switch.
Any other thoughts related to this subject? If so, do not hesitate to leave a comment in the section below.
Radu Tyrsina
Radu Tyrsina has been a Windows fan ever since he got his first PC, a Pentium III (a monster at that time).
For most of the kids of his age, the Internet was an amazing way to play and communicate with others, but he was deeply impressed by the flow of information and how easily you can find anything on the web.
Prior to founding Windows Report, this particular curiosity about digital content enabled him to grow a number of sites that helped hundreds of millions reach faster the answer they’re looking for.
Уровень сложностиСредний
Время на прочтение7 мин
Количество просмотров28K
Сегодняшний разговор пойдет о том, как правильно следует устанавливать 64-битную Windows 11 поверх ранее установленной 64-битной операционной системы Windows 7, 8, 10 или 11. Не пропагандирую переход на Windows 11, — выбор за вами, если это вам не нужно, ради бога, — но давайте поможем тем кто хочет это сделать, но встречается с разными сложностями на пути. Хотя при этом, заметка в целом полезна и тем, кто использует, и планирует далее использовать устаревшие системы, — рассказанный мной способ установки ОС «поверх» или «апгрейд» в целом общий для всех версий Windows, я лишь буду отмечать тонкости ранее мне не встречающиеся. Чего еще не будет в этой статье, так это вопросов совместимости с ПО и железом, — такое коротко и обобщенно не описать, решать нужно конкретно поставленную задачу. Обновлять ОС на совсем уж старом железе, наверное, нецелесообразно, а способов заставить работать древний софт на современных ОС известно много, но они тоже подбираются под нужды.
Собственно, начать об обновлении ОС я хочу с того, что Microsoft всегда имеет «матрицу обновляемости» (upgrade matrix) и четкие правила того, что на что может быть обновлено. Начнем с матрицы (а как иначе, Нео?). В любой версии и издании Windows в папке C:\Windows\servicing\Editions лежит файл UpgradeMatrix.xml, в котором четко прописано, с каких версий и изданий вы можете выполнить обновление на данную систему. Для ОС, которая в ISO образе, или на установочной флешке, этот файл лежит внутри install.wim, его проще всего открыть 7zip архиватором и посмотреть, если есть интерес. Разбирать его детально я сегодня не буду, это скучная задача, поговорим о сложностях, возникающих при обновлении ОС.
Если ваш ПК удовлетворяет новым системным требованиям Windows 11 (в нем есть TPM 2.0, поддержка Secure Boot, минимум 4ГБ оперативной памяти, двухъядерный процессор от 1ГГц и 64ГБ места на диске), то установленная на нем Windows 10 сама через Windows Update предложит вам установить Windows 11 — кроме изданий LTSC, IoT LTSC и Enterprise G. Сегодня мы НЕ говорим о тех, кто хочет установить ОС через Windows Update, — если вам это предлагается и версия/издание вас устраивает, обновляйтесь, там все просто. Однако, у многих других обновления через Windows Update не предлагается.

Им следует самостоятельно загрузить желаемый образ Windows 11 — с UUP Dump, торрентов или любого другого источника, а далее внести минимальные модификации в образ, чтобы тот не проводил проверки на совместимость железа или привязку к изданию/языку текущей установленной ОС.
Итак, проблемы, которые могут встать перед пользователем Windows 10, желающим обновиться на Windows 11 могут быть аппаратными или программными. Рассмотрим самые основные вопросы и дадим на них ответы.
Наиболее часто встречается проблема с совместимостью с минимальными системными требованиями ОС, в первую очередь с отсутствием поддержки TPM 2.0. Похожая ошибка возникнет при попытке установить ОС при отключенном в BIOS режиме безопасной загрузки Secure Boot. Его, к сожалению, поддерживают не все старые материнские платы, так что иногда это проблема.

Ну и, наконец, банально слабые ПК, у которых мало оперативной памяти или старый процессор также приводит к невозможности установки:

Все эти сложности легко обойти. Если у вас вопрос лишь в отсутствии TPM 2.0, можно воспользоваться утилитой Skip_TPM_Check_on_Dynamic_Update.cmd, её достаточно просто запустить в режиме администратора на той системе, что вы собираетесь обновлять, утилита внесет изменения в реестр, так чтобы установка более не проверяла наличие TPM.

Для того, чтобы обойти ограничение установщика на ПК без Secure Boot, или там где мало памяти или диска вам следует воспользоваться другой утилитой — Win 11 Boot And Upgrade FiX KiT (пароль MDL2023 — утилита разрабатывается на MyDigitalLife.com). Загружаете утилиту, распакуете её, далее копируете ранее загруженный ISO образ Windows 11, с которого собираетесь обновлять ОС в папку Win_11_Boot_And_Upgrade_FiX_KiT_v4.0\Source_ISO\W11, запускаете Win_11_Boot_And_Upgrade_FiX_KiT_v4.0.cmd и выбираете 1.

Обратите внимание: 29 июля 2024, уже после публикации статьи, вышла обновленная Win 11 Boot And Upgrade FiX KiT v5.0 (пароль MDL2024). Картинки в статье от версии 4.0. В версии 5.0 я рекомендую опцию AIO 2b: Current OS Registry.
Утилита внесет изменения в файлы установщика, так что проверка проводиться не будет, ни при загрузке с образа (например, с флешки), ни при обновлении ОС поверх установленной. Утилита сохранит измененный образ в ту папку, куда вы её распаковали, и именно с этого образа вы будете далее запускать установщик. Теперь система не ругается на несовместимость ПК с Windows 11, установщик считает, что вы ставите Windows Server и не проверяет ваше железо на совместимость:

То, ваше железо отвечает минимальным требованиям Windows 11 еще не означает, что все трудности с обновлением преодолены. Дело в том, что Microsoft разрешает устанавливать ОС поверх с сохранением файлов и приложений пользователя, только если вы выбираете для установки тот же язык и канал распространения ОС. То есть, если у вас установлена Профессиональная или Корпоративная Windows 10/11, то установить поверх LTSC издание, не удалив данных и программ, вы не сможете. Установить Профессиональную поверх Домашней, или Корпоративную поверх Профессиональной можно. Понизить с Профессиональной на Домашнюю нельзя. Переключения между базовыми изданиями и LTSC изданиями также заблокированы. Невозможно также и обновить никакое издание до ознакомительной (Evaluation) версии. А иногда хотелось бы! О чем позднее.
Вот пример, у меня стоит Windows 10 22H2 Professional (я использую английскую), при попытке запустить обновление на Windows 11 24H2 LTSC я получаю сообщение, что при обновлении смогу лишь сохранить файлы, но не приложения и настройки:

На картинке в командной строке видно, что у меня стоит Professional, я подключаю уже пропатченный ранее на аппаратную совместимость (что видно по заголовку Windows Server Setup) английский же Windows 11 24H2 LTSC. Отдельно у меня открыт редактор реестра, где видно, что в ключе EditionID, ветви HKEY_LOCAL_MACHINE\SOFTWARE\Microsoft\Windows NT\CurrentVersion стоит значение Professional, что совершенно естественно для моей ОС.
Теперь я лишь меняю этот один ключ на EnterpriseS и перезапускаю setup.exe:

Вуаля, теперь я легко могу установить желаемое издание. Трюк в том, чтобы вписать в ключ EditionID название того издания, на которое сейчас будете обновляться. Это работало всегда, и в Windows 2000, и в Windows 7, работает и в Windows 10. С Windows 11 чуть сложнее, способ работает при обновлении с Windows 11 21H2, 22H2 и 23H2, но вот обновить таким образом 24H2 на другое издание вы уже не сможете. Когда это станет актуально, опишу решение и для нее, пока мы обновляемся на 24H2, а не с 24H2.
Что встречается несколько реже, это невозможность обновить издание ОС с одного языка на другой. То есть, установить поверх англоязычной ОС русифицированную, не удалив всех пользовательских данных и установленных приложений, система не даст (обратное тоже верно, перейти на английскую ОС с русской штатно можно лишь выполнив чистую установку). Вот пример, где я у себя на английской ОС запускаю русский установщик:

Оказывается, это тоже можно достаточно просто обойти, просто отредактировав один ключ реестра. В ветке HKEY_LOCAL_MACHINE\SYSTEM\CurrentControlSet\Control\Nls\Language за язык установленной системы отвечает ключ InstallLanguage. В англоязычной ОС он равен 0409, в русскоязычной 0419. Я в своей ОС заменю 0409 на 0419 и перезапущу установщик:

Отдельно проговорим ситуацию со старыми процессорами, не поддерживающими инструкцию процессора POPCNT и набор инструкций SSE4.2. Microsoft сделала поддержку процессорами данного набора инструкций обязательной, начиная с версии 24H2, так что на совсем старых ПК возможна установка максимум Windows 11 23H2, пробовать устанавливать 24H2 не следует.
Поддержка SSE4.2 появилась в процессорах Intel поколения Nehalem в 2008 году. В процессорах AMD поддержка SSE4.2 появилась с запуском чипов на базе архитектуры Bulldozer. SSE4.2 предназначены для выполнения поиска и сравнения символов на двух операндах по 16 байт за раз для ускорения работы XML‑документов, а также вычисления CRC32 для протоколов передачи данных. Любой процессор на базе архитектуры x86, выпущенный после 2008 года, должен поддерживать SSE4.2. При этом процессоры, выпущенные до первого поколения чипов Intel Core i5 и i7, такой поддержки не имеют. Старые процессоры, такие как чипы AMD Barcelona, поддерживающие SSE4a, не подойдут для установки Windows 11 24H2. Очевидно, что нововведение Microsoft не затронет подавляющее большинство пользователей, поскольку поддержка инструкций SSE4.2 реализована во всех современных процессорах. Если у вашего процессора нет поддержки SSE4.2, но вы дико желаете себе Windows 11, вы можете установить версию 23H2 (10.0.22 631.x) или для совсем экстремальных энтузиастов сборку Windows 11 на базе кода Windows Server 23H2 (10.0.25 398.x). Посмотреть наличие SSE4 можно в CPU-Z:

Вообще ситуацию с установкой Windows 11 на слабые ПК я для себя вижу полезность всех этих утилит в первую очередь для работы с ОС в виртуальных машинах. Потенциально нестабильный и слишком новый софт я у себя изначально проверяю в ВМ, а достаточно много памяти ей не всегда удается дать. Устанавливать Windows 11 на одноядерный процессор с 2ГБ памяти может захотеть лишь совсем отчаянный человек, этого я вам не рекомендую.
Итог. Мы рассмотрели основные сложности в установке Windows 11 в качестве обновления. Рассмотрели утилиты, которые позволяют модифицировать установщик, чтобы тот не проверял систему на соответствие требованиям. Предложенный способ работает как при установке ОС в виде обновления поверх старой, так и при загрузке с флешки и установки с нуля. Также мы обсудили, какие модификации реестра следует выполнить, если вы хотите обновиться сменив язык или издание ОС с сохранением приложений и настроек.
Буду рад дополнить статью конструктивными идеями, отвечаю на вопросы в комментариях по возможности.