
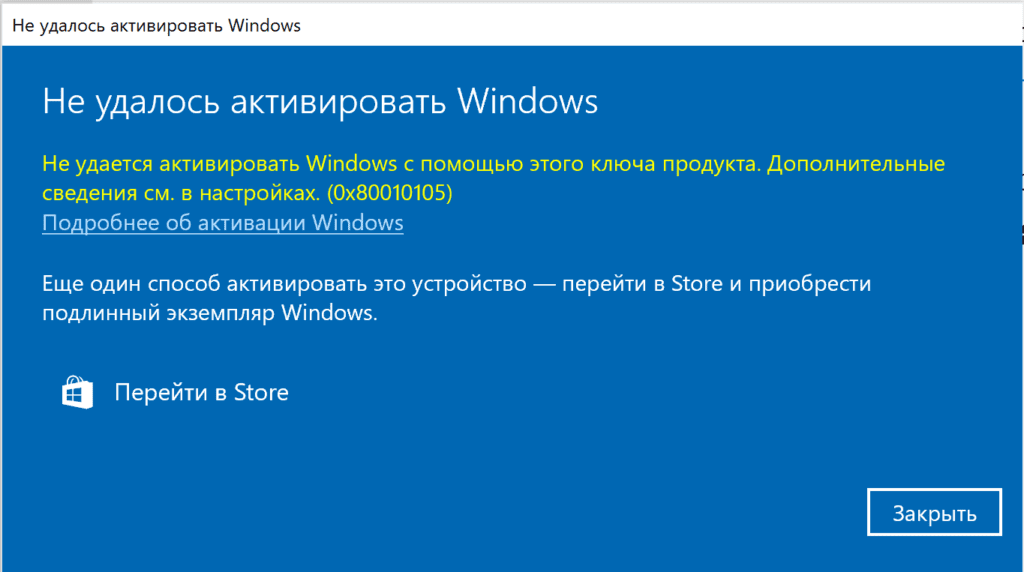
В данной статье рассмотрим как исправить ошибку активации Windows — 0x80010105.
1) Убедитесь, что на Вашем ПК установлено правильное время и дата. Исправьте дату на корректную и попробуйте заново активировать Ваш ключ.
2) Убедитесь, что у Вас установлена верная версия системы под Ваш ключ активации. К примеру Ваш ключ мог быть от Windows 10 Домашняя, а у Вас установлена Windows 10 Pro.
3) Если вышеуказанные методы не помогли, попробуйте активировать Ваш ключ через терминал по инструкции на следующей странице.
4) Возможно Ваш ключ не действителен, обратитесь к Вашему продавцу за консультацией. Если же у Вас нет корректного ключа активации, то приобрести лицензию Windows 10 Вы можете в нашем каталоге по самым низким ценам от 690 ₽.
По дополнительным вопросам Вы можете обратиться в нашу техническую поддержку в чате в правом нижнем углу, либо по электронной почте: [email protected]
7 ноября 2023 г. 12:25
2676
Содержание:
- Причины данной ситуации могут быть разными:
- Первый способ
- Второй способ
- Способ номер три
Сразу оговоримся, что появление ошибки 0x80010105 встречается в практике пользователей Windows 10 и Windows 11 не так уж и часто. Но все же это бывает. Обычно такое происходит, когда вы обновляете операционную систему автоматически с помощью Центра обновления Windows.
Причины данной ситуации могут быть разными:
- Неустойчивость интернет-соединения.
- Сбой работы маршрутизатора Wi-Fi.
- Повреждение системных файлов, которые участвуют в обновлении ОС.
- Остановка в работе Центра обновления и Фоновой интеллектуальной передачи.
- Наличие вредоносного программного обеспечения или вирусов.
- Блокировка процесса антивирусом или брандмауэром.
- Повреждение некоторых компонентов Центра.
Как же устранить возникшую ошибку? Есть несколько способов, которые могут привести к положительному результату.
Первый способ
Это перезагрузить компьютер. Подобный способ эффективен, когда возникновение ошибки – всего лишь очередной баг в системе. Если ошибка исчезнет, то хорошо, если нет – движемся дальше.
Второй способ
Предполагает для решения проблемы запустить средство устранения неполадок. Для этого:
- Нажимаем одновременно клавиши Win и S.
- Пишем в поисковой строке словосочетание Устранение неполадок.
- Открываем требуемый пункт, а потом раздел Запустить и работать.
- Кликаем по Центру обновления Windows.
- Нажимаем Запустить средство устранения неполадок.
- Следуем инструкции, которая появится на мониторе.
Как только процедура будет завершена, не забудьте проверить, исчезла ошибка или осталась.
Способ номер три
Наверное, самый простой: надо уточнить, есть ли подключение к интернету или же нет. Иногда возникновение ошибки – это результат того, что интернет в вашем компьютере не стабилен, поэтому не получается осуществить установку нормального подключения к какому-либо серверу Microsoft, имеющему обновления Виндоус. Необходимо убедиться, что у сетевого подключения удовлетворительное состояние. Можно также попробовать применить средство, устраняющее сетевые неполадки. Делаем следующее:
- Нажимаем одновременно клавиши Win и S.
- Пишем в поисковой строке словосочетание Устранение неполадок в сети.
- Кликаем по Средству устранения сетевых неполадок.
- Следуем инструкции, которая появится на мониторе.
Когда все действия будут выполнены, обязательно проверьте наличие ошибки 0x80010105. Если причина была в нестабильном интернете, то она исчезнет.
The error code 0x80010105 can occur because of two separate reasons on your computer. The first one out of them is due to corrupted system files, disabled update services, and appears only when you are trying to update Windows 11 or 10 OS. In addition to this, stopped print spooler service, or some minor issues in Printers may trigger a printer error code 0x80010105 while printing docs.
Let’s check both these problems out separately and precisely –
- Windows Update Error 0x80010105
- Printer Error 0x80010105

If you are getting this error code while updating existing Windows OS Build, try out these fixes –
1] Run Windows Update Troubleshooter
Whenever you encounter problems updating Windows, running the update troubleshooter is the first thing you should do. This is basically an in-built tool programmed to find and repair issues that are blocking an update from occurring on your PC. To do so, use these steps –
- Press Win + I, and navigate to the following –
System > Troubleshoot > Other troubleshooters
- Under “Most frequent”, you may find a section titled “Windows Update”. Well, click on the Run button available on its right end.

- Now, follow the on-screen instructions to fix the error code 0x80010105.
Even in cases, where this tool doesn’t repair or resolve this issue, this will tell you ways by which you can overcome this problem.
2] Manually install Windows updates
If Windows updates are still failing on an error code 0x80010105, you must manually download the latest cumulative update via Update Catalog. Once you have the required update file (standalone package), double-click on it to begin its installation.
Here’s a detailed guide on how to manually download and install Windows 11 updates. For Windows 10 PC, follow this tutorial instead.
3] Reset Update Components
In rare cases, the error 0x80010105 may still persist. If it does, the problem must be because of corrupted Windows cache folders. One may easily purge both these folders by running a few codes on the Terminal. However, before you do so, make sure to stop the essential update services.
If you do proceed with clearing Windows cache folders without stopping a few Windows update services, you might end up performing a clean installation of Windows OS. Here’s a list of commands that you should run on your PC. The below commands consist of disabling update services, renaming cache folders, and then re-enabling the services that you stopped before.
Here’s how to reset update components on Windows 11/10 –
net stop bits
net stop wuauserv
net stop appidsvc
net stop cryptsvc

rmdir %systemroot%\SoftwareDistribution /S /Q
rmdir %systemroot%\system32\catroot2 /S /Q
net start bits
net start wuauserv
net start appidsvc
net start cryptsvc

Note: Renaming Windows cache folders will get rid of the original folders and hence new folders will be created in their places. You may restart your PC next. After the system reboots, you may delete the renamed folders. One may locate these folders at the below location –
SoftwareDistribution – C:\Windows
Catrrot2 – C:\Windows\System32
Fix Printer Error Code 0x80010105
Several users reported receiving this error code when they were trying to take printouts. If you are one such user and are wondering how to fix this error code, try this solution –
1] Restart Print Spooler Service
Before you try any solutions, make sure to check if the print spooler service is up and running on your PC. This is basically an important service that must be running to avoid any print errors. Here’s how you may check and restart this service –
Solved: How to Fix Print Spooler Service issues on Windows 10
- Right-click on the Windows icon and select Run.
- Type “
services.msc” and press Enter. - Inside the Services, scroll down and right-click on the service – Print Spooler Services. Select Properties on the appeared context menu.

- Make sure the Startup type is on Automatic mode.
- If Service Status is showing stopped, you need to click on the Start. Similarly, if the Service Status is displaying running, you need to stop it first and then start again.

- Lastly, hit OK to save the above configuration.
- Now it’s done, Restart your PC and check whether the error 0x80010105 is resolved or is still occurring.
2] Run Printer Troubleshooter
If you have already checked for the print spooler service and the error is still there, you may troubleshoot the Printers using the steps outlined below –
- Press Win + I to open the Settings app.
- Go to System > Troubleshoot on the left pane.
- When this expands, click Other troubleshooters.
- Locate the “Printer” section and hit the Run button available right beside it.

- When the troubleshooter starts, check the option – “Printer not working”.
- Follow the on-screen instructions to complete the remaining process.
If you are getting this error code on Windows 10, the above procedure remains the same. However, the path to start this troubleshooter changes. To find and start troubleshooting the printer, you need to go to the below location –
Settings > Update & Security > Troubleshoot > Additional troubleshooters

Restart your PC next and see if the error 0x80010105 gets resolved or not. I hope the problem resolves by now.
Windows updates were never error-free whether it is Windows 11 or 10. Issues may arrive while downloading a newer patch or during the installation and even after completing the download successfully. This context describes how to fix update error 0x80010105 in Windows 10 or 11. Such errors usually take place due to broken Windows update agents. Apart from that, malware attacks, missing system files, enabled developer mode can trigger issues while trying to make effort to update the system.
Lack of maintenance of the system also causes performance problems in Windows. If update error 0x80010105 is a result of simple glitches, it will get resolved automatically when you perform a system restart. But that might not be the case always. If the issue is triggered by any abnormalities of Windows, trying out advanced workarounds is mandatory.
Update error 0x80010105 in Windows 10 or 11
Here is how to fix update error 0x80010105 in Windows 10 or 11 –
Way-1: Check internet connection
In Windows-operated machines, updating is autonomous, i.e. takes place automatically if there is a stable internet connection available. An unstable network won’t allow the OS to start the updating process. Sometimes the updating may start but due to intermittent connection, it stops in the middle and shows unexpected error codes. If you are having update error 0x80010105 in Windows 10 or 11, it is the most basic duty to check the connection.
To have an error-free updating process, make sure the metered connection is disabled for your network. Often, the internet service terminates for no particular reason even after having everything alright. In that case, turn off the router for a minimum of 10 seconds and then turn it on again. For having an ethernet connection, remove the plug for a while and then connect after a few seconds. Hopefully, the updating will take place without any error now.
Way-2: Unplug external peripherals
Some external hardware components such as speakers, printer-scanner, USB devices, or webcams trigger various error codes in Windows without any valid reason. Proceeding for performing a Windows update with all these peripherals can be detrimental whereas, you can disconnect which are not necessary for a while.
Disconnecting the external peripherals that are not basic ones won’t affect the regular operation rather, the updating may continue just fine. Plug them in once the updating finishes successfully.
Way-3: Run Windows Update Troubleshooter
Nevertheless, the Windows updating process is autonomous in all the machines, the process oftentimes stuck in the middle showing error codes. Microsoft has considered the issue with utmost priority and offered a built-in troubleshooter in the OS.
Windows Update troubleshooter as Microsoft explains will disable the automatic running of disk cleanup for a while to install required updates. Furthermore, it will detect other associated glitches for which the process is terminated and fix them using default resources. If you are encountering update error 0x80010105 in Windows 10 or 11, can run the troubleshooter using the below guidelines –
Windows 11
- Press – Windows + I.
- From the right pane, choose – Troubleshoot.
- Click – Other troubleshooters.
- Once on the next page, hit – Run button present next to Windows update.
- Follow on-screen instructions to run the troubleshooter.
- After scanning the associated components for abnormalities, the utility will suggest an automatic fix.
- Click – Apply this fix.
Windows 10
- Open Windows Settings.
- Opt for – Update & Security.
- From left overlay, choose – Troubleshoot.
- Move to the right-hand side.
- Click – Additional troubleshooters.
- Select – Windows update.
- Click – Run the troubleshooter from the expanded tray.
Way-4: Download problematic patch manually
An unremitting internet connection is a pre-requirement to download and install an update patch in Windows-operated machines. However, you often move out from such a stable connection and get into trouble. As a preferable alternative to this issue, Microsoft update catalog contains all the update file patches. You can download from here 24/7 whenever the internet service is available and install them at any convenient time. This way, update error 0x80010105 in Windows 10 or 11 will not show up again. To download the specific patch from Microsoft Catalog manually following the below steps –
- Find out the KB number that the system is failing to install.
- Press – Windows + S
- Type – update history.
- Hit – Enter.
- When the Settings page appears, note down the KB number showing the error.
- Navigate to the official website of Microsoft Update Catalog.
- Click the search bar of the webpage and type the patch KB number you noted.
- Press – Enter.
- Look for the version that suits your system configuration and click – Download.
- Click on the link located on the prompted page.
- Once the MSU file is downloaded, double click on it.
- When User Account Control prompts, click – Yes.
- Follow the onscreen instructions until the update is installed.
Way-5: Reset Windows Update component
In an updating process, Windows update components control everything, therefore any glitches in the files will bring up unusual error codes like update error 0x80010105. While having this problem, try resetting dedicated components right away. The process will also reset the SoftwareDistribution folder where the system usually saves the associated files of an update. Furthermore, it will rectify the internet connection issues if persist with the device. To carry out resetting Windows Update component, follow the below guidelines –
- Press – Windows key.
- Type – cmd.
- Press – Ctrl + Shift + Enter.
- To allow User Account Control, click – Yes.
- In the Command Prompt, insert the following commands one after another and hit Enter after each –
net stop wuauserv
net stop bits
net stop appidsvc
ren %systemroot%\SoftwareDistribution SoftwareDistribution.bak
ren %systemroot%\system32\catroot2 catroot2.bak
Once executed, all update-related services will be stopped moreover SoftwareDistribution folder and Catroot2 folder will get replaced with fresh ones. After that, you will have to start all the disabled services again by running the below commands –
net start wuauserv
net start bits
net start appidsvc
net start cryptsvc
- Close Command Prompt.
- Restart Windows PC and check for updates.
Way-6: Run System File Checker
System files are the critical components in Windows without which the OS cannot operate smoothly. Often they are the parts of the Operating System itself while the same can also be a part of other resources like device drivers. However, these components may get into trouble by a conflict between software or attack by bug or malware. Corruption in the system file can cause a wide range of troubles in the system.
Update error 0x80010105 in Windows 10 or 11 often occurs if there are corrupted system files present in your system. To fix them, Windows has a default utility called System File checker which is intended to detect lost or misplaced components and eventually fix them. Some system files can be abruptly removed from the device due to a sudden power surge or outage will also be recovered once this utility runs. To carry out this workaround, follow the below instructions –
- Open Command Prompt as administrator.
- When the app opens up, type –
sfc /scannow. - Hit – Enter.
- Wait until the process reaches 100%.
- Check the report to find out whether the System file checker repaired the found corruption.
- If not, execute –
dism /online /cleanup-image /restorehealthcommand. - Reboot your system once the execution is over.
- When the system powers up, run sfc /scannow once again in the elevated command prompt.
Way-7: Check Date & Time Settings
Incorrect time zone is one of the most prominent causes of giveaway update error 0x80010105 in Windows 10 or 11. Therefore this really important to ensure the correct date and time in the device for performing Windows update. Follow the below steps –
- Right-click the clock present on the taskbar.
- Choose – Adjust date and time.
- If you are using Windows 10, opt for – Adjust Date/time.
- From right pane, switch on the toggle button of Set time automatically.
- Also, enable – Set time zone automatically.
After that, go through the below process –
- Press – Windows+R.
- In Run command, type – control.exe.
- Click – OK.
- Make sure the View by option is set to Category.
- Click – Clock and Region.
- From the right-hand side, hit – Date and Time.
- Shift to Internet Time tab.
- Click – Change settings.
- Check the box present before Synchronize with an Internet time server.
- Click – Update now.
- To save the changes, hit – OK.
Way-8: Turn off the antivirus program
Malwares are always in a hunt to fuse the security layer of the OS and steal sensitive information in order to harm the users. Internet service being so available with the devices, it’s really easy for the strongly coded bugs to dodge the security interface. However, Windows 10 or 11 has the strongest malware protection by default which can significantly block everything suspicious. But the problem arises when this blocks the update patch misinterpreting as unrecognized.
Malware causes severe in the device and we never recommend turning off the anti-virus program whether it is default Windows Security or a third-party one by your choice. However, for the sake of smooth Windows updates, you can disable them temporarily and turn them on again after completing the installation successfully.
Disable Windows Firewall
- Press Windows key.
- Type – security.
- Hit – Enter.
- Click – Virus & threat protection.
- From the right, hit the link – Manage settings.
- Switch off the toggle button of Real-time protection.
- To confirm the process, click – Yes.
- From left sidebar of the app, choose – Firewall & network protection.
- Click – Private network.
- Disable the switch present under Microsoft Defender Firewall.
- Give your final consent when asked.
- Click the Back arrow from the top left corner.
- Select – Public network.
- Turn off the toggle button of Microsoft Defender Firewall for this network as well.
Disable third-party antivirus
- Hover the mouse pointer to the toolbar.
- Right-click on the third-party antimalware software icon.
- If it’s not there, click on Show hidden icons (up arrow symbol) to get the same.
- Choose – Disable.
- You can disable the tool permanently or for a specific period of time.
Note – The above-mentioned method may vary depending upon the software installed in your PC but more or less it will be similar.
Way-9: Free up disk space
In the System drive, a lot of junk files get accumulated every day like temporary files, unnecessary Downloads items, browser cache, shader caches. These files are safe to be removed without making any harm to the system and you can make some space eventually. However, the real killer is the previous Windows update files which usually occupy a few gigabytes of space. These are mostly unnecessary unless you have to perform a system restore and require a previously saved point.
Update patches require a specific amount of free space in the disk drive and that varies from one to another based on build. Usually, the requirement asked by Microsoft is a minimum of 16 GB free storage for installing 32-bit and 20 GB for 64-bit. If the device runs out of free space while downloading or installing a patch, there is a chance of getting update error 0x80010105 in Windows 10 or 11. Windows has disk cleanup tool to free up space altogether and the process is way too simple. To use the utility eventually make additional space in the disk, follow the below guidelines –
- Click the search icon from the taskbar.
- Type – cleanmgr.
- Hit – Enter.
- When a small pop-up appears where (C:) drive is pre-selected, click – OK. If C: is not your System drive, choose the correct one.
- From the bottom left of the next wizard, click – Clean up system files.
- Check whether your system drive is selected in the appearing pop-up. If yes, hit – OK.
- Once again, click – OK.
- To give final consent, hit – Delete files button.
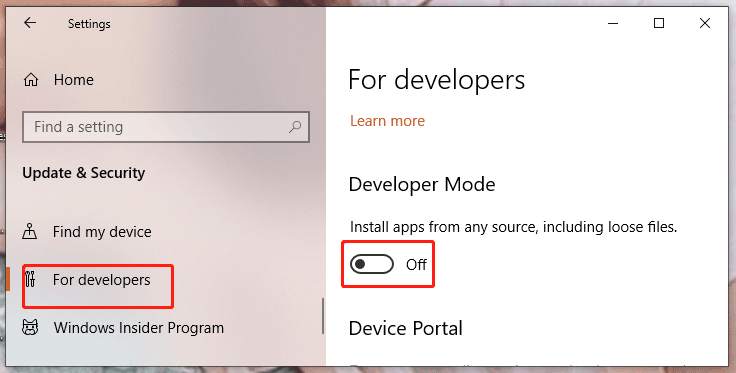
Way-10: Disable Developer mode
Targeting the users intended to develop applications, use visual studio, Microsoft has introduced Developer Mode starting from Windows 10 Anniversary update. The usual setting of this feature supports Windows Subsystem for Linux, Bash shell, Device Portal, Device Discovery, and many more. According to some reports, many users experienced update error 0x80010105 in Windows 10 or 11 when this feature remain enabled in the system. Therefore, disable the mode before proceeding with a Windows Update using the below guidelines –
- Press – Windows + S.
- Type – Developer mode.
- Press – Enter.
- When the dedicated Settings page opens up, switch off the toggle button of Developer mode.
Way-11: Perform a Clean Boot
Installing too many programs unnecessarily in Windows doesn’t come out helpful every time, rather it causes severe trouble. In Windows 10 or 11, we have a great number of default programs for performing all the tasks you need for regular operation even a bit advanced. However, you may need some others too which is completely fine and should not bother the performance.
Some of us may install a lot of programs for no particular reason mostly from untrusted sources which will occupy a large space in the disk, cause the system to act abnormally. A few of these run at the startup, and many similar ones engage in conflicts quite often. As a result, you may experience the update error 0x80010105 in Windows 10 or 11. To resume the installation without any issue, perform Clean Boot in Windows. This will let the OS run with basic programs only and it will be easier to determine which programs are causing the issue. To carry out this process, follow the below guidelines –
- Open Run Dialog box (Win+R).
- In the text field, type – msconfig.
- Hit – Enter.
- When in the General tab, click the checkbox set before – Selective startup.
- Also, select – Load startup items.
- Shift to Services tab.
- Check the box present alongside Hide all Microsoft services.
- Click – Disable all.
- Go to Startup tab.
- Click – Open Task Manager.
- When the app opens up in a separate window, select a startup program.
- Click – Disable.
- Disable all startup items in a similar way.
- Close Task Manager.
- After returning back to the System Configuration window, click on Apply followed by OK.
Way-12: Perform In-place upgrade
As an alternative to automatic Windows Update, this method can upgrade the Operating System to the most recent build. Of course, you can avoid any sort of error code or glitch coming in the way. To do in-place upgrade in Windows, follow the below guidelines –
- Navigate to – Microsoft website.
- Click – Download tool now.
- Go to the directory where the system stores downloaded items.
- Double-click the setup file you got.
- To allow the User Account Control, hit – Yes.
- When the setup wizard becomes ready, click – Accept.
- Click the radio button set before – Upgrade this PC now.
- Hit – Next.
- Update error 0x80010105 should not arise this time.
Methods list:
Way-1: Check internet connection
Way-2: Unplug external peripherals
Way-3: Run Windows Update Troubleshooter
Way-4: Download problematic patch manually
Way-5: Reset Windows Update component
Way-6: Run System File Checker
Way-7: Check Date & Time Settings
Way-8: Turn off the antivirus program
Way-9: Free up disk space
Way-10: Disable Developer mode
Way-11: Perform a Clean Boot
Way-12: Perform In-place upgrade
That’s all!!!
0x80010105 is one of the most common errors in the process of Windows update and it seems tricky to cope with. Follow the guidelines and suggestions in this article on MiniTool Website to get rid of this error at once!
It is normal to update the latest version of Windows to keep your device running more smoothly and securely. However, some errors will happen during the updating process. 0x80010105 is one of the common errors and how to fix it has become a constant pain for many Windows users like you.
If you are also experiencing 0x80010105 Windows 10/11, why not spend a while on this post to seek out more viable solutions? Without wasting any time, let’s start to develop a further discussion about error number 0x80010105 now!
How to Fix Windows Update Error 0x80010105 Windows 10/11?
Fix 1: Check the Internet Connection
To update your Windows, the first thing you should make sure of is that your PC is under a stable and fast internet connection. Any unstable or slow connection will pause the updating process hence causing Windows update error 0x80010105. In this condition, you can choose to turn off the router, wait for a while and turn it on again. If this doesn’t work, you must troubleshoot your internet connection.
Step 1. Tap on Win + I to open Windows Settings.
Step 2. In the menu of Settings, scroll down to find Update & Security and click on it.
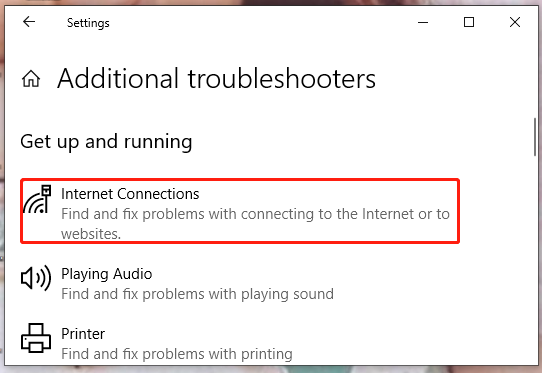
Step 3. In the left pane, press Troubleshoot and then choose Additional troubleshooters.
Step 4. Choose Internet Connections, hit Run the troubleshooter and follow the on-screen instructions to let the system automatically troubleshoot network issues for you.
Fix 2: Run Windows Update Troubleshooter
Windows Update Troubleshooter is a useful inbuilt tool which can detect some associated glitches and disable the automatic running of Disk Cleanup for a while to install corresponding updates. You can make full use of it when discovering that there is a blocked update or an update error on your PC.
Follow the next simple guidelines to know how this tool works to fix Windows update error 0x80010105: open Settings and click on Update & Security > Troubleshoot > Additional troubleshooters > Windows Update> Run the troubleshooter.
Fix 3: Download Problematic Patch
Microsoft provides you with all the updated file patches for you and you can download them at any time. Installing the corresponding problematic patch allows you to clear Windows update error 0x80010105.
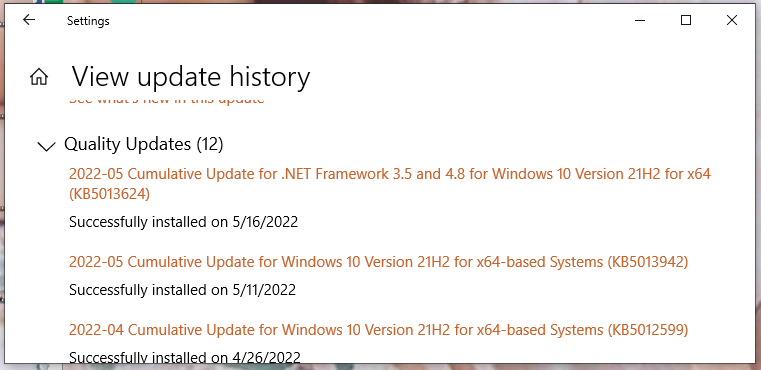
Step 1. In the Windows search bar, type update history and don’t forget to hit Enter to view update history. Copy the KB number that shows the error.
Step 2. Go to Microsoft Update Catalog, type the KB number in the box and press Enter.
Step 3. Find the version that matches your system configuration and hit Download.
Step 4. Click on the link in the popping-up window.
Step 5. As soon as the MSU file is downloaded successfully, double-click on it and then hit Enter to confirm your action.
Step 6. Follow the detailed instructions on the screen to install the update and reboot your PC to see if Windows update error 0x80010105 still persists.
Fix 4: Run SFC Scanning
When the system files become corrupted or missing due to a malware attack or the conflicts between software, your system cannot operate smoothly. What’s worse, there will be a series of troubles in your OS.
Fortunately, it is not so difficult to deal with this issue. Windows has an automated tool called System File Checker which can detect and repair the corrupted files for you. Here’s how to do it:
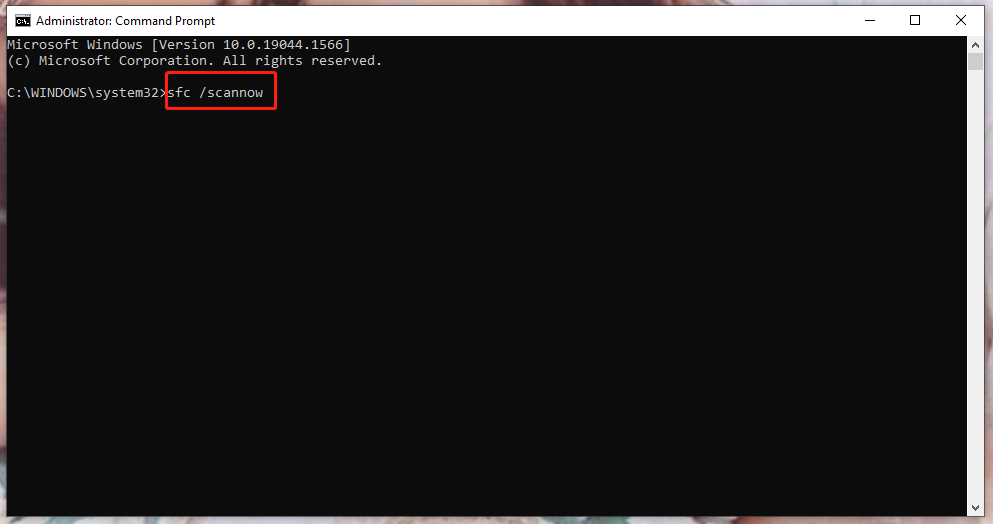
Step 1. Type cmd to locate Command Prompt and do a right-click on it to choose Run as administrator.
Step 2. Cope & paste sfc /scannow in the command window and press Enter.
Step 3. View the report to know whether SFC repairs the corruption it finds. If not, type dism /online /cleanup-image /restorehealth and hit Enter.
Step 4. Execute sfc /scannow again after rebooting your device.
Tip: Although SFC is very useful, it goes wrong sometimes. For more information on that like SFC stuck, go to – Windows 10 SFC /Scannow Stuck at 4/5/30/40/73, etc.? Try 7 Ways.
Fix 5: Turn off Antivirus Software
During the Windows update process, it is highly recommended to disable your antivirus software temporarily for a smoother download & installation.
Warning: You must switch it on as soon as you complete the installation or else the malware and virus will grasp this opportunity to attack your OS.
To carry out this action, you can:
Step 1. Open Windows Settings.
Step 2. Scroll down to click on Update & Security.
Step 3. Under Windows Security, hit Virus & threat protection.
Step 4. Press Manage settings and turn off Real-time protection.
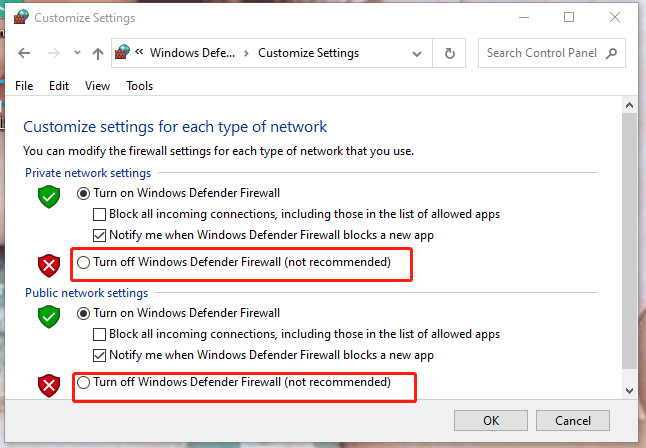
Step 5. Open Control Panel and click System and Security.
Step 6. Hit Windows Defender Firewall > Turn Windows Defender Firewall on or off.
Step 7. Check Turn off Windows Defender Firewall (not recommended) under Private network settings and Public network settings.
Fix 6: Perform A Clean Boot
At times, a number of programs will be installed on your PC without your knowledge and most of them might come from untrusted sources. What’s worse, they take up quite a large space in the disk thus causing the system to act abnormally. In this case, performing a clean boot can help you to determine which program is the culprit. To get rid of Windows update error 0x80010105 in this way, you can:
Step 1. Press Win + R at the same time to launch the Run box.
Step 2. Type msconfig and hit Enter to open System Configuration.
Step 3. In the Services tab, tick Hide all Microsoft services and click on Disable all.
Step 4. Go to the Startup tab and press Open Task Manager.
Step 5. Under the Startup tab of Task Manager, right-click on each item and choose Disable in the drop-down menu.
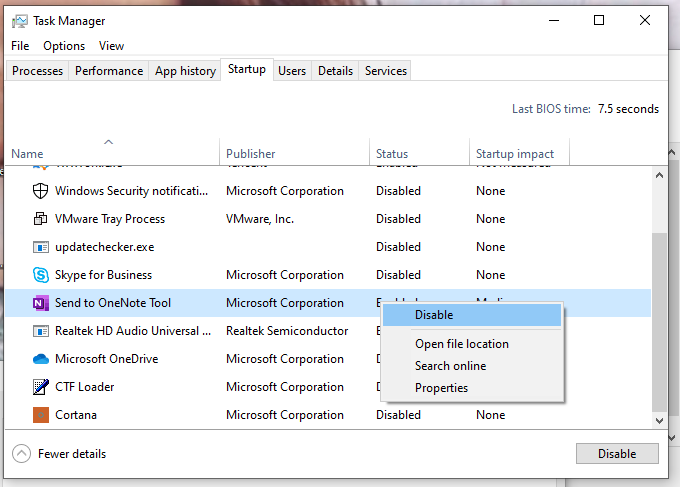
Step 6. Close Task Manager, return to System Configuration and click Apply & OK.
Step 7. The last step is to reboot your PC.
Fix 7: Reset Windows Update Components
Windows update components are so important that any glitches in the files will bring up severe issues such as error code 0x80010105. Therefore, you had better reset them to make sure of their integrity. To do so:
Step 1. Run Command Prompt as an administrator.
Step 2. In the black console window, copy & paste the following commands and hit Enter after each command.
net stop wuauserv
net stop bits
net stop appidsvc
ren %systemroot%\SoftwareDistribution SoftwareDistribution.bak
ren %systemroot%\system32\catroot2 catroot2.bak
Step 3. Those commands above will stop all update-related services. At the same time, the Software Distribution folder and Catroot2 folder will be replaced by the new ones. You need to restart all the disabled services by following the below commands:
net start wuauserv
net start bits
net start appidsvc
net start cryptsvc
Step 4. Exit Command Prompt and reboot your computer to check if Windows update error 0x80010105 disappears.
Fix 8: Free up Disk Space
In your daily cyber life, a lot of junk files like temporary files, browser caches and shader caches can be accumulated with the day. Deleting them can free up some disk space. When you are updating Windows but there’s not enough free space, there’s a possibility that you will get Windows update error 0x80010105. As a result, you had better free up storage space as much as you can.
Tip: When Windows 10 released firstly, Microsoft required that you should have at least 16 GB of free storage for installing 32-bit and 20 GB for 64-bit. But now, since the update process of Windows 10 is changed, Microsoft increases the installation size to 32 GB for both 32-bit and 64-bit.
Step 1. Type cleanmgr in the Windows search bar and hit Enter to locate Disk Cleanup : Drive Selection.
Step 2. You can see C drive is preselected. By default, C drive is your system drive and just click on OK. If you have changed your system drive before, choose the correct one and then hit OK.
Step 3. Choose Clean up system files.
Step 4. Check if your system drive is selected in the popping-up. If so, press OK.
Step 5. Press OK again and click on Delete files.
Fix 9: Check Date & Time Settings
It is very important to make sure the correct time and date for Windows update. Incorrect time zone can also stop any Windows update and then error code 0x80010105 appears. To check date & time settings, you can:
Step 1. Open Windows Settings and browse in the menu to click on Time & Language.
Step 2. In the Date & time section, toggle on Set time automatically and Set time zone automatically.
Step 3. Press Win + R simultaneously to open the Run box.
Step 4. Type control.exe and hit Enter.
Step 5. Click on Date and Time.
Step 6. In the Internet Time tab, tap on Change settings.
Step 7. Check Synchronize with an Internet time server and hit Update now.
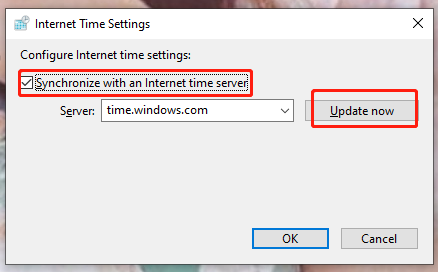
Step 8. Press OK to save the changes.
Fix 10: Perform a System Restore
If you are running Windows 7 or higher, restoring your device to a previous point is an expedient, too. It can enable you to restore your computer to an earlier time to recover from serious system failures like Windows update error 0x80010105.
Step 1. In your search bar, type create a restore point and hit Enter to open System Properties.
Step 2. In the System Protection tab, click System Restore.
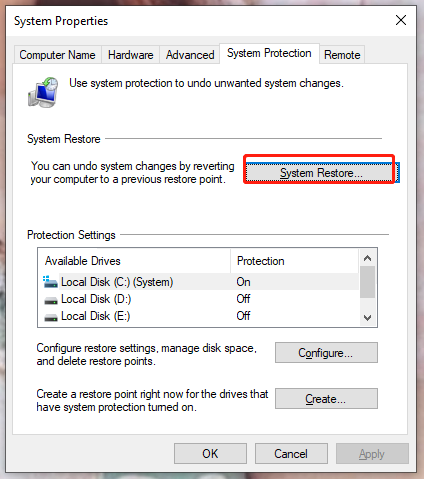
Step 3. Hit Next to see available restore points.
Step 4. Press Scan for affected programs to find which app will be removed because it was added after creating the restore point.
Step 5. Choose one of the most recent restore points and hit Next &Finish.
Fix 11: Disable Developer Mode
It is reported that 0x80010105 will crop up when you enable Developer Mode in the system. To avoid this, you can opt to disable Developer Mode.
Step 1. Go to Windows Settings and choose Update & Security.
Step 2. In the For developers tab, switch off Developer Mode.
Suggestion: Back up Your PC Before Updating Windows
Before performing any operations related to Windows operating system such as Windows updates, it is highly recommended to back up your computer because you will run a risk of data loss during the process of Windows updates. In addition, OS backup and recovery can minimize system downtime and keep your data safe.
When it comes to backup, MiniTool ShadowMaker is a good option for you. It is a professional backup software which enables you to back up your files/folders, disks, partitions and even Windows OS. As for the types of supported operating systems, it is compatible with Windows 11/10/8/8.1/7.
MiniTool ShadowMaker TrialClick to Download100%Clean & Safe
Now, follow the guidelines below to back up your system straight away.
Step 1. Just download its trial edition and you will enjoy a 30-day free service.
Step 2. After downloading & installing MiniTool ShadowMaker successfully, launch it. Click on Keep Trial and go to the Backup interface.
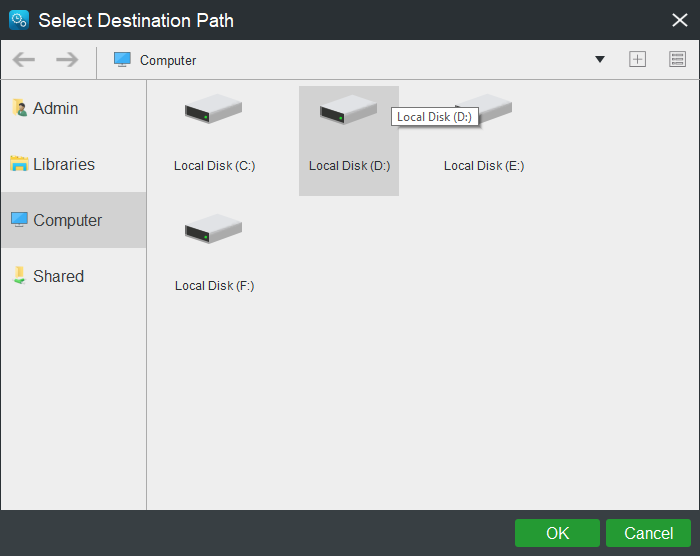
Step 3. You’ll see your system partitions are already selected in Source, so you just need to choose a destination path to save the backup image. Click on Destination and choose a destination in Admin/Libraries/Computer/Shared.
Step 4. After you make a decision, click Back up Now to start the backup task immediately. Also, if you are busy at this moment, you can click Back up Later to delay the task. The remained task will leave in the Manage interface.
Tip: For someone who wants to set a customized backup, go to Schedule. In order to manage your disk space, head over to Scheme to determine the backup type. As for more advanced parameters, move to Options.
Final Words
Are you still bothered by Windows update error 0x80010105? Do you have other good ideas to solve it? Welcome to leave a comment below or send an email to us via [email protected]. Hope this article is useful to you! Thanks a million!