
In this guide I will show some simple steps of how to setup a mongodb installation in a replication on Windows Server.
This guide was tested with:
Windows 2012 R2 Standard
I used for this setup the following three servers that have Windows 2012 r2 Standard edition installed.
mongodb01: 192.168.1.42
mongodb02: 192.168.1.43
mongodb03: 192.168.1.44
They all have to be in the same workgroup or in the same domain, if they are not then you have to add all the servers in your hosts file so mongodb knows how to connect to them.
So lets start!
Step 1: Download MongoDB (on all three servers)
MongoDB provides windows installer packages so simply download their msi file from their website http://www.mongodb.org/.
https://fastdl.mongodb.org/win32/mongodb-win32-x86_64-2008plus-ssl-3.0.0-signed.msi
Even it does say Windows 2008 it does work perfect on Windows 2012!
Step 2: Install MongoDB
Just follow the pictures below to install MongoDB, you have to do this on all three servers.
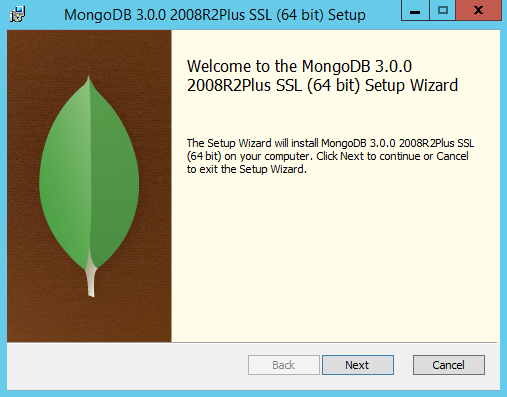
Just press next on the picture above.
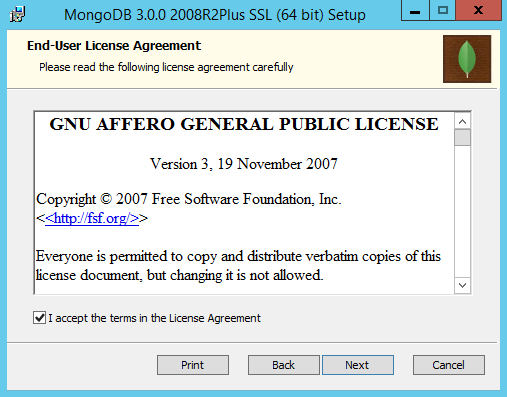
Read the license and then tick the box you accept the license and press next on the picture above.

Press you wish to install the “Complete” version on the picture above.
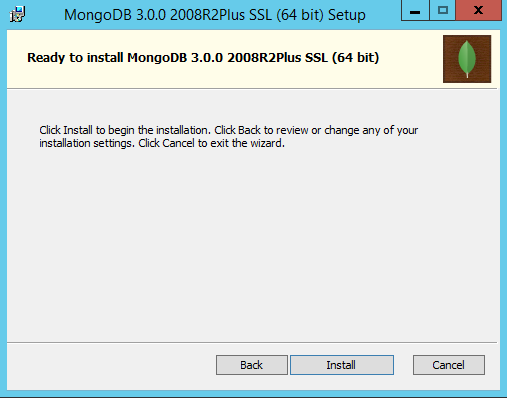
On the window above just press “Install” to start the installation.
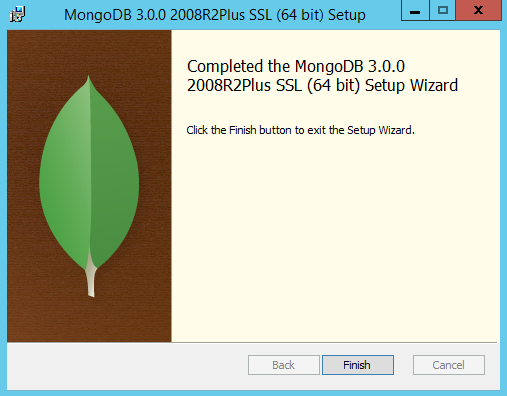
You should now have finished the installation so simpely press “Finish”.
Remember you have to do this on all three your servers.
Step 3: Create a database and log directory (on all three servers)
Create the following directories:
C:\ulyaoth\mongodb\data\db

C:\ulyaoth\mongodb\data\log

C:\ulyaoth\mongodb\config
Step 4: Fix the Windows firewall (on all three servers).
Go to your “Control Panel” and then click on “Network and Internet” once there click on “Network and Sharing Center” and then on the left side at the bottom click on “Windows Firewall”.
You should now see your Windows Firewall like this:
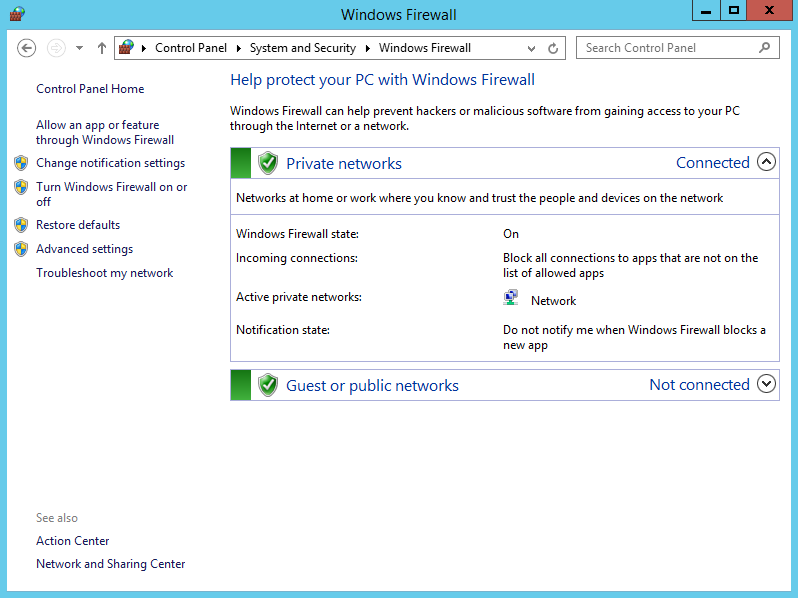
On this window click on “Allow an app or feature trough Windows Firewall” your window will change and click on this window on “Allow another app..” and fill everything in as below.

If everything looks as above press on OK to close the firewall configuration window.
Step 5: Create a MongoDB config file (on all three servers)
Open a notepad and add the following information:
systemLog:

destination: file

path: "C:/ulyaoth/mongodb/data/log/mongod.log"

logAppend: true

storage:

dbPath: "C:/ulyaoth/mongodb/data/db"

journal:

enabled: true

net:

bindIp: 0.0.0.0

port: 27017

replication:

replSetName: ulyaoth
Once added then save the file as “mongod.yaml” in the directory:
"C:\ulyaoth\mongodb\config\"
You should end up with
"C:\ulyaoth\mongodb\config\mongod.yaml"
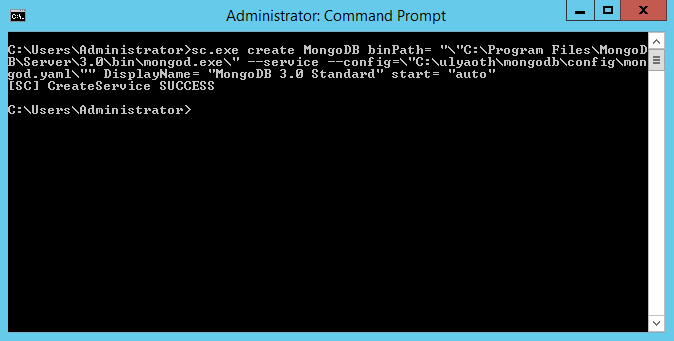
Step 6: Create a service that will auto start MongoDB (on all three servers)
Open a Command Prompt and type the following:
sc.exe create MongoDB binPath= "\"C:\Program Files\MongoDB\Server\3.0\bin\mongod.exe\" --service --config=\"C:\ulyaoth\mongodb\config\mongod.yaml\"" DisplayName= "MongoDB 3.0 Standard" start= "auto"
This should create a service for MongoDB if you did it correct, it should look like this:
If you ever wish to delete the service you can do so with the following command:
sc.exe delete MongoDB
Step 7: Start MongoDB (on all three servers)
Just restart the server and MongoDB should automatically start so it is a good test that the previous commands worked.
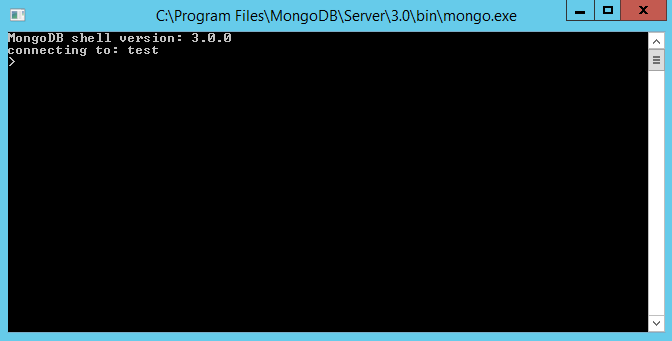
Step 8: Go into the MongoDB shell (only on server one)
Go to “C:\Program Files\MongoDB\Server\3.0\bin” and double click on “mongo” a terminal window should open that looks like this:
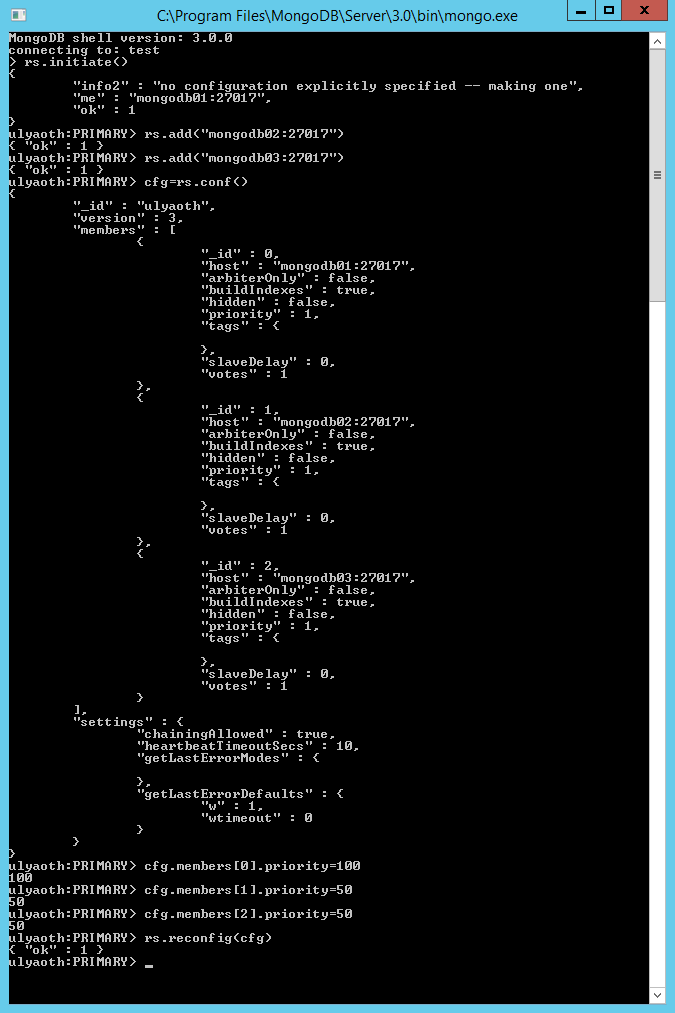
Step 9: Create the replica set in the mongo shell. (only on server one)
While being in the mongo shell type the following commands:
rs.initiate()

rs.add("mongodb02:27017")

rs.add("mongodb03:27017")

cfg = rs.conf()

cfg.members[0].priority = 100

cfg.members[1].priority = 50

cfg.members[2].priority = 50

rs.reconfig(cfg)
(Please be aware if you cannot reach the names “mongodb02” or “mongodb03” you have to use the full ip address of the server or add it to your hosts file)
Step 10: Test your configuration is working. (only on server one)
in the mongo shell still type:
rs.status()
You should see something like this if everything is correct:
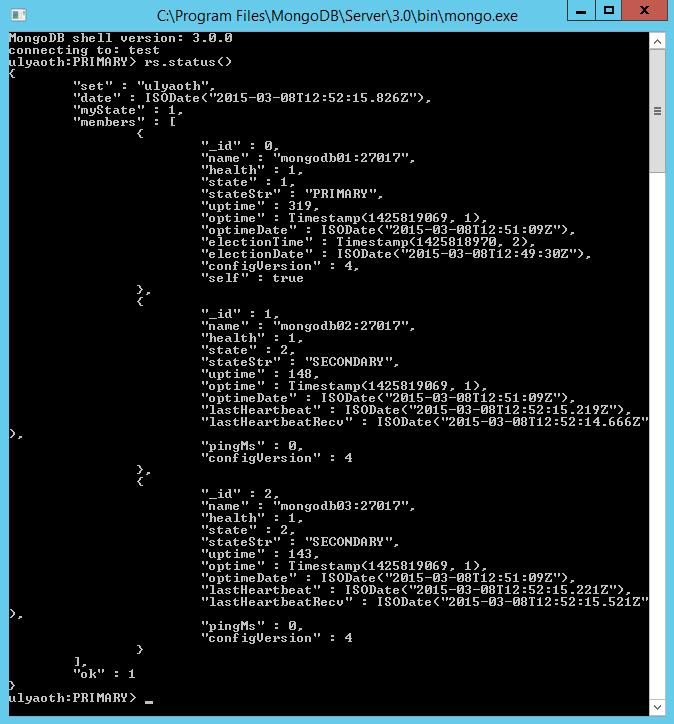
Congratulations you now have successfully installed mongodb on windows and you have set it up in a replication :)! Now lets test that the replication works by creating a database on the master (mongodb01).
Step 11: Create a test collection with some data on the master (only on server one)
In the mongo shell type the following:
use ulyaoth

u = { name : "ulyaothguides" }

db.Data.insert( u )

show dbs

show collections

db.Data.find()
You should see something like this:
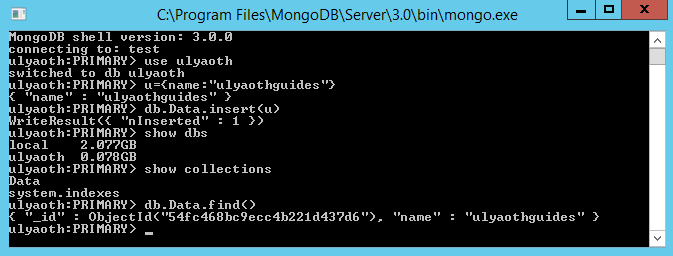
As you can see “show dbs” did show you have a database ulyaoth, “show collections” show you have the collection Data and “db.Data.find()” did show that the Data collections contains the information “ulyaothguides”.
Now if everything did work as intended all this should have been replicated to your servers mongodb02 and mongodb03 so lets test it!
Step 12: Check if the slaves have data (on server two or three)
Go to your server two or three and open a mongo shell by double clicking on the “mongo” file and run the following three commands:
rs.slaveOk()

show dbs

use ulyaoth

show collections

db.Data.find()
If everything worked you should see the following:

The command “rs.slaveOk()” this is so you allow to read from the slave by default this is not enabled.
Well this was it everything worked and you can now use your MongoDB replica set for anything you like!
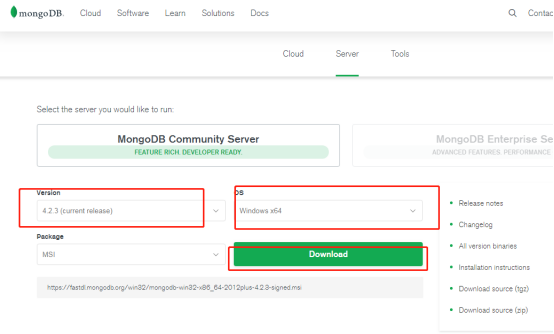
1, download the installation package
Address: https: //www.mongodb.com/download-center/community
is the database MongoDB mounted on the windows sever 2012 r2
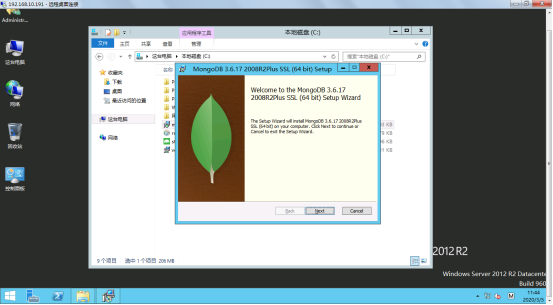
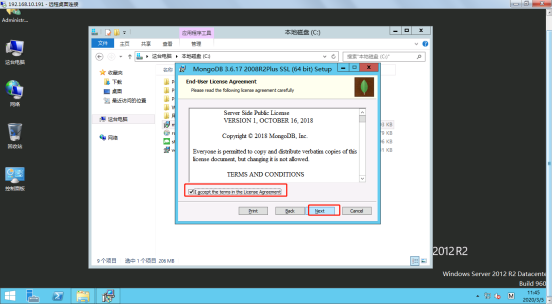
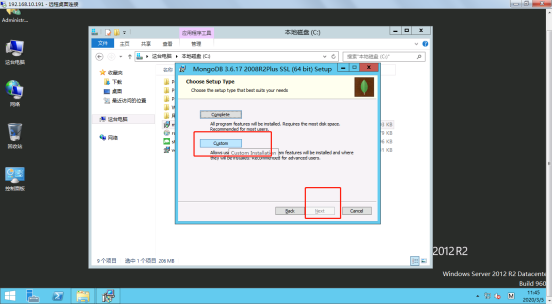
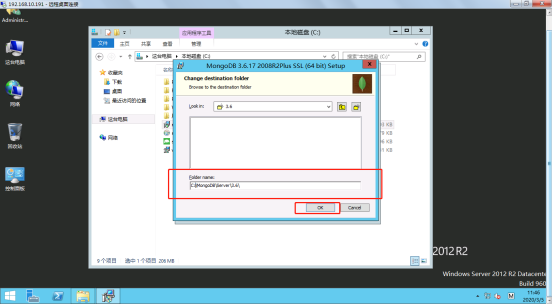
2, the installation process
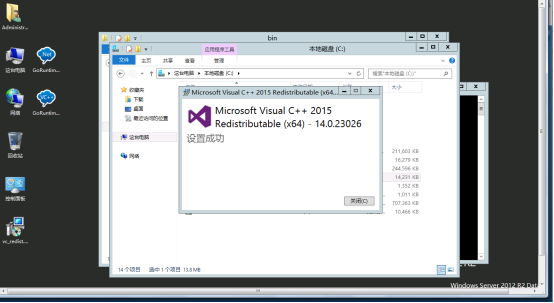
(1) Dual downloaded installation package to install
(2) agree to install check, Next
(3) selecting a custom installation
(4) select the installation path
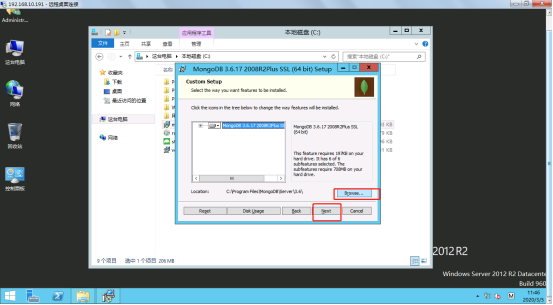
(5) custom installation path
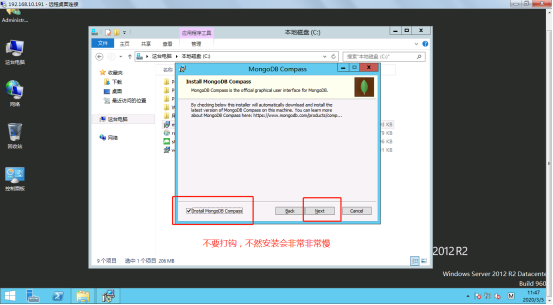
(6) Guide the option to cancel the installation MongDB
Note: If you check the installation will be very slow
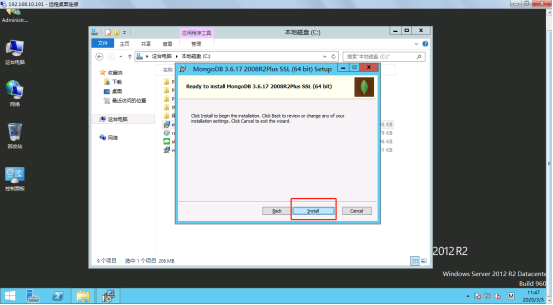
(7) Next install
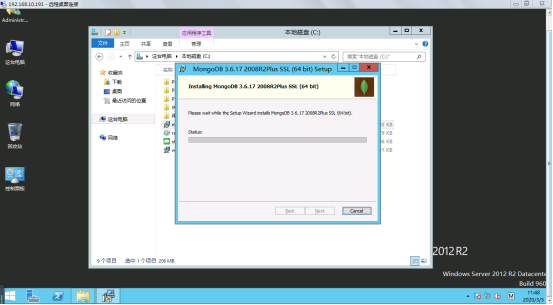
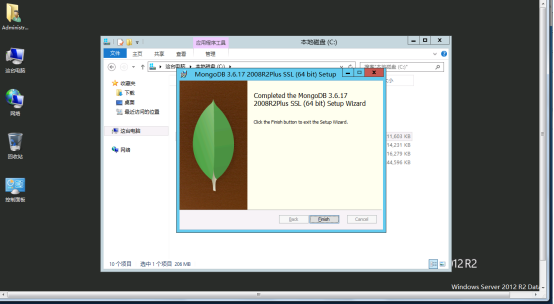
(8) starts mounting
(9) installed
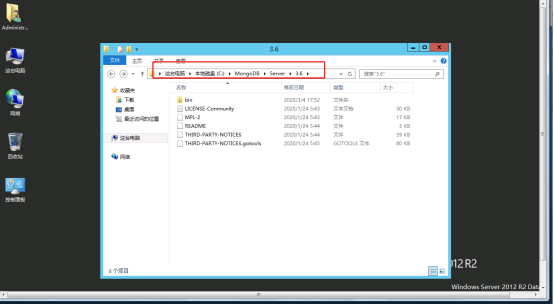
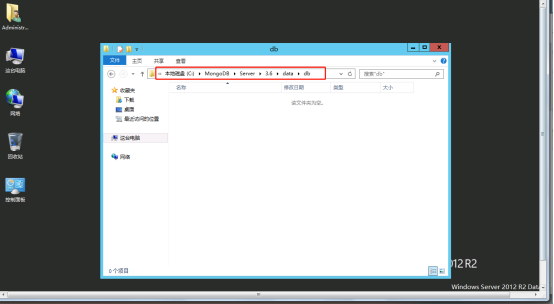
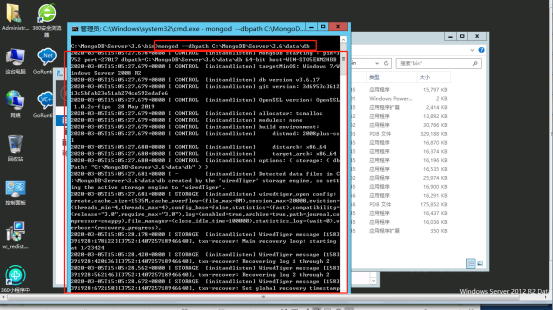
3, create documents, prompt service opening
FIG path after reaching is installed, a new data folder, create a folder in the db data
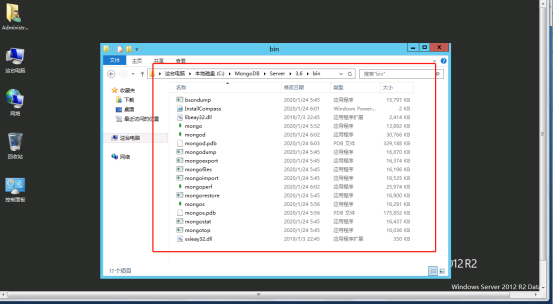
and copy path db
bin reaches click to open folder window Pressing the shift command
4, issue 1
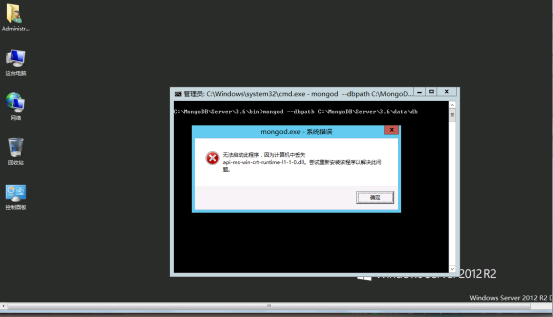
Question 1 Solution
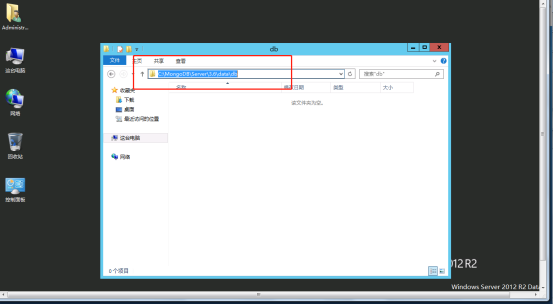
FIG pressing the order to install the patch, can be performed at the start command prompt mongod —dbpath client mongdb
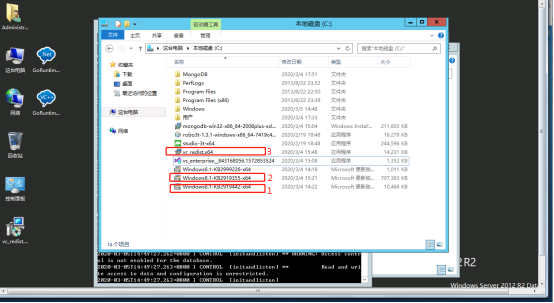
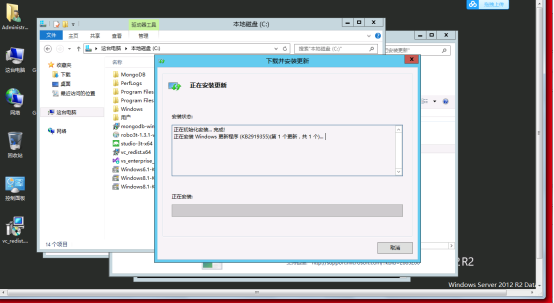
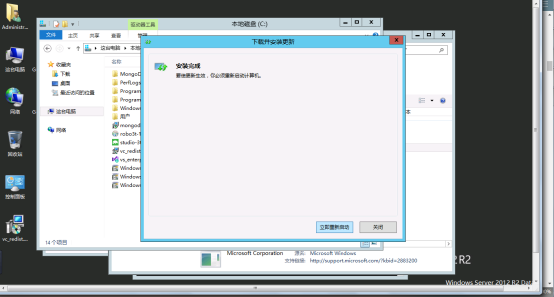
install the update time is longer
below, executing the mongod —dbpath C: \ MangoDB \ Server \ 3.6 \ data \ db after not being given, then the command can be tested
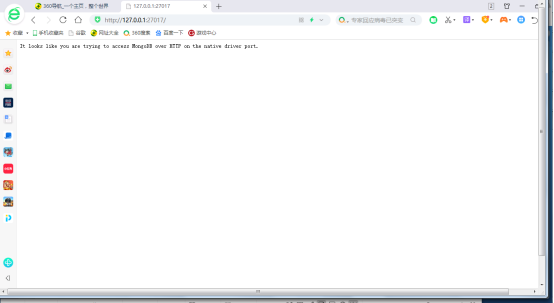
5, the command to open the service test
Test Method: Open Browser Input locahost: 27017 or below 127.0.0.1:27017 echo is the open succeeded
6, to begin the installation service
After installing the service, Mongodb can start as a service, without re-start command line
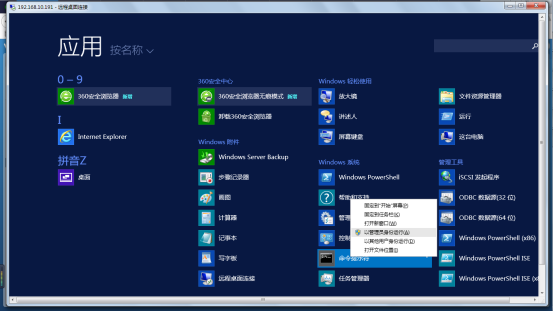
cmd run as administrator
build logs in the log folder data folder
logs in a new folder log file mongo.log
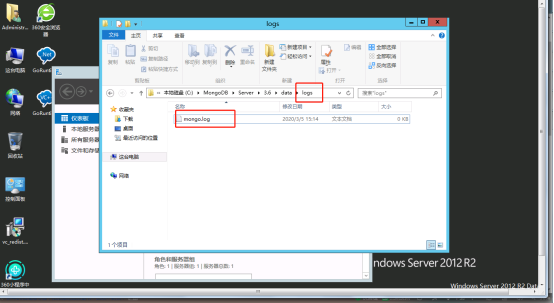
to copy the file path mongo.log
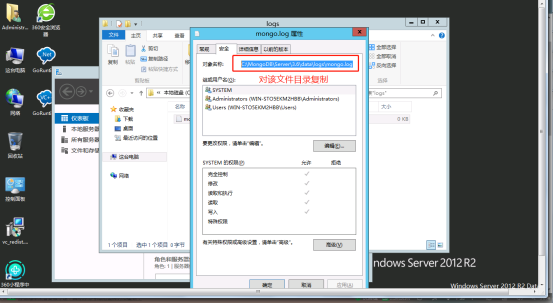
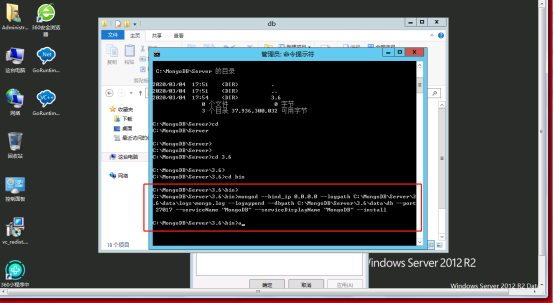
the following command, mongod —bind_ip 0.0.0.0 allow all IP access, a first path is mongo.log path, the second path is the path db folder, Also you can copy and paste into it
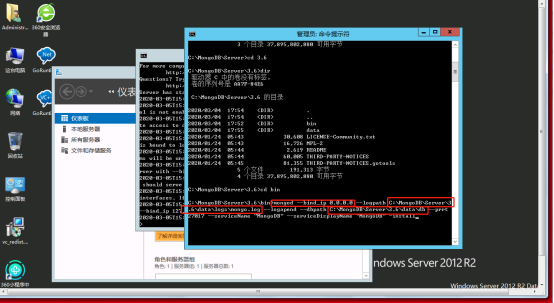
After End Run below, no error is the normal, then type the command words being given after the reboot when the execution if the input command.
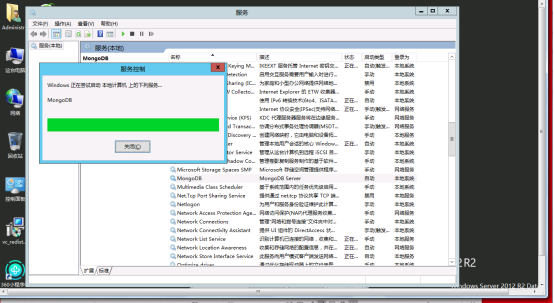
now to find computer services, find MongoDB Server service starts
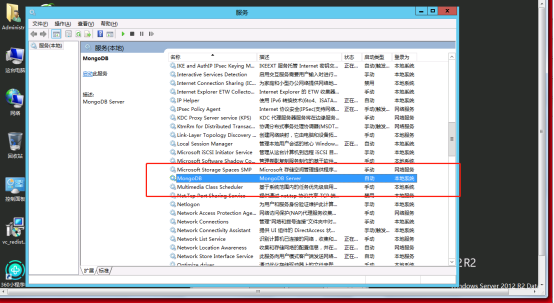
FIG follows after startup is complete, then if an error occurs after start the service during the service start, restart the machine is
7, to install the client
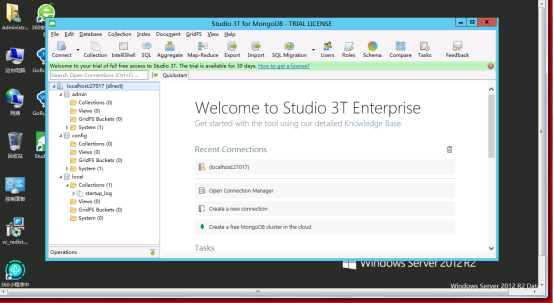
open the client, the client has two graphical Studio is a is a robo3t, this is done by Studio Demo
FIG connector according to the following steps 1,2,3,4 Server, Members (members) where localhost If it is written locally installed client, if the client is connected to the other write Server Server ip address
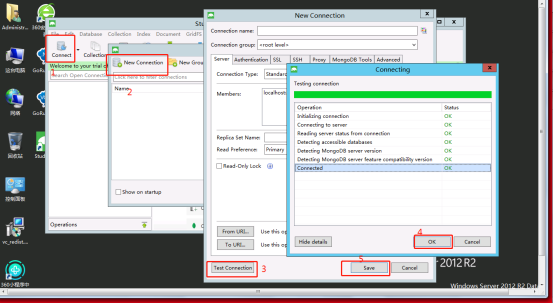
click connection Connect
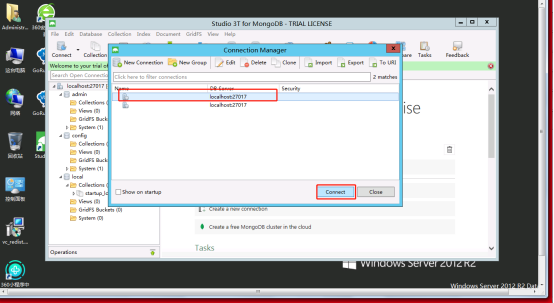
connection is complete, as shown below
As we discuss how to install MongoDB 4.2 on Redhat /Centos 7 in our previous Article How To Install MongoDB 4.2 on RedHat/ CentOS 7 systems, we will discuss in this one How to install MongoDB Community Edition 4.2 4.2 on Windows system using:
- the MongoDB installation wizard
- the msiexec.exe from the command line (cmd.exe)
- Installation MongoDB 4.2 using the MongoDB Installer wizard:
As we can see, installing MongoDB using the MongoDB installation wizard is pretty easy. The pre-requisites of the installation are a Windows system as a supported platform and the MongoDB installer.
Let’s check the supported platforms for the system windows, MongoDB requires x86-64 architecture and supports the following platform:
- Windows 7/Server 2008 R2
- Windows 8/2012 R2 and later
Let’s check the Official MongoDB downloads section to download the MongoDB installer to run the installer:

As we can see above, we can choose the MongoDB version, The Os and the package to download as two formats ZIP format or MSI format.
Let’s start so our Interactive installation on our system windows 8:
Once the downloading of the installer file mongodb-win32-x86_64-2012plus-4.2.2-signed.msi is completing, we initiate the installation process:

Click Next on the screen above and after we accept the terms in the License Agreement’ checkbox:

Click on the button Next to progress further, we have to choose between ‘Complete’ and ‘Custom’ installation:

If we need to choose which programs feature will be installed and where will be installed, it is possible with the custom choice installation:

Considering that we’ve chosen to go by the recommended setup option of ‘Complete’ that will install MongoDB and the MongoDB tools to the default location.
Starting in MongoDB 4.0, the installation process gives us the choice to install just the MongoDB binaries or to set up MongoDB as a Windows service during the install:

In the below screen it appears to trigger the actual installation process by clicking on the Install button:

Since we install and configure MongoDB as a Windows Service during the install, the MongoDB service is started upon successful installation.
After installation, we can check our install directory’s architecture. As we can in our install directory ‘C:\Program Files\MongoDB\Server\4.2’: we have three directories:
- Bin: to store binaries files
- Data: to data in the data directory specified by –dbpath
- Log: to store log files

MongoDB is configured using the configuration file C:\Program Files\ MongoDB\ Server\4.2\bin\mongod.cfg
This is our mongod.cfg in our Demo Install:
# mongod.conf
# for documentation of all options, see:
# http://docs.mongodb.org/manual/reference/configuration-options/
# Where and how to store data.
storage:
dbPath: C:\Program Files\MongoDB\Server\4.2\data
journal:
enabled: true
# engine:
# mmapv1:
# wiredTiger:
# where to write logging data.
systemLog:
destination: file
logAppend: true
path: C:\Program Files\MongoDB\Server\4.2\log\mongod.log
# network interfaces
net:
port: 27017
bindIp: 127.0.0.1
#processManagement:
#security:
#operationProfiling:
#replication:
#sharding:
## Enterprise-Only Options:
#auditLog:
#snmp:
- Installation MongoDB 4.2 using the msiexec.exe:
MongoDB’s Installation using the MongoDB Installer wizard gives us the chance to control the installation process and it is an interactive process based on the installation’s progresses.
Otherwise, if we choose to install MongoDB in silent and unattended, we can use msiexec.exe from the command line.
There are the steps to be followed:
- Open a Windows command prompt/interpreter (cmd.exe) in Administrator mode
- From this command prompt that’s opened, go to the directory where the MongoDB installer is downloaded and run the following command:
msiexec.exe /l*v mdbinstall.log /qb /i mongodb-win32-x86_64-2012plus-4.2.2-signed.msi ^
INSTALLLOCATION=”C:\MongoDB\Server\4.2\”
To personalize the installation directory, we add the option installation. If we want to preserve the default one, we can omit this option.
Starting with Windows 8 or greater, we can use the msiexec.exe to install all MongoDB binaries, including MongoDB Compass. So to omit its installation we have explicitly do it using the argument SHOULD_INSTALL_COMPASS=”0″ as follows:
msiexec.exe /l*v mdbinstall.log /qb /i mongodb-win32-x86_64-2012plus-4.2.2-signed.msi ^
SHOULD_INSTALL_COMPASS=”0″
Moreover, we have the option to install specific MongoDB component sets; we can specify them in the ADDLOCAL argument as follows:
For example, to install just the MongoDB server (mongod.exe) and the mongo.exe shell as well as set up the MongoDB server as a Windows service and include Compass in the installs we can just run this:
msiexec.exe /l*v mdbinstall.log /qb /i mongodb-win32-x86_64-2012plus-4.2.2-signed.msi ^
ADDLOCAL=”ServerService,Client” ^
Provide feedback
Saved searches
Use saved searches to filter your results more quickly
Sign up
Appearance settings
The MongoDB Database Tools are a suite of command-line utilities for working with
MongoDB. Use this guide to install the Database Tools on the Windows
platform.
You can use the MongoDB Database Tools to migrate from a self-hosted deployment
to MongoDB Atlas. MongoDB
Atlas is the fully managed service for MongoDB deployments in the
cloud. To learn more, see Seed with mongorestore.
To learn all the ways you can migrate to MongoDB Atlas, see
Migrate or Import Data.
Starting with MongoDB 4.4, the MongoDB Database Tools are now released separately
from the MongoDB Server and use their own versioning, with an initial
version of 100.0.0. Previously, these tools were released
alongside the MongoDB Server and used matching versioning.
For documentation on the MongoDB 4.2 or earlier versions of these
tools, reference the MongoDB Server Documentation for that version of the tool:
MongoDB Database Tools version 100.10.0 supports the following versions
of the MongoDB server:
-
MongoDB 8.0
-
MongoDB 7.0
-
MongoDB 6.0
-
MongoDB 5.0
-
MongoDB 4.4
-
MongoDB 4.2
While the tools may work on earlier versions of MongoDB server, any
such compatibility is not guaranteed.
The MongoDB Database Tools version 100.10.0 are supported on:
-
Windows 8 and later
-
Windows Server 2012 and later
The MongoDB Database Tools can be installed with an MSI installer, or
downloaded as a ZIP archive. Select the tab below depending on your
desired installation method:
Open the MongoDB Download Center.
Using the drop-down menu on the right-hand side of the page:
-
Select the
Windows x86_64Platform. -
Select the
msiPackage. -
Click the Download button.
Double-click the downloaded MSI installer to install the
Database Tools. During the install you may customize the
installation directory if desired.
You may wish to make the Database Tools available in your system’s
PATH environment variable, which allows referencing each tool
directly on the command prompt by name, without needing to specify
its full path, or first navigating to its parent directory.
Once you’ve installed the Database Tools, follow the instructions
below to add the install directory to your system’s PATH
environment variable.:
-
Open the Control Panel.
-
In the System and Security category, click
System. -
Click Advanced system settings. The System
Properties modal displays. -
Click Environment Variables.
-
In the System variables section, select
Pathand click
Edit. The Edit environment variable modal
displays. -
Click New and add the filepath to the location where
you installed the Database Tools. -
Click OK to confirm your changes. On each other
modal, click OK to confirm your changes.
Once set, you can run any of the Database Tools directly
from your command prompt. Consult the reference page for the
specific tool you wish to use for its full syntax and usage.
Open the MongoDB Download Center.
Using the drop-down menu on the right-hand side of the page:
-
Select the
Windows x86_64Platform. -
Select the
zipPackage. -
Click the Download button.
Double-click the downloaded Zip archive to unpack it and copy the
Database Tools from the bin directory to your computer’s
filesystem.
You may wish to make the Database Tools available in your system’s
PATH environment variable, which allows referencing each tool
directly on the command prompt by name, without needing to specify
its full path, or first navigating to its parent directory.
Once you’ve copied the Database Tools to the desired location on
your filesystem, follow the instructions below to add that location
to your system’s PATH environment variable.:
-
Open the Control Panel.
-
In the System and Security category, click
System. -
Click Advanced system settings. The System
Properties modal displays. -
Click Environment Variables.
-
In the System variables section, select
Pathand click
Edit. The Edit environment variable modal
displays. -
Click New and add the filepath to the location where
you copied the Database Tools. -
Click OK to confirm your changes. On each other
modal, click OK to confirm your changes.
Once set, you can run any of the Database Tools directly
from your command prompt. Consult the reference page for the
specific tool you wish to use for its full syntax and usage.