
How to Fix Modern Setup Host High CPU/Disk Usage in Windows 10
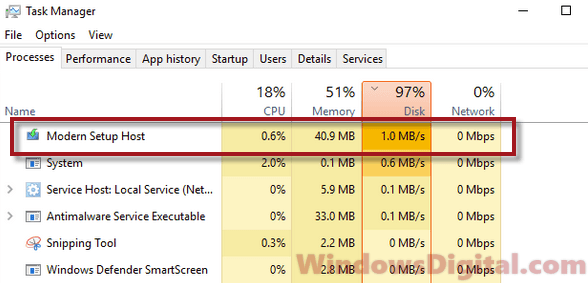
Modern Setup Host (SetupHost.exe) is a Windows process that runs in the background while installing major updates. The problem is that Modern Setup Host has a tendency to cause high CPU and Disk usage. This article is dedicated to helping you fix this issue.

Why Modern Setup Host Causes High CPU/Disk Usage?
Modern Setup Host may consume a lot of your CPU or Disk resources, due to several reasons.
- It may consume close to 100% CPU or Disk resources if Windows downloads a significant update onto a hard drive with a slow read/write speed.
- Modern Setup Host may overload your CPU or Disk is if other resource-intensive tasks run concurrently with SetupHost.exe, thus slowing it down.
- It may cause high CPU or Disk resource consumption if your computer has been infected with malware disguised as SetupHost.exe.
- High CPU/Disk usage may occur due to corrupted or conflicting temporary files on your PC.
- SetupHost.exe may cause high resource usage if Windows Update becomes stuck due to a bug.
In some cases, resource-hogging can be so bad that it causes SetupHost.exe to crash. As a result, you get a «Modern Setup Host has stopped working» error message.
Video Guide on How to Fix Modern Setup Host High CPU and Disk Usage
Table of Contents:
- Introduction
- Solution 1. Run Windows Update Troubleshooter
- Solution 2. Disable Suggestions, App Control, and Background Apps
- Solution 3. Run Deployment Imaging and Servicing Management (DISM) Scan
- Solution 4. Run System File Checker (SFC) Scan
- Solution 5. Clear the SoftwareDistribution Folder
- Video Guide on How to Fix Modern Setup Host High CPU and Disk Usage
Download Computer Malware Repair Tool
It is recommended to run a free scan with Combo Cleaner — a tool to detect viruses and malware on your device. You will need to purchase the full version to remove infections. Free trial available. Combo Cleaner is owned and operated by Rcs Lt, the parent company of PCRisk.com read more.
Solution 1. Run Windows Update Troubleshooter
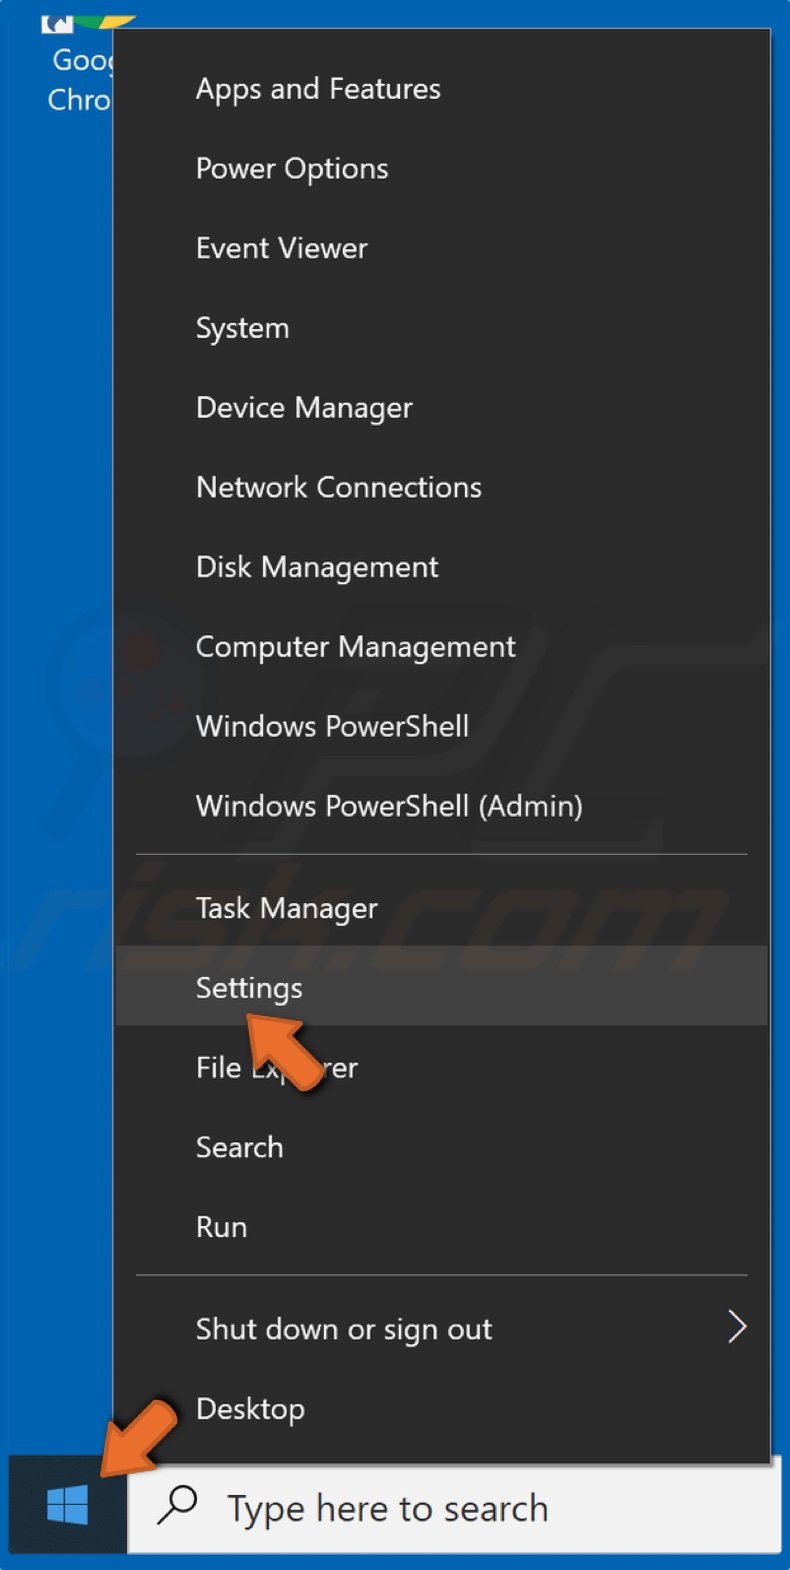
1. Right-click the Start button and select Settings.
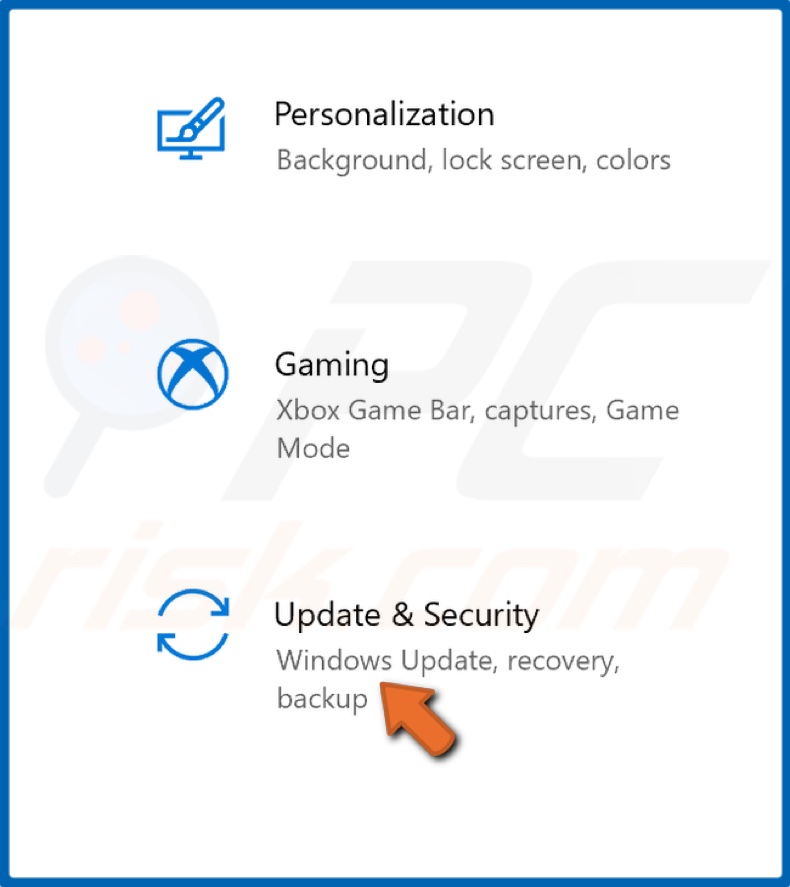
2. Go to Update & Security.
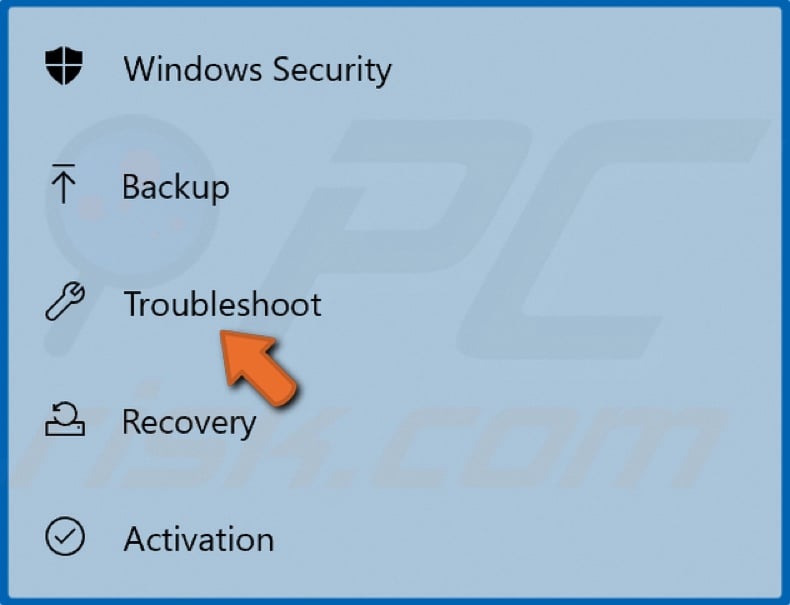
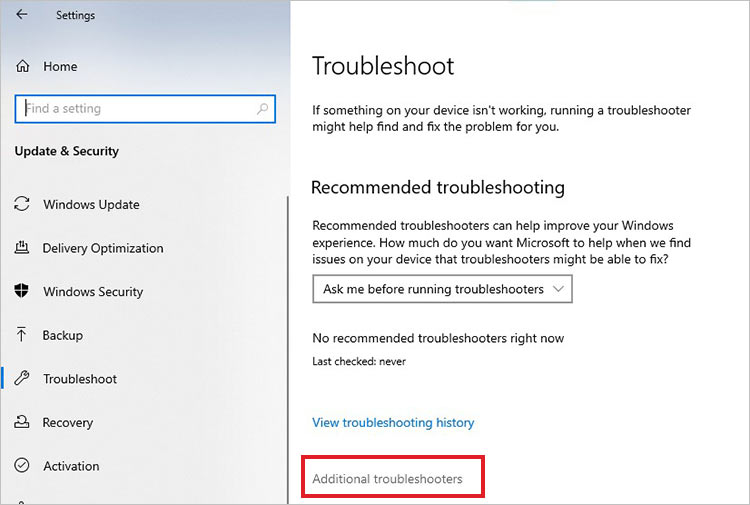
3. Select Troubleshoot.
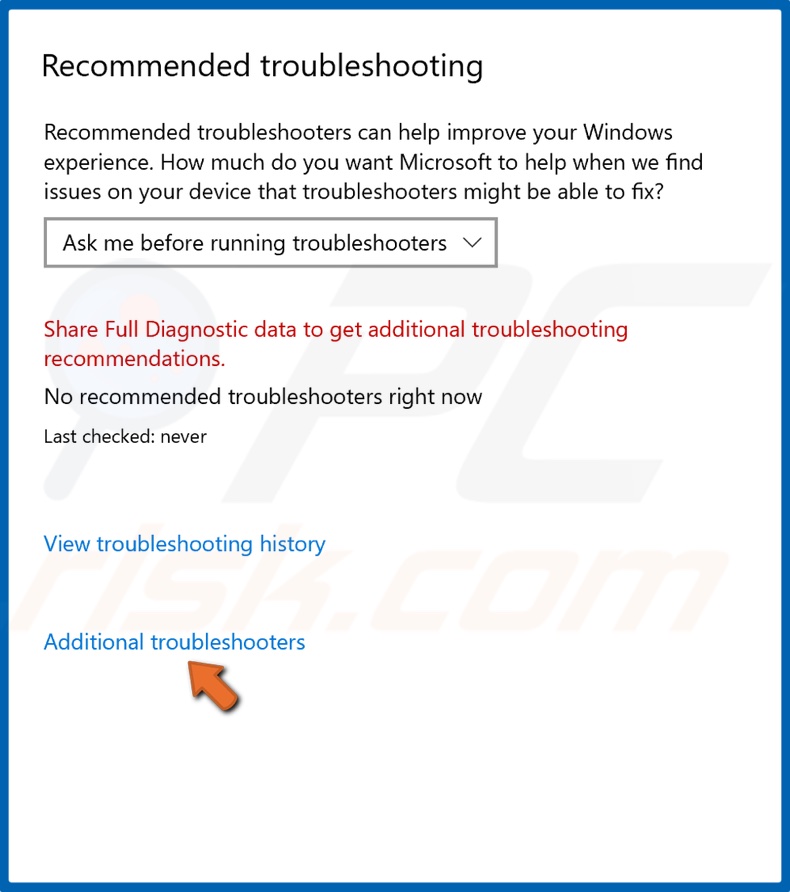
4. Then, click Additional troubleshooters.
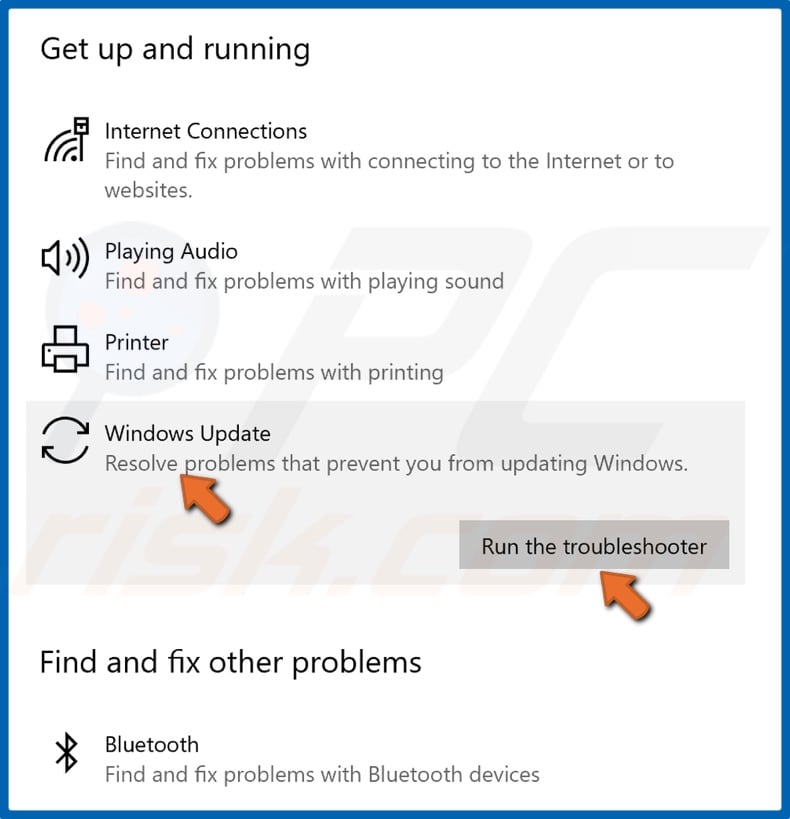
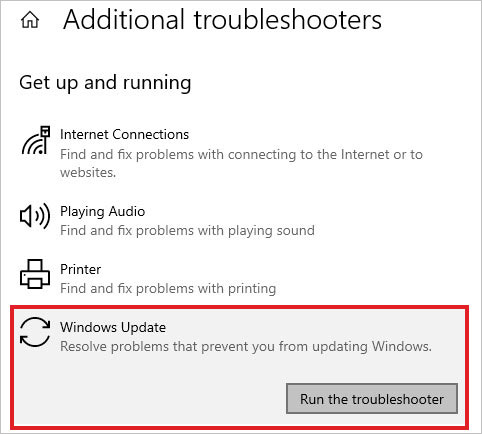
5. Select Windows Update and click Run the troubleshooter.
6. Windows Update troubleshooter will identify the issue and apply a fix automatically.
[Back to Table of Contents]
Solution 2. Disable Suggestions, App Control, and Background Apps
1. Right-click the Start button and select Settings.

2. Select System.

3. Then, select Notifications & actions in the left pane.

4. Uncheck the checkbox next to Get tips, tricks, and suggestions as you use Windows.

5. Then, click the Back button to go back to the main Settings window.

6. Select Personalization.

7. Select Start in the left pane.

8. Toggle off the Show suggestions occasionally in Start option.
9. Then, click the Back button to go back to the main Settings window.
10. Select Update & Security.
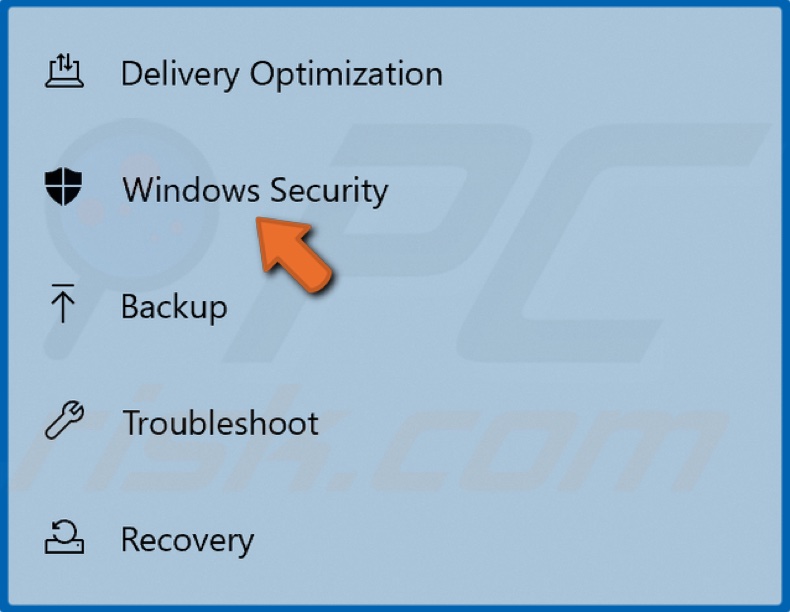
11. Then, select Windows Security in the left pane.
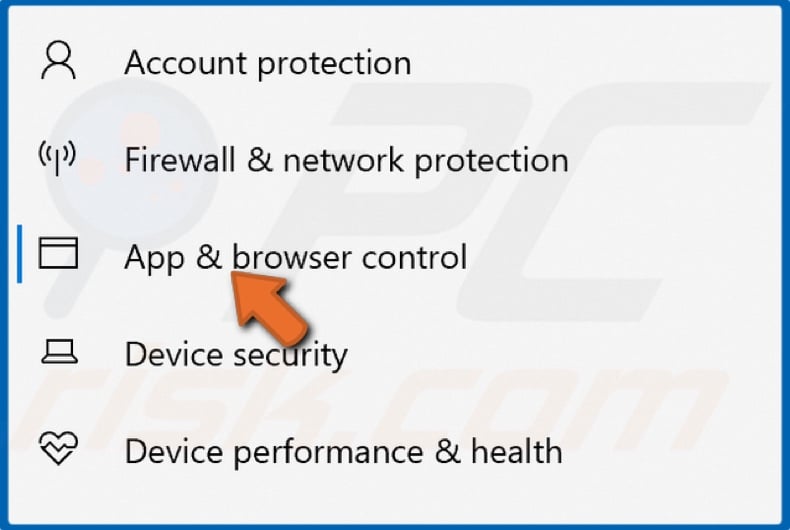
12. Select App & browser control.
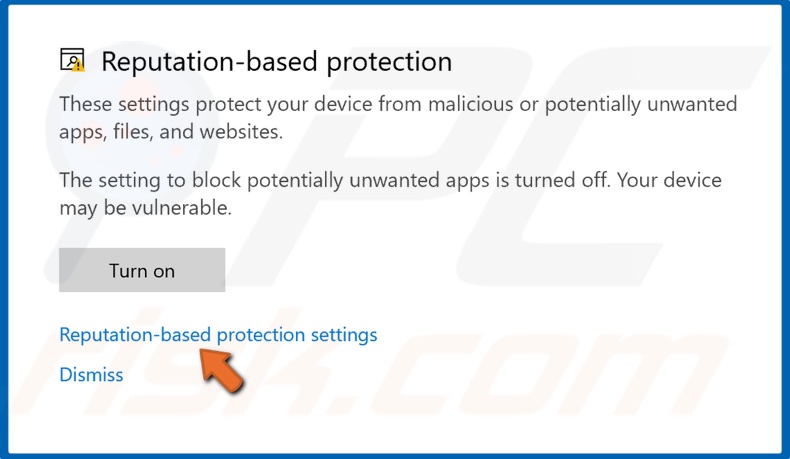
13. In the resulting Windows Security window, click Reputation-based protection settings.

14. Toggle off Microsoft Defender SmartScreen for apps and files, Microsoft Edge, and Microsoft Store apps.
15. Close the Windows Security window.
16. Click the Back button to go back to the main Settings window for the last time.

17. Select Privacy.

18. Select Background apps in the left pane.

19. Scroll through the apps list and toggle off all of the apps you think are unnecessary.
20. Close the Settings window.
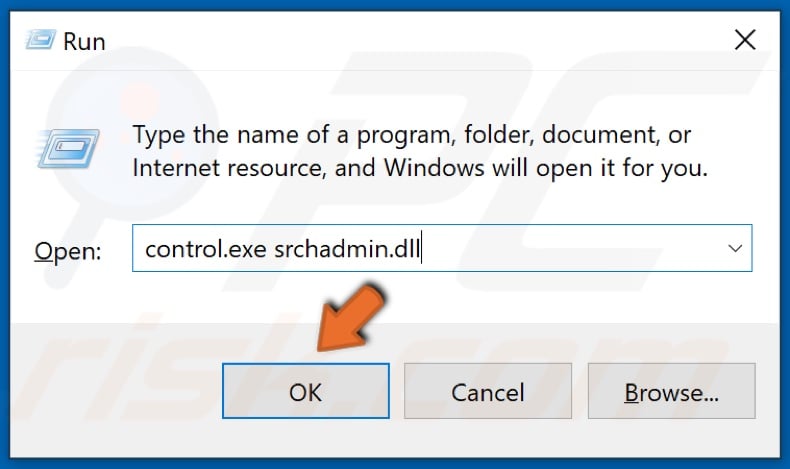
21. Hold down Windows+R keys to open Run.
22. In the Run dialog box, type in control.exe srchadmin.dll and click OK.
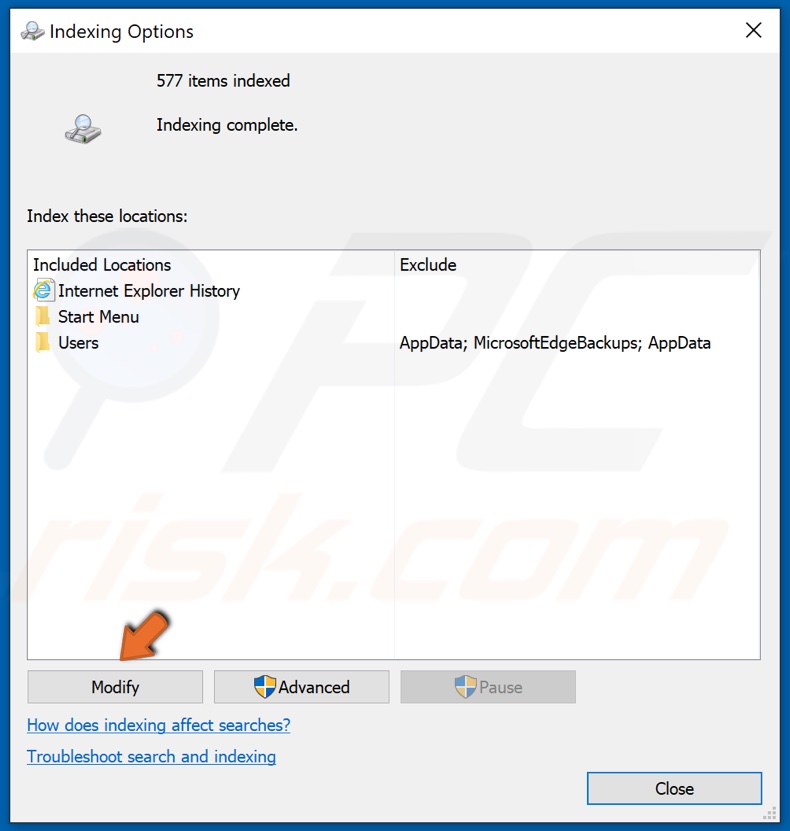
23. Click Modify.

24. Uncheck the options in the top section of the window and click OK.

25. Close the Indexing options window.
[Back to Table of Contents]
Solution 3. Run Deployment Imaging and Servicing Management (DISM) Scan
1. Hold down Windows+R keys to open Run.
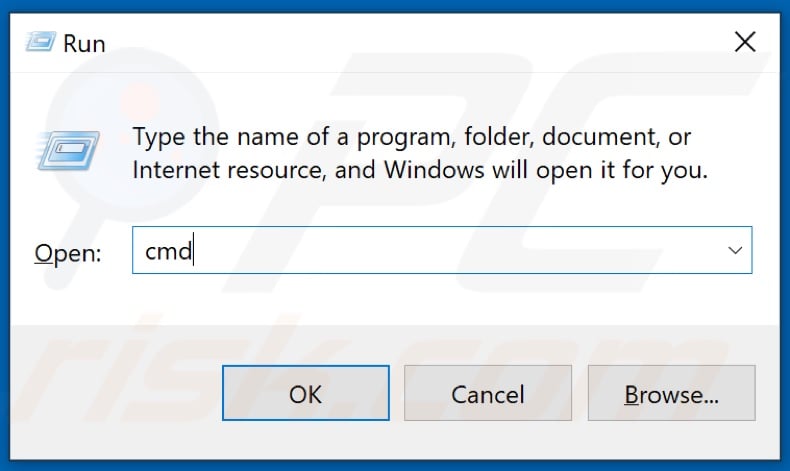
2. In the Run dialog box, type in CMD and hold down Ctrl+Shift+Enter keys to open the elevated Command Prompt.
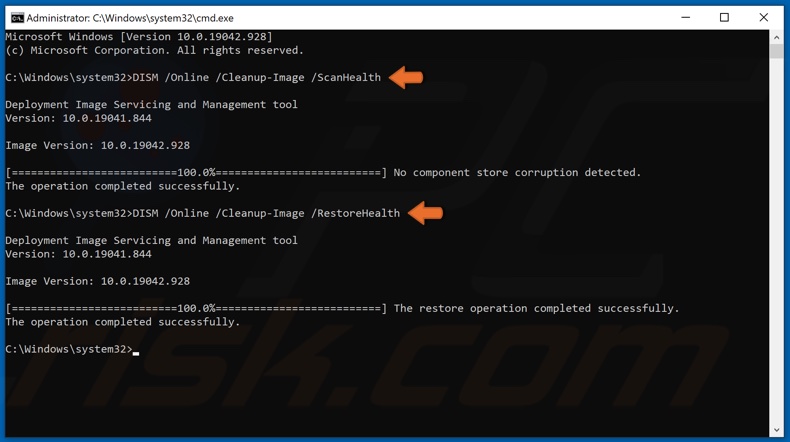
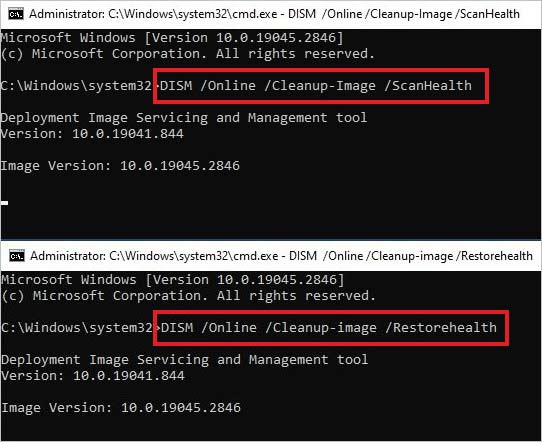
3. First, type in DISM /Online /Cleanup-Image /ScanHealth in the Command Prompt window and press the Enter key.
4. Then, type in DISM /Online /Cleanup-Image /RestoreHealth and press the Enter key.
5. Close the Command Prompt and restart your PC.
[Back to Table of Contents]
Solution 4. Run System File Checker (SFC) Scan
1. Hold down Windows+R keys to open Run.
2. In the Run dialog box, type in CMD and hold down Ctrl+Shift+Enter keys to open the elevated Command Prompt.
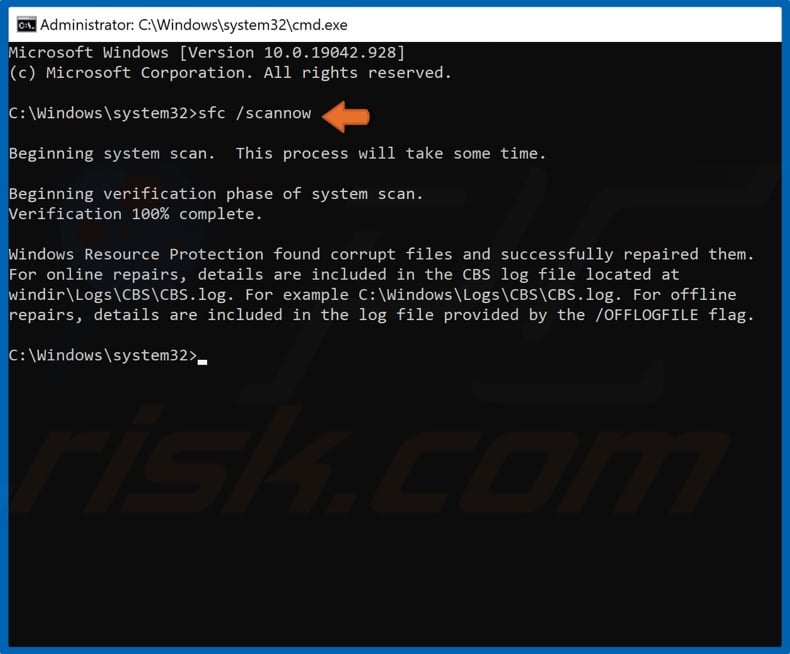
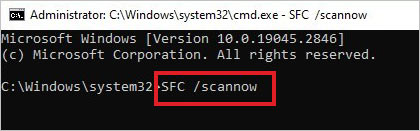
3. Then, in the Command Prompt window, type in SFC /ScanNow and press the Enter key.
4. Then, close the Command Prompt and restart your PC.
[Back to Table of Contents]
Solution 5. Clear the SoftwareDistribution Folder
1. Hold down Windows+R keys to open Run.
2. In the Run dialog box, type in CMD and hold down Ctrl+Shift+Enter keys to open the elevated Command Prompt.
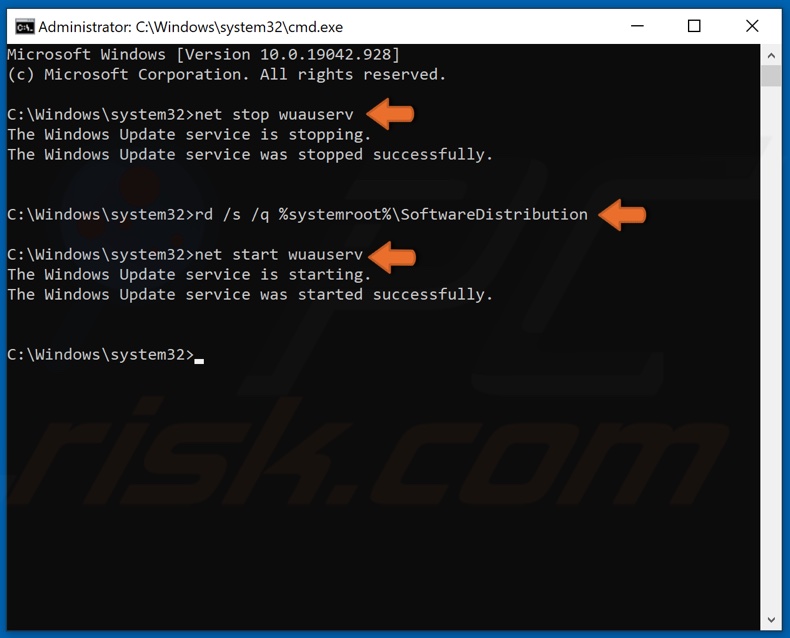
3. First, in the Command Prompt window, type in net stop wuauserv, and press the Enter key.
4. Then, type in rd /s /q %systemroot%\SoftwareDistribution and press the Enter key.
5. Lastly, type in net start wuauserv and press Enter.
6. Close the Command Prompt.
[Back to Top]
Все способы:
- Что такое Modern Setup Host
- Способ 1: Ожидание пользователя
- Способ 2: Очистка кеша обновлений
- Дополнительные решения
- Вопросы и ответы: 0
Что такое Modern Setup Host
Modern Setup Host в Windows 10 – это один из процессов, отвечающих за процедуру поиска, скачивания и установки крупных обновлений операционной системы. Активный процесс Modern Setup Host может создавать повышенную нагрузку на жесткий диск и процессор, что вполне допустимо, но иногда это приводит к существенному снижению производительности накопителя и системы. В таких случаях рекомендуется придерживаться следующих инструкций.
Способ 1: Ожидание пользователя
Если на компьютере активизировался процесс Modern Setup Host, не стоит спешить его завершать через «Диспетчер задач», как это нередко делают пользователи. В таких случаях следует оставить компьютер в покое на некоторое время, желательно завершив работу запущенных приложений. После того как «Центр обновления» выполнит запланированные системой операции, процесс будет завершен автоматически.
Способ 2: Очистка кеша обновлений
Если проблема наблюдается длительное время (несколько часов), исключите проблемы с кешем обновлений Windows 10, очистив его содержимое. Для этого выполните следующие действия.
- Откройте «Диспетчер задач» и завершите процесс Modern Setup Host принудительно.
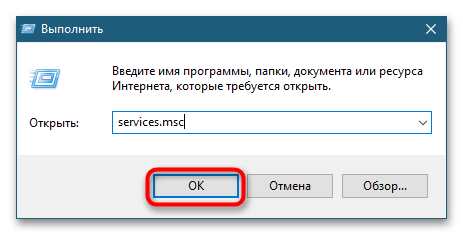
- Запустите оснастку управления службами, для чего вызовите нажатием клавиш Win + R окошко быстрого запуска и выполните в нем команду
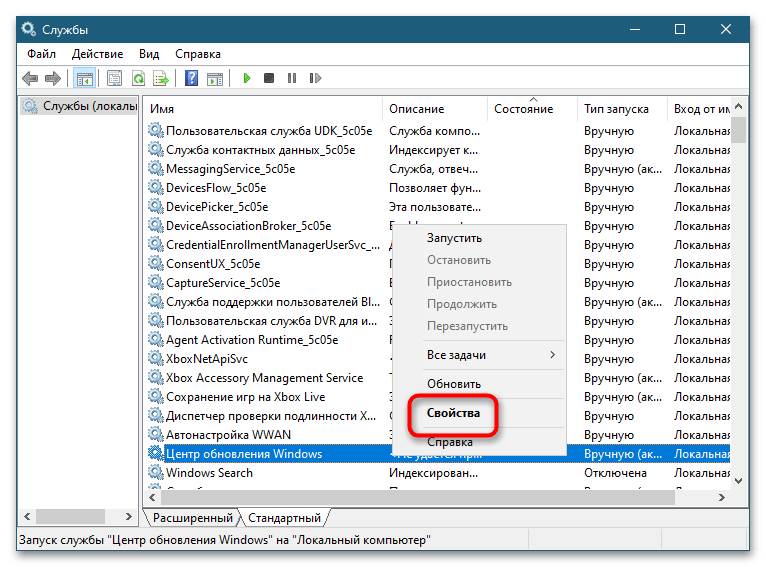
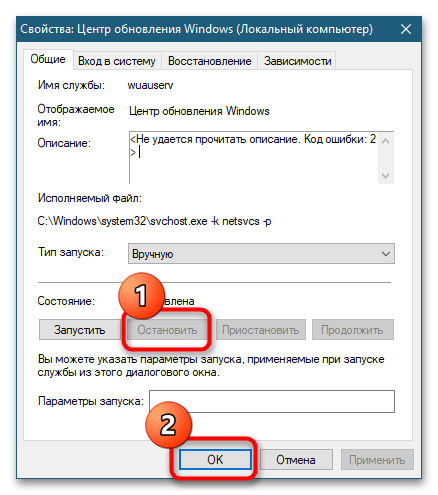
services.msc. - Найдите службу «Центр обновления Windows» и откройте ее свойства двойным кликом.
- Отключите службу и сохраните настройки. Не закрывайте окно оснастки.
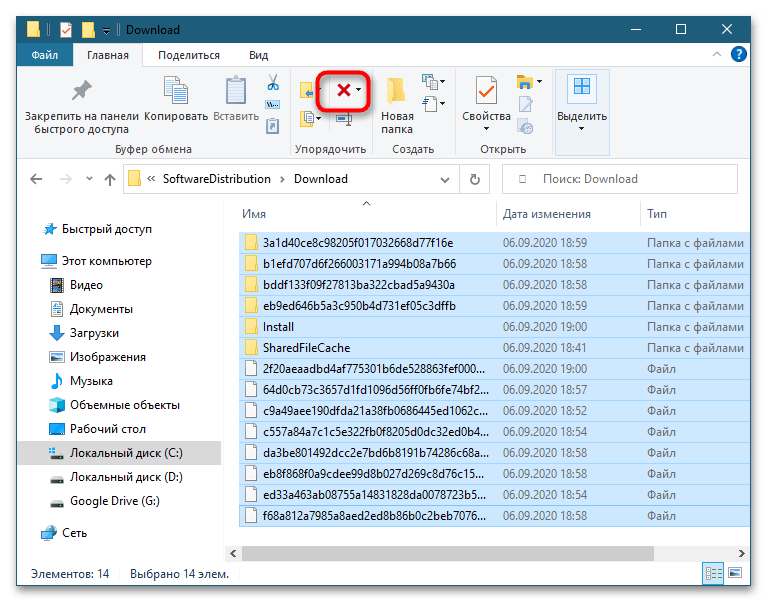
- Перейдите в расположение
C:\Windows\SoftwareDistribution\Downloadи удалите из папки «Download» все файлы. - Вернитесь в окно оснастки управления службами и запустите остановленную службу «Центр обновления Windows».
Дополнительные решения
В большинстве случаев повышенная загрузка диска процессом Modern Setup Host не требует со стороны пользователя каких-либо действий, если только проблема не вызвана другими причинами, не связанными напрямую с работой «Центра обновлений». Если проблему не удается устранить очисткой кеша, можно попробовать временно отключить сторонний антивирус или брандмауэр в случае использования таковых. Также не будет излишним проверить жесткий диск на предмет ошибок файловой системы.
Подробнее: Диагностика жесткого диска в Windows 10
Наша группа в TelegramПолезные советы и помощь
Modern setup host or SetupHost.exe is an essential Windows background process that automates the download and installation of OS-related updates.
While Windows OS has a lot of processes running in the background, occasionally, they act strange and cause various issues like stuttering, freezing, and so on. The modern setup host high CPU usage is one such incident that many Windows users encounter unexpectedly. This could be due to corrupted/damaged system files, malware infection, and more.
So if you observe the ‘modern setup host’ hogging up the CPU resources, follow the easy workarounds explained further in this post.
What is Modern Setup Host or SetupHost.exe?
Before moving onto resolving the issue, let’s learn more about the Modern Setup Host process. As described earlier, the Modern setup host or SetupHost.exe is an executable component responsible for automatically installing Windows updates like bug fixes, minor feature updates, and more.
As its primary function is to install Windows updates, it is not a CPU-intensive task but rather an I/O-intensive task.
What Causes Modern Setup Host High CPU Usage Issues?
Due to the modern setup host high CPU usage issue, many users have observed the performance of their computers plummeting, causing freezing and stuttering. There are many reasons behind this unusual behavior –
- Problematic OS Update
- Outdated OS
- Corrupted system files
- Malware infection
- Incompatible system configuration
- Defective boot drive
- Clashing background processes
Methods to Fix Modern Setup Host High CPU Usage Issue
If you are a user affected by the modern setup host high CPU usage problem, you need not look any further for solutions. In the proceeding section, you will learn how to use methods to fix the underlying issues resulting in modern setup host high CPU usage issue on your Windows PC.
Method 1: Check for Malware
Malware or virus infection is one of the major issues behind the modern setup host high CPU usage. If you suspect a malware doing this on your computer, use a reliable and renowned antivirus software to scan your computer and virus. You can also use Windows Defender for the same.
Method 2: Perform SFC & DISM Scans
If there are damaged, missing, or corrupt system files, it can lead to the Task Manager showing modern setup host high CPU usage. A damaged OS image can also be behind this. To fix the SetupHost.exe high CPU usage problem, run the System File Checker (SFC) and DISM commands in the command prompt. Here’s what to do –
Use DISM commands to fix broken or damaged OS image –
- Press WINDOWS + R and type CMD.
- Press CTRL + SHIFT + ENTER to open CMD as administrator.
- Type and execute the following commands one by one –
DISM /Online /Cleanup-Image /ScanHealth
DISM /Online /Cleanup-image /Restorehealth
- Wait for the process to end.
Use the SFC command to scan & fix system file-related errors –
- After executing DISM commands, execute the following command – SFC /scannow.
- Let the scan complete.
- Restart your PC once the scan is over.
Method 3: Run the Windows Update Troubleshooter
If you have recently installed some Windows updates and observed the modern setup host’s CPU or memory usage through the roof, it can be due to a bad update. To fix this, run the Windows update troubleshooter to fix update-related errors. Here are the steps for doing this –
- Press WINDOWS + I to open the Windows settings app.
- Click on Update & Security.
- Click on Troubleshoot in the left pane.
- On the right side, click on Additional Troubleshooters.
- Select the Windows Update troubleshooter and click on Run the troubleshooter.
- Let the troubleshooter detect problems. Once it completes the scan, follow the steps as displayed on the screen.
Method 4: End the Modern Setup Host Process from the Task Manager
As the modern setup host or SetupHost.exe is not a critical process for Windows, you can end it from the task manager to fix the modern setup host high CPU usage issue on your computer. Here are the steps to do this –
- Right-click on the taskbar and click on Task Manager from the context menu.
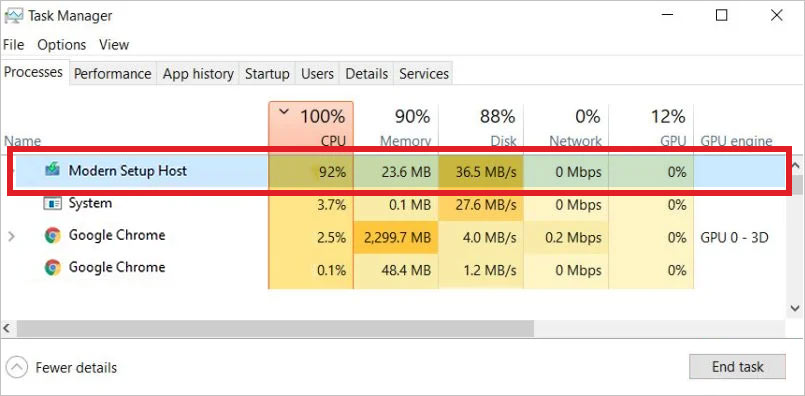
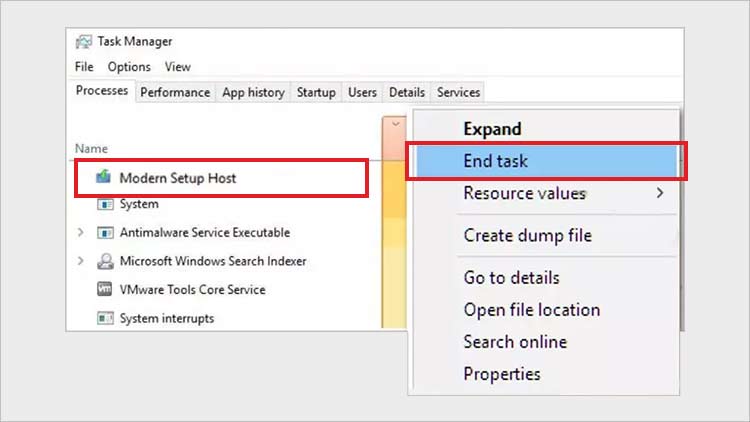
- In the task manager, look for the Modern Setup Host or SetupHost.exe process.
- Right-click on it and click on End task from the context menu.
Eliminating the modern setup host process will help you fix the high CPU usage and resolve the sluggish behavior of your computer.
Method 5: Temporarily Disable Windows Update
If your PC has become slow and shows signs of stuttering, you can temporarily disable the Windows Update service. As the modern setup host is related to Windows updates, disabling the update service will help you fix the high CPU usage issue. Here are the steps –
- Press WINDOWS + R and type services.msc. Press Enter.
- The Services window will appear.
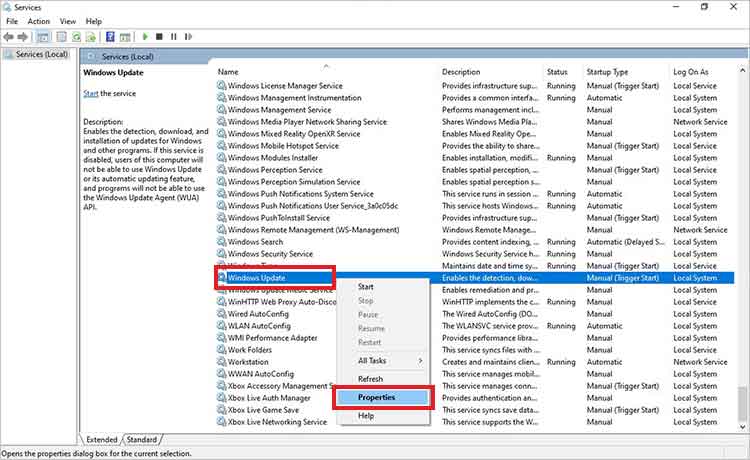
- Look for the Windows Update service and select it.
- Right-click on it and click on Properties. Alternatively, you can simply double-click on it to open properties.
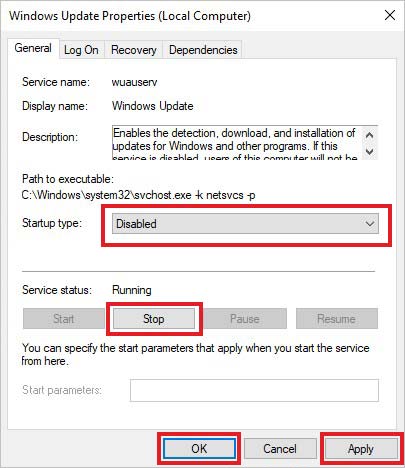
- In the Properties window, navigate to the Service Status section and click on Stop.
- Click on the pull-down menu against the Startup Type and select Disabled.
- Click on Apply and OK to save the changes.
Notes –
- As disabling the Windows Update service for too long leaves your computer vulnerable to viruses and malware. Hence, enable it after some time to get the latest security updates.
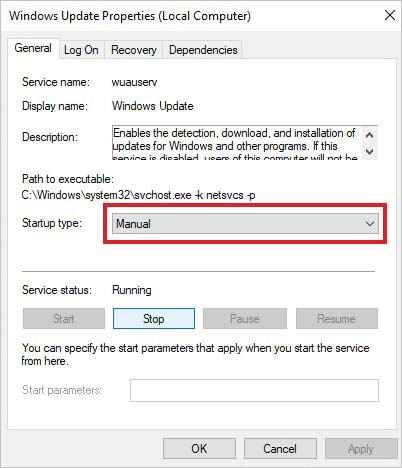
- After enabling, you can also make this process manual instead of automatic. Simply select the Manual in the pull-down menu against the Startup Type label.
Method 6: Disable Unnecessary Components
Some users reported fixing the modern setup host high CPU usage problem by turning off certain unnecessary components like Tips, App suggestions in the start menu, Smartscreen, Background applications and file indexing. You can refer to this user comment for more information.
Method 7: Perform Clean Boot
Conflicting third-party applications and processes can sometimes cause problems like modern setup host high CPU usage. If you observe the SetupHost.exe to show high CPU usage in the Task Manager, perform a clean boot to eliminate any process/application conflicts. Carefully follow the steps below to perform a clean boot –
- Press WINDOWS + R to open the Run utility.
- Type in msconfig and press Enter.
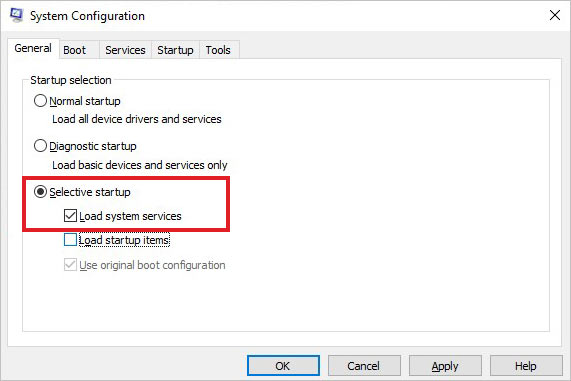
- Under the General tab, choose the Selective Startup option and checkmark the Load System Services option.
- Then, head to the Services tab, select Hide all Microsoft Services and click on Disable.
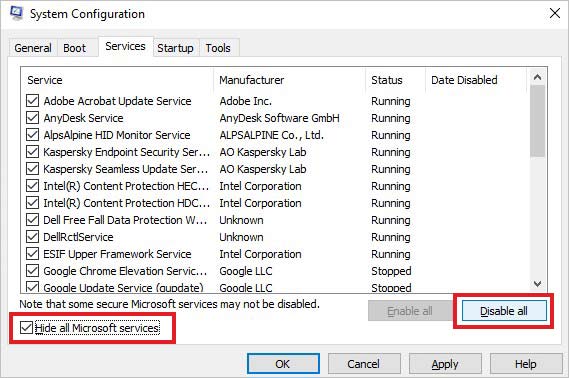
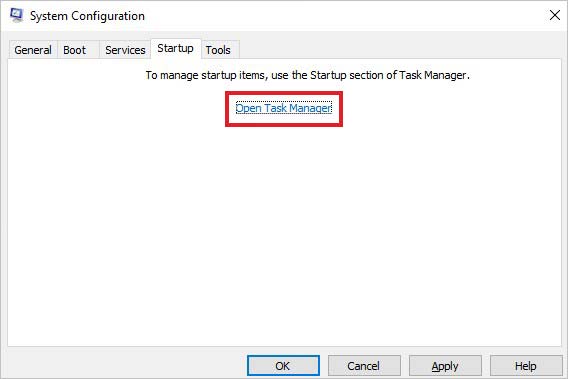
- Finally, go to the Startup tab and click on Open Task Manager.
- Disable all the startup programs programs one by one.
- Exit the Task Manager and press Apply and OK.
- Restart the computer.
Your PC will boot in a clean boot state. Check if the task manager still shows modern setup host high CPU usage. Gradually, enable the programs to circle out the problematic app/process.
Pro Tip
Sometimes, high CPU usage can cause unexpected freezing or stuttering, leading to an irresponsive computer. In some severe conditions, frequent system freezes can even cause system crashes, thereby making the system unbootable. This will prevent you from accessing your data on the computer.
To recover your data from an irresponsive or unbootable computer, you can take the help of a professional data recovery software like Stellar Data Recovery Professional. With its advanced algorithms, you can easily recover hard-to-find files lost in various data loss scenarios and from numerous storage devices, such as HDD, SSD, SD Card, and more. Want to know how to use this software for recovering data from a crashed computer? Use this detailed guide.
Say Goodbye to High CPU Usage
The Modern Setup Host or SetupHost.exe is a Windows process responsible for automatically downloading and installing updates. It runs in the background without interfering with other processes and applications. Sometimes, however, due to damaged system files, errors, or malware, background processes can cause problems.
In this post, we shed some light on various reasons behind the modern setup host high CPU usage problem and deep-dived into methods that can be used to fix it. Hence, if your computer has become sluggish due to the SetupHost.exe showing high CPU usage, you can use the methods explained above.
High CPU usage by Wudfhost.exe
FIXED – Antimalware service executable high CPU usage problem
What is the use of SetupHost.exe?
The modern setup host or SetupHost.exe is a vital component of Windows OS that runs in the background. It is responsible for automatically downloading and installing OS updates.
Is SetupHost.exe a malware?
SetupHost.exe is a vital system file. However, sometimes, malware can mimic it to cause high CPU usage issue, leading to unexpected system freezes and stuttering.
What is the quickest way to fix the modern setup host high CPU usage problem?
Restarting the computer is the simplest and quickest way to fix the modern setup host high CPU usage error.
Was this article helpful?
YES1
NO
Many things can negatively impact your computer’s performance, and this warrants an investigation to get to the bottom of it. Many Windows users usually open Task Manager to see if there’s something consuming system resources and causing performance dips. And, if through your investigation, you find that the problem is Modern Setup Host causing high CPU usage, we’re going to show you how to fix this.
What Is Modern Setup Host on Windows?
Modern Setup Host is a Windows component that runs in the background during a Windows update to ensure that the installation process goes smoothly. After Windows installs the update, Modern Setup Host also aids in making sure that everything is configured correctly to work well with the system, especially if it is a Feature Update. Another thing it does is ensure that Windows is running smoothly in terms of stability and that there aren’t any security vulnerabilities.
As you can see, it is an extremely important process.
Why Is Modern Setup Host Causing High CPU Usage?
Many things can alert you that something on your computer is being wasteful with system resources. In the best-case scenario, your computer can become sluggish, and, in the worst-case scenario, it might outright crash. If Modern Setup Host is the culprit behind this, causing high CPU usage, the following could be the reasons why:
- There are corrupt or missing system files on your computer.
- Something is wrong with the Windows Update process.
- There are corrupt or conflicting update files on your computer.
- There’s a conflict with a third-party program or application.
Let’s look at how to fix all of these things that can affect Modern Setup Host.
How to Fix it Modern Setup Host Causing High CPU Usage
There are several things you can do to stop Modern Setup Host from causing high CPU usage, and we’re going to cover several of them in this section. And if none of them work and the situation gets so bad that you can’t operate your PC efficiently, you can consider resetting your Windows Computer.
1. Run an SFC or DISM Scan
When your computer has corrupted, damaged, or missing system files, it can affect system components, including Modern Setup Host. This can cause these components to not function properly, leading to high CPU usage. To fix this, you can repair or replace the affected Windows system files using built-in tools like the SFC and DISM scan.

Once you run the scans, restart your computer and check if Modern Setup Host is still causing high CPU usage.
2. Use the Update Troubleshooter
The Update Troubleshooter is a tool on Windows that can help diagnose and fix common issues related to Windows Updates. And since Modern Setup Host is integral to the Windows Update process, running the troubleshooter can also help fix issues that affect it, including what’s making it cause high CPU usage.
To do that, you can learn how to run any troubleshooter on Windows, including the Update Troubleshooter.
3. Delete the Contents of the SoftwareDistribution Folder
Before Windows installs an update, it will store it in the SoftwareDistribution distribution folder temporarily. So, if one of the update files there is corrupt, it can cause Modern Setup Host to use more resources than it needs to. If you clear this folder, you can potentially solve the issue.
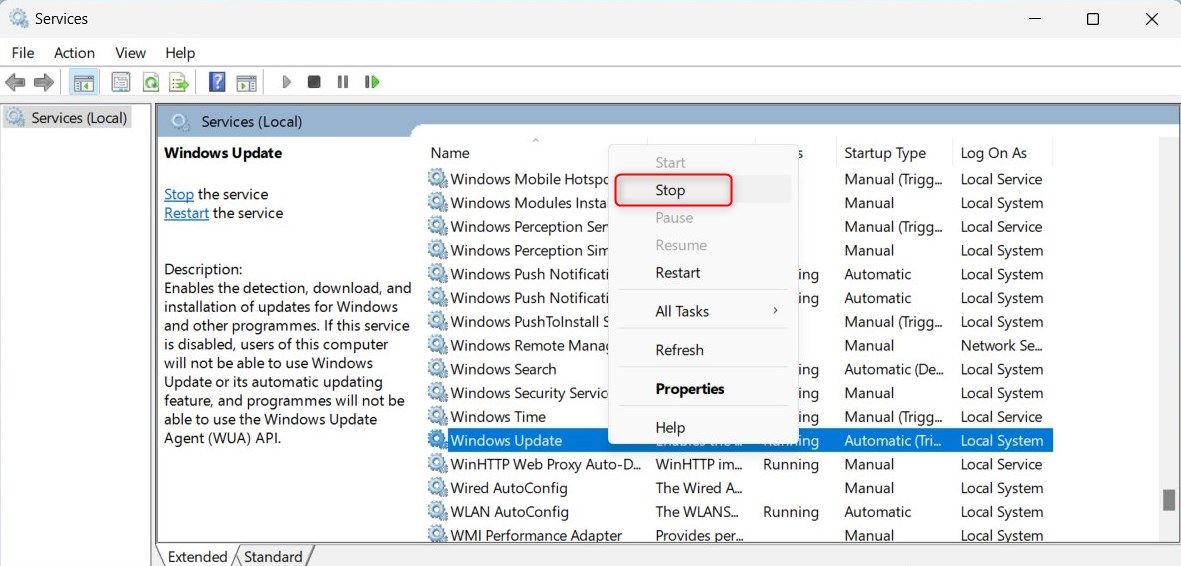
First, you need to stop the Windows Update service in case it is using the files in the SoftwareDistribution folder. To do that, press Win + R to open Windows Run. Type services.msc in the text box and then press the Enter key to open the Services window.

Find Windows Update in the list of services, right-click it, and select Stop.
Once the service stops, go to the SoftwareDistribution folder by opening the Windows File Explorer and heading to C: > Windows > SoftwareDistribution.
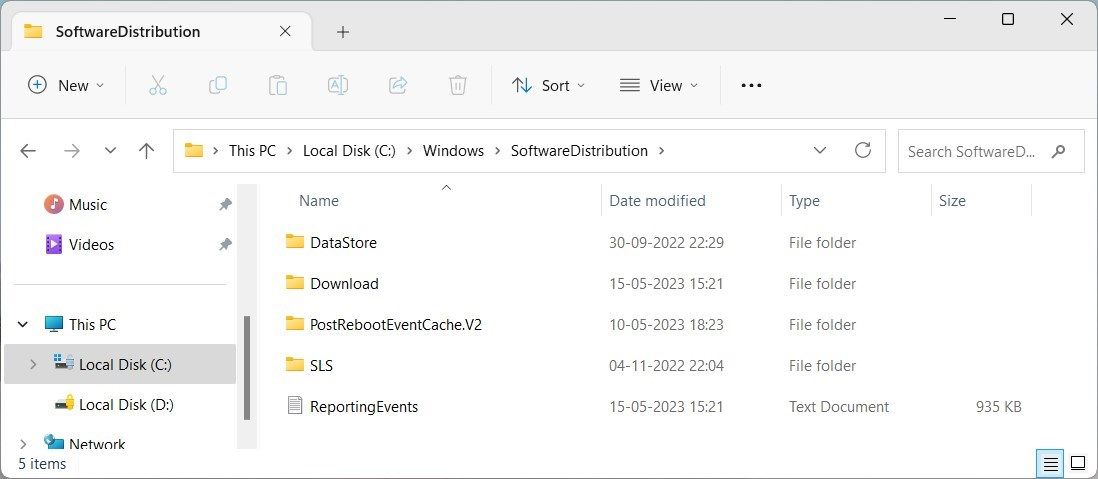
Now, press Ctrl + A to select everything inside the folder and press Shift + Delete. In the prompt, confirm that you want to clear the folder by clicking on Yes.
4. Try a Clean Boot
A clean boot can help you rule out third-party programs and services that could conflict with Modern Setup Host. In this mode, Windows will launch with only the essential programs and services it needs to run, allowing you to rule out the culprit. Luckily, launching Windows in a clean boot state is easy, and the instructions are the same for both Windows 10 and 11.
Stop the Modern Setup Host From Negatively Impacting Your Computer
Many things can cause high CPU usage on a Windows computer, and one of them is the Modern Setup Host. This process should be able to do its thing rather quickly when everything is in order during a Windows Update. But if there’s something affecting the update process, it can stall and cause high CPU usage.
So, try fixing corrupted or damaged system files, using the Update Troubleshooter, clearing the SoftwareDistrubiton folder, or performing a clean boot. Hopefully, the problem will go away before you have to reset your computer.
If you notice that your computer suddenly slows down and becomes laggy, and when you check the task manager, you find a process called Modern Setup Host (SetupHost.exe) causing high CPU usage and disk usage in Windows 10 or Windows 11, this guide will explain what the process is and how to fix the issue.
Also see: High CPU Usage After Windows 11/10 Update (Fix)
What is Modern Setup Host? Is it a virus?
Modern Setup Host, also often known as SetupHost.exe, is a Windows process responsible for installing Windows updates, particularly major updates (once in a few months), in Windows 10 and Windows 11. The process usually runs in the background when there’s an update ready to be installed, whether your computer is idle or active at the moment.
This can sometimes be a concerning issue when you’re working on something or playing a game, and the Modern Setup Host suddenly starts running and using up a lot of CPU and disk resources, causing things to slow down or game to lag.
In most cases, Modern Setup Host will disappear on its own once it completes the necessary update installation. Depending on your computer’s performance, the process typically takes about 15 to 30 minutes, but it can take several hours if your hard drive has a slow write speed or if something else is running in the background that slows down the setuphost.exe process.
Modern Setup Host (setuphost.exe) is not a virus if it is the genuine file. But, any process can become malicious if malware disguises itself as the process. If you’re worried about it, just scan the process with antivirus software.
How to fix Modern Setup Host high CPU and disk usage issue
Since the Modern Setup Host process installs necessary updates for your PC, it’s best to just allow it to run for a while. As mentioned earlier, the process duration depends on your computer’s performance. Try letting it run for several hours.
The process shouldn’t run too frequently, as it usually only runs when there’s a major update, which typically occurs every few months. When it does run, it’s usually installing a one-time, large update and will be gone on its own once its job is done.
Kill the Modern Setup Host or SetupHost.exe process
You can choose to kill the process by selecting Modern Setup Host or setuphost.exe from the Task Manager and then clicking on End Task. This action terminates the process immediately, and it should remain off until your next restart.
Upon your next boot-up, when it detects an update needs to be installed, Modern Setup Host will run again. This solution should only be considered as a temporary fix.
Can I delete Modern Setup Host?
No, you can’t delete the Modern Setup Host process, even with admin privileges. It’s a very important component for installing important updates on your Windows 10 or Windows 11 PC.
Even if you find a way to delete it, we highly recommend against doing so, as it will break the Windows Update process.
Run DISM to check for Windows Update error
Killing the Modern Setup Host process is only a temporary fix. The process will continue to cause high CPU or disk usage as long as its job remains unfinished. If you’ve already tried allowing Modern Setup Host to run overnight, but it’s still causing high CPU or disk usage the next day, try running DISM (Deployment Image Servicing and Management) and Windows Update troubleshooter to check for and fix Windows Update errors.
To run DISM, go to the Start menu. Search for command prompt. Right-click it from the search result and then select Run as administrator. In the elevated command prompt, enter the following command followed by the Enter key:
Dism /Online /Cleanup-Image /RestoreHealth
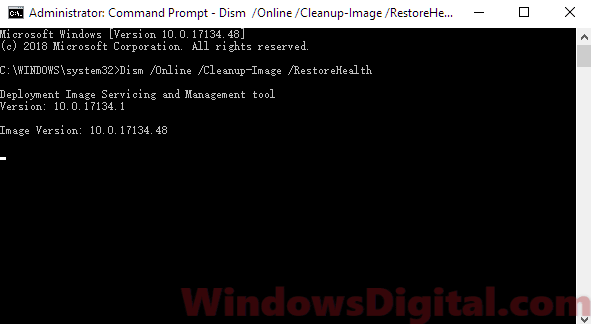
DISM is a built-in Windows tool designed to automatically replace files and correct service problems.
Once the process is completed, restart your PC and try to run Windows Update again, or allow Modern Setup Host to run when it starts itself in the background. If DISM fixes any Windows Update issues, Modern Setup Host should be able to successfully install the updates and disappear on its own.
Disable Windows Update / Modern Setup Host
If nothing works and you don’t care about getting the latest updates, here’s how to disable Windows Update entirely. We do not recommend this, as Windows Update won’t be able to run and get crucial security updates for your computer. However, you can always turn it back on by repeating the steps below and choosing Automatic for the service.
- Press Win+R keys to open the Run window.
- Type services.msc and then click OK.
- In the Services window, look for the service called Windows Update.
- Double-click on the Windows Update service.
- Under Startup type, choose Disabled.
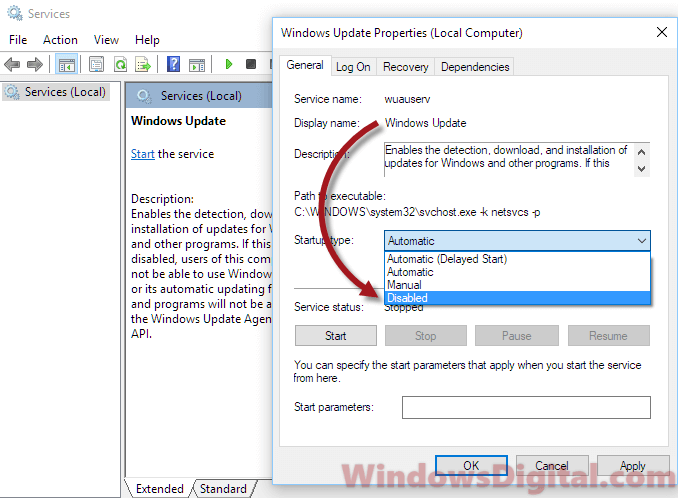
- Restart your PC.