
F9 -> Command -> Directory hotlist и там указываешь директорию, где у тебя всё монтируется.
ados ★★★★★
()
- Ссылка
Ответ на:
комментарий
от hargard
Оно то, да не то. Можно только /run/media/user поставить, а хотелось бы чтобы сразу в корень точки монтирования и само понимало что что-то новое смонтировано.
justin_case ★
()
автор топика
- Показать ответ
- Ссылка
Ответ на:
комментарий
от justin_case
Если ты продвинутый пользователь, то можешь написать демон, который парсит вывод mount и собирает точки монтирования в одной директории, что есть в hotlist, который тебе тут все советуют. Ну или скрипт для F9 -> Command -> External panelize. Keep It Simple Stupid, короче. Не надо усложнять подобными хотелками простой mc, у которого есть hotlist (которым лично я не пользуюсь — мне достаточно отдельной директории где я кидаю симлинки).
А если ты админ локалхоста, то тебе достаточно монтировать свои флешки в одной диретории, которая может быть занесена в hotlist.
Вот у меня система вся построена частью на жёстком диске, а частью на SSD и поэтому у меня в выводе mount такая каша, что я не понимаю в чём удобства того чего ты хочешь. Поэтому я пошёл по пути админа локалхоста.
ados ★★★★★
()
Последнее исправление: ados
(всего
исправлений: 1)
- Показать ответы
- Ссылка
Ответ на:
комментарий
от ados
можешь написать демон, который парсит вывод mount и собирает точки монтирования в одной директории…
Наверно, вместо этого можно просто осилить настройку /etc/udev/rules.d/
ados ★★★★★
()
- Ссылка
Ответ на:
комментарий
от ados
то тебе достаточно монтировать свои флешки в одной диретории
оно и так все складывается в /run/media/user/четотам
Просто на дос нафигаторах можно было сразу попадать в корень нового диска. Но и это терпимо, хотелось бы сразу хоткей который перенесет одну из панелей в ту самую /run/media/user без лишних вопросов вида «выберите в списке состоящем из 1 пункта и нажмите энтер» как control-\
justin_case ★
()
автор топика
- Показать ответ
- Ссылка
Ответ на:
комментарий
от ados
Продвинутый пользователь тратит своё время на написание демонов, чтобы обеспечить базовый функционал программы :DDDDD
Вообще, когда я перешёл на линукс, для меня стало откровением, насколько мало для него «продвинутых» программ. Даже тотала не оказалось.
anonymous
()
- Показать ответы
- Ссылка
Ответ на:
комментарий
от anonymous
А вне этого самого линукса есть симлинки? А аналоги такого гибкого mount и fusermount?
ados ★★★★★
()
- Ссылка
Ответ на:
комментарий
от anonymous
Ответ на:
комментарий
от beduin747
Double Commander
Total Commander
Хммм…. Да уж! Совпадение налицо!
anonymous
()
- Ссылка
Ответ на:
комментарий
от justin_case
Но и это терпимо, хотелось бы сразу хоткей который перенесет одну из панелей в ту самую /run/media/user без лишних вопросов вида «выберите в списке состоящем из 1 пункта и нажмите энтер» как control-\
У меня он довольно-таки часто состоит из 2 и более пунктов. А когда из одного — ну цена вопроса две клавиши: стрелка вниз и Enter.
На самом деле добавить такое было бы неплохо, да. Но я заметил, что в ДОСе и винде примерно в половине случаев я использовал Alt+Fn не по прямому назначению, а для того, чтобы синхронизировать панели (для чего в mc есть Alt+I).
А ещё было бы неплохо дать возможность вешать хоткеи на элементы этого самого Ctrl+\. Вот этого мне не хватает довольно часто, поскольку Hotlist у меня довольно-таки большой и разлапистый (там, если что, можно даже логические подпапки ссылок создавать).
Периодически чешутся руки начать патчить mc. Но таких хотелок у меня большая очередь…
hobbit ★★★★★
()
Последнее исправление: hobbit
(всего
исправлений: 3)
- Показать ответы
- Ссылка
Ответ на:
комментарий
от hobbit
А ещё было бы неплохо дать возможность вешать хоткеи на элементы этого самого Ctrl+\
вот именно. Я удивлен что за такую долгую историю, никто не додумался до этой простой фичи — шорткаты для директорий быстрого доступа. Неужели большинство юзеров либо такие терпеливые, что не написали это в реквест фич, либо такие инопланетяне что им это не было бы удобно?
justin_case ★
()
автор топика
- Показать ответы
- Ссылка
Ответ на:
комментарий
от justin_case
Я бы их постоянно забывал. Тяжело быть дементиком.
anonymous
()
- Показать ответ
- Ссылка
Ответ на:
комментарий
от anonymous
А если будет возможность их самому назначить? Обычно юзеры либо не знают о шорткатах, либо в целом пользуются прогой слишком редко, поэтому им погоды не сделает. Например взять тот же Контрол-R в консоли — либо ты об этом не знаешь либо ты слишком редко юзаешь консоль. Все остальные которые хоть раз увидели начинают юзать всегда.
justin_case ★
()
автор топика
- Ссылка
use far2l, luke
anonymous
()
- Ссылка
Ответ на:
комментарий
от justin_case
Я удивлен что за такую долгую историю, никто не додумался до этой простой фичи — шорткаты для директорий быстрого доступа.
А куда в линуксе ходить? Это в винде куча C:,D: и т.д. Поэтому в Far и есть возможность не только Alt+F1(F2), но и настройка хоткеев для десяти произвольных директорий, без макросов. В линуксе же или симлинки или монтирование в хомяк решают эту задачу, поэтому в этом нет особого практического смысла. Я забыл когда вылазил за пределы ~/, при том, что в хомяке только конфиги, а все остальное, картинки-книжки-видосики на другом физическом диске.
anonymous
()
- Показать ответы
- Ссылка
Ответ на:
комментарий
от anonymous
Ответ на:
комментарий
от anonymous
Ну конечно… «нинужно».
Ну а ты сам часто шаришся по файловой системе? Я максимум что-то обновляю в /opt и то чаще из консоли, что сводится к удалению директории и распаковкой на ее место новой версии. Все остально либо смонтировано в хомяк либо кинуты симлинки:
# /etc/fstab: static file system information.
#
# Use 'blkid' to print the universally unique identifier for a device; this may
# be used with UUID= as a more robust way to name devices that works even if
# disks are added and removed. See fstab(5).
#
# <file system>                            <mount point>        <type>  <options>                <dump> <pass>

UUID=cf516b07-9d07-4141-add4-d9716cc3bac8  /                     ext4   defaults,noatime,discard    0     1
UUID=aa363566-3c57-40f9-8e1c-b9f929aa312e  /data                 ext4   rw,relatime,users           0     2
/data/Downloads                            /home/user/Downloads  none   bind,auto                   0     0
/data/Movies                               /home/user/Videos     none   bind,auto                   0     0
/data/Music                                /home/user/Music      none   bind,auto                   0     0
/data/Pictures                             /home/user/Pictures   none   bind,auto                   0     0
tmpfs                                      /tmp                  tmpfs  defaults,noatime,mode=1777  0     0
tmpfs                                      /var/tmp              tmpfs  defaults,noatime,mode=1777  0     0
/swapfile                                  swap                  swap   defaults                    0     0
anonymous
()
- Показать ответ
- Ссылка
Ответ на:
комментарий
от anonymous
и флешек, мыльниц, телефонов у тебя тоже нет?
anonymous
()
- Показать ответ
- Ссылка
Ответ на:
комментарий
от anonymous
или симлинки
симлинки в каждой директории где ты можешь находиться в произвольный момент времени на каждую директорию куда ты можешь захотеть перейти? Не скучно ты живешь я смотрю.
justin_case ★
()
автор топика
- Показать ответ
- Ссылка
Ответ на:
комментарий
от anonymous
и флешек, мыльниц, телефонов у тебя тоже нет?
Мыльница есть, в ванной комнате. Остального или нет или нет необходимости их втыкать. Для второго ноута есть scp, это проще, не надо думать, какую взять флешку, что там поудалять. Благо OpenSSH на винду таки завезли.
anonymous
()
- Показать ответ
- Ссылка
Ответ на:
комментарий
от justin_case
куда ты можешь захотеть перейти?
Куда? Нахера лазать по дереву, что там смотреть? Все необходимое для повседневного использования не в /usr/share или /etc, а в домашнем каталоге. Ну смонтируй свой /run/media, или что там, к себе поближе и не будет необходимости туда каждый раз добираться.
anonymous
()
- Показать ответ
- Ссылка
Ответ на:
комментарий
от anonymous
и флешек, мыльниц, телефонов у тебя тоже нет?
Мыльницы и телефоны, кстати, удобнее смотреть через Double Commander, там поддержка MTP встроенная (через GVFS). Но в целом я больше с тобой согласен, в mc есть что допилить на эту тему.
hobbit ★★★★★
()
- Показать ответ
- Ссылка
Ответ на:
комментарий
от hobbit
в mc много чего надо пилить с точки зрения удобства пользования 
недавно вот наконец-то допили что при выходе в консоль (ctrl-o) не теряется содержимое строки команд. за что сделавшему сие огромное спасибо !! бесило не подеццки…
и да use far2l, luke !! его сейчас активно пилят.
pfg ★★★★★
()
Последнее исправление: pfg
(всего
исправлений: 2)
- Показать ответ
- Ссылка
Ответ на:
комментарий
от hobbit
У меня он довольно-таки часто состоит из 2 и более пунктов. А когда из одного — ну цена вопроса две клавиши: стрелка вниз и Enter.
А когда больше двух — пользуй цифры. Цифра N кидает курсор на N-ный элемент списка каталогов (нумерация начинается с нуля). Цена вопроса — те же две клавиши (цифра и Enter), если в списке <= 10 элементов.
debugger ★★★★★
()
- Ссылка
Ответ на:
комментарий
от pfg
В Фаре, кстати (виндовом) как раз хотлист ущербный. Он идёт отдельным плагином, в стандартной поставке нет — и при этом никакой визуальной подсказки, всё строго на хоткеях. Хоткеи надо помнить. Т.е. там шарахнулись в противоположную крайность.
hobbit ★★★★★
()
- Ссылка
не буду же я всякие флешки и прочее прописывать в fstab.
Достаточно сделать символическую ссылку в хомяке: mnt -> ../../run/media/vdb и все флешки у тебя «под рукой».
Если хочется прям г̶туй — то элементарно запилить его при помощи dialog и вызвать из mc-шного user menu. Вызываться будет не Alt+F1, а F2, какая-нить-клавиша — те же самые два нажатия, но не аккордом, а последовательно, что даже проще.
debugger ★★★★★
()
- Показать ответ
- Ссылка
Могу патчиком поделиться
ananas ★★★★★
()
- Ссылка
Ответ на:
комментарий
от anonymous
ясно, очередное «нинужно». Причем стоя в гамаке.
justin_case ★
()
автор топика
Последнее исправление: justin_case
(всего
исправлений: 1)
- Ссылка
Ответ на:
комментарий
от debugger
символическую ссылку в хомяке
не всегда это нужно из хомяка. Я этот пост создал после копирования с одной флешки на другую.
justin_case ★
()
автор топика
- Показать ответ
- Ссылка
Ответ на:
комментарий
от justin_case
Я этот пост создал после копирования с одной флешки на другую.
Ты, видимо, не понял. Имея символическую ссылку mnt -> ../../run/media/vdb в твоём хомяке (vdb, разумеется, заменить на твоё имя), обе твои флешки после монтирования будут оказываться в твоём хомяке, в каталоге ~/mnt.
debugger ★★★★★
()
- Показать ответ
- Ссылка
Ответ на:
комментарий
от debugger
Ответ на:
комментарий
от justin_case
vdb — мой логин, сообразительный ты мой.
Достаточно было бы один раз «сходить ногами» в каталог /run/media, повтыкать/повытаскивать флешки и понаблюдать что происходит.
debugger ★★★★★
()
- Показать ответ
- Ссылка
Ответ на:
комментарий
от debugger
сообразительным совет да любовь писать в следующий раз хотя бы $(whoami) и не заставлять других расшифровывать записки сумасшедшего
anonymous
()
- Показать ответ
- Ссылка
Ответ на:
комментарий
от anonymous
$(whoami)
$USER
akk ★★★★★
()
- Ссылка
Вы не можете добавлять комментарии в эту тему. Тема перемещена в архив.
NAME
mc — Visual shell for Unix-like systems.
SYNOPSIS
mc [-abcCdfhPstuUVx] [-l log] [dir1 [dir2]] [-e [file] …]
[-v file]
DESCRIPTION
GNU Midnight Commander is a directory browser/file manager for
Unix-like operating systems.
OPTIONS
- -a, —stickchars
- Disable usage of graphic characters for line drawing.
- -b, —nocolor
- Force black and white display.
- -c, —color
- Force color mode, please check the section Colors for more
information. - -C arg, —colors=arg
- Specify a different color set in the command line. The format of arg is
documented in the Colors section. - —configure-options
- Display configure options.
- -d, —nomouse
- Disable mouse support.
- -e [file],
—edit[=file] - Start the internal editor. If the file is specified, open it on startup.
See also mcedit (1). - -f, —datadir
- Display the compiled-in search paths for Midnight Commander files.
- -F, —datadir-info
- Display extended info about compiled-in paths for Midnight Commander.
- -g, —oldmouse
- Force a «normal tracking» mouse mode. Used when running on
xterm-capable terminals (tmux/screen). - -k, —resetsoft
- Reset softkeys to their default from the termcap/terminfo database. Only
useful on HP terminals when the function keys don’t work. - -K file,
—keymap=file - Specify a name of keymap file in the command line.
- -l file,
—ftplog=file - Save the ftpfs dialog with the server in file.
- —nokeymap
- Don’t load key bindings from any file, use default hardcoded keys.
- -P file,
—printwd=file - Print the last working directory to the specified file. This option is not
meant to be used directly. Instead, it’s used from a special shell script
that automatically changes the current directory of the shell to the last
directory Midnight Commander was in. Source the file
@pkglibexecdir@/mc.sh (bash and zsh users) or
/__w/mc/mc/install-prefix/libexec/mc.csh (tcsh users) respectively
to define mc as an alias to the appropriate shell script. - -s, —slow
- Turn on the slow terminal mode, in this mode the program will not draw
expensive line drawing characters and will toggle verbose mode off. - -S arg, —skin=arg
- Specify a name of skin in the command line. Technology of skins is
documented in the Skins section. - -t, —termcap
- Used only if the code was compiled with S-Lang and terminfo: it makes
Midnight Commander use the value of the TERMCAP variable for the
terminal information instead of the information on the system wide
terminal database - -u, —nosubshell
- Disable use of the concurrent shell (only makes sense if Midnight
Commander has been built with concurrent shell support). - -U, —subshell
- Enable use of the concurrent shell support (only makes sense if the
Midnight Commander was built with the subshell support set as an optional
feature). - -v file, —view=file
- Start the internal viewer to view the specified file. See also mcview
(1). - -V, —version
- Display the version of the program.
- -x, —xterm
- Force xterm mode. Used when running on xterm-capable terminals (two screen
modes, and able to send mouse escape sequences). - -X, —no-x11
- Do not use X11 to get the state of modifiers Alt, Ctrl, Shift
If both paths are specified, the first path name is the directory
to show in the active panel; the second path name is the directory to be
shown in the other panel.
If one path is specified, the path name is the directory to show
in the active panel; value of «other_dir» from panels.ini is the
directory to be shown in the passive panel.
If no paths are specified, current directory is shown in the
active panel; value of «other_dir» from panels.ini is the
directory to be shown in the passive panel.
Overview
The screen of Midnight Commander is divided into four parts.
Almost all of the screen space is taken up by two directory panels. By
default, the second line from the bottom of the screen is the shell command
line, and the bottom line shows the function key labels. The topmost line is
the menu bar line. The menu bar line may not be visible, but appears if you
click the topmost line with the mouse or press the F9 key.
Midnight Commander provides a view of two directories at the same
time. One of the panels is the current panel (a selection bar is in the
current panel). Almost all operations take place on the current panel. Some
file operations like Rename and Copy by default use the directory of the
unselected panel as a destination (don’t worry, they always ask you for
confirmation first). For more information, see the sections on the Directory
Panels, the Left and Right Menus and the File Menu.
You can execute system commands from Midnight Commander by simply
typing them. Everything you type will appear on the shell command line, and
when you press Enter, Midnight Commander will execute the command line you
typed; read the Shell Command Line and Input Line Keys sections to learn
more about the command line.
Mouse
Support
Midnight Commander comes with mouse support. It is activated
whenever you are running on an xterm(1) terminal (it even works if
you take a telnet, ssh or rlogin connection to another machine from the
xterm) or if you are running on a Linux console and have the gpm
mouse server running.
When you left click on a file in the directory panels, that file
is selected; if you click with the right button, the file is marked (or
unmarked, depending on the previous state).
Double-clicking on a file will try to execute the command if it is
an executable program; and if the extension file has a program specified for
the file’s extension, the specified program is executed.
Also, it is possible to execute the commands assigned to the
function key labels by clicking on them.
The default auto repeat rate for the mouse buttons is 400
milliseconds. This may be changed to other values by editing the
~/.config/mc/ini file and changing the mouse_repeat_rate
parameter.
If you are running Midnight Commander with the mouse support, you
can get the default mouse behavior (cutting and pasting text) by holding
down the Shift key.
Keys
Some commands in Midnight Commander involve the use of the
Control (sometimes labeled CTRL or CTL) and the Meta
(sometimes labeled ALT or even Compose) keys. In this manual we will use the
following abbreviations:
- C-<chr>
- means hold the Control key while typing the character <chr>. Thus
C-f would be: hold the Control key and type f. - Alt-<chr>
- means hold the Meta or Alt key down while typing <chr>. If there is
no Meta or Alt key, type Esc, release it, then type the character
<chr>. - S-<chr>
- means hold the Shift key down while typing <chr>.
All input lines in Midnight Commander use an approximation to the
GNU Emacs editor’s key bindings (default).
You may redefine key bindings. See redefine hotkey
bindings
for more info. All other key bindings (described in this manual)
are relative to default behavior.
There are many sections which tell about the keys. The following
are the most important.
The File Menu section documents the keyboard shortcuts for the
commands appearing in the File menu. This section includes the function
keys. Most of these commands perform some action, usually on the selected
file or the tagged files.
The Directory Panels section documents the keys which select a
file or tag files as a target for a later action (the action is usually one
from the file menu).
The Shell Command Line section list the keys which are used for
entering and editing command lines. Most of these copy file names and such
from the directory panels to the command line (to avoid excessive typing) or
access the command line history.
Input Line Keys are used for editing input lines. This means both
the command line and the input lines in the query dialogs.
Redefine hotkey bindings
Hotkey bindings may be read from external file (keymap-file).
Initially, Midnight Commander creates key bindings using keymap defined in
the source code. Then, two files
/__w/mc/mc/install-prefix/share/mc/mc.keymap and
/__w/mc/mc/install-prefix/etc/mc/mc.keymap are loaded always,
sequentially reassigned key bindings defined earlier. User-defined
keymap-file is searched on the following algorithm (to the first one
found):
-
1) command line option -K <keymap> or
—keymap=<keymap>
2) Environment variable MC_KEYMAP
3) Parameter keymap in section [Midnight-Commander] of config
file.
4) File ~/.config/mc/mc.keymap
Command line option, environment variable and parameter in config
file may contain the absolute path to the keymap-file (with the extension
.keymap or without it). Search of keymap-file will occur in (to the first
one found):
-
1) ~/.config/mc
2) /__w/mc/mc/install-prefix/etc/mc/
3) /__w/mc/mc/install-prefix/share/mc/
Miscellaneous Keys
Here are some keys which don’t fall into any of the other
categories:
- Enter
- if there is some text in the command line (the one at the bottom of the
panels), then that command is executed. If there is no text in the command
line then if the selection bar is over a directory the Midnight Commander
does a chdir(2) to the selected directory and reloads the
information on the panel; if the selection is an executable file then it
is executed. Finally, if the extension of the selected file name matches
one of the extensions in the extensions file then the corresponding
command is executed. - C-l
- repaint all the information in Midnight Commander.
- C-x c
- run the Chmod command on a file or on the tagged files.
- C-x o
- run the Chown command on the current file or on the tagged files.
- C-x l
- run the hard link command.
- C-x s
- run the absolute symbolic link command.
- C-x v
- run the relative symbolic link command. See the File Menu section for more
information about symbolic links. - C-x i
- set the other panel display mode to information.
- C-x q
- set the other panel display mode to quick view.
- C-x !
- execute the External panelize command.
- C-x h
- run the add directory to hotlist command.
- Alt-!
- executes the Filtered view command, described in the view command.
- Alt-?
- executes the Find file command.
- Alt-c
- pops up the quick cd dialog.
- C-o
- when the program is being run in the Linux or FreeBSD console or under an
xterm, it will show you the output of the previous command. When ran on
the Linux console, Midnight Commander uses an external program
(cons.saver) to handle saving and restoring of information on the
screen.
When the subshell support is compiled in, you can type C-o at any
time and you will be taken back to Midnight Commander’s main screen, to
return to your application just type C-o. If you have an application
suspended by using this trick, you won’t be able to execute other programs
from Midnight Commander until you terminate the suspended application.
Directory Panels
This section lists the keys which operate on the directory panels.
If you want to know how to change the appearance of the panels take a look
at the section on Left and Right Menus.
- Tab, C-i
- change the current panel. The old other panel becomes the new current
panel and the old current panel becomes the new other panel. The selection
bar moves from the old current panel to the new current panel. - Insert,
C-t - to tag files you may use the Insert key (the kich1 terminfo sequence). To
untag files, just retag a tagged file. - Alt-e
- to change charset of panel you may use Alt-e (M-e). Recoding is made from
selected codepage into system codepage. To cancel the recoding, select
«No translation» in the dialog of encodings. - Alt-g, Alt-r,
Alt-j - used to select the top file in a panel, the middle file and the bottom
one, respectively. - Alt-t
- toggle the current display listing to show the next display listing
format. With this it is possible to quickly switch to brief listing, long
listing, user defined listing format, and back to the default. - C-\
(control-backslash) - show the directory hotlist and change to the selected directory.
- + (plus)
- this is used to select (tag) a group of files. Midnight Commander will
prompt for a selection options. When Files only checkbox is on,
only files will be selected. If Files only is off, as files as
directories will be selected. When Shell Patterns checkbox is on,
the regular expression is much like the filename globbing in the shell (*
standing for zero or more characters and ? standing for one character). If
Shell Patterns is off, then the tagging of files is done with
normal regular expressions (see ed (1)). When Case sensitive
checkbox is on, the selection will be case sensitive characters. If
Case sensitive is off, the case will be ignored. - \ (backslash)
- use the «\» key to unselect a group of files. This is the
opposite of the Plus key. - up-key, C-p
- move the selection bar to the previous entry in the panel.
- down-key, C-n
- move the selection bar to the next entry in the panel.
- home, a1,
Alt-< - move the selection bar to the first entry in the panel.
- end, c1,
Alt-> - move the selection bar to the last entry in the panel.
- next-page, C-v
- move the selection bar one page down.
- prev-page,
Alt-v - move the selection bar one page up.
- Alt-(, Alt-)
- scroll long filenames to the right or left.
- Alt-o
- If the currently selected file is a directory, load that directory on the
other panel and moves the selection to the next file. If the currently
selected file is not a directory, load the parent directory on the other
panel and moves the selection to the next file. - Alt-i
- make the current directory of the current panel also the current directory
of the other panel. Put the other panel to the listing mode if needed. If
the current panel is panelized, the other panel doesn’t become
panelized. - C-PageUp,
C-PageDown - only when supported by the terminal: change to «..» and to the
currently selected directory respectively. - Alt-y
- moves to the previous directory in the history, equivalent to clicking the
< with the mouse. - Alt-u
- moves to the next directory in the history, equivalent to clicking the
> with the mouse. - Alt-S-h,
Alt-H - displays the directory history, equivalent to depressing the ‘v’ with the
mouse.
Quick search
The Quick search mode allows you to perform fast file search in
file panel. Press C-s or Alt-s to start a filename search in
the directory listing.
When the search is active, the user input will be added to the
search string instead of the command line. If the Show mini-status
option is enabled the search string is shown on the mini-status line. When
typing, the selection bar will move to the next file starting with the typed
letters. The Backspace or DEL keys can be used to correct
typing mistakes. If C-s is pressed again, the next match is searched
for.
If quick search is started with double pressing of C-s, the
previous quick search pattern will be used for current search.
Besides the filename characters, you can also use wildcard
characters ‘*’ and ‘?’.
Shell Command Line
This section lists keys which are useful to avoid excessive typing
when entering shell commands.
- Alt-Enter
- copy the currently selected file name to the command line.
- C-Enter
- same a Alt-Enter. May not work on remote systems and some terminals.
- C-S-Enter
- copy the full path name of the currently selected file to the command
line. May not work on remote systems and some terminals. - Alt-Tab
- does the filename, command, variable, username and hostname completion for
you. - C-x t, C-x C-t
- copy the tagged files (or if there are no tagged files, the selected file)
of the current panel (C-x t) or of the other panel (C-x C-t) to the
command line. - C-x p, C-x C-p
- the first key sequence copies the current path name to the command line,
and the second one copies the unselected panel’s path name to the command
line. - C-q
- the quote command can be used to insert characters that are otherwise
interpreted by Midnight Commander (like the ‘+’ symbol) - Alt-p,
Alt-n - use these keys to browse through the command history. Alt-p takes you to
the last entry, Alt-n takes you to the next one. - Alt-h
- displays the history for the current input line.
General Movement Keys
The help viewer, the file viewer and the directory tree use common
code to handle moving. Therefore they accept exactly the same keys. Each of
them also accepts some keys of its own.
Other parts of Midnight Commander use some of the same movement
keys, so this section may be of use for those parts too.
- Up, C-p
- moves one line backward.
- Down, C-n
- moves one line forward.
- Prev Page, Page Up,
Alt-v - moves one page up.
- Next Page, Page Down,
C-v - moves one page down.
- Home, A1
- moves to the beginning.
- End, C1
- move to the end.
The help viewer and the file viewer accept the following keys in
addition the to ones mentioned above:
- b, C-b, C-h, Backspace,
Delete - moves one page up.
- Space bar
- moves one page down.
- u, d
- moves one half of a page up or down.
- g, G
- moves to the beginning or to the end.
Input Line Keys
The input lines (they are used for the command line and for the
query dialogs in the program) accept these keys:
- C-a
- puts the cursor at the beginning of line.
- C-e
- puts the cursor at the end of the line.
- C-b, move-left
- move the cursor one position left.
- C-f,
move-right - move the cursor one position right.
- Alt-f
- moves one word forward.
- Alt-b
- moves one word backward.
- C-h, Backspace
- delete the previous character.
- C-d, Delete
- delete the character in the point (over the cursor).
- C-@
- sets the mark for cutting.
- C-w
- copies the text between the cursor and the mark to a kill buffer and
removes the text from the input line. - Alt-w
- copies the text between the cursor and the mark to a kill buffer.
- C-y
- yanks back the contents of the kill buffer.
- C-k
- kills the text from the cursor to the end of the line.
- Alt-p,
Alt-n - Use these keys to browse through the command history. Alt-p takes you to
the last entry, Alt-n takes you to the next one. - Alt-C-h,
Alt-Backspace - delete one word backward.
- Alt-Tab
- does the filename, command, variable, username and hostname completion for
you.
The menu bar pops up when you press F9 or click the mouse on the
top row of the screen. The menu bar has five menus: «Left»,
«File», «Command», «Options» and
«Right».
The Left and Right Menus allow you to modify the appearance of the
left and right directory panels.
The File Menu lists the actions you can perform on the currently
selected file or the tagged files.
The Command Menu lists the actions which are more general and bear
no relation to the currently selected file or the tagged files.
The Options Menu lists the actions which allow you to customize
Midnight Commander.
Left and Right (Above and Below) Menus
The outlook of the directory panels can be changed from the
Left and Right menus (they are named Above and
Below when the horizontal panel split is chosen from the Layout
options dialog).
Listing Format…
The listing mode view is used to display a listing of files, there
are four different listing formats available: Full, Brief,
Long and User. The full directory view shows the file name,
the size of the file and the modification time.
The brief view shows only the file name and it has from 1 up to 9
columns (therefore showing more files unlike other views). The long view is
similar to the output of ls -l command. The long view takes the whole
screen width.
If you choose the «User» display format, then you have
to specify the display format.
The user display format must start with a panel size specifier.
This may be «half» or «full», and they specify a half
screen panel and a full screen panel respectively.
After the panel size, you may specify how many listings to fit in
the panel, side-by-side (in other words: how many times to repeat the fields
horizontally). This defaults to 1. You may change this by adding a number
from 1 to 9 to the format string.
After this you add the name of the fields with an optional size
specifier. This are the available fields you may display:
- name
- displays the file name.
- size
- displays the file size.
- bsize
- is an alternative form of the size format. It displays the size of
the files and for directories it just shows SUB-DIR or UP—DIR unless the
directory size is computed by the «Show directory sizes»
command. - type
- displays a one character wide type field. This character is similar to
what is displayed by ls with the -F flag — * for executable files,
/ for directories, @ for links, = for sockets,
— for character devices, + for block devices, | for
pipes, ~ for symbolic links to directories and ! for stale
symlinks (links that point nowhere). - mark
- an asterisk if the file is tagged, a space if it’s not.
- mtime
- file’s last modification time.
- atime
- file’s last access time.
- ctime
- file’s status change time.
- perm
- a string representing the current permission bits of the file.
- mode
- an octal value with the current permission bits of the file.
- nlink
- the number of links to the file.
- ngid
- the GID (numeric).
- nuid
- the UID (numeric).
- owner
- the owner of the file.
- group
- the group of the file.
- inode
- the inode of the file.
Also you can use following keywords to define the panel
layout:
- space
- a space in the display format.
- |
- add a vertical line to the display format.
To force one field to a fixed size (a size specifier), you just
add : followed by the number of characters you want the field to
have. If the number is followed by the symbol +, then the size
specifies the minimal field size — if the program finds out that there is
more space on the screen, it will then expand that field.
For example, the Full display corresponds to this
format:
half type name | size | mtime
And the Long display corresponds to this format:
full perm space nlink space owner space group space size space
mtime space name
This is a nice user display format:
half name | size:7 | type mode:3
Panels may also be set to the following modes:
- Info
- The info view display information related to the currently selected file
and if possible information about the current file system. - Tree
- The tree view is quite similar to the directory tree feature. See the
section about it for more information. - Quick View
- In this mode, the panel will switch to a reduced viewer that displays the
contents of the currently selected file, if you select the panel (with the
tab key or the mouse), you will have access to the usual viewer
commands.
Sort Order…
The eight sort orders are by name, by extension, by modification
time, by access time, and by inode information modification time, by size,
by inode and unsorted. In the Sort order dialog box you can choose the sort
order and you may also specify if you want to sort in reverse order by
checking the reverse box.
By default directories are sorted before files but this can be
changed from the Panel options menu (option Mix all files).
Filter…
The filter command allows you to specify a shell pattern (for
example *.tar.gz) which the files and directories must match to be
shown. The input line allow enter the pattern of file/directory names that
will be shown in the panel.
When Files only checkbox is on, only files will be matched
to the filter, and all directories will be shown. Otherwise, as files as
directories will be filtered. When Shell Patterns checkbox is on, the
regular expression is much like the filename globbing in the shell (*
standing for zero or more characters and ? standing for one character).
Otherwise, the matching of files/directories is done with normal regular
expressions (see ed(1)). When Case sensitive checkbox is on, the
filtering will be case sensitive characters. Otherwise, the case will be
ignored.
Reread
The reread command reload the list of files in the directory. It
is useful if other processes have created or removed files.
Midnight Commander uses the F1 — F10 keys as keyboard shortcuts
for commands appearing in the file menu. The escape sequences for the
function keys are terminfo capabilities kf1 trough kf10. On terminals
without function key support, you can achieve the same functionality by
pressing the Esc key and then a number in the range 1 through 9 and 0
(corresponding to F1 to F9 and F10 respectively).
The File menu has the following commands (keyboard shortcuts in
parentheses):
Help (F1)
Invokes the built-in hypertext help viewer. Inside the help
viewer, you can use the Tab key to select the next link and the Enter key to
follow that link. The keys Space and Backspace are used to move forward and
backward in a help page. Press F1 again to get the full list of accepted
keys.
Menu (F2)
Invoke the user menu. The user menu provides an easy way to
provide users with a menu and add extra features to Midnight Commander.
View (F3, F13)
View the currently selected file. By default this invokes the
Internal File Viewer but if the option «Use internal view» is off,
it invokes an external file viewer specified by the VIEWER
environment variable. If VIEWER is undefined, the PAGER
environment variable is tried. If PAGER is also undefined, the
«view» command is invoked. If you use F13 instead, the viewer will
be invoked without doing any formatting or preprocessing to the file.
See parameters for external viewer for explain how you may specify
an extended command line options for external viewers.
Filtered View (Alt-!)
This command prompts for a command and its arguments (the argument
defaults to the currently selected file name), the output from such command
is shown in the internal file viewer.
Edit (F4, F14)
Press F4 to edit the highlighted file. Press F14 (usually F14) to
start the editor with a new, empty file. Currently they invoke the vi
editor, or the editor specified in the EDITOR environment variable,
or the Internal File Editor if the use_internal_edit option is on.
See parameters for external editor for explain how you may specify
an extended command line options for external editors.
Copy (F5, F15)
Press F5 to pop up an input dialog to copy the currently selected
file (or the tagged files, if there is at least one file tagged) to the
directory/filename you specify in the input dialog. The destination defaults
to the directory in the non-selected panel. Space for destination file may
be preallocated relative to preallocate_space configure option. During this
process, you can press C-c or Esc to abort the operation. For details about
source mask (which will be usually either * or ^\(.*\)$ depending on setting
of Use shell patterns) and possible wildcards in the destination see Mask
copy/rename.
F15 (usually F15) is similar, but defaults to the directory in the
selected panel. It always operates on the selected file, regardless of any
tagged files.
On some systems, it is possible to do the copy in the background
by clicking on the background button (or pressing Alt-b in the dialog box).
The Background Jobs is used to control the background process.
Link (C-x l)
Create a hard link to the current file.
Absolute symlink (C-x s)
Create a absolute symbolic link to the current file.
Relative symLink (C-x v)
Create a relative symbolic link to the current file.
To those of you who don’t know what links are: creating a link to
a file is a bit like copying the file, but both the source filename and the
destination filename represent the same file image. For example, if you edit
one of these files, all changes you make will appear in both files. Some
people call links aliases or shortcuts.
A hard link appears as a real file. After making it, there is no
way of telling which one is the original and which is the link. If you
delete either one of them the other one is still intact. It is very
difficult to notice that the files represent the same image. Use hard links
when you don’t even want to know.
A symbolic link is a reference to the name of the original file.
If the original file is deleted the symbolic link is useless. It is quite
easy to notice that the files represent the same image. Midnight Commander
shows an «@»-sign in front of the file name if it is a symbolic
link to somewhere (except to directory, where it shows a tilde (~)). The
original file which the link points to is shown on mini-status line if the
Show mini-status option is enabled. Use symbolic links when you want
to avoid the confusion that can be caused by hard links.
When you press «C-x s» Midnight Commander will
automatically fill in the complete path+filename of the original file and
suggest a name for the link. You can change either one.
Sometimes you may want to change the absolute path of the original
into a relative path. An absolute path starts from the root directory:
/home/frodo/mc/mc -> /home/frodo/new/mc
A relative link describes the original file’s location starting
from the location of the link itself:
/home/frodo/mc/mc -> ../new/mc
You can force Midnight Commander to suggest a relative path by
pressing «C-x v» instead of «C-x s».
Rename/Move (F6, F16)
Press F6 to pop up an input dialog to copy the currently selected
file (or the tagged files, if there is at least one file tagged) to the
directory/filename you specify in the input dialog. The destination defaults
to the directory in the non-selected panel. For more details look at Copy
(F5) operation above, most of the things are quite similar.
F16 (usually F16) is similar, but defaults to the directory in the
selected panel. It always operates on the selected file, regardless of any
tagged files.
On some systems, it is possible to do the copy in the background
by clicking on the background button (or pressing Alt-b in the dialog box).
The Background Jobs is used to control the background process.
Mkdir (F7)
Pop up an input dialog and creates the directory specified.
Delete (F8)
Delete the currently selected file or the tagged files in the
currently selected panel. During the process, you can press C-c or Esc to
abort the operation.
Quick cd (Alt-c) Use the quick cd command if you have full
command line and want to cd somewhere.
Select group (+)
This is used to select (tag) a group of files. Midnight Commander
will prompt for a selection options. When Files only checkbox is on,
only files will be selected. If Files only is off, as files as
directories will be selected. When Shell Patterns checkbox is on, the
regular expression is much like the filename globbing in the shell (*
standing for zero or more characters and ? standing for one character). If
Shell Patterns is off, then the tagging of files is done with normal
regular expressions (see ed (1)). When Case sensitive checkbox is on,
the selection will be case sensitive characters. If Case sensitive is
off, the case will be ignored.
Unselect group (\)
Used to unselect a group of files. This is the opposite of the
Select group command.
Quit (F10, S-F10)
Terminate Midnight Commander. S-F10 is used when you want to quit
and you are using the shell wrapper. S-F10 will not take you to the last
directory you visited with Midnight Commander, instead it will stay at the
directory where you started Midnight Commander.
Quick
cd
This command is useful if you have a full command line and want to
cd somewhere without having to yank and paste the command line. This command
pops up a small dialog, where you enter everything you would enter after
cd on the command line and then you press enter. This features all
the things that are already in the internal cd command.
Command Menu
The Directory tree command shows a tree figure of the
directories.
The «Find file» command allows you to search for a
specific file.
The «Swap panels» command swaps the contents of the two
directory panels.
The «Switch panels on/off» command shows the output of
the last shell command. This works only on xterm and on Linux and FreeBSD
console.
The «Compare directories» command compares the directory
panels with each other. You can then use the Copy (F5) command to make the
panels identical. There are three compare methods. The quick method compares
only file size and file date. The thorough method makes a full byte-by-byte
compare. The size-only compare method just compares the file sizes and does
not check the contents or the date times, it just checks the file size.
The «External panelize» allows you to execute an
external program, and make the output of that program the contents of the
current panel.
The «Command history» command shows a list of typed
commands. The selected command is copied to the command line. The command
history can also be accessed by typing Alt-p or Alt-n.
The «Directory hotlist» command makes changing of the
current directory to often used directories faster.
The «Screen list» command shows a dialog window with the
list of currently running internal editors, viewers and other MC modules
that support this mode.
The «Edit extension file» command allows you to specify
programs to executed when you try to execute, view, edit and do a bunch of
other thing on files with certain extensions (filename endings).
The «Edit Menu File» command may be used for editing the
user menu (which appears by pressing F2).
Directory Tree
The Directory Tree command shows a tree figure of the directories.
You can select a directory from the figure and Midnight Commander will
change to that directory.
There are two ways to invoke the tree. The real directory tree
command is available from Commands menu. The other way is to select tree
view from the Left or Right menu.
To get rid of long delays, Midnight Commander creates the tree
figure by scanning only a small subset of all the directories. If the
directory which you want to see is missing, move to its parent directory and
press C-r (or F2).
You can use the following keys:
- General movement
keys - are accepted.
- Enter.
- In the directory tree, exits the directory tree and changes to this
directory in the current panel. In the tree view, changes to this
directory in the other panel and stays in tree view mode in the current
panel. - C-r, F2
(Rescan). - Rescan this directory. Use this when the tree figure is out of date: it is
missing subdirectories or shows some subdirectories which don’t exist any
more. - F3 (Forget).
- Delete this directory from the tree figure. Use this to remove clutter
from the figure. If you want the directory back to the tree figure press
F2 in its parent directory. - F4 (Static/Dynamic).
- Toggle between the dynamic navigation mode (default) and the static
navigation mode.
In the static navigation mode you can use the Up and Down keys to
select a directory. All known directories are shown.
In the dynamic navigation mode you can use the Up and Down keys to
select a sibling directory, the Left key to move to the parent directory,
and the Right key to move to a child directory. Only the parent, sibling and
children directories are shown, others are left out. The tree figure changes
dynamically as you traverse.
- F5 (Copy).
- Copy the directory.
- F6 (RenMov).
- Move the directory.
- F7 (Mkdir).
- Make a new directory below this directory.
- F8 (Delete).
- Delete this directory from the file system.
- C-s, Alt-s.
- Search the next directory matching the search string. If there is no such
directory these keys will move one line down. - C-h,
Backspace. - Delete the last character of the search string.
- Any other
character. - Add the character to the search string and move to the next directory
which starts with these characters. In the tree view you must first
activate the search mode by pressing C-s. The search string is shown in
the mini status line.
The following actions are available only in the directory tree.
They aren’t supported in the tree view.
- F1 (Help).
- Invoke the help viewer and show this section.
- Esc, F10.
- Exit the directory tree. Do not change the directory.
The mouse is supported. A double-click behaves like Enter. See
also the section on mouse support.
Find
File
The Find File feature first asks for the start directory for the
search and the filename to be searched for. By pressing the Tree button you
can select the start directory from the directory tree figure.
The «File name» input field contains a filename pattern
to be searched for. It is interpreted as a shell pattern or as a regular
expression depending on the state of the «Using shell patterns»
checkbox. An empty value is valid and matches any file name.
The «Content» input field contains a string to search
for within the files. Leave this field empty to disable searching file
contents.
Option «Whole words» allows select only those files
containing matches that form whole words. Like grep -w.
You can start the search by pressing the OK button. During the
search you can stop from the Stop button and continue from the Start
button.
You can browse the filelist with the up and down arrow keys. The
Chdir button will change to the directory of the currently selected file.
The Again button will ask for the parameters for a new search. The Quit
button quits the search operation. The Panelize button will place the found
files to the current directory panel so that you can do additional
operations on them (view, copy, move, delete and so on). To return to the
normal file listing, change directory to «..».
The ‘Enable ignore directories’ checkbox and input field below it
allow one to set up the list of directories that should be skip during the
search files (for example, you may want to avoid searches on a CD-ROM or on
a NFS directory that is mounted across a slow link). List components must be
separated with a colon, here is an example:
/cdrom:/nfs/wuarchive:/afs
Relative paths are supported also. The following example shows how
to skip special directories of version control systems:
/cdrom:/nfs/wuarchive:/afs:.svn:.git:CVS
Attention: input field can contain a dot (.), this means the
current absolute path.
You may consider using the External panelize command for some
operations. Find file command is for simple queries only, while using
External panelize you can do as mysterious searches as you would like.
External panelize
The External panelize allows you to execute an external program,
and make the output of that program the contents of the current panel.
For example, if you want to manipulate in one of the panels all
the symbolic links in the current directory, you can use external
panelization to run the following command:
find . -type l -print
Upon command completion, the directory contents of the panel will
no longer be the directory listing of the current directory, but all the
files that are symbolic links.
If you want to panelize all of the files that have been downloaded
from your FTP server, you can use this awk command to extract the file name
from the transfer log files:
awk '$9 ~! /incoming/ { print $9 }' < /var/log/xferlog
You may want to save often used panelize commands under a
descriptive name, so that you can recall them quickly. You do this by typing
the command on the input line and pressing Add new button. Then you enter a
name under which you want the command to be saved. Next time, you just
choose that command from the list and do not have to type it again.
Hotlist
The Directory hotlist command shows the labels of the directories
in the directory hotlist. Midnight Commander will change to the directory
corresponding to the selected label. From the hotlist dialog, you can remove
already created label/directory pairs and add new ones. To add new
directories quickly, you can use the Add to hotlist command (C-x h), which
adds the current directory into the directory hotlist, asking just for the
label for the directory.
This makes cd to often used directories faster. You may consider
using the CDPATH variable as described in internal cd command
description.
Edit Extension File
This will invoke your editor on the file
~/.config/mc/mc.ext.ini. If this file does not exist and you are not
root, it will be copied from
/__w/mc/mc/install-prefix/etc/mc/mc.ext.ini. If you are root, you can
choose the file to edit: user’s ~/.config/mc/mc.ext.ini or
system-wide /__w/mc/mc/install-prefix/etc/mc/mc.ext.ini. The format
of this file is described in detail in it.
Background Jobs
This lets you control the state of any background Midnight
Commander process (only copy and move files operations can be done in the
background). You can stop, restart and kill a background job from here.
The user menu is a menu of useful actions that can be customized
by the user. When you access the user menu, the file .mc.menu from the
current directory is used if it exists, but only if it is owned by user or
root and is not world-writable. If no such file found, ~/.config/mc/menu is
tried in the same way, and otherwise mc uses the default system-wide menu
/__w/mc/mc/install-prefix/share/mc/mc.menu.
The format of the menu file is very simple. Lines that start with
anything but space or tab are considered entries for the menu (in order to
be able to use it like a hot key, the first character should be a letter).
All the lines that start with a space or a tab are the commands that will be
executed when the entry is selected.
When an option is selected all the command lines of the option are
copied to a temporary file in the temporary directory (usually /usr/tmp) and
then that file is executed. This allows the user to put normal shell
constructs in the menus. Also simple macro substitution takes place before
executing the menu code. For more information, see macro substitution.
Here is a sample mc.menu file:
A	Dump the currently selected file
	od -c %f
B	Edit a bug report and send it to root
	I=`mktemp ${MC_TMPDIR:-/tmp}/mail.XXXXXX` || exit 1
	vi $I
	mail -s "Midnight Commander bug" root < $I
	rm -f $I
M	Read mail
	emacs -f rmail
N	Read Usenet news
	emacs -f gnus
H	Call the info hypertext browser
	info
J	Copy current directory to other panel recursively
	tar cf - . | (cd %D && tar xvpf -)
K	Make a release of the current subdirectory
	echo -n "Name of distribution file: "
	read tar
	ln -s %d `dirname %d`/$tar
	cd ..
	tar cvhf ${tar}.tar $tar
= f *.tar.gz | f *.tgz & t n
X       Extract the contents of a compressed tar file
	tar xzvf %f
Default Conditions
Each menu entry may be preceded by a condition. The condition must
start from the first column with a ‘=’ character. If the condition is true,
the menu entry will be the default entry.
Condition syntax: 	= <sub-cond>


  or:			= <sub-cond> | <sub-cond> ...


  or:			= <sub-cond> & <sub-cond> ...
Sub-condition is one of following:


  y <pattern>		syntax of current file matching pattern?
			(for edit menu only)


  f <pattern>		current file matching pattern?


  F <pattern>		other file matching pattern?


  d <pattern>		current directory matching pattern?


  D <pattern>		other directory matching pattern?


  t <type>		current file of type?


  T <type>		other file of type?


  x <filename>		is it executable filename?


  ! <sub-cond>		negate the result of sub-condition
Pattern is a normal shell pattern or a regular expression,
according to the shell patterns option. You can override the global value of
the shell patterns option by writing «shell_patterns=x» on the
first line of the menu file (where «x» is either 0 or 1).
Type is one or more of the following characters:
  n	not a directory


  r	regular file


  d	directory


  l	link


  c	character device


  b	block device


  f	FIFO (pipe)


  s	socket


  x	executable file


  t	tagged
For example ‘rlf’ means either regular file, link or fifo. The ‘t’
type is a little special because it acts on the panel instead of the file.
The condition ‘=t t’ is true if there are tagged files in the current panel
and false if not.
If the condition starts with ‘=?’ instead of ‘=’ a debug trace
will be shown whenever the value of the condition is calculated.
The conditions are calculated from left to right. This means
= f *.tar.gz | f *.tgz & t n
is calculated as
( (f *.tar.gz) | (f *.tgz) ) & (t n)
Here is a sample of the use of conditions:
= f *.tar.gz | f *.tgz & t n
L	List the contents of a compressed tar-archive
	gzip -cd %f | tar xvf -
Addition Conditions
If the condition begins with ‘+’ (or ‘+?’) instead of ‘=’ (or
‘=?’) it is an addition condition. If the condition is true the menu entry
will be included in the menu. If the condition is false the menu entry will
not be included in the menu.
You can combine default and addition conditions by starting
condition with ‘+=’ or ‘=+’ (or ‘+=?’ or ‘=+?’ if you want debug trace). If
you want to use two different conditions, one for adding and another for
defaulting, you can precede a menu entry with two condition lines, one
starting with ‘+’ and another starting with ‘=’.
Comments are started with ‘#’. The additional comment lines must
start with ‘#’, space or tab.
Midnight Commander has some options that may be toggled on and off
in several dialogs which are accessible from this menu. Options are enabled
if they have an asterisk or «x» in front of them.
The Configuration command pops up a dialog from which you can
change most of settings of Midnight Commander.
The Layout command pops up a dialog from which you specify a bunch
of options how mc looks like on the screen.
The Panel options command pops up a dialog from which you specify
options of file manager panels.
The Confirmation command pops up a dialog from which you specify
which actions you want to confirm.
The Appearance command pops up a dialog from which you specify the
skin.
The Learn keys command pops up a dialog from which you test some
keys which are not working on some terminals and you may fix them.
The Virtual FS command pops up a dialog from which you specify
some VFS related options.
The Save setup command saves the current settings of the Left,
Right and Options menus. A small number of other settings is saved, too.
Configuration
The options in this dialog are divided into several groups:
«File operation options», «Esc key mode», «Pause
after run» and «Other options».
File operation options
Verbose operation. This toggles whether the file Copy,
Rename and Delete operations are verbose (i.e., display a dialog box for
each operation). If you have a slow terminal, you may wish to disable the
verbose operation. It is automatically turned off if the speed of your
terminal is less than 9600 bps.
Compute totals. If this option is enabled, Midnight
Commander computes total byte sizes and total number of files prior to any
Copy, Rename and Delete operations. This will provide you with a more
accurate progress bar at the expense of some speed. This option has no
effect, if Verbose operation is disabled.
Classic progressbar. If this option is enabled, the
progressbar of Copy/Move/Delete operations is always grown form left to
right. If disabled, the growing direction of progressbar follows to
direction of Copy/Move/Delete operation: from left panel to right one and
vice versa. Enabled by default.
Mkdir autoname. When you press F7 to create a new
directory, the input line in popup dialog will be filled by name of current
file or directory in active panel. Disabled by default.
Preallocate space. Preallocate space for whole target file,
if possible, before copy operation. Disabled by default.
Esc key mode.
By default, Midnight Commander treats the Esc key as a key prefix.
Therefore, you should press Esc code twice to exit a dialog. But there is a
possibility to use a single press of Esc key for that action.
Single press. By default this option is disabled. If you’ll
enable it, the Esc key will act as a prefix key for set up time interval
(see Timeout option below), and if no extra keys have arrived, then
the Esc key is interpreted as a cancel key (Esc Esc).
Timeout. This options is used to setup the time interval
(in microseconds) for single press of Esc key. By default, this interval is
one second (1000000 microseconds). Also the timeout can be set via
KEYBOARD_KEY_TIMEOUT_US environment variable (also in microseconds), which
has higher priority than Timeout option value.
Pause after run
After executing your commands, Midnight Commander can pause, so
that you can examine the output of the command. There are three possible
settings for this variable:
Never. Means that you do not want to see the output of your
command. If you are using the Linux or FreeBSD console or an xterm, you will
be able to see the output of the command by typing C-o.
On dumb terminals. You will get the pause message on
terminals that are not capable of showing the output of the last command
executed (any terminal that is not an xterm or the Linux console).
Always. The program will pause after executing all of your
commands.
Other options
Use internal editor. If this option is enabled, the
built-in file editor is used to edit files. If the option is disabled, the
editor specified in the EDITOR environment variable is used. If no
editor is specified, vi is used. See the section on the internal file
editor.
Use internal viewer. If this option is enabled, the
built-in file viewer is used to view files. If the option is disabled, the
pager specified in the PAGER environment variable is used. If no
pager is specified, the view command is used. See the section on the
internal file viewer.
Ask new file name. If this option is enabled, file name is
asked before open new file in editor.
Auto menus. If this option is enabled, the user menu will
be invoked at startup. Useful for building menus for non-unixers.
Drop down menus. When this option is enabled, the pull down
menus will be activated as soon as you press the F9 key. Otherwise, you will
only get the menu title, and you will have to activate the menu either with
the arrow keys or with the hotkeys. It is recommended if you are using
hotkeys.
Shell Patterns. By default the Select, Unselect and Filter
commands will use shell-like regular expressions. The following conversions
are performed to achieve this: the ‘*’ is replaced by ‘.*’ (zero or more
characters); the ‘?’ is replaced by ‘.’ (exactly one character) and ‘.’ by
the literal dot. If the option is disabled, then the regular expressions are
the ones described in ed(1).
Complete: show all. By default, Midnight Commander pops up
all possible completions if the completion is ambiguous only when you press
Alt-Tab for the second time. For the first time, it just completes as
much as possible and beeps in the case of ambiguity. Enable this option if
you want to see all possible completions even after pressing Alt-Tab
the first time.
Rotating dash. If this option is enabled, the Midnight
Commander shows a rotating dash in the upper right corner as a work in
progress indicator.
Cd follows links. This option, if set, causes Midnight
Commander to follow the logical chain of directories when changing current
directory either in the panels, or using the cd command. This is the default
behavior of bash. When unset, Midnight Commander follows the real directory
structure, so cd .. if you’ve entered that directory through a link will
move you to the current directory’s real parent and not to the directory
where the link was present.
Safe delete. If this option is enabled, deleting files and
directory hotlist entries unintentionally becomes more difficult. The
default selection in the confirmation dialogs for deletion changes from
Yes to No. This option is disabled by default.
Safe overwrite. If this option is enabled, overwriting
files unintentionally becomes more difficult. The default selection in the
overwrite confirmation dialog changes from Yes to No. This
option is disabled by default.
Auto save setup. If this option is enabled, when you exit
Midnight Commander, the configurable options of Midnight Commander are saved
in the ~/.config/mc/ini file.
Layout
The layout dialog gives you a possibility to change the general
layout of screen. The options in this dialog are divided into several
groups: «Panel split», «Console output» and «Other
options».
Panel split
The rest of the screen area is used for the two directory panels.
You can specify whether the area is split to the panels in Vertical
or Horizontal direction. Panel layout can be changed using Alt-,
(Alt-comma) shortcut.
Equal split. By default, panels have equal sizes. Using
this option you can specify an unequal split.
Console output
On the Linux or FreeBSD console you can specify how many lines are
shown in the output window. This option is available if Midnight Commander
runs on native console only.
Other options
Menu bar visible. If enabled, main menu of Midnight
Commander is always visible on the top row of screen above panels. Enabled
by default.
Command prompt. If enabled, command line is available.
Enabled by default.
Keybar visible. If enabled, 10 labels associated with
F1-F10 keys are located at the bottom row of screen. Enabled by default.
Hintbar visible. If enabled, the one-line hints are visible
below panels. Enabled by default.
XTerm window title. When run in a terminal emulator for
X11, Midnight Commander sets the terminal window title to the current
working directory and updates it when necessary. If your terminal emulator
is broken and you see some incorrect output on startup and directory change,
turn off this option. Enabled by default.
Show free space. If enabled, free space and total space of
current file system is shown at the bottom frame of panel. Enabled by
default.
Panel options
Main panel options
Show mini-status. If enabled, one line of status
information about the currently selected item is shown at the bottom of the
panels. Enabled by default.
Use SI size units. If this option is enabled, Midnight
Commander will use SI prefixes (base 10) when displaying any byte sizes. If
disabled (default), Midnight Commander will use IEC prefixes (base 2).
Mix all files. If this option is enabled, all files and
directories are shown mixed together. If the option is disabled (default),
directories (and links to directories) are shown at the beginning of the
listing, and other files below.
Show backup files. If enabled, Midnight Commander will show
files ending with a tilde. Otherwise, they won’t be shown (like GNU’s ls
option -B). Enabled by default.
Show hidden files. If enabled, Midnight Commander will show
all files that start with a dot (like ls -a). Disabled by default.
Fast directory reload. If this option is enabled, Midnight
Commander will use a trick to determine if the directory contents have
changed. The trick is to reload the directory only if the i-node of the
directory has changed; this means that reloads only happen when files are
created or deleted. If what changes is the i-node for a file in the
directory (file size changes, mode or owner changes, etc) the display is not
updated. In these cases, if you have the option on, you have to rescan the
directory manually (with C-r). Disabled by default.
Mark moves down. If enabled, the selection bar will move
down when you mark a file (with Insert key). Enabled by default.
Reverse files only. Allow revert selection of files only.
Enabled by default. If enabled, the reverse selection is applied to files
only, not to directories. The selection of directories is untouched. If off,
the reverse selection is applied to files as well to directories: all
unselected items become selected, and vice versa.
Simple swap. If both panels contain file listing, simple
swap means that panels exchange its screen positions: left panel become
right one, and vice versa. If this option is unchecked, file listing panels
exchange its content keeping listing format and sort options. Unchecked by
default.
Auto save panels setup. If this option is enabled, when you
exit Midnight Commander, the current settings of panels are saved in the
~/.config/mc/panels.ini file. Disabled by default.
Navigation
Lynx-like motion. If this option is enabled, you may use
the arrows keys to automatically chdir if the current selection is a
subdirectory and the shell command line is empty. By default, this setting
is off.
Page scrolling. If set (the default), panel will scroll by
half the display when the cursor reaches the end or the beginning of the
panel, otherwise it will just scroll a file at a time.
Center scrolling. If set, panel will scroll when the cursor
reaches the middle of the panel column, only hitting the top or bottom of
the panel when actually on the first or last file. This behavior applies
when scrolling one file at a time, and does not apply to the page up/down
keys.
Mouse page scrolling. Controls whenever scrolling with the
mouse wheel is done by pages or line by line on the panels.
File highlight
You can specify whether permissions and file types
should be highlighted with distinctive Colors. If the permission
highlighting is enabled, the parts of the perm and mode
display fields which apply to the user running Midnight Commander are
highlighted with the color defined by the selected keyword. If the
file type highlighting is enabled, file names are colored according to rules
described in /__w/mc/mc/install-prefix/etc/mc/filehighlight.ini file. See
Filenames Highlight for more info.
Quick search
You can specify how the Quick search mode should work: case
insensitively, case sensitively or be matched to the panel sort order: case
sensitive or not.
Confirmation
In this dialog you configure the confirmation options for file
deletion, overwriting files, execution by pressing enter, quitting the
program, directory hotlist entries deletion and history cleanup.
Appearance
In this dialog you can select the skin to be used and enable
shadow for dialogs and drop down menus.
See the Skins section for technical details about the skin
definition files.
Shadows. If this option is enabled, all dialogs and drop
down menus will have a shadow.
Learn
keys
This dialog allows you to test and redefine functional keys,
cursor arrows and some other keys to make them work properly on your
terminal. They often don’t, since many terminal databases are incomplete or
broken.
You can move around with the Tab key and with the vi moving keys
(‘h’ left, ‘j’ down, ‘k’ up and ‘l’ right). Once you press any cursor
movement key and it is recognized, you can use that key as well.
You can test keys just by pressing each of them. When you press a
key and it is recognized properly, OK should appear next to the name of that
key. Once a key is marked OK it starts working as usually, e.g. F1 pressed
the first time will just check that the F1 key works, but after that it will
show help. The same applies to the arrow keys. The Tab key should be working
always.
If some keys do not work properly then you won’t see OK appear
after pressing one of these. Then you may want to redefine it. Do it by
pressing the button with the name of that key (either by the mouse or by
Enter or Space after selecting the button with Tab or arrows). Then a
message box will appear asking you to press that key. Do it and wait until
the message box disappears. If you want to abort, just press Escape once and
wait.
When you finish with all the keys, you can Save them. The
definitions for the keys you have redefined will be written into the
[terminal:TERM] section of your ~/.config/mc/ini file (where TERM is the
name of your current terminal). The definitions of the keys that were
already working properly are not saved.
Virtual
FS
This option gives you control over the settings of the Virtual
File System.
Midnight Commander keeps in memory the information related to some
of the virtual file systems to speed up the access to the files in the file
system (for example, directory listings fetched from FTP servers).
Also, in order to access the contents of compressed files (for
example, compressed tar files), Midnight Commander needs to create temporary
uncompressed files on your disk.
Since both the information in memory and the temporary files on
disk take up resources, you may want to tune the parameters of the cached
information to decrease your resource usage or to maximize the speed of
access to frequently used file systems.
Because of the format of the tar archives, the Tar
filesystem needs to read the whole file just to load the file entries.
Since most tar files are usually kept compressed (plain tar files are
species in extinction), the tar file system has to uncompress the file on
the disk in a temporary location and then access the uncompressed file as a
regular tar file.
Now, since we all love to browse files and tar files all over the
disk, it’s common that you will leave a tar file and then re-enter it later.
Since decompression is slow, Midnight Commander will cache the information
in memory for a limited time. When the timeout expires, all the resources
associated with the file system are released. The default timeout is set to
one minute.
The FTP File System (ftpfs) allows you to browse directories on
remote FTP servers. It has several options.
ftp anonymous password is the password used when you login
as «anonymous». Some sites require a valid e-mail address. On the
other hand, you probably don’t want to give your real e-mail address to
untrusted sites, especially if you are not using spam filtering.
ftpfs keeps the directory listing it fetches from a FTP server in
a cache. The cache expire time is configurable with the ftpfs directory
cache timeout option. A low value for this option may slow down every
operation on the ftpfs because every operation would require sending a
request to the FTP server.
You can define an FTP proxy host for doing FTP. Note that most
modern firewalls are fully transparent at least for passive FTP (see below),
so FTP proxies are considered obsolete.
If Always use ftp proxy is not set, you can use the
exclamation sign to enable proxy for certain hosts. See FTP File System for
examples.
If this option is set, the program will do two things: consult the
/__w/mc/mc/install-prefix/etc/mc/mc.no_proxy file for lines containing host
names that are local (if the host name starts with a dot, it is assumed to
be a domain) and to assume that any hostnames without dots in their names
are directly accessible. All other hosts will be accessed through the
specified FTP proxy.
You can enable using ~/.netrc file, which keeps login names
and passwords for ftp servers. See netrc (5) for the description of the
.netrc format.
Use passive mode enables using FTP passive mode, when the
connection for data transfer is initiated by the client, not by the server.
This option is recommended and enabled by default. If this option is turned
off, the data connection is initiated by the server. This may not work with
some firewalls.
Save
Setup
At startup, Midnight Commander tries to load initialization
information from the ~/.config/mc/ini file. If this file doesn’t exist, the
system-wide file /__w/mc/mc/install-prefix/etc/mc/mc.ini is used. If
this file doesn’t exist, the system-wide file
/__w/mc/mc/install-prefix/share/mc/mc.ini is used. If this file
doesn’t exist, MC uses the default settings.
The Save Setup command creates the ~/.config/mc/ini file by
saving the current settings of the Left, Right and Options menus.
If you activate the auto save setup option, MC will always
save the current settings when exiting.
There also exist settings which can’t be changed from the menus.
To change these settings you have to edit the setup file with your favorite
editor. See the section on Special Settings for more information.
Executing
operating system commands
You may execute commands by typing them directly in Midnight
Commander’s input line, or by selecting the program you want to execute with
the selection bar in one of the panels and hitting Enter.
If you press Enter over a file that is not executable, Midnight
Commander checks the extension of the selected file against the extensions
in the Extensions File. If a match is found then the code associated with
that extension is executed. A very simple macro expansion takes place before
executing the command.
The cd internal command
The cd command is interpreted by Midnight Commander, it is
not passed to the command shell for execution. Thus it may not handle all of
the nice macro expansion and substitution that your shell does, although it
does some of them:
Tilde substitution. The (~) will be substituted with your
home directory, if you append a username after the tilde, then it will be
substituted with the login directory of the specified user.
For example, ~guest is the home directory for the user guest,
while ~/guest is the directory guest in your home directory.
Previous directory. You can jump to the directory you were
previously by using the special directory name ‘-‘ like this: cd
—
CDPATH directories. If the directory specified to the
cd command is not in the current directory, then Midnight Commander
uses the value in the environment variable CDPATH to search for the
directory in any of the named directories.
For example you could set your CDPATH variable to
~/src:/usr/src, allowing you to change your directory to any of the
directories inside the ~/src and /usr/src directories, from any place in the
file system by using its relative name (for example cd linux could take you
to /usr/src/linux).
Macro Substitution
When accessing a user menu, or executing an extension dependent
command, or running a command from the command line input, a simple macro
substitution takes place.
The macros are:
- %i
- The indent of blank space, equal the cursor column position. For edit menu
only. - %y
- The syntax type of current file. For edit menu only.
- %k
- The block file name.
- %e
- The error file name.
- %m
- The current menu name.
- %f and %p
- In file manager user menu: the current file name in selected panel. In
mcedit user menu: the name of opened file. - %x
- The extension of current file name.
- %b
- The current file name without extension.
- %d
- The current directory name.
- %F
- The current file in the unselected panel.
- %D
- The directory name of the unselected panel.
- %t
- The currently tagged files.
- %T
- The tagged files in the unselected panel.
- %u and %U
- Similar to the %t and %T macros, but in addition the files are untagged.
You can use this macro only once per menu file entry or extension file
entry, because next time there will be no tagged files. - %s and %S
- The selected files: The tagged files if there are any. Otherwise the
current file. - %cd
- This is a special macro that is used to change the current directory to
the directory specified in front of it. This is used primarily as an
interface to the Virtual File System. - %view
- This macro is used to invoke the internal viewer. This macro can be used
alone, or with arguments. If you pass any arguments to this macro, they
should be enclosed in brackets.
- The arguments are: ascii to force the viewer into ascii mode;
hex to force the viewer into hex mode; nroff to tell the
viewer that it should interpret the bold and underline sequences of nroff;
unformatted to tell the viewer to not interpret nroff commands for
making the text bold or underlined.
- %%
- The % character
- %{some text}
- Prompt for the substitution. An input box is shown and the text inside the
braces is used as a prompt. The macro is substituted by the text typed by
the user. The user can press Esc or F10 to cancel. This macro doesn’t work
on the command line yet. - %var{ENV:default}
- If environment variable ENV is unset, the default is
substituted. Otherwise, the value of ENV is substituted.
The subshell support
The subshell support is a compile time option, that works with the
shells: bash, ash (BusyBox and Debian), (o/m)ksh, tcsh, zsh and fish.
When the subshell support is active, Midnight Commander will spawn
a concurrent copy of your shell (the one defined in the SHELL
variable and if it is not defined, then the one in the /etc/passwd file) and
run it in a pseudo terminal, instead of invoking a new shell each time you
execute a command, the command will be passed to the subshell as if you had
typed it. This also allows you to change the environment variables, use
shell functions and define aliases that are valid until you quit Midnight
Commander.
bash users may specify startup commands in
~/.local/share/mc/bashrc (fallback ~/.bashrc) and special keyboard maps in
~/.local/share/mc/inputrc (fallback ~/.inputrc).
ash/dash users (BusyBox or Debian) may specify startup
commands in ~/.local/share/mc/ashrc (fallback ~/.profile).
ksh/oksh users (PD ksh variants) may specify startup
commands in ~/.local/share/mc/kshrc (fallback ENV or ~/.profile).
mksh users (MirBSD ksh) may specify startup commands in
~/.local/share/mc/mkshrc (fallback ENV or ~/.mkshrc).
zsh users may specify startup commands in
~/.local/share/mc/.zshrc (fallback ~/.zshrc).
tcsh, fish users cannot specify mc-specific startup
commands at present. They have to rely on shell-specific startup files.
The following paragraphs are relevant only when the subshell
support is active:
You can suspend applications at any time with the sequence C-o and
jump back to Midnight Commander, if you interrupt an application, you will
not be able to run other external commands until you quit the application
you interrupted.
The basic prompt displayed by Midnight Commander is of the form
«user@host:current_path$ «. When using a capable shell, like Bash,
the prompt displayed by Midnight Commander will be the same prompt that you
are currently using in your shell.
(There’s a known problem when using fish: the prompt is displayed
only in full screen mode (Ctrl-o), not when the panels are visible.)
The OPTIONS section has more information on how you can control
subshell usage (-U/-u). Furthermore, to set a specific subshell different
from your current SHELL variable or login shell defined in /etc/passwd, you
may call MC like this: SHELL=/bin/myshell mc
Chmod
The Chmod window is used to change the attribute bits in a group
of files and directories. It can be invoked with the C-x c key
combination.
The Chmod window has two parts — Permissions and
File.
In the File section are displayed the name of the file or
directory and its permissions in octal form, as well as its owner and
group.
In the Permissions section there is a set of check buttons which
correspond to the file attribute bits. As you change the attribute bits, you
can see the octal value change in the File section.
To move between the widgets (buttons and check buttons) use the
arrow keys or the Tab key. To change the state of the check
buttons or to select a button use Space. You can also use the hotkeys
on the buttons to quickly activate them. Hotkeys are shown as highlighted
letters on the buttons.
To set the attribute bits, use the Enter key.
When working with a group of files or directories, you just click
on the bits you want to set or clear. Once you have selected the bits you
want to change, you select one of the action buttons (Set marked or Clear
marked).
Finally, to set the attributes exactly to those specified, you can
use the [Set all] button, which will act on all the tagged files.
[Marked all] set only marked attributes to all selected
files
[Set marked] set marked bits in attributes of all selected
files
[Clean marked] clear marked bits in attributes of all
selected files
[Set] set the attributes of one file
[Cancel] cancel the Chmod command
Chown
The Chown command is used to change the owner/group of a file. The
hot key for this command is C-x o.
Advanced
Chown
The Advanced Chown command is the Chmod and Chown command combined
into one window. You can change the permissions and owner/group of files at
once.
Chattr
The Chattr window is used to change the attributes of a group of
files and directories on a Linux file system. It can be invoked with the C-x
e key combination.
Not all attributes are supported or utilized by all filesystems.
List of available attribute flags is represented as a set of check buttons
which correspond to the attribute flags (see chattr(1) for details).
As you change the attribute flags, you can see the symbolic value change
below file name.
To move between the widgets (buttons and check buttons) use the
arrow keys or the Tab key. To change the state of the check
buttons or to select a button use Space.
To set the attributes, use the Enter key.
When working with a group of files or directories, you just click
on the flags you want to set or clear. Once you have selected the flags you
want to change, you select one of the action buttons (Set marked or Clear
marked).
Finally, to set the attributes exactly to those specified, you can
use the [Set all] button, which will act on all the tagged files.
[Marked all] set only marked attributes to all selected
files.
[Set marked] set marked flags in attributes of all selected
files.
[Clean marked] clear marked flags in attributes of all
selected files.
[Set] set the attributes of one file.
[Cancel] cancel the Chattr command.
File
Operations
When you copy, move or delete files, Midnight Commander shows the
file operations dialog. It shows the files currently being processed and
uses up to two progress bars. The file bytes bar indicates the percentage of
the current file that has been processed so far. The total bytes bar
indicates the percentage of the total size of the tagged files that has been
handled. Counters that show how many of the tagged files have been handled
are displayed. If the Verbose option is off, the file bytes bar and
total bytes bar are not shown.
There are three buttons at the bottom of the dialog:
- [Skip]
- button to skip the rest of the current file.
- [Suspend]
- button to suspend the file operation and button transforms to the
[Continue] one which continue the suspended operation. - [Abort]
- button to abort the whole operation, the rest of the files are
skipped.
There are three other dialogs which you can run into during the
file operations.
The error dialog informs about error conditions and has four
choices:
- [Ignore]
- button to ignore this error.
- [Ignore all]
- button to ignore this and all future errors.
- [Abort]
- button to abort the operation altogether.
- [Retry]
- button to continue if you fixed the problem from another terminal.
The replace dialog is shown when you attempt to copy or move a
file on the top of an existing file. The dialog shows the dates and sizes of
the both files. There are the following buttons in this dialog:
- [Yes]
- button to overwrite the file.
- [No]
- button to skip the file.
- [Append]
- button to append the source file to the target one.
- [Reget]
- button to append the rest of the source file to the target one. This
button is displayed only if the size of the target file is non-zero and
less than the size of the source file. - [All]
- button to overwrite all the files.
- [Older]
- button to overwrite if the source file is newer than the target file.
- [None]
- button to never overwrite files
- [Smaller]
- button to overwrite if the source file size is less than the target
one. - [Size differs]
- button to overwrite files with different sizes.
- [Abort]
- button to abort the whole operation.
If the Don’t overwrite with zero length file checkbox is
on, the zero-sized source files don’t overwrite the non-zero-sized target
files.
The recursive delete dialog is shown when you try to delete a
directory which is not empty. There are the following buttons in this
dialog:
- [Yes]
- button to delete the directory recursively.
- [No]
- button to skip the directory.
- [All]
- button to delete all the directories.
- [None]
- button to skip all the non-empty directories.
- [Abort]
- button to abort the whole operation.
If you have tagged files and perform an operation on them only the
files on which the operation succeeded are untagged. Failed and skipped
files are left tagged.
Mask
Copy/Rename
The copy/move operations let you translate the names of files in
an easy way. To do it, you have to specify the correct source mask and
usually in the trailing part of the destination specify some wildcards. All
the files matching the source mask are copied/renamed according to the
target mask. If there are tagged files, only the tagged files matching the
source mask are renamed.
There are other options which you can set:
Follow links
determines whether make the symlinks and hardlinks in the source
directory (recursively in subdirectories) new links in the target directory
or whether would you like to copy their content.
Dive into subdirs
determines the behavior when the source directory is about to be
copied, but the target directory already exists. The default action is to
copy the contents of the source directory into the target directory.
Enabling this option causes copying the source directory itself into the
target directory.
For example, you want to copy directory /foo containing
file bar to /bla/foo, which is an already existing directory.
Normally (when Dive into subdirs is not set), mc would copy file
/foo/bar into the file /bla/foo/bar. By enabling this option
the /bla/foo/foo directory will be created, and /foo/bar will
be copied into /bla/foo/foo/bar.
Preserve attributes
determines whether to preserve the permissions, timestamps and (if
you are root) the ownership of the original files. If this option is not
set, the current value of the umask will be respected.
Preserve ext2 attributes
determines whether to preserve the attributes of files and
directories on an ext2/3/4 file system.
Use shell patterns
When this option is on you can use the ‘*’ and ‘?’ wildcards in
the source mask. They work like they do in the shell. In the target mask
only the ‘*’ and ‘\<digit>’ wildcards are allowed. The first ‘*’
wildcard in the target mask corresponds to the first wildcard group in the
source mask, the second ‘*’ corresponds to the second group and so on. The
‘\1’ wildcard corresponds to the first wildcard group in the source mask,
the ‘\2’ wildcard corresponds to the second group and so on all the way up
to ‘\9’. The ‘\0’ wildcard is the whole filename of the source file.
Two examples:
If the source mask is «*.tar.gz», the destination is
«/bla/*.tgz» and the file to be copied is «foo.tar.gz»,
the copy will be «foo.tgz» in «/bla».
Suppose you want to swap basename and extension so that
«file.c» would become «c.file» and so on. The source
mask for this is «*.*» and the destination is
«\2.\1».
Use shell patterns off
When the shell patterns option is off the MC doesn’t do automatic
grouping anymore. You must use ‘\(…\)’ expressions in the source mask to
specify meaning for the wildcards in the target mask. This is more flexible
but also requires more typing. Otherwise target masks are similar to the
situation when the shell patterns option is on.
Two examples:
If the source mask is «^\(.*\)\.tar\.gz$», the
destination is «/bla/*.tgz» and the file to be copied is
«foo.tar.gz», the copy will be «/bla/foo.tgz».
Let’s suppose you want to swap basename and extension so that
«file.c» will become «c.file» and so on. The source mask
for this is «^\(.*\)\.\(.*\)$» and the destination is
«\2.\1».
Case Conversions
You can also change the case of the filenames. If you use ‘\u’ or
‘\l’ in the target mask, the next character will be converted to uppercase
or lowercase correspondingly.
If you use ‘\U’ or ‘\L’ in the target mask, the next characters
will be converted to uppercase or lowercase correspondingly up to the next
‘\E’ or next ‘\U’, ‘\L’ or the end of the file name.
The ‘\u’ and ‘\l’ are stronger than ‘\U’ and ‘\L’.
For example, if the source mask is ‘*’ ( Use shell patterns
on) or ‘^\(.*\)$’ ( Use shell patterns off) and the target mask is
‘\L\u*’ the file names will be converted to have initial upper case and
otherwise lower case.
You can also use ‘\’ as a quote character. For example, ‘\\’ is a
backslash and ‘\*’ is an asterisk.
Stable symlinks
commands Midnight Commander, that it should change symlinks in the
target, so that they’ll point to the same location as it did before. With
absolute symbolic links this does nothing, but if you have a relative one,
it will recompute its value, adding necessary ../ and other directory parts
and making the value as short as possible (most modern filesystems keep
short symlinks inside inodes and thus don’t waste much disk space).
Select/Unselect
Files
The dialog of group of files and directories selection or
uselection. The input line allow enter the regular expression of filenames
that will be selected/unselected.
When Files only checkbox is on, only files will be
selected. If Files only is off, as files as directories will be
selected. When Shell Patterns checkbox is on, the regular expression
is much like the filename globbing in the shell (* standing for zero or more
characters and ? standing for one character). If Shell Patterns is
off, then the tagging of files is done with normal regular expressions (see
ed (1)). When Case sensitive checkbox is on, the selection will be
case sensitive characters. If Case sensitive is off, the case will be
ignored.
Internal
Diff Viewer
The mcdiff is a visual diff tool. You can compare two files and
edit them in-place (diffs are updated dynamically). You can browse and view
a working copy from popular version control systems (GIT, Subversion,
etc).
Following shortcuts are available in internal diff viewer of
Midnight Commander.
- F1
- Invoke the built-in hypertext help viewer.
- F2
- Save modified files.
- F4
- Edit file of the left panel in the internal editor.
- F14
- Edit file of the right panel in the internal editor.
- F5
- Merge the current hunk. Only the current hunk will be merged.
- F7
- Start search.
- F17
- Continue search.
- F10, Esc, q
- Exit from diff viewer.
- Alt-s, s
- Toggle show of hunk status.
- Alt-n, l
- Toggle show of line numbers.
- f
- Maximize left panel.
- =
- Make panels equal in width.
- >
- Reduce the size of the right panel.
- <
- Reduce the size of the left panel.
- c
- Toggle show of trailing carriage return (CR) symbol as ^M.
- 2, 3, 4, 8
- Set tabulation size
- C-u
- Swap contents of diff panels.
- C-r
- Refresh the screen.
- C-o
- Switch to the subshell and show the command screen.
- Enter, Space,
n - Find next diff hunk.
- Backspace,
p - Find previous diff hunk.
- g
- Go to line.
- Down
- Scroll one line forward.
- Up
- Scroll one line backward.
- PageUp
- Move one page up.
- PageDown
- Moves one page down.
- Home, A1
- Moves to the line beginning.
- End
- Moves to the line end.
- C-Home
- Move to the file beginning.
- C-End, C1
- Move to the file end.
Internal
File Viewer
The internal file viewer provides two display modes: ASCII and
hex. To toggle between modes, use the F4 key.
The viewer will try to use the best method provided by your system
or the file type to display the information. Some character sequences, which
appear most often in preformatted manual pages, are displayed bold and
underlined, thus making a pretty display of your files.
When in hex mode, the search function accepts text in quotes and
constant numbers. Text in quotes is matched exactly after removing the
quotes. Each number matches one byte. You can mix quoted text with constants
like this:
"String" 34 0xBB 012 "more text"
Numbers are always interpreted in hex. In the example above,
«34» is interpreted as 0x34. The prefix «0x» isn’t
really needed: we could type «BB» instead of «0xBB». And
«012» is interpreted as 0x12, not as an octal number.
Here is a listing of the actions associated with each key that the
Midnight Commander handles in the internal file viewer.
- F1
- Invoke the built-in hypertext help viewer.
- F2
- Toggle the wrap mode.
- F4
- Toggle the hex mode.
- F5
- Goto. You can specify a line number, offset or percentage of file size of
position that you want to view. - F7, /, ?
- Start search. These keys call the dialog window that allows you to set up
the search options. If key is ? the «Backwards» option is
on. - C-s
- Continue forward search.
- C-r
- Continue reverse search.
- F17, n
- Continue search in the chosen direction.
- N
- Temporary change the search direction: backwards if forward search is
chosen, and vice versa. - F8
- Toggle Raw/Parsed mode: This will show the file as found on disk or if a
processing filter has been specified in the mc.ext.ini file, then the
output from the filter. Current mode is always the other than written on
the button label, since on the button is the mode which you enter by that
key. - F9
- Toggle the format/unformat mode: when format mode is on the viewer will
interpret some string sequences to show bold and underline with different
colors. Also, on button label is the other mode than current. - F10, Esc.
- Exit the internal file viewer.
- PageDown, space,
C-v. - Scroll one page forward.
- PageUp, Alt-v, C-b,
Backspace. - Scroll one page backward.
- Down
- Scroll one line forward.
- Up
- Scroll one line backward.
- C-l
- Refresh the screen.
- C-o
- Switch to the subshell and show the command screen.
- [n] m
- Set the mark n.
- [n] r
- Jump to the mark n.
- C-f
- Jump to the next file.
- C-b
- Jump to the previous file.
- Alt-r
- Toggle the ruler.
- Alt-e
- to change charset of displayed text may use Alt-e (M-e). Recoding is made
from selected codepage into system codepage. To cancel the recoding you
may select «<No translation>» in charset selection
dialog.
It’s possible to instruct the file viewer how to display a file,
look at the Edit Extension File section
Internal
File Editor
The internal file editor is a full-featured full screen editor. It
can edit files up to 64 megabytes. It is possible to edit binary files. The
internal file editor is invoked using F4 if the
use_internal_edit option is set in the initialization file.
The features it presently supports are: block copy, move, delete,
cut, paste; key for key undo; pull-down menus; file insertion; macro
commands; regular expression search and replace; S-arrow text highlighting
(if supported by the terminal); insert-overwrite toggle; word wrap;
autoindent; tunable tab size; syntax highlighting for various file types;
and an option to pipe text blocks through shell commands like indent and
ispell.
Sections:
- Options of editor in ini-file
The editor is very easy to use and requires no tutoring. To see
what keys do what, just consult the appropriate pull-down menu. Other keys
are: Shift movement keys do text highlighting. C-Ins copies to the
file mcedit.clip and S-Ins pastes from mcedit.clip.
S-Del cuts to mcedit.clip, and C-Del deletes
highlighted text. Mouse highlighting also works, and you can override the
mouse as usual by holding down the shift key while dragging the mouse to let
normal terminal mouse highlighting work.
To define a macro, press C-R and then type out the key
strokes you want to be executed. Press C-R again when finished. You
can then assign the macro to any key you like by pressing that key. The
macro is executed when you press C-A and then the assigned key. The
macro is also executed if you press Meta, Ctrl, or Esc and the assigned key,
provided that the key is not used for any other function. Once defined, the
macro commands go into the file
~/.local/share/mc/mcedit/mcedit.macros You can delete a macro by
deleting the appropriate line in this file.
To change charset of displayed text may use Alt-e (M-e). Recoding
is made from selected codepage into system codepage. To cancel the recoding
you may select «<No translation>» in charset selection
dialog.
F19 will format the currently highlighted block (plain text
or C or C++ code or another). This is controlled by the file
/__w/mc/mc/install-prefix/share/mc/edit.indent.rc which is copied to
~/.local/share/mc/mcedit/edit.indent.rc in your home directory the
first time you use it.
Options
of editor in ini-file
Some editor options of ini-file are described in this section.
Options are placed in [Midnight-Commander] section
- editor_wordcompletion_collect_entire_file
- Search autocomplete candidates in entire of file or just from begin of
file to cursor position (0)
Screen
selector
Midnight Commander supports running many internal modules (such as
editor, viewer and diff viewer) simultaneously and switching between them
without closing open files. Using several file managers at a time, however,
is not currently supported.
Let’s call each of these modules a screen. There are three ways to
switch between screens, using one of these global shortcuts:
- Alt-}
- switch to the next screen;
- Alt-{
- switch to the previous screen;
- Alt-`
- open a dialog window with the list of currently open screens (or use the
«Screen list» menu item).
Completion
Let Midnight Commander type for you.
Attempt to perform completion on the text before current position.
MC attempts completion treating the text as variable (if the text begins
with $), username (if the text begins with ~), hostname (if
the text begins with @) or command (if you are on the command line in
the position where you might type a command, possible completions then
include shell reserved words and shell built-in commands as well) in turn.
If none of these matches, filename completion is attempted.
Filename, username, variable and hostname completion works on all
input lines, command completion is command line specific. If the completion
is ambiguous (there are more different possibilities), MC beeps and the
following action depends on the setting of the Complete: show all option in
the Configuration dialog. If it is enabled, a list of all possibilities pops
up next to the current position and you can select with the arrow keys and
Enter the correct entry. You can also type the first letters in which
the possibilities differ to move to a subset of all possibilities and
complete as much as possible. If you press Alt-Tab again, only the
subset will be shown in the listbox, otherwise the first item which matches
all the previous characters will be highlighted. As soon as there is no
ambiguity, dialog disappears, but you can hide it by canceling keys
Esc, F10 and left and right arrow keys. If Complete: show all
is disabled, the dialog pops up only if you press Alt-Tab for the
second time, for the first time MC just beeps.
Apply escaping of ?, *, and & symbols (as
\?, \*, and \&) in filenames to disallow use them
as metasymbols in regular expressions when substitution is performed in the
input line.
Virtual
File System
Midnight Commander is provided with a code layer to access the
file system; this code layer is known as the virtual file system switch. The
virtual file system switch allows Midnight Commander to manipulate files not
located on the Unix file system.
Currently, Midnight Commander is packaged with some Virtual File
Systems (VFS): the local file system, used for accessing the regular
Unix file system; the ftpfs, used to manipulate files on remote
systems with the FTP protocol; the tarfs, used to manipulate tar and
compressed tar files; the undelfs, used to recover deleted files on
ext2 file systems (the default file system for Linux systems), shell
(for manipulating files over shell connections such as rsh and ssh). If the
code was compiled with sftpfs (for manipulating files over SFTP
connections).
A generic extfs (EXTernal virtual File System) is provided
in order to easily expand VFS capabilities using scripts and external
software.
The VFS switch code will interpret all of the path names used and
will forward them to the correct file system, the formats used for each one
of the file systems is described later in their own section.
FTP File System
The FTP File System (ftpfs) allows you to manipulate files on
remote machines. To actually use it, you can use the FTP link item in
the menu or directly change your current directory using the cd
command to a path name that looks like this:
ftp://[!][user[:pass]@]machine[:port]/[remote-dir]
The user, port and remote-dir elements are
optional. If you specify the user element, Midnight Commander will
login to the remote machine as that user, otherwise it will use anonymous
login or the login name from the ~/.netrc file. The optional
pass element is the password used for the connection. Using the
password in the VFS directory name is not recommended, because it can appear
on the screen in clear text and can be saved to the directory history.
To enable using FTP proxy, prepend ! (an exclamation sign)
to the hostname.
Examples:
    ftp://ftp.nuclecu.unam.mx/linux/local


    ftp://tsx-11.mit.edu/pub/linux/packages


    ftp://!behind.firewall.edu/pub


    ftp://guest@remote-host.com:40/pub


    ftp://miguel:xxx@server/pub
Please check the Virtual File System dialog box for ftpfs
options.
Tar File System
The tar file system provides you with read-only access to your tar
files and compressed tar files by using the chdir command. To change your
directory to a tar file, you change your current directory to the tar file
by using the following syntax:
/filename.tar/utar://[dir-inside-tar]
The mc.ext.ini file already provides a shortcut for tar files,
this means that usually you just point to a tar file and press return to
enter into the tar file, see the Edit Extension File section for details on
how this is done.
Examples:
    mc-3.0.tar.gz/utar://mc-3.0/vfs


    /ftp/GCC/gcc-2.7.0.tar/utar://
The latter specifies the full path of the tar archive.
FIle transfer over SHell filesystem
The shell file system is a network based file system that allows
you to manipulate the files in a remote machine as if they were local. To
use this, the other side has to have bash-compatible shell.
To connect to a remote machine, you just need to chdir into a
special directory which name is in the following format:
sh://[user@]machine[:options]/[remote-dir]
The user, options and remote-dir elements are
optional. If you specify the user element, Midnight Commander will
try to login on the remote machine as that user, otherwise it will use your
login name.
The available options are:
  'C' - use compression;


  'r' - use rsh instead of ssh;


  port - specify the port used by remote server.
If the remote-dir element is present, your current directory on the
remote machine will be set to this one.
Examples:
    sh://onlyrsh.mx:r/linux/local


    sh://joe@want.compression.edu:C/private


    sh://joe@noncompressed.ssh.edu/private


    sh://joe@somehost.ssh.edu:2222/private
SFTP (SSH File Transfer Protocol) filesystem
The SFTP file system is a network based file system that allows
you to manipulate the files in a remote machine as if they were local.
To connect to a remote machine, you just need to chdir into a
special directory which name is in the following format:
sftp://[user@]machine:[port]/[remote-dir]
The user, port and remote-dir elements are
optional. If you specify the user element, Midnight Commander will
try to login on the remote machine as that user, otherwise it will use your
login name. port — specify the port used by remote server (22 by
default). If the remote-dir element is present, your current
directory on the remote machine will be set to this one.
Examples:
    sftp://onlyrsh.mx/linux/local


    sftp://joe:password@want.compression.edu/private


    sftp://joe@noncompressed.ssh.edu/private


    sftp://joe@somehost.ssh.edu:2222/private
When establishing the connection, server key fingerprint is
verified using the ~/.ssh/known_hosts file. If the host/key pair is not
found or the host is found, but the key doesn’t match, an appropriate
message is shown. There are three buttons in the message dialog:
[Yes] add new host/key pair to the ~/.ssh/known_hosts file
and continue.
[Ignore] do not add new host/key pair to the
~/.ssh/known_hosts file, but continue nevertheless (at you own risk).
[No] abort connection.
Undelete File System
On Linux systems, if you asked configure to use the ext2fs
undelete facilities, you will have the undelete file system available.
Recovery of deleted files is only available on ext2 file systems. The
undelete file system is just an interface to the ext2fs library to retrieve
all of the deleted files names on an ext2fs and provides and to extract the
selected files into a regular partition.
To use this file system, you have to chdir into the special file
name formed by the «undel://» prefix and the file name where the
actual file system resides.
For example, to recover deleted files on the second partition of
the first SCSI disk on Linux, you would use the following path name:
undel://sda2
It may take a while for the undelfs to load the required
information before you start browsing files there.
EXTernal File System
extfs allows you to integrate numerous features and file
types into GNU Midnight Commander in an easy way, by writing scripts.
Extfs filesystems can be divided into two categories:
1. Stand-alone filesystems, which are not associated with any
existing file. They represent certain system-wide data as a directory tree.
You can invoke them by typing cd fsname:// where fsname is an extfs
short name (see below). Examples of such filesystems include audio (list
audio tracks on the CD) or apt (list of all Debian packages in the
system).
For example, to list CD-Audio tracks on your CD-ROM drive,
type
cd audio://
2. ‘Archive’ filesystems (like rpm, patchfs and more), which
represent contents of a file as a directory tree. It can consist of ‘real’
files compressed in an archive (urar, rpm) or virtual files, like messages
in a mailbox (mailfs) or parts of a patch (patchfs). To access such
filesystems fsname:// should be appended to the archive name. Note
that the archive itself can be on another vfs.
For example, to list contents of a zip archive documents.zip
type
cd documents.zip/uzip://
In many aspects, you could treat extfs like any other directory.
For instance, you can add it to the hotlist or change to it from directory
history. An important limitation is that you cannot invoke shell commands
inside extfs, just like any other non-local VFS.
Common extfs scripts included with Midnight Commander are:
- a
- access ‘A:’ DOS/Windows diskette (cd a://).
- apt
- front end to Debian’s APT package management system (cd
apt://). - audio
- audio CD ripping and playing (cd audio:// or cd
device/audio://). - bpp
- package of Bad Penguin GNU/Linux distribution (cd
file.bpp/bpp://). - deb
- package of Debian GNU/Linux distribution (cd file.deb/deb://).
- dpkg
- Debian GNU/Linux installed packages (cd deb://).
- hp48
- view and copy files to/from a HP48 calculator (cd hp48://).
- lslR
- browsing of lslR listings as found on many FTPs (cd
filename/lslR://). - mailfs
- mbox-style mailbox files support (cd mailbox/mailfs://).
- patchfs
- extfs to handle unified and context diffs (cd
filename/patchfs://). - rpm
- RPM package (cd filename/rpm://).
- rpms
- RPM database management (cd rpms://).
- ulha, urar, uzip, uzoo,
uar, uha - archivers (cd archive/xxxx:// where xxxx is one of: ulha,
urar, uzip, uzoo, uar, uha).
You could bind file type/extension to specified extfs as described
in the Edit Extension File section. Here is an example entry for Debian
packages:
  regex/\.deb$


          Open=%cd %p/deb://
Colors
Midnight Commander will try to detect if your terminal supports
color using the terminal database and your terminal name. Sometimes it gets
confused, so you may force color mode or disable color mode using the -c and
-b flag respectively.
If the program is compiled with the S-Lang screen manager instead
of ncurses, it will also check the variable COLORTERM, if it is set,
it has the same effect as the -c flag.
You may specify terminals that always force color mode by adding
the color_terminals variable to the Colors section of the
initialization file. This will prevent Midnight Commander from trying to
detect if your terminal supports color. Example:
[Colors]
color_terminals=linux,xterm
color_terminals=terminal-name1,terminal-name2...
The program can be compiled with both ncurses and S-Lang, ncurses
does not provide a way to force color mode: ncurses uses just the
information in the terminal database.
Midnight Commander provides a way to change the default colors.
Currently the colors are configured using the environment variable
MC_COLOR_TABLE or the Colors section in the initialization file.
In the Colors section, the default color map is loaded from the
base_color variable. You can specify an alternate color map for a
terminal by using the terminal name as the key in this section. Example:
[Colors]
base_color=
xterm=menu=magenta:marked=,magenta:markselect=,red
The format for the color definition is:
<keyword>=<fgcolor>,<bgcolor>,<attributes>:<keyword>=...
The colors are optional, and the keywords are: normal, selected,
disabled, marked, markselect, errors, input, inputmark, inputunchanged,
commandlinemark, reverse, gauge, header, inputhistory, commandhistory.
Button bar colors are: bbarhotkey, bbarbutton. Status bar color: statusbar.
Menu colors are: menunormal, menusel, menuhot, menuhotsel, menuinactive.
Dialog colors are: dnormal, dfocus, dhotnormal, dhotfocus, dtitle. Error
dialog colors are: errdfocus, errdhotnormal, errdhotfocus, errdtitle. Help
colors are: helpnormal, helpitalic, helpbold, helplink, helpslink,
helptitle. Viewer colors are: viewnormal, viewbold, viewunderline,
viewselected. Editor colors are: editnormal, editbold, editmarked,
editwhitespace, editnonprintable, editlinestate. Popup menu colors are:
pmenunormal, pmenusel, pmenutitle.
header determines the color of panel header, the line that
contains column titles and sort mode indicator.
input determines the color of input lines used in query
dialogs.
gauge determines the color of the filled part of the
progress bar (gauge), which is used to show the user the progress of file
operations, such as copying.
disabled determines the color of the widget that cannot be
selected.
The dialog boxes use the following colors: dnormal is used
for the normal text, dfocus is the color used for the currently
selected component, dhotnormal is the color used to differentiate the
hotkey color in normal components, whereas the dhotfocus color is
used for the highlighted color in the currently selected component.
Menus use the same scheme but uses the menunormal, menusel,
menuhot, menuhotsel and menuinactive tags instead.
Help uses the following colors: helpnormal is used for
normal text, helpitalic is used for text which is emphasized in
italic in the manual page, helpbold is used for text which is
emphasized in bold in the manual page, helplink is used for not
selected hyperlinks and helpslink is used for selected hyperlink.
Popup menu uses following colors: pmenunormal is used for
non-selected menu items and as a main color of popup menu window,
pmenusel is used for selected menu item, pmenutitle is used
for popup menu title.
The possible colors are: black, gray, red, brightred, green,
brightgreen, brown, yellow, blue, brightblue, magenta, brightmagenta, cyan,
brightcyan, lightgray and white. And there is a special keyword for
transparent background. It is ‘default’. The ‘default’ can only be used for
background color. Another special keyword «base» means mc’s main
colors. When 256 colors are available, they can be specified either as
color16 to color255, or as rgb000 to rgb555 and gray0 to gray23.
Example:
[Colors]
base_color=normal=white,default:marked=magenta,default
Attributes can be any of bold, italic, underline, reverse and
blink, appended by a plus sign if more than one are desired. The special
word «none» means no attributes, without attempting to fall back
to base_color. Example:
menuhotsel=yellow;black;bold+underline
Skins
You can change the appearance of Midnight Commander. To do this,
you must specify a file that contain descriptions of colors and lines to
draw boxes. Redefining of the colors is entirely compatible with the
assignment of colors, as described in Section Colors.
If your skin contains any true-color definitions, you should
define the ‘truecolors’ key set to TRUE value in [skin] section. If
true-color is not used but 256-color is, you should define ‘256colors’
instead.
A skin-file is searched on the following algorithm (to the first
one found):
-
1) command line option -S <skin> or —skin=<skin>
2) Environment variable MC_SKIN
3) Parameter skin in section [Midnight-Commander] in config
file.
4) File /__w/mc/mc/install-prefix/etc/mc/skins/default.ini
5) File /__w/mc/mc/install-prefix/share/mc/skins/default.ini
Command line option, environment variable and parameter in config
file may contain the absolute path to the skin-file (with the extension .ini
or without it). Search of skin-file will occur in (to the first one
found):
- 1) ~/.local/share/mc/skins/
2) /__w/mc/mc/install-prefix/etc/mc/skins/
3) /__w/mc/mc/install-prefix/share/mc/skins/
For getting extended info, refer to:
- Description of section and parameters
Color pair definitions
Color and attribute aliases
Draw lines
Compatibility
Description of section and parameters
Section [skin] contain metainfo for skin-file. Parameter
description contain short text about skin.
Section [filehighlight] contain descriptions of color pairs
for filenames highlighting. Name of parameters must be equal to names of
sections into filehighlight.ini file. See Filenames Highlight for getting
more info.
Section [core] describes the elements that are used
everywhere.
- _default_
- Default color pair. Used in all other sections if they not contain color
definitions - selected
- cursor
- marked
- selected data
- markselect
- cursor on selected data
- gauge
- color of the filled part of the progress bar
- input
- color of input lines used in query dialogs
- inputmark
- color of input selected text
- inputunchanged
- color of input text before first modification or cursor movement
- commandlinemark
- color of selected text in command line
- reverse
- reverse color
Section [dialog] describes the elements that are placed on
dialog windows (except error dialogs).
- _default_
- Default color for this section. Used [core]._default_ if not
specified - dfocus
- Color of active element (in focus)
- dhotnormal
- Color of hotkeys
- dhotfocus
- Color of hotkeys in focused element
Section [error] describes the elements that are placed on
error dialog windows
- _default_
- Default color for this section. Used [core]._default_ if not
specified - errdhotnormal
- Color of hotkeys
- errdhotfocus
- Color of hotkeys in focused element
Section [menu] describes the elements that are placed in
menu. This section describes system menu (called by F9) and user-defined
menus (called by F2 in panels and by F11 in editor).
- _default_
- Default color for this section. Used [core]._default_ if not
specified - entry
- Color of menu items
- Color of menu hotkeys
- Color of active menu item (in focus)
- Color of menu hotkeys in focused menu item
- Color of inactive menu
Section [help] describes the elements that are placed on
help window.
- _default_
- Default color for this section. Used [core]._default_ if not
specified - helpitalic
- Color pair for element with italic attribute
- helpbold
- Color pair for element with bold attribute
- helplink
- Color of links
- helpslink
- Color of active link (on focus)
Section [editor] describes the colors of elements placed in
editor.
- _default_
- Default color for this section. Used [core]._default_ if not
specified - editbold
- Color pair for element with bold attribute
- editmarked
- Color of selected text
- editwhitespace
- Color of tabs and trailing spaces highlighting
- editlinestate
- Color for line state area
Section [viewer] describes the colors of elements placed in
viewer.
- viewunderline
- Color pair for element with underline attribute
Color pair definitions
Any parameter in skin-file contain definition of color pair.
Color pairs described as two colors and the optional attributes
separated by ‘;’. First field sets the foreground color, second field sets
background color, third field sets the attributes. Any of the fields may be
omitted, in this case value will be taken from default color pair (global
color pair or from default color pair of this section).
Example:
[core]


    # green on black


    _default_=green;black


    # green (default) on blue


    selected=;blue


    # yellow on black (default)


    # underlined yellow on black (default)


    marked=yellow;;underline
Possible colors (names) and attributes are described in Colors.
section.
Color and attribute aliases
This optional section might define aliases for single colors (not
color pairs) as well as combination of attributes; in other words, for
semicolon-separated fragments of parameters. Aliases can refer to other
aliases as long as they don’t form a loop.
Example:
[aliases]


    myfavfg=green


    myfavbg=black


    myfavattr=bold+italic
[core]


    _default_=myfavfg;myfavbg;myfavattr
Draw
lines
Lines sets in section [Lines] into skin-file. By default
single lines are used, but you may redefine to usage of any utf-8 symbols
(like to lines, for example).
WARNING!!! When you build Midnight Commander with the
ncurses screen library usage of drawing lines is limited! Possible only
drawing a single lines. For all questions and comments please contact the
developers of ncurses.
Descriptions of parameters [Lines]:
- lefttop
- left-top line fragment.
- righttop
- right-top line fragment.
- centertop
- down branch of horizontal line
- centerbottom
- up branch of horizontal line
- leftbottom
- left-bottom line fragment
- rightbottom
- right-bottom line fragment
- leftmiddle
- right branch of vertical line
- rightmiddle
- left branch of vertical line
- centermiddle
- cross of lines
- horiz
- horizontal line
- vert
- vertical line
- thinhoriz
- thin horizontal line
- thinvert
- thin vertical line
Compatibility
Appointment of color by skin-files fully compatible with the
appointment of the colors described in Colors. section.
In this case, reassignment of colors has priority over the skin
file and is complementary.
Filenames
Highlight
Section [filehighlight] in current skin-file contains key names as
highlight groups and values as color pairs. Color pairs is documented in
Skins section.
Rules of filenames highlight are placed in
/__w/mc/mc/install-prefix/share/mc/filehighlight.ini file
(~/.config/mc/filehighlight.ini). Name of section in this file must be equal
to parameters names in [filehighlight] section (in current skin-file).
Keys in these groups are:
- type
- file type. If present, all other options are ignored.
- regexp
- regular expression. If present, ‘extensions’ option is ignored.
- extensions
- list of extensions of files. Separated by ‘;’ sign.
- extensions_case
- (make sense only with ‘extensions’ parameter) make ‘extensions’ rule case
sensitive (true) or not (false).
`type’ key may have values:
- FILE (all files)


  - FILE_EXE
- DIR (all directories)


  - LINK_DIR
- LINK (all links except stale link)


  - HARDLINK


  - SYMLINK
- STALE_LINK
- DEVICE (all device files)


  - DEVICE_BLOCK


  - DEVICE_CHAR
- SPECIAL (all special files)


  - SPECIAL_SOCKET


  - SPECIAL_FIFO


  - SPECIAL_DOOR
Special
Settings
Most of Midnight Commander settings can be changed from the menus.
However, there are a small number of settings which can only be changed by
editing the setup file.
These variables may be set in your ~/.config/mc/ini file:
- clear_before_exec
- By default, Midnight Commander clears the screen before executing a
command. If you would prefer to see the output of the command at the
bottom of the screen, edit your ~/.config/mc/ini file and change the value
of the field clear_before_exec to 0. - confirm_view_dir
- If you press F3 on a directory, normally MC enters that directory. If this
flag is set to 1, then MC will ask for confirmation before changing the
directory if you have files tagged. - ftpfs_retry_seconds
- This value is the number of seconds Midnight Commander will wait before
attempting to reconnect to an FTP server that has denied the login. If the
value is zero, the login will no be retried. - max_dirt_limit
- Specifies how many screen updates can be skipped at most in the internal
file viewer. Normally this value is not significant, because the code
automatically adjusts the number of updates to skip according to the rate
of incoming keystrokes. However, on very slow machines or terminals with a
fast keyboard auto repeat, a big value can make screen updates too
jumpy.
- It seems that setting max_dirt_limit to 10 causes the best behavior, and
that is the default value.
- mouse_move_pages_viewer
- Controls if scrolling with the mouse is done by pages or line by line on
the internal file viewer. - only_leading_plus_minus
- Allow special treatment for ‘+’, ‘-‘, ‘*’ in the command line (select,
unselect, reverse selection) only if the command line is empty. You don’t
need to quote those characters in the middle of the command line. On the
other hand, you cannot use them to change selection when the command line
is not empty. - alternate_plus_minus
- If true, use ‘+’, ‘-‘, ‘\’ and ‘*’ keys normally. For select/unselect, use
‘Alt-+’, ‘Alt—‘ and ‘Alt-*’. - show_output_starts_shell
- This variable only works if you are not using the subshell support. When
you use the C-o keystroke to go back to the user screen, if this one is
set, you will get a fresh shell. Otherwise, pressing any key will bring
you back to Midnight Commander. - timeformat_recent
- Change the time format used to display dates less than 6 months from now.
See strftime or date man page for the format specification. If this option
is absent, default timeformat is used. - timeformat_old
- Change the time format used to display dates older than 6 months from now
or for dates in the future. See strftime or date man page for the format
specification. If this option is absent, default timeformat is used. - torben_fj_mode
- If this flag is set, then the home and end keys will work slightly
different on the panels, instead of moving the selection to the first and
last files in the panels, they will act as follows:
- The home key will: Go up to the middle line, if below it; else go to the
top line unless it is already on the top line, in this case it will go to
the first file in the panel. - The end key has a similar behavior: Go down to the middle line, if over
it; else go to the bottom line unless you already are at the bottom line,
in such case it will move the selection to the last file name in the
panel.
- use_file_to_guess_type
- If this variable is on (the default) it will spawn the file command to
match the file types listed on the mc.ext.ini file. - xtree_mode
- If this variable is on (default is off) when you browse the file system on
a Tree panel, it will automatically reload the other panel with the
contents of the selected directory. - shell_directory_timeout
- This variable holds the lifetime of a directory cache entry in seconds.
The default value is 900 seconds. - clipboard_store
- This variable contains path (with options) to the external clipboard
utility like ‘xclip’ to read text into X selection from file. For
example:
clipboard_store=xclip -i
- clipboard_paste
- This variable contains path (with options) to the external clipboard
utility like ‘xclip’ to print the selection to standard out. For
example:
clipboard_paste=xclip -o
- autodetect_codeset
- This option allows use the `enca’ command to autodetect codeset of text
files in internal viewer and editor. List of valid values can be obtain by
the `enca —list languages | cut -d : -f1′ command. Option must be located
in the [Misc] section.
For example:
autodetect_codeset=russian
Parameters
for external editor or viewer
Midnight Commander provides a way for specify an options for
external editors and viewers. Midnight Commander tries to search the
«[External editor or viewer parameters]» section in the system
initialization file (the mc.lib file located in Midnight Commander’s library
directory) and then in the ~/.config/mc/ini file. The option name should be
equal to the name (full pathname) of external editor or viewer. The option
value can contain following variables:
- %filename
- The filename to edit/view.
- %lineno
- The start line in the opening file.
For example:
[External editor or viewer parameters]


    vi=%filename +%lineno


    joe=%filename +%lineno


    more=%filename +%lineno
Start line is passed to the external editor/viewer only if it is
called from the Find file results window.
If external editor/viewer is launched via F4/F3 keys, MC hopes
that program (at least «joe», but probably others too) has an own
feature that by default opens the file where it was last open. MC doesn’t
prevent external editor/viewer to save and restore position in opened
files.
Terminal
databases
Midnight Commander provides a way to fix your system terminal
database without requiring root privileges. Midnight Commander searches in
the system initialization file (the mc.lib file located in Midnight
Commander’s library directory) and in the ~/.config/mc/ini file for the
section «terminal:your-terminal-name» and then for the section
«terminal:general», each line of the section contains a key symbol
that you want to define, followed by an equal sign and the definition for
the key. You can use the special \e form to represent the escape character
and the ^x to represent the control-x character.
The possible key symbols are:
f0 to f20     Function keys f0-f20
bs            backspace
home          home key
end           end key
up            up arrow key
down          down arrow key
left          left arrow key
right         right arrow key
pgdn          page down key
pgup          page up key
insert        the insert character
delete        the delete character
complete      to do completion
For example, to define the key insert to be the Escape + [ + O +
p, you set this in the ini file:
insert=\e[Op
Also now you can use extended learn keys. For example:
    ctrl-alt-right=\e[[1;6C


    ctrl-alt-left=\e[[1;6D
This means that ctrl+alt+left sends a \e[[1;6D escape sequence and
therefore Midnight Commander interprets «\e[[1;6D» as
C-Alt-Left.
The complete key symbol represents the escape sequences
used to invoke the completion process, this is invoked with Alt-tab, but you
can define other keys to do the same work (on those keyboard with tons of
nice and unused keys everywhere).
FILES
Full paths below may vary between installations. They are also
affected by the MC_DATADIR environment variable. If it’s set, its
value is used instead of /__w/mc/mc/install-prefix/share/mc in the paths
below.
/__w/mc/mc/install-prefix/share/mc/help/mc.hlp
- The help file for the program.
/__w/mc/mc/install-prefix/share/mc/mc.ext.ini
- The default system-wide extensions file.
~/.config/mc/mc.ext.ini
- User’s own extension, view configuration and edit configuration file. They
override the contents of the system wide files if present.
/__w/mc/mc/install-prefix/etc/mc/mc.ini
/__w/mc/mc/install-prefix/share/mc/mc.ini
- System-wide setup files for Midnight Commander, used only if the user
doesn’t have his own ~/.config/mc/ini file. If
/__w/mc/mc/install-prefix/etc/mc/mc.ini exists,
/__w/mc/mc/install-prefix/share/mc/mc.ini isn’t used.
/__w/mc/mc/install-prefix/share/mc/mc.lib
- Global settings for Midnight Commander. Settings in this file affect all
users, whether they have ~/.config/mc/ini or not. Currently, only terminal
settings are loaded from mc.lib.
~/.config/mc/ini
- User’s own setup. If this file is present then the setup is loaded from
here instead of the system-wide startup file.
/__w/mc/mc/install-prefix/share/mc/hints/mc.hint
- This file contains the hints displayed by the program.
/__w/mc/mc/install-prefix/share/mc/mc.menu
- This file contains the default system-wide applications menu.
~/.config/mc/menu
- User’s own application menu. If this file is present it is used instead of
the system-wide applications menu.
~/.cache/mc/Tree
- The directory list for the directory tree and tree view features.
~/.local/share/mc.menu
- Local user-defined menu. If this file is present, it is used instead of
the home or system-wide applications menu.
To change default root directory of MC, you can use
MC_PROFILE_ROOT environment variable. The value of MC_PROFILE_ROOT
must be an absolute path. If MC_PROFILE_ROOT is unset or empty, HOME
variable is used. If HOME is unset or empty, MC directories are get from
GLib library.
LICENSE
This program is distributed under the terms of the GNU General
Public License as published by the Free Software Foundation. See the
built-in help for details on the License and the lack of warranty.
AVAILABILITY
The latest version of this program can be found at
https://ftp.osuosl.org/pub/midnightcommander/ .
SEE
ALSO
ed(1), gpm(1), terminfo(1), view(1), sh(1), bash(1), tcsh(1),
zsh(1).
Midnight Commander's page on the World Wide Web:
	https://midnight-commander.org
Authors and contributors are listed in the AUTHORS file in the
source distribution.
BUGS
See the file TODO in the distribution for information on what
remains to be done.
If you want to report a problem with the program, please create
bugreport at https://github.com/MidnightCommander/mc/issues .
Provide a detailed description of the bug, the version of the
program you are running (mc -V displays this information), the
operating system you are running the program on. If the program crashes, we
would appreciate a stack trace.
Этот материал предназначен для максимально быстрого старта работы с MC.
Midnight Commander (сокращенно – MC) – это файловый менеджер, который устанавливается на ваш сервер (или ваш локальный компьютер) и позволяет управлять файлами, а также редактировать их.
MC используется как основная рабочая лошадка для RISH. С его помощью можно копировать, перемещать, архивировать, редактировать и выполнять другие действия с файлами как на вашем, так и на удаленном компьютере. Так же именно из меню MC вызываются команды RISH.

Тем, кто еще застал времена Norton Commander, наверное, будет проще разобраться с MC, а вот для остальных этот файловый менеджер может вызвать непонимание.
Как работает MC?
Первое, что нужно понять – MC может работать на вашем компьютере, как традиционная программа файловый менеджер и тогда он управляет файлами на вашем компьютере, а может выполняться на удаленном комьютере (сервере с вашим сайтом). В этом случае окошко с файловым менеджером для удаленного сервера выступает как монитор, а вы управляете его работой не на своем компьютере, а на удаленном.
Надеюсь, что это эта очевидная мысль, послужит вам к верному пониманию взаимодействия между вами и MC. Потому что взаимодействовать вы будете посредством терминальной программы, установленной уже на вашем компьютере.
В случае использования RISH у вас будет именно такой сценарий использования, когда MC используется на вашем сервере для управления расположенными там файлами.

Важно понимать, что разные терминальные программы на разных компьютерах с разными клавиатурами (клавиатура mac очень отличается от windows – например, там отсутствует клавиша INSERT) могут вести себя по разному.
Может быть вы сегодня подключились к серверу через свой macbook, а завтра вам нужно соединиться с ним из офиса через windows компьютер, а потом в метро вы можете подключиться со своего телефона… MC приходится взаимодействовать с разными терминальными программами и поэтому некоторые клавиатурные сочетания вам могут показаться странными. Я постараюсь обратить ваше мнимание на этот аспект. Причина такого поведения очень проста – MC должен работать даже на клавиатуре (или телетайпе), где могут отсутствовать стрелки и другие клавиши. И хотя поведение MC может показаться вначале непонятным – он легко подстраивается под ваши привычки.
Как запустить MC и где скачать для MacOS и Windows
Если MC уже установлен (а в случае RISH он уже поставлен на вашей системе), то запускается он очень просто – набираем mc в командной строке.
На Mac Midnight Commander ставится из репозитариев brew – brew install mc в командной строке. Установить brew на Mac можно (если еще не установлен) выполнив команду /bin/bash -c "$(curl -fsSL https://raw.githubusercontent.com/Homebrew/install/HEAD/install.sh)". Прочитать про него можно по ссылке https://brew.sh/
Как устроен MC (анатомия файлового менеджера)
Визуально MC разделяется на 5 основных областей:
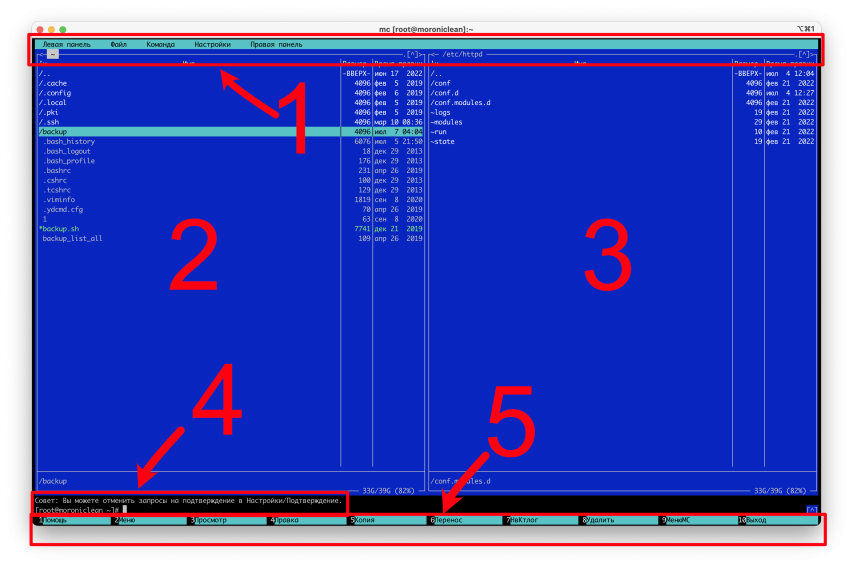

-
Верхняя строка меню. Можно кликнуть мышкой или нажать F9 чтобы перейти в верхнее меню. Передвигаемся по нему стрелками. Выбор пункта меню – enter.
-
Левая панель с файлами или служебной информацией.
-
Правая панель с файлами или служебной информацией.
-
Строка для исполнения терминальных команд
-
Подсказка по назначению основных функциональных клавиш
Команды из блока 5 соответствуют клавишам с F1 по F10. И их также можно нажимать мышкой (если кому так будет удобнее).
Еще можно переключиться на режим командной строки (традиционная консоль), если нажать Ctrl-o (буква о) для того чтобы посмотреть вывод консольных команд или поработать с командной строкой. Назад можно вернуться нажав это сочетание повторно.
Прошу особое внимание уделить блоку 4 – командной строке. Она предназначена для того, чтобы вы могли набрать команды непосредственно в командной строке, как это обычно делается без MC. Выполнить команду можно просто нажав Enter.
Однако есть один коварный момент – где бы ни находился ваш курсор – вы просто можете начать набирать команду и эти символы будут появляться в командной строке. Только вот новички не всегда это делают осознанно – они могут случайно нажать не тот символ и он останется в командной строке набранным. В таком случае меняется поведение клавиши Enter. Вы будете недоумевать почему все работает не так, как вы ожидаете. Просто проверьте, что командная строка пуста (или удалите набранные символы с помощью клавиши backspace – ее еще называют «стрелочка назад» или «забой»).
Панели MC
На левой и правой панели отображаются файлы и каталоги в текущем расположении файловой системы. Здесь так же может отображаться дополнительная информация о текущем файле и файловой системе или содержимом сайта. Режим отображения текущей панели управляется через верхнее меню, в которое можно попасть нажав F9 или кликнув мышкой.
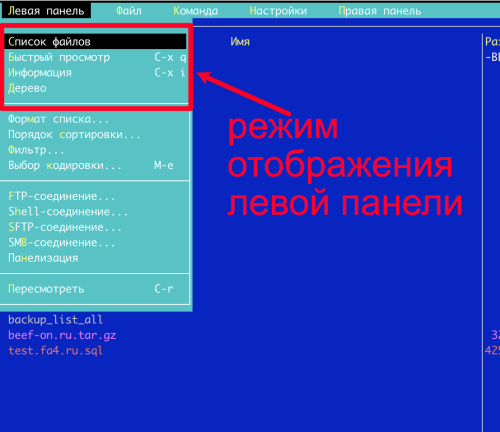

Больше всего из этого списка нас интересует два режима:
-
Список файлов (это то, что вы видите изначально)
-
Информация (о файле и файловой системе)
Второй режим можно включить опять же мышью через меню или нажав следующие клавиши – Ctrl-x i (они указаны в меню). Нажимать их следует так — нажимаем Ctrl, не отпуская ее, нажимаем x, затем, отпустив обе клавиши, просто жмем i. Включится режим отображения о файле и файловой системе. Выключается повторным нажатием на них же. Если не сработает, проверьте какой язык у вас включен на компьютере. Все работает только для английской раскладки.
Режим отображения информации о файле и файловой системе очень важен, потому что именно там вы увидите свободное место на диске. Это очень частый источник проблем на сервере.
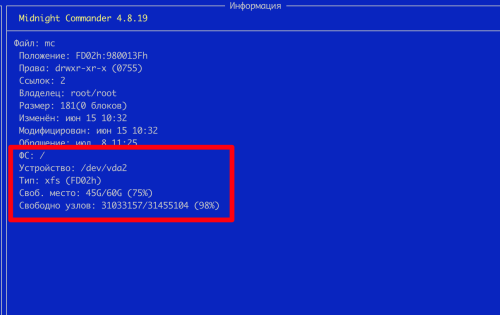

Здесь можно увидеть владельца файла, права и другую информацию о файловой системе.
Ctrl-u позволяет поменять панели местами. Просто для удобства. Но я почему-то этим пользуюсь часто.
Поведение клавиши Esc
Вы уже давно все привыкли к тому, что Esc означает отказ или выход из программы. В большинстве случаев так и есть и сам MC следует этому соглашению. Но, как я уже упоминал ранее, MC расчитан на работу с различными терминалами и некоторые настолько ущербны, что у них отсутствует необходимые клавишы. В таком случае нужное сочетание набирается с помощью клавиши Esc (esc последовательности).
Это противоречит тому поведению клавиши Esc, к которому мы привыкли. MC постарался разрешить это противоречие, введя задержку на ожидание новых нажатий клавиш после клавиши Esc. Эта задержка есть в настройках. По умолчанию там установлено очень большое число, и если вы замечаете, что вам приходится нажимать клавишу Esc два раза, чтобы выйти из программы, то самое время это число в настройках изменить.

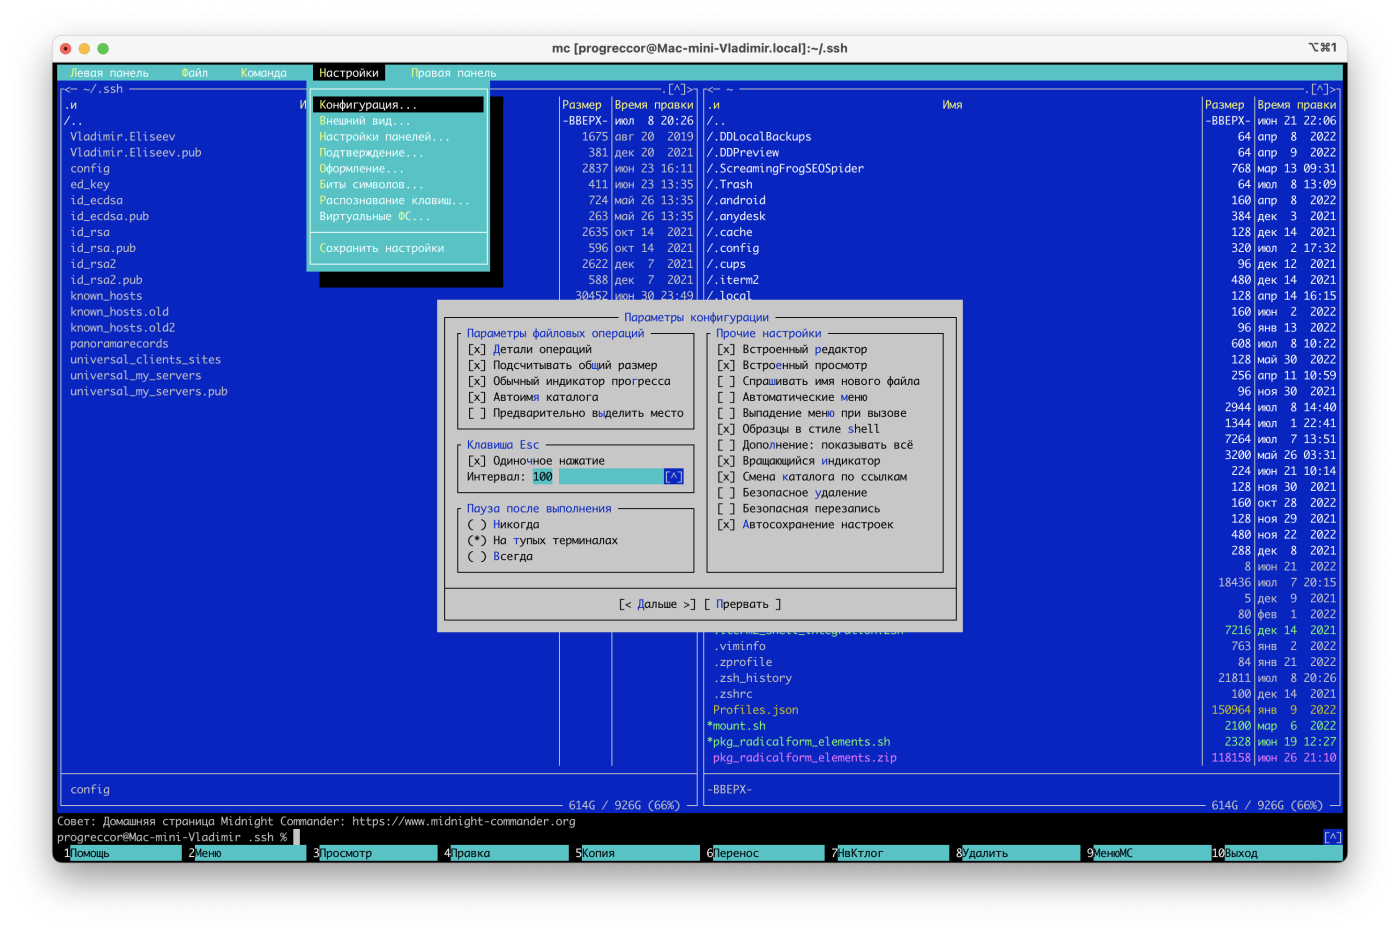
Поставьте здесь значение порядка 100 (это микросекунды, по умолчанию там стоит 1000000). Этого будет достаточно, чтобы вернуть привычное поведение Esc.
Копирование и вставка из буфера обмена
Раз уж мы упомянули поведение обычной клавиши Esc, давайте поговорим еще об одних привычных для нас клавишах — Ctrl-C, Ctrl-V.
Лучше всего про них забыть
Ctrl-C в терминале Linux обычно нужен, чтобы остановить выполнение программы. Это сочетание работает как STOP (кстати, запомните, может пригодиться). А Ctrl-V на вашем Windows терминале скорее всего просто не сработает.
Есть универсальная замена, которая работает везде, в том числе и в других программах Windows.
Ctrl-Insert и Shift-Insert. Лучше привыкните к ним. Тем более, что они работают вне зависимости от языковой раскладки.
Shift-Insert вставляет в терминал текст из буфера обмена. Для владельцев Mac – сочетание Ctrl-V у вас должно работать в терминале, поскольку клавиши Insert у вас попросту нет.
А вот чтобы скопировать текст из терминала никакого сочетания клавиш не требуется – просто выделите мышкой любой текст и он уже окажется в буфере обмена – нажимать ничего не надо. Иногда это может очень путать новичков, у которых непроизвольно исчезает текст из буфера обмена.
Однако, если вы находитесь в MC, то выделять текст, чтобы он попал в буфер обмена, придется с зажатой клавишей Shift для Windows пользователей или c зажатой клавишей Option для владельцев Mac. Помните об этом!
Каталоги и файлы
Каталоги отображаются более ярким белым цветом и идут в начале списка. Файлы идут за ними и отображаются серым цветом (менее ярким белым). Вначале идут скрытые файлы (те, что начинаются с точки), затем идут обычные.
По умолчанию файлы отсортированы по имени. Способ сортировки отображается в левом верхнем углу каждой панели (на него тоже можно кликать мышкой, меняя порядок сортировки).
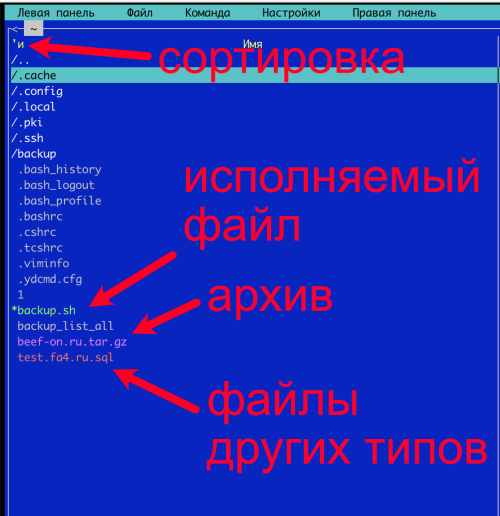

-
отображаются зеленым цветом и перед именем файла рисуется звездочка. В данном случае звездочка – это не часть имени!
-
отображаются цветом magenta (похож на розовый)
-
отображаются красным цветом
Есть и другие цвета файлов (голубые для исходных текстов и символических ссылок, желтые для doc файлов и так далее), но для нас важны именно эти.
Копирование, перемещение и переименовывание файлов
Принцип копирования и перемещения файлов очень простой – текущий файл (тот, что выделен строкой морского цвета) файл копируется из места, где сейчас находится курсор в место, которое отображается на другой панели.
Поменять местами панели можно с помощью клавиш Ctrl-u. Открыть на неактивной панели то же самое расположение, что и на текущей – Alt-i или Option-i нам Mac.
F5 – копирование файлов и каталогов. Производится копирование того файла или каталога, на котором сейчас установлен курсор в место, отображаемое на другой панели MC. Перед копированием будет показано окно, в котором указано откуда файл копируется и куда. Там же можно подправить место назначения. Для начала процесса копирования, просто нажмите Enter.
F6 – перемещение файлов и каталогов. Принцип аналогичен копированию, но исходный файл именно перемещается. Обычно этот процесс происходит быстрее копирования, если все делается в рамках одной файловой системы.
F6 – переименование файлов и каталогов. Эта же самая клавиша может использоваться и для переименования файлов и каталогов. В окне, которое показывает адрес назначения нужно просто набрать новое имя файла или каталога. Маленький совет – не надо кликать в эту строку курсором мыши – в этом случае, если вы начнете набирать новое имя, оно просто сотрет старое, когда вы нажмете первую букву. Это позволит вам сэкономить время на стирание введенных символов.
Обновление панелей
Ctrl-r – панели не обновляются автоматически подобно тому, как это происходит у вас на компьютере. Надеюсь, вы это понимаете… Поэтому если вы следите за обновлением log файлов на компьютере или появлением новых архивов, которые формирует ваш скрипт, или еще какие-то изменения происходят с файлами на вашем сервере, то самое нужное для вас сочетание клавиш, это именно Ctrl-r. Позволяет перечитать состояние файловой системы и отобразить все изменения на панели.
Выделение файлов и каталогов
Если нужно копировать несколько файлов или каталогов, их можно выделить с помощью клавиши insert или Shift-↑ Shift-↓ (Shift и стрелки вверх и вниз на клавиатуре). В случае, если имеются выделенные файлы, копирование производится именно выделенных файлов, а не того, на который указывает курсор.
Для выделения всех видимых в панели файлов и каталогов или для выделения файлов по маске (например, всех файлов с расширением .log) можно использовать клавишу +, которая расположена на цифровом блоке клавиатуры или обычный значок плюса +. Удобнее всего использовать плюс из цифрового блока, потому, что не требуется нажатие Shift.
Так же можно использовать соответствующие пункты меню из раздела Файл.

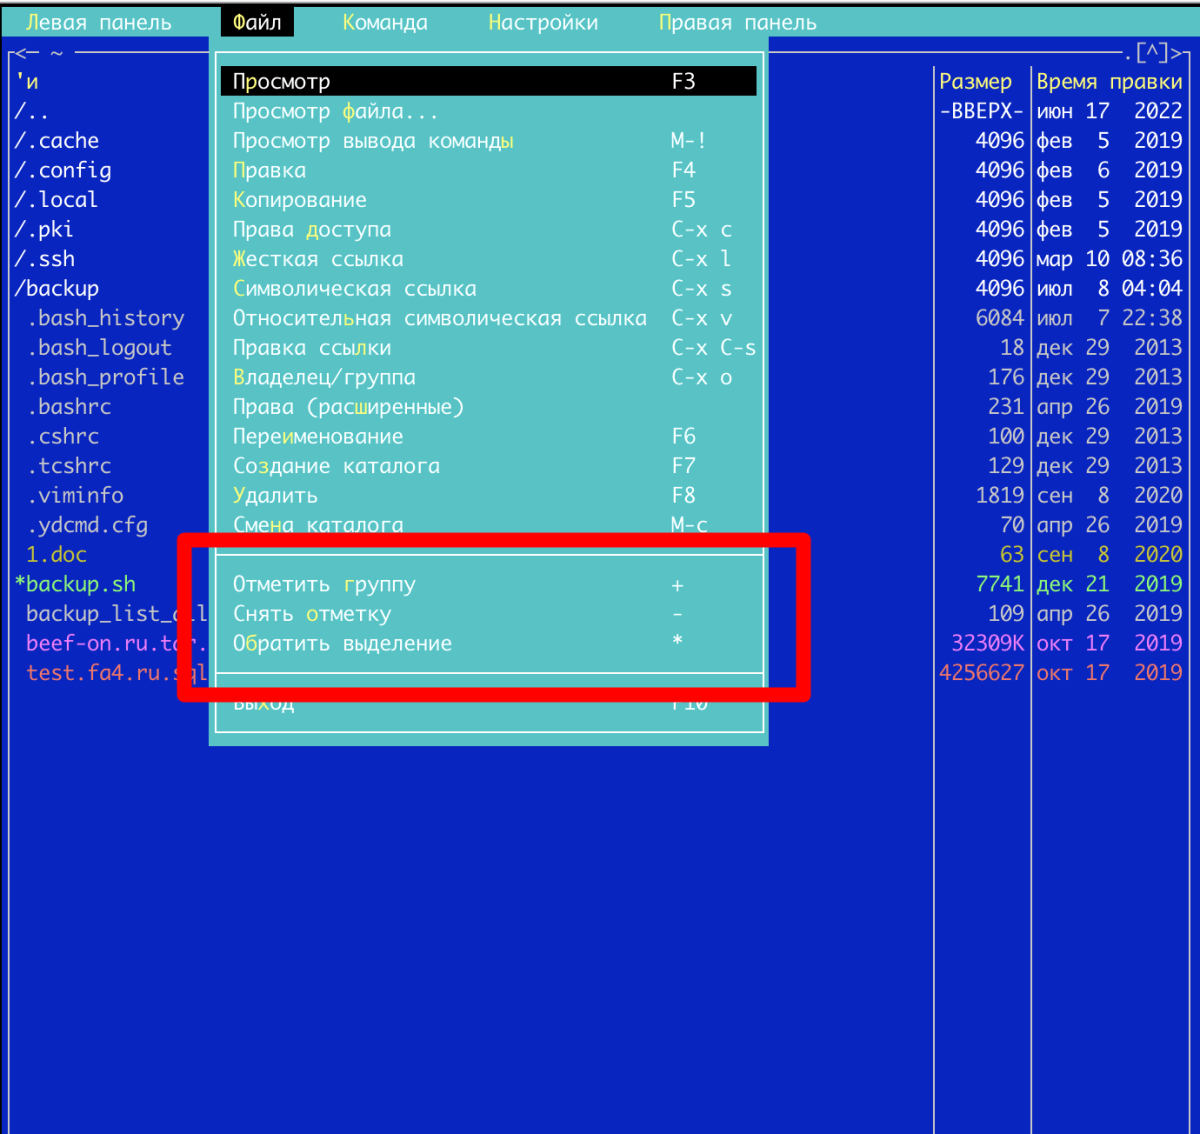
После нажатия клавиши + появится окно для ввода маски выделения. Обратите внимание, что здесь должна стоять звездочка, если вы хотите выделить все файлы и каталоги в текущем каталоге. Или явно указанная маска, для выделения по маске. Например, для выделения только файлов с расширением .log надо ввести *.log
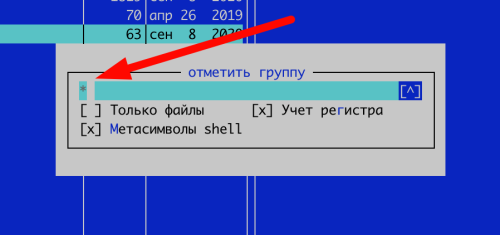

- – снимает выделение файлов по маске или, если в качестве маски введена звездочка (это значение по умолчанию), снимает выделение со всех файлов и каталогов в текущем каталоге.
* – Инвертирует текущее выделение выделение файлов. Прошу акцентировать внимание на слове «файлов». То есть, если выделены и файлы и каталоги, то инвертировать выделение получится именно для файлов. Кстати это самый быстрый способ выделить в каталоге только файлы. Достаточно просто нажать звездочку и все файлы в текущем каталоге окажутся выделены.
Как узнать размер каталога
Ctrl-space – это сочетание клавиш покажет размер текущего каталога, на который указывает курсор. К сожалению, на Mac это сочетание переключает раскладку языка. Поэтому для владельцев Mac придется размер каталога определять через меню F9->Команда->Размеры каталогов.
Перемещение по каталогам
По умолчанию стрелки вверх и вниз позволяют перемещаться по каталогу. Для того, чтобы подняться на уровень выше, вам нужно добраться к началу каталога и найти там две точки – это переход к каталогу на уровень выше. Нажатие Enter на /.. позволит подняться на уровень выше. Быстрее переместиться к началу списка файлов в панели поможет клавиша Home.
Если нажать на Enter на имени каталога – то вы войдете в этот каталог.
Стрелки влево и вправо не несут практической пользы в таком режиме. Но можно переключить режим перемещения на более удобный – он называется «Навигация в стиле lynx».
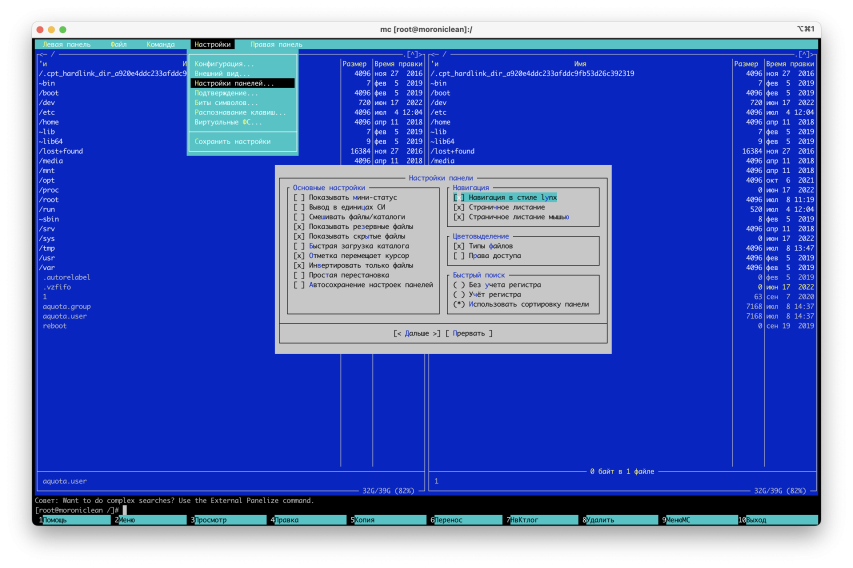
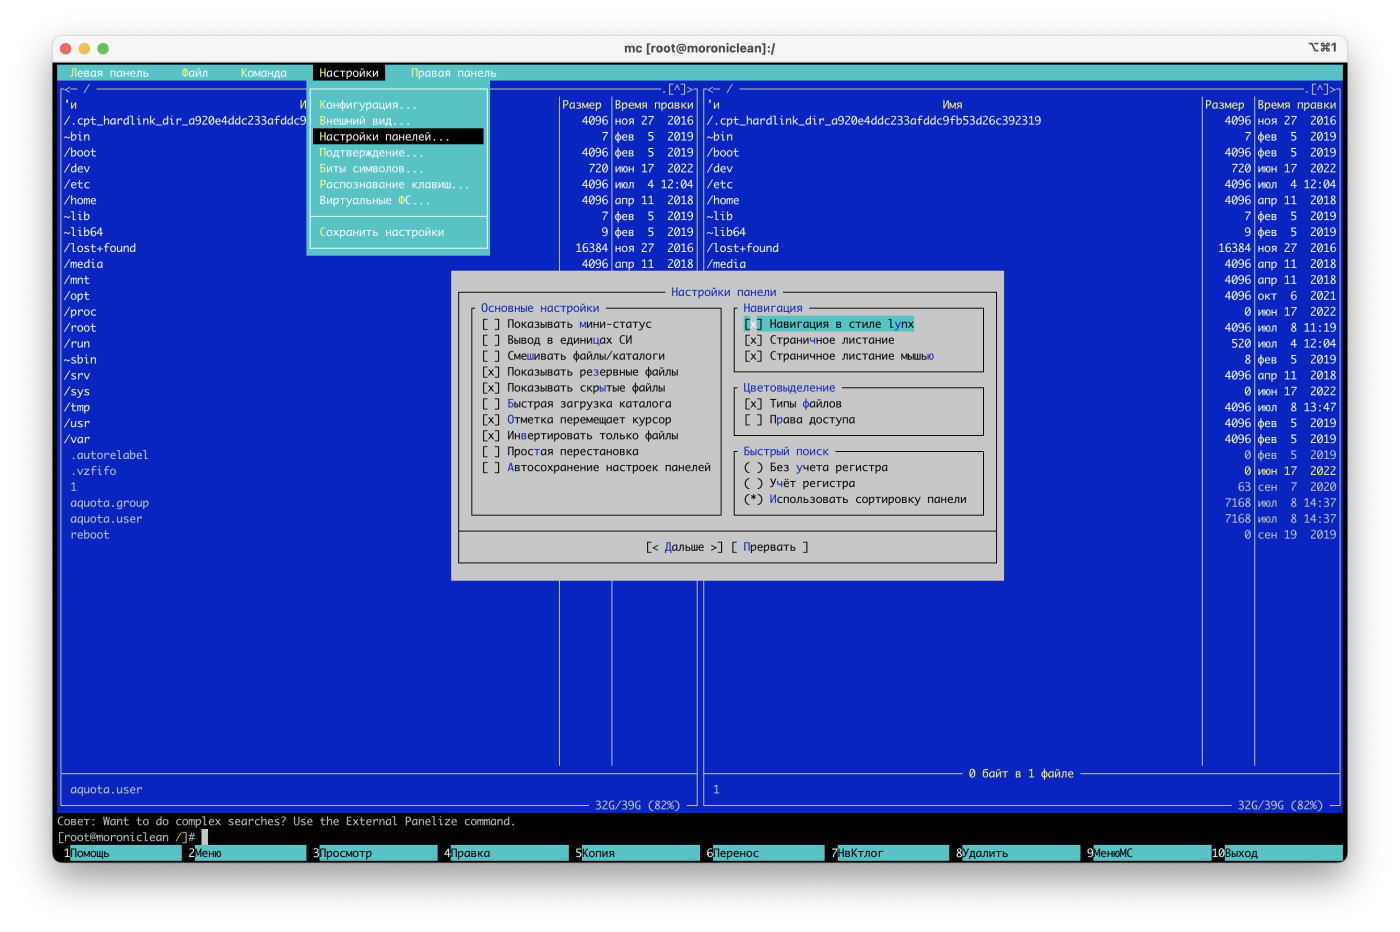
Нужно зайти в настройки в верхнем меню и выбрать «Настройки панелей», а затем – «Навигация в стиле lynx» и включить этот режим (поставить крестик с помощью пробела). После этого стрелка влево позволит подняться на уровень выше (в родительский каталог), а стрелка вправо позволит зайти в тот каталог, на котором расположен курсор. Если вы попробуете попользоваться этим режимом – поймете насколько он удобнее и быстрее. Но если не понравится – всегда можно там же и выключить.
Работа с архивами
Работать с архивами очень просто – в архив можно зайти подобно тому, как заходят в каталог. То есть устанавливаем курсор на файл с архивом и нажимаем клавишу Enter. Правда, сразу нужно учитывать, что если архив большой, то реакция на нажатие Enter последует не сразу. Задержка может доходить даже до десятка секунд – все зависит от мощности вашего сервера и размера архива. В этом случае после нажатия Enter нужно просто подождать некоторое время.
После того, как вы вошли в архив извлечь файлы можно очень просто, подобно тому как вы копируете обычные файлы, нажав F5. С точки зрения пользователя ничем не отличается от работы с каталогом.
Правда, есть один тонкий момент, который надо обязательно учитывать – если вы работаете с архивом .tar.gz, то все пройдет нормально, а вот если у вас .zip – извлечение из такого архива может занять значительное время. Чтобы ускорить процесс – можно воспользоваться командой unzip в командной строке. А вообще лучше взять себе за правило не связываться с архивами zip и все хранить в tar.gz. Еще одна причина так делать – невозможность сохранить в zip архиве права на файлы.
Небольшая подсказка, которая позволяет ускорить работу в командной строке – Alt-Enter (или Option-Enter на Mac) позволяет ввести в командную строку имя текущего файла или каталога. В таком случае разархивирование zip файла выглядит таким образом – мы наводим курсор на файл, набираем unzip в командной строке, нажимаем пробел и затем нажимаем Alt-Enter. Все, у нас получилась готовая команда и нам осталось только нажать Enter для ее запуска.
Создание и удаление файлов и каталогов
F7 – создать папку в текущем каталоге (надеюсь все понимают, что не надо использовать *, +, и знак вопроса в имени?).
F8 – удалить текущий файл или каталог (перед удалением вас переспросят – стоит ли это делать).
Shift-F4 – создать новый файл. Будет открыт текстовый редактор, в котором вы сможете набрать содержимое файла. В момент сохранения (по F2) или при попытке выйти из файла, вас попросят дать имя новому файлу.
Просмотр и редактирование файлов
По умолчанию в MC выбраны встроенные редактор и просмотрщик, но если это не так – можно вернуть стандартное поведение в меню Конфигурации. Поставьте крестики напротив нужных параметров.
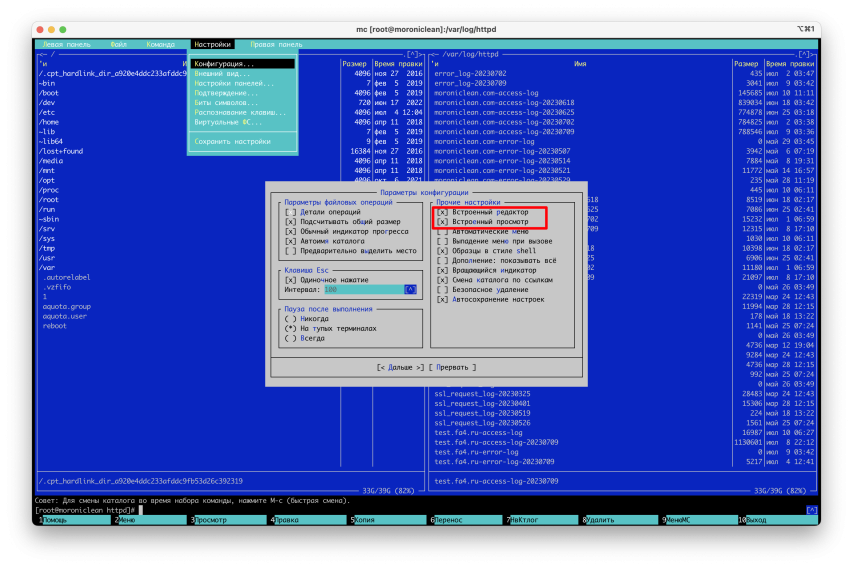
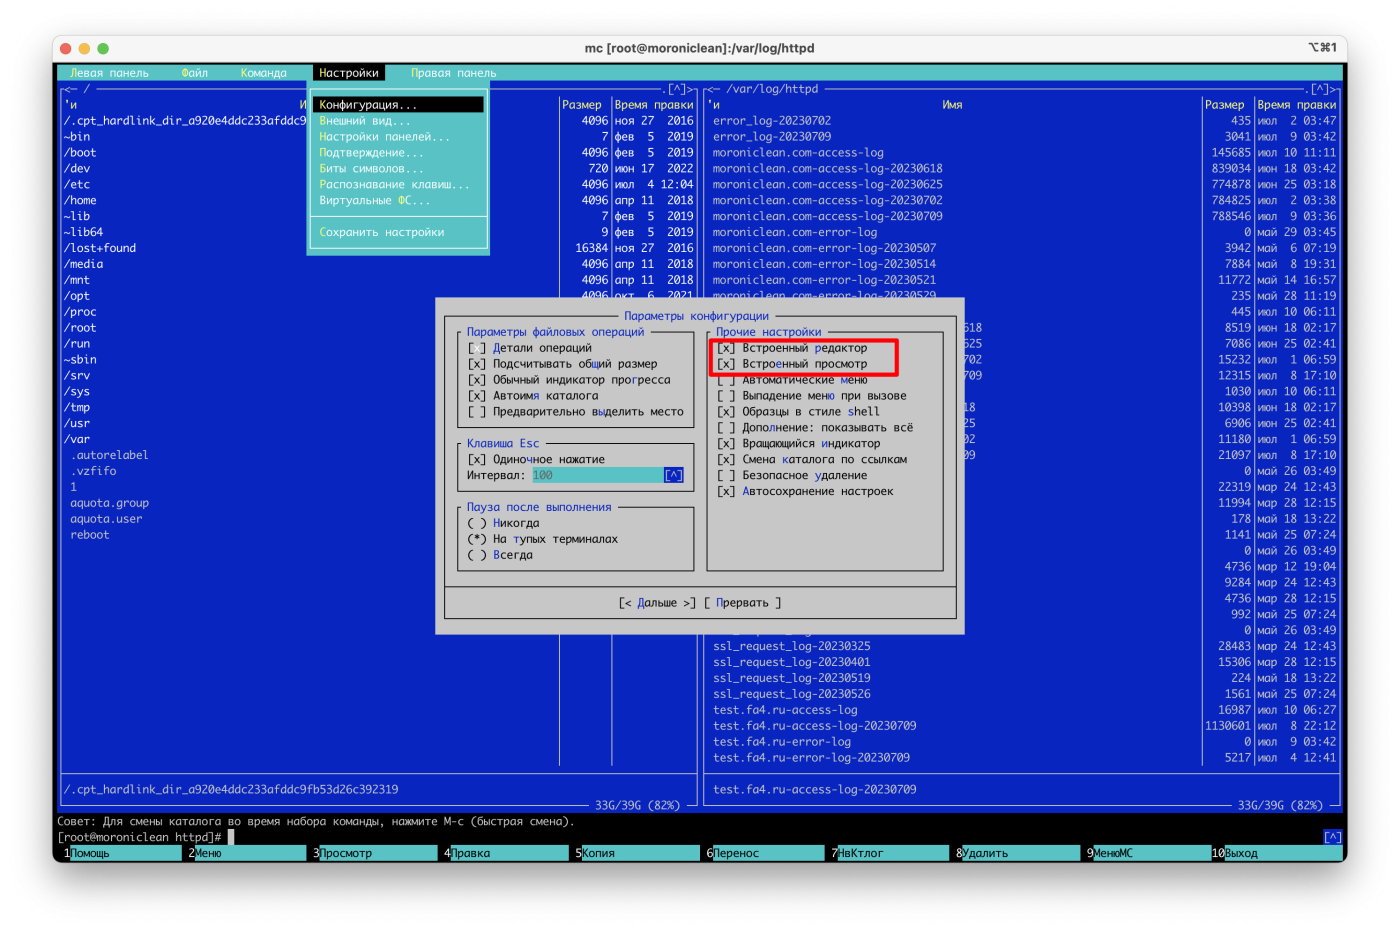
F3 – просмотр текущего файла (обычно срабатывает быстрее на больших файлах и гарантирует, что вы ничего случайно не поменяете в нем). Есть еще одно преимущество – строки можно как сворачивать, так и разворачивать по всей длине. Удобно просматривать таким образом log файлы. F2 – позволяет переключаться между свернутыми и развернутыми строками. F4 – позволяет увидеть 16-тиричный код символов. Очень полезно, если у вас неожиданно возникла неприятная проблема с BOM последовательностью в php файлах, которая способна свести с ума каждого отсутствием явно видимых ошибок в коде. Так вот этот режим позволяет своими глазами убедиться в наличии нечитаемых символов. Must have одним словом. F7 – поиск нужной строки в файле.
F4 – редактирование текущего файла. Есть расцветка кода, что делает редактирование более приятным. Из необходимых команд – F7 – поиск нужной строки текста в файле и F4 – поиск и замена текста по всему файлу. Ctrl-y – удаление строки, на которой находится курсор. С остальными возможностями можно ознакомиться, если нажать F1.
Если вы хотите что-то вставить в буфер обмена,напомню еще раз – делается это с зажатой клавишей Shift для Windows пользователей или c зажатой клавишей Option для владельцев Mac. Просто выделяете текст и все – он уже в буфере обмена! Вставить можно с помощью Shift-Insert для Windows или Ctrl-V для Mac.
Права доступа и владелец файла
Жизненно важные вещи для владельцев веб-сервера – это права доступа к файлу и владельцы файла.
Ctrl-x c – на всякий случай напоминаю – после нажатия Ctrl-x отпускаем обе клавиши и потом нажимаем c. Обязательно нажимаем в английской раскладке.
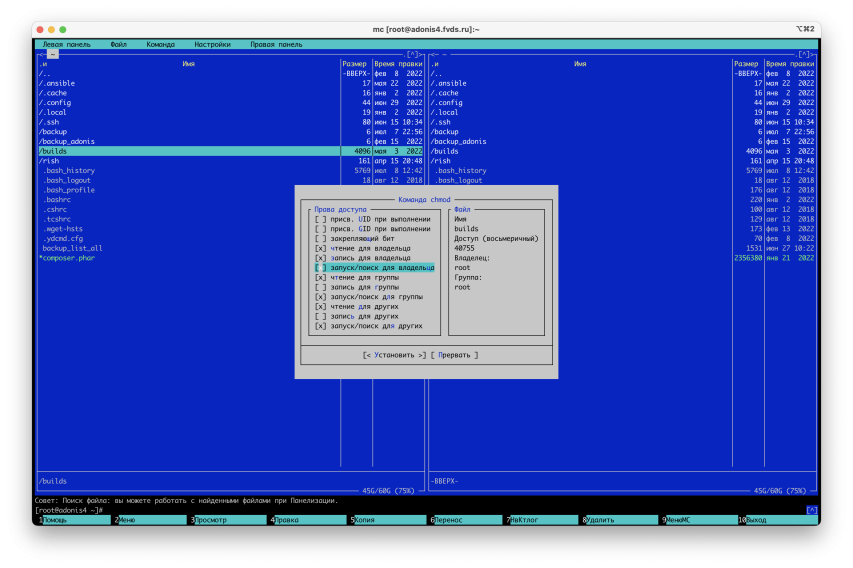

Переключать права можно с помощью пробела или нажатия мыши.
Ctrl-x o – сменить владельца файла.
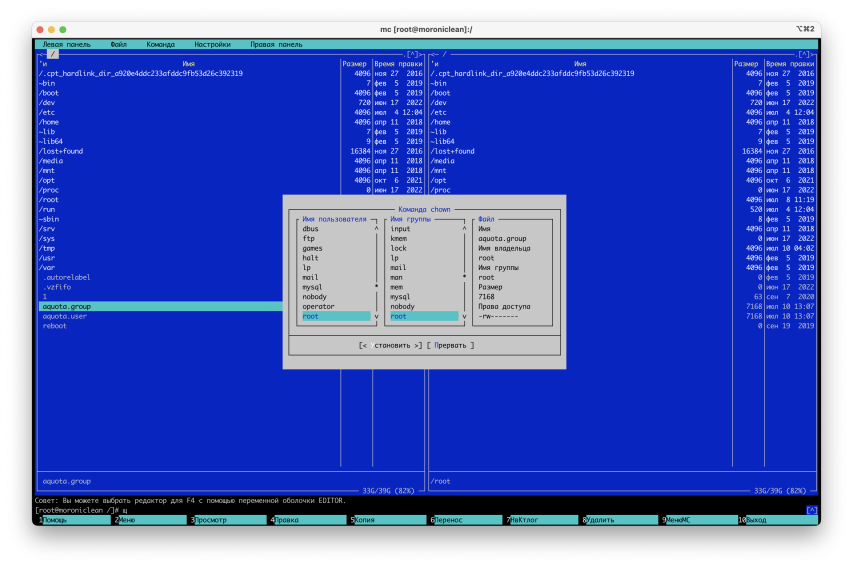
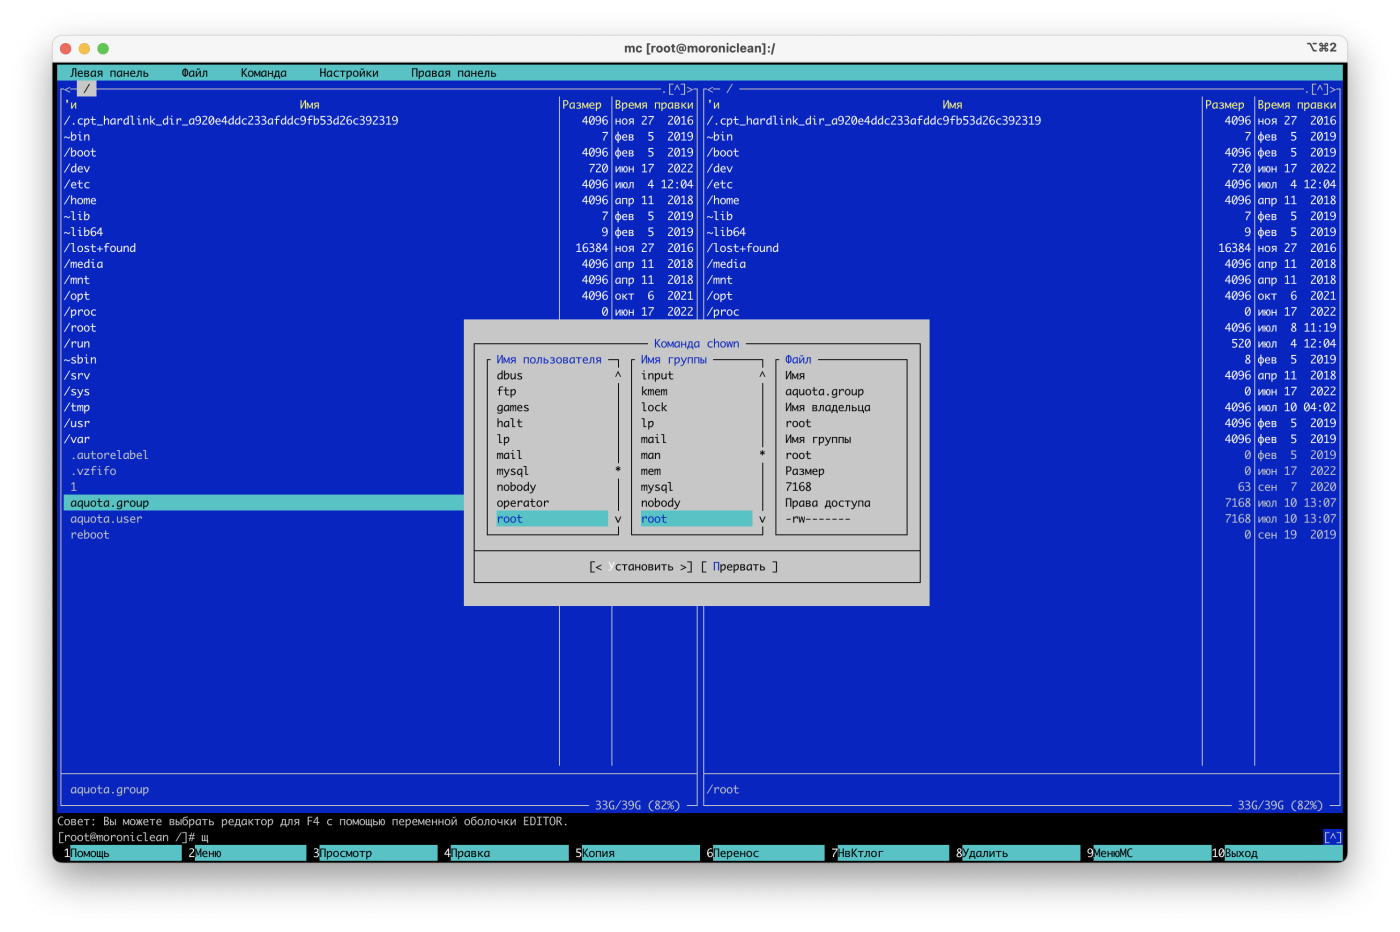
Переход между панелями с помощью привычной табуляции или мышью. Esc – как всегда отмена.
Помимо этих двух привычных и быстрых команд для быстрой смены прав и владельца файла, можно использовать меню расширенной смены, где все можно сделать в рамках одного экрана и отображение может показаться кому-то более привычнм. Вызов происходит только из меню, горячей клавишы для быстрого вызова нет. Путь вызова F9 -> Файл -> Права (расширенные).
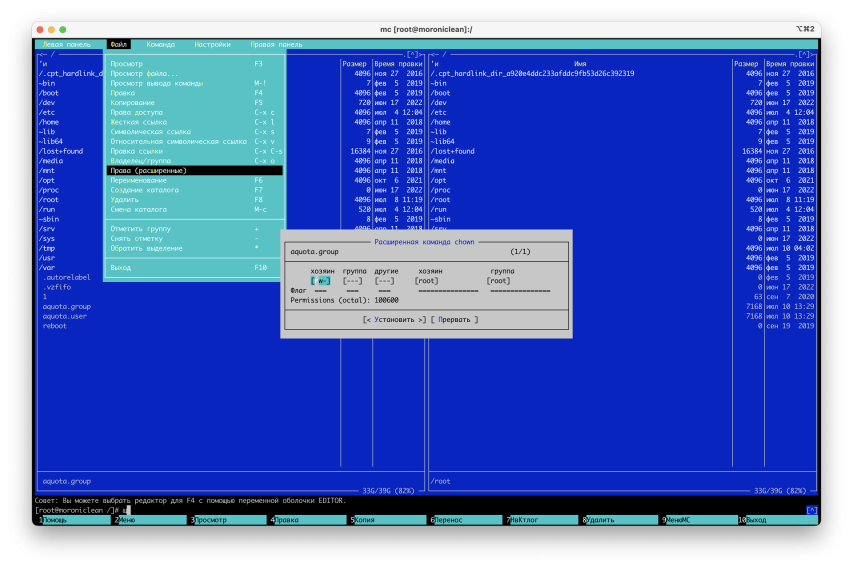

Здесь установка прав делается путем нажатия клавиш r w x. Переход можно делать стрелками или табуляцией. Выбор владельца файла осуществляется путем нажатия Enter, когда курсор переходит на нужный пункт.
Подключение по FTP, SFTP или SSH (Виртуальные файловые системы)
Помимо того, что вы можете работать с файлами на своем сервере или компьютере, MC позволяет переносить файлы и между серверами и вашим компьютером. В терминологии MC это называется виртуальными файловыми системами (ВФС).
Если вам нужно перенести данные с одного сервера на другой, удобнее всего это сделать через MC, минуя скачивание на свой компьютер и промежуточное архивирование. Если вам надо закачать файлы со своего компьютера, то можете это сделать и через MC.
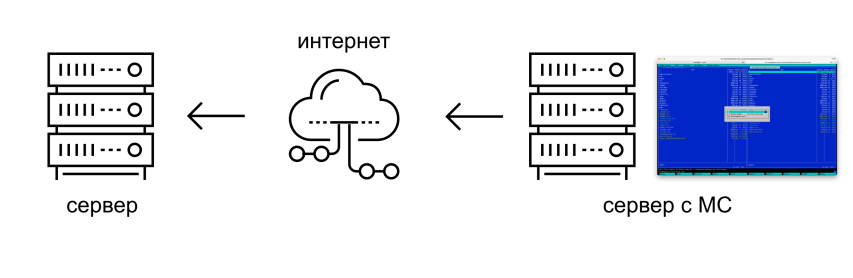
Я советую использовать для подключения к удаленной машине SSH или SFTP. Помните, что FTP соединение не шифруется и подвержено атакам. В RISH FTP не используется.
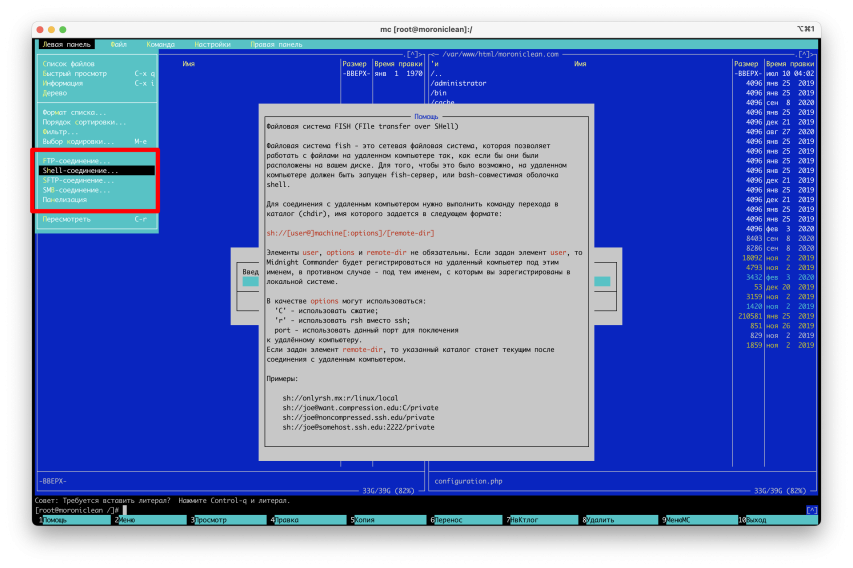
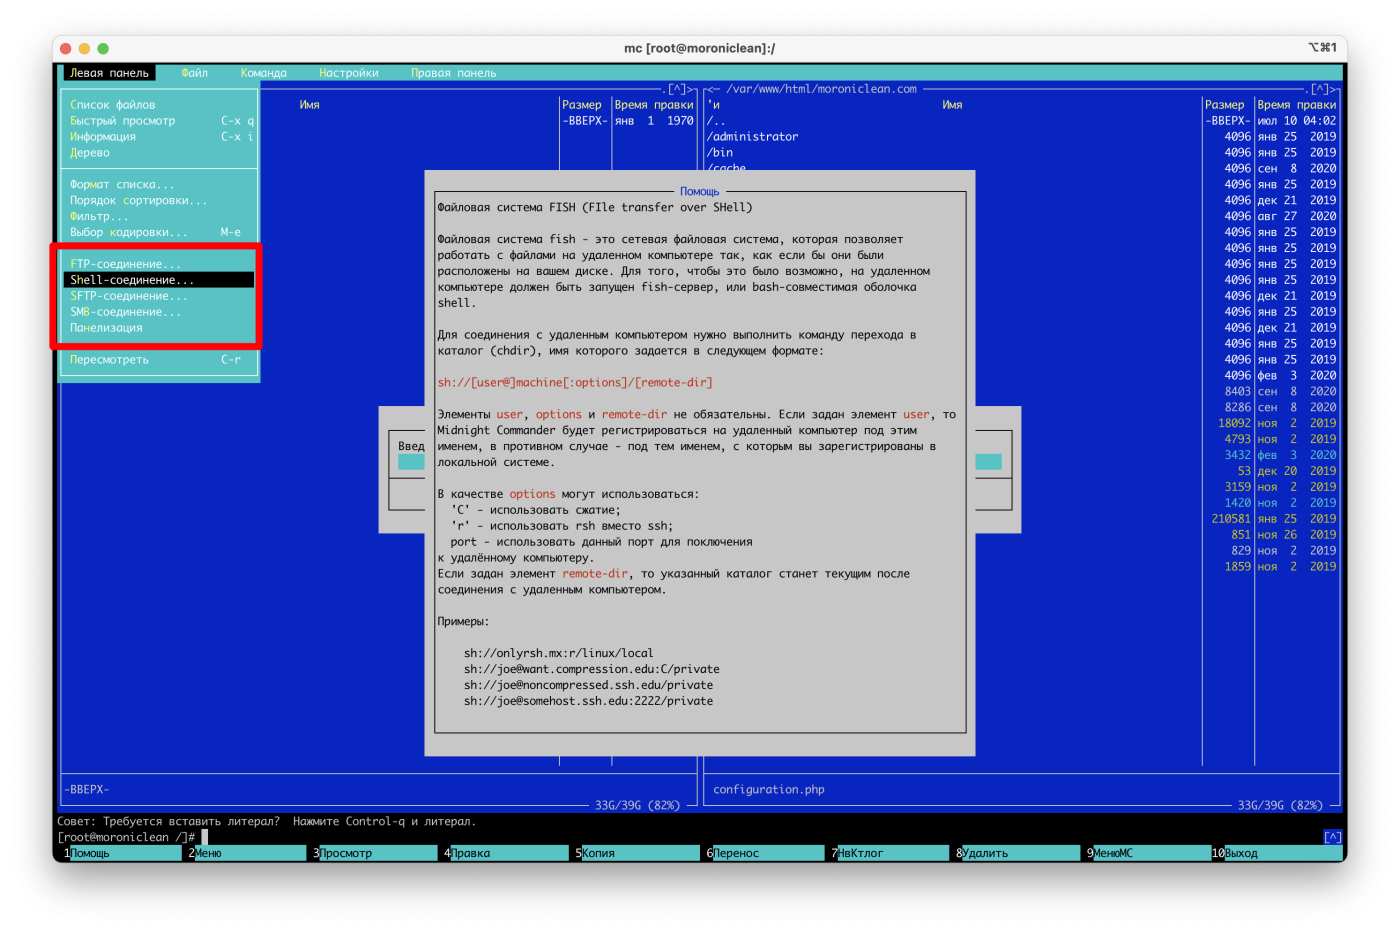
Если у вас настроено подключение через ключ и сервер добавлен в файл config, то подключение в окне Shell-соединения очень простое – вам не придется даже набирать обязательное sh://. Например, вот так: astra. Где astra – это имя вашего сервера.
А еще вы можете использовать щелчок мышью по значку в конце строки для того, чтобы открыть историю подключения к вашим серверам. В этом случае даже набирать ничего не придется.
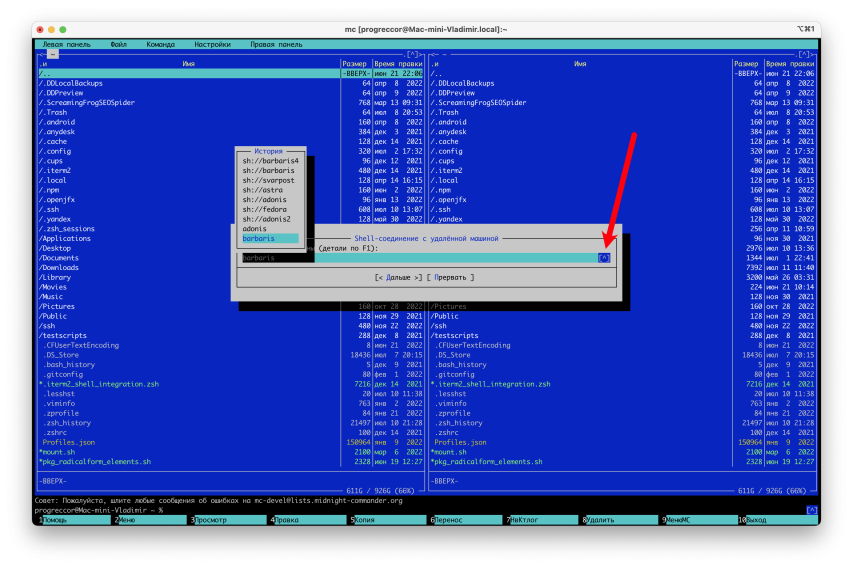
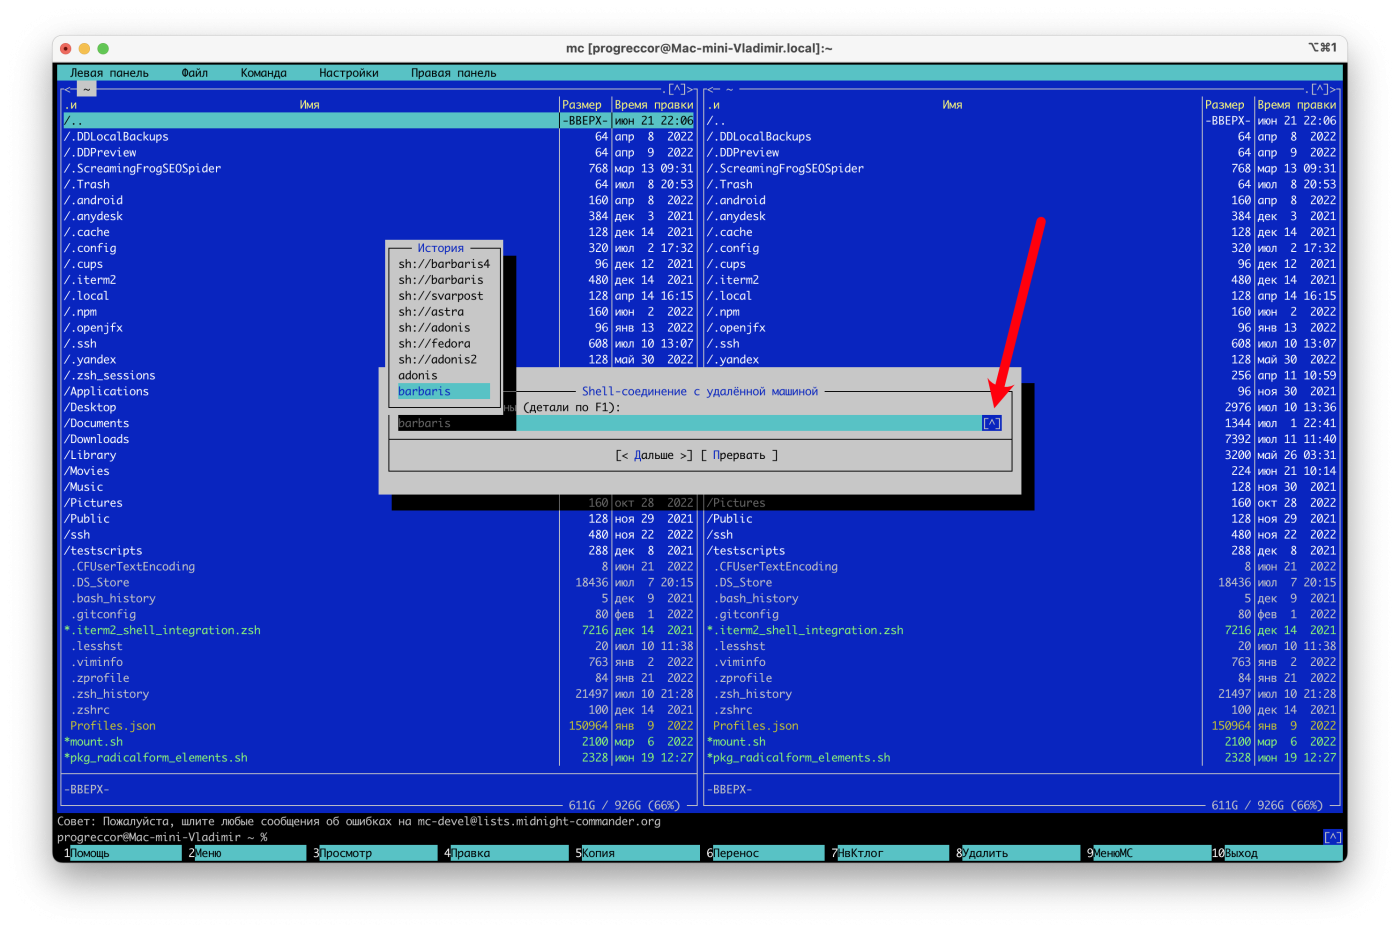
Более подробную инструкцию по каждому виду соединения можно получить, если нажать F1, когда откроется соответствующее окошко подключения.
В общем случае подключение будет выглядеть так: sh://root@37.203.104.29/var/www. Пароль в строке не передается. Подключение либо по ключам, либо пароль у вас спросят в процессе подключения. Здесь первые символы до двух косых черт – это тип подключения, затем идет адрес сервера и потом место в файловой системе сервера куда нужно подключиться.
Обычно таймаут отключения неиспользуемой виртуальной файловой системы (FTP и SFTP это и есть) составляет 60 секунд. Они будут отключены через минуту бездействия. Но, как всегда, параметры можно изменить. F9 -> Настройки -> Виртуальные ФС

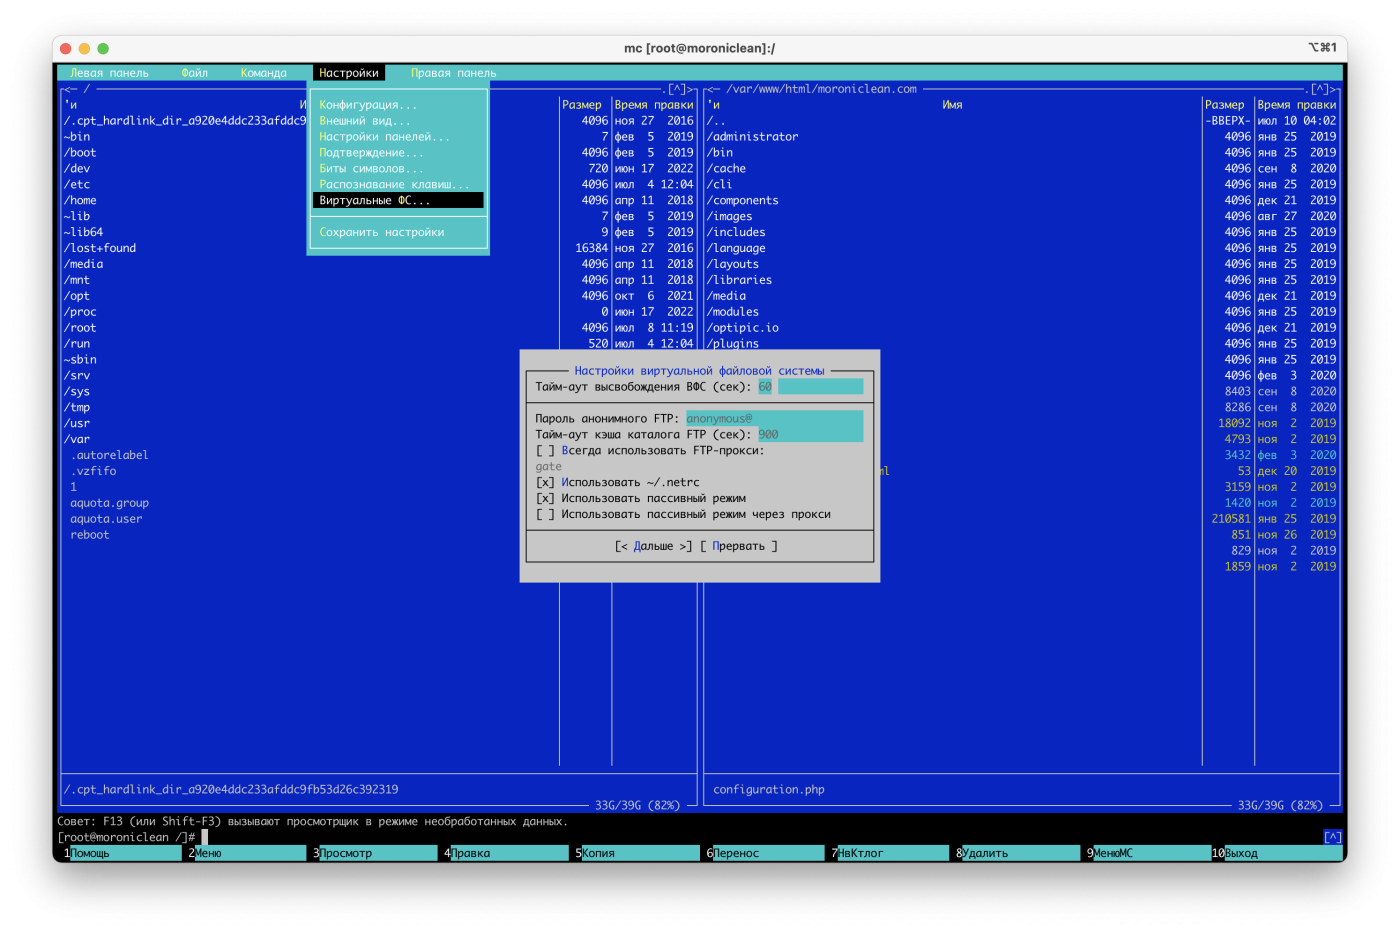
Все текущие подключения виртуальных файловых систем можно просмотреть здесь: F9 -> «Команда» -> «Список активных ВФС». При необходимости ненужные можно отключить.

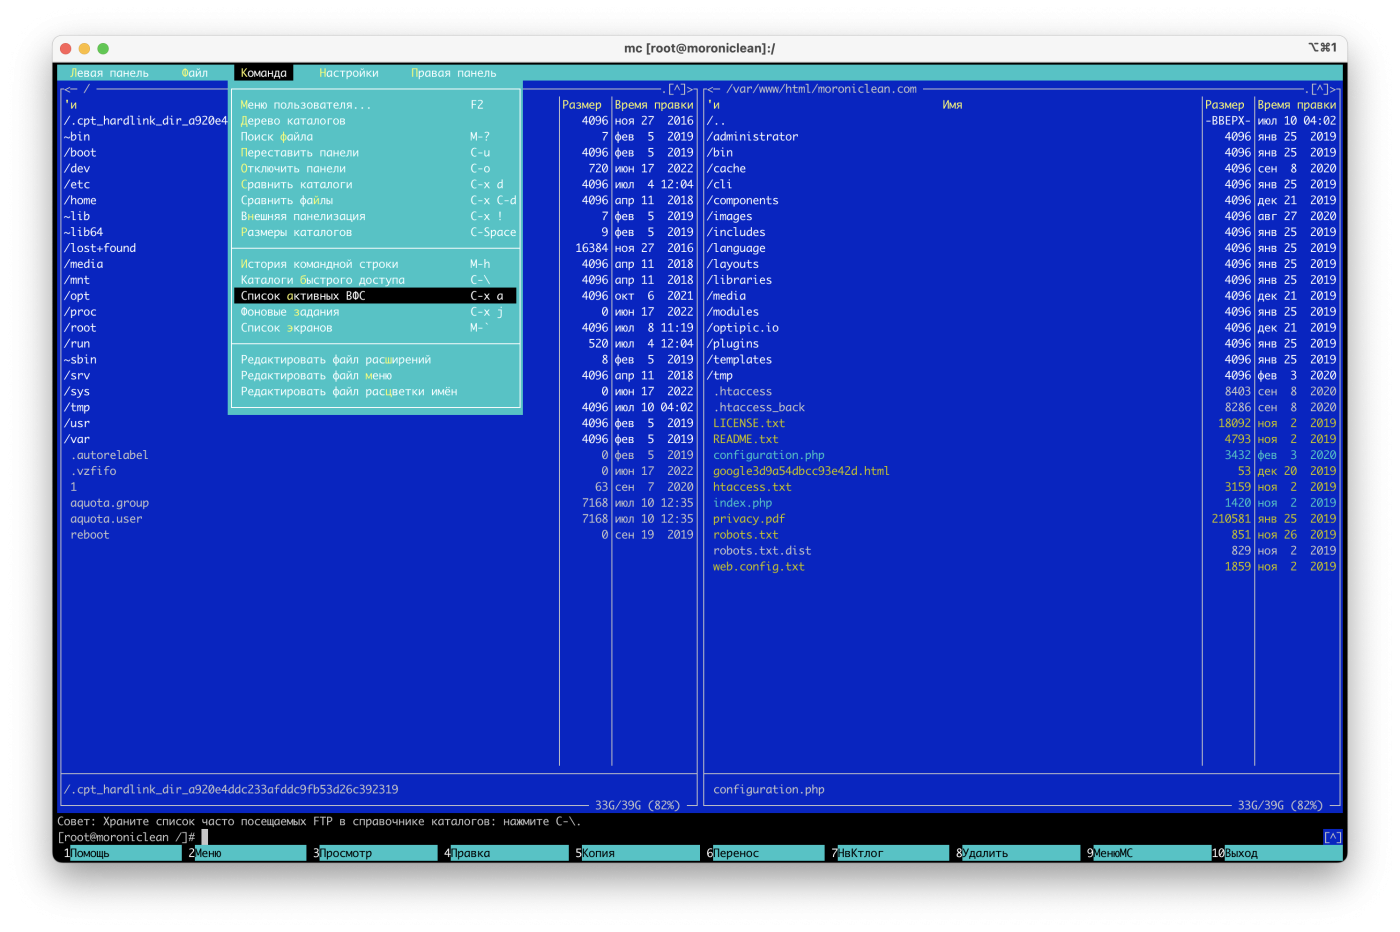
Выход из MC
F10 – выйти из MC. Не забывайте это сделать, если у вас включен режим Ctrl-o. После выхода из MC можно закрыть окно подключения по SSH с помощью Ctrl-D.
Задать вопросы, которые у вас возникли по работе с MC можно в нашем телеграм канале RISH.
В данной статье речь пойдет о горячих клавишах (hotkey) для файлового менеджера Midnight Commander (mc), знание которых позволяет повысить удобство и скорость работы.
Midnight Commander (mc) — консольных файловый менеджер для операционных систем Linux, является свободным программным обеспечением
Рассмотрим клавиши быстрого доступа для работы с панелями mc. Для удобства распределим hotkey по следующим группам.
1. Работа с файлами.
2. Работа с командной строкой.
3. Работа с поиском.
4. Работа с правами.
5. Работа с ссылками.
Работа с файлами.
F3 —> Просмотр файла.
F4 —> Редактирование файла.
SHIFT + F4 —> Создает новый файл.
+ —> Вызывает окно для выделения группы.
\ —> Снимает отметку с группы.
Работа с командной строкой.
ALT + ENTER —> Вставить файл или каталог, на котором установлен курсор в командную строку.
ALT + A —> Вставить в командную строку полный путь в активной панели.
ALT + P —> Вернуть предыдущую выполненную команду в командную строку.
CTRL + X, T —> Вставка всех выделенных объектов в командную строку.
CTRL + X, CTRL + P —> Посылает в командную строку полный путь к нективной панели.
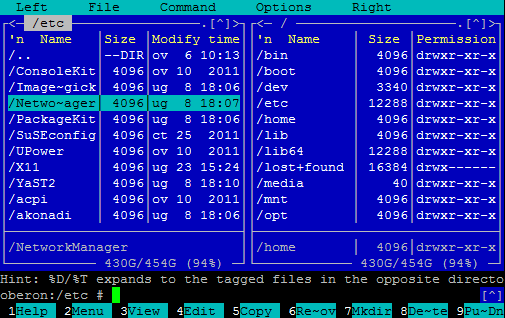
Вид редактора Midnight Commander.
ALT + T —> Смена режима отображения панели.
ALT + [.] —> Cкрыть или показать скрытые файлы и каталоги начинаются на точку.
ALT + A —> Вставить в командную строку полный путь в активной панели.
ALT + C —> Cмена текущего каталога.
ALT + H —> Просмотр последних выполненных команд.
ALT + I —> Смена каталога на неактивной панели, на каталог в котором вы находитесь.
ALT + O —> Неактивная панель переходит в каталог на который указывает активная панель.
CTRL + X, Q —> Просмотр содержимого файла на второй панели.
CTRL + X, I —> Просмотр информации о текущем объекте на второй панели.
CTRL + O —> Скрыть или показать панели.
CTRL + R —> Перечитать содержимое каталога.
CTRL + SPASE —> Показать размер текущего каталога.
Работа с поиском.
ALT + SHIFT + [?] —> Расширенный поиск.
CTRL + S —> Поиск файла или каталога.
Работа с правами.
CTRL + X, O —> Просмотр или изменения владельца, группы.
CTRL + X, C —> Просмотр или изменение прав доступа.
Работа с ссылками.
CTRL + X, L —> Создать жесткую ссылку.
CTRL + X, S —> Создает символьную ссылку symlink.
CTRL + X, CTRL + S —> Редактировать символическую ссылку.
Горячие клавиши (hot key) для редактора mc.
Отдельно рассмотрим hotkey для работы в текстовом редакторе. Для удобства распределим по группам.
1. Изменение вида редактора.
2. Работа с текстом.
3. Работа с файлами.
Изменение вида редактора.
ALT + N —> Показать или скрыть нумерацию строк.
CTRL + S —> Включить или выключить подсветку синтаксиса.
ALT + SHIFT + [-] —> Включить или отключить отображения табуляций и пробелов.
ALT + SHIFT + [+] —> Включить или отключить автовыравнивание возвратом каретки.
Работа с текстом.
F3 —> Начать выделение текста, повторное нажатие F3 закончит выделение.
SHIFT + F3 —> Начать выделение блока текста, повторное нажатие F3 закончит выделение.
F5 —> Скопировать выделенный текст.
F6 —> Переместить выделенный текст.
F8 —> Удалить выделенный текст.
CTRL + K —> Удалить часть строки до конца строки.
CTRL + Y —> Удалить строку.
CTRL + X —> Перейти в конец слова.
CTRL + Z —> Перейти на начало предыдущего слова.
ALT + L —> Переход на строку по номеру строки.
ALT + U —> Выполнить команду и вставить вывод результата команды в позицию под курсором.
ALT + T —> Сортировка строк выделенного текста.
TAB — Отодвигает вправо выделенный текст.
CTRL + U —> Отменить действия.
Работа с файлами.
CTRL + N —> Создать новый файл.
CTRL + F —> Копировать выделенный текст в файл.
SHIFT + F5 —> Вставка текста из файла.
На этом обзор основных hotkey для Midnight Commander завершен.