
Служба Windows Search отвечает за поиск файлов и папок на устройстве. Она способна искать данные не только по наименованию файлов, но и по содержанию этих файлов (метаданным, свойствам и т.д.). Например, поиск по содержанию файлов по умолчанию активирован для текстовых и офисных документов (txt, doc, docx, xls, xlsx, pdf).
На компьютере может быть очень много файлов и папок. Чтобы поиск по устройству не занимал много времени, служба Windows Search использует индексацию файлов. Процесс индексирования представляет собой чтение диска с данными и запись информации о просканированных файлах в базу данных. Индексирование осуществляется в фоновом режиме. Когда вы сохраните новый документ в индексированном расположении, служба Windows Search проиндексирует его и сохранит собранную информацию о нём в своей базе.
Индексатор службы Microsoft Windows Search грузит процессор?
Обычно индексатор службы Microsoft Windows Search не грузит процессор. В нашем случае, когда все файлы проиндексированы, нагрузка на центральный процессор составляет 0%, а объём используемой оперативной памяти составляет порядка 80МБ.
-

На скриншоте видно, что Индексатор службы Microsoft Windows Search в Windows 10 не нагружает процессор, так как все файлы проиндексированы. -


Поэтому, если на вашем устройстве индексатор службы Microsoft Windows Search грузит процессор, это означает, что в настоящее время идёт индексирование файлов. Если вы активно пользуетесь устройством, нажимаете на клавиши клавиатуры, водите мышкой, служба Windows Search замедляет скорость сканирования. В нашем случае при сниженной скорости индексирования нагрузка на процессор составляет 0,6-1,2%.
-

На скриншоте видно увеличение нагрузки на процессор, так как идёт индексирование новых файлов (при сниженной скорости сканирования) -


Конечно, нагрузка будет больше, если процессор относительно старый и имеет одно-два логических ядра. Поэтому приведённые значения нагрузки индексатора службы Microsoft Windows Search на процессор следует считать условными.
Как можно уменьшить нагрузку службы Microsoft Windows Search на процессор?
Определяем папки, которые служба поиска должна индексировать
- Найдите и запустите «Параметры индексирования» в классическом варианте Панели управления.
Как открыть классическую Панель управления?
Несколько простых способов в отдельной статье

- В открывшемся окне нажмите кнопку «Изменить».

- Отметьте галочками папки или диски, которые вы хотите индексировать в фоновом режиме. Оставьте пустым квадрат, чтобы не индексировать папку или диск. После выбора индексируемых расположений нажмите кнопку «ОК».

Уменьшив количество папок и дисков в окне «Индексируемые расположения», вы сможете сократить нагрузку индексатора службы Microsoft Windows Search на процессор. Но имейте в виду, что поиск в исключенных расположениях будет долгим. А в случае использования кнопки поиска в панели задач поиск в неиндексированных расположениях осуществляться не будет. Поэтому не старайтесь исключать все папки. Оставьте папки, в которых вы часто используете функцию поиска.
Устанавливаем классический режим поиска
В Windows 10 предусмотрено 2 режима поиска: классический и расширенный. При классическом режиме поиск осуществляется только в библиотеках пользователя и на рабочем столе. Расширенный режим позволяет искать файлы по всему компьютеру, за исключением системных папок. Расширенный режим, как предупреждает операционная система, может снизить уровень заряда и увеличить нагрузку на центральный процессор. Особенно это актуально для владельцев ноутбуков, которым важно, чтобы их устройство проработало в автономном режиме как можно дольше.
- Перейдите в новые «Параметры Windows» (нажмите на клавиатуре кнопку с логотипом Windows + I ).
- Нажмите на раздел «Поиск».

- В левом боковом меню нажмите на «Поиск в Windows».
- Прокрутите список настроек и выберите параметр «Классический стиль».

Активируем привязку производительности индексатора к параметрам питания устройства
Изменять режим производительности индексатора стало возможным с момента появления Windows 10 версии 2004 (майское обновление 2020 года). Если включить параметр «Использовать параметры режима питания устройства», служба Windows Search будет оценивать, запущен ли на компьютере режим энергосбережения, пониженного электропотребления или игровой процесс. Если да, то служба поиска приостановит индексацию в фоновом режиме.
Также при включении производительности индексатора служба поиска приостановит индексацию файлов в фоновом режиме, если загрузка центрального процессора превысит 80% или загрузка жесткого диска поднимется свыше 70%.
- Перейдите в новые «Параметры Windows» (нажмите на клавиатуре кнопку с логотипом Windows + I ).
- Нажмите на раздел «Поиск».
- В левом боковом меню нажмите на «Поиск в Windows».
- Прокрутите список настроек и включите параметр «Использовать параметры режима питания устройства».

Отключаем службу Windows Search
Отключая службу Windows Search, вы отключите индексирование папок и файлов в фоновом режиме.
Вы сможете осуществлять поиск по устройству, но он будет медленным.
- Запустите приложение «Выполнить» (нажмите на клавиатуре кнопку с логотипом Windows + R ).
- Наберите текст
services.mscи нажмите кнопку «ОК».

- В открывшемся окне найдите службу Windows Search.

- Дважды нажмите на строку службы «Windows Search». Откроется окно с настройками.
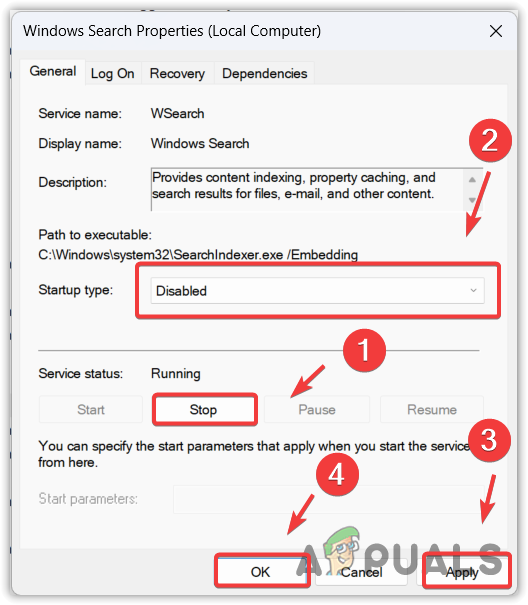
- Выберите тип запуска «Отключена».
- Нажмите кнопку «Остановить», чтобы завершить активный процесс выполнения службы Windows Search.
- Нажмите кнопку «ОК», чтобы сохранить настройки службы.

А как у вас работает служба поиска в Windows? Испытываете ли вы проблемы при ее работе в фоновом режиме?
Расскажите о своем опыте в комментариях 😉
Microsoft Windows Search Indexer, or searchindexer.exe, is a crucial process that powers Windows Search. It indexes the files and folders on your computer and, given its nature, consumes lots of CPU at sporadic intervals. However, if CPU usage remains high for prolonged periods, it may indicate an underlying problem that needs to be addressed.
In this tutorial, we’ll show you how to tackle high CPU and disk usage caused by the Windows Search Indexer with various suggestions and solutions for Windows 10 and 11.

Restart Windows Search Service
It’s best to begin by restarting Windows Search on your computer. That should resolve minor technical issues and reduce high CPU usage caused by the searchindexer.exe process. To do that:
- Right-click the Start button and select Run. Or, press Windows + R.

- Type services.msc into the Run Box’s Open field and select OK.

- Right-click the service labeled Windows Search and select Restart.

Optionally, double-click Windows Search and ensure that Startup type is set to Automatic (Delayed Start).
Restart Your PC
A PC reboot clears out additional software-related anomalies that interfere with system-related processes. Save your work, open the Start menu, and select Power > Restart. If that makes no difference, move on with the rest of the fixes.

Run Search and Indexing Troubleshooter
Windows 11 and 10 have a built-in troubleshooter that helps diagnose and fix issues related to Windows Search. To run it:
- Right-click the Start button and select Settings.

- Go to System > Troubleshoot.

- Select Other troubleshooters/Additional troubleshooters.

- Select Run next to Search and Indexing.

- Follow the onscreen prompts to fix issues with Windows Search.
Rebuild Index
Corruption issues within the Windows Search index often lead to erratic behavior with related processes. Use the Control Panel‘s Indexing Options console to rebuild the index from scratch.
Note: Rebuilding the search index takes time and causes high CPU and HDD/SSD usage for the duration of the procedure.
- Open a Run box, type control.exe srchadmin.dll, and select OK.

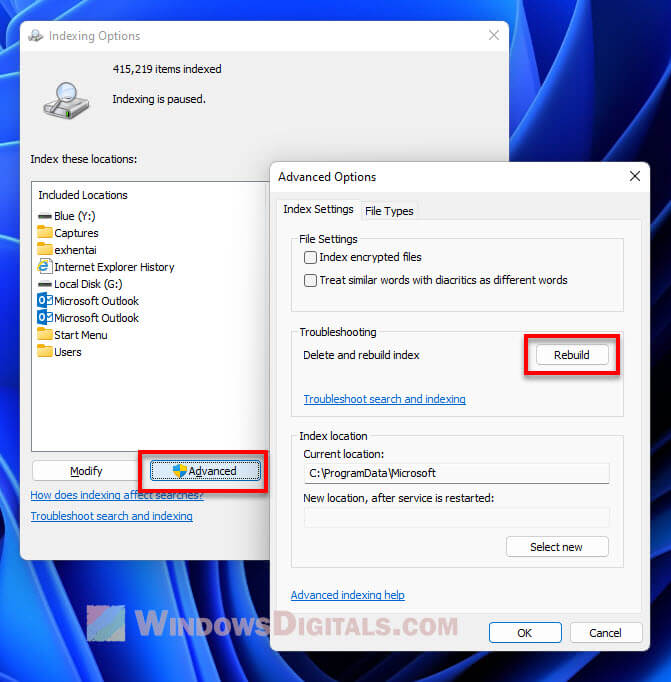
- Select the Advanced button at the bottom of the Indexing Options window.

- Select Rebuild.

Note: Removing locations you don’t want to include within Windows Search can lessen the load on the searchindexer.exe process. Select the Modify button on the Indexing Options console and uncheck the indexed locations you wish to exclude.
Update Windows
Keeping your Windows operating system up to date with the latest patches and updates can help resolve high CPU usage issues with the Windows Search Indexer process. This also helps improve system performance, security, and stability.
To update Windows, open the Settings app, select Windows Update, and select Check for updates. If there are pending updates, choose Download and install.

Run an SFC Scan
The System File Checker (SFC) is a command line tool that can help fix system file corruption issues causing the Windows Search Indexer to malfunction. You can run it via an elevated Windows PowerShell or Command Prompt console. Here’s how:
- Right-click the Start menu and select Windows PowerShell/Terminal (Admin). Or, type cmd into the Start menu and choose Run as administrator.

- Run the following command:
sfc /scannow

- Wait until the System File Checker scans for and fixes Windows.
Run DISM Tool to Fix Windows
Next, run the DISM (Deployment Image Servicing and Management) tool to resolve issues with operating system stability. Just re-open an elevated Windows PowerShell or Command Prompt console and execute the following command:
DISM.exe /Online /Cleanup-Image /Restorehealth
Perform a Clean Boot
Clean booting Windows helps you identify third-party applications or services causing conflicts with the Windows Search Indexer. To do that:
- Open a Run box, type msconfig, and select OK.

- Switch to the Services tab, select Hide all Microsoft services, and choose Disable all.

- Restart your computer. If the Microsoft Windows Search Indexer’s high CPU usage stops becoming an issue, re-enable the disabled services individually or in batches to identify the conflicting item.
Additionally, open the Task Manager, disable any non-Microsoft login items from the Startup tab, and check if that helps.
Check for Malware
Malware can hijack the Windows Search Indexer and result in high CPU usage. Run a full system scan to detect and remove malicious software from your system. To do that:
- Open the Start menu, type Windows Security into the search box, and press Enter.

- Select Virus & threat protection.

- Select Scan options.

- Select the radio button next to Full scan and choose Scan now.

- Wait until Windows Security scans your computer for malware.
You can follow that up with a Microsoft Defender Antivirus (Offline scan), which scans your computer thoroughly for hidden threats. You can also use third-party anti-virus programs to deal with stubborn malware.
Factory Reset Windows
If none of the above methods work, consider factory resetting your PC. This will wipe all data from your computer, return the operating system to its original state, and resolve severe underlying issues with the Windows Search Indexer. Before proceeding, make sure to back up all important files and documents.
To initiate a factory reset, open the Settings app and go to System > Recovery > Reset PC. For comprehensive step-by-step instructions, check our guides to resetting Windows 11 and 10 to factory defaults.
Related Posts
- How to Fix a “This file does not have an app associated with it” Error on Windows
- How to Fix an Update Error 0x800705b4 on Windows
- How to Resolve “A JavaScript error occured in the main process” Error on Windows
- How to Fix the Network Discovery Is Turned Off Error on Windows
- How to Change Folder Icons in Windows
If you’re using Windows 11 and notice your computer is running slow or acting weird, with the CPU and disk going crazy, know that this can happen very commonly. A usual suspect for this mess is something called Windows Search Indexer. This tool actually helps speed up your search for your files and folders. In this guide, we’ll talk about what Windows Search Indexing is, why it might make your computer use more CPU and disk space, and how to fix the problem.
Also see: Windows 11 search slow? How to speed up search in Start and File Explorer

What is Microsoft Windows Search Indexing?
Windows Search Indexing is a very useful feature that makes finding files and folders on your computer much quicker than without it. It creates a special database with information about all your files so that Windows can locate them fast when you’re searching.
By default, this tool goes through most files on your computer, like your documents, pictures, and music.
Why does Windows Search Indexing use a lot of CPU and Disk resources?
The indexing process needs to use a significant amount of CPU power, memory, disk’s reading and writing, as well as disk space. It is because it has to run through and check every single file on your computer to make them into the index. The process can also take a while. If you have lots of files or an relatively older hard drive, the search indexing will consume more time and make your computer slow as it runs in the background.
- If your computer stores many files, the Windows Search Indexer will need more time to scan and index them.
- Whenever you add, delete, or change files, the Windows Search Indexer has to scan and index these files again. This is especially true if you make big changes to many files at once.
- If your computer’s processor isn’t very powerful, or if you’re still using HDD instead of SSD, the Windows Search Indexer might struggle to run the indexing and searching.
- Sometimes, the Windows Search Indexer service might have issues or stop working properly.
Learn: How to Limit CPU Usage of a Process in Windows 11
Let the search indexer finish its job
If your computer is slow because of the indexing process, the best first step is to just let it finish. It usually works in the background, so it might take some time. If you leave your computer on overnight, it should get done. Once it’s finished, your computer’s CPU and disk usage should go back to normal.
Related issue: High CPU Usage After Windows Update
How to turn off Windows Search Indexer in Windows 11
If you rarely search your PC for files or you don’t mind having a slower search (much slower just for your information), you can consider turning off the Windows Search Indexer service completely. Doing so will stop it from ever running again, no matter if you make changes to your files or not. Here’s how you do it.
- Open the Start menu and type “Services” in the search box.
- Choose “Services” from the search results.

- Find “Windows Search” in the list.
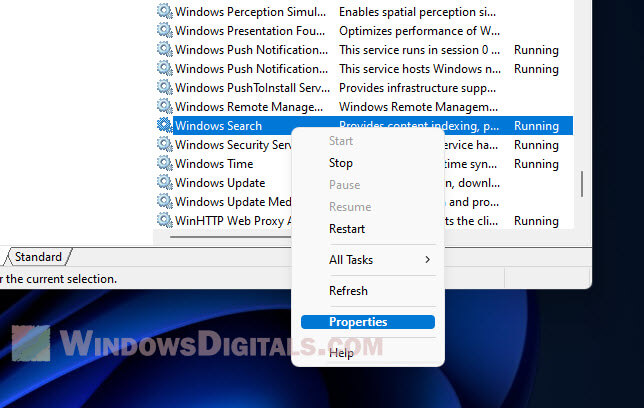
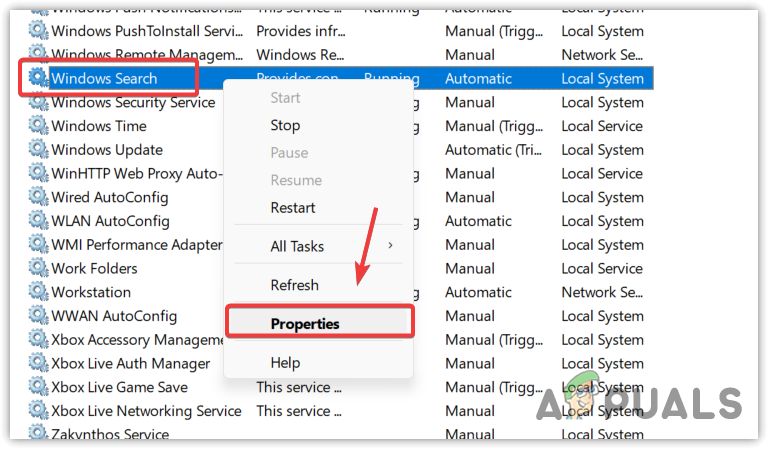
- Right-click “Windows Search” and pick “Properties”.

- In the “Startup type” menu, choose “Disabled”.
- Hit “Apply” and then “OK”.


What happens if you turn off Windows Search Indexing
Turning off Windows Search Indexing can really change how your computer performs. Searches will take longer, and if you ever turn indexing back on, you’ll have to rebuild the database from scratch.
Check for apps that change files a lot
As mentioned, when files get changed, the indexer has to update. If you have apps that often modify files, like backup or syncing software, they can make the indexer work overtime. If your computer is slow and uses lots of CPU or disk space, check if any apps are frequently changing files. You might need to tweak these apps to reduce the changes they make.
Choose fewer folders for indexing
You can also lighten the load on Windows Search Indexing by choosing fewer folders to index. This means the indexer only checks those folders, which can help reduce CPU and disk use.
- Search for “Indexing Options” from the Start menu.
- Pick “Indexing Options” from the results.

- Hit the “Modify” button.

- Uncheck any folders you don’t want indexed.

- Click “OK” to save your settings.


Restart Windows Search Services
If the indexer gets stuck or isn’t working right, try restarting the Windows Search Services. This stops and starts the indexing process again.
See also: How to Unpause Indexing in Windows 11
- Go to the Start menu, search for “Services”, and open it.
- Find “Windows Search” in the list.
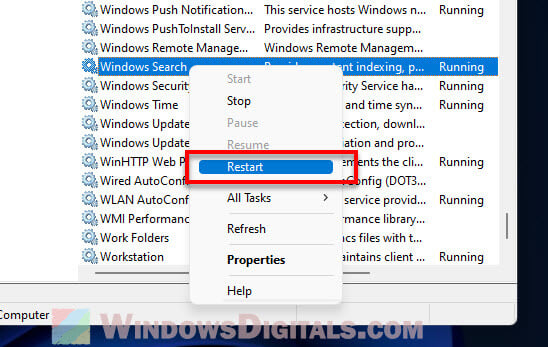
- Right-click it and choose “Restart”.

Rebuild the index
Sometimes the index might have problems and keep indexing the same files over and over, which uses lots of CPU and disk space. If this happens, you might want to rebuild the index.
- Hit Start and search for “Indexing Options”.
- Choose “Indexing Options” from what comes up.
- Click the “Advanced” button.
- Press the “Rebuild” button.

- Hit “OK” to start rebuilding.
Keep in mind, rebuilding the index can take a while, depending on how many files and folders need to be looked at.
Do a clean install of Windows 11
If nothing else works and your computer is still slow because of Windows Search Indexing, you might need to do a clean install of Windows 11.
To do a clean install, you’ll need to make a bootable USB drive with Windows 11 on it, then start your computer from that USB. Follow the steps on the screen to install Windows 11. You’ll get the option to delete all the old stuff on your hard drive and start fresh.
One last thing
Check your computer’s power settings and make sure it’s not on power-saving mode. If your PC is set to save power, your computer will not use its resource to its fullest and will slow things down, such as the indexing process. Try to switch the power mode to either “Balanced” or “High Performance” and see if it fixes your issues. Note that doing so will cause your computer (especially laptop) to use more power, meaning your battery will run out faster if you’re not plugged in.
It is common to face high CPU or disk usage due to the Microsoft Windows Search Indexer. It is an essential Windows process used to index items for Windows Search.
This issue mainly occurs when the Windows search service stops working or when there is a problem with the Windows search database. These two factors are the primary reasons that often trigger this issue.

1. Restart Windows Explorer.
The first and basic solution is to restart Windows Explorer. Restarting Windows Explorer is similar to restarting Windows. Both solutions are used to restart essential services, the taskbar, and other Windows components simultaneously.
This often fixes various temporary Windows issues or errors, so it is recommended to restart Windows Explorer.
To restart Windows Explorer, follow these steps:
- Right-click the taskbar and select Task Manager.

- Once opened, right-click Windows Explorer and select Restart.

- Once it has been restarted, check whether the issue is resolved or not.


2. Restart the Windows Search Service.
The Windows Search Service is an important part of Microsoft Windows Search Indexer. If this service experiences problems while running in the background, such as interference from third-party applications, you will encounter this issue. Therefore, try restarting the Windows Search Service manually to resolve the problem.
To restart the Windows search service:
- Press the Win + R keys to open the Run Program.
- Enter services.msc in the search box and click OK.

- Find the Windows Search service and right-click on it to select Properties.

- Stop the service, change the startup type to Disabled, click Apply, and click OK.

- Open Task Manager and wait for CPU or disk usage to reduce.
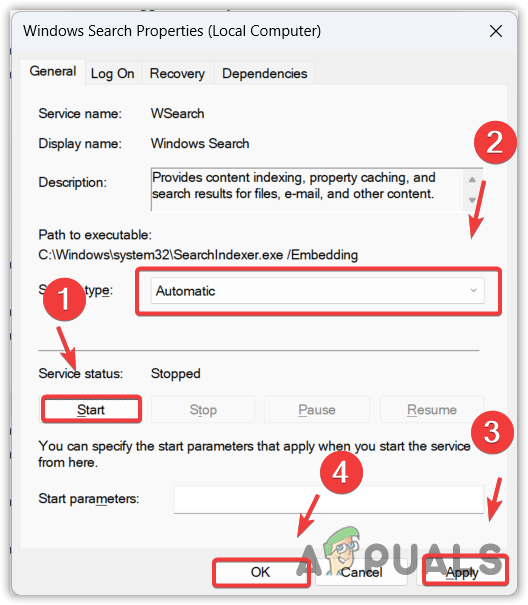
- Once completed, return to the services.msc, change the startup type to Automatic, click Apply, and click OK.
- If the issue persists, move on to the next method.

3. Configure indexing options.
You may have incorrect indexing option settings, which prevent the Windows search indexer from working correctly and cause high CPU or disk usage. Therefore, try configuring the indexing options correctly by following the steps.
- Press the Windows key and type Indexing options.
- Open the settings, and click Modify.

- Here, check all of your disks except for the Internet Explorer History and other folders.

- Once completed, click OK and then click Close to save the changes.
- Now, open Task Manager to see if the error has been fixed or not.


4. Rebuild the search indexer.
Rebuilding the search indexer means that you are going to delete the entire database of Windows search and replace it with a fresh database. Rebuilding the search indexer database will eliminate fragments, reorder the index rows, and reclaim disk storage.
Since the Windows search indexer may cause high CPU or disk usage, rebuilding the database can potentially resolve this issue. Follow the steps below to do so.
- Click the Start Menu and search for Indexing Options.
- Open the Indexing Options and click on Advanced.

- Finally, click “Rebuild” and then click “Yes” to start the process.

- Once completed, you will see “Indexing Complete” at the top of the dialogue box.
- Now, open the Task Manager and see if your problem is fixed or not.


5. Restore the SearchIndexer.exe file.
Searchindexer.exe is responsible for indexing items in Windows search. It is also known as the Microsoft Windows search indexer, which may be causing high CPU or disk usage in your case. Since this file is located in the system32 folder, it is an essential Windows process and file that can be repaired or restored by running the System File Checker utility.
SFC, or System File Checker, is a command-line utility that is used to restore or fix protected system files if they become corrupted. Since SearchIndexer.exe is one of them, we can attempt to restore it using the SFC command.
- To do so, click Start Menu, and search for Command Prompt.
- Right-click the Command Prompt and select Run as administrator.

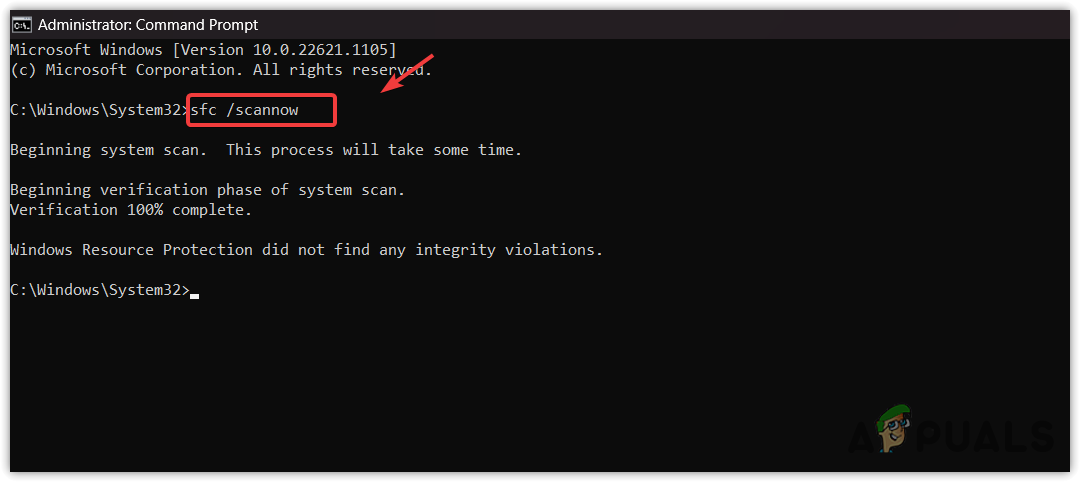
- Once you launch the terminal, enter the following command and wait for it to be executed.
sfc /scannow

Restoring the Searchindexer.exe file - Once done, check whether the issue still persists.

6. Scan your Windows with antivirus software.
If all the methods have failed to fix this issue, your Windows may be affected by malware or viruses causing this problem. When we download and install pirated games or applications on our PC, they often leave malware in the Windows services, which prevents Windows Defender from detecting it.
To counter this issue, you will need to use third-party antivirus software. There are various antivirus programs, such as Avast and Rkill. You can use one of them to scan your Windows. However, if that also fails, then you cannot do anything other than reinstalling or resetting Windows.
7. Reinstall or reset Windows.
Reinstalling or resetting Windows will surely fix this issue because it recreates all the system files from scratch. If you choose to reinstall Windows, visit the article using the link. However, if you want to reset Windows, follow this method.
Keep in mind that resetting Windows will not delete your data if you choose the “Keep my files” option while resetting Windows. However, it will delete your drivers and programs installed on the system disk.
To reset Windows, follow these steps:
- Click the Start Menu and type “Reset this PC.

- Open the settings and click “Reset PC” to access the system reset settings.
- Select Keep my files > Local reinstall.

- Then, click Next and click Reset to start resetting Windows.
- Once completed, your issue will now be resolved.


Search Indexer High Disk Usage or CPU Usage- FAQs
How do I fix Search Indexer high CPU or disk usage?
Restart the Windows search service by going to the service.msc Window. If the issue persists, try rebuilding the database of Windows search, which should fix the problem.
What causes Windows search indexer to consume high CPU or disk usage?
When there is a problem with the Windows search service or database, it consumes high CPU or disk usage. If that’s not the case, you may have malware or a virus on your PC, causing the Windows search indexer to consume high CPU or disk usage.
Kevin Arrows
Kevin Arrows is a highly experienced and knowledgeable technology specialist with over a decade of industry experience. He holds a Microsoft Certified Technology Specialist (MCTS) certification and has a deep passion for staying up-to-date on the latest tech developments. Kevin has written extensively on a wide range of tech-related topics, showcasing his expertise and knowledge in areas such as software development, cybersecurity, and cloud computing. His contributions to the tech field have been widely recognized and respected by his peers, and he is highly regarded for his ability to explain complex technical concepts in a clear and concise manner.
Microsoft Windows Search Protocol Host High CPU can become a major annoyance for users, slowing down their system and causing frustration. The problem arises when the Search Protocol Host consumes excessive CPU resources, resulting in a sluggish computer performance. This issue can be particularly troubling for professionals who rely on their computers to complete important tasks efficiently.
The Microsoft Windows Search Protocol Host is a key component of the Windows operating system, responsible for indexing files and folders to enable quick and efficient searches. However, when the Search Protocol Host starts using abnormally high CPU usage, it can negatively impact the overall system performance. This can be caused by various factors such as outdated search indexes, conflicts with other programs, or corrupted system files. To address this issue, users can try rebuilding the search index, disabling unnecessary search services, or performing a system scan for potential errors. Finding the right solution can alleviate the high CPU usage and restore the smooth functioning of the computer.
If you’re experiencing high CPU usage due to Microsoft Windows Search Protocol Host, there are several steps you can take to resolve the issue. First, open Task Manager and locate the «SearchProtocolHost.exe» process. Right-click on it and select «End Task» to temporarily stop the process. Next, open the Control Panel and navigate to Indexing Options. Click on «Modify» and uncheck any unnecessary file locations to reduce the indexing scope. Finally, restart your computer to apply the changes. This should help alleviate the high CPU usage caused by Microsoft Windows Search Protocol Host.
Understanding Microsoft Windows Search Protocol Host High CPU
The Microsoft Windows Search Protocol Host, also known as SearchIndexer.exe, is a standard Windows process responsible for indexing files on your computer to facilitate faster searching. However, sometimes the Search Protocol Host can consume a significant amount of CPU resources, leading to high CPU usage. This issue can cause your system to slow down, affecting overall performance. In this article, we will explore the reasons behind the high CPU usage of Microsoft Windows Search Protocol Host and provide potential solutions to mitigate the problem.
Causes of High CPU Usage by Search Protocol Host
Multiple factors can contribute to high CPU usage by the Microsoft Windows Search Protocol Host. Some of the common causes include:
- Inefficient indexing process: If the indexing process is not optimized, it can lead to excessive CPU usage.
- Large number of files to index: When there are numerous files on your computer, the indexing process can take a longer time, consuming more CPU resources.
- CPU conflicts with other applications: Certain applications or processes may conflict with the Search Protocol Host, causing it to use more CPU than necessary.
To address the high CPU usage issue, it is essential to identify the underlying cause and implement appropriate solutions.
Optimizing the Indexing Process
To optimize the indexing process and reduce CPU usage, follow these steps:
- Adjust indexing options: Open the Control Panel, search for «Indexing Options,» and click on it. In the Indexing Options window, click on the «Modify» button and uncheck unnecessary folders or file types from being indexed.
- Limit the file size: In the Indexing Options window, click on «Advanced,» then go to the «File Types» tab. Here, you can exclude larger files from the indexing process, which can help reduce CPU usage.
- Change indexing schedule: If you have a powerful computer, you can consider changing the indexing schedule to a time when the system is idle. Open the Indexing Options window, click on the «Modify» button, and choose a suitable time for indexing.
By making these adjustments, you can optimize the indexing process and potentially reduce the CPU usage caused by the Search Protocol Host.
Resolving Conflicts with Other Applications
If the high CPU usage persists despite optimizing the indexing process, it is possible that other applications or processes are conflicting with the Search Protocol Host. To resolve such conflicts, follow these steps:
- Update Windows and drivers: Ensure that your Windows operating system and drivers are up to date. Outdated software or drivers can cause compatibility issues and conflicts with the Search Protocol Host, leading to high CPU usage.
- Check for malware: Run a full system scan using a reliable antivirus software to check for any malware or viruses that may be affecting the system performance.
- Disable unnecessary applications: Disable or uninstall unnecessary applications that could be consuming CPU resources and conflicting with the Search Protocol Host.
Performing these steps can help identify and resolve conflicts with other applications, reducing the CPU usage caused by the Search Protocol Host.
Alternative Search Indexer Options
If the high CPU usage issue with the Microsoft Windows Search Protocol Host persists even after implementing the above steps, you may consider using alternative search indexer options. These options can provide similar search functionality while potentially reducing CPU usage:
- Third-party search tools: Explore third-party search tools that offer efficient file indexing and search capabilities with lower CPU impact. Some popular options include Everything, Agent Ransack, and Listary.
- Disable Windows Search: If you rarely use the built-in Windows Search function, you can disable it entirely. To do so, press Windows Key + R, type «services.msc,» scroll down to «Windows Search,» right-click on it, and select «Properties.» Set the «Startup type» to «Disabled» and click «Apply.»
By utilizing alternative search indexer options, you can potentially minimize the CPU usage caused by the Microsoft Windows Search Protocol Host while still enjoying efficient file searching capabilities.
Troubleshooting Microsoft Windows Search Protocol Host High CPU
In this section, we will explore additional troubleshooting methods to address high CPU usage by the Microsoft Windows Search Protocol Host.
Check for System File Corruption
System file corruption can contribute to high CPU usage. To check and repair any corrupted system files, you can use the System File Checker (SFC) tool. Follow these steps:
- Open the Command Prompt as an administrator by right-clicking on the Start button and selecting «Command Prompt (Admin).»
- Type «sfc /scannow» and press Enter. Wait for the scan to finish and follow any on-screen instructions to repair corrupted files.
- Restart your computer and check if the CPU usage by the Search Protocol Host has reduced.
The SFC tool can help identify and repair any system file corruption that may be contributing to the high CPU usage.
Reset Windows Search
If all else fails, you can reset the Windows Search function to its default settings. Follow these steps:
- Open the Command Prompt as an administrator.
- Type «net stop wsearch» and press Enter to stop the Windows Search service.
- Type «rd /s /q %localappdata%\Microsoft\Windows\1033» and press Enter. This command will delete the current search index.
- Type «net start wsearch» and press Enter to start the Windows Search service again.
By resetting the Windows Search function, you can recreate the search index and potentially resolve any issues causing high CPU usage.
Disable Windows Search Notification
If you find the Windows Search Notification icon distracting or unnecessary, you can disable it. Here’s how:
- Right-click on the taskbar and select «Taskbar Settings.»
- Scroll down and click on «Turn system icons on or off.»
- Locate «Windows Search» and toggle it off.
Disabling the Windows Search Notification can help reduce visual distractions without affecting the Search Protocol Host CPU usage.
In Conclusion
Microsoft Windows Search Protocol Host high CPU usage can significantly impact system performance. By optimizing the indexing process, resolving conflicts with other applications, exploring alternative search indexer options, and troubleshooting using methods like checking for system file corruption or resetting Windows Search, you can mitigate the issue and improve overall system efficiency. Remember to regularly update your Windows operating system and drivers to ensure optimal compatibility and stability.

Microsoft Windows Search Protocol Host High CPU
In professional settings, the issue of Microsoft Windows Search Protocol Host consuming excessive CPU resources can cause significant disruptions and slowdowns. This occurrence can result in reduced productivity, frustration, and impaired performance for users. The high CPU usage by Microsoft Windows Search Protocol Host may be attributed to various factors, including system errors, corrupt files, or conflicts with other programs.
To resolve this issue, users can try several troubleshooting methods:
- Restarting the computer to refresh system processes.
- Disabling the Windows Search service to prevent high CPU usage.
- Running a full system scan to identify and remove any malware or viruses that may be causing the high CPU usage.
- Updating Windows and all installed programs to ensure compatibility and stability.
- Clearing the Windows Search index to rebuild it and potentially resolve any indexing issues.
If the issue persists, seeking assistance from a professional IT support team may be necessary to pinpoint and resolve the underlying cause of the high CPU usage by Microsoft Windows Search Protocol Host.
Key Takeaways
- Microsoft Windows Search Protocol Host can cause high CPU usage.
- High CPU usage can lead to slower system performance.
- One possible solution is to disable Windows Search service.
- Another solution is to rebuild the Windows Search index.
- Updating Windows and device drivers can help resolve the issue.
Frequently Asked Questions
In this section, you will find answers to frequently asked questions about the issue of Microsoft Windows Search Protocol Host causing high CPU usage.
1. What is Microsoft Windows Search Protocol Host?
Microsoft Windows Search Protocol Host is a process that is responsible for indexing files, emails, and other content on your Windows operating system. It helps you quickly search for files and provides a more efficient search experience.
However, sometimes this process can consume a high amount of CPU resources, leading to slow performance and increased power usage on your computer.
2. Why does Microsoft Windows Search Protocol Host use high CPU?
There are several reasons why Microsoft Windows Search Protocol Host may use a high amount of CPU resources:
a. Large Number of Files: If you have a large number of files on your computer, the indexing process can take longer and result in high CPU usage.
b. Corrupted Index: A corrupted index can cause the Windows Search Protocol Host to continuously try to index files, resulting in high CPU usage.
c. Search Indexing Settings: If your search indexing settings are configured to include locations with a large number of files or folders, it can lead to high CPU usage.
3. How can I reduce the high CPU usage caused by Microsoft Windows Search Protocol Host?
To reduce the high CPU usage caused by Microsoft Windows Search Protocol Host, you can try the following solutions:
a. Adjust Search Indexing Settings: Open the Control Panel, go to «Indexing Options,» and customize the locations that are indexed. Exclude folders with a large number of files or folders to reduce the indexing workload.
b. Rebuild the Search Index: If you suspect that the search index is corrupted, you can rebuild it by going to «Indexing Options» in the Control Panel and clicking on the «Advanced» button. Then, select «Rebuild» to rebuild the search index from scratch.
c. Disable Windows Search Service: If you don’t use the Windows search feature frequently, you can disable the Windows Search service to prevent it from consuming CPU resources. Open the Services window, locate the «Windows Search» service, and set its startup type to «Disabled.»
4. Does disabling Microsoft Windows Search Protocol Host have any consequences?
Disabling Microsoft Windows Search Protocol Host can have a few consequences:
a. Slower Search: Disabling the search feature may make it slower to find files on your computer, especially if you have a large number of files.
b. Incomplete Search Results: Disabling the search feature may result in incomplete search results, as the indexing process helps provide more accurate and comprehensive search results.
However, if you don’t frequently use the Windows Search feature or if the high CPU usage is causing significant performance issues, disabling it temporarily can help improve the overall performance of your computer.
5. Are there any alternative search tools available?
Yes, there are alternative search tools available if you don’t want to use the Windows search feature. Some popular options include:
a. Everything: Everything is a lightweight search tool that provides instant search results as you type. It quickly indexes all files and folders on your computer and is known for its fast and accurate search functionality.
b. Agent Ransack: Agent Ransack is a free search tool that offers advanced search features, including support for regular expressions and filters. It allows you to search for specific file types or content within files.
c. Listary: Listary is a search utility that integrates with Windows Explorer and provides quick search functionality. It allows you to search for files and folders by typing keywords directly into the file explorer.
In conclusion, the Microsoft Windows Search Protocol Host high CPU issue is a common problem faced by Windows users. It occurs when the search indexing process consumes excessive CPU resources, leading to performance issues.
To resolve this issue, there are several troubleshooting steps you can try. First, you can disable the Windows Search service temporarily to see if that alleviates the high CPU usage. If it does, you might need to rebuild the search index or tweak the indexing settings to optimize performance.