
Здравствуйте, уважаемые читатели сайта remontcompa.ru! Меня зовут Роман Нахват и в сегодняшней статье мы поговорим о прекрасном инструменте под названием — Windows Performance Analyzer (WPA), который как никто другой произведёт диагностику автозапуска программ Windows и покажет, сколько времени отнимает у загрузки вашей операционной системы та или иная программа.
– Почему именно Windows Performance Analyzer? – Спросите вы! – Ведь она самая сложная в этом отношении.
Да, в цифровом мире существует много программ, пользоваться которыми избегают обычные пользователи по причине их сложности, предпочитая более простые. Но уверяю вас, с Windows Performance Analyzer вам просто не хватило времени разобраться, а разобраться стоит, так как на данный момент не существует инструмента способного его заменить. К примеру, чтобы определить какая именно программа тормозит загрузку вашей Windows, нужно узнать время загрузки (в миллисекундах) всех приложений по отдельности, загружающихся вместе с ОС, также необходимо узнать время загрузки всех системных процессов по одному. Справится с этим только Windows Performance Analyzer.
Чтобы всё было как можно понятнее, разберём конкретный случай. Я установил себе на компьютер программы: Skype, uTorrent, Download Master и FTP-клиент FileZilla, после этого система стала долго загружаться, определим виновника с помощью WPA.
Ещё в конце статьи мы перенесём операционную систему Windows 8.1 с тестового компьютера на твердотельный накопитель «Kingston SSDNow UV400» и произведём повторные измерения скорости загрузки программ, стартующих после запуска операционной системы.
{banner_google1}
Средство Windows Performance Analyzer входит в состав Windows ADK (будем использовать версию 1703) для Windows 10, скачать можно здесь:
Запускаем установку.
Далее

Далее

Принимаем лицензионное соглашение

Ставим галочку напротив «Набор средств для оценки производительности Windows» и выполняем установку «Windows Performance Analyzer» на компьютер нажав «Установить»


Установка завершена.

Если запустить Диспетчер задач на тестовом компьютере и перейти на вкладку «Автозагрузка», то можно увидеть список программ, которые загружаются когда пользователь входит в систему. Также стоит обратить внимание на столбец «Влияние на загрузку», в котором напротив каждой программы стоит своего рода оценка, указывающая, какое влияние оказывает та или иная программа на скорость запуска операционной системы. Влияние программ из автозагрузки на запуск операционной системы может быть «Высокое», «Среднее» и «Низкое». Далее мы увидим, каким же образом операционная система выставляет оценку влияния той или иной программе. На вкладке «Автозагрузка» видно, что к примеру программы Skype и Download Master оказывают высокое влияние на скорость запуска операционной системы.

{banner_google1}
Если перейти по пути C:\Windows\System32\wdi\LogFiles, то мы можем увидеть папку StartupInfo, а также файлы BootCKCL.elt и ShutdownCKCL.etl. Нас в данной статье будет интересовать файл BootCKCL.elt и далее именно с ним мы и будем работать, так как при каждой загрузке операционной системы Windows в файл BootCKCL.elt записывается различная информация о запуске процессов на компьютере, загруженности жёсткого диска и процессора.

Файл BootCKCL.elt мы будем изучать при помощи инструмента Windows Performance Analyzer, который как уже говорилось выше, входит в состав «Windows ADK»
Запускаем инструмент Windows Performance Analyzer.
Главное окно WPA.

Откроем файл «BootCKCL.etl». Для этого выбираем File — Open.

Указываем местоположение файла BootCKCL.etl, находится он по адресу: C:\Windows\System32\wdi\LogFiles
и жмём «Открыть».

После открытия файла BootCKCL.etl мы увидим различные графики, с которыми и будем работать.

Нажимаем на треугольник пункта (Computation), показанный стрелкой, находим график с названием «CPU Usage (Precise)» и мышкой перетягиваем его в окно «Analysis»

{banner_google1}
Должно получиться примерно следующее, а именно в нижней части окна откроется таблица со списком различных работающих в нашей системе процессов.

Щёлкнем правой кнопкой мыши по заглавию какого-либо столбца из таблицы.

и вызовем контекстное меню. После этого добавим в таблицу столбец под названием «CPU Usage (in view)», поставив галочку напротив

Столбец «CPU Usage (in view)» добавлен в таблицу.

В столбце «New Process» выделяем процессы программ из автозагрузки, а именно Skype.exe, uTorrent.exe, dmaster.exe, Cloud.exe, filezilla.exe

Вызываем контекстное меню и отфильтровываем выделенные процессы, выбрав «Filter To Selection»

Получаем следующее.
В столбце «CPU Usage (in view) (ms)» напротив каждого процесса находится определенное числовое значение в миллисекундах, например для процесса «Skype.exe» оно равно 5263,425473, а для процесса «dmaster.exe» — 1119,308324. Данные числа напрямую связаны со степенью влияния программ из автозагрузки (которая как мы уже выше выяснили бывает высокой, средней или низкой, и мы это видели запустив диспетчер задач и перейдя на вкладку «Автозагрузка») на скорость запуска операционной системы следующим образом: влияние программы на скорость запуска операционной системы оценивается по количеству процессорного времени а также объёма дисковой активности.
Параметры влияния на скорость загрузки Windows следующие: имеет место высокая степень влияния, если приложение использует более 1000 миллисекунд ( более 1 секунды) времени процессора или свыше 3 mb дисковых операций; средняя степень влияния — если приложение использует от 300 до 1000 миллисекунд ( от 0.3 до 1 секунды) времени процессора или от 300 kb до 3 mb дисковых операций; низкая степень влияния — если приложение использует менее 300 миллисекунд (0.3 секунды) времени процессора и менее 300 kb дисковых операций.
Исходя из этого видим, что процесс «Skype.exe» использовал 5263,425473 мс (5.26 секунды) процессорного времени, следовательно он оказывал высокую степень влияния на запуск Windows

{banner_google1}
Создадим ещё одну вкладку «Analysis» и перетянем на нёё график с названием «Lifetime by Process»

Получаем следующее

Выделяем нужные нам процессы таким же образом, как мы это делали на графике «CPU Usage (Precise)»
Например выделим процесс «explorer.exe»,

а также процессы программ из автозагрузки, а именно «uTorrent.exe», «dmaster.exe», «Skype.exe», «Cloud.exe» и «filezilla.exe»

Отфильтруем выбранные процессы, выбрав «Filter To Selection»

Получаем следующее:
В Windows 8.1, 10 снижено влияние программ сторонних разработчиков в автозагрузке на скорость запуска операционной системы. Запуск сторонних приложений происходит только после старта всех системных процессов и появления рабочего стола. Сделано это специально, чтобы программы не тормозили ОС во время старта. В столбце «Start Time (s)» напротив каждого процесса указано время (в секундах), через которое программа начала стартовать после запуска операционной системы. К примеру программа «uTorrent» начала стартовать через 45.4 секунд после запуска Windows, а программа «Download Master» начала стартовать через 49.8 секунд.

{banner_google1}
Все статьи о переносе операционных систем находятся на нашем сайте в этом разделе.
Развернем заранее созданную резервную копию тестового компьютера с Windows 8.1 на твердотельный накопитель «Kingston SSDNow UV400» используя загрузочный диск Acronis True Image 2018

Жмём «Приступить».


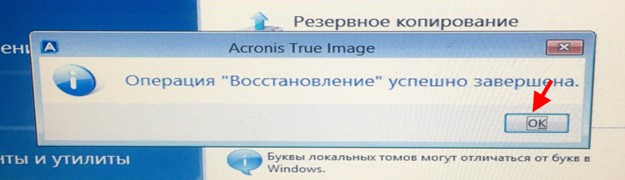
Восстановление Windows 8.1 успешно завершено.
После восстановления системы на твердотельный накопитель «Kingston SSDNow UV400» снова запускаем Диспетчер задач и заходим на вкладку Автозагрузка. Видим, что теперь программа FileZilla оказывает среднее влияние на скорость запуска Windows 8.1

Переходим по пути C:\Windows\System32\wdi\LogFiles и копируем с тестового компьютера файл BootCKCL.etl.

Файл BootCKCL.etl скопированный с тестового компьютера.

Запускаем инструмент Windows Performance Analyzer.
Открываем файл «BootCKCL.etl», выбрав File — Open.

Открыть.

{banner_google1}
Так же, как это мы делали выше, перетягиваем график «CPU Usage (Precise)» в окно «Analysis»
В столбце «New Process» выделяем процессы программ из автозагрузки, а именно Skype.exe, uTorrent.exe, dmaster.exe, Cloud.exe, filezilla.exe.


Вызвав контекстное меню отфильтровываем выделенные процессы, выбрав «Filter To Selection».

Как видим, процесс«filezilla.exe» использовал 507,442282 мс (0.507 секунды) процессорного времени, следовательно он оказывает среднюю степень влияния на запуск Windows. То же самое мы видели на вкладке Автозагрузка в Диспетчере задач.

Если проанализировать график «Lifetime by Process», как мы это делали выше, то можно увидеть, что системный процесс explorer.exe запустился через 5.4 секунды после запуска ОС (до переноса ОС на твердотельный накопитель процесс explorer.exe запускался через 29.1 секунду после запуска ОС), а программа Skype запустилась через 28.2 секунды (до переноса ОС на твердотельный накопитель программа Skype запускалась через 52 секунды)

Статьи на эту тему:
- Автозагрузка Windows 10
- Autoruns – одна из лучших программ для ускорения автозагрузки Windows
- Долгая загрузка Windows 10. Или как быстро определить, какое именно приложение более всего тормозит загрузку операционной системы
- Оптимизация автозагрузки Windows программой Autorun Organizer
The Windows Performance Analyzer (WPA) tool is a part of the Windows Assessment and Deployment Kit (Windows ADK). It’s the tool you can use to create graphs and tables based on event trace log recordings. You make these trace files using tools like Xperf or Windows Performance Recorder (WPR). These tools are useful if you have system performance issues. You can also use them regularly for performance monitoring.
In this article, you’ll learn how to create a quick recording using the WPR. You should launch this recording during an event where you want to test the performance of your computer. This could be launching a game or other application or even running a program you’ve written. Then, we’ll cover how to use the WPA tool to read and analyze that data file for troubleshooting purposes.

Installing and Launching Microsoft Windows ADK Tools
The first step to install both the WPA and WPR is to install Windows ADK from Microsoft’s download page for the Windows Performance Toolkit. This tool is from Microsoft.com, so completely safe to install. As you step through the installation process, you’ll need to choose the components you want to install.
Just make sure that the Windows Performance Toolkit is selected since this includes both tools you need.

Once you select Install, the process can take time, so be patient.
When the Windows Performance Toolkit installation is complete, you’re ready to make your first WPR recording.
Note: For this example, we’ve installed the HeavyLoad Stress Test app to put our system under a heavy load while the WPR recording occurs.
Before using the Microsoft Windows Performance Analyzer tool, you’ll need to use the Windows Performance Recorder to capture an event trace log recording (an ETL file). This recording will contain all Event Tracing for Windows (ETW) events. WPA analyzes all system information about CPU, memory, storage, and more.
To launch WPR, select the Start menu and type “Windows Performance Recorder.” Next, select the Windows Performance Recorder app.

The WPR tool is a straightforward tool to capture events occurring on your system during a specific timeframe. To start the recording, just select the Start button.

This will launch the system event recording process. Perform actions (like launching and running a program) that you want to use to test your system’s performance.
Once finished, just return to the WPR window and select the Save button.

The next step will display the path to your ETL file. You can include a description of what you’re troubleshooting or testing in the detailed description window.

When done, select the Save button.
The app will write all data to the ETL file, and you’ll see options at the bottom of the window to open the WPA tool directly or navigate to the ETL file by opening the folder.

The most convenient way to immediately move on to your performance analysis is to select the Open in WPA button.
Analyzing ETL Files with Windows Performance Analyzer
Once you double-click the WPA app and it launches, you’re ready to start navigating through and visualizing the data in the ETL file. This is a special log file only certain apps can open. You couldn’t view it using something like Google Docs or Microsoft Word.
You’ll notice along the left side there are four major categories of data to explore. You can select any of these charts on the left to see them displayed in more detail in the right pane.

These categories include:
- System Activity: Process information, background tasks, events, and more.
- Computation: All information related to CPU cores.
- Storage: Disk usage information.
- Memory: Real and virtual memory usage.
- Power: Processor power usage details.
In each chart, like the CPU Usage chart, you can hover over any graph area to see a breakdown of the data components like process name, process active time, and percentage of overall CPU usage.

If you select a specific process name from the list at the bottom, you’ll see highlighted areas in the graph to identify the specific times that process consumed CPU resources. This can help identify whether operating system processes or application processes are eating up all CPU time.
You can also drill down into each process to see specific stack activity, again with the graph above highlighting areas when that stack was actively using CPU time.

Available Charts in WPA
Inside each of the four major categories in the left pane, you’ll find a graph explorer that can help you analyze and troubleshoot what’s happening with your system performance.
We’ve covered the System Activity list above. Below this, you’ll find the Computation category.

Here you’ll find the following sub-charts:
- CPU Usage (Sampled): Samples of CPU activity taken at sampling intervals.
- CPU Usage (Precise): CPU usage associated with specific running process threads.
- DPC/SR Duration: CPU time spent servicing deferred procedure calls (DPCs).
- CPU Usage (Attributed): CPU usage broken down into several categories.
Again, you can select any of these sub-charts to display them on the right. Or you can drill down further into more sub-charts related to each of these areas.
The Storage category has several disk usage sub-visuals underneath it in the left navigation pane.

You can view overall lDisk Usage or drill down into any of the following sub-visuals:
- Disk activity
- Disk Counts
- Disk Offset
- IO Time
- Service Time
- Disk Size
- Disk Throughput
- Disk Utilization
Adding one or more of these to the same pane on the left lets you compare different aspects of disk usage to one another. This kind of comparison alongside visuals related to processes or CPU time could potentially help you identify the source of your Windows performance problems.
The next category in the left navigation pane is Memory.

You’ll find the following charts under the Memory category:
- Memory Utilization
- Fault Counts
- Fault IO Time
- Virtual Memory Snapshots
Finally, the last category in the list is Power. These are all visuals related to your system’s overall CPU power consumption.

This includes all of the following sub-visuals around all system processors like CPUs and GPUs:
- CPU Frequency
- CPU Idle States and State Diagram
- System Latency Tolerance
- Processor Profiles
- Processor Parking State
- Core Parking State
- Processor Performance
- Processor Constraints
Other Microsoft WPA Features
There are several useful features in the WPA tool that’ll help you with your troubleshooting efforts.
One of those is an Analysis Assistant. You can find this by selecting the Window menu and selecting Analysis Assistant.
This opens up a new pane in the tool that will give you tips and details about the charts or items inside the charts that you click on.

This is especially useful if you aren’t that familiar with all of the terminology used throughout the tool.
If you select the Window menu and select New Analysis View, you can open a new Analysis tab.

This lets you perform multiple analyses by adding a family of visuals in one tab and then opening a new tab to perform a completely different set of visuals without losing your previous analysis. Flip back and forth between tabs to work on each analysis individually.
Exploring Windows Performance Analyzer Further
If you’d like to dig even further into WPA, Microsoft has an old Microsoft Docs guide. The documentation isn’t being maintained anymore, but it should point you in the right direction. It even includes a full command line reference you can use to run WPA commands from the command prompt.
As you can see, the Windows Performance Analyzer tool is much more flexible and useful than standard performance tools that come installed on Windows by default. So, the next time your Windows system starts acting unusual, take the time to download the Windows ADK and give WPR and WPA a try.
If you’re using Linux (or Android), a GitHub Linux version of a similar tool is available using the Microsoft Performance Toolkit.
Related Posts
- How to Fix a “This file does not have an app associated with it” Error on Windows
- How to Fix an Update Error 0x800705b4 on Windows
- How to Resolve “A JavaScript error occured in the main process” Error on Windows
- How to Fix the Network Discovery Is Turned Off Error on Windows
- How to Change Folder Icons in Windows
-
Home
-
News
- Windows Performance Analyzer – How to Download/Install/Use It
By Daisy | Follow |
Last Updated
If you encounter system performance issues on Windows 11/10, Windows Performance Analyzer can help you detect the issue. This post from MiniTool tells you how to download, install and use Windows Performance Analyzer.
What Is Windows Performance Analyzer
What is Windows Performance Analyzer? The Windows Performance Analyzer (WPA) tool is part of the Windows Assessment and Deployment Kit (Windows ADK). It is a tool you can use to create charts and tables from event trace logging.
The Windows Performance Toolkit consists of two separate tools: Windows Performance Recorder (WPR) and Windows Performance Analyzer (WPA). Windows Performance Recorder (WPR) is a performance recording tool based on Event Tracing for Windows (ETW). It records system events, which you can then analyze using the Windows Performance Analyzer (WPA).
How to Download and Install Windows Performance Analyzer
This part introduces how to download and install Windows Performance Analyzer.
Step 1: Go to Microsoft’s official website to download the Windows ADK according to your operating system.
Step 2: Find the Windows ADK exe file and double-click it to start the installation.
Step 3: There are 2 options for you to install ADK:
- Install Windows Assessment and Deployment Kit on this computer
- Download the Windows Assessment and Deployment Kit for installation on a separate computer
Step 3: Select the second option to download Windows ADK offline. Then, make sure that the Windows Performance Toolkit is selected.
Step 4: On the Windows kits privacy page, click Yes to allow Microsoft to collect insights for the Windows Kits.
Step 5: Accept the license agreement and click Next. Then, it will start the installation.
How to Use Windows Performance Analyzer
This part tells you how to use Windows Performance Analyzer.
Step 1: Before you use Windows Performance Analyzer, you need to use the Windows Performance Recorder to capture an event trace log recording. You can type Windows Performance Recorder in the Search box to open it.
Step 2: After opening it, you can click the Start button. This will start the system event logging process. Perform actions you want to use to test system performance (such as starting and running programs).
Step 3: The next step will display the path to the ETL file. You can include a description of what you are troubleshooting or testing in the Detailed Instructions window.
Step 4: Then, select the Save button. Next, select the Open in WPA button.
Step 5: After launching Windows Performance Analyzer, you can see there are four major categories of data to explore. These categories include:
- System Activity: Process information, background tasks, events, and more.
- Computation: All information related to CPU cores.
- Storage: Disk usage information.
- Memory: Real and virtual memory usage.
- Power: Processor power usage details.
Step 6: In the four main categories in the left pane, you’ll find a graphical browser that can help you analyze and troubleshoot system performance issues. Find the Computation category. Here you’ll find the following sub-charts:
- CPU Usage (Sampled): Samples of CPU activity taken at sampling intervals.
- CPU Usage (Precise): CPU usage associated with specific running process threads.
- DPC/SR Duration: CPU time spent servicing deferred procedure calls (DPCs).
- CPU Usage (Attributed): CPU usage broken down into several categories.
Step 6: In the Storage category, you can see the following items.
- Disk activity
- Disk Counts
- Disk Offset
- IO Time
- Service Time
- Disk Size
- Disk Throughput
- Disk Utilization
Step 7: The next category in the left navigation pane is Memory. You can see:
- Memory Utilization
- Fault Counts
- Fault IO Time
- Virtual Memory Snapshots
Step 8: The last category in the list is Power.
- CPU Frequency
- CPU Idle States and State Diagram
- System Latency Tolerance
- Processor Profiles
- Processor Parking State
- Core Parking State
- Processor Performance
- Processor Constraints
About The Author
Position: Columnist
Having been an editor at MiniTool since graduating college as an English major, Daisy specializes in writing about data backups, disk cloning, and file syncing as well as general computer knowledge and issues. In her free time, Daisy enjoys running and going with friends to the amusement park.
Hi, and welcome to this video about an introduction to the Windows Performance Analyzer.
We’re talking here about something called the Windows Performance Toolkit. The Windows Performance Toolkit can be installed today using the Windows SDK, which is one component you can select while installing. There’s also the Windows ADK—the Assessment and Deployment Kit—where the Windows Performance Toolkit is included as well. You can choose that when installing; either one would work.
Installing the Windows Performance Toolkit
What you get with that is the Windows Performance Recorder first—that is the tool to record ETW (Event Tracing for Windows) events. In fact, the Windows Performance Recorder and Analyzer are all about ETW. You might recall I did a quick introduction to ETW a few videos back.
So, WPR records ETW events, and the more events you have, the more difficult it is to analyze. This is where the Windows Performance Analyzer comes into play.
Using WPR.exe and the GUI Version
In general, there’s a command-line tool called WPR.exe, which is part of Windows—there’s no need to install that. However, there’s a GUI version of that which makes it so much easier to record traces, and this is really part of the Windows SDK or the Windows Performance Toolkit in general.
So, this is one thing you get—an easier way to utilize WPR—even though WPR, the command-line tool, has a bit more options than the UI version.
Analyzing Recordings with Windows Performance Analyzer
Once you have a recording in place, you would like to analyze that, and for that, there’s the Windows Performance Analyzer (WPA). Now, WPA is a fairly complex tool and very powerful, and that’s because there’s lots of things that you typically have in a snapshot or a recording. You get lots and lots of events, and you want to try to make sense of that, especially when you’re trying to figure out something—maybe trying to investigate some kind of scenario, maybe a high CPU user, lots of memory, I/O stuff, maybe a combination of all of those.
Anything like that requires lots of information—not all of that is actually applicable—so Windows Performance Analyzer tries to make it easier to analyze these kinds of traces.
Liked the content?
Subscribe to the free TrainSec knowledge library, and get insider access to new content, discounts and additional materials.
Downloading WPA from the Microsoft Store
Technically, you don’t actually have to install WPA if this is the only thing that you want using the Performance Toolkit. It’s actually also available now through the Microsoft Store. Just search for WPA—Windows Performance Recorder and/or Analyzer, to be more precise—and you’ll find it. There’s even a preview version there that would allow you to install something that is kind of in the works and hasn’t been released just yet, but something you might want to perhaps look at.
So, here’s what that would look like in the store. This is what you would see if you try to install WPA from the store. I’ve already installed that, and that’s something that is just easy to do.
Introduction to the WPA User Interface
So, let’s take a look at what that would look like and give you a basic introduction to the UI of WPA because it is non-trivial, just like the entire tool.
Recording with Windows Performance Recorder
First, we need to record something. So, I’m running here the Windows Performance Recorder, the GUI tool, and when you launch it for the first time, it looks something like this. You can choose More options here to see more information.
What you get here is the ability to select a bunch of profiles. Every profile represents some kind of scenario, some kind of thing you’d like to get. Behind the scenes, the profile selects the appropriate—or at least, as far as the profile is concerned—the appropriate ETW providers that you need to add into the session in order to record information that will help you figure out what is going on.
Understanding Profiles in WPR
You can see there it starts with First Level Triage, which is just a bunch of generic stuff about the system—generic events—and then some CPU, I/O, and memory stuff; basic stuff that might be good enough depending on what you’re trying to do, or maybe it’s just giving you some kind of baseline to work with.
Then you can see there are more intricate Resource Analysis sections here, such as CPU usage, disk and file I/O activity, registry, networking, heap, pool—lots of stuff. And if you go further down, you can see there’s even more elaborate scenarios, such as audio glitches, video glitches. If you get into any kind of trouble there, it’s really difficult to know which ETW providers will serve you best in order to try to figure out what is going on. So, these profiles already provide the best—or at least very close to the best—ETW providers you can get.
It’s also possible to customize these profiles or even create new profiles. These profiles are just XML files, and they’re documented in the Windows ADK—the Assessment and Deployment Toolkit—and so it’s possible to author your own profiles or customize existing profiles if you so desire.
Selecting Profiles for Recording
So, what I’m going to do here: I’m going to unselect First Level Triage and do something like CPU usage and, let’s say, Disk I/O activity. I think it’s good enough for something very simple—relatively simple—but still, it won’t be that simple.
Here you can select the Performance Scenario, either General—which is what you would select in most of these cases—but there’s some special stuff like Boot scenarios and so on, which is not something I’m going to cover here.
Detail Level Settings
We have a Detail level—either Verbose or Light. Verbose is the default; I suggest you stick with it, although you can try Light. Perhaps you’ll get less information, but maybe it would be easier to see through.
Logging Mode: Memory vs. File
Then the Logging mode could be either Memory or File. Always use Memory in general because the buffers will remain in memory, able to capture things fast enough not to lose events, and then you’ll have the ability to save into a file. If you start with a file, then you might not have enough—the disk might not be fast enough to capture everything—and the only advantage there is that you’re going to make sure that you’re not going to run out of disk space.
So, for us, it’s good enough, and just remember it’s better to use small recordings rather than long ones because of the gigantic number of events typically that you get.
Starting and Saving a Recording
So, I’m going to press Start here and just wait a few seconds. We can do stuff in the system—again, usually trying to do some kind of scenario, or maybe your system is already in a particular state where you want to see what is going on. And so once I’m done, I can go ahead and click the Save button—I think that’s enough.
It shows me this little dialog to say where I would like to save this and the name of the file. You can also add some kind of description if it makes sense, but I’m going to skip that and just click Save. So, it’s going to save this file—the recording. It might take a while depending on the size of the recording, so you might need to wait several seconds, even more.
Once the save completes, then you’ll get the option here to directly open this trace in WPA. So, it gives you the option to Open in WPA or just Open the folder.
Opening Traces in WPA
So, let’s just open WPA directly. WPA is going to show up and then load our trace.
Now, of course, you can just open WPA as a standalone application and then go ahead and open a specific trace. So, here’s WPA here—I can go to File, then simply Open a new trace or something like that. So, not a problem. But in this case, it’s okay what we did—we just opened WPA directly after a recording.
Understanding the WPA User Interface
What I want to do here in this little video is to talk about the basics of the UI because it’s not really that trivial to understand, and even before we do any kind of analysis—which we won’t be doing in a substantial way in this video.
You can see there’s this top-level entities here showing some stuff that was recorded. What we see here is something called the Graph Explorer, which is where you want to start from. Then you also have this Analysis View, which currently is empty. You can create more Analysis Views as needed.
Navigating the Graph Explorer and Analysis View
So, we can open that up. Let’s say I’m going to open Computation here. This shows me the second-level items, which in this case I have the CPU Usage Precise and CPU Usage Attributed, and then CPU Usage Precise here by whatever. This just gives me a preview of the main things.
But once I open the second level here, you can see specific graphs here or specific kinds of profiles or analyses, if you will. For example, we have something like Timeline by Process and Thread or Usage by Priority, Utilization by CPU—these kinds of things that you might find useful.
Adding Views to the Analysis View
So, if I go ahead and grab any one of them or just double-click, we can just grab and drag it into an Analysis View. What we see here is this particular view that I’ve just dragged, but in fact, all these views that are covering the CPU Usage Precise category can be seen here. If I just open that up, you can see I can switch between these various views without necessarily taking another drag of this particular view to the Analysis View unless I really want it.
Here’s an example of Analysis by CPU. If I want something else, and maybe I care about Analysis by CPU, I can go ahead and drag something else like what I did previously—Utilization by Process and Thread—which probably is interesting to me.
You notice I can resize these views in any way I see fit, and you can see that these views contain a graph and a table. So, in fact, we can see a graph and a table, or just a graph, or just a table. This is where these little buttons come into play.
Adjusting View Layouts
So, if I do that, I can see here only the graph, and of course, I can resize if I want to see more. I can also go and see just the tables—now we see this part, just the table. This is a mixed mode where we see a table and the graph. So, really up to you—whatever you need, you can switch these views as needed.
Zooming and Selecting in the Graph
Beyond that, one thing that is very kind of obvious—something you definitely want to use—is the fact that you might see lots of stuff here, but you want to zoom in on your specific areas. So, you can just grab and left-click with the mouse button and drag at some kind of part which is something you’re interested in, and then you can see that some other stuff gets selected, which means there’s something in this area that includes these—in this case, processes that you see here and these CPUs that you see here.
If I right-click here, I can do Zoom, and that will zoom in using my selection. If I need to zoom more, I can just select another chunk here and zoom in again. One thing that you should note is that all the views that are in the same Analysis View are always going to be synchronized in terms of time, and so the zooming I did was only in the top view here, but still, it applies to the other one as well. So, this timeline is always synchronized in a particular Analysis View.
Using Multiple Analysis Views
If I want to have different zoom levels in different graphs, I have to put them in different Analysis Windows. For example, I can grab this one and drag it here into a new Analysis Tab, or just click the plus button to add an empty Analysis Tab, then drag it there. In this case, now that I’m looking at a different Analysis View, I can zoom something completely different if so desired, and that’s fine. This is not going to have any effect on the first Analysis View. These have different timelines, and that’s completely fine.
Synchronizing with the Graph Explorer
Another little trick you might find useful is that there’s this little button here which keeps things synchronized between the Graph Explorer and the view. If I click that, they’re no longer synchronized. The Graph Explorer is going to show you the entire view; you can even move this little window to go into different locations in terms of the time. It always starts by default as synchronized like so, so it’s going to show you exactly what you see here, but you can unsynchronize, which perhaps could be a bit easier to see where you are in the grand scheme of things—the entire set of this entire time span you have recorded.
Understanding the Tables
Now, the other thing that you probably are wondering about is these little tables and what you see here in these tables. So, let me give you a quick rundown of some of the ideas here.
Let me go back to something that is easier perhaps to understand. We have this view here, and one thing I can do is say, well, maybe I want this view to be visible—to be maximized. I can do that, so it will try to maximize the space for this view.
But in general, if I like it and I want to examine it perhaps in a separate window, I can just drag it to a new Analysis Window. In fact, we can even detach an Analysis Window entirely and put it, say, on a different monitor if you have another monitor and you want to do that. So, that’s something you can do as well.
Using the Gold Bar for Grouping
What I want to show you here—maybe we have something that is perhaps easier to understand. We can close this one. I want to see this only.
So, we have here—let me unzoom. I’m going to unzoom to see everything that we had, just going back to sort of the beginning, hopefully. So, undo or just unzoom everything like so. So, we’re back at the beginning.
You see that there’s an area here which has nothing. This is sometimes called the trace rundown when the trace is kind of winding down, and so no events are being really recorded, but you still get some time in the recording, which is obviously not useful, and you typically want to filter it out—just zoom into the area that is most convenient and more important.
So, one thing here we see—we see this is a CPU Usage Precise. So, before I talk about precise, maybe we should stick with something simpler, which is CPU Utilization maybe, and something which is not precise.
CPU Usage: Precise vs. Sampled
Let’s close this one as well and create another Analysis Window just to show another way. There’s also a CPU Usage which should be sampled. We’ll see if we get something like this; maybe we don’t. It depends on what we’re trying to do and the thing that we’ve actually selected. In this case, I think we don’t have anything other than precise—that’s what it seems here.
Okay, fine, we’ll go with that. So, the idea of CPU Usage Precise is that it is not based on sampling. Sampling means that every so and so often, every processor is checked to see what is actually running. But instead, it’s using the actual context switches—so these actual context switches that determine exactly when things change between threads and when another thread starts executing and the previous one has been context-switched out, and so on.
Sorting and Grouping in Tables
First, you can see here the table. Now, the table has the medial area here between the gold bar and the blue bar, and this is just, well, mostly a normal kind of table. So, you can sort by whatever column that you see here. It’s also possible to sort by multiple columns, like having a sub-sort—for example, Weight, and then you want to see something else, you can just click Shift and click in kind of a secondary way. I’m not saying this particular one is actually useful, but in general, you can sort by any number of columns.
If you right-click, you can make changes, of course, in various ways, like remove the sorting entirely—like maybe something like this. So, we can definitely remove sorting and sort by some other column if you think this is better in what you’re trying to do.
Aggregation Modes
Now, what we have here are just values, and you can see here some of them have this little string at the bottom here, like Count says Count, Ready (µs) says Sum, Ready (µs) says Max, and these kinds of stuff. These are known as aggregation modes. So, every kind of value, you can see it either as its true value or aggregating that over all the values in a particular category.
Customizing Columns with the View Editor
But first, what is that gold bar? The purpose of the gold bar is to provide grouping. So, I can go to this column, for example—I’m going to right-click here and remove this column, and maybe I’m going to remove this column as well to make things slightly easier. And we have New Thread here.
So, what happens is that we have here New Process as the first item for grouping, and so we see processes here like svchost here, and so on. The second grouping, the subgroup, is based on the New Thread ID. If we drag this New Thread ID to the right of the gold bar, then we now have just a single grouping, which is by New Process.
If you want to also, let’s say, group by CPU, then we can drag the CPU column all the way to the left of the gold bar, and now for every process, we can see which processors (CPUs) were used by that particular process. Whether that’s actually interesting or not is immaterial for now—just a way to try to understand how you can play with these views.
Technically, you can add any number of columns that you want. In fact, you can even have a column that is here and there as well—it’s all fine. You can have as many columns as you want.
If you click—there’s a button here that looks like settings—that’s the View Editor. The View Editor allows you, perhaps in an easier way, to change what you see—so which columns you see and what kind of aggregation mode you would like to see for those items.
Count here happens to be the count of context switches, and that’s because CPU Usage Precise is the one that’s providing you context switches. So, this is what Count here means. Sometimes you need to know a little bit more about what you’re actually looking at, and not just—sometimes the column might not be perhaps clear enough, but this is really the kind of fundamental item that is used to build that kind of view.
You can see there are more columns here. You can remove columns that you don’t care about, or you can change—you can see you have the same column here called Ready, so there’s a Sum and then the maximum amount of time that the thread has spent in the Ready state.
Understanding Ready State and Aggregation
A Ready state represents the thread that wants to run but didn’t have—but all processors were busy at the time; it couldn’t get the CPU at that point. Obviously, normally you’d like to have threads being ready as little as possible—you want them to be in the Running state as much as possible, and that’s what you typically want.
But regardless, again, I’m not focusing here on the actual Windows internals kind of stuff but mostly about the UI.
If I want to see the Waiting Process, I can take it, and then we can see we have a sorting here that we can do if that makes sense, and some aggregation if that makes sense, and if so, the valid options are going to show up. So, we can make changes here as much as we like. We can drag columns here.
So, if I want something like a new column here—the New Alt Priority—I can just drag it, and again, I can use aggregation mode if that makes sense, like the maximum priority, the average priority, things like that.
Again, sorting here is also possible. So, we can use descending sort, click OK—it would apply the information, or click Apply and then OK—it doesn’t matter. So, we see what is happening here.
In this case, Waiting Process is right here, and it is the third group to be used here for sorting purposes. So, that’s what we’re trying to see here. So, this process was the waiting one in order for this process to have some kind of thread running.
Again, in this case, it’s probably not—maybe it’s not very useful. We can drag it to the other side or simply completely remove it.
Manipulating the Gold Bar
In general, this is how you manipulate the gold bar. Stuff on the left of the gold bar represents grouping; stuff on the right of the gold bar just represents columns with values—could be the direct value or some kind of aggregation depending on what you’re trying to show here.
So, if we have something like a thread here using a certain processor, we can see the Thread ID. Aggregating that—like showing a sum of Thread IDs—is probably, probably doesn’t make any sense. So, I can maybe show the sum of Thread IDs, but it’s kind of silly—it doesn’t really represent anything that makes any kind of sense. So, it does sum these Thread IDs for this particular process based on the grouping, but really it’s just kind of useless.
So, of course, you want to do the things that make sense in terms of what you’re trying to do and what you’re trying to figure out.
Filtering and Analyzing Data
As usual, you can zoom in, and once you zoom in, everything updates—not just the graph but also the table. The table and the graph are always in sync—they’re always in sync. If you don’t want to see one or the other, you can just make them go away and see only the graph or only the table—that’s fine. But even if you see both, they’re always synchronized in terms of time.
You can also do some basic filtering. For example, let’s say I’m interested in some process, maybe a bunch of processes, maybe not just one. So, I can go ahead and select some processes, and I can right-click here and say Filter to Selection. This means that I’m now going to look at stuff which only has these processes in mind.
So, now we are focusing on this set of processes. Maybe something here is interesting—I want to zoom in, see what is going on, what exactly was here.
Notice if I just hover over the graph, when I hover over some part of the graph, we get some tooltip—like a nice tooltip—providing information about that graph based on the stuff which is shown on the right of the blue bar. So, right of the blue bar is actually what is shown in the graph. If you want to see more types of stuff in the graph, you can drag it to the blue bar, and of course, it might not make sense, but still, you could in theory do that.
If you want to go back—you’re not happy with the filter anymore—you can go ahead and undo the filter to go back to the normal kind of thing, or just clear the filter. So, undo just goes one step back, but you could clear the entire filter by selecting Clear Filter.
These are some of the options you find here, and you probably start to get the sense that this is definitely not easy. It’s not easy—not because necessarily the tool is overly complex, but because Windows is complex, and in fact, this is true for any operating system. Lots of stuff is happening at the same time, and it’s not always easy to see what is going on.
So, here we can just sort by certain context switch count, and you can see that Camtasia Recorder was the one that had the most context switches. Doesn’t mean that this is necessarily the most CPU time being consumed, but definitely the most context switches. So, this is what Count here—because we’re talking about CPU Usage Precise.
This is just to give you a sense of what is going on and just to show you some of the things we can get and how the view looks like. Hopefully, in subsequent videos, we’ll do some real analysis to try to figure out what is going on, but at least for now, you should play with this view and the tool and get a sense of how to navigate the various things here.
Trace Properties and System Configuration
A few more notes perhaps. First, there’s the Trace here, and you can have Trace Properties providing different sets of properties for this particular trace. You can also look at System Configuration to give you some information about the system on which the particular trace was taken, and that information is also gathered as part of the trace. So, you might see some things that would make sense for whatever you’re trying to do here. At least you get some sense as to which devices were available at the time, and also in terms of storage—all the drives and things like that.
Loading Symbols
Then I mentioned you can do Open, but another thing you can do is—well, first, there’s of course Settings, which you can play around with, like changing the settings here to the theme, to dark mode if you care about these things. So, it’s really whatever is more convenient for you.
Another thing that is important is this ability to load symbols. So, this Load Symbols option will start loading symbols, and of course, for that to work properly, you need to configure symbol paths. But if you have the standard stuff, like the path to the Microsoft symbol server using the _NT_SYMBOL_PATH environment variable—many of you are probably familiar with—then it will just work and go to that Microsoft symbol server to get symbols for the Microsoft binaries.
Now, this might take a while depending on the various modules that it recognized in the trace, and this is mostly important when you examine call stacks, which you can examine, but we’re not going to do that here. But just know that it is possible and sometimes definitely necessary, especially when trying to figure out which function is used a lot and stuff like that.
Exporting and Applying Views
Another thing you can do here is to export. The idea of exporting is exporting a kind of view—all your settings. So, the next time you open up and you want to open that particular view, that particular export, this is done using the option of Apply. So, Apply would allow you to apply a previously exported view. It will open the same kind of analysis windows with the same graphs open up.
Notice it is not based on the actual trace you’re looking at, so if the particular graph doesn’t make any sense because you don’t have that information in the trace file, it will not open it. But if it can, it will open that, and you’ll have similar settings to what were saved at that time. So, that’s the option of Export and Apply. Feel free to try it out.
Conclusion
What else I can show here—I think that’s good enough for now, and hopefully, in future videos, we’ll take a look at a more realistic scenario, try to figure out what is going on using this tool.
$1182 or $120 X 10 payments
Windows Master Developer
Takes you from a “generic” C programmer to a master Windows programmer in user mode and kernel mode.
Analyzing Disk I/O Activity
Here’s the last example, just to make things a bit easier. Perhaps this CPU stuff is slightly complex—we can look at storage. Here you can see there’s a Disk Storage here, and various stuff is happening here, like the I/O Type Activity by Process. We can just drag it, say, to a new column here, and you can see there are three types of operation: Write, Read, and Flush. We can see that the categories here—the grouping here—is by process.
So, I can see that the process that did the most write operations was the System process; the next one is in terms of I/O time; the next one is WPR, and so on. We can see the number of items. We can open that up, of course, and see every item that was 680 microseconds here that were spent, and this is the size of the transfer—so there’s a 12K transfer, and then there’s a 512K transfer, and so on. Kind of interesting information here.
Of course, we can group by other stuff and do other kinds of aggregations. I leave that to you as an exercise.
Liked the content?
Subscribe to the free TrainSec knowledge library, and get insider access to new content, discounts and additional materials.
Main work of the Windows Performance Analyzer program is to trace logs events usually for the purpose of troubleshooting. The application creates the event trace log report table and graphical visuals to enable users to track down the potential issues. Thus, it provides the necessary data and ensures every user comfortably blocks the recurrence of detrimental system errors. Usually, Windows Performance Recorder or else performs the recording of event trace logs. This is a generic part of the Windows ADK program commonly well known as Windows Assessment and Deployment Kit.
Windows Performance Analyzer has an extraordinary UI that offers one-shot access to programs like Diagnostic Console, Graph Explorer, Issues Window, Analysis Tab, and many more. The program is basically useful while analyzing the Operating system of your machine. You can easily check the memory status, power source stability, system activity log thus you can get information about the part of your Windows that is insecure.
Way to use Windows Performance Analyzer
Here is How to Use Windows Performance Analyzer in Windows 11 or 10 –
Step-1: Download Windows Performance Analyzer from Store
Windows Performance Analyzer is available in Microsoft Store now so go to this link and download the tool.
Step-2: Open a Trace file
To open a trace file, choose File>Open.
When you open a trace file, events are categorized in Graph Explorer on the left, and the Analysis Assistant opens in the pane on the right. The Analysis tab is in the center.
Step-3: Configure symbols
After a trace file is loaded, choose File>Configure Symbols to control the processes and images that have symbols.
Symbols must be loaded correctly for all the data to appear in the Analysis tab. Choose File>Load Symbols after the settings are configured.
Step-4: Apply a profile
Profiles optimize the information displayed in the Analysis tab.
Choose File>Apply Profile>Catalog, and then select a profile applicable to your analysis.
Step-5: Add graphs to the Analysis tab
Graph Explorer lists the available graphs.
Drag a graph to the Analysis tab to start your performance analysis.
You can also double-click a graph to add it to the Analysis tab.
Basic Actions
Use the Analysis Assistant
Analysis Assistant provides useful information about the profile, tab, graph and preset. When you select a specific graph or data table, information about that specific graph and table is shown in the Analysis Assistant. Use this as a guide during your analysis.
Highlight a time interval
Click and drag the mouse pointer over a time interval on the graph where system activity indicates a potential performance issue, for example, high CPU usage. Information in the table will sync to your selection.
Zoom, Search and Filter
In the Data table, select and right-click on a row to filter the data that is displayed in the table.
Select an area in the graph and then right-click and select Zoom.
Press Ctrl+F to search for data.
View Data
Graphs
Graphs are the primary way to visualize the recorded data. The style of the graph is dependent on the type of data.
Data Tables
The data from your trace log file is also available in tabular form, in the data table. It is divided into three areas: keys, data and graphing.
Customization
You can customize any data table by right-clicking on the columns and adding more columns. Once required columns are added, save the changes to allow faster repeat analysis.
That’s all!!