
Все способы:
- Способ 1: Возможности Windows
- Способ 2: Драйвер для звуковой карты
- Способ 3: ПО для игровых девайсов
- Способ 4: Сторонний софт
- Способ 5: Отдельные приложения
- Вопросы и ответы: 0
Способ 1: Возможности Windows
В Windows 10 настроить чувствительность микрофона можно с помощью встроенных средств операционной системы – через «Панель управления»:
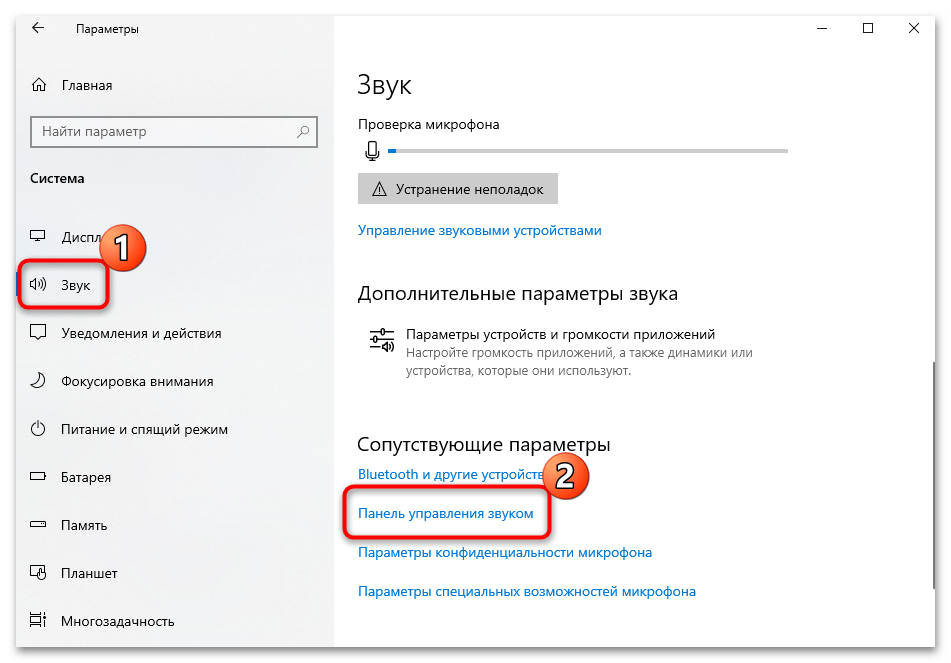
- Перейдите в «Параметры». Для этого кликните по иконке в виде шестеренки в главном меню Windows.
- Выберите раздел «Система».
- Перейдите на вкладку «Звук» слева и нажмите на строку «Панель управления звуком».
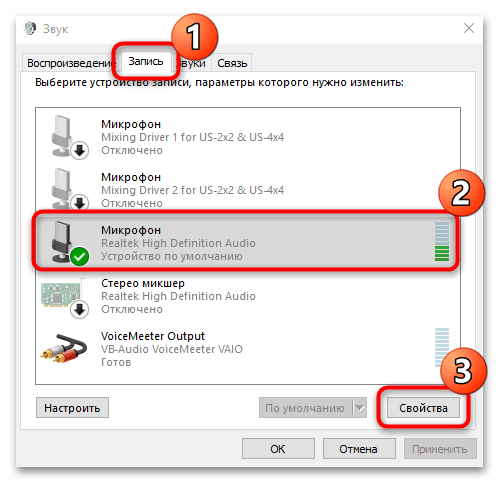
- Откроется новое системное окно, где нужно перейти на вкладку «Запись», чтобы отобразить устройства ввода. Кликните по нужному оборудованию левой кнопкой мыши, затем перейдите в раздел «Свойства», нажав на соответствующую кнопку.
- Нажмите на вкладку «Уровни». В блоке «Усиление микрофона» с помощью ползунка можно отрегулировать чувствительность микрофона. Двигайте фиксатор право, чтобы увеличить ее, влево — чтобы уменьшить. После завершения настройки нажмите на кнопку подтверждения внизу.


Количество пунктов увеличения чувствительности зависит от модели используемого микрофона. Как правило, встроенные устройства не предусматривают большое количество настроек, в отличие от внешнего специализированного оборудования.
Способ 2: Драйвер для звуковой карты
У многих звуковых карт есть собственное приложение для настройки звучания как наушников/динамиков, так и микрофона. Чаще всего это приложение Realtek HD, но есть и другие разновидности софта. Так, у внешних звуковых карт всегда фирменное ПО, наделенное большим количеством настроек. Ссылки ниже помогут разобраться с тем, как запустить приложение Realtek, если аудиокарта у вас от этого производителя, а также как определить, какой драйвер нужно установить для того, чтобы иметь возможность настраивать работу устройств воспроизведения и записи звука.
Читайте также:
Установка Realtek HD на компьютер с Windows 10
Методы открытия Диспетчера Realtek HD в Windows 10
Определение необходимых для звуковой карты драйверов
Запустите фирменное для вашей аудиокарты программное обеспечение и найдите раздел, отведенный под настройку микрофона. Здесь вам нужен пункт «Усиление микрофона» или максимально приближенное к этому значение. Формат настройки зависит от конкретного ПО: где-то надо указывать значение в цифрах, где-то — двигать регулятор.
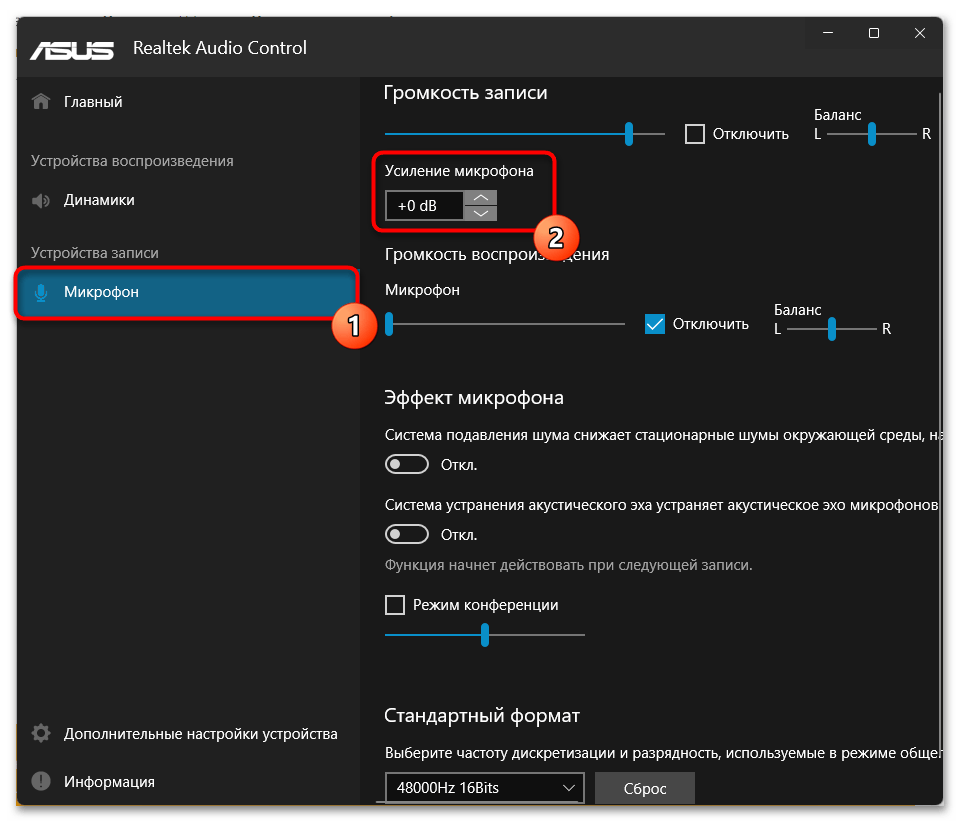
Тут вы, скорее всего, найдете больше настраиваемых параметров, чем в Windows, часть из которых также может косвенно влиять на чувствительность. Регулируйте их на свое усмотрение, добиваясь оптимального результата.
Способ 3: ПО для игровых девайсов
Если вы пользуетесь игровыми наушниками со встроенным микрофоном, обратитесь к специализированному софту для управления ими: он есть у большинства девайсов, чья ценовая категория средняя и выше. У бюджетных наушников даже популярных брендов типа SteelSeries фирменный софт может отсутствовать.
Интерфейс у таких приложений всегда разный, но найти настройки микрофона будет несложно. Понадобится либо выбрать сами наушники (если софт поддерживает разные игровые девайсы), либо, если это приложение только для наушников, переключиться в подраздел «Микрофон» (может еще называться «Mic») и включить/настроить там «Чувствительность микрофона» («Mic Sensitivity»). Для достижения лучшего эффекта попробуйте воспользоваться дополнительными предложенными параметрами на этой вкладке. При наличии кнопки прослушивания активируйте ее и скажите что-то, чтобы понять, как микрофон теперь захватывает звук.

Способ 4: Сторонний софт
Если штатные Windows 10 и другие инструменты не позволяют тонко настроить чувствительность микрофона, то можно воспользоваться универсальными сторонними программами, которые предоставляют расширенные функции для работы со звуковым оборудованием. Одним из таких является приложение VoiceMeeter, предназначенное для микширования и управления входящих и исходящих сигналов.
Скачать VoiceMeeter с официального сайта
- Скачайте и установите программу, следуя пошаговому мастеру установки. Необходимо перезагрузить компьютер, чтобы новое виртуальное оборудование начало работать. Найдите приложение через список установленного софта системы.
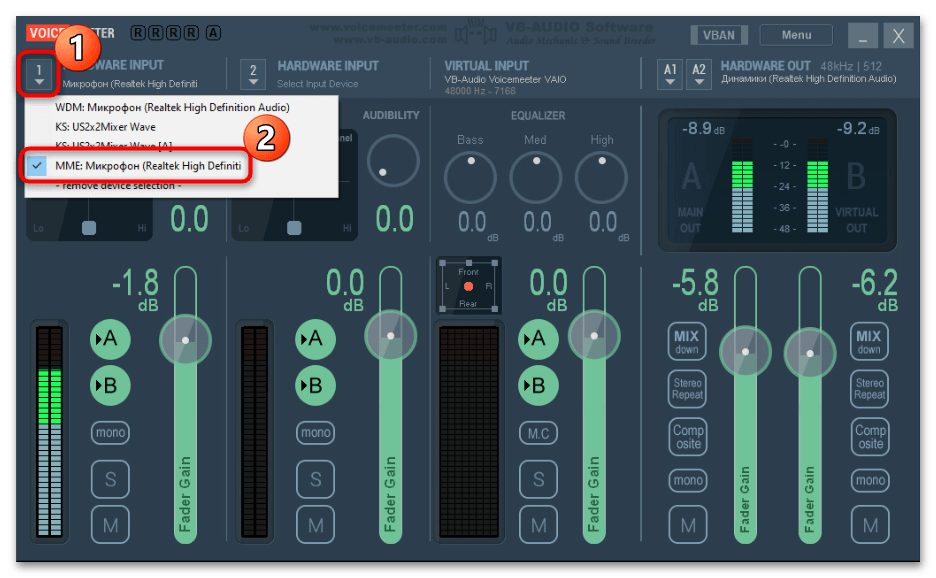
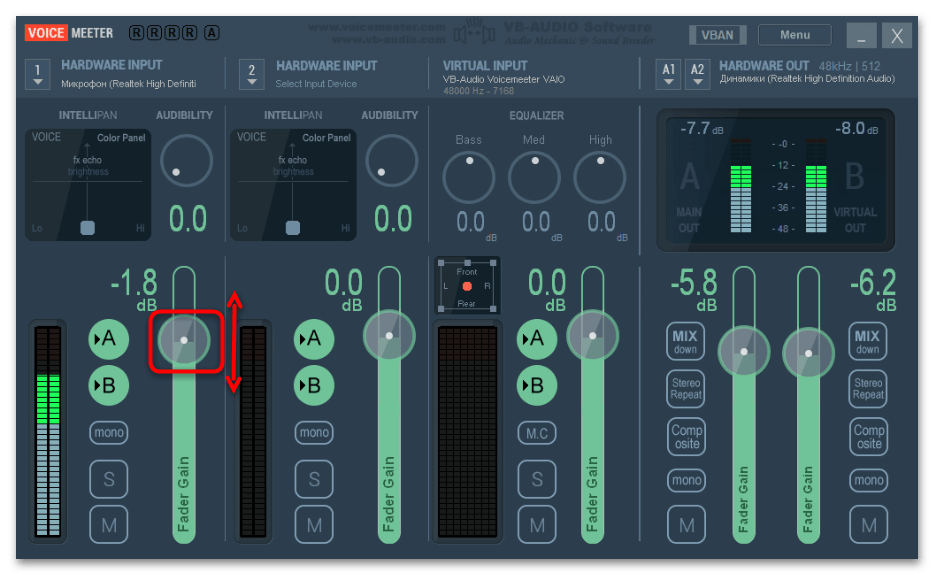
- В разделе 1 «Аппаратный вход» («Hardware Input») выберите микрофон, который нужно отрегулировать. Нажмите по названию группы, затем во всплывающем списке – по устройству.
- После необходимо настроить вывод звука. Для этого в группе «Hardware Out» нажмите на плитку «A1» или «A2» и выберите звуковое оборудование, например встроенные или внешние колонки для каждого канала.
- Вернитесь на панель настройки микрофона (в группу 1) и используйте ползунок «Fader Gain», чтобы увеличить чувствительность, поднимая его вверх. Встроенные измерители позволят отслеживать уровень звука.

На этом настройка чувствительности завершена. Останется, не закрывая программу, открыть любое средство связи или приложение, использующее микрофон (то есть VoiceMeeter должна работать в фоне).
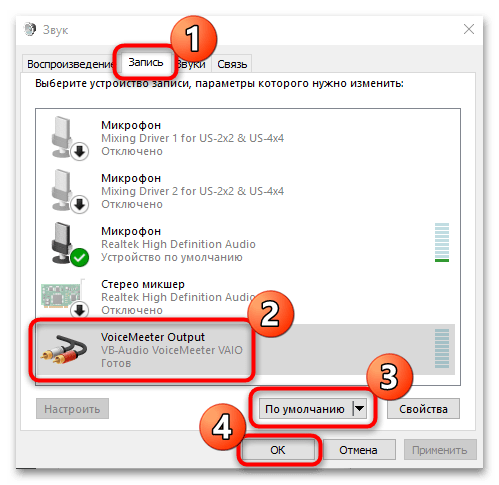
При возникновении проблемы с выводом звука потребуется установить виртуальный вход VoiceMeeter как устройство воспроизведения по умолчанию. Для этого перейдите в окно с настройками звука на вкладку «Запись» так, как это было показано в первом способе. В списке оборудования должно появиться новое после установки программы – «VoiceMeeter Output». Выделите его, затем нажмите на кнопку «По умолчанию».
Если VoiceMeeter вам не нравится, подберите другое приложение для работы с микрофоном. В материале по ссылке ниже собраны наиболее популярные варианты в виде небольшого, но информативного обзора.
Читайте также: Программы для улучшения звука микрофона
Способ 5: Отдельные приложения
Настроить микрофон и входной сигнал в общем можно прямо из интерфейса некоторых приложений, которые используют эти устройства в своей работе. Например, программа OBS Studio часто применяется для стриминга на видеохостинг YouTube, и через нее можно настроить аудио- и видеооборудование с помощью встроенных средств и дополнительных плагинов.
На примере OBS Studio разберем, как настроить чувствительность микрофона в Windows 10:
Скачать OBS
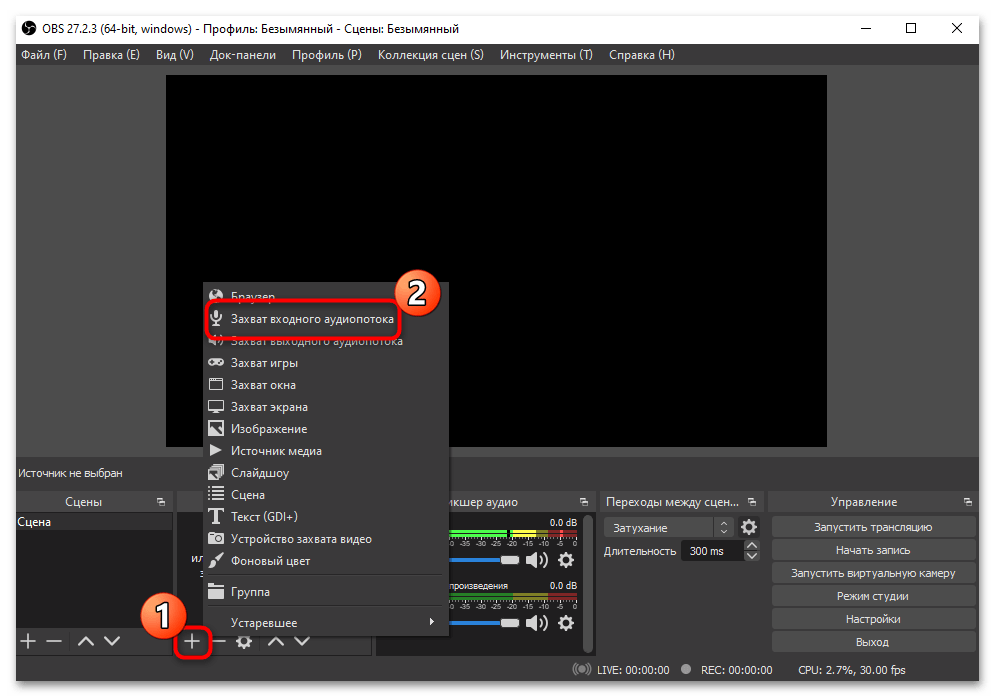
- Запустите OBS Studio. Если на микшерной панели присутствует микрофон, то сразу переходите к Шагу 4. Добавить его можно через окно «Источники». Нажмите на иконку в виде плюса, затем выберите пункт «Захват входного аудиопотока».
- В открывшемся окне отметьте пункт «Создать новый» и при необходимости задайте имя. Нажмите на кнопку «ОК».
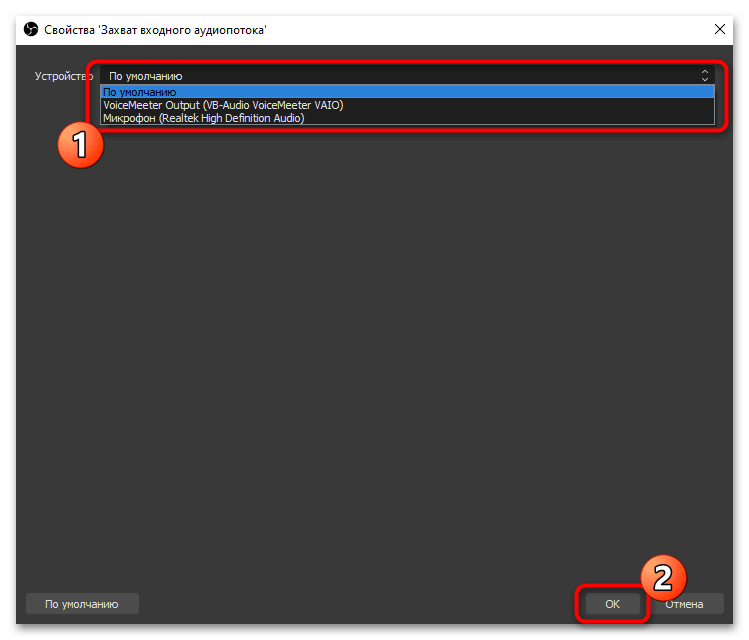
- Выберите устройство ввода из выпадающего меню, затем кликните по кнопке подтверждения.
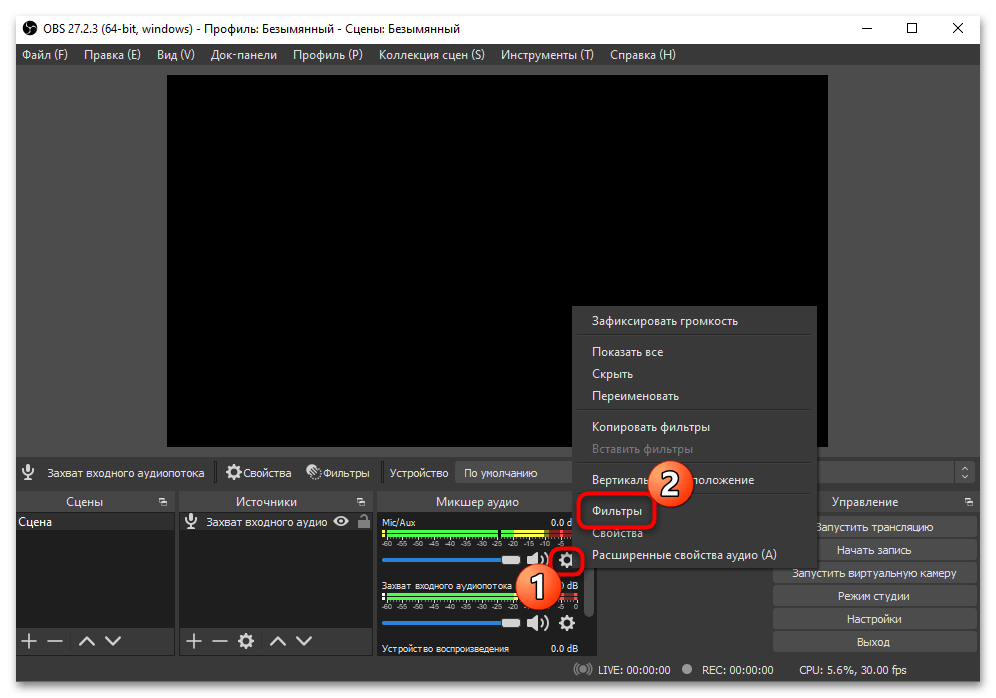
- Нажмите на иконку в виде шестеренки в разделе «Микшер аудио» у микрофона. Во всплывающем меню нажмите на пункт «Фильтры».
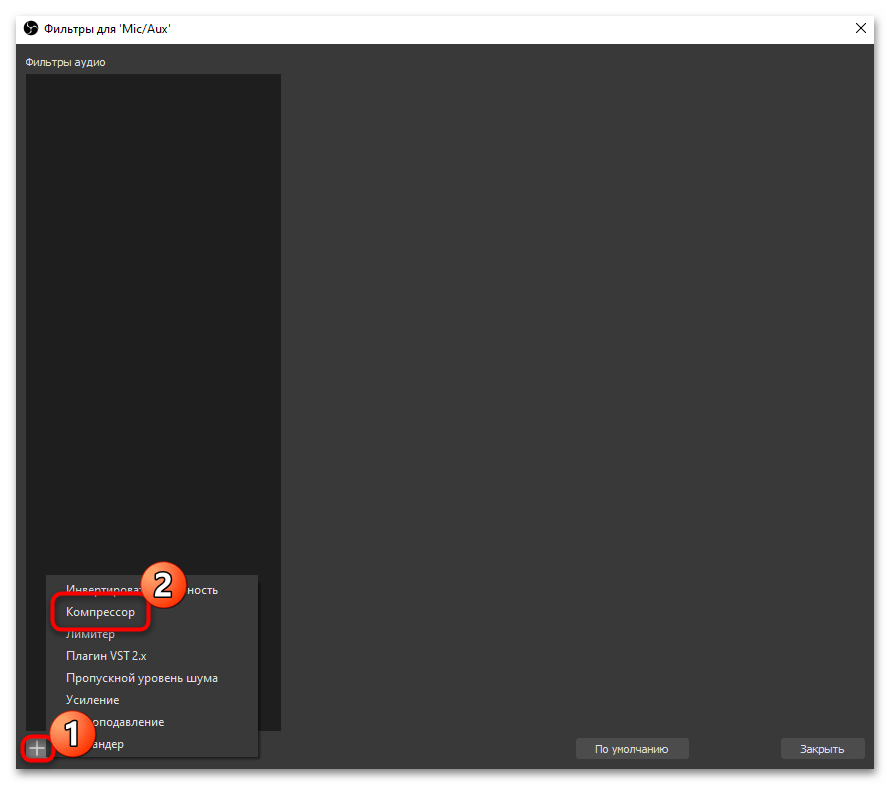
- Кликните по значку с плюсиком, чтобы выбрать фильтр для сигнала. Нажмите на строку «Компрессор».
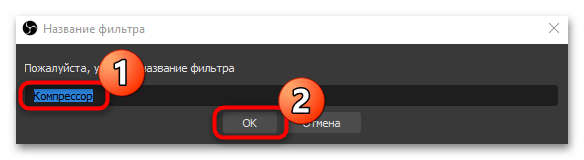
- Задайте имя фильтру, если хотите.
- Настройте чувствительность, перемещая ползунок у опции «Выходное усиление».

Также можно применять другие настройки, чтобы оптимизировать звучание микрофона. Так, если микрофон совсем слабый, то лучше выставить значение усиления от 8 до 24 дБ, но при этом установить порог срабатывания -25…-35 дБ, атаку — от 3 до 20 мс, а спад — от 25 до 100 мс.
Читайте также: Настройка микрофона в OBS
Наша группа в TelegramПолезные советы и помощь
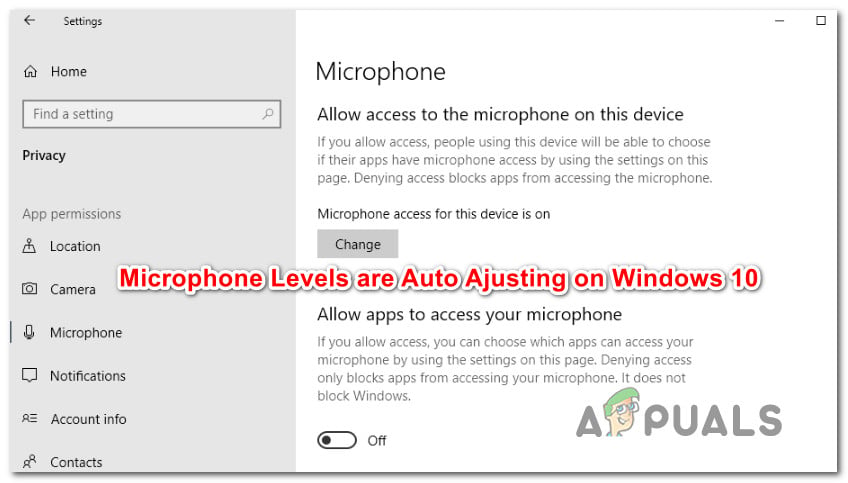
A lot of users complain that their microphone level is automatically adjusting without any user intervention. How to stop microphone auto adjusting Windows 10? If you are trying to fix the issue, this post of MiniTool is what you need.
Why Microphone Level Keep Changing on Windows 10
A lot of users reported that the microphone levels keep changing on Windows 10. This issue often occurs when using much multiple applications or third-party programs. According to investigating many user reports, there are several situations that can cause Windows 10 microphone level keeps changing.
- It is commonly reported that Skype can cause microphone levels keep changing if it is configured to launch every system startup.
- Steam is also responsible for the automatic microphone adjustments issue. You can change its settings to fix the issue.
- If an application is allowed to take exclusive control of the microphone, it may automatically adjust the microphone levels.
- Outdated or corrupt microphone driver can cause the microphone issue as well.
Now, let’s see how to stop microphone auto adjusting Windows 10.
How to Stop Microphone Auto Adjusting Windows 10
Method 1. Prevent Skype from Auto Adjusting the Microphone
If Skype is configured by default to adjust the microphone levels, you may encounter the problem. So, it is necessary to prevent Skype from auto adjusting the microphone. Here’s how to do that:
Step 1. Open the Skype UWP client, and then click the Action button (three-dot icon) at the upper left corner and select Settings from the context menu.
Tip: If you are using the desktop version, you can navigate to Tools > Options from the ribbon bar.
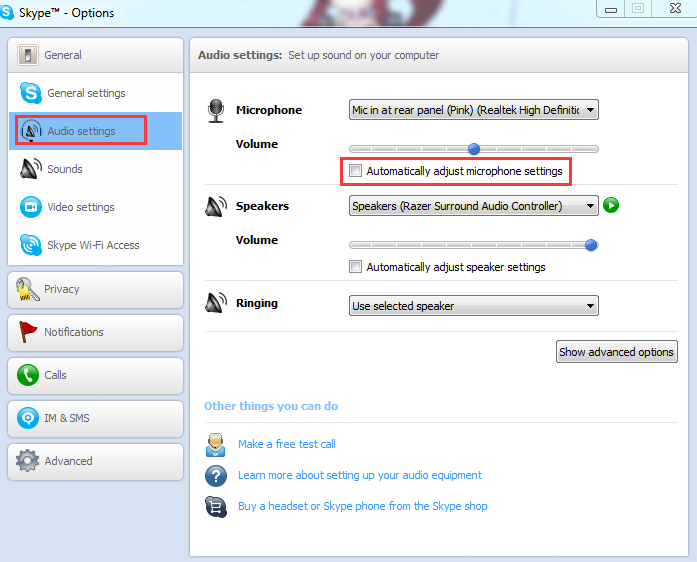
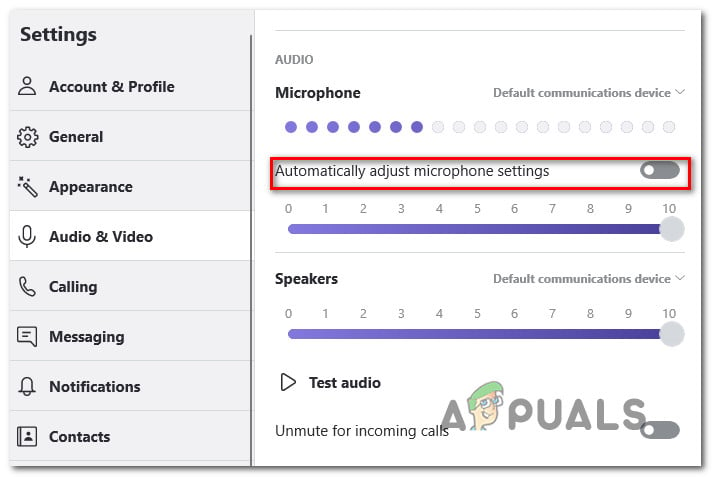
Step 2. Select the Audio &Video tab from the pane, and then scroll down to the Microphone section and untick the checkbox for Automatically adjust microphone settings.
If you are using the Desktop version, you can go to the Audio Settings and uncheck the box of Automatically adjust microphone settings.
Now, you can start your computer and see if the issue “mic volume keeps changing” still persists.
Method 2. Prevent Steam from Auto Adjusting the Microphone
As mentioned above, Steam is another application that may cause microphone levels keep changing. If you are using the Steam client and configure it to launch automatically at startup, you need to disable the Automatic volume settings. For that:
Step 1. Log in to your Steam client and click on the Friends & Chat icon at the bottom right corner of the window.
Step 2. Click on the Gear icon at the upper right corner and select the Settings menu.
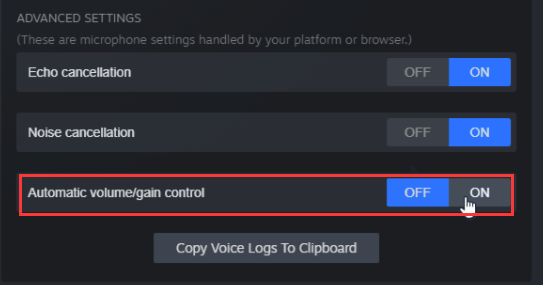
Step 3. In the Friends List settings, click on the Voice tab and scroll down to the bottom of the screen and click on Show Advanced Settings.
Step 4. Toggle off the switch of Automatic volume/gain control.
Restart Steam and see if Windows 10 microphone level keeps changing.
Method 3. Reconfigure the Microphone Settings
How to stop microphone auto adjusting Windows 10? Another effective method is to reconfigure the microphone settings. By doing so, no apps are allowed to take exclusive control of the microphone. Here’s how:
Note: This operation might cause some other voice features to function improperly. If this method fails to work, you’d better reverse its settings.
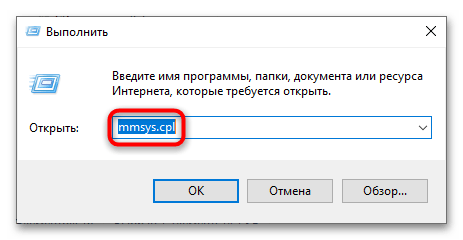
Step 1. Press Win + R keys to open the Run box, and then type mmsys.cpl in it and hit Enter.
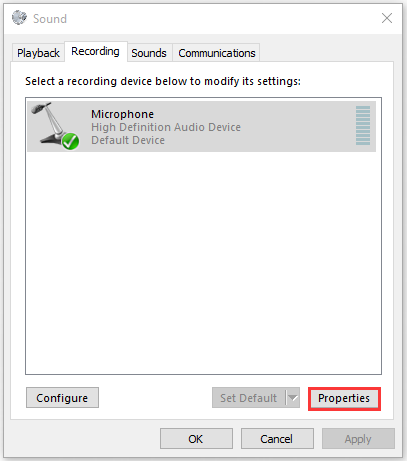
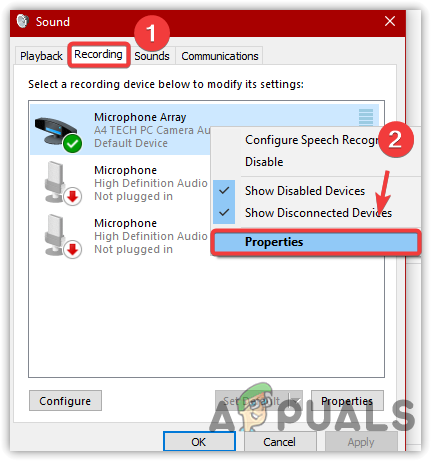
Step 2. Go to the Recording tab, and then select the affected microphone and click on Properties.
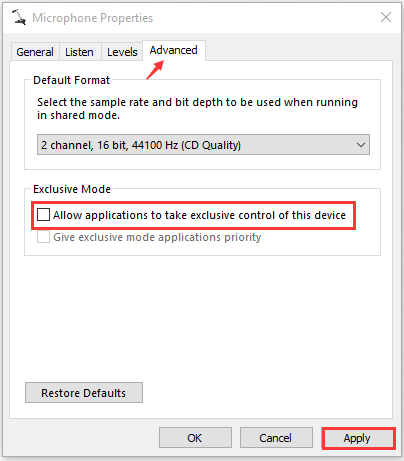
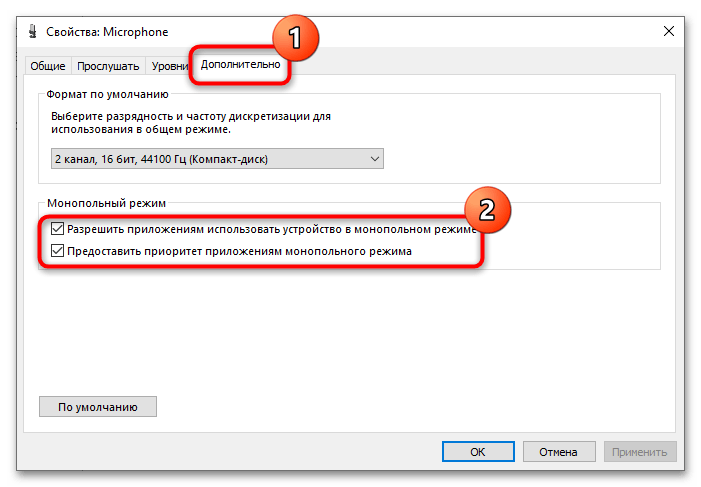
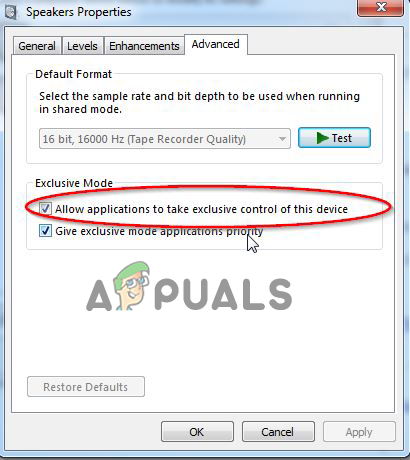
Step 3. Go to the Advanced tab inside the Properties window and then untick the checkbox next to Allow applications to take exclusive control of this device.
Step 4. Click on the Apply button to execute the changes.
After that, restart your computer and see if it stops microphone auto adjusting Windows 10
Method 4. Change the Microphone Levels Manually
Another quick fix is to set a default value for your microphone manually. This method has been proven to be useful. Try it now.
Step 1. Open the Sound window through the above method and go to the Recording tab. Alternatively, you can right-click the Speaker icon at the bottom of the notification screen and select Sound from the elevated menu.
Step 2. Select the affected microphone/headset and click on Properties.
Step 3. Navigate to the Levels tab inside the Microphone Properties window, and then adjust the value of the microphone via the slider and click on Apply to save the changes.

Method 5. Update the Microphone Driver
An outdated or corrupted audio driver is also responsible for the issue. To fix the problem, you can try updating the audio driver to the latest build. Here’s a quick guide:
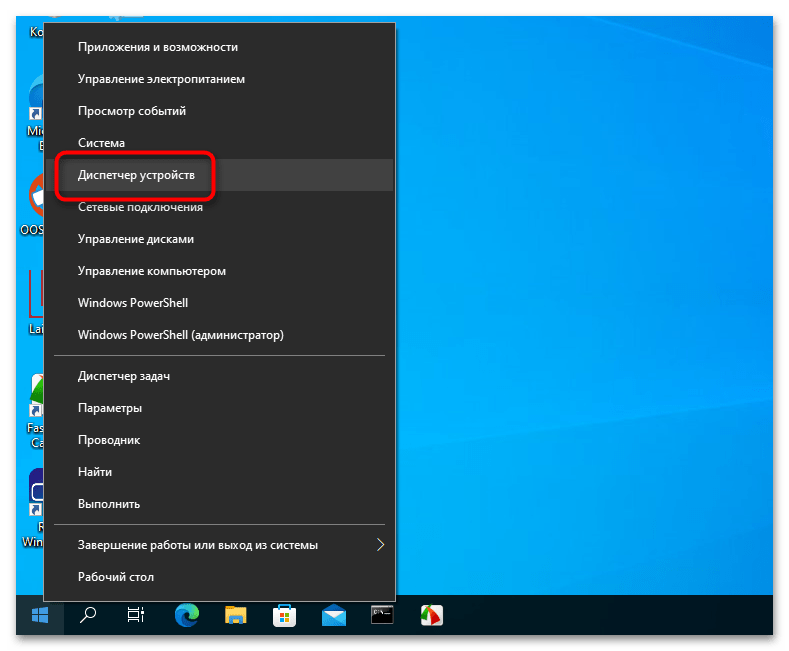
Step 1. Right-click the Start button and select Device Manager from the context menu.
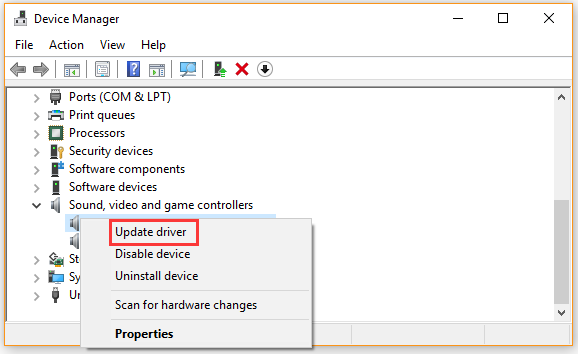
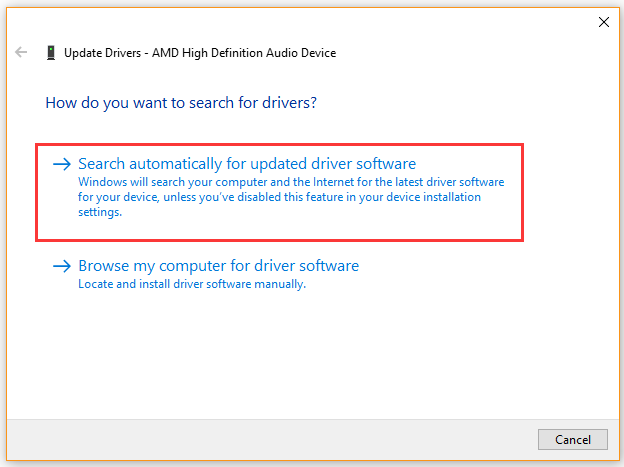
Step 2. Expand the Sound, video and game controllers category, and then right-click the audio device that needs to update and select Update Driver.
Step 3. Select the Search automatically for updated driver software option. Then follow the on-screen prompts to complete this update. Now, Windows will automatically any available updated driver and install it for you.
Once the update finishes, reboot your computer and see if the auto adjustment issue still persists.
How to stop microphone auto adjusting Windows 10? The top 5 methods have been introduced to you. Now, it’s your turn to have a try.
Все способы:
- Способ 1: Проверка аудиоустройства
- Способ 2: Настройки микрофона
- Способ 3: Настройки сторонних программ
- Способ 4: Средство устранения неполадок
- Способ 5: Переустановка микрофона
- Способ 6: Обновлении или откат драйвера
- Вопросы и ответы: 0
Способ 1: Проверка аудиоустройства
Первым делом при таком поведении микрофона необходимо убедиться в исправности устройства и проверить качество его подключения. Если микрофон внешний, подключите его к другому компьютеру, планшету или телефону и протестируйте. Самопроизвольное изменение громкости и чувствительности, скорее всего, укажут на аппаратную неисправность записывающего устройства или его кабеля. Проверьте также качество подключения, если микрофон использует порт USB, подключите его к другому порту – USB 2.0 или USB 3.0.
Способ 2: Настройки микрофона
Наладьте системные настройки микрофона, в частности настройки автоматического усиления и регулирования уровня громкости.
- Нажатием клавиш Win + R вызовите диалоговое окошко «Выполнить», введите в него команду
mmsys.cplи нажмите клавишу ввода, чтобы открыть апплет «Звук». - Переключитесь на вкладку «Запись», выберите записывающее устройство и нажмите кнопку «Свойства».
- Переключитесь на вкладку «Дополнительно» и отключите или, напротив, включите опции монопольного доступа, сохраните настройки и проверьте работу микрофона.
- Также посмотрите, имеется ли на вкладке «Уровни» опция «Усиление микрофона». Если да, установите ползунок в среднее положение или вовсе сдвиньте его влево (отключите усиление).

Способ 3: Настройки сторонних программ
Если микрофон самопроизвольно меняет звук в интернет-мессенджерах, возможно, есть надобность отредактировать их звуковые настройки. Например, в Skype необходимо зайти в раздел «Настройки звука» и снять флажок с чекбокса «Разрешить автоматическую настройку микрофона».
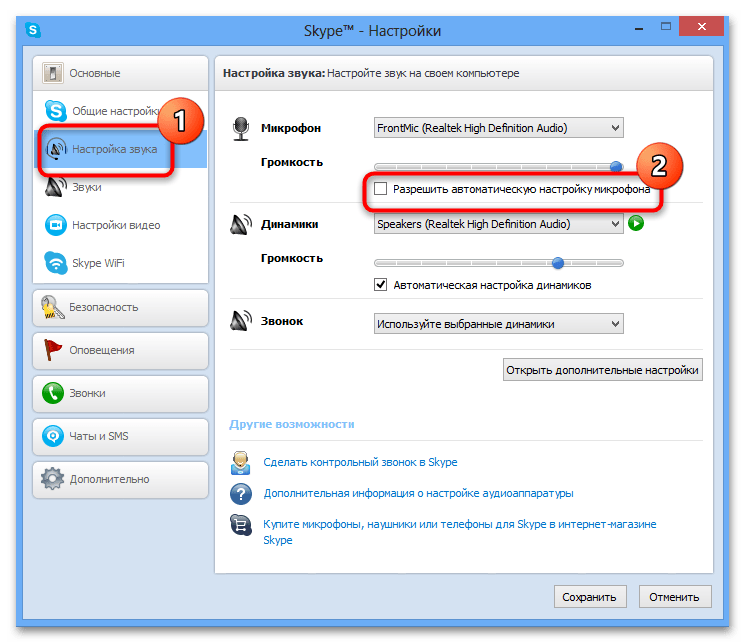
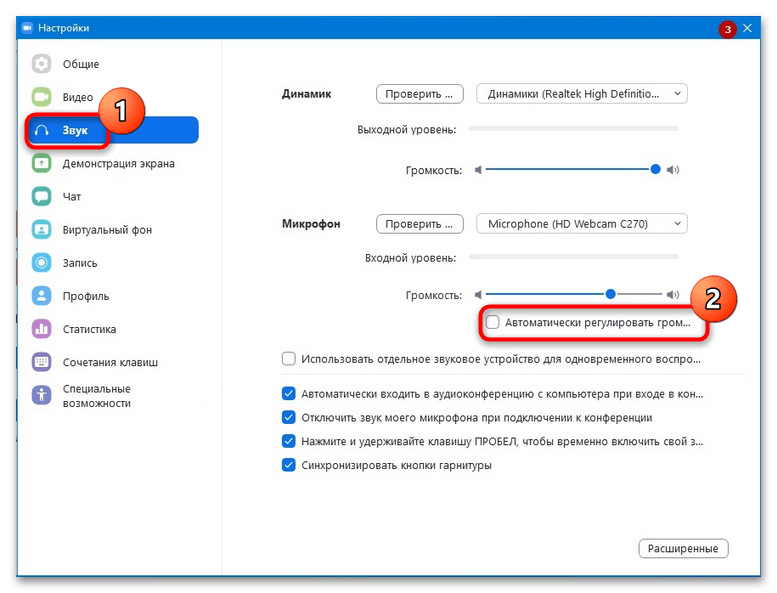
Аналогичная настройка имеется и в других программах для голосового общения. Так, в настройках приложения Zoom надо вызвать раздел «Звук» и снять флажок с пункта «Автоматически регулировать громкость микрофона».
Способ 4: Средство устранения неполадок
Запустите встроенное в Windows 10 «Средство устранения неполадок» со звуком — возможно, ему удастся обнаружить и устранить неисправность.
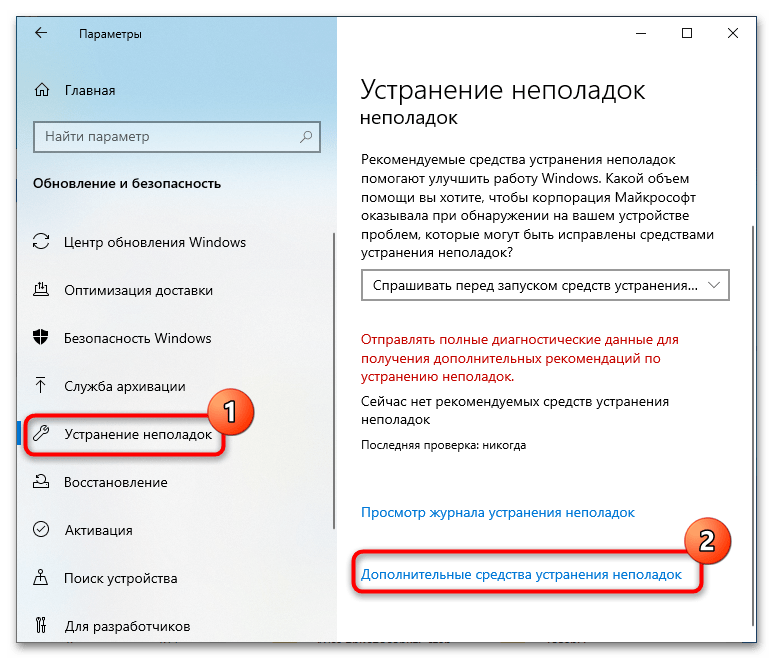
- Откройте приложение «Параметры», перейдите в раздел «Обновления и безопасность» → «Устранение неполадок» и нажмите ссылку «Дополнительные средства устранения неполадок».
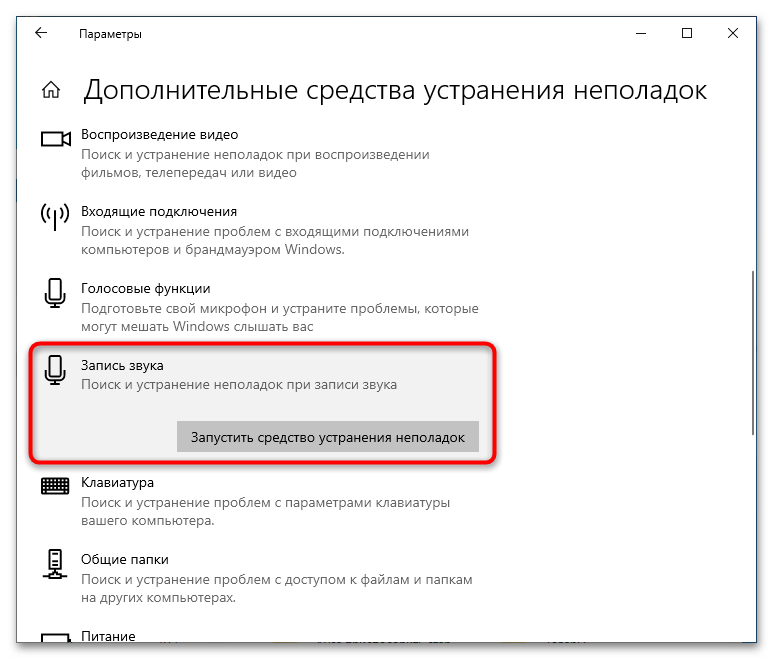
- Найдите в списке пункт «Запись звука», нажмите по нему, а затем — по появившейся кнопке «Запустить средство устранения неполадок».
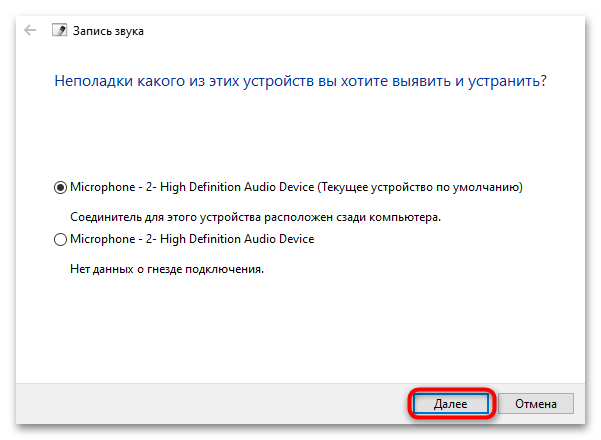
- Дождитесь завершения результата проверки, выберите из списка проблемное устройство, нажмите «Далее» и проследуйте предложенным рекомендациям мастера.
Способ 5: Переустановка микрофона
В некоторых случаях устранить неполадку в работе микрофона успешно удается путем его переустановки из «Диспетчера устройств».
- Запустите «Диспетчер устройств» из контекстного меню кнопки «Пуск».
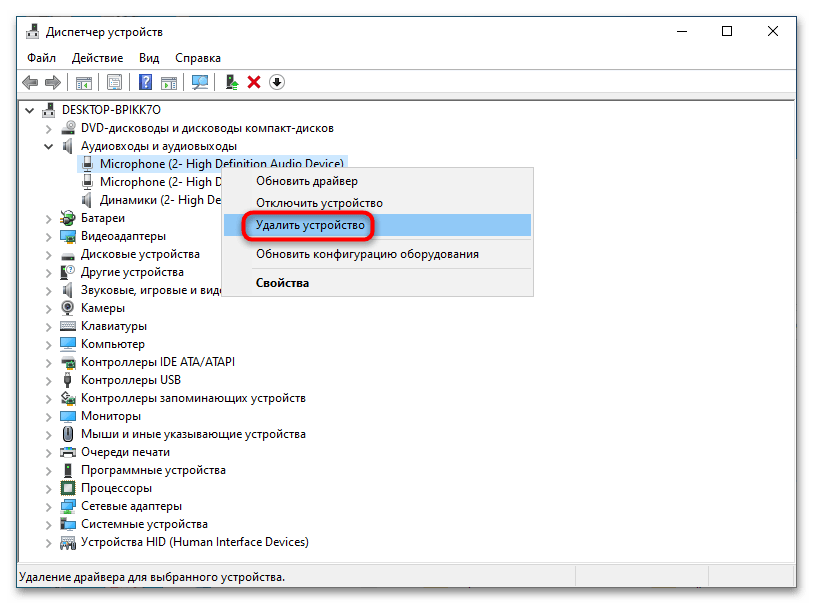
- Раскройте раздел «Аудиовходы и аудиовыходы», кликните правой кнопкой мыши по микрофону и выберите из контекстного меню «Удалить устройство».
- Подтвердите удаление в диалоговом окошке.
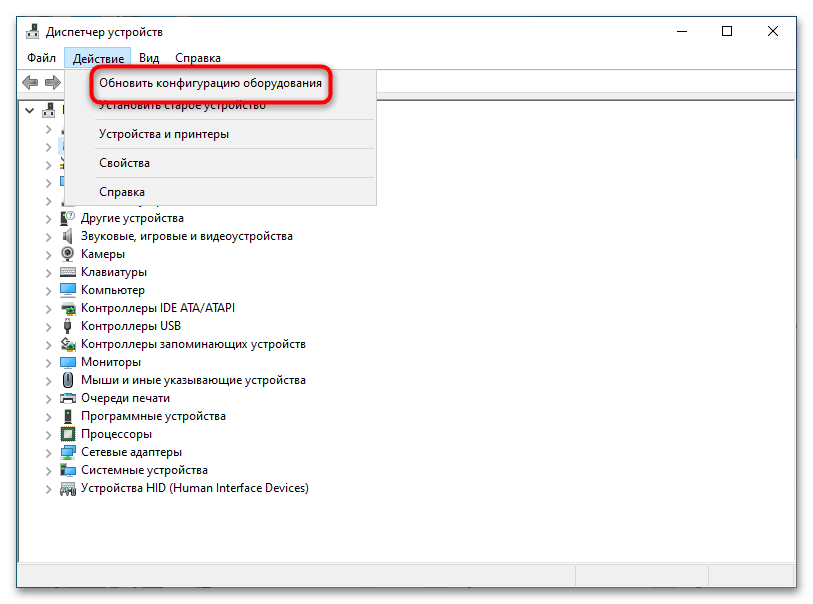
- Разверните меню «Действие» и выберите там «Обновить конфигурацию оборудования» либо перезагрузите компьютер.
Способ 6: Обновлении или откат драйвера
Помочь устранить проблемы с произвольно изменяющейся громкостью микрофона может обновление драйверов устройства, хоть и не всегда.
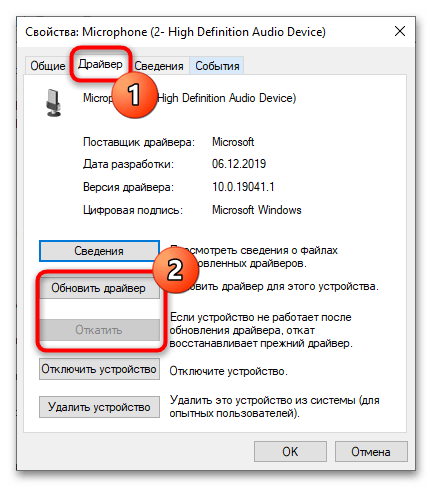
- Откройте «Диспетчер устройств» как было показано выше, перейдите в раздел «Аудиовходы и аудиовыходы» и кликните по микрофону дважды, чтобы открыть его «Свойства». Обратите внимание, что подключаемые по USB микрофоны могут находиться в других разделах «Диспетчера устройств», например в разделе «Звуковые, игровые и видеоустройства», а также в «Устройства HID».
- Переключитесь на вкладку «Драйвер», нажмите кнопку «Обновить драйвер», а затем проследуйте указаниям мастера. Если же проблемы начались после обновления драйверов, нажмите кнопку «Откатить» и точно так же выполните предложенные шаги.
После того как драйвер будет установлен или переустановлен, перезагрузите компьютер.
И еще один момент: в случае с профессиональными микрофонами драйвер необходимо брать с официального сайта производителя. Также обратите внимание, что конфигурация таких микрофонов выполняется не через системные настройки, а через собственную фирменную панель управления (при наличии на ПК соответствующих драйверов).
Наша группа в TelegramПолезные советы и помощь
Microphone adjusting on its own can cause sudden volume changes, leading to uneven audio during calls or recordings. This usually happens when programs like Skype, Steam, or other communication software change the microphone volume automatically without user input. The primary reason is the “Allow applications to take exclusive control of this device” setting being turned on, which lets apps change volume levels on their own.
Other reasons include tools like Skype that have their own auto-adjustment features, like automatic gain control.
Now that you know the causes, lets discuss the solutions.
1. Stop Skype from Automatically Adjusting the Microphone (if applicable)
When Skype controls your microphone, it often changes the volume automatically based on background noise or call quality, causing uneven audio levels. By turning off Skype’s automatic gain control, you stop it from changing your microphone settings. This keeps your audio levels steady, providing stable input for all apps.
- Open Skype UWP, click the action button in the top-left corner, and then click the three-dot icon. From the context menu, click on Settings.

Accessing the settings menu of Skype Note: For the desktop version of Skype, use the ribbon bar at the top to go to Tools > Options.
- In the Settings tab, select Audio & Video from the menu on the left.
- In the Audio & Video tab, scroll down to the Microphone section and uncheck Automatically adjust microphone settings.

Preventing Skype from adjusting the microphone Note: For the desktop version of Skype, go to Audio Settings and uncheck Automatically adjust microphone settings.
- Use your computer normally to check if the microphone settings still auto-adjust. If the issue persists, proceed to the next method below.

2. Stop Steam from Automatically Adjusting the Microphone Level (if applicable)
If you notice your microphone volume changing on its own, stopping Steam from adjusting it might fix the problem. Steam’s voice chat has a feature that automatically changes microphone volume levels during conversations. By turning off this feature, Steam won’t mess with your computer’s audio settings, helping to keep the volume steady during games or voice chats.
- Open the Steam client, log in, and click the Friends & Chat icon at the bottom-right corner.
- In the Friends & Chat window, click the gear icon in the top-right corner to open Settings.
- In Friends List Settings, select the Voice tab from the left menu, then go to the right pane, and scroll down to click Show Advanced Settings at the bottom.
- In the Advanced settings menu, turn off the toggle for Automatic volume/gain control.
- Restart Steam and check if the automatic volume adjustments continue.
If this method wasn’t applicable to your current situation, move down to the next method below.
3. Stop Applications From Taking Exclusive Control of the Microphone
When Skype or Steam controls your microphone, it can change the volume automatically, leading to unpredictable audio levels during calls or recordings. By turning off these apps’ ability to change microphone settings, you can keep the volume stable.
- Press Windows + R, type “mmsys.cpl“, and press Enter.

- Click the Recording tab.
- Select the microphone you’re having issues with, and click Properties.

- Go to the Advanced tab and uncheck Allow applications to take exclusive control of this device.

Click on Allow applications to take exclusive control of this device. - Click Apply to save the changes, then restart your computer and check if the issue is resolved at the next startup.

4. Change the Microphone Value Manually
Manually setting your microphone’s volume gives you control over its sensitivity, stopping other apps from changing the settings. This avoids the software adjustments that often make the volume change automatically when apps like Skype or Zoom try to fix background noise.
- Press Windows + R to open a Run dialog box. Type “control” in the text box and press Enter to open the Control Panel.
- In the Control Panel, use the search function in the top-right corner to find ‘sound’.
- Click on Sound from the search results.
- In the Sound window, select the Recording tab, choose the active microphone or headset, and click Properties.
- In the Properties window, go to the Levels tab and adjust the microphone level using the slider. Click Apply to save the changes.
- This should keep the microphone level steady, regardless of any changes third-party programs try to make in the future.
If this procedure wasn’t applicable to your current situation or you’re looking for a different approach, move down to the next method below.
5. Update your Microphone Driver
If your drivers are outdated, your microphone may not work properly with the system. Updating the driver ensures that your microphone functions smoothly with Windows, fixing any compatibility issues that can cause problems like auto-adjusting volume.
- Press Windows key + R to open a Run dialog box. Type “devmgmt.msc” and press Enter to open Device Manager.
- In Device Manager, expand the Sound, video, and game controllers section.
- Right-click the recording device you’re having issues with and select Properties from the context menu.
- In the properties screen, go to the Driver tab and click Update Driver.
- Click Search automatically for updated driver software and wait to see if a new driver is found.
- Once complete, restart your computer and check if the microphone level adjustments persist. If they do, or if no new driver is found, proceed to the next steps.
- Repeat steps 1 to 3 to return to the Driver tab of your recording device, but click Uninstall Device instead of Update Driver. Confirm the uninstallation and wait for it to finish.
- Restart your computer to allow Windows Update to install a clean driver.
- After the restart, check if the microphone auto adjustments continue.
6. Perform a Clean Boot
By turning off unnecessary startup programs and services, a clean boot helps find out if a background process is changing your microphone’s settings. Since volume changes can be caused by third-party software, this step finds the problem by running only important services. Once the system is steady with a clean boot, it’s easier to find the app that’s adjusting the microphone settings.
- Press Windows + R, type ‘msconfig‘, and hit Enter.
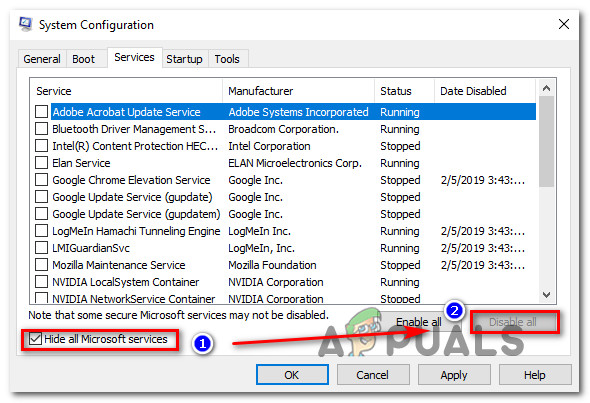
Running MSCONFIG from a Run dialog box - Navigate to the Services tab.
- Check Hide all Microsoft services.
- Click Disable all.

Disabling all Windows services
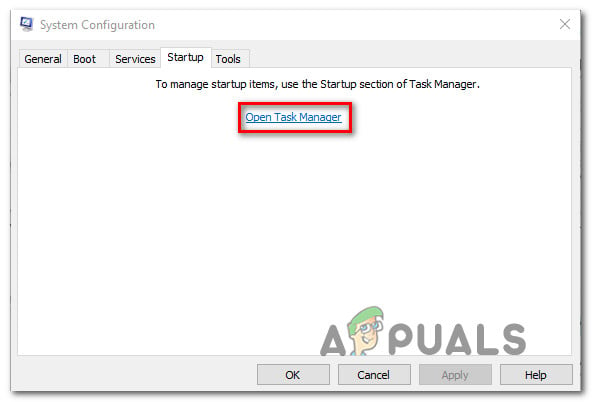
- Click Apply, then go to the Startup tab and click Open Task Manager.

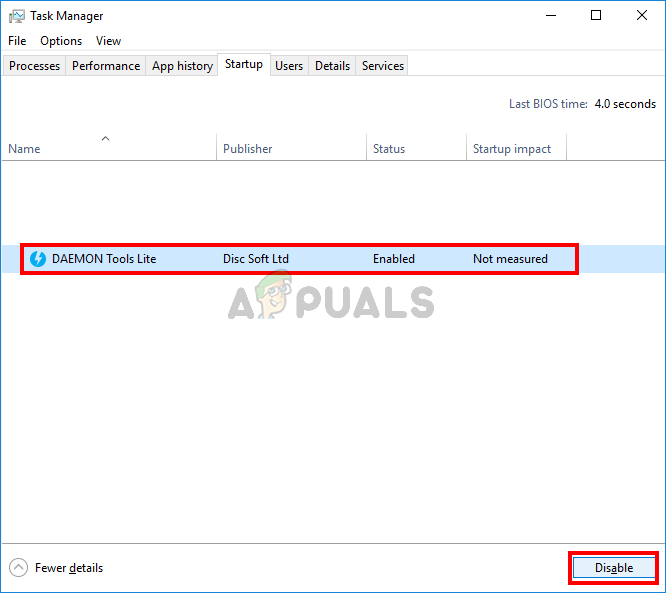
Opening the Task Manager via System Configuration - Select each service individually and click Disable to stop it from running at startup.

Disabling Apps from Startup - Restart your PC.
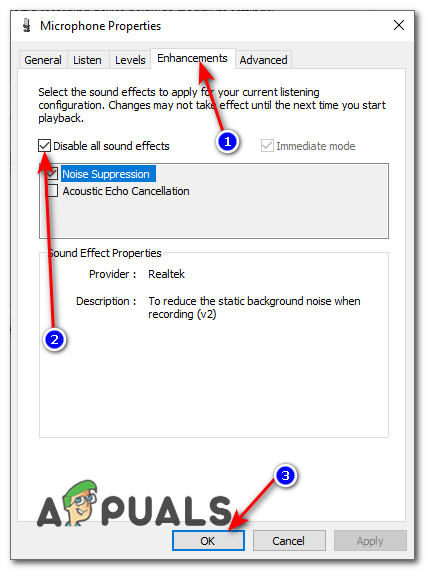
7. Disable Microphone Enhancements
Audio enhancements, meant to improve sound, can sometimes cause problems with the microphone, like changing its volume on its own. Turning off these enhancements lets the microphone work naturally, without extra processing that might clash with app settings or how the system works.
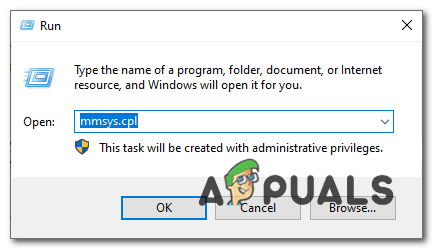
- Press Windows + R to open the Run dialog.
- Type mmsys.cpl and press Enter.

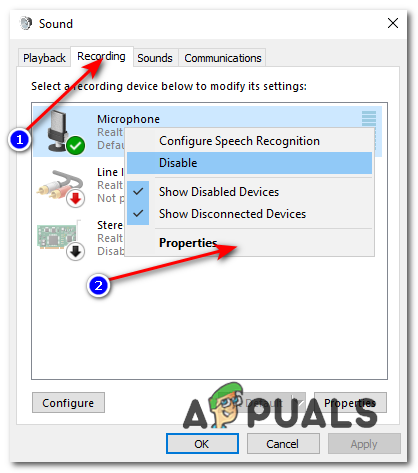
Opening Microphone Properties - Go to the Recording tab, right-click your microphone, and select Properties.

Opening the Microphone properties - Select the Enhancements tab in the Microphone Properties.
- Check the Disable all enhancements option.

Disabling all microphone enhancements
8. Edit Registry
Sometimes, the issue lies with the registry configuration of the microphone level. Windows might have stored a value in the registry for your microphone level which might receive precedence over the manual value that you select from the Sound Control Panel. You can adjust this value by:
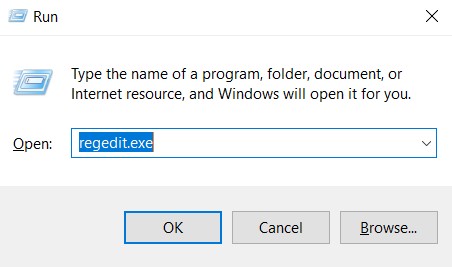
- Press Windows + R to open the run prompt. Type regedit and press Enter.

regedit.exe - Navigate to the following location:
HKEY_CURRENT_USER\Software\Microsoft\Speech\RecoProfiles\Tokens\{95CF724E-B3B5-4D94-A4FB-36AE77A88FE0}\{DAC9F469-0C67-4643-9258-87EC128C5941}\Volume - Double click on the following value:
HKEY_LOCAL_MACHINE\SOFTWARE\Microsoft\Speech\AudioInput\TokenEnums\MMAudioIn\{0.0.1.00000000}.{e4e24557-c9f8-46f6-8486-50981fcf3cc5} - Set its value to the Microphone level that you want. For example, 8888 for 88% and 2222 for 22%.
- Check to see if the issue persists.
Kevin Arrows
Kevin Arrows is a highly experienced and knowledgeable technology specialist with over a decade of industry experience. He holds a Microsoft Certified Technology Specialist (MCTS) certification and has a deep passion for staying up-to-date on the latest tech developments. Kevin has written extensively on a wide range of tech-related topics, showcasing his expertise and knowledge in areas such as software development, cybersecurity, and cloud computing. His contributions to the tech field have been widely recognized and respected by his peers, and he is highly regarded for his ability to explain complex technical concepts in a clear and concise manner.