
Applies ToWindows 7 Enterprise Windows 7 Professional Windows 7 Ultimate Windows 7 Service Pack 1
ВВЕДЕНИЕ
Виртуальный компьютер Windows
Виртуальный компьютер Windows — это новейшая технология виртуализации Майкрософт. Она позволяет запускать множество приложений для повышения производительности в виртуальной среде Windows одним щелчком мыши непосредственно с компьютера под управлением Windows 7.
Поддерживаемые операционные системы узла
-
Windows 7 Домашняя базовая
-
Windows 7 Домашняя расширенная
-
Windows 7 Корпоративная
-
Windows 7 Профессиональная
-
Windows 7 Максимальная
-
Windows 7 Домашняя расширенная (SP1)
-
Windows 7 Корпоративная (SP1)
-
Windows 7 Профессиональная (SP1)
-
Windows 7 Максимальная (SP1)
Поддерживаемые гостевые операционные системы
-
Windows XP с пакетом обновления 3 (SP3) Professional
-
Windows Vista Enterprise с пакетом обновления 1 (SP1) и более поздних версий
-
Windows Vista Ultimate с пакетом обновления 1 (SP1) и более поздних версий
-
Windows Vista Бизнес с пакетом обновления 1 (SP1) и более поздних версий *
-
Windows 7 Профессиональная *
-
Windows 7 Корпоративная.
-
Windows 7 Максимальная
-
Windows 7 Профессиональная (SP1)*
-
Windows 7 Корпоративная (SP1)
-
Windows 7 Максимальная (SP1)
*Примечание. Виртуальные приложения не поддерживаются в Windows Vista Business, Windows 7 Профессиональная или Windows 7 Профессиональная (SP1). Все остальные функции Виртуального компьютера Windows поддерживаются в этих двух гостевых системах.
Дополнительные сведения
Дополнительные сведения о Виртуальном компьютере Windows и режиме Windows XP см. на следующем веб-сайте Майкрософт:
http://www.microsoft.com/windows/virtual-pc/default.aspx
Ссылки
Сторонние продукты, которые рассматриваются в этой статье, производятся компаниями, которые не зависят от Майкрософт. Корпорация Майкрософт не дает никаких гарантий, явных или подразумеваемых, относительно производительности или надежности этих продуктов.
Нужна дополнительная помощь?
Нужны дополнительные параметры?
Изучите преимущества подписки, просмотрите учебные курсы, узнайте, как защитить свое устройство и т. д.
- About
- Blog
- Projects
- Help
-
Donate
Donate icon
An illustration of a heart shape - Contact
- Jobs
- Volunteer
- People
Item Preview
There Is No Preview Available For This Item
This item does not appear to have any files that can be experienced on Archive.org.
Please download files in this item to interact with them on your computer.
Show all files
software
Microsoft Virtual PC 2007
- by
- Microsoft
Full copies of Microsoft Virtual PC 2007 x86 (32-bit) and x64 (64-bit). Runs fine on Windows XP, Vista and 7. Will not run on Windows 8/8.1 without a patch. Will not run on Windows 10 at all.
- Addeddate
- 2020-07-12 03:43:56
- Identifier
- virtual-pc-2007
- Scanner
- Internet Archive HTML5 Uploader 1.6.4
comment
Reviews
(1)
There is 1 review for this item. .
6,305
Views
7
Favorites
1
Review
DOWNLOAD OPTIONS
Uploaded by
Alethila
on
SIMILAR ITEMS (based on metadata)
Microsoft Virtual PC (renamed Windows Virtual PC for the Windows 7 release) is a virtualization program for Microsoft Windows operating systems, and an emulation program for Mac OS X on PowerPC-based systems. The software was originally written by Connectix, and was subsequently acquired by Microsoft. In July 2006 Microsoft released the Windows-hosted version as a free product. In August 2006 Microsoft announced the Macintosh-hosted version would not be ported to Intel-based Macintosh computers, effectively discontinuing the product as PowerPC-based Macintosh computers are no longer manufactured. The newest release, Windows Virtual PC is available only for Windows 7 hosts.
Virtual PC virtualizes a standard PC and its associated hardware. Supported Windows operating systems can run inside Virtual PC. However, other operating systems like Linux may run, but are not officially supported.
The successor to Virtual PC 2007, Windows Virtual PC, entered public beta testing on April 30, 2009, and is intended for release alongside Windows 7.Template:Update after Unlike its predecessors, this version supports only Windows 7 host operating systems and requires hardware virtualization support (see requirements).
Windows Virtual PC includes the following new features:
- USB support and redirection – connect peripherals such as flash drives and digital cameras, and print from the guest to host OS printers
- Seamless application publishing and launching – run Windows XP Mode applications directly from the Windows 7 desktop
- Support for multithreading – run multiple virtual machines concurrently, each in its own thread for improved stability and performance
- Smart card redirection – use smart cards connected to the host
- Integration with Windows Explorer – manage all VMs from a single Explorer folder (%USER%\Virtual Machines)
System requirements[]
System requirements for Windows Virtual PC:
- 1+ GHz processor (32- or 64-bit)
- AMD-VTM or Intel VT hardware virtualization must be supported and enabled
- 1.25 GB memory required (2 GB recommended)
- Additional 15 GB of hard disk space per virtual Windows environment recommended
Availability[]
- Windows Virtual PC (currently the RC version) is available free of charge to users of Windows 7 Home Premium, Professional, Ultimate, and Enterprise editions, either pre-installed by OEMs or via download from the Microsoft website [1].
- Windows XP Mode, which enables guest applications to be integrated into the host Windows 7 desktop, will be available free of charge to users of Windows 7 Professional, Enterprise, and Ultimate editions, either pre-installed by OEMs or via download from the Microsoft website.
Windows XP Mode[]
File:Windows XP Mode.PNG An application running in Windows XP Mode, displayed on the Windows 7 desktop.
Windows XP Mode (XPM) is a virtual machine package for Windows Virtual PC containing a pre-installed, licensed copy of Windows XP SP3 as its guest OS. Pre-installed integration components allow applications running within the virtualized environment to appear as if running directly on the host, sharing the native desktop and Start Menu of Windows 7 as well as participating in file type associations. XP Mode applications run in a Terminal Services session in the virtualized Windows XP, and are accessed via Remote Desktop Protocol by a client running on the Windows 7 host.
Applications running in Windows XP mode do not have compatibility issues as they are actually running inside a Windows XP virtual machine and redirected using RDP to the Windows 7 host.
Emulated environment[]
Virtual PC emulates the following environment:
- Intel Pentium III (32-bit) processor (but virtualizes the host processor on Windows versions) with an Intel 440BX chipset.
- Standard SVGA VESA graphics card (S3 Trio 32 PCI with 4 MB video RAM, adjustable in later versions up to 16 MB).
- System BIOS from American Megatrends (AMI).
- Creative Labs Sound Blaster 16 ISA PnP. (When Vista is installed as both the host (main) and guest (virtual) operating systems, settings are synchronized with the host and audio configuration is not required.)
- DEC 21041 (DEC 21140 in newer versions) Ethernet network card.
- Microsoft Virtual PC 2007 and earlier do not support USB, although standard peripherals (e.g., keyboards and mice) connected to the host OS via USB are recognized . Programs using undocumented features of hardware, exotic timings, or unsupported opcodes may not work.
Implementation:
- The Macintosh version of Virtual PC uses dynamic recompilation to translate the x86 code used by PCs into equivalent PowerPC code for Macs.
- The Windows version of Virtual PC also uses dynamic recompilation, but only to translate x86 kernel mode and real mode code into x86 user mode code; original user mode and virtual 8086 mode code run natively.
- Guest call traps are used, especially for guest extensions, to accelerate emulation or offer additional features, such as integration with the host environment.
- Virtual PC and Virtual Server encapsulate virtual hard disks in the Virtual Hard Disk (VHD) file format, for which Microsoft has made all documentation available under the Open Specification Promise.
Earlier versions of Virtual PC supported the following features: (now removed in Microsoft Virtual PC 2004, 2007, and Windows Virtual PC):
- Older versions of Virtual PC (v5.0 or earlier) may have the hard disk formatted after creating the Virtual Hard Disk file. Newer versions must partition and format the Virtual Hard Disk file manually.
- A Virtual Switch available in Virtual PC version 4.1 or earlier allows adding multiple network adapters.
- Older operating systems are supported with Virtual Machine additions.
- Older versions of Virtual PC for Macintosh can run on Mac OS 9.2.2 or earlier. Support of Apple System 7.5 was dropped in version 3.
Virtual Machine Integration Components[]
To facilitate the exchange and sharing of files, folders and data between the host and guest operating systems, Virtual PC provides an optional set of Virtual Machine Additions. These can be installed in the guest OS to provide the following functionality across the host and guest:
- Better performance of the guest
- Integrated use of the mouse
- Optimized video drivers
- Dynamic screen resolution (resizing the virtual machine window sets the guest to any screen resolution)
- Time synchronization with the host
- Clipboard sharing
- Drag-and-drop capabilities
- Access to designated host OS folders from within the guest
- Support for USB devices beginning with Windows Virtual PC although isochronous USB support is absent
Virtual PC Additions are called Virtual PC Integration Components beginning with Windows Virtual PC.
Supported host and guest operating systems Template:Anchors Template:Anchors[]
Virtual PC allows multiple guest operating systems to run virtualized on a single physical host. Although a number of popular host and guest operating systems lack official Microsoft support, there are sometimes few, if any, technical obstacles impeding installation. Instead, a configuration may be unsupported due to Microsoft’s own licensing restrictions, or a decision to focus testing and support resources elsewhere, especially when production use of a legacy product fades.
A program manager on Microsoft’s core virtualization team explains what official support entails:
With each release of Virtual PC we spend a significant amount of time trying to decide which (guest) operating system should be officially supported. While Virtual PC is capable of running many operating systems, official support for an operating system means that we will test it thoroughly, not ship Virtual PC if an issue exists with that operating system, and provide full support for customers who encounter problems while running these operating systems under virtual PC.
—Ben Armstrong, «Virtual PC Guy»
As a product positioned for desktop use, Virtual PC provides official support for a different set of operating systems than its server-oriented counterpart, Microsoft Virtual Server and the more advanced Hyper-V. While the latter products support a range of server operating systems,«Virtualization with Hyper-V: Supported Guest Operating Systems». Windows Server 2008 – Product Information. Microsoft.com. http://www.microsoft.com/windowsserver2008/en/us/hyperv-supported-guest-os.aspx. Retrieved 2009-07-10.</ref> Virtual PC 2007 supports only one variety as host and another as guest; its successor, Windows Virtual PC, supports none. And, whereas Virtual Server and Hyper-V have supported select Linux guests since 2006 and 2008, respectively, as of 2009, no Microsoft release of Virtual PC has officially supported Linux. Nonetheless, a number of Linux distributions do run successfully in Virtual PC 2007, and can be used with the Virtual Machine Additions from Virtual Server (see below). Lastly, while 64-bit host support was introduced with Virtual PC 2007, no release has been able to virtualize a 64-bit guest; Microsoft has thus far reserved this functionality for Hyper-V, which runs only on 64-bit (x64) editions of Windows Server 2008.«Virtualization with Hyper-V: FAQ». Windows Server 2008 – Product Information. Microsoft.com. http://www.microsoft.com/windowsserver2008/en/us/hyperv-faq.aspx. Retrieved 2009-07-10.</ref>
Table of supported operating systems[]
In the following table and notes, «support» refers to official Microsoft support, as described above.
|
|
Notes – Details of Microsoft support
- 1 2 Supported editions: OS/2 Warp Version 4 Fix Pack 15, OS/2 Warp Convenience Pack 1, and OS/2 Warp Convenience Pack 2.
- 1 Support added in Virtual PC 2004 Service Pack 1 (SP1) for Windows Server 2003, Standard Edition as a host.
- 1 2 3 4 5 For Virtual PC 2007, Microsoft designated the following legacy operating systems «compatible», but discontinued official support: MS-DOS 6.22, Windows NT 4.0 Workstation, Windows 95, Windows 98 (original release), and Windows Me.
- 1 2 3 4 For Windows Vista guests in Virtual PC 2007, the Windows Aero graphical user interface is disabled due to limitations of the emulated S3 Trio graphics card; the interface falls back to the Vista Home Basic theme. However, Aero effects can be rendered by connecting to the guest via Remote Desktop Connection from an Aero-enabled host.
- 1 Support added in Virtual PC 2007 Service Pack 1 (SP1) for Windows Server 2008 Standard as a guest.
- 1 2 Microsoft’s January 2008 EULA supplement«Microsoft Software License Terms». Microsoft Use Terms. Microsoft. p. 13. http://download.microsoft.com/documents/useterms/Windows%20Vista_Ultimate_English_36d0fe99-75e4-4875-8153-889cf5105718.pdf. Retrieved 2009-07-10. «If you [install the software within a virtual system], you may not play or access content or use applications protected by any Microsoft digital, information or enterprise rights management technology or other Microsoft rights management services or use BitLocker.» (The later Vista SP1 EULA adopted the amended terms of the January 2008 Supplement.)</ref> for Windows Vista lifted restrictions barring installation of Vista Home Basic and Home Premium as guest operating systems.
- 1 2 3 Microsoft’s January 2008 EULA supplement for Windows Vista lifted restrictions barring use of BitLocker and Microsoft-DRM-protected content within virtualized environments.
- 1 2 3 4 5 6 Support added in a Virtual PC 2007 Service Pack 1 (SP1) hotfix rollup, dated February 20, 2009, for Windows XP Home as both host and guest, and for all Home editions of Windows Vista as hosts.
- 1 2 3 4 The pre-configured XP Mode of Windows Virtual PC is restricted to Windows 7 Professional, Enterprise, and Ultimate hosts. However, an equivalent environment can be configured manually by installing Windows XP SP3 as a guest (requires an XP license and installation media or files) and applying an integration components update (available for download from Microsoft) to enable seamless mode and other Windows 7 integration features.
- ^ The integration components enabling seamless mode and other features of Windows Virtual PC support only the following guests: Windows XP Pro Service Pack 3 (SP3); Windows Vista Business SP1, Enterprise SP1, and Ultimate SP1; and Windows 7 Professional, Enterprise, and Ultimate.
Notes – Unsupported installations
- 1 Virtual PC 2007 does not include Virtual Machine Additions for MS-DOS, but the DOS additions from Virtual PC 2004 can be used without problem.
- 1 The Virtual Machine Additions included with Virtual PC 2007 will not install on Windows 95 guests, but the additions from Virtual PC 2004 can be used.
- 1 In informal testing, Microsoft virtualization manager Ben Armstrong found XP Media Center 2004 «distorted and unusable» under Virtual PC 2004, but Media Center 2005 worked «beautifully», sans TV features.
- 1 2 3 MSDN blogs report that pre-release versions of Windows 7, similar to the forthcoming Ultimate edition,Template:Update after run successfully as both host and guest operating systems on Virtual PC 2007 Service Pack 1 (SP1). Integration features provided by Virtual Machine Additions function normally, but Virtual PC 2007 must be SP1 or later. See «Windows 7 on Virtual PC on Windows 7» for more caveats.
- 1 2 Although Windows NT 3.1 and NT 3.5 refuse to install on newer processors (NT 3.51 fixes this), it is possible to modify files on the install CD to allow install; the patch can be downloaded here.
Linux guests Template:Anchors[]
Installing a Linux-based guest environment in Virtual PC is possible but not seamless. As of Windows Virtual PC, Linux guests are not officially supported. Linux additions are supported in Microsoft Virtual Server, and these additions should also work in Virtual PC.
Some Linux distributions must be installed in text mode, as Microsoft Virtual PC only emulates graphics at 16-bit or 32-bit color depth, not 24-bit; thus, in order to run an X Window user interface, a 16-bit color depth must be specified in the guest operating system’s xorg.conf configuration file.
Ubuntu 8.10 (Intrepid Ibex) must be installed in SafeMode, but does not require other changes.
Some websites specialize in listing operating systems that run successfully as Virtual PC guests, to help users avoid issues when installing Linux distributions or other operating systems lacking official Microsoft support.[3]
Intel-based Mac support[]
Microsoft announced on August 7, 2006, that Virtual PC for Mac would not be ported to the Intel Mac platform. Microsoft stated, «Alternative solutions offered by Apple and other vendors, combined with a fully packaged retail copy of Windows, will satisfy this need.» Similar products available at the time were Parallels Desktop and VMware Fusion.
Previous versions[]
Virtual PC by Connectix[]
Template:FixBunching
File:Virtual PC 3 for Mac OS running Windows 95.png Connectix Virtual PC version 3 in Mac OS 9, running a Brazilian Portuguese edition of Windows 95
Template:FixBunching
File:Virtualpc.png Virtual PC 6.1 for Macintosh
Template:FixBunching
Virtual PC was originally developed for the Macintosh and released by Connectix in June 1997. The first version of Virtual PC designed for Windows-based systems, version 4.0, was released in June 2001. Connectix sold versions of Virtual PC bundled with a variety of guest operating systems, including Windows, OS/2, and Red Hat Linux. As virtualization’s importance to enterprise users became clear, Microsoft took interest in the sector and acquired Virtual PC and Virtual Server (unreleased at the time) from Connectix in February 2003.
Earlier versions of Virtual PC supported the following features: (now removed in Microsoft Virtual PC 2004, 2007, and Windows Virtual PC):
- Older versions of Virtual PC (v5.0 or earlier) may have the hard disk formatted after creating the Virtual Hard Disk file. Newer versions must partition and format the Virtual Hard Disk file manually.
- A Virtual Switch available in Virtual PC version 4.1 or earlier allows adding multiple network adapters.
- Older operating systems are supported with Virtual Machine additions.
- Older versions of Virtual PC for Macintosh can run on Mac OS 9.2.2 or earlier. Support of Apple System 7.5 are dropped in version 3.
Guest extensions[]
Under agreement with Connectix, Innotek GmbH (makers of VirtualBox and now part of Sun Microsystems) ported version 5.0 to run on an OS/2 host. This version also included guest extensions (VM additions) for OS/2 guests, which could run on Windows, OS/2 or Mac OS X hosts using Virtual PC versions 5, 6 or 7. A new version of the guest extensions was later included with Microsoft’s Virtual PC 2004.
Microsoft Virtual PC 2004 / Virtual PC 2007[]
On July 12, 2006, Microsoft released Virtual PC 2004 for Windows as a free product, but the Mac version was not made free. The Windows version may be downloaded here. The equivalent version for Mac, version 7, was the final version of Virtual PC for Mac.
Virtual PC 2007 was released only for the Windows platform, with public beta testing beginning October 11, 2006, and production release on February 19, 2007. It added support for hardware virtualization, viewing virtual machines on multiple monitors and support for Windows Vista as both host and guest. (The Windows Aero interface is disabled on Windows Vista guests due to limitations of the emulated video hardware; however, Aero effects can be rendered by connecting to the guest via Remote Desktop Connection from an Aero-enabled Vista host.)
On May 15, 2008, Microsoft released Virtual PC 2007 Service Pack 1, which added support for both Windows XP SP3 and Vista SP1 as guest and host OSes, as well as Windows Server 2008 Standard as a guest OS. A hotfix rollup for Virtual PC 2007 SP1, released February 20, 2009, solved networking issues and enhanced the maximum screen resolution to 2048×1920 (32-bit), enabling 16:9 resolutions such as 1920×1080.
See also[]
- x86 virtualization
- Comparison of platform virtual machines
- Microsoft Virtual Server
- Virtual machine
- VirtualBox
- Virtual Hard Disk (VHD) format
- Features new to Windows 7
References[]
- ↑ Template:Cite episode
- ↑ «Windows Virtual PC – FAQ». Microsoft.com. http://www.microsoft.com/windows/virtual-pc/support/faq.aspx. Retrieved 2009-07-10.
- ↑ What Works and What Doesn’t in Microsoft Virtual PC 2004
External links[]
- Download Microsoft Virtual PC 2004 SP1 for Windows
- Download Microsoft Virtual PC 2007 SP1 for Windows
- Download Microsoft Virtual PC 2007 SP1 for Windows hotfix rollup KB958162
- Microsoft Virtual Server 2005
- Template:Waybackdate
- Template:Waybackdate
- Use Microsoft’s Virtual PC to Test Software Before Deploying It
- Brian Randell interview regarding Microsoft Virtual PC architecture
- Software Review — Microsoft Virtual PC
- Virtual PC Blog on Microsoft MSDN
- ArsTechnica comparison of Virtual PC and VMware
- Running DOS games and Linux in a Virtual PC
- Vista Running on Virtual PC 2007 Beta Vista on Vista Virtualization using Virtual PC 2007
- Virtual machines for Virtual PC 2007
nl:Microsoft Virtual PC
ja:Microsoft Virtual PC
pl:Microsoft Virtual PC
pt:Microsoft Virtual PC
ru:Microsoft Virtual PC
fi:Microsoft Virtual PC
sv:Microsoft Virtual PC
ta:மைக்ரோசாப்ட் வர்ச்சுவல் பிசி
zh:Microsoft Virtual PC
9 января 2016 г. в 12:00 · Артём Золотаревский

В статье приведена подробная пошаговая инструкция по установке Windows 7 на VirtualBox. В чем преимущество виртуального окружения? Это изолированная среда. Запустив в ней вирус, вашей основной системе ничего не грозит.
Подготовка
В этом разделе мы подготовим все необходимые компоненты. Нам надо:
1. Скачать виртуальную машину
Чтобы скачать виртуальную машину нам надо сначала выбрать ее. К наиболее популярным относиться VMWare, Virtual PC 2007 от Microsoft и VirtualBox от Sun. Мне больше всего понравились две машины, первая и последняя. Но мы будем рассматривать именно VirtualBox. Скачать свежую версию нужно с их официального сайта — http://www.virtualbox.org/wiki/Downloads. Послего этого установка производится стандартным образом.
2. Скачать образ виртуальной ОС
Мы будем устанавливать Windows 7. Найти нужную версию можно по ключевым словам: “Образ операционной системы Windows 7”. Вот ссылка на используемый в статье образ — https://yadi.sk/d/NviXZl9gmksdf. Для установки данной ОС необходимо минимум 7 ГБ свободного дискового пространства.
Создание виртуальной машины
После установки VirtualBox на рабочем столе должен был появиться вот такой значок.
Мы нажимаем по нему и тем самым запускаем программу. Если вы удачно ее установили, тогда у вас должно открыться окно, которое показано ниже.

В этой программе можно создавать много виртуальных OC. А установить можно даже андроид или люникс.
Чтобы создать виртуальную систему нам надо нажать на кнопку «Создать». Откроется окно, в котором нужно указать, какую именно систему Вы хотите создать.

Заполняете параметры, в нашем случае выбираем любое имя, Тип: Microsoft Windows, а версия: Windows 7 и жмем далее.
В следующем окне введите размер оперативной памяти, меньше 512 не рекомендуеться, в принципе, их хватит для знакомства с системой. Щелкаем Далее.
В новом окне нужно выбрать загрузочный виртуальный жесткий диск. Поскольку мы их еще не создали, выбираем пункт «Создать новый виртуальный жесткий диск» и нажимаем кнопу Создать.
В новом окне надо выбрать тип файла, определяющий формат, который Вы хотите использовать при создании нового жесткого диска. Тут мы ничего не трогаем и жмем Далее.

Откроется окно мастера в котором надо выбрать тип хранения данных жесткого диска новой системы. Есть два варианта:
- Динамический
- Фиксированный
Динамический означает, что у вас изначально он будет занимать мало места и будет расширяться постепенно, а фиксированный сразу заберет весь выделенный под него объем. Я вам советую выбрать динамический. И так, мы выбираем динамический и жмем далее.
Здесь мы должны выбрать размер диска. По умолчанию рекомендуется 25 гигабайт, но можно и уменьшить, я поставил 20 гигабайт.
Мы нажимаем готово и нас вернуло в первоначальное окно. Так мы создали виртуальную машину, в которую нам предстоит еще загрузить образ диска.
После установки виртуальной машины у нас заработали еще две кнопки: настроить и запустить. Мы нажимаем настроить и у нас открывается окно настроек вашей виртуальной машины.

В этом окне, как вы заметили, у нас есть левое меню. Мы выбираем «Дисплей» и ставим флажок на «Включить 3d ускорение».
Дальше мы переходим во вкладку «Носители». В этом окне, в разделе носители информации, выбираем диск, на котором написано «Пусто». У нас во втором разделе «Атрибуты» появляется значок диска. Нам надо на него нажать. У нас появляется небольшая менюшка, в которой мы выбираем: «Выбрать образ оптического диска».

Теперь надо найти образ Windows, который вы возможно уже скачали по ссылке, которую я вам дал в начале статьи, или нашли в интернете. Если вы еще не скачали, то вот вам ссылка — https://yadi.sk/d/NviXZl9gmksdf.

После того, как мы нашли образ диска и нажали открыть, во вкладке «Носители информации», где было написано «Пусто», теперь появилось название файла образа Windows. В окне настроек мы нажимаем «ОК», чтобы сохранить наши изменения.
Мы проделали важную работу, но самое важное осталось впереди. Нам предстоит произвести непосредственно установку систему. Установка таким образом помогает новичкам научиться установливать Windows на реальный компьютер, ведь в виртуальной машине происходит все тоже самое, что и на физическом устройстве.
И так, чтобы начать процесс установки Windows нам надо выбрать нашу виртуальную машину, если имеются другие, и нажать кнопку «Запустить». Что мы сейчас и делаем.
Установка Windows 7
Мы нажали «Запустить» и у нас открылось еще одно окошко. Это окно самой виртуальной машины, в которой сейчас происходит стандартная установка Windows.

Для специалиста, который уже устанавливал Windows, будет легко разобрать что дальше надо делать.
Мы подождали секунд десять и у нас появилось установочное окно Windows. В левом меню мы выбираем пункт «Установка Windows > Установка Windows 7″.

У нас пошло начало установки.
В следующем окне мы снова выбираем нашу операционную систему. Также, если вы использовали мою сборку операционной системы, то у вас выбор будет не богатый. Выбираем то, что есть, и жмем «Далее».

Дальше мы выбираем раздел для установки Windows. Сейчас мы выбираем как раз диск, который мы создавали, и нажимаем Далее.
У нас идет процесс установки Windows. А точнее копирование файлов. Это долгий процесс. Копирование может идти примерно полчаса, но может закончиться и через 5 минут. У кого как.
В процессе установки ваш виртуальный Windows будет несколько раз перезагружен и, когда у вас скопируются все системные файлы, то произойдет очередная перезагрузка и в конечном итоге появится этот экран:
Здесь вы должны указать имя вашего виртуального компьютера и новой учетной записи пользователя.
Нажимаете «Далее» и в следующем окне указываем пароль для этой учетной записи, но это необязательный пункт. Нажимаем «Далее» и идем дальше.
В следующем окне нас ждет сюрприз. Нас просят вести ключ продукта, но у нас его нет. Что же делать?!? Мы просто жмем «Пропустить» и идем дальше.
Идет завершение установки. Ваша виртуальная Windows почти готова.

Мы чуть подождали и все, Windows готова. Виртуальная машина перезагрузиться и все что нам остается сделать, это просто вести пароль от учетной записи.

Все, мы ввели пароль, еще немножко подождали и, воуля, ваша виртуальная Windows готова!
Вы можете экспериментировать, изменять что хотите, вашей основной операционной системе ничего не будет. Только не забываем сохранять виртуальную машину (делать снапшоты), ведь вы можете что-нибудь испортить, а устанавливать лишний раз Windows, я думаю, мало кому захочется!

С уважением,
Артем Золотаревский
9 января 2016 года
Если вам нужно скачать виртуальную машину Windows 7, 8 или Windows 10, то Microsoft предоставляет прекрасную возможность для того, чтобы этого сделать. Для всех желающих представляются бесплатные готовые виртуальные машины всех версий ОС, начиная с Windows 7 (обновление 2016: совсем недавно была и XP и Vista, но убрали).
Если вы совсем не знаете, что такое виртуальная машина, то кратко это можно описать как эмуляция настоящего компьютера со своей собственной операционной системой внутри вашей основной ОС. Например, вы можете запустить виртуальный компьютер с Windows 10 в простом окне на Windows 7, как обычную программу, ничего не переустанавливая. Отличный способ попробовать разные версии систем, поэкспериментировать с ними, не боясь что-то испортить. См. например Виртуальная машина Hyper-V в Windows 10, Виртуальные машины VirtualBox для начинающих.
Обновление 2016: статья была отредактирована, так как с сайта пропали виртуальные машины для старых версий Windows, изменился интерфейс, да и сам адрес сайта (ранее — Modern.ie). Добавлена краткая сводка по установке в Hyper-V.
Загрузка готовой виртуальной машины
Примечание: в конце статьи есть видео о том, как скачать и запустить виртуальную машину с Windows, возможно вам удобнее будет воспринимать информацию в таком формате (однако в текущей статье есть дополнительная информация, которой нет в видео, и которая пригодится, если вы решите установить виртуальную машину у себя).
Готовые виртуальные машины Windows можно скачать бесплатно с сайта https://developer.microsoft.com/ru-ru/microsoft-edge/tools/vms/, специально подготовленного Microsoft для того, чтобы разработчики могли тестировать различные версии Internet Explorer в разных версиях Windows (а с выходом Windows 10 — и для тестирования браузера Microsoft Edge). Однако ничто не мешает использовать их и для других целей. Виртуальные мышины доступны не только для запуска в среде Windows, но и в Mac OS X или Linux.

Для загрузки выберите на главной странице пункт «Бесплатные виртуальные машины», а затем — какой именно вариант вы планируете использоваться. На момент написания статьи готовые виртуальные машины со следующими операционными системами:
- Windows 10 Technical Preview (последняя сборка)
- Windows 10
- Windows 8.1
- Windows 8
- Windows 7
- Windows Vista
- Windows XP
Если вы не планируете использовать их для тестирования Internet Explorer, то обращать на то, какая версия браузера установлена, думаю, не стоит.
В качестве платформы для виртуальных машин доступны Hyper-V, Virtual Box, Vagrant и VMWare. Я покажу весь процесс для Virtual Box, который, на мой взгляд, является самым быстрым, функциональным и удобным (а также понятным для начинающего пользователя). Помимо этого Virtual Box бесплатен. Также кратко расскажу об установке виртуальной машины в Hyper-V.
Выбираем, после чего скачиваем либо один zip файл с виртуальной машиной, либо архив, состоящий из нескольких томов (для виртуальной машины Windows 10 размер составил 4.4 Гб). После загрузки файла распакуйте его любым архиватором или встроенными средствами Windows (ОС тоже умеет работать с ZIP архивами).

Также потребуется скачать и установить платформу виртуализации для запуска виртуальной машины, в моем случае — VirtualBox (также это может быть VMWare Player, если вы предпочли этот вариант). Сделать это можно с официальной страницы https://www.virtualbox.org/wiki/Downloads (загружаем VirtualBox for Windows hosts x86/amd64, если только у вас не другая ОС на компьютере).
Во время установки, если вы не специалист, ничего менять не нужно, достаточно нажимать «Далее». Также в процессе пропадет и снова появится Интернет-соединение (не пугайтесь). Если же даже после завершения установки Интернет не появляется (пишет ограничено или неизвестная сеть, возможно в некоторых конфигурациях), отключите компонент VirtualBox Bridged Networking Driver для вашего основного Интернет-подключения (в видео ниже показано, как это сделать).
Итак, все готово для следующего шага.
Запуск виртуальной машины Windows в VirtualBox
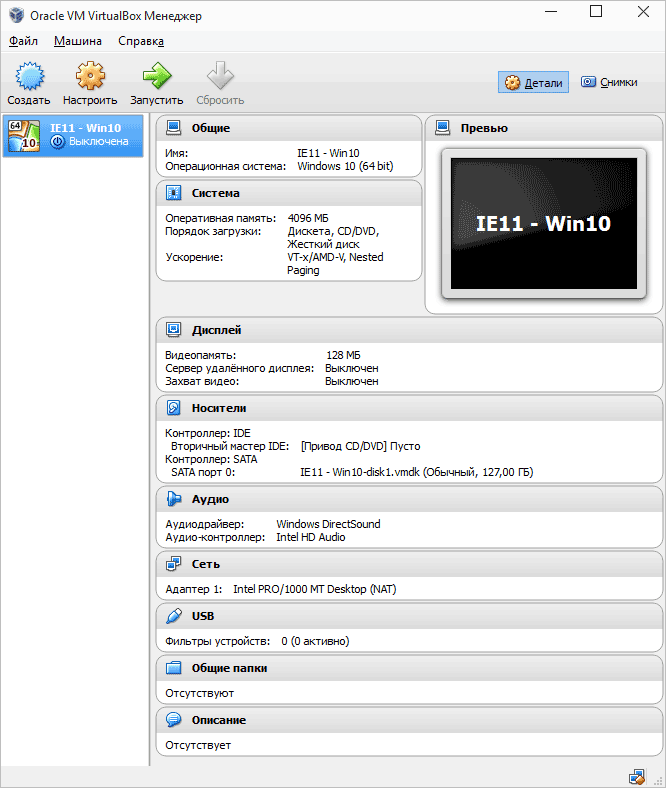
Далее все просто — дважды кликните по файлу, который мы скачали и распаковали, автоматически запустится установленное ПО VirtualBox с окном импорта виртуальной машины.

При желании, вы можете изменить настройки количества процессоров, оперативной памяти (только не отнимайте слишком много памяти у основной ОС), после чего нажать «Импорт». Более подробно вдаваться в настройки не буду, но используемые по умолчанию будут работать в большинстве случаев. Сам процесс импорта занимает несколько минут, в зависимости от производительности вашего компьютера.

По завершении вы увидите новую виртуальную машину в списке VirtualBox, а для ее запуска достаточно будет либо дважды кликнуть по ней, либо нажать «Запустить». Начнется загрузка Windows, аналогичная той, которая происходит в первый раз после установки и через короткое время вы увидите рабочий стол полнофункциональной Windows 10, 8.1 или другой версии, которую вы установили. Если вдруг какие-то элементы управления ВМ в VirtualBox вам будут непонятны, внимательно читайте появляющиеся информационные сообщения на русском или зайдите в справку, там все изложено довольно подробно.
На рабочем столе загруженной с modern.ie виртуальной машины имеется кое-какая полезная информация. Помимо имени пользователя и пароля, данные об условиях лицензии и способах продления. Кратко переведу то, что может вам пригодиться:

- Windows 7, 8 и 8.1 (а также Windows 10) активируются автоматически при подключении к интернету. Если этого не произошло, в командной строке от имени администратора введите slmgr /ato — период действия активации 90 дней.
- Для Windows Vista и XP срок действия лицензии 30 дней.
- Возможно продление пробного периода для Windows XP, Windows Vista и Windows 7, для этого в последних двух системах введите в командной строке от имени администратора slmgr /dlv и перезагрузите виртуальную машину, а в Windows XP используйте команду rundll32. exe syssetup,SetupOobeBnk
Так что, не смотря на ограниченный период действия, наиграться времени хватит, а если нет, то вы можете удалить виртуальную машину из VirtualBox и заново импортировать ее, чтобы начать с начала.
Использование виртуальной машины в Hyper-V
Примерно также выглядит и запуск скачанной виртуальной машины в Hyper-V (которая встроена в Windows 8 и Windows 10 начиная с Pro версий). Сразу после импорта желательно создать контрольную точку виртуальной машины для возврата к ней после истечения 90-дневного срока действия.
- Загружаем и распаковываем виртуальную машину.
- В меню диспетчера виртуальных машин Hyper-V выбираем Действие — Импорт виртуальной машины и указываем папку с ней.
- Далее можно просто использовать параметры по умолчанию для импорта виртуальной машины.

- По завершению импорта виртуальная машина появится в списке доступных для запуска.


Также, если вам требуется доступ в Интернет, в параметрах виртуальной машины задайте для нее виртуальный сетевой адаптер (о его создании я писал в статье про Hyper-V в Windows, упомянутой в начале этой статьи, для этого служит диспетчер виртуальных коммутаторов Hyper-V). При этом, почему-то в моем тесте, интернет в загруженной виртуальной машине заработал только после ручного указания параметров IP соединения в самой ВМ (при этом в тех виртуальных машинах, которые создавались вручную работает и без этого).
Видео — скачиваем и запускаем бесплатную виртуальную машину
Нижеследующее видео было подготовлено до изменения интерфейса загрузки виртуальных машин на сайте Microsoft. Сейчас это выглядит несколько иначе (как на скриншотах выше).
Вот, пожалуй, и все. Виртуальная машина — отличный способ поэкспериментировать с различными операционными системами, попробовать программы, которые не хотелось бы устанавливать у себя на компьютере (при запуске в виртуальной машине они в большинстве случаев полностью безопасны, а также имеется возможность за секунды вернуться к предыдущему состоянию ВМ), обучения и многого другого.