
Первое, с чем может столкнуться администратор при развертывании Office 2019 в компании – теперь нельзя скачать установочный образ Office 2019 на сайте лицензирования Volume Licensing Service Center (VLSC). Установочные файлы Office теперь доступы в Интернете в сети Office CDN (Content Delivery Network). Другая неожиданность, дистрибутив Office 2019 теперь поставляется не в виде привычного MSI пакета, а распространяется через установщик Click to Run (как и Office 365). В этой статье мы рассмотрим особенности подготовки и развертывания корпоративной версии Office 2019 в сети предприятия (вручную, с помощью GPO или SCCM).
Основные особенности Office 2019, о которых нужно помнить перед началом развертыванием пакета в компании:
- Office 2019 можно установить только на Windows 10 или Windows Server 2016/2019;
- Установщик Office 2019 основан на технологии «Нажми и работай / Click-to-Run (C2R)», а не на классическом MSI установщике (как это было в предыдущих версиях Office);
- Нельзя одновременно использовать на компьютере Office 2019 и предыдущую версию Office или любой пакет из Office 365 (например, вы не сможете установить Skype for Business Click to Run из Office 365);
- Для настройки параметров установки Office 2019 теперь используется Office Deployment Tool (ODT) вместо привычной Office Customization Tool (OCT);
- Установка всегда выполняется на системный диск.
Перед началом развертывания Office 2019, скопируйте из своего личного кабинета на сайте VLSC ключ для установки продуктов из комплекта Office (это может быть ключ для активации KMS сервера, или MAK ключ многократной установки).
Для развертывания Office 2019 по технологии Click-to-Run нужно использовать специальную утилиту – средство развёртывания Microsoft Office Deployment Tool – ODT (также он используется для развертывания Office 365 ProPlus).
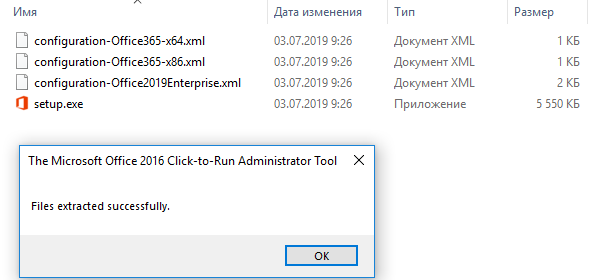
Скачайте Microsoft Office Deployment Tool (https://www.microsoft.com/en-us/download/details.aspx?id=49117), запустите файл officedeploymenttool_11901-20022.exe и распакуйте содержимое Office Click-to-Run Administrator Tool в локальный каталог на компьютере.
Как вы видите, в каталоге установке есть три XML файла c образцом конфигурации установки: configuration-Office365-x64.xml, configuration-Office365-x86.xml и configuration-Office2019Enterprise.xml. Программа setup.exe используется для запуска получения дистрибутива и запуска установки пакета Office на клиенте.
В данном случае нас не интересуют файлы конфигурации для Office 365 (в чем отличия Office 2016/2019 от Office 365). Перейдем к рассмотрению XML файла configuration-Office2019Enterprise.xml в котором содержится пример конфигурации Office 2019 Enterprise для канала Volume License. Рассмотрим структуру XML файла:
<Configuration>
<Add OfficeClientEdition="64" Channel="PerpetualVL2019">
<Product ID="ProPlus2019Volume">
<Language ID="en-us" />
</Product>
<Product ID="VisioPro2019Volume">
<Language ID="en-us" />
</Product>
<Product ID="ProjectPro2019Volume">
<Language ID="en-us" />
</Product>
</Add>
<!-- <RemoveMSI All="True" /> -->
<!-- <Display Level="None" AcceptEULA="TRUE" /> -->
<!-- <Property Name="AUTOACTIVATE" Value="1" /> -->
</Configuration>
Рассмотрим основные параметры:
-
OfficeClientEdition="64"
– установка 64 битной версии Office 2019; -
Channel="PerpetualVL2019
– установка Office 2019 по системе корпоративного лицензирования (Volume License); -
<Language ID="en-us" />
— установка английской редакции Office. Для формирования и установки русской версии нужно указать ru-ru; -
<!-- <RemoveMSI All="True" /> -->
— перед установкой Office 2019 необходимо удалить все старые версии Office, установленные через Windows MSI. Данный параметр закомментирован, но для перед развёртыванием Office 2019 его нужно включить, иначе вы столкнетесь с ошибками при развертывании; -
<Product ID="ProPlus2019Volume" PIDKEY="" >
— вы можете указать компоненты пакета Office (ProPlus2019Volume, Standard2019Volume, ProjectPro2019Volume, ProjectStd2019Volume, VisioPro2019Volume, VisioStd2019Volume), которые нужно установить. В параметре PIDKEY=»» можно указать ваш корпоративный ключ (обычно это MAK ключ); - С помощью директивы вид <ExcludeApp ID=»PowerPoint» /> вы можете устанавливать только выбранные приложения Office (по умолчанию C2R установщик ставит все приложения пакета Office).
Более подробно о параметрах XML файла установки Office 2019 в статье https://docs.microsoft.com/en-us/deployoffice/office2019/deploy#create-the-configurationxml.
После того, как вы сформировали XML файл, вы можете скачать дистрибутив для установки Office 2019. Для этого выполите команду:
Setup.exe /download configuration-Office2019Enterprise.xml

Загрузка дистрибутива выполняется в тихом режиме. Для загрузки нужен доступ в Интернет, файлы загружаются из сети CDN Office.
После окончания загрузки в каталоге Microsoft Office Deployment Tool появится каталог Office (содержит cab и dat файлы для установки Office 2019) размером около 2 Гб.
Полученный пакет можно использовать для установки Office 2019 на компьютеры пользователей. Но, чтобы каждый компьютер не загружал установочные файлы Office 2019 из сети CDN, а пользовался локальной копией, нужно в XML файле указать путь к каталогу с файлами установки Office. Проще всего их разместить в общей сетевой папке. Например:
<Add SourcePath="\\srv1\Distr\Apps\Office2019" OfficeClientEdition="64" Channel="PerpetualVL2019">
Обычно сначала рекомендуется протестировать установку пакета из сети CDN Office, и только после этого создавать локальный пакет.
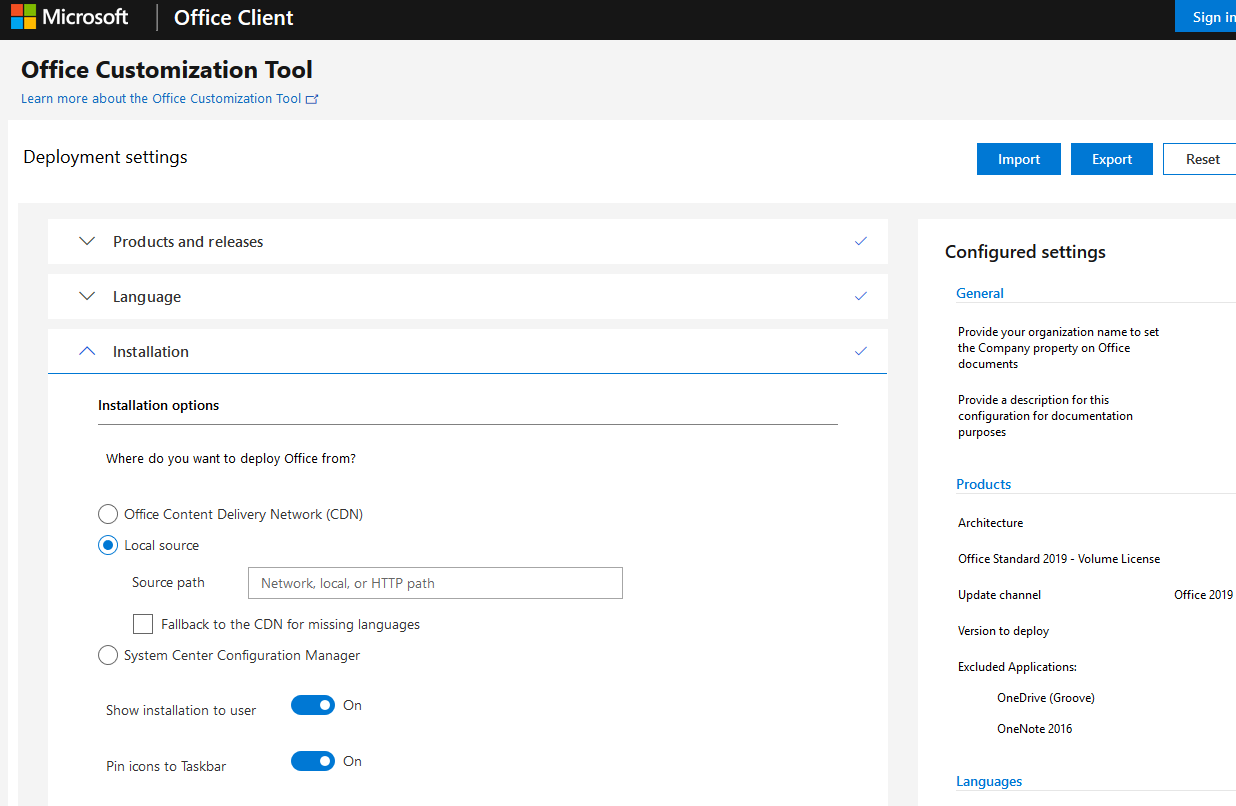
Для удобства администраторов Microsoft предлагает воспользоваться простым графическим онлайн-мастером для создания XML файла при развёртывании Office 2019/365 — https://config.office.com/.
Для генерации XML файла для Office 2019 выберите:
- Office Suites: Office Standard 2019 – Volume License
- Update channel: Office 2019 Perpetual Enterprise
Так же вы можете указать, что установочный файлы Office нужно получать не из CDN сети Microsoft, а из сетевой папки внутри локальной сети.
После того, как вы заполнили все формы, нажмите Export, скачайте XML файл и поместите его в каталог с Office Deployment Tool.
Теперь вы можете скопировать каталог Microsoft Office Deployment Tool с xml файлами и дистрибутивом Office 2019 в сетевой каталог или на SCCM сервер.
Для начала установки Office2019 вам достаточно выполнить команду:
Setup.exe /configure configuration-Office2019Enterprise.xml
После окончания установки Office 2019 Enterprise или любого его пакета, вы можете активировать продукт с помощью MAK ключа многократной установки, если вы не указали его в XML файле (Файл -> Учетная запись -> Сведениями о продукте -> Изменить ключ продукта) или с помощь KMS сервера (как установить KMS сервер для активации Office 2019).
Для дальнейшей настройки параметров Office на компьютерах пользователей вы можете использовать административные шаблоны GPO.

Для возможности работы с офисными документами в SharePoint Server в режиме онлайн необходимо настроить подключение фермы к Office Online Server. Именно этот компонент позволяет нам работать с документ, не требуя скачивания. В этой статье рассмотрим развертывание Office Online Server 2019 подключим к нему нашу ферму SharePoint Server 2019.
В этой статье будем придерживаться плана:
- Подготовим Windows Server для развертывания Office Online Server;
- Выполним установку и развертывание Office Online Server;
- Выполним подключение SharePoint Server 2019 к Office Online Server;
Установленная ОС в нашем стенде – Windows Server 2022.
Подготовка Windows Server
1. Заходим на наш сервер под учетной записью с правами локального администратора;
2. Подключаем образ, с которого была произведена установка ОС на сервер или же просто забираем каталог sxs из образа и копируем в каталог на сервере, например C:\Install\sxs;
3. Открываем PowerShell от имени администратора и вводим следующий код:
Add-WindowsFeature Web-Server,Web-Mgmt-Tools,Web-Mgmt-Console,Web-WebServer,Web-Common-Http,Web-Default-Doc,Web-Static-Content,Web-Performance,Web-Stat-Compression,Web-Dyn-Compression,Web-Security,Web-Filtering,Web-Windows-Auth,Web-App-Dev,Web-Net-Ext45,Web-Asp-Net45,Web-ISAPI-Ext,Web-ISAPI-Filter,Web-Includes,NET-Framework-Features,NET-Framework-45-Features,NET-Framework-Core,NET-Framework-45-Core,NET-HTTP-Activation,NET-Non-HTTP-Activ,NET-WCF-HTTP-Activation45,Windows-Identity-Foundation,Server-Media-Foundation -Source D:\sources\sxs -VerboseВ атрибуте Source мы указываем путь к нашему каталогу sxs;
5. Ждем окончания установки:

Установка предварительных компонентов
1. Скачиваем дополнительные компоненты по списку ниже:
- .NET Framework 4.5.2;
- Visual C++ Redistributable Packages for Visual Studio 2013;
- Visual C++ Redistributable for Visual Studio 2015;
- Microsoft.IdentityModel.Extention.dll.
2. Выполняем установку компонентов.
Установка Office Online Server 2019
После выполнения подготовительных этапов приступим к установке OOS.
1. Подключаем наш дистрибутив Office Online Server;
2. Открываем наш дистрибутив и запускаем Setup.exe;
3. На странице Read the Microsoft Software License Terms необходимо ознакомиться с лицензионным соглашением:

и нажимаем Continue;
4. На следующей странице необходимо выбрать каталог установки:

В нашем случае каталог оставляем по умолчанию и нажимаем Install Now;
5. Начнется процесс установки:

6. Если завершилась успешно, то мы увидим следующее окно:

7. Нажимаем Close. На этом установка Office Online Server завершена.
Установка языковых пакетов и обновлений Office Online Server
Устанавливаем нужные нам языковые пакеты при необходимости. В нашем случае мы выполним установку русского языкового пакета.
1. Идем по ссылке — https://www.microsoft.com/en—us/download/details.aspx?id=51963, выбираем нужный нам язык и скачиваем:

2. Копируем установочный файл языкового пакета на сервер и запускаем;
3. На странице «Прочтите лицензионное соглашение на использование программного обеспечения корпорации Майкрософт» необходимо ознакомиться с лицензионным соглашением:

Ставим галочку «Я принимаю условия этого соглашения» и нажимаем Продолжить;
4. Начнется процесс установки:

5. Если установка завершена успешно, то мы увидим следующее окно:

6. Нажимаем Закрыть. Установка языкового пакета завершена.
Также перед развертыванием мы можем установить последние обновления безопасности. В нашем стенде мы развернем последнее на текущий момент обновление — KB5002677 от января 2025 года.
1. Скачиваем пакет обновления с официального сайта Microsoft;
2. Копируем пакет на сервер и запускаем;
3. На первой странице необходимо прочитать лицензионное соглашение:

Ставим галочку «Click here to accept the Microsoft Software License Terms» и нажимаем Continue;
4. Начнется процесс установки:

5. Если установка прошла успешно, то мы увидим следующее окно:

6. Установка обновления завершена.
Развертывание фермы Office Online Server 2019
После установки Office Online Server, языковых пакетов и обновлений можно начать разворачивать ферму Office Online Server 2019. В данной статье будет разворачиваться ферма OOS из одного сервера, работающая по протоколу HTTPS. Процесс создания сертификата в данной статье мы опускаем, предполагая, что он у нас уже есть.
1. Открываем PowerShell или PowerShell ISE, кому как удобно, от имени администратора;
2. Вводим команду:
Import-Module -Name OfficeWebAppsДанный командлет подключает модуль Office Online Server;
3. Далее, нам потребуется использовать следующий командлет:
New-OfficeWebAppsFarm -InternalUrl "https://server.contoso.com" -CertificateName "OfficeWebApps Certificate" -EditingEnabledВ данной команде:
- -InternalURL – вводим FQDN нашего сервера;
- -CertificateName – вводим FriendlyName нашего SSL – сертификата;
- -EditingEnabled – включает редактирование при работе с SharePoint Server;
Теперь составим команду для нашего стенда:
New-OfficeWebAppsFarm -InternalURL "https://oos01.alexitblog.ru" -CertificateName "oos01cert" -EditingEnabled4. Запускаем командлет и ждем выполнения. После того, как наша команда применится, будет отображена основная конфигурационная информация:

В выводимой информации можем увидеть указанный нами InternalURL и имя сертификата;
5. Для проверки работы заходим на другой сервер, открываем браузер и вводим следующий URL — https://oos01.alexitblog.ru/hosting/discovery. Если все настроено правильно, то мы получим XML:

Подключение фермы SharePoint Server 2019
После развертывания фермы OOS можно подключить к ней ферму SharePoint Server.
1. Заходим на наш сервер SharePoint и открываем SharePoint 2019 Management Shell от имени администратора;
2. Вводим команду:
New-SPWOPIBinding -ServerName serverOOS.domain.comВ данной команде:
- —ServerName – вводим FQDN нашего сервера OOS;
Теперь составим команду для нашего стенда:
New-SPWOPIBinding -ServerName oos01.alexitblog.ru3. После выполнения команды мы увидим привязки:

4. Выполняем команду Get—SPWOPIZone и проверяем, что у нас выставлено корректное значение. Для HTTPS значение должно быть internal-https:
5. Включаем Excel SOAP API. Для этого вводим следующие команды:
$Farm = Get-SPFarm
$Farm.Properties.Add("WopiLegacySoapSupport", "<URL>/x/_vti_bin/ExcelServiceInternal.asmx")
$Farm.Update()
Проверка работы
Подключение выполнено, теперь идем и проверяем работу.
1. Идем на любой сайт, заходим в любую библиотеку и убеждаемся, что у нас появилась возможность создавать документы:
2. Выбираем «Документ Word» и убеждаемся, что документ создается и открывается:

Вносим данные, убеждаемся в сохранении, закрываем и открываем снова – убеждаемся, что все хорошо;
3. Аналогично проверяем по всем остальным пунктам (Excel, PowerPoint, OneNote), чтобы не возникло «сюрпризов» у пользователей.
Для настройки и развертывания корпоративных версий Office 2019 в вашей организации, включая Project и Visio (и других программ), используйте средство развертывания Office Deployment Tool (ODT).
Файлы установки для Office 2019 доступны непосредственно из сети CDN Office, т.е. пакеты Windows (MSI) больше не используется.
А по факту это значит, что на одном компьютере у тебя будет одна установка 2019 Office, и невозможно будет установить любой другой пакет Office.
Для примера: приобретен Office 2019 Standard, вы установили его на пользовательский компьютер и планируете установить Skype for Business Basic c помощью установщика MSI – это не будет работать. И, даже если вы выкачаете Skype for Business Click to Run пакет с офиса 365, он тоже не установится. Извините, повторюсь: может быть только одна установка Office 2019 на компьютер, независимо каким способом распространяется дополнительный продукт Office.
И так, вам нужно создать один пакет для развертывания Office 2019.
Загрузите средства развертывания Office из центра загрузки Майкрософт. После получения копии ODT вам необходимо создать файл конфигурации configuration.xml.
Можно создать несколько файлов configuration.xml, который будет использоваться с ODT.
Для чего это нужно: вы можете установить Office 2019 непосредственно из сети CDN Office, или можно загрузить файлы установки из сети CDN Office в папку в локальной сети, например, в общую папку и установить Office 2019 из этого расположения. Можно использовать различные методы для различных наборов компьютеров в вашей организации.
Для создания файла конфигурации рекомендую использовать Office Customization Tool. С помощью этого сайта вы можете сгенерировать файл ответов для Office 365 / Office 2019 с базовыми настройками такими как:
- версия архитектуры офиса;
- продукты, компоненты и языки;
- параметры установки (CDN Office или «Локальный источник»);
- тип лицензирования.
И дополнить его идентификаторами продуктов, поддерживаемых средством развертывания Office Deployment Tool. Вот основные из них:
Skype for Busies
Другие продукты
Официальная ссылка на поддерживаемые продукты (, которую я долго искал).
Установка Office 2019 с помощью средства развертывания Office
После получения ODT и создания конфигурационного файла configuration.xml можно установить Office 2019.
Откройте командную строку с повышенными привилегиями, перейдите к папке, в которой вы сохранили ODT и файл configuration.xml, и введите следующую команду для скачивания инсталляционного пакета в сетевую папку:
- setup /download configuration.xml
далее введите команду:
- setup /configure configuration.xml
для установки Office из сетевой папки или непосредственно из сети CDN Office. Ждите окончания установки Office.
По опыту скажу, что лучше протестировать установку пакета из сети CDN Office, а потом создавать локальный пакет.
На всякий случай привожу полный список команд ODT:
SETUP /download [path to configuration file]

SETUP /configure [path to configuration file]

SETUP /packager [path to configuration file] [output path]

SETUP /customize [path to configuration file]

SETUP /help
Руководство по развертыванию для Office 2019 от Microsoft .
Обратите внимание, что сайт Office Customization Tool уже содержит коды для Project/ Visio 2016, но их нет на сайте Product IDs that are supported by the Office Deployment Tool.
Microsoft такой Microsoft.
Надеюсь, что эта статья сэкономит ваше время.
Дополнение:
Теперь Office Deployment Tool может добавлять продукты в развернутый пакет, для примера: конфигурация добавления Skype for Business 2019 Basic в развернутый Office 2019 Standard.
<Configuration>
  <Info Description="Skype for Business 2019 (64-bit)" />
  <Add OfficeClientEdition="64" Channel="PerpetualVL2019">
    <Product ID="SkypeforBusiness2019Volume" PIDKEY="#####-#####-#####-#####-#####">
      <Language ID="en-us" />
    </Product>
  </Add>
  <RemoveMSI />
  <Display Level="Full" AcceptEULA="TRUE" />
</Configuration>
When it comes to optimizing your productivity, one tool that stands out is Microsoft Office Online Server 2019. With its array of features and functionalities, it has become an essential resource for professionals worldwide. But how exactly can you make the most of this powerful tool?
Microsoft Office Online Server 2019 offers a seamless and efficient way to collaborate, create, and communicate. By providing access to applications such as Word, Excel, PowerPoint, and more, it enables users to work on documents simultaneously, making teamwork a breeze. Its intuitive interface and comprehensive suite of tools make it a go-to for businesses looking to streamline their workflows and increase productivity.
To effectively use Microsoft Office Online Server 2019, follow these steps:
- Install Microsoft Office Online Server 2019 on the desired server.
- Configure server settings and add the necessary certificates.
- Create an Office Web Apps farm and specify the URL for Office Online Server.
- Configure the binding for the Office Online Server farm.
- Verify the installation by accessing Office Online Server through a supported web browser.
By following these steps, you can maximize the benefits of Microsoft Office Online Server 2019 and enhance your productivity in a professional setting.
Overview of Microsoft Office Online Server 2019
Microsoft Office Online Server 2019 is a powerful tool that allows users to access and collaborate on Office documents from anywhere with an internet connection. Unlike the traditional desktop version of Microsoft Office, Office Online Server is a web-based application that provides a streamlined and efficient way to create, edit, and share documents, spreadsheets, presentations, and more. In this article, we will explore how to use Microsoft Office Online Server 2019 and the various features and functionalities it offers.
1. Installation and Setup
Before getting started with Microsoft Office Online Server 2019, you need to install and configure it on your server. The installation process involves several steps, including preparing the server environment, downloading and running the installation package, and configuring the server farm. Once the installation is complete, you can start using Office Online Server.
To install Office Online Server 2019, you need to meet the minimum system requirements, such as having a supported operating system, sufficient disk space, and the necessary hardware resources. You can download the installation package from the Microsoft Download Center, and then run the setup program to begin the installation process.
During the installation, you will be prompted to provide various configuration settings, such as the server role, database server information, and the SSL certificate. It is important to carefully follow the instructions and provide accurate information to ensure a successful installation. Once the installation is complete, you can configure the server farm by creating the necessary bindings, adding host names, and configuring other settings as required.
After the installation and setup, you can access Office Online Server by opening a web browser and entering the URL of the server. You will be prompted to sign in with your Microsoft account or organizational account, depending on your setup. Once signed in, you can start using the various Office Online applications, such as Word Online, Excel Online, PowerPoint Online, and more.
1.1 System Requirements
Before installing Microsoft Office Online Server 2019, ensure that your server meets the minimum system requirements. These requirements include an operating system running Windows Server 2016 or later, sufficient disk space, at least 16GB of RAM, and a processor with multiple cores. Additionally, you will need the following software installed:
- Windows Identity Foundation
- .NET Framework 4.5
- Visual C++ Redistributable for Visual Studio 2015
- Internet Information Services (IIS)
Make sure to install and configure these prerequisites before proceeding with the Office Online Server installation.
1.2 Installation Steps
The installation process for Microsoft Office Online Server 2019 involves the following steps:
- Prepare the server environment by installing the required software and enabling necessary features.
- Download the Office Online Server installation package from the Microsoft Download Center.
- Run the setup program and follow the on-screen instructions.
- Configure the server farm by creating bindings, adding host names, and specifying connection settings.
It is important to carefully read and follow the instructions provided during the installation process to ensure a successful installation.
1.3 Getting Started with Office Online Server
Once you have installed and set up Microsoft Office Online Server 2019, you can start using it to create, edit, and collaborate on Office documents. To get started, open a web browser and enter the URL of the server where Office Online Server is installed. You will be prompted to sign in with your Microsoft account or organizational account.
After signing in, you will see the Office Online Server homepage, which provides access to all the available applications, including Word Online, Excel Online, PowerPoint Online, and more. To create a new document, click on the corresponding application icon and select the desired document type.
Once you have opened a document, you can use the familiar Office interface to perform various tasks, such as formatting text, applying styles, inserting tables or pictures, and more. Office Online Server provides many of the same features and functionalities as the desktop version of Microsoft Office, making it easy to transition from one to the other.
2. Collaborating on Documents
One of the main advantages of using Microsoft Office Online Server 2019 is the ability to collaborate on documents in real-time. Whether you are working on a project with colleagues or collaborating with clients, Office Online Server offers powerful collaboration features that make it easy to work together efficiently.
To collaborate on a document, you can simply share it with others by providing them with the document’s URL or inviting them via email. Once they have access to the document, multiple users can simultaneously edit the document, making changes, leaving comments, and even chatting with each other within the document.
Office Online Server automatically saves changes made by different users in real-time, ensuring that everyone is working on the latest version of the document. You can also track and view the revision history of the document, allowing you to revert to previous versions if needed.
In addition to real-time collaboration, Office Online Server also provides granular control over document permissions. You can define who has access to the document, whether they can view, edit, or comment, and even set specific permissions for individual users or groups.
2.1 Sharing and Collaborating on Documents
To share a document and collaborate with others in Office Online Server, follow these steps:
- Open the document you want to share.
- Click on the Share button in the toolbar.
- Enter the email addresses of the people you want to share the document with.
- Select the desired permission level for each user (view, edit, or comment).
- Click on Send to share the document.
Once the document is shared, each recipient will receive an email invitation with a link to the document. They can access the document by clicking on the link and signing in with their Microsoft account or organizational account.
When multiple users are collaborating on a document, each user’s changes are highlighted with their name or user color, allowing for easy identification. Users can also leave comments on specific sections of the document, providing feedback or asking questions.
2.2 Version History and Tracking Changes
Office Online Server keeps a record of the revision history and changes made to a document, allowing you to access previous versions and track changes made by different users. To view the version history of a document and track changes, follow these steps:
- Open the document you want to view the version history of.
- Click on the File tab in the toolbar.
- Select Version history from the menu.
- View the list of previous versions and changes made by different users.
- Select a specific version to revert to if needed.
The version history allows you to see the evolution of the document over time and revert to a previous version if necessary. It also provides insight into who made changes and when they were made.
2.3 Document Permissions and Access Control
Office Online Server offers flexible document permissions and access control options, allowing you to define who can access a document, what actions they can perform (view, edit, comment), and even specific permissions for individual users or groups.
To manage document permissions and access control in Office Online Server, follow these steps:
- Open the document you want to manage permissions for.
- Click on the Share button in the toolbar.
- Click on the Advanced button to access advanced sharing settings.
- Specify the desired permissions for each user or group.
- Click on Apply to save the changes.
By managing document permissions, you can ensure that only authorized individuals have access to sensitive or confidential information, and control their level of interaction with the document.
3. Offline Access and Syncing
Although Office Online Server is a web-based application, it also provides offline access to your documents through the use of synchronization. Synchronization allows you to download a local copy of your documents to your computer, enabling you to work on them even when you are offline.
To enable offline access and syncing in Office Online Server, follow these steps:
- Open the document you want to enable offline access for.
- Click on the File tab in the toolbar.
- Select Save As.
- Choose a location on your computer to save the document.
- Click on Save.
Once the document is saved locally, you can access it even without an internet connection. When you reconnect to the internet, any changes made to the offline document will automatically sync with the online version, ensuring that both versions are up to date.
3.1 Editing Documents Offline
When working on a document offline in Office Online Server, you can make changes, format the text, insert images, and perform other editing tasks as usual. All changes made to the document will be saved locally and will automatically sync with the online version when you reconnect to the internet.
It is important to note that some advanced features or functionalities may be limited or unavailable when working offline, as they require an internet connection to function properly. However, the majority of basic editing tasks can be performed offline.
3.2 Syncing Changes with the Online Version
When you reconnect to the internet, Office Online Server automatically syncs any changes made to the offline document with the online version. This ensures that both versions are up to date and that any changes made by other users are also reflected in your document.
If conflicts occur due to simultaneous edits by multiple users, Office Online Server will attempt to merge the changes. In some cases, manual intervention may be required to resolve conflicts, such as choosing which version of a certain section to keep.
4. Advanced Features and Integrations
In addition to the basic features and functionalities, Microsoft Office Online Server 2019 offers several advanced features and integrations that enhance productivity and collaboration.
One of the notable features is the ability to integrate with other Microsoft services, such as OneDrive for Business and SharePoint Online. This integration allows you to access and save documents directly from and to these services, making it easy to organize and manage your files.
Office Online Server also supports co-authoring in real-time, which allows multiple users to simultaneously edit a document, spreadsheet, or presentation. Changes made by each user are instantly visible to others, enabling seamless collaboration and efficient work processes.
Another advanced feature is the seamless integration with other Office applications, both online and desktop versions. You can easily switch between Office Online Server and the desktop version of Microsoft Office, ensuring a consistent user experience and smooth transition.
4.1 Integration with OneDrive for Business and SharePoint Online
Microsoft Office Online Server seamlessly integrates with OneDrive for Business and SharePoint Online, allowing you to access and save documents directly from and to these services. To access documents stored in OneDrive for Business or SharePoint Online, follow these steps:
- Open Office Online Server.
- Click on the Open File button.
- Select the desired location from the list, such as OneDrive for Business or SharePoint Online.
- Navigate to the folder where the document is stored.
- Select the document you want to open.
Once the document is opened, you can edit, collaborate, and save changes directly to OneDrive for Business or SharePoint Online. This integration provides seamless access to your files, ensuring that you can work on them wherever you are.
4.2 Real-Time Co-Authoring
Office Online Server supports real-time co-authoring, which allows multiple users to simultaneously edit a document, spreadsheet, or presentation. To co-author a document in Office Online Server, follow these steps:
- Open the document you want to co-author.
- Share the document with others by providing them with the document’s URL.
- Invite users through email to collaborate on the document.
- Each user can open the document and make changes, which are instantly visible to others.
- Users can collaborate, leave comments, and

Using Microsoft Office Online Server 2019
Microsoft Office Online Server (OOS) 2019 is a powerful tool for professionals to access and collaborate on Office documents online. Here’s a step-by-step guide on how to use OOS 2019:
1. Installing OOS 2019
To begin, you need to install OOS 2019 on a server. Follow the installation instructions provided by Microsoft to set it up.
2. Configuring OOS 2019
After installation, you need to configure OOS 2019 according to your organization’s requirements. This includes setting up authentication, storage, and other settings. Refer to the official documentation for detailed instructions.
3. Accessing OOS 2019
Once configured, you can access OOS 2019 using a web browser. Open your preferred browser and enter the URL provided by your organization to access the OOS portal.
4. Collaborating on Documents
With OOS 2019, multiple users can collaborate on Office documents in real time. Simply open the desired document in the OOS portal, make your changes, and save it. Other users can see changes instantly.
5. Sharing and Permissions
You can control document sharing and permissions within the OOS portal. Decide who can view
Key Takeaways: How to Use Microsoft Office Online Server 2019
- Create, edit, and collaborate on documents using the online version of Microsoft Office.
- Access your files from anywhere with an internet connection, without needing to install Office on your computer.
- Use familiar Office applications such as Word, Excel, and PowerPoint online.
- Share and collaborate with others in real-time on documents, spreadsheets, and presentations.
- Enjoy the convenience of automatic syncing, so you always have the latest version of your documents.
Frequently Asked Questions
Here are some commonly asked questions about using Microsoft Office Online Server 2019:
1. How do I install Microsoft Office Online Server 2019?
To install Microsoft Office Online Server 2019, you need to follow these steps:
First, download the installation package from Microsoft’s official website. Then, run the setup file and follow the on-screen instructions to install the server. You will need to enter the relevant product key during the installation process. Once the installation is complete, configure the server settings and start using Microsoft Office Online Server 2019.
2. How can I access Microsoft Office Online Server 2019?
To access Microsoft Office Online Server 2019, you can use a web browser or any compatible Office application. Simply open your preferred browser or the Office application, and enter the URL or server address provided during the installation process. You may need to enter your credentials to log in, and once logged in, you can start using the Office Online Server features and functionalities.
3. What are some key features of Microsoft Office Online Server 2019?
Microsoft Office Online Server 2019 offers a wide range of features to enhance your productivity and collaboration. Some key features include:
— Real-time co-authoring: Collaborate with others on documents in real-time.
— Document sharing and permissions: Control who can access and edit your documents.
— Document versioning: Keep track of document versions and revert to previous versions if needed.
4. Can I integrate Microsoft Office Online Server 2019 with other applications?
Yes, you can integrate Microsoft Office Online Server 2019 with other compatible applications. It offers integration capabilities with SharePoint Server, Exchange Server, and other Microsoft Office products. This allows for seamless collaboration and communication across different platforms and applications.
5. How do I update Microsoft Office Online Server 2019?
To update Microsoft Office Online Server 2019, you need to follow these steps:
First, download the latest update package from Microsoft’s official website. Then, run the update file and follow the on-screen instructions to apply the update to your server. It is recommended to backup your server data before performing the update. Once the update is successfully installed, your Microsoft Office Online Server 2019 will be up to date with the latest features and security patches.
Using Microsoft Office Online Server 2019 can greatly enhance your productivity and collaboration capabilities. With this powerful tool, you can access and edit your documents, spreadsheets, and presentations from anywhere, allowing for seamless remote work and collaboration.
To get started, simply install and configure the Office Online Server on your network. Once set up, you can access the server through your web browser, eliminating the need for software installation on individual devices. This ensures that everyone in your organization can easily access and collaborate on documents, regardless of their location or the device they are using.
Additionally, Microsoft Office Online Server 2019 offers a wide range of features to improve your document management. You can easily share files with colleagues, control access permissions, and track changes made to documents in real-time. The server also provides robust security measures, ensuring that your confidential information remains protected.
By utilizing Microsoft Office Online Server 2019, you can increase your productivity, streamline collaboration, and enhance document management within your organization. Embrace the power of this versatile tool to transform the way you work and achieve greater efficiency in your daily tasks.

Как установить Office 2019. Как активировать корпоративный офис 2019.
Как оказалось больше не существует обычного интерфейса для девочек при установке корпоративной версии офиса 2019 .
Но всё оказалось настолько просто, что даже ебанутая документация Microsoft не смогла омрачить жизнь админам. Так как Microsoft забацала сайт для помощи в установке.
Есть несколько основных нюансов которые нужно будет запомнить и осознать, а в остальном всё делается одним батником
В статье используются программы:
AkelPad v4.9.8 Текстовый редактор оф. сайт
QIP Shot v3.4.3 Программа для создания скриншотов оф. сайт
Полезные ссылки:
Сайт для создания и скачивания созданного «xml-конфига»
Место для скачки «Office Deployment Tool (ODT)»
Таааааак… Вот основные нововведения (частично спизжено с WinITPro):
Основные особенности Office 2019, о которых нужно помнить перед началом развертыванием пакета в компании:
Приступим.
Скачиваем «Office Deployment Tool (ODT)», создаём папку «Papke» где нам удобно и есть 3 гигабайта места:
Запускаем «Office Deployment Tool (ODT)» и указываем путь к нашей папке «Papke».
Блядь, он же 2016. А вот и нет. Просто программистам зарплату выдали хуями:
Там появляются вот такие файлики:
Появился «setup.exe» он консольный. Видим файлики с ознакомительной конфигурацией. Можно их поглядеть но по факту киляем их к хуям (сегодня статья про хуи):
Отправляемся на сайт «Microsoft» и будем создавать конфигурацию:
Тут нужно собрать именно такую конфигурацию которую мы планируем устанавливать на рабочие станции (что бы по сто раз не делать одно и тоже). Конечно можно сделать несколько разных не тупи.
Рекомендую почитать что пишет «Microsoft», не смотря на то, что они слабо понимают что пишут.
Так, по поводу битности — раньше «Microsoft» всегда рекомендовало ставить именно «x86» несмотря на то, что было и «x64». Как сейчас не знаю, но если у вас есть плагины или софт который что-то автоматически открывает в офисе или генерирует документы из себя с помощь. шаблонов офиса, то ставить лучше «x86»! (А вообще, как всегда — не забываем всё тестировать перед внедрением в пердакшен).
Будим делать на примере «Стандарт» так как в 99% именно такой версии достаточно на
работе дома.
Так дальше будет куча картинок
без комментариев:
Вот тут пожалуй нужен комментарий. Так как это начальный конфиг и у нас ещё не скачан «дистрибутив» мы выбираем «Сеть доставки содержимого CDN Office» и галочки ставим, чтоб пользователи не пугались. Оно нам конечно пока не нужно. Но! Мы можем с этим конфигом и устанавливать сразу… но у нас другой план. Но галочки всё равно поставим. Пф…
Вот тут внимательно!
Сохранение некоторых продуктов Office и удаление всех остальных продуктов Office
Название организации на Русском не поддерживает (поддерживает). Потому потому что мы пилотки, и пилотками мы пишем наши коды:
Готово. Нажимаем «Экспорт» и сохраняем в нашу папку «Papke» под любым именем:
Открываем и смотрим, что у нас внутри нашего xml-конфига. «KMS-ключ» уже введён:
Так как мы сейчас предварительно скачиваем дистрибутив, то часть данных вообще не нужна. Но мы с помощью этого же конфига и будем устанавливать на рабочие станции. Мы не выбрали автоматическую активацию потому, что мы будем использовать не свой «KMS-сервер», а
пиратский альтернативный
Теперь запускам «CMD» консоль от Администратора!
Переходим в нашу в директорию «Papke»:
И пишем там «setup /download конфигурация.xml» (без кавычек):
Если
После нажатия ентер воооообще ничего визуально не произойдёт. Всё хорошо, не нужно жмакать кнопки, нужно ждать… минут по разному.
Смотрим в папке «Papke», что у нас там появляется:
О, появилась папочка «Office», там папка «Data» а в ней несколько фалов и папка с номером текущей актуальной (мы же скачиваем) версии офиса
Вот как только в папке появятся файлы, а в консоли курсор перейдёт на новую строку значит скачивание завершено:
Консоль не закрывать она ещё нужна.
Теперь нам нужно сделать копию нашего файла «Конфигурация.xml», назовём его «Конфигурация_локальная_установка.xml» и добавить туда локальный путь откуда мы будем устанавливать офис. Путь нужно указать до верхней папки в которой лежит «setup.exe». И кстати название организации можем написать на русском но без пробелов и кавычек:
Давайте теперь установим себе офис
Пишем в консоли: «Setup /configure Конфигурация_локальная_установка.xml» (без кавычек):
Готово, офис установился:
Теперь (можно и запустить офис можно и не запускать) нам нужно поменять путь к нашему «KMS-серверу» — пишем в консоли:
cd «C:\Program Files\Microsoft Office\Office16»
cscript ospp.vbs /sethst:kms.srv.crsoo.com
cscript ospp.vbs /act
Готово. Наш офис установлен и активирован. Без всяких кряков и отключений антивируса:
ЗЫ. Можно сделать батник, а в файле конфигурации указать путь к общей папке и распространить групповой политикой, или вот таким батником устанавливать локально:
@echo off
rem -----------------------------------------------------
rem Автоматическая установка офиса 2019 стандарт
rem и его активация
rem 			(С) (:Pro:) 29.06.2023
rem -----------------------------------------------------
BREAK off
cd /d "%~dp0"
setup.exe /configure Конфигурация_локальная_установка.xml
echo "Подождать окончания установки и нажать любую кнопку для активации"
pause
cd /D "C:\Program Files\Microsoft Office\Office16"
cscript ospp.vbs /sethst:kms.srv.crsoo.com
cscript ospp.vbs /act
echo "Готово =D"
pause
Положить его в корень папки с офисом (где лежит «setup.exe») и запускать его от Администратора.
Главное не забыть отредактировать «XML» указав пустой источник установки — вот так: SourcePath=»» (Если вы его указывали) Или вообще удалить эту часть.
Список «KMS-серверов»
Список «KMS-ключей»
GVLKs for Office