
Все способы:
- Способ 1: Проверка аудиоустройства
- Способ 2: Настройки микрофона
- Способ 3: Настройки сторонних программ
- Способ 4: Средство устранения неполадок
- Способ 5: Переустановка микрофона
- Способ 6: Обновлении или откат драйвера
- Вопросы и ответы: 0
Способ 1: Проверка аудиоустройства
Первым делом при таком поведении микрофона необходимо убедиться в исправности устройства и проверить качество его подключения. Если микрофон внешний, подключите его к другому компьютеру, планшету или телефону и протестируйте. Самопроизвольное изменение громкости и чувствительности, скорее всего, укажут на аппаратную неисправность записывающего устройства или его кабеля. Проверьте также качество подключения, если микрофон использует порт USB, подключите его к другому порту – USB 2.0 или USB 3.0.
Способ 2: Настройки микрофона
Наладьте системные настройки микрофона, в частности настройки автоматического усиления и регулирования уровня громкости.
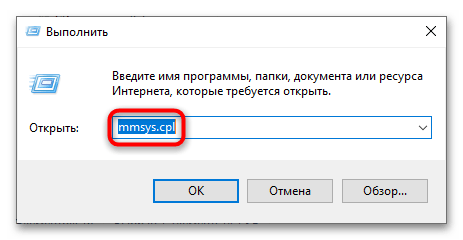
- Нажатием клавиш Win + R вызовите диалоговое окошко «Выполнить», введите в него команду
mmsys.cplи нажмите клавишу ввода, чтобы открыть апплет «Звук». - Переключитесь на вкладку «Запись», выберите записывающее устройство и нажмите кнопку «Свойства».
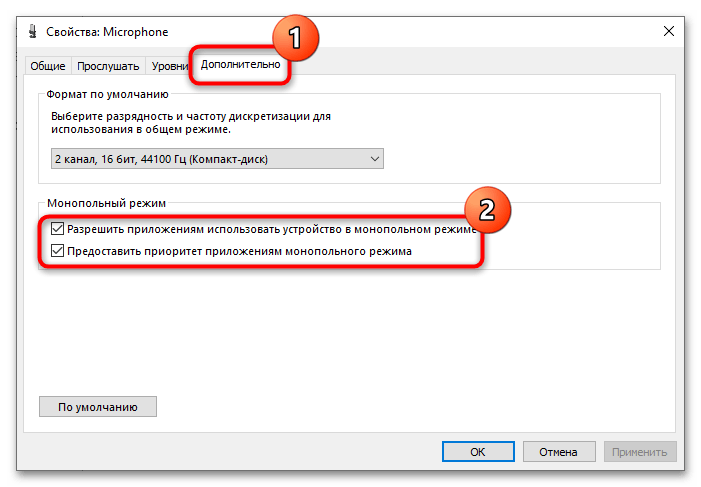
- Переключитесь на вкладку «Дополнительно» и отключите или, напротив, включите опции монопольного доступа, сохраните настройки и проверьте работу микрофона.
- Также посмотрите, имеется ли на вкладке «Уровни» опция «Усиление микрофона». Если да, установите ползунок в среднее положение или вовсе сдвиньте его влево (отключите усиление).


Способ 3: Настройки сторонних программ
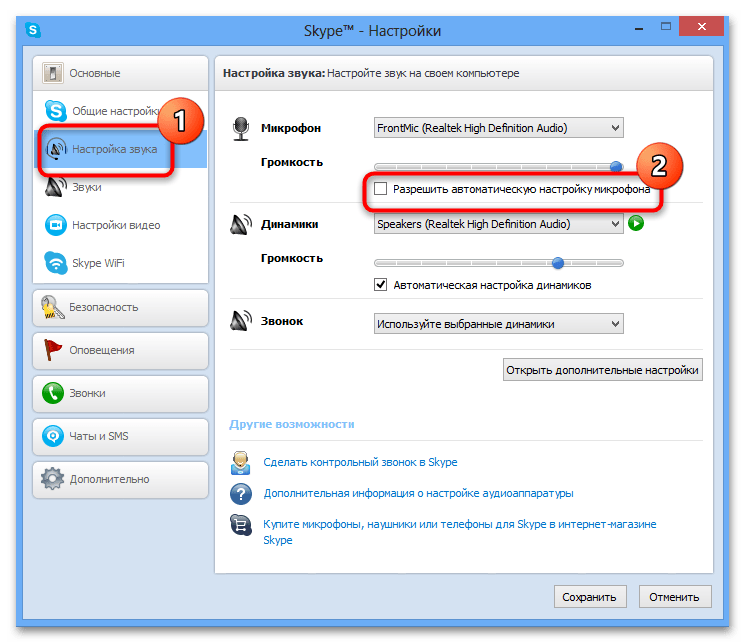
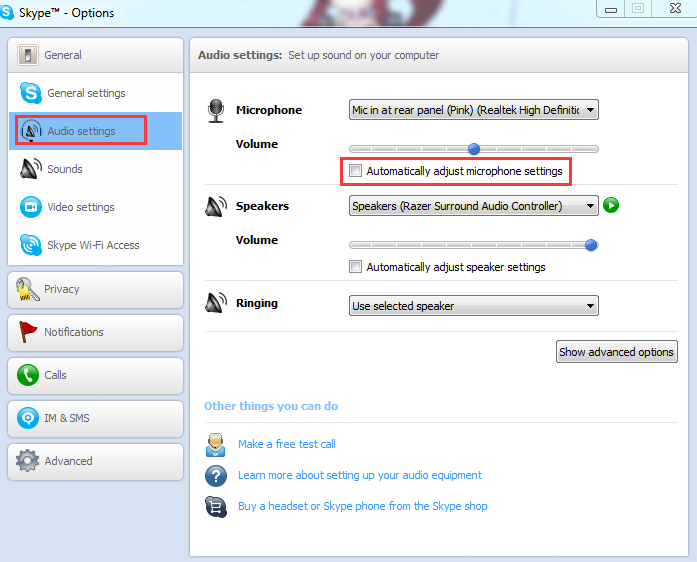
Если микрофон самопроизвольно меняет звук в интернет-мессенджерах, возможно, есть надобность отредактировать их звуковые настройки. Например, в Skype необходимо зайти в раздел «Настройки звука» и снять флажок с чекбокса «Разрешить автоматическую настройку микрофона».
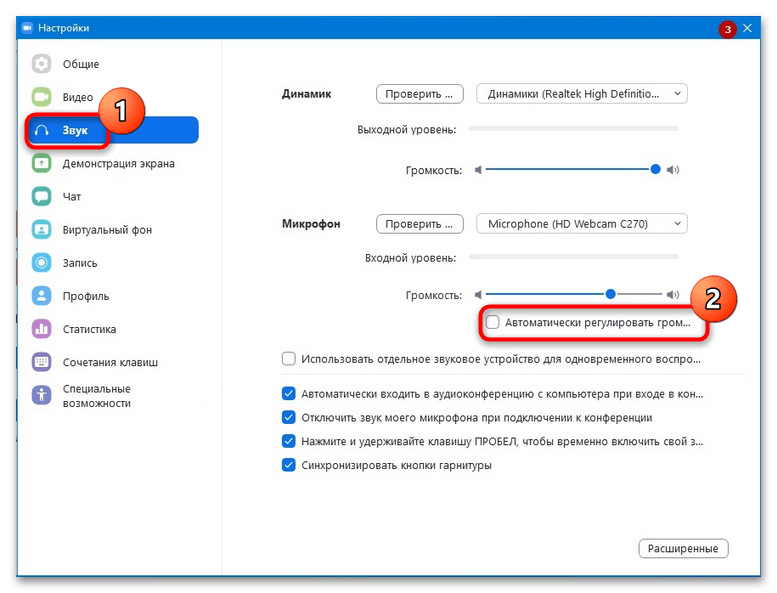
Аналогичная настройка имеется и в других программах для голосового общения. Так, в настройках приложения Zoom надо вызвать раздел «Звук» и снять флажок с пункта «Автоматически регулировать громкость микрофона».
Способ 4: Средство устранения неполадок
Запустите встроенное в Windows 10 «Средство устранения неполадок» со звуком — возможно, ему удастся обнаружить и устранить неисправность.
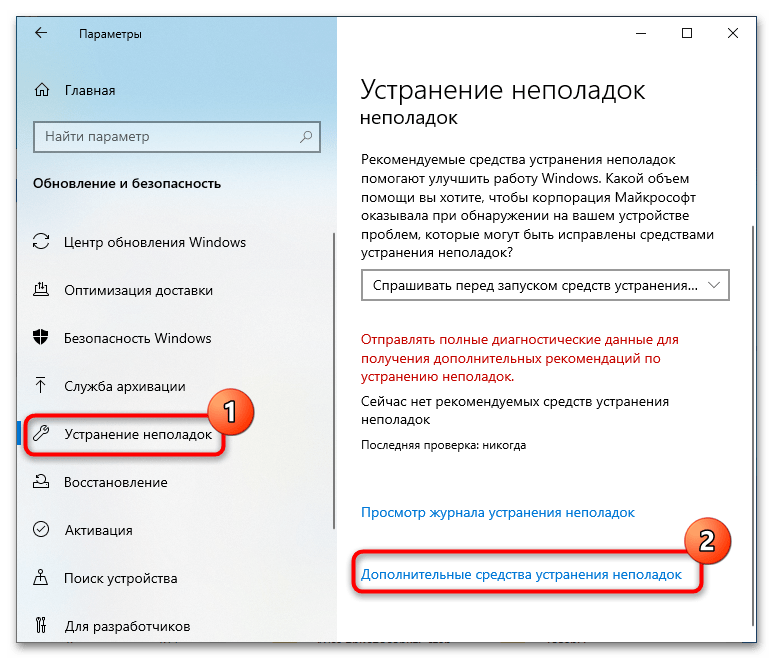
- Откройте приложение «Параметры», перейдите в раздел «Обновления и безопасность» → «Устранение неполадок» и нажмите ссылку «Дополнительные средства устранения неполадок».
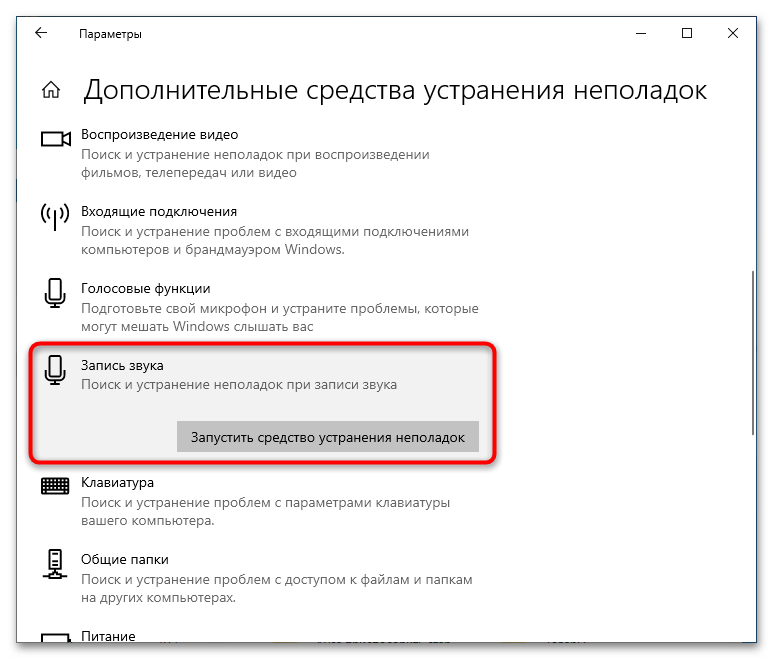
- Найдите в списке пункт «Запись звука», нажмите по нему, а затем — по появившейся кнопке «Запустить средство устранения неполадок».
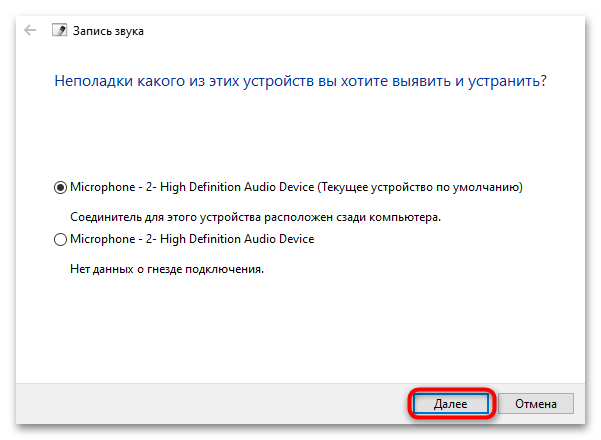
- Дождитесь завершения результата проверки, выберите из списка проблемное устройство, нажмите «Далее» и проследуйте предложенным рекомендациям мастера.
Способ 5: Переустановка микрофона
В некоторых случаях устранить неполадку в работе микрофона успешно удается путем его переустановки из «Диспетчера устройств».
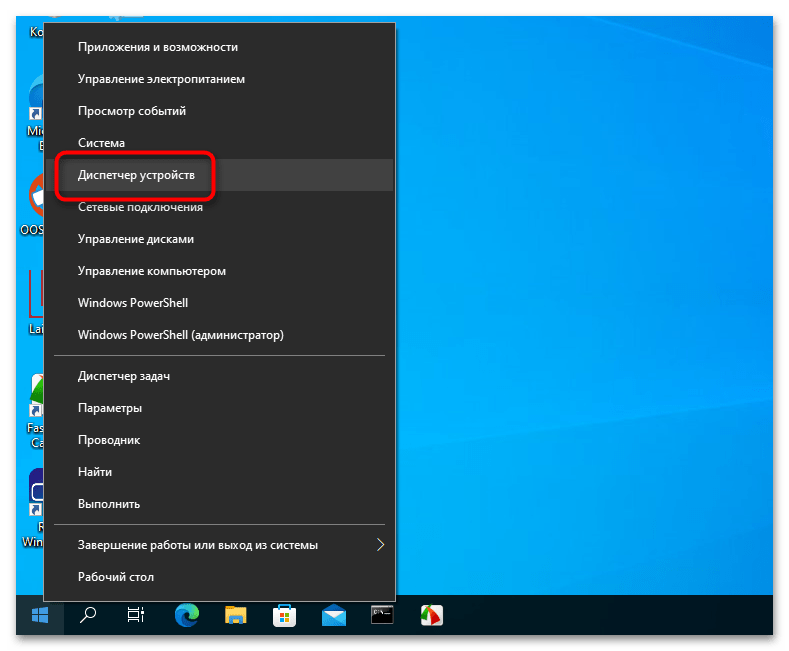
- Запустите «Диспетчер устройств» из контекстного меню кнопки «Пуск».
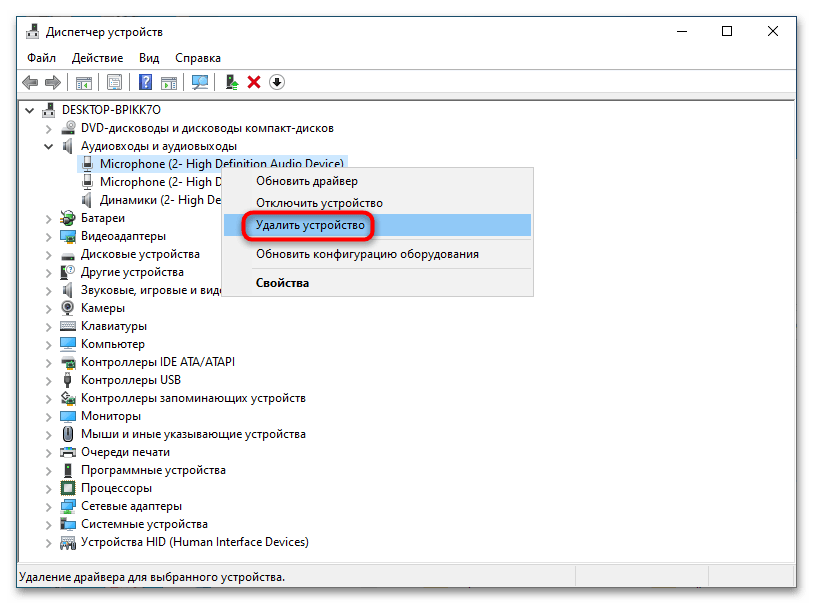
- Раскройте раздел «Аудиовходы и аудиовыходы», кликните правой кнопкой мыши по микрофону и выберите из контекстного меню «Удалить устройство».
- Подтвердите удаление в диалоговом окошке.
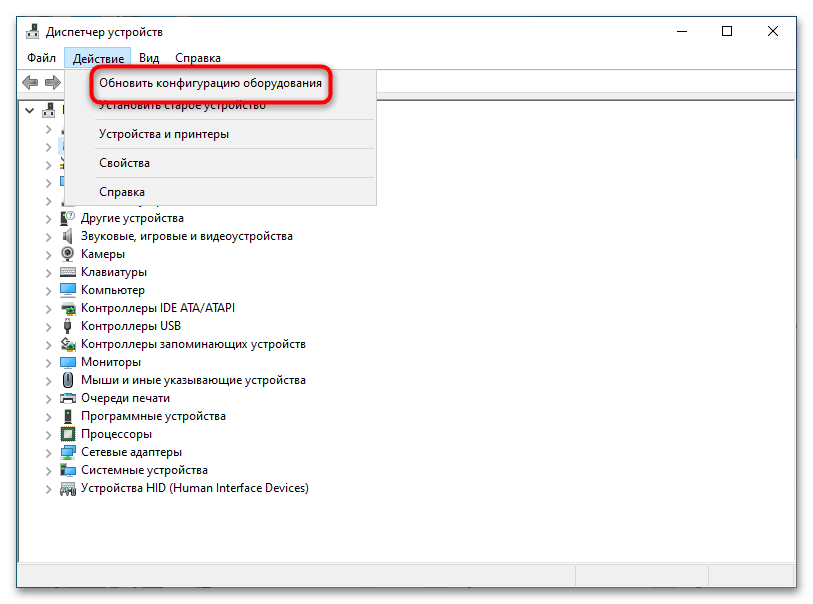
- Разверните меню «Действие» и выберите там «Обновить конфигурацию оборудования» либо перезагрузите компьютер.
Способ 6: Обновлении или откат драйвера
Помочь устранить проблемы с произвольно изменяющейся громкостью микрофона может обновление драйверов устройства, хоть и не всегда.
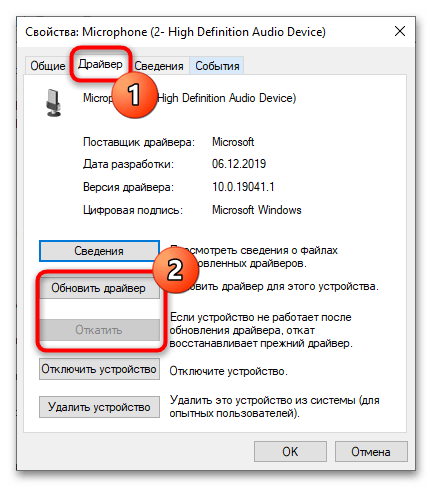
- Откройте «Диспетчер устройств» как было показано выше, перейдите в раздел «Аудиовходы и аудиовыходы» и кликните по микрофону дважды, чтобы открыть его «Свойства». Обратите внимание, что подключаемые по USB микрофоны могут находиться в других разделах «Диспетчера устройств», например в разделе «Звуковые, игровые и видеоустройства», а также в «Устройства HID».
- Переключитесь на вкладку «Драйвер», нажмите кнопку «Обновить драйвер», а затем проследуйте указаниям мастера. Если же проблемы начались после обновления драйверов, нажмите кнопку «Откатить» и точно так же выполните предложенные шаги.
После того как драйвер будет установлен или переустановлен, перезагрузите компьютер.
И еще один момент: в случае с профессиональными микрофонами драйвер необходимо брать с официального сайта производителя. Также обратите внимание, что конфигурация таких микрофонов выполняется не через системные настройки, а через собственную фирменную панель управления (при наличии на ПК соответствующих драйверов).
Наша группа в TelegramПолезные советы и помощь
A lot of users complain that their microphone level is automatically adjusting without any user intervention. How to stop microphone auto adjusting Windows 10? If you are trying to fix the issue, this post of MiniTool is what you need.
Why Microphone Level Keep Changing on Windows 10
A lot of users reported that the microphone levels keep changing on Windows 10. This issue often occurs when using much multiple applications or third-party programs. According to investigating many user reports, there are several situations that can cause Windows 10 microphone level keeps changing.
- It is commonly reported that Skype can cause microphone levels keep changing if it is configured to launch every system startup.
- Steam is also responsible for the automatic microphone adjustments issue. You can change its settings to fix the issue.
- If an application is allowed to take exclusive control of the microphone, it may automatically adjust the microphone levels.
- Outdated or corrupt microphone driver can cause the microphone issue as well.
Now, let’s see how to stop microphone auto adjusting Windows 10.
How to Stop Microphone Auto Adjusting Windows 10
Method 1. Prevent Skype from Auto Adjusting the Microphone
If Skype is configured by default to adjust the microphone levels, you may encounter the problem. So, it is necessary to prevent Skype from auto adjusting the microphone. Here’s how to do that:
Step 1. Open the Skype UWP client, and then click the Action button (three-dot icon) at the upper left corner and select Settings from the context menu.
Tip: If you are using the desktop version, you can navigate to Tools > Options from the ribbon bar.
Step 2. Select the Audio &Video tab from the pane, and then scroll down to the Microphone section and untick the checkbox for Automatically adjust microphone settings.
If you are using the Desktop version, you can go to the Audio Settings and uncheck the box of Automatically adjust microphone settings.
Now, you can start your computer and see if the issue “mic volume keeps changing” still persists.
Method 2. Prevent Steam from Auto Adjusting the Microphone
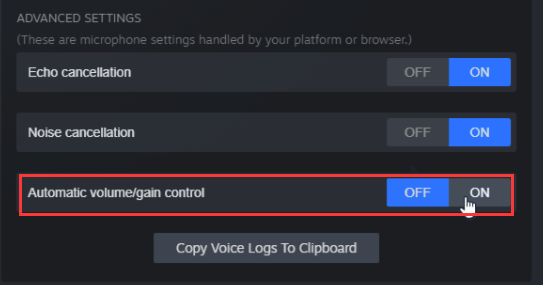
As mentioned above, Steam is another application that may cause microphone levels keep changing. If you are using the Steam client and configure it to launch automatically at startup, you need to disable the Automatic volume settings. For that:
Step 1. Log in to your Steam client and click on the Friends & Chat icon at the bottom right corner of the window.
Step 2. Click on the Gear icon at the upper right corner and select the Settings menu.
Step 3. In the Friends List settings, click on the Voice tab and scroll down to the bottom of the screen and click on Show Advanced Settings.
Step 4. Toggle off the switch of Automatic volume/gain control.
Restart Steam and see if Windows 10 microphone level keeps changing.
Method 3. Reconfigure the Microphone Settings
How to stop microphone auto adjusting Windows 10? Another effective method is to reconfigure the microphone settings. By doing so, no apps are allowed to take exclusive control of the microphone. Here’s how:
Note: This operation might cause some other voice features to function improperly. If this method fails to work, you’d better reverse its settings.
Step 1. Press Win + R keys to open the Run box, and then type mmsys.cpl in it and hit Enter.
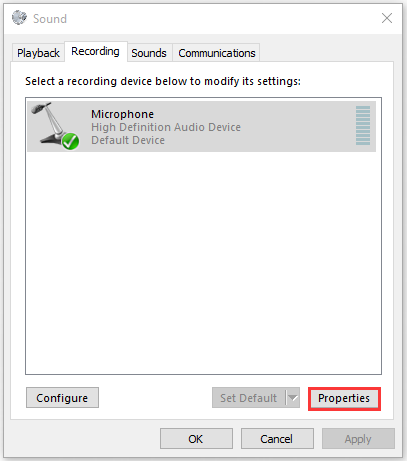
Step 2. Go to the Recording tab, and then select the affected microphone and click on Properties.
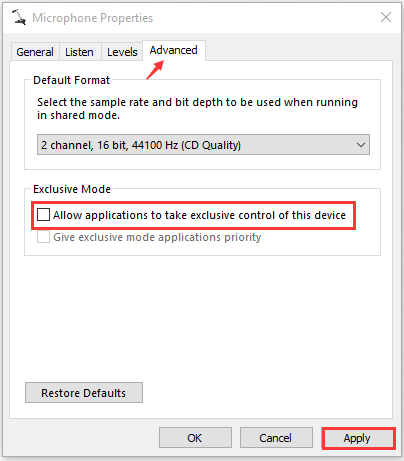
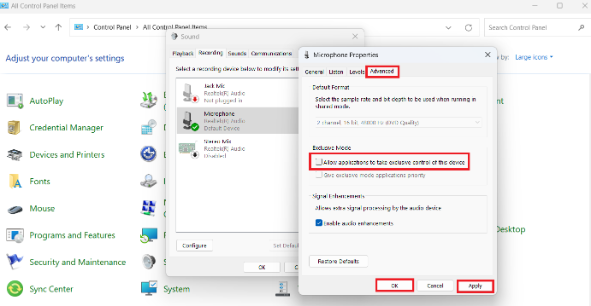
Step 3. Go to the Advanced tab inside the Properties window and then untick the checkbox next to Allow applications to take exclusive control of this device.
Step 4. Click on the Apply button to execute the changes.
After that, restart your computer and see if it stops microphone auto adjusting Windows 10
Method 4. Change the Microphone Levels Manually
Another quick fix is to set a default value for your microphone manually. This method has been proven to be useful. Try it now.
Step 1. Open the Sound window through the above method and go to the Recording tab. Alternatively, you can right-click the Speaker icon at the bottom of the notification screen and select Sound from the elevated menu.
Step 2. Select the affected microphone/headset and click on Properties.
Step 3. Navigate to the Levels tab inside the Microphone Properties window, and then adjust the value of the microphone via the slider and click on Apply to save the changes.

Method 5. Update the Microphone Driver
An outdated or corrupted audio driver is also responsible for the issue. To fix the problem, you can try updating the audio driver to the latest build. Here’s a quick guide:
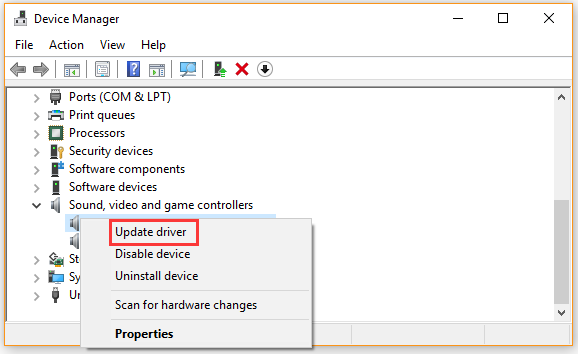
Step 1. Right-click the Start button and select Device Manager from the context menu.
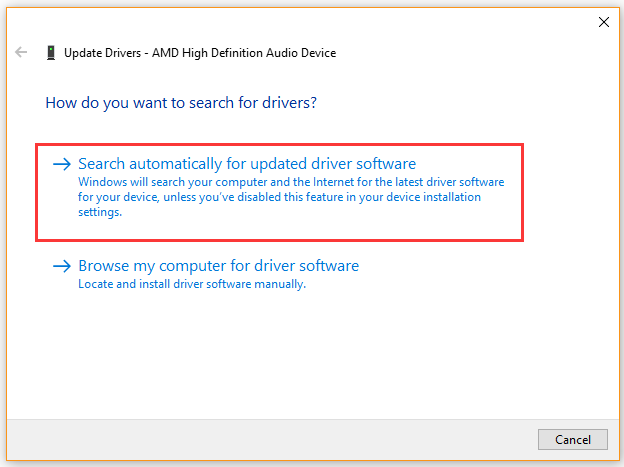
Step 2. Expand the Sound, video and game controllers category, and then right-click the audio device that needs to update and select Update Driver.
Step 3. Select the Search automatically for updated driver software option. Then follow the on-screen prompts to complete this update. Now, Windows will automatically any available updated driver and install it for you.
Once the update finishes, reboot your computer and see if the auto adjustment issue still persists.
How to stop microphone auto adjusting Windows 10? The top 5 methods have been introduced to you. Now, it’s your turn to have a try.
Table of contents
- Why Is Microphone Resetting to 0 or 100 Volume on Windows 10?
- How to Resolve Microphone Resetting to 0 or 100 Volume on Windows 10
- How to Fix Microphone Keeps Resetting to 0 or 100 Volume on Windows 10
- Fix 1: Run the audio/speech troubleshooter
- Fix 2: Check for hardware issues
- Fix 3: Update or reinstall the audio/microphone driver from the manufacturer
- Fix 4: Stop other apps from controlling the microphone
- Fix 5: Change audio recording settings
- Fix 6: Uninstall audio control software
- Fix 7: Repair your system files through an SFC scan
- Final Word
Sometimes, Microsoft Volume keeps adjusting without the user’s authority. For example, users have reported microphone volume resetting to 0 or 100 on Windows 10 with no apparent trigger.
Users say that the microphone adjusting or resetting can affect multiple applications on the operating system, both built-in and third party.
This issue can be annoying because it can prevent you from conversing with fellow gamers, recording audio, communicating with your friends or colleagues online, etc.
Fortunately, you can fix it. So, if your microphone volume keeps resetting on Windows 10, this article will show you why the issue is occurring and what to do about it.
Why Is Microphone Resetting to 0 or 100 Volume on Windows 10?
If your Microphone resets to 0 or 100 volume, the problem can be one or more of the following situations:
- A problematic audio driver, such as outdated or corrupted audio drivers
- Incorrect microphone, audio, or PC settings
- The computer’s hardware failures
- Malware infection on your PC
- A background application is taking control of your microphone settings
- Corrupted, damaged, or missing system files
You wouldn’t automatically know what is causing your Microphone to auto-adjust or reset to 0 or 100 in Windows 10. However, you can diagnose the problem and find a solution.
How to Resolve Microphone Resetting to 0 or 100 Volume on Windows 10
If your computer’s microphone keeps resetting to 0 or 100 volume, you can start by restarting your PC. Computer errors can occur because of system or app conflicts, and rebooting the system can reset these apps and stop the conflicts.
If rebooting the system doesn’t work, you can scan it for malware using a quality anti-malware solution. Windows Defender is a good anti-virus, but some malware can bypass its security stops.
A quality third-party security tool like Auslogics Anti-Malware can help you find any malware residing in your PC.
You can also try plugging your microphone jack pinout on and off or plugging it into a different port to see if there are some hardware problems.
If the microphone keeps resetting after trying these solutions, you may need to conduct the technical troubleshooting solutions below.
How to Fix Microphone Keeps Resetting to 0 or 100 Volume on Windows 10
The following troubleshooting solutions will show you how to fix a microphone that keeps resetting to 0 or 100. You’ll also learn how to fix a microphone volume that won’t stay set on Windows 10.
Let’s dive in!
Fix 1: Run the audio/speech troubleshooter
When you experience the issue of the Microphone keeps resetting volume on Windows 10, the first thing to do is run the Speech and Recording Audio troubleshooters.
These are built-in Windows troubleshooters that will detect the problem and fix them automatically.
To run the speech troubleshooter, follow the steps below:
- Press the
Windows key + Ito open the Settings app directly. - Select the Update & Security tile and click on it.
- Now, on the left pane, click Troubleshoot.
- Next, click the Additional troubleshooters link on the right pane.
- From the list of apps and programs, search for Recording Audio under Find and fix problems.
- Click on the option, then click Run the Troubleshooter.
- Wait for the troubleshooter to run and follow the onscreen instructions to fix the problem if found.
If the problem persists, you can then proceed and run Audio Troubleshooter from the same window.
Here’s what to do:
- Press the
Windows key + Ito launch Settings directly. - Select the Update & Security tile and click on it.
- Now, on the left pane, click Troubleshoot.
- Next, click the Additional troubleshooters link on the right pane.
- Look for Playing Audio under Get up and Running from the list of apps and programs.
- Click on the option, then click Run the Troubleshooter.
- Wait for the troubleshooter to run and follow the onscreen instructions to fix the problem if found.
If the speech/audio troubleshooter fails to solve the problem, proceed to the next solution and see if you can find help.
Also Read: Quick & Easy: How to Increase Microphone Volume on Windows 10 and 11?
Fix 2: Check for hardware issues
Sometimes, the problem might be in your hardware devices. The microphone jack pinout port on your device might have been damaged.
You can try connecting the microphone to another jack port or to another computer to see if it works fine.
If the microphone fails to work on other ports or shows faulty features like adjusting the volume, it might be the problem.
In this case, you can dispose of it and find a new microphone that works fine.
If the microphone works fine on another jack port or computer, perhaps your device has technical issues that need to be addressed, such as driver issues.
Proceed to the next section to see how to update your drivers.
Fix 3: Update or reinstall the audio/microphone driver from the manufacturer
As we’ve previously mentioned, the microphone keeps resetting to volume 0 or 100 could be a driver issue. Updating this driver can help you fix the problem.
If the microphone you’re using is an external device, such as an NVIDIA microphone, you can download its latest drivers from the official manufacturer’s website.
If you are using a Windows built-in Microsoft microphone, you can install the latest audio drivers from Intel.com.
You will simply go to the website and find the latest audio drivers for your particular PC specs.
If you’re not sure about your PC specifications, find them out using the following steps.
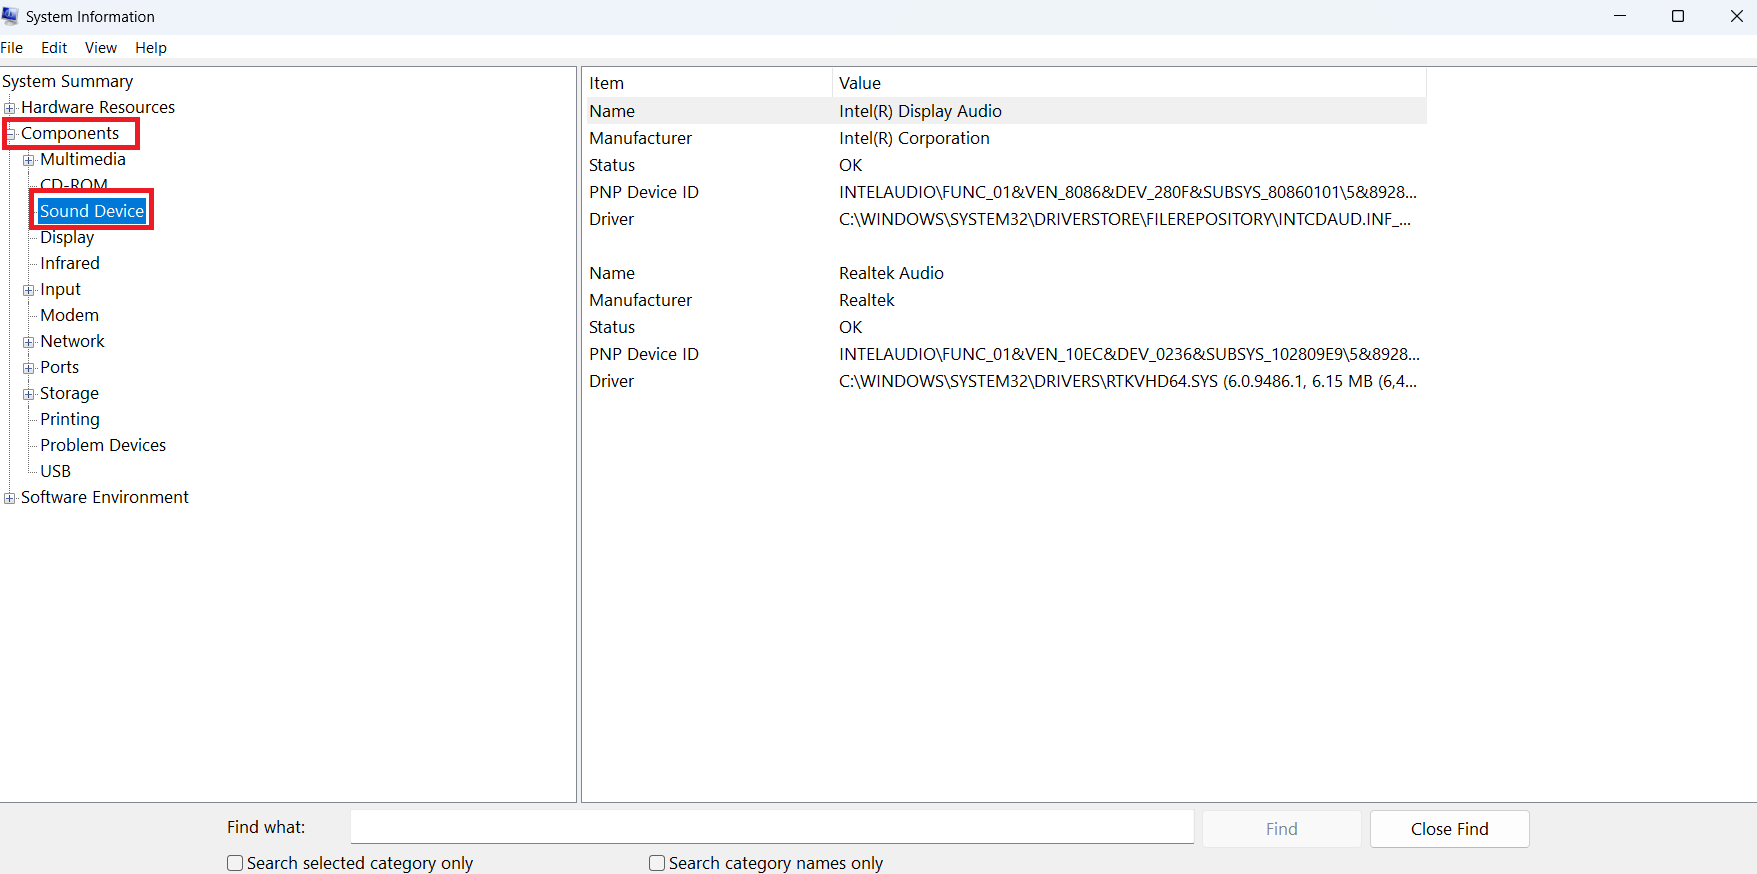
- Press the Windows key and type msinfo32.
- Select the top result to open the System Information app.
- On the left pane, select Components and expand it.
- See the Sound Device and click on it.
- Next, check the specifications of the Sound device on the right-pane.
- Note down the Driver ID and version.
- Now, with this information, you can check the manufacturer’s site and find the update that matches your system’s driver specifications.
- Download and install it on your system and see if it solves the problem.
Alternatively, to update the drivers use the following steps.
- Press the Windows key and type dxdiag.
- Select the top result to open the DirectX Diagnostic Tool.
- Go to the Sound tab.
- Check the Sound Device and click on it.

- Under Drivers, note down the Driver name and version.
- Now, with this information, you can check the manufacturer’s site and find the update that matches your system’s driver specifications.
- Download and install it on your system and see if it solves the problem.
Download Auslogics Driver Updater
Prevent hardware errors and ensure problem-free device operation with this advanced tool that detects outdated drivers and safely gets them updated.
Related: Auslogics Driver Updater: Update Your Drivers in One Click!
Fix 4: Stop other apps from controlling the microphone
If you have third-party apps like Skype, Steam, and Discord, there is a chance that they’re causing problems to your microphone.
Windows gives you an option to allow or restrict apps from accessing your microphone, which can help you stop the problem you’re facing.
To stop other apps from controlling your microphone, use the following steps:
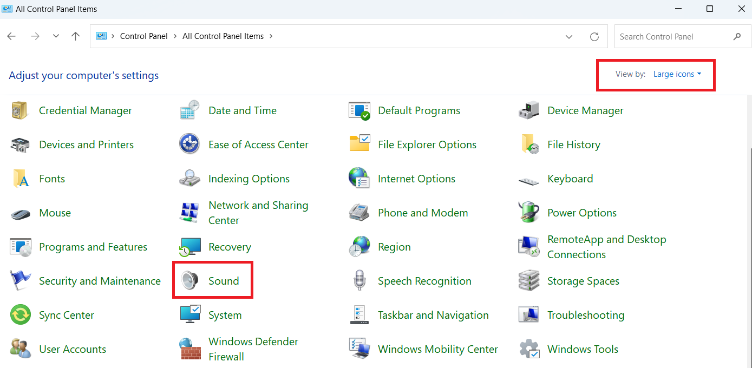
- Press the Windows key on your keyboard.
- Type control and select the Control Panel from the results.
- In the Control Panel window, locate Sound (if it opens in Large icons) and click on it.
- Now, go to the Recording tab.
- Double-click on the microphone option to open its properties.
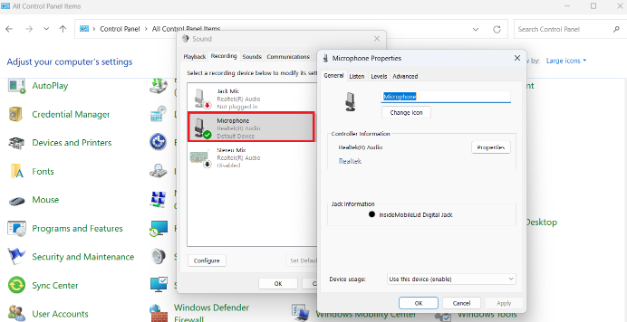
- In the microphone properties windows, go to the Advanced tab.
- Uncheck the box next to Allow applications to take exclusive control of this device.
- Once done, click Apply, then click OK.
This will lock the microphone volume and prevent other apps from controlling it.
You can then exit the Control Panel and see if the microphone issue has been solved.
Related: Windows 10 Control Panel: Where to Find It and How to Use It
Fix 5: Change audio recording settings
If your PC’s Microphone is not set as the device’s default recording device, you may not be able to record audio using the Microphone.
If you’ve set this before and it won’t stay set, you can try again to set it using the following steps:
- Go to the Volume Control icon at the bottom-right corner of your screen.
- Right-click it, then select Open Sound Settings from the list.
- Next, click on the Manage Sound Devices link below Troubleshoot.
- Now under the Input device category, check if you have any other device enabled apart from your Microphone.
- If there are any other devices, select them, and click on the Disable option.
- This will leave only your device’s microphone as the only device to record Sound.
- You can now try to use the microphone and see if the problem persists.
If the problem persists, you can either update the device or conduct other diagnoses to know the exact problem and fix it using the methods we’ve provided below.
Fix 6: Uninstall audio control software
You may be experiencing the volume resetting problem because of audio control software on your PC. So, uninstalling it can help you fix the problem.
Follow the steps below to uninstall the audio control software:
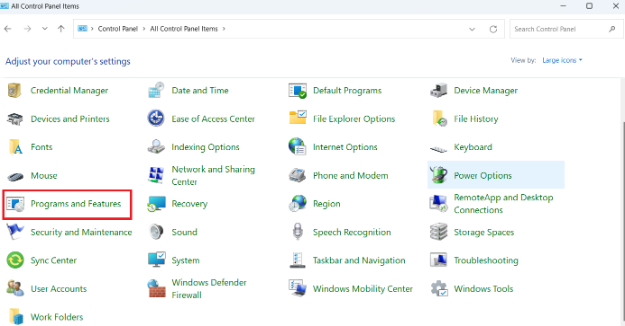
- Press the Windows logo key and type control.
- Select Control Panel from the results.
- Next, select the Programs and Features option.
- Now, search for any audio control software from the list of your installed programs.
- If you find such software, click on it, then select Uninstall.
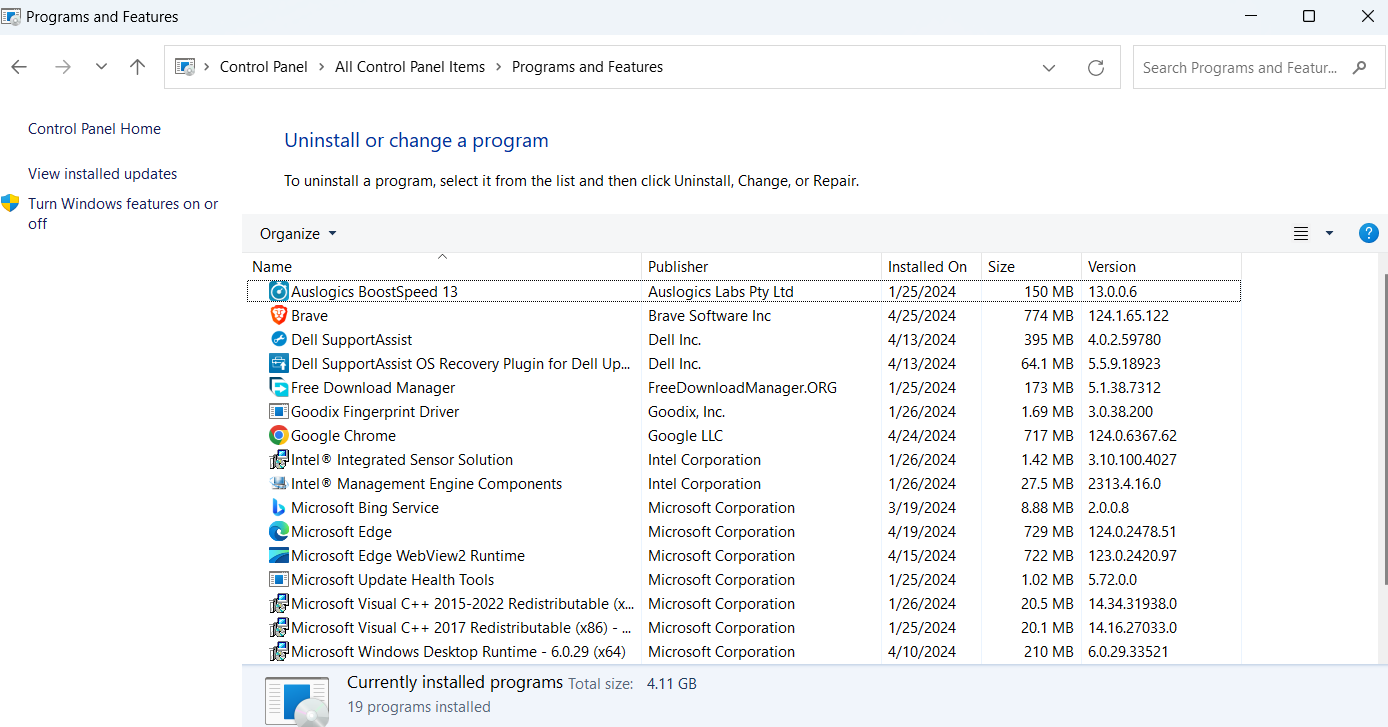
Wait for the uninstallation to be complete, then restart your computer. Check if the “Microphone volume keeps resetting to 100 on Windows 10” error has been solved.
Also Read: How to Fix an Auto Muting Microphone on Windows 10/11: Quick Solution Here
Fix 7: Repair your system files through an SFC scan
If your computer has corrupted, missing, outdated system files, you may experience some PC issues.
If this is the case, then the microphone volume may keep resetting to 0 or 100. An SFC scan can help you repair these system files.
To run an SFC scan follows these steps:
- Launch Command Prompt as an administrator:
- Press the Windows key and type cmd.
- Right-click Command Prompt, then select Run as Administrator from the list.
- Once the elevated Command Prompt opens, type the following command and press Enter:
sfc/ scannow
- Now, wait for the command to run and fix issues automatically.

Once done, restart your PC and see if the problem has been solved.
PRO TIP
Keep your devices running smoothly with Auslogics Driver Updater . This powerful tool scans your system for outdated drivers and updates them to the latest versions, ensuring optimal performance and preventing hardware errors.
Also Read: Windows Command Prompt: 28 Most Useful CMD Commands [with Examples]
Final Word
We believe these solutions will help you if your microphone volume keeps resetting to 0 or 100 on Windows 10. If we’ve left out other solutions that can help solve the error, please let us know in the comments section.
If you use a Windows 11/10 computer to avidly communicate with other people, you may have been notified by your peers about fluctuations in your Microphone sound levels despite you not interfering with them, and fluctuating microphone audio levels may not suit everyone. You can lock the microphone volume and stop this automatic adjustment.
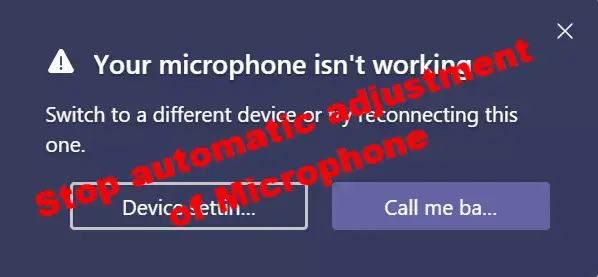
Stop automatic adjustment of Microphone in Windows 11/10
In this post, we will be showing you how you can restrict Windows from automatically resetting or adjusting the audio levels of your microphone.
- Run the Audio Troubleshooter
- Run Speech troubleshooter
- How to lock microphone volume
- Modify your sound settings
- Check for malware on your computer
- Troubleshoot in Clean Boot State
1] Run the Audio Troubleshooter
You’re suggested to run the Audio Troubleshooter before going ahead with any of the workarounds. In order to do so, you have to open your Windows settings and visit the ‘Update and Security’ page.
Here, go to Troubleshoot, click Additional Troubleshooter under Get up and running look for Playing Audio. Clicking on that will give you an option to run the Troubleshooter. Do so and check if the issue has been resolved. You should also try plugging your microphone on and off, or plugging it into a different port.
2] Run Speech troubleshooter
On most occasions, Windows 10 will automatically detect and resolve the problem that persists with the microphone. All you must do is run the Speech troubleshooter from the Troubleshooters page.
3] How to lock microphone volume
Right-click on the speaker icon available in the System Tray and from the context menu that shows up, click on Sound.
Click on Recording and double-tap on the microphone that is in use to open its properties. From the tabs on top, click on Advanced and uncheck the box that says ‘Allow applications to take exclusive control of this device‘.
Check if the issue still persists after applying these changes and exiting the box.
Related: Volume keeps muting automatically
4] Modify your sound settings
There are several settings that may be triggering fluctuating microphone levels on your computer, so you can try disabling them to rid yourself of this problem.
Open the Sound properties box again from the Speaker icon on the System Tray and click on communications.
Here, under ‘When Windows detects communication activity,’ check ‘Do Nothing‘.
Open the properties box of your microphone again and under Levels, adjust the microphone level to be at least 75.
From the tabs on top, click on Enhancement and enable the ‘Disable all sound effects‘ feature.
Also, make sure that you’ve un-checked the ‘Acoustic echo cancellation‘.
Similar: Microphone keeps resetting to 0 or 100 volume.
5] Check for Malware on your computer
It is important to make sure that your computer isn’t being plagued by malware, which is eventually causing you all this trouble with your microphone. You can make sure that that’s not the case by running a Malware scan.
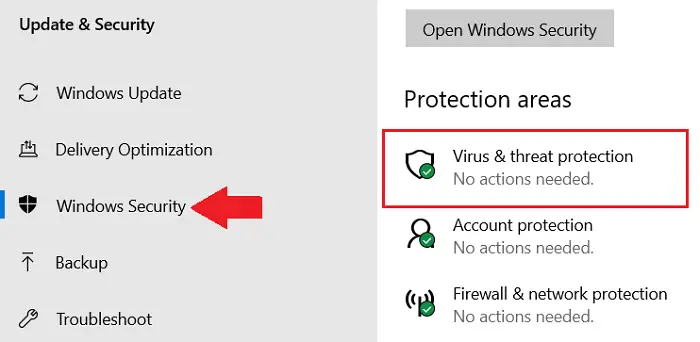
In order to get things started, open your Windows Settings by pressing the Windows and ‘I’ keys together and go to Update and Security. From the options on the left-side pane, click on Windows Security and select ‘Virus and Threat protection’ under Protection Areas. This will open a separate Windows security window, where you have to click on Scan options under Quick scan.
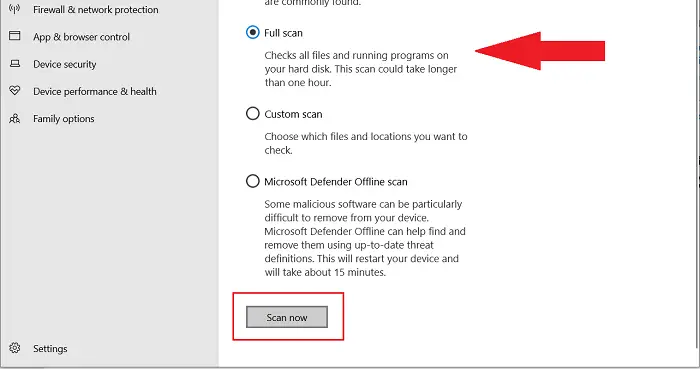
From the Scan options, select Full scan and initiate the process by clicking on Scan Now. Wait for the scan to complete and hopefully, the issue would be resolved at your end.
6] Troubleshoot in Clean Boot state
It is possible that this issue is being caused by a third-party app that has administrator privileges, without us knowing. You can try performing a clean boot to ensure if it’s a third-party app that is at play here. Before you begin with the process, it is important that you are logged into Windows with an account that has administrative privileges.
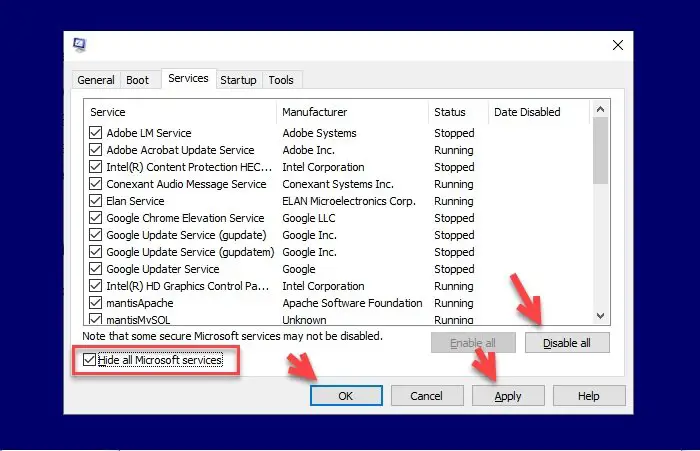
Open the Run command and in the empty space type ‘msconfig.’ In the system configurations window, you’ll find a couple of tabs on top. Select the services tab. First things first, check the box that says ‘Hide all Microsoft services.’ This will help you cut back on the services displayed. Click on Disable all on the bottom-right, which will stop any third-party services from running the next time you boot your system. Apply these changes and then visit the Startup tab right next to Services.
The only option here says Open Task Manager, clicking on which will take you to Task Manager’s Startup tab. Here, individually select and disable each service to stop it from running at the next startup.
Once you’re done disabling all the processes, restart your computer to troubleshoot it in a clean boot state.
You need to enable one Service after another and reboot into Clean Boot, till the problem reappears.
In this way, you will be able to identify the process that is causing problems.
Related: Microphone not working in Windows 10.