
Node.js это кроссплатформенная среда исполнения, позволяющая запускать серверные (бэкенд) приложения JavaScript вне браузера. В этой статье мы рассмотрим, как установить фреймворк Node.js и его менеджер пакетов NPM в Windows.
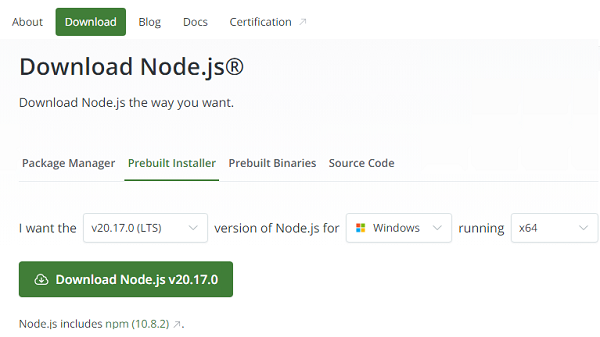
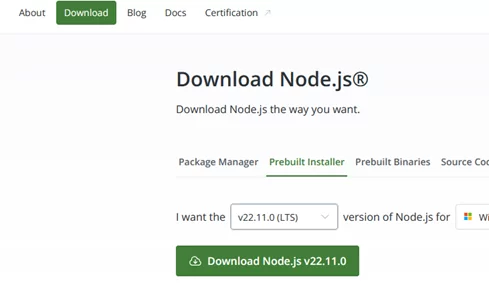
Для установки Node.js и NPM можно скачать с официального сайта готовый установщик в виде MSI пакета (https://nodejs.org/en/download/prebuilt-installer). На сайте доступны MSI пакеты для x86 и x64 версий Windows. Если нет специальных требования, обычно рекомендуется устанавливать LTS версию Node.js (Long Term Support) .
Запустите установку из MSI пакета с настройками по умолчанию.
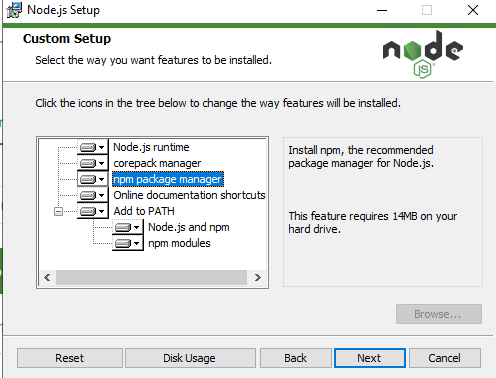
MSI пакет содержит не только сам фреймоворк Node.js, но и также менеджер пакетов NPM, который устанадливается по-умолчанию. Установщик позволяет автоматически добавить пути к директориям node.js и npm в переменные окружения Windows.
Встроенный в node.js менеджер Node Package Manager (NPM), используется для загрузки и установки сторонних модулей из внешних репозиториев.
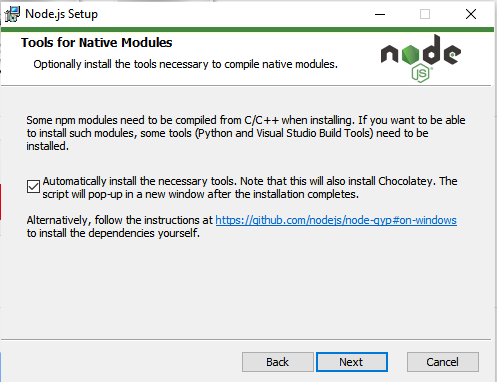
Для компиляции некоторых модулей, установленных через npm, могут потребоваться среды разработки python и Visual Studio. Вы можете разрешить NPM автоматически устанавливать необходимые инструменты, либо установить их в дальнейшем вручную через Chocolatey (https://github.com/nodejs/node-gyp#on-windows).

После окончания установки, проверьте что Node.js и npm установлены. Выполните следующие команды, чтобы вывести версии инструментов:
node -v
npm -v
Также для установки Node.js можно использовать менеджер пакетов WinGet, который установлен по-умолчанию в Windows 10 и 11.
winget install OpenJS.NodeJS.LTS

Эта команда автоматически скачает и в тихом режиме установит последнюю LTS версию Node.js.
Перезапустите консоль cmd/powershell, чтобы обновить пути в переменных окружения. Проверьте, что node.js и NPM успешно установлены и пути к ним прописаны в переменной окружения PATH:
(Get-ChildItem env:Path).value -split ";"

C:\Program Files\nodejs\
C:\Users\%username%\AppData\Roaming\npm
Также можно установить Node.js в Windows с помощью пакетного менеджера Chocolatey:
Choco install -y nodejs.install
Проверить работу Node.js можно с помощью простого JavaScript скрипта. Создайте текстовый файл hello.js с кодом:
console.log("Hello, world!")
Запустите скрипт с помощью node.js:
node hello.js
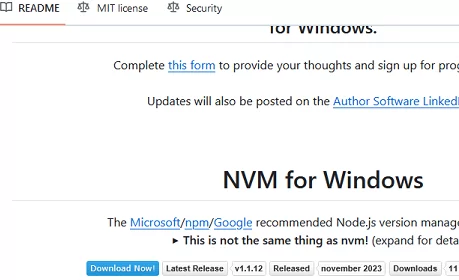
Для серверных развертываний Node.js, рекомендуется использовать менеджер версий NVM (Node Version Manager) для установки Node.js и npm.
NVM позволяет установить на компьютере несколько версию Node.js и переключаться между ними. Кроме того, в отличии от MSI установщика Node.js, NPM не использует профиль текущего пользователя для хранения данных. Это позволит исключить проблемы с путями и разрешениями при запуске сервисов.
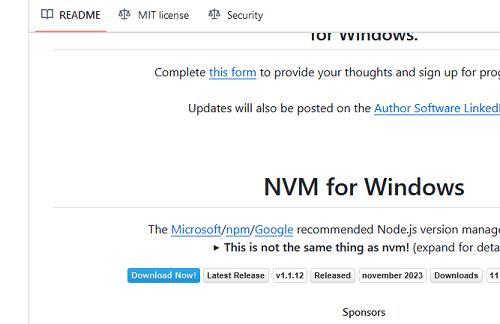
Для установки NVM в Windows воспользуетесь пакетом NVM for Windows ( https://github.com/coreybutler/nvm-windows). Скачайте файл nvm-setup.exe и запустите установку.
Для установки определенной версии Node.js через NVM, используется команда:
nvm install 21
Вывести список установленных версий Node:
nvm list
Чтобы переключиться между версиями:
nvm use 20.11.0
При переключении версий скрипт nvm подменяет путь до Node.js в переменной PATH.
#статьи
-
0
Разбираемся, как работает пакет с пакетами для JavaScript.
Иллюстрация: Катя Павловская для Skillbox Media
Филолог и технарь, пишет об IT так, что поймут даже новички. Коммерческий редактор, автор технических статей для vc.ru и «Хабра».
Если вы начали разрабатывать проект на Node.js, то уже наверняка заметили, что работа с библиотеками может быть сложной и выматывающей. Постоянно надо следить за тем, чтобы модули проекта не терялись, вовремя обновлялись и не конфликтовали с другими пакетами. В этой статье рассказываем про NPM — пакетный менеджер, который упрощает работу со сторонними библиотеками в JavaScript.

ЭКСПЕРТ
Эксперт по фронтенд-разработке в Skillbox, фрилансер.
Содержание
- Знакомство с NPM
- Загрузка и установка пакетов
- Установка зависимостей
- Автоматическое добавление зависимостей
- Обновление пакетов
- Загрузка пакетов определённых версий
- Запуск скриптов
- Файл package.json
- Файл package-lock.json
NPM (Node Package Manager) — менеджер пакетов для программной платформы Node.js. С его помощью можно устанавливать библиотеки, управлять зависимостями и редактировать метаданные проекта.
Перед началом работы с NPM надо скачать и установить пакет Node.js с официального сайта проекта. После этого нужно запустить любой интерфейс командной строки — приложение для ввода команд. Это может быть PowerShell, терминал, консоль или командная строка. Всё зависит от вашей операционной системы.
Пакет — упакованный код, который может быть библиотекой, утилитой или полноценным приложением. Разработчики используют общедоступные пакеты, чтобы не изобретать велосипед — то есть не писать с нуля модули, которые уже давно созданы. Представьте, что вы пишете бота, который конвертирует валюты. Можно самостоятельно продумать логику модуля, который будет сверять курс, например, с сайтом Центрального банка, а можно воспользоваться уже готовым пакетом и сэкономить время.
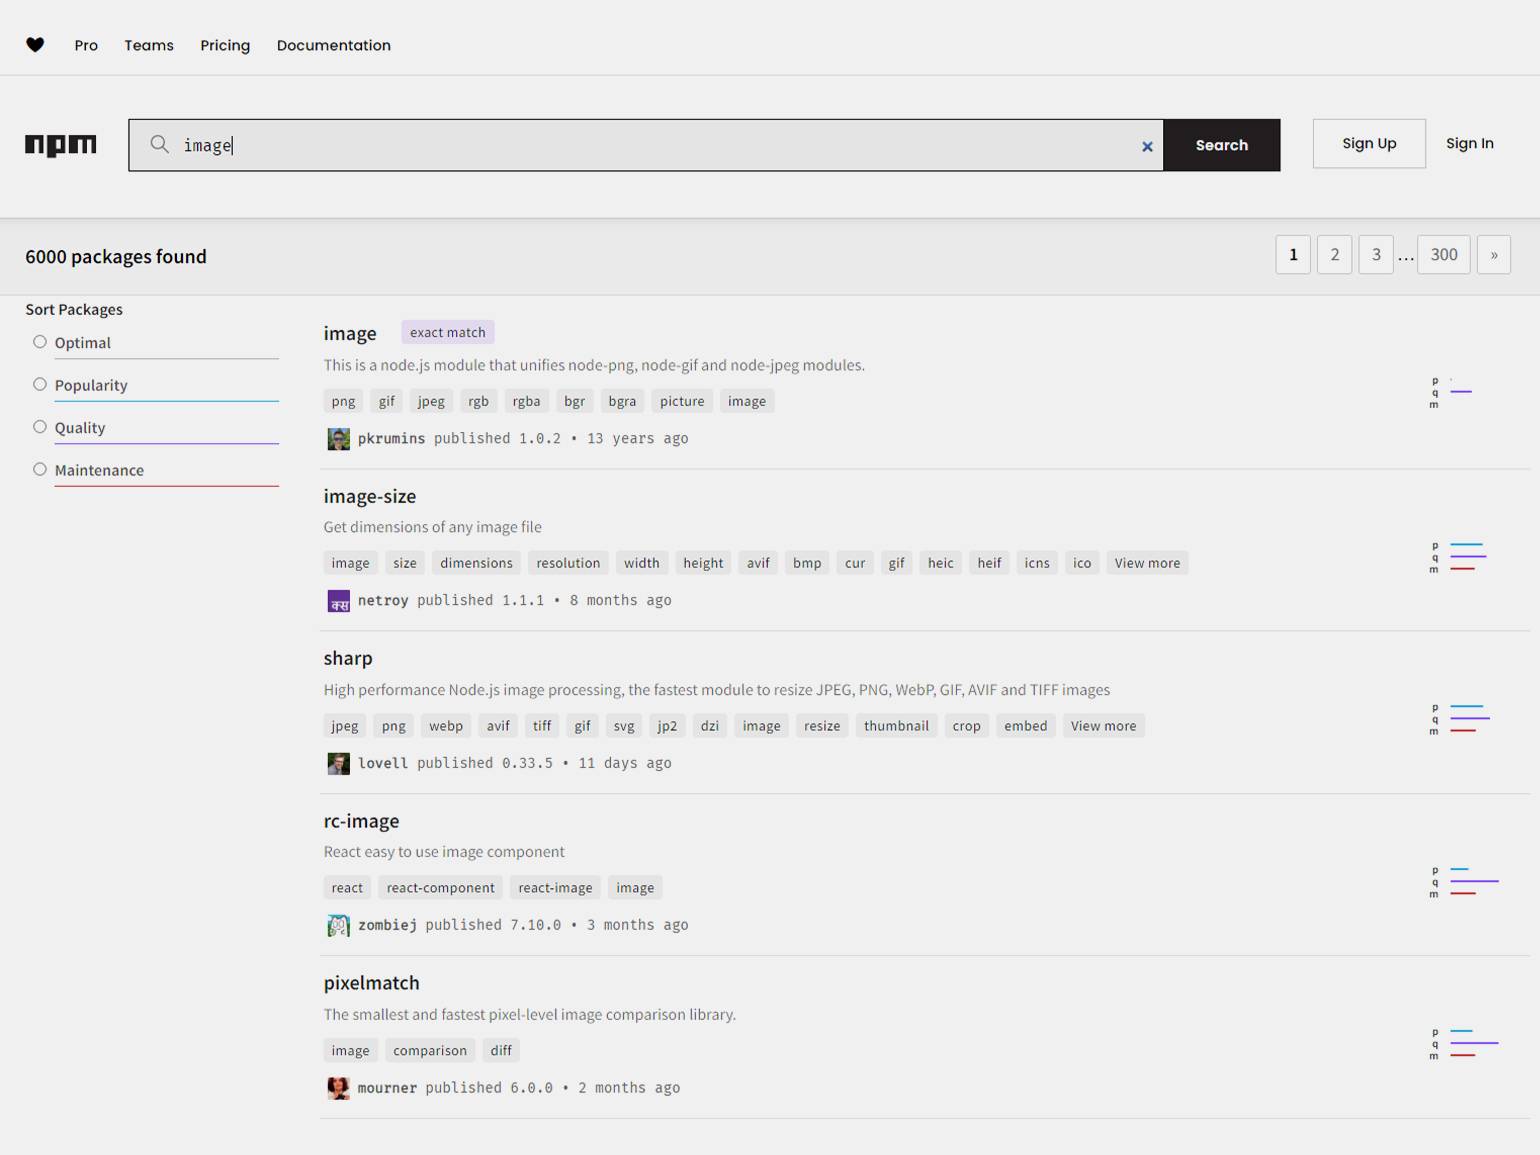
Скриншот: NPM / Skillbox Media
В экосистеме Node.js пакеты устанавливаются с помощью менеджера NPM, а хранятся они в публичных репозиториях. Это значит, что любой желающий может изучить их код и принять участие в разработке. Список доступных пакетов по ключевым словам доступен на сайте NPM.
Для установки в NPM используется команда install, после которой надо указать название пакета:
npm install имя_пакета
Можно использовать краткую форму команды:
npm i имя_пакета
Если нужно установить несколько модулей, то можно сразу указать их названия:
npm install имя_пакета имя_пакета2 имя_пакета3...
Например, вот так можно установить Lodash — популярную у JS-разработчиков библиотеку для работы с массивами, строками и другими типами данных:
npm install lodash
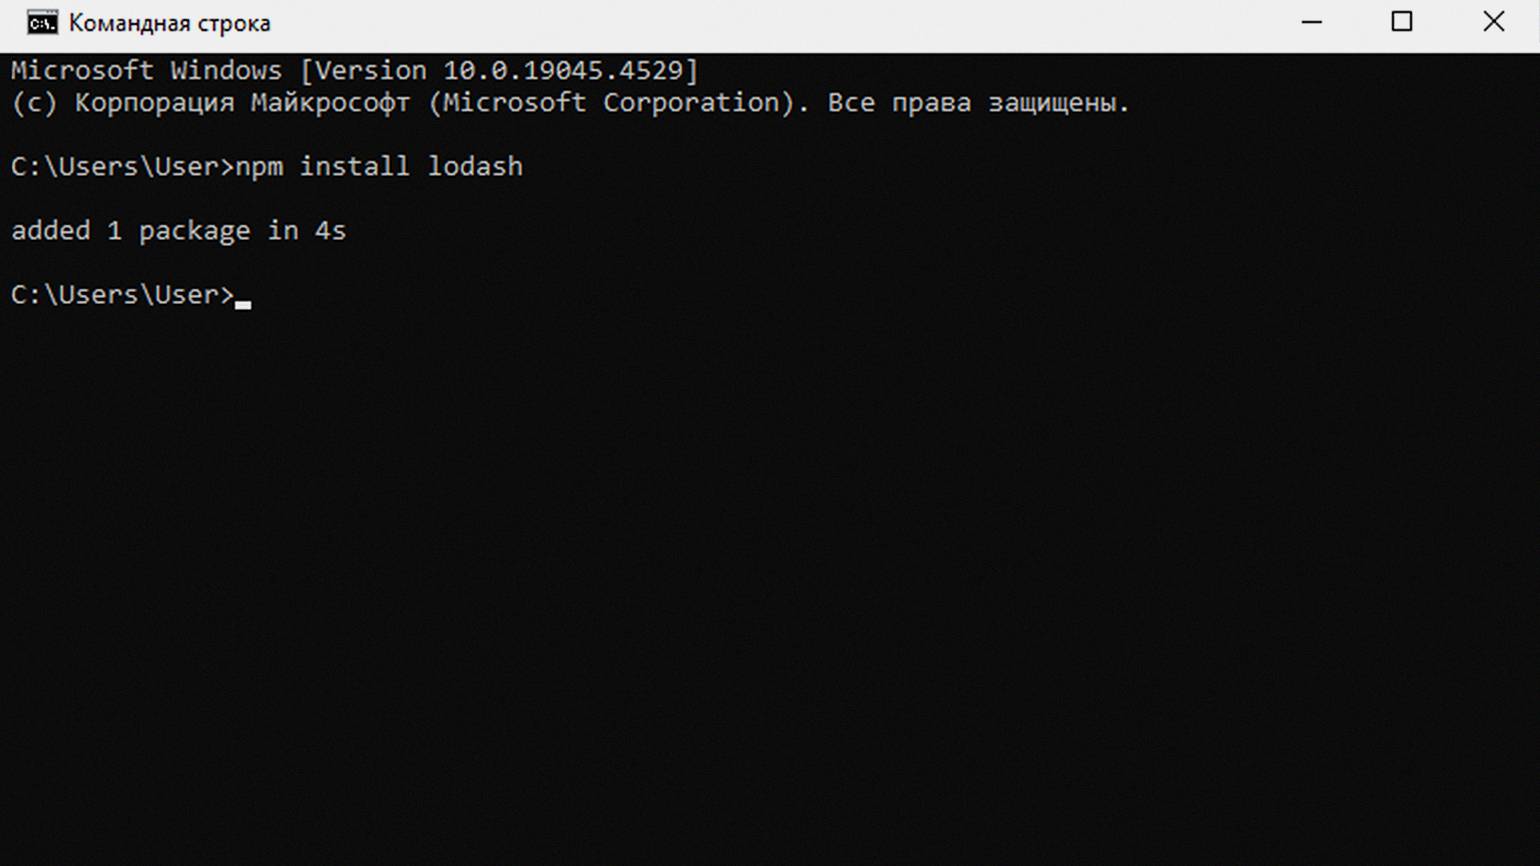
Скриншот: командная строка Windows / Skillbox Media
Важно
Во время установки следите за названиями модулей, которые вы вводите в терминале, чтобы не стать жертвой тайпсквоттинга — хакерской атаки, эксплуатирующей ошибки ввода.
Представим, что в репозитории есть полезный модуль под названием express. Злоумышленники создают заражённый пакет с максимально похожим названием (например, expres) в надежде, что пользователь ошибётся во время ввода команды, не перепроверит данные и установит вирус. С помощью тайпсквоттинга злоумышленники часто распространяют ПО, которое ворует данные разработчиков, включая пароли от различных сервисов.
Зависимости — набор пакетов, которые нужны для работы приложения. Они устанавливаются командой npm install и записываются в файл package.json в разделе dependencies.
Файл package.json можно отредактировать вручную, чтобы автоматически установить все необходимые пакеты. Сперва надо создать сам проект. Для этого с помощью команды cd перейдём к директории, в которой будет храниться папка проекта. В нашем случае это «Рабочий стол»:
cd C:/Users/User/Desktop
После этого выполним команду npm init, которая инициализирует новый проект и создаст файл package.json:
npm init
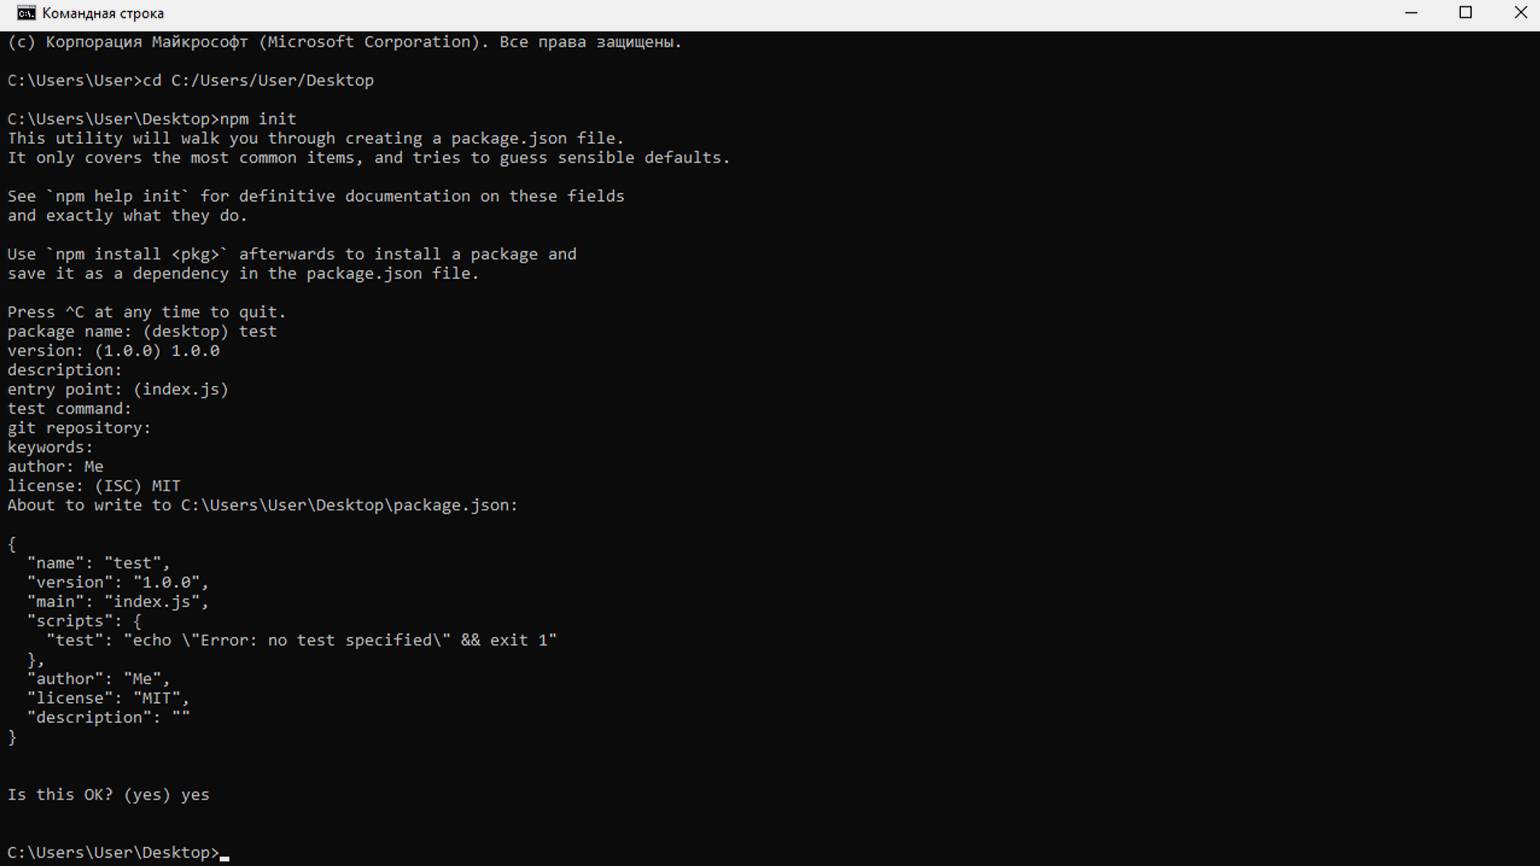
Скриншот: командная строка Windows / Skillbox Media
Во время создания проекта NPM спросит его название, автора и версию. Важно помнить, что название должно быть в нижнем регистре, а неактуальные пункты можно пропустить. Если не хочется вводить все данные, то можно воспользоваться командой npm init -y, которая автоматически сгенерирует шаблон. В итоге в папке появится файл package.json с вот таким содержимым:
{
  "name": "test",
  "version": "1.0.0",
  "main": "index.js",
  "scripts": {
    "test": "echo \"Error: no test specified\" && exit 1"
  },
  "author": "Me",
  "license": "MIT",
  "description": ""
}
Теперь в раздел dependencies можно добавить названия пакетов с указанием версий в формате «название_пакета»: «версия»:
{
  "name": "test",
  "version": "1.0.0",
  "main": "index.js",
  "scripts": {
    "test": "echo \"Error: no test specified\" && exit 1"
  },
  "author": "Me",
  "license": "MIT",
  "description": "",
  "dependencies": {
  "express": "4.17.1",
  "lodash": "4.17.21",
  "gm": "1.22.0"
}
}
Сохраняем файл и выполняем команду:
npm install

Скриншот: командная строка Windows / Skillbox Media
Менеджер NPM проверит список зависимостей, создаст файл package_lock.json и папку node_modules, в которой будут храниться скачанные модули проекта.
В NPM предусмотрена возможность автоматического добавления зависимостей в файл package.json, чтобы не приходилось самостоятельно редактировать раздел dependencies. Для этого используют следующие флаги команд:
- —save или -S — флаг, который во время установки добавляет название пакета и его версию в раздел dependencies. Важно отметить, что этот флаг нужен только в старых версиях NPM. Начиная с NPM 5 все устанавливаемые пакеты автоматически добавляются в раздел dependencies.
npm install music-metadata --save
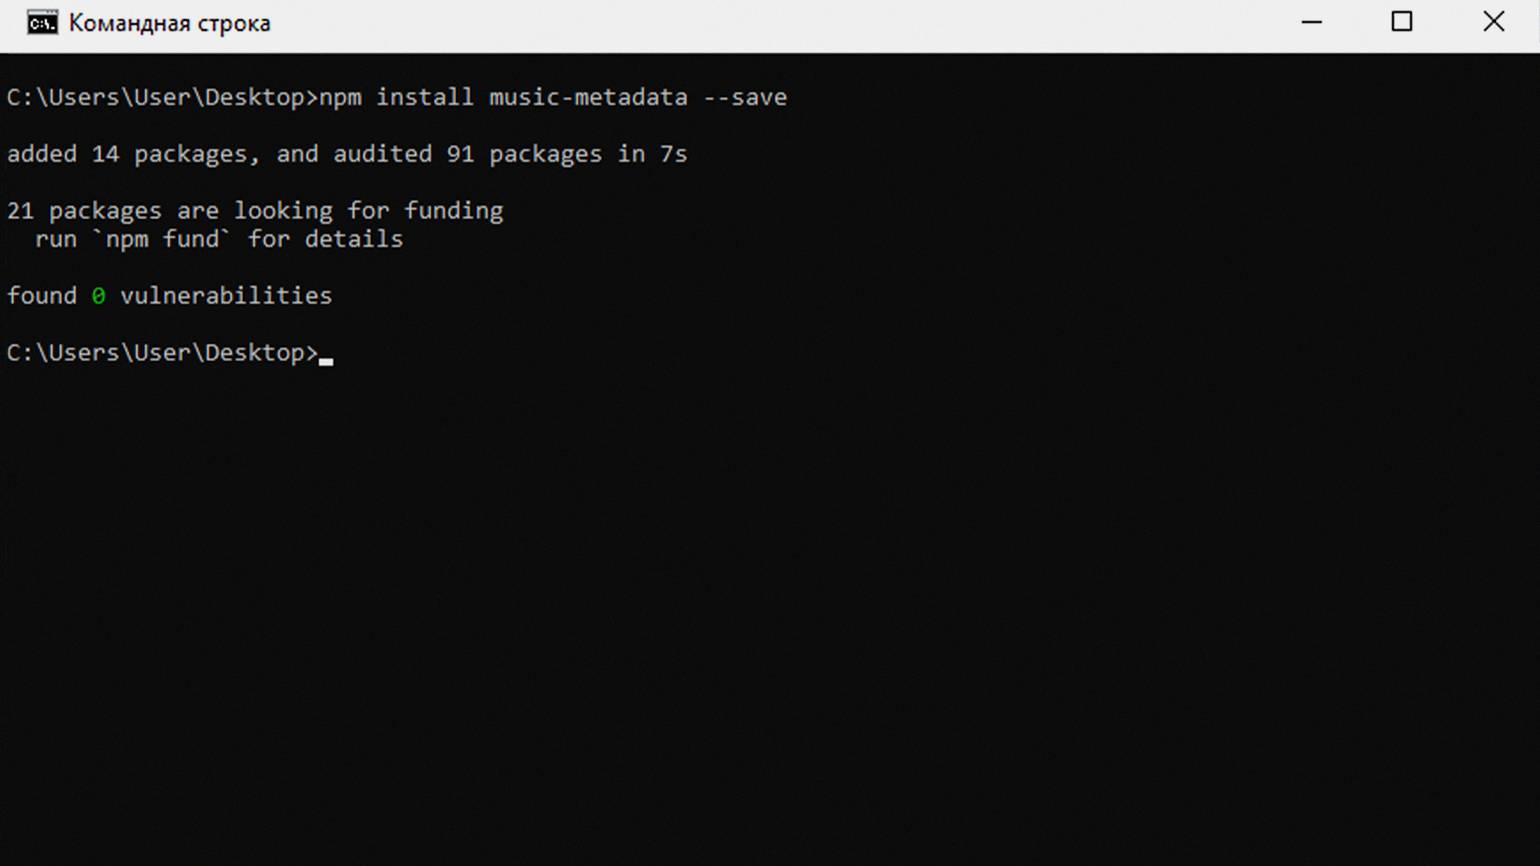
Скриншот: командная строка Windows / Skillbox Media
- —save-dev или -D — флаг, который во время установки добавляет зависимость в раздел devDependencies. Он нужен для перечисления пакетов, которые используются только для разработки и не нужны в финальной версии проекта. Например, это могут быть фреймворки для тестирования, линтеры или инструменты сборки.
npm install music-metadata --save-dev
Для обновления модулей используется команда npm update. Она указывает менеджеру пакетов, что надо проверить список зависимостей в package.json и установить все доступные обновления, если нет ограничения.
Ограничения указываются в разделе dependencies с помощью символа каретки (^). Например, список зависимостей с ограничениями будет выглядеть так:
{
  "name": "test",
  "version": "1.0.0",
  "main": "index.js",
  "scripts": {
    "test": "echo \"Error: no test specified\" && exit 1"
  },
  "author": "Me",
  "license": "MIT",
  "description": "",
  "dependencies": {
  "express": "^4.17.1",
  "lodash": "^4.17.21",
  "gm": "^1.22.0"
}
}
Это значит, что NPM сможет обновить модули только до минорных версий и патчей, не трогая мажорные версии.
?️ Технические детали
Пакеты в NPM используют принцип семантического версионирования, когда версии записываются в формате MAJOR.MINOR.PATCH, где:
- MAJOR (мажорная версия) — масштабные изменения, которые могут повлиять на совместимость модуля с другими пакетами и инструментами.
- MINOR (минорная версия) — интеграция новых функций, которые не мешают продолжать использовать пакет в проекте.
- PATCH (патч) — исправления ошибок, которые никак не влияют на функции и возможности модуля.
Если надо обновить конкретный пакет, то можно использовать команду update с указанием имени пакета:
npm update имя_пакета
Если вы автоматически обновили все пакеты в проекте, а потом заметили, что в одном из них появились баги или пропали нужные функции, то в NPM можно откатиться до предыдущей версии и запретить установку обновлений.
Для начала надо узнать, какая версия шла перед злосчастным обновлением. Например, сейчас установлен пакет music-metadata 10.2.0. Список всех версий можно посмотреть в калькуляторе NPM SemVer: вводим название модуля и диапазон версий. В нашем случае это 10.x.x — все релизы мажорной версии под номером 10. Также список версий доступен на странице пакета в NPM.
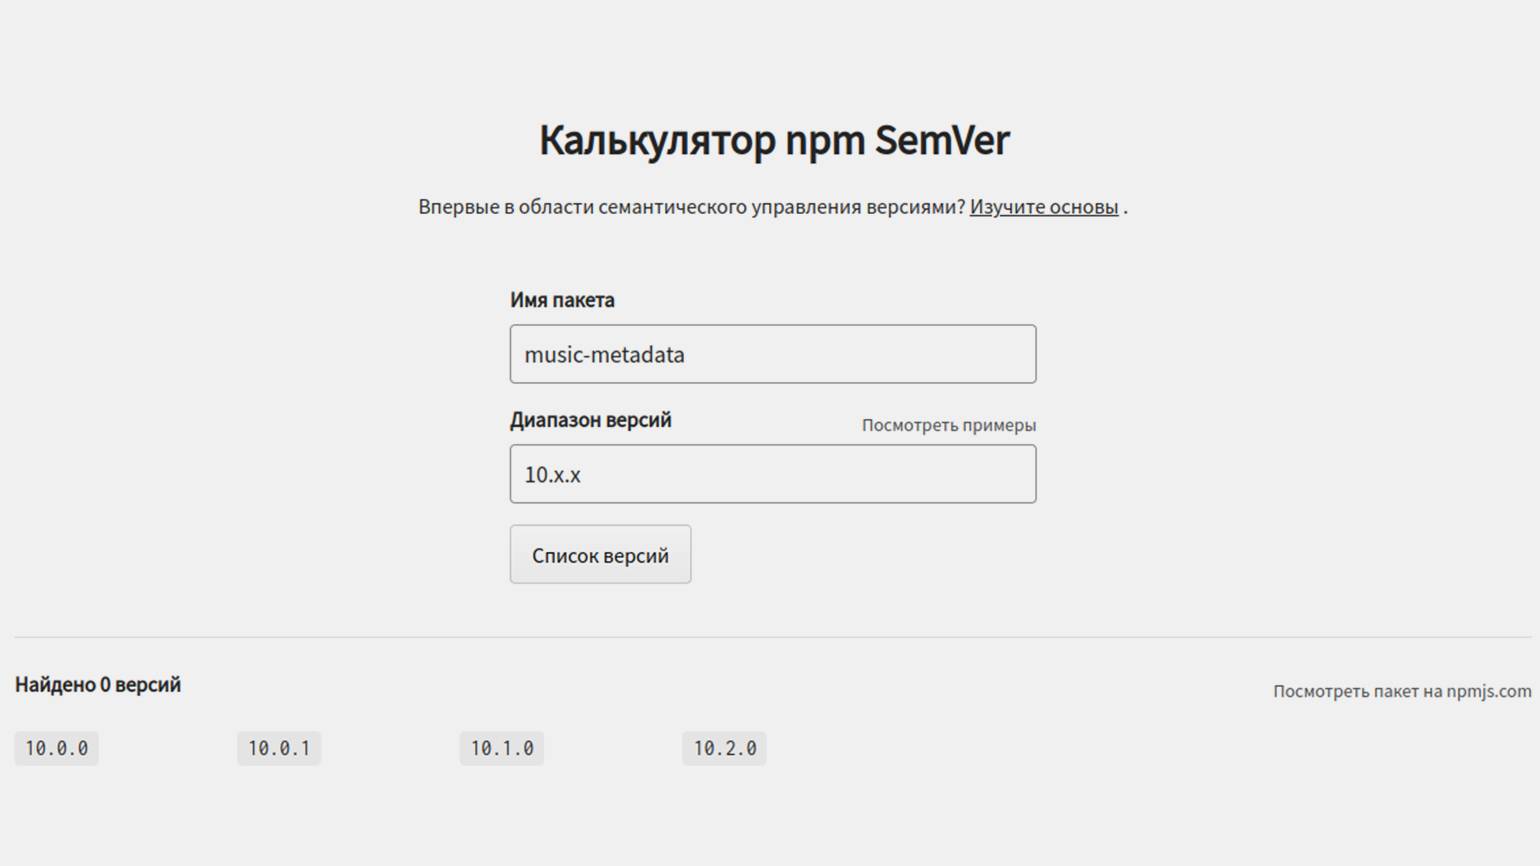
Скриншот: NPM SemVer / Skillbox Media
Мы видим, что до 10.2.0 была версия 10.1.0, с которой у нас не возникало проблем. Открываем файл package.json и меняем номер версии music-metadata:
{
  "name": "test",
  "version": "1.0.0",
  "main": "index.js",
  "scripts": {
    "test": "echo \"Error: no test specified\" && exit 1"
  },
  "author": "Me",
  "license": "MIT",
  "description": "",
  "dependencies": {
    "express": "^4.17.1",
    "gm": "^1.22.0",
    "lodash": "^4.17.21",
    "music-metadata": "10.1.0"
  }
}
После этого выполняем команду npm install.
В файле package.json можно указать скрипты и сложные команды, которые должны запускаться для сборки проекта или вывода ошибок. Например, разработчики используют Webpack для сборки нескольких файлов с JS-кодом в одно приложение. Для запуска сборки надо выполнить следующую команду:
NODE_ENV=production webpack -p --config webpack.conf.js
Эту задачу можно упростить, добавив команду в разделе scripts файла package.json. Перед командой надо добавить название скрипта, с помощью которого можно будет запустить его выполнение. В нашем случае это prod:
{
  "name": "test",
  "version": "1.0.0",
  "main": "index.js",
  "scripts": {
    "prod": "NODE_ENV=production webpack -p --config webpack.conf.js"
  },
  "author": "Me",
  "license": "MIT",
  "description": "",
  "dependencies": {
    "express": "^4.17.1",
    "gm": "^1.22.0",
    "lodash": "^4.17.21",
    "music-metadata": "10.1.0"
  }
}
После этого длинную и сложную команду можно запускать с помощью более лаконичной npm run prod.
Теперь напишем собственный скрипт, который будет выводить в терминал фразу Hello, Developer!. Для этого в раздел scripts добавим строку «say-hello»: «echo ‘Hello, Developer!'»:
{
  "name": "test",
  "version": "1.0.0",
  "main": "index.js",
  "scripts": {
    "say-hello": "echo 'Hello Developer!'"
  },
  "author": "Me",
  "license": "MIT",
  "description": "",
  "dependencies": {
    "express": "^4.17.1",
    "gm": "^1.22.0",
    "lodash": "^4.17.21",
    "music-metadata": "10.1.0"
  }
}
Теперь выполним в терминале команду npm run say-hello и увидим результат — сообщение, которое указали в файле package.json:
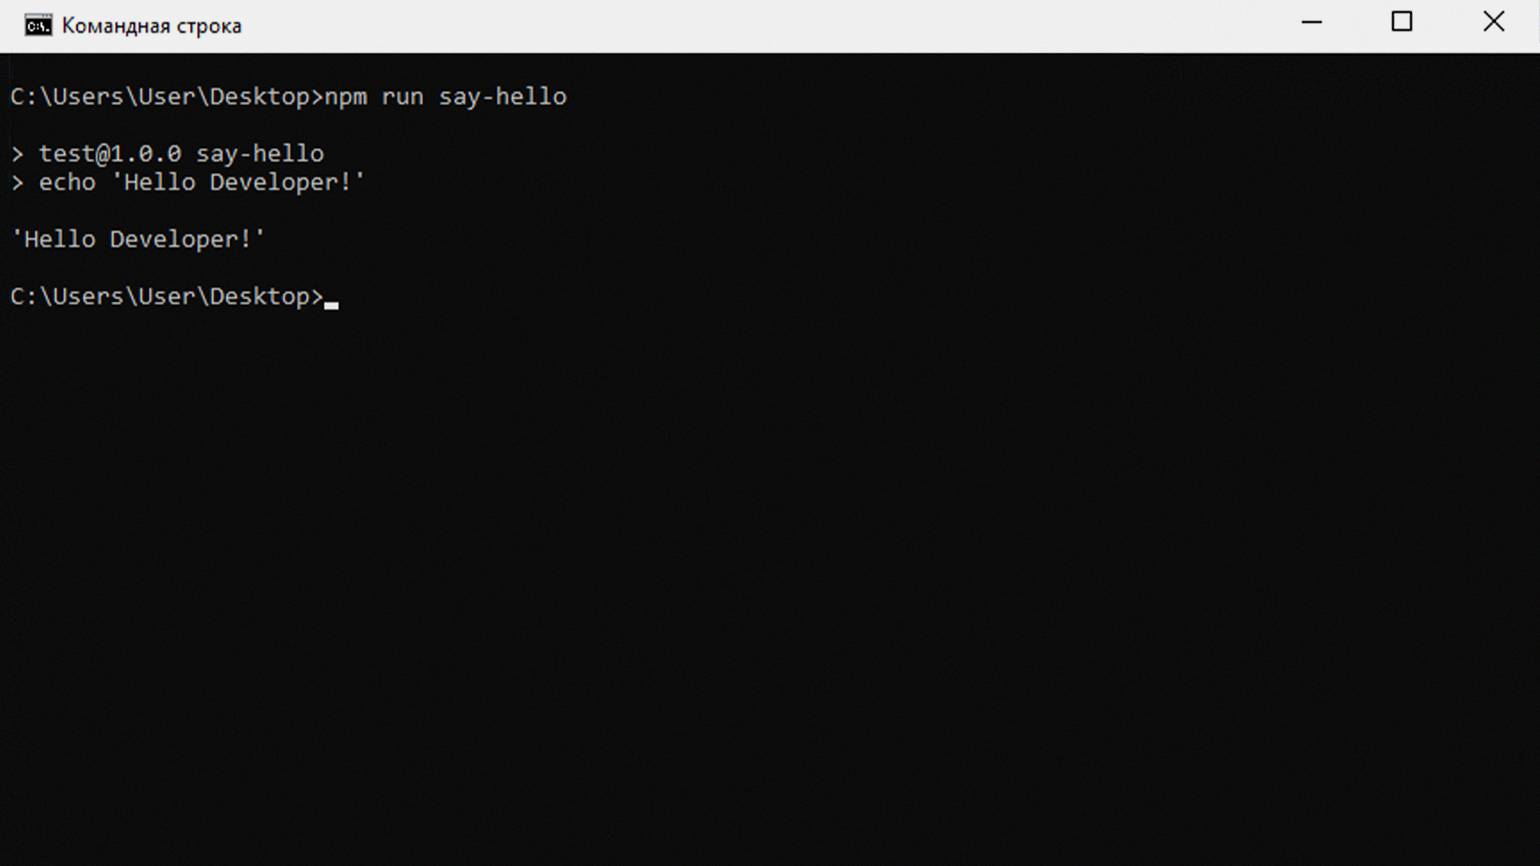
Скриншот: командная строка Windows / Skillbox Media
Файл package.json — важнейший элемент проектов в экосистеме Node.js. Мы уже рассмотрели, как можно использовать файл для установки зависимостей, а теперь разберёмся со структурой и другими полезными возможностями.
Содержимое файла package.json записывается в формате JSON, поэтому важно соблюдать требования к его оформлению. Если их проигнорировать, то NPM не сможет прочитать содержимое. Сам файл содержит метаданные проекта, которые задаются с помощью соответствующих разделов:
- version — текущая версия программы, которая задаётся по правилам семантического версионирования.
"version": "1.0.0"
- description — краткое описание программы и её возможностей.
"description": "This utility works only with numbers"
- main — указывает на файл, который будет точкой входа в приложение.
"main": "files/first.js"
- private — отвечает за возможность публикации приложения в NPM. Модификатор true запрещает публиковать приложение.
"private": true
- scripts — задаёт список скриптов, которые можно запустить.
"scripts": {
    "say-hello": "echo 'Hello Developer!'"
  }
- dependencies — список зависимостей, без которых приложение не будет работать.
"dependencies": {
    "express": "^4.17.1",
    "gm": "^1.22.0",
    "lodash": "^4.17.21",
    "music-metadata": "10.1.0"
  }
- devDependencies — список зависимостей, которые нужны только во время разработки.
"devDependencies": {
  "autoprefixer": "^7.1.2",
  "babel-core": "^6.22.1"
}
- engines — список версий Node.js, на которых приложение будет работать.
"engines": {
  "node": ">= 5.0.0",
  "npm": ">= 2.5.0",
  "yarn": "^0.14.0"
}
- browserslist — список браузеров и их версий, в которых приложение будет работать.
"browserslist": {
  "last versions",
  "not ie <= 10"
}
- license — содержит информацию о лицензии, под которой публикуется код.
"license": "MIT"
- author — информация об авторе проекта: имя, сайт, электронная почта и другие данные.
{
  "author": {
    "name": "Vasily Popov",
    "email": "v.popov@siteexample.ru",
    "url": "https://v-popov.ru"
  }
}
- contributors — список людей, которые внесли вклад в развитие проекта.
{
  "contributors": [
    {
      "name": "Vasily Popov",
      "email": "v.popov@siteexample.ru",
      "url": "https://v-popov.ru"
    }
  ]
}
- bugs — ссылка на баг-трекер проекта.
{
  "bugs": "https://github.com/v_popov/package/issues"
}
- homepage — ссылка на официальный сайт проекта.
{
  "homepage": "https://v-popov.ru"
}
Во время работы над проектом чаще всего изменяется содержимое разделов dependencies и devDependencies. Разработчики интегрируют новые пакеты и меняют версии уже имеющихся. Для всего этого используется принцип семантического версионирования, а в NPM есть инструменты для удобного упрвления версиями пакетов. С несколькими из них мы уже сталкивались в этой статье, а сейчас посмотрим на всю коллекцию специальных символов.
Для управления версиями пакетов NPM используются следующие символы:
| Символ | Значение | Пример |
|---|---|---|
| ~ | Можно устанавливать только патчи пакета (1.2.x) | ~1.2.0 |
| ^ | Можно устанавливать только минорные версии и патчи (1.x.x) | ^1.2.0 |
| * | Последняя версия модуля | * |
| > | Выше указанной версии | >1.2.0 |
| < | Ниже указанной версии | <1.2.0 |
| = | Строго указанная версия модуля | =1.2.0 |
| >= | Версия, равная указанной или выше | >=1.2.0 |
| <= | Версия, равная указанной или ниже | <=1.2.0 |
| — | Диапазон версий | 1.2.0-1.3.4 |
| latest | Последняя версия модуля | latest |
| || | Логическое ИЛИ | <1.2.1 || >1.3.4 |
Файл package-lock.json создаётся автоматически при установке NPM-пакетов. Если вы следовали инструкциям выше, то наверняка заметили, что этот файл уже появился в папке проекта. Он нужен для того, чтобы зафиксировать зависимости, которые нужны для работы сторонних пакетов.
Например, программист решил разработать библиотеку для обработки онлайн-платежей. Он решил использовать несколько готовых модулей из NPM и на их основе написал собственное решение.
Спустя какое-то время мы нашли эту библиотеку и решили добавить в свой проект. Информация о ней зафиксируется в уже знакомом нам файле package.json, а зависимости, без которых не будет работать сторонняя библиотека, запишутся в дополнительный файл package-lock.json. Если говорить проще, то в файле package-lock.json описаны зависимости зависимостей.
Если заглянуть в папку node_modules, то там можно найти пакеты, которые вы скачали сами, и случайные модули. Они установились автоматически, потому что нужны для работы библиотек, которые вы используете. Возможным это стало благодаря записям в package-lock.json.
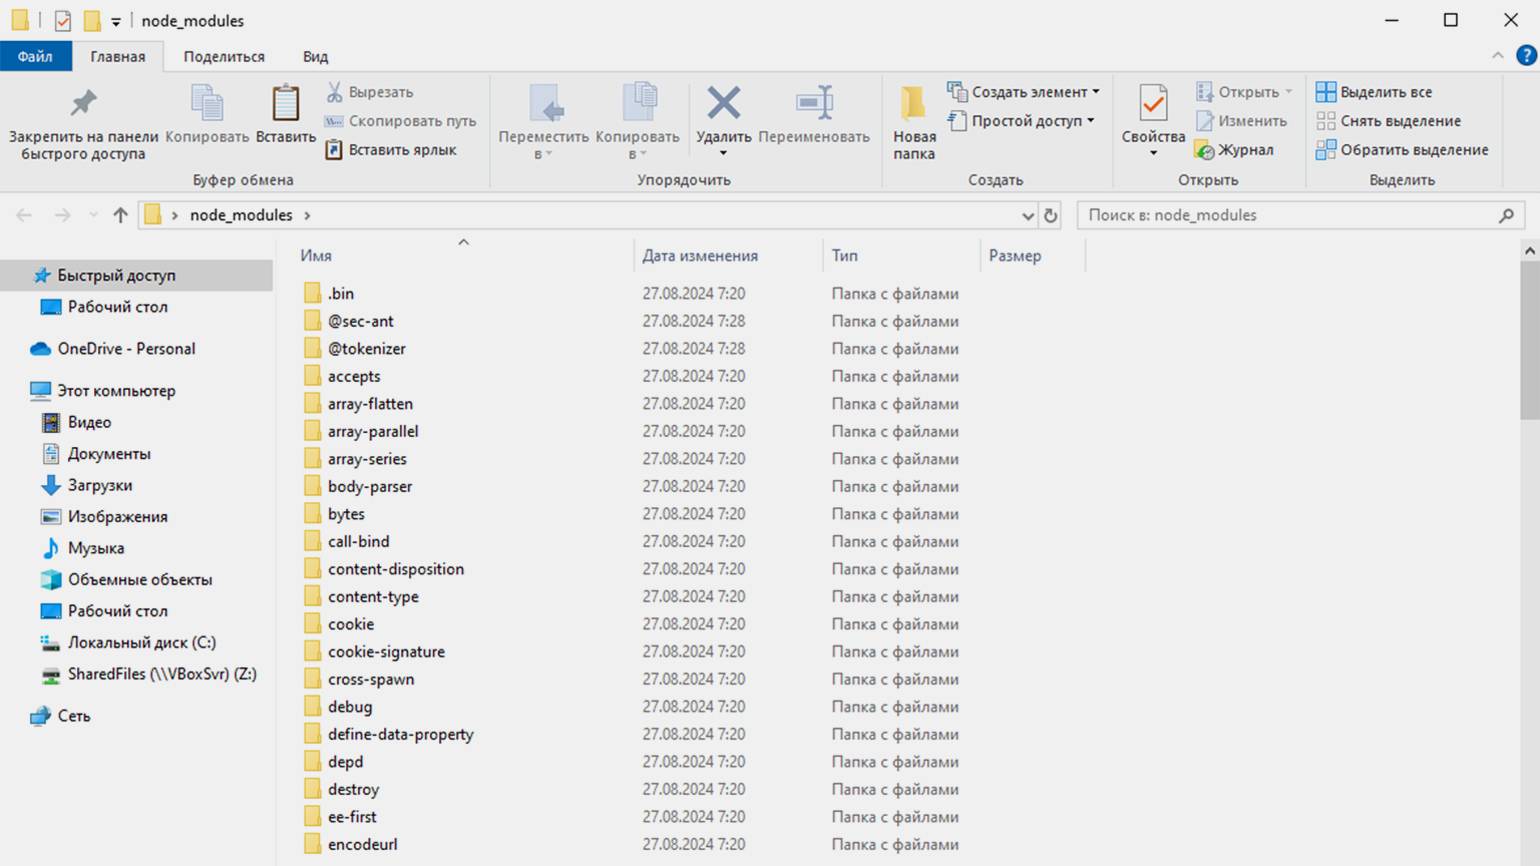
Скриншот: «Проводник» Windows / Skillbox Media
- NPM — удобный менеджер пакетов для тех, кто пишет код на JavaScript.
- С помощью NPM можно устанавливать библиотеки и модули, которые расширяют возможности языка программирования.
- Встроенные инструменты управления зависимостями позволяют быстро настраивать окружение проекта и запускать его на сервере или другом компьютере.
- В NPM предусмотрены удобные функции для автоматического обновления зависимостей до указанных версий.
Профессия Фронтенд-разработчик
Освойте фронтенд без опыта в IT. Практикуйтесь на реальных задачах и находите первых заказчиков в комьюнити Skillbox.
Узнать о курсе →

Бесплатный курс: «Веб-разработка с нуля»
Начать учиться
Last Updated :
23 Apr, 2025
NodeJS and NPM (Node Package Manager) are essential tools for modern web development. NodeJS is the runtime environment for JavaScript that allows you to run JavaScript outside the browser, while NPM is the package manager that helps manage libraries and code packages in your projects.
To run a Node.js project on your system, you first need to install Node.js and NPM. Once installed, you can use the Node.js runtime to execute JavaScript code and NPM to manage project dependencies and packages.
Note: We do not need to download NodeJS and NPM separately. When we install NodeJS, NPM (Node Package Manager) is installed automatically along with it.
How to download and install NodeJS and NPM
Follow the below given steps below to download and install NodeJS and npm on your system:
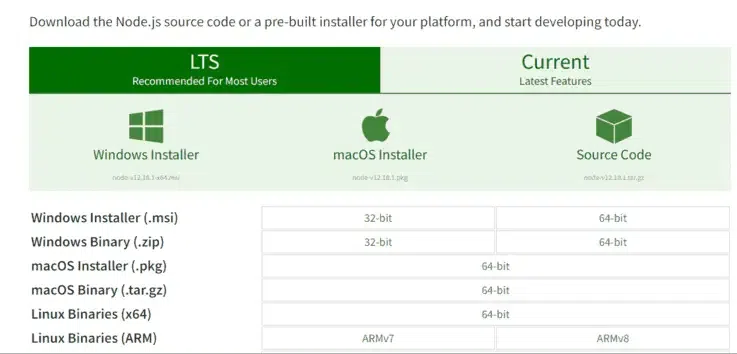
Step 1: Download the package from its Official Website
Go to the official NodeJS website.
You will see two main download options:
- LTS (Long-Term Support): This version is recommended for most users, especially for production environments, as it is stable and receives long-term updates.
- Current: This version includes the latest features but may not be as stable as the LTS version.
- Click on the version you wish to download. The website will automatically detect your operating system and recommend the appropriate version (Windows, macOS, or Linux).
Installing NodeJS is the first step towards building scalable web applications.
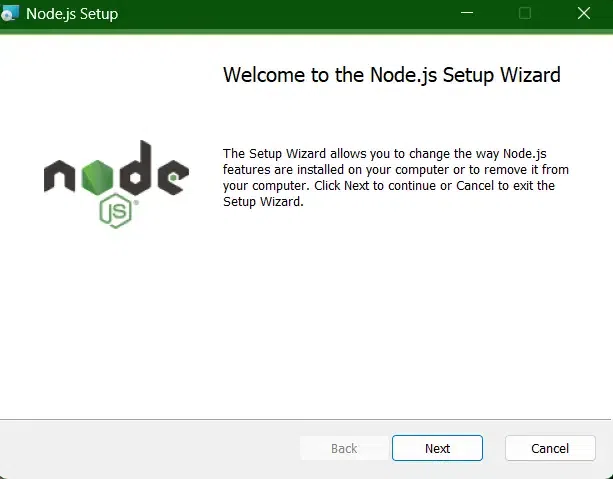
Step 2: Install NodeJS and NPM
Now you need to install the NodeJS installer on your system. You need to follow the following steps for NodeJS to be installed.
- Double-click on the .msi installer. The NodeJS Setup wizard will open.
- Welcome To NodeJS Setup Wizard.
- Now, select “Next” to proceed.
Step 3: Finish Setting up
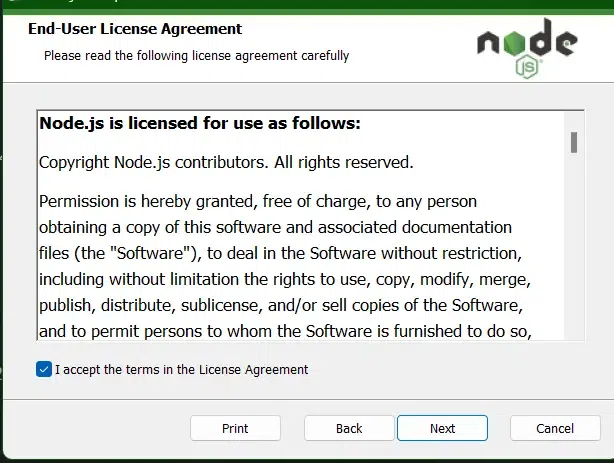
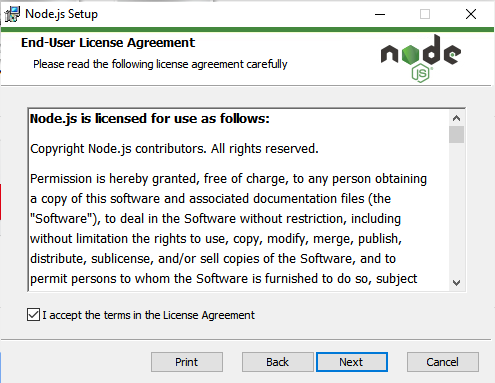
Go through the terms and license carefully before finishing up the setup.
- After clicking “Next”, the End-User License Agreement (EULA) will open.
- Check “I accept the terms in the License Agreement.”
- Select “Next.”
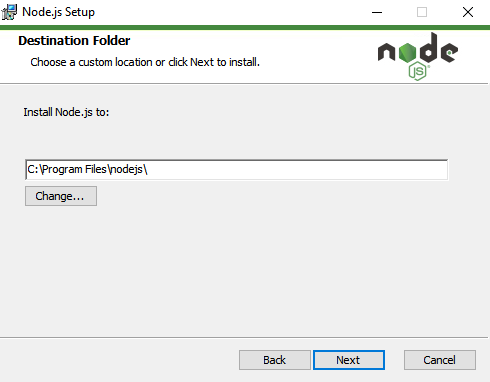
Step 4: Set Download Path
At last, it will ask for a «Destination Folder» where all the files and their utility will be saved, provide the path where you want to install NodeJS and then click on NEXT.
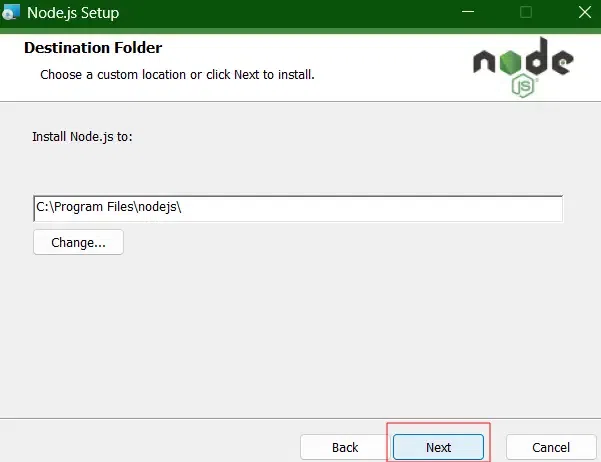
- Or, if you wish to perform «Custom Setup», click on Change and choose your desired path.
- Then, select “Next”
Step 5: Get the System Ready to Complete the Setup
The installer may prompt you to “install tools for native modules”.
- Select “Install”
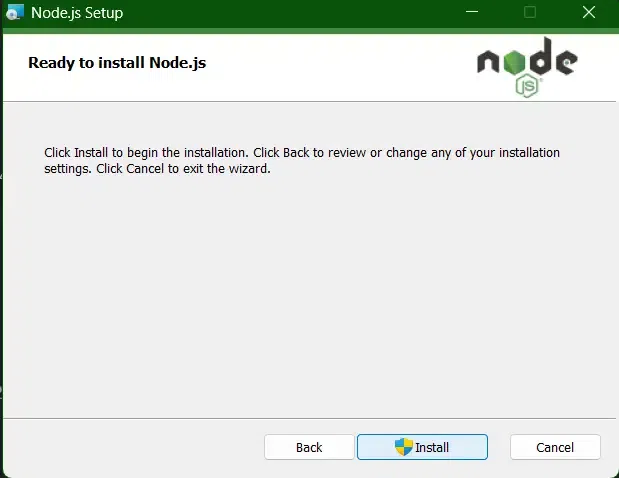
- Do not close or cancel the installer until the installation is complete.
- Complete the NodeJS Setup Wizard.
- Click “Finish.”
.png)
Step 6: Verify the Installation
Once the installation is complete, you can verify that both NodeJS and NPM are installed correctly by running the following commands in your terminal or command prompt:
- Verify NodeJS Installation:
node -v
This command will display the installed version of NodeJS.
- Verify NPM Installation:
npm -v
This command will display the installed version of NPM.
If both commands return the version numbers, it means that NodeJS and NPM are successfully installed on your system.
Start creating your NodeJS application.
Conclusion
That’s it! You’ve successfully installed NodeJS and NPM on your system, and you’re ready to start building and managing NodeJS projects. With NPM, you can easily install third-party libraries, manage dependencies, and work on large-scale JavaScript projects.
Node.js is a cross-platform runtime for running server-side (back-end) JavaScript apps outside the browser. This guide describes how to install the Node.js framework and the Node Package Manager (NPM) on Windows.
The official website (https://nodejs.org/en/download/prebuilt-installer) provides an MSI installer for Node.js and NPM. If there are no specific requirements, it is usually recommended to install the LTS (Long Term Support) version of Node.js.
Run the installation from the MSI package with the default settings.
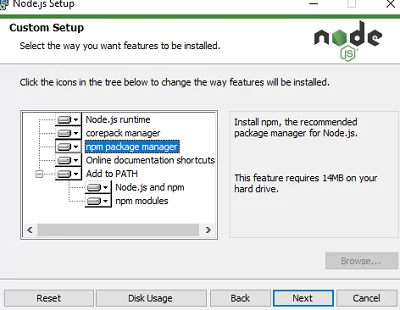
The MSI package contains not only the Node.js framework itself but also the NPM package manager, which is installed by default. The installer will automatically add the paths to the Node.js and NPM directories to the Windows environment variables.
The built-in Node Package Manager (NPM) is used to download, install, and manage the dependencies of third-party modules and projects from external repositories.
Compiling some of the modules installed via npm may require Python and Visual Studio. You can either let NPM install the required tools automatically via Chocolatey, or install them manually later (https://github.com/nodejs/node-gyp#on-windows).
Once the installation is complete, check that Node.js and npm are installed. Run the following commands to check the tool versions:
node -v
 npm -v
It is also possible to install Node.js. using the WinGet package manager (installed by default on Windows 10/11).
winget install OpenJS.NodeJS.LTS
This command will automatically download the latest LTS version of Node.js and silently install it.
Restart the cmd/powershell console to update the paths in the environment variables. Check that node.js and NPM have been successfully installed and that the paths to them have been added to the PATH environment variable:
(Get-ChildItem env:Path).value -split ";"
C:\Program Files\nodejs\
C:\Users\%username%\AppData\Roaming\npm
Or install the Node.js on Windows using the Chocolatey package manager:
Choco install -y nodejs.install
You can use a simple JavaScript script to test how Node.js works. Create a text file hello.js containing the code:
console.log("Hello, world!")
Run the JS script using node.js:
node hello.js
For server deployments, it is recommended to use the NVM (Node Version Manager) to install Node.js and npm.
NVM allows developers to have multiple Node.js versions installed on a computer and to switch between them. NPM also doesn’t use the current user’s profile to store temp and app data, unlike the Node.js version in the MSI installer. This eliminates problems with paths and permissions when launching Node JS-based services.
The easiest way to install NPM is to use the NVM for Windows package ( https://github.com/coreybutler/nvm-windows). Download the nvm-setup.exe file and run the installation.
To install a specific version of Node.js using NVM, run:
nvm install 21
List installed Node versions:
nvm list
Switch between NodeJS versions:
nvm use 20.11.0
When switching versions, the nvm script replaces the path to the Node.js version in the PATH variable.
Introduction
Node.js is a backend Javascript runtime environment that is light and highly scalable. It is used to build real-time applications such as video streaming applications. To make development easier, Node js developers created a node package manager (npm). This package manager acts as the Node.js command line. It is used for installing modules and initializing projects.
In this tutorial, you will learn how to install npm on Windows and how to use it.
How to Install npm on Windows
Follow the steps below to download and install the Node.js .msi file. The Node.js .msi file includes the node package manager. You don’t have to download them separately like before.
-
Go to the Nodej.s website and download the Long Term Support (LTS) version of Node.js. The LTS version has features that have abundant documentation and it is stable in terms of security and performance when compared to the Node.js current version.
-
Navigate to the Download folder in the file manager and click the
.msipackage to start the installation procedure. -
Accept the terms in the License Agreement.

-
Add a different directory if you want but you can just leave the default location set by Node.js.
-
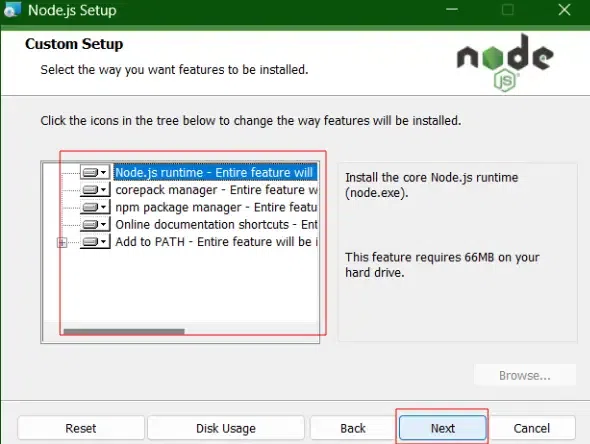
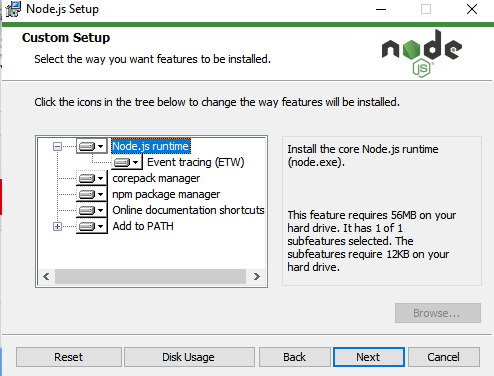
Select the Node.js features you want to install or remove by clicking on the drop-down list. You can leave everything on default if you don’t have any changes to make.
-
Check the box to install essential tools required by Node.js and npm.
-
Finish the installation process by clicking on the install button to install Node.js.
Confirming that npm and Node.js have been installed successfully
Use the npm -v command to check the version of the node package manager you just installed. You will get the version number if it has been successfully installed.
npm -v
8.1.0
Use node -v command to check if Node.js has been installed successfully. This command will also show the version number if Node.js has been successfully installed.
node -v
8.1.0
How to initialize a project using npm
The npm init command is used to create a Node.js project. The npm init command will create a package where the project files will be stored. All the modules you download will be stored in the package.
npm init The npm init command will also create the package.json file, and prompt you to add the following project information when creating a project:
- Project name
- Project initial version
- Project description
- The project’s entry point
- The project’s entry point
- The project’s test command
- The project’s git repository
- The project’s license
The information will be stored in the package.json file. The package.json file contains the important details and metadata of your project such as package versions.
Here is an example of a package.json file:
{
  "name": "hometech",
  "version": "1.0.0",
  "description": "How to install node package manager",
  "main": "index.js",
  "scripts": {
    "test": "echo \"Error: no test specified\" && exit 1",
    "start": "node server.js"
  },
  "author": "Boemo Mmopelwa",
  "license": "MIT",
  "dependencies": {
    "@apollo/client": "^3.3.7",
    "Express": "^3.0.1",
    "apollo-angular": "^2.2.0",
    "express": "^4.17.1",
    "express-graphql": "^0.12.0",
    "graphql": "^15.4.0"
  },
  "devDependencies": {},
  "keywords": [
    "vultr"
  ]
}
The package.json file is stored in your current prescribed directory but you can also move it to your desired destination.
If you want to skip the questions asked when creating a project, use this command:
npm init --yes The above command will initialize the project and skip all the required details required by the package.json file. You can set these configuration details later when you’re ready to add them. But these are important details that should never be forgotten to be added.
You can use the following commands to install additional information:
- npx license: use this command to download your preferred license package such as MIT.
- npx gitignore: This command downloads the gitignore file from GitHub’s repo of your choice using the gitignore package.
- npx covgen: This command uses the covgen package to generate the Contributor Covenant. This command will also generate a code of conduct that all contributors must abide by.
Setting config options for the init command
The node package manager allows you to set default config options for the npm init command.
Here are some of the commands you can use to set default config options:
The following command sets your default email address.
> npm set init.author.email "enter your email address here"Setting the author’s name
The following command sets your default author name.
> npm set init.author.name "enter your author name here"Setting the project license
The following command sets your project’s license.
> npm set init.license "MIT"How to add dependencies in the package.json file manually
Use the dependencies attribute to manually add dependencies to the package.json file by referencing the name and version of the dependency using any text editor such as Microsoft Visual studio:
{
 "name": "hometech",
 "version": "1.0.0",
 "dependencies": {
 "my_dep": "^1.0.0",
 }
}
Use the devDependencies attribute to manually add devDependencies name and version to the package.json file:
"name": "hometech",
"version": "1.0.0",
"dependencies": {
"my_dep": "^1.0.0",
},
"devDependencies" : {
"my_test_framework": "^3.1.0".
"another_dev_dep": "1.0.0 - 1.2.0"
}
How to list packages in dependencies
You can check and keep track of all installed using the npm list command. The npm list command will generate a list of all installed packages.
npm listThe command will output all installed packages:
demo@1.0.0 C:\Users\Demo
+-- @apollo/client@3.3.7
+-- apollo-angular@2.2.0
+-- array-flatten@1.1.1 extraneous
+-- body-parser@1.19.0 extraneous
+-- content-disposition@0.5.3 extraneous
+-- cookie-signature@1.0.6 extraneous
+-- cookie@0.4.0 extraneous
+-- debug@2.6.9 extraneous
+-- destroy@1.0.4 extraneous
+-- ee-first@1.1.1 extraneous
+-- encodeurl@1.0.2 extraneous
+-- escape-html@1.0.3 extraneous
+-- etag@1.8.1 extraneous
+-- express-graphql@0.12.0
+-- Express@3.0.1 invalid: "^4.17.1" from the root project
+-- finalhandler@1.1.2 extraneous
+-- forwarded@0.1.2 extraneous
+-- fresh@0.5.2 extraneous
+-- graphql@15.4.0
+-- http-errors@1.7.2 extraneous
+-- type-is@1.6.18 extraneous
+-- utils-merge@1.0.1 extraneous
How to Install Modules using npm
The npm install command is used to install modules such as Express. To use this command just add the name of your module after the install keyword.
npm install <enter the module name here>If you don’t want to install a specific module you can go ahead and install modules and project dependencies listed in the package.json file using the following command.
npm installIf you are installing a module that hasn’t been listed in the package.json file. You can use the following command to install and add the module to the package.json file as a project dependency.
npm install <module> --save You can also use the --save-dev flag which adds the module as a devDependencies. Development dependencies (devDependencies) are used for development purposes only, they are not required during runtime.
npm install <module> --save-dev How to Install Modules Globally on your System
If you want all of your applications to use a specified module, install the module globally by using the--global flag so that all Node.js applications in your system can access the module:
npm install <enter the module you want to install globally here> --global Inspecting and auditing installed packages
Security vulnerabilities found in packages often cause service outages and data loss. Inspecting and auditing your Node.js package dependencies using the npm audit command could help you identify security vulnerabilities and fix them before they cause data loss.
The npm audit command is only supported in npm version 6.0.0 and later versions only.
The npm audit command sends details about the package’s dependencies and devDependencies for inspection to your default registry. A report will be sent back which contains results of your package dependencies, devDependencies, bundledDependencies, and optionalDependencies security state.
Follow the following steps to audit your package dependencies:
- Launch the command line and navigate to your package directory.
- Make sure that your package includes the package.json and package-lock.json files.
- Insert the
npm auditcommand and press enter to start the security auditing process. - After the report has been generated using the previous command you can now analyze the audit report and implement security measures to eliminate security vulnerabilities detected in your package dependencies.
Node Package Manager Command Cheat Sheet
Here is a list of essential commands that you will use after you install Node.js and the node package manager.
- npm uninstall <package>: This command is used to uninstall a package.
- npm list -g —depth=0: List globally installed packages.
- npm -g uninstall <name>: This command is used to uninstall a global package.
- npm-windows-upgrade: Upgrade npm on Windows.
- npm run: list available scripts to run.
- npm-windows-upgrade: This command is used to update npm.