
В этой статье мы разберемся, как на базе Windows Server 2012 R2 установить и настроить связку Microsoft Deployment Toolkit 2013, Windows Assessment & Deployment Kit и роли WDS, и использовать этот набор для разворачивания образа Windows 10 на компьютеры клиентов по сети путем загрузки в режиме PXE (Preboot Execution Environment).
Нам понадобятся следующие компоненты:
- Windows Deployment Services – это роль Windows Server 2012, используемая для загрузки и разворачивания операционных систем по сети
- Microsoft Deployment Toolkit (MDT) 2013 Update 1 ( https://www.microsoft.com/en-us/download/details.aspx?id=48595) – набор инструментов для автоматизации развертывания операционных систем на рабочие станции и сервера
- Windows Assessment and Deployment Kit (Windows ADK) для Windows 10 (https://go.microsoft.com/fwlink/p/?LinkId=526740) – набор компонентов для настройки и развертывания Windows на новые компьютеры
- Установочный образ Windows 10 — в виде iso образа или установочного диска
Содержание:
- Установка роли Windows Deployment Services
- Установка Microsoft Deployment Toolkit 2013
- Установка Windows Assessment and Deployment Kit
- Настройка MDT 2013
- Создание задания установки MDT
- Настройка загрузочного образа в Windows Deployment Services
- Тестирование установки Windows 10 по сети
Установка роли Windows Deployment Services
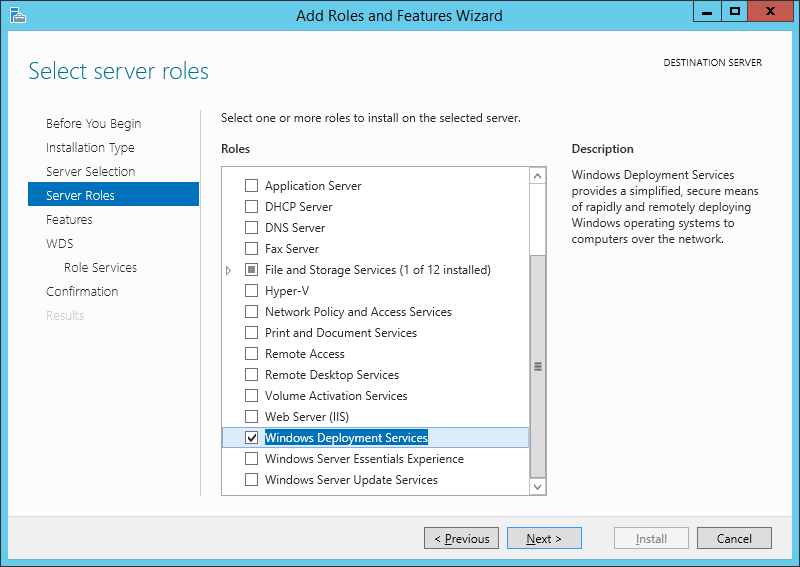
В первую очередь нужно на сервере под управлением Windows Server 2012 R2 установить роль Windows Deployment Services. Установку роли можно выполнить из консоли Server Manager. В списке ролей выберите Windows Deployment Services и нажмите Next.
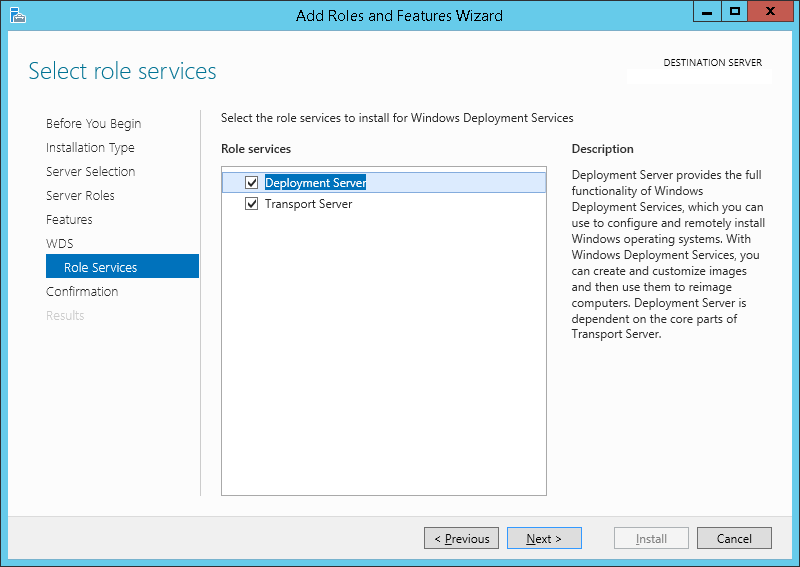
В списке устанавливаемых компонентов роли WDS отметьте службы Deployment Server и Transport Server.
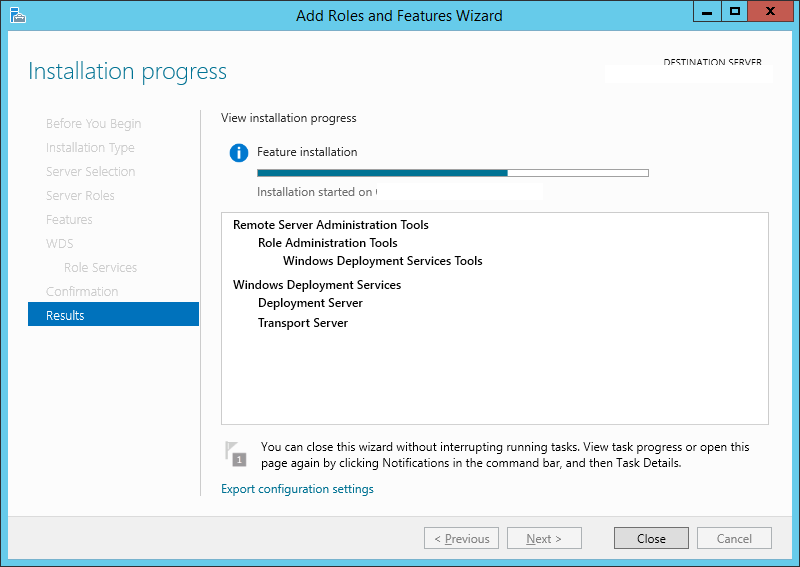
Запустите установку роли WDS (занимает пару минут).
Совет. Роль Windows Deployment Services можно установить с помощью всего одной команды PowerShell:
Install-WindowsFeature -Name WDS -IncludeManagementTools
Установка Microsoft Deployment Toolkit 2013
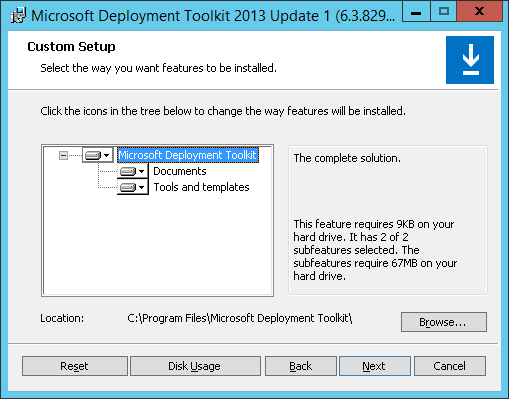
Установите Microsoft Deployment Toolkit (MDT) 2013 Update 1 со стандартными настройками, для чего достаточно скачать и запустить с правами администратора файл MicrosoftDeploymentToolkit2013_x64.
Установка Windows Assessment and Deployment Kit
Далее нужно установить Windows Assessment and Deployment Kit (Windows ADK) для Windows 10. Скачайте и запустите файл adksetup.exe.
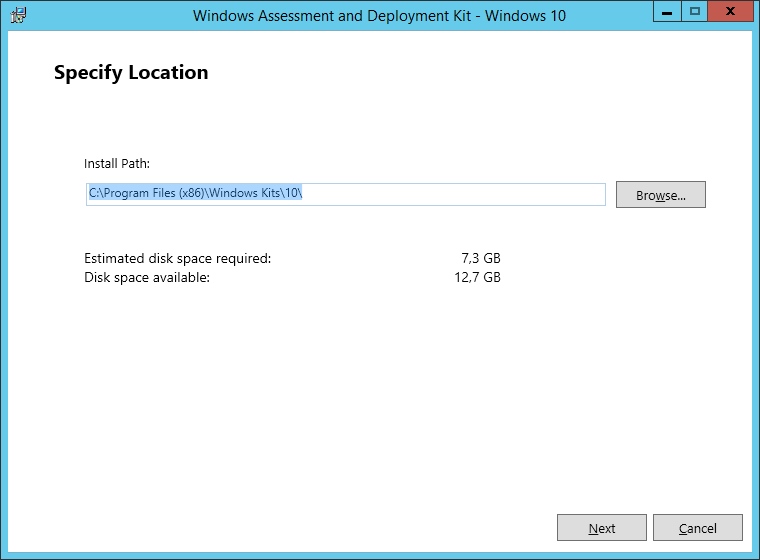
Укажите каталог для установки (по умолчанию C:\Program Files (x86)\Windows Kits\10\).
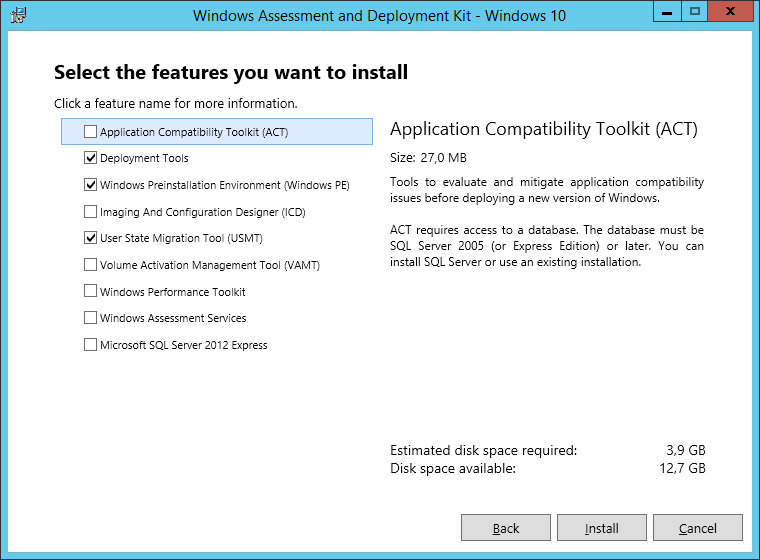
В списке компонентов ADK для установки отметьте:
- Deployment tools –используется для настройки образа Windows и автоматизации развертывания образа
- Windows Preinstallation Environment (Windows PE) – среда WinPE — минимальная ОС, разработанная для подготовки компьютера к установке Windows или обслуживания
- User State Migration tool (USMT) – набор инструментов для миграции данных пользователей между системами
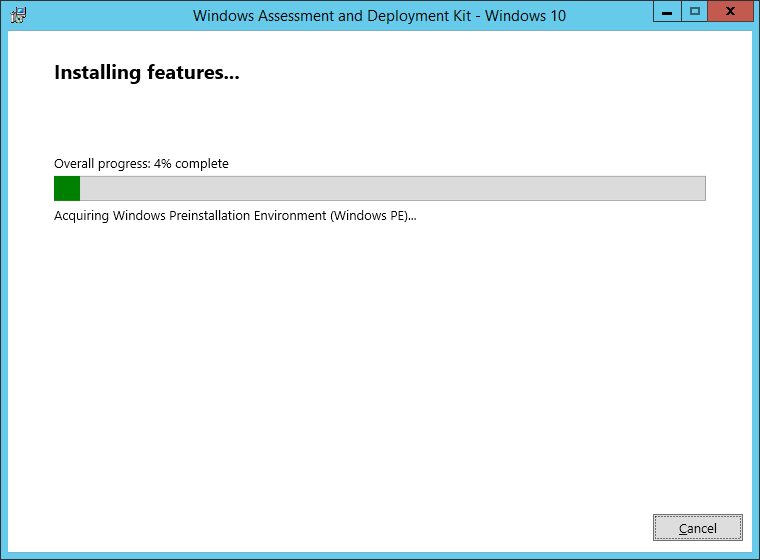
Запустите установке Windows ADK.
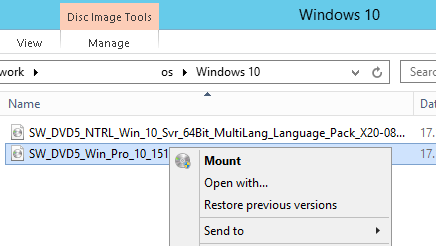
Теперь нам нужен дистрибутив Windows 10. В нашем примере это будет Windows 10 x64 Pro. Т.к. MDT не позволяет напрямую работать с iso файлами образа Windows, необходимо распаковать установочные файлы. Самый простой вариант – смонтировать файл с iso образом Windows 10 через File Explorer (Проводник) в отдельный виртуальный драйв (ПКМ по iso файлу-> Mount).
Настройка MDT 2013
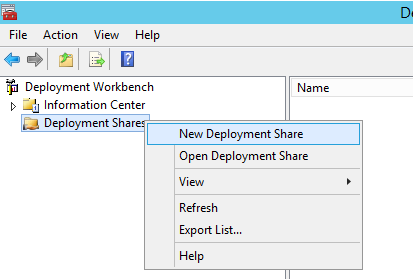
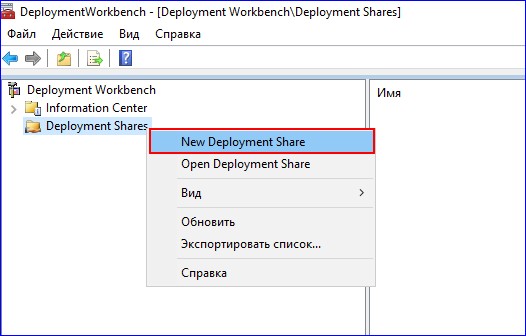
Приступим к настройке MDT 2013. Запустим консоль Deployment Workbench, щелкнем ПКМ по Deployment Share и создадим новый каталог (New Deployment Share).
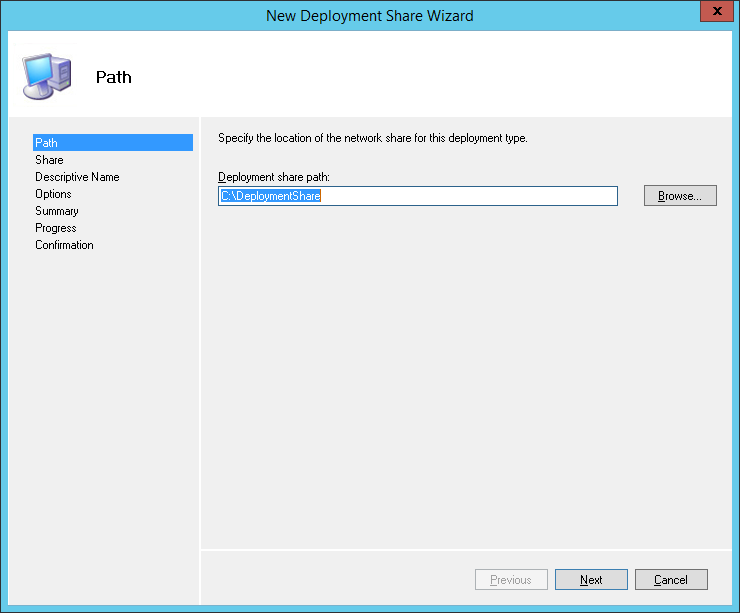
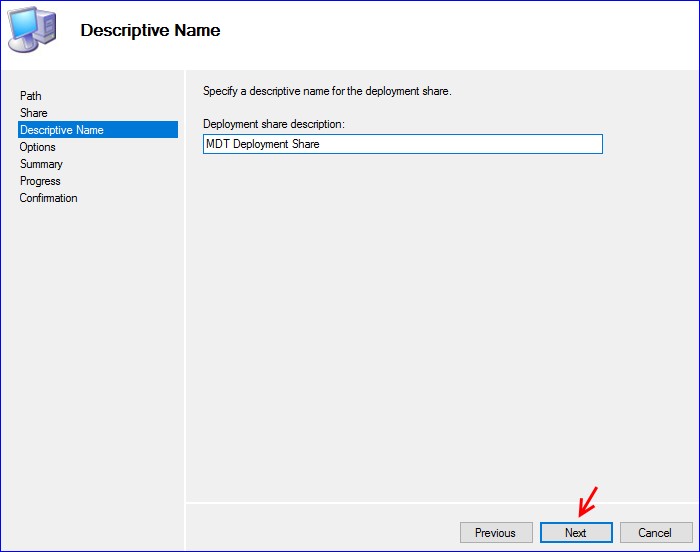
В окне мастера создания нового каталога распространения укажите путь к папке (C:\DeploymentShare в нашем случае).
Укажите сетевое имя каталога (мы оставили имя по умолчанию DeploymentShare$) и нажмите Next.
Совет. Знак “$” в имени сетевой папки означает, что она будет скрыта от пользователей.
После окончания работы мастера перейдите в папку C:\DeploymentShare.
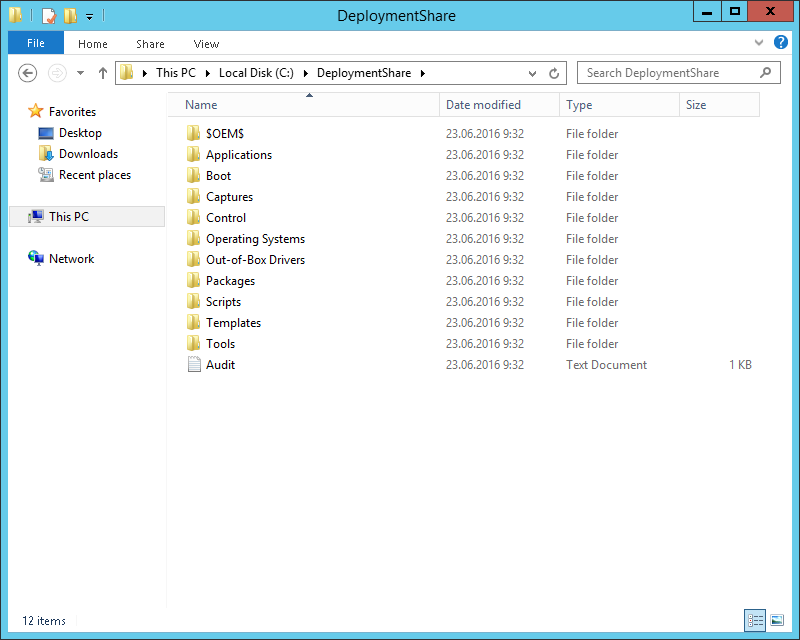
В этой папке хранятся образы ОС, драйвера, настройки, пакеты с приложениями и т.д. Папка является портабельной и может быть легко перенесена на другой MDT сервер.
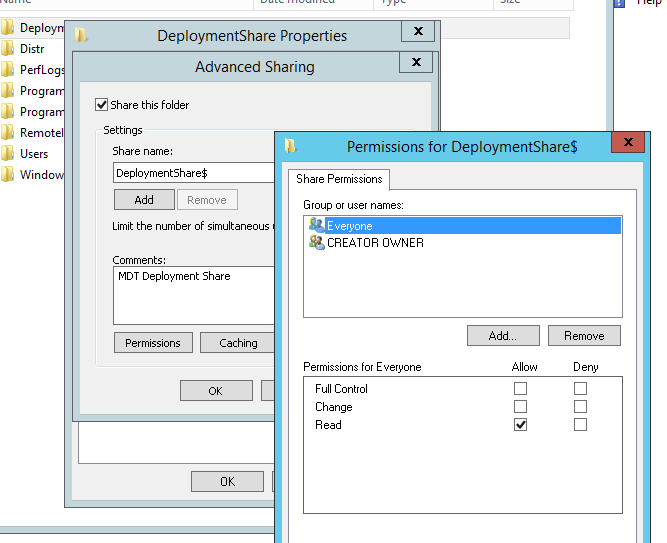
Чтобы все сетевые клиенты (в том числе анонимные) могли обращаться к содержимому этой папке, в свойствах сетевой папки DeploymentShare$, нужно добавить группу Everyone с разрешением на чтение.
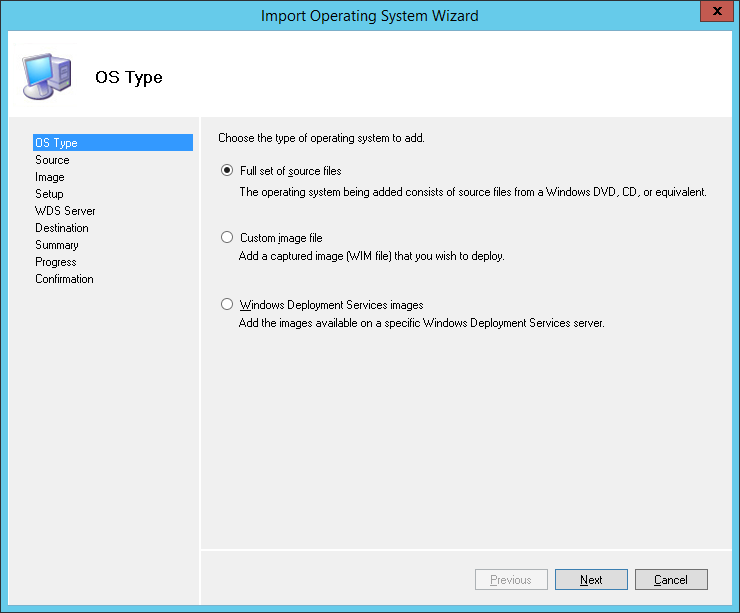
На следующем шаге нам нужно импортировать образ Windows 10. MDT поддерживает импорт образа операционной системы непосредственно с диска дистрибутива, wim файла или образа wds.
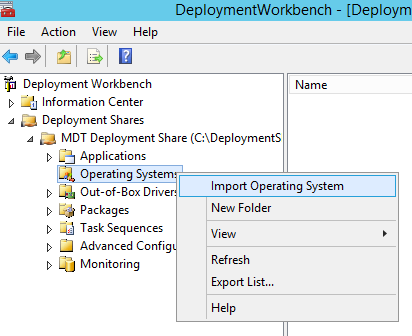
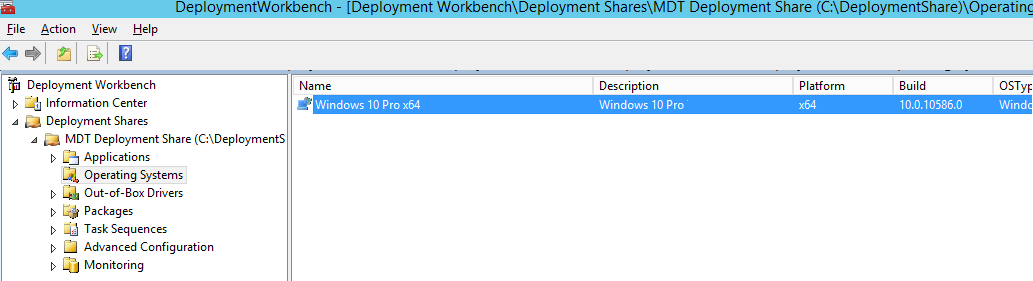
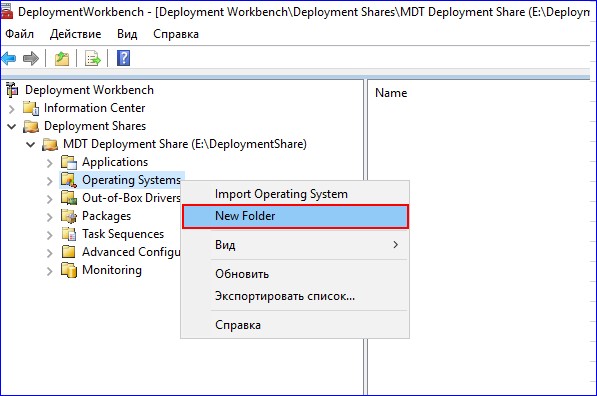
Разверните Deployment Shares -> MDT Deployment share. ПКМ по разделу Operating systems и в меню выберите Import Operating System.
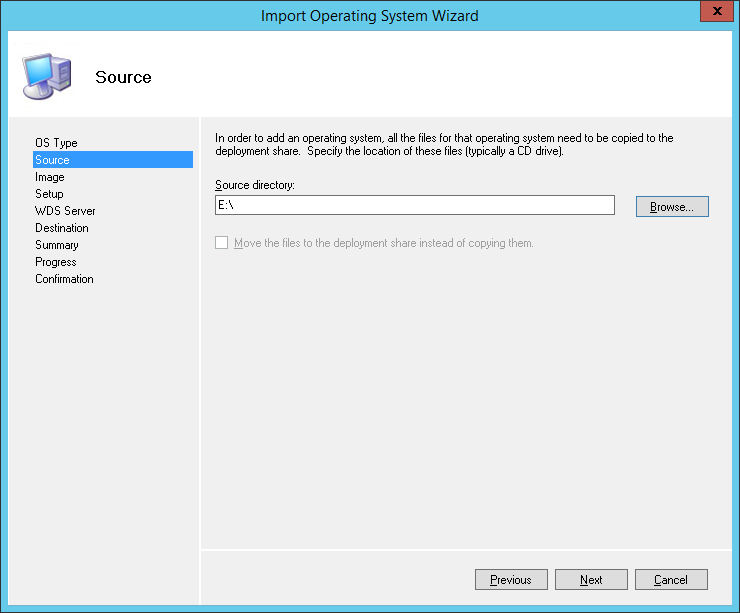
Выберите пункт Full set of source files и укажите имя драйва, на который был смонтирован iso образ Windows 10.
Укажите имя каталога, в котором будет храниться импортируемый образ.
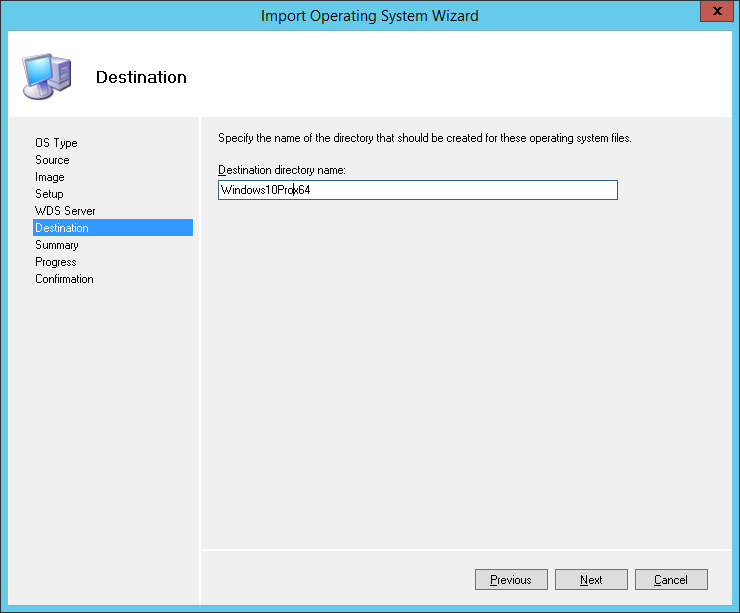
Мастер скопирует файлы дистрибутива Windows 10 в каталог C:\DeploymentShare\Operating Systems\Windows10Prox64, а в разделе Operating Systems появится новый запись, указывающая на образ Windows 10 Pro x64.
Создание задания установки MDT
Теперь нужно создать задание установки (Task Sequence), представляющее собой последовательность действий, необходимых для разворачивания Windows (это установка ОС, драйверов, приложений, конфигурация системы, обновлений, запуск различных скриптов настройки и т.п.).
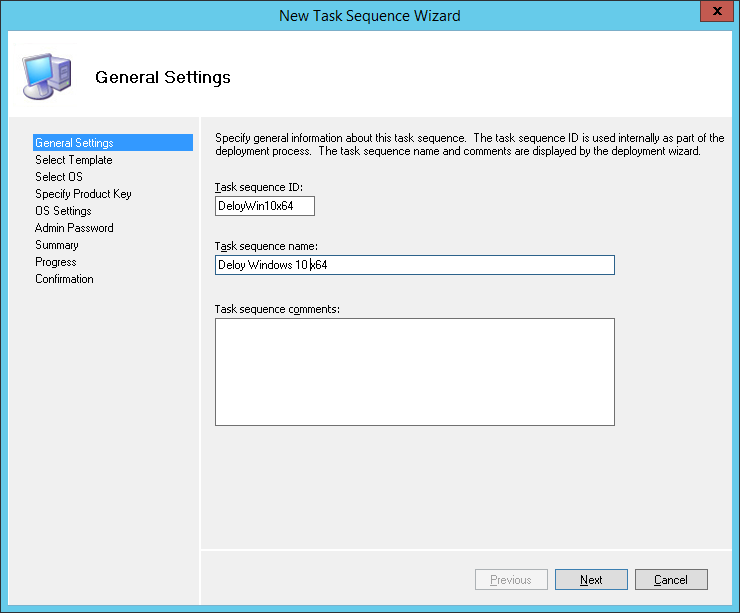
Щелкните ПКМ по разделу Task Sequences и выберите New Task Sequence.
В качестве идентификатора задания (Task sequence ID) укажем DeployWin10x64, а имени (Task sequence name) — “Deploy Windows 10 x64”.
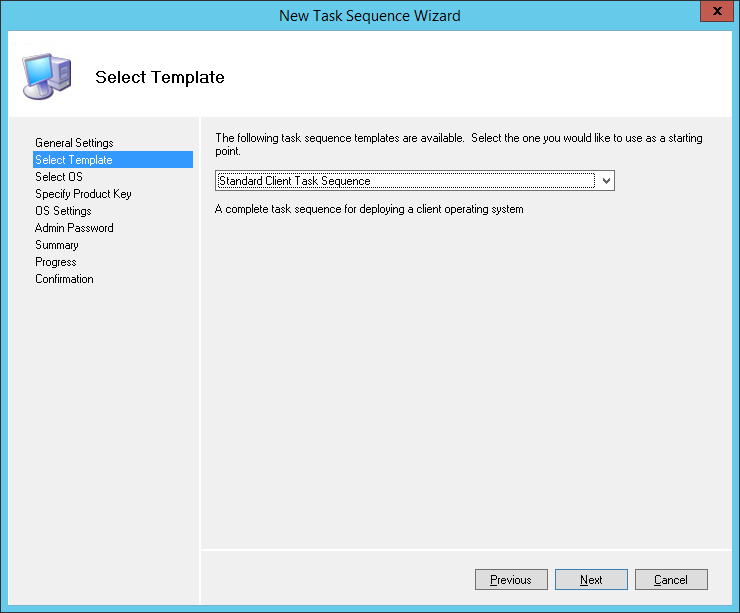
В выпадающем меню нужно выбрать один из существующих шаблонов заданий установки. В нашем случае это будет Standard Client Task Sequence.
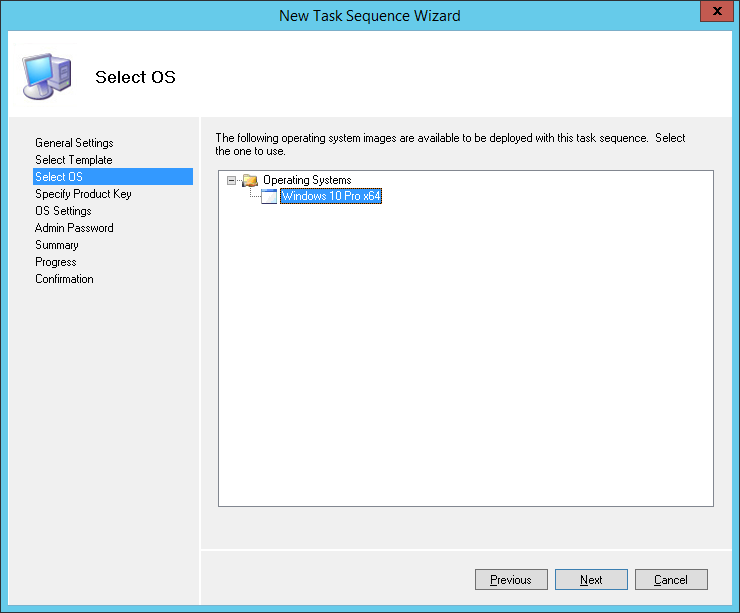
Выберите ОС, которую нужно установить в рамках этого задания (Windows 10 Pro x64).
Затем можно указать ключ продукта, это может быть как retail, MAK или KMS ключ.

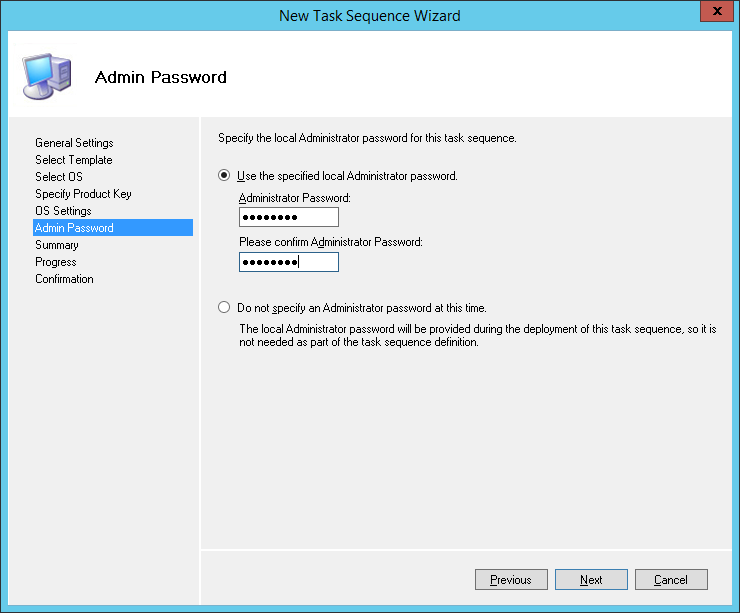
Далее можно задать пароль локального администратора на устанавливаемой системе.
Совет. Имейте в виду, что пароль хранится в открытом виде в файле Unattend.xml, поэтому стоит задать простой пароль локального администратора, который после ввода компьютера в домен будет автоматически измен с помощью MS LAPS.
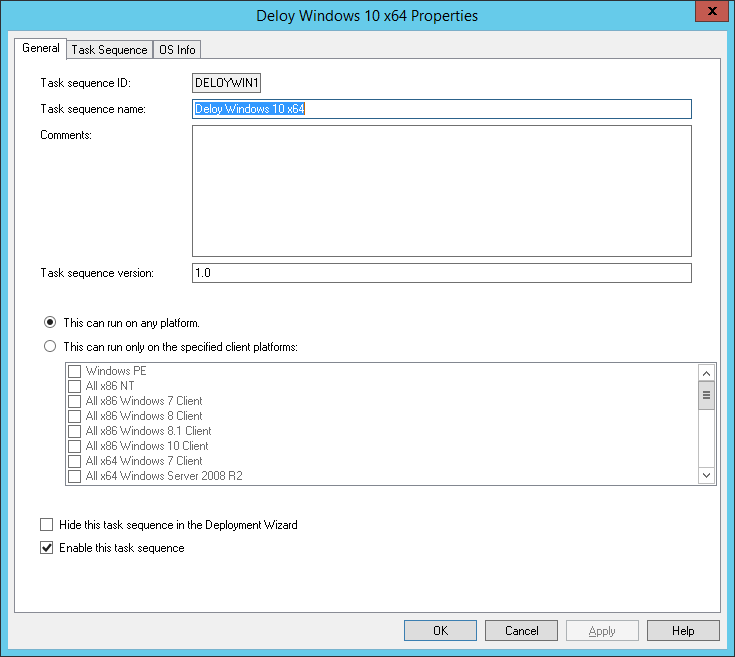
Откройте свойства созданного задания и проверьте, что его запуск разрешён на любых платформах (This can run on any platforms).
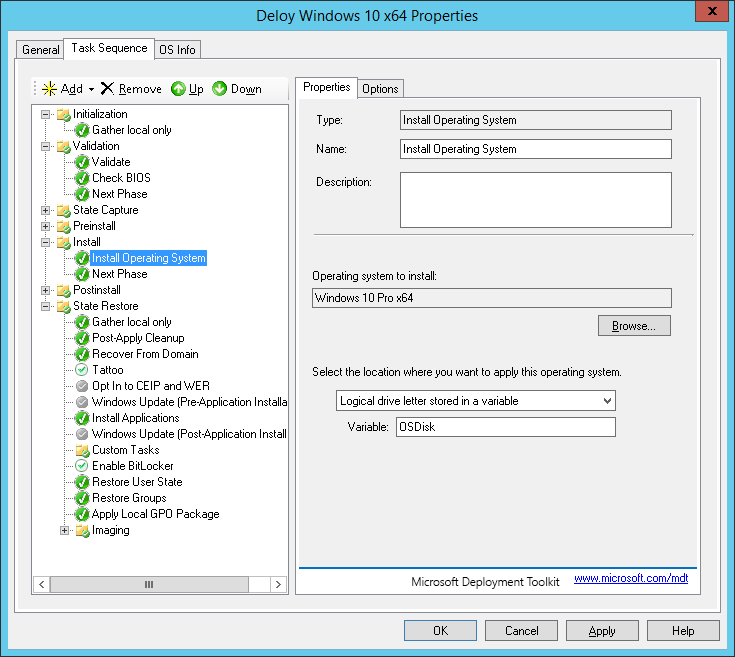
На вкладке Task Sequence отображается последовательность шагов, определенных в шаблоне, которые нужно выполнить при разворачивании ОС на клиенте. Здесь можно добавить собственные шаги, либо оставить все по-умолчанию.
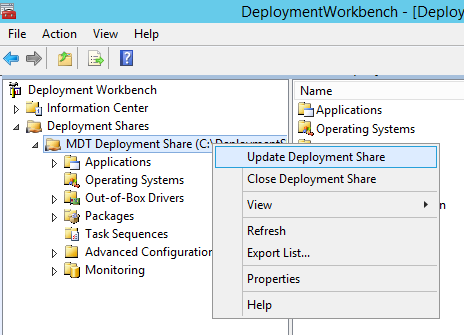
Далее нужно обновить каталок распространения MDT. Щелкните ПКМ по MDT Deployment Share и выберите Update Deployment Share. MDT сгенерирует загрузочные образы и файлы, нужные для установки ОС.
При первом запуске каталог C:\DeploymentShare\Boot пуст, поэтому нужно выбрать пункт Completely regenerate the boot image и дождаться генерации образов ОС.
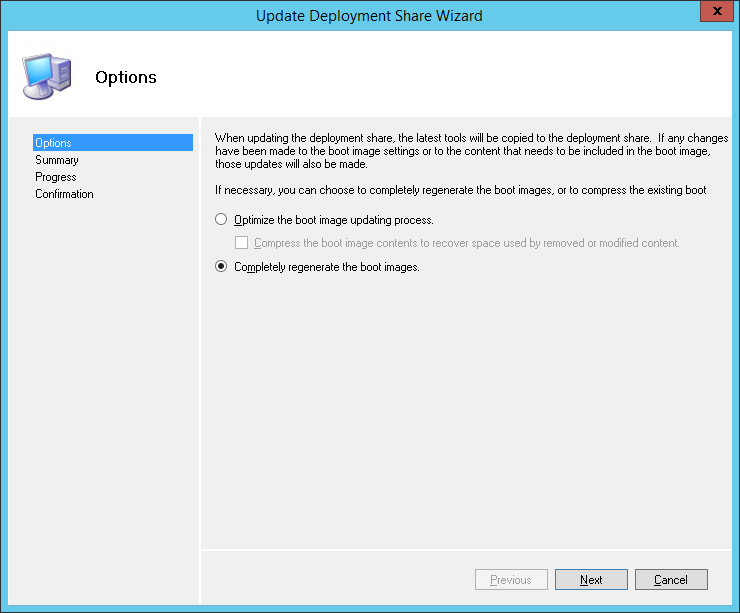
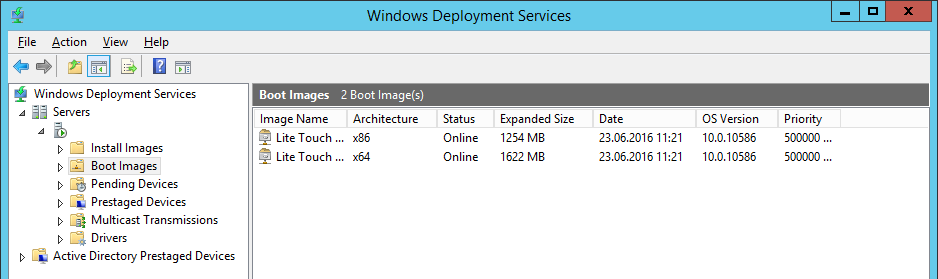
В каталоге C:\DeploymentShare\Boot должны появится iso и wim образы Windows PE для x86 и x64 платформ. Эти образы могут быть использованы для загрузки физических или виртуальных машин при разворачивании образа. При разворачивании образа Windows по сети (PXE boot) с помощью Windows Deployment Services могут быть использованы wim файлы.
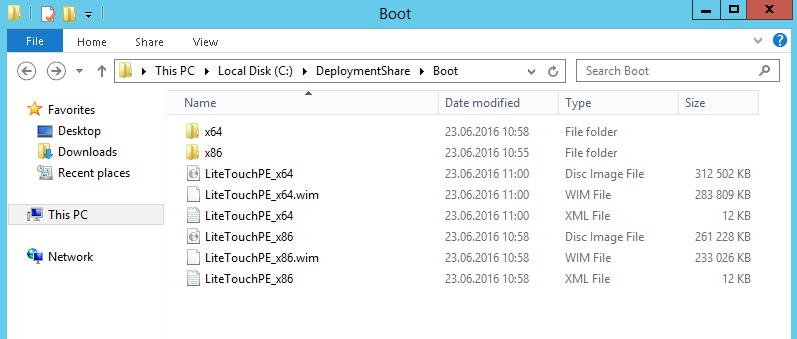
Совет. Т.к. мы планируем использовать загрузку PXE booting, нам понадобятся только wim файлы LiteTouchPE_x64.wim и LiteTouchPE_x86.wim.
Настройка загрузочного образа в Windows Deployment Services
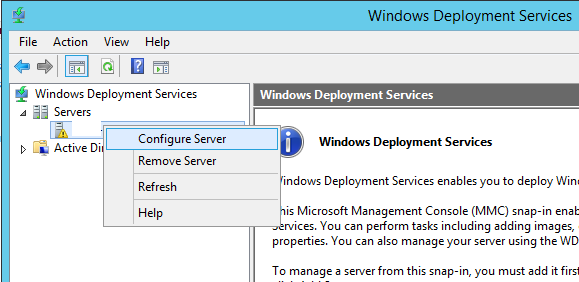
Следующий этап – настройка сервера WDS, который должен обслуживать запросы клиентов PXE. Откройте консоль Windows Deployment Services (Server Manager -> Tools -> Windows Deployment Services), разверните ветку Servers и в контекстном меню сервера выберите Configure Server.
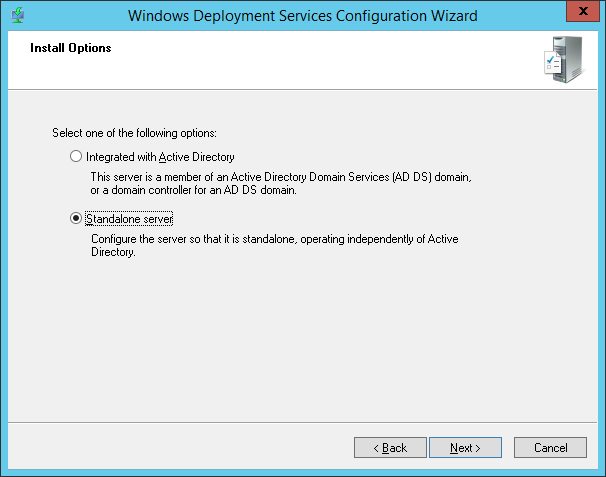
Укажем, что это будет отдельный WDS сервер (Standalone Server), не зависимый от Active Directory.
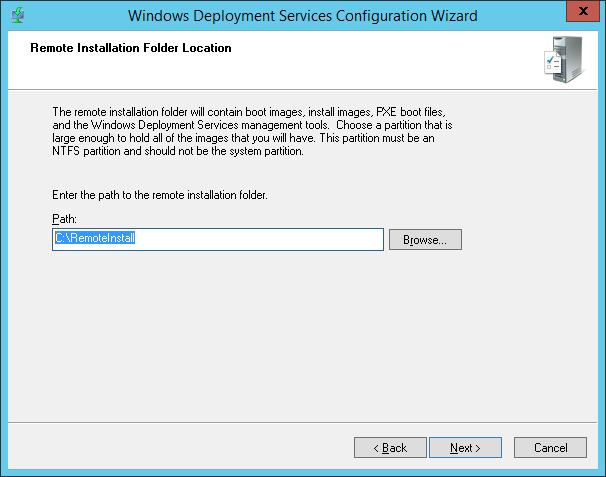
Каталог установки оставим без изменений — C:\RemoteInstall.
В настройках клиента PXE нужно указать, что нужно отвечать на запросы всех клиентов — Respond to all clien computers (known and unknown).
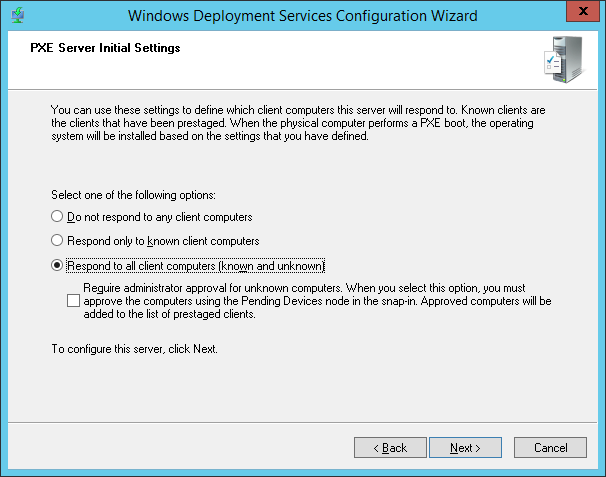
Совет. В среде Active Directory было бы безопаснее использовать опцию Respond only to known client computer.
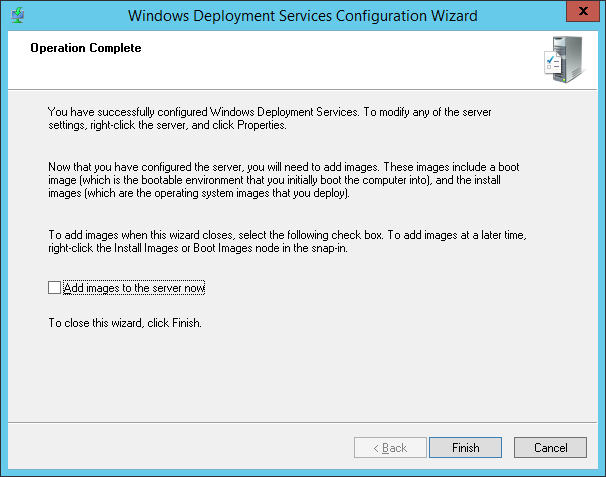
Снимите галку– Add images to the server now.
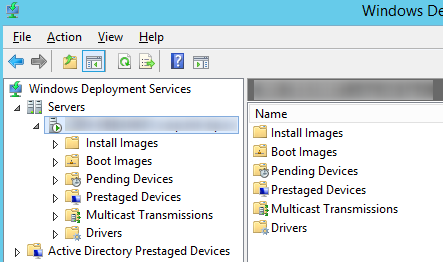
Зеленый треугольник на имени WDS сервера означает, что он настроен и запущен.
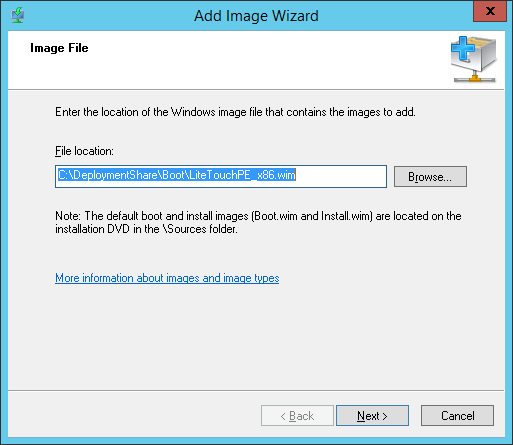
Теперь нам нужно импортировать на WDS сервер загрузочный образ, который мы создали ранее с помощью MDT. Щелкните ПКМ по Boot Image –> Add boot image.
Перейдите в каталог C:\DeploymentShare\Boot и последовательно добавьте файлы LiteTouchPE_x86.wim и LiteTouchPE_x64.wim.
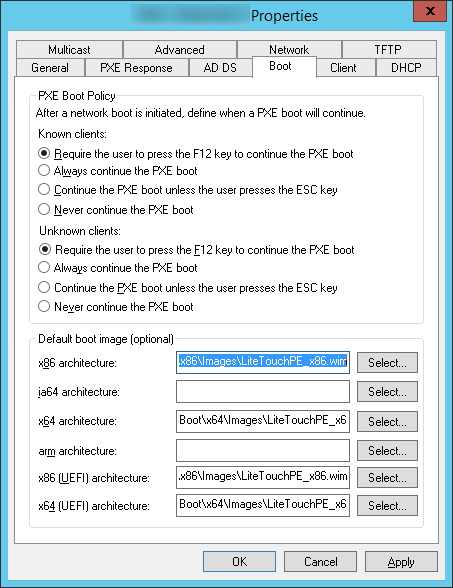
Последнее, что осталось выполнить – открыть свойства WDS сервера и перейти на вкладку Boot. Чтобы предотвратить случайную загрузку клиентов через PXE и автоматическую установку Windows, зададим обязательное использование клавиши F12 для использования PXE-загрузки. Для этого в секции PXE Boot Policy нужно выбрать опцию Require the user to press the F12 key to continue the PXE boot.
Здесь же укажите загрузочные образы для архитектур x86 и x64 (в том числе для архитектуры UEFI).
Все остальные настройки WDS сервера оставим по-умолчанию. Перезапустите службу WDS через консоль (All tasks ->Restart).
Важно. WDS сервер и клиентский компьютер, на который вы хотите установить ОС через PXE, должны находится в одной подсети (VLAN). Если они расположены в разных подсетях, нужно настроить DHCP-relay (IP Helper) с дополнительными DHCP опциями 60 и 67.
Тестирование установки Windows 10 по сети
Теперь мы готовы протестировать сетевую загрузку компьютера клиента с wim образа, расположенного на WDS сервере (PXE boot). В этом тесте это будет виртуальная машина VMWare. Запустите ВМ и в процессе загрузи несколько раз нажмите клавишу F12 для начала загрузки через PXE.
Press F12 for network service boot
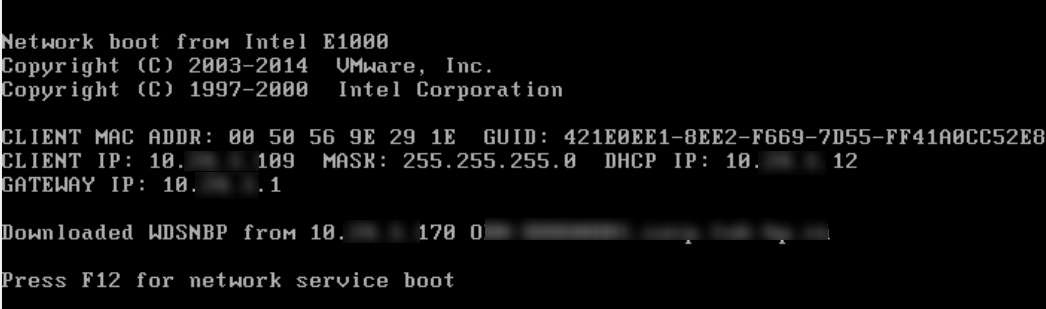
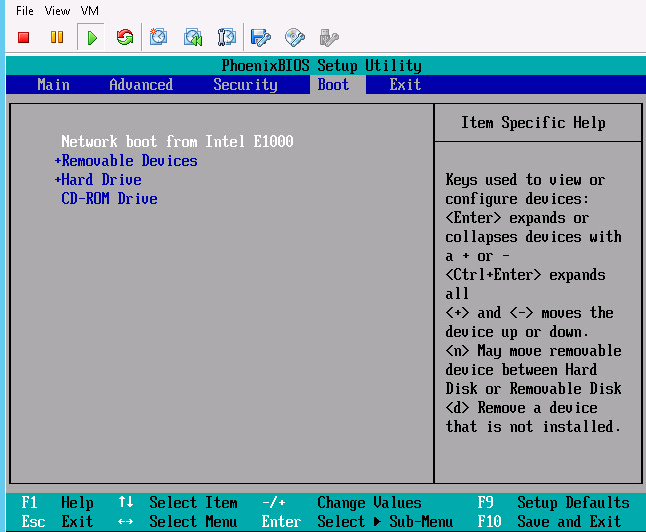
Совет. Т.к. экран загрузки в ВМ проскакивает слишком быстро, практически нереально успеть нажать кнопку F12. Поэтом в настройках ВМ предпочтительно задать наивысший приоритет для загрузочного устройства Network boot from Intel E1000.
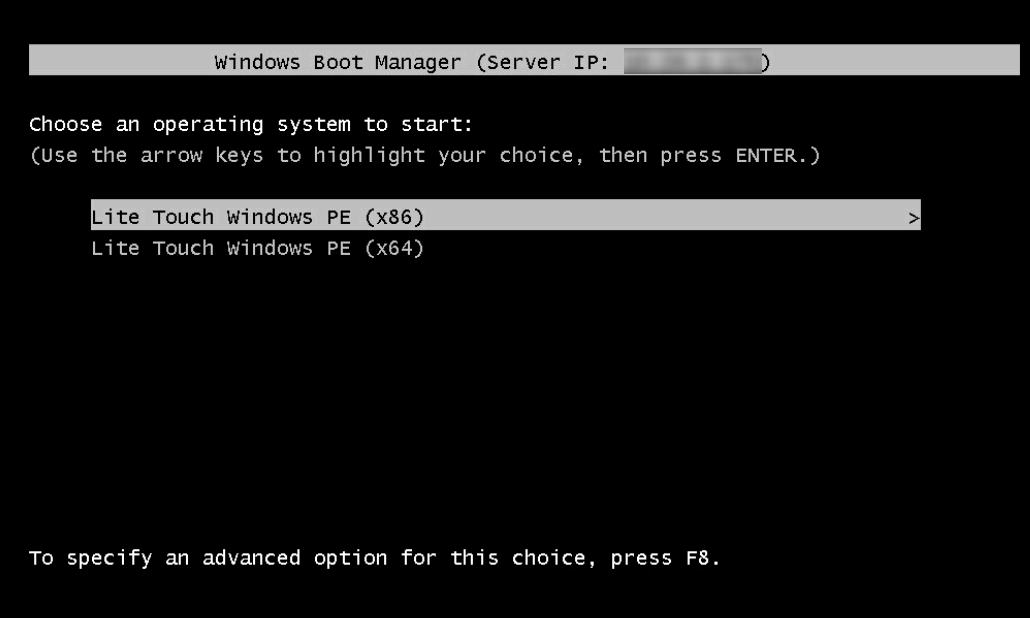
Машина подключится к WDS серверу и получит список доступных загрузочных образов Windows PE. В стандартном диалоге Boot Manager нужно быте выбрать ОС, которую нужно загрузить. В нашем случае это Lite Touch Windows PE (x86).
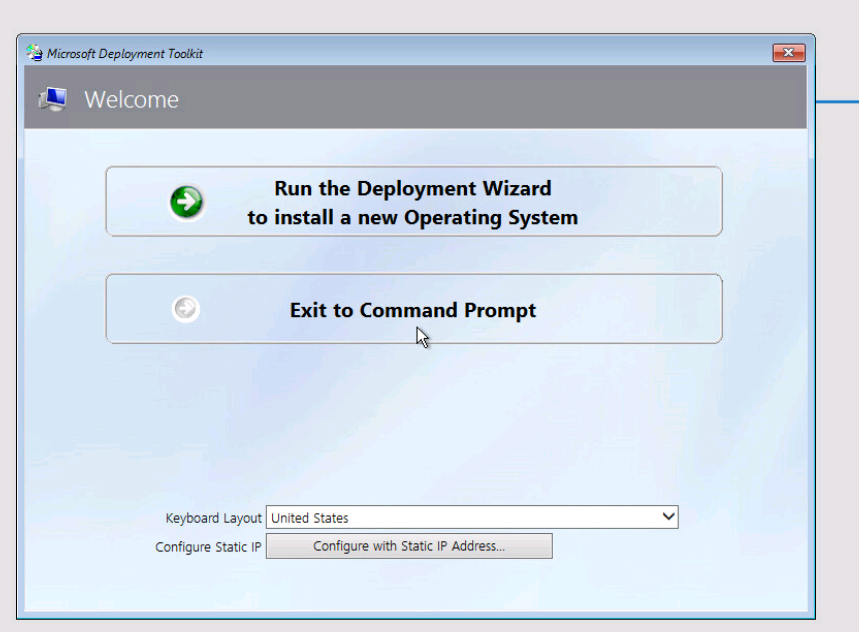
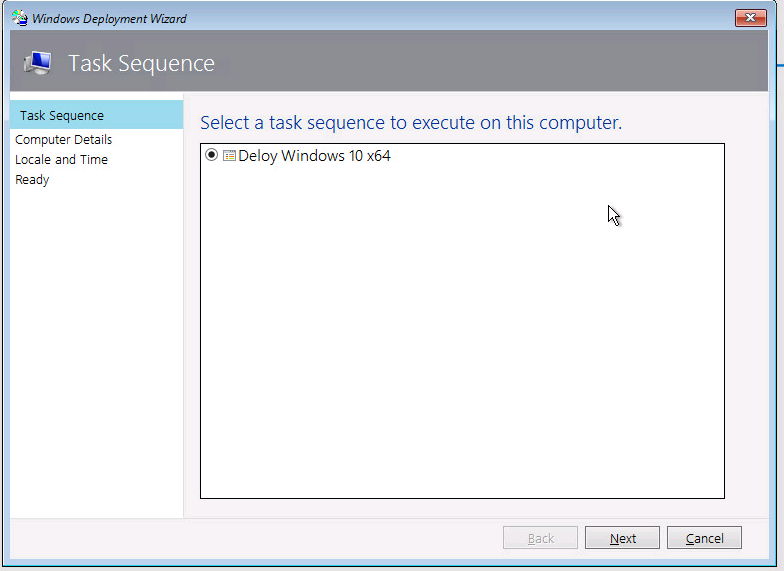
Система начнет загрузку по сети wim образа со средой WinPE и предложит начать установку Windows 10 с помощью мастера Microsoft Deployment Tool Wizard.

Нажмите на кнопку Run the Deployment Wizard to install a new Operating System для запуска пошагового мастера установки образа Windows 10 на компьютер клиента.
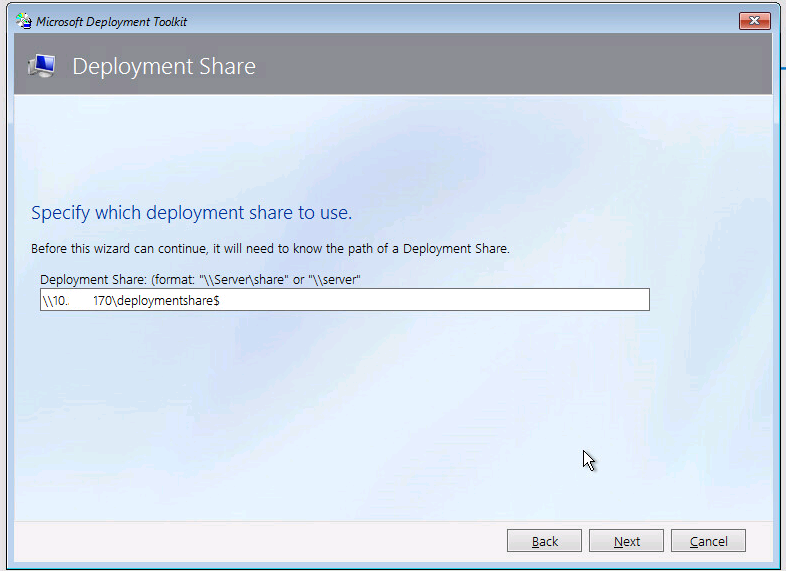
В нашем примере также понадобилось указать UNC путь к сетевой папке DeploymentShare$ на MDT сервере(\\10.1.24.170\DeploymentShare$) и имя+пароль пользователя для доступа к ней.
Осталось среди доступных заданий выбрать созданное ранее Deploy Windows 10 x64 и дождаться окончания сетевой установки образа Windows 10 на этот компьютер.
Итак, в этой статье мы показали, как воспользоваться функционалом MDT 2013 и WDS сервера для создания инфраструктуры, позволяющей в автоматическом режиме по сети развернуть образ Windows 10 на клиентах.
Здравствуйте, уважаемые читатели сайта remontcompa.ru! Меня зовут Роман Нахват и я представляю вашему вниманию статью о создании установочного дистрибутива операционной системы Windows 10 (версии 1809) с интегрированными в него приложениями и драйверами. Создавать данный установочный дистрибутив мы с вами будем используя Microsoft Deployment Toolkit (MDT) версии 8456. Для создания такого дистрибутива нам понадобится оригинальный, скачанный с официального сайта Microsoft iso образ Windows 10, комплект средств для развёртывания и оценки Windows 10 (ADK for Windows 10) версии 1809, установочный файл Microsoft Deployment Toolkit, установочные файлы приложений и драйвера, которые необходимо включить в состав дистрибутива Windows 10. Итак, поехали.
Создание установочного дистрибутива Windows 10 1809 с приложениями и драйверами используя Microsoft Deployment Toolkit (MDT) версии 8456
Переходим по адресу:
https://docs.microsoft.com/en-us/windows-hardware/get-started/adk-install
И выполняем скачивание пакета ADK for Windows 10 версии 1809.
 версии 8456")
Также переходим по адресу:
https://www.microsoft.com/en-us/download/details.aspx?id=54259
И скачиваем установочный файл Microsoft Deployment Toolkit.
 версии 8456")
Выполняем установку ADK for Windows 10 версии 1809.
 версии 8456")
В окошке принятия правил конфиденциальности жмём «Далее». Затем принимаем лицензионное соглашение. На этапе выбора компонентов всё оставляем по умолчанию, жмём «Установить».
 версии 8456")
И устанавливаем.
 версии 8456")
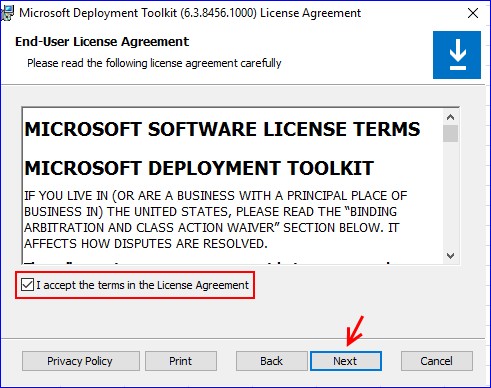
Теперь выполняем установку Microsoft Deployment Toolkit. Принимаем лицензионное соглашение.
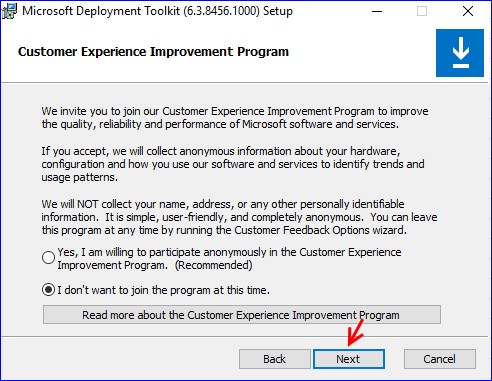
Жмём просто Next на этапе настройки компонентов. И на следующем за ним этапе тоже жмём Next.
Install.
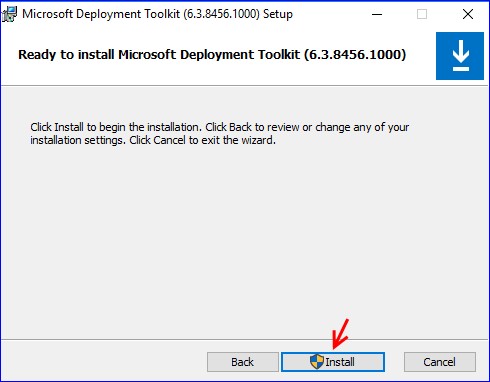
Установка Microsoft Deployment Toolkit завершена. Жмём в конце «Finish».
Запускаем Deployment Workbench в меню «Пуск». Microsoft Deployment Toolkit (MDT) предоставляет пользователю набор инструментов для автоматизации развертывания операционных систем на настольных компьютерах и серверах. MDT поддерживает развертывание операционных систем от Windows 7 до Windows 10, гибкое управление драйверами и приложениями.
 версии 8456")
Создадим новую Deployment Share (New Deployment Share).
Указываем месторасположение создаваемой Deployment Share (в нашем случае это раздел E:).
 версии 8456")
На странице Share оставляем всё по умолчанию.
 версии 8456")
Next.
Next.
 версии 8456")
Next.
 версии 8456")
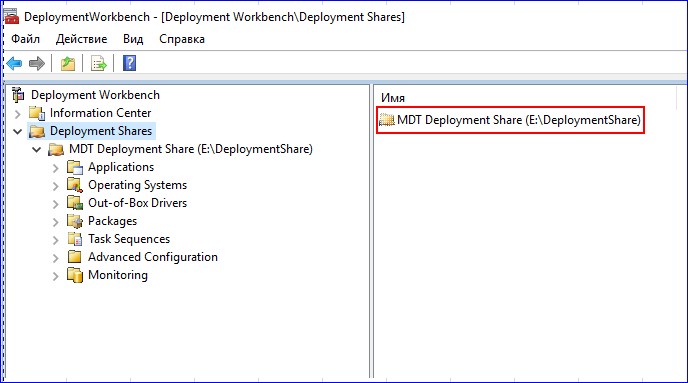
Deployment Share успешно создана.
 версии 8456")
Созданная Deployment Share.
Под буквой G: у нас смонтирован в виртуальный привод установочный дистрибутив Windows 10. Cмонтированный дистрибутив Windows 10 базируется на файле install.esd.
 версии 8456")
Создадим на разделе C: папку win10x64 и скопируем в него файл install.esd.
 версии 8456")
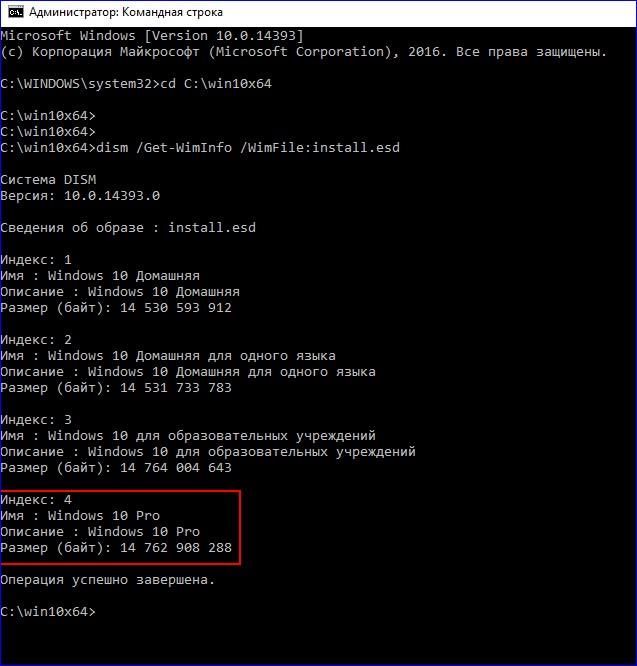
Запустим командную строку от имени администратора, перейдем в папку win10x64 и выполним команду:
dism /Get-WimInfo /WimFile:install.esd
 версии 8456")
Как видим, файл install.esd содержит в себе несколько редакций операционной системы Windows 10. Нас интересует редакция под индексом 4, то есть Windows 10 Pro.
Выполним экспорт образа Windows 10 Pro из файла install.esd в отдельный файл c расширением .wim. Для этого вводим команду:
dism /export-image /SourceImageFile:install.esd /SourceIndex:4 /DestinationImageFile:install.wim /Compress:max /CheckIntegrity
После параметра SourceIndex указываем число 4 (т.е порядковый номер индекса Windows 10 pro), задаём максимальное сжатие экспортируемого образа (параметр Compress:max), параметр CheckIntegrity применяем для выявления повреждения wim-файла.
 версии 8456")
Процесс экспорта Windows 10 pro в отдельный файл с расширением .wim.
 версии 8456")
Экспорт образа Windows 10 pro успешно завершён
 версии 8456")
Перейдём в папку win10x64 и рядом с файлом install.esd видим файл install.wim
 версии 8456")
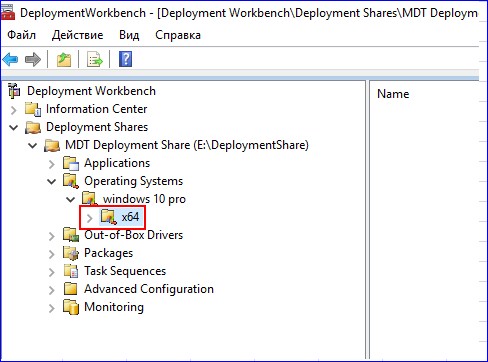
Перейдём в окно Deployment Workbench, развернём созданную Deployment Share и далее в Operating Systems создадим папки windows 10 pro и x64 (пункт New Folder).
Указываем имя папки.
 версии 8456")
Жмём Next.
 версии 8456")
Finish.
 версии 8456")
Таким же образом создаем папку x64. В итоге получаем следующее
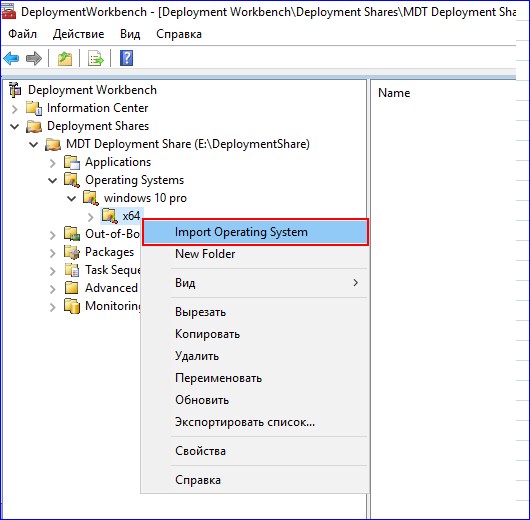
Выделяем папку x64 и в контекстном меню выбираем Import Operating System.
Выбираем Custom image file.
 версии 8456")
Указываем путь к файлу install.wim, который мы выше экспортировали из файла install.esd.
 версии 8456")
Оставляем всё по умолчанию. Жмём Next.
 версии 8456")
Next.
 версии 8456")
Next.
 версии 8456")
Процесс добавления образа Windows 10 pro в Deployment Share.
 версии 8456")
Жмём Finish.
 версии 8456")
Видим, что мы успешно добавили образ Windows 10 pro в Deployment Share.
 версии 8456")
Добавим в созданную Deployment Share приложения и драйвера. На флеш накопителе в соответствующих папках у нас находятся драйвера и установочные файлы приложений.
 версии 8456")
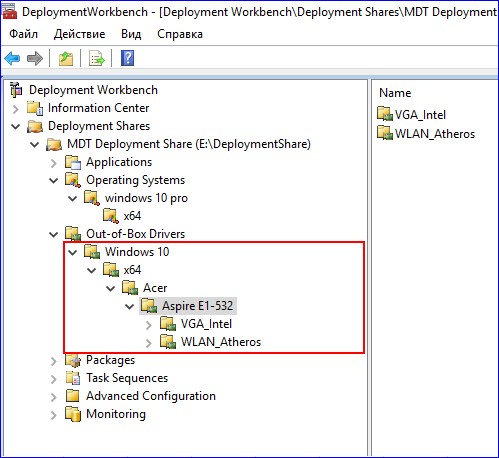
Выбираем Out-of-Box Drivers, и создаём структуру папок, как показано ниже.
Выделяем папку VGA_Intel и выбираем Import Drivers.
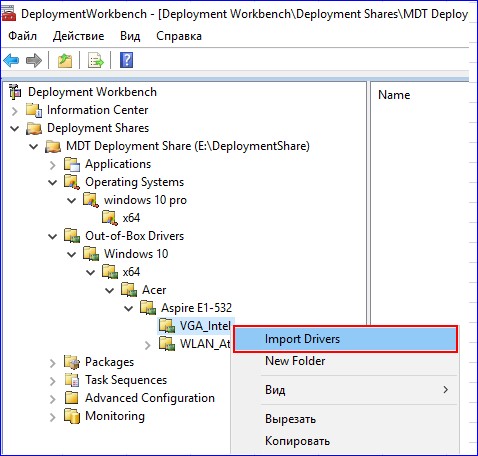
Указываем путь к драйверам, которые будем добавлять в папку VGA_Intel.
 версии 8456")
Next.
 версии 8456")
Процесс добавления драйверов в папку VGA_Intel.
 версии 8456")
Finish.
 версии 8456")
Драйвера, добавленные в папку VGA_Intel.
 версии 8456")
Таким же образом добавим драйвера и в папку WLAN_Atheros. Получим следующее.
 версии 8456")
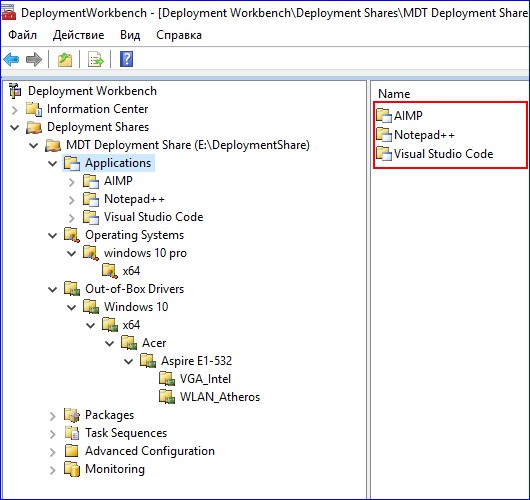
В Deployment Share переходим в Applications и создаём три папки: AIMP, Notepad++ и Visual Studio Code.
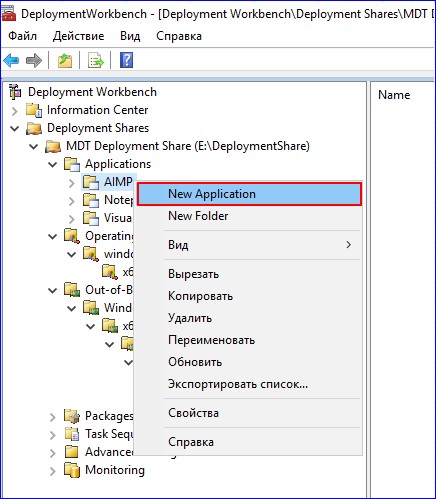
В каждую из созданных папок добавим соответствующие приложения. Выделяем папку AIMP и выбираем New Application.
Выбираем Application with source files.
 версии 8456")
Указываем название приложения и его версию.
 версии 8456")
Прописываем путь к установочному файлу приложения.
 версии 8456")
В строке Command line указываем название установочного файла приложения с расширением и далее прописываем ключ для тихой установки данного приложения. Например, для медиапроигрывателя AIMP ключ тихой установки будет /SILENT /AUTO.
 версии 8456")
Next.
 версии 8456")
Приложение AIMP успешно добавлено.
 версии 8456")
Таким же образом в соответствующие папки добавляем приложения Notepad++ и Visual Studio Сode, используя следующие ключи тихой установки:
- для Notepad++ /S, а
- для Visual Studio Сode /VERYSILENT /SUPPRESSMSGBOXES /NORESTART /SP-
Получаем следующее.
 версии 8456")
 версии 8456")
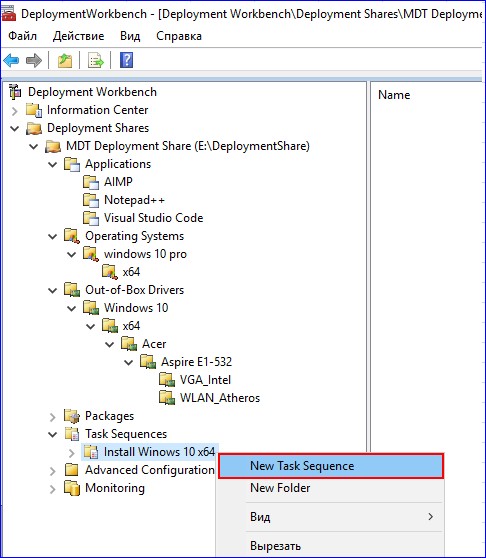
Переходим в Task Sequences, и как это делали выше, создаём папку Install Windows 10 x64. Создадим новую последовательность задач, выделив данную папку и выбрав New Task Sequence.
Указываем идентификатор последовательности задач (w10), и название (Install Windows 10).
 версии 8456")
На вкладке Select Template из выпадающего списка выбираем Standard Client Task Sequence.
 версии 8456")
Указываем операционную систему для установки.
 версии 8456")
Вводим ключ для установки Windows 10 pro.
 версии 8456")
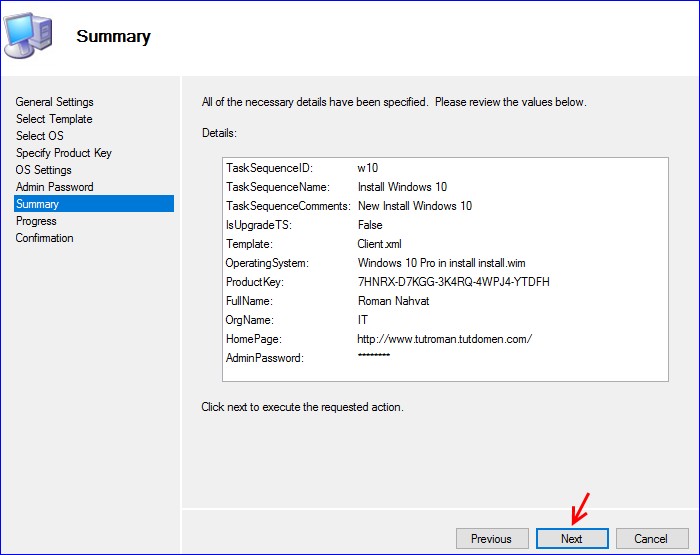
Указываем имя владельца системы, название организации и домашнюю страницу для встроенного в операционную систему браузера.
 версии 8456")
Указываем пароль для встроенной учётной записи администратора.
 версии 8456")
Жмём Next.
Последовательность задач Install Windows 10 x64 успешно создана.
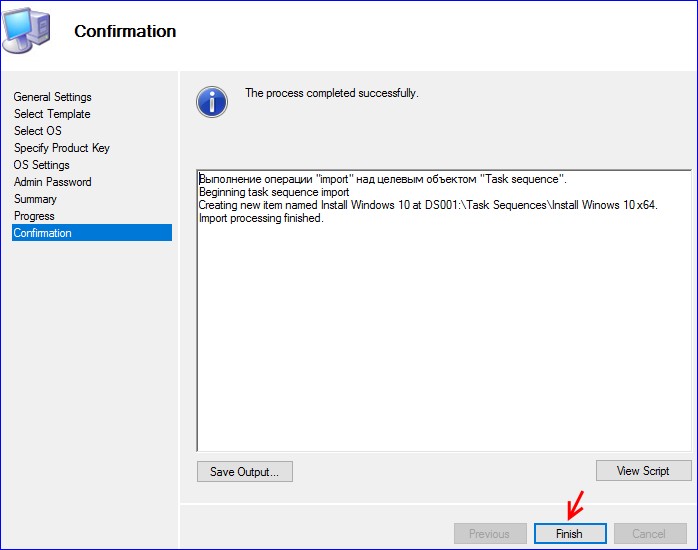
Созданная последовательность задач Install Windows 10 x64.1
 версии 8456")
Переходим к Selection Profiles и выбираем New Selection Profile.
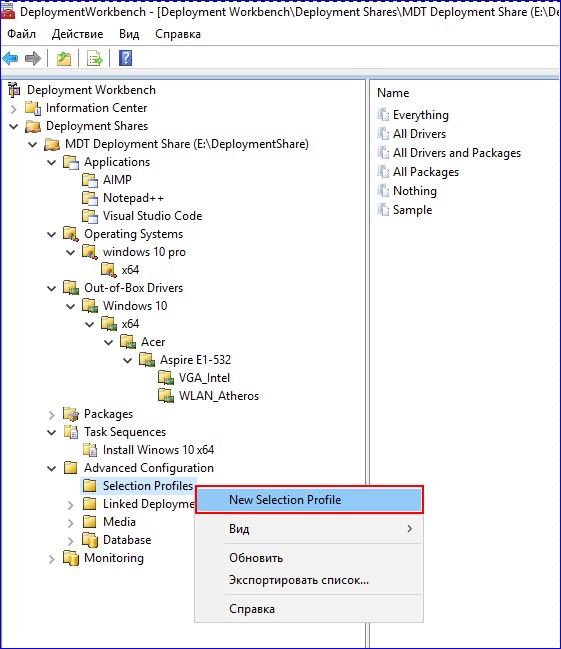
Указываем имя для создаваемого Selection profile, в нашем случае это Drivers Acer Aspire E1-532.
 версии 8456")
Выбираем компоненты для создаваемого Selection profile (ставим галочки напротив папок с драйверами, а именно VGA_Intel и WLAN_Atheros).
 версии 8456")
Жмём Next.
 версии 8456")
Finish.
 версии 8456")
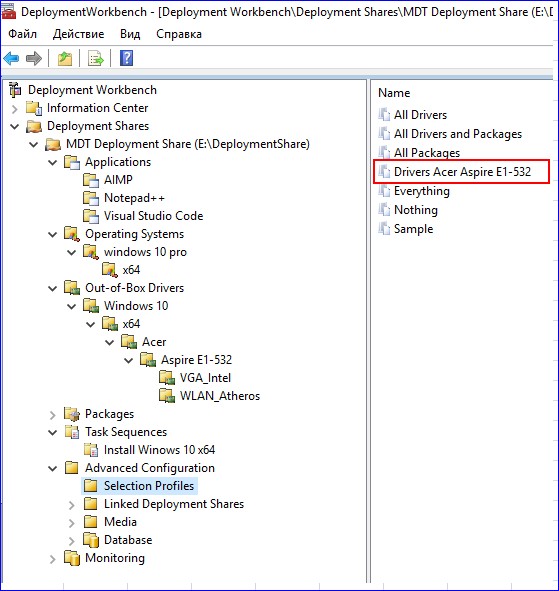
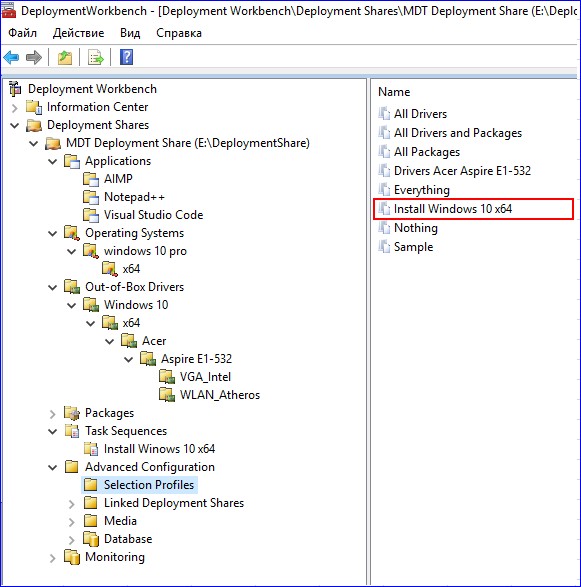
Selection profile c именем Drivers Acer Aspire E1-532 успешно создан.
Создадим ещё один Selection profile с именем Install Windows 10 x64.
 версии 8456")
Для Selection profile с именем Install Windows 10 x64 поставим галочки для компонентов, как это показано ниже.
 версии 8456")
Next.
Selection profile с именем Install Windows 10 x64 успешно создан.
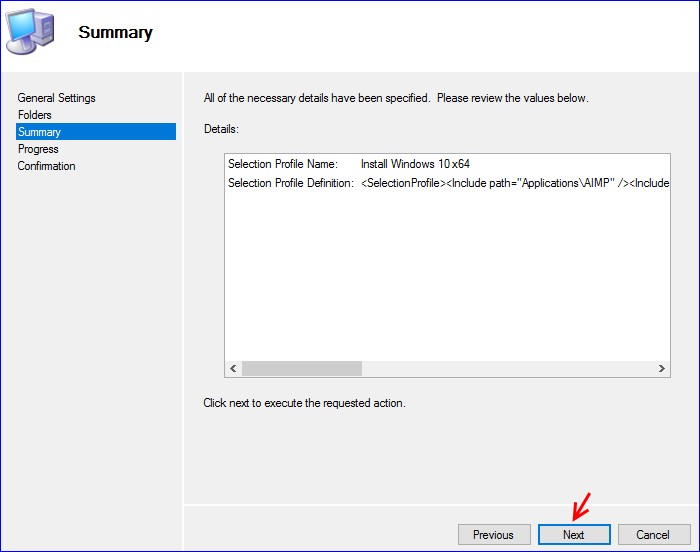
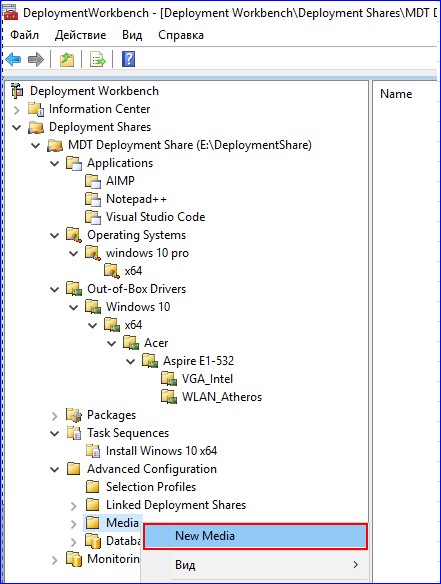
Приступим к созданию установочного дистрибутива с Windows 10 pro. Щёлкаем по Media и выбираем New Media.
Указываем путь, где будет сохраняться создаваемый установочный дистрибутив. В выпадающем списке Selection profile выбираем Install Windows 10 x64.
 версии 8456")
Next.
 версии 8456")
Ожидаем завершения процесса копирования файлов, необходимых для создания установочного дистрибутива (в нашем случае с Windows 10).
 версии 8456")
Finish.
 версии 8456")
Получаем следующее.
 версии 8456")
Щёлкаем по созданному MEDIA001 и выбираем Свойства.
 версии 8456")
Переходим на вкладку Windows PE.
 версии 8456")
Далее переходим на вкладку Drivers and Patches.
 версии 8456")
Включим в состав создаваемого установочного дистрибутива Windows 10 драйвера, которые мы добавляли в Deployment Share. Для этого в выпадающем списке Selection profile выбираем Drivers Acer Aspire E1-532.
 версии 8456")
Жмём Применить и ОК
 версии 8456")
Выделяем созданный Media (MEDIA001) и выбираем Update Media Content
 версии 8456")
Ожидаем завершения процесса создания установочного дистрибутива Windows 10. Процесс создания установочного дистрибутива Windows 10 с интегрированными драйверами и приложениями успешно завершён
 версии 8456")
Переходим на раздел E: в папку media и видим созданный установочный дистрибутив Windows 10 под именем LiteTouchMedia и расширением .iso
 версии 8456")
В следующей статье по Microsoft Deployment Toolkit (MDT) мы выполним установку Windows 10 на компьютер используя созданный дистрибутив, а так же рассмотрим процесс настройки данного дистрибутива для полной автоматизации установки Windows 10
Posted
Updated
Please refer to the tutorial below for Windows 10 Deployment with MDT
Components used in this lab
- Windows 2019 Server Core as AD Domain Controller
- AVENTIS-AD01 – 192.168.1.230
- Windows 2019 Server as MDT Deployment Server
- AVENTIS-MGMT – 192.168.1.232
Software Required for MDT Installation
- Download Windows ADK for Windows 10, version 1903 and Windows PE Add on for ADK and save it locally
Windows PE is available separately form the Assessment and Deployment Kit (ADK) starting from Windows 10 version 1809

- Download Microsoft MDT 8456 – MicrosoftDeploymentToolkit_x64.msi
- Download ISO Installation file for Windows 10 1909 from [Microsoft Volume License Service Center] (https://www.microsoft.com/Licensing/servicecenter/default.aspx)
- Driver Pack for HP Laptop
- Installation Files for Applications, like 7Zip, Foxit Reader and etc
Installation of Windows Deployment Service (WDS)
Install WDS Role with the PowerShell
#Enable WDS Role
Install-WindowsFeature wds-deployment -includemanagementtools
Open Windows Deployment Service and right click on Server-SERVER_NAME-Configure Server

Select Integrated with Active Directory

Select the Remote Installation Folder

Select Response to all client computers (known and unknown)

Uncheck Add image to the server now

We will prepare the Boot & Capture Image in later stage
Preparation of DHCP Server for PXE Boot
Add the following DHCP Options to existing DHCP Server running on AVENTIS-AD01
#Define 060 as PXEClient
Add-DhcpServerv4OptionDefinition -ComputerName $env:COMPUTERNAME -Name "PXEClient" -Description "PXE Support" -OptionId 060 -Type String

#Set PXE Boot Options
Set-DhcpServerv4OptionValue -OptionId 066 -Value "192.168.1.232"
Set-DhcpServerv4OptionValue -OptionId 067 -Value "\boot\x64\wdsnbp.com"
DHCP Option 066 & 067 are configured
Do not configure Option 60 if DHCP Server is NOT installed on MDT Server, or VM will failed to boot from PXE with error PXE-E55 ProxyDHCP did not reply to request on port 4011

Installation of Windows ADK & MDT
Install ADK v1903 by double click on C:\Users\administrator.LAB\Downloads\Windows Kits\10\ADK\adksetup.exe
Select the following features when prompted
- Deployment Tools
- Imaging And Configuration Designer (ICD)
- Configuration Designer
- User State Migration Tool (USMT)

Install WinPE by double click on C:\Users\administrator.LAB\Downloads\Windows Kits\10\ADKWinPEAddons\adkwinpesetup.exe

Installation of MDT v8456

Launch MDT by opening Deployment Workbench

Create Deployment Share with PowerShell
Import PowerShell Module for MDT
Import-Module “C:\Program Files\Microsoft Deployment Toolkit\bin\MicrosoftDeploymentToolkit.psd1”
Create a New Deployment Share called MDT$ in M:\MDT on AVENTIS-MGMT
$MDT_Folder = "M:\MDT"
$MDT_Share = "MDT$"
$MDT_Path = "\\192.168.1.232\MDT$"

New-Item -Path $MDT_Folder -ItemType directory
New-SmbShare -Name $MDT_Share -Path $MDT_Folder -FullAccess Administrators

New-PSDrive -Name "DS001" -PSProvider "MDTProvider" -Root $MDT_Folder -Description "MDT Deployment Share" `
-NetworkPath $MDT_Path -Verbose | add-MDTPersistentDrive -Verbose

Prepare Boot Image in WDS
A boot image is a WindowsPE which is a stripped down OS that only includes the necessary tools to install, deploy, and repair Windows.
Mount Windows 10 1909 ISO File
#Mount Windows 10 1909 ISO File
$ISO = "E:\MyLAB\MDT\WIN10_1909.iso"
$MountInfo = Mount-DiskImage -ImagePath $ISO
Write-Output "ISO is mounted to $(($MountInfo | Get-Volume).DriveLetter):\"

#Dismount ISO when done
Dismount-DiskImage -ImagePath $ISO
Right click on Boot Image-Add Boot Image

Select E:\Sources\Boot.wim

Enter Image Name, like WIN10-BOOT

Import VMware Drivers to Boot Image
Please follow the steps below to import VMware Drivers to Boot image if you are preparing the Windows 10 reference image in VMware ESXi Host
Download VMware Tools (windows.iso) from ESXi host with SCP
scp [email protected]:/vmimages/tools-isoimages/windows.iso /home/mobaxterm
Mount the ISO file and extract the contents to M:\MDT-Apps\VMware with «setup64.exe /a /p«

VMware Drivers are extracted to M:\MDT-Apps\VMware\VMware\VMware Tools\VMware\Drivers

Open Windows Deployment Services and right click on Drivers – Add Driver Package to import drivers

Create a Driver Group called VMware where prompted
Accept all default values when prompted, and VMware Drivers are imported successfully

Right click on WIN10-BOOT and select Add Drivers Package to Image

Click Search for Packages

VMware Drivers are imported to boot.wim image successfully
Prepare Capture Image
A capture Image is used to capture a Windows 10 Reference Images and import it to MDT for deployment
Right Click on WIN10-BOOT and select Create Capture Image

Enter Name & Location for Capture Image

Check Add Image to the Windows Deployment Server Now
Enter the Location & Image Name when prompted
WIN10-BOOT & WIN10-CAPTURE are created in WDS successfully

Prepare Windows 10 Reference Image
Refer to Prepare Windows 10 Image for MDT Deployment
Capture Windows 10 Reference Image
Refer to Capture Windows 10 Image for MDT Deployment
Import Windows 10 Reference Image
Import the captured WIN10-2004.wim file to MDT
- -SetupPath – Location of the Windows 10 ISO File
- -DestinationFolder – Create a new Folder for WIN10-2004.wim image
# Import WIM file
$SourceFile = "M:\WIN10-2004.wim"
$MDT_Drive = (Get-MDTPersistentDrive)

# creates temporary and persistent drives to map to MDT Drive - DS001
New-PSDrive -Name $MDT_Drive.Name -PSProvider MDTProvider -Root $MDT_Drive.Path

Import-MDTOperatingSystem -Path "DS001:\Operating Systems" -SourceFile $SourceFile -SetupPath D: -DestinationFolder "WIN10PRO-2004"
Rename the imported image
Get-ChildItem "DS001:\Operating Systems"

Name
----

WIN10-1909.wim
WIN10PRO-2004 in WIN10PRO-2004 WIN10-2004.wim

Rename-Item '.\WIN10PRO-2004 in WIN10PRO-2004 WIN10-2004.wim' "WIN10PRO-2004.wim"
WIN10PRO-2004.wim is imported to Deployment Share – Operating Systems successfully

Out of Box Drivers
Drivers for Windows 10 can be organized in folder and injected to Windows 10 during MDT deployment
Download and extract SCCM Driver Pack, like HP Driver Pack and import to MDT Server using PowerShell below
# Create a New Folder
New-Item -path "DS001:\Out-of-Box Drivers" -enable "True" -Name "VMware" -ItemType "folder" -Verbose

# Import Drivers
Import-MDTDriver -path "DS001:\Out-of-Box Drivers\VMware" -SourcePath "M:\Drivers\VMware" -Verbose
New folder called VMware is created in Out-of-Box-Drivers with all VMware Drivers imported

Selection Profile
Selection Profile can be used to control what drivers and packages are injected into the Boot Image.
Create a new Selection Profile called VMware with all drivers in Out-of-Box Drivers\VMware
New-Item -path "DS001:\Selection Profiles" -enable "True" -Name "VMware" -Definition "<SelectionProfile><Include path=`"Out-of-Box Drivers\VMware`" /></SelectionProfile>" -ReadOnly "False" -Verbose

Task Sequence
Task sequences are basic XML files which call on a series of scripts to run parameters chosen by the user, when the task was created.
Create a new Task Sequence based on the template Client.xml to deploy WIN10PRO-2004.wim to new computer
Import-MDTTaskSequence -Path "DS001:\Task Sequences" -Name "WIN10PRO-2004" -Template "Client.xml" -ID "010" -OperatingSystemPath "DS001:\Operating Systems\WIN10PRO-2004.wim" `
-Version 1.0 -Verbose
Customize the Task Sequence
- Disable Format and Partition Disk (BIOS)

- Remove the Recovery Partition and increase the Windows (Primary) partition to use 100% of the remaining spaces

- Inject Drivers – Select the Drive Profile to be installed during OS Deployment

- Install Operating System – Select the WIM file that will be deployed and Select Next Available Formatted Partition

- Inject Drivers – Select Continue on Error

- Add a PowerShell Script in State Restore – Custom Tasks – Run PowerShell Script
Create a PowerShell Script called PostInstallation.ps1 in M:\DeploymentShare\Scripts\Custom
# PostInstallation.ps1
# Join to AD Domain
$cred = New-Object System.Management.Automation.PsCredential("LAB\Administrator", (ConvertTo-SecureString "P@ssw0rd!@#$" -AsPlainText -Force))
Add-Computer -DomainName "lab.aventislab.com" -Credential $cred -OUPath "OU=MDT,DC=lab,DC=aventislab,DC=com"

- Enter the location of PowerShell Script – %SCRIPTROOT%\Custom\PostInstallation.ps1

- Disable Apply Local GPO Package

We had create a task sequence to deploy Windows 10 PRO successfully
Convert the Task Sequence to Template
Copy the the Task Sequence we prepared above from M:\DeploymentShare\Control\010\ts.xml to M:\DeploymentShare\Templates\TS-WIN10PRO-UEFI-VM.xml
Open the XML file with Notepad and change the Display Name this Template

Select the Template – TS-WIN10PRO-WUFI-VM when you want to create a similar Task Sequence in the future.

Update Deployment Share
Update Deployment Share with the latest file from the Windows ADK to updates or regenerates the required Windows PE boot images in both WIM and ISO file formats.
- Right click on MDT Deployment Share – General and uncheck x86 as we are going to use x64 files only

- Modify the CustomSettings.ini (Rules) and Bootstrap.ini in M:\DeploymentShare\Control

[Settings]
Priority=Default
Properties=MyCustomProperty
[Default]
OSInstall=Y
SkipCapture=YES
SkipAdminPassword=YES
AdminPassword=Vind@100
SkipComputerBackup=YES
SkipBitLocker=NO
BDERecoveryKey=AD
BDEInstall=TPMPin
SkipCapture=YES
SkipComputerName=NO
SkipComputerBackup=YES
SkipDomainMembership=YES
SkipFinalSummary=YES
SkipLocaleSelection=YES
KeyboardLocale=en-us
UserLocale=en-us
UILanguage=en-us
SkipPackageDisplay=No
SkipProductKey=YES
SkipSummary=YES
SkipTaskSequence=NO
SkipTimeZone=YES
TimeZoneName=Singapore Standard Time
WSUSServer=http://prod-mdt.lab.aventislab.com:8530
SkipUserData=Yes
FinishAction=REBOOT
EventService=http://PROD-MDT.lab.aventislab.com:9800
[Settings]
Priority=Default
[Default]
DeployRoot=\\PROD-MDT\DeploymentShare$
UserID=lab\administrator
UserPassword=P@ssw0rd!@#$- Uncheck Generate a Lite Touch Bootable ISO Image as we are not going to use the WinPE ISO file to boot up VM

- Update Deployment Share
Update-MDTDeploymentShare -Path "DS001:" -Verbose
MDT Monitoring
MDT Monitoring let you to monitor the progress of deployment tasks and check for error message from MDT console
Check Enable Monitoring for this Deployment Share

Ensure that Microsoft Deployment Toolkit Monitor Service is running
Get-Service -Name MDT_Monitor | ft

Status   Name               DisplayName
------   ----               -----------
Running  MDT_Monitor        Microsoft Deployment Toolkit Monito...
Allow inbound TCP 9800 & 9801 if Windows Firewall is enabled – Optional Steps
# Allow inbound TCP 8002 TCP 9800
New-NetFirewallRule -DisplayName "In-TCP-9800" -Direction Inbound -Protocol TCP -LocalPort 9800 -Action Allow
New-NetFirewallRule -DisplayName "In-TCP-9801" -Direction Inbound -Protocol TCP -LocalPort 9801 -Action Allow

# TCP 9800 & 9801 is in listening mode
Get-NetTCPConnection | ? LocalPort -like "980*"

LocalAddress                        LocalPort RemoteAddress                       RemotePort State       AppliedSetting
------------                        --------- -------------                       ---------- -----       --------------
::                                  9801      ::                                  0          Listen
::                                  9800      ::                                  0          Listen
Verify that EventService=http://PROD-MDT.lab.aventislab.com:9800 is added in CustomSettings.ini

Access to http://192.168.1.232:9801/MDTMonitorData/ to confirm that the page below is displayed

You can monitor the deployment progress in MDT Console now

If you’ve read my other posts you’ll know that usually I make a post focusing on building a reference image and then another post on deploying that image.
This post is very similar but I’m going to streamline things by just covering the installation of MDT, and deploying Windows 10 1909. I have also recently published a video walkthrough covering this.
What you’ll need:
- A server to host the MDT share.
- A client PC, or the MDT server above to install the tools.
- A VM to test the install task sequence.
This walkthrough will cover installing the tools on a client PC and then the MDT deployment share will be hosted on a server. Here are the links to the software we’ll be using:
- Windows 10 1903 Assessment and Deployment Kit (ADK)
- Windows System Image Manager (WSIM) 1903 update
- Windows PE add-on for the ADK
- Microsoft Deployment Toolkit (8456)
- Windows 10 1909 x64 ISO Volume Licensing Service Center
Installing Microsoft Deployment Toolkit and Dependencies
- First we’ll install the Windows 10 1903 ADK. During setup additional files will need to be downloaded, so it may take some time depending on your internet connection.
- On the Select the features you want to install screen select:
- Deployment Tools
- Imaging And Configuration Designer (ICD)
- Configuration Designer
- User State Migration Tool (USMT)
- Install WinPE by running the adkwinpesetup.exe. There is no specific configuration during the install wizard.
- Install MDT by running the MicrosoftDeploymentToolkit_x64.msi. There is no specific configuration during the install wizard.
Install the Windows System Image Manager Update
- Unzip the archive containing the WSIM 1903 fix.
- Copy the two files: ImageCat.exe and ImgMgr.exe to the location the ADK is installed to. The default location is: C:\Program Files (x86)\Windows Kits\10\Assessment and Deployment Kit\Deployment Tools\WSIM.
- After installation you will still not be able to access WSIM through MDT. You will need to load WSIM from the Start Menu then open the XML file for the Operating System you wish to change. The XML answer file will be located in \\server\deploymentshare$\Control\Task-Sequence-ID\Unattend.xml.
- Go to the server that will host the deployment share.
- Create a folder called DeploymentShare.
- Share the folder by right-clicking on the folder and go to Properties > Sharing > Advanced Sharing.
- Tick the Share this folder check box.
- Enter DeploymentShare$ as the Share name. We do this so the share is hidden.
- Go to Permissions, remove Everyone.
- Add Domain Users and leave the permissions as Allow Read. Add Domain Admins and check Allow Full Control permissions.
- Go back on the client PC where the MDT tools installed.
- Open the Deployment Workbench from the Start Menu.
- Right click on Deployment Shares.
- Select New Deployment Share.
- Under Deployment share path enter the UNC path: \\server\DeploymentShare$
- Enter a description in the Deployment share description text field.
- On the Options screen, accept the defaults as we’ll change them later.
- Complete the wizard to create the share.
Adding an Operating System
- Mount the Windows 10 1909 ISO in File Explorer.
- Go to Deployment Workbench > Operating Systems.
- Right click and select New Folder.
- Enter the name Windows 10 1909 x64 and click through the wizard to create the folder.
- Right click again and select Import Operating System.
- In the wizard, select Full set of source files and then enter the root of the mounted ISO as the Source directory.
- For the destination directory name enter Windows 10 1909 x64 and complete the wizard.
Adding Packages
- Go to Deployment Workbench > Packages.
- Create a folder named Windows 10 1909 x64.
- Go to the website catalog.update.microsoft.com
- Search for Windows 10 version 1909.
- Download the latest Cumulative Update for Windows 10 1909 x64.
- Download the latest Servicing Stack Update for Windows 10 x64.
- Create a folder and put both update files in the folder.
- Go to Deployment Workbench > Packages.
- Right-click on the folder Windows 10 1909 x64.
- Select Import Packages.
- In the Package source directory enter the path to the new folder we created containing the updates.
- Click Next and complete the wizard.
Now we’ll create a selection profile so that the task sequence only installs updates for Windows 10 1909 x64.
Creating A Selection Profile
- Expand the Advanced Configuration node.
- Right click on Selection Profiles and select New Selection Profile.
- Name it Windows 10 1909 x64.
- On the Folders page, tick the Windows 10 1909 x64 folder under Packages and complete the wizard.
Importing Applications
Here I’m going to cover how to add Microsoft Office 2016, but the method is the same for all applications.
- Go to Deployment Workbench > Deployment Share > Applications.
- Right click on Applications and select New Application.
- In the New Application Wizard, choose Application with source files.
- Give the application the name: Microsoft Office 2016.
- Enter the Source directory of the installation files.
- Enter the Destination directory: Microsoft Office 2016.
- For the Command line enter anything, we’ll revisit this later.
- On the summary page, click Next and after the files are copied click Finish to complete the wizard.
Configuring Microsoft Office 2016 in MDT
- Right click on Microsoft Office 2016, go to the Office Products Tab.
- Choose the desired Office Product to Install from the drop down menu.
- Check the desired Office language.
- Enter a product key, unless you will be activating Office via KMS in which case leave the Product Key option unchecked.
- Check the Customer name option and enter the desired information.
- Check the Display level option and select None in the drop down menu.
- Check the Accept EULA option.
- Check the Always suppress reboot option.
- Click Apply.
- Go to the Details tab and the Quiet install command should now read:
|
|
Microsoft Office is now set up to be installed silently by a task sequence. This process can also be done for Microsoft Visio and Project 2016. If you wish to customise the installation to a greater degree, the Office Customization Tool can be launched from the Office Products tab. This only works with the Office 2016 family of products. Office 365 and 2019 do not support this method and should be installed like a regular application. To customise Office 365 and 2019, check out my post: Deploying Office 2019 or Office 365.
Adding Third-party Applications
To add other popular third party software, you’ll need to repeat the steps above with the relevant Command line to execute a silent install. You’ll also need to fill in the Working directory: .\Applications\App-name
Google Chrome — Enterprise Installer
msiexec /i googlechromestandaloneenterprise64.msi /qn
Adobe Reader — Enterprise Installer
AdobeReaderDC.exe /sAll
VLC Player
VLC.exe /S
7-Zip
msiexec.exe /i 7zip.msi /qn
We now need to create a new task sequence to deploy Windows 10 along with the applications.
Creating a Task Sequence
- In Deployment Workbench, go to Task Sequences.
- Right click and select New Task Sequence.
- For the ID enter: W10-1909-A.
- Name it Deploy Windows 10 1909 x64 Edition.
- Select Standard Client Task Sequence.
- Select the Operating System Windows 10 1909 x64 Edition.
- Select Do not specify a product key at this time if you are using KMS.
- Enter an Organization name.
- Enter the local Administrator password.
- Complete the wizard.
Now we’ll configure the task sequence.
Configuring the Task Sequence
- Right click on the Task Sequence just created and select Properties.
- Go to the Task Sequence tab on the Properties window of the Task Sequence.
- Expand the Initialization folder in the left hand pane.
- Go to the Gather local only item.
- In the Properties window select Gather local data and process rules.
- Enter the following in the Rules file: customsettings.ini
- Expand the Preinstall folder, and select the Apply Patches item.
- Change the Selection Profile to Windows 10 1909 x64.
- Go to the State Restore folder and select Windows Update (Pre-Application Installation).
- On the right side of the Properties window, go to the Options tab.
- Uncheck the Disable this step tick box and do the same with Windows Update (Post-Application Installation).
- Go to the Install Applications item.
- In the right side of the Properties box, select the Install a single application option and click the Browse… button.
- Select Microsoft Office 2016 and change the name Install Applications to Microsoft Office 2016.
- To install other Applications, copy and paste the Install Applications item and repeat the previous steps.
- Click Apply and close the task sequence.
Next we need to configure the Bootstrap.ini and the CustomSettings.ini files to control certain aspects of the deployment environment. The settings below enable auto login and skip the welcome screen, so these should only be used for lab or closed development environments.
Configuring Bootstrap.ini
- In Deployment Workbench, right click the Deployment Share and select Properties.
- Select the Rules tab and click the Edit Bootstrap.ini button.
- Add the settings below to the Bootstrap.ini.
- Close and Save the Bootstrap.ini
|
|
Configuring CustomSettings.ini
The settings below need some explanation. The [Virtual Machine] section is regarding driver installs which we’ll cover later in this post.
The JoinDomain= section is important. Here I’ve put the account sysadmin to use as the account to join the device being imaged to the domain contoso.com. The account entered here must have the relevant permissions to join a device to the domain.
The other settings are location preferences relevant to the UK and resolution settings which prevent the finished device from defaulting to a resolution of 1024 x 768, and instead using the recommended resolution Windows receives from the display. On the Rules tab of the Deployment Share properties window, add the settings below.
|
|
We now need to create the boot media in order to boot the VM into WinPE for deployment.
Creating The Boot Media
- In Deployment Workbench, right click on the Deployment Share.
- Select Update Deployment Share.
- Select Completely regenerate the boot images.
- Complete the wizard. It will take some time to create the boot images.
Testing The Task Sequence
To test everything we need to copy the ISO file that we just generated. It is located in the Boot folder in the Deployment Share. Go to the server that is hosting the deployment share and navigate to the boot folder. Inside there should be a file named LiteTouchPE_x64.iso. Copy this file to a location where a virtual machine will be able to access it. Create a new VM with the following configuration:
- For Hyper-V Only: Generation 1, not 2. I’ve had issues reported with Gen2 VMs.
- 2x vCPUs
- 4GB of RAM
- Network Adapter with access the local network.
- Virtual Hard Drive of at least 40GB, preferably on an SSD.
- Boot from CD using the LiteTouchPE_x64.iso from MDT.
- Start the VM and it will boot from the LiteTouchPE_x64.iso into WinPE.
- You will be presented with a login screen. Here you should login with Active Directory credentials that have access to the deployment share.
- Once logged in you will be presented with a screen with the name of the task sequence you created earlier. Select your Task Sequence and click Next.
- You’ll be prompted to enter a Computer Name.
- Click Next and the task sequence will begin.
The task sequence will install Windows 10 1909. Windows Update will run and install updates from the WSUS server and the VM will be added to the Active Directory domain. When this process completes the VM will shut down. Boot up the VM and check to see if it has successfully joined the domain and has all the applications installed.
Driver Management
In this section we’re going to configure how drivers are managed during deployment. There are a few ways to do this, here I’ll show the method I’ve been using which has worked very well for a variety of manufactures and models of devices.
The first thing you’ll need is the model numbers for all the devices you want to deploy to. You can find this out by booting the device in to its current version of Windows or the deployment environment using the LiteTouch_x64.iso boot disc or PXE booting. I haven’t covered PXE booting in this post but here’s a previous post I wrote on how to setup PXE booting for MDT: PXE Booting for Microsoft Deployment Toolkit.
When the device is booted into WinPE, press F8 to get a command prompt, and type out the following command:
|
|
The output of the command is the model number you’ll need.
The next thing you’ll need is the drivers. I’ve found Windows 10 is good at installing missing drivers from Windows Update, but it can take some time and it would be better for the device to be running with all the drivers it needs once deployment has completed.
Windows 10 tends to have some drivers built right in and I’ve found they are usually very stable, so I only add drivers to MDT that Windows 10 cannot find. Deploy the image to each type of device you have and use Device Manager to see what’s missing.
If you’re missing drivers, go to Settings > Windows Update and use Check online for updates from Microsoft Update which should find and install the relevant drivers. Then using the Update History and see what you need to find and import into MDT.
Note: I recommend to avoid using WSUS to download and install drivers as it inflates the WSUS database, slowing WSUS down and making it difficult to manage.
To import drivers into MDT you’ll need the INF files. Most large manufacturers do a decent job of providing drivers that can be used with MDT. Should you have difficulty with them you can use the Microsoft Update Catalog to search for and download the specific drivers that Windows Update installs and use them with MDT. I use this method myself and although it can be time consuming, the results are worth it.
Once you have the drivers you require, we need to add them to MDT.
- Open the Deployment Workbench.
- Navigate to Deployment Share > Out-of-Box Drivers.
- Right click and select New Folder, call the folder Windows 10 x64.
- Right click on the Windows 10 x64 folder and select New Folder.
- Name the folder a human readable name for the model of device you’ll be adding drivers for.
- Right click on the folder you just created and create folders for each driver type you’ll be adding, e.g. Graphics, Chipset, Bluetooth.
- Right click on a driver type folder and select Import Drivers.
- Enter the source directory of the drivers for that driver type.
- Check the Import drivers even if they are duplicates of an existing driver check box.
- Click Next and complete the wizard. The wizard will copy all the files needed to the driver type folder.
- Repeat steps 7-10 for each driver type required.
We now need to edit the CustomSettings.ini to configure the driver location for each model.
- Go to the Deployment Workbench and right click on the Deployment Share, select Properties.
- Go to the Rules tab in the Properties window.
- Enter the text below under the [Settings] section but after the Properties.
- Once you’ve added in all the models required, click Apply to save the changes.
|
|
You’ll need to enter the above text for each model. Below is an example of my CustomSettings.ini for reference.
|
|
The deployment share is now configured to install drivers for the models specified.
Boot the physical device into WinPE and run the task sequence. After it completes, check Device Manager and all devices should be successfully installed.
Adding Drivers to the WinPE Boot Media
It may be necessary to add drivers to the WinPE boot media for devices such as storage or network adaptors.
To determine if drivers are required:
- Boot the device in question into the deployment environment and press F8 to bring up a command prompt.
- Type ipconfig and if you have an IP address, you should not have to add network adaptor drivers
- Type diskpart, and when diskpart has loaded, type list disk. If the local hard drive is listed, you should not need to add storage drivers.
If you do need to add drivers to the boot image:
- In the Deployment Workbench, go to Deployment Share > Out-of-Box Drivers.
- Right click and select New Folder, call the folder WinPE x64.
- Right click on the WinPE x64 folder and select New Folder.
- Name the folder a suitable name for the model of device you’ll be adding drivers for.
- Right click on the folder you just created and create folders for each driver type you’ll be adding, e.g. Storage, Network.
- To import the drivers, right click on a driver type folder and select Import Drivers.
- Enter the source directory of the drivers and tick the Import drivers even if they are duplicates of an existing driver check box.
- Click Next and complete the wizard. The wizard will copy all the files needed to the driver type folder.
- Repeat steps 6-8 for each driver type required.
- Now we must create a Selection Profile for WinPE x64.
- Go to Advanced Configuration > Selection Profiles.
- Right click on Selection Profiles and select New Selection Profile.
- Enter WinPE x64 as the Selection profile name.
- In the folders list navigate to DS001:\ > Out-of-Box Drivers > WinPE x64 and check the box next to the folder.
- Click Next > Next > Finish to complete the wizard.
- Right click on the Deployment Share and select Properties.
- Go to the Windows PE tab and change the Platform drop down menu to x64.
- Go to the Drivers and Patches tab, and change the Selection profile drop down menu to WinPE x64.
- Make sure that Include only drivers of the following types is selected and both Include all network drivers in the selection profile and Include all mass storage drivers in the selection profile are checked.
- Click Apply to save the changes, click OK to close the Properties window.
- Right click the Deployment Share and select Update Deployment Share.
- Select Completely regenerate the boot images, and then Next. The boot images will be regenerated with the drivers included.
- Click Finish to complete the wizard.
The WinPE boot media should now have the network and/or storage drivers required.
I take great care to test my ideas and make sure my articles are accurate before posting, however mistakes do slip through sometimes. If you have any questions or comments, please leave them below.
I hope this article is useful to you. Please consider supporting my work with paypal.
-Mike
In a Enterprise network, directly upgrading the network operating systems are difficult task. But upgrade to Windows 10 using MDT is the easiest way to upgrade the old machines. As network admin you already know the importance of OS and application deployment rules in a enterprise network. And also must be familiar with Microsoft Deployment Toolkit, Windows Deployment Services and deployment operations.
In this practice lab I will show you how to upgrade to Windows 10 using MDT and refresh old machines with new operating system. You need to be familiar with MDT installation and creating deployment share with MDT. If you are beginner and don’t know the basic of deploying Windows with MDT and WDS, I recommend you to read the below article before continuing this post.
- How to install MDT and ADK in Windows Server 2016?
- How to Deploy Windows 10 using MDT?
Try to create your own test lab and continue this article. In the final stage I had faced with an error, hope it will not issue that for you.
Step 1: Import Windows 10 full source to MDT
Adding Windows 10 full sources to MDT will be done through MDT Deployment Workbench. I already have my deployment lab which installed and configured MDT as deployment Server in a Windows Server 2016. So go to open deployment workbench and import Windows 10 and create an upgrade task sequence.
- Open Deployment Workbench from start menu in your MDT machine. Create a folder for Windows 10 on Operating system section.
2. Simply right click Windows 10 folder and select Import Operating System to open the OS Type page.
3. On the OS Type page select Full set of source files and go to the next page.
4. Put the Windows 10 disc to DVD ROM or mount the Windows 10 Image and select the directory drive then click Next.
5. On the Summary page read details and click Next to start importing Windows 10. Finally on Confirmation page click Finish to close the page and the Windows 10 should be ready.
Step 2: Create an Upgrade Task Sequence in MDT
On the Task Sequence section of Deployment workbench, create a folder relevant to upgrade to Windows 10 using MDT.
- Right click the Task Sequence and create a folder, so do right click the folder and select New Task Sequence. Now on the General Settings page fill out the task id, name and comments then click Next.
2. Select the Standard Client Upgrade Task Sequence for task sequence template then click Next.
3. Select the previously imported Windows 10 as operating system and click Next.
4. Select the first option Do not specify a product key at this time for now on the Specify Product Key page and click Next.
5. Enter the Full name, Organization and Internet Explorer Home Page correctly on OS Settings page then go to next page.
6. If you like the local Admin account with a password, enter the password, otherwise select Do not specify and Administrator at this time on the Admin Password page and go to Summary page.
7. On the Summary page read the detail and click Next to being creating the upgrade task sequence. Finally on the Confirmation page of Task Sequence close the page.
8. Now expand the Upgrade Windows 10 folder and right click the created task sequence then click Properties. See the options on the Task Sequence tab that everything is okay.
Close Task Sequence properties and go to update the MDT deployment share.
Step 3: Update the Upgrade MDT Deployment Share
The final step before performing upgrade to Windows 10 using MDT, try to update the MDT deployment share.
- Right click MDT Deployment Share and click Update Deployment share then select Optimize the boot image updating process and click Next.
2. Read the Summary details and click Next to begin updating MDT Deployment share. Finally the update should be done successfully.
Close the page and go to begin Windows upgrading from Windows 7 or 8 to Windows 10.
Step 4: Upgrade to Windows 10 Using MDT
Lets begin with a Windows 8.1 to upgrade to Windows 10 using MDT in our lab. I hope you could perform all above steps successfully.
- Login to your old machine such as Windows 7 or Windows 8. Then run the Lite Touch script form Windows run like the screenshot. Click Yes to run the script.
The Lite Touch script is a vb script that load the Windows Deployment Wizard from deployment server, where the MDT is installed.
2. When the Lite Touch script will load, select the upgrade task sequence and click Next.
3. Specify a product key if you have, otherwise select No product key is required then click Next. In a production environment you can activate your machine from KMS Server.
4. Do you need to install or update applications also? If you don’t click Next and go to the next page. You can install or updated the applications from this section also. But I don’t want to update or install any software to testing lab.
5. Specify a strong password for Administrator for security reason then click Next.
6. Type the appropriate deployment share domain account for connecting to network share then click Next. I’m using the domain admin user for this lab.
7. On the Ready to begin page, read the details and click Begin to start upgrade to Windows 10 using MDT form a network shared.
8. Let the Windows deployment perform the upgrading from Windows 8 to Windows 10 successfully.
When the upgrade complete, the system will restart and finalizing the upgrade process. So don’t push it to restart or shutting down while installing new OS.
Ops! I don’t know why installation progress page disappeared? OK… Let me troubleshoot this error and find the problem. Try to your lab and share the result. I hope it work perfectly for you on your production environment.