
@scottgus1:
scottgus1 wrote:To be honest, I haven’t noticed the true or false part. I could be and probably am wrong…
After consulting the VirtualBox source code and some older posts from user socratis, you seem to be wrong in assuming to be wrong, because you’re probably right.
VBox.log file wrote:
00:00:59.872097 HM: HMR3Init: Attempting fall back to NEM: VT-x is not available
[...]
00:00:59.903329 VT-x is not available (VERR_VMX_NO_VMX)
1) The VMX bit in the CPUID is not set. This happens either when VT-x is not enabled in the (UEFI) BIOS, or when VirtualBox is running under another hypervisor (e.g. Hyper-V) that intercepts the CPUID command and hides the VMX bit in the response. Assuming the latter case as the only possibility to proceed, VirtualBox tries to use Hyper-V (NEM, Native Execution Mode).
VBox.log file wrote:
00:00:59.901881 VMSetError: WHvCapabilityCodeHypervisorPresent is FALSE! Make sure you have enabled the 'Windows Hypervisor Platform' feature.
2) The Windows Hyper-V Capability HypervisorPresent is not available. This means that the API necessary to programmatically create a Hyper-V partition (VM) is not available, and since VirtualBox cannot proceed without this API, it asks for the Windows Hypervisor Platform to be installed (*). But before this check is made, …
1.5) … VirtualBox has already detected that it is running under another hypervisor (the HVP (HyperVisor Present) bit in the CPUID is set). This is not reflected by a log file message, because it is the expected situation after the decision to try Hyper-V.
*) Either the Windows Hypervisor Platform is not installed, or it doesn’t exist at all in Windows 10 1803 used here.
@ahm_bj:
What does that all mean? We know that VirtualBox is running under another hypervisor (1.5). The hypervisor could be the expected one (Hyper-V) or another one (e.g. VMware ESXi), and it must be disabled for VirtualBox to proceed. For the methods if the hypervisor is Hyper-V, see the second-to-previous post by scottgus1: viewtopic.php?f=7&t=97134#p473652
Do you want to simultaneously run VirtualBox with enabled Hyper-V Manager services on a single Windows 10 machine? Then it is possible, without disabling any of them, to look at the steps in this tutorial…
Enable Hyper-V and VirtualBox together at the same time on Windows 101: Open Turn Windows features ON & OFF2: Enable Hyper-V and Windows hypervisor platforms3. Restart your Windows 10 system4. Download Oracle VirtualBox5. Configure Paravirtualization Interface6. Run the Guest Virtual Machine7. Run VM on Hypervisor
Earlier, there was a big problem when we wanted to use Hyper-V on a Windows machine, and we couldn’t use Vmware, Virtual Box, or any other platform where we wanted Virtualization access. The existing Hyper-V service on the Machine already occupied Intel virtualization technology (VT-x) and the kernel access. However, that has been changed after Windows v1803 update. Now, we can run VirtualBox or VMWare workstation side by side with the inbuilt Hypervisor Manager of Windows 10 using its API.
Note: If you cannot yet use VirtualBox without disabling the Hyper-V on Windows 10, here is the solution… However, a few operating systems would not work and give output in freezing VMs on boot.
Enable Hyper-V and VirtualBox together at the same time on Windows 10
1: Open Turn Windows features ON & OFF
The first thing is to access the extra service which we want to be on Windows 10. Go to Search Box and type “Turn Windows Features On & Off.”
2: Enable Hyper-V and Windows hypervisor platforms
Now, you will see various services; some are already enabled, and others are not. So, scroll down to “Hyper-V” and then further down to check the “Windows Hypervisor Platforms” box. And then click on the OK button. It will start installing these two services on your Windows 10 machine.

Note: if you don’t turn on the “Windows Hypervisor Platforms” services, then while running the VirtualBox, you will get an error”
WHvCapabilityCodeHypervisorPresent is FALSE! Make sure you have enabled the 'Windows Hypervisor Platform' feature.
(VERR_NEM_NOT_AVAILABLE).

VT-x is not available (VERR_VMX_NO_VMX).

Result Code : E_FAIL (0x80004005)
Composant : ConsoleWrap
3. Restart your Windows 10 system
Once all the above services are installed on your computer, restart it to put the update into effect.
4. Download Oracle VirtualBox
Although you might already have open-source Oracle VirtualBox on your Windows 10 system, if you don’t, go to the official website and download one. Run it to install. Also, those running older versions should update their VBox software to the latest version.
5. Configure Paravirtualization Interface
This step is essential to make VirtualBox compatible with Hyper-V on Windows 10. What we have to do is, run the VirtualBox on your system and select the created Machine that you want to run.
- For example, I have an Ubuntu 20.04 VM server edition and will select that.
- Click on the Settings option given in the Menu.
- Select System⇒Acceleration Tab.
- Click the dropbox from the Paravirtualization Interface and select Hyper-V.
However, by default, VirtualBox will access Hyper-V API; if not, then setting the paravirtualization interface will do that.

6. Run the Guest Virtual Machine
Now, on the area corresponding to the select Virtual Machine, you will see:
Acceleration= VT-X/AMD-V, Nested Paging, PAE/NX, Hyper-V Paravirtualization.
This means that your VirtualBox uses the Hypervisor as a virtualization platform to create and run virtual machines of different OS such as Linux, Windows, NAS, etc.
To see if everything is working fine, click on the start, and you will see the virtual machine running, maybe without any error.

7. Run VM on Hypervisor
Test Hyper-V and make sure its machines are also working fine without my error. Open the Hyper-V Manager and start your Virtual Guest created on it.

Все способы:
- Причины возникновения ошибки 0x80004005 в VirtualBox
- Способ 1: Переименование внутренних файлов
- Способ 2: Включение поддержки виртуализации в BIOS
- Способ 3: Обновление VirtualBox
- Способ 4: Отключение Hyper-V
- Способ 5: Изменение типа запуска гостевой ОС
- Способ 6: Удаление/исправление обновления Windows 7
- Вопросы и ответы: 52
При попытке запуска операционной системы Windows или Linux в виртуальной машине VirtualBox пользователь может столкнуться с ошибкой 0x80004005. Она возникает до старта ОС и препятствует любой попытке ее загрузки. Есть сразу несколько способов, помогающих устранить существующую проблему и продолжить пользоваться гостевой системой в обычном режиме.
Причины возникновения ошибки 0x80004005 в VirtualBox
Ситуаций, из-за которых не получается открыть сессию для виртуальной машины, может быть несколько. Зачастую данная ошибка возникает спонтанно: еще вчера вы спокойно работали в операционной системе на VirtualBox, а сегодня выполнить то же самое не удается из-за сбоя при запуске сессии. Но в некоторых случаях не удается выполнить первичный (установочный) запуск ОС.
Это может произойти вследствие одной из следующих причин:
- Ошибка при сохранении последней сессии.
- Отключенная поддержка виртуализации в BIOS.
- Некорректно работающая версия VirtualBox.
- Конфликт гипервизора (Hyper-V) с VirtualBox на 64-разрядных системах.
- Проблемное обновление хостовой Windows.
Далее мы рассмотрим, как устранить каждую из этих проблем и начать/продолжить пользоваться виртуальной машиной.
Способ 1: Переименование внутренних файлов
Сохранение сессии может завершиться ошибочно, в результате чего последующий ее запуск будет невозможен. В этом случае достаточно выполнить переименование файлов, связанных с запуском гостевой ОС.
Для выполнения дальнейших действий вам необходимо включить отображение расширений файлов. Это можно сделать через «Параметры папок» (в Windows 7) или «Параметры Проводника» (в Windows 10).
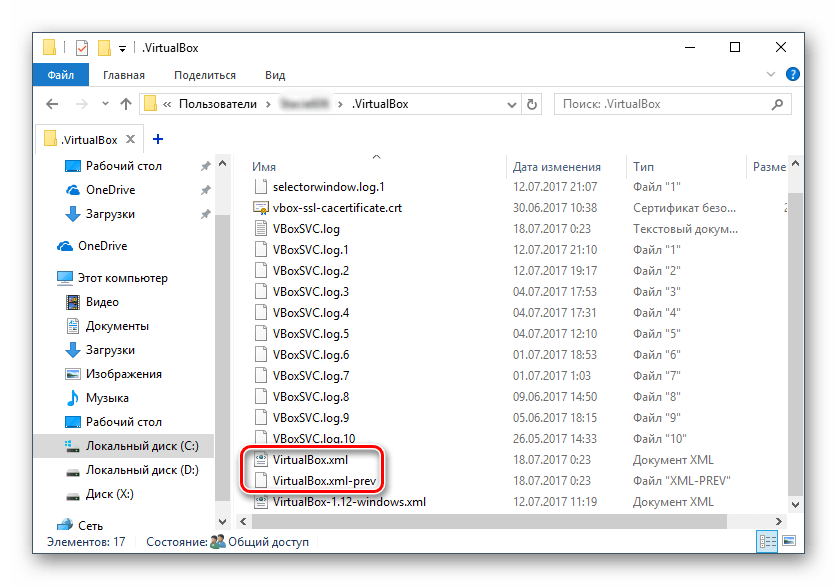
- Откройте папку, где хранится файл, отвечающий за запуск операционной системы, т.е. сам образ. Он располагается в папке VirtualBox VMs, место сохранения которой вы выбирали при установке самой VirtualBox. Обычно она находится в корне диска (диска С или диска D, если HDD разбит на 2 раздела). Также она может располагаться в персональной папке пользователя по пути:
С:\Users\ИМЯ_ПОЛЬЗОВАТЕЛЯ\VirtualBox VMs\ИМЯ_ГОСТЕВОЙ_ОС - В папке с операционной системой, которую вы хотите запустить, должны быть следующие файлы: Name.vbox и Name.vbox-prev. Вместо Name будет имя вашей гостевой операционной системы.

Скопируйте файл Name.vbox в другое место, например, на рабочий стол.
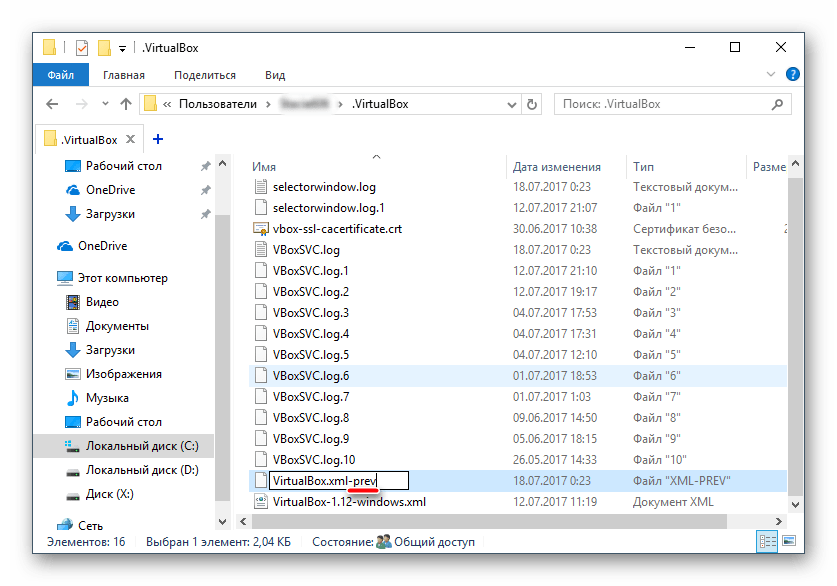
- Файл Name.vbox-prev необходимо переименовать вместо перемещенного файла Name.vbox, то есть удалить «-prev».
- Эти же действия необходимо проделать и внутри другой папки, находящейся по следующему адресу:
C:\Users\ИМЯ_ПОЛЬЗОВАТЕЛЯ\.VirtualBox
Здесь вы будете менять файл VirtualBox.xml — скопируйте его в любое другое место.
- У файла VirtualBox.xml-prev удалите приписку «–prev», чтобы получилось имя VirtualBox.xml.
- Попробуйте запустить операционную систему. Если не сработало, восстановите все назад.


Способ 2: Включение поддержки виртуализации в BIOS
Если вы решили воспользоваться ВиртуалБокс впервые, и сразу же столкнулись с вышеупомянутой ошибкой, то, возможно, загвоздка кроется в не настроенном BIOS для работы с технологией виртуализации.
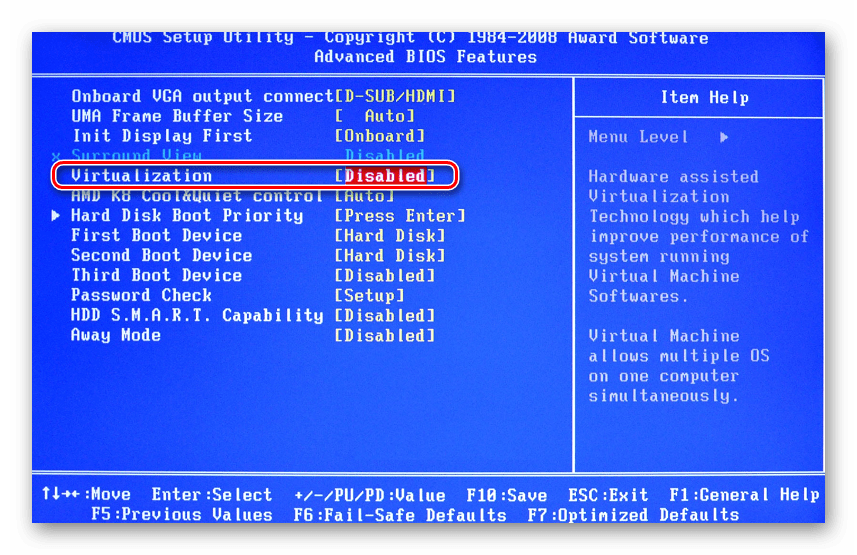
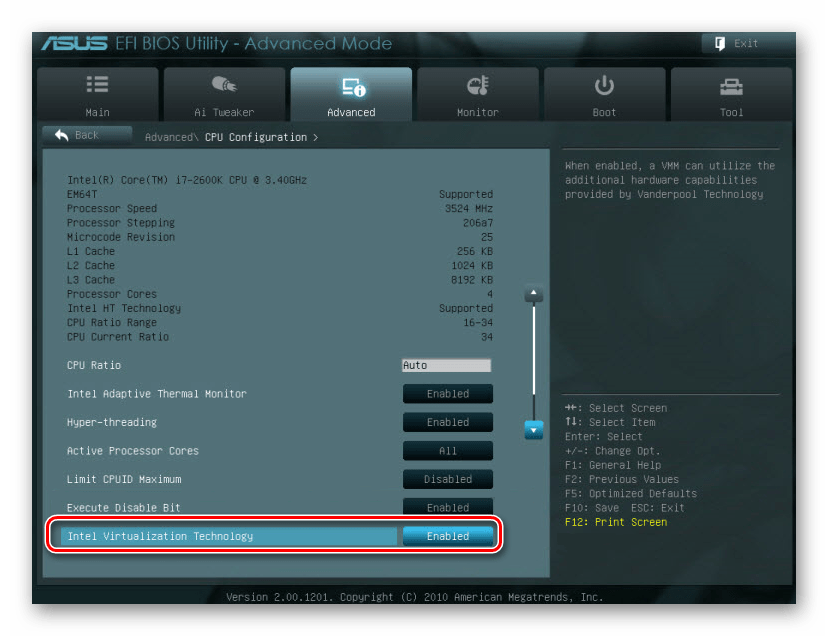
Чтобы осуществить запуск виртуальной машины, в БИОС достаточно включить всего лишь одну настройку, которая называется Intel Virtualization Technology.
- В Award BIOS путь к этой настройке следующий: Advanced BIOS Features > Virtualization Technology (или просто Virtualization) > Enabled.

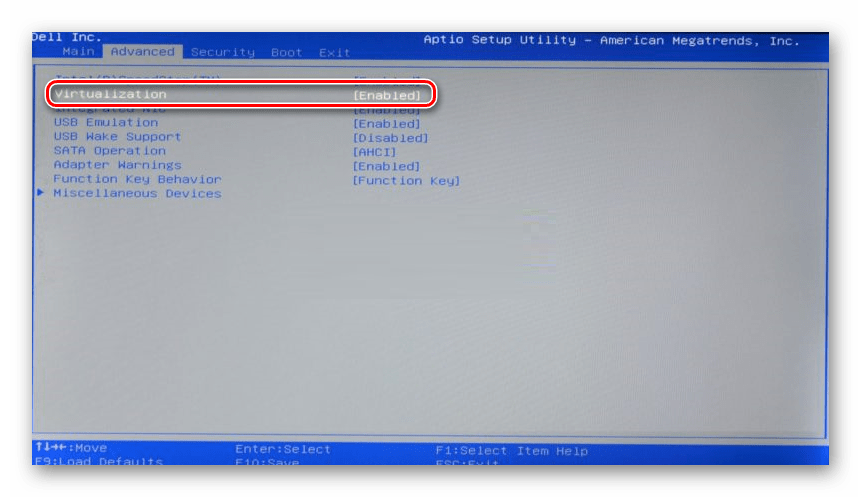
- В AMI BIOS: Advanced > Intel(R) VT for Directed I/O > Enabled.

- В ASUS UEFI: Advanced > Intel Virtualization Technology > Enabled.

Настройка может иметь и другой путь (например, в BIOS на ноутбуках HP или в БИОС Insyde H20 Setup Utility):
- System Configuration > Virtualization Technology > Enabled;
- Configuration > Intel Virtual Technology > Enabled;
- Advanced > Virtualization > Enabled.
Если вы не нашли данной настройки в своей версии BIOS, то ищите ее вручную во всех пунктах меню по ключевым словам virtualization, virtual, VT. Для включения выбирайте состояние Enabled.
Способ 3: Обновление VirtualBox
Возможно, состоялось очередное обновление программы до последней версии, после чего и появилась ошибка запуска «E_FAIL 0x80004005». Есть два выхода из сложившейся ситуации:
- Дождитесь выхода стабильной версии VirtualBox.
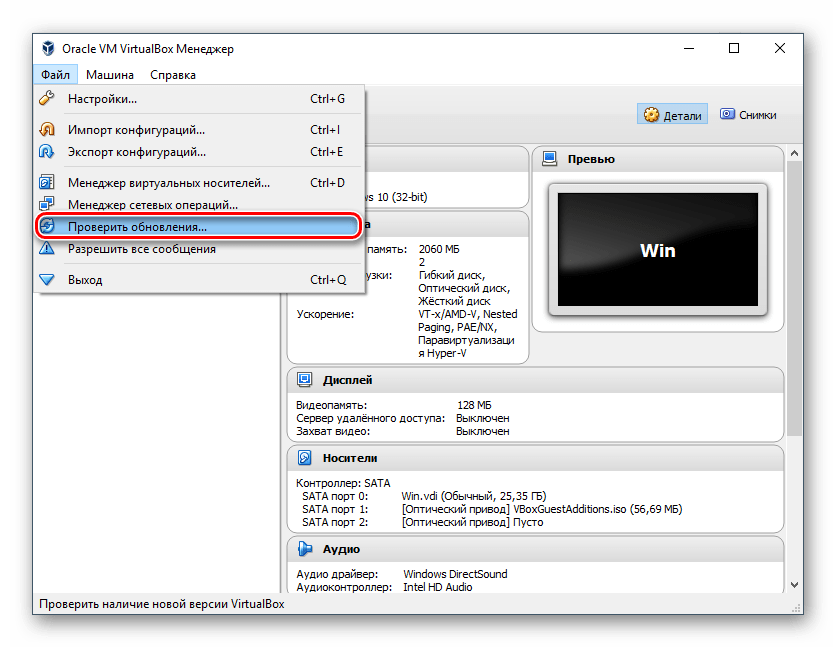
Те, кто не хочет заморачиваться с выбором рабочей версии программы, может просто дождаться обновления. Узнать о выходе новой версии можно на официальном сайте VirtualBox или через интерфейс программы:
- Запустите Менеджер виртуальных машин.
- Нажмите «Файл» > «Проверить обновления…».

- Дождитесь проверки и при необходимости установите обновление.
- Переустановите VirtualBox на текущую или предыдущую версию.
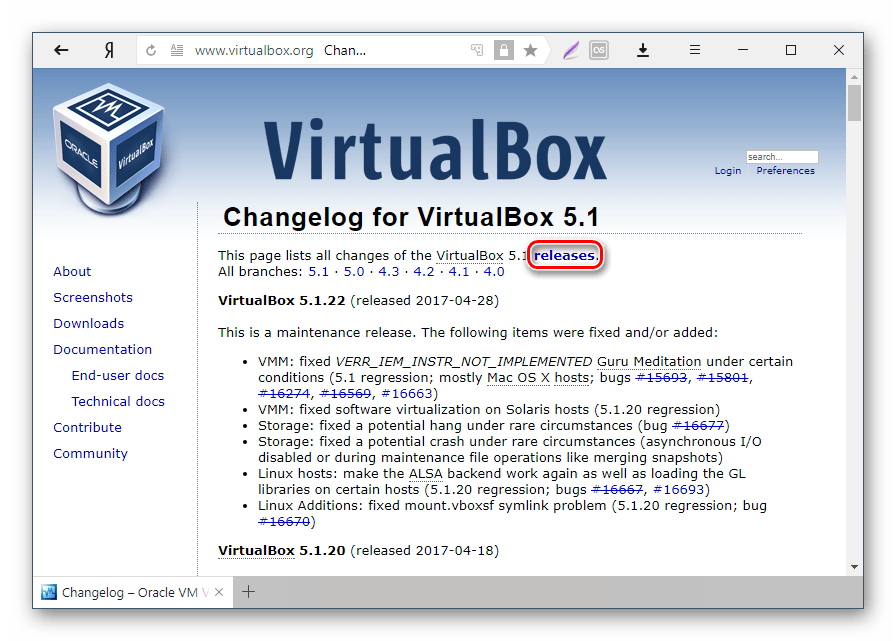
- Если у вас есть установочный файл VirtualBox, то используйте его для переустановки. Для повторного скачивания актуальной или предыдущей версии перейдите по этой ссылке.
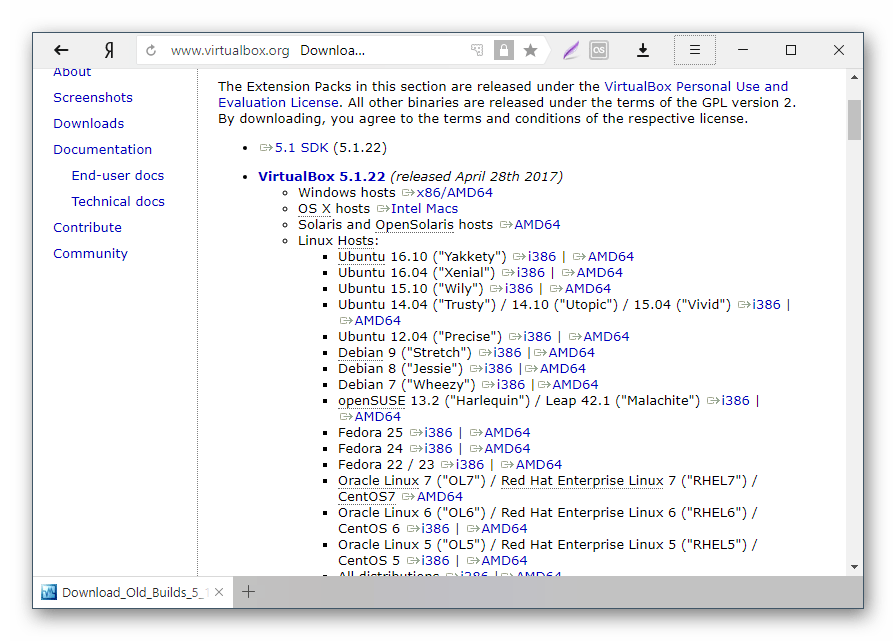
- Нажмите на ссылку, ведущую к странице со списком всех предыдущих релизов для текущей версии VirtualBox.

- Выберите подходящую для хостовой ОС сборку и скачайте ее.
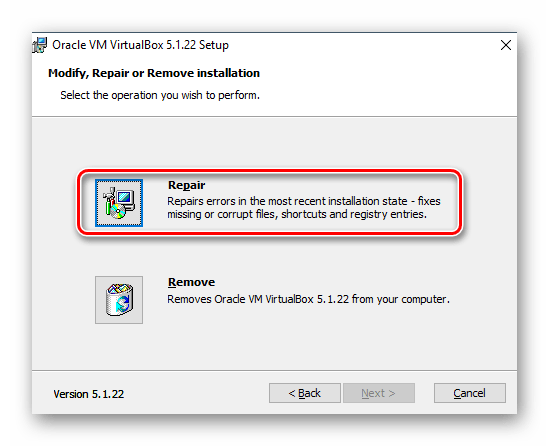
- Для переустановки установленной версии VirtualBox: запустите инсталлятор и в окне с типом установки выберите «Repair». Установите программу в обычном режиме.

- Если вы делаете откат до предыдущей версии, то лучше сперва удалить VirtualBox через «Установку и удаление программ» в Windows.

Или через установщик VirtualBox.
Не забудьте сделать резервные копии своих папок с образами ОС.


Способ 4: Отключение Hyper-V
Hyper-V — система виртуализации для 64-разрядных систем. Иногда у нее может возникнуть конфликт с VirtualBox, что и провоцирует появление ошибки при старте сессии для виртуальной машины.
Для отключения гипервизора выполните следующее:
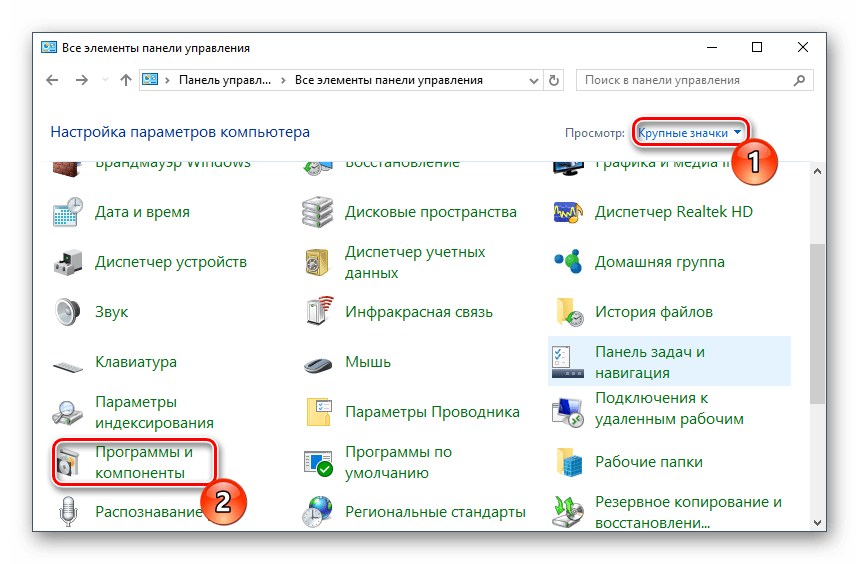
- Запустите «Панель управления».

- Включите просмотр по значкам. Выберите пункт «Программы и компоненты».
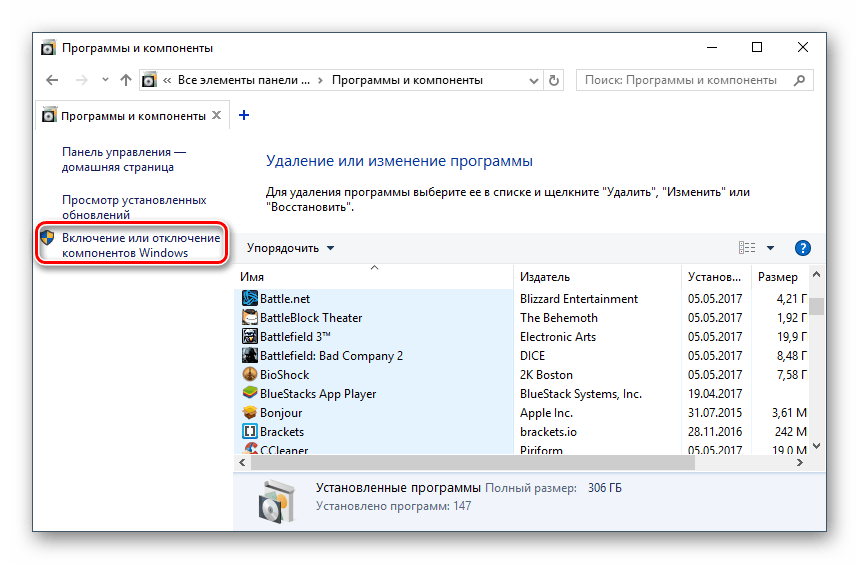
- В левой части окна нажмите на ссылку «Включение или отключение компонентов Windows».
- В открывшемся окне необходимо снять галочку с компонента Hyper-V, а затем нажать «ОК».

- Перезагрузите компьютер (необязательно) и попробуйте запустить ОС в VirtualBox.


Способ 5: Изменение типа запуска гостевой ОС
В качестве временного решения (например, до выпуска новой версии VirtualBox) можно попробовать изменить тип запуска ОС. Этот способ помогает не во всех случаях, но, возможно, сработает у вас.
- Запустите Менеджер VirtualBox.
- Нажмите по проблемной операционной системе правой кнопкой мыши, наведите курсор на пункт «Запустить» и выберите вариант «Запуск в фоновом режиме с интерфейсом».


Данная функция доступна только в VirtualBox, начиная с версии 5.0.
Способ 6: Удаление/исправление обновления Windows 7
Этот способ считается устаревшим, поскольку после неудачного патча KB3004394, приводящего к прекращению работы виртуальных машин в ВиртуалБокс, была выпущена заплатка KB3024777, устраняющая данную проблему.
Тем не менее, если у вас на компьютере по каким-то причинам отсутствует фикс-патч, а проблемный присутствует, то есть смысл либо удалить KB3004394, либо установить KB3024777.
Удаление KB3004394:
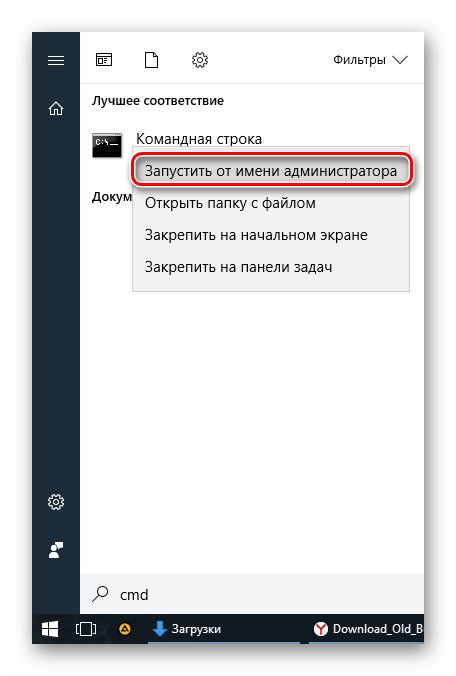
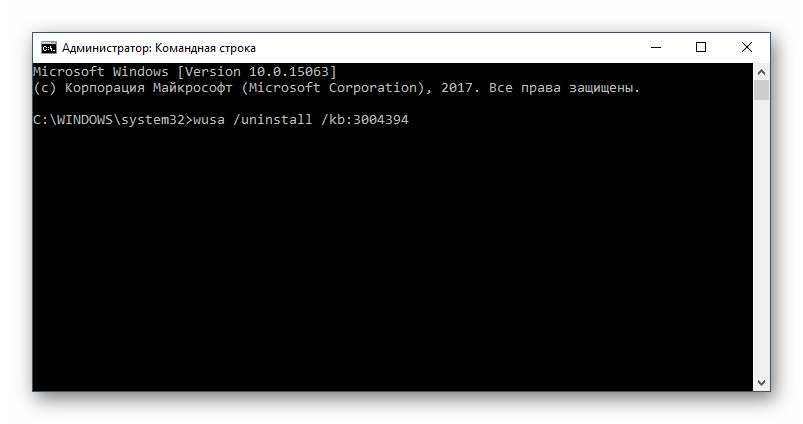
- Откройте «Командную строку» с правами администратора. Для этого откройте окно «Пуск», напишите cmd, правым кликом мыши выберите пункт «Запустить от имени администратора».

- Пропишите команду
wusa /uninstall /kb:3004394и нажмите Enter.

- После выполнения этого действия может потребоваться перезагрузка компьютера.
- Попробуйте еще раз запустить гостевую ОС в ВиртуалБоксе.
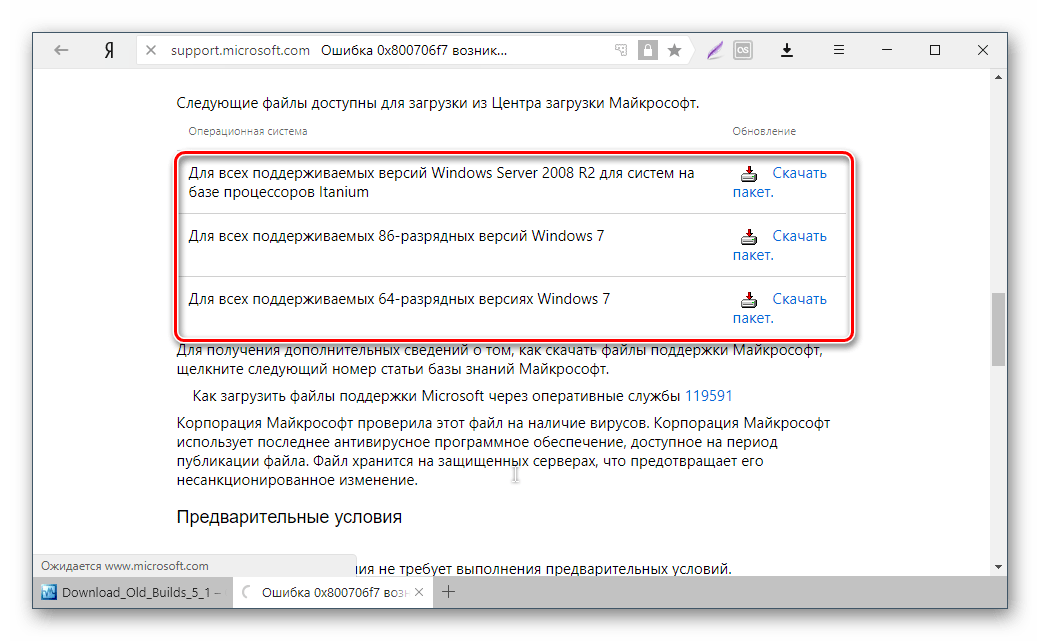
Установка KB3024777:
- Перейдите по этой ссылке на сайт Microsoft.
- Скачайте версию файла с учетом разрядности своей ОС.

- Установите файл вручную, если необходимо, перезагрузите ПК.
- Проверьте запуск виртуальной машины в VirtualBox.
В подавляющем большинстве случаев точное выполнение данных рекомендаций приводит к устранению ошибки 0x80004005, и пользователь может без труда начать или продолжить работать с виртуальной машиной.
Наша группа в TelegramПолезные советы и помощь
I stumbled across this while trying to get Multipass working on Server 2019, with Hyper-V. My plan is to use Multipass to quickly spin up virtual machines for different blog posts I plan on doing. There is a known issue with Multipass using Hyper-V, so I decided to try it with Oracle VirtualBox instead.
With VirtualBox 6.0 you can now install it along side the Hyper-V hypervisor, but you will encounter the error below if you try to start any virtual machine in Virtual Box.
VBoxManage.exe: error: WHvCapabilityCodeHypervisorPresent is FALSE! Make sure you have enabled the ‘Windows Hypervisor Platform’ feature. (VERR_NEM_NOT_AVAILABLE).
If you are using a version of Windows that is not Server 2019, you can easily enable the ‘Windows Hypervisor Platform’ feature, and be on your way. If you are using Windows Server 2019, this feature does not exist in the Server Manager UI, so you have to add it manually.
Enable using PowerShell as Administrator
Enable-WindowsOptionalFeature -FeatureName "HypervisorPlatform" -OnlineEnable using Command-line as Administrator
Dism /Online /Enable-Feature:HypervisorPlatformI have recently installed Windows PRO. During installation of Hyper-V, it duly warns you that you will no longer be able to use VirtualBox. Which is true, because when I start a VM in VirtualBOx I get the message:
WHvCapabilityCodeHypervisorPresent is FALSE! Make sure you have enabled the ‘Windows Hypervisor Platform’ feature. (VERR_NEM_NOT_AVAILABLE).
VT-x is not available (VERR_VMX_NO_VMX).
Apparently all you need to do to re-enable VirtualBox is:
open CMD as Administrator
bcdedit /set hypervisorlaunchtype off
reboot your machine
To restore Hyper-V you simply run:
bcdedit /set hypervisorlaunchtype on
or
bcdedit /set hypervisorlaunchtype auto
I haven’t tested yet but it should work IMHO
bcdedit is this https://docs.microsoft.com/en-us/windows-hardware/manufacture/desktop/bcdedit-command-line-options
Windows Boot Manager
--------------------
identifier              {bootmgr}
device                  partition=\Device\HarddiskVolume2
path                    \EFI\Microsoft\Boot\bootmgfw.efi
description             Windows Boot Manager
locale                  fr-FR
inherit                 {globalsettings}
badmemoryaccess         Yes
default                 {current}
resumeobject            {b32f6aed-59a4-11e8-b3f7-b9390bbf0244}
displayorder            {current}
toolsdisplayorder       {memdiag}
timeout                 30

Windows Boot Loader
-------------------
identifier              {current}
device                  partition=C:
path                    \WINDOWS\system32\winload.efi
description             Windows 10
locale                  fr-FR
inherit                 {bootloadersettings}
recoverysequence        {b32f6aef-59a4-11e8-b3f7-b9390bbf0244}
displaymessageoverride  Recovery
recoveryenabled         Yes
badmemoryaccess         Yes
isolatedcontext         Yes
allowedinmemorysettings 0x15000075
osdevice                partition=C:
systemroot              \WINDOWS
resumeobject            {b32f6aed-59a4-11e8-b3f7-b9390bbf0244}
nx                      OptIn
bootmenupolicy          Standard
hypervisorlaunchtype    Auto