
10/25/2022 – This guide is outdated and a new one has been written.
For a much simpler and smoother install process that works for any Intel Mac that can run Windows 10, please check out my newer article Install Windows 11 on any Intel MacBook Pro, MacBook Air or iMac.
Prerequisites of this guide
This guide assumes you already have Windows 10 installed with Boot Camp. If you need help with this initial step, Apple provides instructions on its Boot Camp Support Page.
Guide Compatibility
My machine is a mid 2015 MacBook Pro. It is the final model of the 3rd Generation of MacBook Pros (“MacBook Pro with Retina display” as Apple labeled it). This generation runs from mid 2012 to mid 2015. There is a chance these steps work on other models in this generation, but I personally am unsure. All I know is these steps worked for my mid 2015 model. If you are on a different machine than mine, I can’t guarantee this guide will work. Either way, follow at your own risk.
Thank you
At the bottom of the article I list my acknowledgement and thanks to everyone who helped me create this guide.
Note regarding the tool used
I completed the process of upgrading my Windows 10 Boot Camp install to Windows 11 back in October 2021. Since then, the Github tool has been updated and the install process may be slightly different from what is explained in this guide. Both of the links below are to the Github repo of the upgrade tool. The first link goes to the latest version of the tool, while the second one links directly to the version I used. If you’re interested in following the steps exactly as I performed them, download the tool via the second link.
Download MediaCreationTool.bat from GitHub
Latest Version
https://github.com/AveYo/MediaCreationTool.bat
Guided Version
https://github.com/AveYo/MediaCreationTool.bat/tree/a21ed3c420dbc4797908c23505f1c0498bd816ec
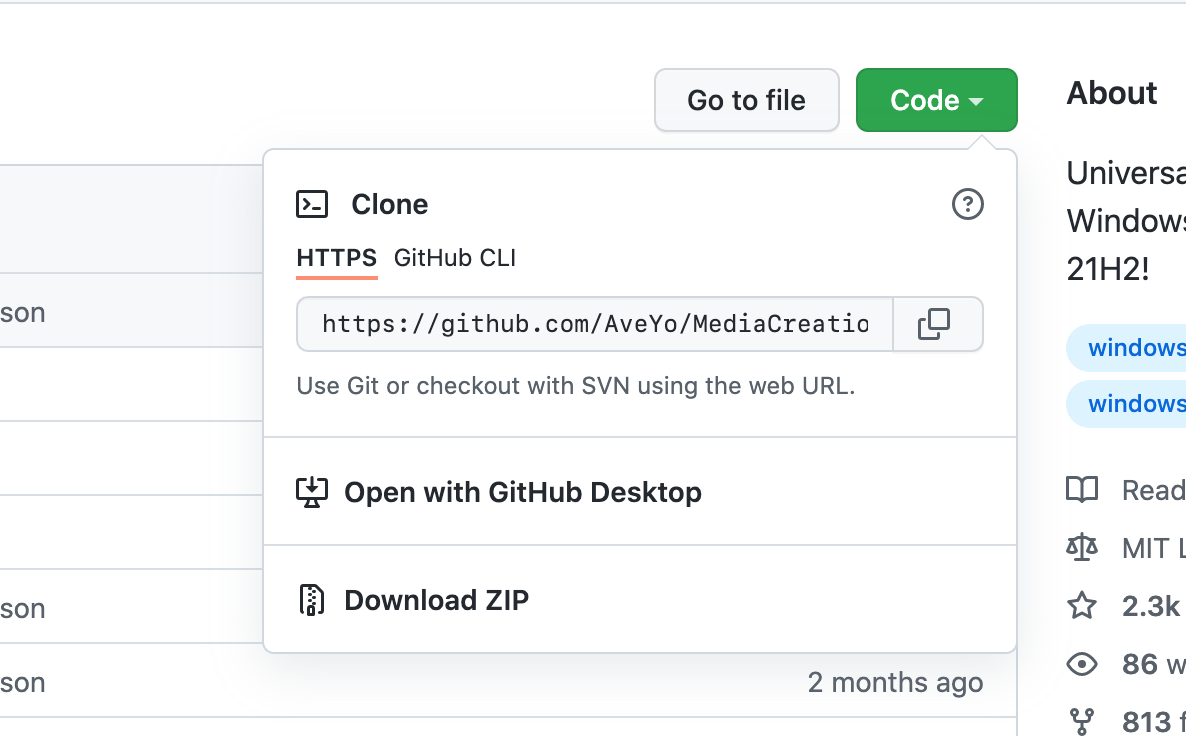
Once at github.com, click the big green “Code” button, followed by “Download ZIP.” You should be booted up in Windows 10 for these steps.
Unzip the file and navigate into the unzipped folder.
Next Steps
The following steps are exactly the ones I took to successfully install Windows 11 on my mid 2015 MacBook Pro with Boot Camp. These steps require downloading MediaCreationTool.bat from the second link above (this one), not the first. Again, Windows 10 needs to already be set up on your machine.
Let’s Begin
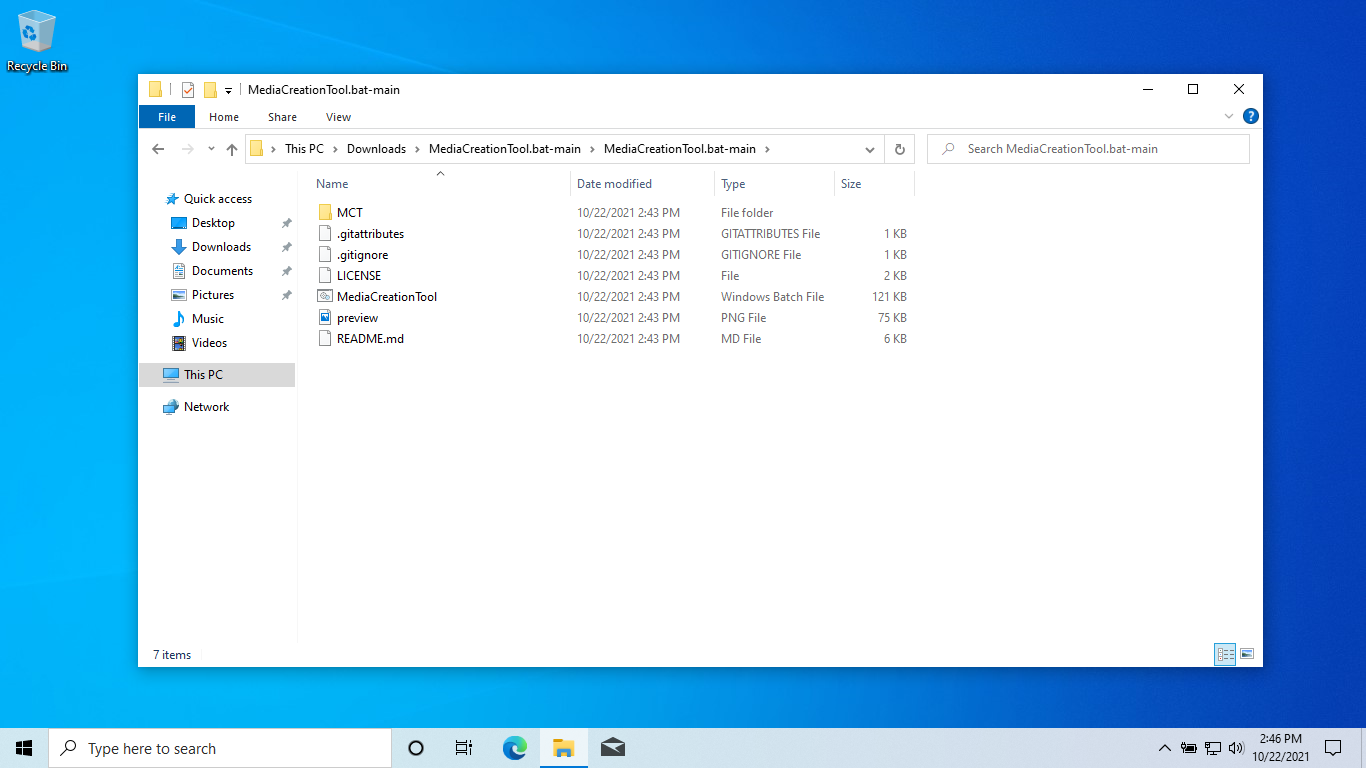
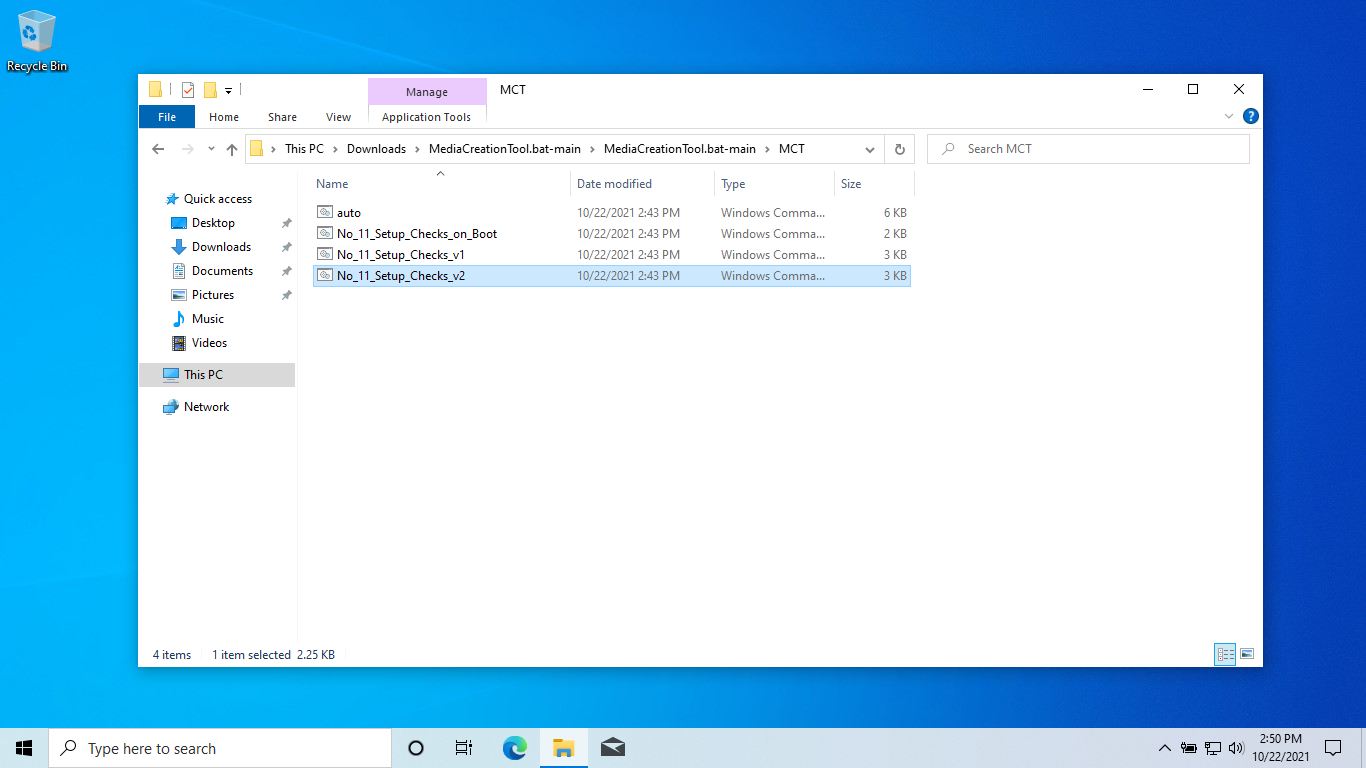
Unzip the downloaded file and open up the directory. This is what the contents should look like.
Open the MCT folder.
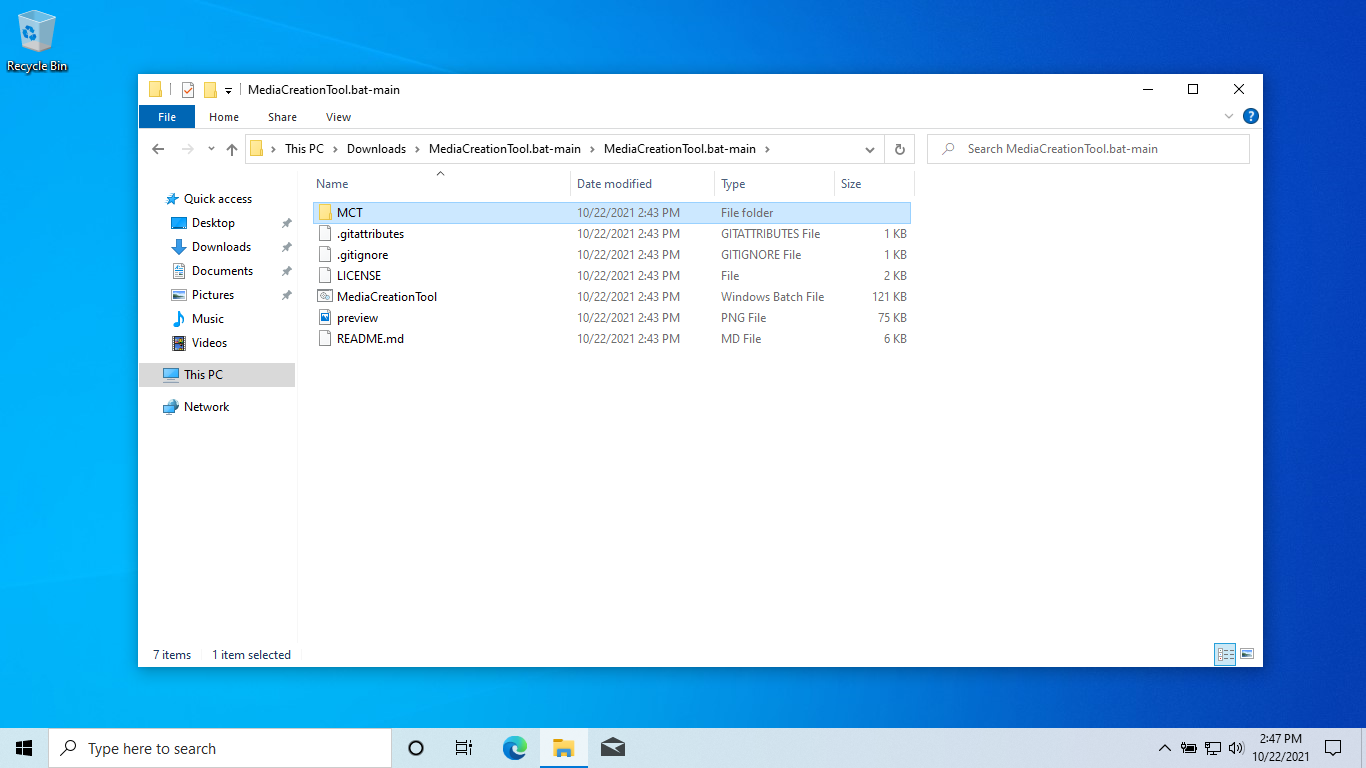
Double-click No_11_Setup_Checks_v1.cmd to run it.

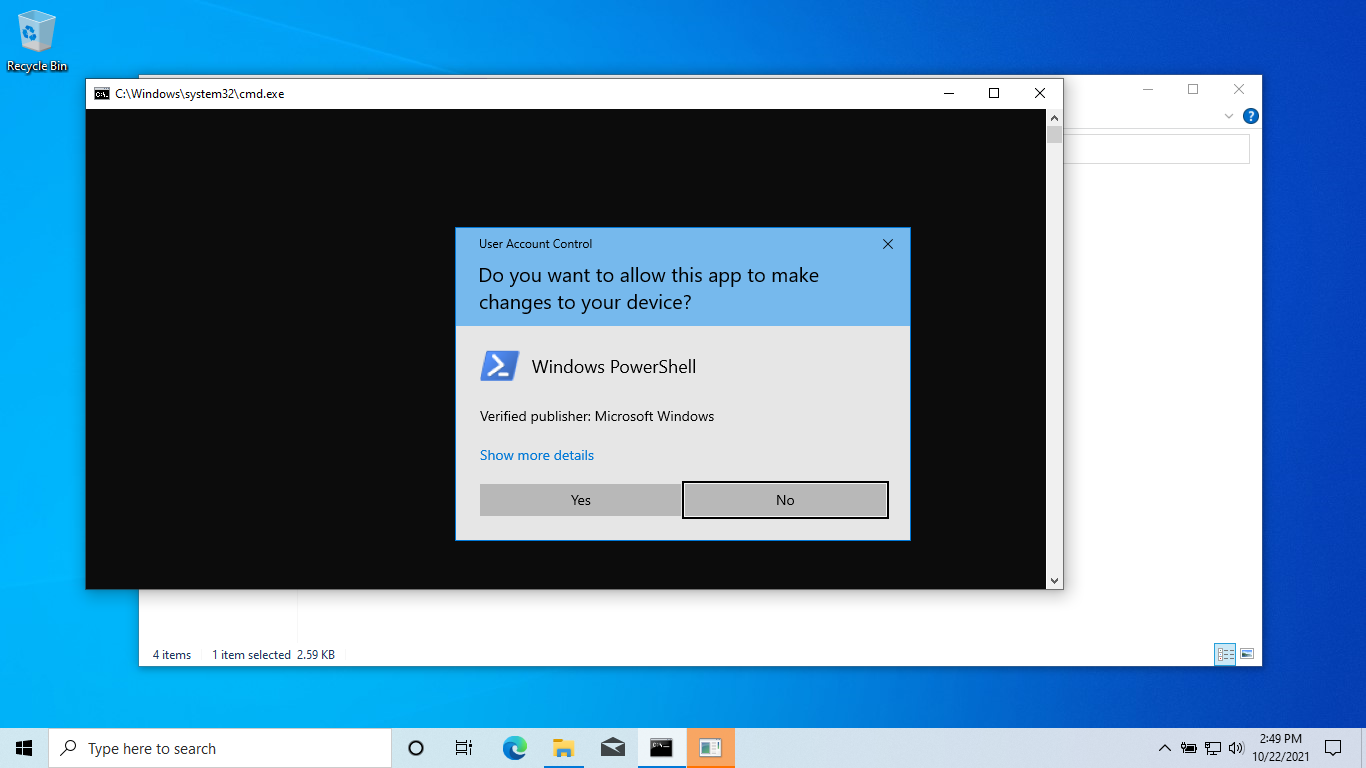
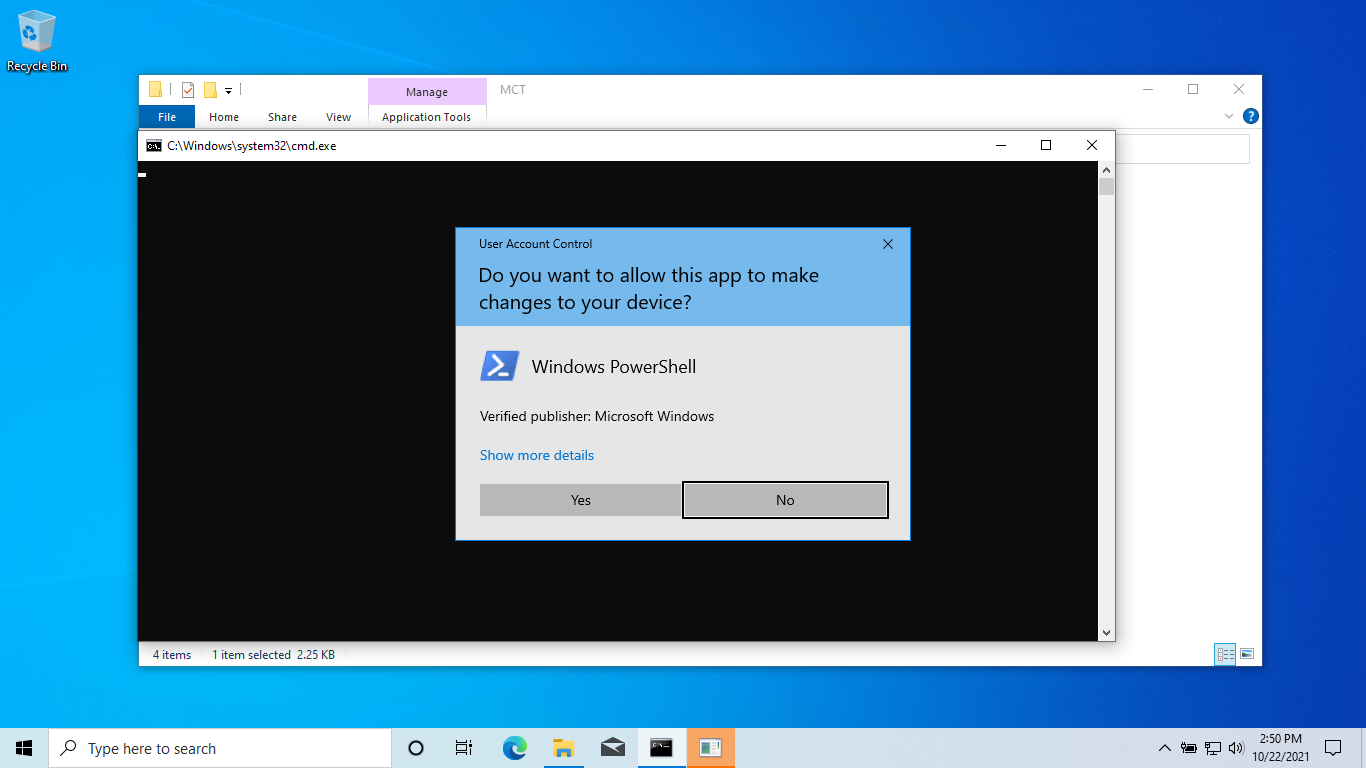
A prompt will pop up asking if you want to “allow this app to make changes to your device.” Click Yes.
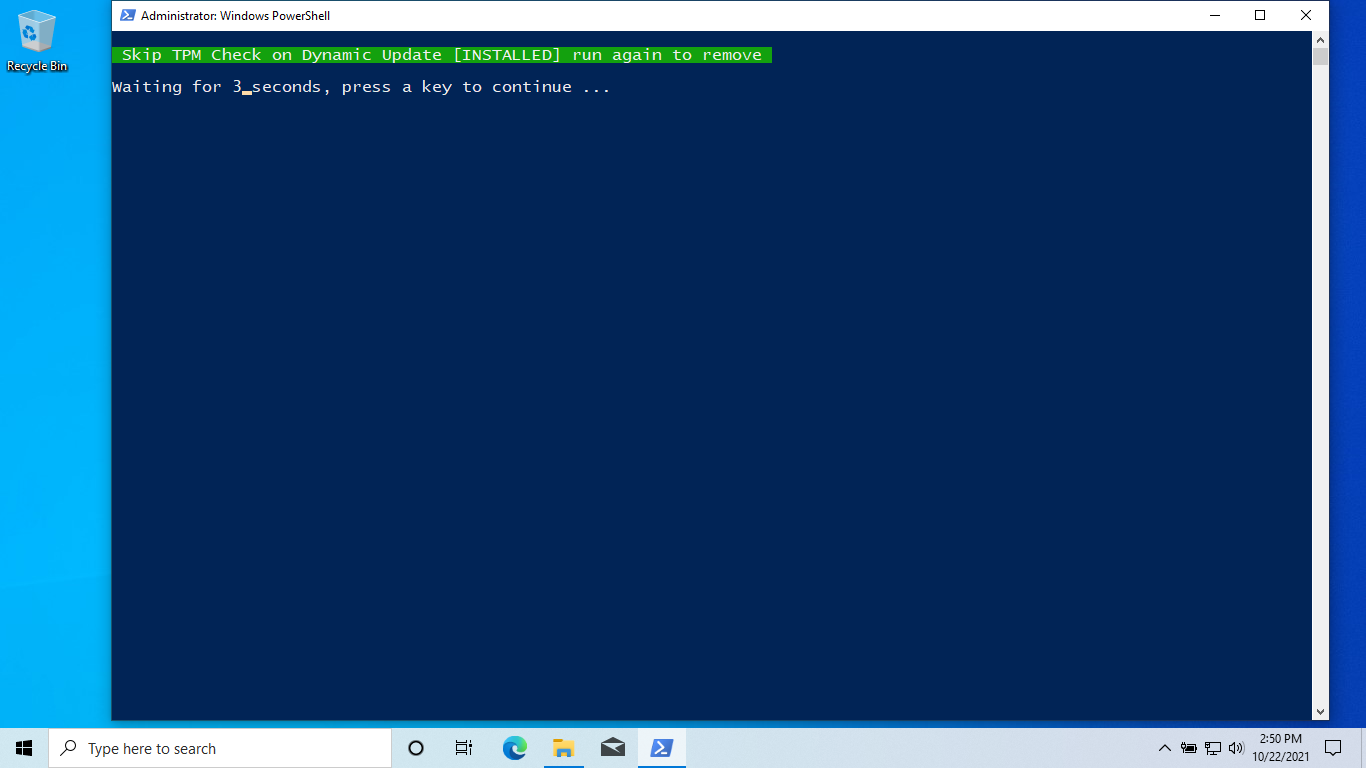
After clicking Yes, this PowerShell window will appear. Once it does, just hit Enter on your keyboard and it will then close.
Next, double-click No_11_Setup_Checks_v2.cmd to run it. Honestly I’m not sure the difference between these two files, but running both worked for me.
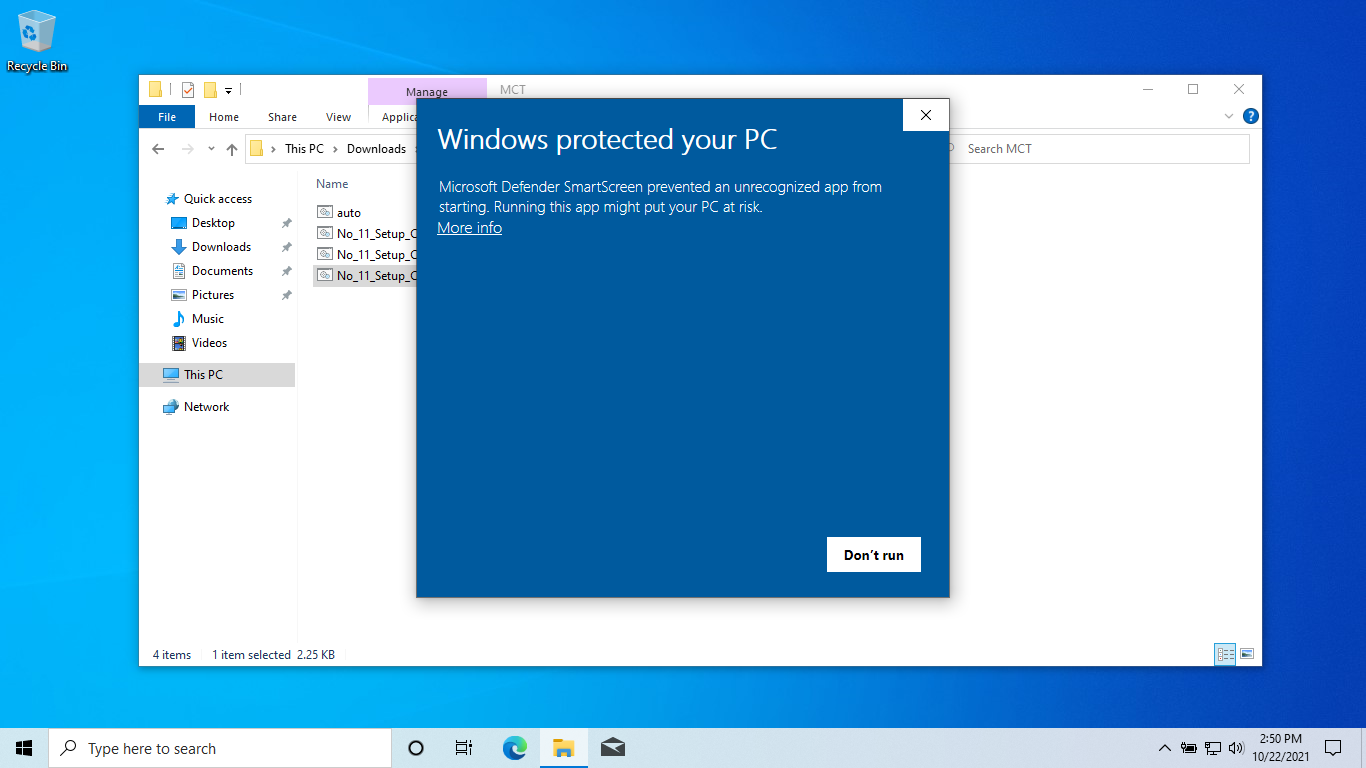
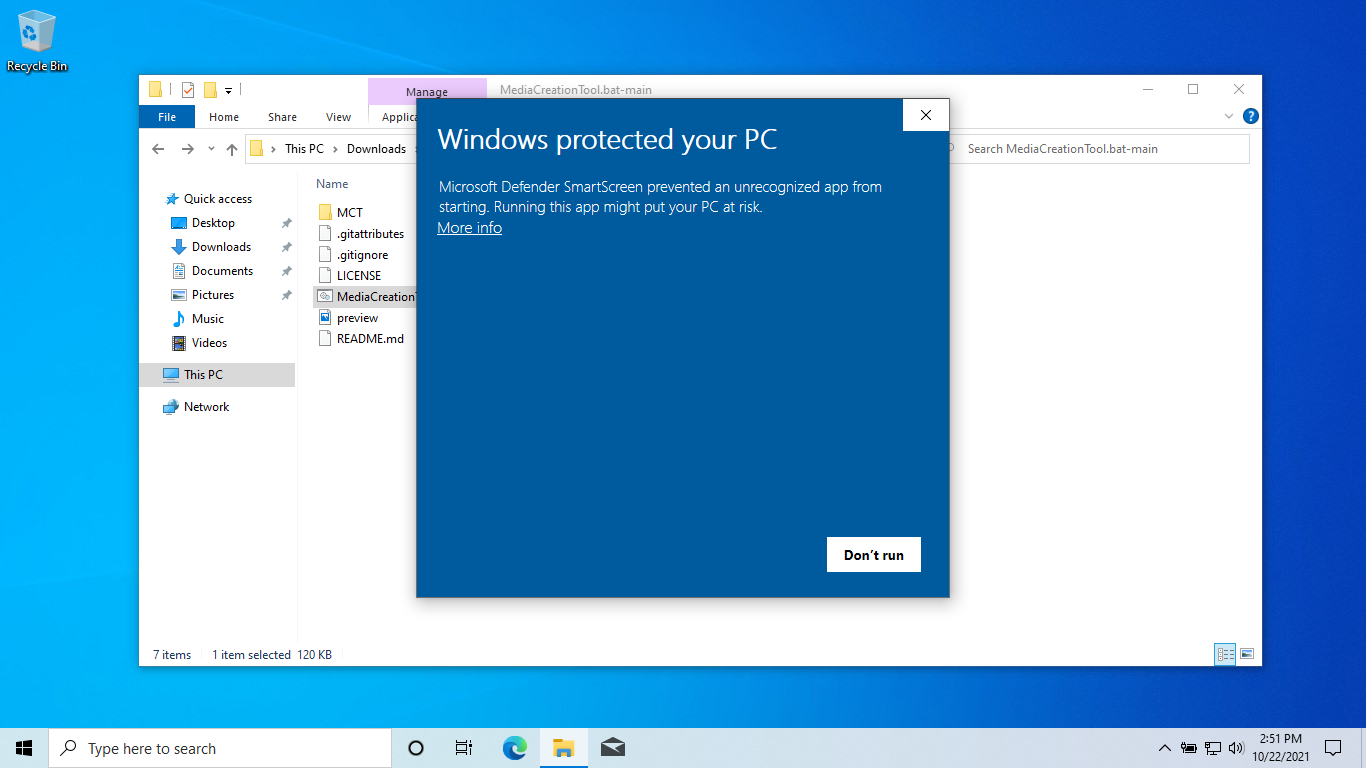
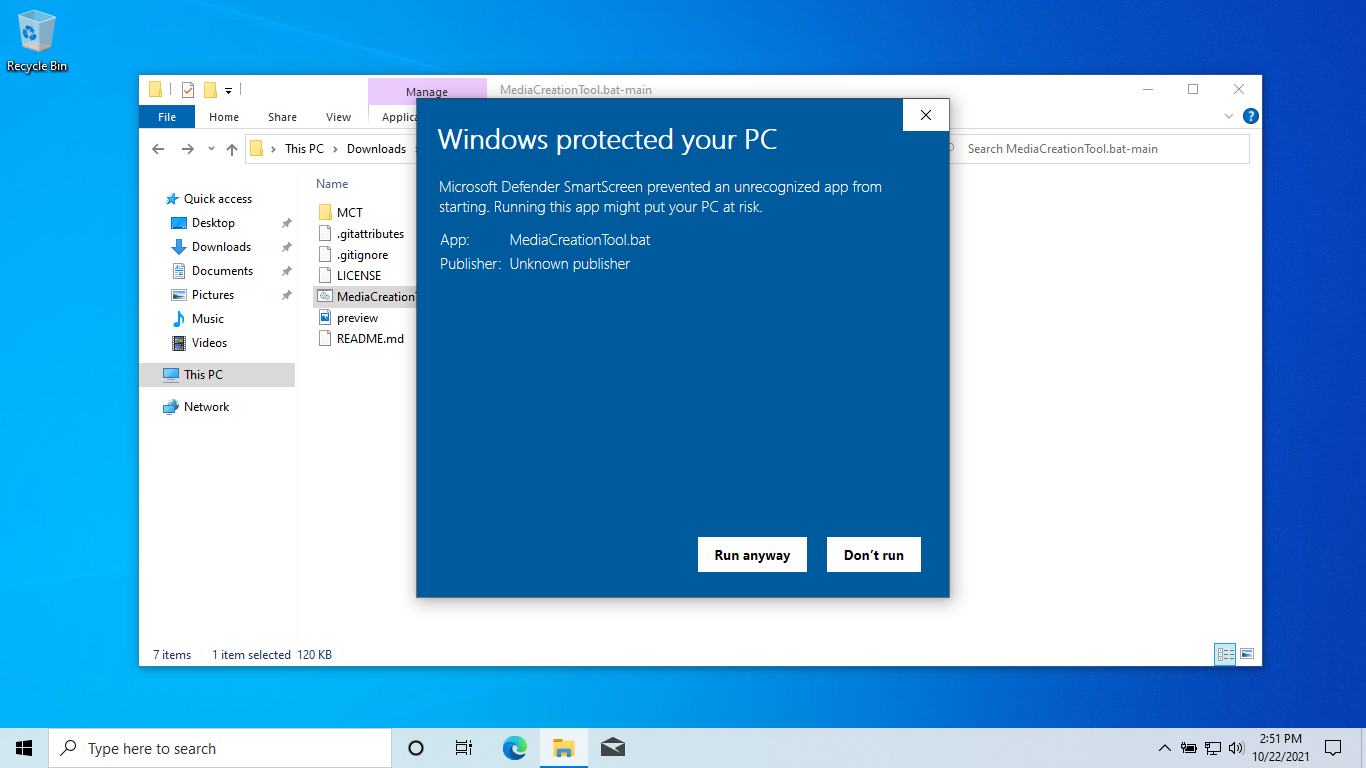
This time a different prompt will appear, saying “Windows protected your PC.” Click “More Info” and then “Run anyway.”

A blank Command Prompt will appear.
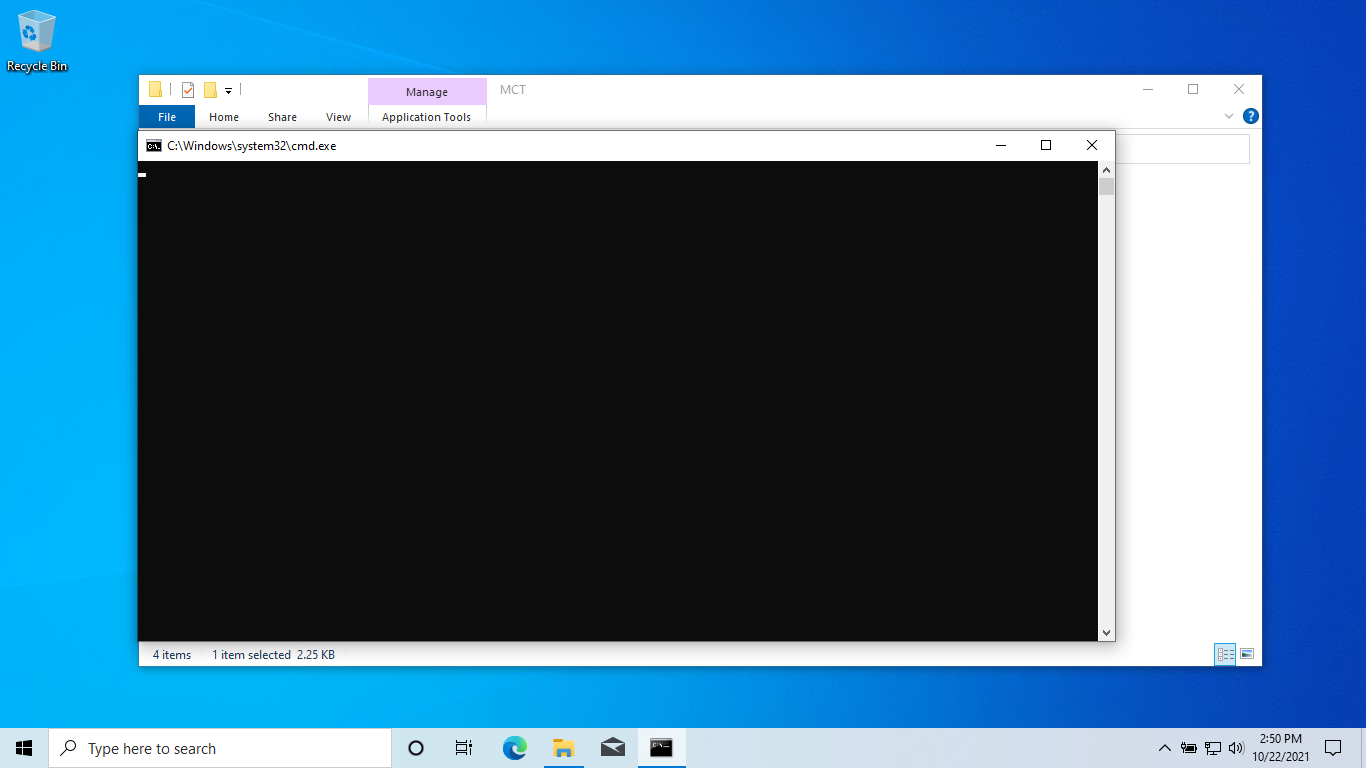
Immediately after, another “Allow” prompt will appear. Select “Yes.”
Then a PowerShell window similar to the No_11_Setup_Checks_v1.cmd will appear. Press Enter and it will close itself.

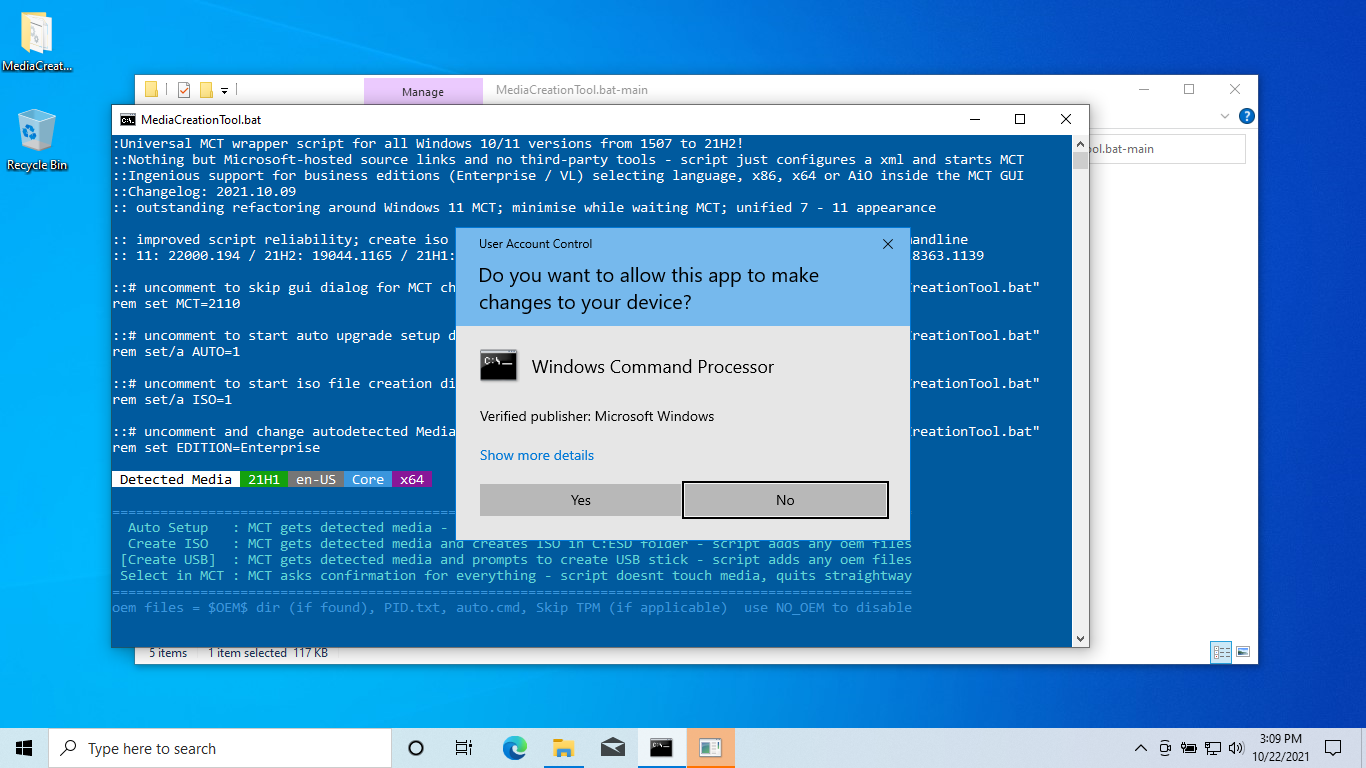
Go back to the main top-level folder. Right-click MediaCreationTool and select “Run as administrator” to run it.
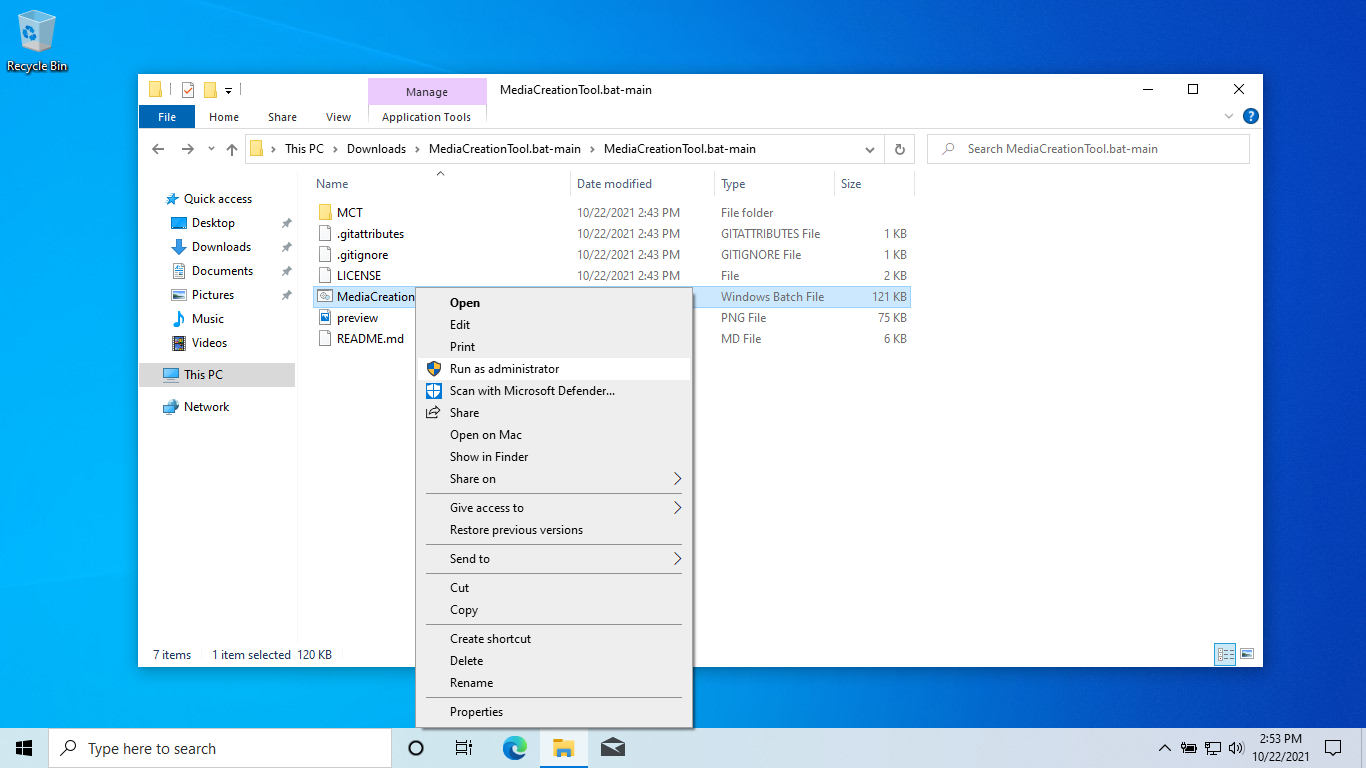
A prompt will appear, asking if you want to allow this app to make changes to your device. Select Yes.
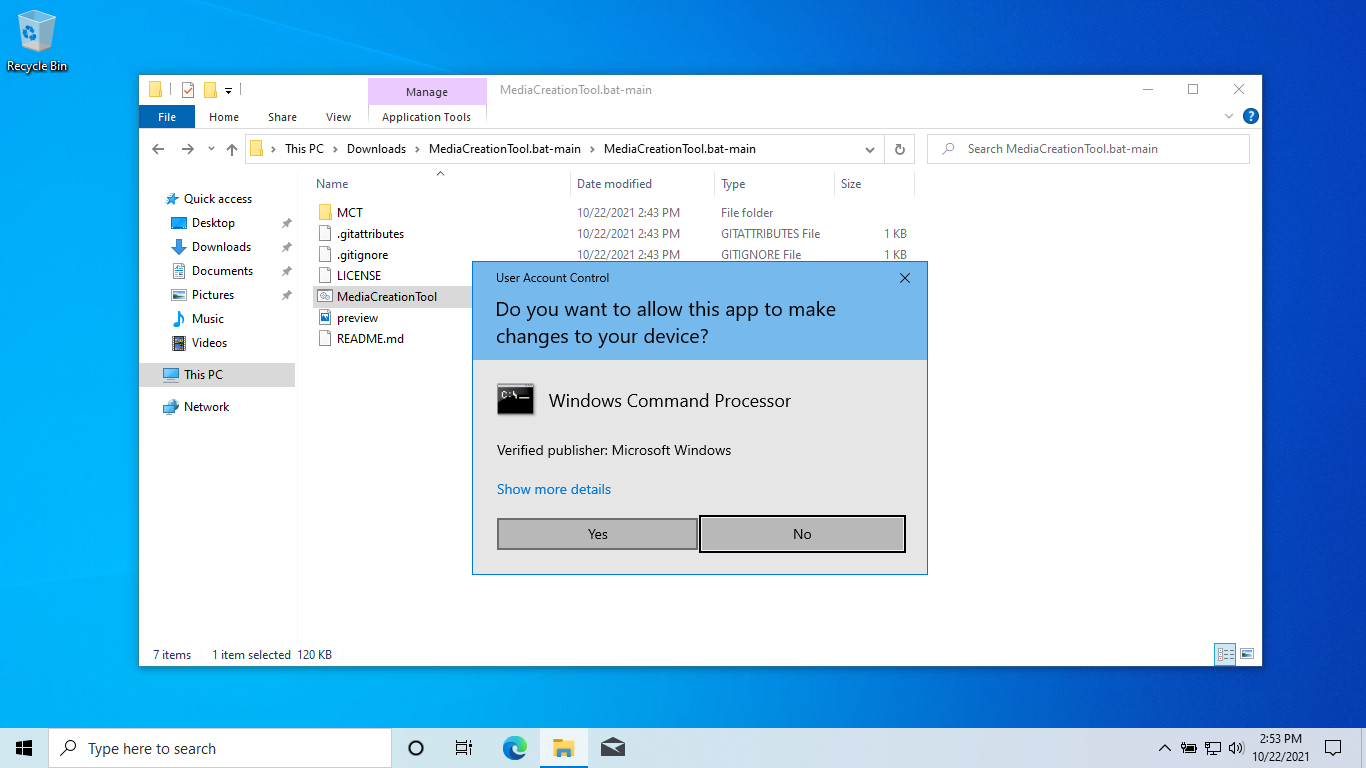
Another “Windows protected your PC” pop up will appear. Click “More info.”
Then click “Run Anyway.”
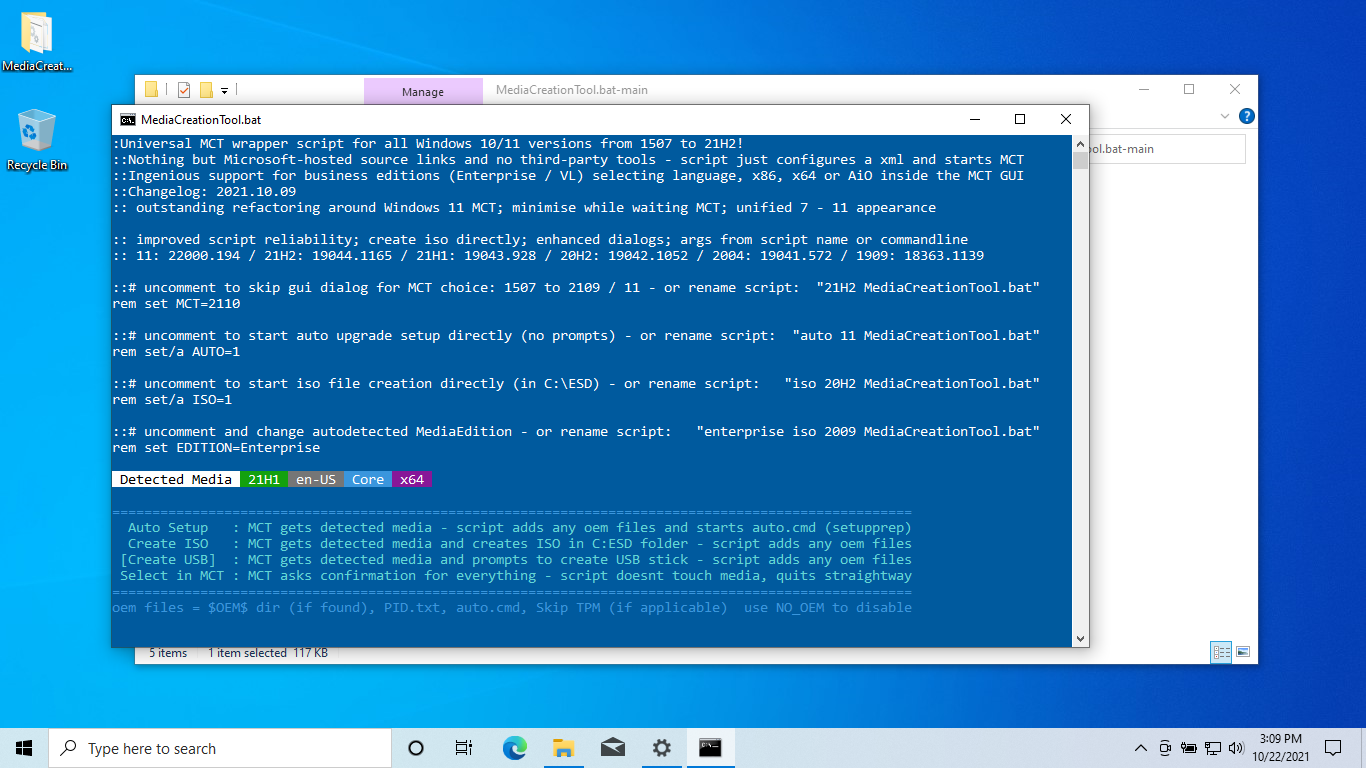
Next this blue MediaCreationTool window will appear. It pauses for a moment.
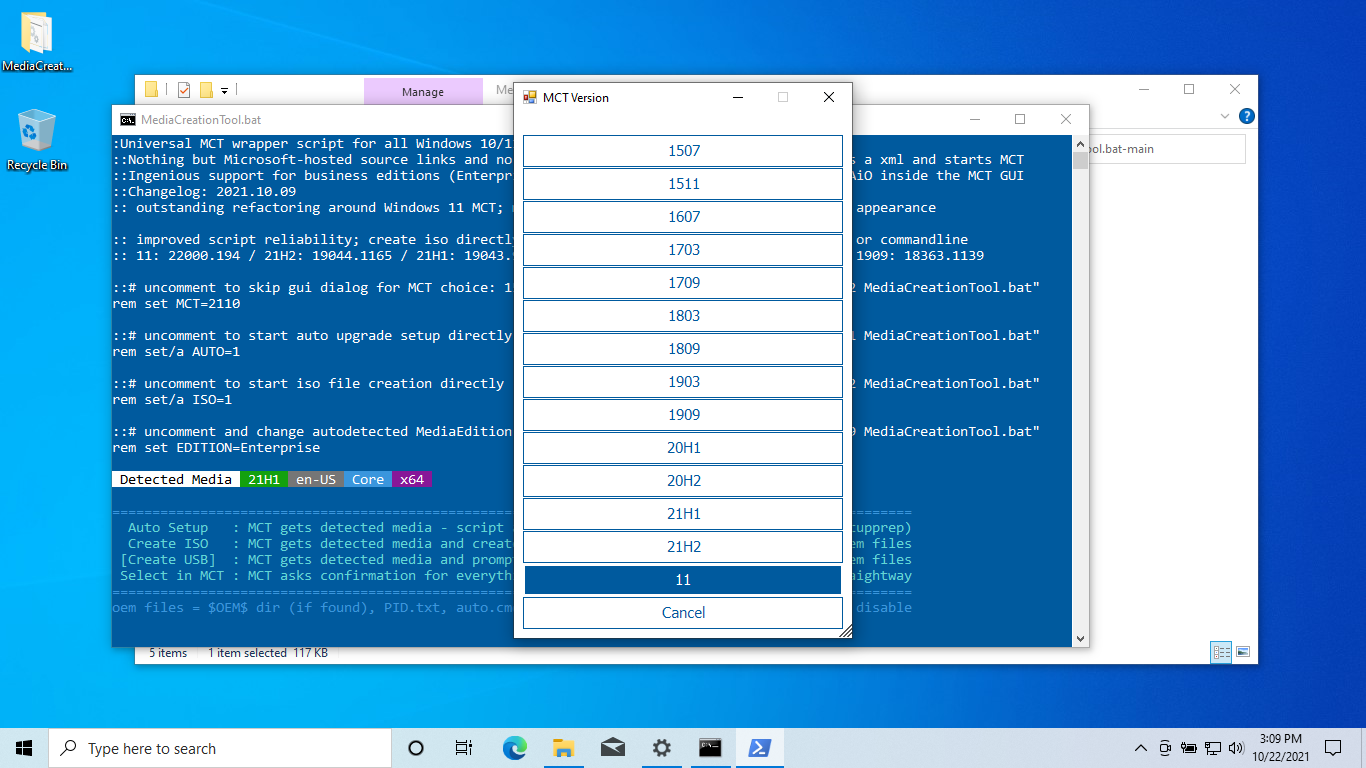
Then a GUI window will pop up. Select “11” at the bottom of the list.
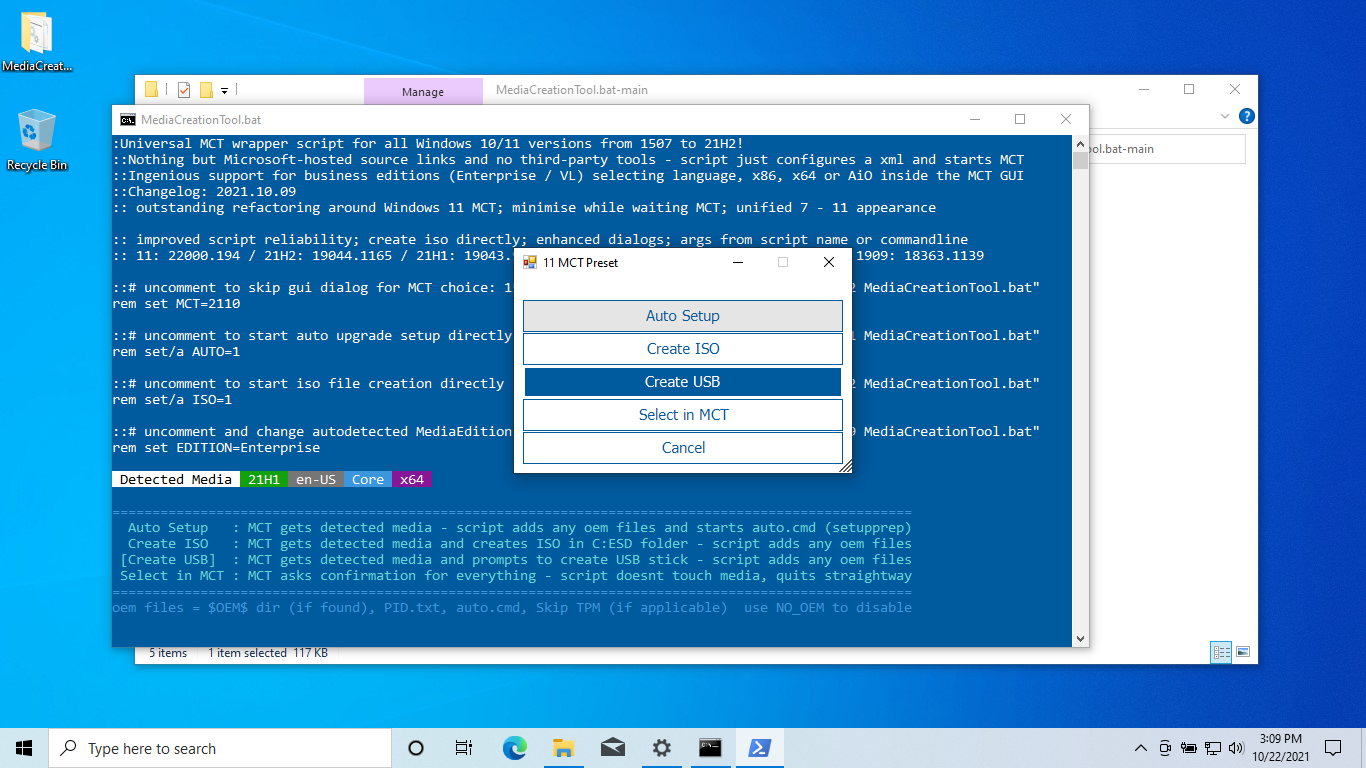
After selecting “11”, a new menu appears. Select “Auto Setup” from this list. “Create USB” is highlighted by default, but be sure to click “Auto Setup” at the top.
An “Allow” prompt will appear. Select “Yes.”
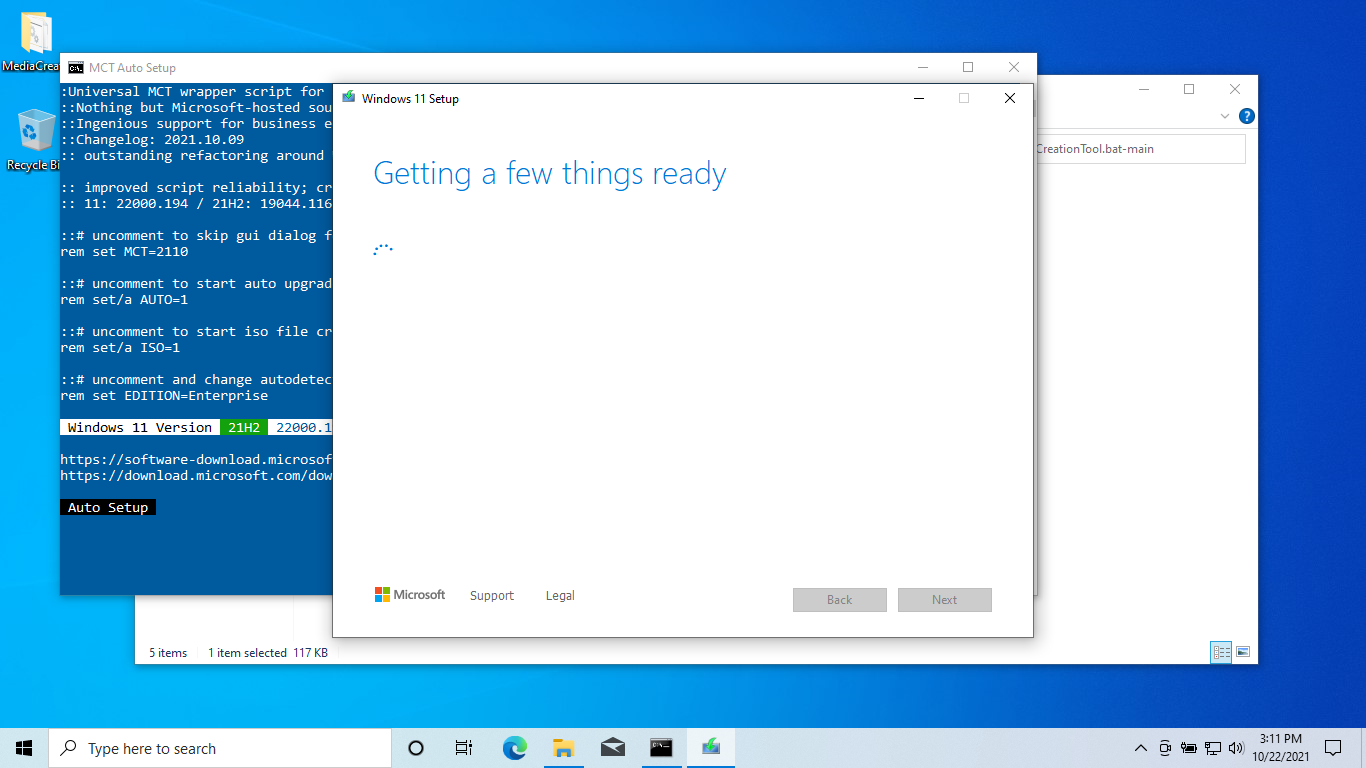
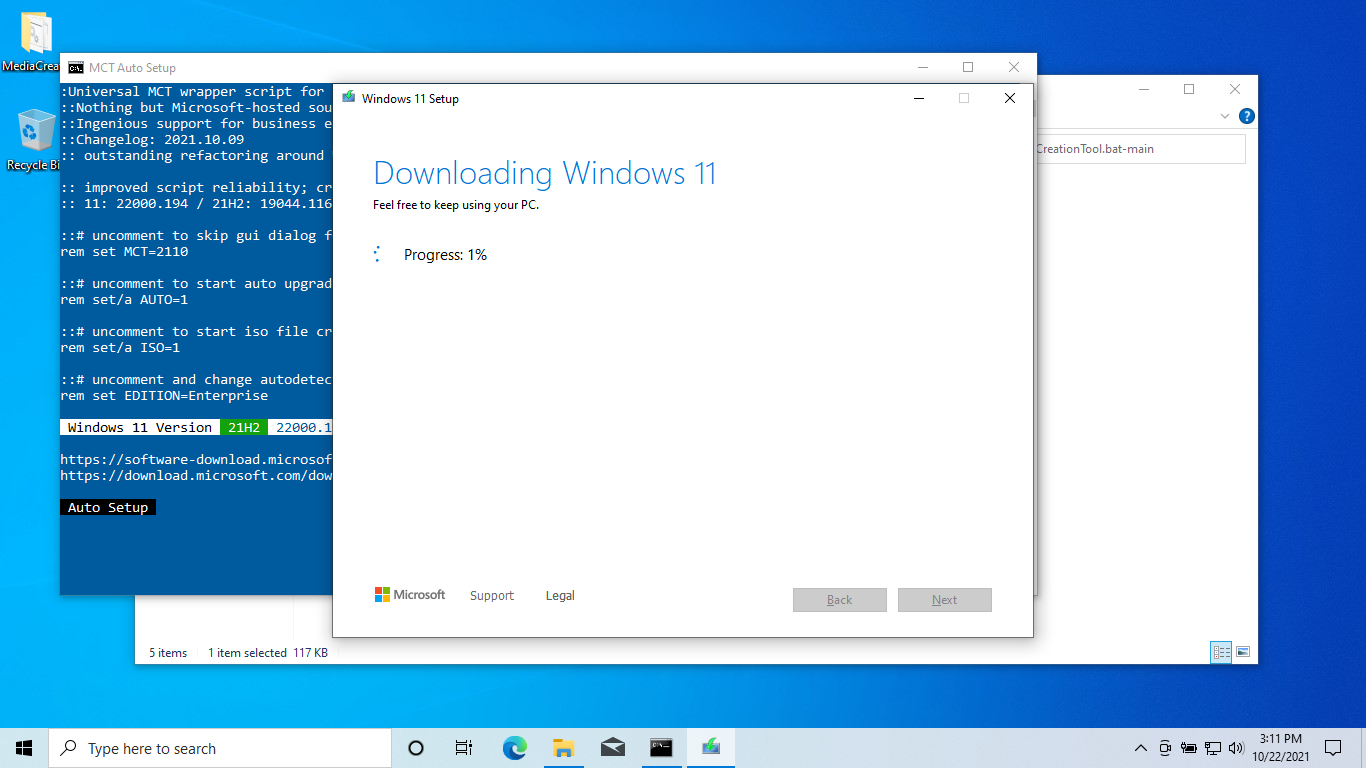
After all this, the default Windows 11 Setup program will appear!
The program will then begin to download Windows 11.
It will then Verify the Download.

Next it will create the Windows 11 media.

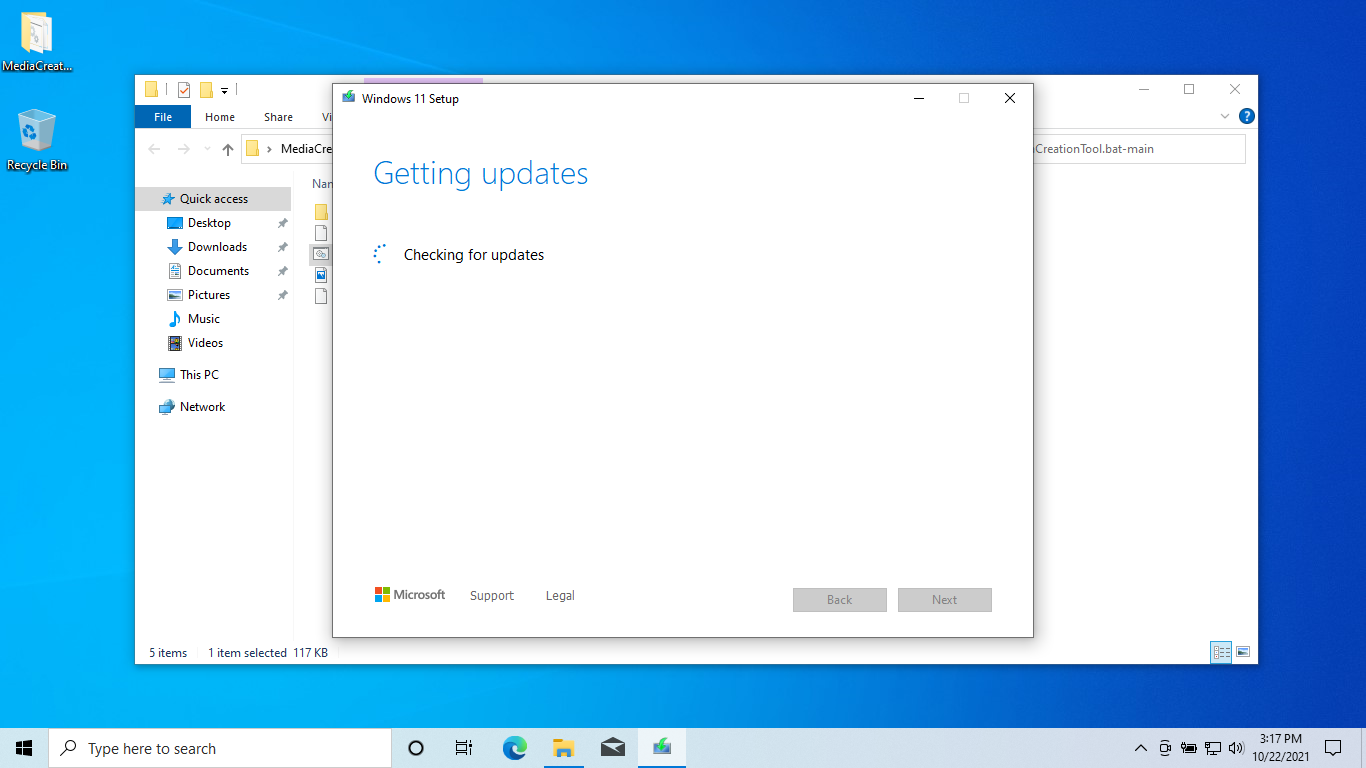
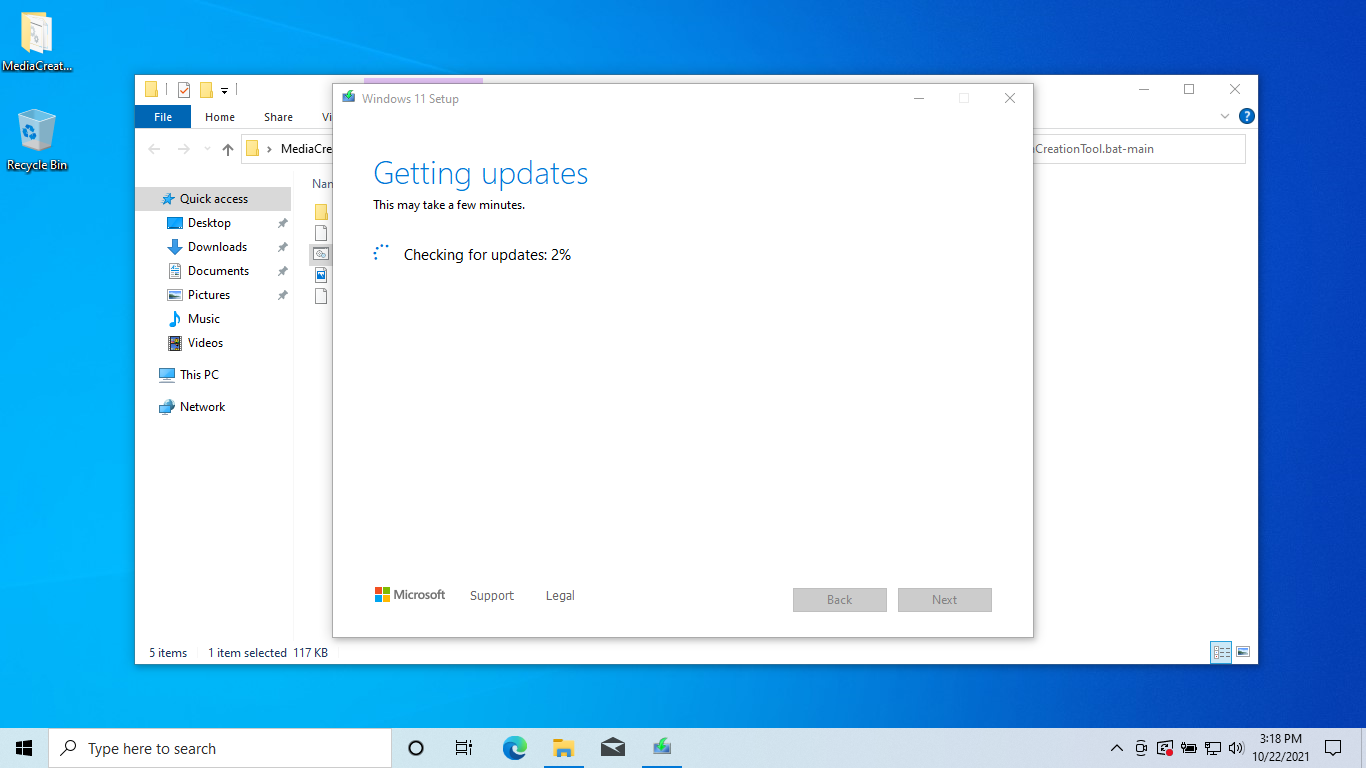
Then it will check for updates.
The program will then inform you it needs to restart itself to continue.

Once Windows 11 Setup restarts, it will begin “Getting things ready.”

Then it will do another round of updates.
Lastly, a final step of making sure you have enough disk space.

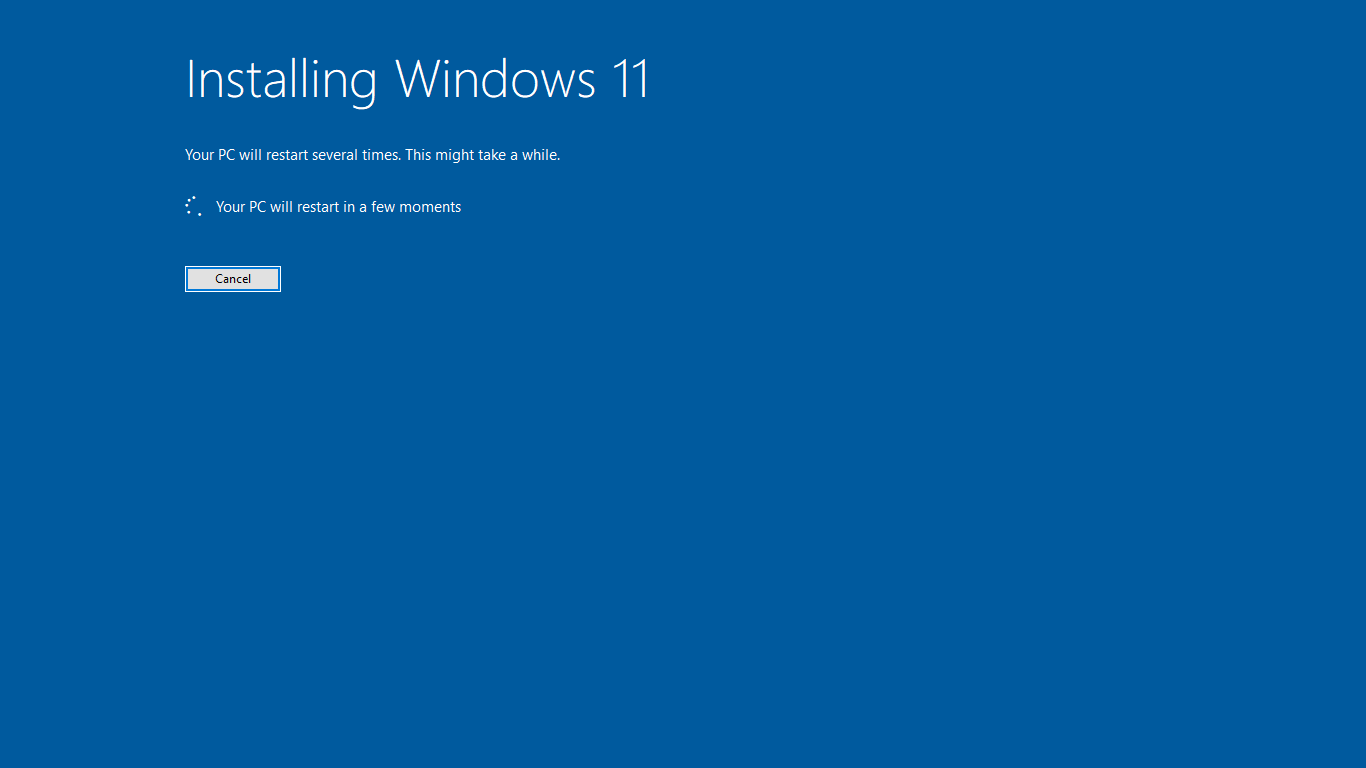
Windows 11 Setup will then take over the entire screen. After 100% install completion, your computer will restart.
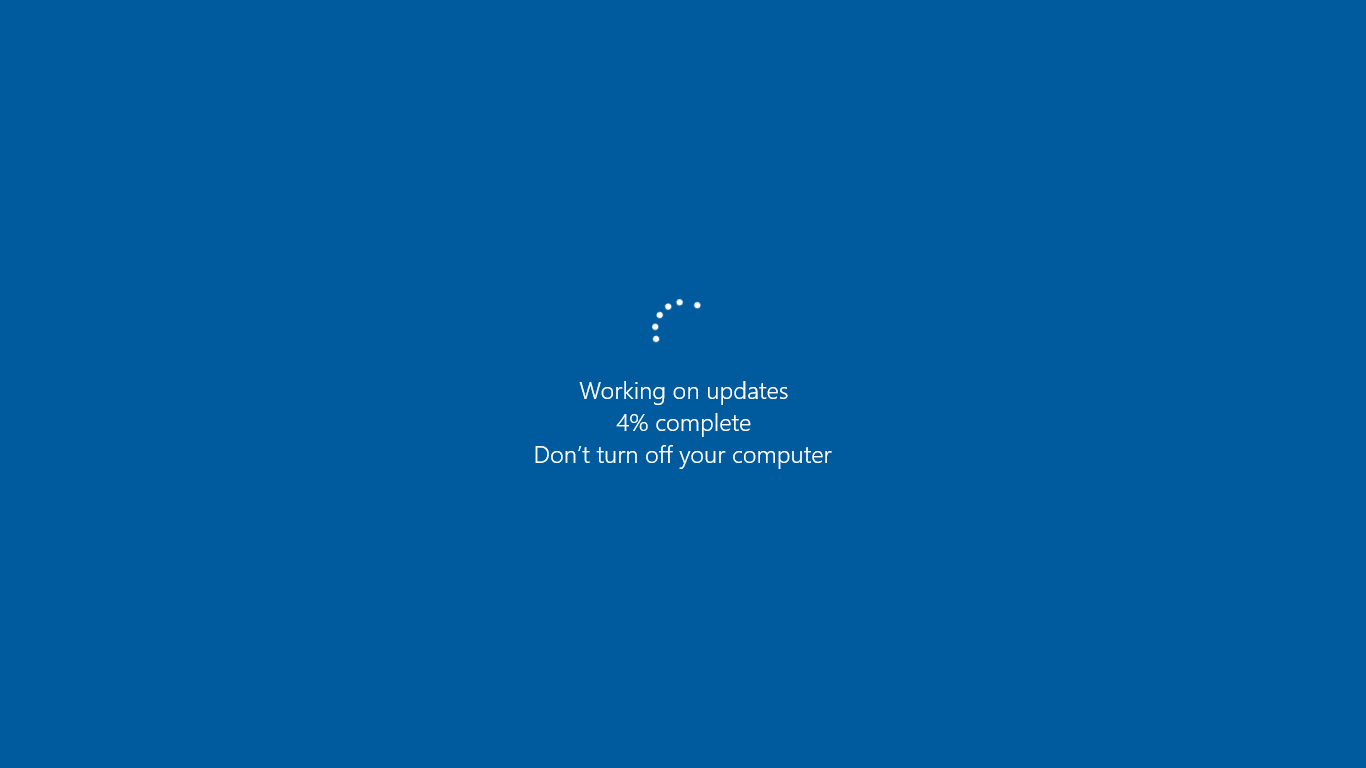
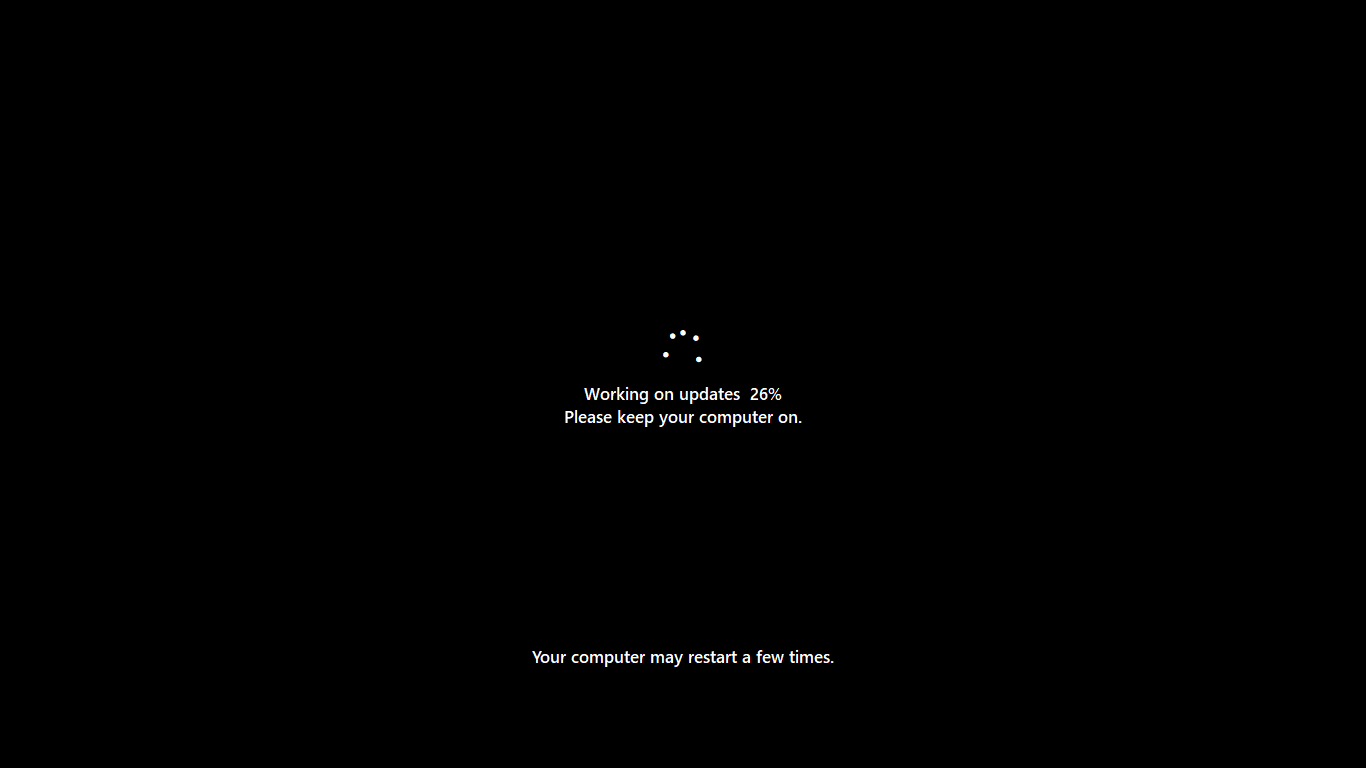
After restarting, you get a percentage-completion measure.
It will then restart again.
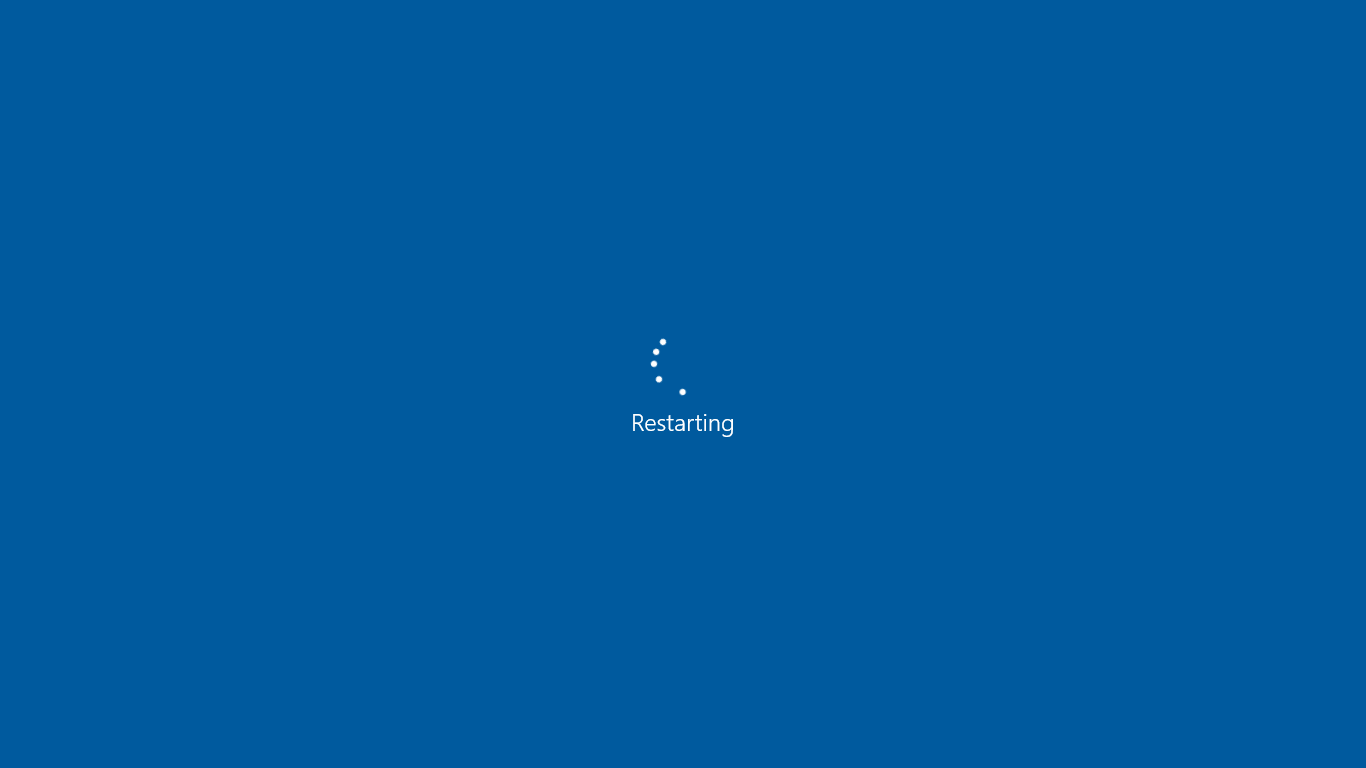
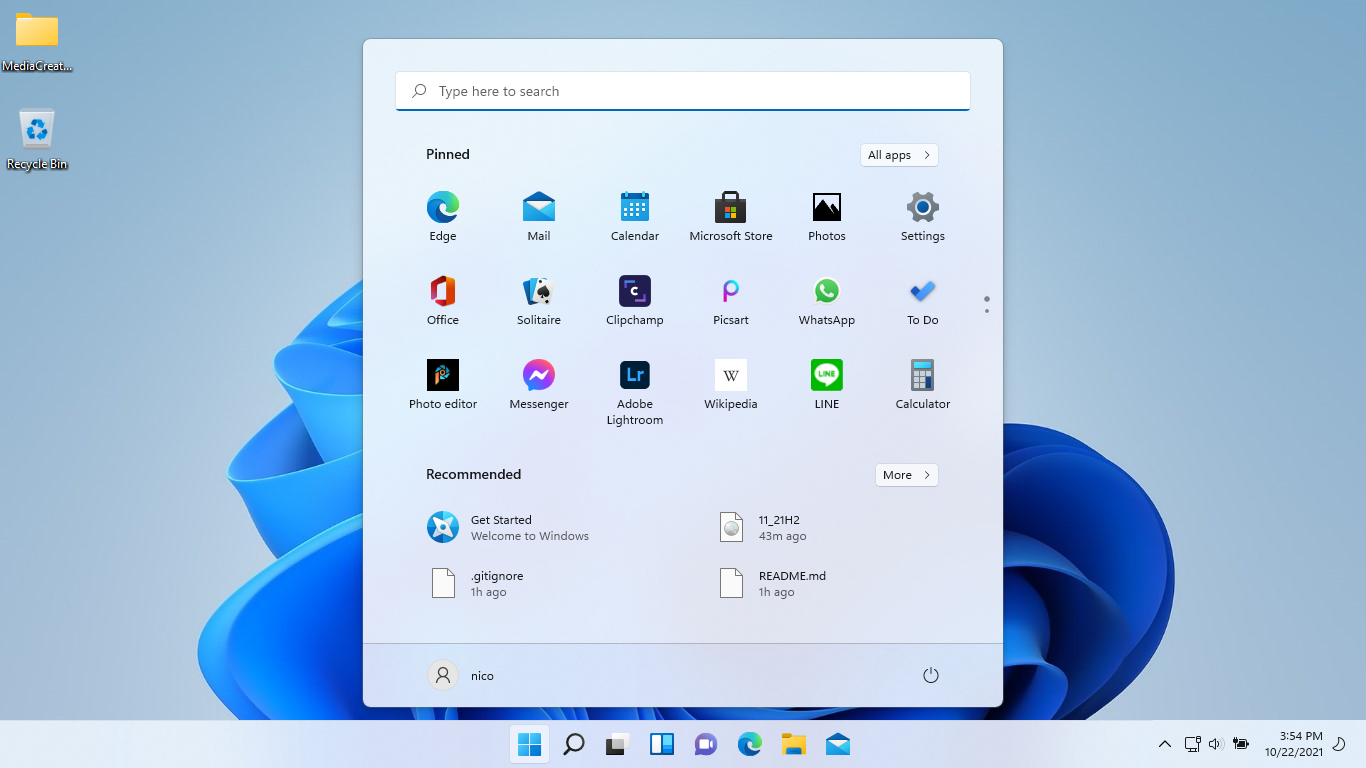
After it restarts, you should be greeted with the new Windows 11 logo!

The computer will continue working on updates.
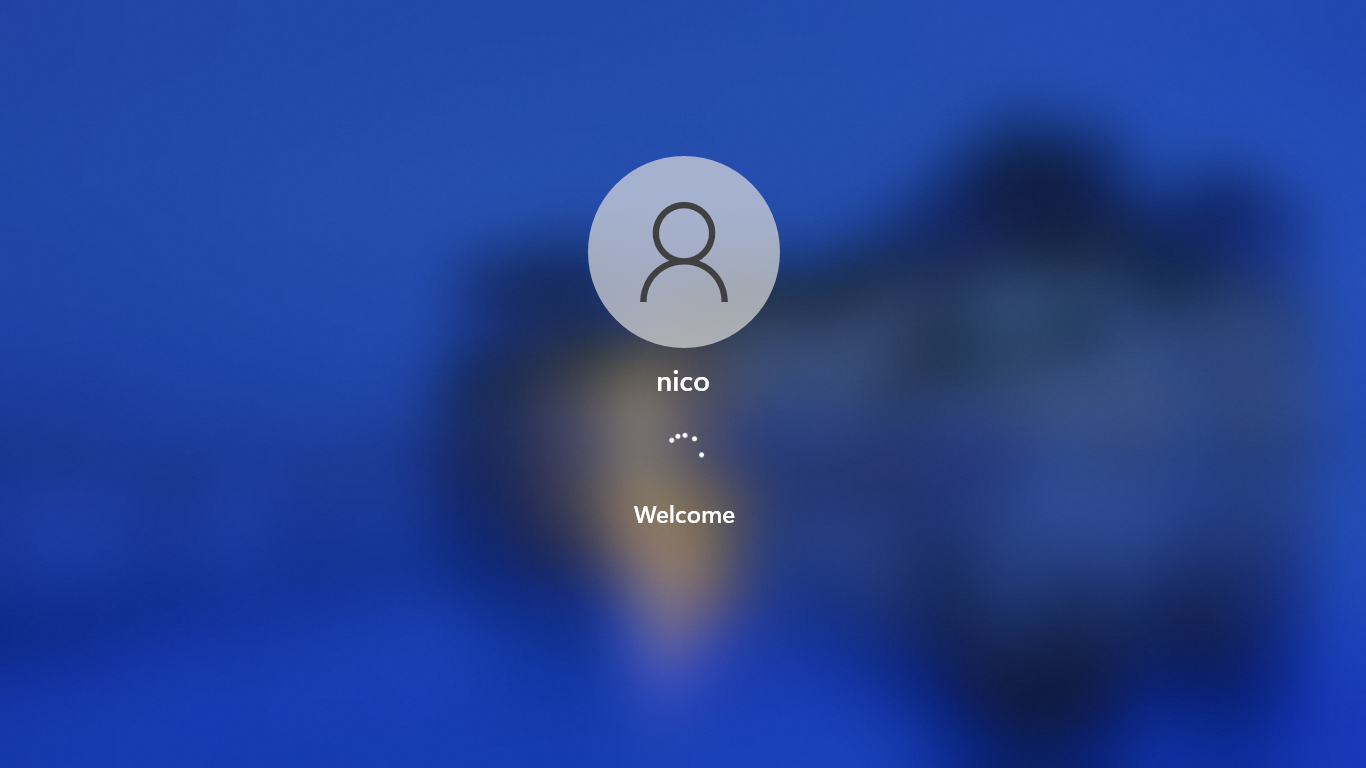
Then after another reboot, you receive a Welcome screen, followed by some “please hold” prompts.
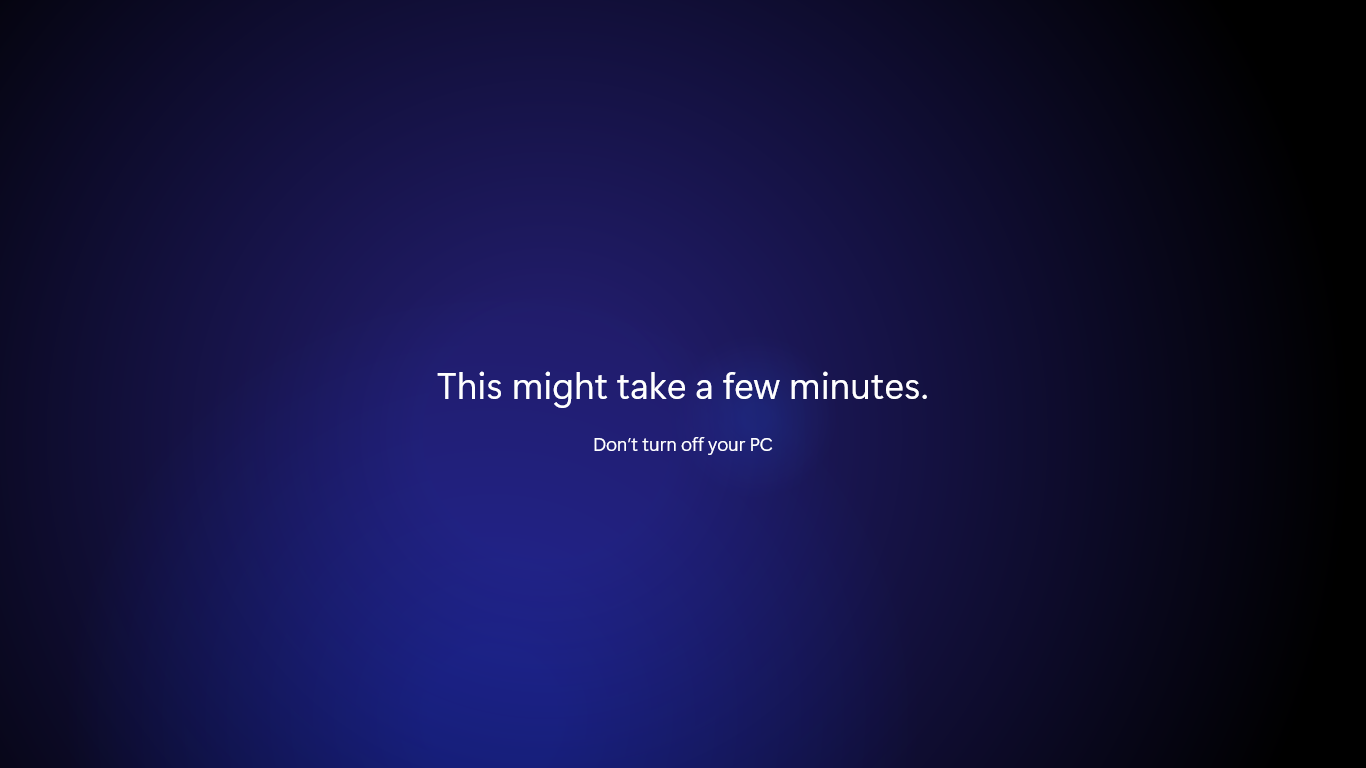
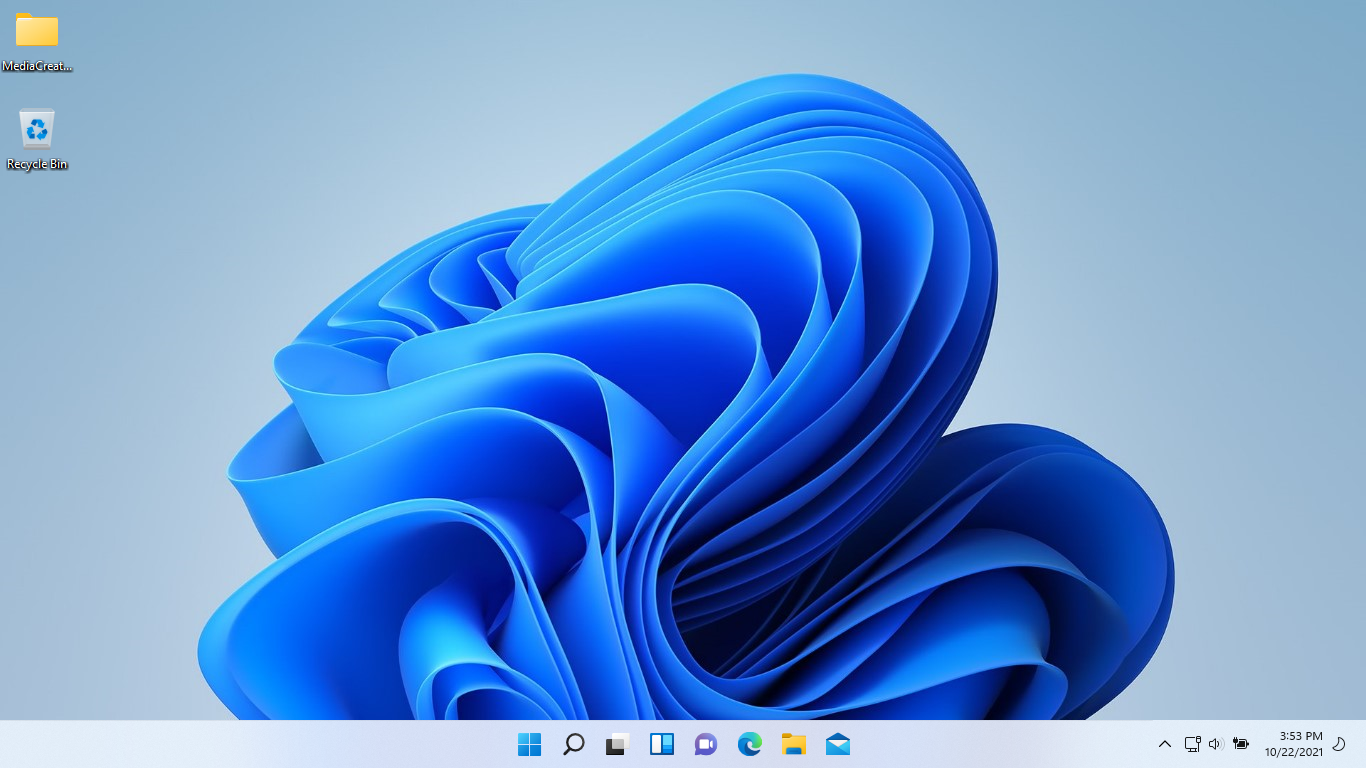
Once it is all done getting a few things ready, you will be logged in and land on your new Windows 11 desktop!
Regarding updates
I completed this upgrade process back in October 2021, and have been able to successfully run Windows Update every day automatically. Since this install method is technically a hack, the update support may suddenly end one day, but as of the writing of this post (December 2021), it is still accepting updates.
Update 10/16/2022
Windows Update is still functioning correctly.
Acknowledgements
Huge thanks to GitHub user AveYo for creating the tool that made this all possible – “MediaCreationTool.bat.” Also a big thanks to Reddit user u/AMFxC for his post explaining how he installed Windows 11 on his machine. His post is what introduced me to MediaCreationTool.bat. Lastly, thanks to Reddit user u/Alien_Drew for his take on the Windows 11 logo. I used it in this article’s feature image.
Enjoy your new Windows 11 Boot Camp install!
I’m a web developer by trade and Mac enthusiast at heart. If you ever need help with either of those things you can always reach me at nico@studioncreations.com.
Bootcamp for Updated 13 inch early 2015 MacBook Pro with Retina Display
When will Apple have the Windows support Bootcamp drivers for the updated 13 inch early 2015 MacBook Pro with Retina Display?
Thank you very much,
Itamar Friedman.
Posted on Mar 18, 2015 9:39 AM
Sep 13, 2015 7:09 PM in response to danlmark
danlmark wrote:
2. The product versions in Bootcamp.xml were 5621 and 5640
3. The corresponding driver versions were 5.1.5621 and 5.1.5640
These are invalid for W10. You need 6.0.6133 (available via BCA direct download or Apple Software Update on W10). What issues did you run into when not trying to workaround with these versions? You may have traded on set of problems for another. 😉
From Boot Camp Support Software 5.1.5621,
Post Date: Feb 11, 2014
File Size: 924.9 MB
System Requirements
- MacBook Air (11-inch & 13-inch, Mid 2011)
- MacBook Air (11-inch & 13-inch, Mid 2012)
- MacBook Pro (15-inch & 17-inch, Mid 2010)
- MacBook Pro (13-inch, & 15-inch, Early 2011)
- MacBook Pro (17-inch, Early 2011)
- MacBook Pro (13-inch,15-inch & 17-inch Late 2011)
- MacBook Pro (13-inch & 15-inch, Mid 2012)
- MacBook Pro (Retina, Mid 2012)
- MacBook Pro (Retina, 13-inch, Late 2012)
- MacBook Pro (Retina, 13-inch and 15-inch, Early 2013)
- Mac Pro (Early 2009)
- Mac Pro (Mid 2010)
- Mac Pro (Mid 2012)
- Mac mini (Mid 2011)
- Mac mini (Late 2012)
- iMac (27-inch, Mid 2010)
- iMac (21.5-inch & 27-inch, Mid 2011)
- iMac (21.5-inch & 27-inch, Late 2012)
- iMac (21.5-inch) Early 2013
- Windows 7, Windows 8, and Windows 8.1, 64 bit
From Boot Camp Support Software 5.1.5640,
Post Date: Feb 11, 2014
File Size: 925.6 MB
System Requirements
- MacBook Air (11-inch & 13-inch, Early 2014)
- MacBook Pro (Retina, 13-inch & 15-inch, Mid 2014)
- MacBook Air (11-inch & 13-inch, Mid 2013)
- MacBook Pro (Retina, 13-inch & 15-inch, Late 2013)
- Mac Pro (Late 2013)
- iMac (21.5-inch & 27-inch, Late 2013)
- Windows 7, Windows 8, and Windows 8.1, 64 bit
Mar 18, 2015 10:20 AM in response to ItamarFriedman
Please use Bootcamp Assistant. The new BC drivers are available for 2015 models.
Reference — System requirements to install Windows on your Mac via Boot Camp — Apple Support.
MacBook Pro
| Mac model | Windows 8 64-bit | Windows 7 64-bit | Windows 7 32-bit | Windows Vista 64-bit | Windows Vista 32-bit | Windows XP 32-bit |
|---|---|---|---|---|---|---|
| MacBook Pro (Retina, 13-inch, Early 2015) |
BCA | — | — | — | — | — |
Mar 18, 2015 10:30 AM in response to Loner T
Will it work as good with Windows 8.1? I saw someone posted that he had problems with the trackpad and few more things for the new MacBook but I don’t know which Windows version he has installed. Thanks a lot 🙂
Sep 13, 2015 6:33 PM in response to Loner T
I am having a similar problem, and similar problems to those who have used BCA in the past. I have a Macbook Pro Retina (Early 2015) and using BCA has been a most frustrating experience. I have had the boot camp install «hang» when downloading the Windows support software. I managed to fool BCA into installing Windows 10 with a direct download of support drivers, but when I attempt to install these drivers in Windows the setup program tells me they are incorrect.
BCA has been a most frustrating experience for me. Windows 10 does work on my Macbook Pro, but I’m missing vital functionality (mouse pad, wireless drivers) that I definitely need! I’d really like to be able to download the support software directly, given my prior experiences.
Sep 16, 2015 4:05 PM in response to Loner T
Thank you, Loner T, for letting me know what version of support software I needed. In case anyone else is following this thread, this is the final work around I used to get version 6.0.6133:
http://forums.macrumors.com/threads/guide-manually-save-windows-support-software -after-bootcamp-errors-please-read.15727…
The direct download via BCA would constantly stall. Apparently the .dmg file downloaded is saved on the main hard drive before it is expanded to the proper flash drive (FAT16 formatted, no larger than 2gb due to FAT16 restrictions). Part of the problem was the uncompressed support software is greater than 2gb in size! BCA needs to «see» an FAT16 flash drive to download the software. So using the work around at the link above, I «captured» the .dmg file and uncompressed it onto a flash drive it would fit on. Then I was able to install the support software on my Windows 10 install on my Macbook Pro. I am now completely operational with Windows 10!
Mar 18, 2015 11:52 AM in response to ItamarFriedman
The drivers for both W8 and W8.1. There are no W8.1 specific drivers.
Sep 13, 2015 6:35 PM in response to danlmark
1. What is the version of Windows?
2. Can you check Product Version line in Bootcamp.xml?
3. Which version of drivers did you ‘directly download’ to fool Windows?
Sep 13, 2015 6:50 PM in response to Loner T
1. Windows 10
2. The product versions in Bootcamp.xml were 5621 and 5640
3. The corresponding driver versions were 5.1.5621 and 5.1.5640
Sep 16, 2015 6:25 PM in response to danlmark
Please ensure you create a System Restore point before any Windows Updates are applied.
This thread has been closed by the system or the community team.
You may vote for any posts you find helpful, or search the Community for additional answers.
Bootcamp for Updated 13 inch early 2015 MacBook Pro with Retina Display
In this guide, you’ll learn how to run macOS 15.3 on a Windows 11 PC using VMware. Apple prohibits the installation of macOS on non-Apple hardware via itsEULA license, but technically these restrictions can be circumvented.
The aim here is not to hack macOS, but to prove two things:
- Installing macOS on a PC is totally feasible, despite Apple’s restrictions.
- These restrictions are primarily commercial, not technical.
This installation is also of practical interest. Safari is the second most used browser in the world and to enrich my article How to set Google or another search engine as default on PC, it is essential for me to have access to Safari under macOS since Safari users mainly use this system and its behavior is not the same under Windows.
To achieve this, we’re going to use VMware and modify the virtualized processor ID to make macOS believe it’s running on Apple hardware.
- Download VMware to install macOS in 2025
- Unlock VMware to configure macOS on Windows
- Create a virtual machine for macOS
- Optimize MacOS on VMware with VMware Tools
Download VMware to install macOS in 2025
VMware Workstation or Player is virtualization software that lets you run macOS on a Windows PC.
- Download VMware Player or Workstation from Broadcom’s official repository.
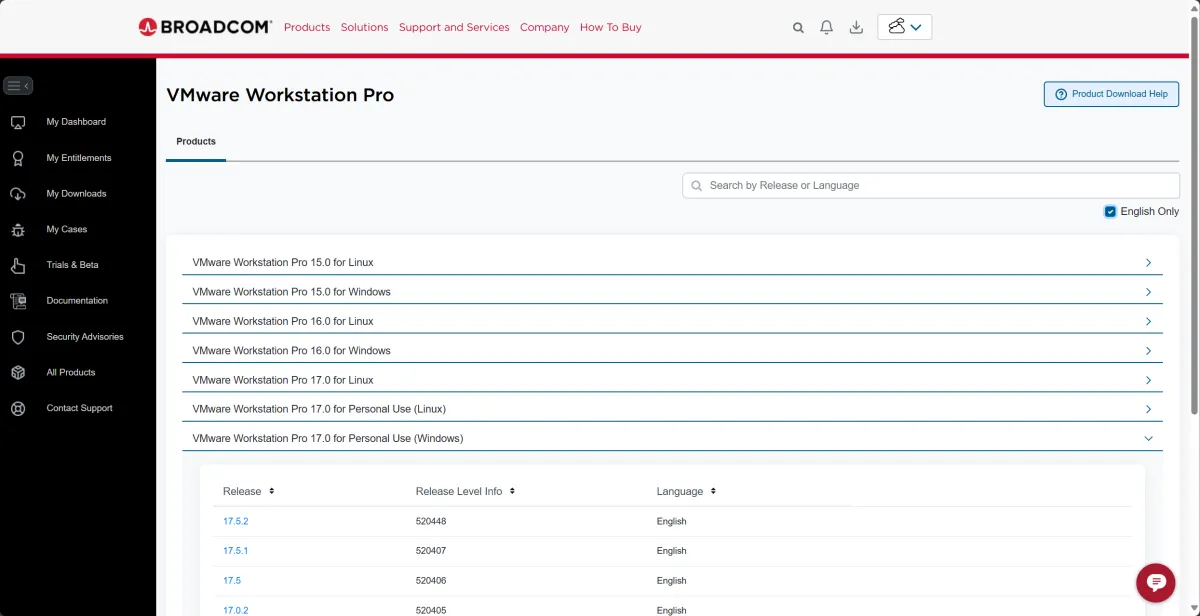
Since the acquisition of VMware by Broadcom in May 2022, the distribution policy for VMware Workstation Pro has changed. After being offered as a paid version, it is now free for private users ( Free Personal Use). The program download (approx. 680 MB) is available after registration on the Broadcom website.
- Install VMware by following the on-screen instructions.
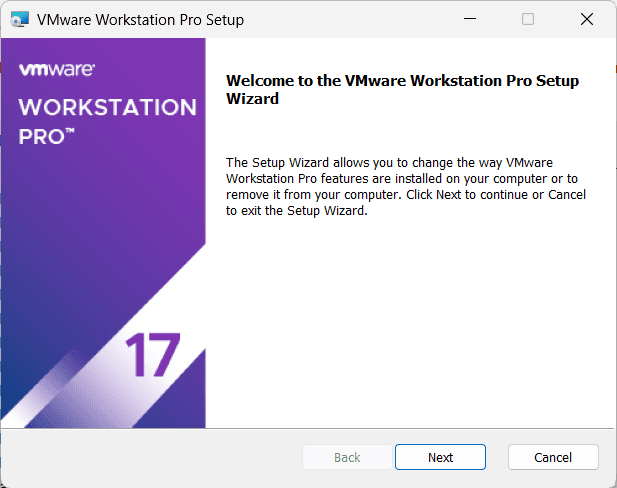
- Once installation is complete, launch VMware.
Unlock VMware to configure macOS on Windows
By default, VMware does not support macOS. To activate this feature, we need to use Auto Unlocker.
- Download Auto Unlocker from GitHub.
- Extract the archive and run Auto-Unlocker.exe.
- In the interface, select the VMware installation location.
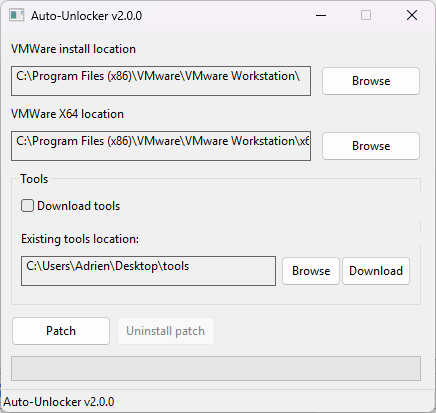
- Click Patch to apply changes.
- When finished, restart VMware.
Create a virtual machine for macOS
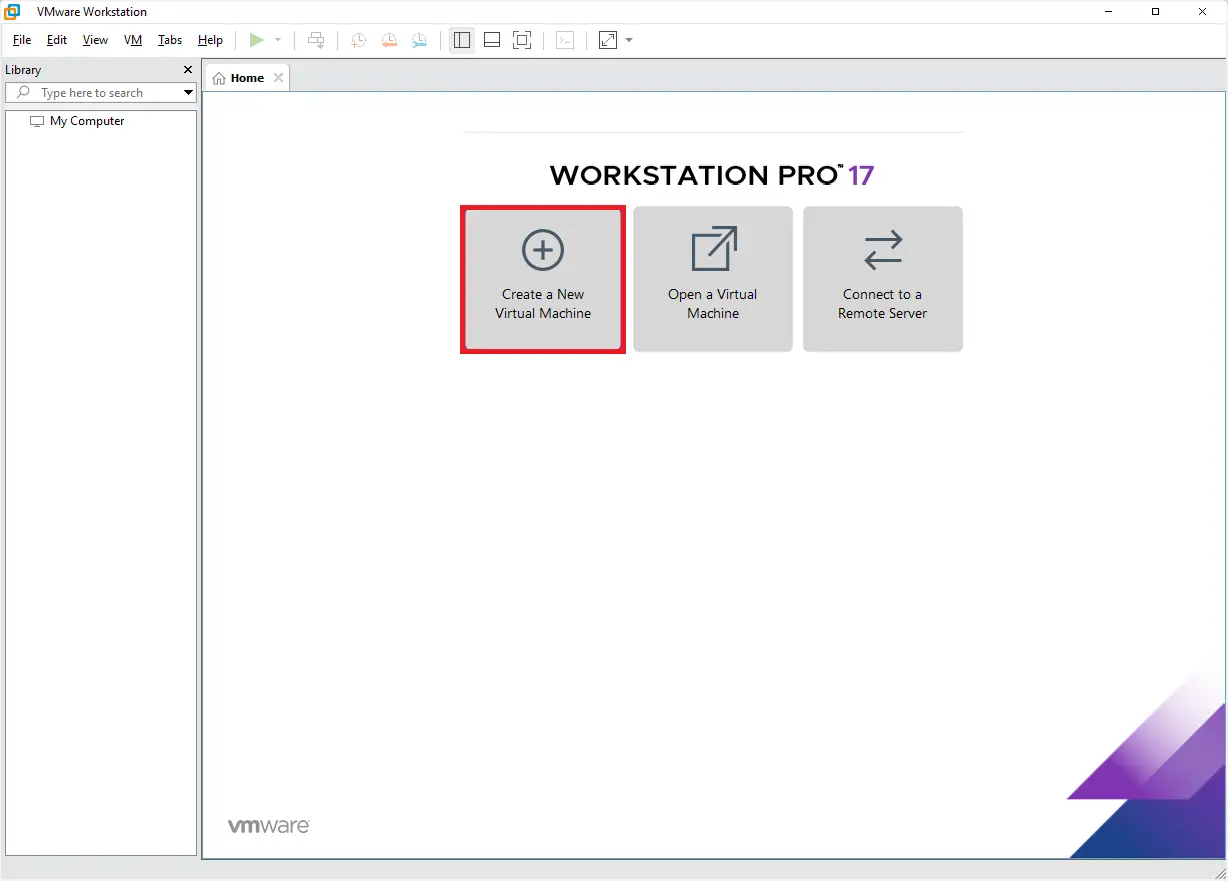
- Click on Create a New Virtual Machine.
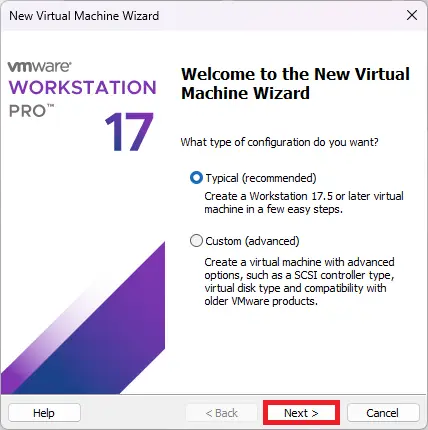
- Select Typical (recommended) and click Next.
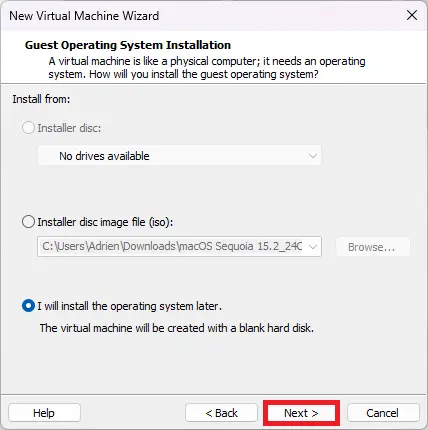
- Select I will install the operating system later and click Next.
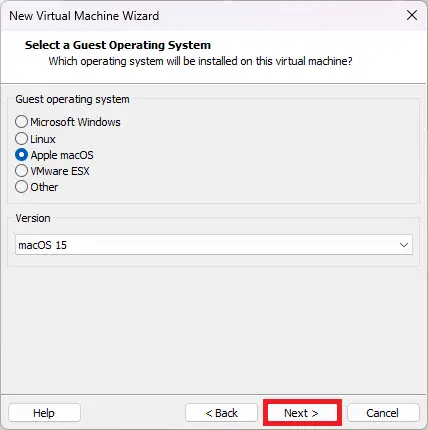
- Choose Apple macOS as operating system and select the corresponding version (macOS 15 in my case).
- Give your virtual machine a name and choose a storage location.
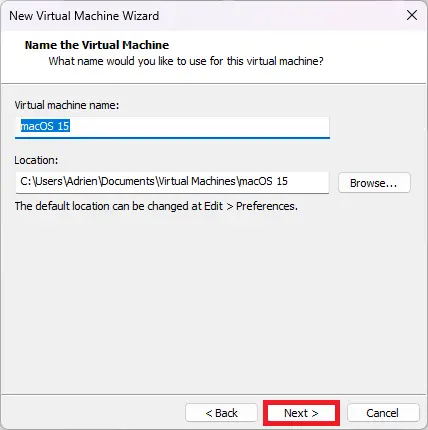
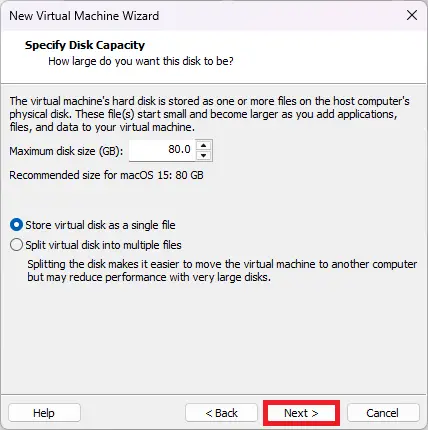
- Set a disk size of 80 GB (or more).
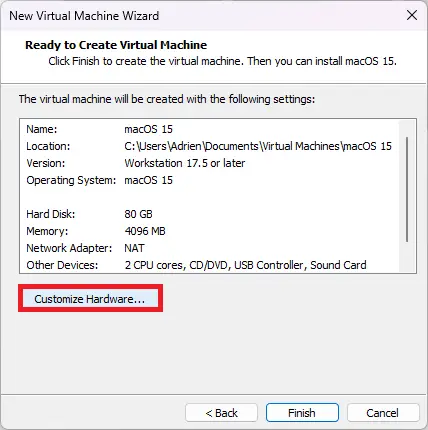
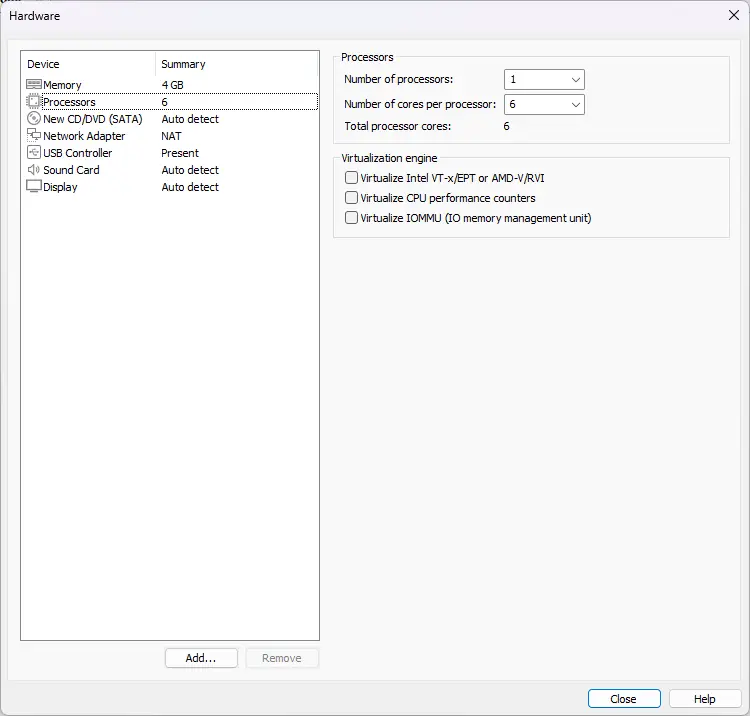
- Click on Customize Hardware… to adjust the configuration.
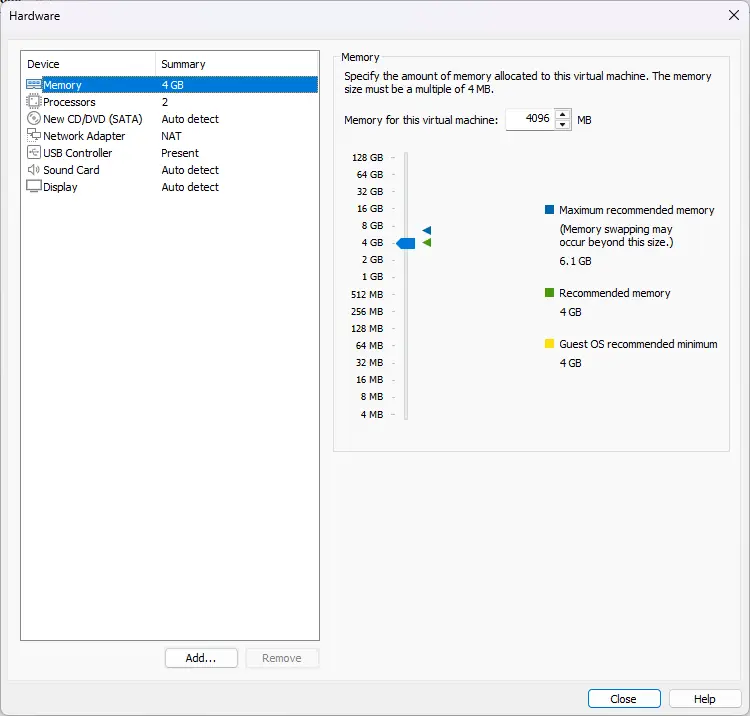
- Adjust memory to 4 GB (minimum recommended) or more.
- Allocate an appropriate number of processor cores to your configuration.
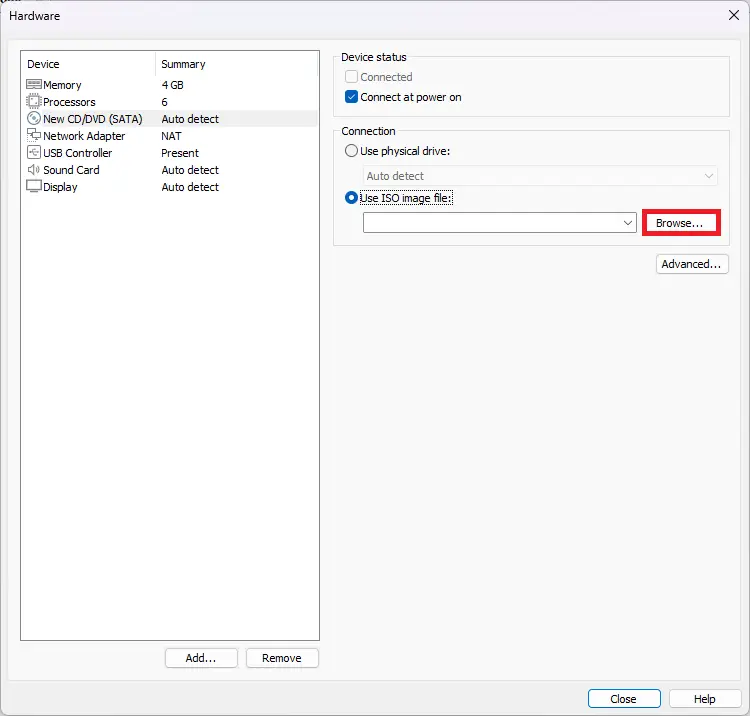
- Add the downloaded macOS ISO image.
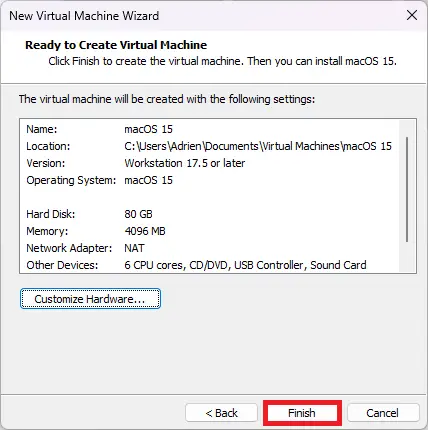
- Finally, click Close then Finish, but do not open the virtual machine.
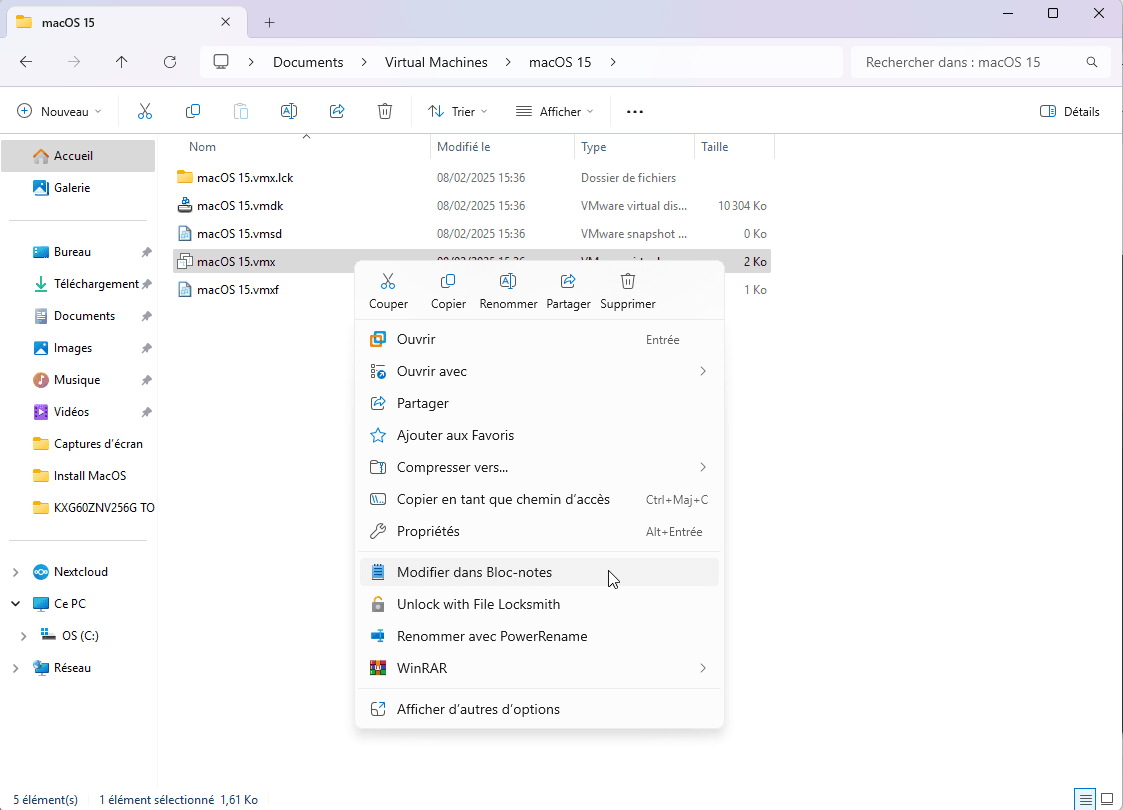
- Go to the folder where your virtual machine is stored, in our case :
C:\Users\Adrien\Documents\Virtual Machines\macOS 15\macOS 15.vmx- Right-click on the
.vmxfile and select Open with > Notepad.
- Add the following lines according to your processor (CPU):
For Intel CPUs :
smbios.reflectHost = "TRUE"
hw.model = "MacBookPro6,2"
board-id = "Mac-7DF21CB3ED6977E5"
smc.version = "0"
For AMD CPUs :
smc.version = "0"
cpuid.0.eax = "0000:0000:0000:0000:0000:0000:0000:1011"
cpuid.0.ebx = "0111:0101:0110:1110:0110:0101:0100:0111"
cpuid.0.ecx = "0110:1100:0110:0101:0111:0100:0110:1110"
cpuid.0.edx = "0100:1001:0110:0101:0110:1110:0110:1001"
cpuid.1.eax = "0000:0000:0000:0001:0000:0110:0111:0001"
cpuid.1.ebx = "0000:0010:0000:0001:0000:1000:0000:0000"
cpuid.1.ecx = "1000:0010:1001:1000:0010:0010:0000:0011"
cpuid.1.edx = "0000:0111:1000:1011:1111:1011:1111:1111"
smbios.reflectHost = "TRUE"
hw.model = "MacBookAir6,2"
board-id = "Mac-7DF21CB3ED6977E5"
These settings allow macOS to detect the virtual machine as a real Mac.
smc.version = "0": Disables a Mac-specific control chip (System Management Controller).cpuid.0.eax, etc. Modify the processor’s identity to make it look like a Mac.smbios.reflectHost = "TRUE": Enables the VM to use certain information from the real PC.hw.model = "MacBookAir6,2": Makes the virtual machine look like a MacBook Air.board-id = "Mac-7DF21CB3ED6977E5": MacBook Air motherboard identifier.
⚠️ Some processors (AMD in particular) are still poorly supported by this method. For example, I was able to install macOS 12 (Monterey) with a Ryzen 5 but not macOS 14 (Sonoma) using the same method.
Apple continues to restrict access to macOS in order to maintain total control over its ecosystem and applications, by requiring the purchase of a Mac and limiting the development of new applications and drivers.
If you encounter a critical error when starting the macOS virtual machine, it’s probably because a line already exists in the file.
If you get a critical error after installation, your CPU is probably not supported (try an earlier version of macOS).
Install macOS Sequoia on VMware Workstation
Installing macOS Sequoia on VMware Workstation lets you run the macOS system in a virtual environment, which is particularly useful for developers, testers or anyone wishing to explore macOS without owning a Mac. Follow the installation procedure once the VM has been configured.
- Start the macOS 15 virtual machine and wait for the Apple logo to appear in the loading bar.
- When the language selection screen appears, choose French (or any other language of your choice).
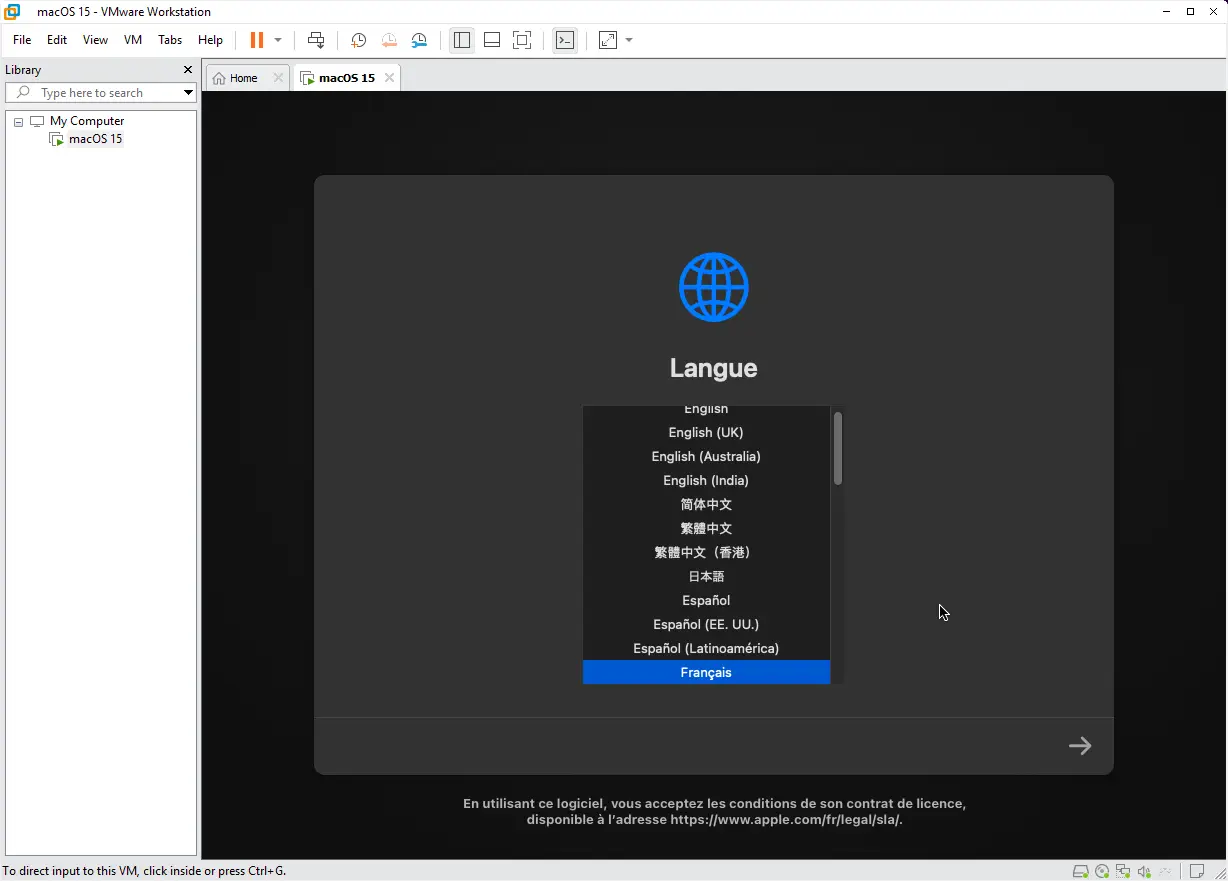
- Click on the arrow to continue.
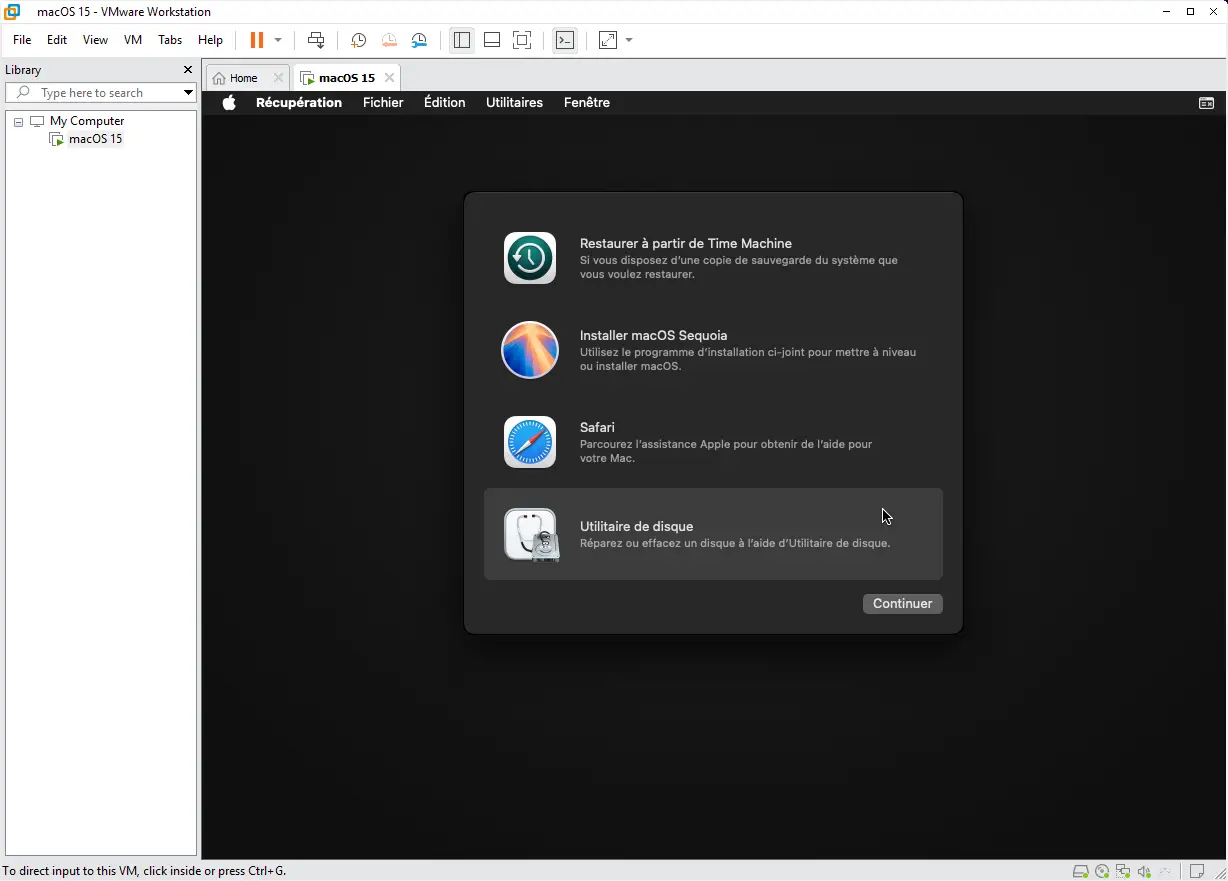
Before installing macOS, you need to format the virtual hard disk.
- From the macOS Utilities menu, select Disk Utility and click Continue.
- In the list of storage devices, select VMware Virtual SATA Hard Drive Media.
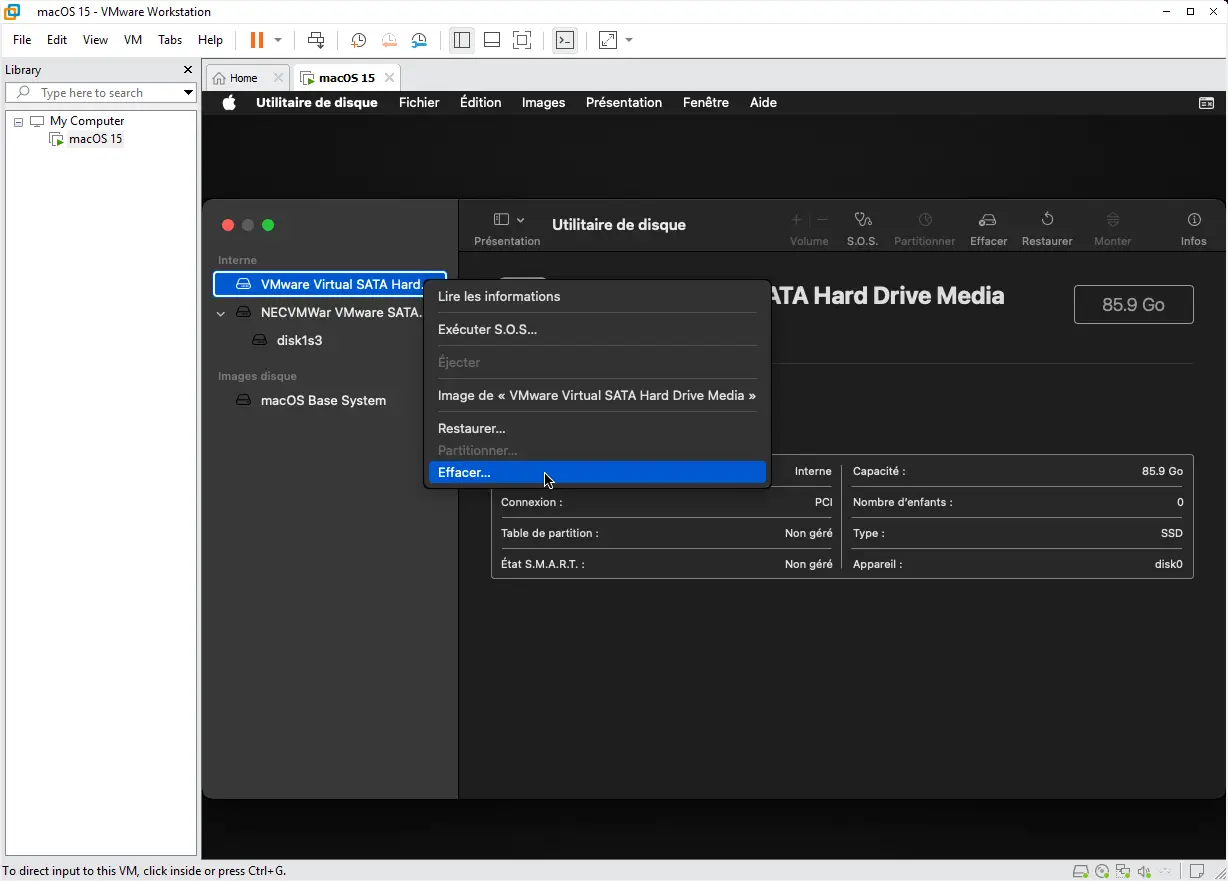
- Click on Clear and set the following options:
- Diagram: GUID partition table
- Name: macOS 15
- Format: APFS
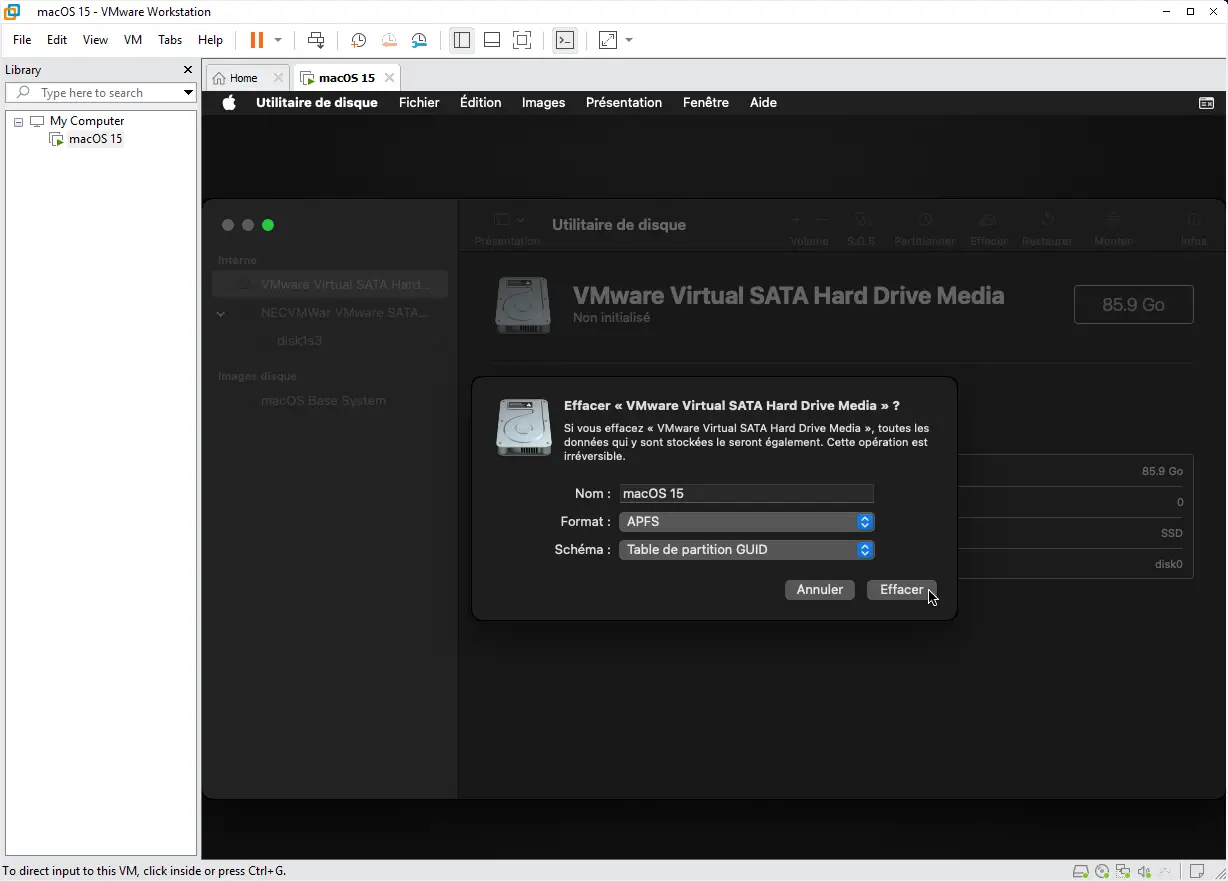
- Click Clear, then OK when formatting is complete.
- Then close Disk Utility to return to the main utilities menu.
- Back to the utilities screen, click on Install macOS Sequoia and Continue.
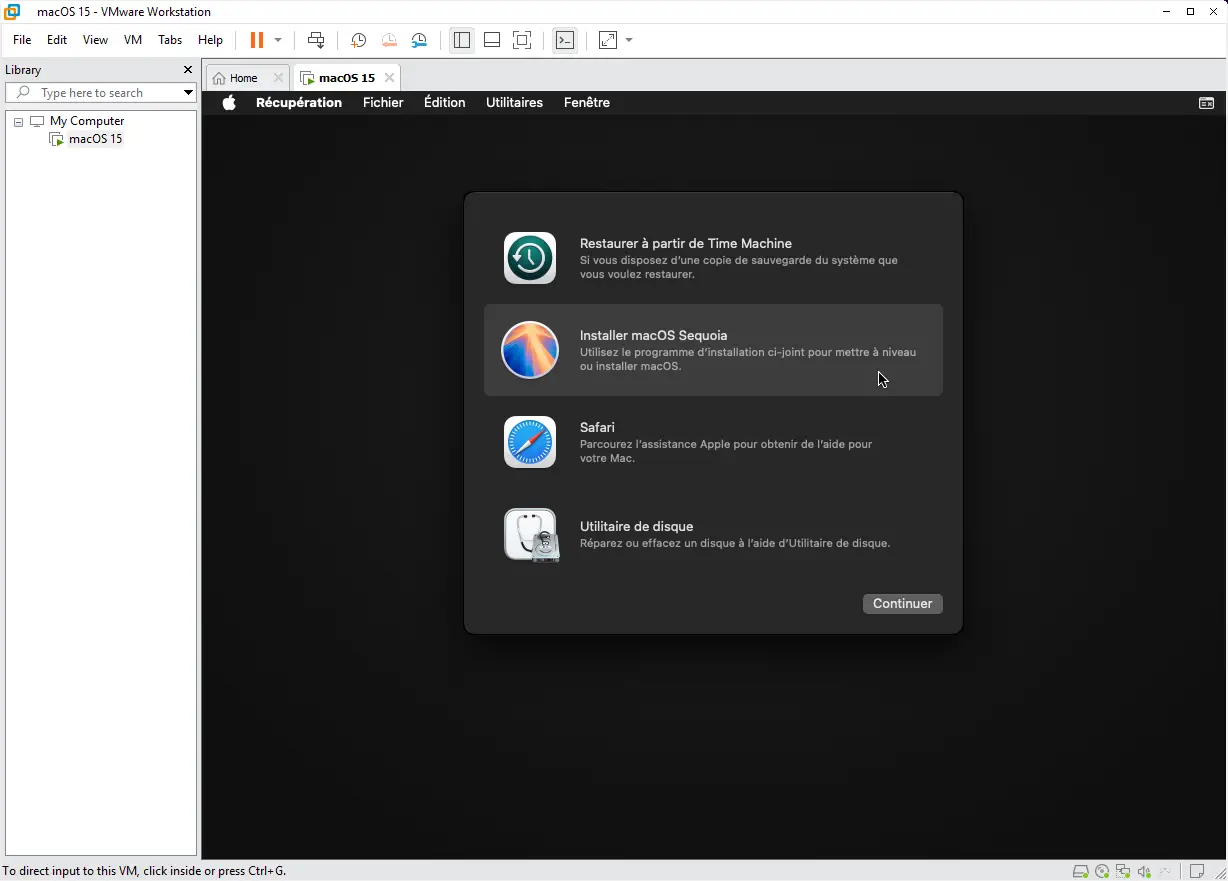
- Accept the license agreement.
- Select the macOS 15 disk you formatted in the previous step.
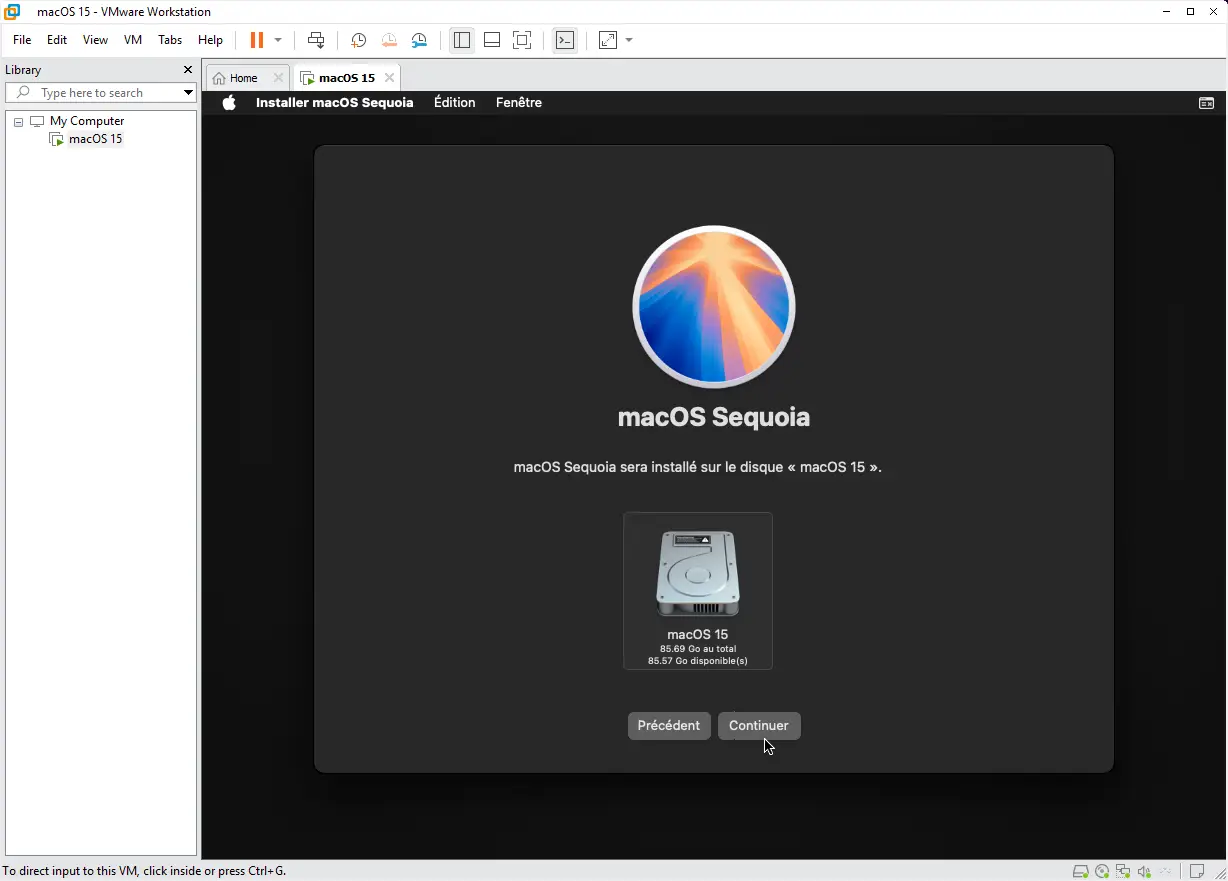
- Click on Continue.
- Installation begins, and may take several minutes depending on your PC’s performance and allocated resources.
Virtualization adds extra load to the processor, limits access to resources (RAM, GPU) and prevents certain native macOS optimizations.
- When finished, the VM restarts automatically.
- Follow the initial macOS configuration steps (no changes here).
Installing macOS on VMware Workstation allows you to use macOS in a virtual environment. However, without VMware Tools, performance is limited: the mouse is imprecise, the display is frozen at a low resolution and drag & drop doesn’t work. Installing VMware Tools on virtualized macOS considerably improves the user experience by enabling :
- Better cursor management and overall performance.
- Video memory is increased to 128 MB.
- Dynamic display resolution,
- Drag-and-drop between host and VM,
- Clipboard sharing,
There are two ways to download VMware Tools:
- From Archive.org: Download the VMware Tools ISO.
- With Auto Unlocker: If you’re using Auto Unlocker, a darwin.iso file is already generated in the Tools folder.
- Once you’ve found or downloaded the right files,stop the virtual machine and open the VM settings(VM > Settings).
- In the CD/DVD (SATA) tab, select Browse and choose darwin.iso.
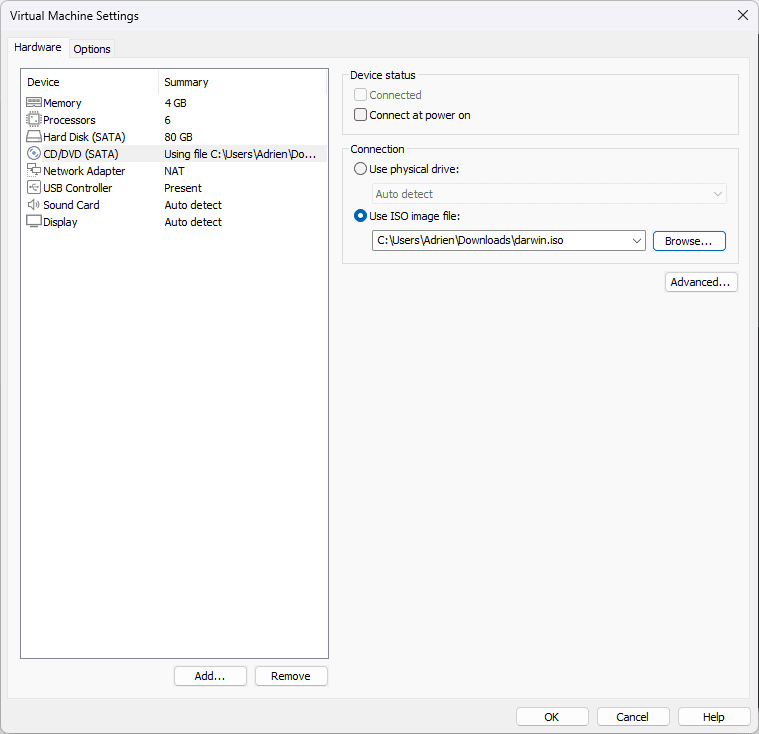
- Check the Connect at power on option.
- Start the VM.
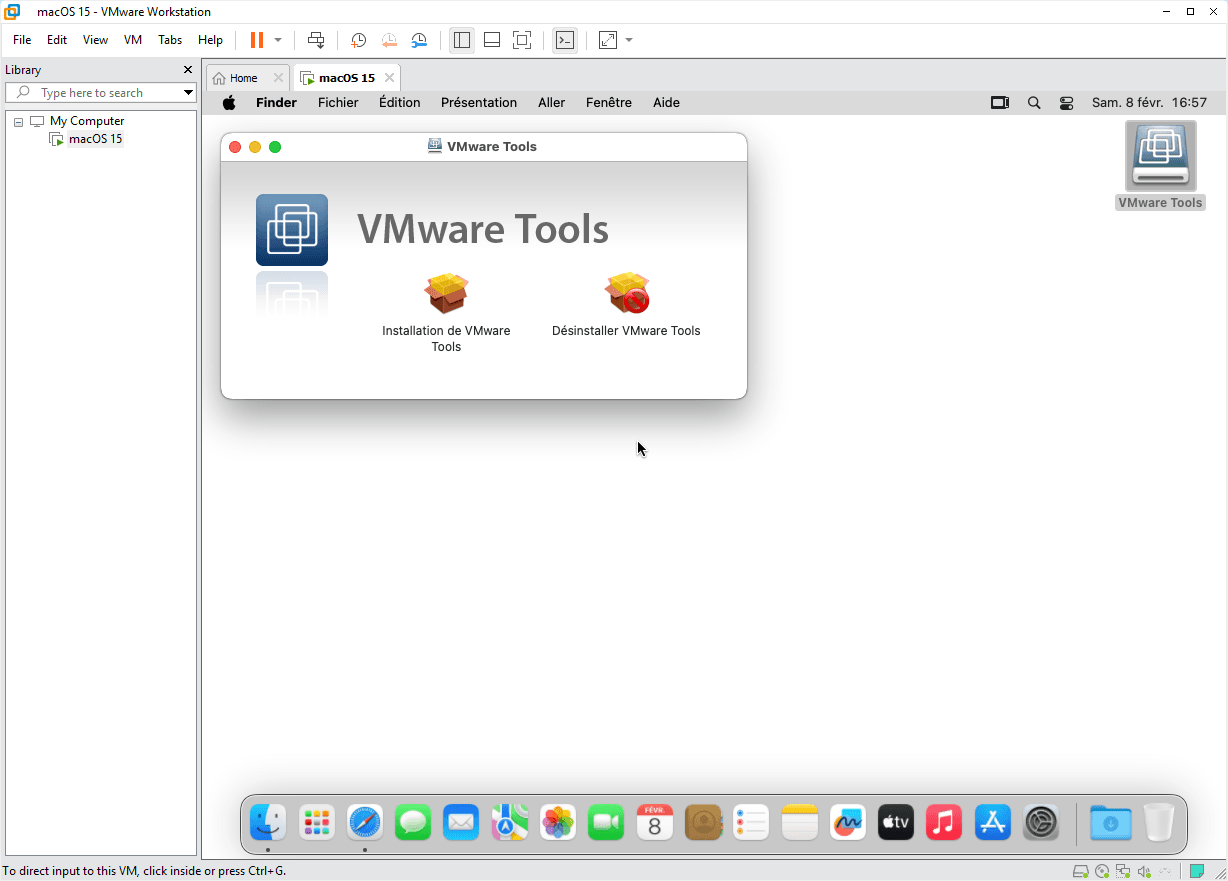
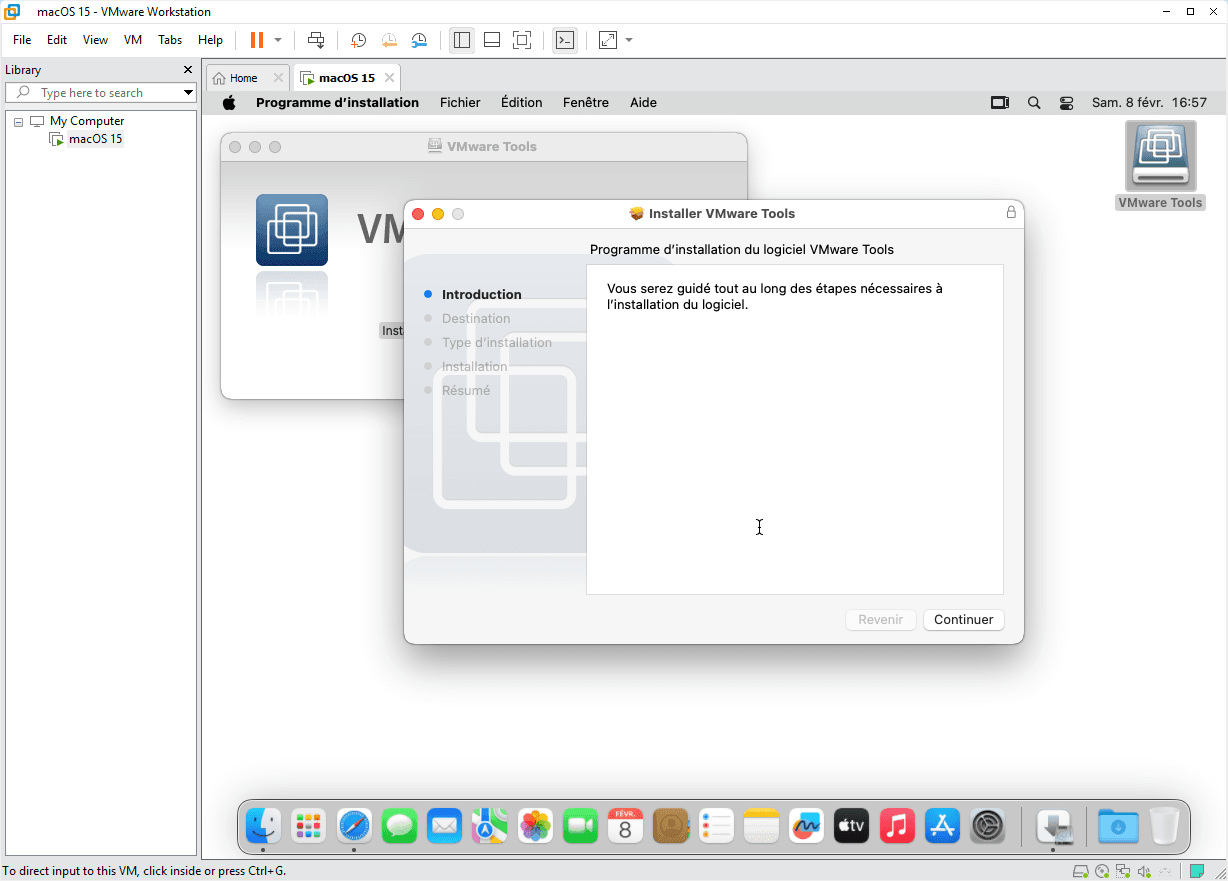
- Once macOS is booted, open Finder and select the VMware Tools disk.
- Double-click on VMware Tools Installation.
- Click Continue, accept the conditions and install.
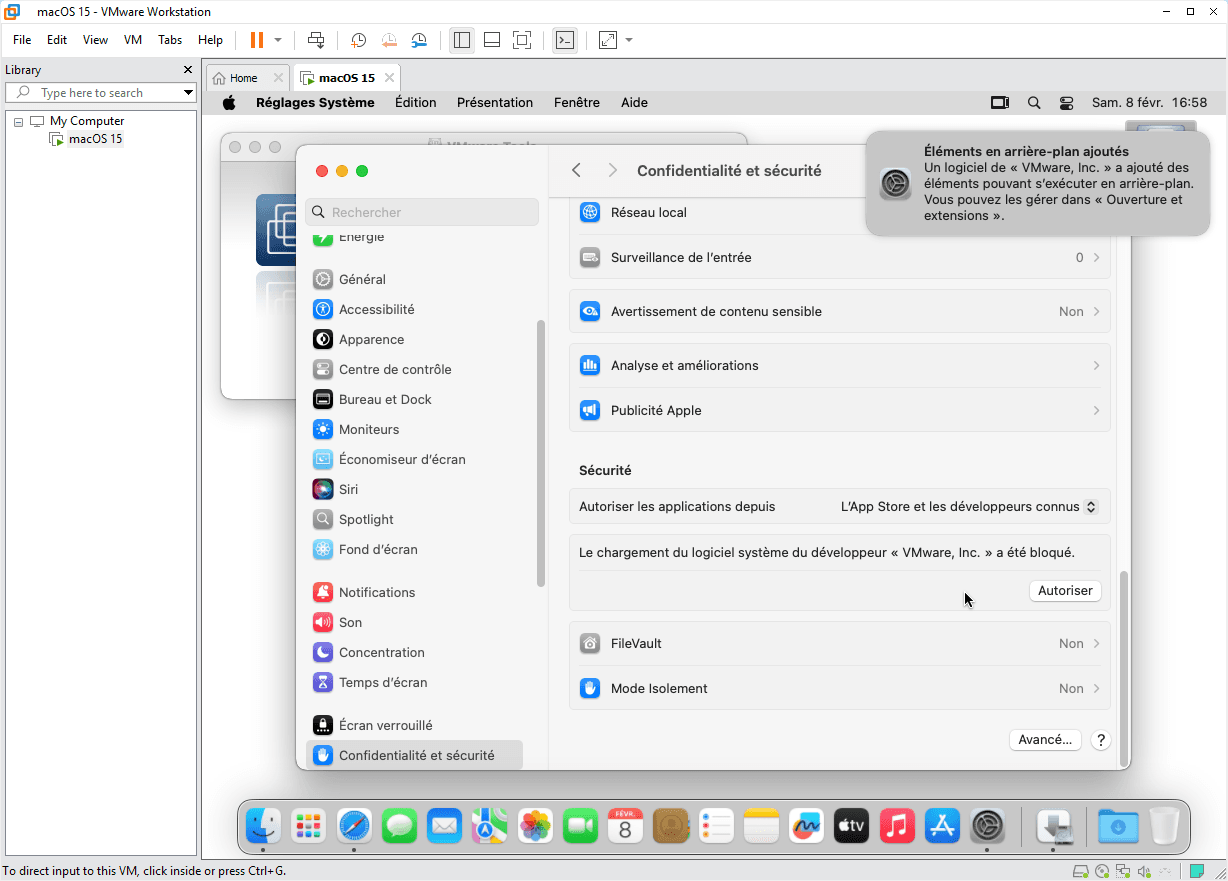
After installation, macOS blocks unsigned extensions by default.
- Go to System Settings > Privacy & Security.
- At the bottom, a message says VMware system software loading has been blocked.
- Click on Authorize, then Restart VM.
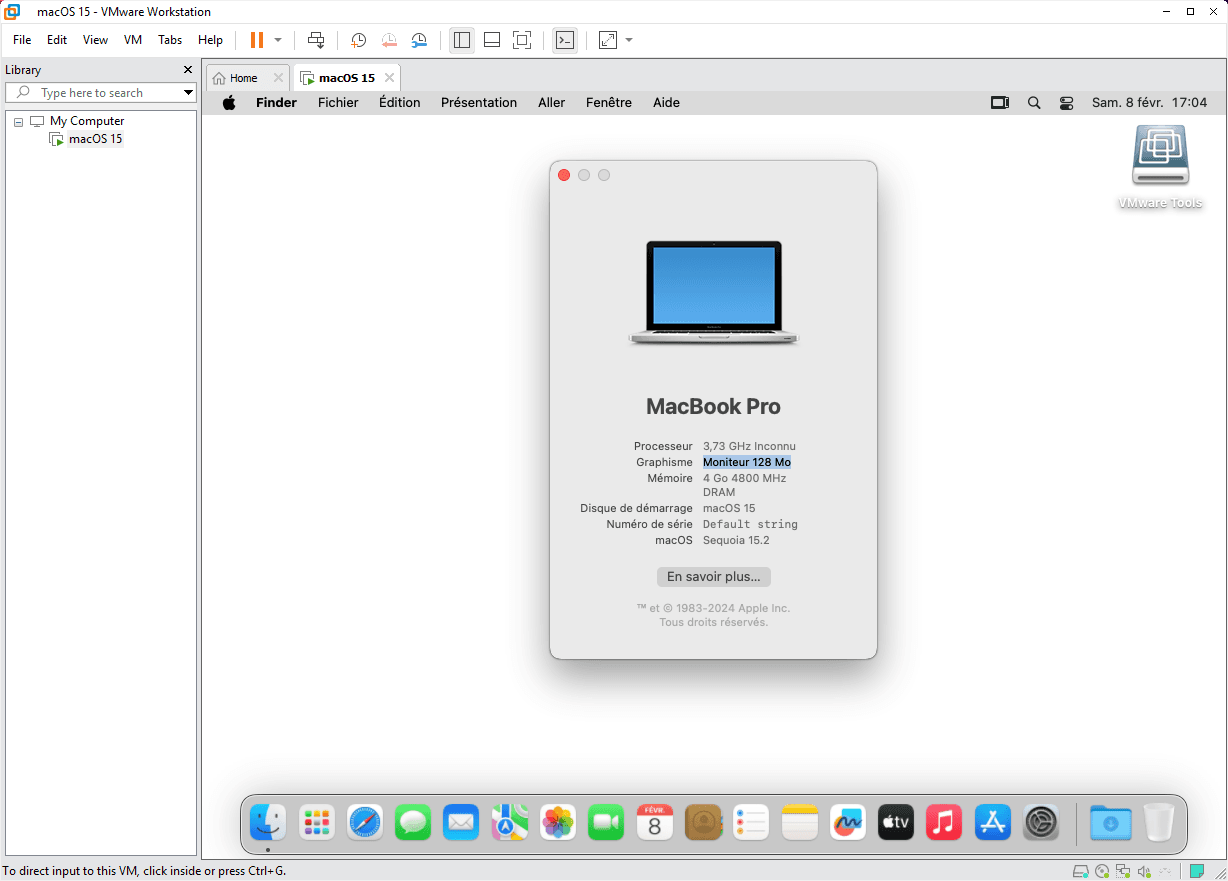
After reboot :
- Screen resolution is adjustable in System Settings > Monitors.
- Video memory is increased to 128 MB.
- The cursor is no longer captive and can move freely.
- Drag-and-drop between host and VM works.
- The clipboard is shared.
👏 Well done! You’ve reached an important milestone by successfully virtualizing macOS. You can now test applications, configure development tools or customize your environment without constraint.
Was this article helpful to you?
This article pleased 5 people! What about you?
Item Preview
There Is No Preview Available For This Item
This item does not appear to have any files that can be experienced on Archive.org.
Please download files in this item to interact with them on your computer.
Show all files
95
Views
DOWNLOAD OPTIONS
Uploaded by
crystepsi
on
SIMILAR ITEMS (based on metadata)
Прощаться с отличным компьютером только потому, что производитель отказывается выпускать для него обновления, обидно. Но именно так рано или поздно произойдёт со всеми Mac на процессорах Intel.
Сегодня остаётся всего несколько моделей Mac с чипами Intel, под которые ещё выпускаются новые версии macOS. Этим летом всё может измениться. Возможно, уже в этом году, максимум следующем, Apple окончательно уберёт поддержку процессором x86-64 из операционки. Обновлений не будет. Но сейчас не про это.
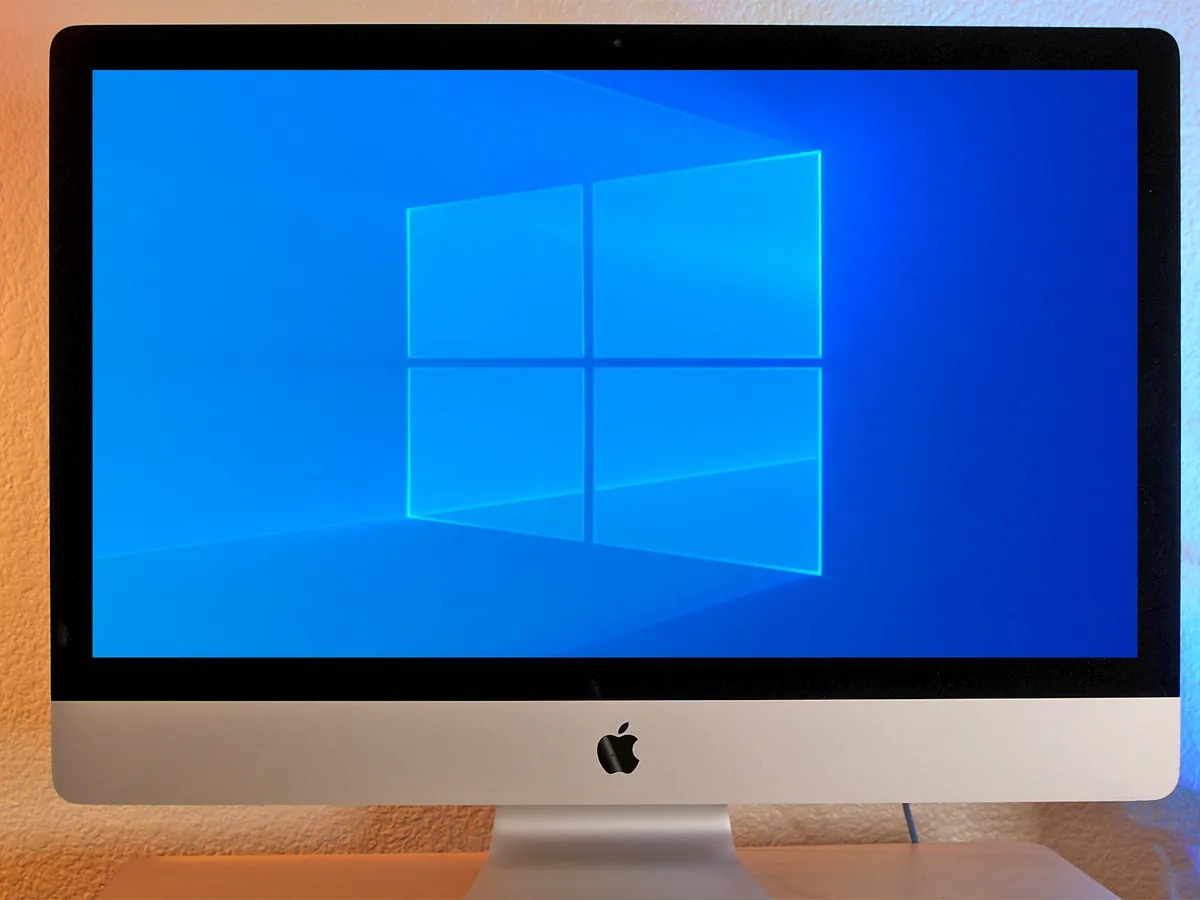
Продлить работу таких Mac можно ещё лет на пять, а то и на десять, и это без шуток. Достаточно установить Windows 11 второй системой. И всё, ваш MacBook, iMac или Mac mini снова в строю. Между прочим, на Mac c Apple Silicon такой финт не работает.
Сейчас расскажу, зачем рекомендую ставить именно Windows 11, дам простую инструкцию по установке и пару рекомендаций по значительному улучшению производительности ваших «старых» Mac в Windows 11.
Стоп, а почему бы не установить Windows 10?
Вопрос правильный. Каждый владелец Mac на чипе Intel знает, что на них можно без труда установить Windows 10 второй системой через BootCamp, встроенное приложение в macOS. Я так давно сделал на всех своих Mac без Apple Silicon. И всё бы хорошо, но это сейчас не лучшая идея.
Поддержка Windows 10 прекращена. Эту систему, что вышла в 2015 году, Microsoft фактически «списала» и отказалась выпускать новые фичи, патчи и вообще содержать в рабочем виде. К тому же горячо любимая в мире «десятка» в некоторых вещах технически устарела.
Производительность актуальной версии Windows 11 сейчас сравнялась с Windows 10 с финальным обновлением. Так что объективных причин не ставить Windows 11 не осталось. Кроме одной, с которой мы сейчас разберёмся.
Как подготовить старый Mac к установке Windows 11
Во всех Mac с чипами Intel отсутствует поддержка технологии TPM 2.0, необходимой как для обновления уже установленной Windows 10 на Windows 11, так и для «чистой» установки новой системы. Также BootCamp официально не поддерживает установку Windows 11.
Но всё это можно обойти. Погнали.
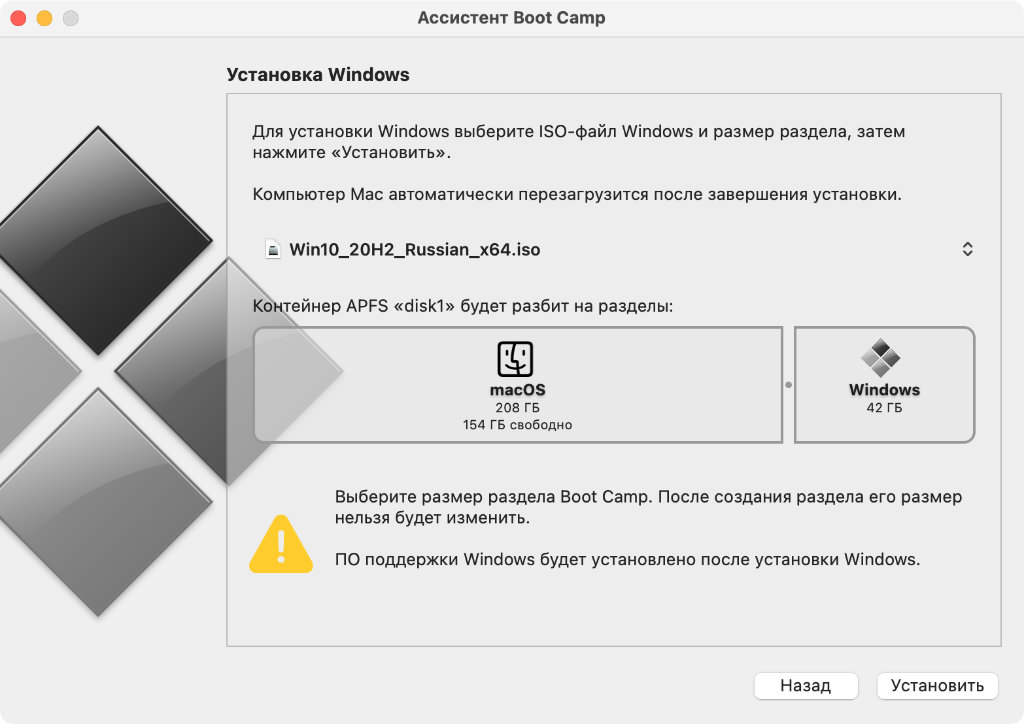
Для начала вам нужно установить Windows 10 через BootCamp. Да-да, это самый лучший вариант. Таким образом вы удобно и легко разметите диск под «винду», а также получите все необходимые драйверы для вашего Mac. Драйверы эти затем будут работать в Windows 11 без проблем.
Чтобы не повторяться здесь, советую перейти в нашу статью-гайд по установке Windows 10 через BootCamp. Она по-прежнему актуальна.
Если у вас уже есть Windows 10, установленный через BootCamp, то продолжаем дальше.
Как установить Windows 11 на старый Mac
Все действия далее будем проводить в Windows.
Вам понадобится где-то час времени, не менее 50 ГБ свободного места на разделе диска с BootCamp (где установлена Windows) и ISO-файл Windows 11. Скачать последний можно с сайта Microsoft. В России прямая загрузка затруднена, но иностранный IP решает проблему. Можно также найти образы Windows 11 в интернете, но так делать стоит только на свой страх и риск.
Не рекомендую ставить сборки и модифицированные версии Windows 11 на Mac. Выбирайте обычную, не изменённую никем версию ОС, чтобы не столкнуться с неожиданными трудностями во время и после установки системы.
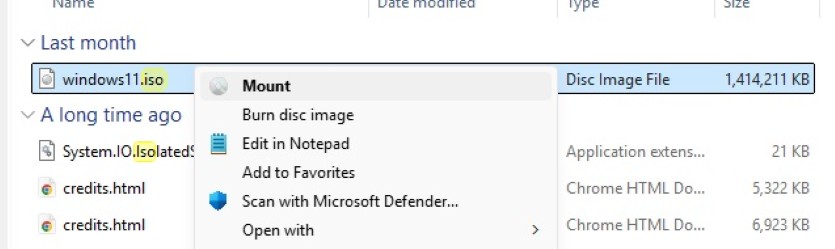
1. Как только скачаете ISO-файл, нажмите на него дважды, чтобы он развернулся как виртуальный диск в Проводнике. Зайдите в Проводник и запомните латинскую букву напротив развёрнутого диска.
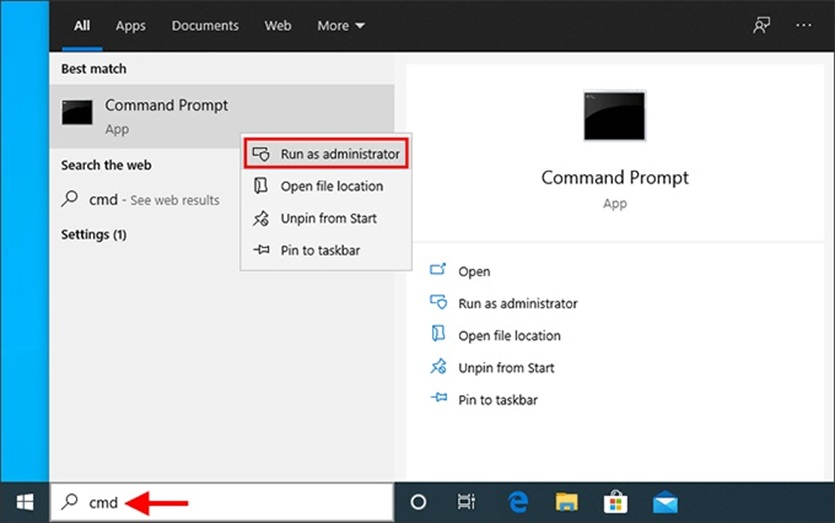
2. Нажмите на Пуск, введите в поиске cmd.exe. Щёлкните по cmd.exe правой кнопкой и в открывшемся меню выберите «Запустить как Администратор».
3. В открывшемся окне cmd.exe введите букву виртуального диска, которую ранее запомнили, и двоеточие. Затем нажмите Enter.
Например, если это диск D, то должно получиться вот так:
D:
4. Теперь в том же окне cmd.exe вставьте следующую строку и нажмите Enter.
setup.exe /product server
5. Запустится установка Windows 11. Соглашайтесь на всё, а когда вас спросят, как именно устанавливать систему, выберите вариант установки Windows 11 через обновление. Тогда все данные, приложения, учётные записи и драйвера Mac останутся нетронутыми.
6. В процессе установки Mac перезагрузится несколько раз, затем запустит первичную настройку Windows 11. Проходите её так, как считаете нужным, никаких особенных рекомендаций тут нет.
Всё, добро пожаловать в Windows 11. Все ваши драйверы на месте, файлы тоже, система работает отлично и будет далее получать все обновления от Microsoft.
Пара рекомендаций после установки Windows 11
Это делать совершенно необязательно и уже не настолько просто, как всё предыдущее. Но лично я это сделал для всех Mac.
Во-первых, драйвера BootCamp для видеокарт, которые предоставляет Apple и AMD, безнадёжно и критически устарели. С ними не запустятся многие игры, а требовательный софт будет тормозить. Поэтому пользуйтесь драйверами с сайта BootCampDrivers.com. Я установил их ещё в 2020 году на все Mac с Windows, пользуюсь чуть ни не ежедневно и очень доволен результатом: прирост производительности очень значительный.
Самые свежие релизы размещаются у них не на сайте, а в Discord (заблокирован в РФ). У меня стоит последний бета-драйвер оттуда, никаких жалоб, всё отлично. Перед установкой обязательно ознакомьтесь с инструкцией в архиве и следуйте ей.
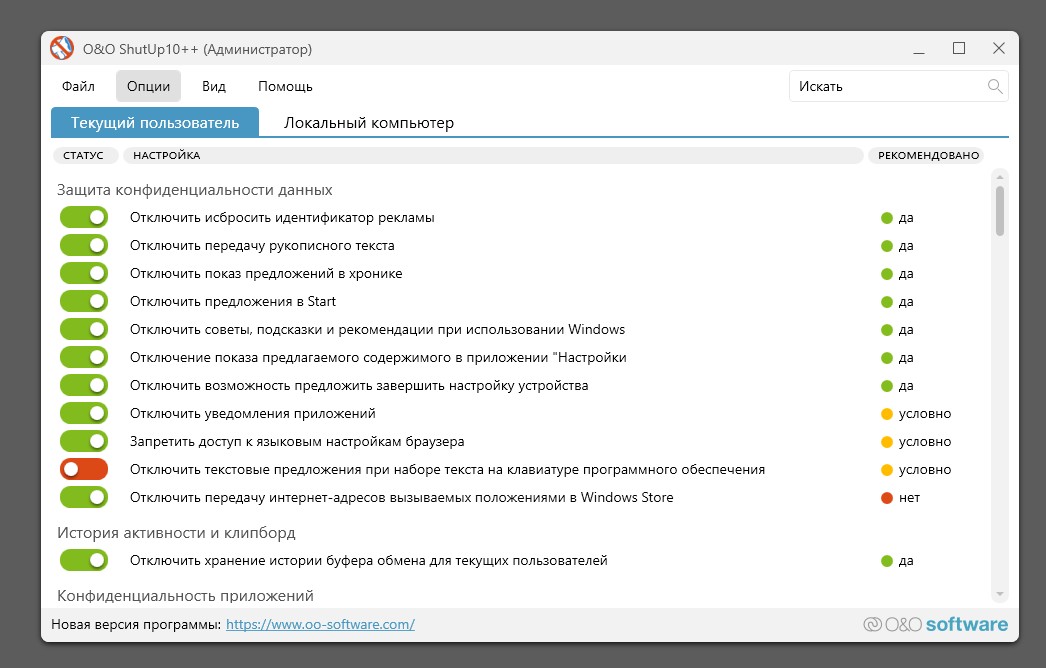
И во-вторых, в Windows 11 очень много лишнего. Чтобы отключить все трекеры, отправку ваших данных на серверы Microsoft и ненужные «фишечки», поставьте бесплатное приложение O&O ShutUp10++. В нём сможете вырубить кучу наворотов за минуту.
Кстати, ставить антивирус в 2025 году на Windows почти нет никакого смысла, встроенный справляется очень хорошо.
Вот теперь точно всё. Я пользуюсь iMac 2020 в Windows 11 постоянно, даже чаще, чем в macOS. Всё работает куда быстрее, чем в ОС от Apple, кстати. Чего и советую всем владельцам Mac на чипах Intel.
(33 голосов, общий рейтинг: 4.55 из 5)
iPhones.ru
Прощаться с отличным компьютером только потому, что производитель отказывается выпускать для него обновления, обидно. Но именно так рано или поздно произойдёт со всеми Mac на процессорах Intel. Сегодня остаётся всего несколько моделей Mac с чипами Intel, под которые ещё выпускаются новые версии macOS. Этим летом всё может измениться. Возможно, уже в этом году, максимум следующем,…
Никита Горяинов
@ngoryainov
Главный редактор iPhones.ru. Спасибо, что читаете нас. Есть вопрос, предложение или что-то интересное? Пишите на [email protected].