
Regardless of your OS – whether it’s Windows 10 or macOS Sierra – you could face the instance where your device refuses to reboot. This can happen for numerous reasons, including hardware failure, file corruption, malicious update, and the likes. If something similar happens with your Apple PC, you can repair it with macOS bootable USB that features installation media.
This is one of the core arguments for making a macOS bootable USB on a Windows PC when your Mac is working correctly. However, if none of your Apple computers [MacBook Air, iMac, Mac Pro, Mac Mini, MacBook Pro or MacBook] are working, then a Windows PC can be used to rescue the PC. You can use a Windows 10, or Windows 8.1/7 to create a bootable USB installation media for reinstalling macOS Sierra on your Apple PC.
Guide to Creating a macOS bootable USB on a Windows PC
In this tutorial, we’ll take you through the steps you need to take to create a macOS Sierra bootable USB installation on a PC featuring Windows 10, 8 or Windows 7. This can then be used to upgrade or reinstall Apple’s MacOS.
The pre-requisites
Before taking any step, you’d need the following:
- A problematic Mac PC with OS X or MacOS Sierra [10.12 or a later version].
- TransMac software [trial version would be sufficient].
- 16GB flash storage.
- A copy of macOS DMG file.
To use the latest macOS version to make a bootable USB drive, take these steps:
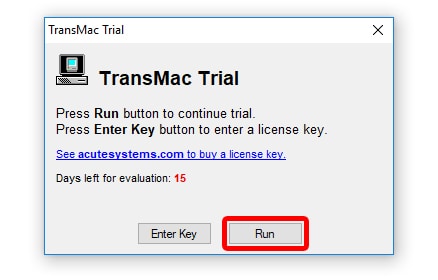
Step 1: Download, launch and install the TransMac software on Windows. The software comes at a cost, but you’ll get a 15-day trial free of cost, which is just enough. P.S. If you like TransMac, you can buy the paid version and show some love to the developer.
Step 2: Put in the USB flash drive you wish to use to resolve the problem of Mac. If you have a backup on the USB, remember to copy it somewhere, as the USB’s content will be erased.
Step 3: Right click on TransMac and choose “Run as administrator.”
Step 4: If you’re using TransMac’s free trial, click Run after waiting for a total of 15 seconds.
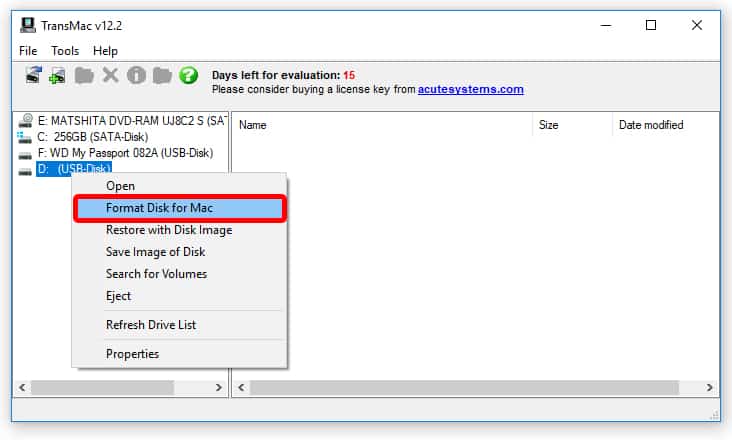
Step 5: On the late pane, right click the flash drive of USB, and choose “Format Disk for Mac.” You should do this before making bootable media because there is a probability that a Windows device was used to format the drive. If that’s the case, it’s likely that it is making use of the MBR partition. However, for it to work on Mac, it requires GPT partition.
Step 6: Click “Yes” on the warning message when prompted to continue formatting.
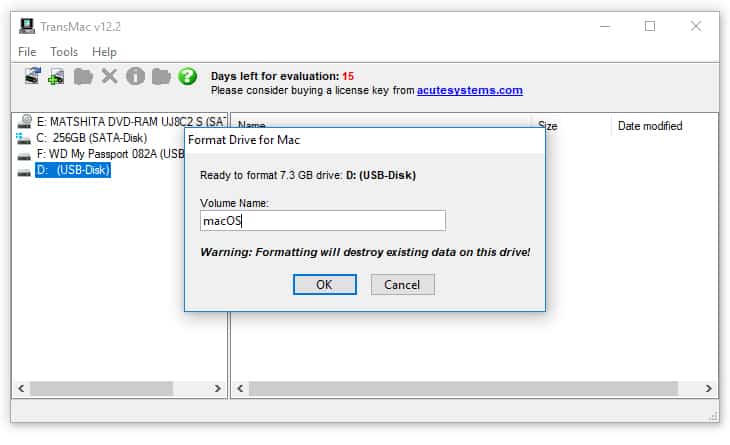
Step 7: Give some name to the drive and click “OK.” For example, you could name it “macOS bootable USB.”
Step 8: Now proceed further by clicking “Yes.”
Step 9: Click “OK” to continue when the formatting finishes.
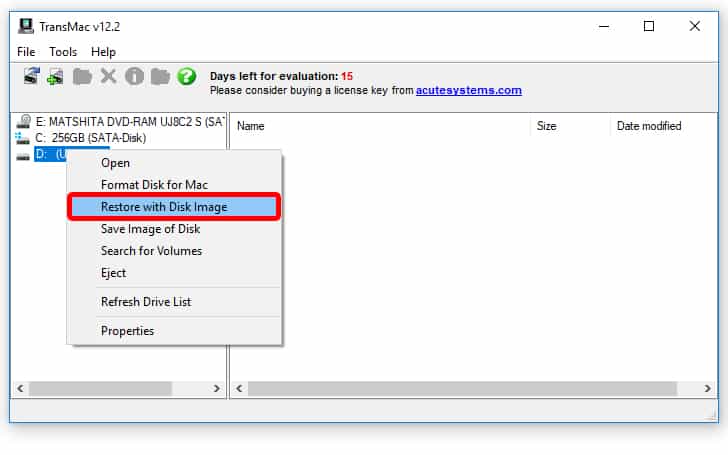
Step 10: Next, right click on the flash drive of the USB, choose “Restore with Disk Image.”
Step 11: Click “yes” to erase the data on the flash drive when you get the warning message.
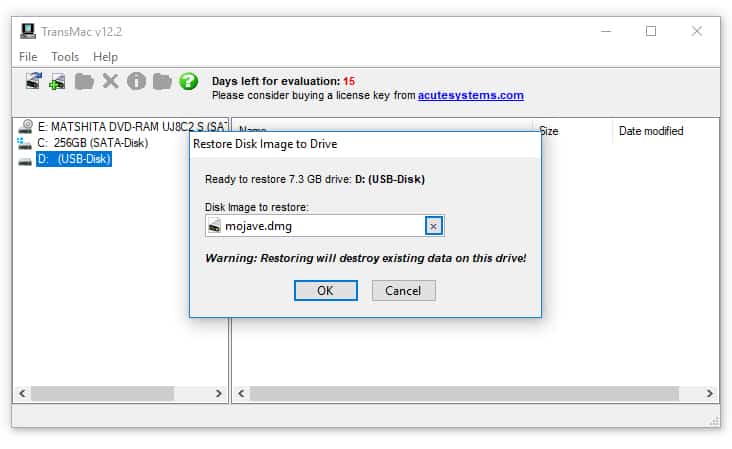
Step 12: Now on the right, click the button that says browse, and find the .dmg file with the installation files of macOS.
Step 13: Now click “Open” > “OK” > “Yes’ to make the macOS USB bootable media.
Once the process comes to an end, put the USB flash drive on your Mac PS to reinstall, install, or ugrade the OS to macOS’s newest version, which could be Sierra or above.
Steps to Create GPT Partition on a USB flash drive
If the USB flash drive doesn’t work with TransMac, you could still be facing an issue of partition. When that happens, you’ll want to repeat the whole process, but this time around, follow the steps listed below to utilize the Dispart command-line utility on the Windows PC for creating the relevant GPT partition.
- Launch Command Prompt in system administrator
- Type the command “diskpart” and press “Enter.”
- Enter the “list disk” command to each drive connected to your PC and press “Enter.”
- Now type the command “select disk” followed by the assigned number for the flash drive “select disk 4”, and press “Enter” again.
- Now enter “clean” command and press “Enter.”
- Enter the “convert GPT” command and hit “Enter.”
- Type the “create partition primary” command and tap “Enter” to finish the process.
After you’ve made a GPT partition for the USB flash drive, you can leverage the instructions above to leverage TransMac to make bootable media, but ignore the steps 5-9 this time around, and do what it says from the tenth step onward.
Once the process ends (note that it could take 30-60 minutes), connect the flash drive of USB and switch on the Mac PC while holding the “Option” key, and choose the USB flash drive to start the installation.
If you’re facing an issue producing bootable media, you can buy a flash drive that comes in the package of macOS Sierra.
That’s it. You’ve successfully created a macOS Bootable USB on a Windows PC. Feel free to use it at your will to fresh install macOS’s latest OS on Mac.
По разным причинам нам может потребоваться переустановить Mac OS, возможно мы заменили жесткий диск или просто хотим сделать чистую установку системы. Сейчас разберемся как сделать загрузочную флешку для Мac-a из под Windows, описывать процесс установки Mac OS мы не будем Вы это легко сделаете и без нашей помощи, а мы расскажем как сделать флешку с Mac OS из под Windows и запустим установку системы.
Для создания загрузочной флешки из под винды Мы будем пользоваться утилитой Boot Disk Utility, посмотрим как она работает и пройдем весь процесс создания флешки с Mac OS по шагам.

Что понадобится для создания загрузочной флешки Mac OS?
– Утилита Boot Disk Utility, скачиваем ее с официального сайта по ссылке
– Флешка объемом на 8 или 16 гигов, зависит от версии системы, чем новее версия тем больше места ей потребуется.
– Образ системы Mac OS в формате HFS
Где взять образ Mac OS для создания загрузочной флешки?
Образ Mac OS в формате HFS, можно скачать на торрентах, например на NNM-Club (пример на скрине).

Мы будем загружать hfs образ с помощью Boot Disk Utility, утилита сама скачает и подготовит выбранный образ.

При создании загрузочной флешки вся информация содержащаяся на ней будет стерта и перезаписана, обязательно убедитесь что на флешке нет важных документов и фалов.
Загрузочная флешка Mac OS из под Windows по шагам
Запускаем Boot Disk Utility (BDU) и заходим в DL Center, будем скачивать образ.

Поскольку наш Mac старенький то и систему для него мы выбираем не самую новую, но и не очень старую, OS Catalina подойдет. Жмем кнопку DL.

Ждем пока Наш образ будет скачен и подготовлен. Подготовленный образ Mac OS будет лежать в папе утилиты.

Теперь подготовим флешку, в списке выбираем флешку и жмем формат, утилита поделит флешку на два раздела, загрузочная область на 200Мб и основная часть диска. Форматируем флешку — жмем Format.

Утилита предупреждает о том что данные будут удалены.

Записываем образ Mac OS на флешку, для этого выбираем второй раздел флешки и жмем Restore.

Утилита попросит указать скаченные образ Mac OS в формате hfs, выбираем и жмем “открыть”.

Ждем завершения процесса.

Загрузочная флешка с Mac OS готова.

Проверяем загрузочную флешку с macOS
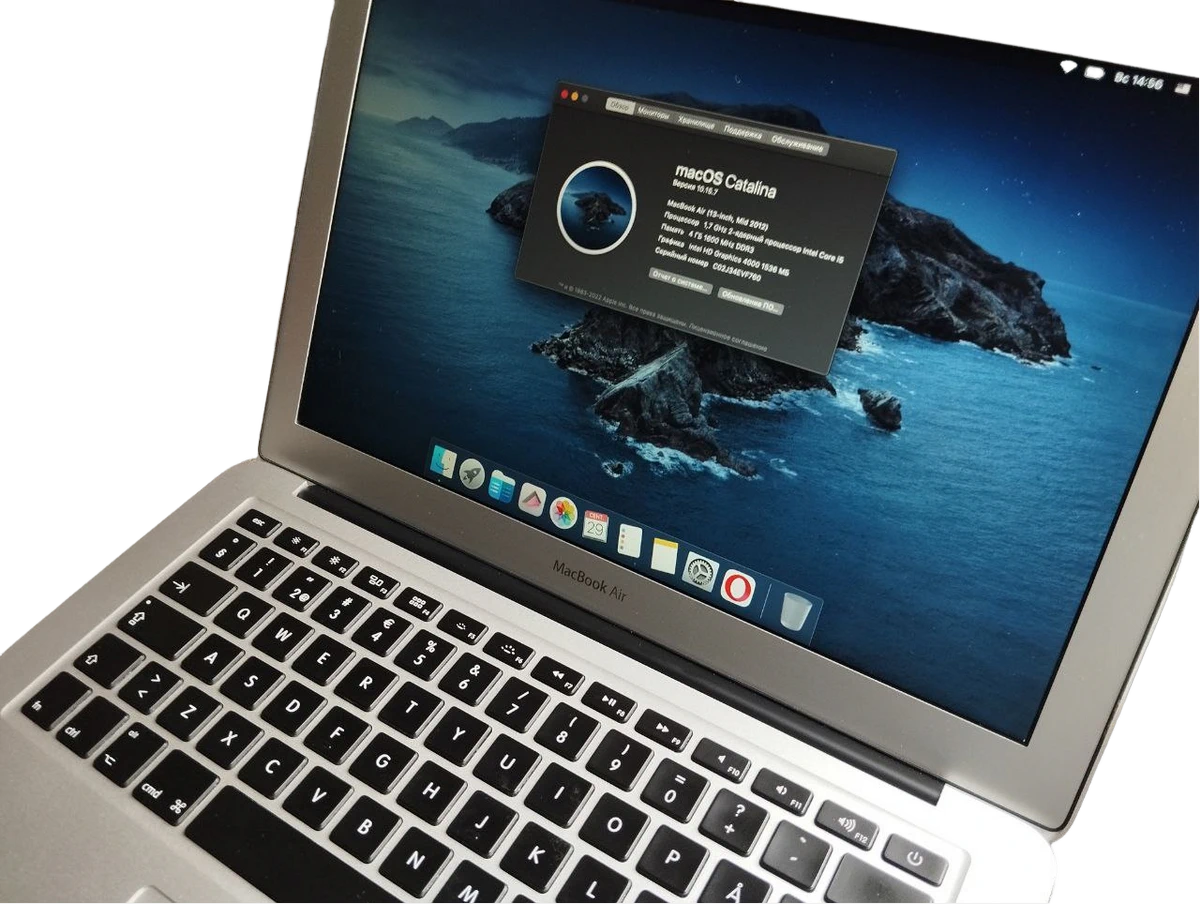
Теперь проверим работоспособность нашей флешки, запустим процесс установки Mac OS. Включаем ноут и жмем клавишу Option (⌥) пока не появится загрузочное меню.
На ноутбуках с разными процессорами (apple m/ intel i) вызов загрузочного меню происходит по разному, полную информацию по запуску флешки можно найти на официальной странице Apple – Сочетания клавиш Mac

Вот так просто можно создать загрузочную флешку с Mac OS из под Windows. Флешка запустилась, с нее нам без каких либо проблем получилось установить OS Catalina.

Table of Contents
Create Bootable USB Installer for macOS X on Windows!
We’ve advised you on How to Create a Bootable Disk of MacOS X: 2 Easy Steps in our previous post. But this process requires an already installed MAC operating system. So, if you are working on a Windows PC and want to Create a Bootable Disk of MacOS X, you can continue reading this post on How to Create Bootable USB Installer for macOS X on Windows 10?
Within the following guide, you’re likely to understand How to Create Bootable USB Installer for macOS X on Windows 10 in the event you don’t own a Mac computer. If you do not own a Mac computer, so don’t be worried about it since we’ll explain to you the way you can make a bootable USB Installer for Mac OSX on Windows 7, 7, and Windows 10.
Additionally, you are going to find some advice about “TransMac” applications. What’s “TransMac Software”? From where to obtain? How can this function? You want these materials to Create Bootable USB Installer for macOS X on Windows 10.
- Download TransMac
- macOS X dmg file (can be downloaded from Apple Store) or you can simply download from the links provided below
- USB Flash Drive
Download DMG files
Download macOS Monterey DMG File
Download macOS Big Sur DMG File
Download Macos Catalina Dmg File
Download macOS Mojave DMG File
Download macOS High Sierra DMG File
What’s TransMac Software?
TransMac from Acute Systems is a Windows application that may replicate and manage folders and files around Apple drives and apparatus, such as Mac-formatted hard drives, flash drives, and other memory devices, also, to open and burn disk images and .dmg along with .sparseimage documents. It is shareware, which you may search for free for 15 days. Recent upgrades include a better open file dialog, speed enhancements, along Windows 8 compatibility.
TransMac for Windows may open Macintosh format disc drives, flash drives, CD/DVD/Blu-ray networking, dmg, dmgpart, sparsebundle along with sparseimage files. Characteristics: produce, compress and enlarge Mac dmg disk images, built in CD/DVD burner to burn ISO and also dmg files. The newest version can also be compatible with Windows 10.
Create Bootable USB Installer for macOS X With TransMac
To make a bootable USB installer for Mac to Install macOS X on Windows, Mac, or even VirtualBox, you need to create a bootable USB flash drive. Let us begin on the way to perform it.
Measure #1. To begin with, you need to download TransMac applications for Windows and install it on your PC. The Setup method is simple, and everybody can do it with no issue. As soon as you’ve set up, you then are going to notice that the screenshot below.
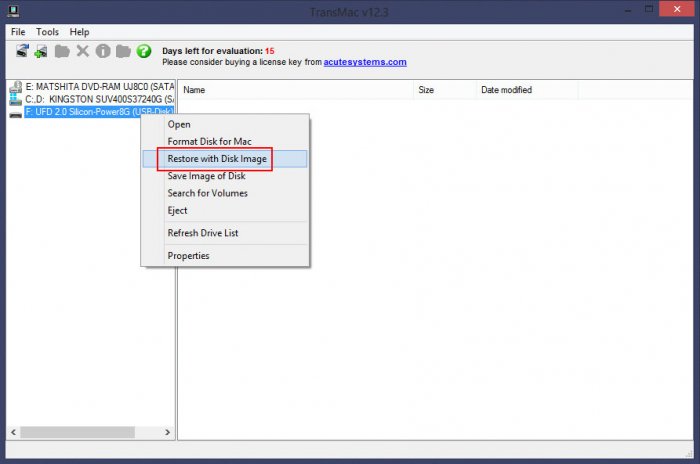
Right-click about the flash which you would like to produce bootable for Mac using TransMac applications then select” Restore using disc image”.
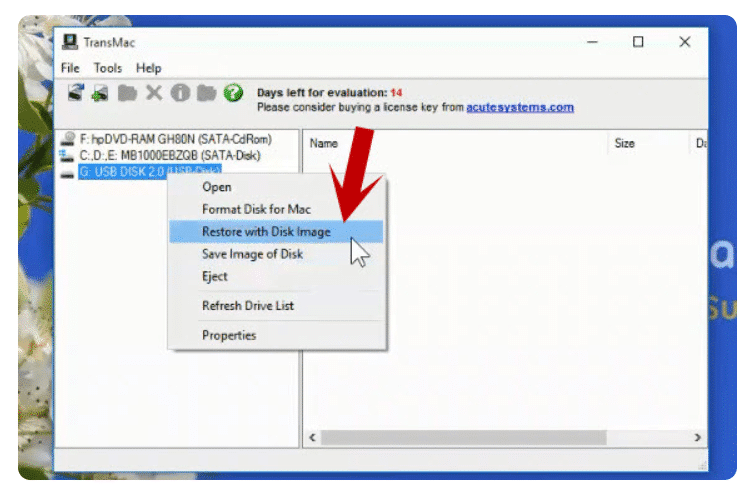
Pick Restore with Disk Image
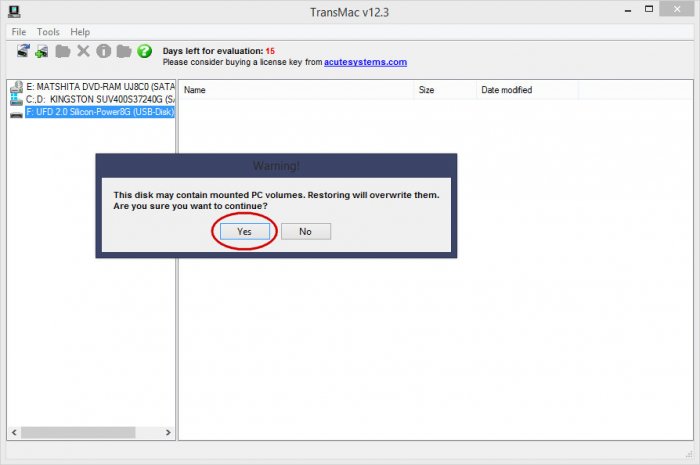
Measure #2. Now a warning message will be displayed to you. Click “Yes“.
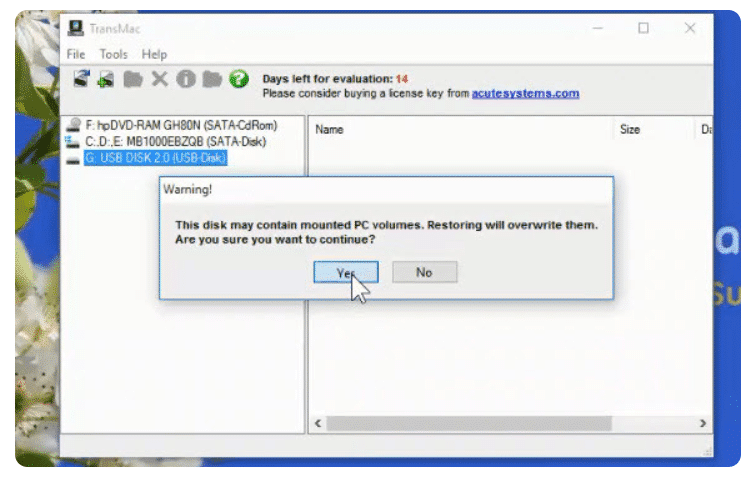
Create Bootable USB for MacOS X using TransMac
Measure #3. A new dialog box will pop up, then click the 3 dots then select your Mac operating system .dmg file.
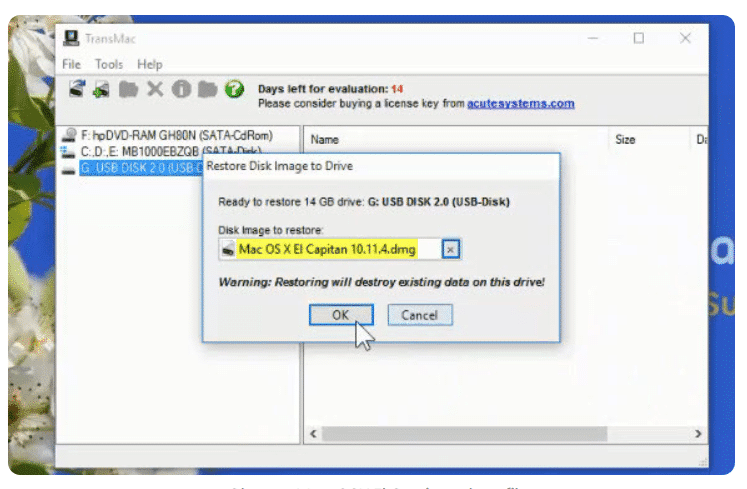
Pick MacOS X dmg file
Measure #4. After picking the Mac OS dmg file, then click on “OK” button. This will take approximately 20 to 35 minutes.
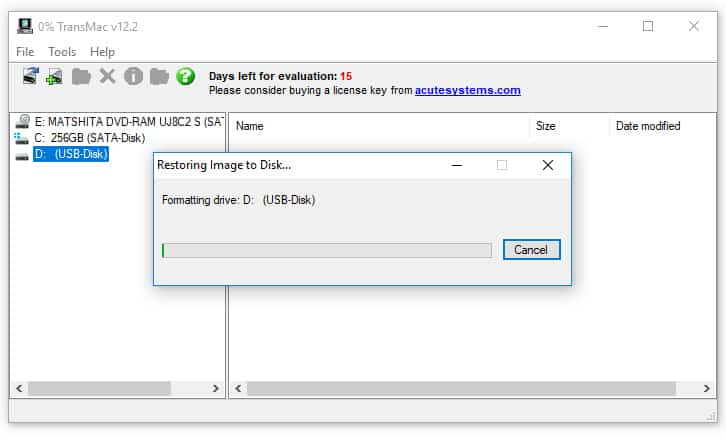
Restoring OSX Document into USB Flash
Concluding: How to Create Bootable USB Installer for macOS X on Windows 10?
Your USB Flash drive is prepared for installing the Mac operating system on Windows or over Mac itself. In case you have any queries regarding this guide or our prior articles, don’t hesitate to share them in the comment section below.
Want to make a bootable macOS USB from your PC, No problem! This guide shows you how to create a bootable macOS USB installer using a Windows 10/ 11 computer.
Prerequisites
1. USB Drive (8GB or Larger)
For USB drives 16GB or smaller, formatting with FAT32 is straightforward. If you’re using a larger USB drive, tools like Rufus are recommended to ensure proper formatting and compatibility. Download Rufus from here.
2. macrecovery.py
A convenient Python script that simplifies the macOS recovery process. Ensure that Python 3 is installed on your system before running it. You can download Python from here.
To retrieve macOS installer files, open a Command Prompt in the macrecovery directory and run the appropriate script:
Example Commands for Different macOS Versions:
- macOS Ventura 13
python3 macrecovery.py -b Mac-4B682C642B45593E -m 00000000000000000 download - macOS Sonoma 14
python3 macrecovery.py -b Mac-937A206F2EE63C01 -m 00000000000000000 download - macOS Sequoia 15
python3 ./macrecovery.py -b Mac-937A206F2EE63C01 -m 00000000000000000 download
For more macOS versions, refer to our detailed guide.
3. OpenCorePkg
This package is essential for setting up macOS on non-Apple hardware. We’ll use it to download and configure the macOS installer files needed for a successful Hackintosh build. You can get the latest OpenCorePkg from here.
Steps to Extract OpenCore and Run macrecovery:
Open Command Prompt in this directory and run the required macrecovery script as shown above.
Download OpenCorePkg from the official OpenCore release page.
Extract the ZIP file and navigate to Utilities/macrecovery/.
Step 1: Get the macOS Installer Files
- Download OpenCorePkg from the official source. We are currently using a nightly build for Opencore 1.0.1
- Extract it and Navigate to the
/Utilities/macrecovery/folder. - Right-click inside the folder and click on (type “cmd” in the address bar).
Run One of the following scripts for the macOS you wanted to download for your bootable media.
For OS X Lion 10.7python3 macrecovery.py -b Mac-2E6FAB96566FE58C -m 00000000000F25Y00 downloadpython3 macrecovery.py -b Mac-C3EC7CD22292981F -m 00000000000F0HM00 download
For OS X Lion 10.8python3 macrecovery.py -b Mac-7DF2A3B5E5D671ED -m 00000000000F65100 download
for OS X Mavericks 10.9python3 macrecovery.py -b Mac-F60DEB81FF30ACF6 -m 00000000000FNN100 download
for OS X Yosemite 10.10python3 macrecovery.py -b Mac-E43C1C25D4880AD6 -m 00000000000GDVW00 download
for OS X El Capitan 10.11python3 macrecovery.py -b Mac-FFE5EF870D7BA81A -m 00000000000GQRX00 download
for macOS Sierra 10.12python3 macrecovery.py -b Mac-77F17D7DA9285301 -m 00000000000J0DX00 download
for macOS High Sierra 10.13python3 macrecovery.py -b Mac-7BA5B2D9E42DDD94 -m 00000000000J80300 download
python3 macrecovery.py -b Mac-BE088AF8C5EB4FA2 -m 00000000000J80300 download
for macOS Mojave 10.14python3 macrecovery.py -b Mac-7BA5B2DFE22DDD8C -m 00000000000KXPG00 download
for macOS Catalina 10.15python3 macrecovery.py -b Mac-00BE6ED71E35EB86 -m 00000000000000000 download
for macOS Big Sur 11python3 macrecovery.py -b Mac-42FD25EABCABB274 -m 00000000000000000 download
for macOS Monterey 12python3 macrecovery.py -b Mac-FFE5EF870D7BA81A -m 00000000000000000 download
for macOS Ventura 13python3 macrecovery.py -b Mac-4B682C642B45593E -m 00000000000000000 download
for macOS Sonoma 14python3 macrecovery.py -b Mac-937A206F2EE63C01 -m 00000000000000000 download
macOS Sequoia 15python3 ./macrecovery.py -b Mac-937A206F2EE63C01 -m 00000000000000000 download
NOTE: If you are making a bootable USB for Hackintosh, make sure to map your USB first before installing macOS on your system.
Downloading macOS for our bootable USB:
In our case, we’ll be downloading macOS 14 Sonoma for our system.
- Copy and Paste the command from above and paste it on Terminal. ( If you for App Execution Error follow these steps)
- The script will now start downloading bootable recovery installation media. (remove the 3 from python3 command if you get error like this)
Let it Complete.
- Check the macrecovery folder, a new folder with
name com.apple.recovery.bootwill appear and inside there will be downloaded recovery files.
Installing macOS on our bootable USB:
- Download and open Rufus.
- Plug Your USB and Open Rufus.
- Set Boot Selection as NOT BOOTABLE,
File System as Large FAT32 (For USB over 32GB)
Click START - Open the Drive and Delete Both
autorun.icoandautorunfile. - now go back to the macrecovery folder and copy the folder
com.apple.recovery.bootwe just downloaded. - Paste the folder into the USB Drive.
now your macOS bootable media is ready.
If you’re building a Hackintosh, you’ll need to configure your EFI (Extensible Firmware Interface) folder using OpenCore or Clover. This folder contains essential configuration files for your specific hardware. Once configured, copy and paste the EFI folder into the root directory of your bootable USB drive to ensure a successful boot.
Need help with EFI configuration? Check out the OpenCore or Clover guides for detailed instructions and support resources.
Каждый уважающий себя пользователь должен иметь под рукой как минимум диск с операционной системой, дабы загрузить с него компьютер и выполнить восстановление, если тот по какой-то причине не смог загрузиться самостоятельно. Касается это не только Windows, но и Mac OS. Правда, создавать такой образ нужно заранее, чтобы затем внезапно не оказаться обезоруженным. В ОС от Apple для этих целей можно воспользоваться такими программами как MacDaddy Install Disk Crеаtor и DiskMaker X, но что, если беда случилась, а вы так и не позаботились загодя создать загрузочный носитель с «яблочной» системой?
Неприятно, но не катастрофично, потому что создать его вы можете на другом маке, а если он недоступен, вполне сгодится ПК под управлением Windows, нужно только установить на него программу TransMac. Это простое приложение предназначается для просмотра содержимого оптических и жестких дисков, флеш-накопителей и томов Apple File System, а также файлов dmg, dmgpart, sparsebundle и sparseimage. Программа поддерживает работу с файловыми системами HFS, HFS+, создание, редактирование и разделение образов DMG, их запись на оптические и флеш-накопители.
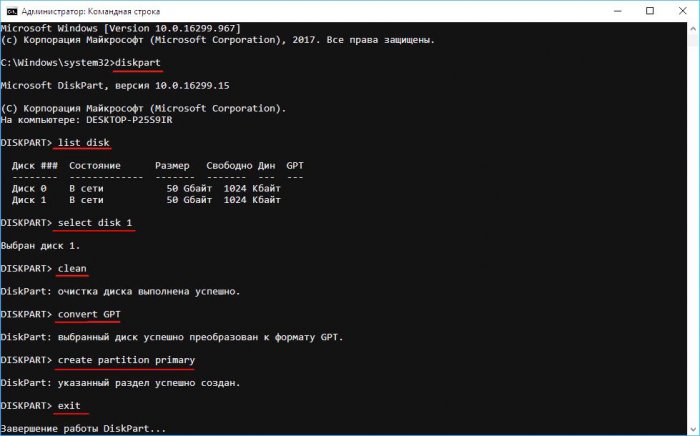
Для создания загрузочной флешки Mac OS вам понадобится установочный образ DMG с операционной системой от Apple, флеш-накопитель объёмом 16 Гб и установленная на компьютер с Windows программа TransMac. Перед тем как приступать к записи, флешку необходимо соответствующим образом подготовить, создав на ней раздел GPT. Для этого откройте от имени администратора командную строку и выполните в ней следующие команды:

Первой командой запускается утилита Diskpart, второй и третьей командами выводится список подключенных к компьютеру носителей и выбирается номер нужного диска, в данном случае флешки, четвертая и пятая команды очищают и преобразовывают диск в GPT, шестая команда создаёт на нём первичный раздел. Наконец, команда exit завершает работу утилиты Diskpart.
Подготовив носитель, запустите программу TransMac от имени администратора, слева на панели кликните по подключённой флешке ПКМ и выберите в меню опцию «Restore with Disk Image».
Подтвердите действие в открывшемся диалоговом окошке, затем в новом диалоговом окне
укажите путь к образу DMG и нажмите ОК.
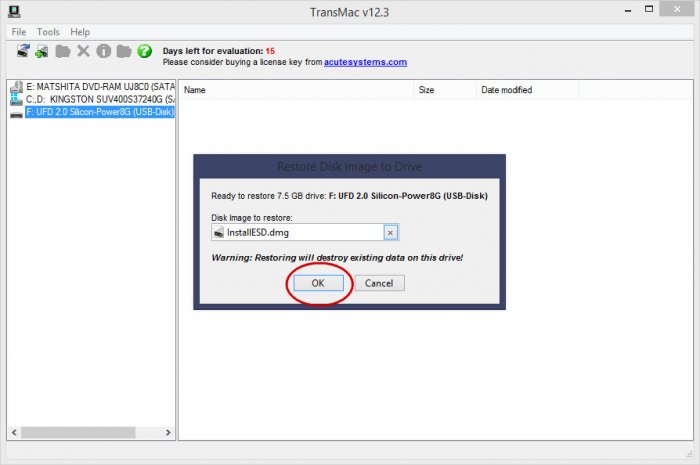
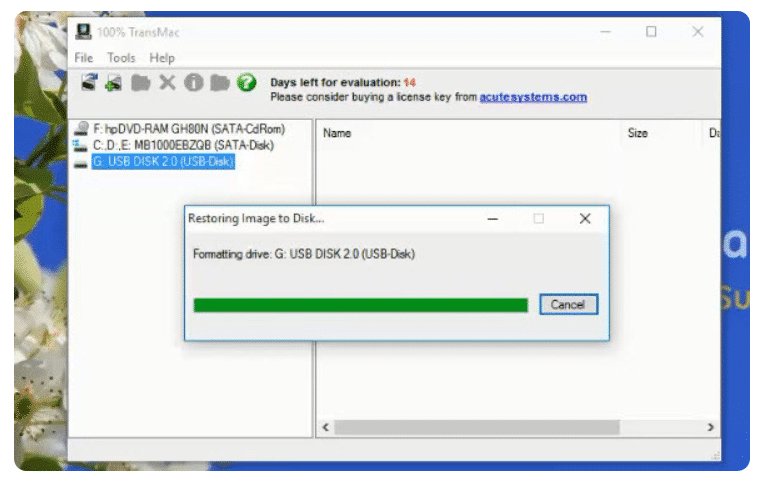
Начнётся процедура копирования файлов загрузочного образа на флешку. Она может занять достаточно длительное время, час или даже более, так что наберитесь терпения. По завершении процедуры вы станете обладателем загрузочной флешки, с помощью которой сможете попасть в среду восстановления операционных систем от Apple.
Статьи по этой теме:
1. Как установить Mac OS на Windows
2. Windows или Mac — какая из операционных систем лучше