
Table of Contents
In our previous post, we shared an easy method to How To Create macOS Catalina Bootable USB on Windows: 4 Easy Steps (+Video Tutorial). We also shared a method on How to Create a Bootable Disk of MacOS X: 2 Easy Steps using a MAC system. Today, we will dive into a much deeper method on How To Create macOS Big Sur Bootable USB on Windows!
macOS 11 Big Sur has just been released. The update brings several important improvements to the operating system relative to the best Macs while offering additional stability.
You can also read: How to Speed Up macOS Big Sur? 7 Easy Methods
We also noted a change in the appearance of native macOS applications. Apple introduced the changes with Messages, Mail, Photos, Calendar, and even Finder, all in a new, much more compact, optimized design. We’ll also finally get improvements that are more in line with iOS updates with macOS Big Sur, including the widget feature that came with iOS 14 and iPad 14, which makes the entire Apple product experience more harmonious and solid.
macOS 11 Big Sur: System Requirements
If you want to download and install macOS 11, you’ll have to make sure your Mac can run it. And unfortunately, the system requirements of macOS have grown with the update. We went ahead and listed the Big Sur-compatible Macs below.
- Apple MacBook 12 (2015 and newer);
- Apple MacBook Air (2013 and newer);
- Apple MacBook Pro (2013 and newer);
- Apple Mac Mini (2014 and newer);
- Apple iMac (2014 and newer);
- Apple iMac Pro (all models);
- Apple Mac Pro (2013 and newer);
macOS 11 Big Sur: Features
Safari
Safari is an underrated macOS hero. The improvements that come with the new update make the browser faster – now, according to Apple, it’s 50% faster than Chrome – along with simultaneously improved privacy and optimized energy consumption. But that’s not all. Presumably, this is the most significant update Apple has received since its first release.
The new version of Safari promises a host of new features, including intelligent tracking that provides you with a privacy report for every site you visit, saves passwords from tracking them for hacking attempts, supports extensions for WebExtensions API, and gets a selection of new extensions in the App Store, along with a built-in translation feature.
There’s one interesting feature here: the browser homepage has become highly customizable, so you’ll be able to change the background image and add/edit sections.
Messages
This service’s capabilities have been inferior to their iOS analog for some time, but now you’ll be able to use Pinned Messages, Notes, and Updated Groups that will come with iOS 14, which is nice. Basically, all updates share the iOS 14 features, which is nice to see. The update will also offer a better search, a redesigned sample of photos, and new effects in messages.
AirPods Update
Besides the exciting support for Spatial Audio for AirPods Pro, we expect significant improvements in AirPods support in macOS. Instead of messing with Bluetooth settings, whenever you want to use headphones with your Mac, they automatically switch to a Mac when you start using your computer. AirPods will now easily and intuitively switch between devices without any additional action.
Sidebar in Mail and Photos
Apple Mail and Photos apps are long out of date, so Apple has introduced a new design for most of its apps, among which the new sidebars in Mail and Photos are the most visible. The Photos app will look the same as the iOS 14 version.
MAC Control Center
One of the best things about iOS is the very convenient Control Center, which allows you to change many settings on the go. macOS Big Sur will transfer this functionality to Macs, providing easy access to them from the menu, so you can easily change the most popular settings without going to a separate Settings app.
Widgets in Notification
As with iOS 14, macOS 10.16 Big Sur has widgets for the notification menu, making it easier to access important information with a user-friendly interface. These widgets can be customized to suit your needs and preferences.
MAC Catalyst
An essential addition to macOS Mojave has been integrating some popular iOS apps. But with Mac Catalyst, new APIs and tools for app developers promise to move even more iOS apps into the Mac operating system. With these tools, you get features such as changing window size, and keyboard tools that allow you to transform your app into a Mac environment, breaking away from the problems of ported apps with the iPhone.
Create macOS Big Sur Bootable USB on Windows: Required Files
- macOS Big Sur DMG file for a clean installation. (Download links have been provided below)
- The DMG file is around 12 GB, so you need a good internet connection to download the macOS Big Sur DMG file. So, here is a tool that you can use to speed up the download process. Internet Download Manager tool that will help you enhance your downloading speed. You can download the full version below.
- A USB Drive (Pen-Drive or External Disk). Your USB device must be of sufficient memory for the installation.
- TransMac tool from Acute Systems. This Windows application tool may replicate and manage folders and files around Apple drives and apparatus, such as Mac-formatted hard drives, flash drives, and other memory devices, to open and burn disk imaged .dmg along with .sparseimage documents.
How To Create macOS Big Sur Bootable USB on Windows: Step by Step
This is a 4 step simple process. I have also shared a complete video tutorial on How To Create macOS Big Sur Bootable USB on Windows, you can find the video at the end of this post.
NOTE: Kindly do not skip any step; the process will fail, and you might corrupt your USB device. I crashed mine once!
Step 1: Downloading necessary files to Create macOS Big Sur Bootable USB on Windows
- macOS Big Sur DMG by techrechard (Google Drive + MediaFire)
- TransMac tool from Acute Systems- This file is password-protected, and the password is www.techrechard.com. You can extract this file using WinRAR download free and support: WinRAR (win-rar.com).
- IDM 6.27 Build 2 Registered (32bit + 64bit Patch) [Techrechard.com] – This file is password-protected, and the password is www.techrechard.com. You can extract this file using WinRAR download free and support: WinRAR (win-rar.com).
Step 2: Install TransMac Tool on your Windows
After downloading the TransMac tool from the above links, proceed with the installation. The process is very similar to installing any other tool on your Windows. Once you have downloaded and extracted the contents from the RAR file, you will see the following contents:

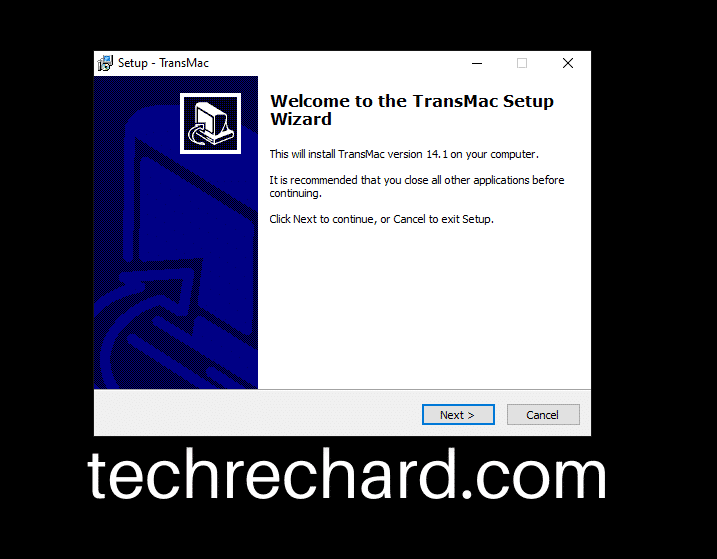
Open the TransMac Techrechard.com folder, and click SETUP.
And click, Next.
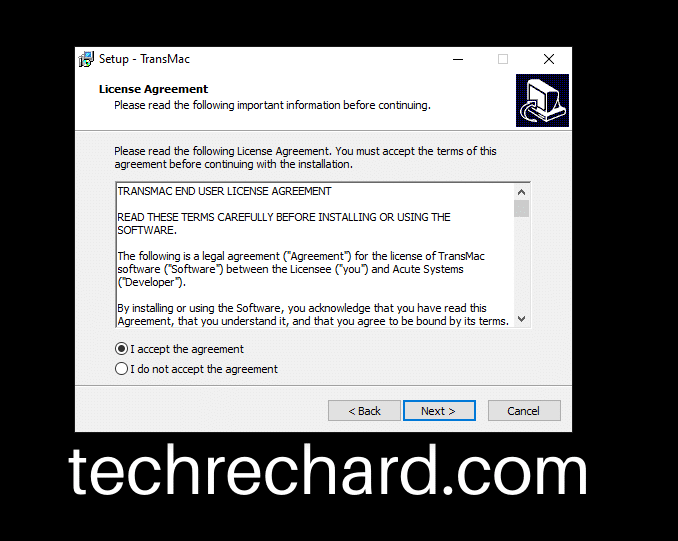
Accept the terms and conditions.
Choose the directory for installation. You can keep it default.

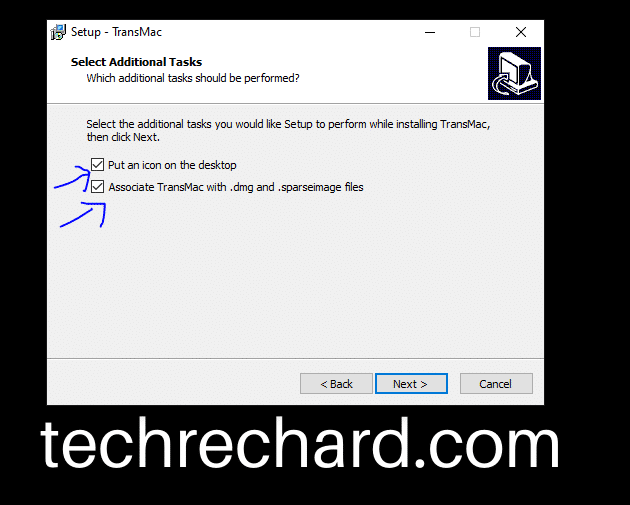
Leave the default ticks and click Next.
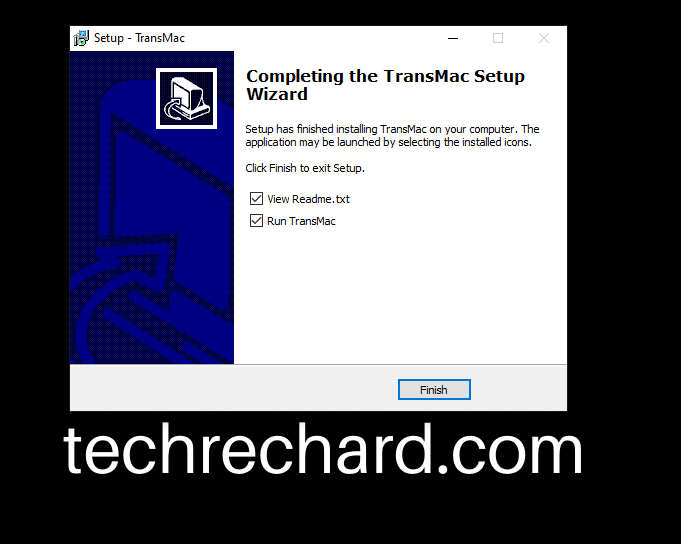
And you see that within no time the setup is complete.
Step 3: Open TransMac Tool
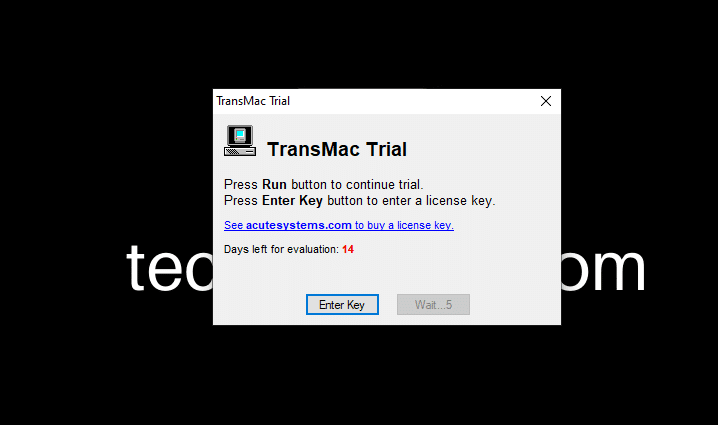
Once the installation is over, the transmac tool will open itself. And you will see the following message.
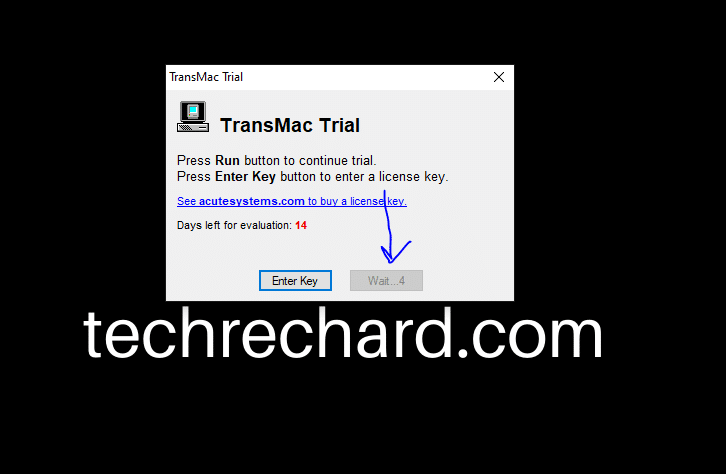
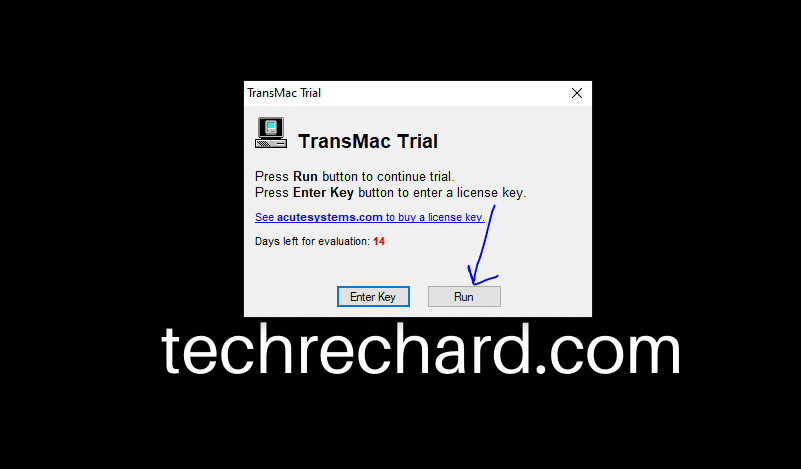
Since we are running the trial version of TransMac, you need to wait for 10 seconds, and it will open up automatically. After 10 seconds, you can click, Run.
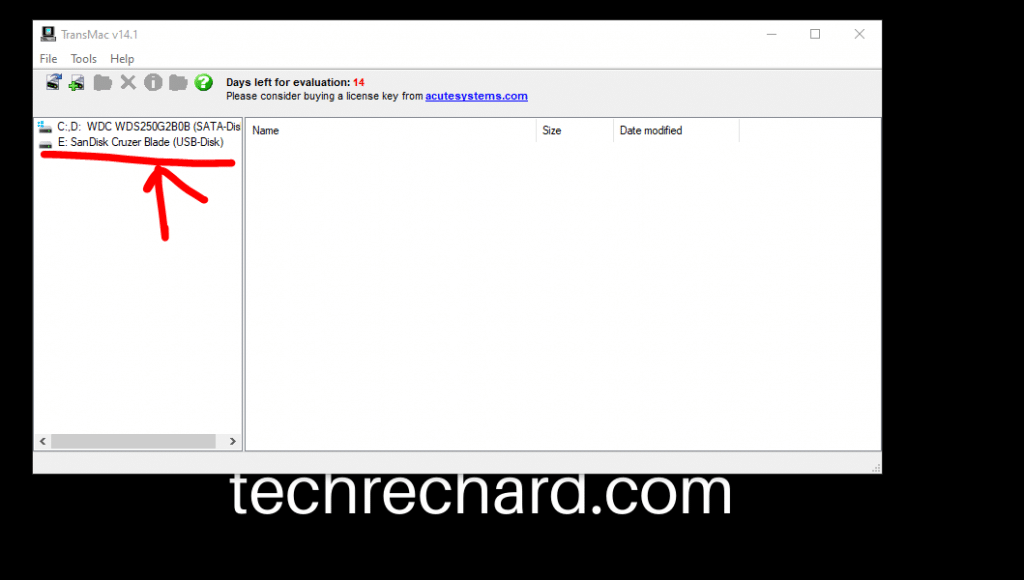
Now insert your pendrive, usb drive or any external disk.
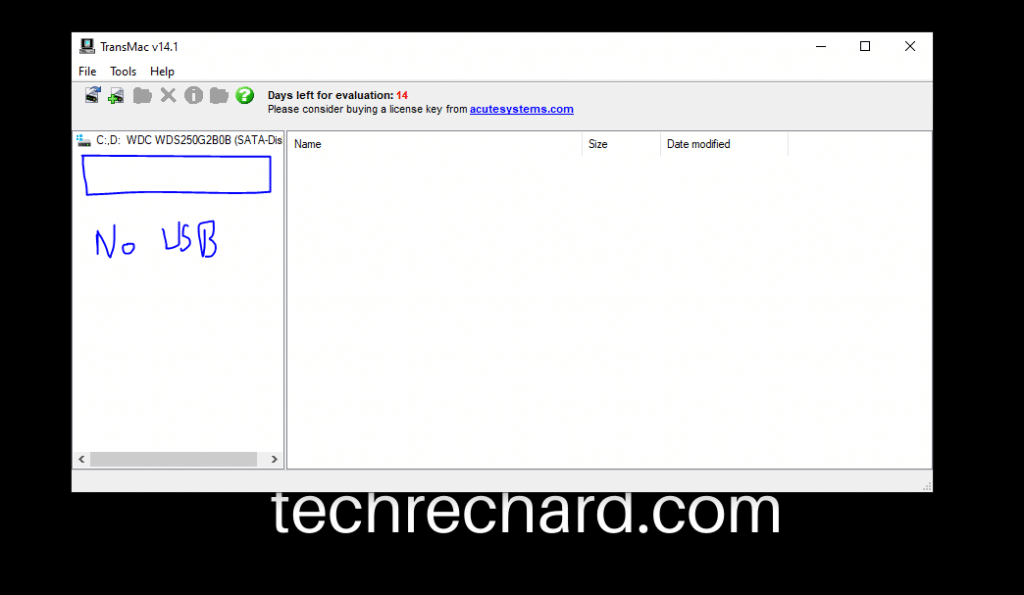
And click Tools, followed by Refresh drive list.

Once you click refresh drive list, you will see your USD device attached.
Step 4: Complete the installation
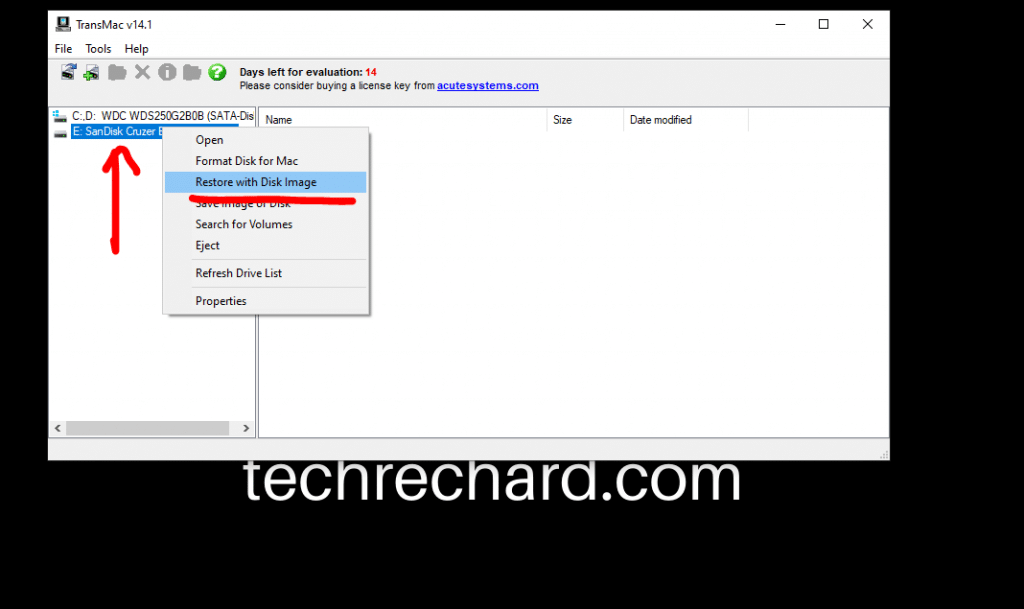
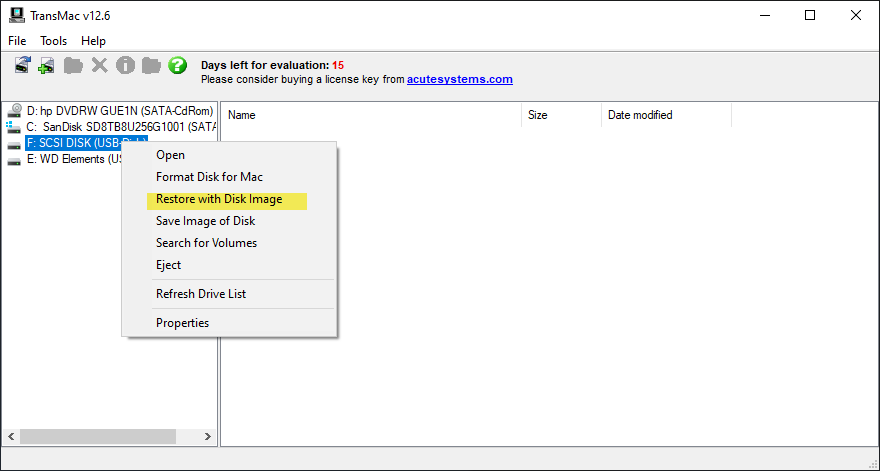
Now, right click your USB and click Restore with Disk Image.
Now, you will be prompted an error that you need to run TransMac using administrator access. So you simply click YES.
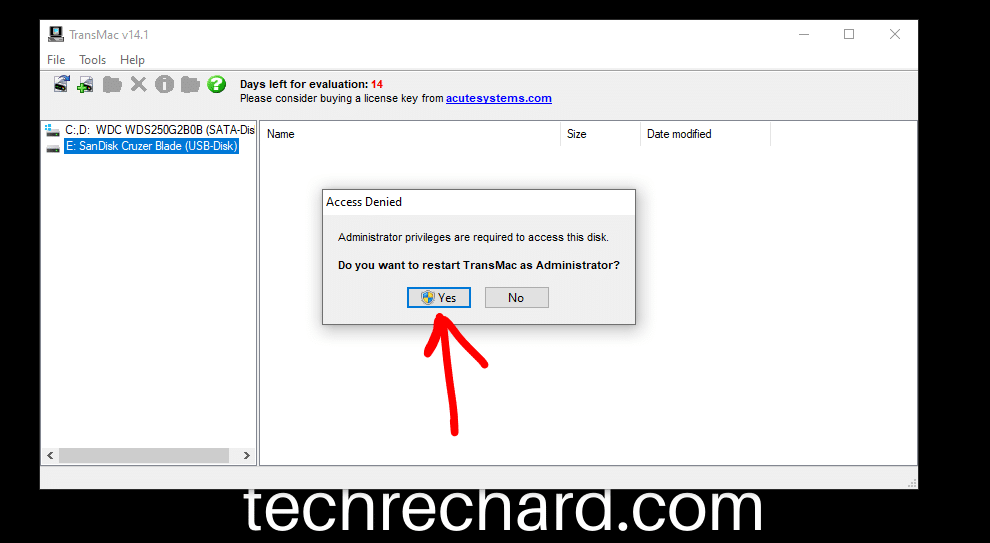
Now, wait again for 10 seconds.
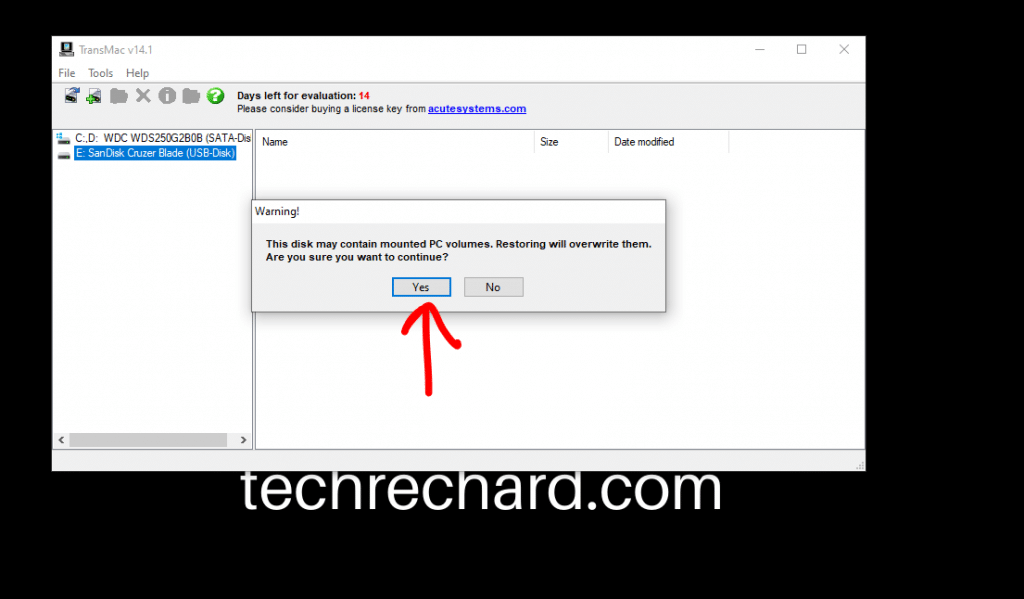
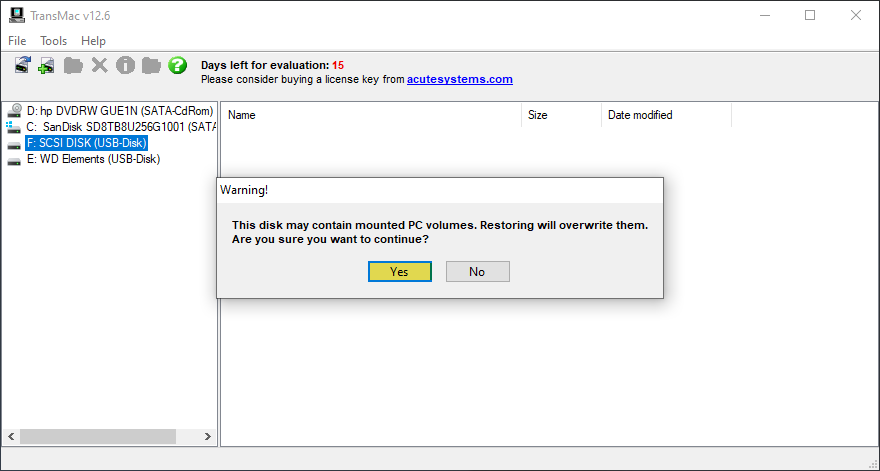
Now, right-click on your USB device and click Restore from Disk Image again. You will be prompted with a warning, and you can click Yes.
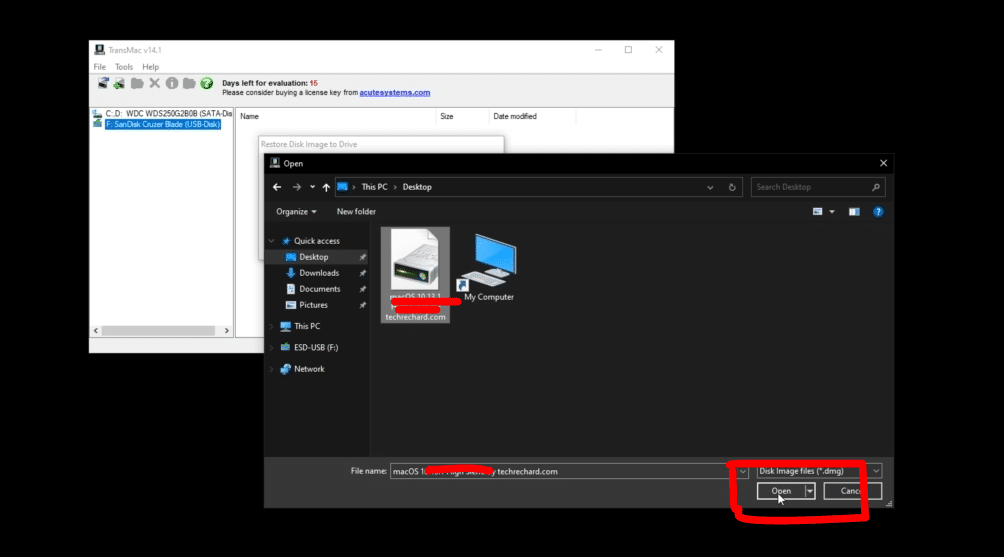
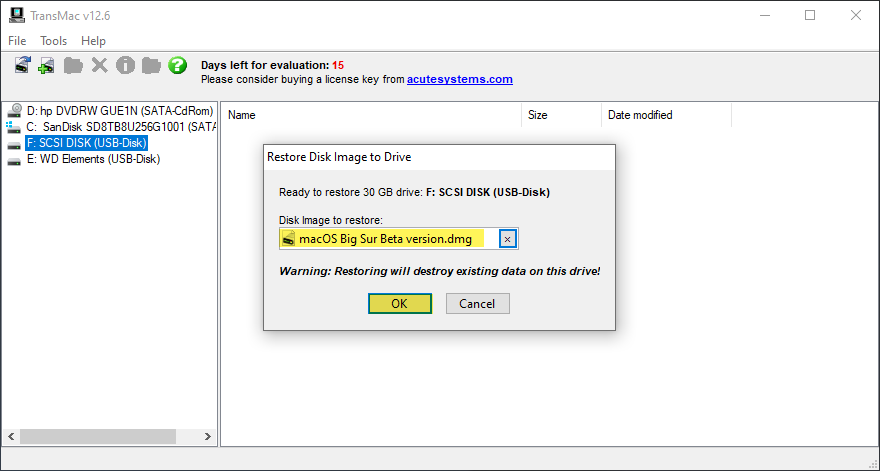
Now you select the Big Sur DMG file that you have downloaded and upload it.
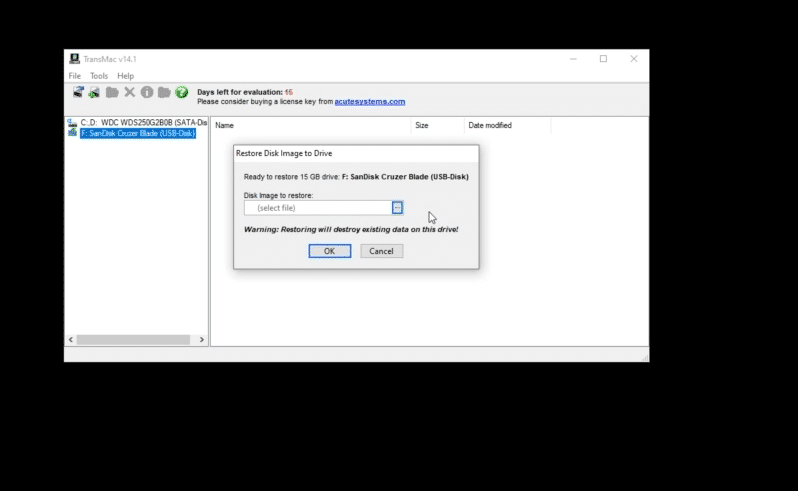
Now click OK,
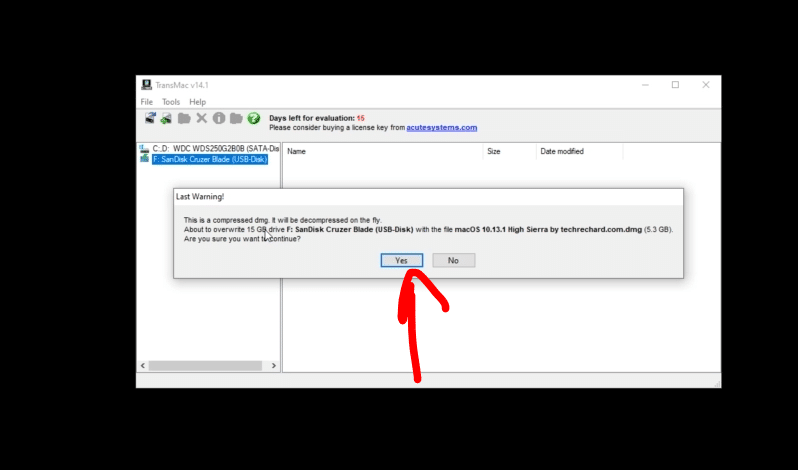
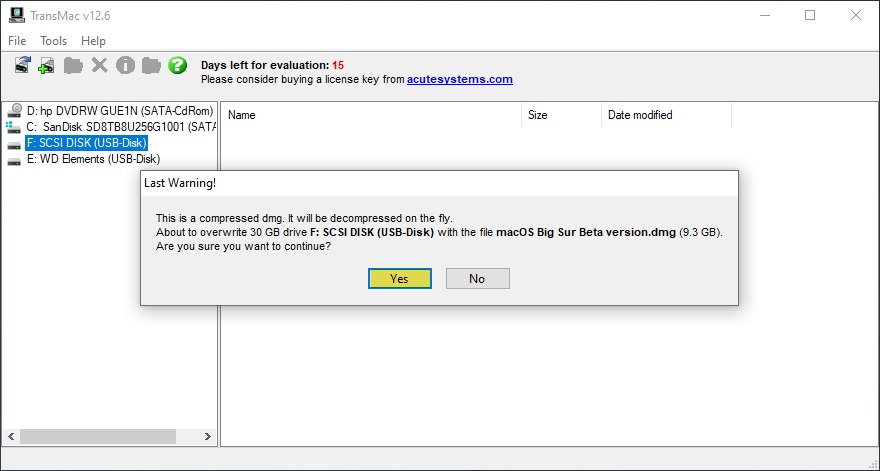
Now you will get your last warning that the USD device will be formatted. You can click YES.
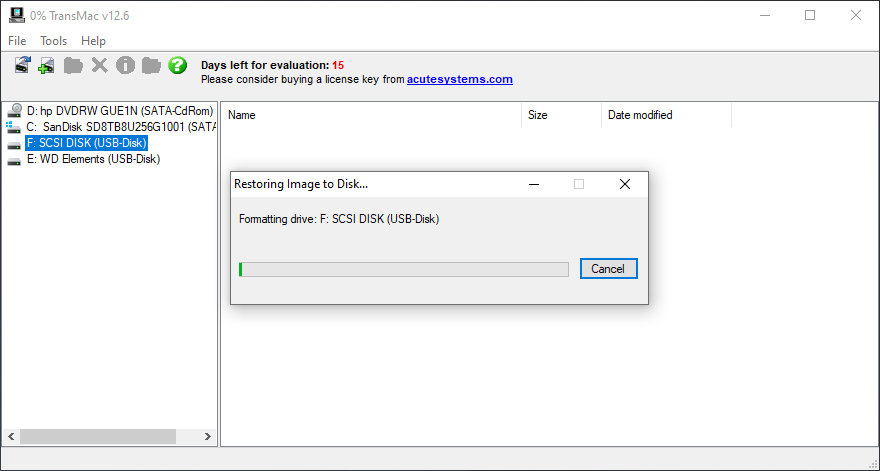
The restoration process will begin, and it will take around 20-30 minutes, depending upon your USB device’s speed. For me, it took around 17 minutes.
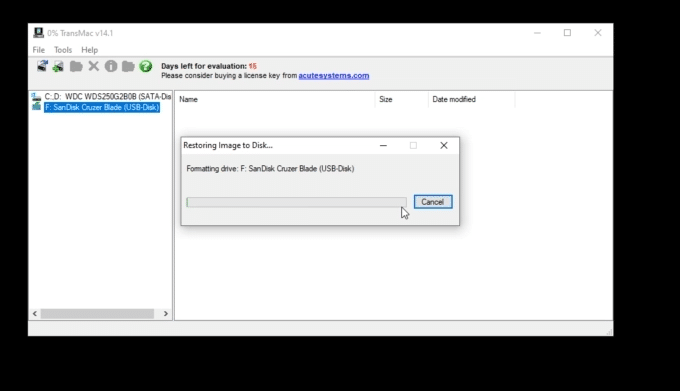
Once complete, you will see the following snapshot.
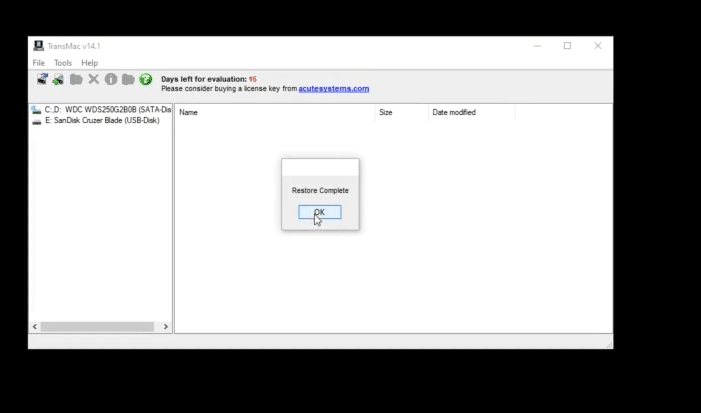
Now the Restore process is complete, and you can use this USB as macOS Big Sur Bootable USB. To check the contents of this USB, you will need a MAC system. If you do not have a spare MAC, no need to worry. I will show you the contents of this USB created.
NOTE: This USB will not work on Windows anymore. If you plug it again on your desktop, it will ask you to format the drive. So do not worry. The contents of this USB will be visible only on a MAC system.
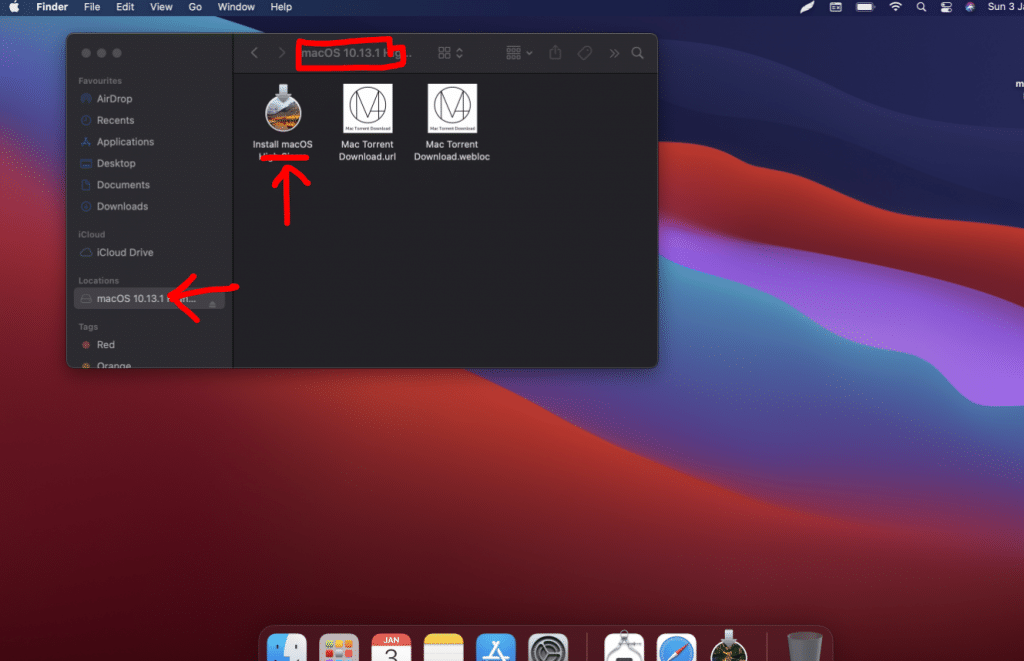
As you can see the contents of the USB device. Now, you can use this as a macOS Big Sur Bootable USB.
After this process is complete, you can use this USB to install macOS Big Sur on your MAC system using the BIOS mode. You simply need to boot your MAC using this USB device at startup.
Here are some other posts that you might be interested in-
How to Fix macOS Big Sur Screen Resolution on VirtualBox: 5 Step Guide
How to Install macOS Big Sur on VMware on Windows? 8 Step Guide
How to Install macOS Big Sur on VirtualBox on Windows? 8 Step Guide
How to Create macOS Big Sur Bootable Installer for Clean Installation: 2 Easy Steps
Download macOS Big Sur DMG File 11.1 {Updated 4 Jan 2020}
Download macOS Big Sur VMDK (Virtual Machine Disk) File
Download macOS Big Sur VMware & VirtualBox Image – Latest Version
How To Create macOS Big Sur Bootable USB on Windows: Final Words
I hope you have enjoyed this article and have successfully created macOS Big Sur Bootable USB on Windows. If you find any issues, you can leave your comments below. I have also created a complete video tutorial that you use and learn How To Create macOS Big Sur Bootable USB on Windows below.
macOS Big Sur version 11.0 is the next biggest release of Apple Inc operating system for Macintosh computers. It is the successor to macOS Catalina 10.15 version 10.15. The macOS 11 Big Sur was announced at the “Apple Worldwide Developer Conference” on June 22, 2020. You can get macOS Big Sur in Beta version now, and the Public Beta scheduled for July to be released.
The primary version number of operating systems has been incremented for the first time with the release of Mac OS X Beta 2000. macOS Big Sur features are a major of new interface user design, support for iOS and iPadOS, and also are designed to the Apple future Macs with ARM Processors. A refreshed design to macOS Big Sur, Control Center for Wifi and Bluetooth connectivity, Notification center, Support for Apple Designed ARM processors, Support for iOS and iPadOS apps, Signed system volume, Software updates, Spotlight, improvements to Safari, Messages, App Store, Notes, Photos, Maps, and New Apps introduced in Mac Catalyst.
Related:
- How to Create a Bootable macOS Big Sur USB Installer
- How to Create Windows 10 Bootable USB on macOS
Unfortunately, macOS Catalina, which supported the standard configuration Mac that Mojave supported, now macOS Big Sur drops support of various Macs released in 2012 and 2013. The below down is the list of Macs that are compatible with macOS Big Sur.
- MacBook Early 2015 or newer
- MacBook Air Mid 2013 or Newer
- MacBook Pro late 2013 or newer
- Mac Mini Late 2014 or newer
- iMac Pro
- Mac Pro Late 2013 or newer
Required Files:
- macOS Big Sur installer file
- At least 16GB Pen Drive
- TransMac (Download)
Testing macOS Big Sur with its new features is much interesting, but before that, you need to prepare some requirements such as macOS Big Sur image, Create a Bootable USB Drive, and a compatible machine that should support macOS Big Sur. Now macOS Big Sur is available in the Beta version in App Store, that you can download from there. Beta version means the Developer version, that only developers can download the file.
No worries we covered each and everything for you to download macOS Big Sur installed file free without Developer account, check the below link.
- Download macOS Big Sur installer file
- Download macOS 11 Big Sur VMDK (VMware & VirtualBox Images)
Create Bootable USB Using TransMac
TransMac is an application for Windows users for file management to read, write, and format Mac disks in your PC. A Windows application that allows you to open the Mac-formatted devices and drives on your Windows machine. Alongside this, most of the people are using the TransMac software on their Windows PC for creating Bootable USB Drive. The same here I want to use TransMac, as before I used this software for creating macOS Catalina 10.15 Bootable USB Drive. And the TransMac gives me the positive result on Windows PC.
TransMac is non-paid software for Windows users, therefore, for using TrasnMac full version you need to pay money. But TransMac has the limitation of 15-days trial to use it for free.
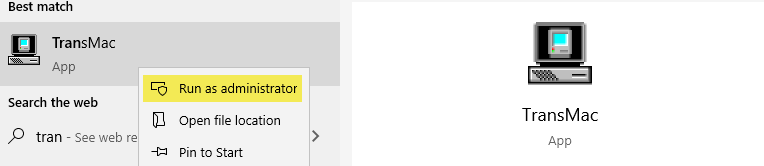
Download and install TransMac on your Windows PC, then attach the USB Drive. And run TransMac software as Administrator.
Select the USB Drive from left-handed, then right-click and select (Restore with Disk Image).
In here you will face Warning! the disk may contain mounted PC volume, simply click “Yes”.
Now click on three dotes then select the macOS Big Sur dmg file and click Open. Be sure that macOS Big Sur dmg file inserted then click OK.
And this will be the last Warning! this is a compressed dmg, it will be decompressed on the fly, again click “Yes” to go ahead.
Now the TransMac will start copying the macOS Big Sur installer file to USB Drive, it will take some time, have patient, and don’t do anything.
Create Bootable USB Drive on Mac
When the macOS Big Sur installer file downloaded, then it will be much easy to create a Bootable USB Drive on Mac. For this process, you need to use “Terminal” and apply some commands.
- Firstly attach the USB Drive to your Mac
- Over ahead to search spotlight and search terminal
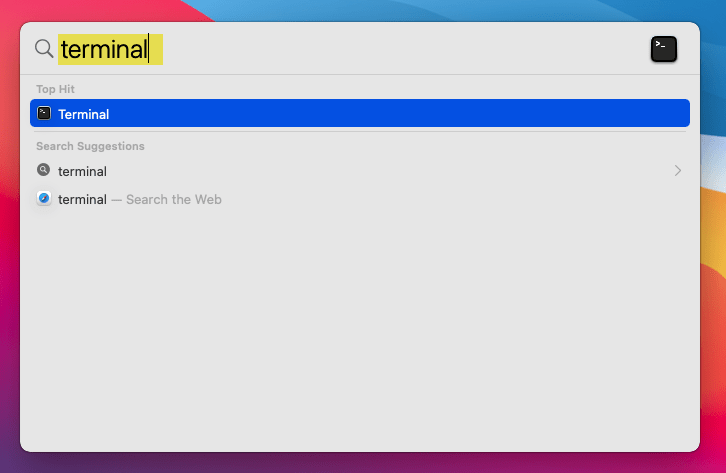
- Once terminal appeared press enter to open
- On the terminal window apply the below commands and press enter
sudo /Applications/Install\ macOS\ Beta.app/Contents/Resources/createinstallmedia --volume /Volumes/USB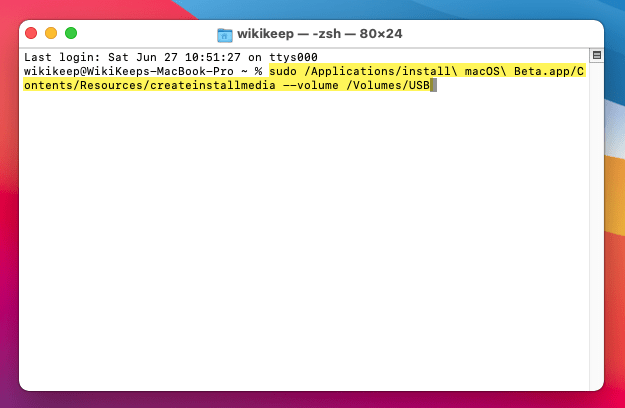
- Type your username password and press enter
- For the confirmation type “Y” and press enter
- Wait for the copying of the macOS Big Sur installer file to USB Drive.
Check out the related articles about creating macOS Catalina, macOS Mojave Bootable USB Drive on Windows, and Mac.
- How to Create macOS Catalina 10.15 Bootable USB Installer Drive
- Easiest Way to Create macOS Catalina 10.15 Installer USB Drive
- How to Create macOS Mojave Bootable USB installer Drive on Windows

Welcome to the macOS Big Sur Hackintosh Tutorial. In this article, we will show you how to create a macOS Big Sur installer using Windows 10 PC. If you own a Mac, you can follow my other tutorial to create a macOS Big Sur installer from a Mac/Hackintosh. Please note that this is not a complete Big Sur Hackintosh step by step guide. After you create the installer, there still one critical step, creating and configuring the EFI. The EFI configuration will be in another post.
This tutorial is based on OpenCore version 0.6.3. If there is a new version, the steps might be a little bit different but overall its the same.
Prerequisites
- Windows 10 PC with 15 GB of free hard disk space
- OpenCore RELEASE
- Python
- USB Drive 16 GB or more
Step 1. Download the macOS Big Sur Files
At this point, make sure you have installed Python software on your Windows 10. You can download and install Python from the following link.
https://www.python.org/downloads/
After Python is installed, now download the latest OpenCore Master file from the following link
https://github.com/acidanthera/OpenCorePkg/archive/master.zip
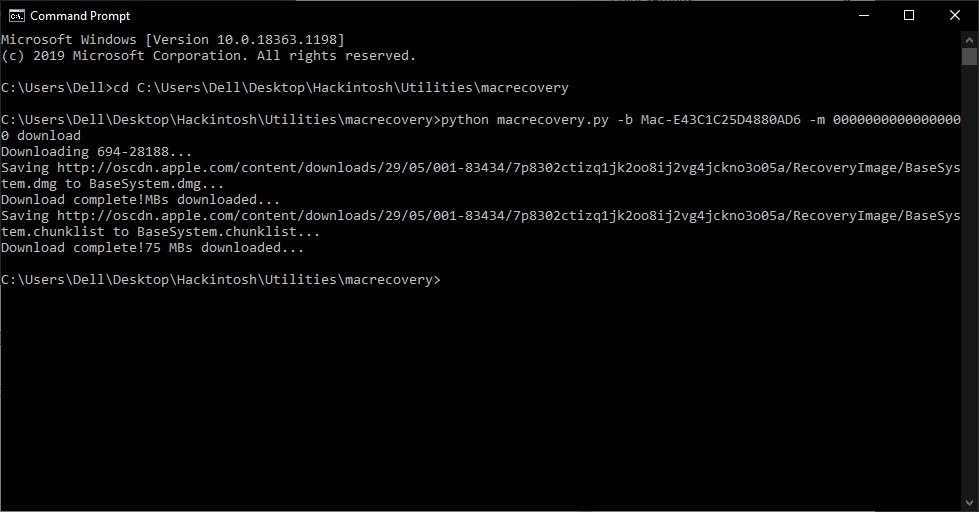
Extract the file and then open the command prompt and cd to the macrecovery folder inside the Utilities folder. For example
cd "D:\Software\BigSur_Hackintosh\OpenCorePkg-master\Utilities\macrecovery"
And then run this command. The following command is for macOS Big Sur download. For another macOS version, please visit this dortania page.
python macrecovery.py -b Mac-E43C1C25D4880AD6 -m 00000000000000000 download
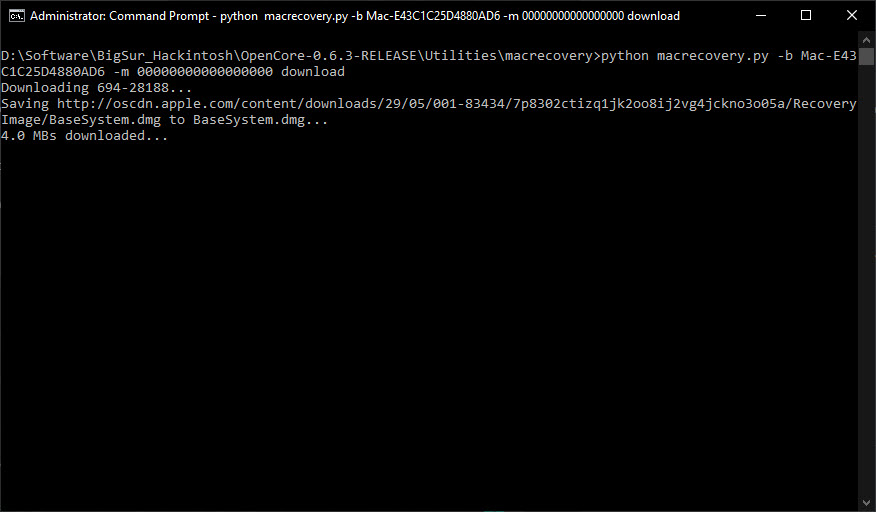
Wait until the download process completes.
Step 2. Format the USB drive
Once the download completed, now we need to format the USB drive. To do this, open the Disk Management. Right-click the Windows Start Menu and click Disk Management.
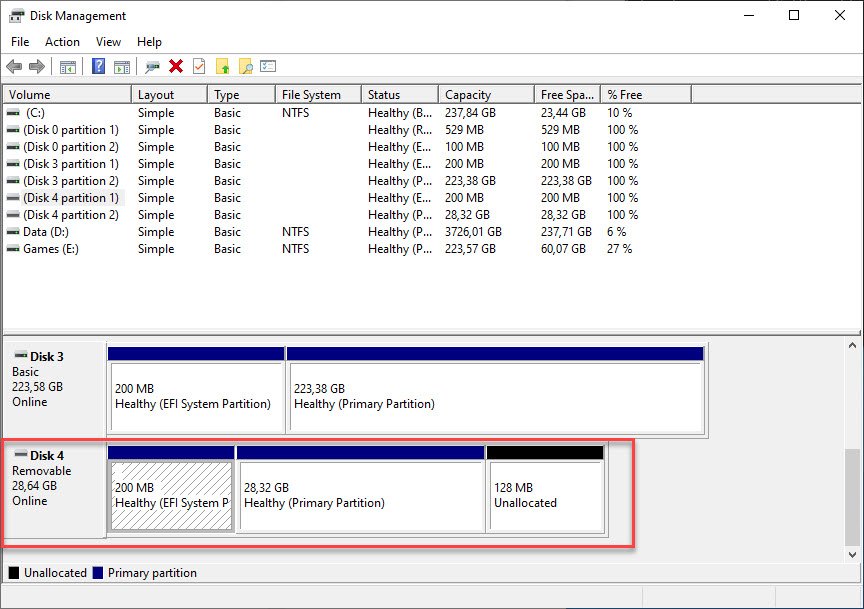
If your USB disk has multiple partitions as mine above, right-click on each volume and click Delete. Make sure there is no important data in it. Backup first if necessary. And then once all volumes are deleted.
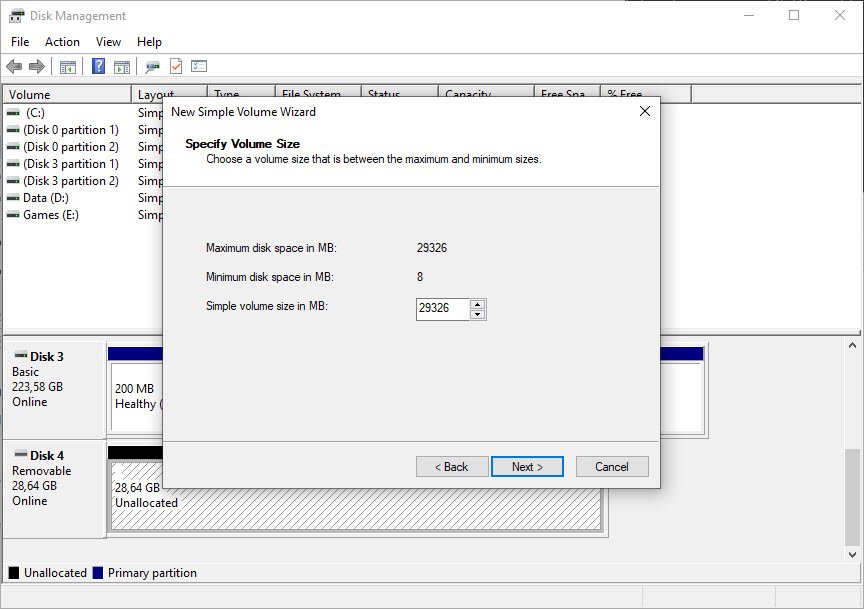
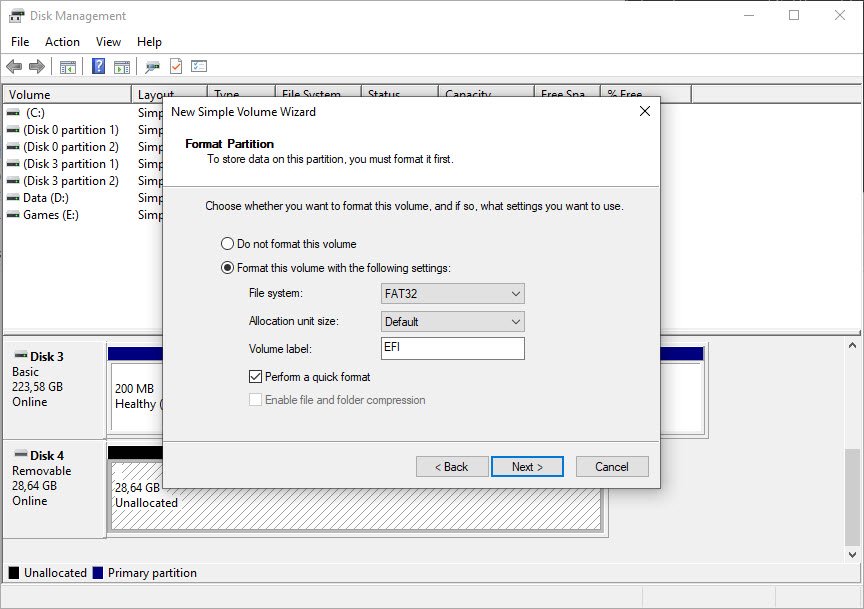
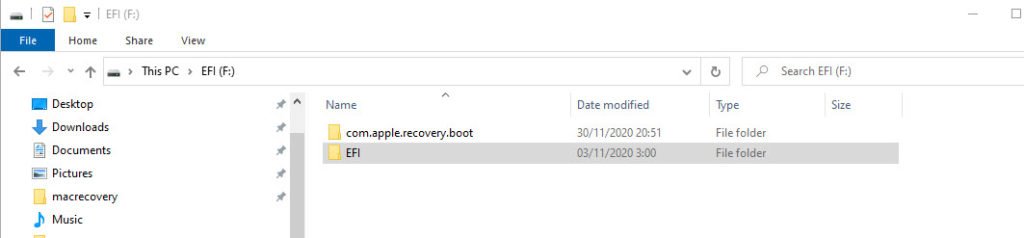
- Right-click and choose New Simple Volume. In this example, I use all the space of my USB drive. And then Format it with FAT32 and call it “EFI”.
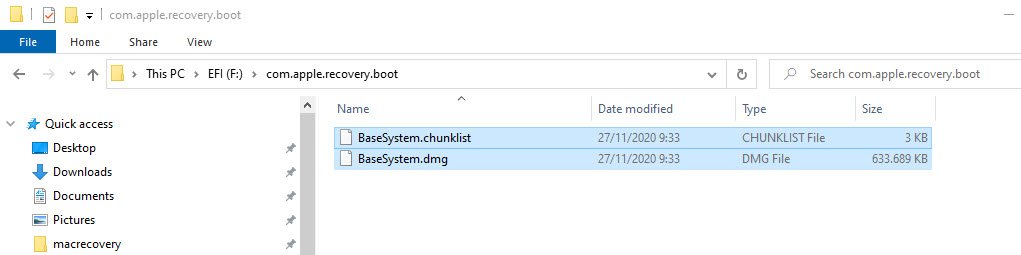
Now open the USB drive and create a new folder called com.apple.recovery.boot. And then copy the following files from the OpenCore folder OpenCore-0.6.3-RELEASE\Utilities\macrecovery.
- BaseSystem.chunklist
- BaseSystem.dmg
Now copy the EFI folder from the OpenCore folder to the USB drive. In my case, it would be OpenCore-0.6.3-RELEASE\X64\EFI
At this point, we have successfully created the macOS USB installer from Windows 10. But, we still need to configure the EFI in order to boot our PC and install macOS Big Sur.
If you have an AMD FX PC, you may try to use my EFI which can be downloaded from the link below. Replace the EFI folder with mine below. Visit this page and scroll down to the EFI download section.
Download EFI folder for AMD FX for macOS Big Sur
The main reason to create macOS 11 Big Sur Bootable USB on Windows is to have a clean installation of macOS Big Sur on virtual machines. With bootable USB you can install macOS Big Sur on VirtualBox and Vmware. Even, you will have a full installation on Mac compatible computers. However, if the virtual machines or Macbook and Mac has crushed and don’t reboot normally as it should.
The reason to not reboot macOS Big Sur can be from file corruption, buggy update, hardware failure, or malware. Then, with a macOS 11 Big Sur bootable installer you can easily install the latest operating system.
On Mac computers, you can easily create a USB installer for macOS Big Sur using Terminal and some commands line. But, doing it on Windows is somehow difficult and you have to create it using third-party software. Therefore, we will create a macOS 11 Big Sur USB installer using UUByte DMG Editor and TransMac software.
- How to Install macOS Big Sur on Virtualbox on Windows
- How to Install macOS Big Sur on Vmware on Windows
However, the macOS 11 Big Sur developer beta version is available and the public beta will be released in July. Remember, with this method, you can create any version of the macOS Big Sur installer. Whether, it is developer beta, Public beta, or final release version.
MacOS 11 Big Sur Compatible devices
Before moving on the macOS 11 Big Sur compatible Macs list. Let’s have a short glimpse of macOS 11 Big Sur introduction. However, Apple Inc. announced and released macOS 11 Big Sur the latest Macintosh operating system. Meanwhile, Apple released the first developer beta for developer users to check the new operating system bugs, features, and improvements.
The macOS 11 Big Sur has major new features with new user interface design and iOS14 and iPadOS 14 supports. The refreshed design to macOS Big Sur, Control center for Wifi and Bluetooth connectivity, Notification center, support for Apple-designed ARM processor, Support for iOS and iPadOS apps, Signed system volume, Software updates, Spotlight, Improvements to Safari, Messages, App Store, Notes, Photos, Maps, and New apps introduced in Mac Catalyst.
When Apple introduced the next Mac operating system and tweeted ‘the older Mac computer 2012 and 2013 will not get macOS Big Sur updates’. So, the older Mac has dropped from the compatible list and it can’t support macOS Big Sur. However, you can install macOS Big Sur on Unsupported Mac devices. and you can download and install macOS Big Sur on your Mac.
So, the below lists can support macOS 11 Big Sur and they will get the new updates and can install macOS 11. Therefore, if you have the below Mac computer then you can get macOS 11 experience by creating macOS 11 Big Sur bootable USB.
- MacBook 2015 and later
- MacBook Air and Pro Late 2013 and later
- Mac mini 2014 and later
- iMac 2014 and later
- iMac Pro 2017 and later (all models)
- Mac Pro 2013 and later
The older Mac computers like Macbook 2012, Mac Mini 2012, iMac 2012, and 2013 can not support macOS Big Sur. But, you can follow the article above.
How to Create macOS Big Sur Bootable USB on Windows
To create a macOS 11 Big Sur USB Installer, you need a few required files to complete the process. So, the below files are important and you have to prepare them. However, the macOS Big Sur developer beta is available and without developers, no one can download it. But, you can download macOS 11 Big Sur from the below link.
Require Files
- macOS Big Sur installer file
- At least 16GB USB Drive
- Download TransMac Or Download UUByte DMG Editor
Create macOS 11 Big Sur Bootable USB Installer Using UUByte DMG Editor
The best method to create a macOS Big Sur USB installer is using UUByte DMG Editor. It is super easy to use and has a modern user interface. After downloading the macOS Big Sur DMG file, then it is only four clicks away to make a bootable macOS Big Sur USB within a few minutes.
- Download and install UUByte DMG Editor on your Windows PC.
- Insert a USB drive or DVD disc into the PC.
- Launch the app from the desktop shortcut and click the ‘Burn’ tab at the welcome window.
- Now, import the macOS Big Sur DMG file into the software by clicking the ‘Browse’ button.
- Select the USB or DVD drive name and click the ‘Burn’ button to start burning the dmg file to the target device.
- Wait about 10 minutes and a bootable macOS Big Sur installer USB is ready!
The above process is much easier than any other method. In addition, you can also make bootable USB from other types of image files, such as .iso, .img, .bin, .zip, etc.. So, it is a powerful image file burning utility.
Create macOS 11 Big Sur Bootable USB Installer Using TransMac
TransMac is another premium software that can help you create a bootable macOS USB installer on Windows. Though it is not free, But, you will have a 15-days trial. Between 15-days, you can easily create multiple time macOS bootable USB on Windows. However, TransMac is an application for Windows users for file management to read, write, and format Mac disks in your PC. This application allows you to open Mac-formatted devices and drives on your Windows.
Most of Windows users are using TransMac for creating a macOS bootable USB installer. Creating a bootable USB using TransMac is the easy way on Windows. Therefore, download the TransMac on your Windows and follow the installation steps.
Install TransMac on Windows
- Go to the Download folder and find the TransMac installer file that you downloaded earlier.
- Double-Click the TransMac installer file.
- Now, you will see the TransMac welcome page. Here, click the Next
- Kindly read the following important information before moving on. After that, check the ‘I accept the agreement’ and click the Next
- Where you are going to install TransMac, So, select the destination folder and click the Next
- On select start menu folder, click Next
- Click
- Finally, click the Install button to install the TransMac on your Windows.
- Once the installation is completed then click the Finish
Open TransMac as Administrator
Once you installed TransMac on your Windows then connect the USB drive you are going to use it for macOS 11 Bootable USB. After that, launch TransMac as an administrator and follow the below steps.
- Now, right-click the USB drive from the left side of the page. After that, tap on ‘Restore with disk image‘.
- You will get a warning pop-up menu, click Ok.
- After that, browse the macOS 11 Big Sur dmg file using the three-dot option. Make sure you have selected the macOS Big Sur dmg file. Then, click the Ok button.
- You will see another warning pop-up menu that said ‘This is a compressed dmg, it will be decompressed on the fly’. Simply, click Yes.
- Now the TransMac will start making a bootable USB for macOS Big Sur. The process will take time and don’t do anything simply to be patient.
Read Next:
- How to create a bootable USB for macOS Catalina on Windows
- Create macOS High Sierra Bootable USB on Windows
- How to Create a bootable USB from Android
- Create macOS Mojave bootable USB Installer on Windows
Conclusion
As you created macOS Big Sur bootable USB on your Windows. Therefore, you can install macOS Big Sur on Mac and virtual machines using the macOS 11 USB Installer. It will help you to have a clean macOS Big Sur installation.
The method that shown in this article will work with all types of macOS Big Sur version. Till now, the macOS Big Sur developer beta is available. But, once the public beta or final version will release then using this method you can create macOS Big Sur bootable USB on your Windows.
Уровень сложностиПростой
Время на прочтение3 мин
Количество просмотров80K
Описываю свой рабочий опыт установки macOS на старенький macbook, так как другие способы описанные в интернете не дали результатов, либо привели к новым ошибкам.
Для начала скачиваем дистрибутив в формате *.dmg. Сделать это можно из App Store со второго macbook, либо с торрент (важно чтобы это была чистая копия из App Store).
Берем флешку на 8Гб и более, вставляем в компьютер с Windows, нажимаем Win+R, пишем cmd.
Запускается консоль и в ней уже пишем diskpart потом list disk, на экран выводиться список дисков windows, теперь важно не перепутать диски и выбрать именно диск с флешкой. Пишем select disk (номер флешки):

Теперь нам нужно преобразовать загрузочную область в формат GPT, набираем по очереди команды:
clean, convert GPT, create partition primary, exit.
C сайта https://www.acutesystems.com/ скачиваем программу TransMac, она платная, но работает 15 дней которых должно хватить. Запускаем, выбираем наш флеш накопитель, сначала выбираем пункт Format Disk fo Mac. И после завершения процесса выбираем Restore with Disk Image где нам нужно будет указать наш дистрибутив с macOS в формате *.dmg.

Все флешка готова, но загрузиться с нее не выйдет. Если загрузить мак удерживая клавишу alt, слоты загрузки будут пустые. Поэтому загружаем Recovery system удерживая клавиши cmd+R (нажимать нужно сразу после кнопки включения до появления яблока или земного шара).
Тут нам понадобиться дисковая утилита, запускаем ее, смотрим что флешка определилась и далее нам нужно отформатировать основной диск (Тут я подразумеваю что все ваши нужные файлы лежат в облаке, важных файлов на самом маке нет, так как после форматирования все файлы будут УТЕРЯНЫ).
Нажимаем в меню пункт вид-показывать все устройства. Выбираем APPLE SSD, нажимаем кнопку стереть. Вводим имя, Mac OS Extended, Схема разделов GUID.

Ну а теперь можно и загрузочную флешку сделать. Выходим из дисковой утилиты и в меню выбираем пункт Утилиты-Терминал. Пишем команду df -h и смотрим что в файловой системе есть флеш накопитель с названием который был в дисковой утилите (у меня это /Volumes/Install macOS Mojave) после этого копируем дистрибутив на жесткий диск командой
cp -R "/Volumes/Install macOS Mojave/Install macOS Mojave.app" "/Volumes/Macintosh HD"
После копирования закрываем терминал cmd+Q. Выбираем флешку и форматируем также как форматировали жесткий диск (Имя: USB, Mac OS Extended, Схема разделов GUID.).
Теперь запускаем терминал и создаем загрузочный образ:
"/Volumes/Macintosh HD/Install macOS Mojave.app/Contents/Resources/createinstallmedia" --volume /Volumes/USB
Соглашаемся, вводим y и возможно потребуется пароль от системы.
Теперь можно перезагрузить мак с зажатой клавишей alt и в пункте загрузки мы увидим картинку Install macOS Mojave. Теперь можно нажать пункт Установить macOS.
Если в процессе установки вылетела ошибка “Экземпляр программы установка macOS Mojave поврежден и не может быть использован.”
Нужно найти в интернете дату выпуска дистрибутива, отключить WiFi, запустить терминал ввести команду установки даты date: месяц-число-время-год в формате ммддччммгггг
Например, 12 декабря 10:00 2017 будет выглядеть так:
date 120110002017
Если не помогло, перезагружаем, отключаем интернет, ставим дату и после этого только запускаем установку.
После этого устанавливаем mac OS как обычно.
P.S.1: Чтобы восстановить флешку для пользования под Windows скачиваем программу SD Memory Card Formatter for Windows с сайта https://www.sdcard.org/ так как в проводнике вряд ли получиться отформатировать.
P.S.2: У других дистрибутивов названия путей будут другие, так что смотрите по возможности название папок например командой ls в терминале.
парпар