
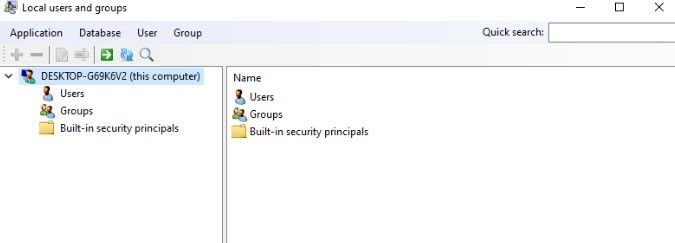
Local user and group management (lusrmgr.msc) is a console for managing local users and groups in Windows. It is a universal console and has been used in all versions of Windows since Windows 2000 including Windows XP, Windows Vista, Windows 7, Windows 8 and now Windows 10.
The basic purpose of local user management is to assign rights to different users and groups on a computer. For example, the default roles include administrator, power user, standard user, guests, etc.
You can open local users and group management console by going to Run –> lusrmgr.msc.
But when you run this command in Windows 10 Home edition, you will get the following message:
This snapin may not be used with this edition of Windows 10. To manage user accounts for this computer, use the User Accounts tool in the Control Panel.
 Console in Windows 10 Home 1")
The problem with the user accounts tool from the control panel is that it does not give a lot of options regarding user rights control. Lusrmgr is always easier to use and historically, administrators have used the console for user management.
In this article, we will discuss how to enable lusrmgr in Windows 10 Home and also how to manage users from the command-line.
Enable Lusrmgr in Windows 10 Home
It is not possible to use the built-in local user and group management tool in Windows 10 Home but we can use a third-party tool which is very similar to the built-in tool and it has the same functionality.
- Go to the lusrmgr download page. Download lusrmgr.exe.
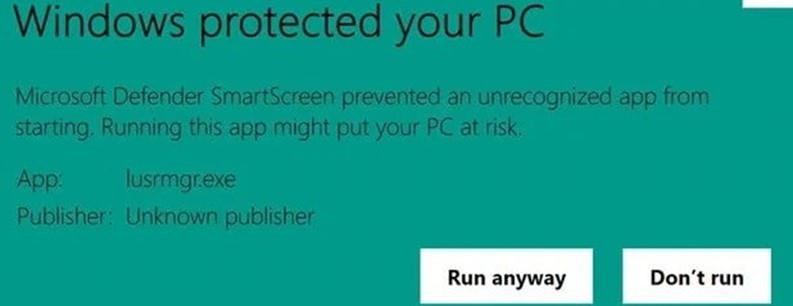
- Run the downloaded executable. Since the executable is not digitally signed, you may encounter a Microsoft Defender SmartScreen prompt. Click on More info and then on Run anyway.
 Console in Windows 10 Home 2")
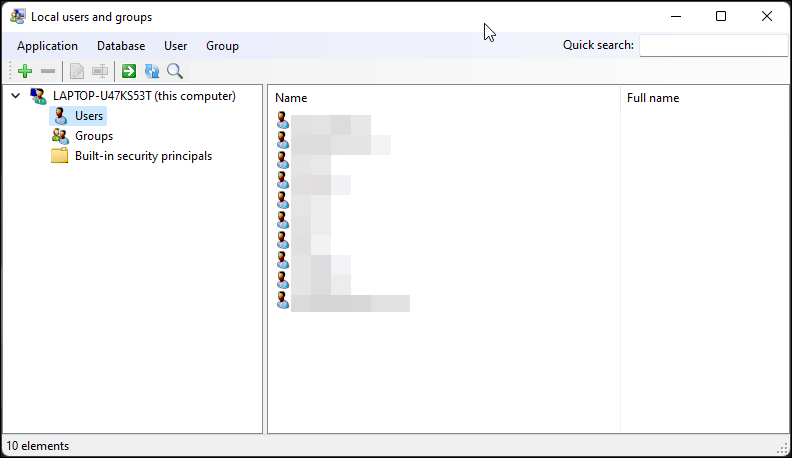
- You will get the following screen which is very similar to the built-in lusrmgr tool:
 Console in Windows 10 Home 3")
 Console in Windows 10 Home 2")
 Console in Windows 10 Home 3")
You can create new users and groups and change the existing users and groups easily using this app.
Lusrmgr is a portable app that can be run on any edition of Windows 10 including Windows 10 Home. Please note that the lusrmgr program requires administrative privileges and .NET framework 4.5 or higher to function correctly.
You can configure the following settings for a single user:
Password settings include changing or resetting Windows passwords, restricting password changes and password changes at the next logon, and storing passwords using reversible encryption and logins without passwords.
 Console in Windows 10 Home 4")
You can also configure the logon times of the user, account expiration and also define a logon script path and the home folder.
 Console in Windows 10 Home 5")
You can also add or remove a user from a specific group.
 Console in Windows 10 Home 6")
One interesting feature of lusrmgr is that it can also connect to remote computers for managing their local users and groups. To do this, go to Database –> Connect to computer or simply press Ctrl + C shortcut key.
Please note that remote computers are required to allow remote connections otherwise this utility will not be able to connect successfully.
 Console in Windows 10 Home 7")
Once you have made the changes in the user or group rights, you can easily verify if the new changes are in effect using the command-line.
For example, I added the user itechtics in Hyper-V administrators group using lusrmgr executable discussed above. To verify if the user has been added to the group, I’ll run the following commands:
net localgroup "hyper-v administrators"
This will show a list of users in the group.
 Console in Windows 10 Home 8")
Overall, lusrmgr.exe is a nifty portable tool that fills in the gap of user management for home users without getting into a lot of complexities.
What is your experience with the tool? Please share your experience with us in the comments below.
Also check out the following articles related to Windows 10 Home:
How to enable the group policy editor in Windows 10 Home
How to enable Hyper-V in Windows 10 Home
We often want to limit other users’ abilities by adding or removing the user from being members of groups on our PC. Like you can set different rights and permissions for different groups. And for this, the Local User and Group Management tool or lusrmgr.msc is responsible. But unfortunately, it doesn’t really come with the Windows Home version. So the question is, how to enable the Local User and Groups in Windows 11/10 Home?

What is the Local User and Group Management tool?
Talking about lusrmgr.msc, it is a console for managing local users and groups. It has been in the Windows ecosystem since Windows 2000. But with the Windows 11/10 Home version, the feature doesn’t exist. As a result, you cannot assign rights to different users and groups.
But in this article, I will be sharing a step-by-step guide on how you can get rid of the local users and groups access is denied error or find an alternative.
Unfortunately, it is impossible to use the built-in or the official local user and group management tool in Windows 10 Home. But luckily, there is a third-party tool called lusrmgr.com.You can use it to assign rights to groups and users.

Talking about the program, Lusrmgr is a portable app that can run on any edition of Windows 11 and Windows 10, including the Home version. However, it requires administrative privileges and the .NET framework 4.5 or higher to function correctly.
Follow the steps to download and use the lusrmgr.msc alternative:
- At first, download the lusrmgr.exe file from this Github page.
- Once downloaded, double-click on the program to run it. You may also encounter a Microsoft Defender SmartScreen prompt. Click on More info and then on Run anyway.
- After launching the program, you should see a screen similar to the built-in lusrmgr tool.
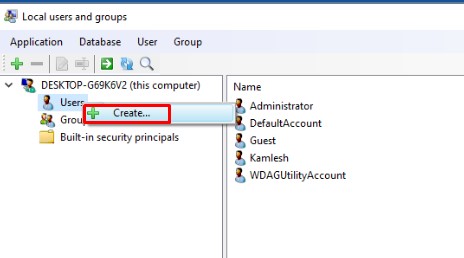
- Now under the Local users and group consoles, you can easily create and manage users and groups.

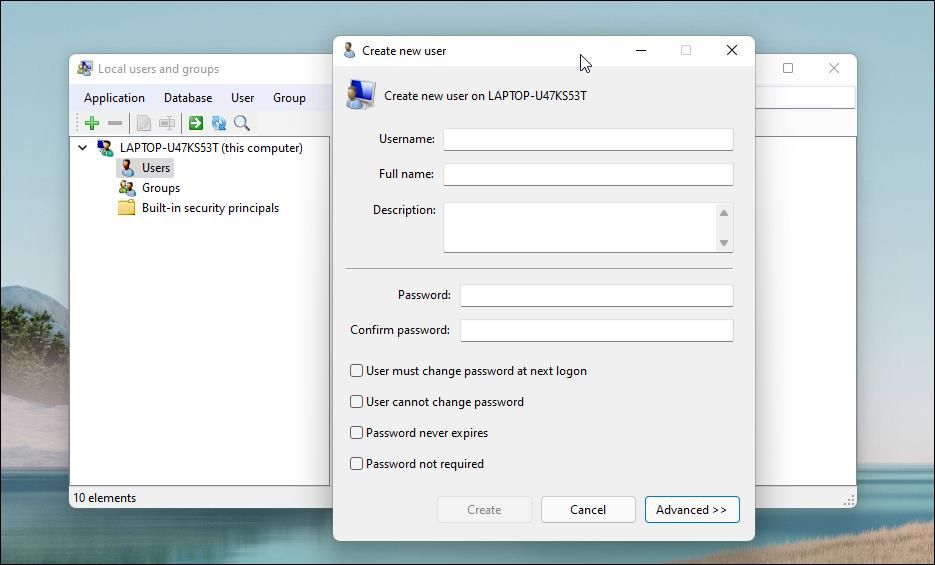
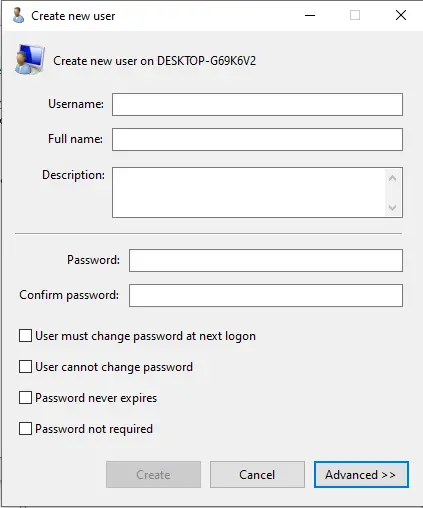
- To create a user, right-click on the Users menu and select create. On the create new user window, fill in all the details of a new user and click on the create button.

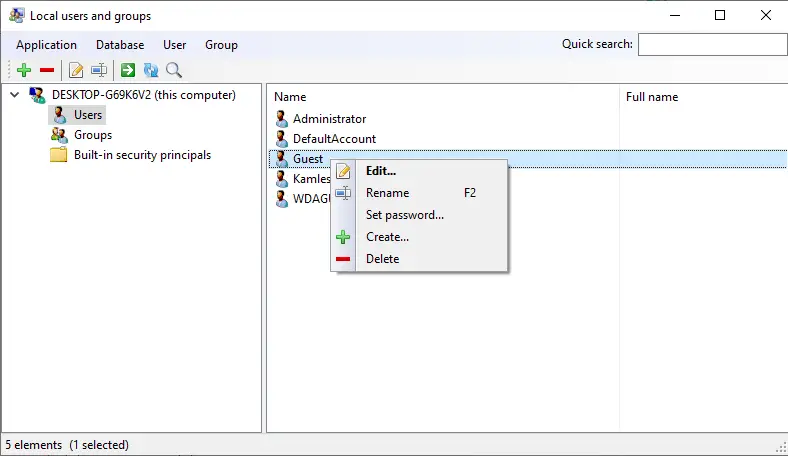
- Also, to manage an account already created under your Windows 11/10, you have to select and right-click on the account. After that, you will find options to rename it, set a password, delete or edit the account.

Moreover, with the help of this program, you will be able to connect to a remote computer if a remote computer allows the remote connection. You have to right-click on your computer’s entry and select connect to a computer to access this feature.
Why is Gpedit not available for Windows 11/10 Home?
Windows 10 Home was made for home or personal use. As a result, there are lots of advanced features are missing from it. Among them, one is the Group Policy feature. Also, as there is no Group Policy Feature by default, Gpedit is not available.
How to Enable gpedit.msc in Windows Home version?
Similar to this tool, Group Policy Editor is not available for the Windows Home version. However, you can enable gpedit.msc by following this simple guide.
I cannot access GPEDIT.MSC in Windows?
At first, ensure that your computer is running on the latest version of Windows. Then to access Group Policy Editor, make sure you are using a profile with Admin rights. If your computer is on a domain, you must contact your Administrator.
To go to Group Policy Editor, press Windows + R, type “gpedit.msc” and press enter. If you cannot access Group Policy Editor, create a new user with admin rights and follow the same steps.
How Do I Enable Lusrmgr MSC in Windows 11/10 Home?
There is no way to enable Lusrmgr MSC by default in Windows 10 home. Instead, you have to download the lusrmgr.exe file, a third-party program to manage users and groups.
So that was a quick answer to your how to enable local users and groups in Windows 11/10 Home. I hope the above guide has helped you with your query. Also, in case if there is anything else you would want to ask, then feel free to drop a comment below.
Nayan is a crypto and gadget enthusiast who likes to cover topics related to Tech, Startups, Crypto, Gaming, Windows, and other interesting areas. But when he is not working, you can find him playing games or watch random videos on YouTube.
Quick Links
-
Enable the Local Users and Groups Management Console in Windows 11/10 Home
-
Manage Local Users and Groups Using the Command Prompt
Summary
- Local Users and Groups Management is not available in Windows 11/10 Home editions. You need a third-party program to access it.
- You can use Lusrmgr.exe, a portable third-party alternative, to enable the Microsoft Management Console snap-in in Windows 11 Home. The Lusrmgr application provides additional features like account search and defining access times.
- The Command Prompt can also be used to manage users and groups without a third-party utility.
Local Users and Groups Management is a shell application to manage local and remote computers and access system administrator tools. However, Local Users and Groups Management is unavailable in the Windows 11/10 Home editions, so you must rely on a third-party program to use it there.
Enable the Local Users and Groups Management Console in Windows 11/10 Home
Like the Local Group Policy Editor, Local Users and Groups Management (lusrmgr.msc) is an advanced feature available only on Windows Pro, Education, and Enterprise.
However, while you can use workarounds to enable Group Policy Editor on Windows Home, it is not possible to enable the Local Users and Groups Management snap-in console.
Instead, you can use Lusrmgr.exe, a third-party alternative, to enable the Microsoft Management Console snap-in in Windows 11 Home. Lusrmgr.exe is similar to the built-in Local Users and Groups Management console. It is a portable application, and you can download it from GitHub for free.
Here’s how to download and use the Local User and Group Management tool on Windows 11 Home. Follow the same steps on a Windows 10 PC:
- Open the lusrmgr GitHub page.
- On the default Code tab, scroll down to the Download link to get the latest version of the file.
- Once downloaded, double-click the lusrmgr.exe file to run the program.
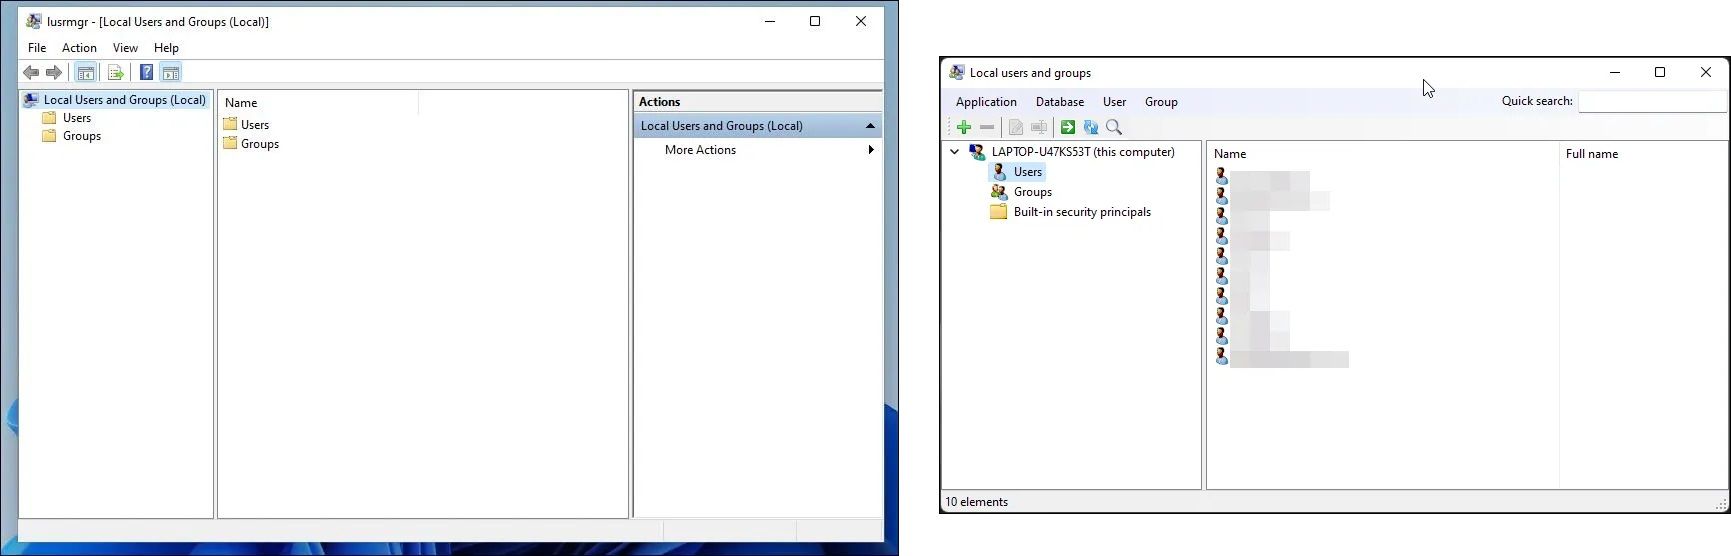
You will notice the lusrmgr application looks similar to opening the native Local Users and Groups Management console. However, the difference lies in the usability of the tool. Below are side-by-side images for the built-in lusrmgr console (left) and the third-party application (right) for reference.
To create a new user account with this Local User and Group Management tool:
- Right-click on User and select Create. Then fill in the details for the new user account.
-
Click the Advanced button to configure the advanced account option, local path, and profile path.

- Click on Create to add the new user account.
Similarly, you can edit, remove, rename, or add a password to the existing user account. You can also enable the secret built-in administrator account using the tool.
Additional Features of the Lusrmgr App
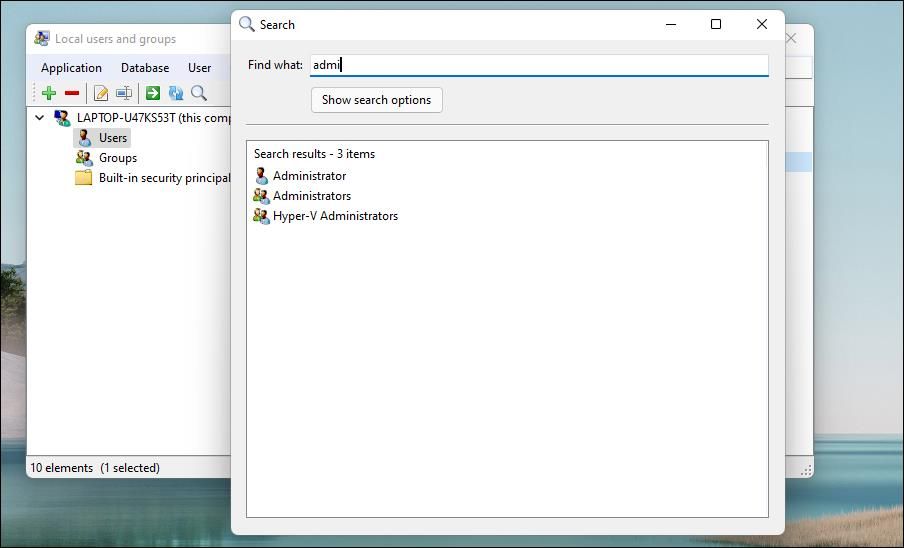
Apart from the usual account management features, lusrmgr.exe provides additional functions not available in the native utility. For example, you can use the search function to find a specific account. This is useful for system administrators who manage multiple user accounts in an organization.
Another handy feature is the ability to define access times for individual accounts. To set an access time, right-click on the username and select Edit. Next, open the Account tab and click on Define access time.
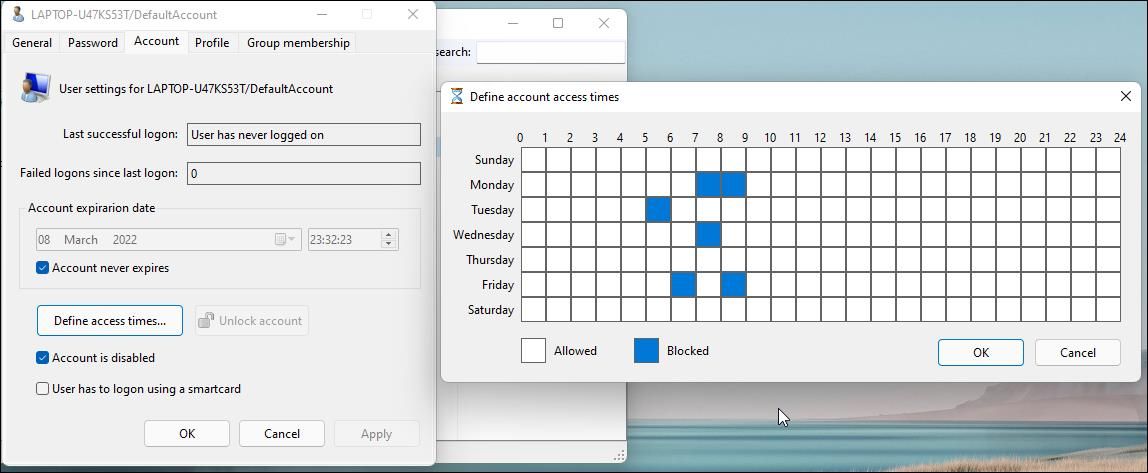
By default, the user accounts have no limit on access time. But you can define this by selecting a time block for different days.
Since lusrmgr is a portable app, you can’t open it with the lusrmgr.msc command like the built-in app. To launch the program, double-click the executable file you downloaded and make the necessary changes to the user account or groups.
2. Manage Local Users and Groups Using the Command Prompt
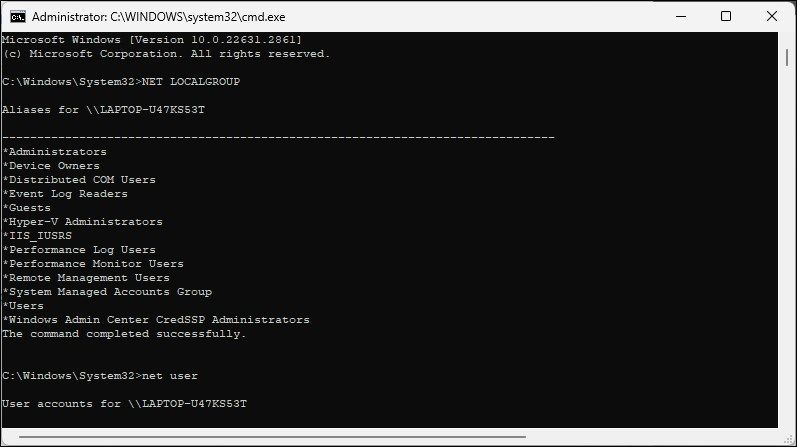
You can use the «net localgroup» or «net user» command-line utility to manage users and groups on Windows 11/10. It’s a handy way to view, add, and delete local groups and users without using a third-party utility.
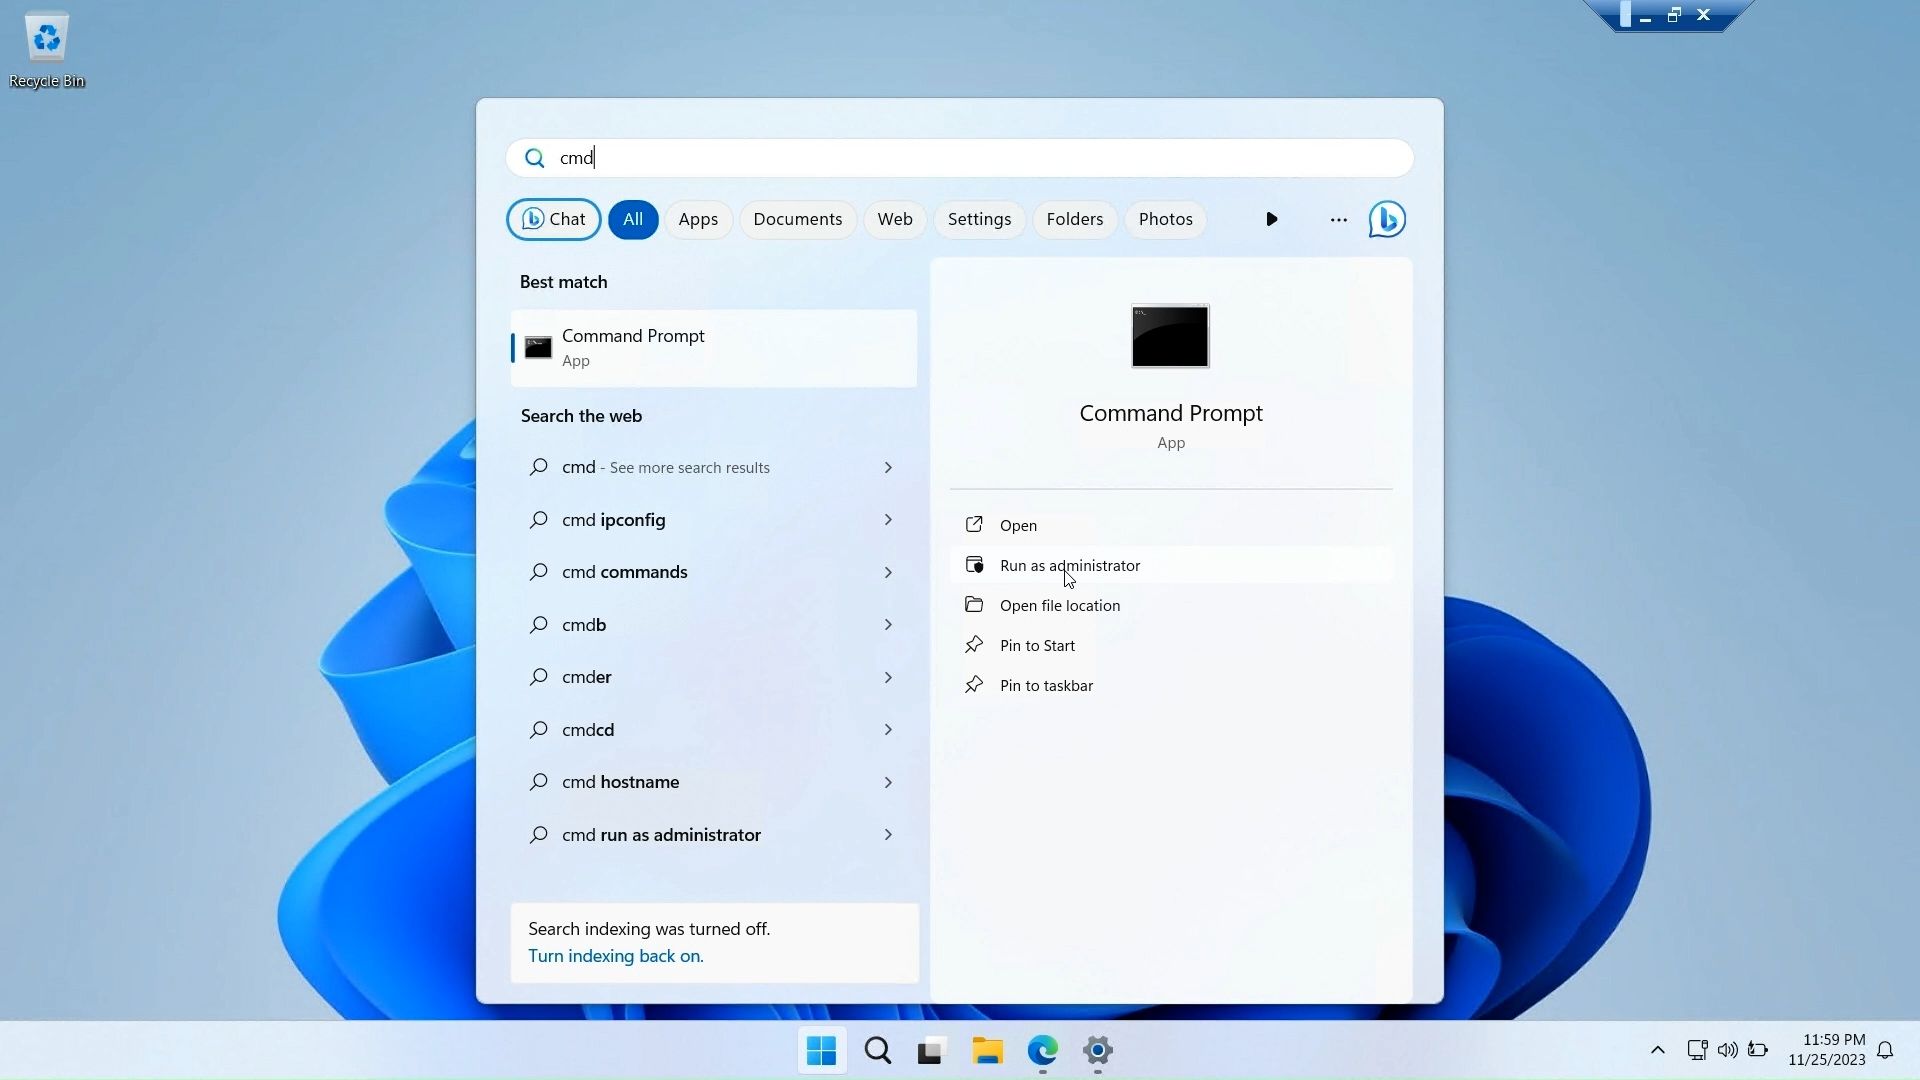
First, open a Command Prompt window with administrative privilege. To do this, press the Windows key, type cmd, right-click on Command Prompt, and select Run as administrator.
Below is a list of commands to view and manage local users and groups using the Command Prompt:
-
To view the name of the server and local groups on the computer, type:
net localgroup -
To view all users in a group, enter:
net localgroup [groupname] -
To create a new group, use the following command. Replace xyz with the group name you want to create:
net localgroup xyz /add -
To view all user accounts:
net user -
To create a new user account (replace abc with the username you want to add):
net user abc /add -
To view all the accounts with administrator privileges:
net localgroup administrator -
To add a user account to the administrator group (be sure to change abc, and Administrator to the group name if needed):
net localgroup Administrator abc /add -
To delete a local group:
net localgroup xyz /delete -
To delete a local user:
net user abc /delete -
If you need help with syntax for a specific command, use this:
net help <command>
The Local Users and Groups Management console is a handy utility for system administrators to manage local computers and connect remotely to compatible systems. However, if you are running Windows 11 Home and need to use the lusrmgr.msc tool, your only option is to use the third-party application from GitHub.
The console known as Local User and Group Management (lusrmgr.msc) is utilized for managing local users and groups on a Windows computer. This console is universally available across all versions of Windows, ranging from Windows 2000 to the current Windows 11. Its primary purpose is to assign privileges to different users and groups, including the administrator, power user, standard user, and guest roles. To access the local users and group management console, simply execute the lusrmgr.msc command.
However, it is worth noting that this command is not functional in Windows 11/10 Home Edition. Instead, attempting to run the lusrmgr.msc command in these versions will trigger the message: “This snap-in may not be used with this edition of Windows 11/10. To manage user accounts for this computer, use the User Accounts tool in the Control Panel.”
Fortunately, this article will provide instructions on how to activate lusrmgr in Windows 11/10 Home edition and efficiently manage users.
How To Enable Local User and Group Management (Lusrmgr.msc) Console in Windows 11/10 Home Edition?
If you are using Windows 11/10 Home, it is not feasible to use the pre-installed local user and group management console tool without the aid of a third-party tool. However, a suitable substitute can be found with comparable features to the original tool. Follow these instructions to activate and operate the Local User and Group Management (Lusrmgr.msc) Console in Windows 11/10 Home:-
Step 1. Download the lusrmgr executable file from Github.
Step 2. Run the downloaded file on your Windows 11/10 Home.
Step 3. It will get the following screen, which is very similar to the built-in lusrmgr tool:-
Step 4. Under the Local Users and Groups console, you can create and manage users and groups. To create a user, right-click on the Users and select Create in the menu.
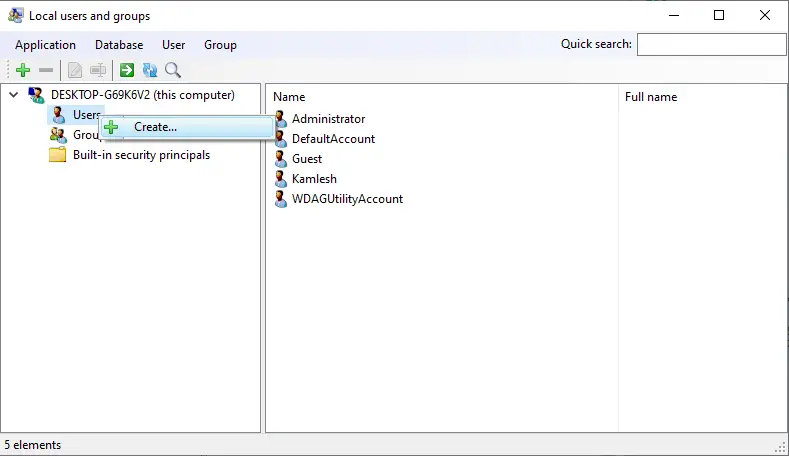
Step 5. The “Create new user” window will open. Fill in the details of a new user you want to create under Windows 11/10 and click the Create button.
Step 6. To manage an account already created under your Windows 11/10, select and right-click on an account. You can rename, set a password, and delete or edit the account.
One of the interesting features of this tool is that it lets you connect to a remote computer if a remote computer allows the remote connection. To access it, right-click on the entry of your computer and select “Connect to computer.”

Conclusion
In conclusion, the Local User and Group Management (lusrmgr.msc) console is a useful tool for managing local users and groups on a Windows computer. Although it is not functional in Windows 11/10 Home Edition, a suitable substitute can be found by downloading the lusrmgr executable file from Github. This article provides step-by-step instructions on how to activate and operate the Local User and Group Management Console in Windows 11/10 Home, allowing users to create and manage users and groups, rename, set passwords, and delete or edit accounts. It is a valuable tool that can aid in efficiently managing user accounts on a Windows computer.
Also Read:
- How to Enable Windows Sandbox Feature in Windows 10 Home Edition?
- How to Enable Group Policy Editor (gpedit.msc) on Windows 11/10 Home Edition?
- How to Open Local Users and Groups MMC Snap-in in Windows 11 or 10?
The windows 10 User Accounts and Settings app under the Control Panel (CP) can allow you to edit user accounts. But with the snap-in console’s Local Users and Groups management feature, you gain access to more details such as the permissions granted to groups and users on your personal computer.
Local User and Group Management (LUSRMGR.MSC) is a tool that supports managing local computer user accounts and groups. The tool can delete, add, or edit local user groups and accounts on a PC, including adding and removing users from local groups. It can also change the attributes of user accounts, such as login scripts, password policies, and home directories.
However, the LUSRMGR.MSC tool isn’t available under the “Administrative Tools” menu on most Windows 10 and 11 Home computers. In this case, you can use a third-party program to enable the tool because it’s not activated by default.
You can also run LUSRMGR.MSC file to access Local Users and Groups Management or gain access using Computer Management Windows feature. In this article, you’ll learn how to enable LUSRMGR.MSC in Windows 10 and 11 computers, including how to view and manage all local users and groups on your PC.
Activating This Tool on Windows Home
Local Users and Groups Management resembles the Local Group Policy Editor function and is only available in Windows 11 Edu, Pro, and Enterprise OS editions. However, the built-in LUSRMGR.MSC snap-in isn’t available on the Home edition of Windows operating system.
LUSRMGR.MSC third-party tool, including features, resembles the built-in Windows user accounts and groups management tool. The portable application can run on any Windows 10 and 11 Home editions, making it ideal for enabling the built-in tool.
Available on GitHub, LUSRMGR.MSC download is free. However, you must assign LUSRMGR.MSC administrator privileges and set the .NET framework at 4.5 or higher for the tool to function properly. Enable LUSRMGR.MSC in Windows 11 or 10 is as follows:
1) Download an executable LUSRMGR.exe file.
2) Double-click on the downloaded file to run it. If you encounter a Microsoft Defender SmartScreen prompt, click on “More Info.”
3) Click on “Run Anyway.”
4) Launch the program, and a screen similar to that of the built-in LUSRMGR tool will appear as follows:
5) Create and manage user accounts and groups under the console.
Adding a New User
1) Click on the “Users” menu.
2) Select the option “Create” to create a new user.
3) Enter all the correct user account details and click on the “Create” button.

4) Configure the local path, advanced options, and profile, then click on the “Advanced” button.
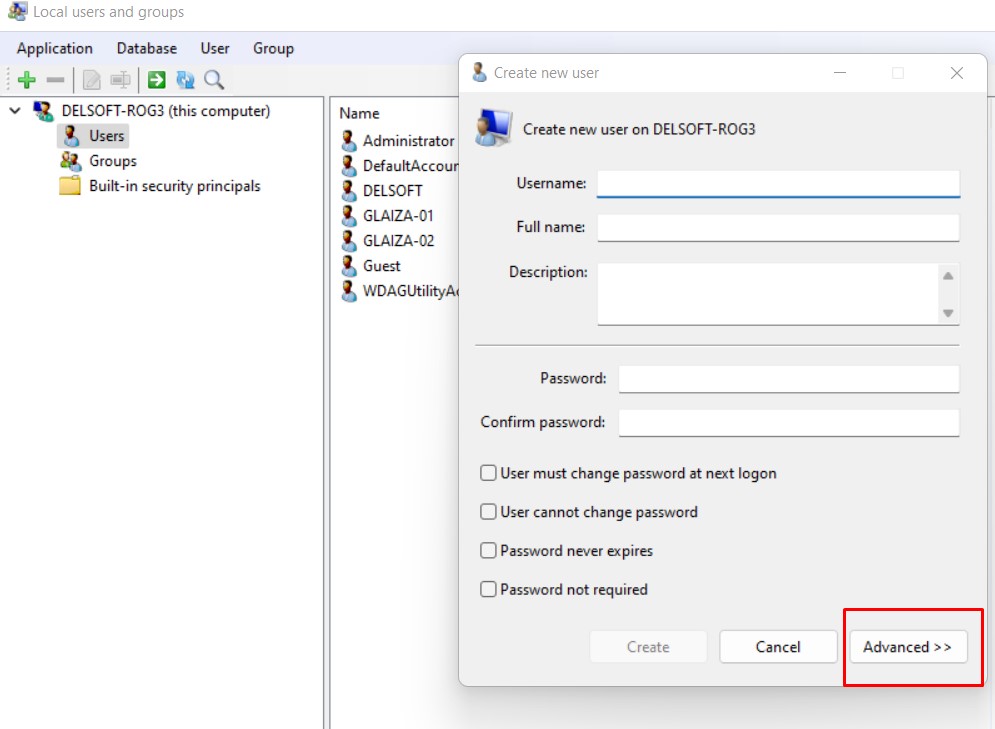
5) Click on the “Create” button to add the newly-created user account to your computer.
With the LUSRMGR tool, you can delete, edit, add, or rename an existing user account password. The tool also enables the creation of a hidden administrator account. It also allows remote connection to computers.
Other Available Functions
Apart from account management features, the LUSRMGR.MSC command line options offer other possibilities not available within the built-in utility. They include:
- Using the search function to find a particular user account. It enables system administrators to easily manage several user accounts.
- Defining individual user account access times or set blocked times for particular times and days. Right-click on an account’s username and select “Edit” to set its access time. Finally, click on the “Account” tab and select “Define access time.”
All user accounts lack a default time limit. Choose a time block for various days to define access time, if necessary.
Common Issues and Fixes
Some common errors linked to the local user accounts and groups include:
- Lusrmgr. Application error.
- Lusrmgr – bad image.
- Lusrmgr could not be installed.
- Lusrmgr could not be started.
- Lusrmgr could not be found.
- Lusrmgr failed to initialize properly.
- Lusrmgr could not be launched. Class not registered.
- Lusrmgr is not running.
- Lusrmgr has encountered a problem and need to close. We are sorry for the inconvenience.
- Lusrmgr is not a valid Win32 application.
- Error starting program: lusrmgr.msc
- The file lusrmgr.msc is missing or corrupt.
- Cannot find lusrmgr.msc.
- Windows failed to start – lusrmgr.msc.
- Faulting application path: lusrmgr.msc.
Solution 1: Troubleshooting Steps
Restore Your Computer to the Last Backup Image or Restore Point Prior to the Error
You can restore your Windows XP, Vista, 8, 7, 10, and 11 as follows:
1) Click on the “Start” button and type “System Restore” on the search box, then hit the “Enter” key.
2) Find “System Restore” in the search results and click on it.
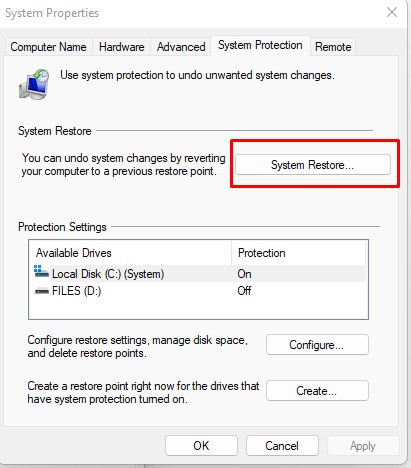
3) Enter your administrator password if prompted.
4) Follow the System Restore window prompts to select a relevant point of restoration.
5) Restore your PC to that restore point or backup image.
Solution 2: Perform a System Update
An outdated Windows operating system is also linked to most lusrmgr.msc errors. Conduct an update as follows:
1) Click on the “Start” button and type “Update” in the search box, and hit the “Enter” key.
2) Click on “Check for Updates” on the Windows Update wizard.
3) Download available updates and click on “Install Updates.”
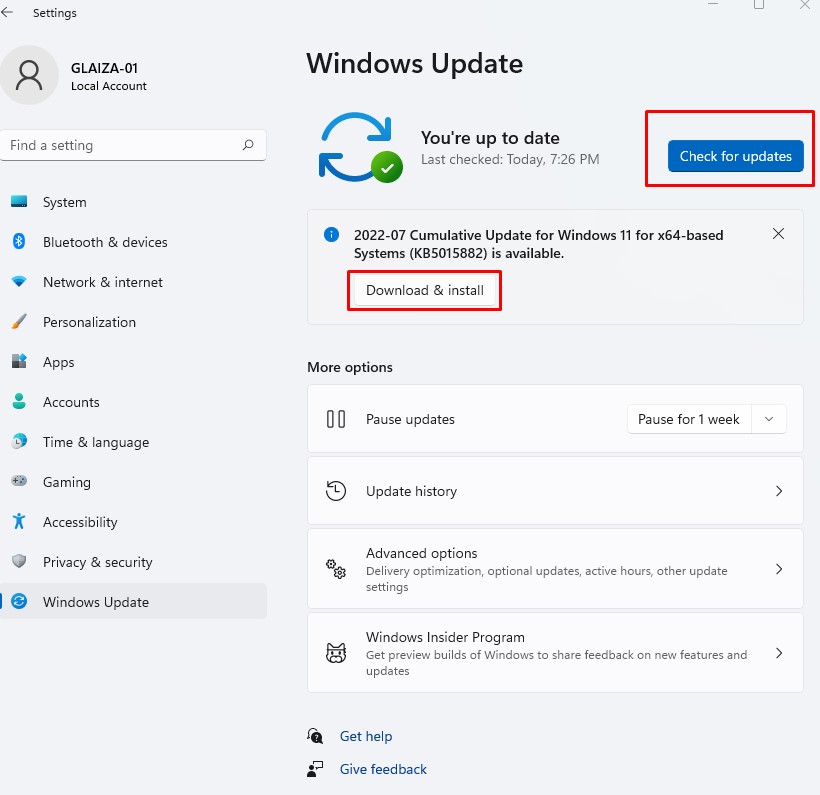
4) Restart your computer once all update downloads and installations are complete.
Final Notes
The local users and groups management tool enable easy control of local users and groups on your computer. The program allows for the addition, deletion, or modification of user accounts and groups. In addition, you can easily download the portable LUSRMGR.MSC application to enable the built-in feature on Windows 10 and 11.
Run Windows Update or restore your PC to the last restore point to fix most LUSRMGR.MSC errors, such as application error and could not be found or started. We hope that you found this helpful article and you were able to enable your local user and group management Windows feature.