Если сбои системы, синие экраны BSoD или иные проблемы при работе Windows 10, 8.1 или Windows 7 наводят вас на мысли о том, что имеются какие-либо проблемы с оперативной памятью компьютера, может иметь смысл выполнить её проверку, а начать можно со встроенного средства диагностики проверки памяти Windows.
В этой инструкции подробно о способах запустить средство проверки памяти средствами Windows, причём даже в тех случаях, когда вход в систему невозможен, а также о возможных вариантах действий в случае, если в результате теста средство диагностики памяти сообщает о том, что были обнаружены проблемы оборудования. На схожую тему: Устранение неполадок Windows 10.
- Способы запуска средства проверки памяти
- Использование средства и просмотр результатов
- Обнаружены проблемы оборудования в средстве диагностики памяти
- Видео инструкция
Как запустить средство проверки памяти в Windows 10 и предыдущих версиях системы
В случае, если операционная система запускается, вход в неё и работа возможны, вы можете использовать один из следующих вариантов запуска средства проверки памяти:
- Найти нужный пункт в разделе «Средства администрирования Windows» меню «Пуск».
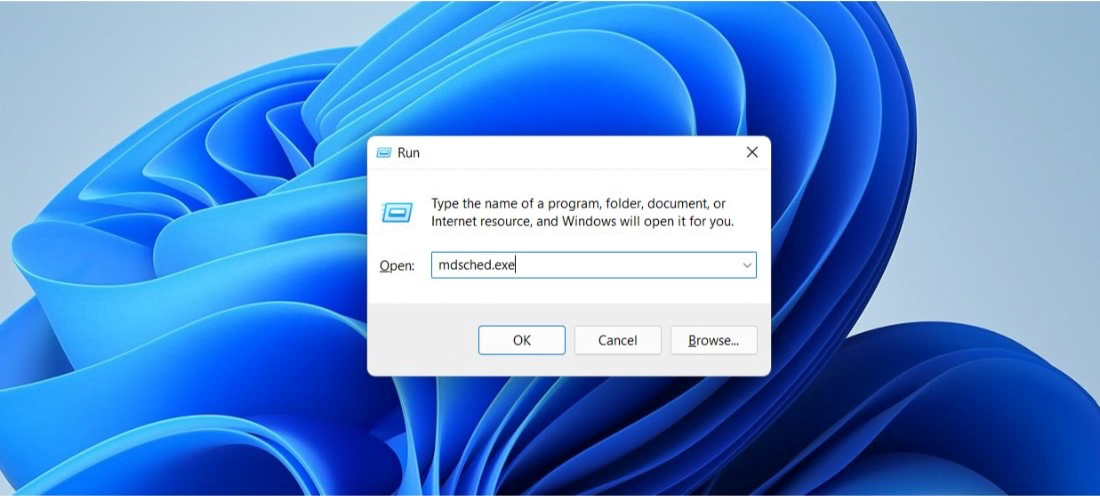
- Нажать клавиши Win+R на клавиатуре, ввести mdsched.exe и нажать Enter.

- Открыть панель управления, выбрать пункт «Администрирование» и запустить «Средство проверки памяти Windows».
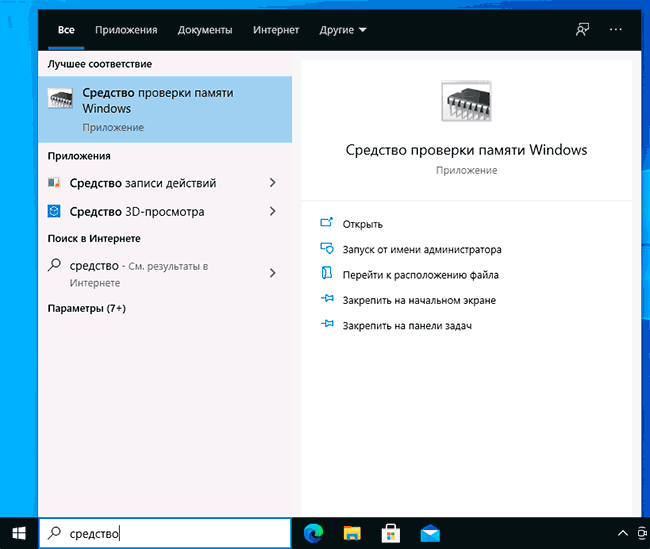
- Использовать поиск в панели задач Windows 10, начав вводить «Средство проверки памяти». Или встроенные средства поиска в предыдущих версиях ОС.

- Вручную запустить файл C:\Windows\System32\MdSched.exe

Если же ситуация осложняется тем, что Windows не запускается, вход в неё невозможен, либо сразу после него происходят сбои, можно использовать следующие способы запуска средства диагностики оперативной памяти:
- Загрузить компьютер или ноутбук с загрузочной флешки с Windows 10 или другой версией Windows, можно и с загрузочного диска. На экране программы установки нажать клавиши Shift+F10 (Shift+Fn+F10 на некоторых ноутбуках), ввести mdsexe в открывшейся командной строке и нажать Enter. После выбора в утилите проверки пункта «Выполнить перезагрузку и проверку», загружайте компьютер не с флешки, а с обычного загрузочного HDD или SSD.

- Средство проверки памяти можно запустить из среды восстановления Windows 10 — нажав кнопку «Дополнительные параметры» на синем экране с ошибкой или, находясь на экране блокировки Windows 10 (с выбором имени пользователя) нажать по изображенной справа внизу кнопке «Питания», а затем, удерживая Shift, нажать «Перезагрузка». В среде восстановления выбираем «Поиск и устранение неисправностей» — «Дополнительные параметры» — «Командная строка». А в ней, как и в предыдущем случае используем команду mdsched.exe.

- Если у вас есть подготовленный диск восстановления Windows, запуск можно осуществить, загрузившись с него.


Использование средства проверки памяти Windows и просмотр результатов

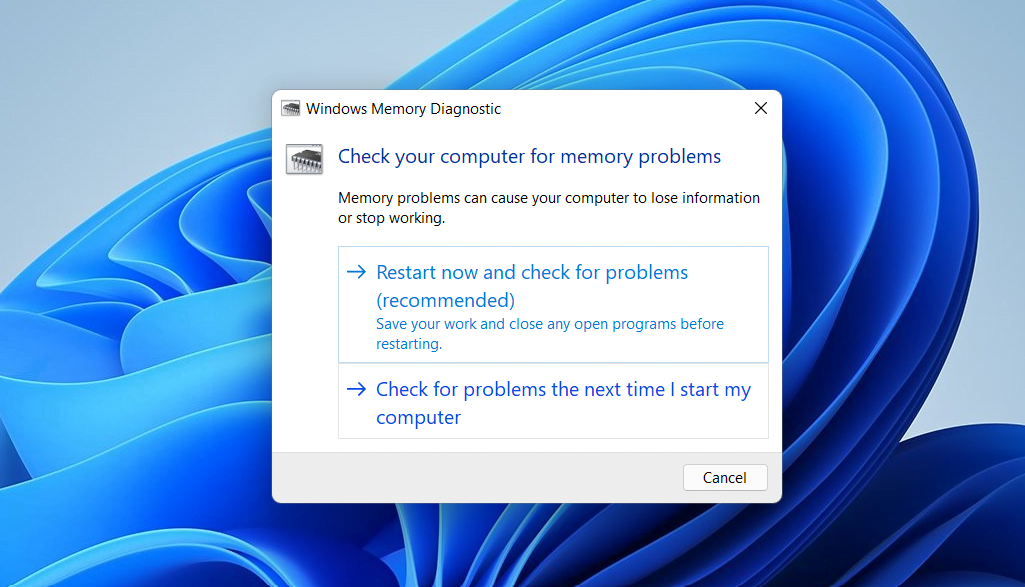
После запуска средства проверки памяти вам будет предложено перезагрузить компьютер, после согласия, процесс будет выглядеть следующим образом:
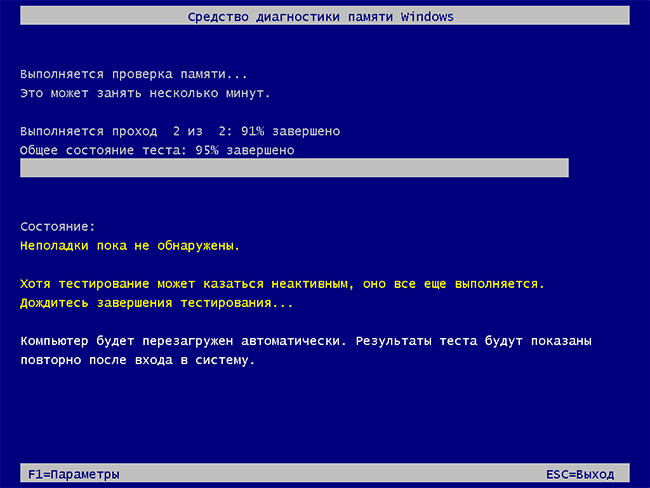
- Начнётся проверка оперативной памяти, которая может занять продолжительное время. Может показаться, что средство диагностики зависло: на всякий случай подождите в такой ситуации 5-10 минут. Если же действительно произошло зависание, не исключено что есть проблемы с оборудованием, вероятно — с оперативной памятью, но не обязательно.

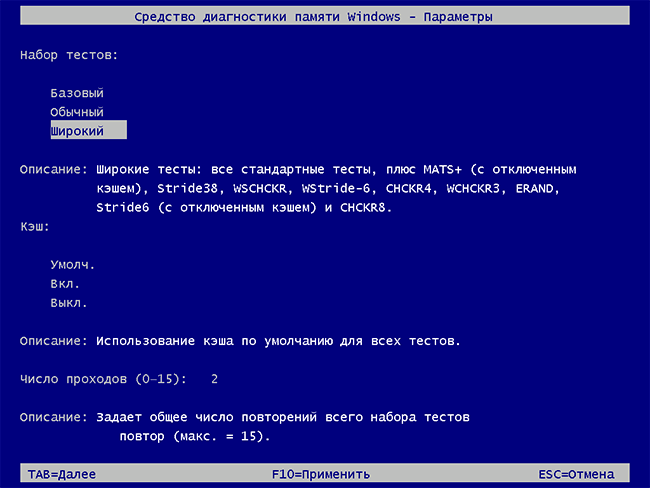
- Если в ходе проверки нажать клавишу F1 (или Fn+F1, если F1 не срабатывает), вы попадёте в настройки средства диагностики памяти Windows. Здесь можно выбрать набор тестов (по умолчанию — обычный), использование кэша, и число проходов. Переключение между разделами настроек выполняется клавишей Tab, изменение параметров — стрелками и вводом цифр (для числа проходов), применение параметров — клавишей F10. После изменения настроек тест перезапускается.
- В ходе проверки вы будете видеть информацию вида «Неполадки пока не обнаружены» или «Были обнаружены проблемы оборудования».
После завершения проверки компьютер будет автоматически перезагружен. Дальнейшие шаги — просмотр результатов.
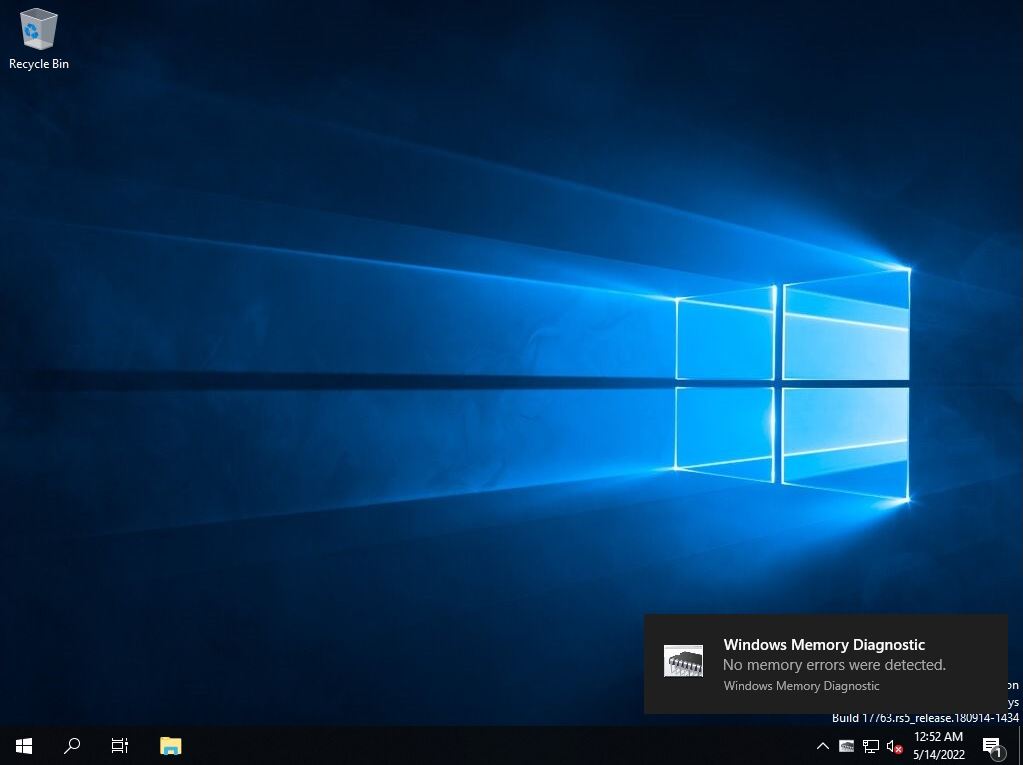
- После перезагрузки в случае Windows 10 вы можете увидеть уведомление в области уведомлений, сообщающее о результате проверки памяти. Но оно отображается не всегда.
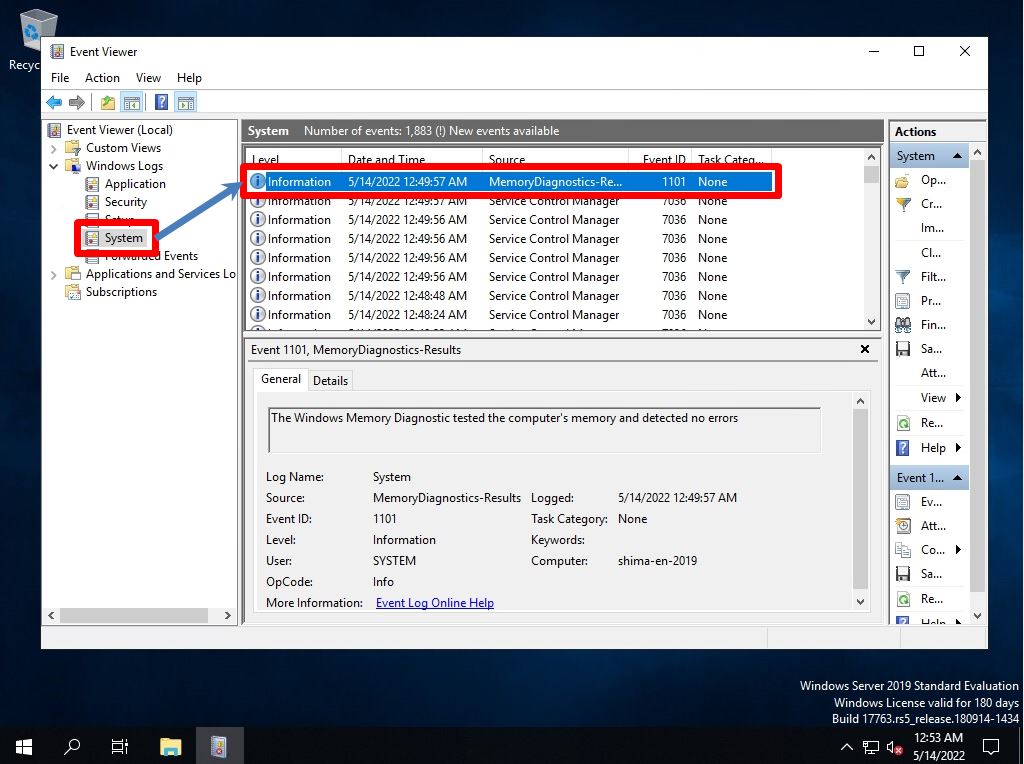
- Можно зайти в просмотр событий, для этого нажимаем Win+R, вводим eventvwr.msc и нажимаем Enter. Там открываем раздел «Журналы Windows» — «Система», находим пункты, где в столбце «Источник» указано MemoryDiagnostics-Results и просматриваем результаты.


Учитывайте, что ошибки, «вылеты», синие экраны и зависания не всегда связаны с проблемами оперативной памяти: если средство диагностики показывает, что всё в порядке, есть и иные возможные причины: отключенный файл подкачки, проблемы с HDD или SSD (или с их подключением, например — неисправный кабель), сторонние антивирусы или, наоборот, вредоносные программы, неправильная работа драйверов оборудования.
Что делать, если были обнаружены проблемы оборудования в средстве диагностики памяти
К сожалению, средство диагностики не сообщает о том, какие именно проблемы были обнаружены в ходе проверки, а лишь рекомендует обратиться к производителю оборудования. Что можно сделать:
- Отключить любые опции ускорения памяти (изменение частоты, таймингов и другие) при наличии соответствующих опций в БИОС или ПО производителя материнской платы или ноутбука.
- Попробовать проверить планки памяти по одной, в других слотах на материнской плате для того, чтобы выяснить, появляются ли проблемы только с одним конкретным модулем памяти или в одном конкретном разъеме.
- Использовать другие утилиты для проверки оперативной памяти при необходимости.
- Прочитать документацию к материнской плате ПК — возможно, это какая-то несовместимость с памятью с конкретными характеристиками (если вы недавно добавили новые модули памяти или только что самостоятельно собрали компьютер).
- Иногда может помочь обновление БИОС.
Видео инструкция
Если вы разобрались, чем была вызвана именно ваша проблема, буду благодарен комментарию к статье: возможно, для кого-то он окажется полезным.
- Описание
- Просмотр результатов
- Вывод
Привет. Данная заметка опишет предназначение одной системной утилиты, которая способна исправить некоторые проблемы оперативки (RAM). На заметку: оперативка это ОЗУ, жесткий диск/твердотельный накопитель (постоянная память) это ПЗУ.
mdsched — что это?
Коротко ответ: системный инструмент, позволяющий проверить оперативную память компьютера на наличие ошибок.
Появилась начиная с операционки OS Windows 7.
Использование:
- Зажмите клавиши Win + R, вставьте команду mdsched (или запустите ярлык Средство проверки памяти, расположенный в папке панели управления Администрирование).
- Теперь необходимо закрыть запущенные приложения, сохранить данные открытых документов.
- Выбираем выполнить перезарузку с последующей проверкой памяти.
Диалоговое окно запуска функции mdsched:

После перезагрузки запустится инструмент Средство диагностики памяти Windows:

Кнопка F1 позволяет получить доступ к другим режимам тестирования mdsched:

По умолчанию запускается ускоренный режим, при котором не всегда обнаруживаются проблемы. Режимы отличаются глубиной тестирования, длительностью:

При обнаружении проблем — они будут отображены во время тестирования.
mdsched — где посмотреть результаты?
- Откройте Просмотр событий (зажмите Win + R > команда eventvwr.msc > нажмите ОК > появится окно Просмотр событий).
- Первый вариант: Журналы Windows > Система > MemoryDiagnostics (колонка Источник).
- Второй вариант: выберите Журналы приложений и служб > разверните Microsoft > откройте Windows -> MemoryDiagnostics — Results/Debug.
Заключение
Теперь понятно:
- mdsched — встроенный инструмент Windows проверки памяти на наличие ошибок, присутствует три режима работы, которые отличаются уровнем проверки/длительностью.
- Просмотр событий дополнительно содержит результаты проверки оперативки.
Удачи и добра!
На главную!
13.03.2021
Table of contents
- What is Windows Memory Diagnostic?
- 1. Memory Testing
- 2. Identifying Memory Issues
- 3. Diagnostic Reports
- 4. Options for Advanced Testing
- When Should You Use Windows Memory Diagnostic?
- 1. Frequent PC Crashes and Freezes
- 2. Application Errors
- 3. Blue Screen of Death (BSOD)
- 4. Slow Performance
- 5. After Hardware Upgrades
- 6. Routine Maintenance
- Running Windows Memory Diagnostic
- Method 1: Using the Windows Interface
- Method 2: Running from the Command Prompt
- Where to Find Windows Memory Diagnostic Results
- How to Check Windows Memory Diagnostic Results: Interpreting the Results
- No Errors Detected
- Hardware Errors Detected
- Conclusion
- FAQ
When your computer is booting randomly, freezing, or crashing, it might indicate a memory issue. However, you can use the Windows Memory Diagnostic tool to see if the problem is with the memory rather than changing your computer or memory. If the memory passes the test, you can rule out this being the issue’s root. If it fails, you may need to replace one of your RAM modules. This guide will show you how to run Windows Memory Diagnostic and check its results. Let’s begin.
What is Windows Memory Diagnostic?
The memory diagnostic tool is a program that comes pre-installed with the Windows operating system from Microsoft. Its main objective is to help you find and diagnose problems with your computer’s Random Access Memory (RAM). RAM is a crucial part of a computer that stores data that the Central Processing Unit (CPU) needs to carry out various operations. So, what does Windows Memory Diagnostic do ? Let’s find out:
1. Memory Testing
The tool runs several checks on the RAM in your computer to look for any potential issues or mistakes to get the Windows Memory Diagnostic results. These tests involve reading from and writing to various RAM locations to ensure the RAM operates correctly.
2. Identifying Memory Issues
You’ll get the Windows Memory Diagnostic results after the test if any problems are discovered. These issues could involve faulty memory sectors, data corruption, or other issues with memory.
3. Diagnostic Reports
It gives you a report that includes a summary of the tests’ findings, any memory-related issues, or if Windows Memory Diagnostic detected hardware errors.
4. Options for Advanced Testing
A basic test and an extended test are also available. The shorter basic test usually meets the needs of most users, whereas the extended test conducts a more thorough analysis of your RAM.
When Should You Use Windows Memory Diagnostic?
There are several indications to know when you should perform a memory diagnostic. Let’s go through them:
1. Frequent PC Crashes and Freezes
Frequent system freezes, or crashes are one of the most obvious indicators to use memory diagnostic. These sudden breaks in activity can be a sign of RAM problems.
Your computer may crash, become unresponsive, or even restart without warning when your RAM doesn’t function as it should. Using the diagnostic tool, you can determine whether the problem is with the RAM.
Related:How to Clear RAM and Reduce RAM Usage in Windows 10
2. Application Errors
Applications on your computer that frequently crash or shut down unexpectedly could indicate that you have memory issues. Applications can behave unpredictably, and data corruption can result from faulty RAM.
If your RAM is causing these issues, memory diagnostic can help identify the problem.
3. Blue Screen of Death (BSOD)
The feared Blue Screen of Death (BSOD) clearly indicates that your computer is malfunctioning. Memory problems can occasionally be the root of BSOD faults. You can use the Windows Memory Diagnostic results to check whether your RAM is the cause.
Related: Windows Stop Code: How to Check Causes of Windows BSOD?
4. Slow Performance
Memory issues may also cause a slowdown in your computer’s general performance, such as prolonged application loading times or slow response. RAM issues can cause ineffective data handling, which slows down your computer.
The diagnostic program can show you if your RAM isn’t operating at peak efficiency.
Related: Why Is My Computer So Slow? – Improve Computer Performance
5. After Hardware Upgrades
It’s a good idea to run a memory diagnostic if you just updated or installed new RAM modules on your computer. Memory-related issues can result from incompatible RAM modules or improper installation.
After a hardware upgrade, you can run the utility to help you ensure your new RAM operates properly.
Also Read: Why Is My Computer Glitching?
6. Routine Maintenance
The long-term health of your computer depends on routine maintenance. Even if you haven’t noticed any problems, you may run Windows Memory Diagnostic as part of this routine.
This approach might help you spot and address any memory issues before they become more serious problems.
Running Windows Memory Diagnostic
Here’s how to run a memory diagnostic:
Method 1: Using the Windows Interface
- Press the
Windows log + Rto open the Run dialog box - Enter
mdsched.exein the search field to launch the Windows Memory Diagnostic tool.
You now have two options for running the utility when your PC boots up. The first option is to restart your computer right away. The diagnostic will automatically run when the PC starts again. Alternatively, you can schedule the utility to launch when your PC restarts.
When your computer restarts, the tool checks your memory immediately for any potential problems. The memory diagnostic tool launches by default in Standard mode, which includes eight consecutive memory tests.
Each of these tests uses a unique algorithm to look for different faults. The Standard tests can run until finished when Windows restarts.

You also have the option to use the F1 key at any time while the test is running. By doing this, you’ll be redirected to a different screen where you can choose the precise type of scan you want. The utility offers the Basic, Standard, and Extended scan options.
You can configure the Pass Count, which indicates how many times each test will be run. Two is the default value, which is usually sufficient for seeing any possible problems. Simply hit the F10 key to apply your options and begin the test after choosing your preferred option.
Method 2: Running from the Command Prompt
Running the memory diagnostic from the command prompt is easy. Here’s how to run Windows Memory Diagnostic from command prompt :
- Type
command promptin the search bar, right-click, and select Run as administrator.
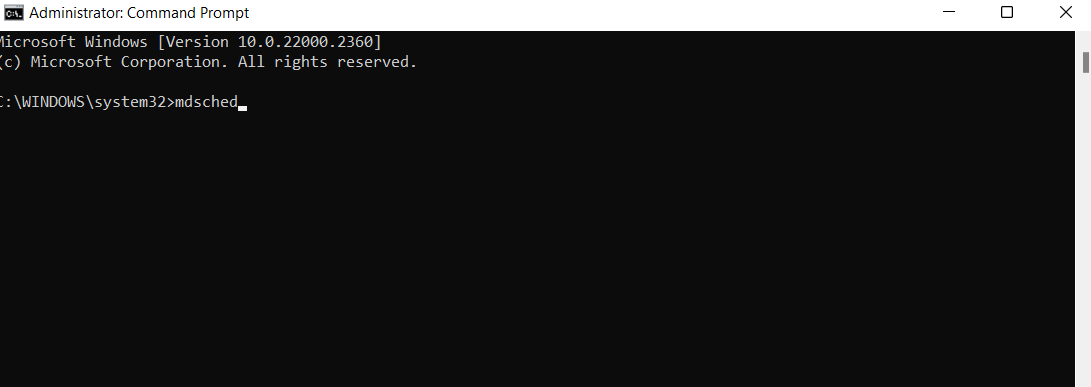
- Type
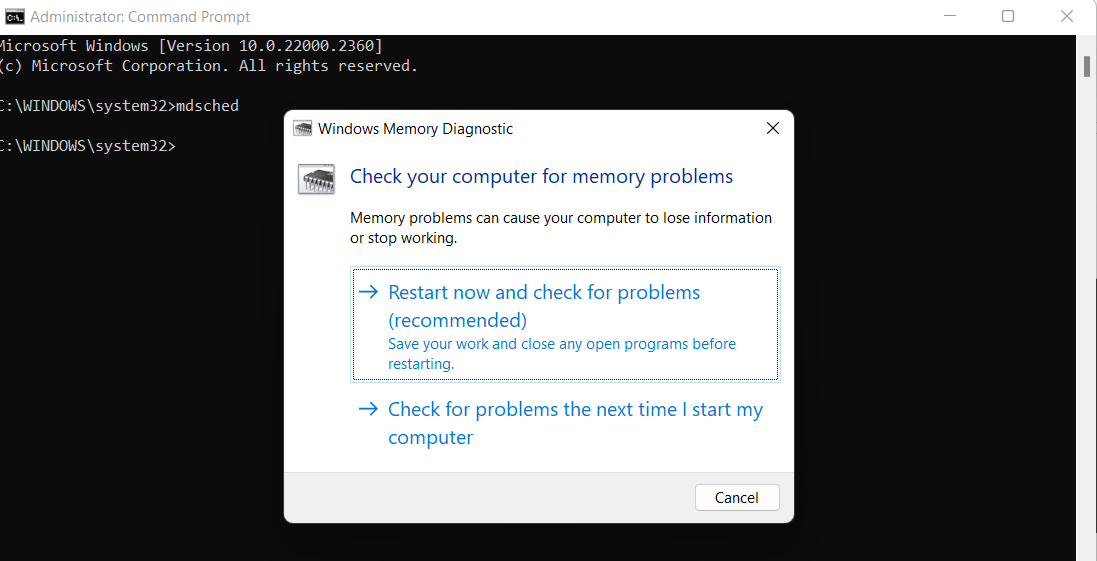
mdschedand pressEnter.
- Click the Restart now and check for problems(recommended) option from the pop-up window.

Your computer will launch the memory diagnostic tool after restarting. This utility will start scanning the memory of your computer right away, and it’ll let you know if it finds any issues. After the test, your computer will immediately reboot and return to the Windows desktop.
Related: Windows Command Prompt: Most Useful Commands
Where to Find Windows Memory Diagnostic Results
Here’s how to see results of Windows Memory Diagnostic :
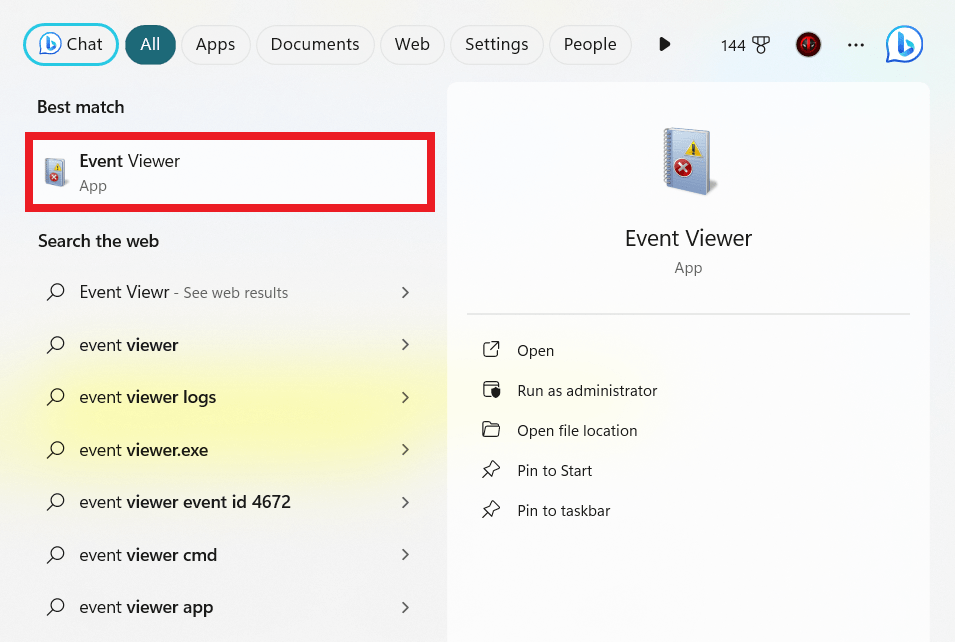
- Type
Event Viewerin the search bar and click to open.
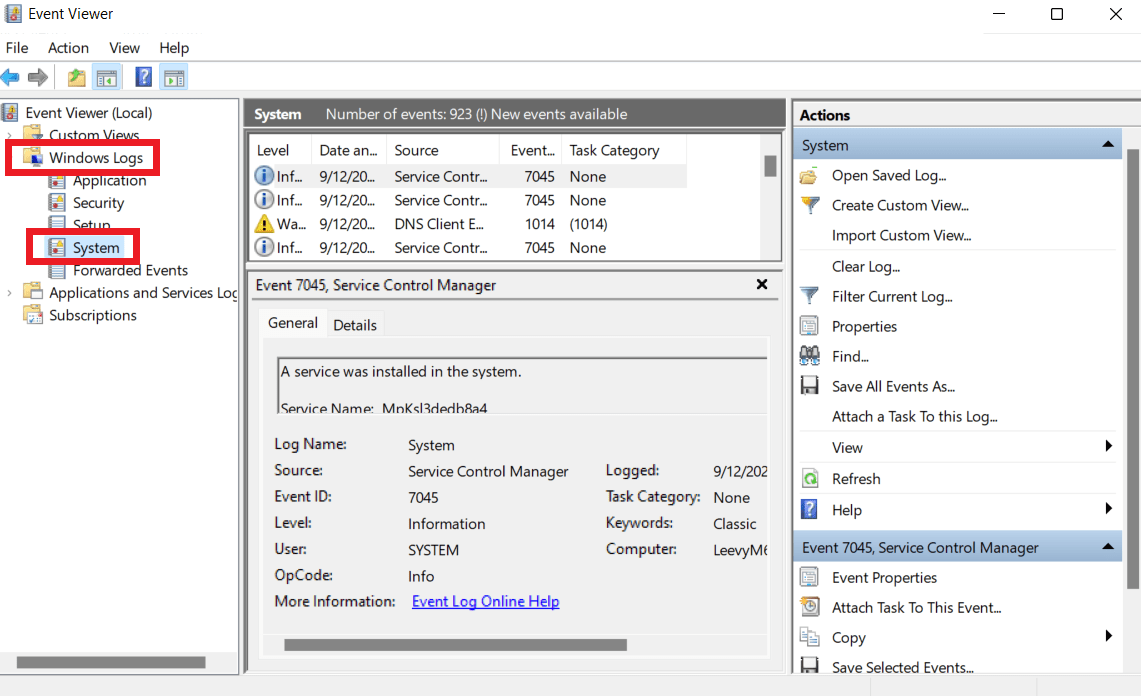
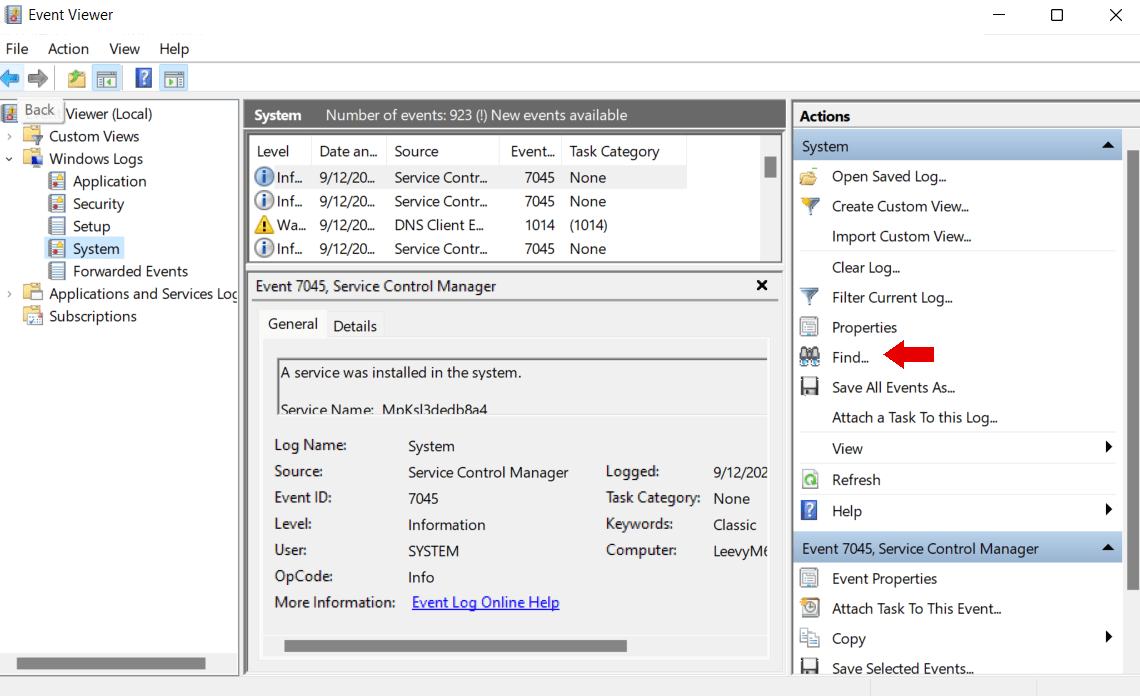
- Expand Windows Logs and select System in the left panel.
- Click the Find button on the right-side panel. Alternatively, press
Ctrl + Fto open the Find tool.
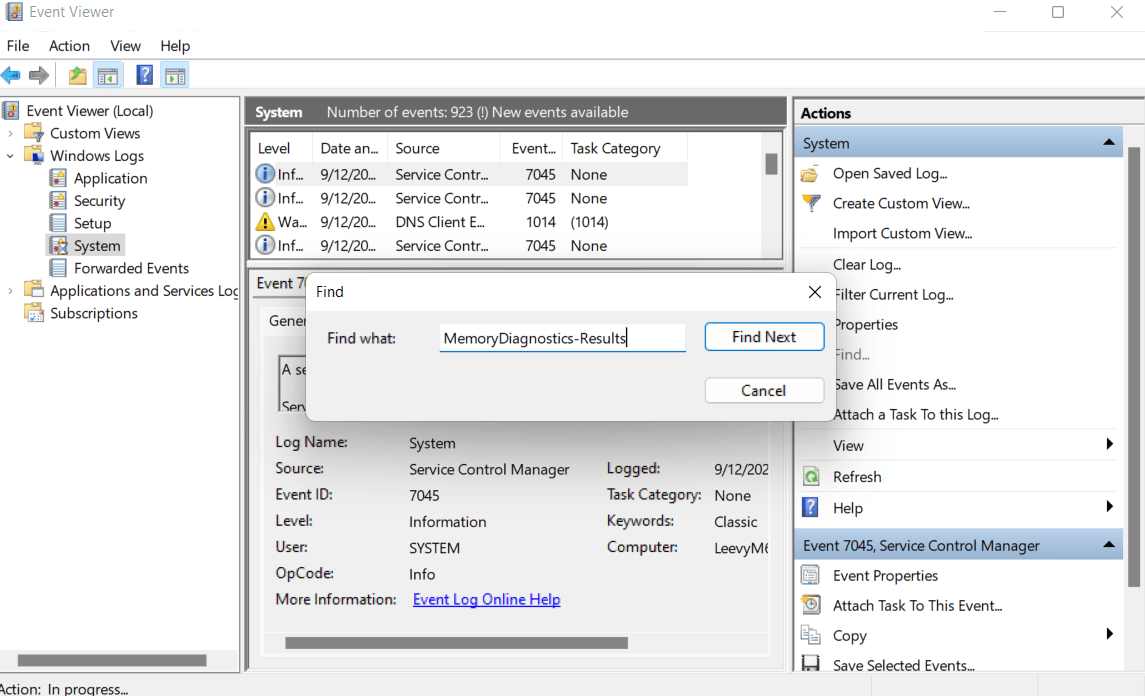
- Type
MemoryDiagnostics-Resultsin the Find what field, and click Find Next.
- Close the Find window. You’ll see the first highlighted entry in the middle column. Double-click on it.
You can learn more about the tests from the scan results. You can rule out memory as the problem’s source if you receive a message, ”
The Windows Memory Diagnostic tested the computer’s memory and detected no errors.”
How to Check Windows Memory Diagnostic Results: Interpreting the Results
After the Windows Memory Diagnostic results , you’ll receive one of two messages: no errors detected or hardware errors detected. Let’s go through each of them:
No Errors Detected
A clean report from memory diagnostic shows that the issues you’ve been having are not most likely caused by your RAM. So you can focus on other areas causing the problem. Here’s what you should do:
1. Update Your Software
Even though memory problems might not be the main cause, updating your software is crucial. Check to see if the most recent versions of your operating system, drivers, and apps are installed.
Also, check for Windows updates. Outdated software can cause incompatibility issues and instability. You can use Auslogics Driver Updater to automatically check and install updates with just one click.
Download Auslogics Driver Updater
Prevent hardware errors and ensure problem-free device operation with this advanced tool that detects outdated drivers and safely gets them updated.
This software installs the manufacturer-recommended drivers, ensuring it’s always compatible with your devices.
Learn more here: Auslogics Driver Updater: New Drivers in One Click!
2. Check the HardwareIt’s a good idea to check other hardware parts if your computer still has problems. For example, system instability can result from overheating. Verify that the cooling system on your computer is operating correctly and that there isn’t excessive dust accumulation.
Related: Enjoy a Dust-Free PC: Expert Tips on How to Clean a Computer
3. Scan for MalwareMalicious software occasionally imitates the signs of memory issues. Run a complete malware scan with reliable anti-malware software like Auslogics Anti-Malware to ensure your system is malware-free.
Download Auslogics Anti-Malware
Detects malware, spyware and viruses, then safely removes them from your PC to help keep it as secure as possible. The program is made to complement your main antivirus.
Related: How to Remove Virus and Other Malware from Windows
Hardware Errors Detected
If there’s a problem after the memory diagnostic test, you’ll get one of two error messages: “Hardware problems were found” or “Physical Address Limit Exceeded.”
These error messages warn that one or more memory modules in your computer may be defective. Here are some troubleshooting methods you can use if you run into these error messages to fix the problem:
1. Don’t Overclock the System
The error message could appear if you overclocked your Graphics Processing Unit (GPU), CPU, or RAM to the limit. Think about turning off overclocking and returning your BIOS/UEFI settings to the default settings.
2. Re-insert Memory Modules
Memory modules may not be inserted correctly in their slots. Open the computer’s case, turn off the power, and unplug it. Ensure all memory sticks are completely seated by carefully removing and replacing the RAM modules in their slots.
3. Test Each Module Separately
If you have more than one memory module, check each one separately. Run the diagnostic tool, remove all but one, and record the outcomes.
For every RAM module, repeat this process. This method can help identify which RAM module is responsible for the faults experienced.
Conclusion
Memory issues can be annoying, but the Windows Memory Diagnostic tool provides a helpful solution. You can go through this guide and use the methods discussed to run the tool properly.
You can troubleshoot and fix memory-related issues by being aware of its capabilities and how to interpret its findings. This can help your computer to run more smoothly.
You’ll be well-equipped to handle any memory difficulties you run across, ultimately improving your PC performance.
FAQ
The hardware and installed RAM on your computer can affect how long a Windows Memory Diagnostic test takes. A basic test typically takes 10 to 15 minutes to finish. However, selecting the “Extended” test option can take a lot longer, possibly an hour or more, depending on how much memory your PC has.
One trustworthy tool for identifying memory-related problems is the memory diagnostic tool. It carries out several straightforward and in-depth tests to find memory issues. Although it’s not perfect, it’s a helpful starting step in identifying potential memory issues with your computer.
Here are some things to consider. Ensure your computer is connected to a power source without using its battery life. Start your computer again, then repeat the diagnostic test.
If the issue still exists, use an alternative memory diagnostic program or contact a professional because it can point to more severe hardware problems.
The memory diagnostic tool’s default pass count is one. This shows that it’ll only run a single pass of memory testing by default. When you begin the test, you can set this option if you want to run the test several times. Multiple attempts can help you discover random memory issues.
The frequency with which you should perform the RAM diagnostic is mainly determined by how often you use your computer and whether or not you’ve recently had any problems. If you frequently have system freezes, crashes, or strange errors, run the memory diagnostic, as these could be symptoms of memory issues.
Consider regularly running the diagnostic on your computer as part of routine maintenance, possibly once every few months, if used for necessary tasks or work.
Readers help support Windows Report. We may get a commission if you buy through our links.
Read our disclosure page to find out how can you help Windows Report sustain the editorial team. Read more
When troubleshooting a Windows PC, one of the most common issues is when the Windows Memory Diagnostic returns no results.
If your computer’s RAM is defective, you may experience issues. Application crashes, system freezes, blue screens of death (BSODs), data corruption, and other issues might occur as a result of this.
This is when you need to check your RAM to see if anything is wrong with it. To do that, you can use a hidden tool in Windows called Windows Memory Diagnostic.
However, If you don’t get any results after performing the scan, here’s how to fix it.
How can I fix the Windows Memory Diagnostic with no results?
1. Check out the Windows Logs
- To run the Windows Memory Diagnostic tool, press the Windows key on your keyboard, type Windows Memory Diagnostic and select it.

- Click Restart now and check for problems (recommended) to agree.


- The Windows Memory Diagnostics Tool screen will show after your computer restarts. Simply leave it alone and let it run the test. This could take a few minutes.

- Your system will reboot and return to the Windows desktop after it is finished. The test results will show after you log in.
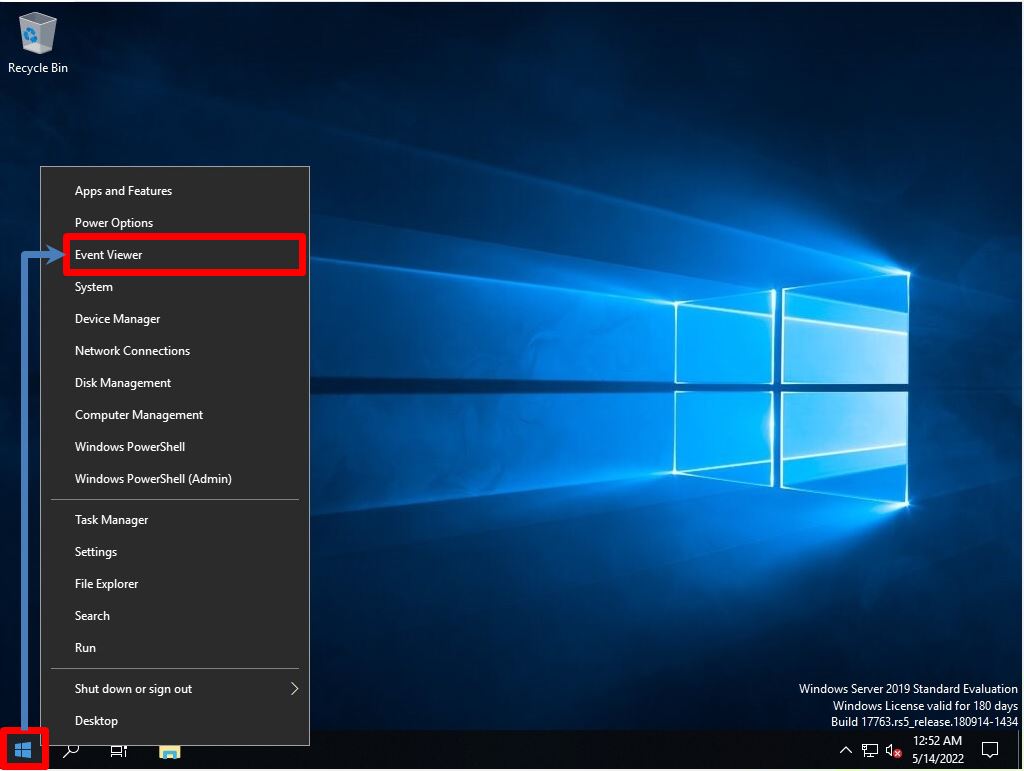
However, sometimes that does not happen and the results are not automatically shown on the screen. In that case, follow the steps below. - Right-click on the Start button and then click on Event Viewer. Alternatively, search event viewer in the search box and find it there.

- Following that, navigate to Windows Logs, then select System from the menu. Right-click on System and select Find.

- Type MemoryDiagnostic and click on Find Next.
- The result, as well as further information about your RAM, will be displayed by double-clicking on the event.


If for whatever reason, the Windows Memory Diagnostic tool has no results, try the method below.
- Microsoft releases Windows 11 (KB5058411, KB5058405) May 2025 Patch Tuesday
- You can now share an app/browser window with Copilot Vision to help you with different tasks
- Windows 11 24H2’s Settings now bundles FAQs section to tell you more about your system
- You can now remove Android/iPhone from Phone Link app & Mobile devices setting
2. Change System properties in Even Viewer
- Hold down the Windows + R key at the same time. This will launch Run.
- Right-click on the Start menu and then click on Event Viewer. Alternatively, search event viewer in the search box and find it there.
- Expand Windows Logs.
- Right-click System and select Properties from the menu.
- Check the option Enable Logging under the General tab, then select the option that says Overwrite events as needed (oldest events first). Finally, click on Apply and then OK.


3. Enter the BitLocker recovery key
- Wait for the Windows Memory Diagnostics tool to finish.
- You will probably come across this message that says Enter the BitLocker recovery key of your drive. When you see this, enter the recovery key.
- Finally, your PC would now reboot and the results can be found in Event Viewer.
It is worth noting that this issue only occurs when you use PTT instead of TPM for BitLocker.
To sum it up, it is possible to troubleshoot an issue with your computer by running the Windows Memory Diagnostic tool.
This program can be used when your computer begins to perform slowly, freezes, displays a blue screen, or reboots on its own.
Windows Memory Diagnostic tool may discover issues with installed applications on a computer, regardless of whether the issues are caused by memory errors.
Fixing issues related to Windows Memory Diagnostic with no results is quite easy, and all you need to do is to change the system properties.
This article will show you how to run thorough hardware diagnostics on Windows 10.
Farhad Pashaei
As a technophile, Farhad has spent the last decade getting hands-on experience with a variety of electronic devices, including smartphones, laptops, accessories, wearables, printers, and so on.
When he isn’t writing, you can bet he’s devouring information on products making their market foray, demonstrating his unquenchable thirst for technology.

Windows Server 2019
The “Windows Memory Diagnostic” that comes standard with Windows Server 2019 is application software that allows you to check if there are any abnormalities in the memory. If the number of unintended restarts, sudden blue screens, and other errors that occur when using the terminal you are using increases, it is possible that there is a problem with the OS, disk, or memory, but there are cases where memory is the cause. It is often seen. * The resource handling method differs depending on the event ID output to the event viewer.
If there is a possibility of memory failure by judging the event ID / error message in the event viewer, we recommend “Windows Memory Diagnostic”, which is a standard Windows function. This time, we will explain how to check the log in the event viewer while executing the Windows Memory Diagnostic using Windows Server 2019.
Windows Server 2019: Run Windows Memory Diagnostic
Step 1:
Click the Windows logo at the bottom left of your desktop
*As another execution method, it can be started by executing a command. Run –> Enter MDSCHED.EXE
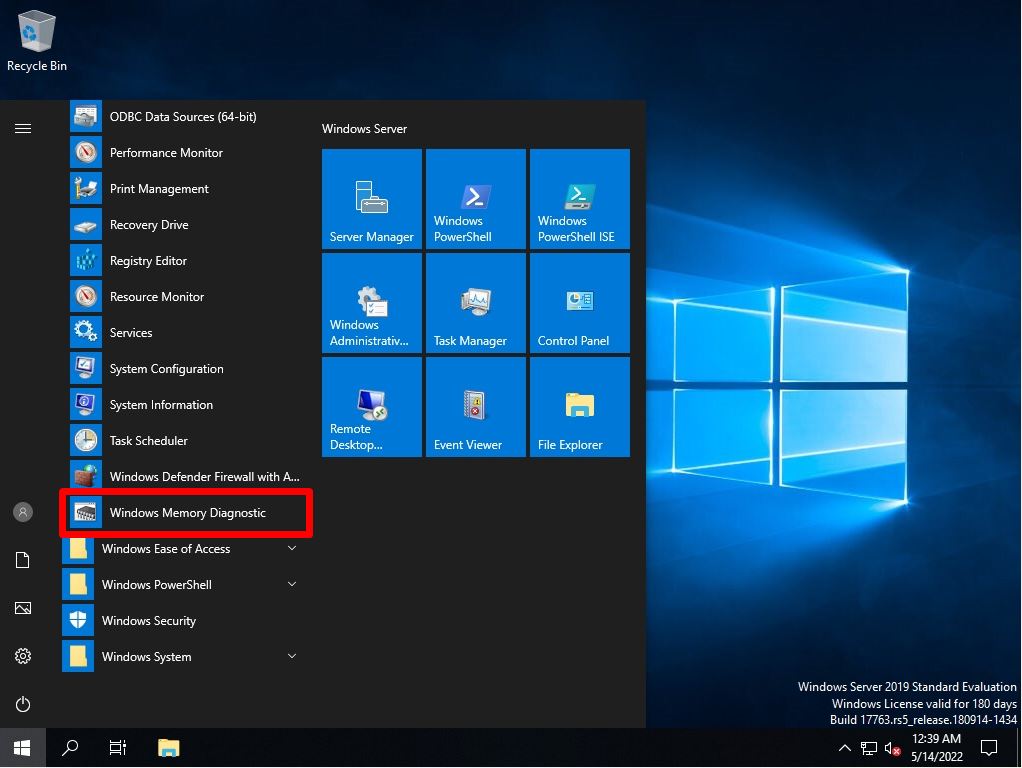
Step 2:
Windows Administrative Tools -> Select Windows Memory Diagnostic.
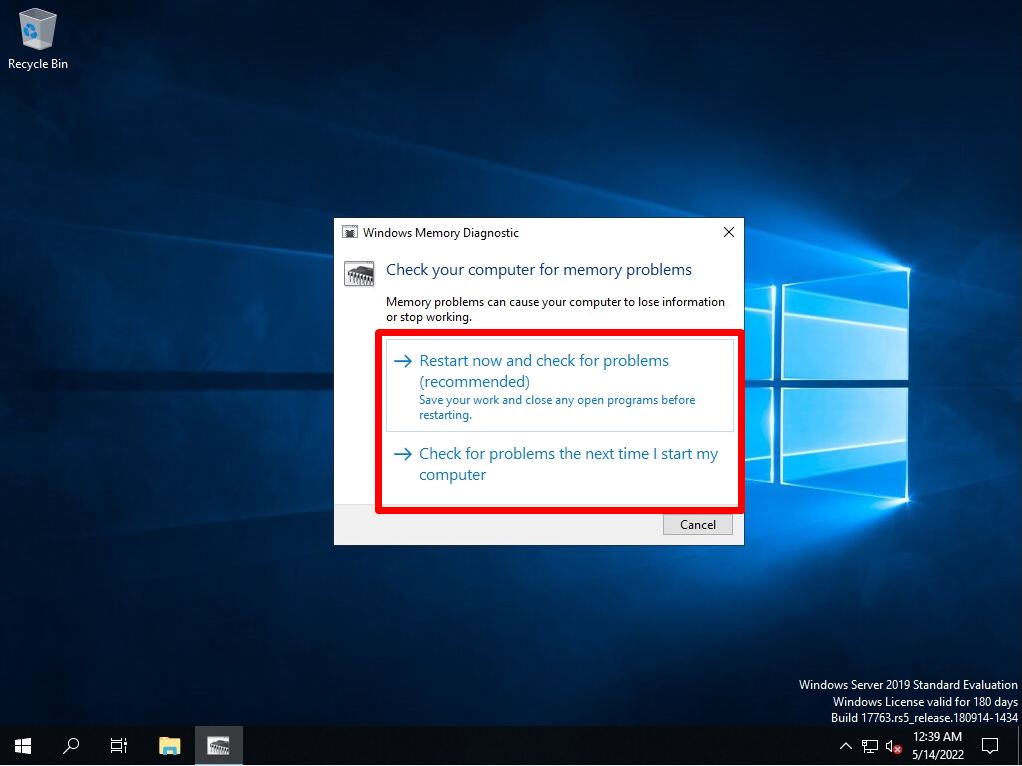
Step 3:
Select the timing to restart and restart.
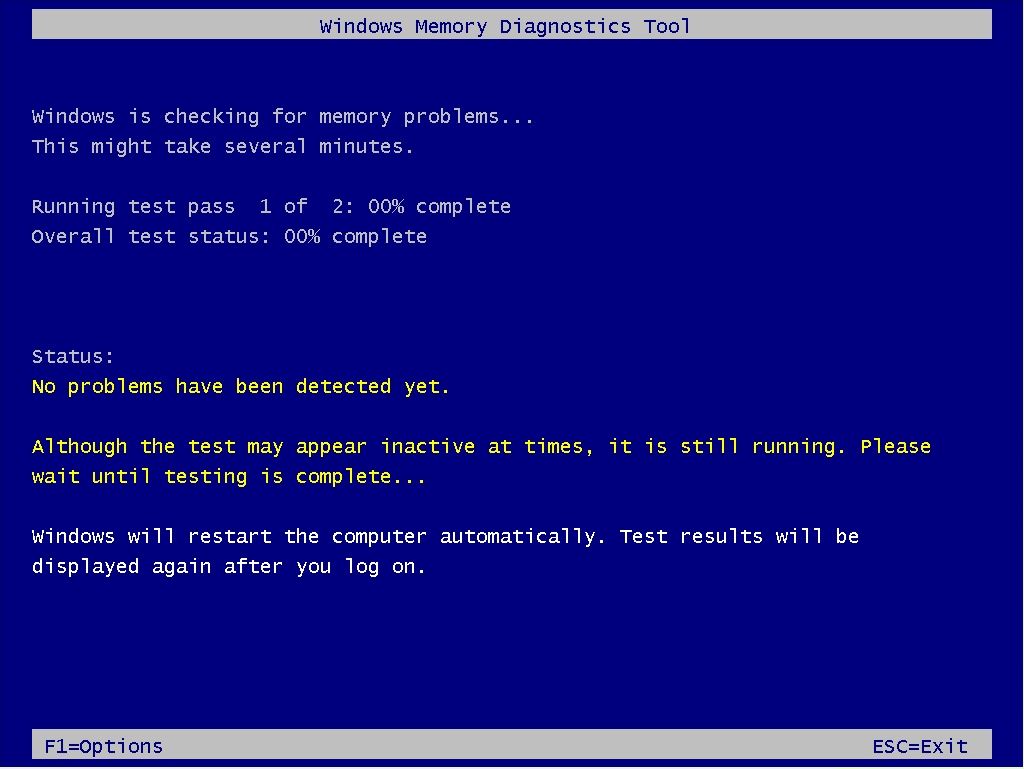
Step 4:
The Windows Memory Diagnostic Tool will start.
*The diagnostic processing time varies depending on the terminal (installed memory) used.
Step 5:
The Windows Memory Diagnostic result will be displayed a little after the memory diagnosis is completed.*This time, the result screen was displayed in about 4-5 minutes.
The Windows Memory Diagnostic result screen is displayed for only a few seconds. You may miss the output screen and think that there is no result, but you don’t have to stick to the server and wait for confirmation. The log is recorded in the event viewer.
Run Windows Memory Diagnostic: Check logs in Event Viewer
Step 1:
The memory diagnosis result can be confirmed in the Event Viewer log. Right-click on the Windows mark at the bottom left of your desktop –> select Event Viewer.
Step 2:
Windows Log -> System -> Source “Memory Diagnostics-Results” log is output and the result is displayed.