
For Ubuntu, Fedora & other GNOME based Linux user switching from Windows 10/11, it’s easy to get your familiar start menu & taskbar back!
GNOME is highly customizable via extensions. There’s ‘dash-to-panel’ to merge the top-bar and dock into single bottom bar. And ‘ArcMenu’ is available to choose between various start menu styles. By installing the 2 extensions as well as a few tweaks, you can make Ubuntu/Fedora just look like Windows 10 or Windows 11.
NOTE: this tutorial is tested and works on Ubuntu 22.04 (Ubuntu 23.10 Updated) and Fedora 38/39, though it should also work on Debian 11 and Arch Linux and other Linux with GNOME Desktop.
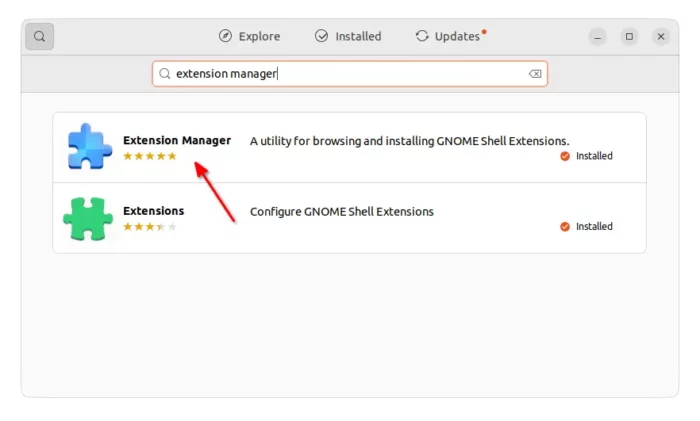
1. Install “Extension Manager”
The “Extension Manager” app is a good choice to install & manage GNOME extensions.
Ubuntu 22.04 and higher can easily install the application from Ubuntu Software (or App Center) app:
Fedora and its based systems may simply open terminal and run command below to install it as Flatpak:
flatpak install https://dl.flathub.org/repo/appstream/com.mattjakeman.ExtensionManager.flatpakref
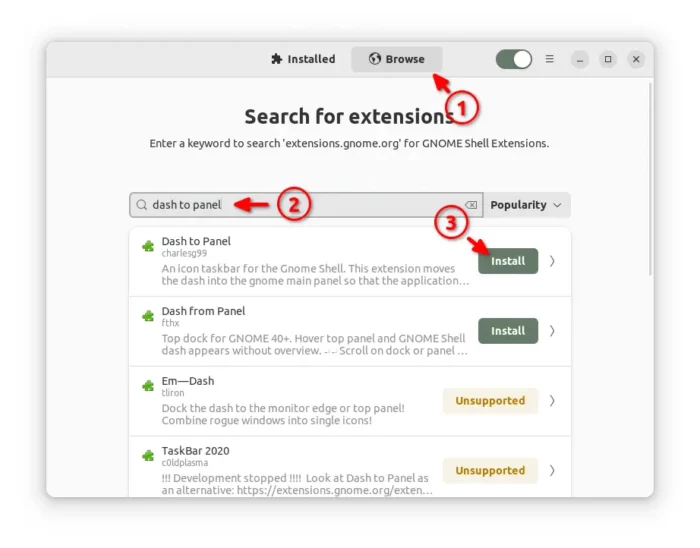
2. Install Dash to Panel
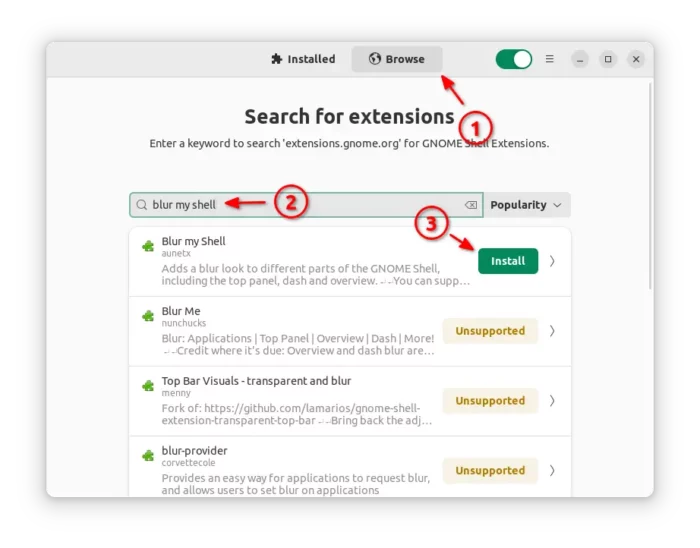
After that, open “Extension Manager” and use the tool to search for & install ‘Dash to panel’ extension:
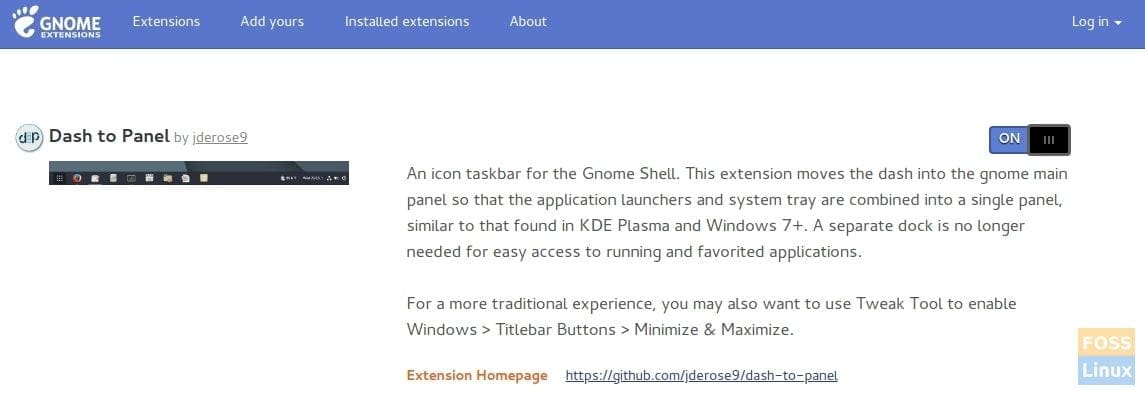
For choice, you may use ON/OFF switch in the web page below to install the extension via web browser:
NOTE: Firefox in Ubuntu 22.04 does NOT support installing Gnome extension. Use another browser or install Firefox as classic deb.
Don't see the on/off switch? Install the browser extension via the prompted link and refresh the page.
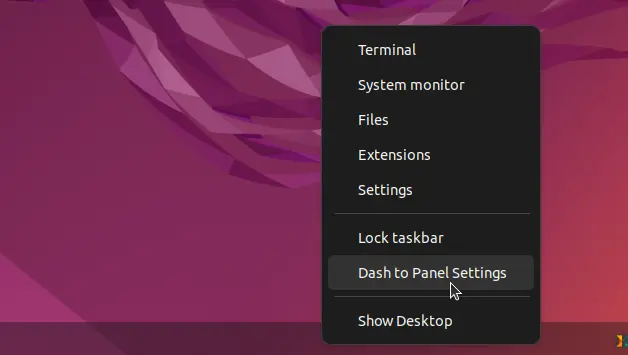
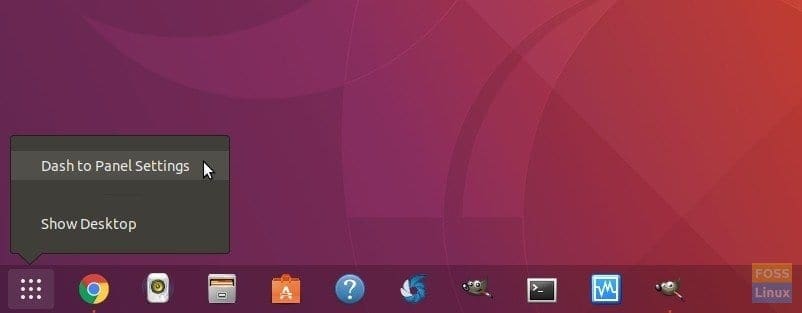
Once installed the extension, you desktop taskbar should go immediately into a single bottom panel. Right-click on blank area of the bar, and select “Dash to Panel settings”. You may then configure the icons size/margin/padding, background opacity, auto-hide, and so forth as you prefer.
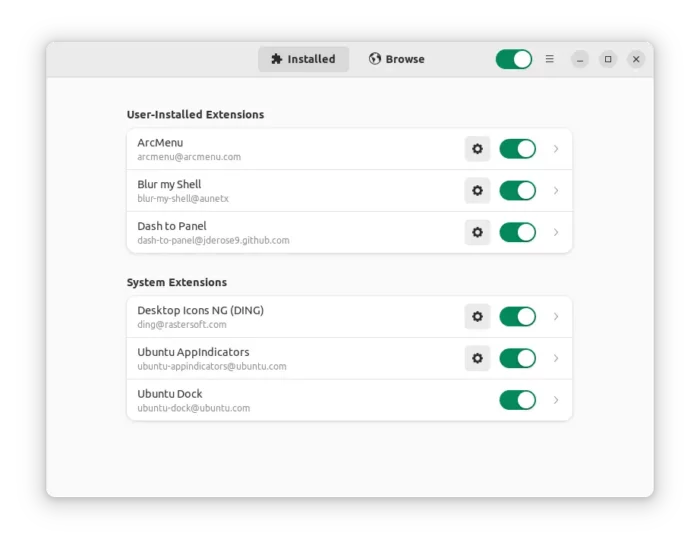
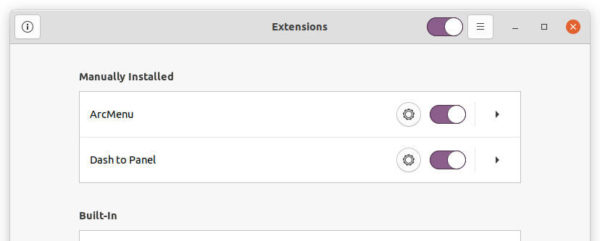
NOTE: Ubuntu user may need to turn OFF ‘Ubuntu Dock’ using “Extension Manager” app.
If you don’t like the system default “Start Menu”, disable it in Dash-to-panel settings dialog by toggling visible of “Show Applications” button in first tab.
Then install ArcMenu extension either via ‘Extension Mangaer’:
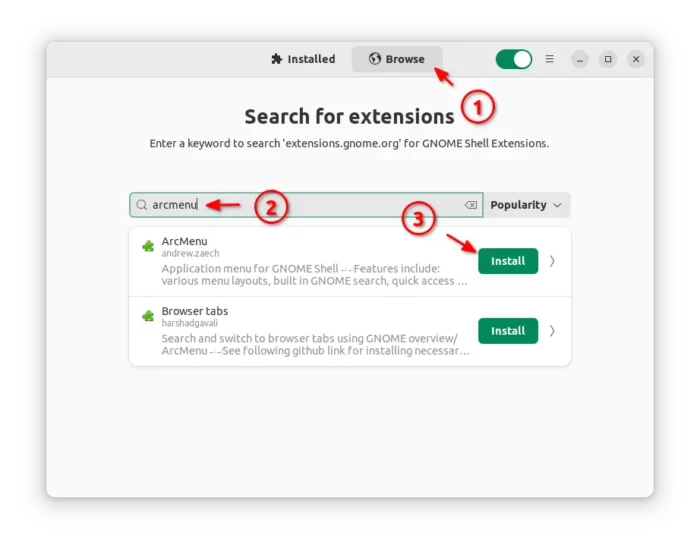
or via the ON/OFF switch in the link below:
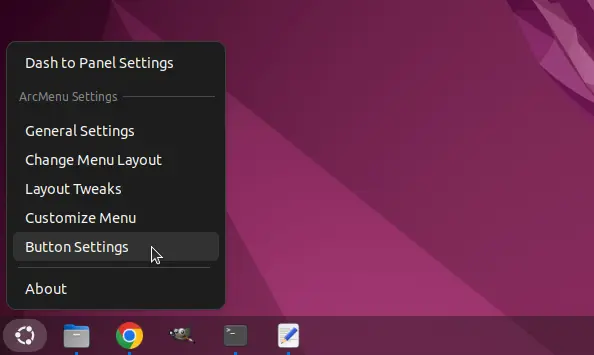
The menu also appears immediately on panel after installation. And, right-click on it allows to choose configure the menu button, layout, and other settings.
4. Blur my shell (optional)
If you prefer, it’s possible to add blur effect to taskbar via ‘Blur my shell’ extension:
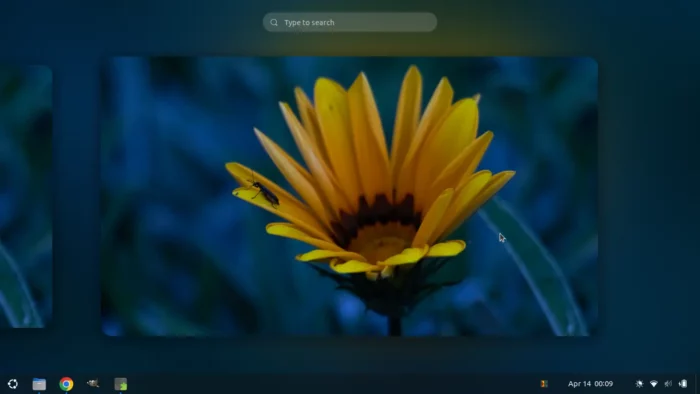
It by default blur the panels, overview, and lock screen. Though it has beta support for blurring your application windows.
Restore (uninstall extensions)
If you want to revert back the original desktop appearance, just disable or remove these plugins via “Extension Manager” app under ‘Installed’ tab.
Do you prefer a single taskbar as in KDE Plasma and the Windows when compared to Ubuntu’s separate top panel and application launcher? Then, you should be installing the “Dash to Panel” extension.
“Dash to Panel” is a free GNOME extension that will combine the system tray and favorites panel into one taskbar located at the bottom of the screen. The taskbar looks elegant, clean with icons, and also saves some screen space by having an integrated panel. It also gives you several other options to make the taskbar look like Windows 7+.
In this article, I will show you how to enable GNOME extensions in Ubuntu running GNOME shell and then install the “Dash to Panel” extension.
Installing Dash to Panel extension
To install Dash to Panel extension, you must first install GNOME extensions on your Ubuntu PC.
The below guide is tested to work in Ubuntu 17.10, but it should work on Ubuntu 16.04 and 16.10 with GNOME shell as well.
Step 1) Refer to our detailed guide on how to install GNOME extensions and continue to step next.
Step 2) Click on the below link using the same browser that you used to enable GNOME extensions in Step #1.
Install “Dash to Panel” GNOME extension
Step 3) Enable the feature.
Installing Dash to Panel GNOME extension
Step 4) You should instantly see the brand new taskbar appear at the bottom.
Dash to Panel enabled desktop on Ubuntu 17.10
Step 5) Not happy with the bottom taskbar and instead want it on the top? No problem, there are plenty of tweaks that you can do! Right-click on the “Show Applications” button and click “Dash-to-panel” settings.
Dash-to-Panel Settings
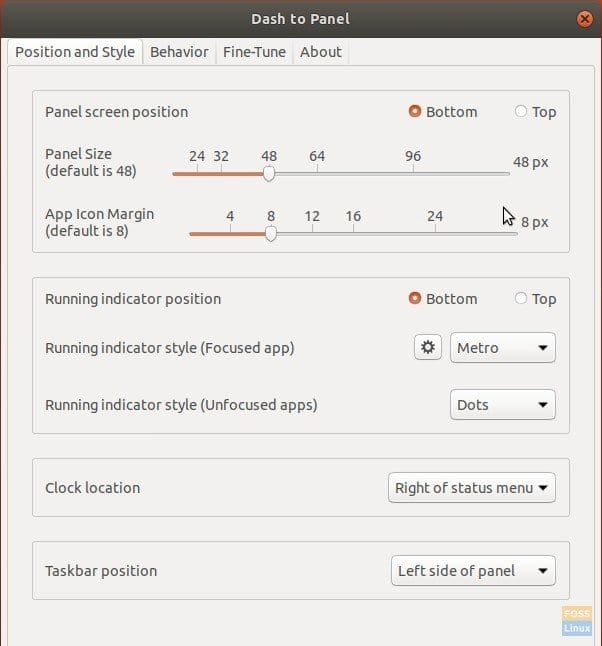
Step 6) In the “Position and Style” settings, you can set the Taskbar position either to top or bottom, adjust panel size, and even space between the icons. You can set the clock location and indicator style.
Position and Style Settings
Step 7) In the “Behavior” tab, you can enable the “Show Desktop button” that adds a bar in the right corner of the taskbar, just like in Windows 10, which upon clicking, minimizes all the windows and shows desktop.

Behavior Settings
There are plenty of other things you can do with Dash-to-Panel. I will live it up to you to play around and adjust your desktop the way you want. Enjoy!
The upcoming Windows 11 has leaked online a few days ago. Here’s how to implement the new look and feel in Ubuntu 20.04, and/or Ubuntu 21.04.
Gnome has a large collection of extensions to get additional and optional functionality. You can use dash to panel to combine the top-bar and the left dock into single. And Arc Menu extension is available to replace the default system app launcher.
So your Ubuntu Desktop can be customized to look like the picture shows:
Install Dash To Panel to get single system panel:
1.) Install Dash to Panel extension:
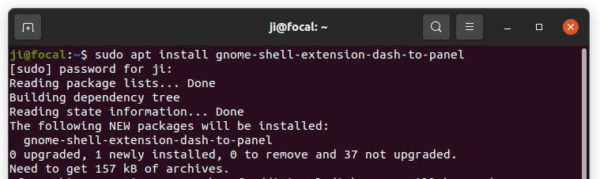
For Ubuntu 21.04, simply press Ctrl+Alt+T on keyboard to open terminal and run command to install the extension:
sudo apt install gnome-shell-extension-dash-to-panel
For Ubuntu 20.04, though the previous command works I recommend to do following steps instead to get the newer version:
a. First run command to install required tools for installing & managing Gnome extensions:
sudo apt install chrome-gnome-shell gnome-shell-extension-prefs

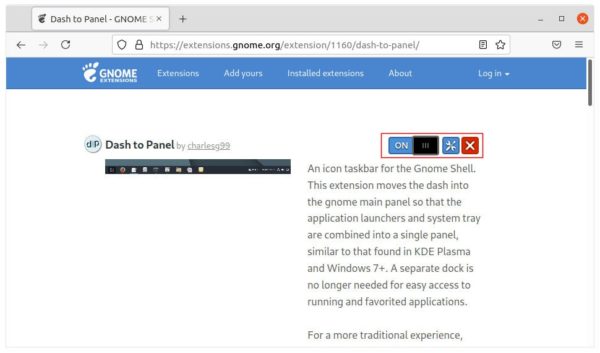
b. Next go to Dash-to-Panel web page and turn on the slider icon to install it:
If you don’t see the toggle icon, install browser extension via “Click here to install browser extension” link and refresh the web page.
Enable & Configure Dash to Panel:
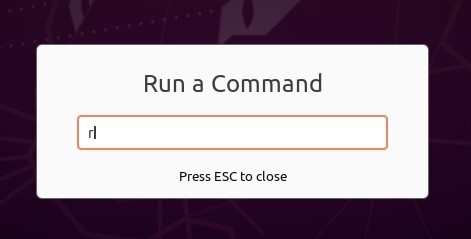
Once installed the extensions, restart Gnome Shell by pressing Alt+F2, type r in popup ‘Run a Command’ box, and hit Enter.
Or just log-out and back in if you’re running on Wayland session.
Next enable the extension via either Gnome Extension app or Gnome Tweaks tool.
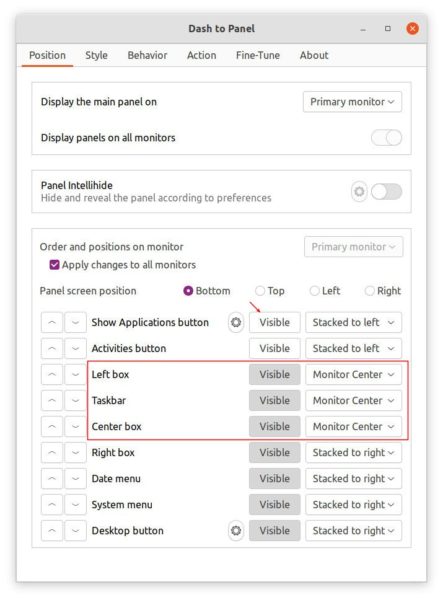
Finally right-click on blank area of the new panel, and go to ‘Dash to Panel Settings’. There do:
- Toggle off ‘Show Applications’ button.
- Change the position of ‘Left box’, ‘Taskbar’, and ‘Center box’. Use ‘Centered’ or ‘Monitor Center’ depends on your display.
- Change panel background opacity, icon size, etc in next tabs.
Install Arc Menu as Start Menu:
Though the Arc Menu is available to install via apt command, I recommend to install it from your web browser. That’s because the one in apt repository is the un-maintained versions though it still works in current releases.
1.) First run command to install the required tools, if you didn’t do it in previous step:
sudo apt install chrome-gnome-shell gnome-shell-extension-prefs
Next go to Arc Menu web page and turn on the slider icon to install it:
If you don’t see the toggle icon, install browser extension via “Click here to install browser extension” link and refresh the web page.

You may need to press Alt+F2, type r, and hit Enter to restart Gnome Shell, or log out and back in to enable the extension. If you don’t see the new start menu, enable Arc Menu via either Gnome Extension app or Gnome Tweaks tool.
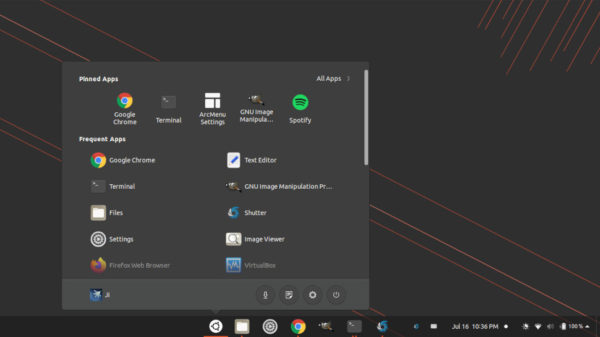
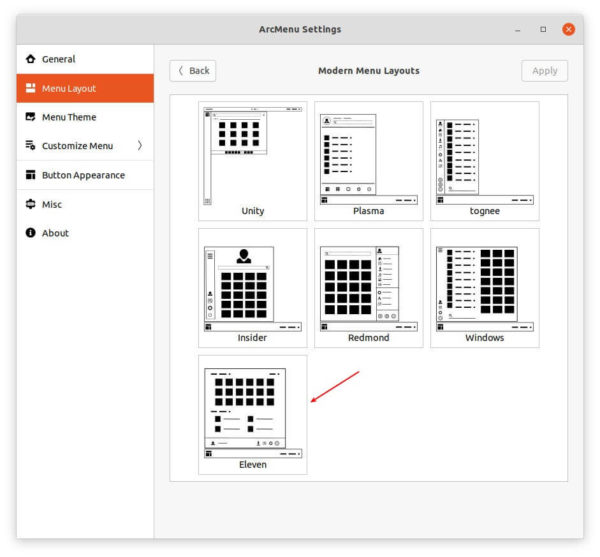
Finally right-click on new start menu and open settings. Under ‘Menu Layout’, choose the Modern Menu Layouts and select “Eleven”.
That’s it.
How to Restore:
Simple turn off or remove the two extensions via Gnome Extension App will restore your desktop appearance. If not, restart Gnome Shell via Alt+F2 run command box or log out and back in.
The old adage “How do you know somebody is a Linux user? Because they’ll tell you” is about to hold up true.
In this article I’m going to configure the taskbar/panel found in Linux Mint to make it a little more familiar, I have a multi-monitor setup so wanted to make sure that I could have a similar panel on each screen and I wanted it to be somewhat similar to the taskbar found in Windows purely because I’m used to it.
By default on Linux Mint, you only have a panel on the main monitor. Although there are in theory ways to copy the panel between monitors they are unsupported as far as I can tell so I would suggest avoiding them.
Before/After
So we’ll be going from something similar to this, which will only display on a single monitor by default –

To something similar to this on all monitors, this will show programs only on the monitor they’re open, the full date and time, system icons on the primary monitor etc –

Create a Panel on each Display
So the first thing to do is to create a Panel on each display, this is quite straightforward if you follow the process below –
, right-click the panel (known as the taskbar on Windows, we’ll refer to it as Panel from now on).
- Right-click the panel on a blank spot.
- Select ‘Add a new panel’ in the contextual menu that appears.
- Red highlights will appear on each screen, select where you would like the new panel, I selected the red bar at the bottom of each of my monitors to create new panels on each.
- At this point we should have a blank panel on each of the other two monitors.
Recreating the Main Panel on each Display
Now we need to recreate the ‘Applets’ shown on the primary monitor, for me these include the following Applets (I’ve boldened the ones I personally copied to the other monitors) –
- Menu – This is the Start-like menu that shows a menu of all installed software
- Seperator – A small separator, right of the Menu icon
- Grouped window list – A list of open software and shortcuts (set to only show programs on the current display)
- XApp Status Applet – Equivelent to the System Icons tray from Windows
- Notifications – A button to open system notifications
- Network Manager – Shortcut to basic network settings
- Sound – Shortcut to basic sound settings
- Power Manager – Shortcut to brightness and power settings
- Calendar – Full date, time and shortcut to calendar view.
We can add most of these to the new panels, some are limited to single use however, the process below covers how to add and configure where required, each applet.
- Right-click one of the new panels.
- Right-click the panel again then select Applets to open the available applets window.
- Select each applet that you want to add then click the + symbol at the bottom of the window to add it to the panel.
- Close the Applets window.
- Right-click the panel and select ‘Panel edit mode’ to enter the edit mode.
- Drag each applet to be either left, center or right-aligned as you like.
- Right-click the panel then disable Panel edit mode.
- You can now right-click each applet in the panel and select Configure to change a variety of settings.
There’s no doubt that Gnome Shell has a slick, modern interface. That said, the default look of the desktop isn’t something that appeals to everyone. Some people prefer a Windows-like interface. That’s where the Dash to Panel Gnome extension comes in. It allows users to stick with the best parts of Gnome Shell (the Activities overview, search feature and modern design) will have a familiar, Windows-like interface.
In this guide, we’ll go over how to set up Dash to Panel to give Gnome Shell a better interface. However, before we begin, your Gnome Shell desktop must be able to install Gnome extensions. If you’re unable to install extensions, follow our guide to learn how to set up Gnome extensions on your system.
Install Dash to Panel
Once you’ve enabled Gnome extensions on your system, it’s time to install the Dash to Panel extension. There are two ways to do this: the Gnome Software app, and the website. Look at the instructions below to get the extension installed with your preferred method.
Gnome Software
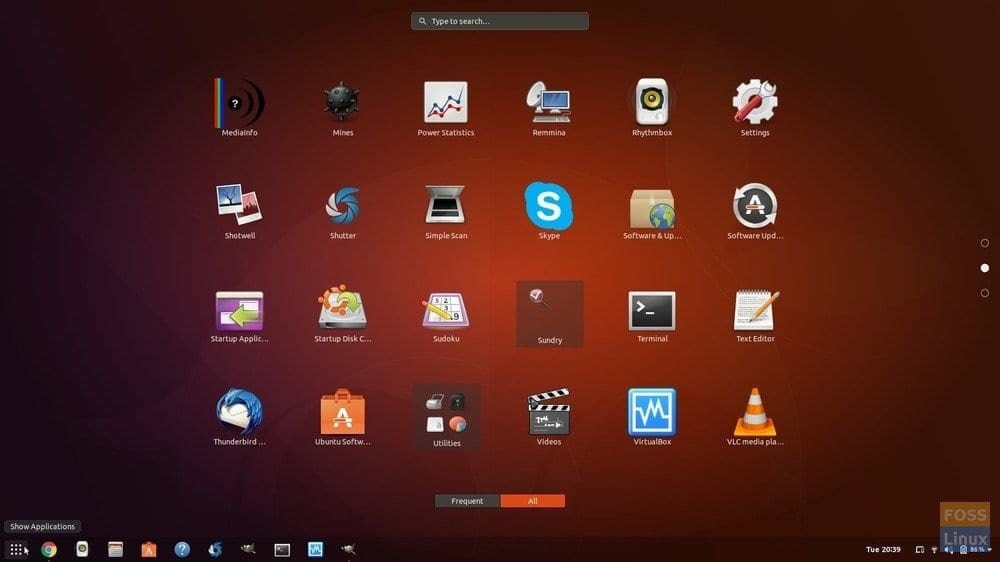
To install the Dash to Panel extension on the Gnome desktop via the Gnome Software application, start by pressing Win to bring up the search box inside of the “Activities” area. Locate the search box and type in “Dash to Panel,” and you’ll see a black puzzle piece icon with “Dash to Panel” as its label.
Click on the “Dash to Panel” search result, and you’ll immediately launch the extension’s Gnome Software page. From here, click the “Install” button.
Once you click the “Install” button in Gnome Software for Dash to Panel, a black window will appear in the center of the screen, asking if you’d like to install the extension. Allow it to install by clicking the “install” button.
After you click the “install” button, Dash to Panel will launch with default settings on your Gnome Desktop. Move on to the configuration section of this guide to learn how to set the panel up to best suit your needs.
Extensions website
Those who prefer to install extensions from the website can get Dash to Panel set up in the following way. First, click this link here to head over to the official page for the extension.
Once on the page, confirm you have the Gnome Shell extension set up in Firefox or Chrome, and that you have the “Gnome-chrome” runtime package set up as well. Then, locate the “off” button and set it to “on,” next to Dash to Panel.
As you slide the extension to “On,” you’ll see a black window appear in the center of the screen asking if you’d like to install Dash to Panel. Click “Install” to confirm, and the Dash to Panel extension will download to your Gnome PC and launch with the default settings.
With the extension set up on your Linux PC via the Gnome Extensions website, move down to the configuration portion of this tutorial, as it will go over how you can customize this panel to suit your needs better.
Configuring Dash to Panel
Installing Dash to Panel is enough for most people to get an excellent Windows-like experience in Gnome Shell. That said, the extension has a lot of customization settings, so we’ll show you some basic tweaks and changes you can make to change and improve the panel.
To tweak Dash to Panel, you must first install Gnome Tweaks. If you do not have this app set up on your Linux PC, open up a terminal window by pressing Ctrl + Alt + T or Ctrl + Shift + T on the keyboard. Then, follow the command-line installation instructions below to get it working on your PC.
Ubuntu
sudo apt install gnome-tweak-tool
Debian
sudo apt-get install gnome-tweak-tool
Arch Linux
sudo pacman -S gnome-tweak-tool
Fedora
sudo dnf install gnome-tweak-tool
OpenSUSE
sudo zypper install gnome-tweak-tool
Other Linuxes
Need to get Gnome Tweaks for your Linux PC but unable to find it? Check out Pkgs.org; they list Gnome Tweaks packages for almost every Linux operating system!
After installing the Gnome Tweaks application on your Linux system, press Win, search for “Tweaks” and open the app. Then, locate “Extensions” and select it to access Gnome Extension settings.
On the “Extensions” page in Gnome Tweaks, scroll through the list to find “Dash to Panel,” and click the gear icon next to it to access its settings.
Upon selecting the gear icon for Dash to Panel, a pop-up window will appear with various settings. These settings are “Position,” Style,” “Behavior,” “Fine-Tune,” and “About.”
Position of panel
Want to change the status of your panel from the bottom of the screen to the top? Locate the “Panel screen position” and change it to “Top” in “Position.”
Change clock location
Not happy with where the clock is by default? Select “Position” and find “Clock location.” In this menu, you’ll be able to customize exactly how the clock appears on the panel.
Icon sizes
The size of the icons on the panel is a bit big by default. If you’d like to tweak the size to make them smaller, locate “Style,” in settings and select it. From there, drag the “Panel Size” slider downward to get smaller icons. You’ll also be able to change the icon margins, and icon padding by messing with “App Icon Margin,” and “App Icon Padding.”
Favorites
By default, Dash to Panel will show all of your application favorites in the Panel. Showing favorites on the panel is a nice feature, but if you dislike it, the setting is easily disabled by going to “Behavior,” and turning the slider off next to “Show running applications.”
Other tweaks
There are a lot of other tweaks that Dash to Panel offers to Gnome users, such as disabling animations (located in “Fine-Tune”), disabling application grouping (found in “Behavior,”) and much more. Be sure to go over all of the different customization settings that Dash to Panel has to offer to get the best Windows-like experience on Gnome Shell for Linux!
