
Transferring files between Linux and Windows might seem tricky at first, especially if you’re new to working across different operating systems. Now, whether you’re sharing documents, moving project files, or backing up data, knowing how to transfer files between these two platforms is very important.
In this blog, we’ll walk you through simple and effective methods to transfer files from Linux to Windows. From using shared networks and USB drives to leveraging powerful tools like Samba, SSH, and cloud services, we’ve got you covered. No matter your level of expertise, this guide will help you choose the best method for your needs and ensure your files are transferred quickly and securely.

Methods to How To Transfer File From Linux To Windows
Explore this section to get three methods that will help you in-order to transfer file form Linux system to Windows system.
Method 1: Using SSH Transfer Protocol with PuTTy
One of the easiest methods to transfer files from Linux (Ubuntu) to Windows OS is to use PuTTy pscp (PuTTy Secure Copy Client). PuTTy is used to create a client-server link to connect both platforms via a Wireless connection. PuTTy is a free open-source SSH client which works across multiple platforms and has become a mode for easy file transfers across platforms.
Step 1: Install SSH
- To start with Install SSH if you don’t have it in your Linux OS. Follow the Command prompt codes to do so.
Ubuntu/Debian OS
sudo apt update
sudo apt install ssh-server
sudo service ssh start
Red Hat and other Linux-based OS
sudo yum install openssh-server
sudo systemctl start sshd
Step 2: Install PuTTy
- Install PuTTy in your system if you don’t have it. Otherwise, ignore this step. If you want to install PuTTy in your Linux OS, follow the command prompt lines below:
For Ubuntu and Linux Mint OS
For Ubuntu, you’ll need to access the universal repository available and install PuTTy there. Hence, there are additional commands to access the universal repository below:
sudo add-apt-repository universe
sudo apt update
sudo apt install putty
For Debian OS
sudo apt-get putty
For Arch Linux OS
sudo pacman -S putty
For RHEL, Fedora, CentOS, AlmaLinux
sudo dnf install putty
For others
sudo yum install putty
Now you have successfully installed PuTTy in your Linux OS. Now, you can use it for file transfer from Linux to Windows and vice-versa. Similarly, you can also download PuTTy in Windows OS.
Step 3: Start Transferring Files
Transfer files across different OS. It becomes easy using PuTTy pscp (PuTTy Secure Copy Client). Simply provide the source path and the destination paths for file transfer and the files would be transfered.
Point to Note
In this case, the IP address of a sample Linux system is 192.168.0.18. Let’s see the skeletal structure of the command prompt line we’ll need to type:
[path_where_pscp_is_downloaded]>pscp user@[host:source destination]
Example 1:
For example, assume that PuTTy pscp is downloaded on the Windows Program Files directory and we’ll need to transfer files from Linux to Windows OS to send a file called “a.txt”. Follow the command prompt code below:
C:\Program Files\PuTTY>pscp user@192.168.0.18:/tmp/a.txt \Users\<username>
Example 2:
For vice-versa, to store the file in a new directory follow the code below:
Important: Check whether the directory exists or else, you’ll get an error. You can use the following command to create a new directory:
mkdir <directory_name>
C:\Program Files\PuTTY>pscp \Users\<username>\a.txt user@192.168.0.18:/<directory_name>
Now, you’ve successfully transferred files from Linux OS to Windows OS and vice-versa.
Method 2: Using FTP with FileZilla or Shared Network Folders
Another simple method used for file transfer is using FTP (File Transfer Protocol). This is the easiest method since this involves no coding/ command lines. Let’s see how to do that. If you don’t have FileZilla, check out How to install FileZilla on Windows. After installing FileZilla, follow the following steps.
Step 1: Download and Install FileZilla on Windows
- To trasnfer file from Linux to Windows you need a FTP server and for this you need to install FileZilla on Windows
Step 2: Open FileZilla
- Once the installation process is over open FileZilla on you Windows system.
Step 3: Open File
- Navigate to “File” section and select “Site Manager” after opening FileZilla.
Step 3: Choose SFTP Protocal
- Change the protocol to SFTP.
Step 4: Add Your Linux Address
- Type your Linux Address in the Host coloumn, which in this case is 192.168.0.18.
Step 5: Modify General Settings
- Under the General section, go to “Logon Type” and select “Normal” as shown in the image below:

Step 6: Enter the User Credentials
- Enter the Username and Password of the Linux OS machine.
Step 7: Share Files
- After all the 6 steps are done, click “Connect”.
- Now you’ve created a client-server connection with SFTP between Linux and Windows OS. After the connection is created, it is simply a matter of dragging and dropping files between the platforms mentioned earlier.
Method 3: Using SMB Protocol
One other way of transferring files from Linux to Windows is by connecting both OS systems using the SMB (Server Message Block) protocol. SMB can be used both in Windows and Linux to initiate a connection to share and transfer files.
Step 1: Use/ Install Samba in Linux
- Samba is an open-source software which provides clients with file and print services in a Windows-based network. This software supports connections between Windows systems and can be used to transfer files.
- To install Samba, type the following commands in your Linux terminal.
sudo apt install samba -y
- After successfully installing samba-client, check its status by typing the command:
systemctl status smbd
Step 2: Create a shared directory
- When transferring files from Linux to Windows, create a shared directory which will be used by both Linux and Windows OS. Follow the command below to see how to do so.
mkdir <directory_of_your_choice>
- Give administrative permission using the chmod command.
chmod 777 <directory_of_your_choice>
Note: There are several numbers in chmod which are used to give specific permissions. They are
- 777— everyone can read, write and edit (full access)
- 755— Owners can read, write and execute, and group users can read and edit the file.
- 644— Only owners can read, write and execute the files. The other people included by the owner can only view the file.
Step 3: Create a New uUer Specifically for File-Sharing
- While sharing files, create a new user whose account will be used for the sharing/ transfer of files. The command for this is
useradd <username>
Step 4: Give an SMB Password for the User
- To facilitate SMB protocol under the user, you must create an SMB password by executing the command below
smbpasswd -a <username>
- Then type out the password in the terminal.
Step 5: Edit the Config File in Samba Using Any Editor (or nano)
- Type out the command below
sudo nano /etc/samba/smb.conf
- After opening the file, scroll to the bottom of the file and add the following lines.
path = <directory_of_your_choice>
valid users = <username>
read only = no
browsable = yes
public = yes
writable = yes
browsable = yes
- Save and exit the file, then check if everything was edited and saved successfully by running the following command.
testparm
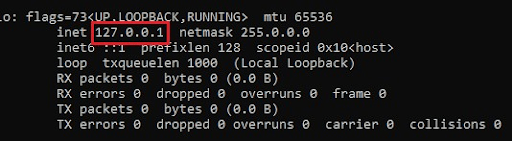
Step 6: Find the IP Address of Your Linux System
- Using ifconfig, find the IP address of your Linux system.
ifconfig wlo1
- Your IP address will be shown below:
Step 7: Connect to the Network from the Windows Side
- Launch the “Run” program by pressing the “Windows button” and “R”. Then type the IP address of the Linux system you got from the previous step. Type the IP address with two slashes before it.
- This will open the Linux-shared folders. Now you can view it and transfer files in between.
Methods 4 Use USB Drive (Easiest Method)
If you do not want to do any scription tasks or do not want to use FTP, then you can simple use USB drive to share files between Linux to Windows systems. Just insert your USB drive and copy all the files into the USB drive that you want to transfer into Windows. Once the copying task is completed, eject the USB drive from your Linux system, insert it into Windows system, and paste in anywhere in your Windows system.
Conclusion
Successfully transferring files from Linux to Windows can streamline your workflow and ensure that your data is accessible across different platforms. Whether you choose to use network sharing, SCP, or a USB drive, the methods covered in this guide provide you with the tools you need for efficient Linux to Windows file transfer. Understanding these techniques will help you handle cross-platform data management with ease.
Also Read
- How to Download a File from a Server with SSH / SCP?
- How to Troubleshoot SSH Connection Issues?
- How To Transfer Files From Android to iPhone?
Are you trying to perform Rsync from Linux to Windows share?
This guide is for you.
Rsync is a command-line utility that helps us to copy files from one location to another. We did experiments and found that it is fast. It can also be used for mirroring data and incremental backups.
Here at Ibmi Media, as part of our Server Management Services, we regularly help our Customers to perform Rsync related queries.
In this context, you shall learn how to transfer Rsync from Linux to Windows share.
More information about Rsync ?
A fast and versatile command-line utility, Rsync (Remote Sync) helps to synchronize files and directories between two locations over a remote shell, or from/to a remote Rsync daemon.
In addition, it provides fast incremental file transfer by transferring only the differences between the source and the destination.
We can use Rsync for mirroring data, incremental backups, copying files between systems. It acts as a replacement for scp, sftp, and cp commands.
Benefits and features of the Rsync command include:
i. Rsync efficiently copies and sync files to or from a remote system.
ii. Supports copying links, devices, owners, groups, and permissions.
iii. It’s faster than SCP (Secure Copy) since it allows the transfer of just the differences between two sets of files.
iv. It consumes less bandwidth using the compression and decompression method while sending and receiving data.
How to transfer Rsync from Linux to Windows share ?
To get started, we make a mount point:
mkdir /mnt/share
Then, we mount the smb share:
mount -t cifs -o username=domainusername //ip_add/ShareFolder /mnt/share
It will prompt for a password. It is always a good practice not to provide password within commands.
In addition, if we run the following command we can verify if it has mount:
mount
//ip_add/ShareFolder on /mnt/share type cifs (rw)
Similarly, we can mount it after every boot.
In order to do that we need to add it to /etc/fstab:
//ip_add/ShareFolder /mnt/share smbfs username=domainusername,password=P@S5W0rd 0 0
Now we can Rsync data to it.
For example, to rsync ibmimedia’s home directory into a dir called ‘homedir’ we run:
rsync -avz /home/ibmimedia/ /mnt/share/homedir/
[Stuck with the transfer with rsync? We are here to help you. ]
This describes how to copy files over the network between a computer (or virtual machine) running Windows and another computer (or virtual machine) running Linux.
There is also an article how to access a Linux partition when running Windows and how to access a Windows partition when running Linux. You may need this if your computer is running only one operating system and having two hard disk partitions.
You are on a Linux host
You want to access a Windows drive
So you are on a Linux computer and want to access a Windows drive over the network. This explains how. In this example we assume winhost is your Windows computer’s hostname (you can check the hostname by right clicking on My Computer and selecting Properties). Go to the Windows computer and open the Explorer. Share a folder by right-clicking onto it and selecting «Sharing and security». Call it «share1». Then, on your Linux computer,
- Open up your favorite file explorer, perhaps Konqueror or Nautilus
- In the address bar, type smb://winhost/share1
- You should now see the files and folders in that share. Double-click on them to open them up and view them.
troubleshooting
If that doesn’t work, then you may need to do something more complicated.
- install the samba client software
- try to find the share:
smbclient -L winhost
- If you see the share, mount it like this:
mount //winhost/share1 /mnt/smb
- after the next reboot, your mount will be lost. To make it persistant, add the following line to your /etc/fstab:
//winhost/share1 /mnt/smb smbfs defaults 0 0
So you are on a Linux computer and want to share a folder so that also Windows machines can access it over the network. To do this, you run the SAMBA service on your computer. To enable sharing to Windows machines, right click on a folder in Nautilus; the menu should have an item called «Sharing Options». Click it and pick the name for your share. If you don’t have Windows folder sharing enabled yet, Nautilus will ask you for a password and install the service, after which you will need to log out and back in. The share should now be available on the Windows computer.
See also Setting up a Samba Server.
You are on a Windows host
You want to access a Linux drive
Use WinSCP. Choose the SFTP protocol; the login and password are the same as those you use when logging in locally. If it does not work, look at your Linux computer: Try to shut down your firewall and install the openssh service.
You can share files with Linux using normal Windows sharing mechanisms. The Linux host will be able to access these files using samba.
See also
- interoperability
- file sharing
- «Accessing windows shared folders in linux»
- «Accessing Windows Shared Folders»
- «Mounting & Accessing Windows Shared Folders on Linux» by Sathya 2008
- «Mount a Windows shared folder in Linux» by Kyle Pott 2007
Wondering how to perform Rsync from Linux to Windows share? We can help you.
We help some of our customers with Rsync to copy files from one location to another. In the course it was found that it is fast and can also be used for mirroring data and incremental backups.
As part of our Server Management Services, we assist our customers with several Rsync queries.
Today, let us see how to transfer Rsync from Linux to Windows share.
What is Rsync?
A fast and versatile command-line utility, Rsync (Remote Sync) helps to synchronize files and directories between two locations over a remote shell, or from/to a remote Rsync daemon.
In addition, it provides fast incremental file transfer by transferring only the differences between the source and the destination.
We can use Rsync for mirroring data, incremental backups, copying files between systems. It acts as a replacement for scp, sftp, and cp commands.
Advantages and features of the Rsync command include:
- Rsync efficiently copies and sync files to or from a remote system.
- Supports copying links, devices, owners, groups, and permissions.
- It’s faster than SCP (Secure Copy) since it allows the transfer of just the differences between two sets of files.
- It consumes less bandwidth using the compression and decompression method while sending and receiving data.
Transfer Rsync from Linux to Windows share
Initially, we make a mount point:
mkdir /mnt/shareThen, we mount the smb share:
mount -t cifs -o username=domainusername //ip_add/ShareFolder /mnt/shareIt will prompt for a password. It is always a good practice not to provide password within commands.
In addition, if we run the following command we can verify if it has mount:
mount //ip_add/ShareFolder on /mnt/share type cifs (rw)Similarly, we can mount it after every boot.
In order to do that we need to add it to /etc/fstab:
//ip_add/ShareFolder /mnt/share smbfs username=domainusername,password=P@S5W0rd 0 0Now we can Rsync data to it.
For example, to rsync bob’s home directory into a dir called ‘homedir’ we run:
rsync -avz /home/bob/ /mnt/share/homedir/[Stuck with the transfer? We are here to help you]
Conclusion
To conclude, the transfer of Rsync from Linux to Windows share can be done in a few steps. Today, we saw the best fit suggested by our Support Engineers.
PREVENT YOUR SERVER FROM CRASHING!
Never again lose customers to poor server speed! Let us help you.
Our server experts will monitor & maintain your server 24/7 so that it remains lightning fast and secure.
GET STARTED
var google_conversion_label = «owonCMyG5nEQ0aD71QM»;