
Бывают случаи, когда вам нужно записать Windows на флешку в Linux, например, когда вы хотите поставить эту систему второй для использования специализированных программ, или вам нужно переустановить операционку своим знакомым. Или же есть пользователи Linux, которые решили вернуться на Windows, но единственную флешку уже перезаписали под Linux LiveUSB.
Загрузочная флешка Windows в Linux создается достаточно просто. Я предлагаю несколько способов решения этой проблемы. Все их я перечислил ниже.
Содержание статьи
- Загрузочная флешка Windows в Linux
- Выводы
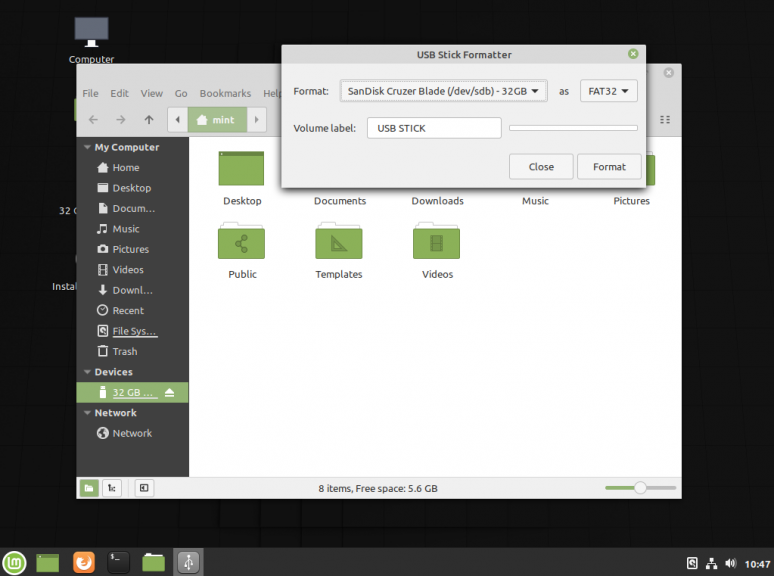
Загрузочную флешку можно создать с помощью терминала или специальных графических утилит. Настоятельно рекомендую отформатировать флешку в Fat32 (или Exfat) перед использованием любого из предложенных методов. Форматирование можно выполнить через Gparted, сfdisk+mkfs или через usb stick formatter (форматирование USB флеш накопителя).
Способ 1. Утилита USB Image Write
Для создания флешки можно воспользоваться утилитой Запись образа на USB. В некоторых дистрибутивах она уже предустановленна (Ubuntu, Mint и др.):
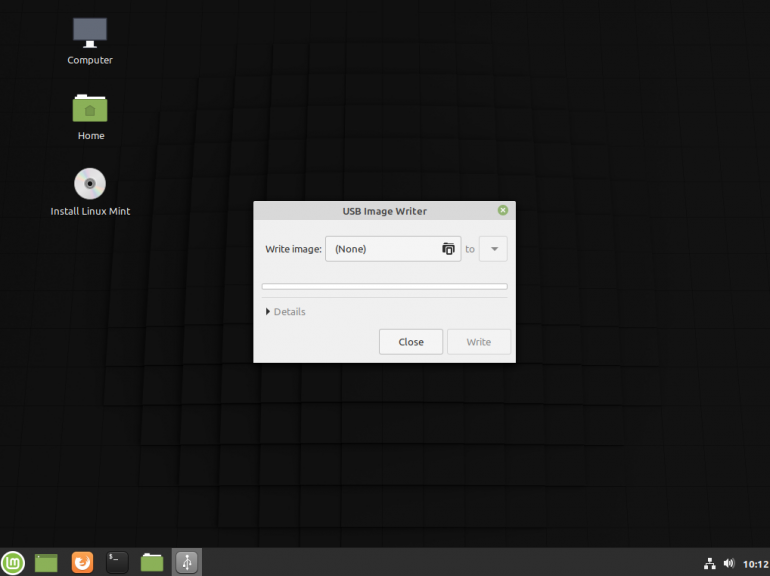
Выбрать образ в графе Write image образ и в поле to выбрать флешку. Далее нажимаем Write.
Способ 2. Утилита WoeUSB
Пожалуй, это самый простой способ создания. Установка в Ubuntu выполняется с помощью таких команд:
sudo add-apt-repository ppa:nilarimogard/webupd8
sudo apt update
sudo apt install woeusb
Откройте утилиту в меню приложений:
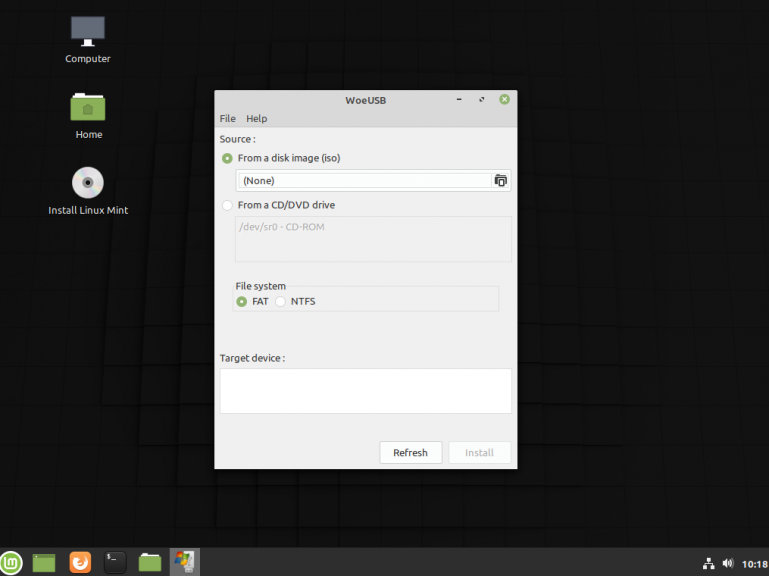
Интерфейс простой. Нажмите на кнопку Обзор со значком папки и выберите образ. Target device это флешка, на которую будет идти запись, если у вас их несколько выберите нужную. Ещё есть поле File system, где нужно выбрать какую файловую систему будете использовать. Рекомендую FAT. Затем нажмите Install и дождитесь окончания.
При появлении ошибки с кодом 256 Source media is currently mounted, размонтируйте образ ISO с Windows, если вы его смонтировали. При ошибке Target device is currently busy, извлеките флешку, затем снова подключите её. Если не сработало, попробуйте отформатировать её.
Способ 3. Терминал и Gparted
Положите образ в домашнюю папку и переименуйте его в windows.iso во избежание проблем с пробелами. Затем перейдите в терминале в домашнюю папку
cd ~
Запустите терминал через главное меню или с помощью сочетания клавиш Ctrl + Alt + T затем используйте команду dd для записи образа на флешку:
dd if=/windows.iso of=/dev/sdX
Замените X на букву вашей флешки! Узнать её можно через Gparted. В правом верхнем углу есть кнопка переключения дисков:
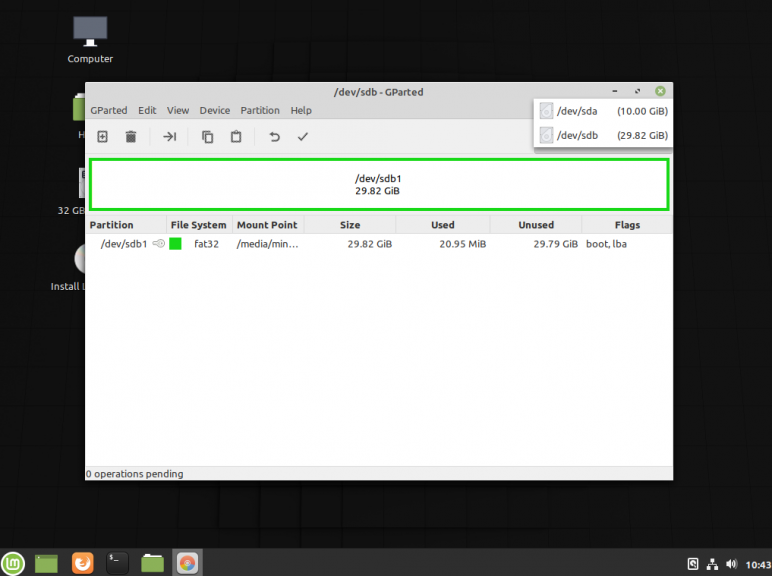
Тот диск который соответствует размеру вашей флешки и есть ваша флешка. В моем случае флешка на 32 гб это /dev/sdb. Значит команда будет иметь вид:
dd if=/windows.iso of=/dev/sdb
Дождитесь окончания записи и извлеките флешку.
Выводы
Как видите, создание загрузочной флешки Windows в Linux не представляет сложности. Это были все способы, которые я знаю. Если они вам помогли, напишите об этом. Если вы знаете еще способы, обязательно напишите о них в комментариях!
Об авторе
Здравствуйте, я изучаю Linux и обладаю хорошими знаниями английского.
Hi there⌗
Out of many ways to create a windows bootable usb stick in Linux, the only thing that worked for me was Woe Usb. It is a great tool to flash, specifically windows. It is available for almost any major Linux distribution. In case it’s not your existing repo, u can install it as a snap package.
1. Install WoeUSB⌗
-
For Arch Linux Users⌗
-
For Ubuntu Users⌗
1.1. Add WoeUSB repo⌗
sudo add-apt-repository ppa:nilarimogard/webupd81.2. Update⌗
1.3. Install WoeUSB⌗
-
For Fedora Users⌗
NOTE: For all the left-out distros, please give it a quick internet search on “how to install woeusb in….»
2. Flash Windows using WoeUSB⌗
2.1. Choose a Disk Image⌗
CLick on the folder icon next to none to select the windows iso you want to burn
2.2. Choose the Filesystem⌗
Since Windows uses a NTFS as its file system, just choose NTFS!
2.3 Choose the Target Device⌗
This refers to your usb stick that you’ll be flashing…
2.4 DONE!⌗
Just wait until the process completes. Reboot your system, boot to BIOS and then choose the usb stick with windows.
Hope you enjoyed reading
Hello everyone. In this article, I am going to show you how to create a Windows 11 bootable USB on Ubuntu using the GParted project.
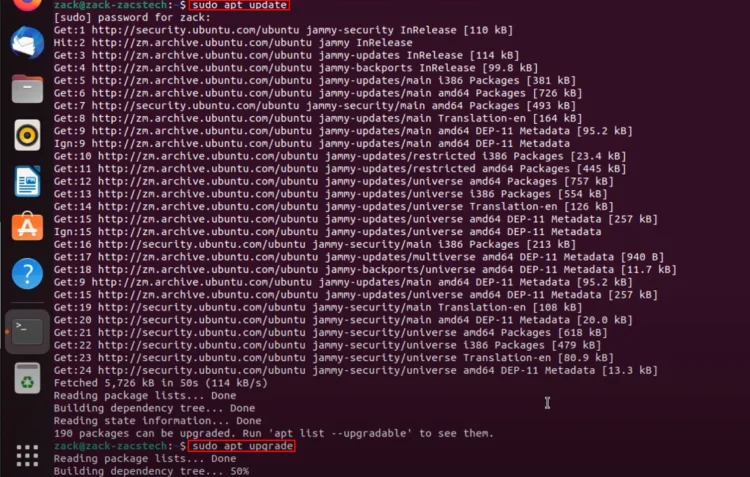
Updating Your System
Before we begin, if you’re using Ubuntu, it’s a good practice to update your system. I will show you how to create a Windows 10 or 11 bootable USB in Ubuntu. You can start by updating your system by typing “sudo apt update” in Terminal. If there are any packages that need to be upgraded, you can upgrade them by typing “sudo apt update“.
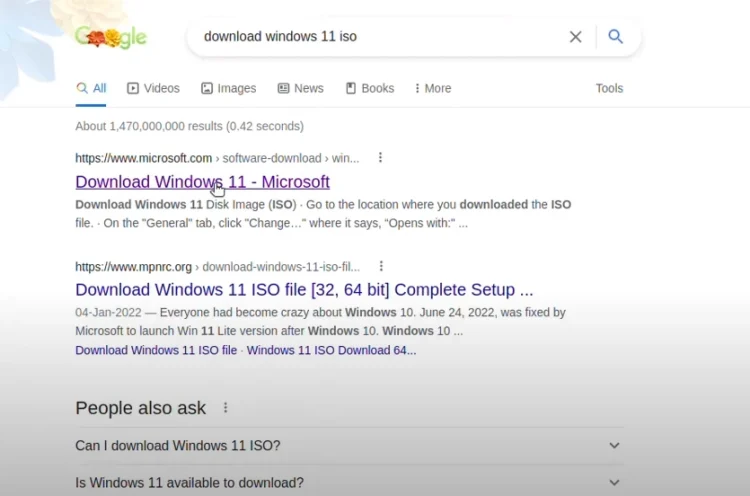
Downloading the Windows 10/11 ISO
So, the first step is to download the Windows 11 ISO image. Open your favorite browser or simply use the default browser that comes with Ubuntu. Simply search for “download Windows 11 ISO” and you’ll get the Windows 11 ISO image from Microsoft’s official website.
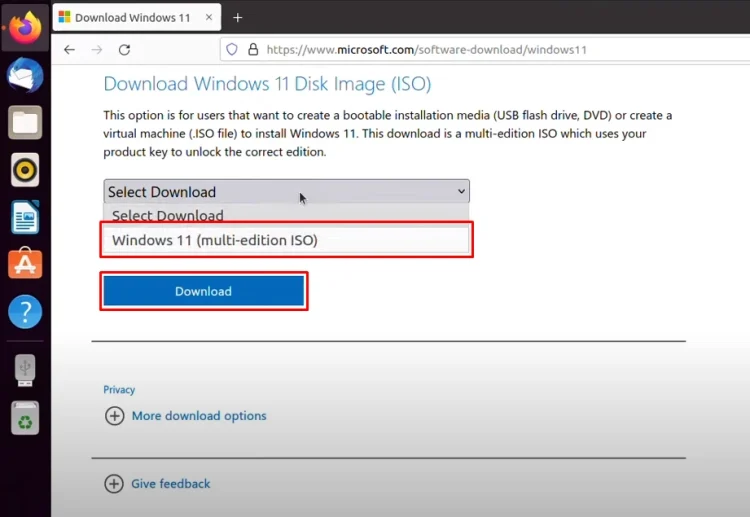
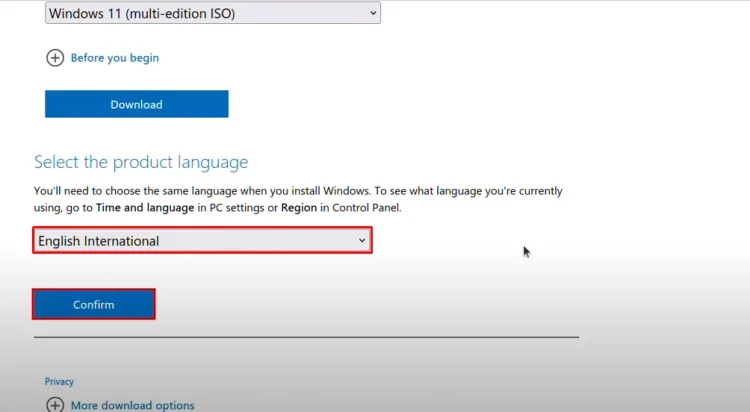
After that, you have to select the Windows 11 ISO image edition and click Download.
Choose a language and click Confirm.
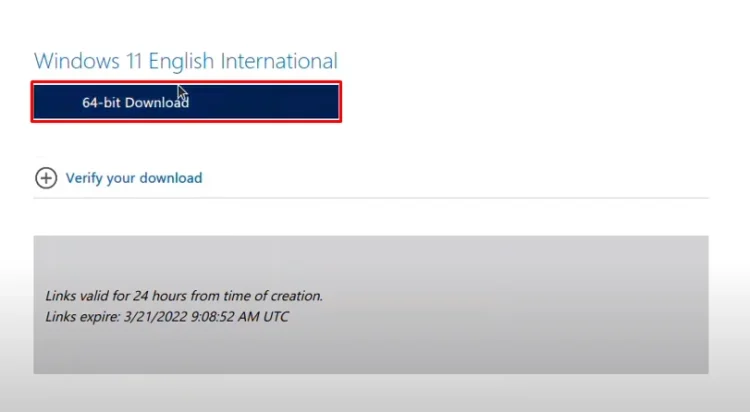
Then click 64-bit Download and save it. It will save the file to your computer.
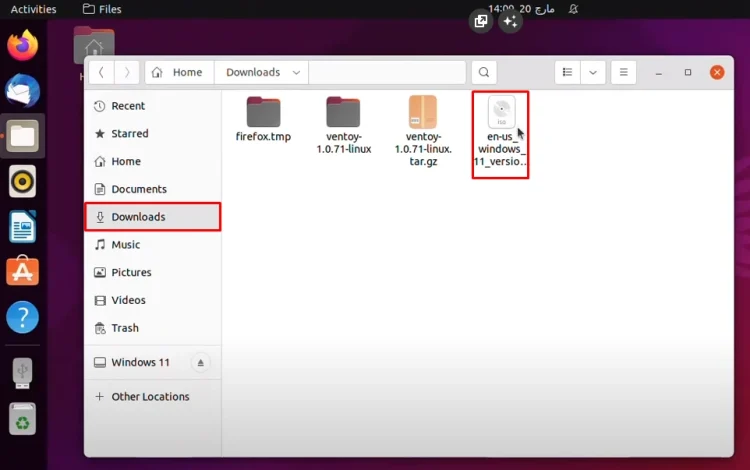
Now, I’m going to insert it because I already have it. If I have to show you, it’s in the Downloads directory, which I have simply imported from my main PC. The size is around 4 GB.
Preparing the USB Flash Drive
The second step is to attach the USB flash drive to your computer. I’ve already done that, so there’s no need for me to attach it.
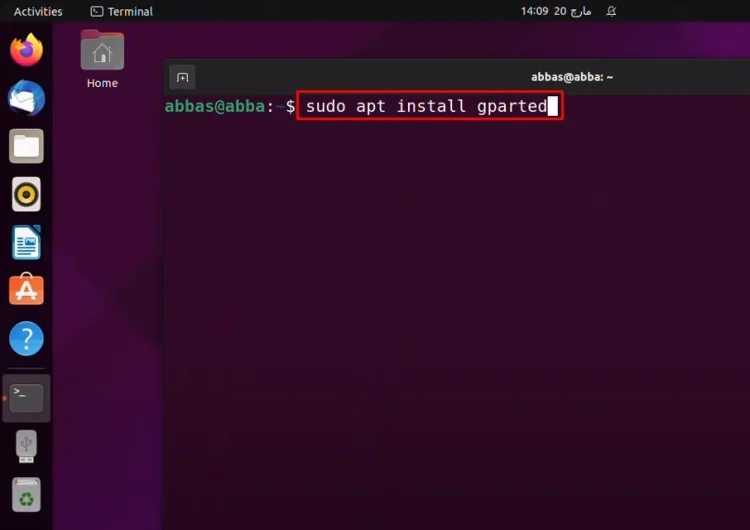
The third step is to install GParted onto your computer.
You can use the Ubuntu Software or the Terminal. I prefer the terminal because it’s faster. Once it’s launched, simply type “sudo apt install gparted“.
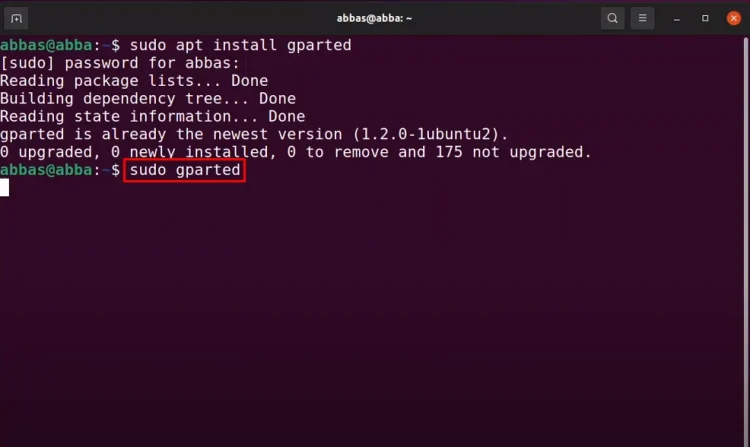
The next step is to launch GParted, typing “sudo gparted” in Terminal.
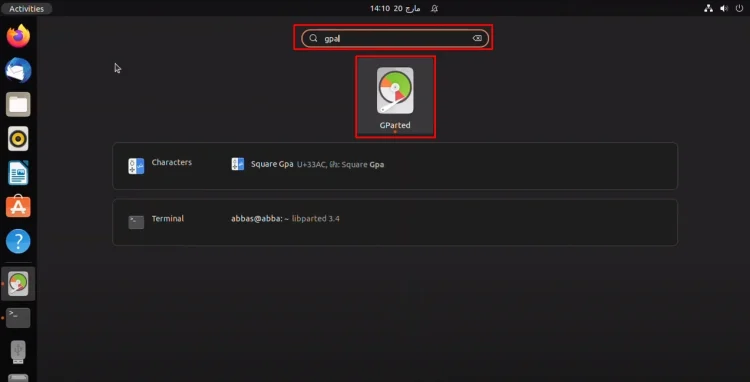
You can also launch GParted from Launchpad. Just simply search for GParted and launch it.
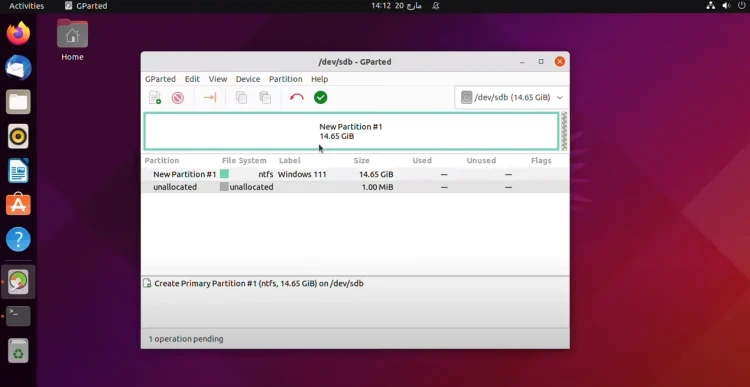
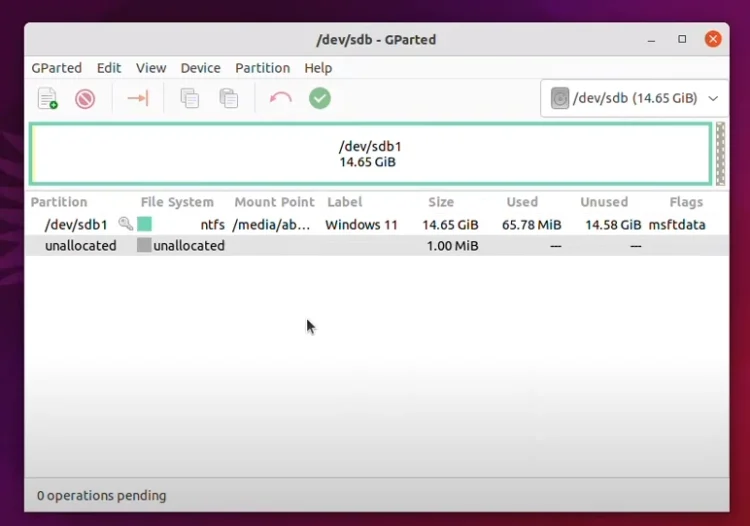
Once it’s launched, select the USB flash drive.

Partitioning the USB Flash Drive
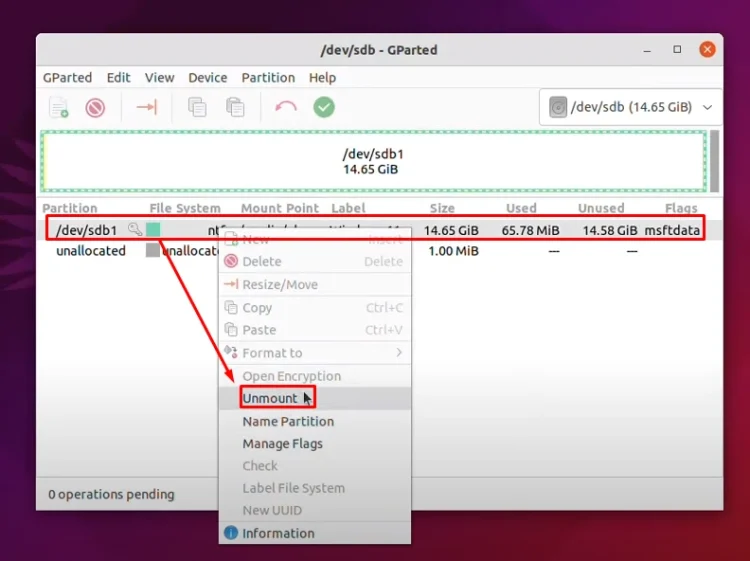
By default, you can see that it’s a bootable USB flash drive of Windows 11.
For now, I have to delete all of them and then I’ll show you how to create them again from the beginning.
Let me delete it first. You have to unmount it, then delete it. Sorry for that. Now delete.
Okay, it is deleted.
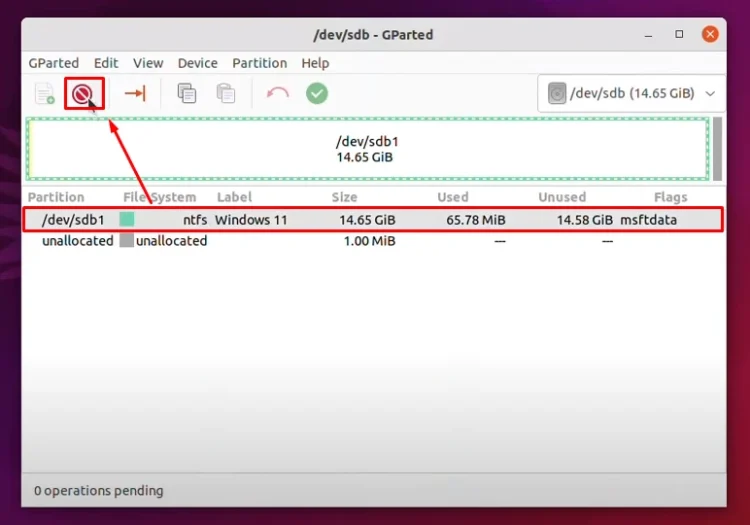
Now click Apply.
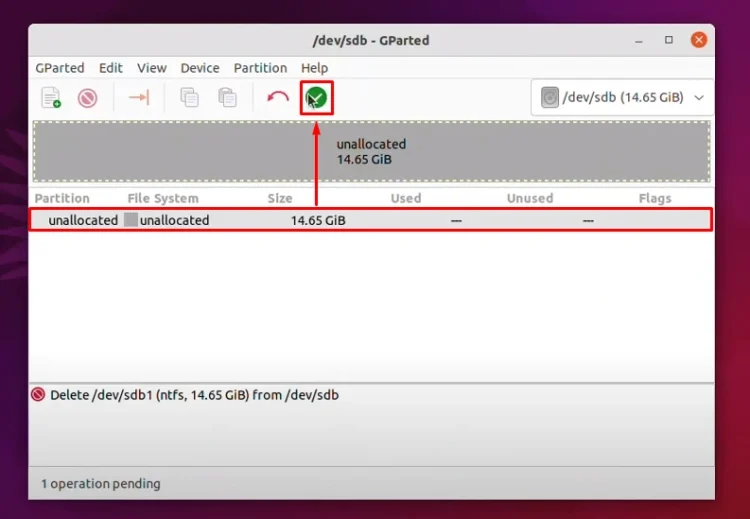
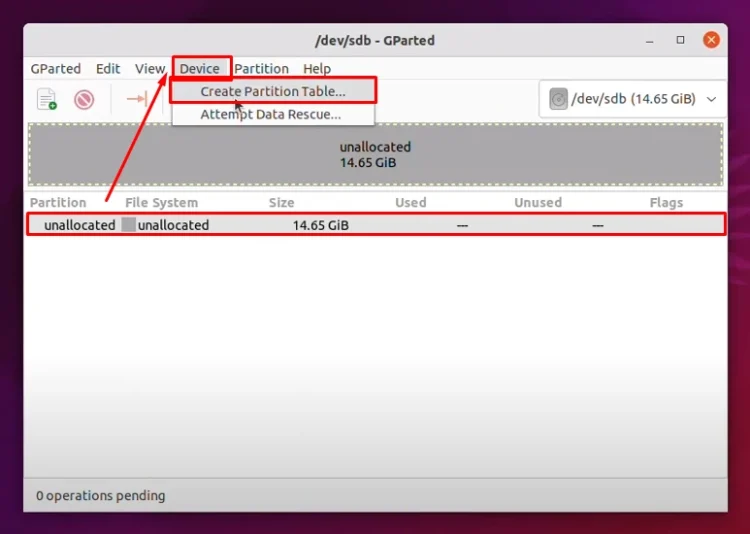
Once it’s removed, we need to create a partition for it. Go to Device and click Create partition table.
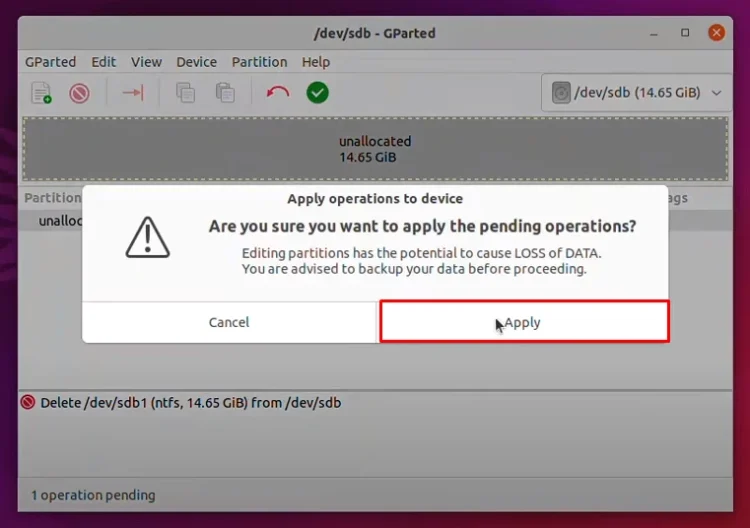
From here, select a partition style for Windows. We are going to choose gpt. Click Apply.
Remember, it’s going to remove everything from your USB flash drive, so back up your files.

Formatting and Copying Files
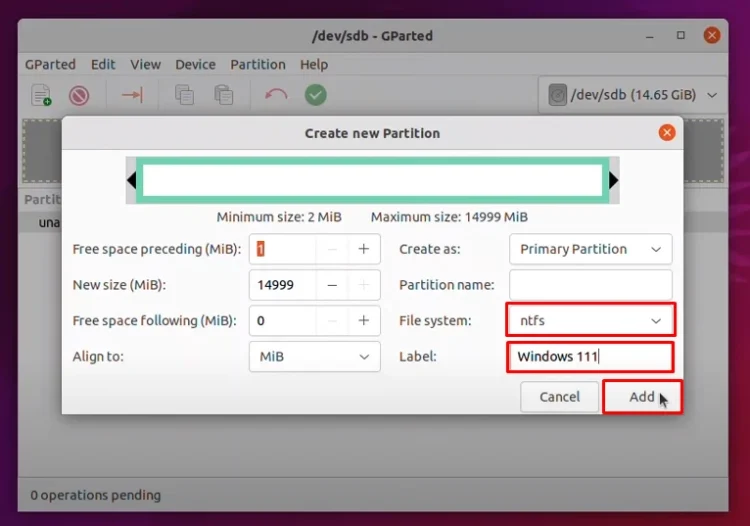
The next step is to create a file system for it.

By default, Linux personal file system is ext4. Windows is using NTFS. We’re going to choose NTFS. We can also label the USB flash drive. I’m going to name it “Windows 111“. Click Add.
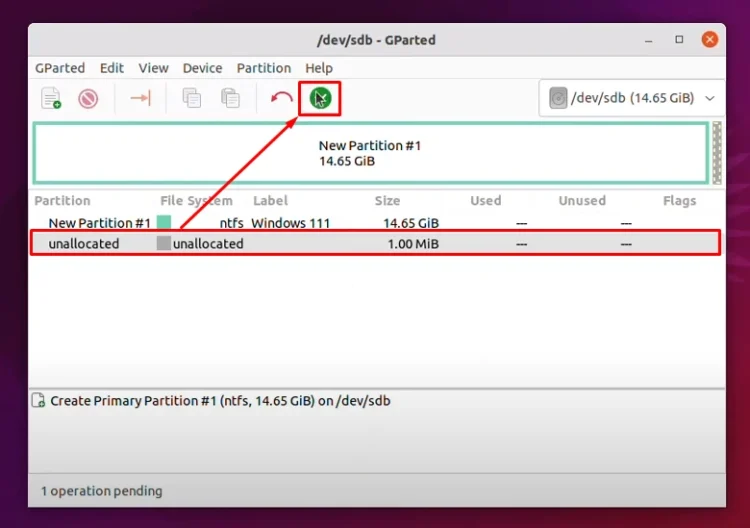
Now you can see that it’s done, but the changes have not applied. Click Apply and wait for it.
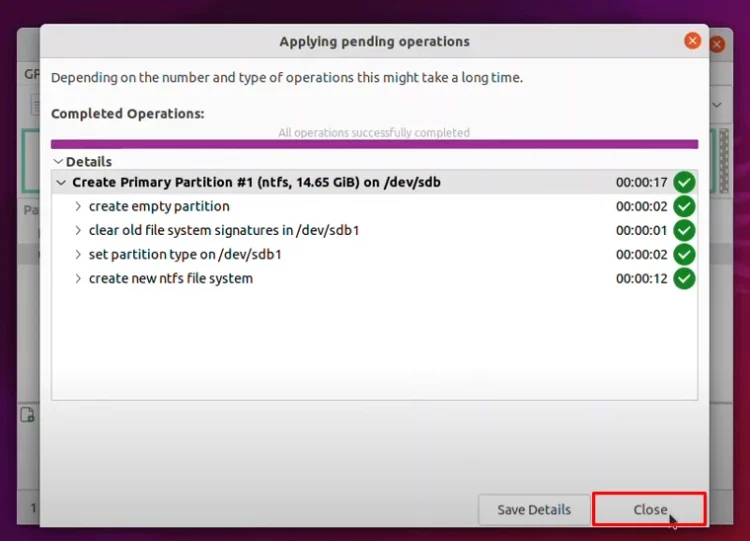
Once it’s done, you can close it.
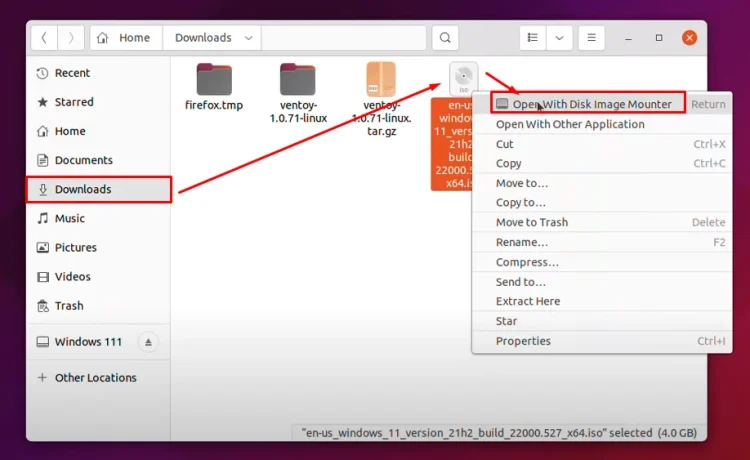
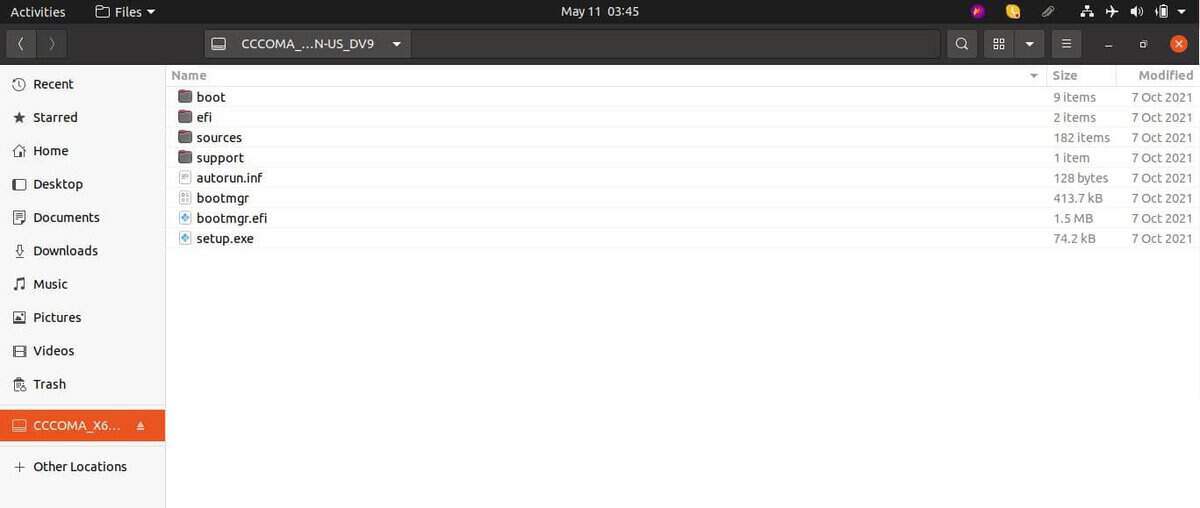
The next step is to open files and go to the Downloads folder where Windows 11 is located. Right-click on it and choose Open With Disk Image Mounter.
Finalizing the Bootable USB
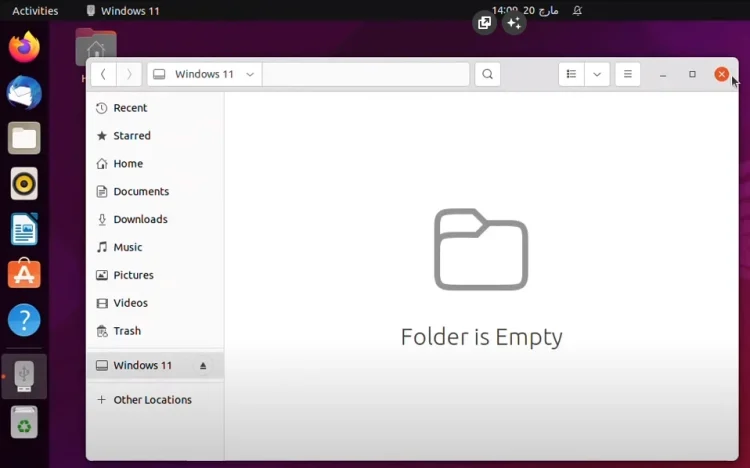
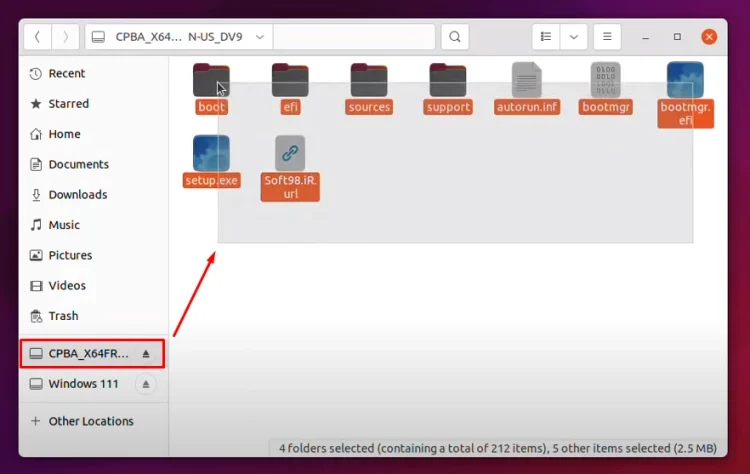
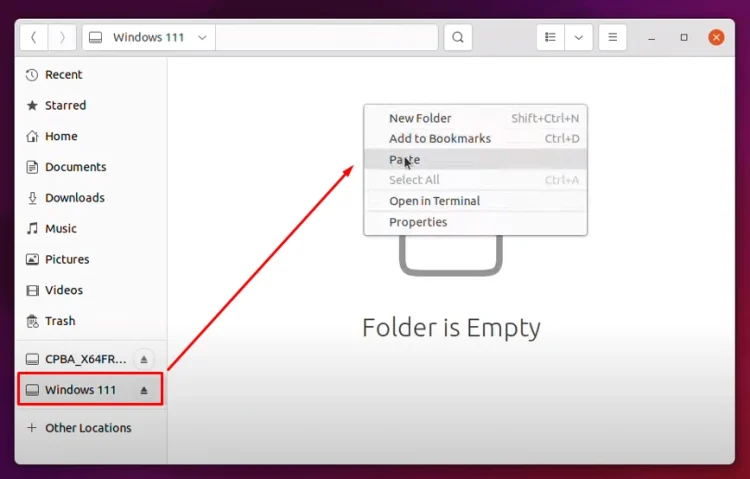
Here you can see that Windows 11 is mounted. Right-click, copy, and now go to the USB flash drive and paste them here.
During the copy of the files, you will not face any type of error. If you face any type of error, it means the Windows 11 ISO that you downloaded from the internet has been corrupted. Maybe the speed of your internet connection was not fast and somehow it got corrupted.
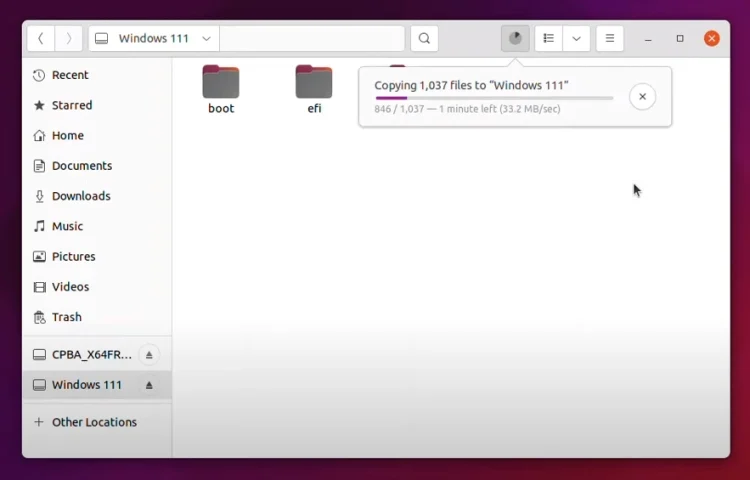
So basically, this is how you can create a Windows 11 bootable USB. For now, I am going to wait until the files are copied from the ISO inside the USB flash drive.
Post Views: 4,603
Most Linux users do not bother with the Windows operating system. But, if you’re a professional user, sometimes, you will need to get back to Windows for testing and checking purposes. However, besides experimenting and developing, there are many tools that run well in Windows and won’t even run on Linux. In these circumstances, you might need to get back to the Windows operating system. If you need to get a dual-boot arrangement system on your PC, you will need to create a bootable Windows ISO file on the USB from your Linux system to get the secondary OS.
Create a Windows Bootable USB on Linux
In Ubuntu and other Linux distros, there are a few powerful tools that let you create a bootable USB drive of Windows ISO files. Besides these, in Ubuntu and many other distributions, you can directly create a bootable disk and mount the files on a temporary directory.
Before I go into the steps where I will show the methods, I assume that you have the ISO file downloaded on your filesystems and you know the BIOS method of your PC and what type of filesystem partition you need, like MBR or GPT. In this post, we will see how to create a Windows bootable USB on Linux.
Method 1: Create a Windows Bootable USB on Linux with WoeUSB
In this method, we will see how we can create a bootable USB file of Windows from a Linux host machine through the app called WoeUSB. The WoeUSB is one of the oldest and most effective tools for making bootable files.
Step 1: Install WoeUSB on Linux
As the WoeUSB is a third-party app, so we will need to install the tool first on your Linux system. The installation process of the WoeUSB tool is easy and straightforward. First, you need to get the package dependencies on your machine. Please execute the below-mentioned command according to your distribution.
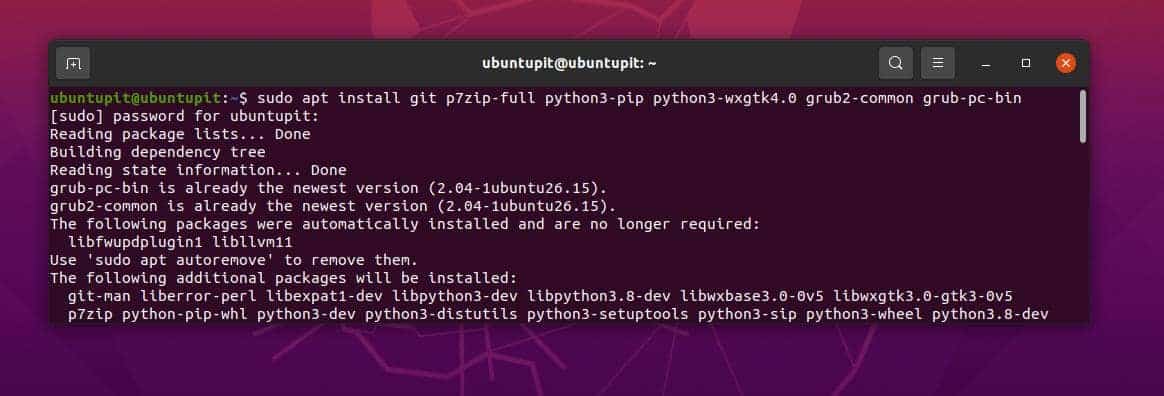
Install WoeUSB dependencies on Ubuntu/Debian System
sudo apt install git p7zip-full python3-pip python3-wxgtk4.0 grub2-common grub-pc-bin
Get the dependencies on Arch Linux
sudo pacman -S p7zip python-pip python-wxpython
Install WoeUSB dependencies on Fedora/Red Hat Linux System
sudo dnf install git p7zip p7zip-plugins python3-pip python3-wxpython4
Now, we will need to clone the Git repository of the WoeUSB on our system. The below-mentioned commands would be executed on all major systems.
git clone https://github.com/WoeUSB/WoeUSB-ng
cd WoeUSB-ng
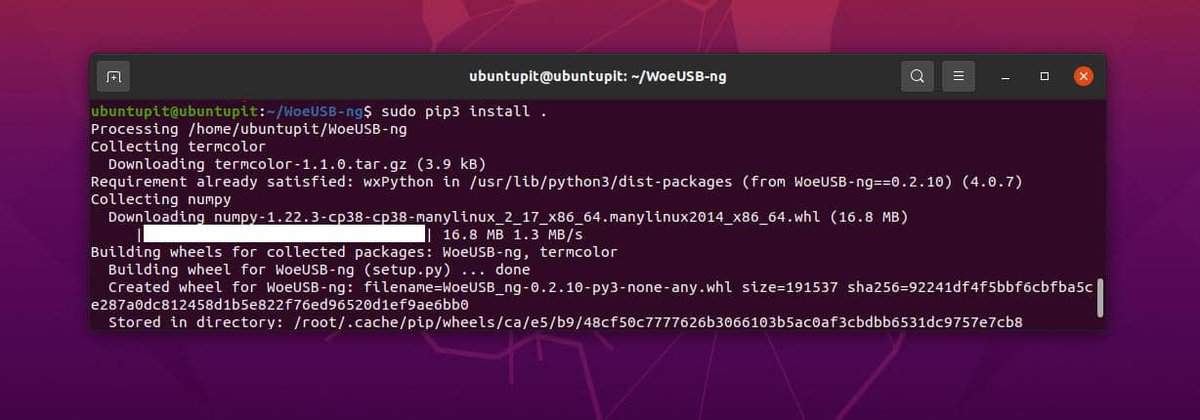
Finally, Execute the below-mentioned comment on the terminal shell to get the tool installed on your system. Please don’t ignore the dot (.) at the end of the command.
sudo pip3 install .
Step 2: Open WoeUSB
Once we are done with installing the WoeUSB, we can now fire up the tool and get started. We can use either the conventional method or we can just type the below command on the shell and hit Enter.
woeusbgui &
Step 3: Create the Windows Bootable USB
So far we have seen how to install the WoeUSB tool and how to open the tool on a Linux system. When you open this told you will see that the tool is a graphical user interface-based tool. Here I have pointed out the steps that you will need to do now to create a Windows bootable USB file on Linux.
- At first, you will need to click on the from disk image menu to select your Windows ISO file on the tool.
- Now under the target device, you will select the USB pen drive or the USB disk drive where you want to create the bootable Windows files.
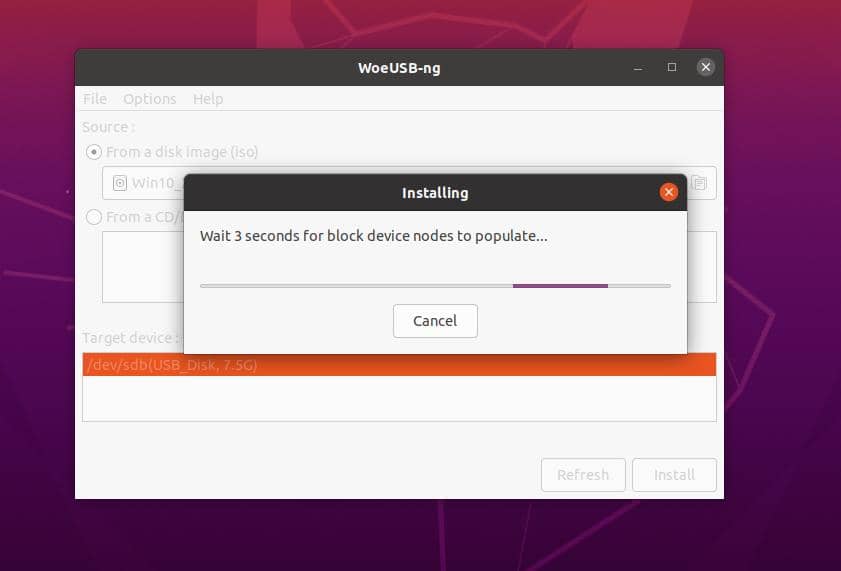
- Finally, click on the install button to late the tool to create the bootable file.
- Please wait until the tool finishes creating the bootable file and don’t close the window until it finishes.
It will take a while to initialize the process, the progress status will be displayed on the WoeUSB tool.
Method 2: Create a Windows Bootable USB on Linux with balenaEtcher
The Etcher tool is pretty similar to the WoeUSB tool that we have seen earlier. To create the bootable USB stick with this tool, you will need to get the tool first on your Linux system.
Step 1: Instal the Etcher Tool on Linux
As the Etcher tool is very famous, the developers have already made both GUI and CLI methods available to install this too. Here, we will see both GUI and CLI methods to install the Etcher tool.
1. GUI Method to Install Etcher
The Etcher tool is very famous among the Raspberry Pi board and micro-computer users. This tool is very handy for creating and burning ISO files very effectively and it ensures an errorless output. You can download the Etcher AppImage tool from here for your Linux system.
After you download the AppImage file, extract the file on your system. Then right-click on the file and hover over the Properties tab.
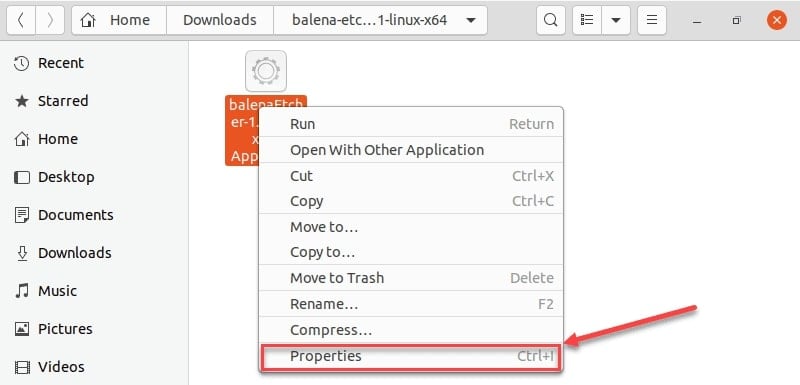
Then go to the Permissions tab, and finally check the Allow executing file as a program. You can now double-click on the AppImage file to run the Etcher tool.
2. CLI Method to Install Etcher
If you find any issues installing the Etcher tool with the above-mentioned GUI method, or you prefer to use the CLI method; this step is totally for you.
First, you will need to execute the below-mentioned echo command on the new terminal shell to get the resource file on your system.
echo "deb https://deb.etcher.io stable etcher" | sudo tee /etc/apt/sources.list.d/balena-etcher.list
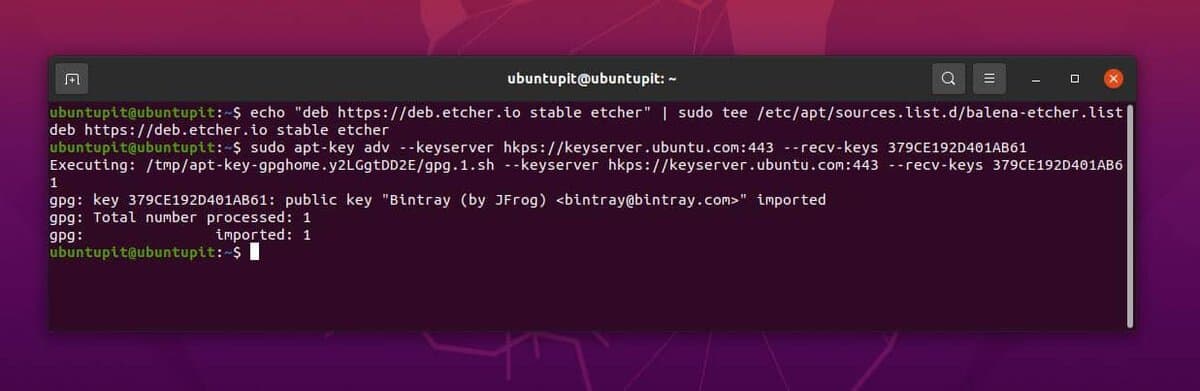
Now please execute the below-mentioned APT command on your shell to get the repository queries on your Debian or other Linux systems.
sudo apt-key adv --keyserver hkps://keyserver.ubuntu.com:443 --recv-keys 379CE192D401AB61
Finally, you can now update your aptitude repositories and run the below-mentioned comment to install the Etcher tool on your system.
sudo apt update
sudo apt install balena-etcher-electron
Step 2: Use Etcher Tool to Create A Windows Bootable USB
So far we have seen how to install the Etcher tool on a Linux System. we will now see how to use this tool to create a bootable USB disk for Windows. Once you open the tool you will find all the options and buttons are self-explanatory that you will not need some additional help or guideline to operate this tool.
Please note when you choose a Windows ISO file on the Etcher tool, it might show a warning with a suggestion to use the WoeUSB or Rufus tool for creating the Windows bootable file. However, you can ignore that warning and proceed.
Please be mindful while you choose the USB device because this Etcher tool is going to erase all the data from the USB device. If you accidentally choose any other directory or folder you cannot go reverse to back up the data. Nonetheless, Here I am adding the steps in a few points so that you can get the steps easily.

- First, you will need to open the Etcher tool on your system.
- Now you will need to choose the ISO file from your file system that you want to use for creating the USB disk.
- After you choose the ISO file you will now need to choose the USB device.
- Finally, click on the flash button from the Etcher tool it will instantly initiate creating the bootable device.
Method 3: Mount ISO on the FileSystem
This method is pretty much basic and you won’t need any additional third-party software or tools to make a bootable disk on your Linux System. In this method, we will use the in-built file manager and the disk mounting tool that Linux already offers with the operating system.
When you have the ISO file downloaded to your system, you can just right-click on the file and choose Open with Disk Image mounter on the system. This method will automatically convert the ISO files into a bootable format under the filesystem and allow you to copy the entire bootable files into a USB disk.
Please note, that the bootable files will stay for a temporary basis mounted on the system. If you reboot the system the mounted bootable files will be gone. So before rebooting or restarting, please copy the files into a USB disk.
Insights!
In the entire post, we have seen how to create a Windows bootable USB on Linux. In the above post, I have mentioned two excellent tools for creating the bootable device, there are other tools available on the web as well.
Please be careful when you choose a third-party app on your system, there are many tools that do not work for creating a bootable USB device on Linux. Before you install an app, please read the reviews carefully to check if this is a hoax or not.
In the entire post, we have seen three different options for making a bootable USB on Linux. These methods are executable in all major distributions. Besides these, you can also try using the Unetbootin tool for creating a bootable USB disk.
If you find this article has been useful for you, please do not forget to share this post with your friends and the Linux community. We also encourage you to write down your opinions in the comment section regarding this article.
В данной статье мы расскажем как создать загрузочную флешку с Windows в системе Linux с помощью утилиты под названием «Ventoy».
Для начала вам потребуется:
— Сама утилита Ventoy под Linux, скачать вы ее можете с официального сайта.
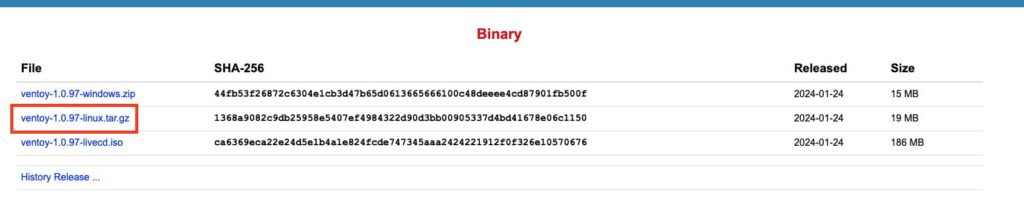
— ISO Образ нужной вам Windows, скачать его можно в нашем каталоге.
— Так же вам потребуется активировать будущую Windows, оригинальные ключи активации вы можете приобрести у нас в магазине по выгодным ценам от 1140 ₽.
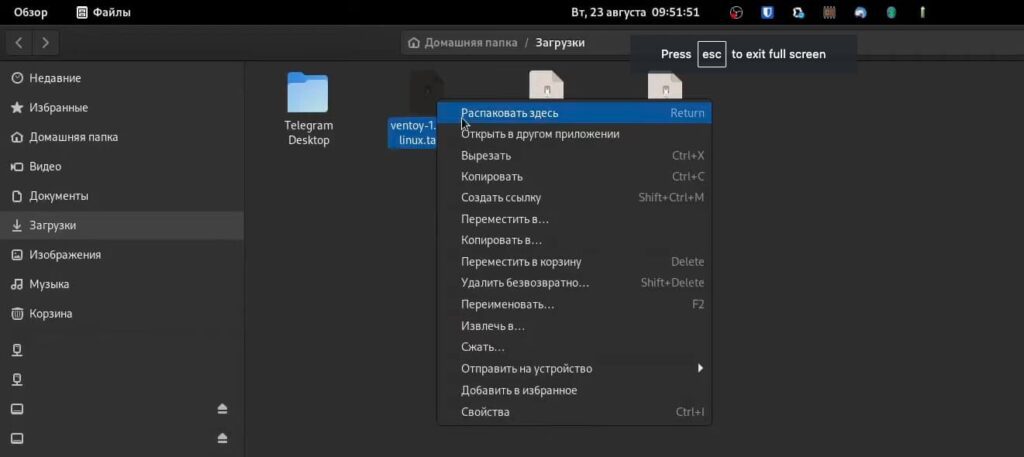
1) После того как вы скачали архив с программой, распаковываем его в удобное для вас место.
2) Переходим в папу с программой, и нажимаем «Свойство» на файле «VentoyGUIx86_x64».
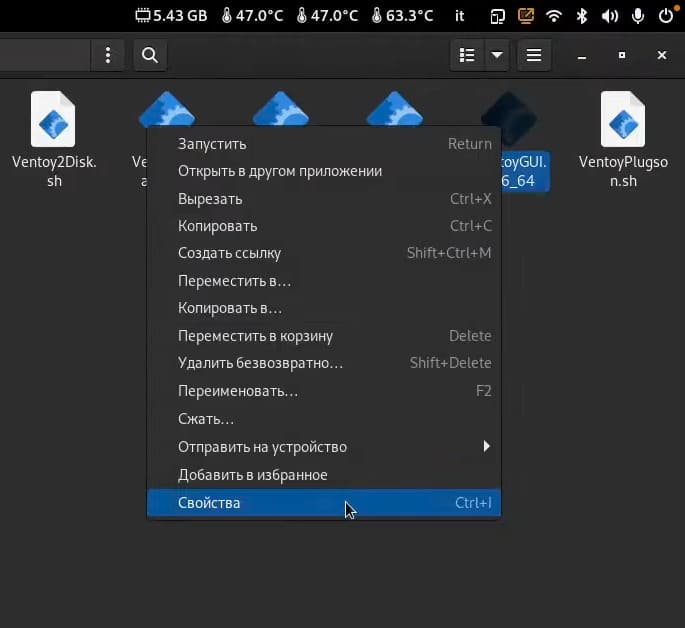
3) В разделе «Права» ставим галочку напротив «Разрешить выполнение файла как программы», чтобы сделать файл исполняемым.

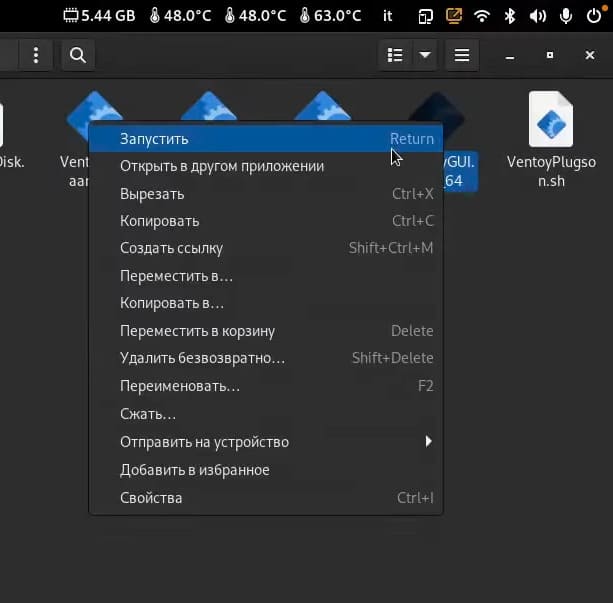
4) После этого запускаем файл.
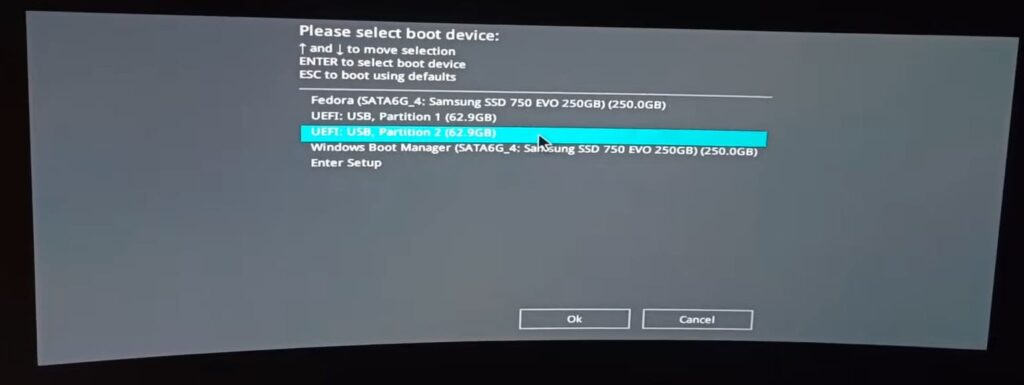
5) После запуска открывается интерфейс утилиты, если вы будете устанавливать Windows на старый ПК c Legacy Boot, то в разделе Option => Partition Style выбираем «MBR». Если же установка будет производиться на новый ПК с UEFI, тогда выбираем разметку «GPT».
6) После выбора нужной вам разметки, жмем «Install» и ждем какое-то время.
7) После записи программы на флешку, появится два раздела.
— Первый раздел, куда установилась сама утилита с ее файлами.
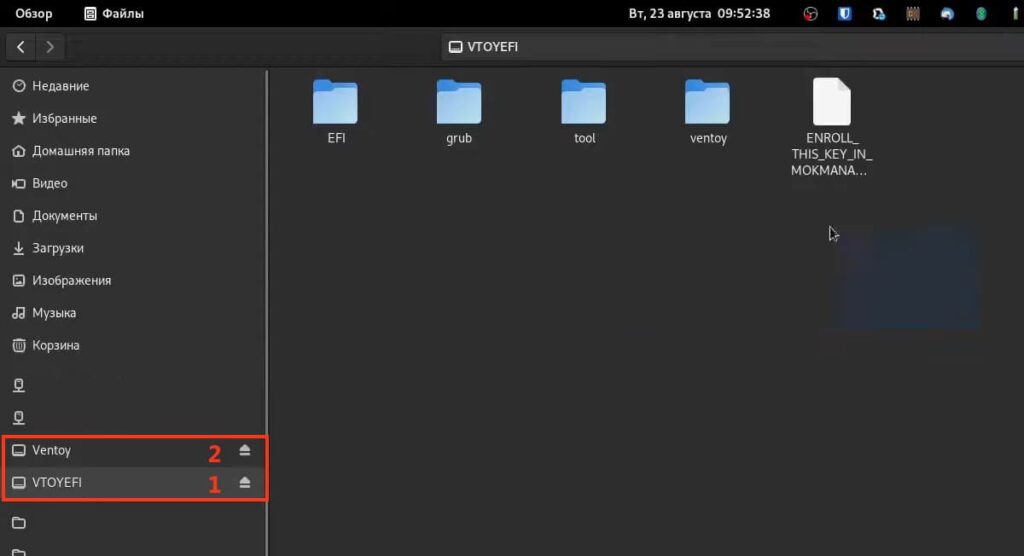
— Второй раздел, куда нужно будет поместить ISO образ Windows.
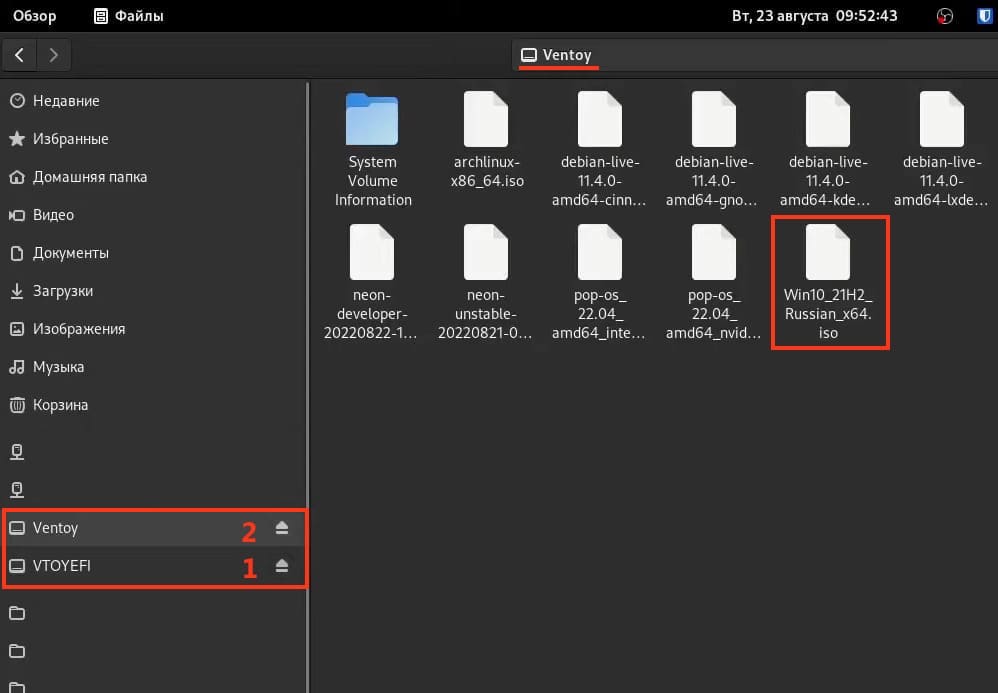
 Все что нам остается, это просто переместить во второй раздел заранее скачанный ISO образ нужной вам Windows.

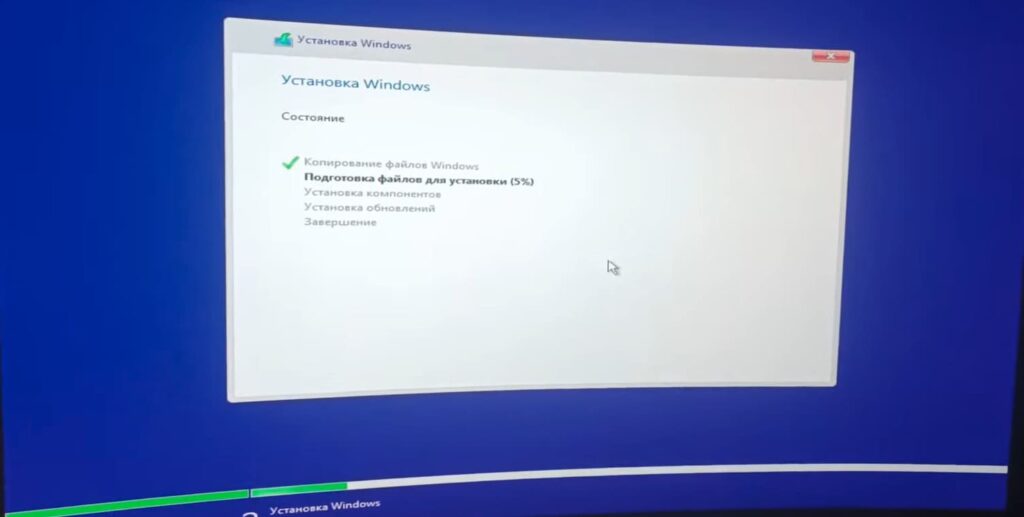
9) После чего запуститься с этой флешки, выбрать второй раздел и начать процедуру установки системы.
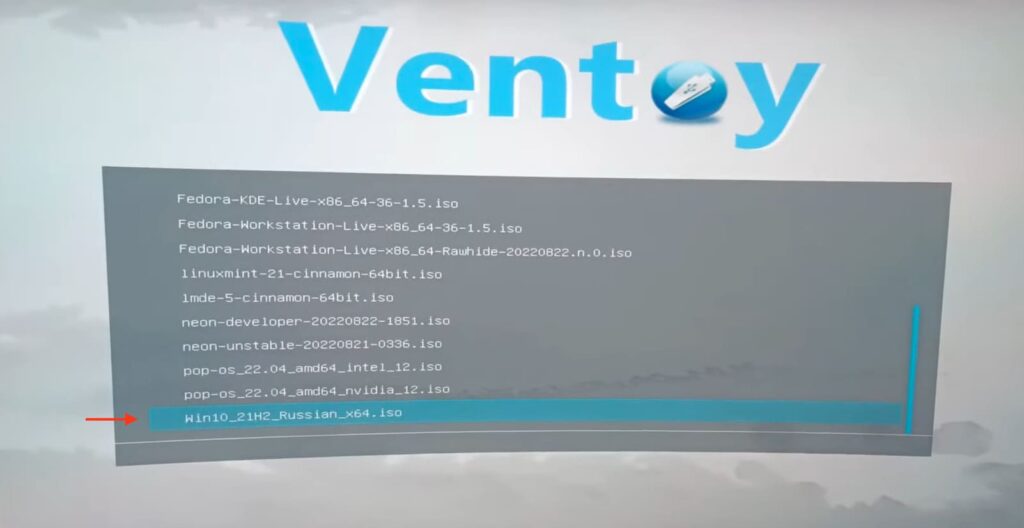
Хотим напомнить что все популярные ISO образы Windows вы можете скачать в нашем каталоге.
— Windows 11
— Windows 10
— Windows 8.1
— Windows 7