
Панель задач Windows достаточно удобна в части размещения на ней значков часто используемых программ и других инструментов, но не всегда достаточна. Если вы хотите добавить дополнительные панели на рабочем столе с вашими ярлыками программ, папок или файлов, для этого можно использовать сторонние утилиты, одна из которых — Linkbar.
В этом обзоре о создании панелей на рабочем столе в Linkbar — бесплатной программе с открытыми исходным кодом для Windows 11/10 и предыдущих версий системы.
Использование Linkbar

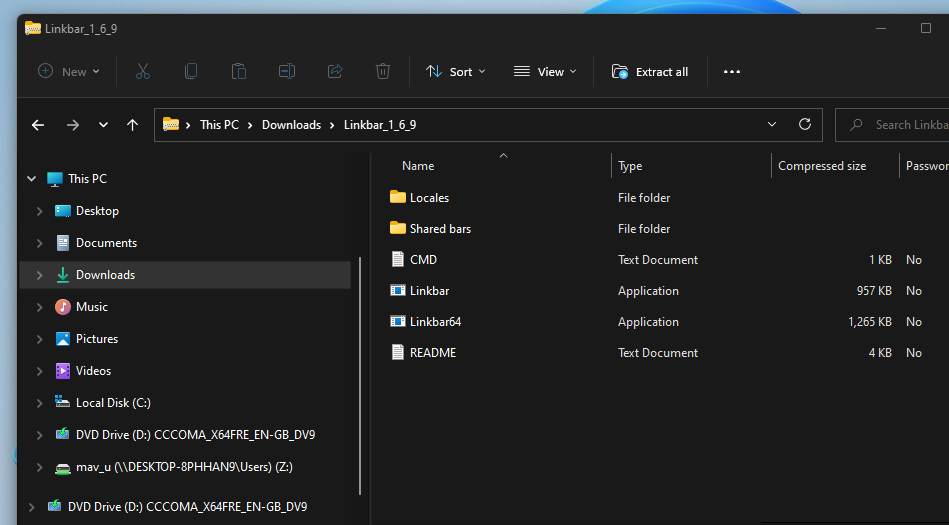
Скачать последнюю версию Linkbar можно с официальной страницы разработчика на GitHub, после чего достаточно распаковать архив в удобное расположение и запустить версию программы с нужной разрядностью.
Создание и настройка панелей в Linkbar состоит из следующих простых шагов:
- При первом запуске будет предложено создать панель для текущего или для всех пользователей компьютера, а также выбрать папку, в которой будут храниться ярлыки.

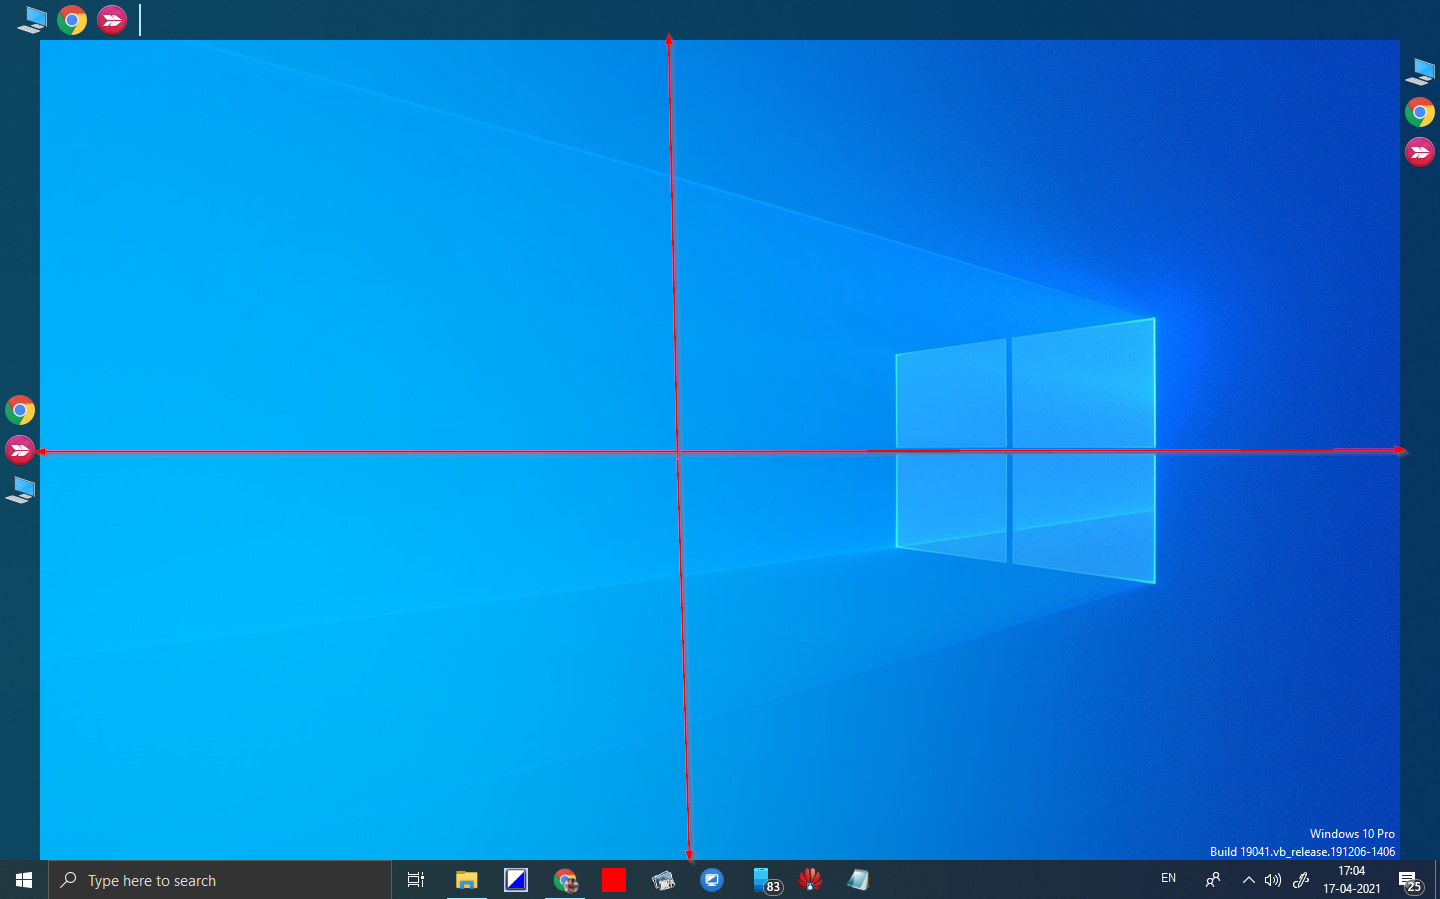
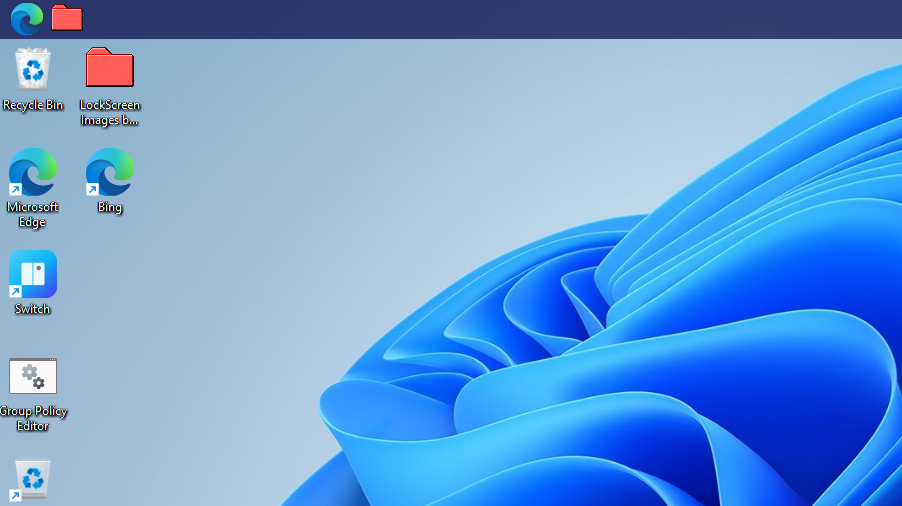
- По умолчанию будет создана пустая панель вверху экрана. Чтобы добавить ярлыки в неё, вы можете использовать один из следующих способов: перетащить ярлык, папку, файл на панель; создать ярлык в выбранной на первом шаге папке, используя стандартные методы создания ярлыка Windows, нажать правой кнопкой мыши по панели и выбрать пункт «Создать» — «Ярлык».

- Вы можете создавать разделители на панели, а также перетаскивать её в другие расположения — к правой или левой границе экрана.
- Можно создать дополнительные панели через контекстное меню уже имеющейся панели Linkbar, в разделе «Создать».
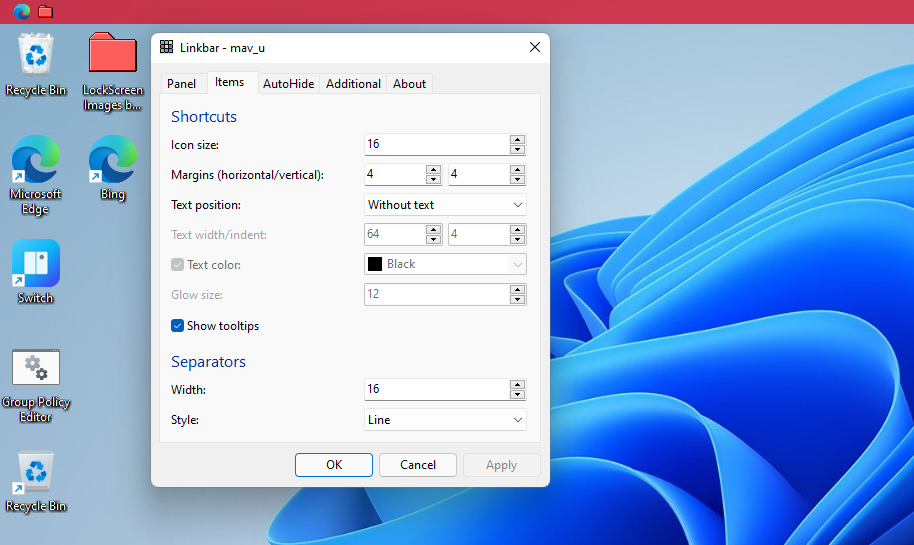
- Открыв настройки Linkbar вы можете изменить её расположение, цвета, стиль отображения, настроить размер и подписи значков, а также цвет шрифта, автоматическое скрытие панели с рабочего стола.

- Для переименования ярлыка или изменения значка достаточно использовать его контекстное меню в панели и пункты «Переименовать» или «Свойства» — «Ярлык».


В моем тесте всё работает исправно, без заметного использования ресурсов ПК и ошибок. Сама программа проста в использовании и не исключено, что для кого-то из читателей окажется полезной.
Linkbar — небольшое системное расширение, позволяющее вам создать произвольное количество дополнительных панелей задач с наиболее часто используемыми программами, ссылками, папками и т.д. Бывают ситуации, что одной рабочей панели недостаточно для размещения всех ваших приложений. В этом случае данный инструмент поможет решить такую ситуацию, предоставив возможность самостоятельно организовать новые панели задач.
Эта утилита портативна (не требует установки в систему), что позволяет использовать ее сразу после скачивания и распаковки архива. Запустив исполняемый файл, перед вами появится меню с запросом на создание новой панели: нужно указать место ее хранения на ПК и определиться с видимостью (для всех пользователей ПК или только текущего юзера). По умолчанию панель появится в верхней части экрана. Кликнув правой кнопкой мышки по панели, можно перейти в меню размещения элементов, создания новой и удаления текущей панели, отсортировать список и открыть окно свойств. Кстати, в свойствах можно изменить положение панели (сверху, снизу, справа, слева), отрегулировать размер значков и полей, расположение ярлыков (слева направо, сверху вниз), настроить автоскрытие и другие параметры.
Таким образом, вы сможете создать неограниченное количество панелей задач, что облегчит вашу работу и ускорит запуск самых нужных и используемых программ и сервисов.
As we all know, every version of Windows, including Windows 11, 10, 8.1/8, and 7, features a single Windows Taskbar that allows us to pin frequently used applications and shortcuts for quick access. While having a single Taskbar is not a problem, it can become cluttered if you have too many items pinned to it. This can create problems when you need to switch between different applications, as you’ll have to use the down arrow key to locate the correct one to launch.
One solution is to add more Taskbars to your PC, which will allow you to access your favorite applications from the top, bottom, left, or right Taskbar, reducing clutter and increasing productivity. By doing so, you’ll be able to access your favorite applications from the top, bottom, left, or right Windows Taskbar, which can help to reduce clutter and increase productivity. However, it’s worth noting that adding more Taskbars can affect system performance and stability, so it’s important to follow the correct steps to ensure that your PC remains stable.
In this post, we’ll guide you through the process of creating multiple Taskbars on your Windows 11/10/8/7 PC using Linkbar.
Linkbar is a handy freeware application that enables users to create multiple taskbars on all versions of Windows from Windows XP and above, including Windows 11, Windows 10, Windows 8.1/8, Windows 7, and Windows Vista. The most notable feature of Linkbar is that it is a portable tool, which means that you can use it without installing it on your computer or laptop. Simply download and use this free tool to create multiple taskbars. By default, Windows PC comes with a single taskbar, but with the Linkbar application, you can add up to three additional taskbars that can enhance the look and feel of your Windows 10 PC. Additionally, if required, you can add more than three taskbars with the help of Linkbar.
How to create multiple Taskbars on Windows 11/10/8/7 with Linkbar?
To create multiple Taskbars on your Windows 11/10/8/7 PC, follow these steps:-
Step 1. Download Linkbar in the ZIP format from sourceforge.net.
Step 2. Extract it in a folder using WinRAR or any other application.
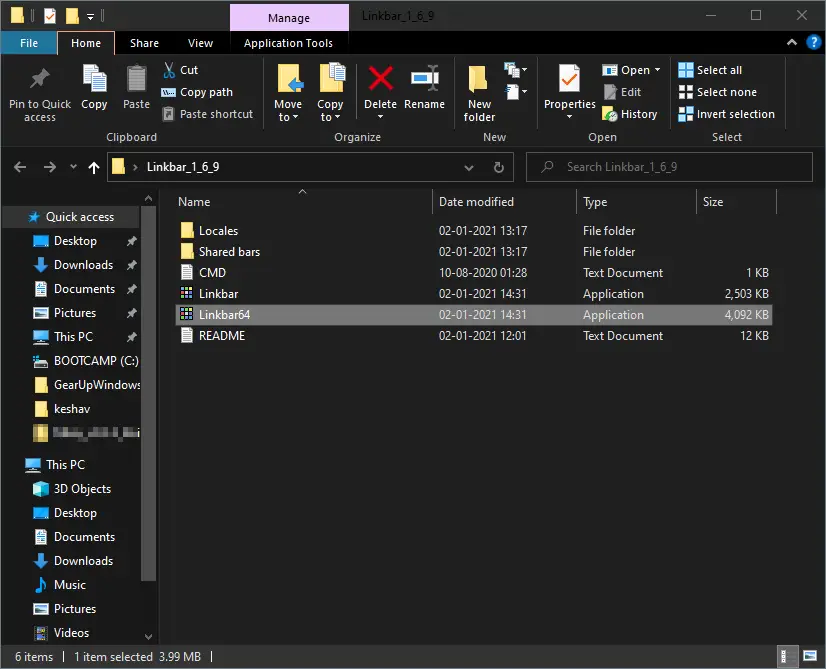
Step 3. Open the extracted folder to see its contents. You will find two executable files: Linkbar (for 32-bit architecture) and Linkbar64 (for 64-bit architecture).
Step 4. Double-click on the correct file to launch the Linkbar application.
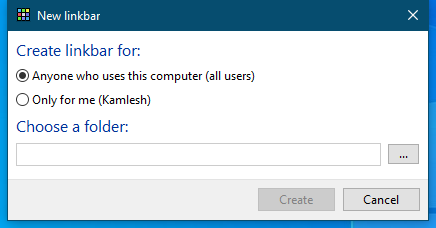
Step 5. Here, you can select the radio button “Anyone who uses this computer (all users)” or “Only for me,” according to your choice.
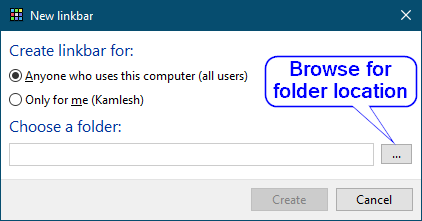
Step 6. Click the Browse button and select a folder to create an additional taskbar. Once you choose the folder, click the Create button to create a new Taskbar on your PC.
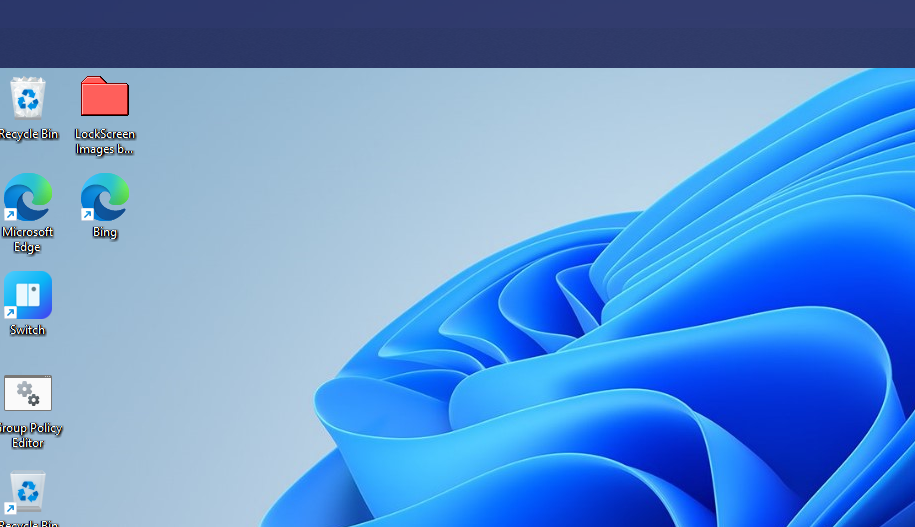
Step 7. The above action will create a blank toolbar on the top of the desktop. If you want, drag it and change its location. You can keep it at the top, right, left, or bottom of the Desktop screen. To add icons to the newly created taskbar, use the drag and drop shortcuts, folder, or file from your Desktop.
If you want to add more taskbars on the Windows Desktop, repeat the above steps. To delete the taskbar, right-click on the taskbar and select the Delete the linkbar option.
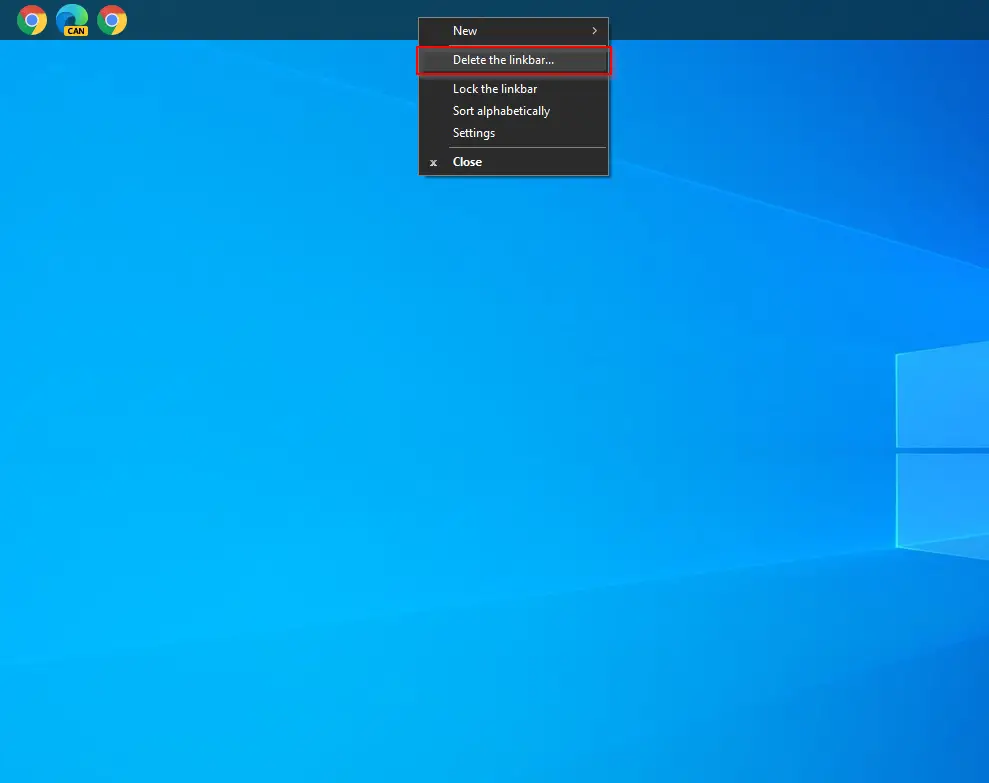
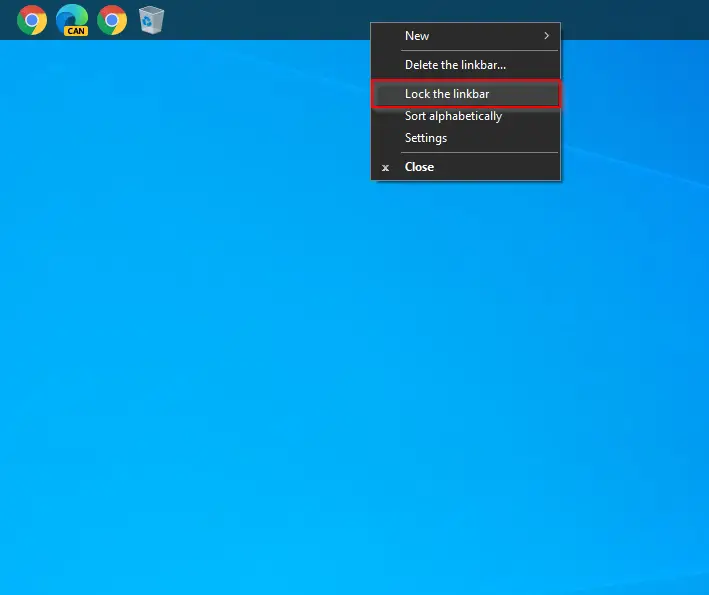
Once you have set the desired programs and folders on the newly created Taskbar, right-click the Taskbar and select the Lock the linkbar option to stop the accidental movement of the Taskbar.
You can also sort the pinned items icons on the Taskbar alphabetically by right-clicking on the Taskbar and selecting the option “Sort alphabetically.”
You can customize the generated Toolbar from Linkbar using the Settings option. To access the settings of the Linkbar, right-click on Toolbar and select the Settings option.
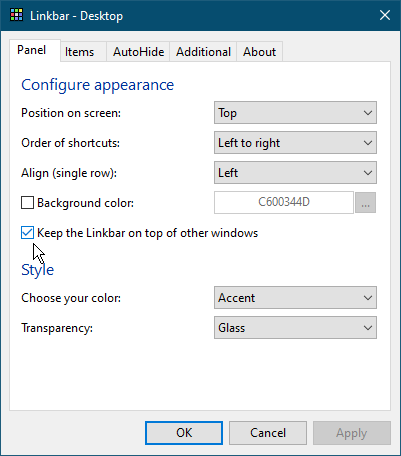
By accessing the Settings of the Linkbar freeware application, you can change the taskbar’s position, align the icons, change the background color, check the option to keep the Linkbar taskbar on top of other opened applications or windows, and even you can set the transparency of the Taskbar.
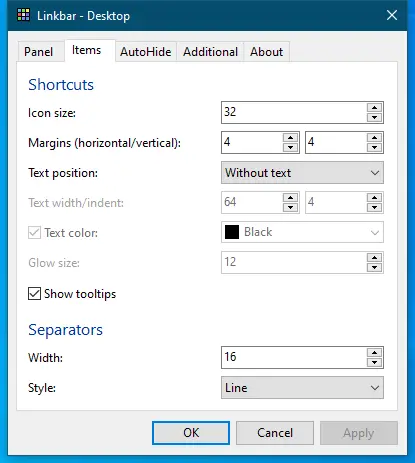
The items tab of Linkbar Settings lets you configure the Icon size, Margins (horizontal/vertical), Text position, text color, tooltips, etc.
You can also configure Linkbar to autohide the Toolbar. You can set this behavior from the Settings > AutoHide tab.
Download Linkbar
If you need, you can download Likbar from Sourceforge.
Conclusion
To summarize, Linkbar is a highly useful and unique freeware application that enables users to add multiple taskbars to their Windows 11/10/8/7 computers or laptops. Not only is it free to use, but it also offers several customization options to suit individual requirements. Our personal testing of the application on a Windows 11/10 64-bit operating system revealed that it worked flawlessly without any issues. Overall, we believe that Linkbar is an excellent tool to enhance productivity and streamline workflow on Windows devices.
To make Windows 11/10 Taskbar fully transparent, you can download a freeware utilityTranslucentTB.
The taskbar is an integral part of Windows 11 and has a long-standing history in prior versions of the operating system. The bar includes familiar features such as the Start menu, search tool, File Explorer, and widget panel buttons. You can also add shortcuts for your favorite software to the taskbar.
However, the default taskbar in Windows 11 can only include so many shortcuts. If you add more shortcuts to it, there will also be less space available for minimized windows. As such, adding another taskbar to Windows 11 would be a great way to give yourself some more room. And you can do just that with Linkbar.
How to Download and Extract Linkbar
Linkbar is a freeware app that enables you to add a new taskbar to Windows 11, 10, 8.1, 7, and Vista. You can even set up more than one new taskbar with it. Then you can add many more software shortcuts to your new taskbar instead of the default one.
To get started:
- First, open the Linkbar download page on Softpedia.
- Select the Download Now option there to save Linkbar’s ZIP archive.
- Next, click File Explorer’s taskbar button, which has a folder icon.
- Open the folder that includes the Linkbar ZIP file.
- Double-click Linkbar’s ZIP archive to open it up.
-
Click the Extract all option within File Explorer.

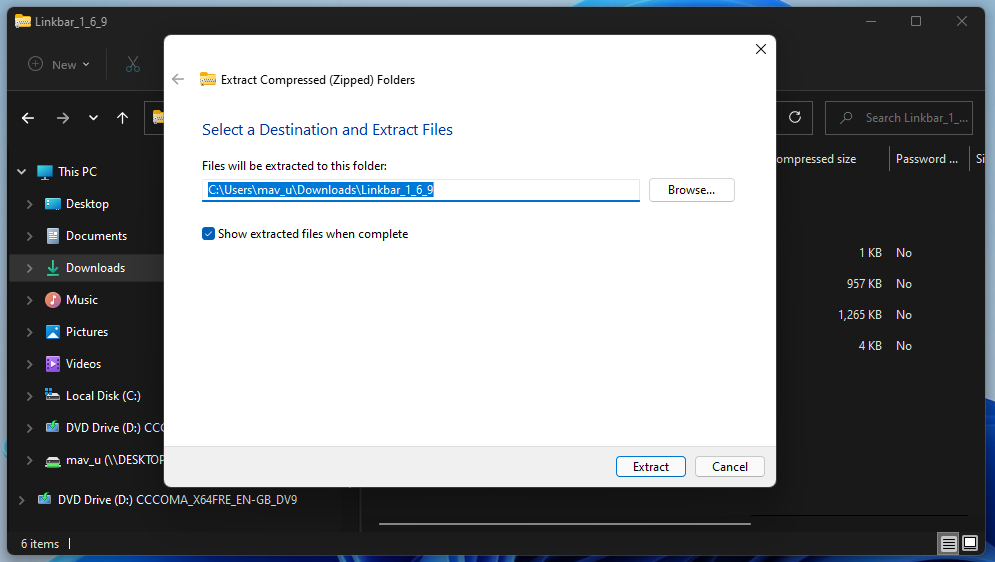
- Press the Browse button within the Extract Compressed (Zipped) Folders window, and choose an extraction location.
-
Select the Show extracted files when complete checkbox, which will save you having to manually open the extracted folder.

- Click the Extract option to finish.
Once done, an extracted folder will open. There is no installer for Linkbar, so you need not have to run any install wizards.
How to Add a New Linkbar Taskbar
Now you can add a new taskbar to Windows 11 with Linkbar. To do so, double-click Linkbar64 within Linkbar’s extracted folder to open the window shown directly below. The alternative Linkbar EXE within the folder is for 32-bit system architecture.
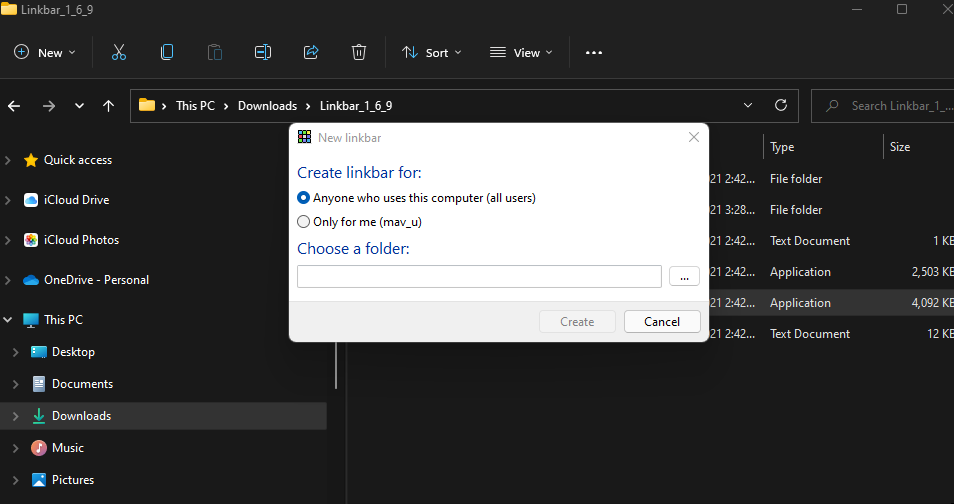
Select the Only for me radio button. Click the dots button to select a working directory for the taskbar. It’s best to select your user folder for that. Then press the Create button to add a blank new taskbar like in the snapshot directly below.

Don’t forget that you can add more than one taskbar when you’ve set up the first one. Simply double-click Linkbar64 again and then again to add a second or third bar for even more shortcut space. When you’ve added multiple taskbars, they’ll stack up as shown directly below.
How to Add Taskbar Shortcuts
You can now add many shortcuts to your new taskbar. To do so, right-click the Linkbar taskbar and select New > Shortcut. Select Browse on the window that opens to choose the software you want to add.
Press the Next button, enter a shortcut name, and click Finish. Click the shortcut on the Linkbar taskbar to open its software.
Alternatively, you can drag and drop desktop shortcuts onto the Linkbar taskbar directly. To do that, left-click a shortcut on the desktop and hold the left mouse button. Then drag the shortcut over the new taskbar, and release the left mouse button.
To remove an item from the Linkbar taskbar, right-click a shortcut and select Delete. Select Delete the linkbar on the Linkbar submenu if you want to erase the whole taskbar. You can also change shortcut names by selecting the Rename option on the context menu.
How to Further Configure the Linkbar Taskbar
Once you’ve added some shortcuts, you can then check out Linkbar’s additional customization options. Right-click an area of the Linkbar taskbar and select Settings. The Linkbar settings window includes settings for taskbar position, appearance, shortcuts, separators, and auto-hide customization.
You can change the position of the Linkbar taskbar via the Panel tab. Click the Position on screen drop-down menu there. Then select a Left, Right, Top, or Bottom option.
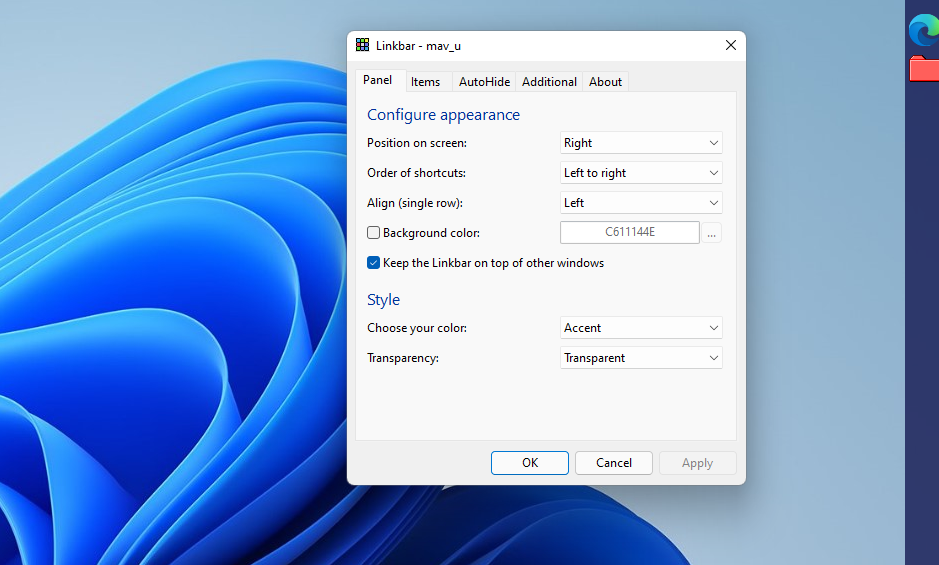
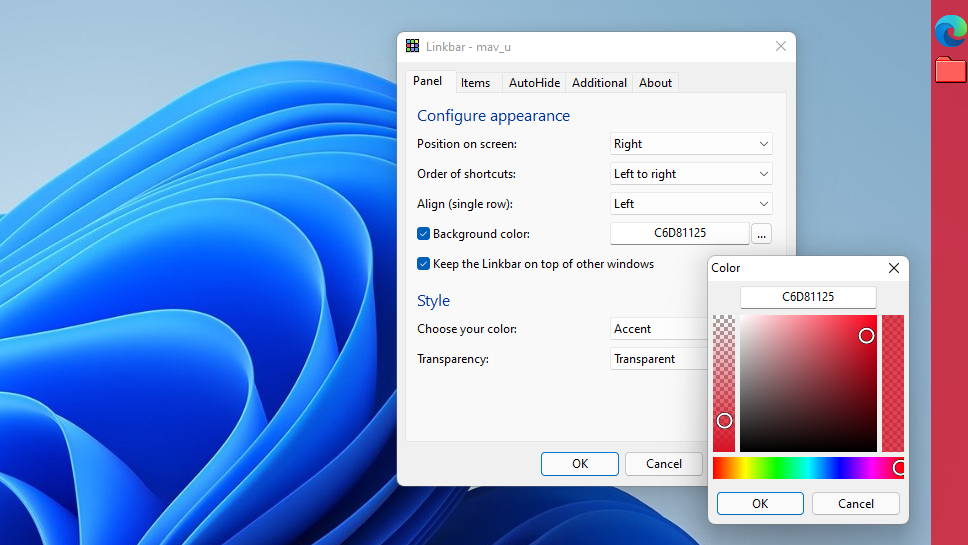
If you want to change the taskbar’s color, click the Background color checkbox. Choose a color on the palette by clicking the dots button. You’ll need to select Apply for all changes to take effect.
There’s also a taskbar transparency option on the Panel tab. To select it, click the Transparency drop-down menu. Select Transparent on that menu.
You can fit more on your Linkbar taskbar by adjusting its icon size. To do so, select the Items tab shown directly below. Then decrease the value for the Icon size option.
Linkbar Taskbars Provide Much More Shortcut Space
Linkbar is an ideal solution for anybody who needs more space for software shortcuts. Instead of adding shortcuts to Windows 11’s default taskbar and desktop, you can add them to the Linkbar bars instead. With its numerous additional customization options, the Linkbar taskbar is in some respects better than the default Windows one.
v1.6.9
Changes:
- Brazilian Portuguese localization (Feijionico)
- Indonesian localization (EkoPrasetiyo)
- Italian localization (BrezzaTM)
- Localization updates
- Separators
- Option «Items align»
- Option «Tooltips show»
- For Windows 10 option «Color Mode»
- For Windows 10 support dark mode for tooltips and context menus
- For Windows 10 improve drawing buttons and Jumplist
- Linkbar Jumplist
- Jumplist window aligned to top of an item
- Settings reorganized
- Command line option «-ca» to close all open panels
Bug fixes:
- Access violation when opening Settings (#14)
- Windows 7/8/8.1 startup exception «Access violation at address 00000000 in module. Read of address 00000000.»
- Linkbar opening on wrong screen in multi-monitor setup
- Exception while Drag&Drop when system style services disabled
- Cannot open context menu (e.g. Windows 10 Calculator)
v1.6.8
Changes:
- Spanish localization (Gohar)
- Improved Autohide behaviour
- Used more actual API for processing Jumplists
- For Windows 10 improved obtaining the taskbar color
- For Windows 10 option «Look»
- Option «Number of recent items to display in Jumplists»
- Option «Corners transparency width» to prevent show autohidden Linkbar
- Prevents hide Linkbar by Win+D when the option «Keep the Linkbar on top of other windows» disabled
- Saving the settings by clicking the «OK»/»Apply» button in the settings window instead of closing the application
- Some settings are hidden if your OS does not support them
Bug fixes:
- Access violation read/write while autostart (often with 125% UI scaling)
- Error «Argument out of range» while remove last item
- Losed some graphics in Jumplists on Windows 8
- In the settings, mouse wheel change a spinedit value on more than 1 step
v1.6.7
Changes:
- New localization system. Simple and clear
- Chinese-Simplified localization (Hue Liu)
- Greek localization (geogeo.gr)
- Korean localization (미유키로즈)
- Polish localization (Galileusz)
- AutoHide by Keyboard shortcut
- Restoring the panels after restarting Explorer.exe
- Keyboard control. Arrows, Spacebar/Enter, Menu, F2, Delete(+Shift) and Esc supported
- Jumplist keyboard control
- Option for disable Jumplists
- Option «Keep the Linkbar on top of other windows»
- Delete old localization files — Linkbar.lc3, LOCALIZATION.txt
Bug fixes:
- Exception on closing if the Properties is open
- Multiple separators in Shell menu (e.g. for a shortcut to an HTML-file)
- Incorrect behavior in negative desktop coordinates