
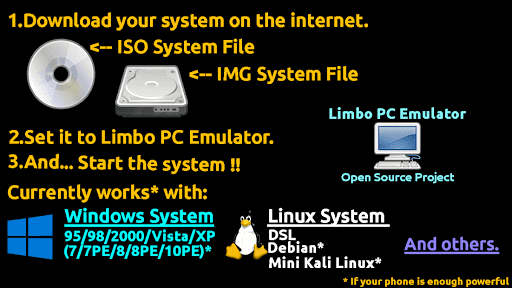
Android is the most popular operating system which runs on Linux environment. As it is a Linux based system, You can easily root your device and install the Linux terminal for using ‘sudo‘ commands. Linux provides you a very smooth flexibity by which you can easily boot any boot img or iso file on your device.
You can also install windows 7 operating system with win img or iso file in just a couple of steps. And here in this guide, I am going to show how to boot windows 7 iso file on your android device without root.
Let’s see the step by step guide:
How to install Windows 7 on android using Limbo
-
- The very first thing which you need to do is that download and install the below-required files:
- Download Windows 7 ISO free, click here
- Download Limbo PC emulator free full version
- Once you have downloaded win 7 iso for Limbo then install Limbo emulator in your device as usual.
- Open Limbo emulator.
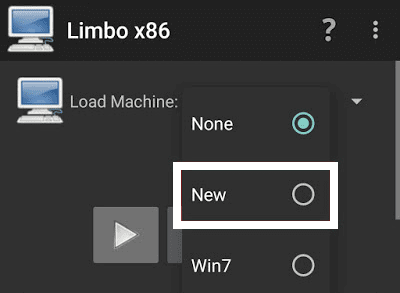
- Now at your Limbo App dashboard, You will find a drop-down menu for loading machine. You need to tap the drop-down menu and then select “New.” see below picture.

- Now, a pop-up window will appear. You need to enter the name of your new virtual machine and then click on ‘Create’. see below picture
- Architecture option: Here you need to select PC.
- Machine Type option: Here you need to select the x64 option.
- CPU Model option: Here you need to select the SandyBridge option.
- CPU cores option: Here you need to select 4 Cores.
- RAM memory option: Here you need to select 880 MB RAM. You can select more RAM if your device has more than enough RAM.
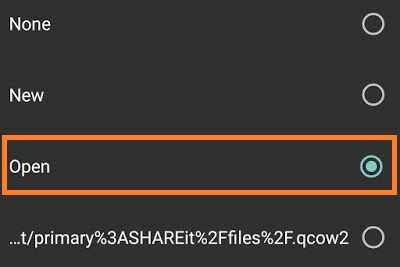
- Hard disk option: Here you need to select the “OPEN” option. After that, you will be redirected to your SD card. Now you need to locate the downloaded Windows 7 img/iso file and then select the file.

- Device option: Here you need to select Hard Disk in the boot settings.
- VGA Display option: Here you need to select Vmware.
- User Interface option: Here you need to select SDL.
- Now you need to match all the settings as shown in the below picture one by one.
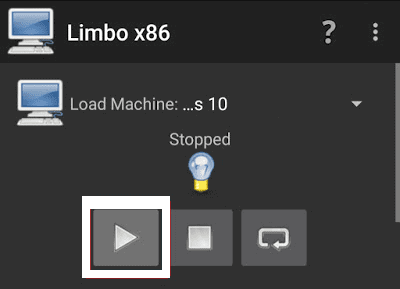
- Now you need to click on ‘Play Option‘. It will start booting process of Windows 7.

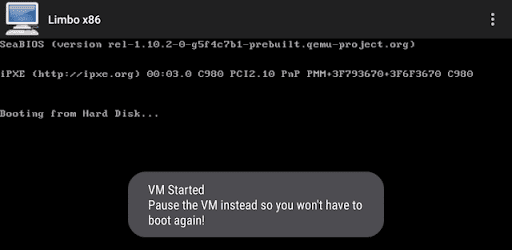
- While booting being in the process. Your device screen will look something like below picture.

- When the booting process will be 100% completed. Your Windows 7 home screen will look something like below picture.

- That’s it.
- The very first thing which you need to do is that download and install the below-required files:


I hope that the above step by step guide has helped you for installing Windows 7 iso on your android device (tablet or mobile) without root using limbo emulator.
Also Read: Windows 10 on Android limbo
Для работы проектов iXBT.com нужны файлы cookie и сервисы аналитики.
Продолжая посещать сайты проектов вы соглашаетесь с нашей
Политикой в отношении файлов cookie
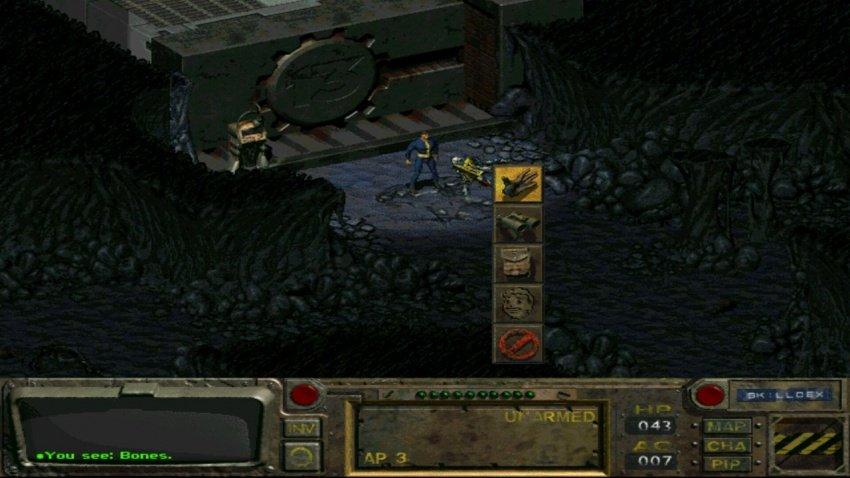
BOCHS меня расстроил. Правда. После стольких часов ожидания он отказался запускаться, не аргументируя это никак. Моя мечта вновь сыграть на Android в Fallout 2 потеряла ещё одну опору. Осталось всего два варианта — Limbo и DosBox, причём первым я займусь прямо сейчас, так как на его счёт у меня опасений больше всего. Дело в том, что Limbo, как я понимаю, является тем же QEMU, но с немного переработанным интерфейсом, а QEMU на смартфоне с Lollipop не запустился. А, ладно, будь что будет!

В отличие от BOCHS, Limbo почти никто не знает. Ну, во всяком случае Wikipedia об этом эмуляторе ни слухом, ни духом… И намного чаще по запросам мне выдавало либо одноименную игру, либо… LSD Emulator, в котором есть уровень Limbo. Так что неизвестно, кто и когда начал делать сей эмулятор, поэтому перейду сразу к делу.
Интерфейс программы сумбурный, но по большей части приятный, и представляет из себя набор выпадающих меню. Есть вещи, которые и бесят. Например, то, что у приложения фиксированная позиция экрана, не меняющаяся даже при повороте смартфона на 180 градусов. Также напрягает чёрная полоса сверху, которая уменьшает рабочую площадь экрана.

Для начала необходимо создать свой профиль и назвать его. Далее идёт выбор конфигурации. Стандартной (для игры в Fallout) считается следующий набор:
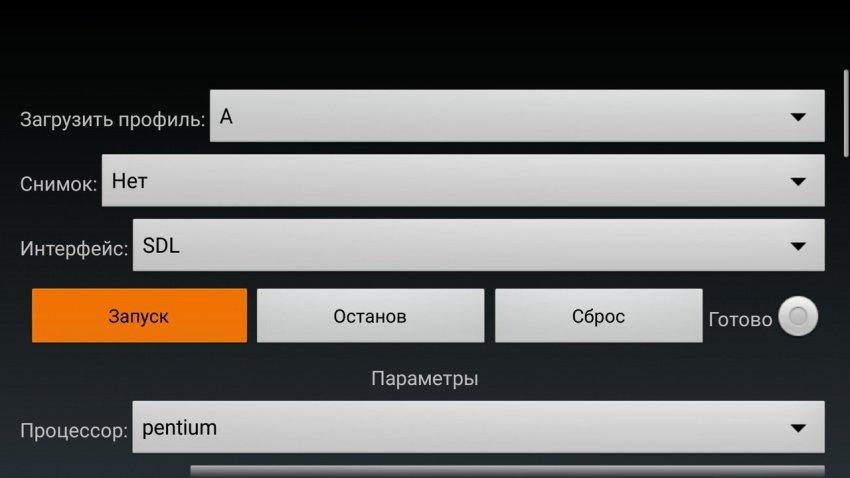
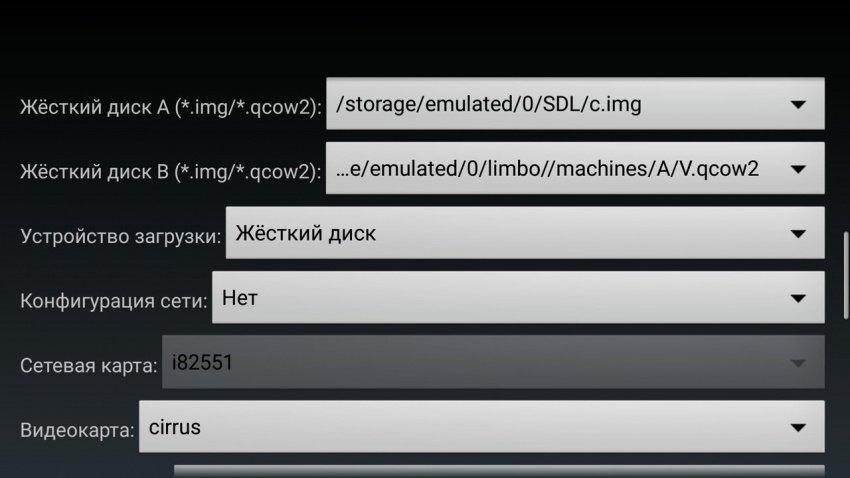
Интерфейс: SDL
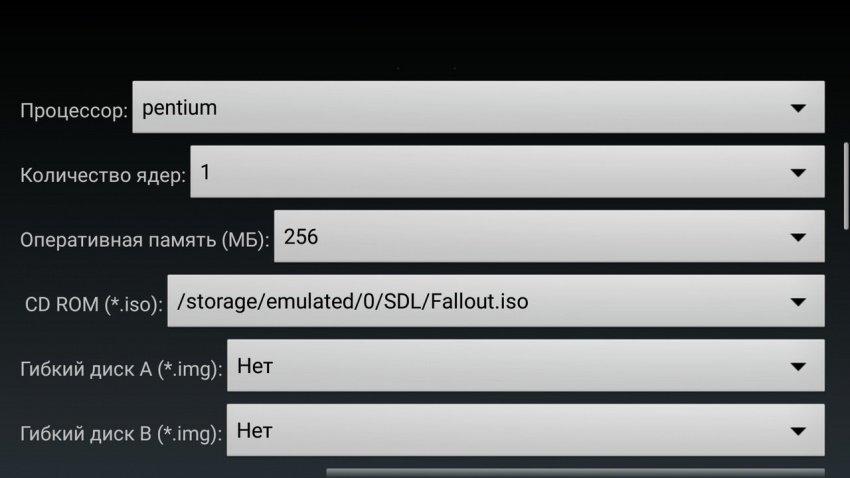
Процессор: Pentium
Количество ядер: 1
Оперативная память (МБ): 64 — 256
CD ROM (*.iso): образ диска с игрой
Жёсткий диск А (*.img/*.qcow2): образ диска с Windows
Устройство загрузки: Жёсткий диск
Конфигурация сети: Нет
Видеокарта: cirrus
Звуковая карта: Нет
Теоретически, эта конфигурация является самой надёжной. Но после первого удачного запуска на ней я начал пробовать различные варианты, отличные от изначального. Оперативную память на моём D802 можно задать до 392 МБ, более высокие значения крашат программу. С процессором и количеством ядер можно экспериментировать, у меня и более мощные пункты ОС запустили, вроде Phenom и Core2Duo. С количеством ядер тоже не всё понятно. Почему — напишу чуть позже.
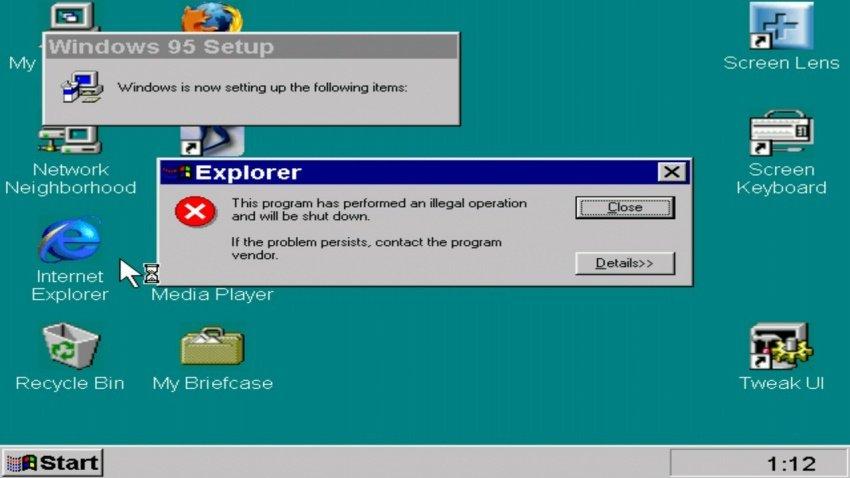
Загружается Windows 95 (сборка от MVoloshin) от силы полторы минуты, сразу же выбивается ошибка рабочего стола, но после её подтверждения можно работать дальше без проблем. Растянутый интерфейс SDL выглядит непривычно и приятно одновременно. Кроме того, ошибка выскакивает только при первом запуске. Все остальные происходят без проблем.
Мышка работает внятно, но через двойной тап по экрану перетаскивание файлов порой сбивается через пару сотен пикселей. Масштабирование, как я понял, переключает режим мышки с левой кнопки на правую.
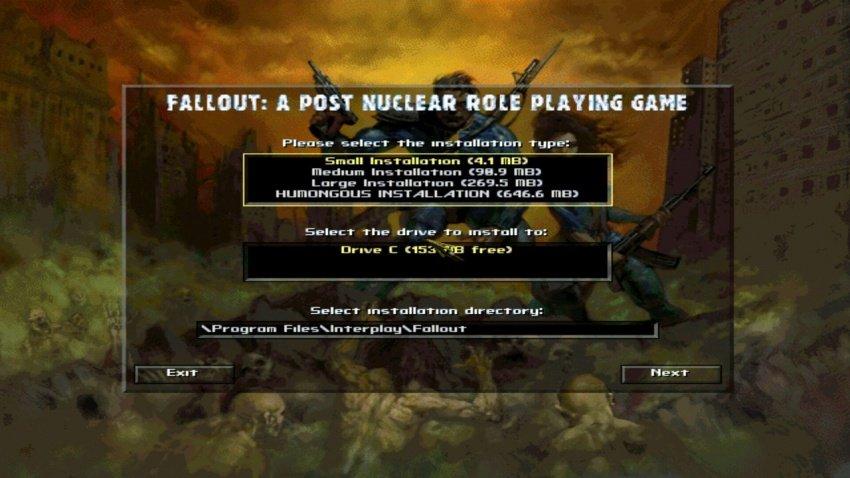
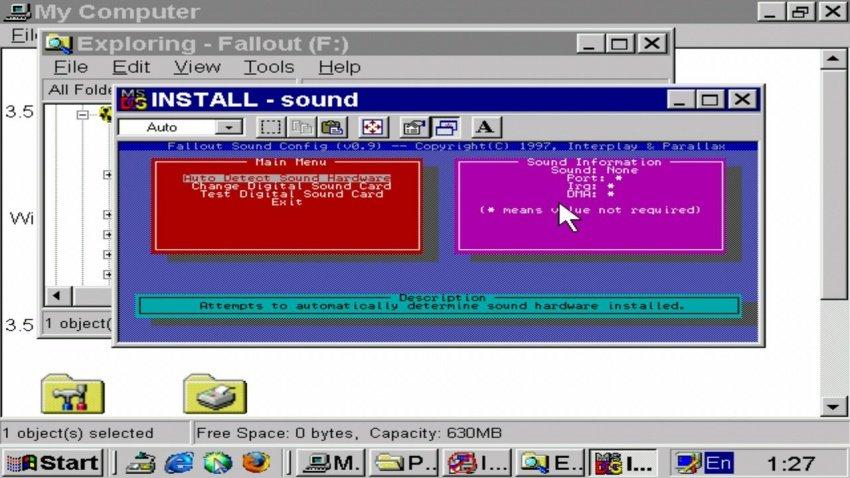
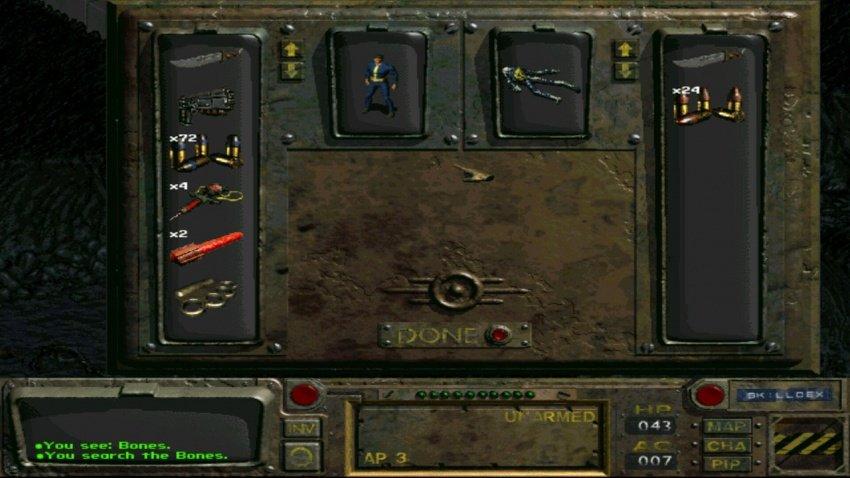
Fallout 2 установился вариантом «Small Installation», но завис при выходе из программы-установщика. Работоспособность оказалась никакой, пришлось удалять файл через Uninstall, открывать диск Fallout через контекстное меню и устанавливать игру через MS DOS. Это удалось без ошибки, но после меня выкинуло в окно настройщика, где навигация могла осуществляться только через клавиатуру. Которой у меня, разумеется, не оказалось.
Закрыв программу и напугавшись предупреждением, что «несохранённые файлы будут потеряны», я зашел в директорию Interplay, которая создалась не в Programm Files, а в корневой папке, запустил Fallout.exe и… начал хвалить Боженьку, ибо игра запустилась!

Счётчик кадров в игра держится на уровне 10 — 15, что, разумеется, ниже прожиточного минимума. На QEMU счётчик был в районе 30, да и грузилось оно быстрее. Тут уже несколько вариантов может быть. Первый — стоит поэкспериментировать с мощностями эмулирования, задать различные процессоры, количество ядер, выделить больше памяти… Что я и сделал, но никаких изменений не заметил. Во всяком случае, в игре. Смена же видеоадаптера привела к тому, что вместо Fallout я увидел чёрный экран.
Второй вариант, теоретически способный повлиять на скорость игры — более массивная установка. То есть, не «Small Installation», а другие. Возможно, на скорость игры влияют какие-то синтетические ограничения в передаче данных при эмулировании дисковода. Возможно, это звучит для знающего человека, как утонченный, изысканный бред, но других вариантов я особо не вижу.
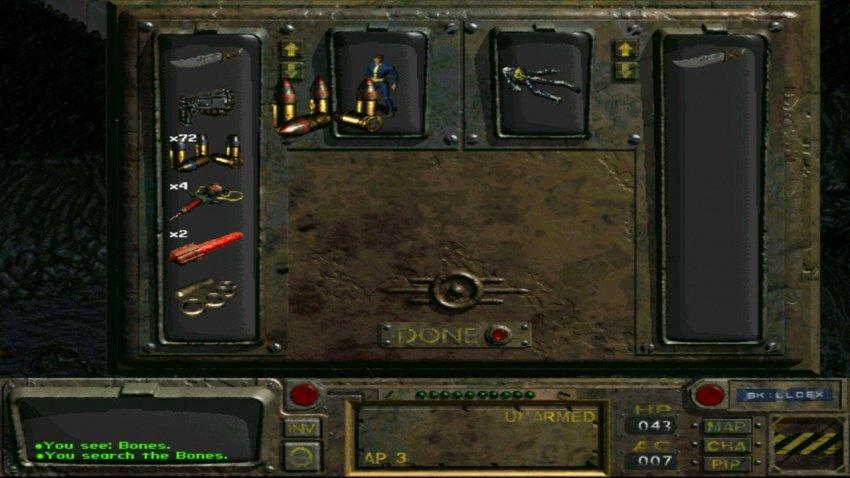
Для проверки был скачан пустой образ HDD на 1 гигабайт, присобачен вторым жёстким диском через Limbo, и туда была установлена полная версия Fallout 1. Процесс занял целый час, и ничего не изменилось вообще. Думаю, что дело именно в видеоадаптере, и для более комфортной игры нужно экспериментировать именно с ним.
Внимание! Limbo очень плохо дружит с Clean Master, которая в процессе чистки системного кэша полностью удаляет содержимое папки эмулятора. Помогает только полное удаление программы и установка её заново.
Тем не менее, на этом моя работа с Limbo… не заканчивается. Именно на этом эмуляторе я буду проверять и эмуляцию различных ОС, и различных игр, поскольку программа позволяет это, и не вылетает.
Now that you have the necessary components, follow these steps to get Windows 10 to work on Limbo.
1. Install the Limbo Emulator on Your Android Device
Start by downloading the Limbo emulator from a trusted source like GitHub or an Android app store. Once downloaded, install the app on your Android device. After installation, launch the Limbo app, which will allow you to create a new virtual machine.
2. Prepare the Windows 10 ISO File
To install Windows 10 on your virtual machine, you need to have the Windows 10 ISO file ready. Download the ISO from the official Microsoft website and save it to your device’s storage. This file will be used to boot Windows 10 on Limbo.
3. Set Up the Virtual Machine in Limbo
Once Limbo is installed, it’s time to configure the virtual machine to run Windows 10. Here’s what you need to do:
- Open Limbo and click on the “New” button to create a new virtual machine.
- Assign a name to your VM and select a folder to store the VM files.
- Choose the architecture as x86 or x64, depending on the ISO file you have.
- For how to get Windows 10 to work on Limbo, set the CPU to at least 2 cores for better performance.
- Allocate memory (RAM) to the virtual machine. A minimum of 2GB is recommended for Windows 10 to run smoothly, but more RAM will result in better performance.
- Set the disk size to at least 20GB to ensure sufficient space for Windows 10.
- In the “Boot” section, choose the Windows 10 ISO file you previously downloaded.
4. Configure Other Virtual Machine Settings
While the basic configuration is important, there are additional settings you can tweak to optimize Windows 10 performance on Limbo:
- Graphics: Select “SDL” or “OpenGL” for better graphics rendering.
- Network: Enable the network interface to connect to the internet from within Windows 10.
- CD-ROM: Attach the ISO file to the virtual CD-ROM drive.
Make sure that the “Start VM” option is selected so that the virtual machine boots when you launch Limbo.
5. Boot the Virtual Machine and Install Windows 10
Now, you’re ready to install Windows 10. Click on the “Start” button in Limbo to boot your virtual machine. You’ll be greeted by the Windows 10 installation screen, just like when installing it on a physical computer.
- Follow the on-screen instructions to install Windows 10. Choose your language, region, and other settings.
- Select the drive where you want to install Windows 10 (usually, it’s the virtual hard drive you created earlier).
- The installation will take some time, depending on your device’s performance.
6. Optimize Windows 10 on Limbo
After Windows 10 is installed, it’s time to optimize the performance to get it running smoothly on your Android device.
- Increase Virtual Memory (RAM): If Windows 10 runs slow, try increasing the virtual RAM in Limbo’s settings.
- Disable Unnecessary Features: Turn off animations and transparency in Windows 10 to reduce the load on the virtual machine.
- Use Lightweight Software: To improve performance, use lightweight versions of software or apps that consume fewer resources.
Limbo PC Emulator — это мощное и универсальное приложение для Android, которое позволяет пользователям эмулировать широкий спектр компьютерных систем на своих мобильных устройствах. С помощью Limbo PC Emulator пользователи могут с легкостью запускать операционные системы Windows, Linux и даже Android-x86, открывая совершенно новый мир возможностей для производительности, игр и многого другого.
Одной из отличительных особенностей Limbo PC Emulator является его широкая совместимость с широким спектром компьютерных архитектур, включая системы x86, ARM и MIPS. Это означает, что пользователи могут эмулировать системы от старых машин с Windows XP до современных смартфонов Android, и все это в рамках одного приложения.
Другие примечательные особенности Limbo PC Emulator включают поддержку широкого спектра виртуальных аппаратных компонентов, таких как жесткие диски, CD-ROM, сетевые адаптеры и многое другое. Приложение также включает в себя множество опций настройки, позволяя пользователям изменять такие параметры, как скорость процессора, распределение памяти и разрешение дисплея для достижения оптимального баланса производительности и функциональности.
В целом, эмулятор ПК Limbo — это мощный инструмент для тех, кто хочет запустить устаревшее программное обеспечение или поэкспериментировать с различными операционными системами на своем Android-устройстве. Благодаря широкой совместимости и богатому набору функций, это приложение является обязательным для всех, кто интересуется эмуляцией мобильных устройств.
Функции:
- Эмуляция различных компьютерных систем, включая Windows, Linux и Android-x86.
- Широкая совместимость с архитектурами x86, ARM и MIPS
- Поддержка виртуальных аппаратных компонентов, таких как жесткие диски, CD-ROM и сетевые адаптеры.
- Настраиваемые параметры скорости процессора, распределения памяти и разрешения дисплея
- Встроенная поддержка популярных форматов файлов, таких как ISO, IMG и ZIP.
Have you ever wondered if it’s possible to run Windows 11 on your Android phone? While it may sound like a far-fetched idea, it’s technically possible with an app called Limbo emulator.
If you’re a tech enthusiast who likes to tinker with devices, this might just be the project for you.
What is Limbo Emulator?
Limbo is an open-source emulator that allows you to run various operating systems on your Android device. It supports x86, ARM, PowerPC and SPARC architectures, and can emulate Windows, Linux, DOS, Solaris and more.
Limbo uses QEMU, a generic and open-source machine emulator and virtualizer, as its backend engine. With Limbo, you can create virtual machines on your phone or tablet and run different operating systems as if they were installed on a separate device.
Prerequisites for Installing Windows 11 on an Android Phone
To run Windows 11 on Android using Limbo Emulator, you will need the following:
- A flagship Android device. Preferably with Snapdragon 845 or above.
- 4GB RAM or more.
- A genuine copy of Windows 11 that works on the emulator.
- Limbo emulator.
Downloading and Installing Limbo Emulator on Your Android Phone
The next step is to download and install the Limbo emulator app on your Android phone.
- You can download Limbo Emulator directly from the developer’s page. Click this link to download. The app is also available on the F-Droid open-source app store.
- Before installing the APK, make sure “install from unknown resources” is selected in the settings of your device. Skip this step if you have it turned on.
- Wait for the installation process to complete.
Once the app is installed, you can proceed to create a virtual machine for Windows 11.
Creating a Virtual Machine for Windows 11 on Limbo Emulator
Unfortunately, dumping an ISO file on the emulator will not work. To proceed you would need to create a virtual disk image (VHD) for the Windows 11 operating system.
To do that, download and install a program called QEMU on your desktop/laptop computer. Once QEMU is installed, use it to create a virtual disk image for the Windows 11 operating system. Click this link to download QEMU.
Once this is complete, transfer the created virtual disk image file to your phone. Make sure to place it in a new folder with an identifiable name. Remember, this is the file that will be used to boot Windows 11 on Limbo Emulator.
Note: There is more than one way to create a virtual disk image (VHD). Feel free to explore other methods or apps. It is unclear if virtual images created by VMware or VirtualBox would be compatible with Limbo Emulator, which is based on QEMU at its core. Feel free to comment below!
Configuring the Windows 11 Virtual Machine on Limbo Emulator
To properly set up Windows 11, you might have to tinker with settings for the best performance. But for now, use the settings below.
Step 1: Click on the add new button, and give it a name

Step 2: On the Board (CPU) section, add these setting
- Machine type: PC
- CPU Model: SandyBridge
- CPU cores: 4
- RAM Memory (MB): 2040
- Enable MTTCG

Note: If you have a device that fully supports KVM, this would be the better option. The virtual OS would perform significantly faster and more efficiently.
Furthermore, for those who have rooted devices, you may be able to flash a kernel that has KVM support built in.
Step 3: Add a disk
This is where you can select the Windows 11 virtual disk file.
To add a disk, tap on None and select Open. Choose your Windows 11 VHD file from the folder where you copied it.

Step 4: Graphics settings
Set video display to vmware

Step 5: Audio settings
Set Sound Card to adlib

Step 6: Network settings
- Set Network to User
- Set Network Card to pcnet

Step 7: Advanced settings
Click High Priority on advanced settings.
(Depending on the version of the app, this option may not be available.)
Start Windows 11
Tap on the Play button at the top to start the emulation. Wait for a few minutes (or even longer) until Windows 11 boots up on your Android device.
Troubleshooting common issues while running Windows 11 on Limbo Emulator
Some of the most common issues include
- Black screen
- Unresponsiveness
- Freezing
- Crashes and boot loop
The fix these issues, you might have to tinker around with settings.
“Limbo supports light weight operating systems while large operating systems might be very slow or not work at all”
Quote from the official website
Can you play Windows games on Android using Limbo Emulator
Theoretically, yes, but they would have to be old games, and that’s still not a guarantee. You will most likely be disappointed with the performance.
Running Windows 11 on your Android device: Is it worth it?
Honestly, no! The hassle of getting Windows 11 to run on Limbo is not worth the effort. It’s slow even on the most powerful devices and configuration is not straightforward.
However, if you have a device that supports KVM, maybe the performance boost might just make up for it.
Also, the performance may vary depending on your device specifications and settings. Use this tutorial at your own risk and for educational purposes only.
Disclosure: Vividbay is a participant in the Amazon Associates Program. We may earn a commission from qualifying purchases.
Kenyon Ndezi is a tech enthusiast, active developer, and the founder of NeonBuild.com, a platform that enables users to create apps without any coding knowledge. Residing in Newfoundland, Canada, Kenyon delves into the latest in gadgets, science, and technology on VividBay.com, offering in-depth tech reviews and analyses. His minor in computer science, paired with a degree in economics, provides a well-rounded perspective to his content. With expertise in mobile app development, web development, server management, and WordPress, Kenyon ensures VividBay.com is a hub for tech-savvy readers seeking reliable information and innovative insights. Kenyon also runs Kenyonndez.com, where he shares personal experiences, travel adventures, and lifestyle tips. His extensive experience in creating websites for various organizations and educational institutions further enriches his content, blending practical knowledge with forward-thinking technology trends.