
-
Home
-
News
- Is Lightshot Not Working After Windows Update? Here Are Fixes!
Is Lightshot Not Working After Windows Update? Here Are Fixes!
By Daisy | Follow |
Last Updated
Lightshot is one of the popular screenshot apps in Windows 11/10. However, many have complained about Lightshot not working after Windows update. If you have faced the same, this post from MiniTool provides the best ways to fix the issue.
Lightshot is a very useful screenshot software. It allows you to select any area on your desktop and take a screenshot. You can also share screenshots via the Internet or edit screenshots instantly. However, some Windows 11/10 users report that they meet the “Lightshot not working after Windows update” issue. The following is a forum.
I use Lightshot as it’s the most convenient tool for taking screen snippets I’ve ever experienced, but after my new laptop was updated last week, Lightshot is no longer running from the background. I tried to uninstall and reinstall but did not work.Microsoft
Then, let’s see how to fix Lightshot not working in Windows 11.
1. Run Lightshot as Administrator
How to fix Lightshot not working after Windows update Windows 11? You can run Lightshot as an administrator. Here is how to do that:
Step 1: Type Lightshot in your Search box.
Step 2: Choose Run as administrator.
2. Disable Use the Print Screen to Open Screen Capture
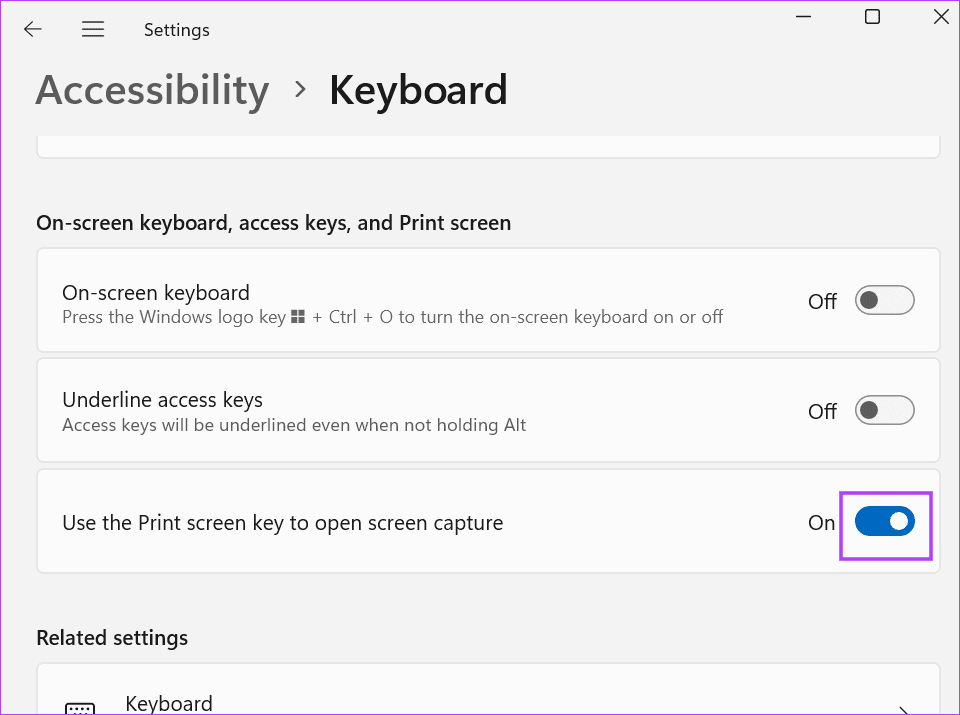
Microsoft has offered an option to assign the prt sc screen to launch the Snipping tool. If you have assigned the key to open the Snipping tool, it may override Lightshot’s default hotkey. You need to disable use the Print screen to open screen capture.
Step 1: Press the Windows + I keys together to open the Settings application.
Step 2: Go to Accessibility > Interaction > keyboard.
Step 3: Find and turn off the disable use the Print screen to open screen capture option.

3. Set a Different Hotkey
One of the ways to fix the Lightshot issue is by assigning another key as a hotkey to launch the app. Here’s how.
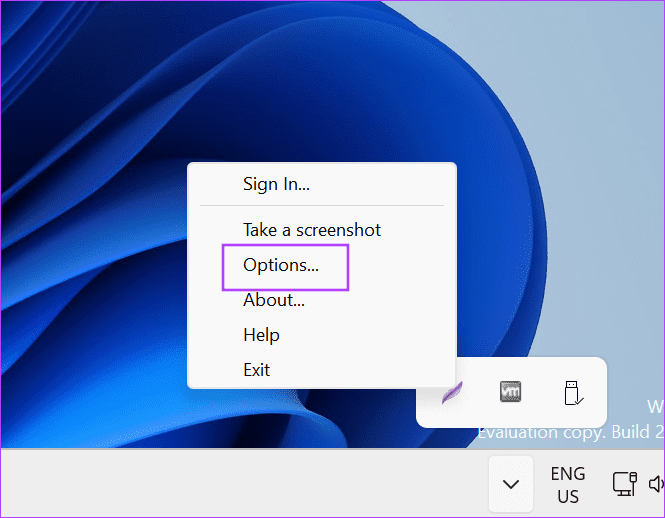
Step 1: Right-click the Lightshot icon on your taskbar and choose Options….
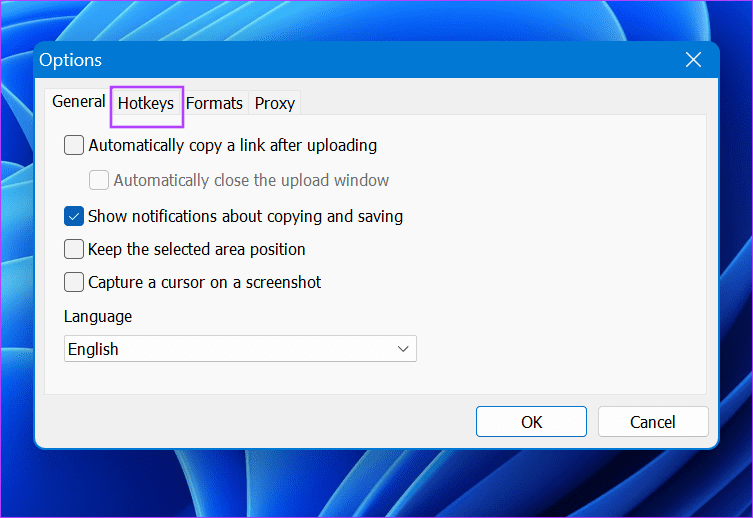
Step 2: Under Hotkeys, uncheck the General hotkey box and click OK. Then, recheck it.

Step 3: Assign another key to launch Lightshot and click OK.
4. Reinstall Lightshot
You can also try to reinstall Lightshot to remove the “Lightshot not working in Windows 11” error
Step 1: Type Control Panel in the Search box and press Enter.
Step 2: Go to Programs > Uninstall a program.
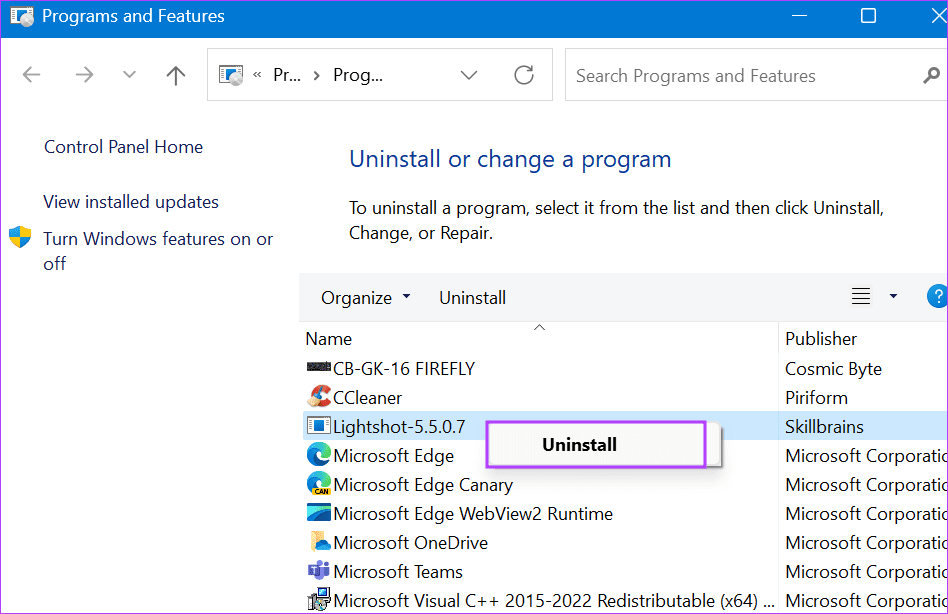
Step 3: Find Lightshot, then right-click it to choose Uninstall.
Step 4: Follow the on-screen instructions to uninstall it.
Step 5: Reboot your system and reinstall Lightshot.
5. Update the Lateset Windows and Optional Update
It’s recommended to update your Windows to the latest version and install the optional updates to fix the Lightshot not working after Windows update issue.
Step 1: Press the Windows + I keys together to open Settings.
Step 2: Navigate to Windows Update, and click Check for updates. If there are any new updates, you can download and install them.
Step 3: Then, click Advanced options and click Optional features. If any driver update is available, check the available updates, then click the Download & install button.

Tips:
If screenshots are valuable to you, it’s highly recommended to back them up. To do this task, you can try free backup software – MiniTool ShadowMaker. It supports various operating systems including Windows 11, Windows 10, Windows 8, Windows 7, and Windows Server.
MiniTool ShadowMaker TrialClick to Download100%Clean & Safe
Final Words
Here are 5 ways for you to fix the “Lightshot not working after Windows update” issue. Try them to find back your Lightshot. I hope that this post will be helpful.
About The Author
Position: Columnist
Having been an editor at MiniTool since graduating college as an English major, Daisy specializes in writing about data backups, disk cloning, and file syncing as well as general computer knowledge and issues. In her free time, Daisy enjoys running and going with friends to the amusement park.
Lightshot is a free screen capture tool available for Windows and Mac. You can grab screenshots, share them with others, or upload them to its cloud storage. It is even possible to annotate the screenshot. While it’s a fantastic utility, some users report that Lightshot is not working or doesn’t work properly and either crashes in between or doesn’t launch at all.
Evidently, this happens when Lighshot doesn’t have administrator privileges, has a misconfigured hotkey, or is due to a recent Windows update. We will discuss six methods to fix Lightshot and make it functional again.
1. Restart Lightshot With Administrator Privileges
Missing administrative privileges can prevent Lighshot from saving images or working properly. So, you must restart Lightshot with administrative privileges. Here’s how to do it:
Step 1: Press the Ctrl + Shift + Esc keys to open the Task Manager.
Step 2: Find the Lightshot process and right-click on it. Select the End Task option.
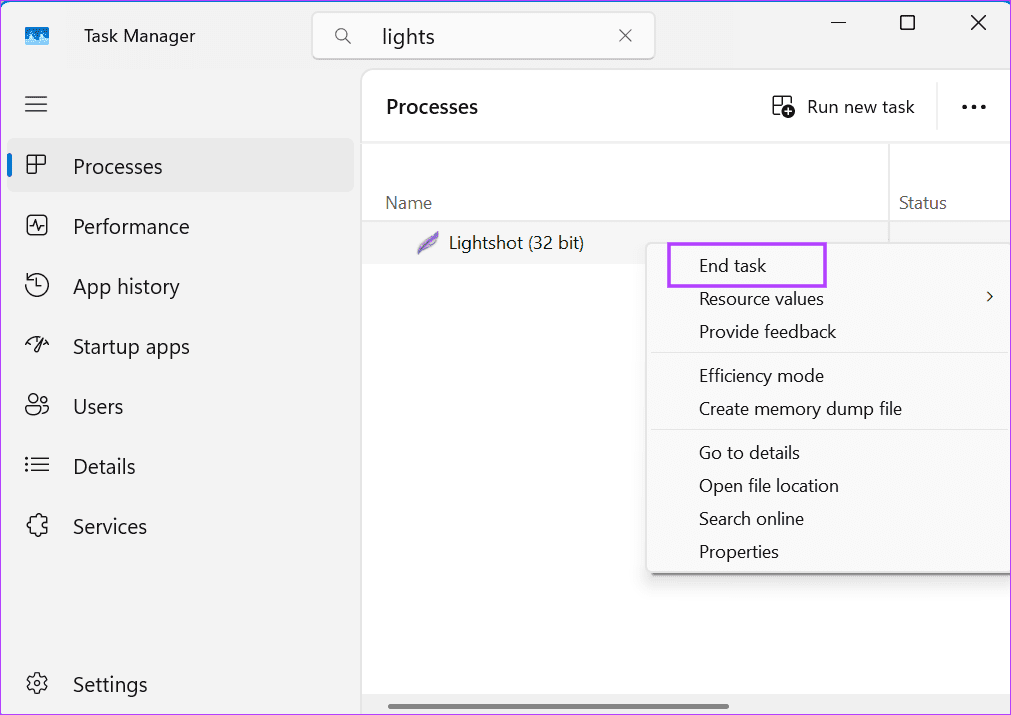
Step 3: Close the Task Manager.
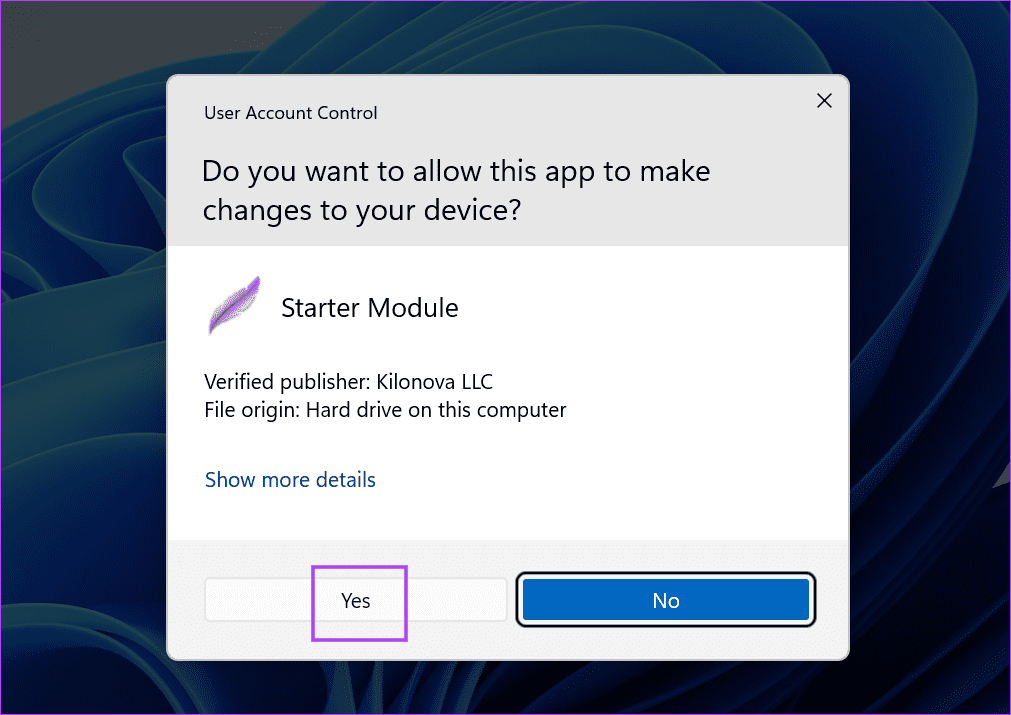
Step 4: Press the Windows key to open the Start menu. Type lightshot in the search bar and click on the Run as administrator option.

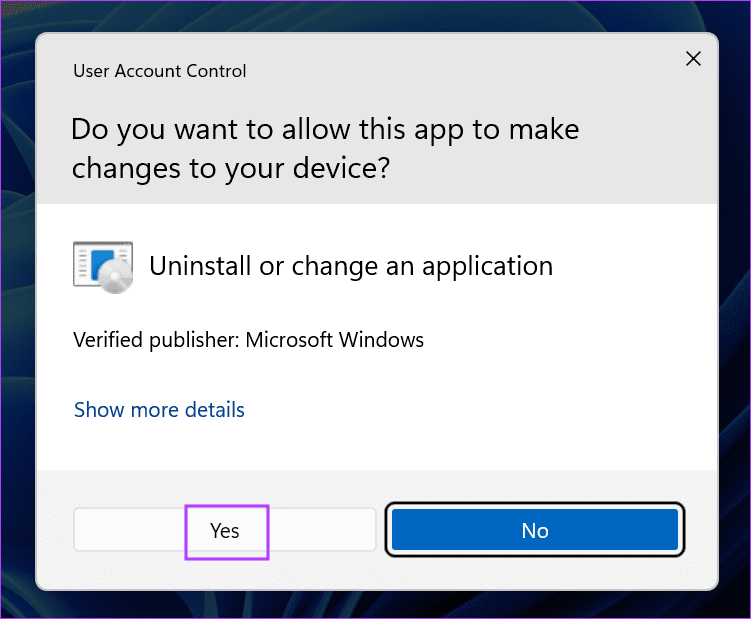
Step 5: The User Account Control window will launch. Click on the Yes button to open Lightshot with administrator privileges.
Step 6: Go to the system tray icons and click on Lightshot. Or you can press the hotkey to open the capture window.
2. Check and Configure Lightshot’s Capture Key
Microsoft changed the way the PrintScreen key works in Windows 11. It opens the Snipping Tool by default now. Needless to say, if you previously used the same key to launch the screen capture in Lighshot, it won’t work now.
So, you must reconfigure the hotkey or disable the PrintScreen key from opening the Snipping Tool by default.
Here’s how to disable Windows from using the PrintScreen key for the Snipping Tool:
Step 1: Press the Windows key + I to open the Settings app.
Step 2: Click on the Accessibility option.

Step 3: Scroll down to the Interaction section. Click on the Keyboard option.
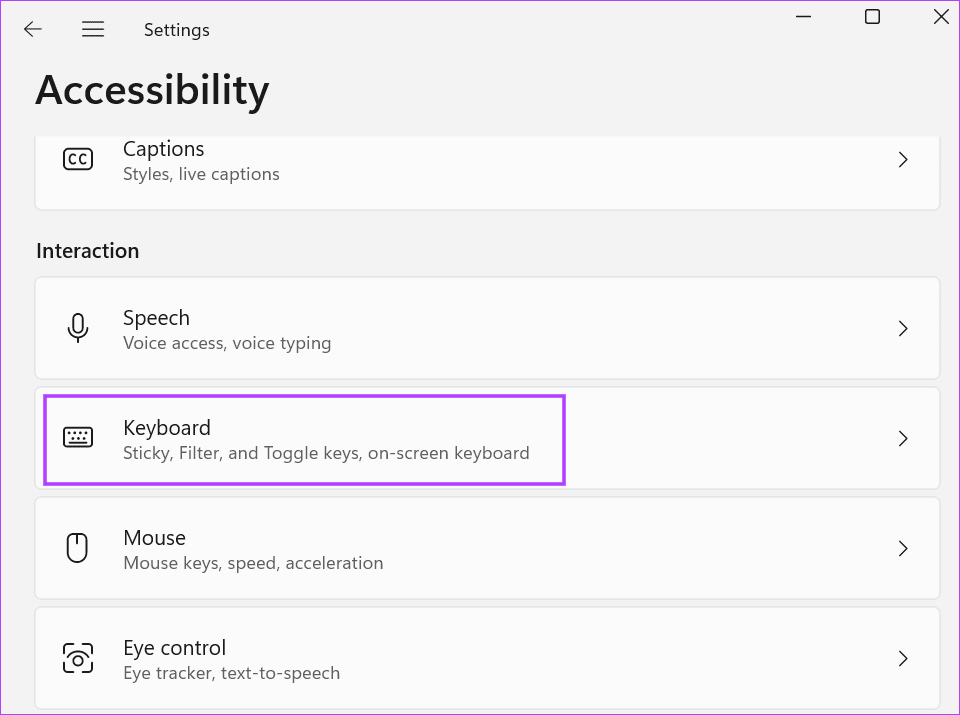
Step 4: Disable the toggle next to the ‘Use the Print Screen to open screen capture’ option.
Step 5: Close the Settings app.
Step 6: Go to the system tray icons area and right-click the Lightshot icon. Select Options.
Step 7: Switch to the Hotkey tab.
Step 8: Enable the General Hotkey checkbox. Click on the key mapping box and press PrintScreen.
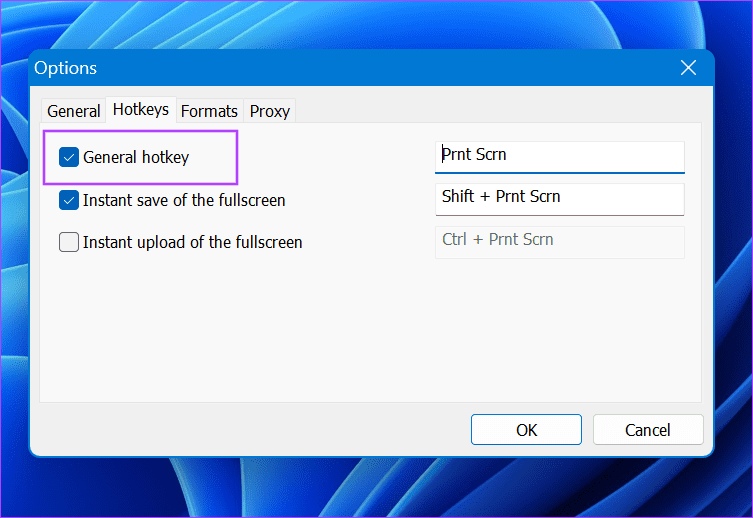
Step 9: Click on the OK button.

Step 10: Restart Lightshot with administrator privileges.
Step 11: Press the PrintScreen key to check if the capture option appears now.
3. Change the GPU Preference in the NVIDIA Control Panel
A few users fixed the Lighshot not capturing issue by changing the GPU preference in the NVIDIA Control Panel. If you have a laptop with two graphics cards (integrated and discrete), you must switch to the auto-select GPU mode option in the NVIDIA Control Panel. Here’s how to do it:
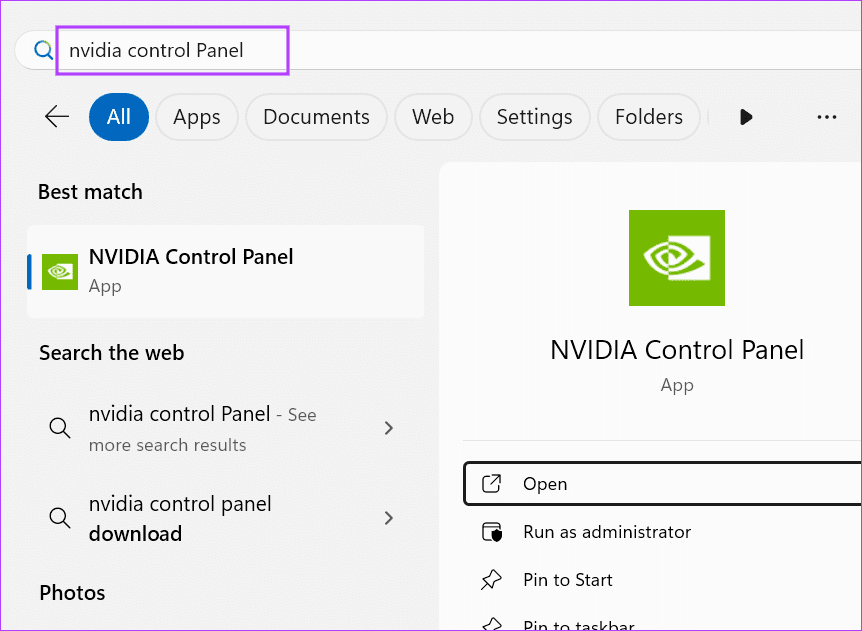
Step 1: Press the Windows key to open the Start menu. Type nvidia control panel in the search bar and press Enter.
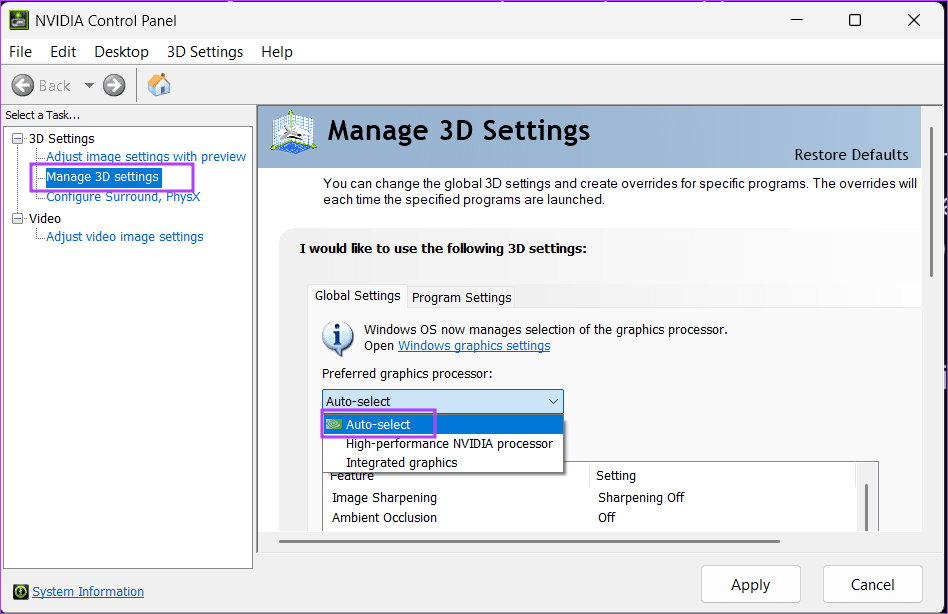
Step 2: Click on the Manage 3D settings option.
Step 3: Click on the Preferred graphics processor option and choose Auto-select.
Step 4: Now, click on the Apply button.
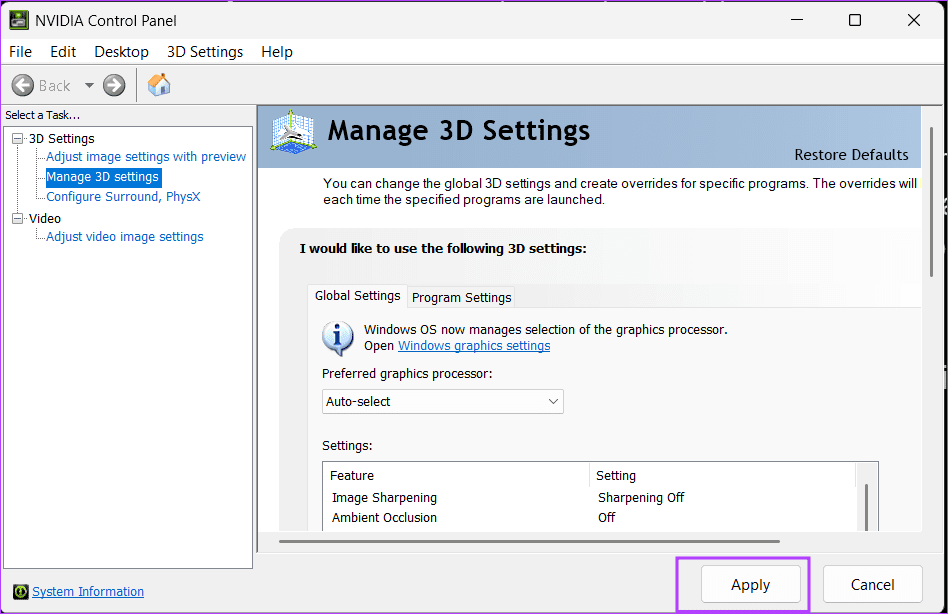
Step 5: Close the NVIDIA Control Panel app.
4. Remove a Recent Windows Update
Many users complained about Lightshot not capturing screenshots after Windows installed an automatic update. However, some users noticed that the Lighshot problem disappeared after manually installing the latest definition updates.
All you need to do is open the Settings app and check for the latest updates. If any are available, install them and check if Lighshot works properly. But if there are no new patches and updates, you must uninstall the update that caused interference with Lightshot. Here’s how to do it:
Step 1: Press the Windows key to open the Start menu. Type uninstall updates in the search bar and press Enter.
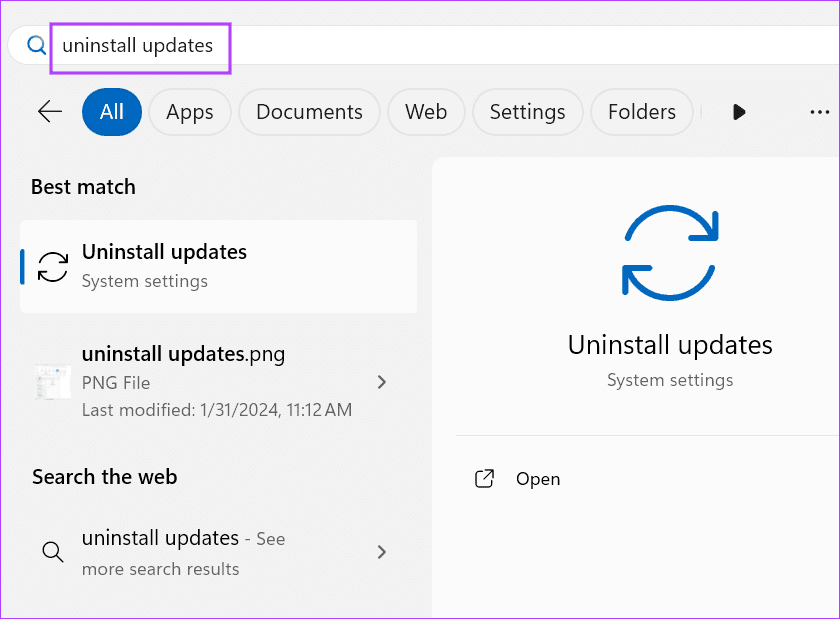
Step 2: Find the most recent update and click on Uninstall.
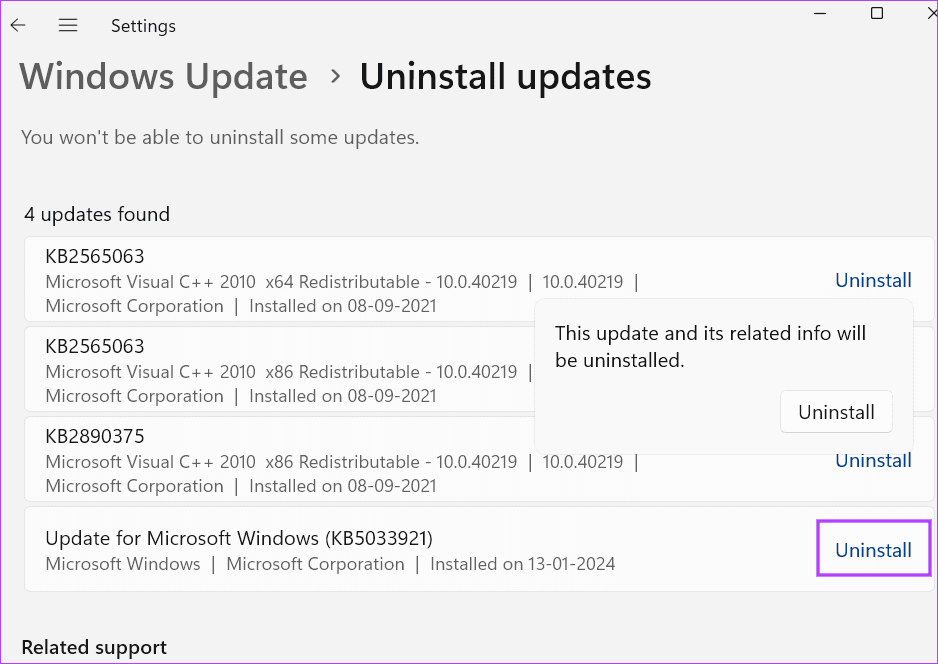
Step 3: Click on Uninstall once again to remove the update.
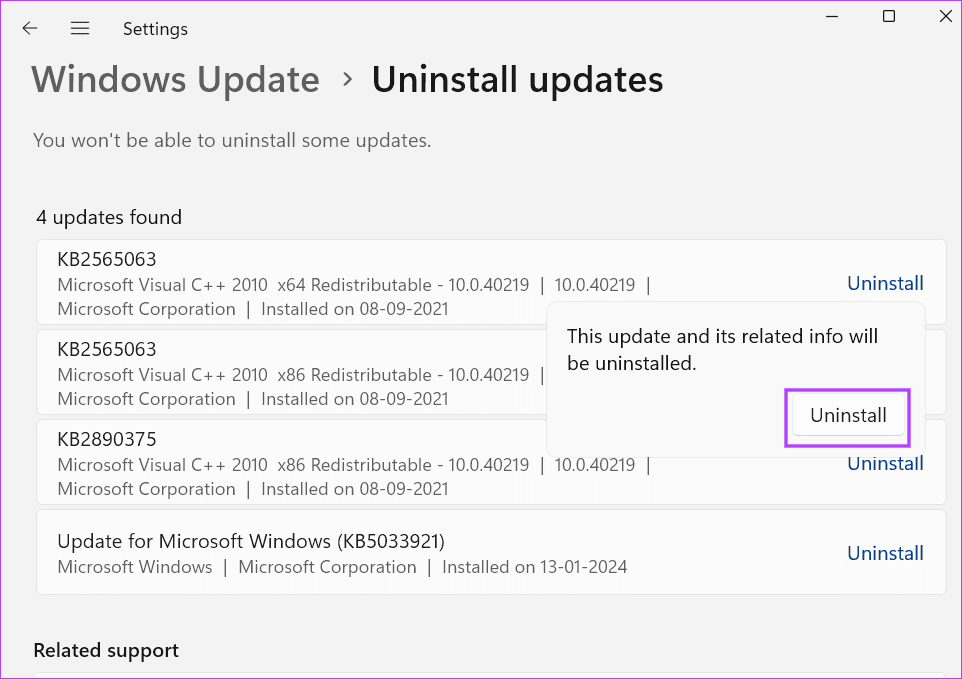
Step 4: Restart your PC to apply the changes.
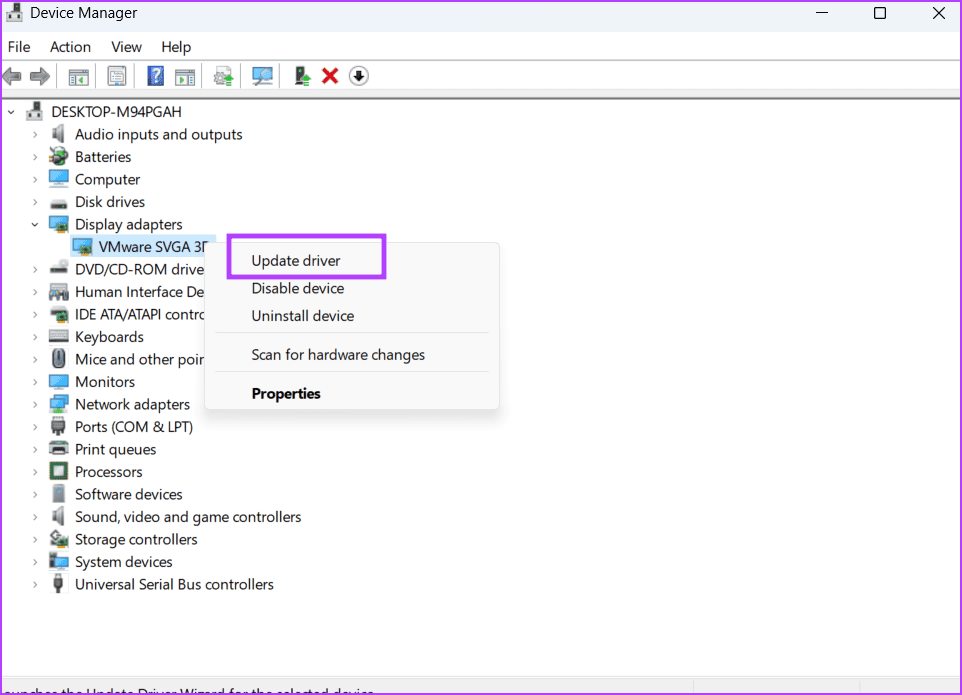
5. Update System Drivers
If you last updated your device drivers a while ago, you must update them using the Device Manager. Open the Device Manager and right-click on a device. Select the Update driver option, and the utility will install the latest drivers.
However, Device Manager doesn’t always download the latest drivers. In that case, you can use a driver download utility (MyAsus, MSI Center, etc) offered by your PC manufacturer. That will help you check and download all the drivers’ updates in one go.
For custom PC users, it will be painstaking because they need to check and download the latest version for each device. Also, update your BIOS along with the device drivers.
6. Reinstall Lightshot
The last resort is to reinstall Lightshot. Since Lightshot has no option to check for updates, you must uninstall the current version and replace it with the most recent version from the official website.
It will replace the corrupt files of the current installation and fix the launch and crash issues with Lightshot. Here’s how to do it:
Step 1: Press the Windows key to open the Start menu. Type appwiz.cpl in the search bar and press Enter.
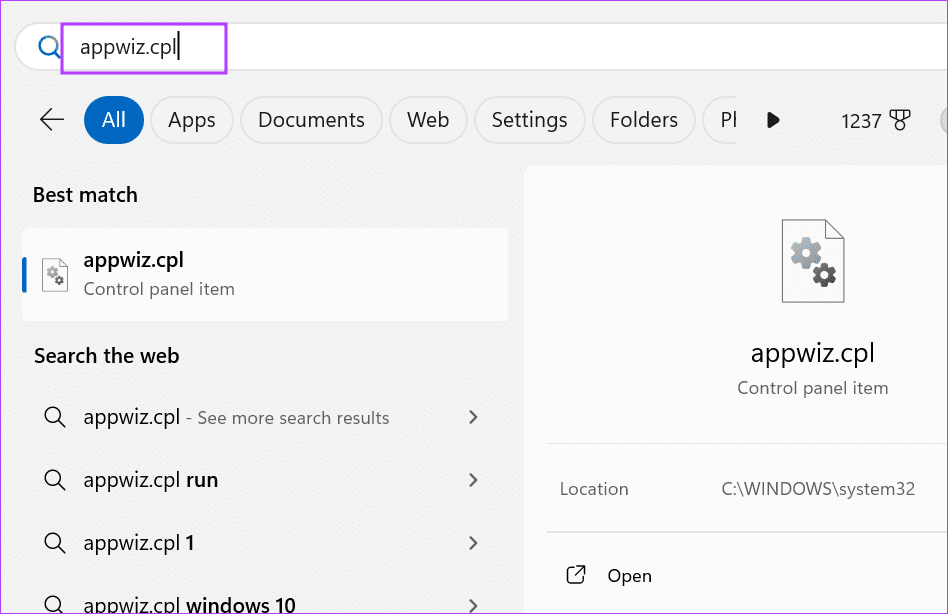
Step 2: The Programs and Features window will launch. Right-click on Lightshot and select the Uninstall option.
Step 3: The User Account Control window will launch. Click on the Yes button.
Step 4: Follow the on-screen instructions to remove the app.
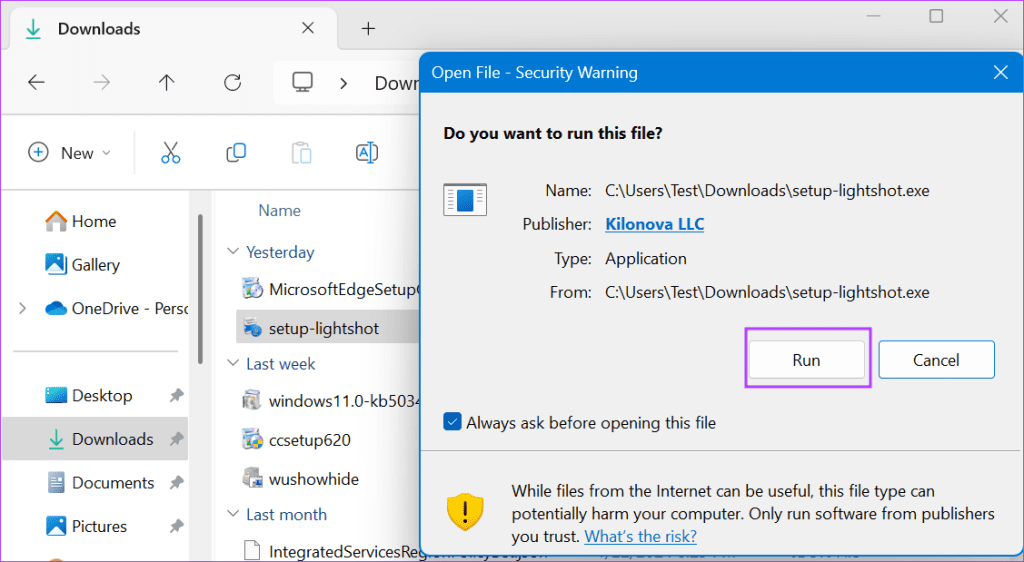
Step 5: Download Lightshot from the official website.
Download Lightshot
Step 6: Run the setup file and install Lightshot.
Step 7: Launch Lightshot with administrator privileges. Customize your preferred hotkeys and check if the app works fine.
No More Screenshot Troubles
We hope the above methods helped you fix the ‘Lighshot not working or opening’ issue in Windows. Change the default behavior of the PrintScreen key, map a new hotkey, and update drivers and Windows. Lastly, reinstall Lighshot to fix the issue. Share the method that worked for you in the comments below.
Was this helpful?
Thanks for your feedback!
The article above may contain affiliate links which help support Guiding Tech. The content remains unbiased and authentic and will never affect our editorial integrity.
Home
Software
By
Jabin Manandhar
Lightshot is a handy app for taking instant screenshots while still being able to edit and customize them simultaneously.
Also, it overcomes various limitations of your system’s built-in screenshot tools. However, it isn’t always the perfect app.
Sometimes the app doesn’t respond or crashes when opening. To resolve these issues, try relaunching the application and see if it solves your problem.
Nonetheless, continue reading further to find various fixes for other issues you may face while using Lightshot.
Why is Lightshot Not Working?
There are various reasons why Lightshot may fail to work as expected. The most common ones are listed below.
- Screenshot copied to clipboard but not saved
- Using the wrong keyboard shortcut
- The default save location has changed
- Opening a similar screenshot capture tool
How to Fix the Lightshot Not Working?
Before you begin, it might be helpful to know that Lightshot doesn’t work in some specific situations.
For instance, you cannot take screenshots using Lightshot while playing a game in the full-screen mode. Likewise, it may not work while taking screenshots of a particular window of a setting.
However, you can overcome the above issues with workarounds. You can use the game bar as an alternative for taking in-game screenshots. Likewise, for the latter issue, launch the Lightshot app, click its icon from the taskbar, and you should be able to take screenshots after that.
On the other hand, go through the following fixes until your specific problem gets resolved.
Use the Correct Keyboard Shortcut
It could be the case that you are just copying the screenshot to the clipboard and not actually saving it. As a result, you aren’t finding the screenshots anywhere on your PC. Therefore, use the correct keyboard shortcut.
For copying the screenshot to the clipboard:
- Ctrl + C (Windows)
- Cmd + C (Mac)
For saving the screenshot:
- Ctrl + S (Windows)
- Cmd + S (Mac)
Furthermore, make sure you are pressing the whole key combination.
Close Similar Applications
If you have installed similar applications like Lightshot, they may interfere with the Lightshot app. And, you might get an error like “Failed to register hotkey.” Therefore, close them to avoid Lightshot issues while taking screenshots.
To close applications running in the background,
On Windows
- Press the Ctrl + Shift + Esc key to open the Task Manager.
- Under the Processes tab and the Apps section, select the conflicting application.
- Then, click the End task button in the bottom right corner

.
- Repeat the above process if you have multiple screenshot capture apps.
- Check if the Lightshot is working as expected.

On Mac
- Search for and open Activity Monitor on the Spotlight app. You can use the shortcut key Command + Spacebar to open the Spotlight app.
- Select Lightshot from the list of apps/processes.
- Then, click the cross icon in the top left corner and select Quit/Force Quit.
- See if the Lightshot application works as expected.
Configure the Keyboard Shortcut
Windows has its own built-in screenshot capture tool called “Snip & Sketch.” And, since it is the default tool for taking screenshots on Windows, it may override the shortcut key PrtSc/PrintScr.
And although the key works even when using Lightshot, sometimes it may fail to work. Therefore, assign a different shortcut key to avoid issues while launching Lightshot. Here’s how you can do it.
- Launch the Lightshot application.
- Then, click the Show hidden icons(which looks like an up arrow) from the taskbar.
- Now, right-click on the Lightshot icon(feather) and click Options.
- Under the Hotkeys tab, assign a different shortcut key (e.g., Ctrl + PrntScrn) to take screenshots with Lightshot.

- Click OK to confirm.
- Check if you can take screenshots with Lightshot now.

In case you don’t have a print screen button, you can set assign a new keyboard shortcut and use it for taking screenshots.
Stop the Default Screenshot Tool from Launching
By default, Windows launches the snipping tool when you press the Prt Scrn/Prt Scn key. Likewise, the Lightshot application also uses the same key for taking screenshots. So, it may cause conflict, and the key may not work as expected.
You can prevent the snipping tool from using the PrtSc key to resolve the above issue.
Here’s how you can do it using the Settings app.
- Press the Windows + I to open the Settings app.
- Then, navigate to Ease of Access > Keyboard.
- Now, in the right pane, scroll to the Print Screen shortcut section and toggle off the button under Use the PrtScn to open screen snipping.

- Restart your PC and see if your problem has been solved.

Check the Save Location
By default, Lightshot creates and saves all its screenshots inside the following path on Windows:
C:\Users\[Username]\Documents\Lightshot
However, if you launched Lightshot, clicked its Save button, and saved to a different location, it automatically saves the new screenshots in that location. This is because it always saves the current screenshot according to the most recent save location.
As a result, you may not find the screenshots in the usual save location.
On the other hand, if you use OneDrive on your system, it can save every screenshot taken to its folder. To prevent it,
- Open the OneDrive app.
- Now, click the OneDrive icon(which looks like a cloud) from the taskbar. If you don’t find it, click the Show hidden(up arrow) icon.
- Then, click the gear icon and select Settings.
- Under the Backup tab, uncheck the Automatically save screenshots I capture to OneDrive checkbox.

- Click OK.

Reinstall the Application
If the problem persists, you can just reinstall the application to resolve any unknown issues with the application. To uninstall the app,
On Windows
- Press the Windows + R key and type the command
appwiz.cpl. - Select Lightshot from the list of applications.
- Then, click Uninstall from the top bar.
- Next, click Yes to confirm.

On Mac
- Click Finder from the bottom of your screen.
- Select Applications from the left sidebar.
- Now, drag and drop the Lightshot app to the Trash icon located at the bottom of your screen.
After uninstalling the application from your system, download the appropriate application for your system from the Lightshot official website.
Likewise, if you are using the Lightshot in a browser, uninstall it and download it again to resolve the issue.
Provide Permissions for Lightshot (Only for Mac)
Lightshot needs permission on Mac to work to capture screenshots of your system. So, in case it’s not enabled, you can face issues. Here’s how to allow the Lightshot app on Mac.
- Click the little Apple icon in the top left corner of the screen.
- Navigate to System Preferences > Security & Privacy.
- Now, under the Privacy tab, select Screen Recording from the left sidebar and check the Lightshot Screenshot checkbox.


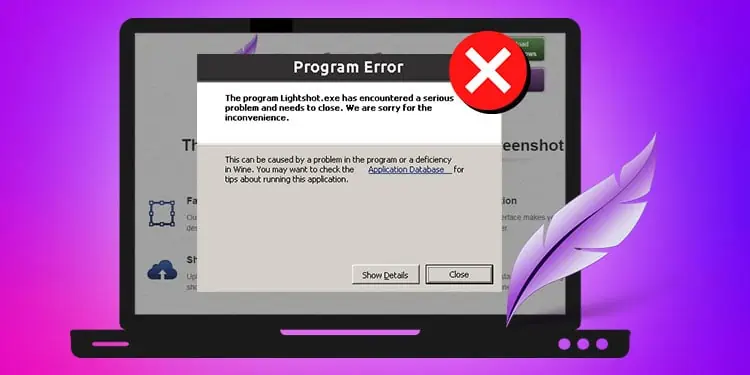
Lightshot is a tremendously useful software for taking screenshots but can have occasional hiccups. It may fail to launch, launch but not take screenshots, show a black screen in the screenshot, stop working in games or on the desktop, or stop responding to keys you set up. To sum up, it may give you troubles that would ruin normal functionality and frustrate you to no end. Luckily, we’re adept at the application and have demonstrated a wide array of solutions over time. Therefore, we’re prepared to cover the most common sources of woe and show you how to fix the Lightshot not working problem, whatever it is.
1. Fix Lightshot not working by restarting or reinstalling the software
The vast majority of issues with the software refusing to work can be solved by quitting, then starting it again. You may also choose to restart Lightshot as administrator by:
- Opening the Start menu.
- Searching for the software, then right-clicking on Lightshot.
- Going to Properties.
- Clicking on Advanced…
- Selecting Run as administrator, then OK.
If that doesn’t produce results, consider deleting Lightshot and installing it again after downloading it from the Internet. You may need to set the hotkeys again, explained in the method below, but that’s a small price to pay for restored functionality.
2. Double-check the hotkey and set a different one
We showed how to change a Lightshot hotkey, and what to do if Lightshot fails to register a hotkey. Those two guides should get you through most permission-related concerns and ways to run the software as an administrator on other platforms.
We also touched on the fact that several well-known applications may impact the functionality. They may take precedence over Lightshot or occupy the key in question, meaning it will not be working until you fix the problem by removing them or ensuring they become low-priority. That applies to Snipping Tool/Snip & Sketch in Windows 10 and 11, which frequently occupy the Print Screen key. Some others include Core Temp, Speed Fan, CPU-Z, NetStress, OneDrive, and Dropbox.
Note that using a laptop may require you to press the Fn (Function) or More button to use some unique buttons. In some cases, that applies to pressing Fn + Print Screen, if the keyboard is reduced in size. We propose checking our guide on types of keyboard, especially if using a non-standard one.
3. Configure settings and eliminate black screen
Another reason Lightshot may stop functioning may include wrong quality settings or format (PNG, JPG, BMP) automatic upload to the Internet when you don’t want that, or printing. If uploading to the Internet is standard practice for you, the Proxy tab is where you need to go. In all these cases, you need to learn to change Lightshot settings. That should solve any issues in the software or its configuration.
4. Check guides or contact Skillbrains if Lightshot is not working
Its developer, Skillbrains, has answered Frequently Asked Questions about Lightshot on its website. If that’s insufficient, look into the Lightshot tutorials. If that is still not the solution to the problem, consider reaching out to Lightshot’s developers at [email protected]. They should answer promptly and help you with any issues you may have.