
Все способы:
- Процесс подготовки
- Аппаратные модификации
- Драйвера
- Рут-права
- Бэкап
- Прошивка
- Способ 1: Заводское рекавери
- Способ 2: SP FlashTool
- Способ 3: Infinix Flashtool
- Способ 4: TeamWin Recovery
- Установка TWRP
- Инсталляция кастомной прошивки
- Установка официальной сборки Андроид через TWRP
- Вопросы и ответы: 25
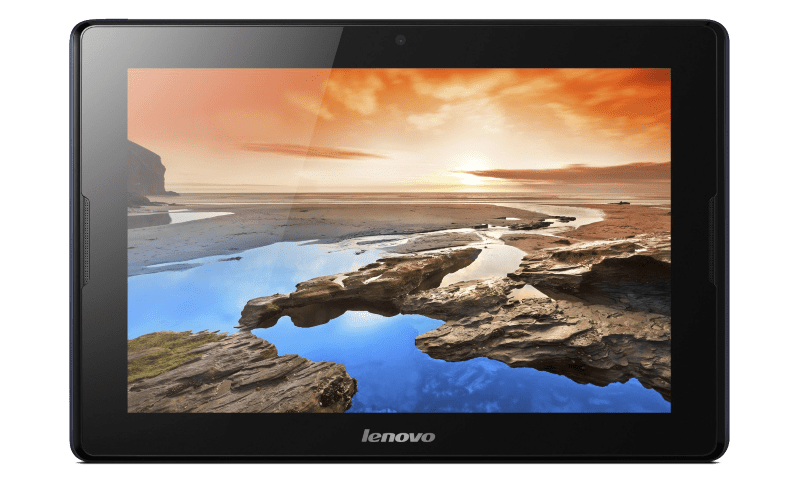
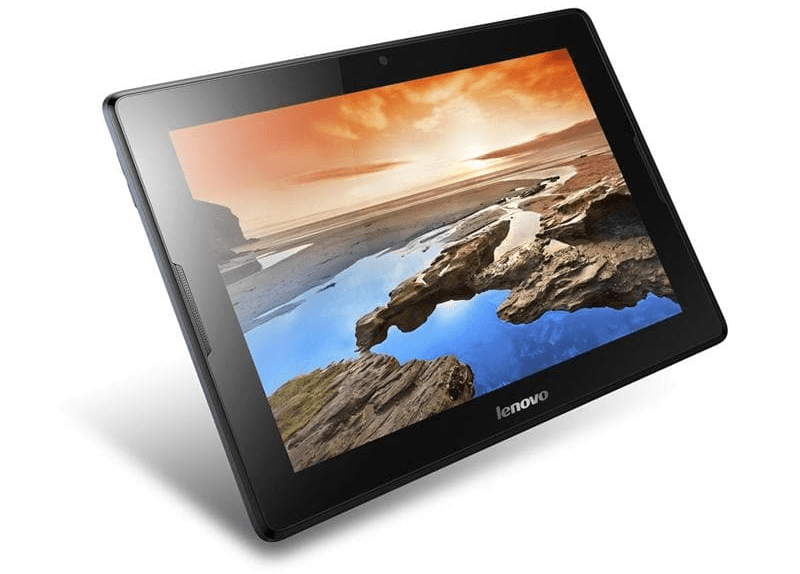
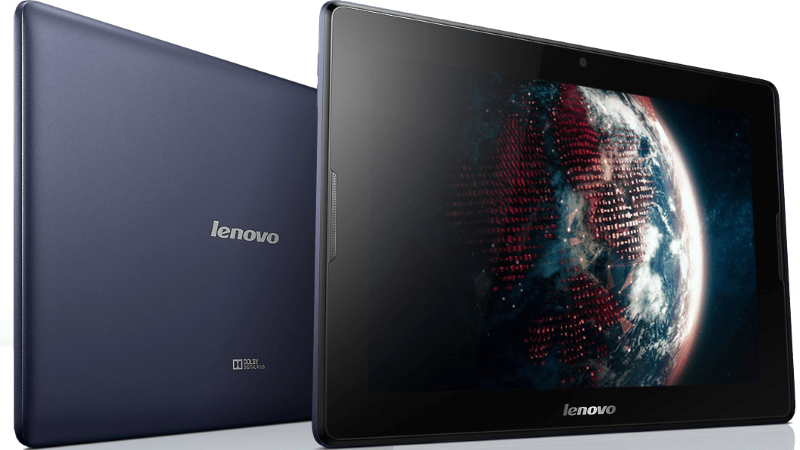
Практически каждый владелец Андроид-девайса рано или поздно сталкивается с необходимостью перепрошивки своего цифрового помощника. Не углубляясь в причины возникновения такой потребности, рассмотрим возможности проведения манипуляций с системным ПО, которые имеются у каждого пользователя планшетного компьютера популярной модели Lenovo IdeaPad A7600 в различных аппаратных конфигурациях.
В целом Lenovo A7600 не выделяется какими-либо техническими особенностями и, с точки зрения манипуляций с системными разделами памяти, устройство можно назвать стандартным. Аппаратная платформа Mediatek, которая лежит в основе девайса, диктует применяемость тех или иных программных инструментов и способов взаимодействия с ОС планшета. Несмотря на то, что при четком следовании инструкциям никаких проблем с переустановкой Android в большинстве случаев не возникает, нужно помнить:
Каждая манипуляция, подразумевающая вмешательство в системное ПО Андроид-девайса, несет в себе потенциальный риск нарушения работоспособности и даже повреждения последнего! Пользователь, осуществляющий описываемые ниже процедуры, принимает на себя полную ответственность за возможные последствия и отсутствие нужного результата!
Процесс подготовки
Прежде чем приступать к непосредственной перезаписи системных областей памяти Lenovo A7600, необходимо провести подготовку. Это позволит сохранить ценную информацию из планшета, а также быстро и беспроблемно установить, а впоследствии использовать на девайсе ОС Андроид желаемой версии.
Аппаратные модификации
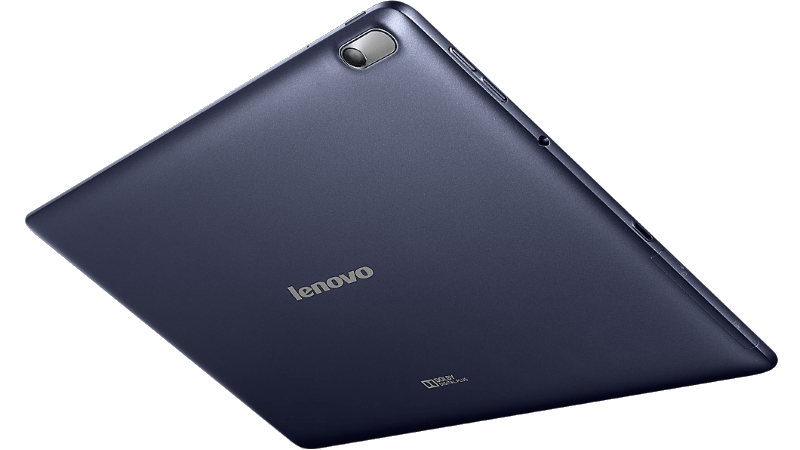
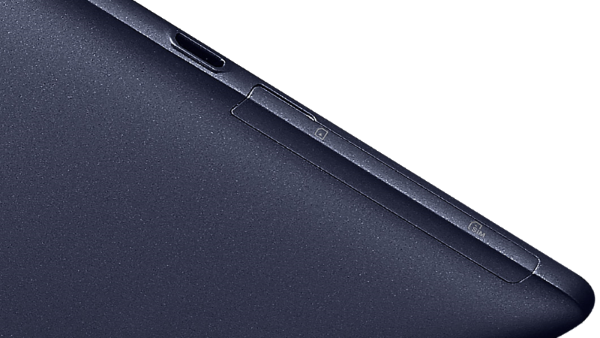
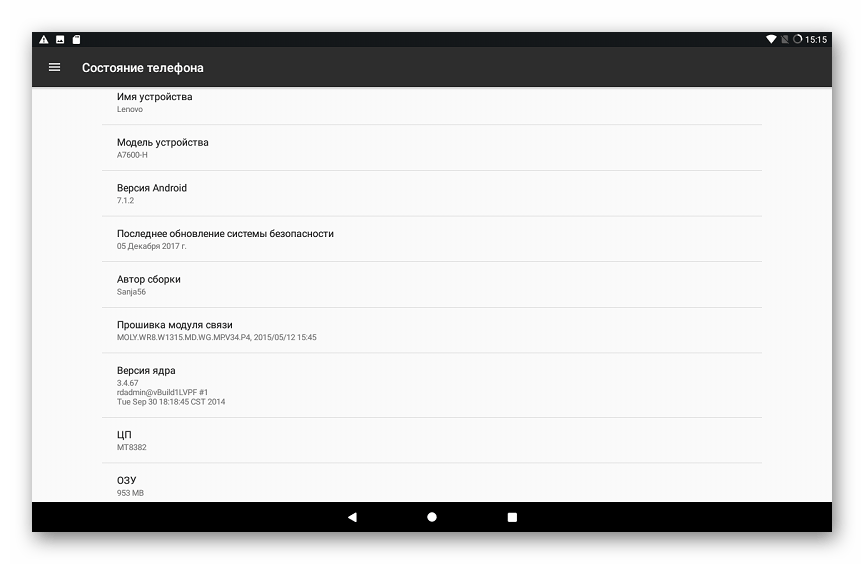
Всего существует два варианта рассматриваемой «таблетки» — A7600-F (Wi-Fi) и A7600-H (Wi-Fi + 3G). Основное различие между ними – это наличие слота под SIM-карту у модели с индексом «Н» и, соответственно, поддержка последней работы в сетях мобильной связи. Кроме того, используются разные процессоры: Mediatek MT8121 у аппаратов «F» и MT8382 в основе вариантов «H».
Довольно существенные отличия в технических компонентах модификаций приводят к необходимости использования разного программного обеспечения. То есть системное ПО для A7600-F и A7600-H отличается и применять для установки следует исключительно тот пакет, который предназначен для конкретного варианта устройства.
По ссылкам ниже в статье доступны и соответствующим образом обозначены решения для обоих индексов модели, при загрузке выбираем пакет внимательно!
В качестве объекта для экспериментов при создании настоящего материала использовался планшетный ПК A7600-H. Что касается способов перезаписи памяти и применяемых при этом инструментов — они идентичны для всех аппаратных конфигураций IdeaPad A7600.
Драйвера
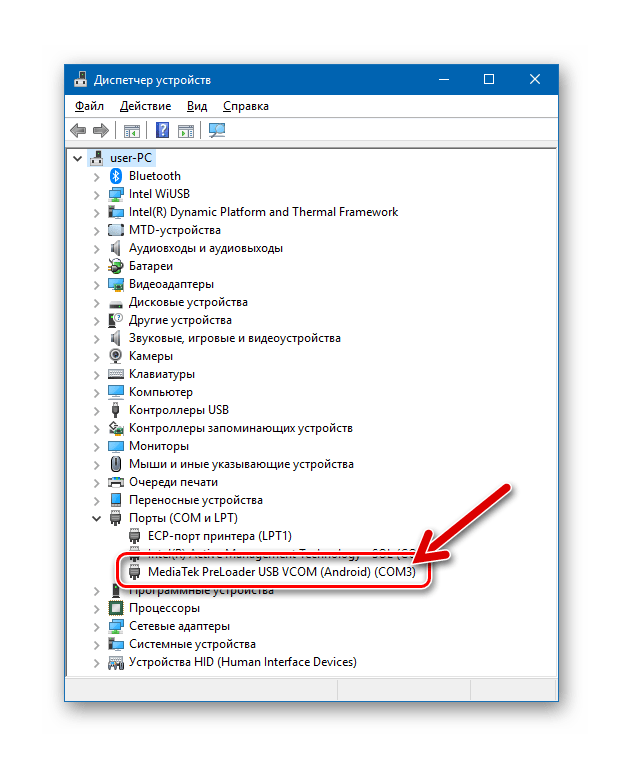
Без предварительной установки специализированных драйверов проведение операций с Андроид-девайсами способами, подразумевающими использование ПК и специализированных приложений в качестве инструментов, невозможно. Практически для всех МТК-аппаратов, и Леново А7600 здесь не исключение, инсталляция описываемых компонентов системы не вызывает сложностей – разработаны и успешно применяются автоустановщики.

Самым эффективным и простым решением вопроса с драйверами для МТК аппаратов можно считать продукт, получивший название «SP_Flash_Tool_Driver_Auto_Installer». Загрузить данное решение можно по ссылке из материала на нашем сайте, там же обнаруживается инструкция по использованию средства – раздел статьи «Инсталляция драйверов VCOM для девайсов МТК».
Подробнее: Установка драйверов для прошивки Android
На всякий случай ниже представлена еще одна разновидность инсталлятора компонентов ОС Windows, позволяющая очень быстро установить драйвера для взаимодействия с Lenovo IdeaPad A7600.
Скачать драйвера с автоустановщиком для прошивки планшета Lenovo IdeaPad A7600
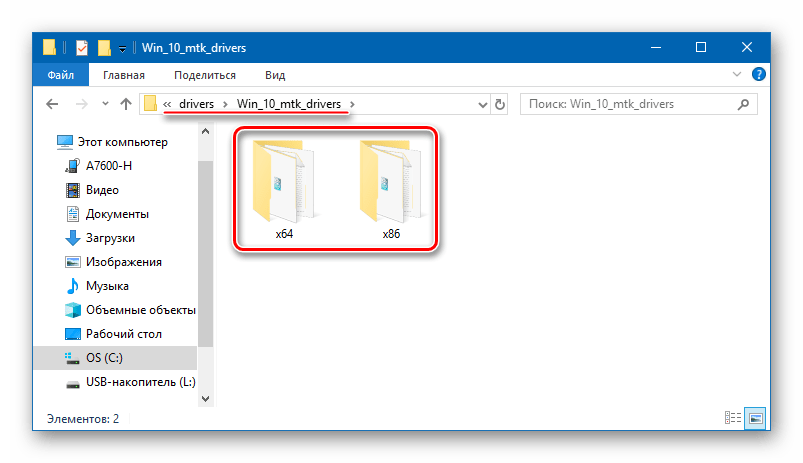
- Разархивируем пакет, полученный по ссылке выше. В результате имеем два каталога, содержащие установщики для x86 и x64 версий Виндовс.

- Полностью выключаем планшет и подключаем к разъему устройства кабель, сопряженный с USB-портом ПК.
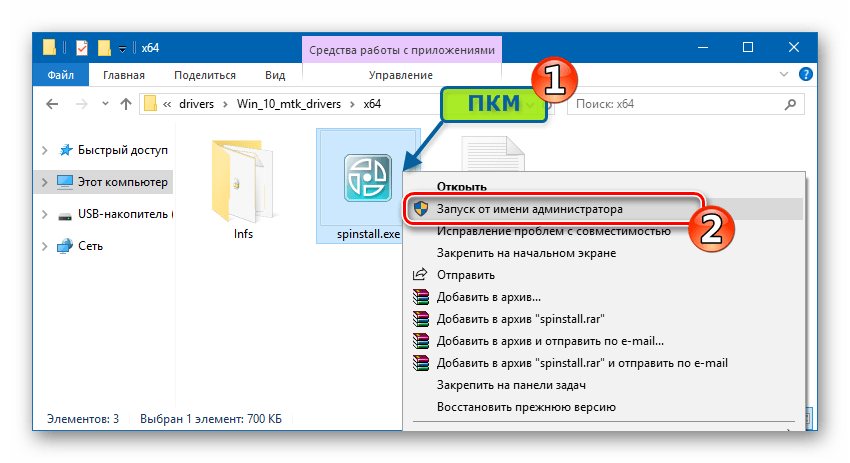
- Открываем соответствующую разрядности своей ОС папку и запускаем файл «spinstall.exe» от имени Администратора.

- Нужные файлы переносятся в систему очень быстро, в процессе на короткое время появится окно командной строки Windows, которое автоматически будет закрыто.

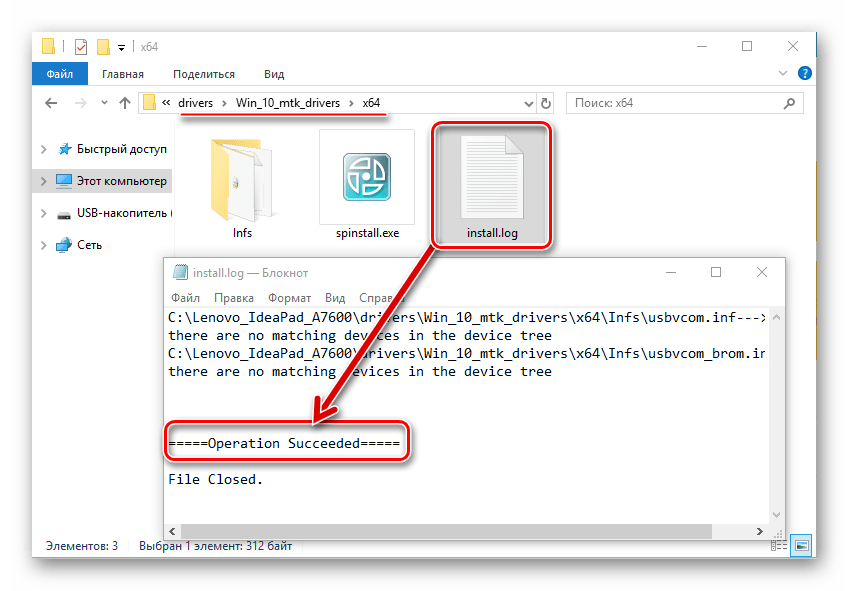
- Чтобы убедиться в том, что автоустановщик успешно выполнил свою работу, открываем файл «install.log», созданный инсталлятором в собственной папке. После успешного добавления драйверов в систему в данном файле присутствует строка «Operation Succeeded».


Рут-права
Официальные сборки Android, предлагаемые Lenovo, нередко вызывают нарекания пользователей за перегруженность предустановленными, часто ненужными большинству владельцев девайсов приложениями. Ситуация исправима удалением лишних компонентов, но для этого действия потребуются рут-права.
Кроме прочего, получение привилегий Суперпользователя на IdeaPad A7600 может стать необходимостью при создании полноценного бэкапа перед переустановкой Андроид некоторыми методами, а также других целей.
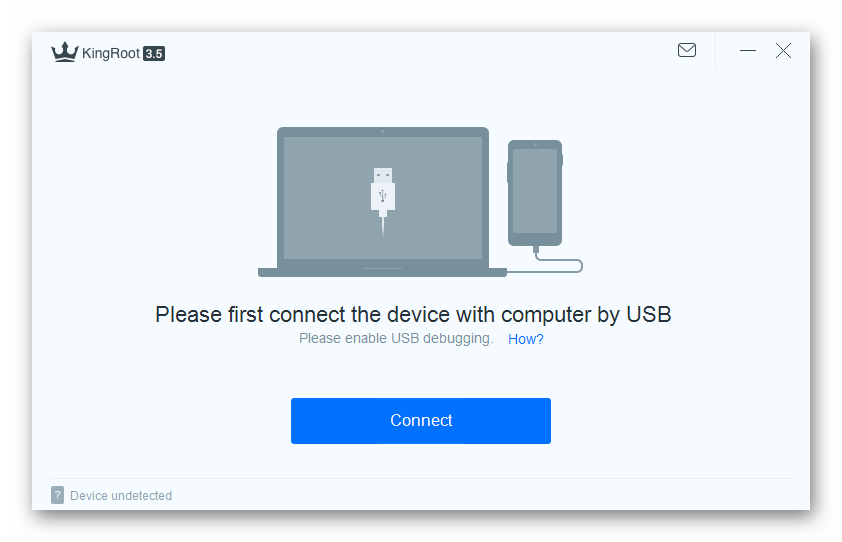
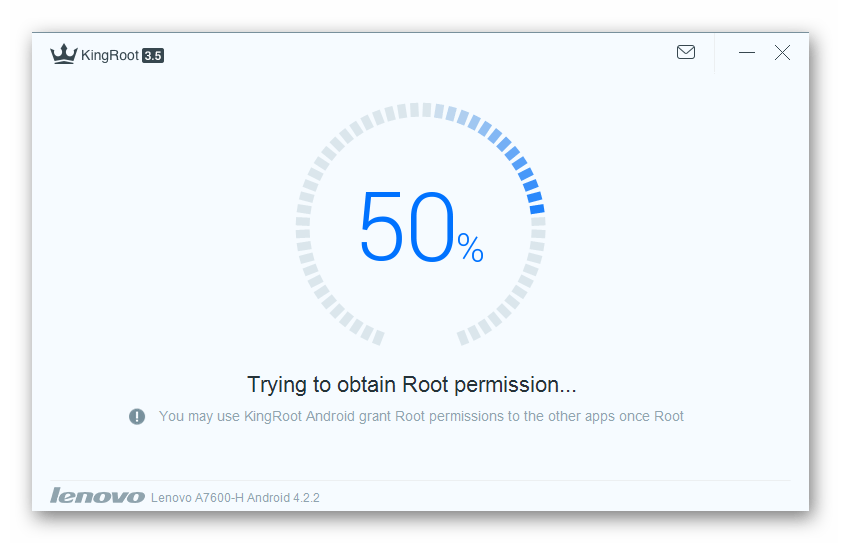
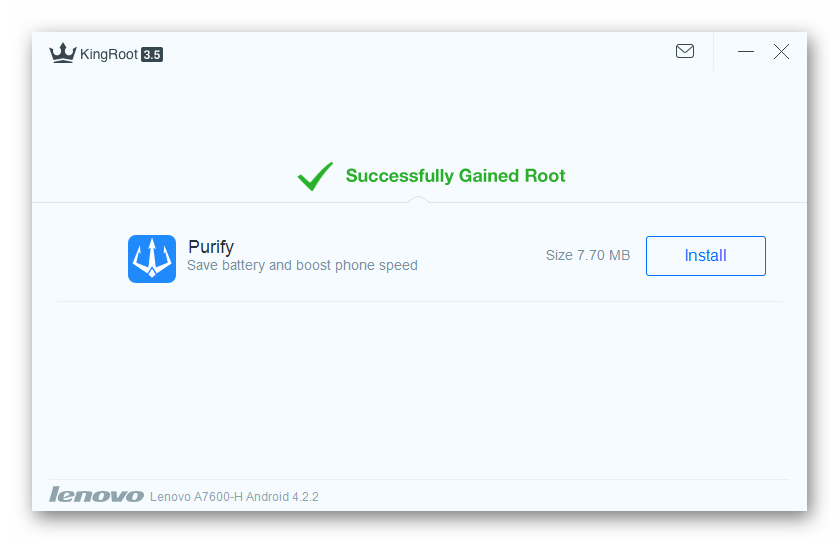
Наиболее действенным инструментом для рутирования рассматриваемого планшета, функционирующего под управлением официального Android любой версии, является приложение KingRoot.
- Загружаем последнюю версию КингРут для ПК с официального сайта. Ссылка на ресурс доступна в статье-обзоре средства у нас на сайте.

- Выполняем указания по работе с KingRoot из материала:
Подробнее: Получение рут-прав с помощью KingROOT для ПК

- После перезагрузки устройства получаем расширенные возможности по управлению планшетным ПК, а точнее — его программной частью.


Бэкап
Пользовательская информация, содержащаяся в памяти планшета, в процессе переустановки Андроид будет удалена при применении практически любого способа прошивки. Даже если выбран метод, не предполагающий очистку памяти, перестраховаться и создать резервную копию важных сведений все же не будет лишним.
Подробнее: Как сделать бэкап Android-устройства перед прошивкой
Для сохранения данных из Леново А7600 подойдут практически все методы из предложенного выше по ссылке материала. В идеальном случае, создаем полный дамп разделов памяти планшета с помощью SP FlashTool, а также выполняем рекомендации из статьи по созданию Nandroid-бэкапа через TWRP, если модифицированная среда будет установлена и планируется инсталляция неофициальных вариантов ОС. Эти способы гарантируют возможность возврата к предыдущему состоянию программной части девайса во многих ситуациях.

Кроме прочих, довольно действенным инструментом для архивации важной информации, накопленной в IdeaPad A7600, является фирменное средство производителя для работы с собственными аппаратами – Lenovo MotoSmartAssistant. Скачать дистрибутив следует с официального веб-ресурса Леново на страничке технической поддержки рассматриваемой модели.
Загрузить приложение Lenovo Moto Smart Assistant для работы с планшетом IdeaTab A7600 с официального сайта
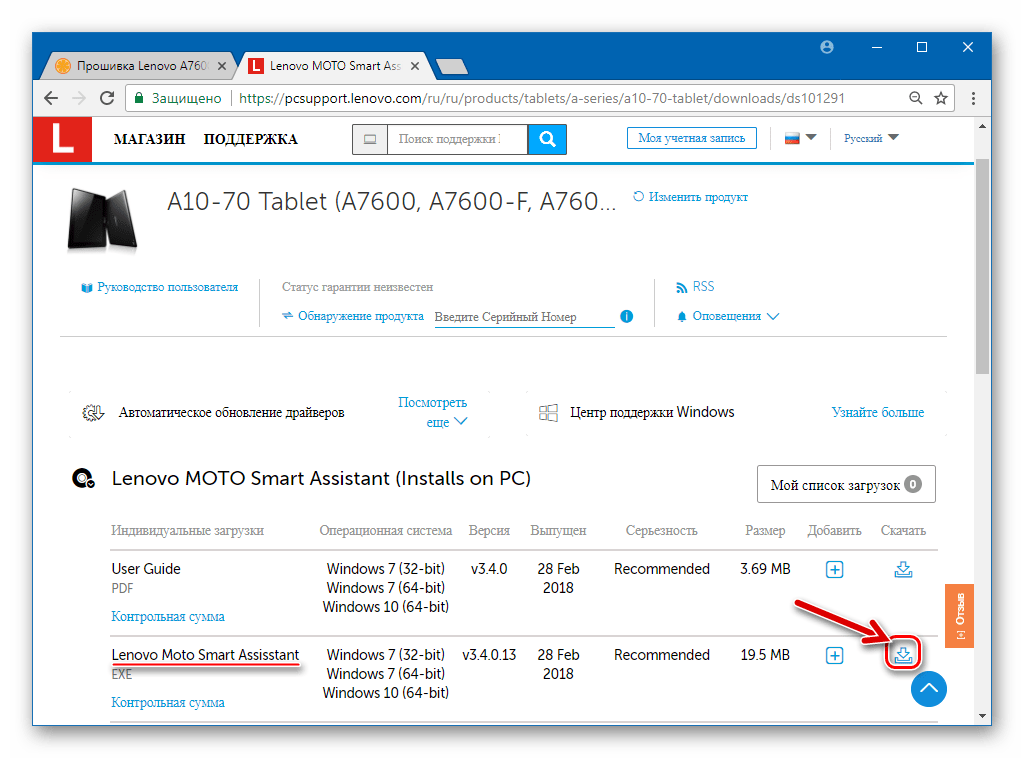
- Загружаем инсталлятор и устанавливаем Smart Assistant на компьютер.

- Запускаем приложение и подключаем планшет к USB-порту ПК. Предварительно на «таблетке» должен быть активирован режим «Отладки по ЮСБ».
Подробнее: Как включить режим отладки USB на Андроид

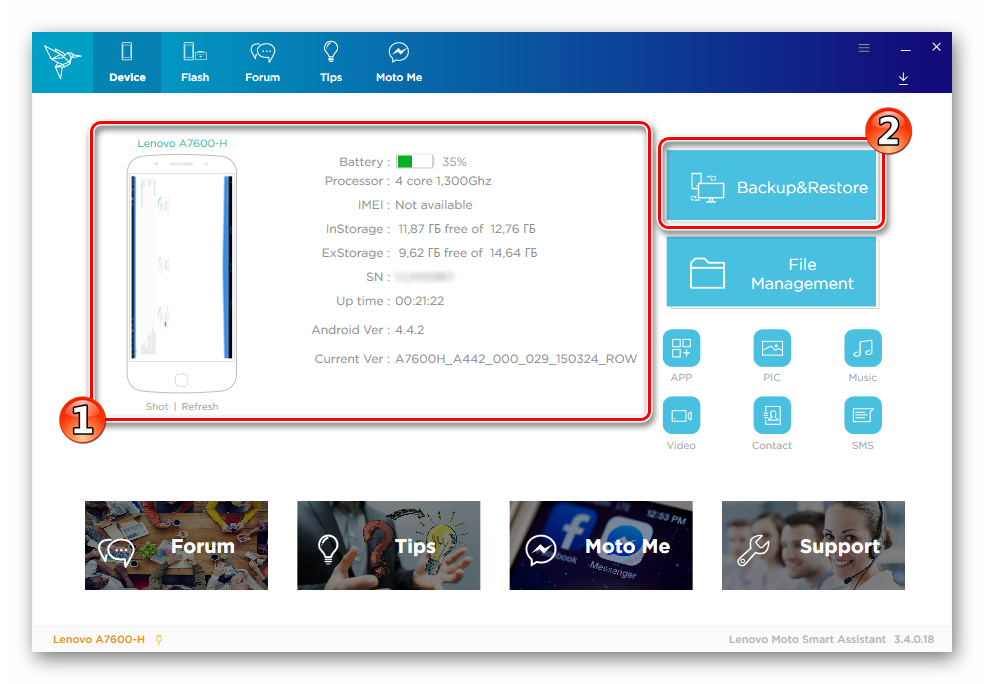
- После того как Смарт Ассистент определит подключенный девайс и продемонстрирует его технические характеристики в своем окне, переходим к созданию резервной копии – нажимаем «Backup & Restore».
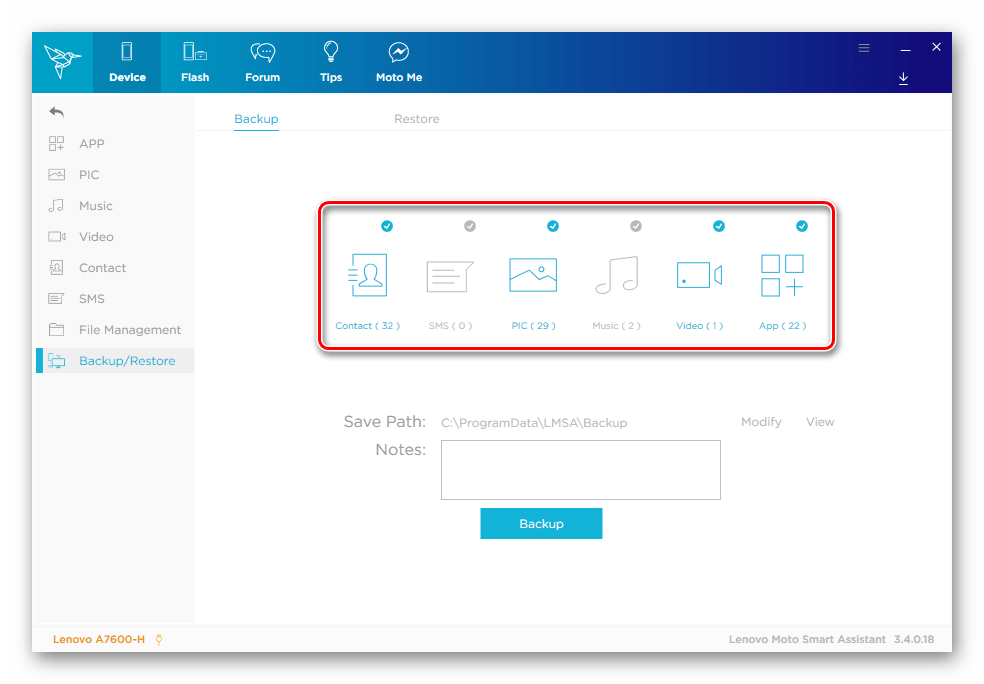
- Отмечаем в открывшемся окне предполагаемые для сохранения типы данных, кликая по ним мышкой, — это действие приводит к окрашиванию значков в синий цвет.
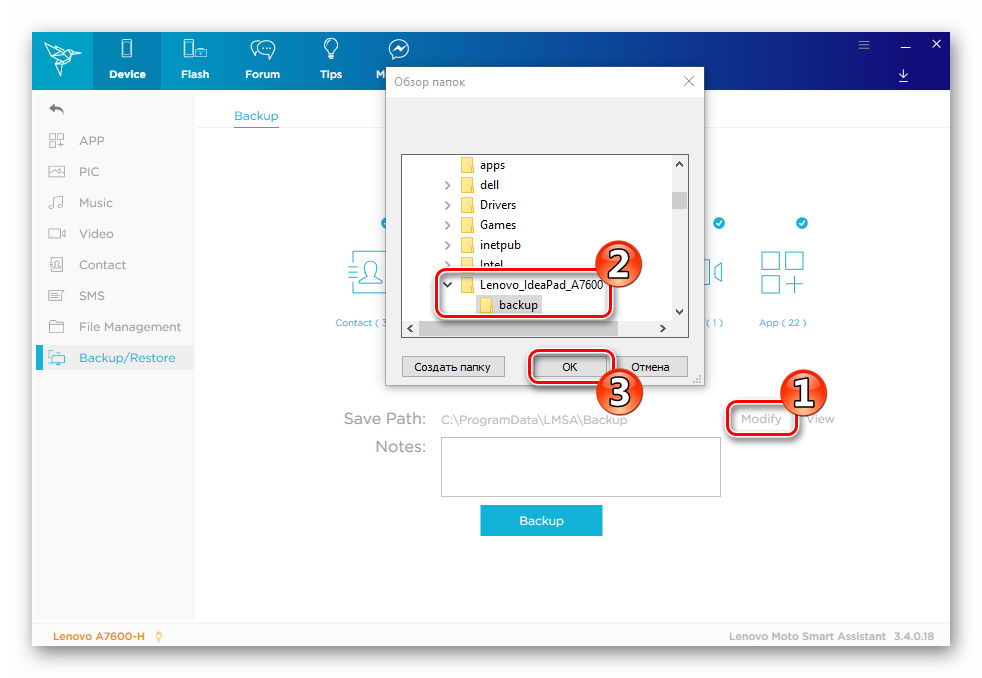
- Определяем каталог для сохранения бэкапа, нажав «Modify» возле обозначения пути по умолчанию и указав желаемую папку в окне Проводника.

- Нажимаем «Backup» и ждем завершения резервного копирования.


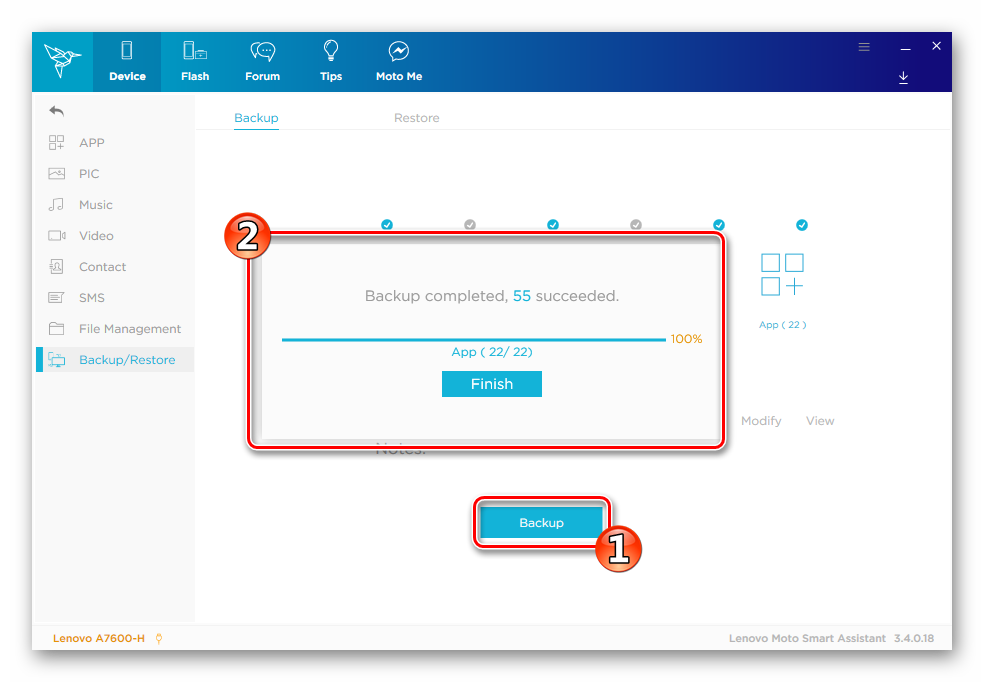
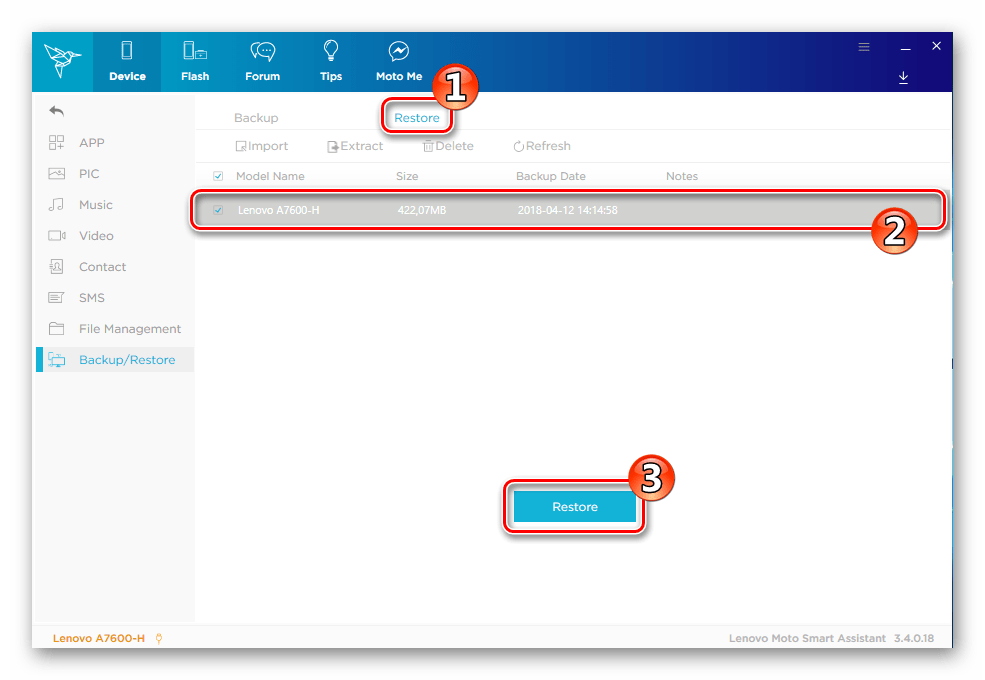
При необходимости восстановить данные впоследствии используем вкладку «Restore». После перехода в данный раздел необходимо поставить отметку в чекбоксе возле нужной копии и нажать кнопку «Restore».
Прошивка
После того как планшет и компьютер подготовлены к проведению операций по вышеизложенным рекомендациям, можно переходить к процедуре прошивки аппарата. Существует несколько способов инсталляции Андроид в Леново АйдиаПад А7600, выбираем инструкцию в соответствии с текущим состоянием системного ПО девайса и нужным результатом. Представленные ниже инструменты позволяют не только переустановить/обновить/восстановить официальную сборку ОС, но и оснастить устройство неофициальными (кастомными) прошивками.
Способ 1: Заводское рекавери
Официально производитель предлагает применять для манипуляций с системным по Lenovo Idea Pad A7600 несколько средств: предустановленное в планшете Андроид-приложение «Обновление системы», вышеупомянутый Lenovo SmartAssistant, среду восстановления (рекавери). Все эти инструменты в аспекте прошивки позволяют добиться единственного результата – актуализировать версию ОС, под управлением которой работает девайс.

Остановимся на работе в рекавери, так как этот программный модуль дает возможность не только провести актуализацию версии официального Android, но и вернуть планшетный ПК в заводское состояние, очистив его таким образом от накопившегося за время использования устройства программного «мусора», большинства вирусов и т.п.
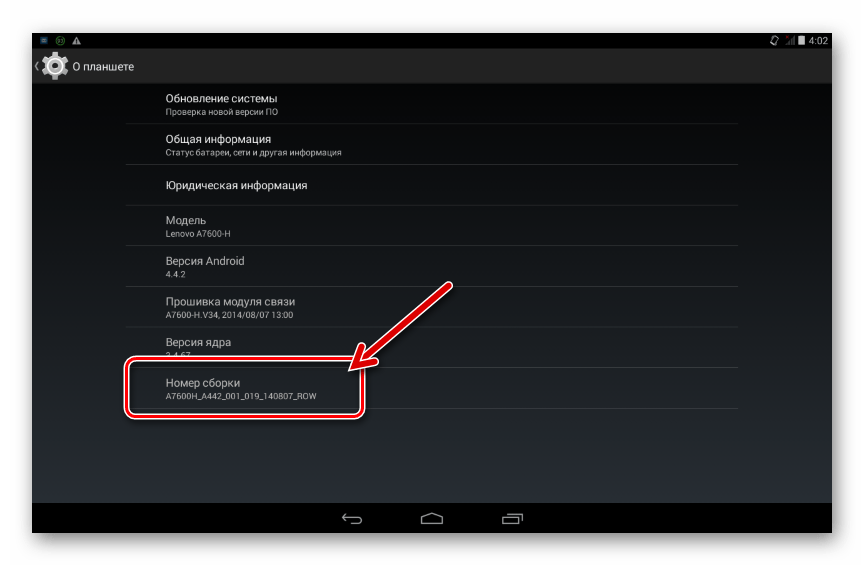
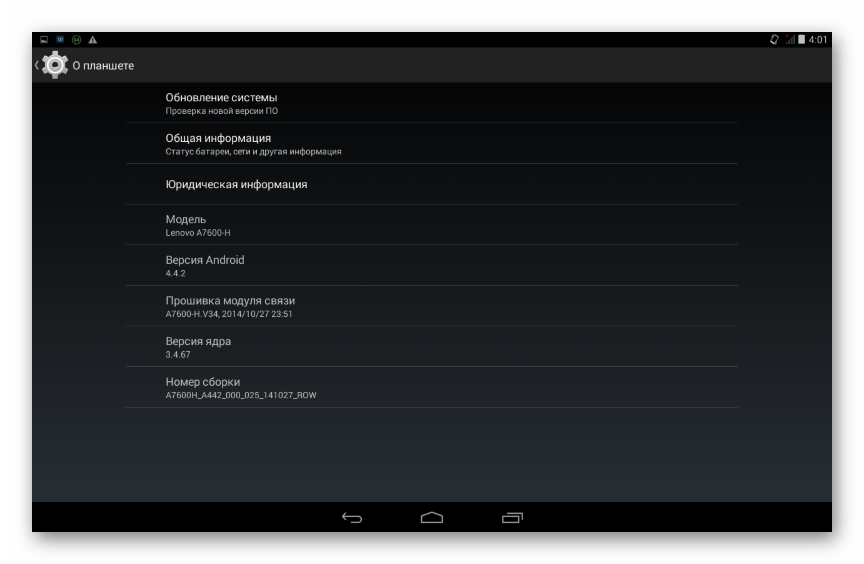
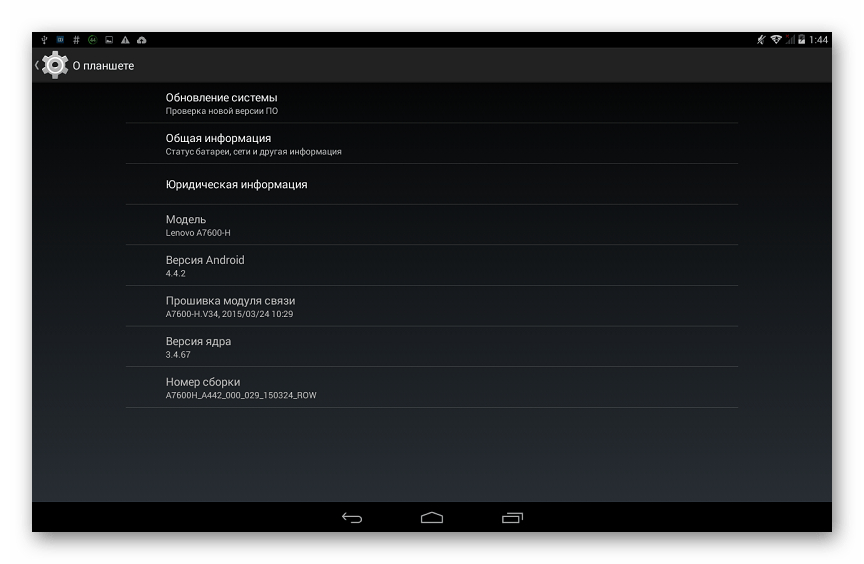
- Определяем номер сборки установленной в А7600 системы. Для этого на планшете переходим по пути: «Параметры» — «О планшете» — смотрим значение параметра «Номер сборки».

Если планшет не загружается в Android, выяснить нужные сведения можно, войдя в режим среды восстановления, в пункте 4 настоящей инструкции описано, как это сделать.
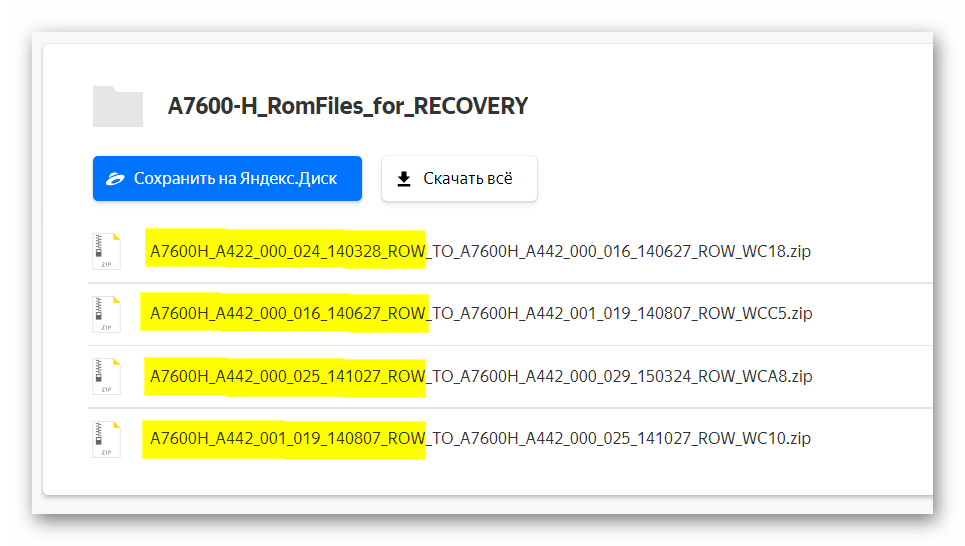
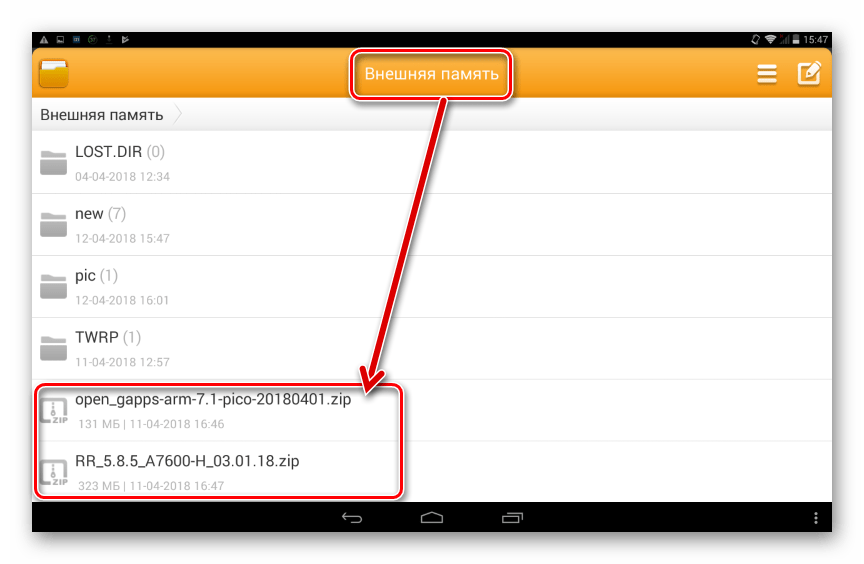
- Загружаем пакет с системным ПО, который будет инсталлироваться. Ниже по ссылке представлены все выпущенные для модели A7600-H обновления официальной прошивки, в виде zip-файлов, предназначенных для установки через «родное» рекавери. Для модификации «F» пакеты с ПО для установки по нижеизложенной инструкции пользователю придется искать самостоятельно.
Скачать прошивки Lenovo IdeaPad A7600-H для установки через заводское рекавери
Поскольку установку актуализированных версий необходимо производить поэтапно, важно правильно выбрать загружаемый пакет, для этого нам и понадобится выясненный на предыдущем шаге номер сборки системы. Находим в первой части наименования zip-файла версию установленного на настоящий момент Андроид (выделено желтым цветом на скриншоте ниже) и загружаем именно этот файл.

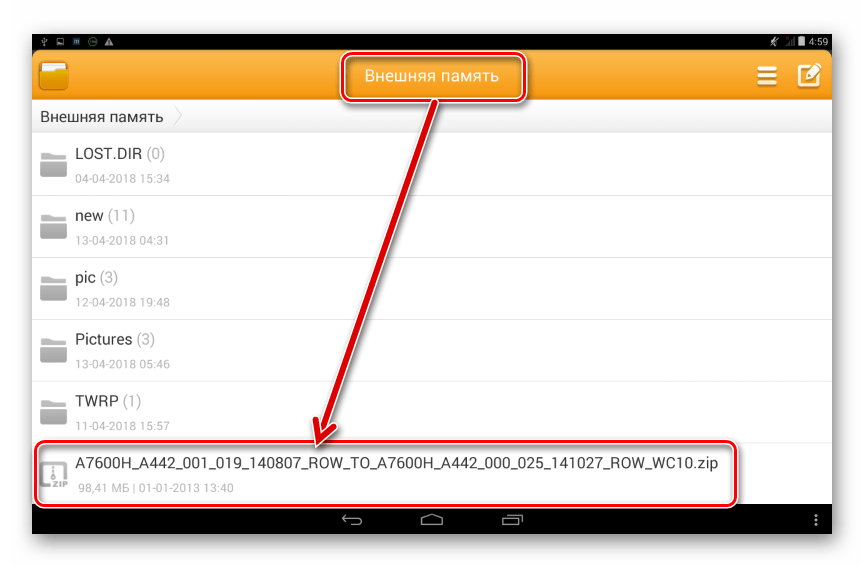
- Помещаем пакет с обновлением ОС на карту памяти аппарата.

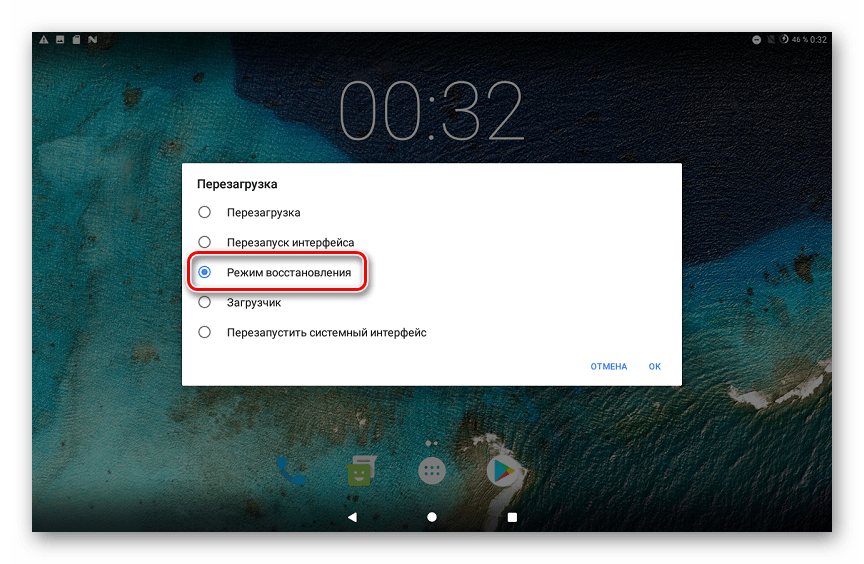
- Полностью заряжаем аккумулятор устройства и запускаем его в режиме рекавери. Для этого:
Перемещение по опциям рекавери осуществляется с помощью «Громкость-», подтверждением выбора того или иного пункта является нажатие клавиши «Громкость+».
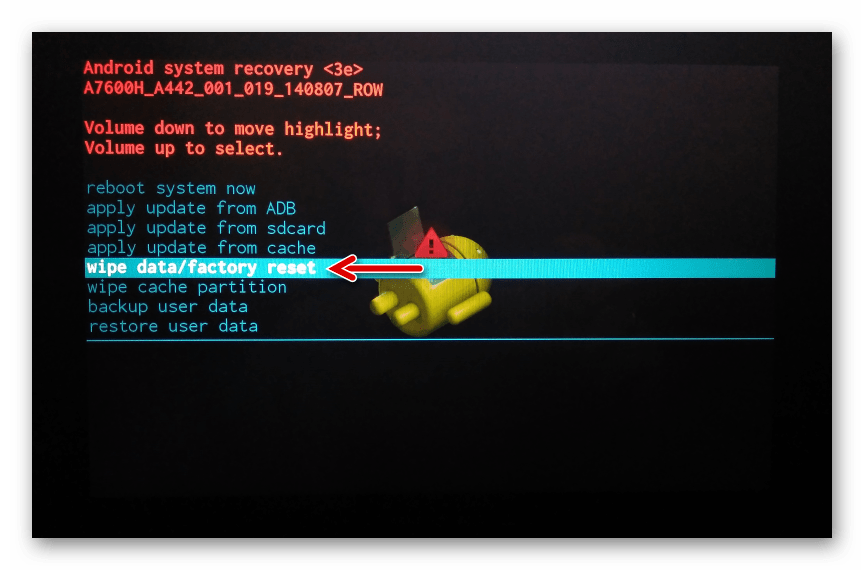
- Производим очистку памяти от накопившихся в ней приложений и данных, а также сброс настроек А7600. Данное действие не является обязательным, но рекомендуется к выполнению, если цель процедуры – полная переустановка Андроид, а не только повышение версии ОС.
Не забываем о необходимости создания бэкапа перед процедурой возврата к заводскому состоянию, — все данные в процессе форматирования будут уничтожены!
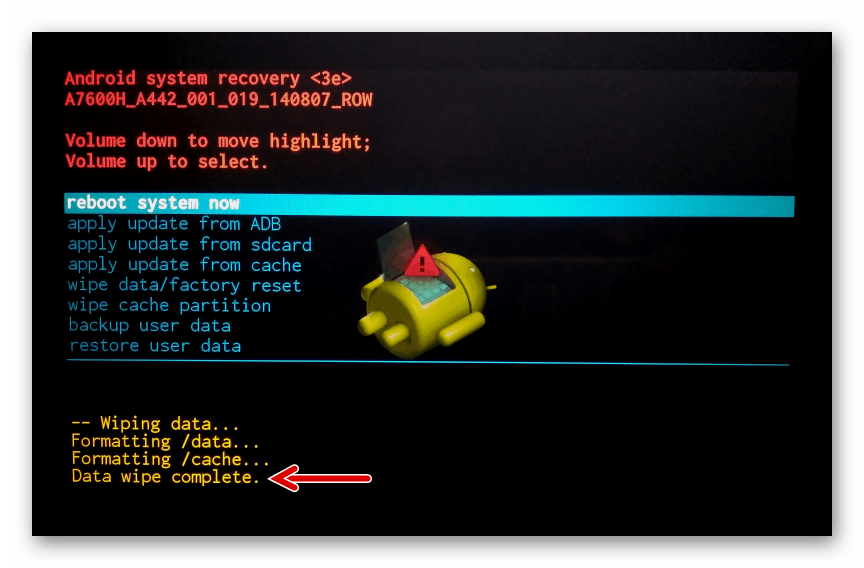
- Выбираем в перечне опций рекавери «wipe data/factory reset»,

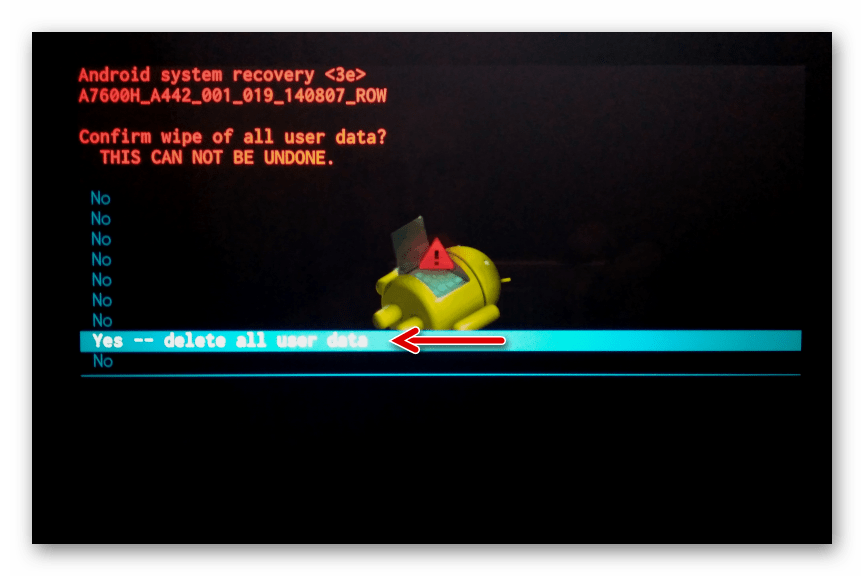
подтверждаем намерение удалить всю информацию – «Yes – delete all user data»;

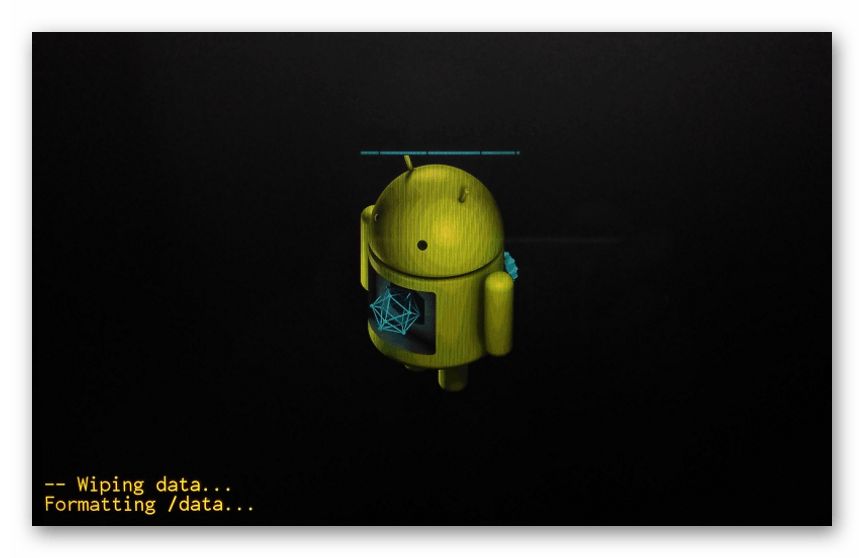
- Ожидаем завершения форматирования – это недолгая процедура, производимая автоматически;

- В результате на экране появится уведомление «Data wipe complete».

- Выбираем в перечне опций рекавери «wipe data/factory reset»,
- Переходим к установке/обновлению Андроид:
- По завершении процедуры обновления системного ПО отобразится уведомление «Install from sdcard complete» и станет видимым перечень опций среды восстановления. Подтверждаем нажатием кнопки «Громкость+» инициирование перезагрузки – пункт «reboot system now».

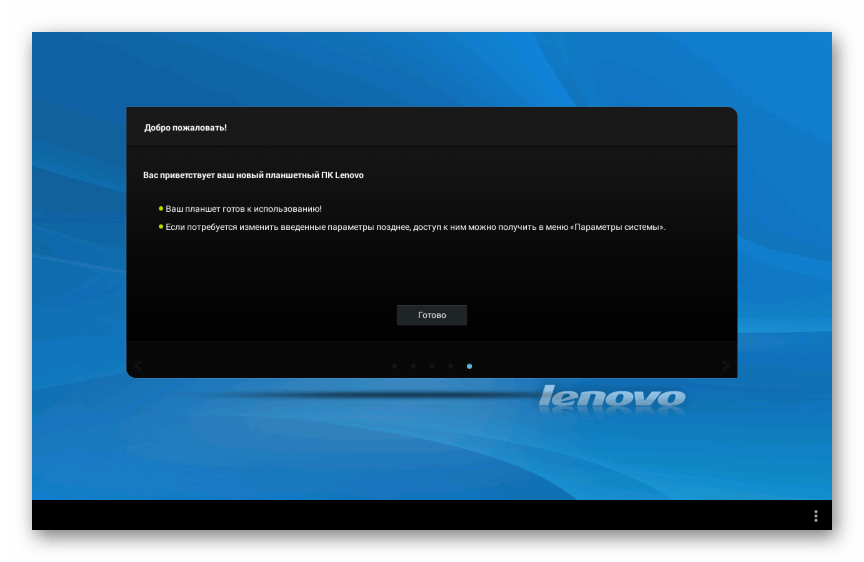
Аппарат перезапустится в уже обновленный Android, нужно лишь подождать некоторое время пока компоненты системы полностью инициализируются (планшет в это время «зависнет» на загрузочном логотипе).

- Если проводилась очистка разделов, после отображения приветственного экрана проводим определение параметров системы и приступаем к восстановлению данных.

-
Планшет Леново A7600 готов к эксплуатации!


Способ 2: SP FlashTool
Одним из самых эффективных инструментов для манипуляций с системными разделами памяти аппаратов, созданных на базе процессоров Mediatek, является приложение SP FlashTool. Последние версии средства замечательно взаимодействуют с Lenovo IdeaPad A7600, позволяют обновить и полностью переустановить официальную операционную систему, а также восстановить работоспособность программной части аппаратов в случае такой необходимости.
Читайте также: Прошивка Android-устройств на базе МТК через SP FlashTool
Установим с помощью СП ФлешТул официальную сборку Андроид последней версии. Загрузить пакеты с ПО для A7600-H и A7600-F можно по ссылке ниже, а само приложение – по ссылке из обзора инструмента на нашем сайте.
Скачать прошивки планшета Lenovo IdeaTab A7600 для установки с помощью SP FlashTool
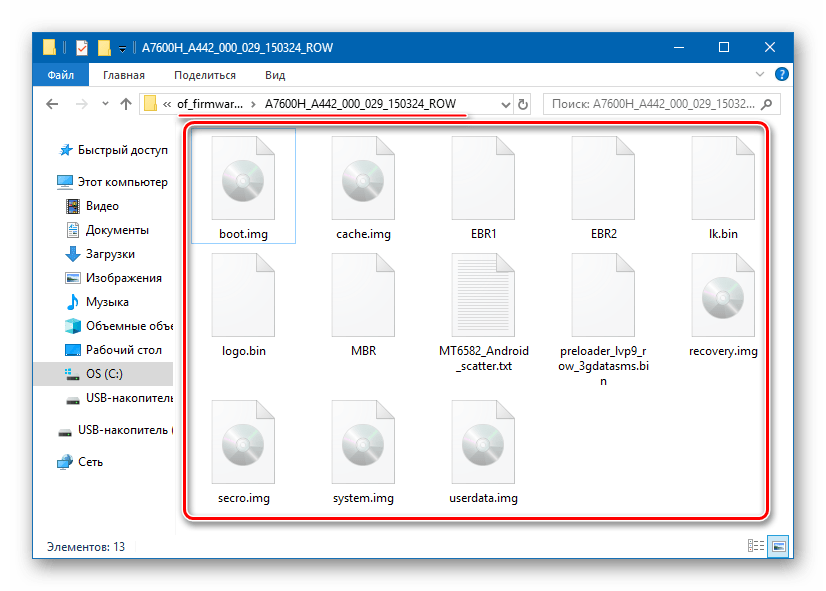
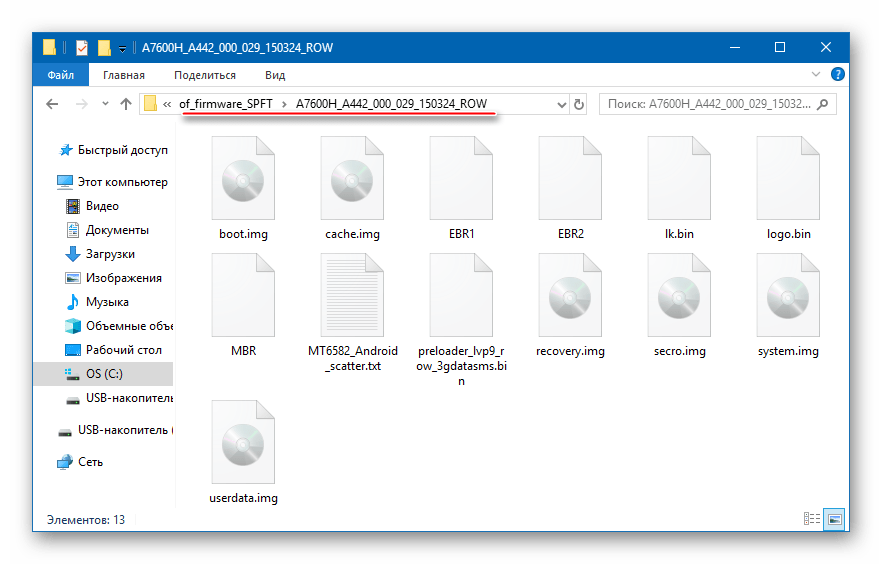
- Распаковываем архив с компонентами прошивки.

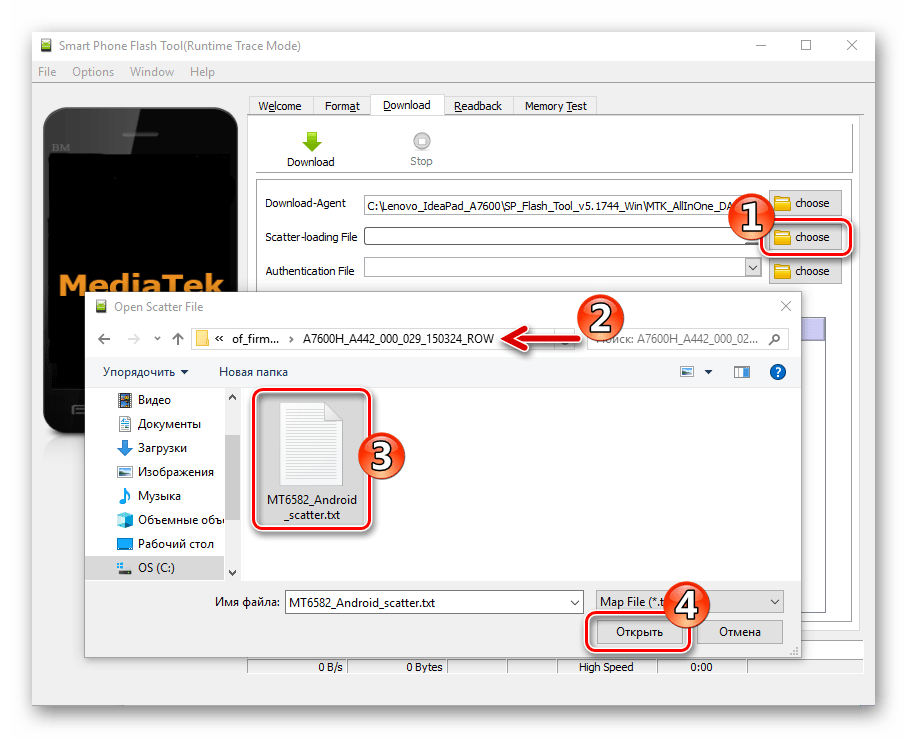
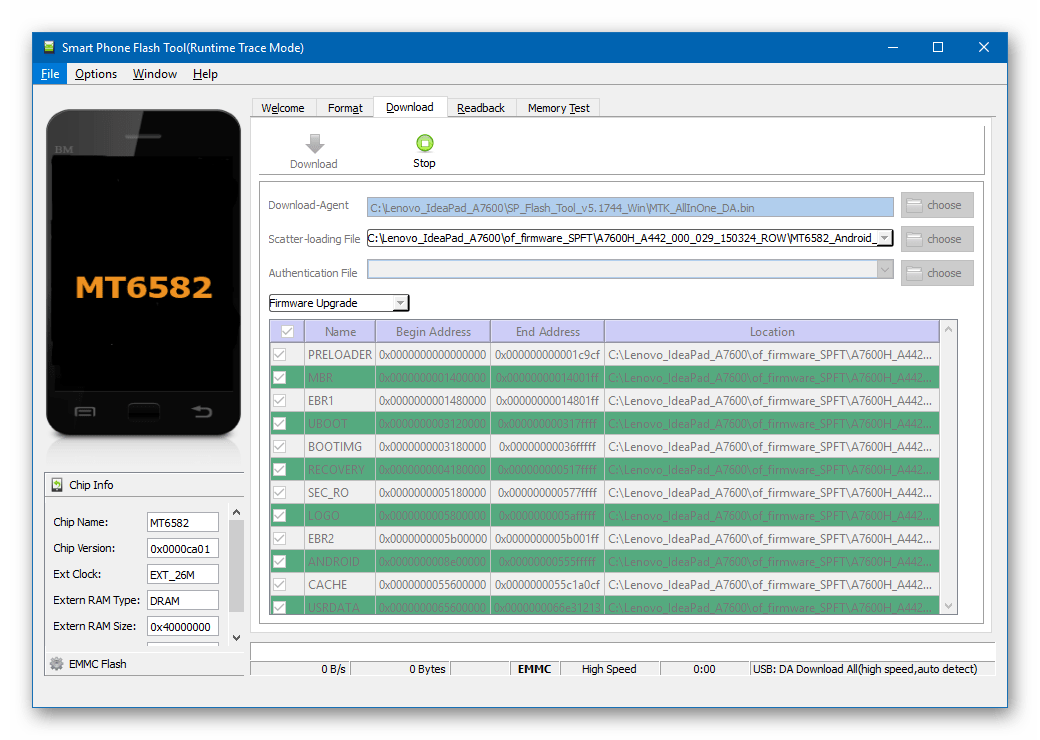
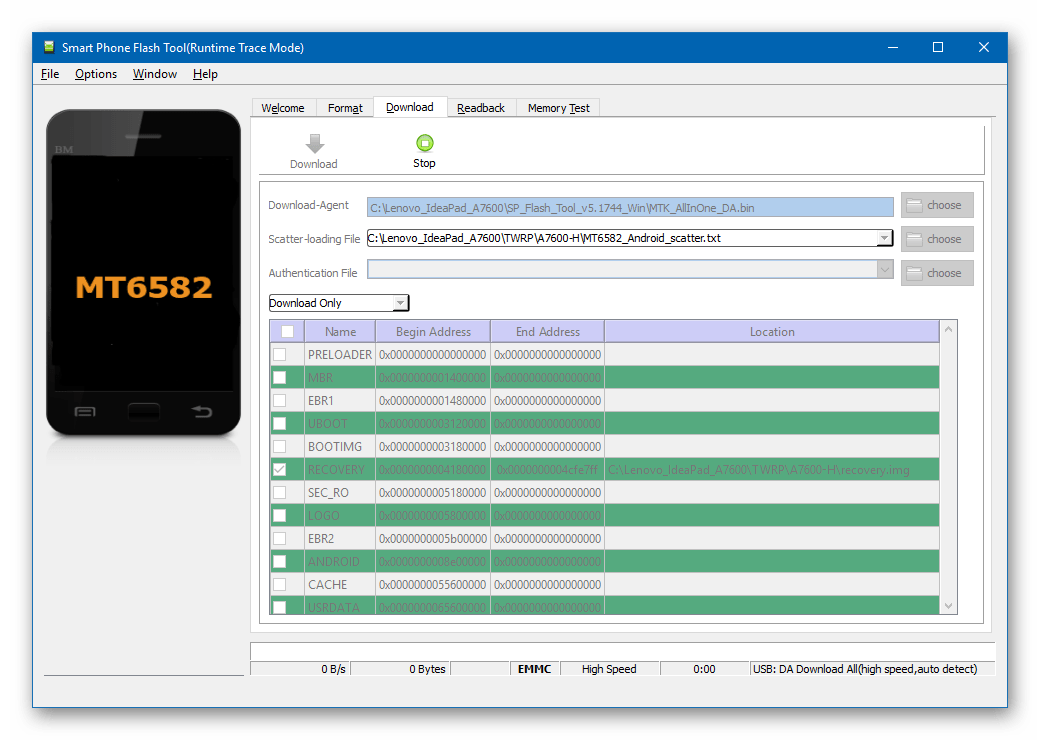
- Запускаем FlashTool и загружаем образы Android в программу путем открытия scatter-файла из каталога с распакованным пакетом системного ПО. Для этого нажимаем кнопку «choose», отмеченную на скриншоте ниже, и затем указываем в Проводнике, где расположен файл «MT6582_scatter… .txt». Выделив компонент, нажимаем «Открыть».

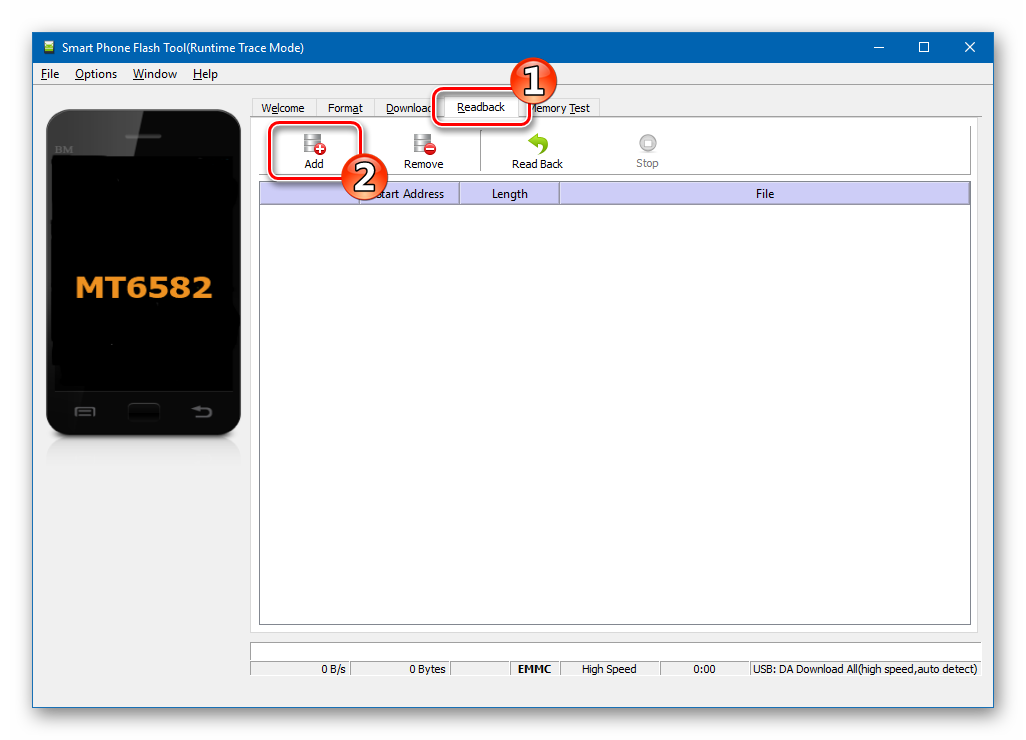
- Владельцам модели A7600-H перед дальнейшими манипуляциями рекомендуется создать бэкап раздела «NVRAM», который позволит быстро восстановить IMEI и работоспособность мобильной сети на планшете в случае повреждения области в процессе вмешательства в системные области памяти:
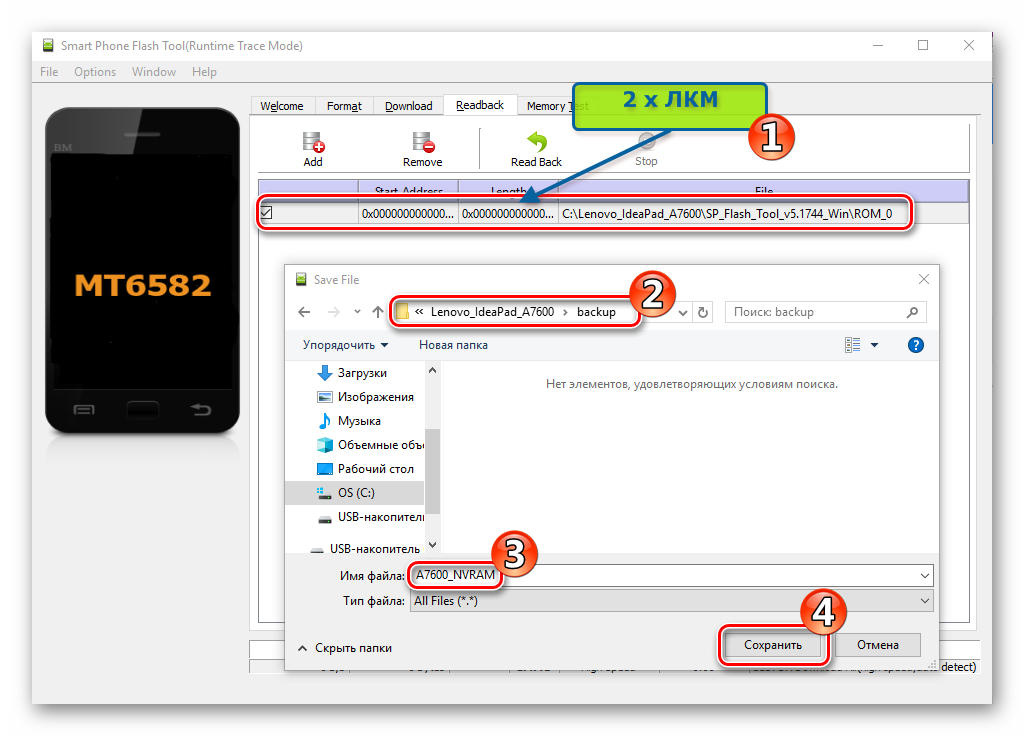
- Переходим на вкладку «Readback» в SP FlashTool и кликаем кнопку «Add»;

- Двойным нажатием по строчке, появившейся в основной области окна программы, вызываем окно Проводника, где указываем путь расположения создаваемого дампа и при желании назначаем данному файлу осознанное имя. Нажимаем кнопку «Сохранить»;

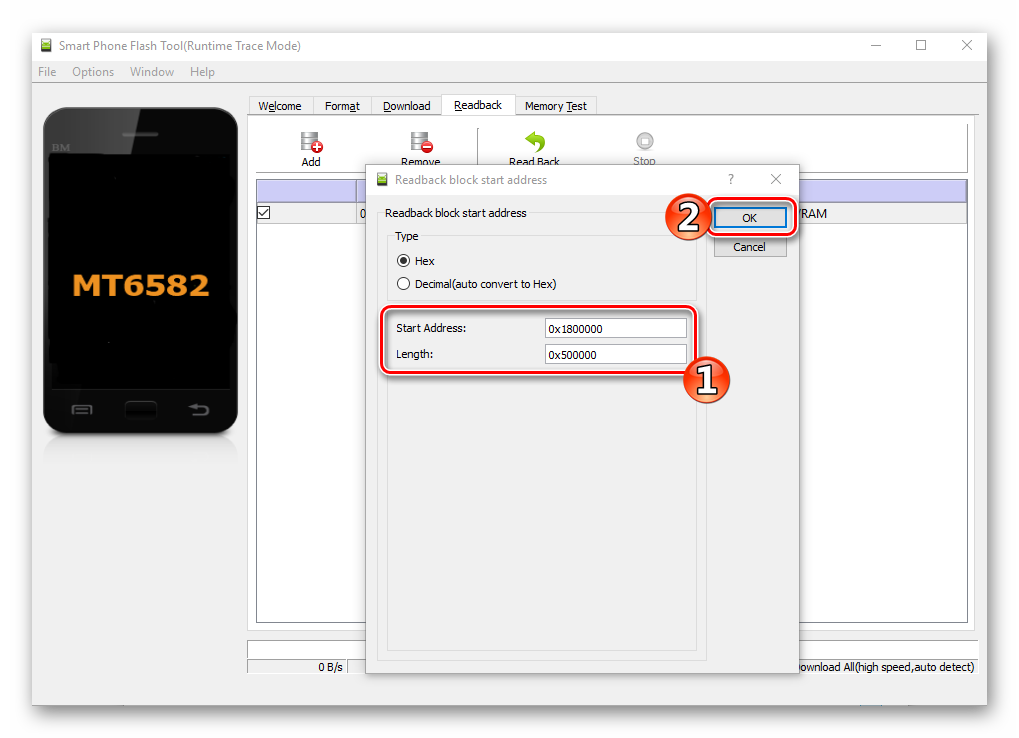
- В открывшемся окошке параметров вычитки данных в поле «Start Adress:» вносим значение
0x1800000, а в поле «Length:» —0x500000. После заполнения полей с адресами нажимаем кнопку «ОК»;
-
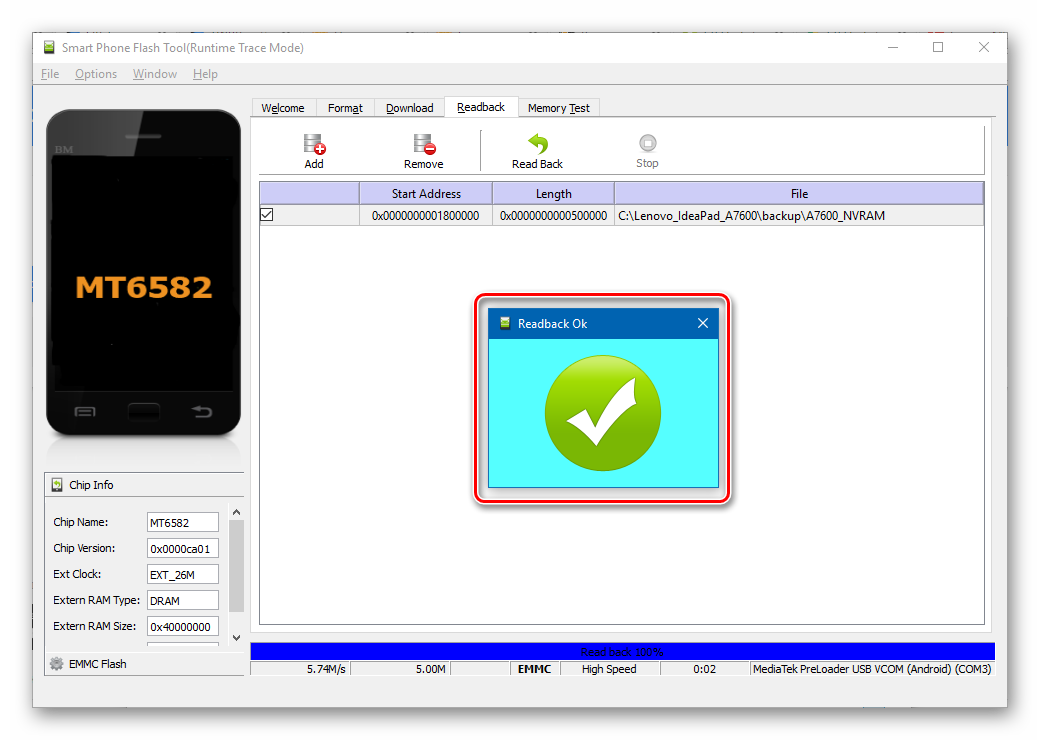
Кликаем «Readback» и кабелем подсоединяем A7600-H в выключенном состоянии к ПК. Прогресс-бар в нижней части окна программы быстро заполниться синим цветом, а затем появится окошко «Readback Ok» — создание резервной копии области «NVRAM» завершено.

Отключаем от девайса кабель USB.
- Переходим на вкладку «Readback» в SP FlashTool и кликаем кнопку «Add»;
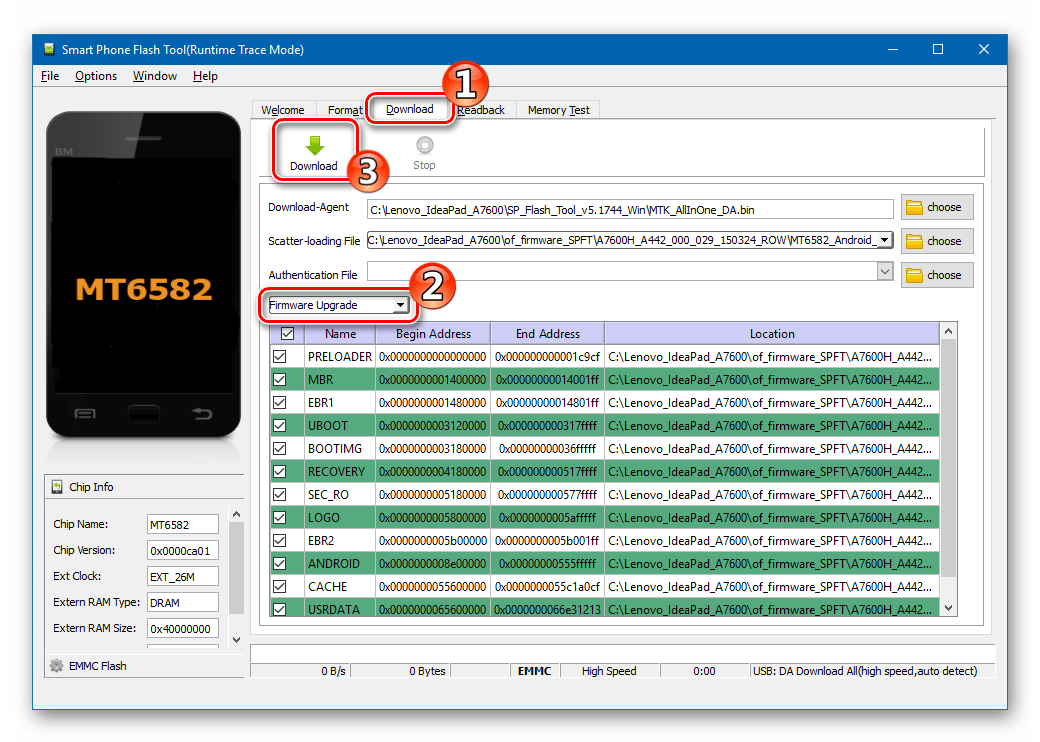
- Переходим к непосредственной записи компонентов Андроид в память планшета. На вкладке «Download» выбираем режим проведения операции – «Firmware Upgrade», а для начала процедуры прошивки кликаем по изображению зеленой стрелки, направленной вниз (расположена в верхней части окна Flash Tool).

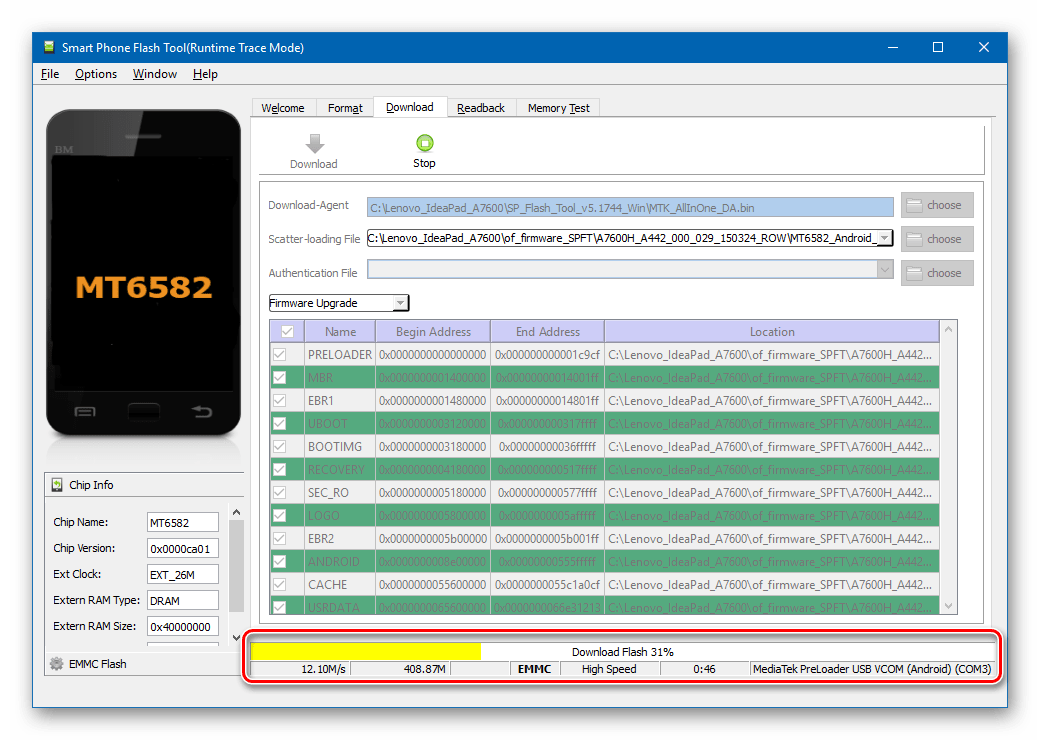
- Подсоединяем к IdeaPad ЮСБ-кабель, сопряженный с портом компьютера.
Прошивка начнется сразу же после определения аппарата системой. О старте процедуры свидетельствует начало заполнения индикатора выполнения.
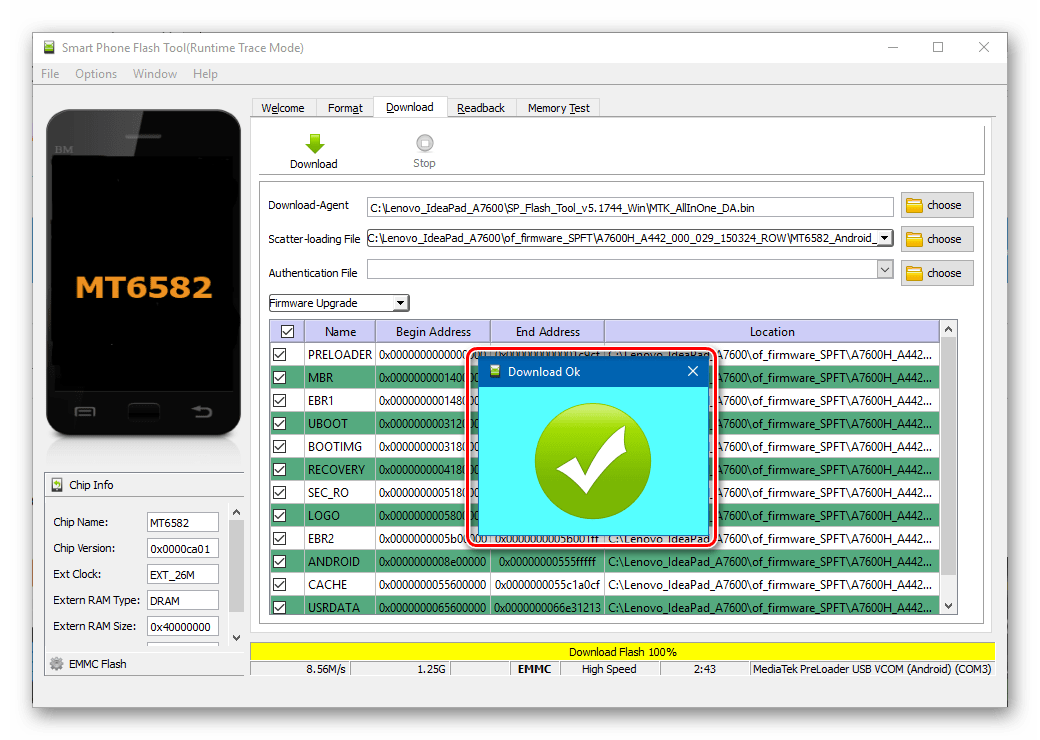
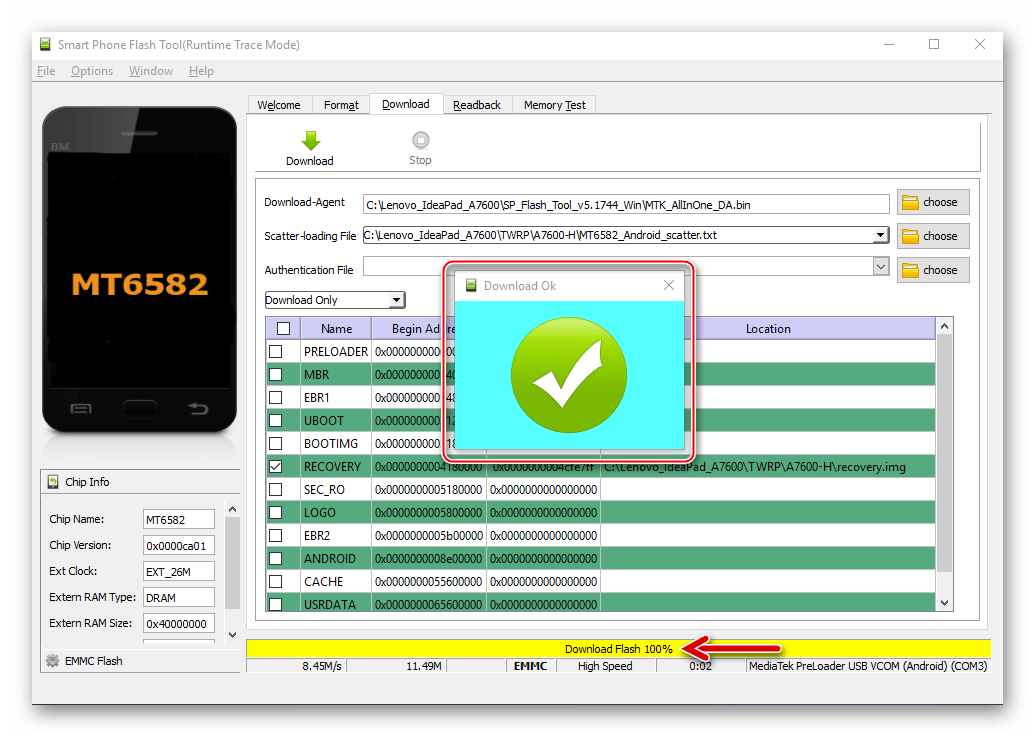
- Осталось дождаться завершения процесса. В этот момент отобразится окно «Download Ok».
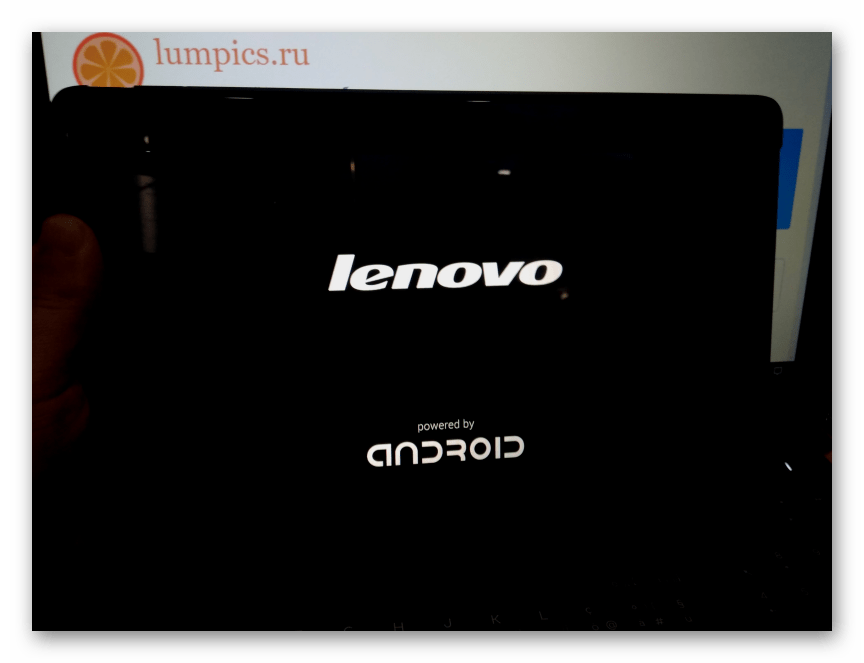
- Прошивка может считаться завершенной. Отключаем аппарат от ПК и запускам его, длительно нажав клавишу «Power».

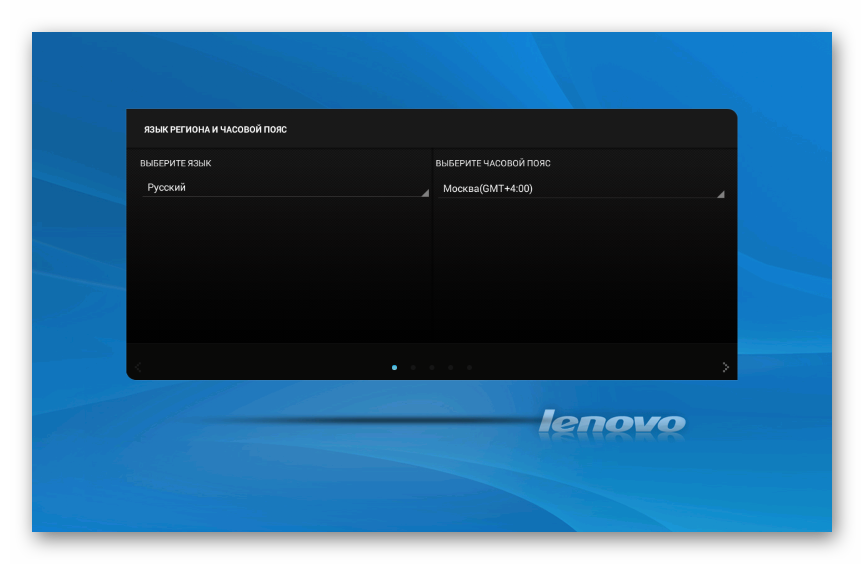
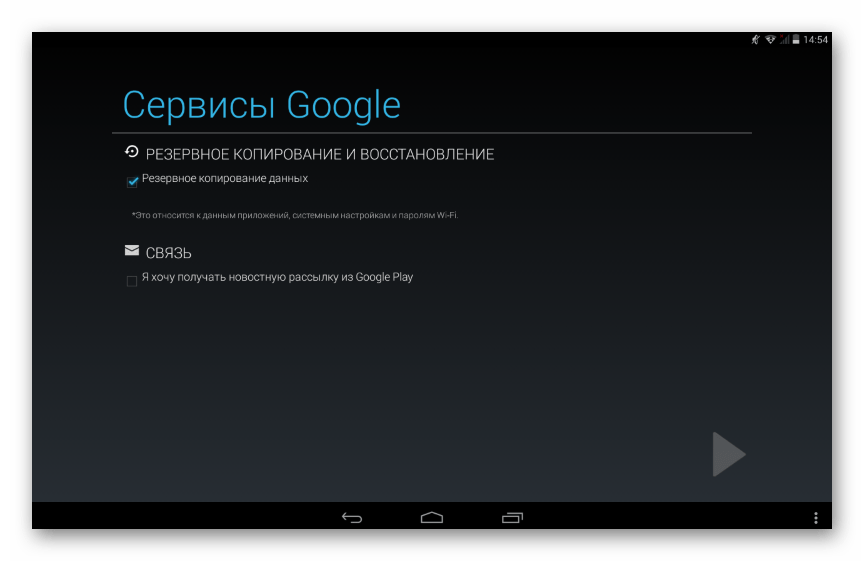
После отображения приветственного экрана с выбором языка проводим первоначальную настройку,
затем при необходимости восстановление данных.

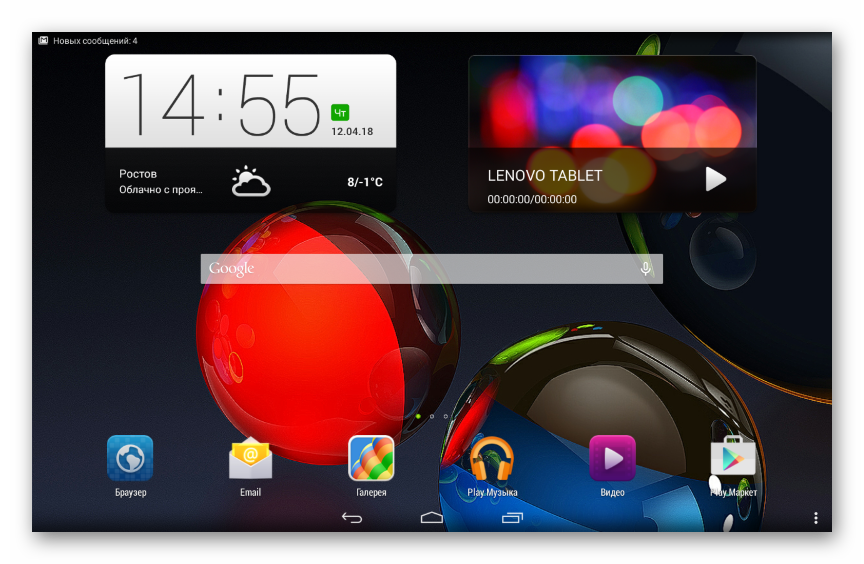
- Теперь можно использовать планшетный ПК под управлением переустановленной и/или обновленной официальной ОС.
Способ 3: Infinix Flashtool
Помимо известного практически каждому, кто сталкивался с необходимостью переустановки Android на MTK-аппаратах инструмента SP FlashTool, существует еще одно более простое, но при этом не менее эффективное средство для инсталляции, повышения/понижения версии и восстановления ОС на этих аппаратах — Infinix Flashtool.

Для выполнения инструкции ниже понадобится пакет с системным ПО, предназначенный для СП Флеш Тул (берем из описания предыдущего способа манипуляций) и сама программа, которую можно загрузить по ссылке:
Скачать приложение Infinix Flashtool для прошивки планшета Lenovo IdeaTab A7600
- Готовим компоненты ОС для инсталляции, распаковав архив с прошивкой в отдельную папку.

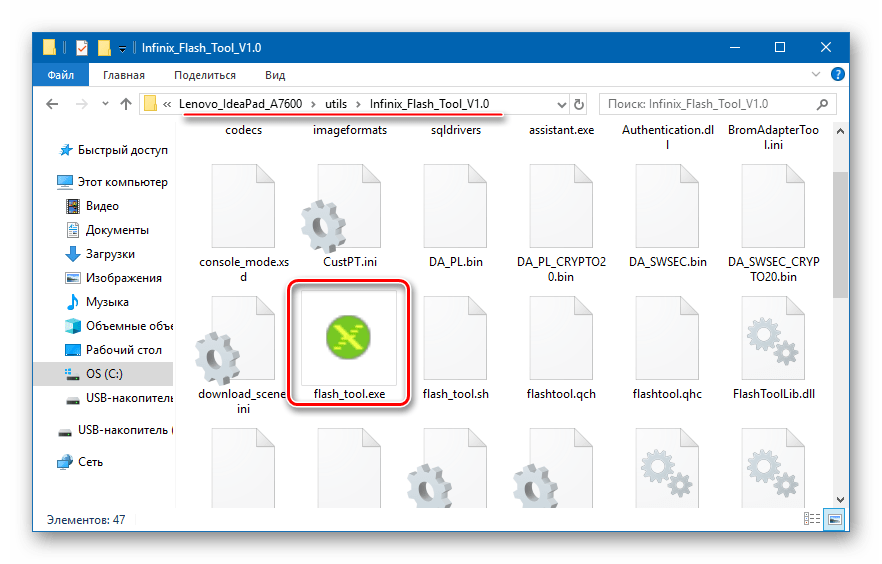
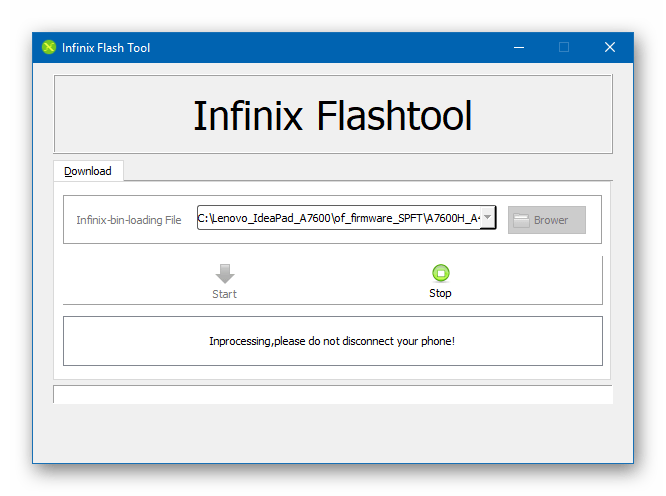
- Разархивируем пакет с Инфиникс Флештул и запускаем средство путем открытия файла «flash_tool.exe».
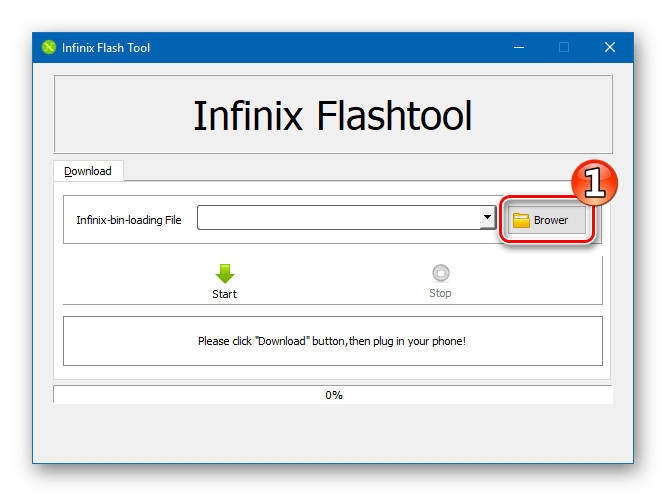
- Загружаем в программу образы устанавливаемой системы, нажав «Brower»,

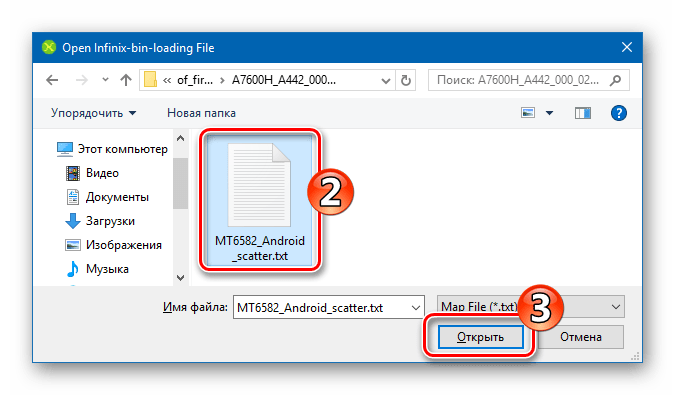
указав затем путь к скаттер-файлу в окне Проводника.

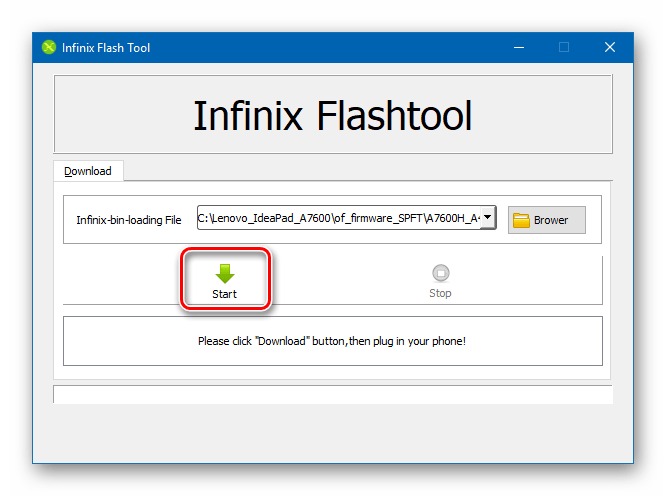
- Кликаем «Start»,
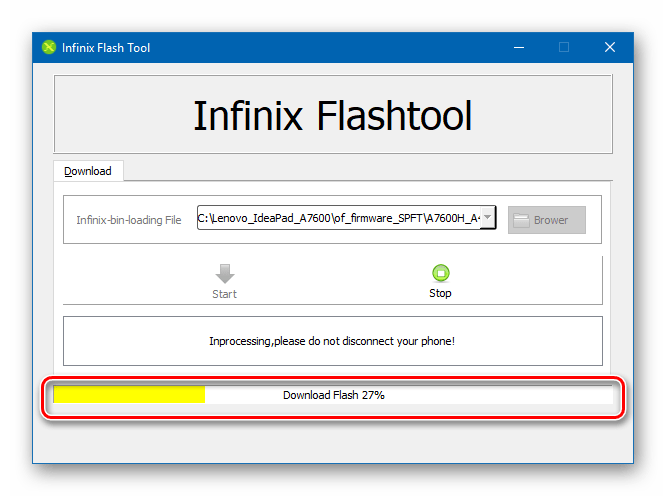
что переведет программу в режим ожидания подключения устройства. Соединяем выключенный планшет с USB-портом компьютера.
- Запись файл-образов в девайс стартует автоматически после определения аппарата системой и сопровождается заполнением индикатора выполнения.
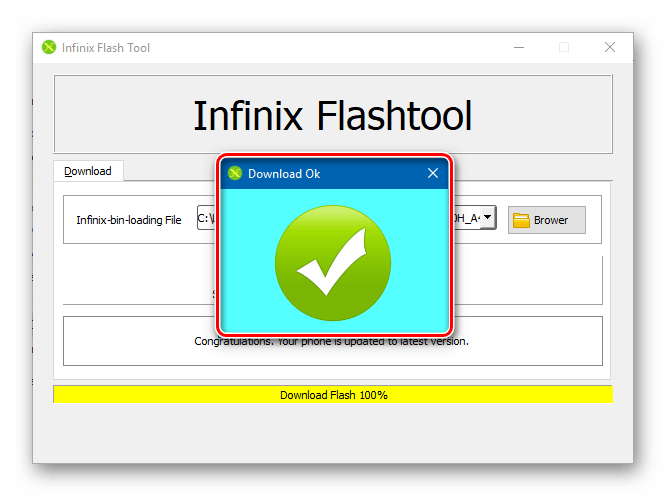
- По окончании процедуры отображается окно «Download OK».
- Установка ОС в Lenovo IdeaPad A7600 завершена, отключаем от устройства кабель и запускаем его в Android, нажав и немного подержав клавишу «Power».

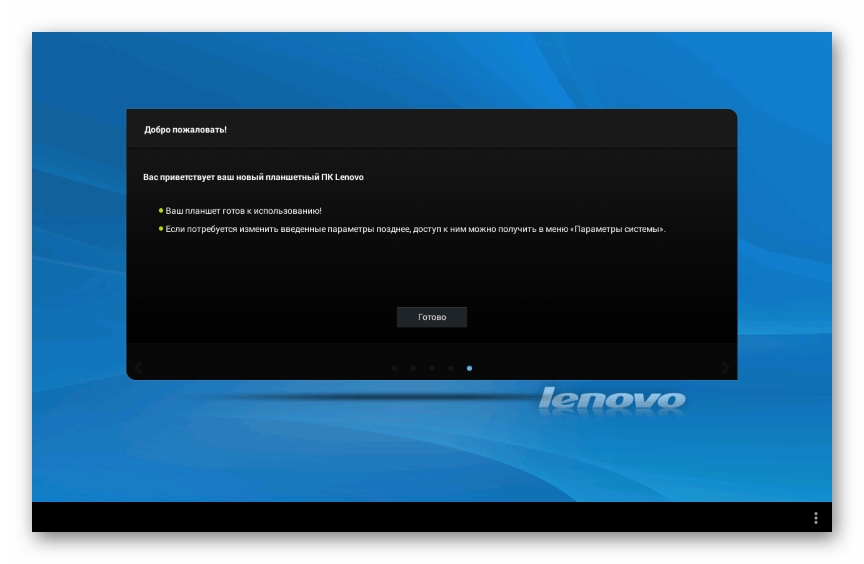
- После довольно продолжительного первого запуска (это нормальное явление, не стоит беспокоиться), появится приветственный экран официальной системы. Осталось провести определение главных параметров инсталлированного Android и планшетом можно пользоваться!

Способ 4: TeamWin Recovery
Очень многие преобразования программной части Андроид-девайсов осуществимы с помощью функционала модифицированных (кастомных) сред восстановления. Оснастив Lenovo IdeaPad A7600 кастомным рекавери TeamWin Recovery (TWRP) (именно это решение будет использоваться в примерах ниже), пользователь получает, кроме прочего, возможность устанавливать в девайс неофициальные прошивки. Инсталляция последних является единственным способом получить более современную, чем предлагаемая производителем KitKat, версию Android и превратить таким образом планшет в более подходящий для выполнения современных задач инструмент.
Установка TWRP
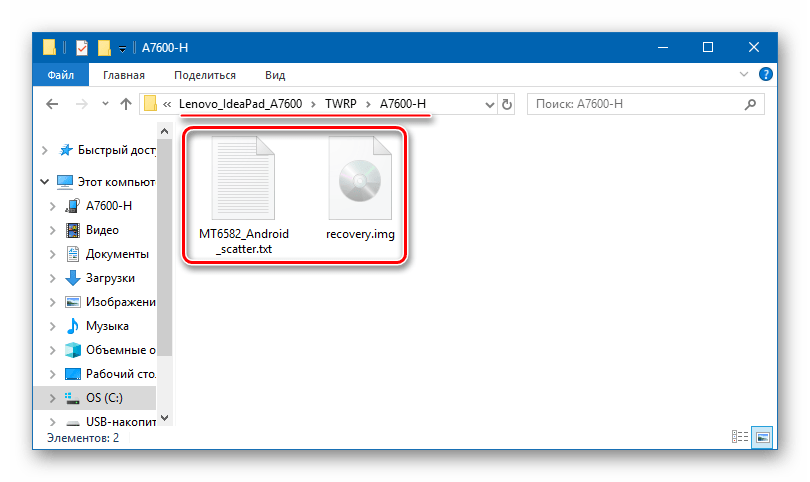
В действительности среда восстановления с расширенными возможностями может быть получена на рассматриваемом планшете несколькими способами. Ниже предложена инструкция по оснащению девайса рекавери наиболее действенным методом – с помощью SP Flash Tool. Для получения нужного результата понадобится img-образ ТВРП и скаттер-файл из пакета с официальной прошивкой. И то и другое для обеих модификаций IdeaTab A7600 можно загрузить по ссылке:
Скачать TeamWin Recovery (TWRP) для Lenovo IdeaTab A7600
- Помещаем образ среды восстановления и скаттер-файл в отдельный каталог.

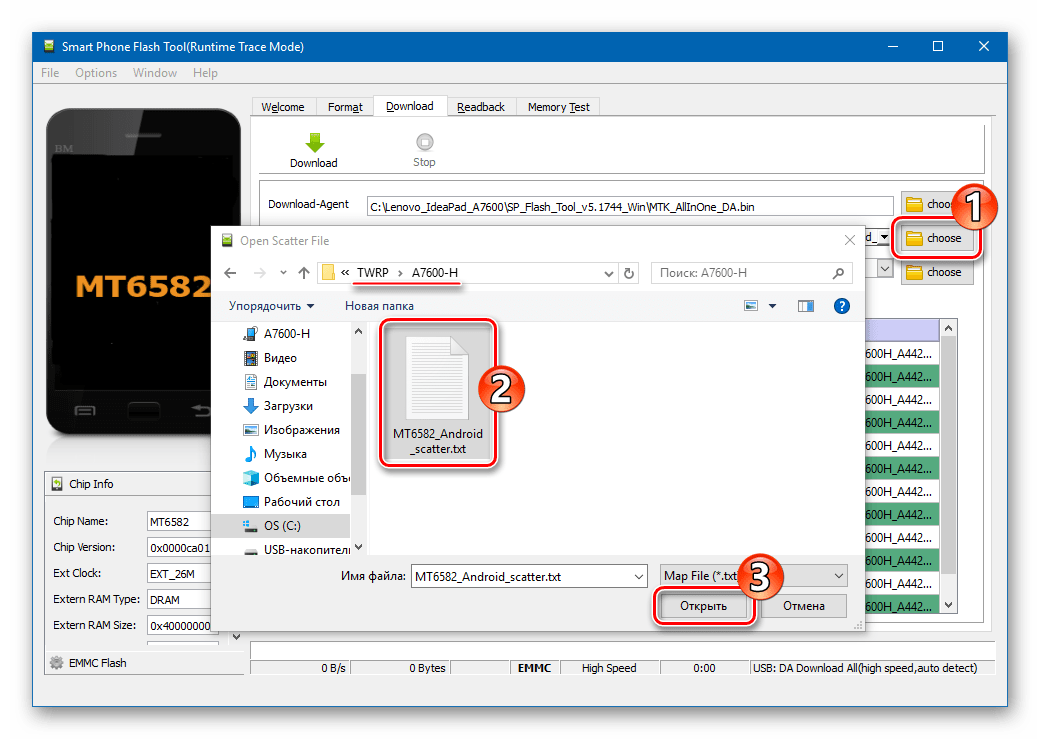
- Запускаем ФлешТул, добавляем в программу scatter-файл.

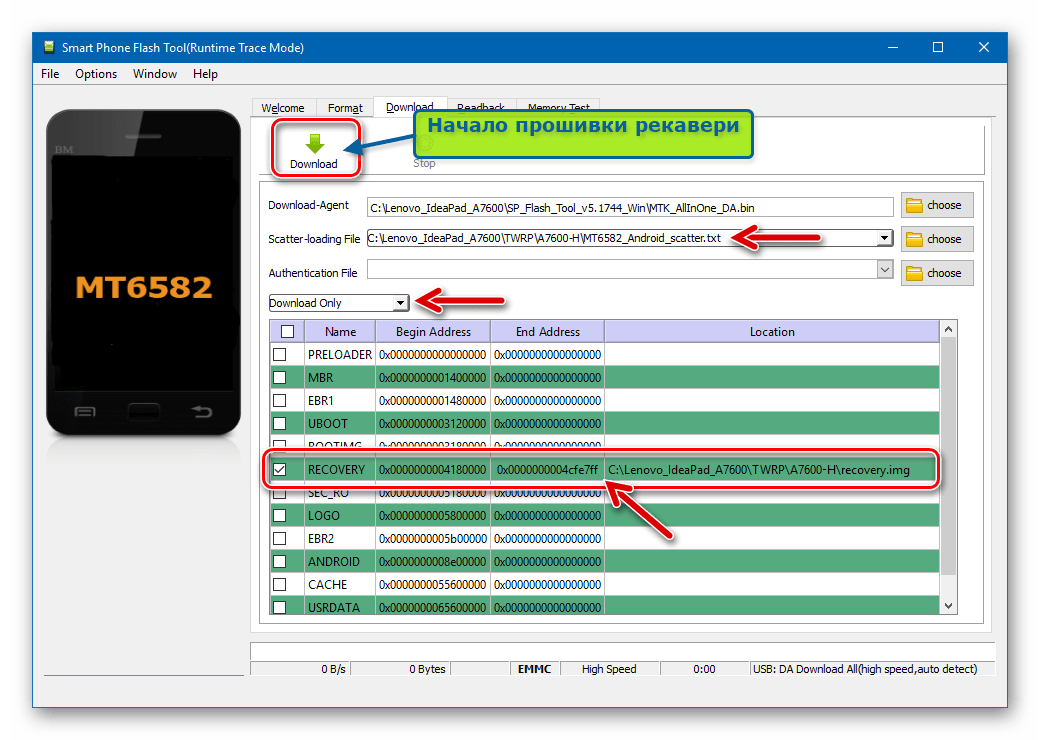
- Убеждаемся, что полученное окно соответствует скриншоту ниже, и кликаем «Download».
- Соединяем выключенный А7600 с USB-портом.
Запись образа в нужный раздел происходит в автоматическом режиме и очень быстро. В результате отобразится окно «Download Ok».

Важно! После инсталляции TWRP необходимо сразу же загрузиться в него! Если перед первым запуском произойдет загрузка в Андроид, рекавери будет перезаписано заводским образом среды восстановления и процедуру установки придется повторять заново!
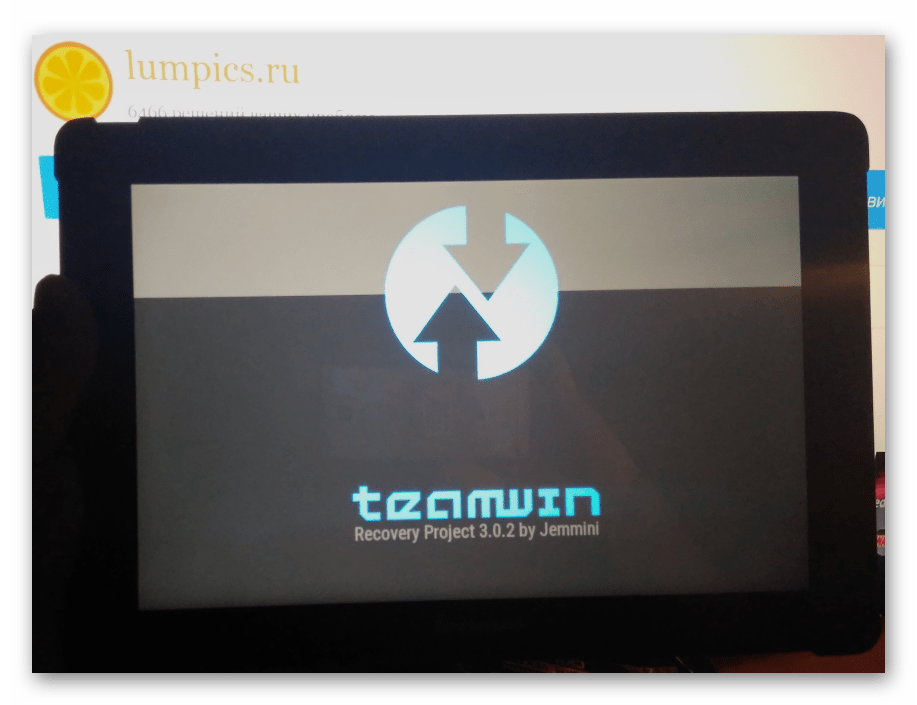
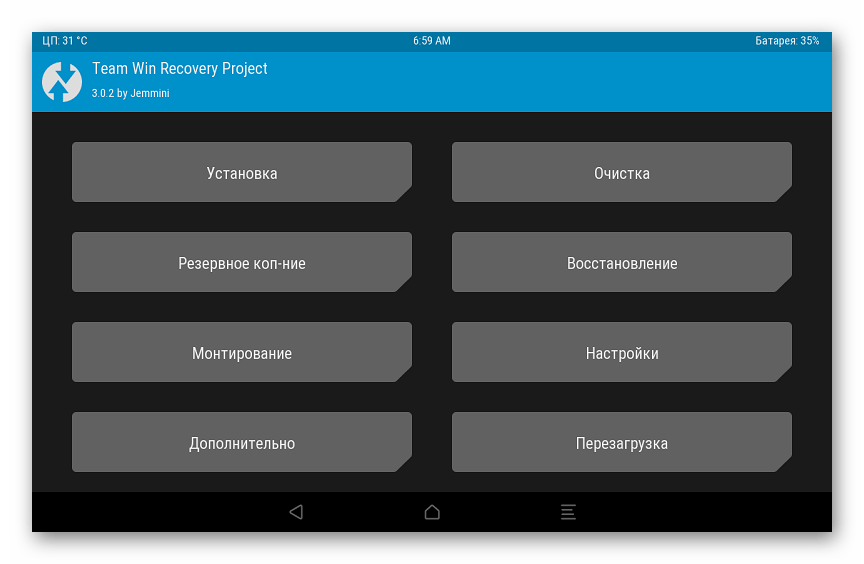
- Отсоединяем от планшета кабель и загружаемся в TWRP точно таким же образом, как и в «родное» рекавери: нажатие клавиши «Громкость+» и, удерживая ее, «Питание», затем выбор «Recovery Mode» в меню режимов.

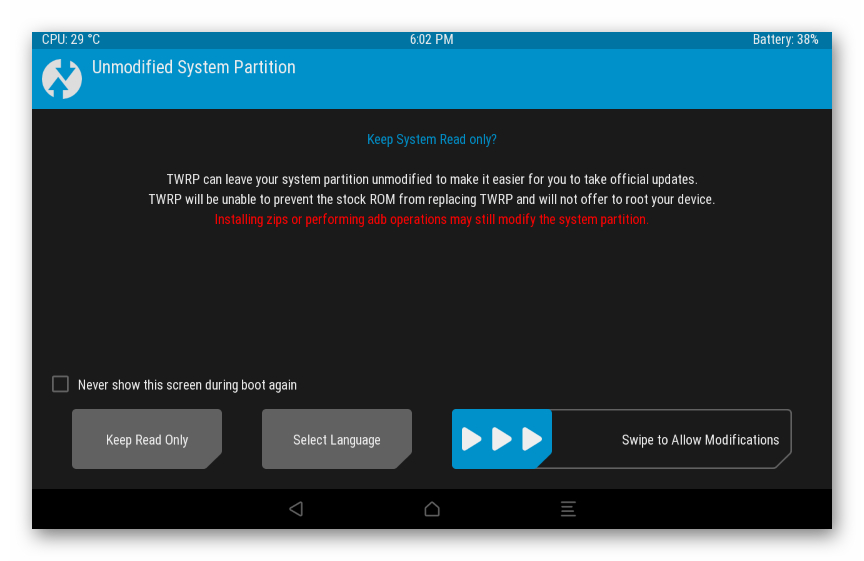
- После запуска модифицированного рекавери нужно определенным образом настроить среду.
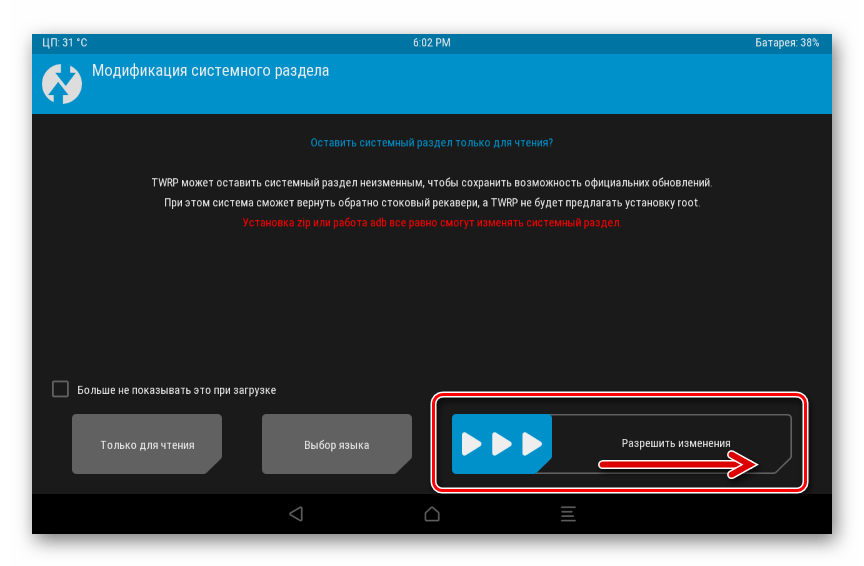
Для удобства дальнейшего использования выбираем русский язык интерфейса (кнопка «Select language»).
Затем (обязательно!) сдвигаем переключать «Разрешить изменения» вправо.
- Кастомное рекавери подготовлено к выполнению дальнейших действий, можно перезагрузиться в Андроид.
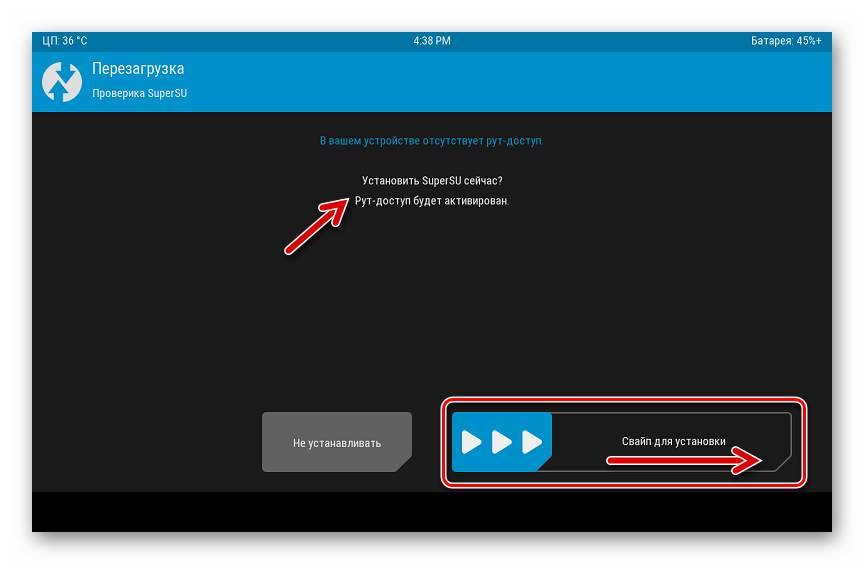
- Дополнительно. Перед перезапуском системой предлагается получение на девайсе прав Суперпользователя. Если наличествующие в распоряжении пользователя рут-права необходимы или желательны, активируем переключатель «Свайп для установки», в противном случае выбираем «Не устанавливать».


Инсталляция кастомной прошивки
Как уже указывалось выше, единственная возможность получить современную версию Андроид на своем устройстве для пользователей Lenovo IdeaPad A7600 появляется после инсталляции прошивок, созданных для планшета сторонними разработчиками. Практически все неофициальные решения (найти варианты на просторах интернета не составит труда) устанавливаются в девайс выполнением одинаковых шагов.
Читайте также: Прошивка Android-девайсов через TWRP

В качестве примера инструкцией ниже продемонстрировано оснащение планшета, пожалуй, одной из самых прогрессивных и функциональных систем на момент написания статьи — Resurrection Remix OS (RR) на базе Android 7.1.
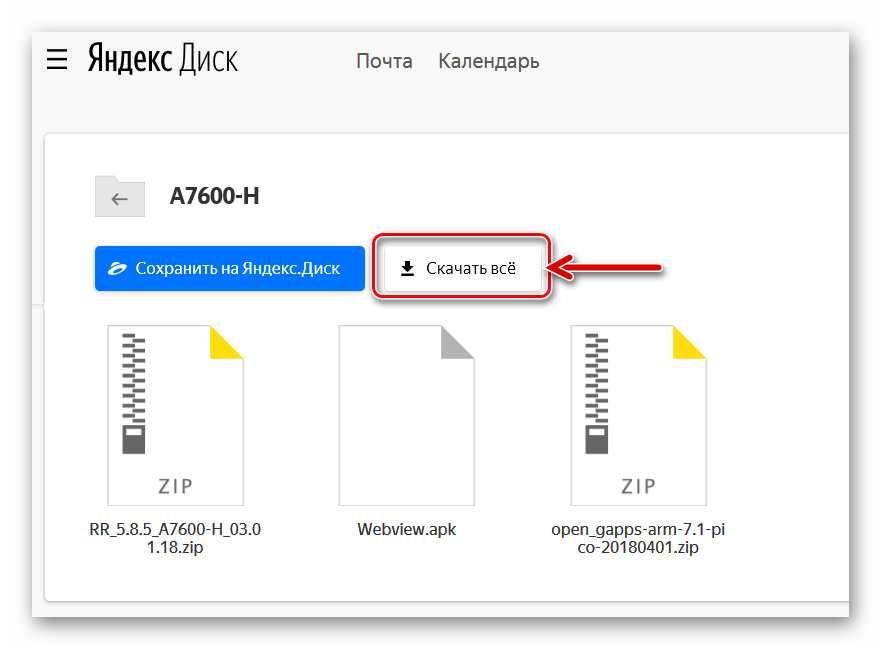
Скачать кастомную прошивку Android 7.1 для планшета Lenovo IdeaTab A7600
По ссылке выше доступны для загрузки пакеты для обеих модификаций рассматриваемого аппарата, zip-файлы, обеспечивающие после своей установки наличие и функционирование сервисов Google в предлагаемой прошивке, а также файл «Webview.apk», который понадобится уже после инсталляции RR.
Авторы Resurrection Remix рекомендуют инсталлировать Gapps одновременно с ОС, что и осуществляется в инструкции ниже. Тем пользователям, которые не сталкивались с нюансами внедрения приложений и сервисов Гугл в кастомные сборки Андроид рекомендуется ознакомиться с материалом:
Читайте также: Как установить сервисы Google после прошивки
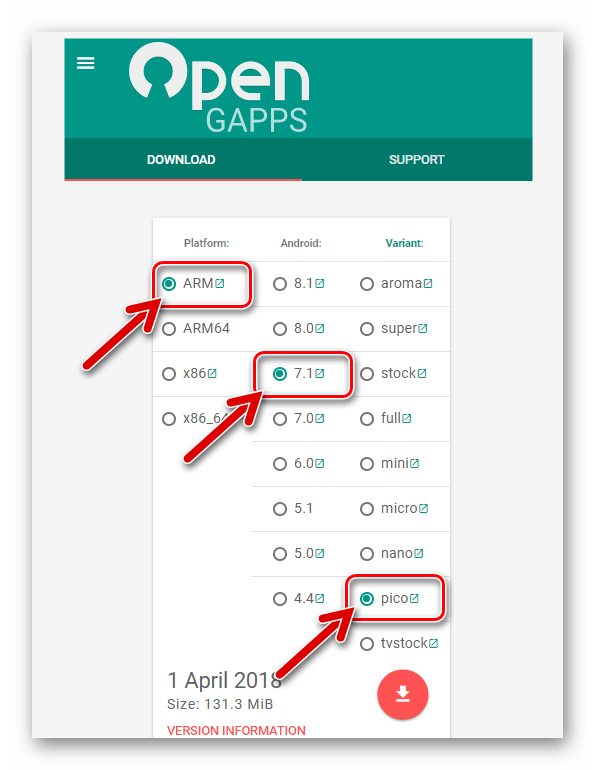
При использовании других модифицированных ОС, отличных от предлагаемой RR, и самостоятельной загрузке пакетов для установки в планшет с официального сайта OpenGapps правильно выбираем архитектуру – «ARM» и версию Android (в зависимости от той, на которой создан кастом)!
- Скачиваем zip-пакеты с модифицированной ОС и Gapps, Webview.apk. Помещаем все три файла в корень карты памяти девайса.
- Перезагружаем А7600 в TWRP.
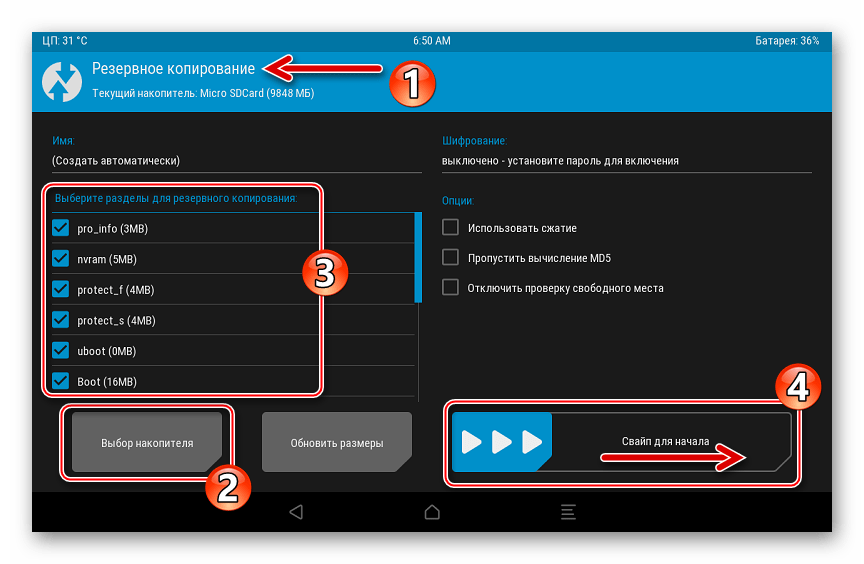
- Делаем Nandroid-бэкап инсталлированной системы на карту памяти. Игнорировать процедуру не рекомендуется, а подробную инструкцию, позволяющую создать резервную копию всех разделов памяти аппарата, можно найти по ссылке ниже.
Подробнее: Как создать полный бэкап Android-устройства через TWRP перед прошивкой
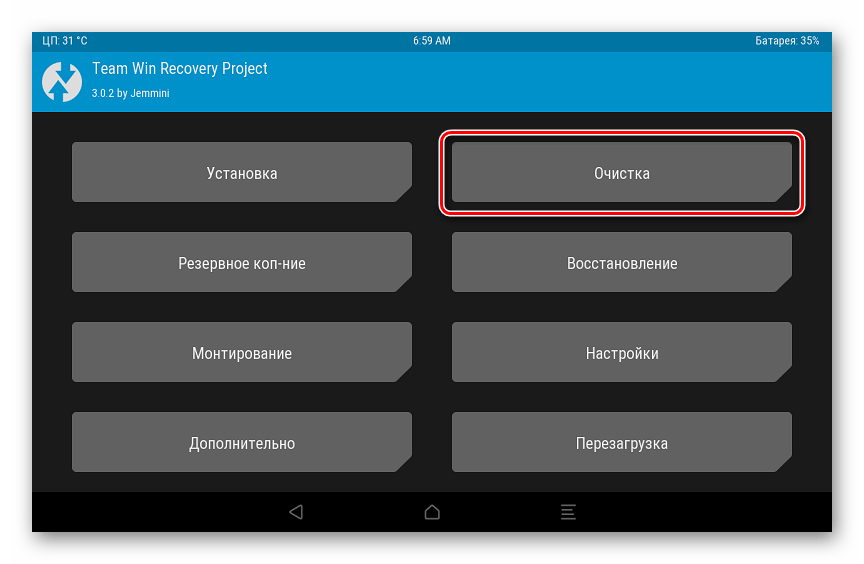
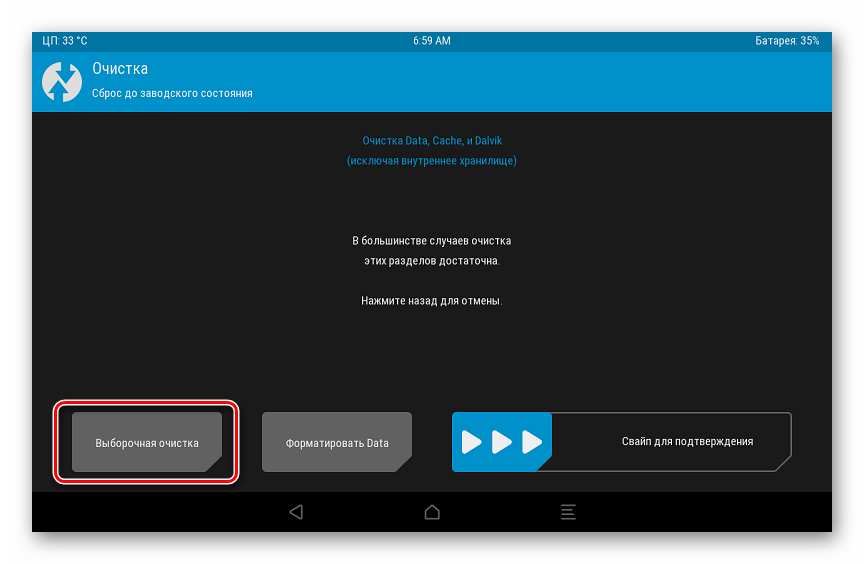
- Выполняем форматирование всех разделов памяти девайса, за исключением «MicroSD». Проведение этой процедуры — фактически стандартное требование перед инсталляцией неофициальных систем в Андроид-девайсы, и производится она несколькими тапами по экрану:
- Нажимаем «Очистка» на главном экране модифицированной среды восстановления;
- Далее указываем «Выборочная очистка»;
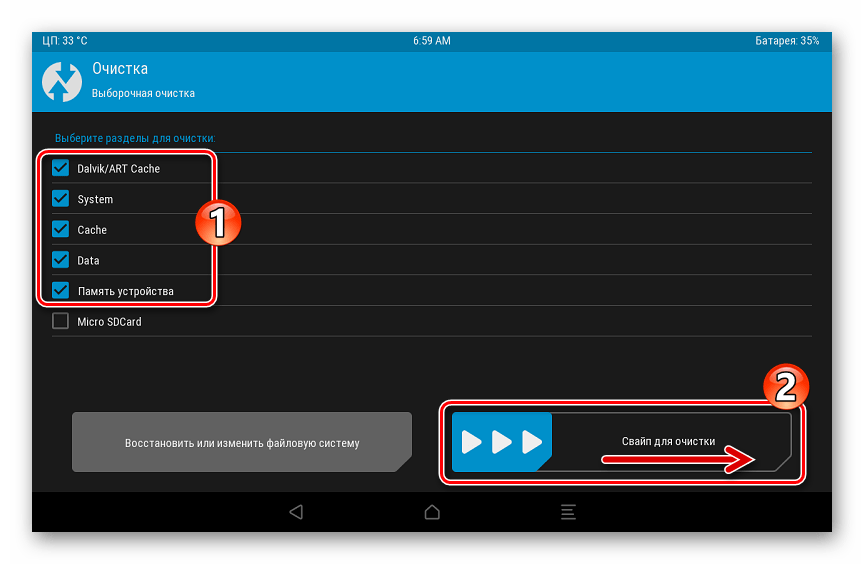
- Проставляем отметки во всех чекбоксах, расположенных возле пунктов-обозначений областей памяти, за исключением «Micro SDCard» и активируем элемент интерфейса «Свайп для очистки»;
- Возвращаемся к главному меню ТВРП с помощью кнопки «Домой».
- Нажимаем «Очистка» на главном экране модифицированной среды восстановления;
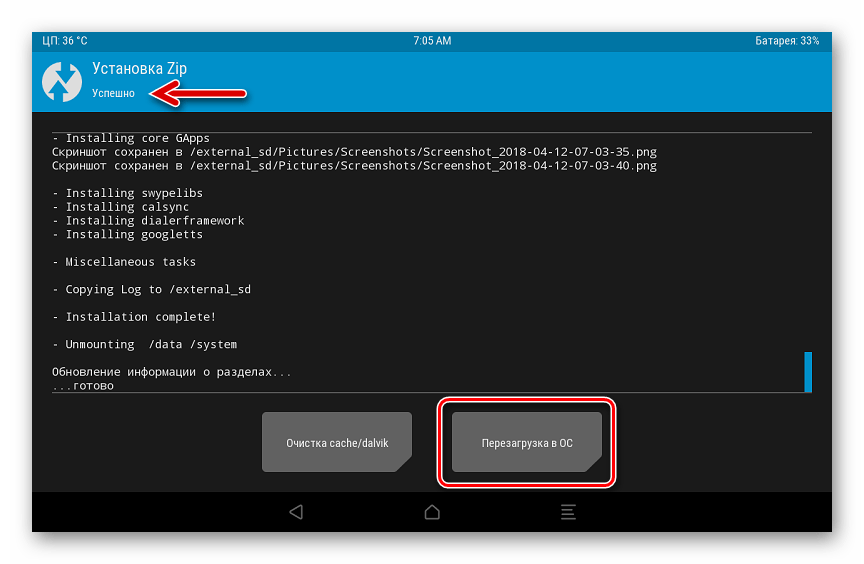
- Устанавливаем модифицированный Android и Гаппс пакетным способом:
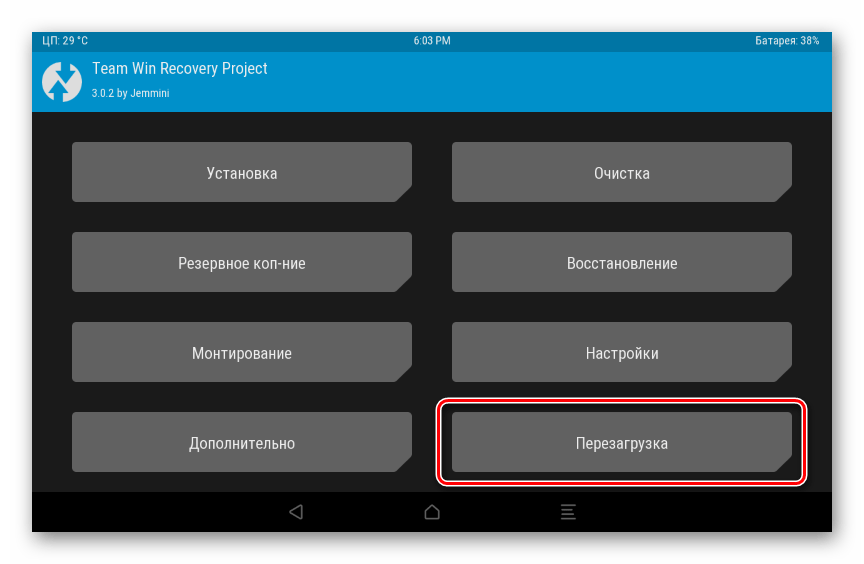
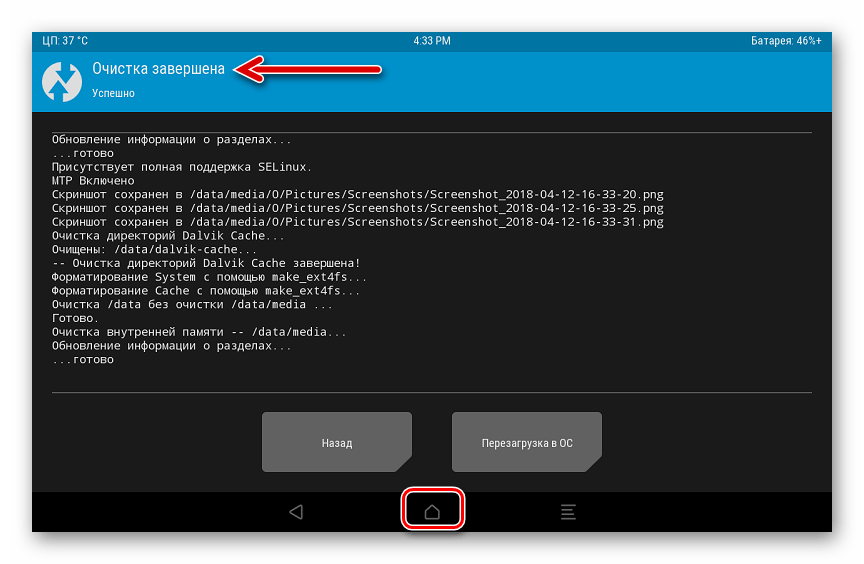
- По завершении инсталляции кастома и Гаппс станет активной кнопка «Перезагрузка в ОС», нажимаем ее.
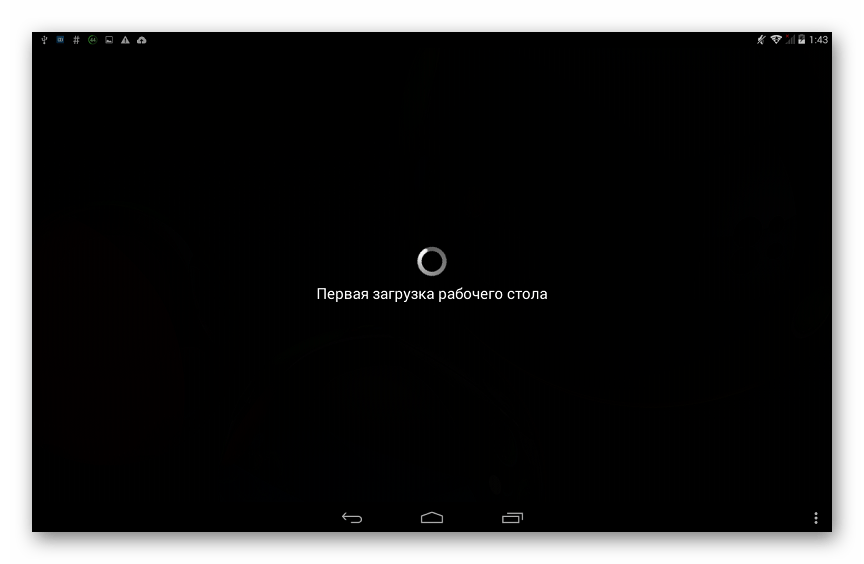
- На этом этапе прошивку планшета A7600 через TWRP можно считать завершенной, осталось понаблюдать некоторое время за бутлого модифицированной ОС (первый после инсталляции запуск довольно длительный) в ожидании запуска Андроид.

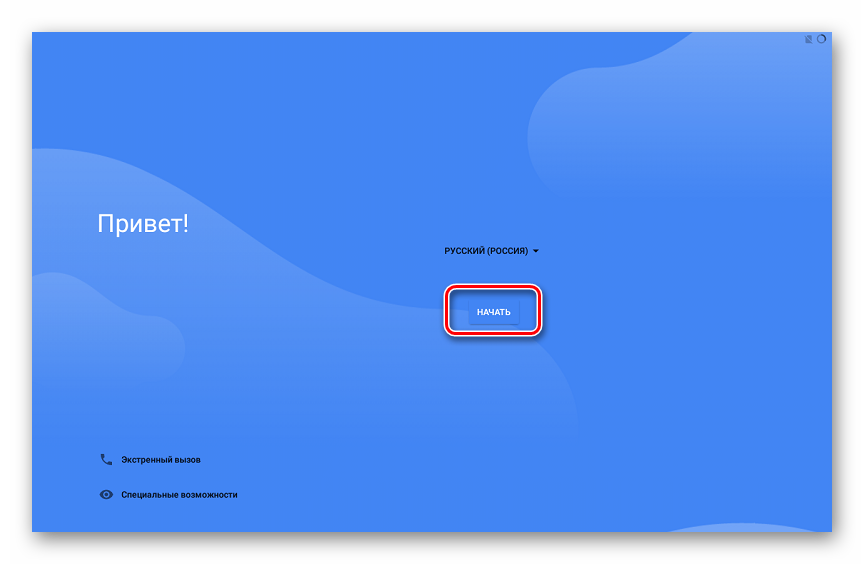
- Процесс завершается появлением приветственного экрана с выбором языка. Первоначальную настройку придется пропустить, тапая на каждом экране «Далее», ввиду одной не совсем удобной особенности Resurrection Remix — экранная клавиатура не работает до включения ее в «Настройках».
- Активируем виртуальную клавиатуру. Для этого:
- Добавляем в систему компонент «Android System WebView»:
- В результате выполнения вышеперечисленного для установки параметров кастомной ОС, персонализации и использования прошивки не остается никаких препятствий.
Все модули неофициального Андроид полноценно работают и выполняют свои функции должным образом.


Установка официальной сборки Андроид через TWRP
В некоторых ситуациях на девайс, оснащенный модифицированной средой восстановления, требуется установка официального системного ПО, а компьютер либо возможность/желание проводить операции с помощью Windows-приложений отсутствует. В этом случае можно выполнить инсталляцию ОС по нижеследующей инструкции. В итоге получим IdeaTab A7600 под управлением официальной системы от Lenovo, но с установленным TWRP и возможностью получения рут-прав через модифицированное рекавери.
Для достижения вышеописанного результата потребуется записать с помощью рекавери в память девайса всего два img-образа: «system.img», «boot.img». Эти файлы содержатся в пакетах с системным ПО, предназначенных для переноса в девайс с помощью SP FlashTool согласно инструкции «Способ 3» выше в статье. Подготовленные компоненты из последней сборки Андроид, выпущенной Леново для рассматриваемого устройства, доступны к загрузке по ссылке:
Скачать официальную прошивку планшета Lenovo IdeaTab A7600 для установки через TWRP
- Помещаем файлы «system.img» и «boot.img» на карточку памяти, установленную в планшет.
- Перезагружаемся в расширенное рекавери и выполняем бэкап разделов, а затем форматирование всех областей памяти, кроме съемного носителя.
Действия производятся точным выполнением пунктов 3 и 4 инструкции по установке кастомной ОС, предложенной выше в настоящем материале.
- Запись img-образов в память Андроид-устройств c помощью ТВРП осуществляется с помощью стандартных функций среды, сначала перезаписываем раздел «System».
Читайте также: Установка img-образов через TWRP
- Перезаписываем раздел «Boot». Процедура практически полностью повторяет действия с областью «System»:
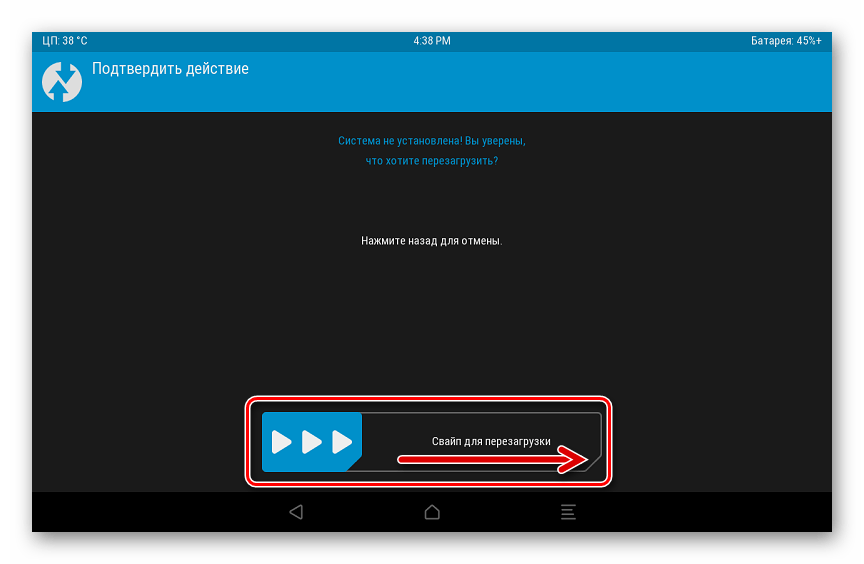
- Не обращая внимания на уведомление «Система не установлена!», сдвигаем «Свайп для перезагрузки» вправо.
- Дополнительно. По желанию можно сразу же получить права Суперпользователя и установить SuperSU.
- Ожидаем, пока инициализируются компоненты ОС, и проводим первоначальную настройку Android.
В результате получаем на Lenovo IdeaPad A7600 официальную сборку Android,
но с рядом дополнительных возможностей и преимуществ!

Из вышеизложенного можно сделать вывод, что даже такое серьезное вмешательство в работу планшетного компьютера Lenovo IdeaPad A7600, как полная переустановка операционной системы Android вполне осуществима обычным пользователем. Для достижения положительного результата важно производить все действия аккуратно и обдуманно, не забывать про необходимость бэкапа и четко выполнять инструкции.
Наша группа в TelegramПолезные советы и помощь
On this page, you can find the official link to download Lenovo A7600H Stock Firmware ROM (Flash File) on your computer. Firmware comes in a zip package containing Flash File, Flash Tool, USB Driver, and How-to Flash Manual.
Lenovo A7600H Stock Firmware (Flash File)
The Flash File will help you Upgrade, Downgrade, or re-install the Stock Firmware (OS) on your Mobile Device. In addition, the Flash File (ROM) also enables you to repair the Mobile device if facing any Software Issue, Bootloop Issue, IMEI Issue, or Dead Issue.
File Name: Lenovo_A7600H_MT6582_000_024_140328_ROW.zip
File Size: 795 MB
Flash Tool: SP Flash Tool for Windows | SP Flash Tool for Linux
How to Flash (install): Follow Tutorial
(Mediafire)
File Name: Lenovo_A7600H_MT6582_000_025_141027_ROW.zip
File Size: 868 MB
Flash Tool: SP Flash Tool for Windows | SP Flash Tool for Linux
How to Flash (install): Follow Tutorial
(Mediafire)
How to Flash or Install Firmware (ROM)
- Download and extract the Lenovo A7600H stock firmware package on the computer.
- After extracting the package, you will be able to get the Firmware File, Flash Tool, Driver, and How-to Flash Guide.
- Install the provided USB Driver on the computer (if the USB Driver is already installed, then SKIP this step).
- Follow the How-to Flash Manual to Flash or install the Firmware on your Lenovo A7600H device.
Follow Complete Tutorial
Readme Once:
[*] Flash Tool: If you wish to download the latest version of SP Flash Tool, then head over to SP Flash Tool for Windows or SP Flash Tool for Linux page.
[*] Take a Backup: If you are going to flash or install the above Firmware on the Lenovo A7600H device, then take a backup of everything because your data will be deleted or removed post flashing or installing the Firmware.
[*] We have scanned the above firmware (ROM) package against viruses/malware using Norton AntiVirus Plus. You can also use Malwarebytes to scan your computer against viruses/malware.
Custom ROMs For Lenovo A7600-H
-
By
Nihal T -
Updated On May 12, 2021 — 3:19 AM -
No Comments
What are the available custom ROMs for your Lenovo A7600-H , how do you install a custom ROM on your A7600-H , and what is the use of installing it? In this article, we will answer this and other questions.

Android users is largely behind custom ROM development. Every day hundreds of developers work to improve the operating system. Large community developers like the XDA developers forum periodically publish updated versions of the ROMs. The development of custom ROMs follows a similar process to the development of official ROMs.
But exactly, what are the available custom ROMs for your Lenovo A7600-H , how do you install a custom ROM on your A7600-H , and what is the use of installing it? In this article, we will answer this and other questions.
- What is Custom ROM?
- Advantages of Installing Custom ROM on Lenovo A7600-H
- Risk of Installing Custom Firmware on your Lenovo A7600-H
- Requirements to Install a Custom Firmware on Your Lenovo A7600-H
- List of Custom ROMs for Lenovo A7600-H
- Lineage Os For Lenovo A7600-H
- Pixel Experience for Lenovo A7600-H
- Havoc os for Lenovo A7600-H
What is a Custom ROM?
The term ROM stands for Read-Only Memory and represents volatile read-only memory. In smartphones, ROM represents the operating system installed in the physical memory of the device. This means that, in everyday use, a regular user cannot go and edit system files.
However, some ROMs, referred to as custom ROMs, were explicitly modified to act on the standard functionality of the factory OS. The original ROM is called the stock ROM. The operation of a custom ROM is quite simple. In other words, the custom ROM modifies the so-called kernel of your Lenovo A7600-H (the core of the operating system), changing its functionality.
Often these ROMs add options that would not usually be present through an official update of Lenovo A7600-H. In addition to this, through a custom ROM, installing a version of the operating system that may not arrive officially on our machine is possible.
For example, you can install Android 10 on your Lenovo A7600-H A7600-H even if the official version is not yet released.
Advantages of Installing Custom ROM on Lenovo A7600-H
There are many reasons why a Lenovo A7600-H user wants to install a custom ROM. Some people may want to get rid of bloatware, give their Android a new look, fix their phone, and have the most current Android version when the manufacturer doesn’t support it.
We can get many benefits, as long as we carry out the process correctly. Customization is one aspect we win, as we have the ability to modify some elements with the factory ROM we were not able to do. It is the cheapest way to “change mobile.”
Bloatware is a problem we’ve been complaining about since time immemorial and, to make matters worse, it continues to exist. Most bloatware cannot be easily uninstalled. Custom ROMs on Lenovo remove the bloatware from us (at least a significant part of it), giving us that extra storage that the manufacturer had taken from us.
Custom ROMs are often a way to stay up-to-date when the manufacturer, for whatever reason, doesn’t support us. Luckily, custom ROMs are stable enough to be used daily without problems and give us a bit of extra customization that never hurts the user experience.
Why Not Install Custom Firmware on your Lenovo A7600-H
When we install a custom ROM, we must know what we are doing with our device. Once we establish one, we often lose the product’s original warranty of Lenovo A7600-H . Also, there can be errors when installing, and the developers are not responsible for them.
Likewise, when an installation is completed, all the data you have on your Lenovo A7600-H is lost, so a Backup is essential. And finally, you can’t get Google apps, which can be a disadvantage for many users.
Ultimately, ROMs are responsible for our phone’s many software problems, and for those more restless, we do not get bored. Are you one of those who install custom ROMs or prefer to keep the one that comes with your Lenovo A7600-H from the factory?
Requirements to Install a Custom Firmware on Your Lenovo A7600-H
The first fundamental requirement to install a custom ROM is the unlocking of your Lenovo A7600-H root permissions. In fact, to modify the operating system, you need special administrator permissions, which are typically not accessible. Through these permissions, you become a superuser and have full access to the operating system, with the possibility of modifying it without limits.
- How to Root Lenovo A7600-H Without PC [Easy Rooting Guide]
- How to Install Magisk On Lenovo A7600-H
The next step is to install a custom recovery, that is, an initial menu modified ad hoc to allow the installation of custom ROM and completely format your Lenovo A7600-H . Recovery is the equivalent of the BIOS for PCs, a section accessible via a particular combination of keys and where there are advanced settings.
The most reliable custom recovery we recommend is TWRP, which can be installed with the help of the below guide.
- How to Install TWRP Recovery On Lenovo A7600-H
As for ROM, the most reliable alternative is undoubtedly LineageOS, a spiritual sequel to CyanogenMod. Through the below links, you can check if your device is compatible with the modification or not.
In the latest devices released on the market, it is increasingly difficult to root and flash a custom ROM due to increased security.
List of Custom ROMs for Lenovo A7600-H
It’s fair to say that the golden age of custom ROMs has passed. Android phones are better than they’ve ever been, even at the end of the market.
You own an Lenovo , but the same old UI starts to bore you. Well, it’s time to enter the field of custom ROMs. One of the best ways to resolve OEM delays and add a lot of new features to Android devices is to install a custom ROM.
As Android OS is open source, the enthusiastic community can always use their own version, which is why there are so many versions. Flashing the custom ROM requires you to unlock the bootloader and install a custom recovery on your Lenovo A7600-H .
Here are some of the custom firmware which you can try on your Lenovo A7600-H . We request you to check the availability of custom ROMs. Please check the list of available devices.
Tweak Guide >
How to Install MoKee ROM On Lenovo A7600-H
Read complete tutorial on installing MoKee ROM on your device.
Tweak Guide >
How to Install Havoc OS On Lenovo A7600-H
Read complete tutorial on installing Havoc OS on your device.
Lineage Os For Lenovo A7600-H
The Cyanogen company has a long history since it finished developing the CyanogenMod (December 2016). This is one of the best ROMs for Android smartphones. Fortunately, CyanogenMod is not permanently dead. Its development has continued under the name Lineage OS.
Lineage OS has a lot of features.
LineageOS is helpful for phones with discontinued software updates. Some smartphone makers aren’t that reliable when it comes to software updates. Also useful for users who want to get the latest Android version as soon as it comes out for Lenovo A7600-H .
Unofficial builds of LineageOS are made available immediately after the release of the AOSP source code. Official builds, however, take a bit longer to release.
So, whether you want to quickly enjoy the latest Android or want to give your old smartphone a new life, LineageOS is your way.
-
Lineage OS 17.1: List Of Supported Devices and Features
Pixel Experience for Lenovo A7600-H
The name of this ROM says almost everything: if you install it, you will get the experience of a Google Pixel on your Lenovo A7600-H .
In addition, in most cases, you can enjoy the latest version of Android. Based on AOSP, the ROM includes all the Pixel features. You only need a compatible mobile phone with Pixel Experience support. Don’t worry. The list is quite extensive, and your device likely has a stable version of this ROM. Before entering the guide, please check availability.
Pixel experience brings Pixel features to a range of supported devices like the latest Google Assistant, built-in GCam support, Pixel live wallpapers, and more.
-
Pixel Experience: List Of Supported Devices
Havoc os for Lenovo A7600-H
Havoc OS was first released with Android Oreo. Its rich and smooth experience makes Havoc OS better than other custom ROMs. All without compromising stability or the overall smooth ROM experience.
In the early days, the Havoc team focused on providing the happiest of all possible worlds, providing a pleasant user experience. Things are very different, as the Havoc OS project brings new features that are attracting the attention of all other developers in the custom ROM world. I usually switch to HavocOS from time to time.
GSI Roms brings Latest Android OS to any Project Treble-enabled device
GSI stands for Generic System Image. A GSI package refers to a system of images with adjustable contrast for projecting treble support compatible with Android devices.
Google has made it possible for all non-pixel devices with the Android operating system to flash the GSI package based on their device’s supportability with project Treble and enjoy the latest version of the OS.
Finally, we have explained the list of Custom ROM available for your Lenovo A7600-H . Detailed instructions are attached to the list of ROMs. Hope you have chosen the right ROM for your device.
Leave a Reply
Recent Posts
- How to Screen Record on Android Device
- Backup & restore your Android – Complete guide
- Take screenshots on an Android device with or without a power button
- Google Camera [GCam] APK for Android 11: How to Install and Use
- Free video editing software for windows 7 [Top 5]
- Home
- All Brands
- Lenovo
- A7600H Stock Firmware
by Editorial Staff
File Name: Lenovo_A7600H_MT6582_000_024_140328_ROW.zip
File Size: 795 MB
Firmware flashing is the process of updating or reinstalling low-level software, known as firmware, on your LenovoA7600H device. This software controls the fundamental functions of your phone, such as buttons, display, and connectivity. If you encounter software errors or application issues, flashing your phone can often resolve these problems. In this tutorial, we’ll provide step-by-step instructions on how to flash firmware on your LenovoA7600H device.
Rest assured, we offer a swift resolution for each individual device. This assists you in upgrading or downgrading any Android device. It’s possible to restore any phone, implement a custom ROM, or resolve any software glitch using a firmware flash file.
This process enables you to substitute the existing firmware on the device with an updated version. This can often be used to tackle bugs, enhance performance, or incorporate new functionalities to the device.
The process necessitates the use of specialized software and a computer, and it can be complex, requiring a degree of technical proficiency. It is vital to only utilize firmware flash files that are expressly constructed for your device, as employing an incompatible file could lead to serious issues like bricking your device (rendering it inoperative).
Before you undertake a firmware flashing, it is advised to backup any valuable data on your device, as this procedure may eliminate all stored data.
Update Device Driver
Download the latest Lenovo A7600H Stock ROM, and official firmware [Flash file]. On this webpage, we’ve presented a comprehensive guide on how to download and install Custom ROMs and stock firmware utilizing a PC with Windows or Linux. In this article, you’ll find download links that you can extract on any desktop computer. The complete package includes a flash file, flash tool, and USB drivers, enabling you to unlock or flash any Android device manually.
The question now is how to acquire a firmware flash file to rectify all boot loop problems. Indeed, anyone can access it via the link provided below. It’s also useful for rooting or installing any mods. Follow the instructions below to troubleshoot the issues.
We consistently advise you to backup your Android smartphone before initiating the flashing process.
Download Important Files
- ADB and Fastboot files. [Windows]
- Download And Install A7600H USB Drivers.
- Other Drivers: Mediatek VCOM Drivers
- Download Latest Lenovo A7600H Stock ROM
- Download And Install the SP Flash tool on Windows 11, 10, Mac, and Linux computers.
SpreadTrum driver
- Download latest SPD Flash Tool.
- Now, install the updated SpreadTrum driver on your phone from the above link.
- You must have the latest version of the SPD driver.
- Download and install the Stock ROM as per your phone requirements.
- Now, you need to extract the downloaded file on Windows 11, 10, Mac, and Linux computers.
- Run the SpreadTrum Upgrade tool. [.exe]
- After that, connect your Lenovo A7600H to your computer.
- Now «switch off» your phone.
- Please wait… Once your Android device is connected
- Then Load the Pocket and select the PAC/PAC5 file for the connected device.
- Now, Click / Select then “Start Downloading”
- Let’s follow the instruction that appears and continues the flashing.
- Finally, your phone will reboot automatically it took a few minutes to reboot.
- You will receive a pass message in green color.
- Now you have successfully flashed your device.
We hope that the above-given procedure is easy to use and successful to install Stock Firmware on the Lenovo A7600H Spreadtrum-powered. If you have any issues or queries, feel free to ask in the comments below.
Firmware has several advantages, including:
- You can Unbrick your Lenovo A7600H.
- You can fix the boot loop problem.
- You can unlock your Screen Lock and remove malware on your Lenovo A7600H.
- You can Upgrade and Downgrade Lenovo A7600H.
- You can fix Bugs or Unroot them on your Android device.
- You can Restore Stock ROM after using Custom ROM.
- You can fix the lag or stutter on the Lenovo A7600H.
- You can Revert to stock to gain your warranty.
- You will be able to receive OTA Updates.
- Improved performance: You can optimize to improve the performance of a device. It can be designed to take advantage of hardware capabilities, resulting in faster operation and more efficient use of resources.
- Enhanced functionality: You can add new functionality to a device. This can range from simple tweaks to existing functionality, to the addition of entirely new features.
- Improved reliability: It will help you to improve the reliability of your phone by fixing bugs and addressing security vulnerabilities.
- Easy upgrades: You can easily upgrade to fix bugs, add new features, or improve performance. This eliminates the need to replace the entire device or buy a new one.
- Better compatibility: It can also help to ensure compatibility between different components of a device, such as a processor, memory, and peripheral devices.
- Lower cost: Using firmware can reduce the cost of a device by eliminating the need for additional hardware components or specialized chips.
- Customization: With firmware, you can customize your phone to meet specific needs or requirements by making it more versatile and flexible.
While firmware updates offer these potential advantages, they also come with risks. An incorrect or failed update can cause a device to malfunction or even become inoperable. Therefore, it is important to always follow the manufacturer’s instructions when updating firmware, and only use official updates designed specifically for your device.
Disclaimer: Please note that this is a general guide, and the steps may vary depending on the specific model of your Oppo phone and the version of the SPD Upgrade Tool that you are using. Always ensure you have the correct firmware for your specific device model before attempting to flash it.
How to Flash Lenovo A7600H via firmware file? Quick steps:
You can Upgrade or Downgrade Lenovo A7600H with a Stock ROM file. First of all, you need to download the official stock ROM from the above-given link to flash your device. With Flash files, you can also re-install the Stock Firmware on any Android device. You can also install this firmware zip file when you are facing Software Issues, Boot loop Issues, and much more. It will also help you with IMEI Issues or Dead Issues. You may also repair your A7600H Android device using Stock ROM Firmware Flash File.
Flashing a firmware file refers to the process of loading a new firmware onto a device. The process can vary depending on the device and the firmware file you’re using, but here’s a general outline of how you can flash a firmware file:
Estimated time: 3 minutes.
Step 1:
Basic Preparation: Make sure that you have all the necessary equipment, including a computer, a USB cable, and the firmware file you want to flash. You can download it from the above-given link.
Step 2:
You should also back up any important data stored on your device as the flashing process can erase everything on it.
Step 3: Download the necessary tools, download all USB drivers and install them to flash the firmware file. Such as you want to install the flash tool or use fastboot for Android devices.
Step 4: Now, you need to put your smartphone into download mode: You can do it by holding down a combination of buttons while turning the device on. We always recommend to device’s manual or support website for specific instructions.
Step 5: After that, Connect the Lenovo A7600H to the computer: Connect your phone to the computer using the USB cable.
Step 6: Then, run the flashing tool, Open the flashing tool you downloaded in step 2.
Step 7: Wait for the flashing process to complete. This process may take several minutes to an hour. It depends on the size of the firmware file and the speed of your phone. Do not interrupt the process or disconnect the device until it’s complete.
Step 8: How to verify the firmware, after the flashing process is complete, verify that the firmware has been installed correctly.
Step 9: You can check the device’s settings or run a system update to see if the firmware version has changed.
Note: Flashing firmware is a complex process and can result in permanent damage to your device if not done correctly. If you’re unsure about how to flash your device’s firmware, consider seeking assistance from the manufacturer or a professional technician.
Note:
SP Flash Tool: If you want to download the latest version of the SP Flash Tool, then you must head over to SP Flash Tool for Windows or SP Flash Tool for the Linux page.
Create a Backup: We always suggest you create a backup of your Lenovo A7600H and save it on Google Drive or any suitable location, because your data may be lost after flashing your device.
Read Me Once
Stock Firmware process will affect your Lenovo A7600H phone data like images, videos, and files. We advise you before starting Flashing firmware you need to create a backup and save it in a safe location.
Frequently Asked Questions (FAQs)
Firmware is also a type of software, it helps the computer hardware to run any applications.
If you would like to download free stock firmware then you are on the right page. You can download it here, if you would like to buy paid version of the stock firmware then You could use online FW databases like SamMobile, Samfrew, etc. However, I would recommend using Frija or Samloader as they allow you to download the firmware directly from Samsung’s Firmware Update Servers and without any speed caps. [Source]
- First, download the latest stock ROM and extract it.
- Now, install all necessary USB drivers to connect your device to the computer.
- Back up all your data. Turn off your phone and go to fastboot mode or Boot into recovery.
- Now, select the Wipe option to factory reset your phone.
- After that, you need to select the «Install» option from the recovery home screen, and navigate to pick the stock ROM you downloaded earlier.
- Finally, Swipe the bar to start the installation process. Now, you can reboot your phone when it’s finished.
- You have done it successfully, Enjoy your device with a fresh look.
Download the Android newest update Lenovo A7600H Stock ROM Original firmware ( flash file). You can flash the Lenovo A7600H newest Android os (Stock Firmware file) to troubleshoot any issues or problems on your Lenovo. Yes! This guide can resolve WiFi and Bluetooth issues, unbrick your device, determine lag or lousy performance, and fix any software-related problems. The specific Lenovo Firmware comes with a Stock ROM of Lenovo A7600H.This helps you to FRP Bypass lock and revert from the root and custom ROM. There are various reasons to flash (Firmware on Lenovo A7600H). For example, your phone will be stuck or hang on the logo. You want to remove the FRP lock from it. Suppose you’re going to hard reset your phone and cannot access the recovery menu. But most of the problems and benefits that cause Fashing stock ROM are below.

Important note: Flashing your phone can be risky if not done correctly. We’ll discuss these risks and crucial steps to take before proceeding to ensure a smooth and successful process.
Bringing Your Lenovo A7600H Back to Life: Stock Firmware and Its Benefits
Is your Lenovo A7600H sluggish, prone to crashes, or riddled with software bugs? A factory reset might not be enough to solve these issues. In such cases, flashing the official stock firmware can be a powerful solution. But what exactly is stock firmware, and what advantages does it offer?
Understanding Stock Firmware
The official stock firmware is the operating system specifically designed and optimized for your Lenovo A7600H by Lenovo itself. Flashing this firmware essentially reinstalls the core software, wiping away any customizations, glitches, or modifications that might be causing problems. This process can breathe new life into your phone, restoring its original performance and stability.
Advantages of Using Stock Firmware
There are several advantages to using the official stock firmware on your Lenovo A7600H:
Resolves Software Issues: Stock firmware is designed to address a wide range of software problems, including performance slowdowns, unexpected crashes, bugs, and glitches. Flashing the firmware can potentially eliminate these issues and make your phone run smoothly again.
Restores Functionality: If your Lenovo A7600H has been modified with custom ROMs or software that caused instability, flashing the stock firmware can revert it back to its original factory settings and functionality. This ensures all the built-in apps and features work as intended.
Improved Stability: Lenovo rigorously tests its official firmware to guarantee optimal performance and stability for your specific device model. Flashing the stock firmware can significantly enhance your phone’s overall stability and user experience.
Security Updates: The latest stock firmware often includes the most recent security patches to safeguard your phone against potential vulnerabilities and exploits. Flashing the update ensures your Lenovo A7600H is protected against emerging threats.
Important Considerations: It’s crucial to remember that flashing firmware can be risky if not done correctly. Make sure you download the firmware specifically designed for your Lenovo A7600H model. Additionally, backing up your important data before proceeding is essential to avoid any potential loss.
Why We Need Lenovo A7600H Official Stock Firmware?
- Unbrick Lenovo A7600H device.
- Upgrade new android system update for Lenovo A7600H OS.
- Fix Lenovo A7600H OTA update issue.
- Fix a problem with the device startup loop.
- Fix system upgrade android your phone.
- Fix Lag or Stuttering on the Lenovo A7600H.
- Fix Lenovo A7600H battery drain issue.
- Software performance improvement.
- Returning a stock ROM entitles the warranty on the Lenovo A7600H.
- If your Lenovo phone boots straight into recovery
Download Lenovo A7600H Flash Tool And USB Driver:
Lenovo A7600H USB Driver for Windows 10, Windows 8.1, Windows 8, Windows 7 Download Lenovo A7600H USB Driver is software that creates a stable connection between the computer’s operating system and the Lenovo Android Phones. The USB Driver for Lenovo A7600H is an essential component. Without that, the connection will not work when developing your phone. All the following Lenovo A7600H Stock ROM (zip file) contains the original Lenovo A7600H USB Driver, Flash Tool, and the Flash File. After Downloading the firmware, follow the instruction manual shipped with the firmware to flash or install firmware on mobile.
Requirements:
1-Charge your Lenovo A7600H: Your phone may charge no less than a half.
2- Take Lenovo A7600H Full Backup , Before installing Lenovo A7600H stock ROM, you need to take a backup of all your messages, photos, and apps from your smartphone.
Download Lenovo A7600H Stock Firmware (flash file)
Firmware File Name: Lenovo_A7600H_MT6582_000_024_140328_ROW_(EN.Flash-Files.NET).zip
Firmware File Size: 795 MB
Download Flash Tool: SP Flash Tool Download for Windows | SP Flash Tool Download for Linux
How to Flash firmware: Guide How to Flash Firmware
Download ROM File
Firmware File Name: Lenovo_A7600H_MT6582_000_025_141027_ROW_(EN.Flash-Files.NET).zip
Firmware File Size: 868 MB
Download Flash Tool: SP Flash Tool Download for Windows | SP Flash Tool Download for Linux
How to Flash firmware: Guide How to Flash Firmware
Download ROM File
How to Flash or Install Lenovo A7600H Firmware (ROM)
-
- # Download and extract the Lenovo A7600H Stock ROM (Firmware Flash File) package on the computer.
- # After extracting the package, you will get the Lenovo USB Driver, Firmware (ROM), Flash Tool, and How-to Flash Manual.
- # Install the provided USB Driver on the computer. If you have already installed the Lenovo A7600H USB Driver on the laptop, then SKIP this step.
- # Follow the How-to Flash Manual to flash the android latest update (Stock Firmware) on the Lenovo A7600H device.
Guide How to Flash Firmware
Readme Once:
[@] Lenovo A7600H USB Driver: If you are looking for the latest USB Driver version, head over to the Lenovo USB Driver Page.
[@]Download Lenovo A7600H Flash Tool: If you want to download the latest version of Lenovo A7600H Flash Tool, then head over to Flash Tools latest version page.
[@]Identify your model: Make sure you download the firmware specifically designed for your Lenovo A7600H model number. Downloading the wrong firmware can damage your device.
[@] Please Take a Backup: Flashing or installing the Lenovo A7600H Device, then we recommend you to take backup of your personal data from the Lenovo device, as flashing the ROM (firmware) will permanently delete your personal data from the device.
[@] The Lenovo A7600H officially releases the Firmware shared above. It helps you recover the Lenovo A7600H device if it gets a boot loop, software error, update error, hanging, and dead issue.
[@] Request Lenovo Firmware: If you are looking for any Lenovo specific firmware that is not listed above. Then you can request it through the comment box below (do not request Firmware through the contact page, or else it will be ignored).
Conclusion
Flashing the official stock firmware can be a powerful way to restore your Lenovo A7600H to its original performance and functionality. By following this guide and downloading the correct firmware from Lenovo , you can breathe new life into your device. Remember to back up your data beforehand and proceed with caution.