
Вам для этого не требуется использование программы Windows Insider. С помощью этого гайда вы сможете скачать систему Windows Subsystem for Android и уста��авливать приложения Android.
Естественно, это все стоит делать на свой страх и риск, так как Microsoft еще занимается тестированием этой технологии.
1. Включение соответствующего параметра в UEFI. Эту информацию найдете отдельно для вашей материнской платы.
2. Запускаете через Пуск Включение или отключение компонентов Windows.
3. Ставите галки напротив этих двух параметров и перезагружаете систему.
1. Идем на сайт, который позволяет генерировать ссылки для скачивания приложений из магазина Microsoft в обход самого магазина.
3. Скачиваем самый тяжелый пакет с расширением .msixbundle. На момент написания статьи его SHA-1 хэш: 0c4b3430bcd37be562f54322c79fb14f11ce1348.
4. Запускаем Powershell от имени администратора (можно запустить новый Windows Terminal и в нем открыть Powershell вкладку).
5. Используем команду Add-AppxPackage -Path <path_to_msixbundle_file>, где последний параметр это путь к скачанному файлу.
6. Если установка прошла успешно, то вы сможете запустить Windows Subsystem for Android.
1. Идем на сайт Google и качаем версию для вашей системы.
2. Распаковываете в какое-нибудь удобное для вас место и прописываете путь к этой папке в PATH.
1. Включите режим разработчика в настройках Windows Subsystem for Android.
2. Для первичной настройки запустите управление параметрами Android
3. Запустите командную строку и подключитесь к adb с помощью команды adb connect <IP>, где в качестве параметра IP следует использовать указанный в настройках разработчика.
4. Скачайте с известных вам сайтов нужный вам APK.
5. Используйте команду adb install <PATH>, где последний параметр это путь к скачанному APK.
6. Запускайте приложение.
При анонсе Windows 11 Майкрософт пообещала возможность запуска Android приложений в новой операционной системе. На момент релиза функция была недоступна, затем появилась в предварительных версиях системы, теперь же доступна всем пользователям.
В этой инструкции пошагово о том, как включить Windows Subsystem for Android в Windows 11, установить Android приложения и дополнительная информация, которая может оказаться полезной в контексте рассматриваемой темы. Также может быть полезным: Лучшие эмуляторы Android для Windows.
Установка Windows Subsystem for Android (WSA, Подсистема Windows для Android)
Все описанные действия по установке Подсистемы Windows для Android актуальны на момент написания статьи: вероятнее всего в скором времени процесс будет проще.
Необходимые шаги для установки Windows Subsystem for Android или WSA в Windows 11:
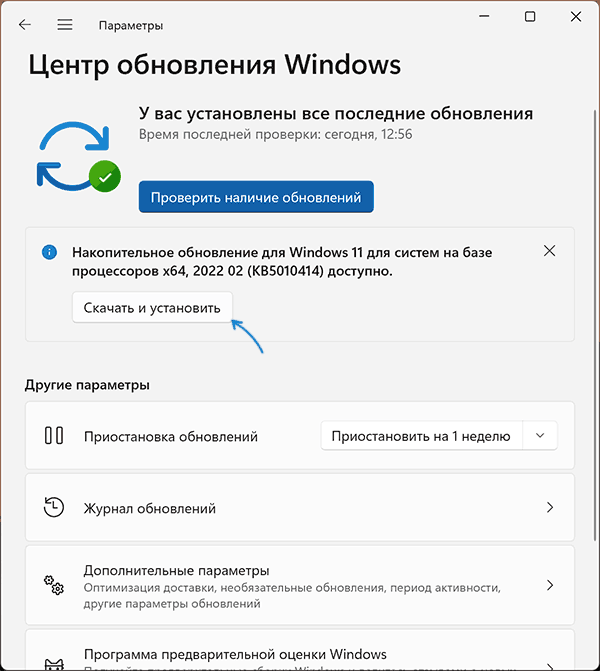
- Установите накопительное обновление KB5010414 через Центр обновления Windows, если вы этого еще не сделали.

- Для того, чтобы WSA могла работать, необходимо, чтобы на компьютере была включена виртуализация. Среди прочих требований — наличие SSD. Мне неизвестно, насколько критичен последний пункт при ручной установке Windows Subsystem for Android, к которой мы прибегнем далее.
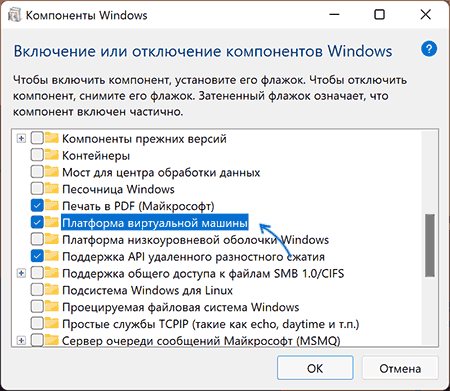
- Зайдите в Панель управления (для её открытия можно использовать поиск в панели задач) — Программы и компоненты, откройте пункт «Включение или отключение компонентов Windows», включите компонент «Платформа виртуальной машины», установите его и перезагрузите компьютер. Подробнее: Как установить дополнительные компоненты Windows 11 и Windows 10.

- Следующий шаг — установка приложения Windows Subsystem for Android, которое устанавливается при установке Amazon Appstore из магазина Microsoft Store. Сейчас приложение доступно лишь пользователям из США (но проверьте, возможно, к моменту, когда вы читаете этот материал, это уже не так), поэтому придется использовать обходной путь: зайдите на сайт https://store.rg-adguard.net/
- В пункте слева выберите «ProductId», в поле ввода данных введите 9p3395vx91nr и нажмите кнопку с изображением «галочки» справа. Внизу отобразится список доступных файлов для загрузки, требуется скачать файл размером более одного гигабайта в конце списка с именем
MicrosoftCorporationII.WindowsSubsystemForAndroid_НОМЕР_ВЕРСИИ_neutral_~_8wekyb3d8bbwe.msixbundle

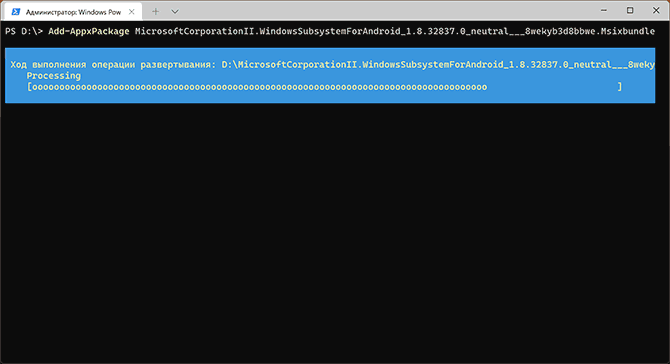
- Загруженный файл не получится установить просто запустив его. Для установки откройте Терминал Windows от имени администратора (правый клик по кнопке Пуск и выбрать нужный пункт в контекстном меню), а затем используйте команду
Add-AppxPackage полный_путь_к_скачанному_файлу
Путь можно скопировать, нажав правой кнопкой по файлу и выбрав соответствующий пункт в контекстном меню. Если путь содержит пробелы, возьмите его в кавычки.


В результате выполнения указанных действий WSA или Подсистема Windows для Android будет установлена на компьютере, а в списке доступных приложений появится приложение «Параметры подсистемы Windows для Android».
После запуска подсистемы Windows для Android (первый раз можно быстро запустить, открыв пункт «Файлы» в параметрах подсистемы Windows для Android), на компьютере также будет установлено приложение Amazon AppStore — стандартный метод установки Android-приложений в Windows 11.
Установка Android приложений в Windows 11
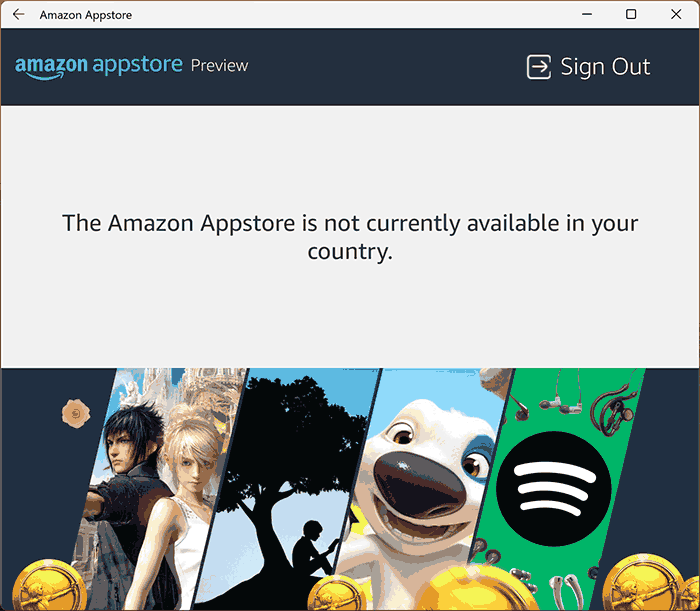
Стандартный метод установки Android приложений в Windows 11 — Amazon AppStore, однако на текущий момент (если ситуация изменится, и вы заметите это раньше меня, пожалуйста, напишите в комментариях), после входа в приложение вы увидите уведомление о том, что оно недоступно в нашей стране:
Поэтому придется использовать один из следующих методов.
Ручная установка Android-приложений в WSA с помощью adb.exe
Первый метод — использовать команды adb.exe для установки приложений из файлов APK вручную. Порядок действий:
- Скачайте инструменты командной строки platform-tools, включая adb.exe и распакуйте в удобную папку на вашем компьютере, рекомендую брать отсюда: https://adbinstaller.com/ — в этом варианте будет загружено только самое необходимое.
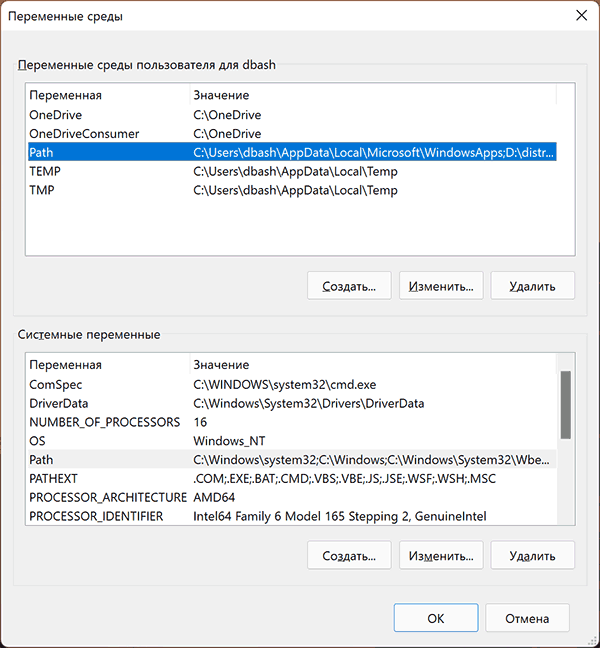
- Шаги 2-4 можно не выполнять, если вы готовы указывать полный путь к adb.exe в командной строке. Нажмите клавиши Win+R на клавиатуре, введите sysdm.cpl и нажмите Enter. Перейдите на вкладку «Дополнительно» и нажмите кнопку «Переменные среды».
- Выберите переменную Path (для пользователя, если требуется использование только текущим пользователем или в разделе «Системные переменные» для всей системы» и нажмите «Изменить».

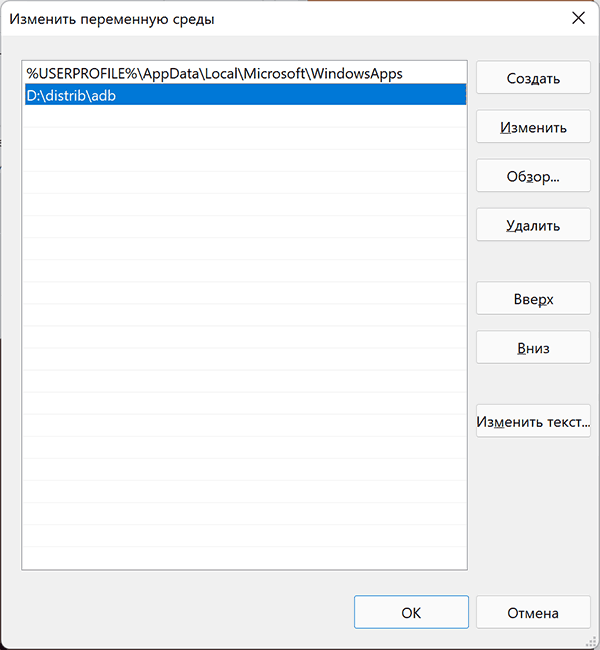
- Нажмите «Создать» и добавьте путь к папке с файлом adb.exe в системную переменную Path.

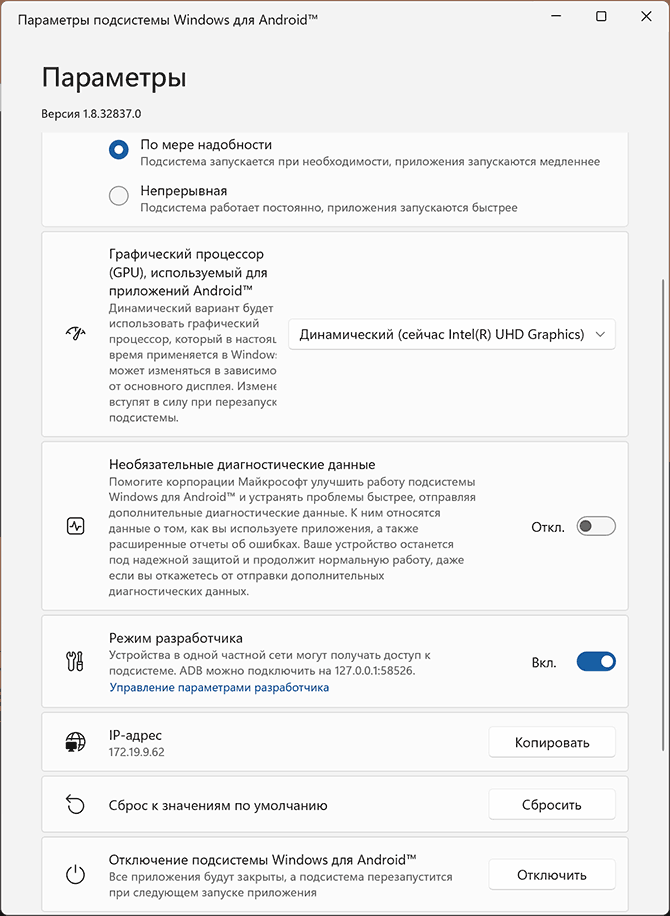
- Откройте приложение «Параметры подсистемы Windows для Android», включите пункт «Режим разработчика». Если сама WSA не запущена, запустите её (например, откройте пункт «Файлы» вверху окна, после открытия можно закрыть). Обратите внимание на пункт «IP-адрес» в параметрах, скопируйте его (если адрес не отображается, нажмите кнопку «Обновить» после запуска подсистемы Windows для Android).
- Скачайте нужные вам приложения Android в виде файлов APK, например вот так: Как скачать APK приложений Android.
- Запустите командную строку от имени Администратора (как запустить командную строку от администратора в Windows 11).
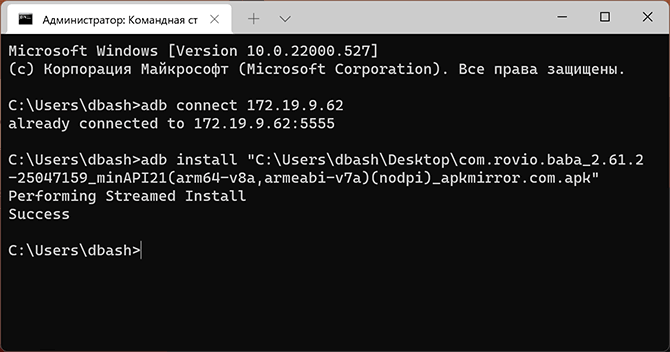
- Введите команду adb connect IP-адрес (где IP-адрес — адрес WSA из 5-го шага).
- Используйте команды adb install путь_к_файлу_apk для установки приложений Android. Успешно установленные приложения будут добавляться в меню Пуск Windows 11.

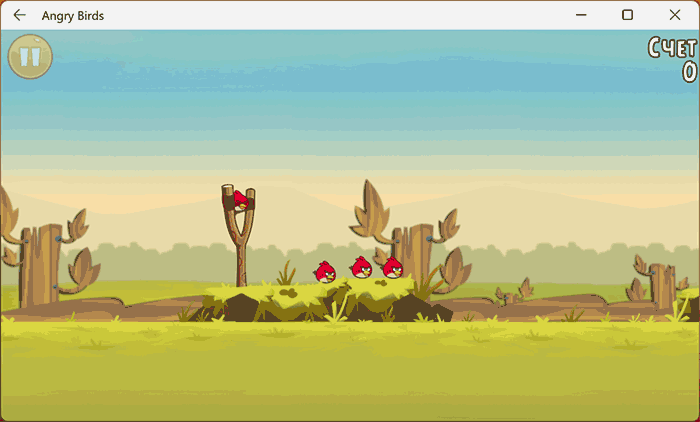
Не все приложения исправно работают: некоторые будут сообщать об ошибках или необходимости установки из Google Play (по всей видимости, из-за отсутствия Google Play Services). Но некоторые работают очень хорошо:
Даже работающие приложения не всегда делают это вполне исправно, среди замеченных проблем — неправильная отрисовка текстового контента в браузерах.
WSATools
В магазине Microsoft Store вы можете найти приложение WSATools, которое призвано облегчить установку приложений Android в Windows 11. Всё что требуется — указать файл APK устанавливаемого Android приложения, а всё остальное программа должна выполнить автоматически, в том числе — скачать и установить adb.exe при необходимости.

Однако в моем тесте установка в актуальной не Preview версии Windows 11 не удалась: экземпляр adb.exe, скачиваемый WSATools отказывается запускаться, а при ручной установке adb.exe, приложение либо зависает, либо «не видит» установленного adb.
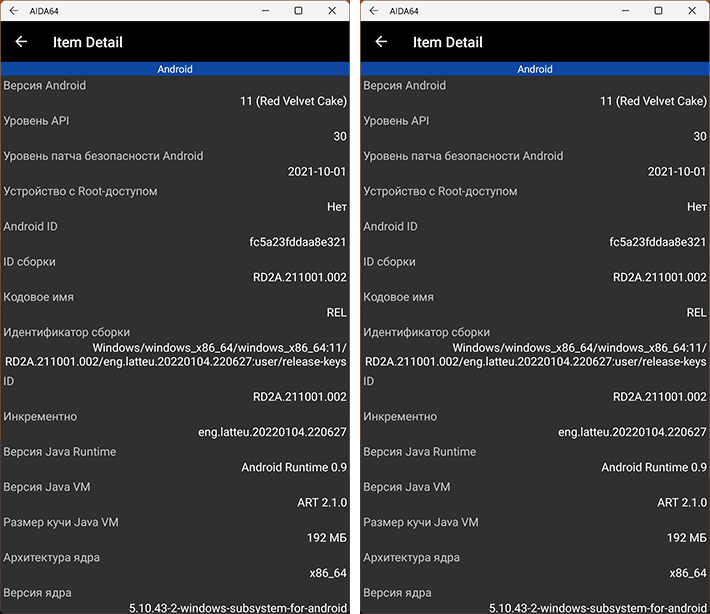
Если кому-то интересны характеристики виртуального устройства, запущенного в рамках Подсистемы Windows для Android, ниже — скриншоты с этой информацией.
Также, думаю, может заинтересовать проект MagiskOnWSA https://github.com/LSPosed/MagiskOnWSA для установки OpenGApps и получения Root в Windows Subsystem for Android.
With the Phone Link , you can instantly access the Android apps installed on your mobile device right on your PC. Using a Wi-Fi connection, Apps allows you to browse, play, order, chat, and more — all while using your PC’s larger screen and keyboard.
Note: The Phone Link doesn’t currently support multiple Android profiles or work/school accounts.
You can add your Android apps as favorites on your PC, pin them to your Start menu and taskbar, and open them in separate windows to use side-by-side with apps on your PC.
Note: For the best experience, we recommend making sure your Android device and your PC are on the same Wi-Fi network and band. Some Wi-Fi networks offer different connection bands, like a 5GHz or 2.4GHz band. Make sure both your devices are connected to the same frequency. Learn more
How do I interact with apps?
You can use your PC’s mouse, trackpad, keyboard, pen or touch-enabled screen to open, type, scroll, and interact with apps. A few tips for using your mouse and keyboard:
-
Single click will behave the same as any single touch/tap interaction
-
Right click anywhere on your phone screen to navigate to the previous page
-
Click and hold will behave the same as a tap/hold interaction
-
Click and hold and drag to select content
-
Mouse scroll to move between pages vertically or horizontally
Some games and apps might not work with a mouse or keyboard. You’ll need to use a touch-enabled PC to interact with them.
If you’re encountering issues using Apps, our troubleshooting tips may help.
How do I interact with Recent Apps?
To access Recent Apps from your PC, do the following:
-
In the bottom right corner of the Windows taskbar, click the ^ button.
-
Click the Phone Link icon.
-
In the flyout menu that appears, do either of the following:
-
Click the app you want to open.
-
Right-click the app you want to use, and then select Open.
To access Recent Apps from the Phone Link, do the following:
-
On your device, open the Phone Link .
-
Go to Apps.
-
At the top of Apps page, look for the Recently used section that’s showing up to three of your most recently used apps.
-
Click an app to open it, or right-click an app and then select Open.
How do I turn off Recent Apps from the Windows notification area?
Do the following:
-
In the Phone Link , go to Settings > Features.
-
Under the Apps section, turn off Show recently used apps in Windows notification area.
Known Issue
There is currently a known issue with Recent Apps that prevents the opening of mobile Microsoft Office apps. We will update this article as soon as this issue has been resolved.
How do I know I’m using the multiple apps experience?
The requirements for using multiple apps are:
-
A PC running the Windows 10 May 2020 Update or later. For best performance, we recommend having at least 8GB of RAM.
-
An Android device running Android 11.0.
-
On your Android device, you’ll need Link to Windows (pre-installed) version 2.1.05.6 or later, or Link to Windows (pre-installed) version 1.20104.15.0 or later.
-
Phone Link version 1.20104.20.0 or later.
How do I pin Android apps into Windows?
You can pin your Android apps to the Windows Start menu, taskbar, or add it to your Phone Link favorites.
To pin an app on your PC:
-
Open the Phone Link .
-
Go to Apps.
-
Right click on the app icon you want to pin or add to your favorites.
How do I remove pinned Android apps from my Windows taskbar or Start menu?
-
If you’ve pinned an app to your taskbar, just right-click the app icon and select Unpin from taskbar.
-
If you’ve added an app to your Windows Start menu, you’ll need to uninstall the app from your apps list. Go to Settings > Apps & features, search for your app in the list. Select it, then select Uninstall.
Are the apps from my Android device now installed on my PC?
No, apps you open will be running from your Android device. The Phone Link is mirroring apps from your Android device to your PC, meaning you’ll see the same thing on your PC that’s being displayed on your Android device.
Can I access Android apps without linking my device?
No, you’ll need to connect your Android device to your PC via the Phone Link in order to use this experience. Learn more
Can I open multiple apps at the same time?
Yes, if you have Android 11 and one of these select Samsung or HONOR devices. For most other Android devices, you can only open one Android app at a time.
How do you stream audio from your Android device?
Now you can stream your audio from your Android device while you are engaging with Apps or Phone screen features. To use audio streaming on your PC:
-
Make sure you have a Samsung device and update OS to OneUI 5.0 or higher.
-
App versions requirements:
-
Phone Link is updated to 1.22092.214.0 or higher.
-
Link to Windows is updated to 1.22102.149.0 or higher.
Note: Honor and Surface Duo are currently not supported for this feature.
How can you enable audio streaming on your PC?
You don’t need to set up this feature. When you open apps or phone screen, you will be requested audio permissions in order to hear the audio on PC. Go to your mobile phone to grant the permissions from both Link to Windowsapp and Link to Windows Service app. Then you are all set and able to hear audio from PC.
How can you change the audio output?
You can change whether the audio comes from PC or phone in Phone Link settings.
Open Phone Link on your PC:
-
Go to Settings > Features.
-
Scroll down to Apps and select Computer or Phone under the drop-down menu of Listen to audio from.
Can I listen to audio via Bluetooth headphones connected to my PC?
Yes, you can. If you connect an external audio device to PC, you will hear the audio from your external device.
What can I do if I hear robotic sound when I use this feature?
Follow instruction here: Fix sound or audio problems in Windows (Add the link to this new content after publishing to https://support.microsoft.com/en-us/topic/setting-up-and-using-phone-screen-in-the-phone-link-app-ea853ebc-0856-2f6e-af34-703fe449416b
How do you stream audio from your Android device?
You can find details on Setting up and using phone screen in the Phone Link.
Quick Tips
- There’s no official way to run all Android apps on Windows 11.
- You can run Android games on Windows 11 officially.
- The Phone Link app lets you use some Android apps on Windows devices.
- Third-party Android emulators can run all Android apps on Windows 11.
When Windows 11 launched in 2021, Microsoft introduced the Windows Subsystem for Android. It allowed Windows users to run Android apps directly on their devices. However, the support for this feature will sadly end on March 5, 2025. But even after March 2025, you can still run Android apps on Windows 11. This guide will show you the best remaining options to do so.
How to Run Android Apps on Windows 11: The Official Methods
The Windows Subsystem for Android isn’t the only official feature that bridges the gap between Windows and Android. Here are two ways you can run Android apps on Windows 11 “officially.”
Google Play Games Beta
Mobile gaming is immensely popular. However, the little screen can seriously affect your experience. So, when a user wants to run Android app on Windows 11, it’s usually a game. They’re only looking for a bigger screen and smoother gameplay. This can be achieved by installing Google Play Games Beta on your Windows 11 device.
But first, you’ll have to set up virtualization on your Windows PC. This will allow your system to run the Android apps smoothly. Here’s how to enable virtualization in your BIOS/UEFI settings.
Step 1: Restart your computer.
Step 2: Enter the BIOS/UEFI menu. You can do this by pressing “F2,” “F12,” “Delete,” or “Esc” during boot-up. The exact key depends on your computer’s manufacturer.
Step 3: Look for a setting named Intel VT-X or AMD-V. Which setting you’ll see depends on the type of your processor.
Step 4: Enable this option.
Step 5: Save the changes before exiting the BIOD/UEFI menu.
Next, you’ll have to enable virtualization in Windows 11. Here’s how.
Step 1: Search for “Control Panel” in the “Start” menu.

Step 2: Go to the “Programs” section.

Step 3: Click on “Turn Windows features on or off.”

Step 4: Check the boxes next to “Virtual Machine Platform” and “Windows Hypervisor Platform.”

Step 5: Click on “OK.”

Step 6: Restart your device.
Now, you can install Google Play Games Beta.
Step 1: Make sure your PC meets the necessary requirements for this feature.
Step 2: Go to the Google Play Game Beta website.

Step 3: Click on the “Download beta” button.

Step 3: Open the downloaded file.
Step 4: Follow the on-screen instructions to complete the installation.
All that’s left to do is sign in to your account. Make sure you’re using the same account on your Android and Windows devices. From there, you’ll be able to install and run Android games on your Windows 11 system.
The Phone Link App
The Phone Link app can connect your Android smartphone directly to your Windows 11 device. Then, you can use this device to run Android apps, as well as view photos, change device settings, and more. This app will work with select Microsoft Duo, HONOR, and Samsung phones. Here’s what to do.
Step 1: Download and install the Phone Link app to your Windows device.

Step 2: Download and install the Link to Windows app on your Android phone.

Step 3: Launch the Phone Link app and select “Android.”

Step 4: Open the Link to Windows app and scan the QR code.
How to Run Android Apps on Windows 11: The Unofficial Way
By sunsetting the Windows Subsystem for Android, Microsoft took away the best way to run Android apps on Windows 11. This goes for all apps, not just games. That’s why you might need to go the unofficial route – install an Android emulator. You’ll still need to set up virtualization for these emulators to work. After completing those steps, you can download and install an Android emulator of your choosing. Our suggestion is BlueStacks.

This emulator is widely considered the best in its category. This mainly has to do with its wide range of features, excellent compatibility with Android apps, and user-friendly interface.
Was this helpful?
Thanks for your feedback!
The article above may contain affiliate links which help support Guiding Tech. The content remains unbiased and authentic and will never affect our editorial integrity.
When it comes to app selection, few platforms rival Android. Unfortunately, using your Android phone and tablet apps isn’t normally possible on Windows. However, there are ways to use your apps on a full screen if you know how to run Android apps in Windows. This way, you can enjoy the best Android apps and the best Android games on the big screen.
We’re focused on emulating Android apps on Windows 10 here. If you have Windows 11, make sure to read our guide on how to natively install Android apps on Windows 11.
Bluestacks
The easiest way to run Android apps on Windows is through an emulator, like Bluestacks. It’s one of the most popular and robust Android emulators around, allowing you to run 32-bit and 64-bit games and apps for Android on your Windows desktop.
If you can, enable AMD-V or Intel VT-x within the BIOS for optimal performance.
Step 1: Download the installer from the official Blue stacks website.

Image used with permission by copyright holder
Step 2: Launch the install application and choose the storage location for the app and data files. Unfortunately, you can’t change the Bluestacks directory — it will install on your boot drive by default.
Step 3: Once Bluestacks installs, launch it and enter your Google and/or Samsung account credentials. You’ll need this info to log in to the Google Play Store and Galaxy Store and access your Android app library.
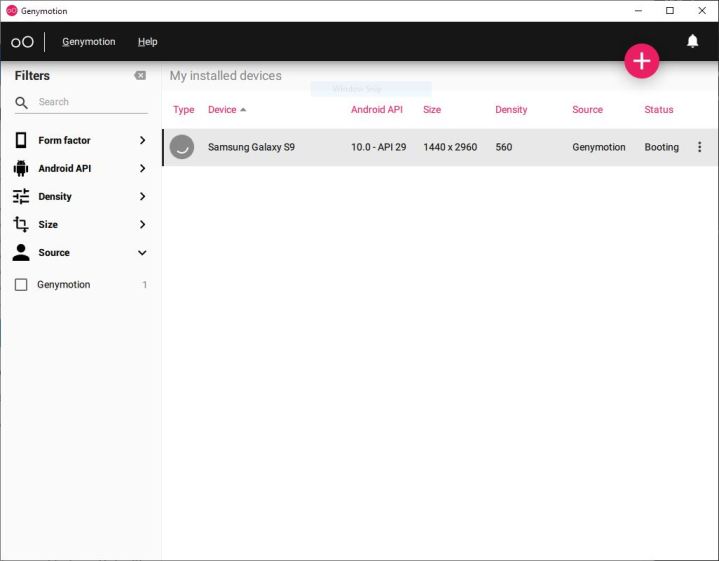
Image used with permission by copyright holder
Genymotion
While Bluestacks is focused on apps and games, Genymotion provides the full Android experience (though at the cost of performance). Genymotion offers several paid emulation modes, including an option to run Android emulation from the cloud. There’s also a free version for personal use.
If you can, enable AMD-V or Intel VT-x within the BIOS for optimal performance.
Step 1: Download VirtualBox for Windows.
Step 2: Download Genymotion for personal use.
Step 3: Open Genymotion and select Create Account. After you’re done setting up your account, activate it and log in with your credentials.
Step 4: Click the Plus icon and select a device you want to emulate. You can also emulate a custom device.
Dual Booting Android-x86
There’s an alternative to emulation that gives you access to newer versions of Android, but the setup is a bit more involved. It’s called «dual booting,» and it effectively transforms your Windows computer into an Android device. You’ll gain the option to boot into Android when you switch on your computer, and Android will work just like it does on your smartphone or tablet.
Our preferred version is Android-x86. It comes with features like a new Taskbar launcher and the ability to launch apps in resizable windows rather than just full-screen. It also lets you customize Android to your liking. You can install third-party themes, home screens, and more without having to worry about whether or not they will play nicely together.
To use Android-x86, your PC must have:
- An AMD or Intel processor.
- 2GB or more RAM.
- 4GB or more disk space.
- An available USB port.
Step 1: Plug in an empty USB drive, and download both Android-x86 and UNetbootin.
Step 2: Find and open UNetbootin and click the Three Dots button to the far right of Diskimage.

Kevin Parrish/Digital Trends
Step 3: Locate and select the downloaded ISO file for Android-x86.
Step 4: At the bottom, next to Type, select USB Drive from the list and then click OK.
Wait for UNetbootin to copy and install Android-x86 to your flash drive.
Step 5: Reboot your computer. This may require you to hit a specific key to prevent Windows 10 from loading, like ESC or F12. A screen should appear allowing you to select Boot to the Boot Device Selection.
Step 6: Select your flash drive.
Step 7: From the UNetbootin menu, select Install Android-x86 to Hard Disk.
Step 8: Select the partition — or location — to which you want to install Android-x86. The program will ask if you plan to format the disk. If you’re unsure, don’t.
Step 9: Select Yes to install GRUB and then select Yes again.
Step 10: A prompt asks if you want to “make system r/w,” which enables Android-x86 to read and write data to your hard drive. Select Yes.
Step 11: Reboot your computer for the second time. Once installed, use the Google Play Store to install Android apps as you wish.
Link to Windows
Microsoft’s Your Phone app allows Android phone owners to send and receive texts from their Windows PC without using their mobile devices. Users can also access their phone’s photos from Windows 10 and see phone-related notifications in the Action Center.
Samsung takes this cool relationship one step further with Link to Windows. This technology now provides two services: Phone Screen and Apps. With the former, you’re essentially streaming a Samsung phone’s screen to an interactive window on your PC. With Apps, you’re streaming individual apps rather than mirroring the phone’s entire screen.
However, all Android apps remain on the Samsung phone. Moreover, this method requires the Windows 10 PC and Samsung Android phone to be on the same local network. Microsoft provides a list of compatible Samsung phones — not all Samsung phones support Link to Windows.
Step 1: Open the Your Phone app or download it from the Microsoft Store if it’s not installed.
Step 2: Sign in to your Microsoft Account.
Step 3: Move to the Samsung phone. Swipe down on the Quick Panel *and tap *Link to Windows. If it doesn’t appear in the Quick Panel, download it from the Google Play Store — it’s typically integrated into newer Samsung phones.
Step 4: If other Microsoft apps are already signed in, you won’t need to do it again on your phone. If not, sign in manually.
Step 5: Allow permissions when prompted.
Step 6: The Samsung phone and Windows 10 should begin synchronizing. When complete, tap the blue Allow button on the Samsung phone’s screen to allow the pairing.
If successful, the Samsung phone will display a switch that’s toggled on — tap it to disconnect at any time. The screen also lists the connected PC’s name and the Microsoft Account login name.
Step 7: With the Your Phone app open in Windows 10, click the Gear (Settings) icon in the bottom-left corner.
Step 8: Verify that the Display My Phone Screen option is on.
Step 9: Select the Phone Screen or Apps option on the left to begin.