
We all know that even a slight stuttering during TV shows or movies will kill the fun. That being said, severe video playback stuttering on Windows 11 has been reported by many Windows users.
Occasionally, all media players and streaming services experience a delay in video playback, which can be related to connection issues or application bugs. You can resolve this problem by performing a quick driver update or, more intricately, by repairing the video if you’re experiencing a problem with downloaded video content. Let’s examine your options for resolving Windows 11 video stuttering and lag.
What are the causes of Windows 11 video playback issues?
There are various potential causes for this problem. However, some of the most common reasons for choppy videos are as follows:
- A video file with a problematic audio or visual codec
- A damaged or corrupted video file
- Using old media players
- Your device is using outdated drivers
- System requirements are too low to play the intended video file (This usually happens if the video file size is too big or the video quality is better than HD.)
There are several ways to resolve this problem. Now, let’s get to the solutions.
How Do I Fix Video Playback Stuttering on Windows 11?
1. Run Video Playback Troubleshoot
You can start the fixing process by attempting to play the videos on different media players. If you are experiencing similar issues with other media players, you can try using Microsoft’s troubleshooters to identify the issue.
The video playback troubleshooter will allow Windows to identify and fix video playback stuttering on Windows 11. In the worst scenario, Windows won’t be able to resolve the problem, but it will let you know what caused it.
Here’s how to find the troubleshooter options and run them.
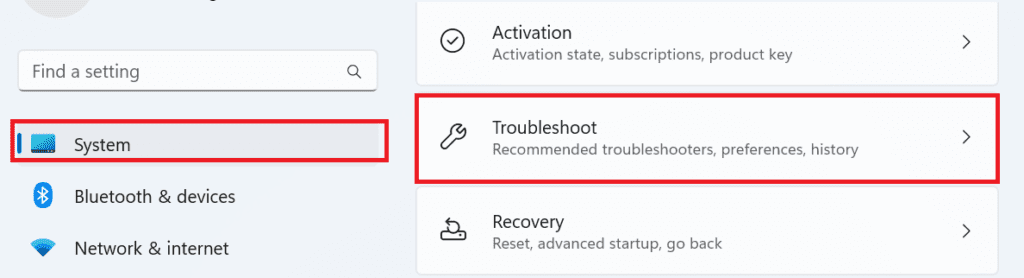
- Access the Settings by simultaneously pressing the Windows key + I. You can find Troubleshoot under the System tab.
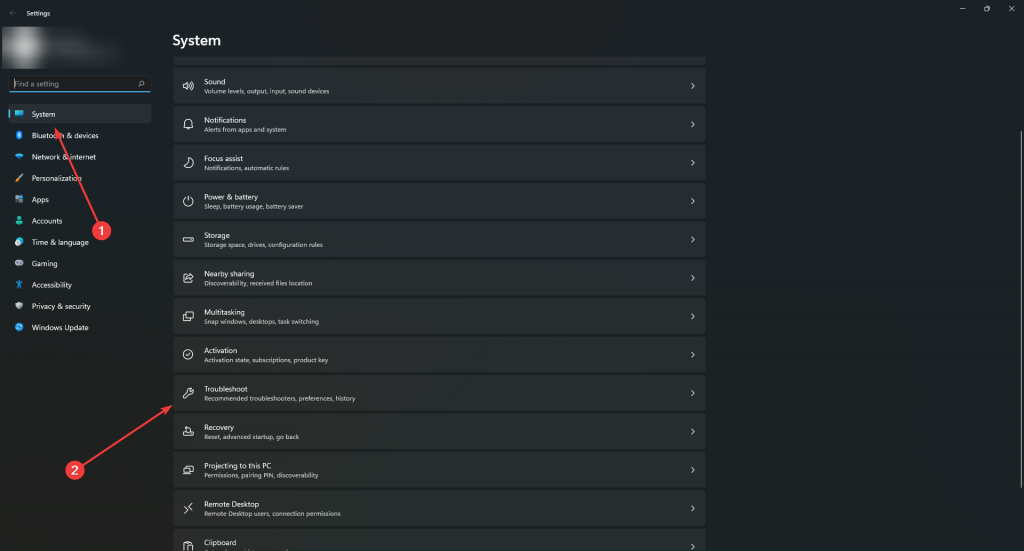
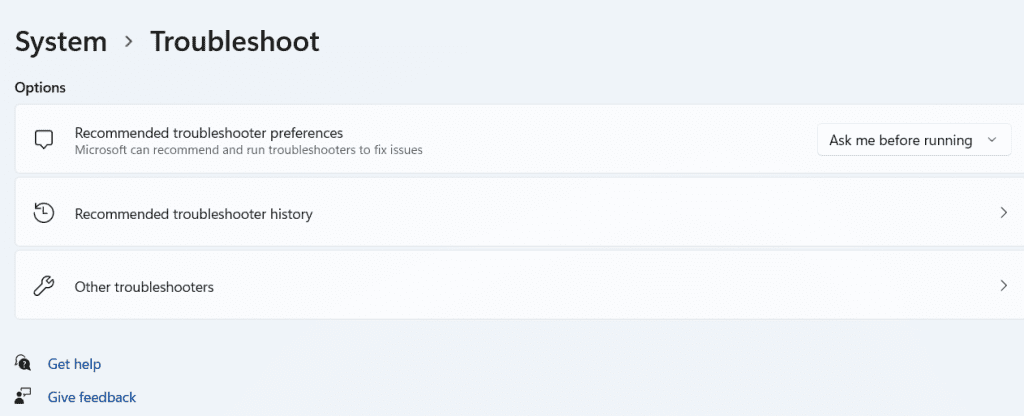
- Go to Other Troubleshooters.
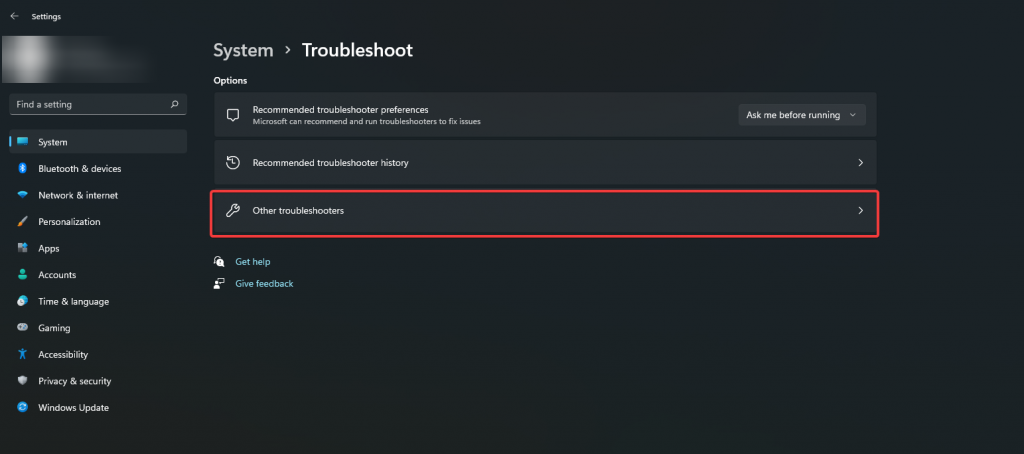
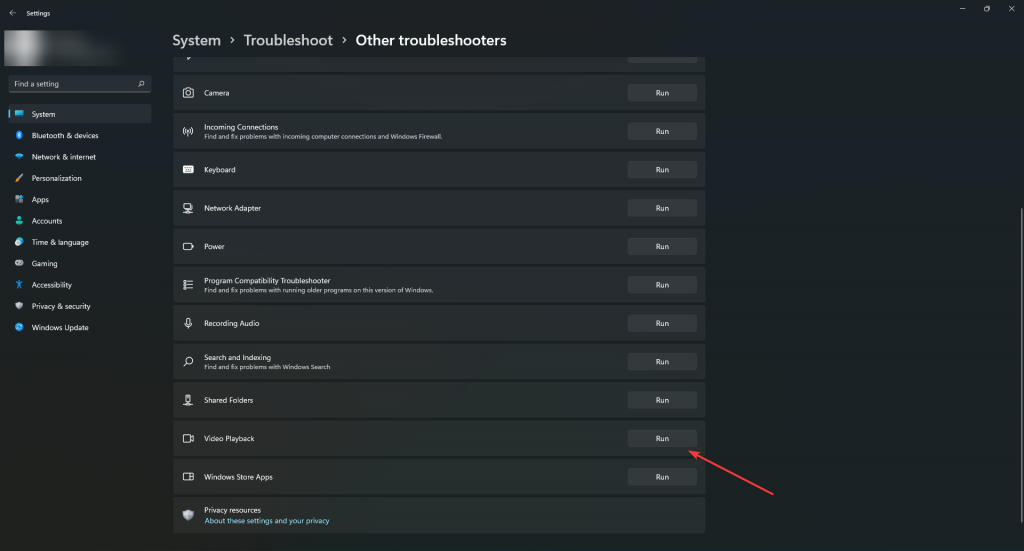
- Click on the Run option of the Video Playback Troubleshooter.
A dialog box informing you of the troubleshooting results will appear after completing the troubleshooting process.
2. Update Drivers
Your computer’s graphics card handles video processing. The latest graphics card drivers are typically included in Windows updates, but there is a risk that your PC is still using old drivers.
Make sure to update your graphics driver to fix video playback stuttering on Windows 11. To automatically update your drivers, use the Device Manager or manually download them from the website of the GPU manufacturer.
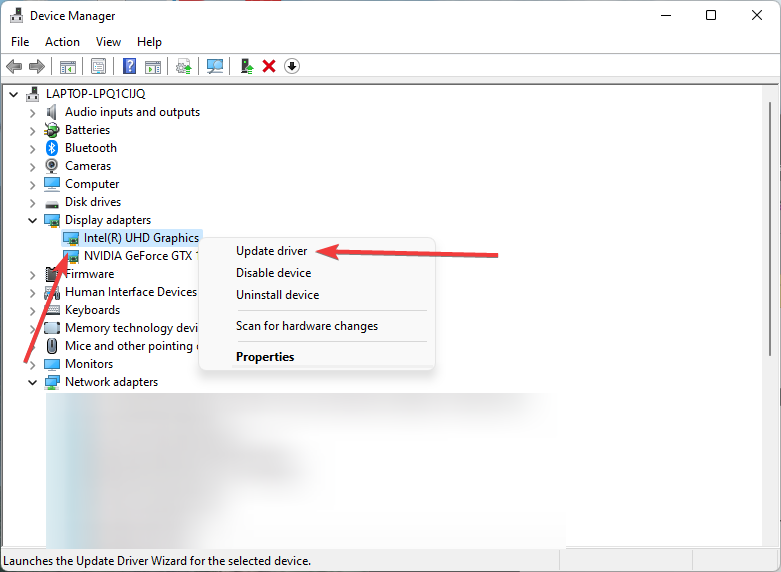
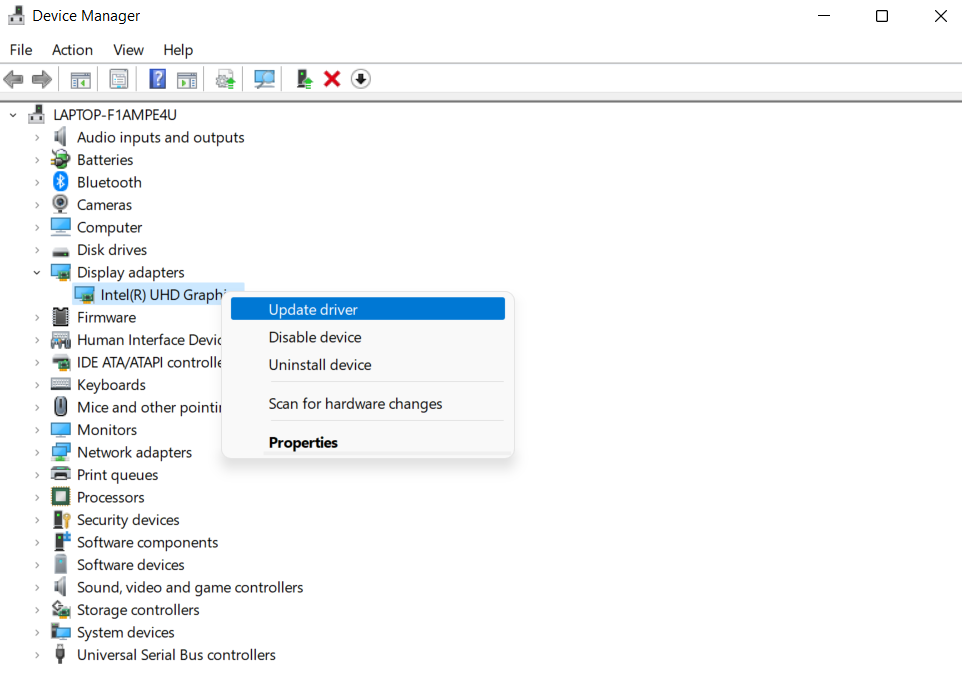
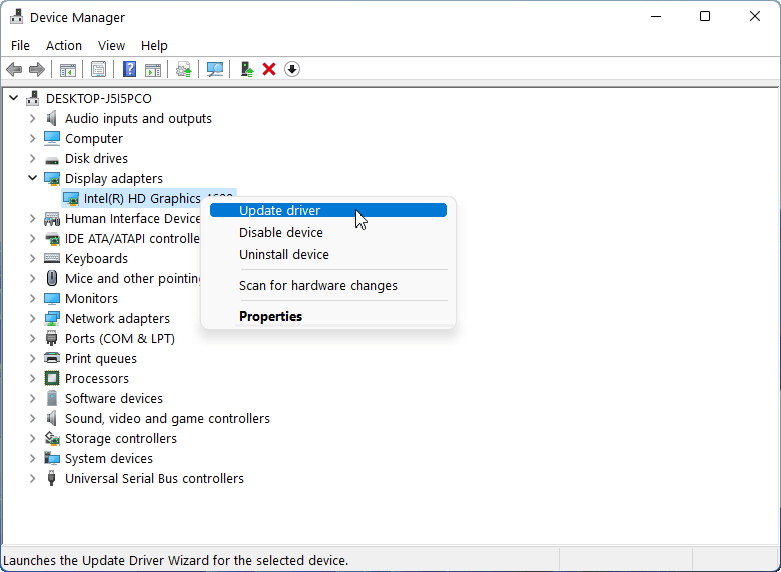
- Access the Device Manager by right-clicking on the Start Menu.
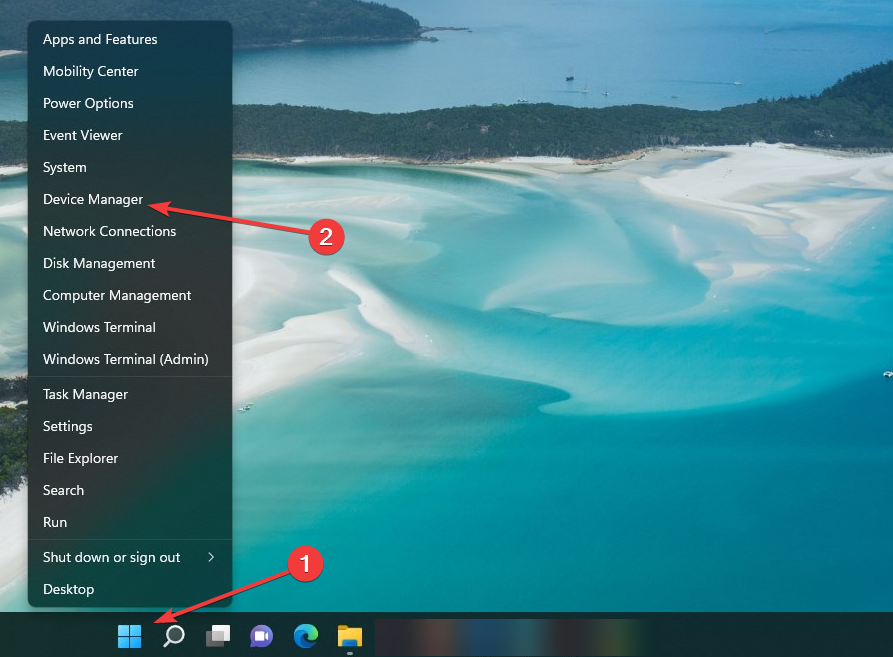
- To expand the category, click on the arrow next to Display adapters.
- Update the driver by right-clicking on your graphics driver and selecting the respective option.
- Select Search automatically for drivers.
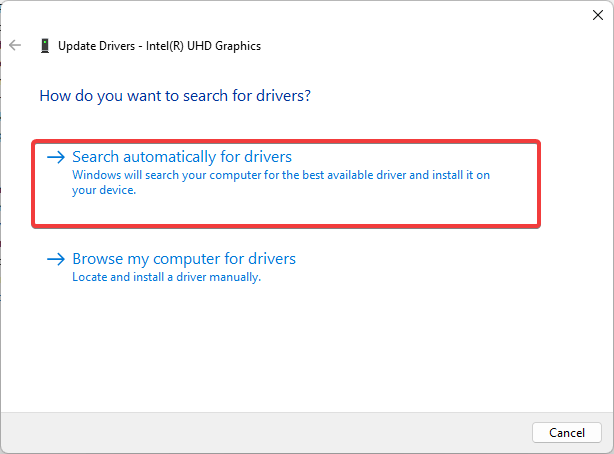
- Wait until the most recent graphics driver installation is complete on your PC.
- Check if the delay in video playback persists after restarting your computer.
To guarantee that your computer is using the most recent graphics driver version, visit the website of the GPU manufacturer and manually check for updates. Check the Nvidia or AMD websites to download the most recent drivers.
You should also update your media player and browser to the latest versions.
3. Use Stellar Repair for Video
If the video or mp4 file is the issue, you can attempt fixing it with the best repair program available, Stellar Repair for Video. Along with repairing files that you can’t watch or play, Stellar Repair for Video also deals with issues with file headers or formats.
Additionally, it fixes playback problems like those that make a video unplayable, stutter, flicker, out of sync, choppy, jerky, truncated, grainy, frozen, or blurry. Remember how we said it could be extremely difficult to fix video files? You may easily and effectively fix an unlimited number of videos of any size using Stellar Repair for Video. Ultimately, it works with most media capture devices, such as drones and security cameras.
Here’s how to use the Stellar Repair for Video software:
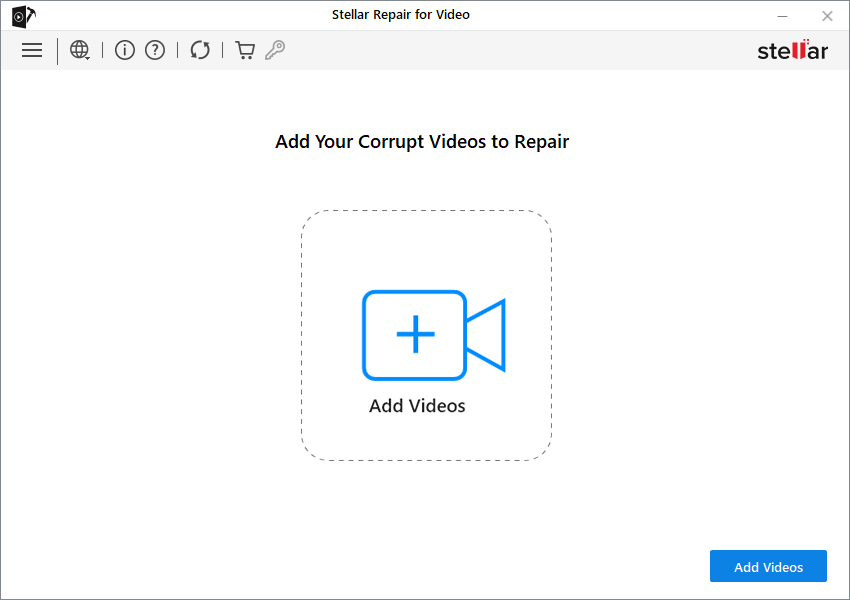
- Download and install Stellar Repair for Video from the official website.
- Launch Stellar Repair for Video software and in the first window, click on Add file.
- Here, you can browse and select the video or mp4 file you want to repair using Stellar Repair for Video software and then select Repair.
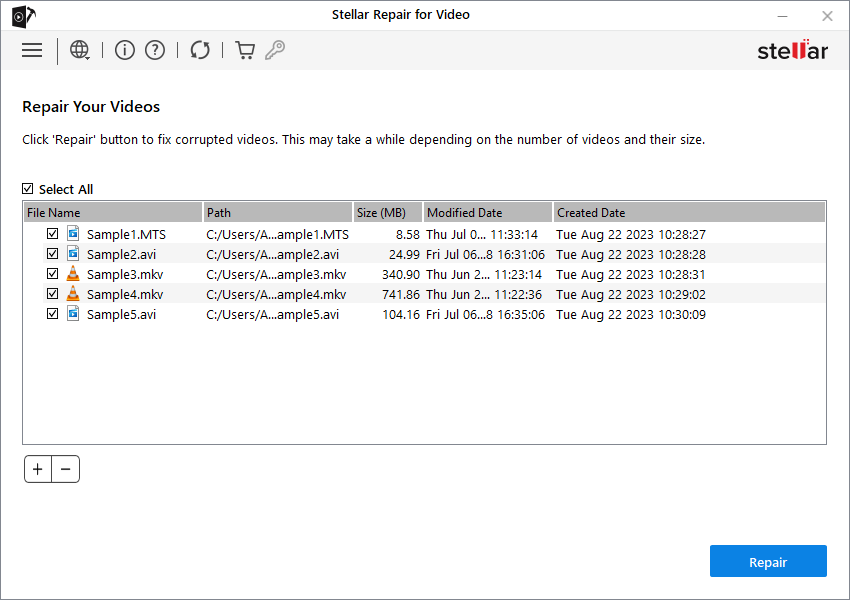
- Wait patiently as the software repairs your file.
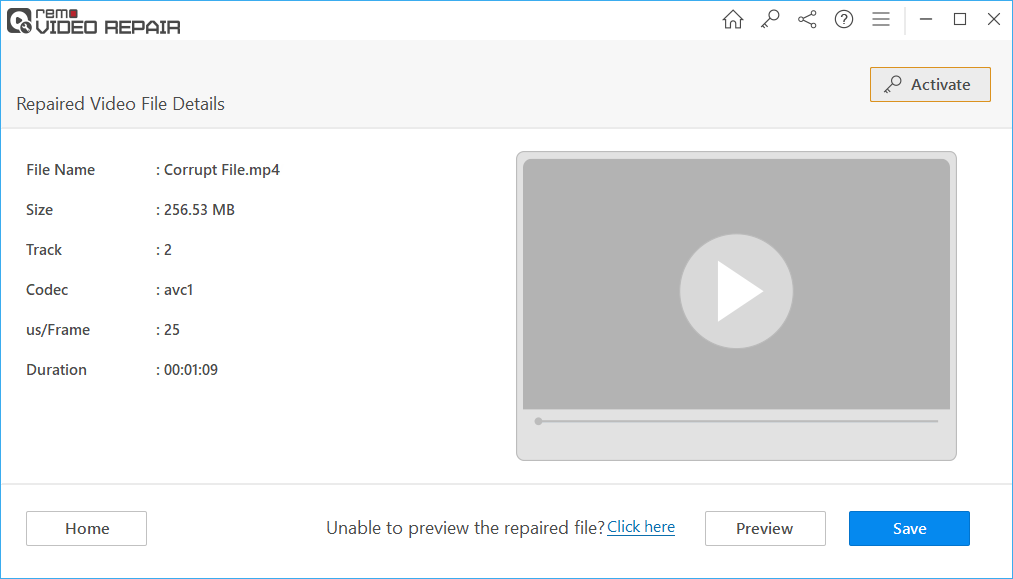
- After the process, you can preview the repaired file or run the Advanced Repair process.
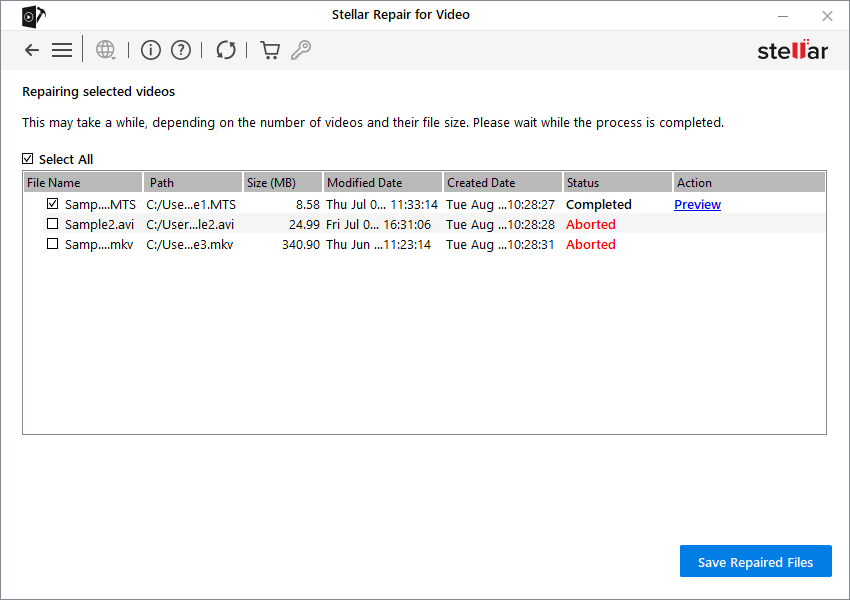
- Click on Save Repaired Files to save the video files.

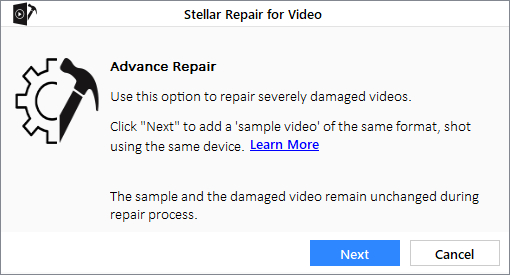
- If you select Advanced Repair, a window will appear asking for a video sample. The video sample needs to be a video recorded by the same camera with which you captured the damaged video. Choose Next.
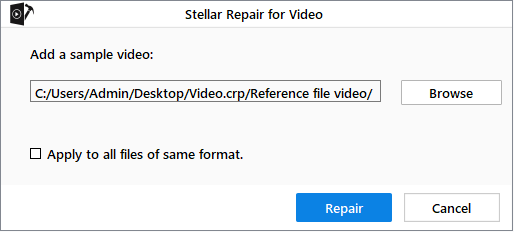
- Click Browse, then choose the necessary Sample file from the list of options. Select Apply to use the sample file you’ve chosen to fix all the corrupt video files in the list by applying it to all files with the same format.
- After you’ve added the sample video, click the Repair button. A dialog window titled Repair process completed displays after the process. Click OK.
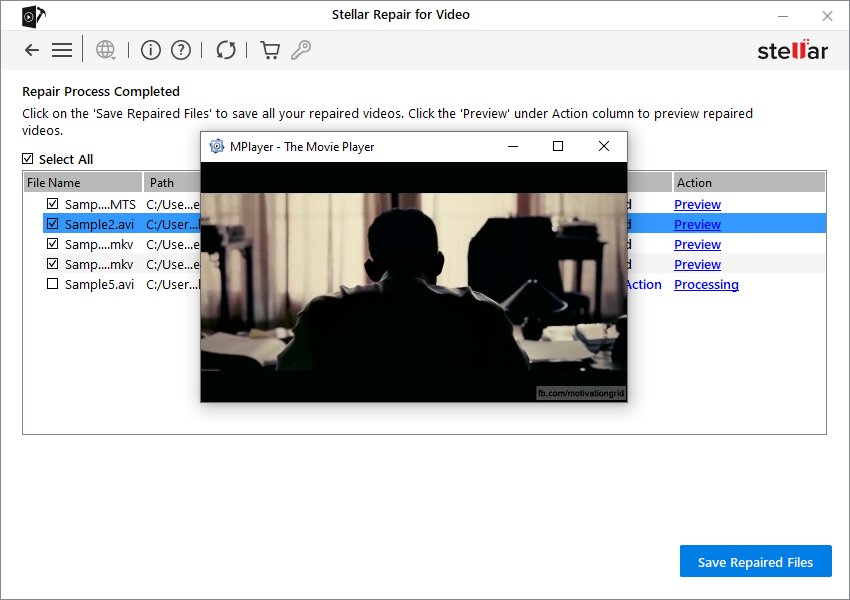
- Click Save Repaired Files. A dialog box appears with options to save repaired files at the source or a different location if you want to save the file somewhere else.
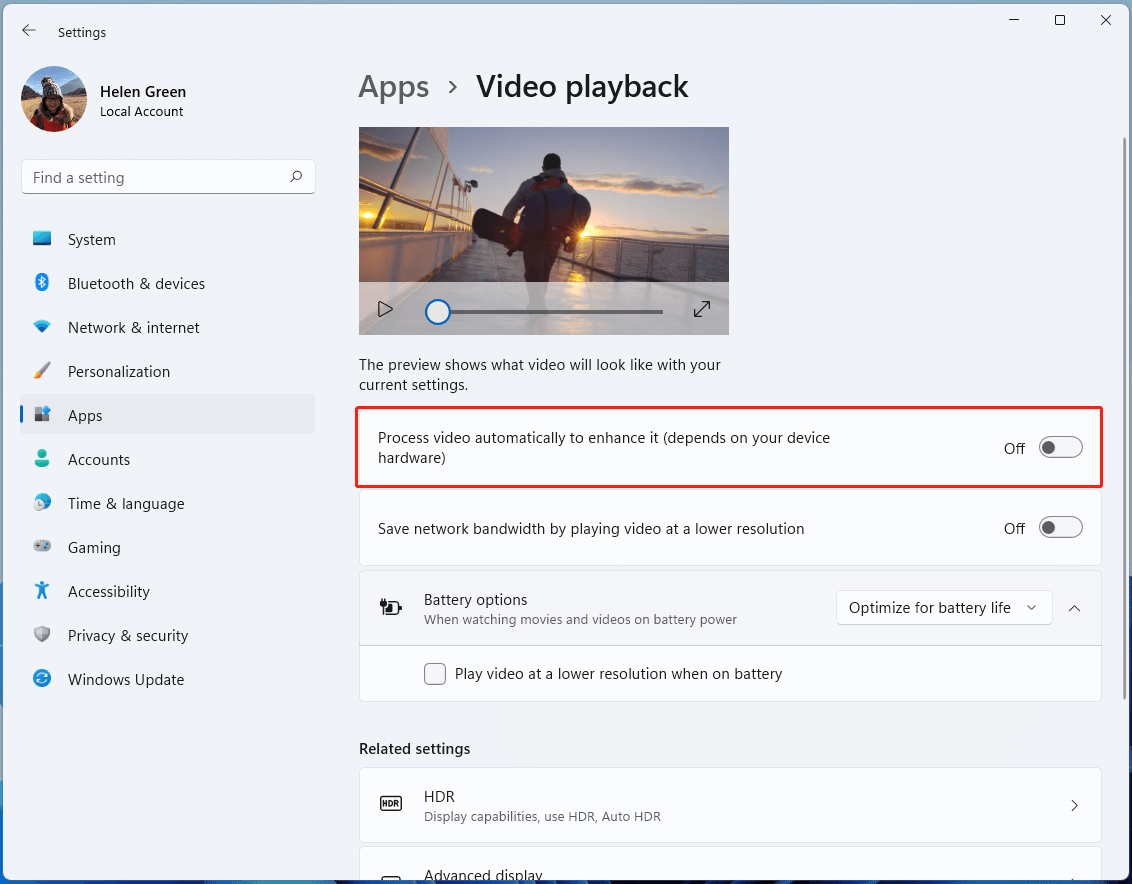
4. Disable Video Automatic Processing
Your Windows 11 computer comes with a video enhancement tool to enhance your video playback experience. However, you might have trouble playing videos if your hardware isn’t compatible with this feature. You can try disabling it to check if it will resolve the Windows 11 video issues.
- Select Settings from the menu after right-clicking the Start Menu.
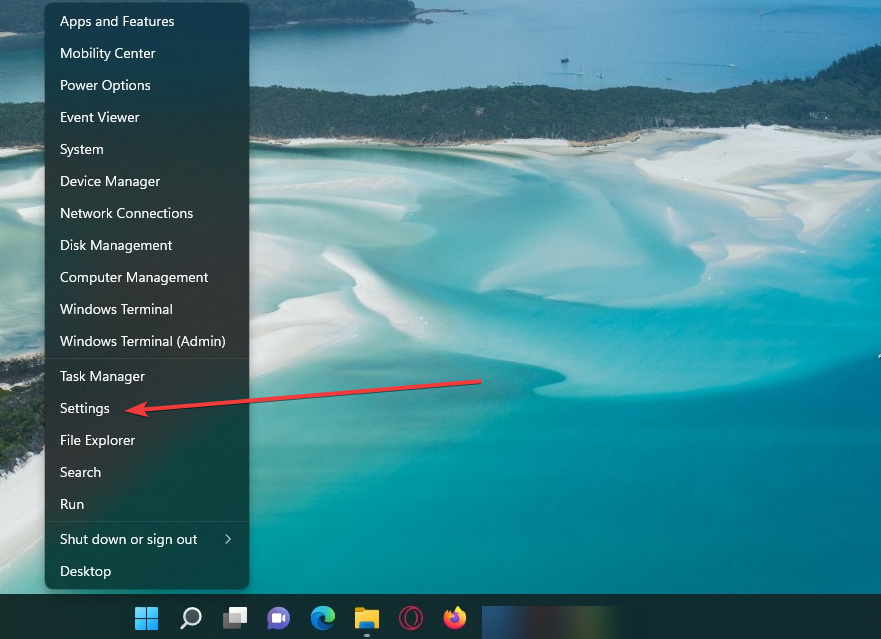
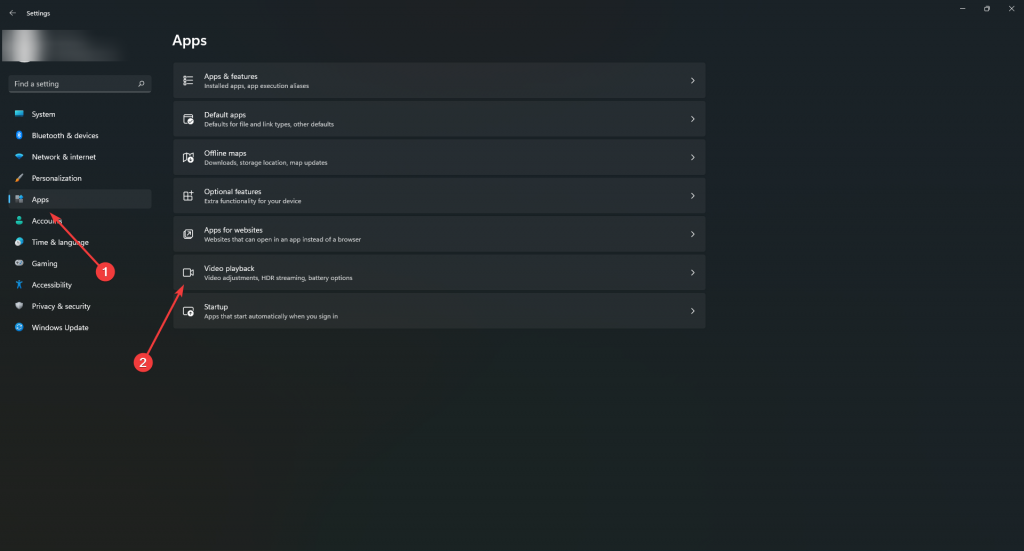
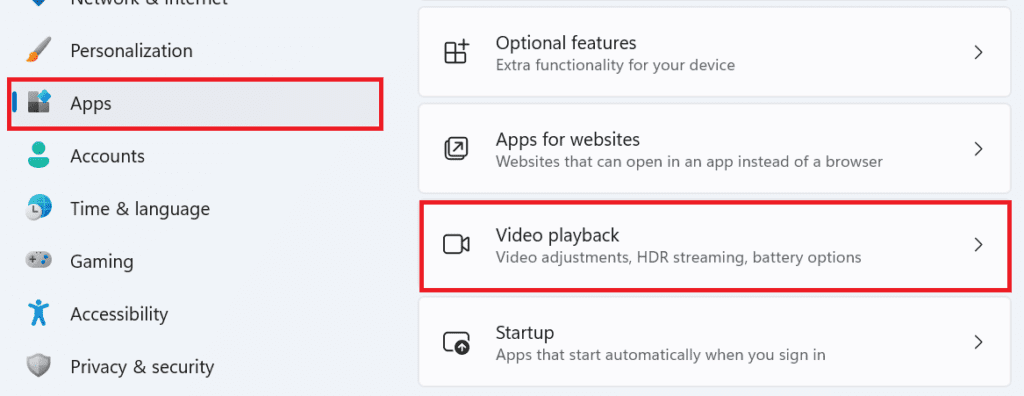
- Choose the Apps tab from the left menu. Go to the Video playback settings next.
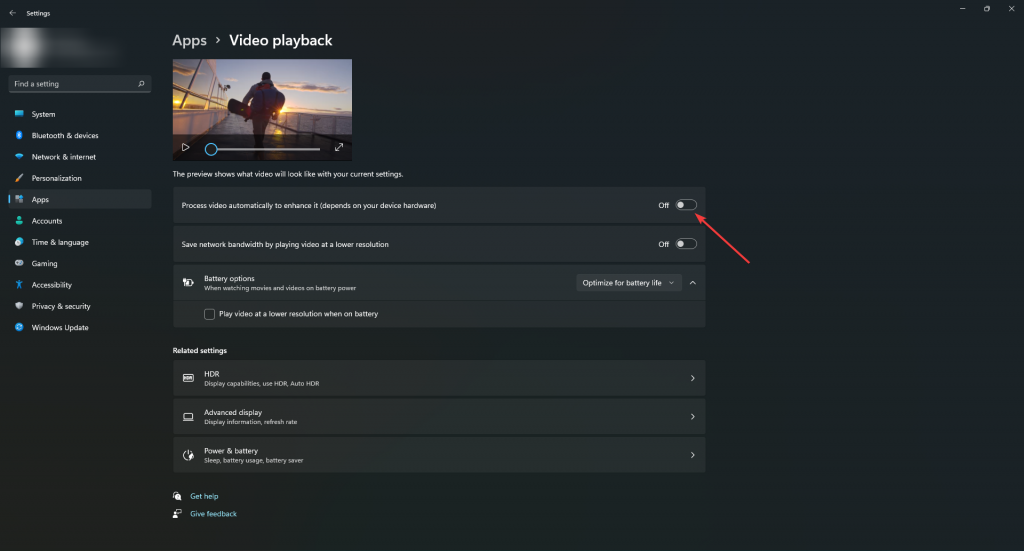
- Turn off the switch next to the Automatically Process video to enhance it.
5. Turn On Software Rendering
If only streaming videos have playback issues, Windows should have software rendering enabled. This will be super useful if the GPU chip in your PC is old.
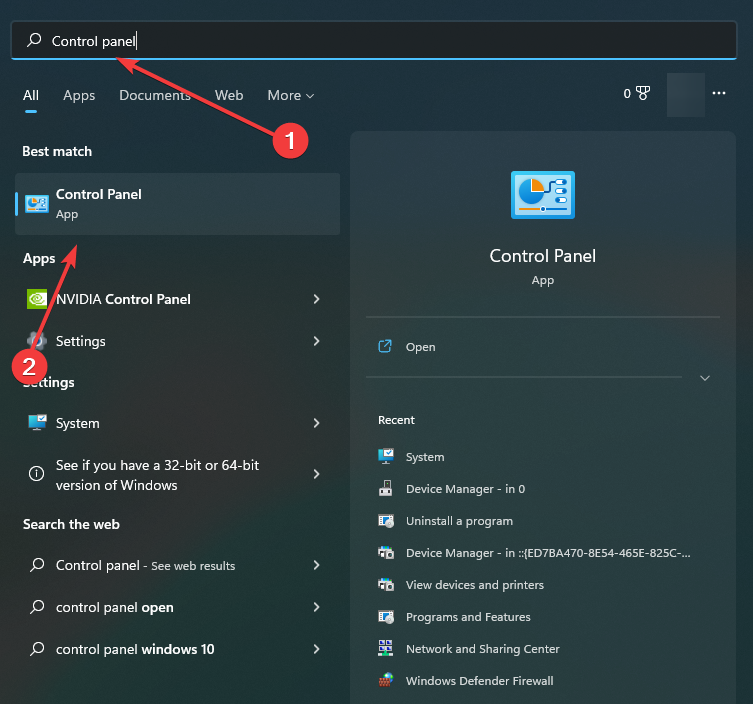
- Click the Search button in the Taskbar, search Control Panel, and then hit Enter. Click on the best result.
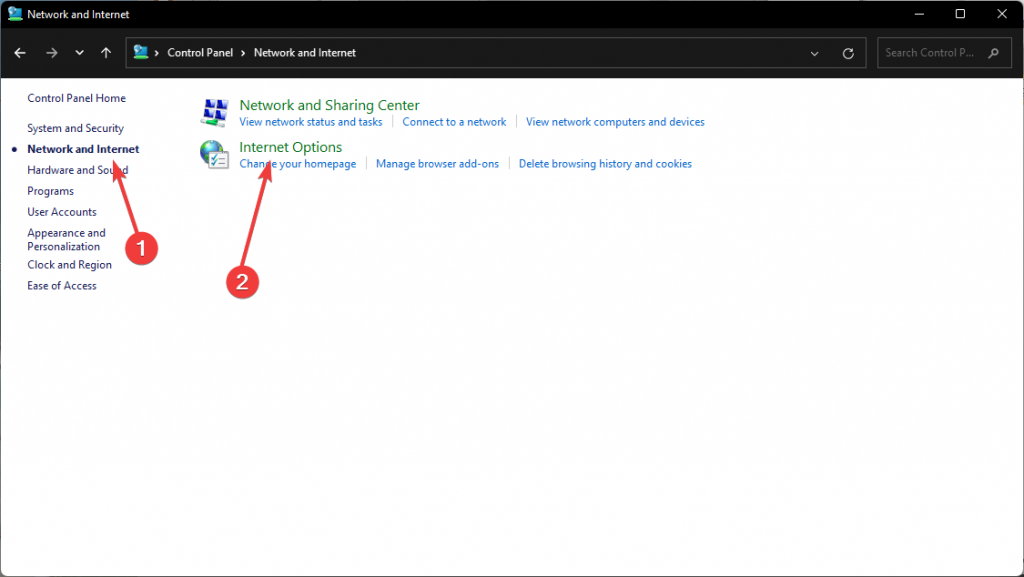
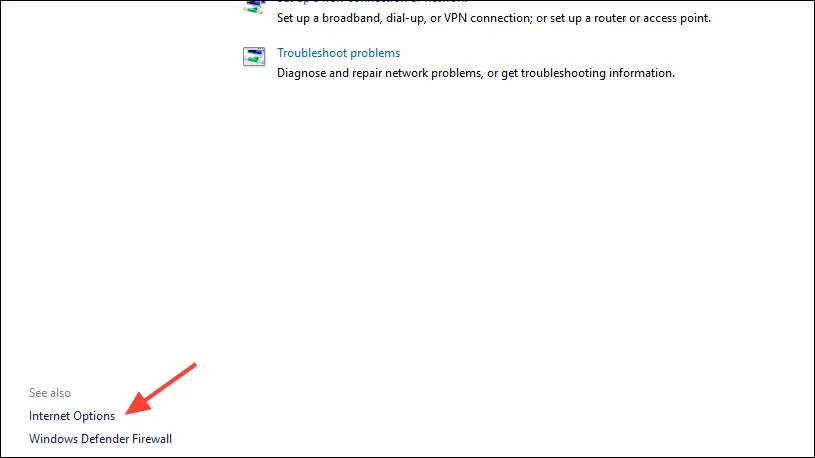
- Look for Network and Internet options. Next, choose Internet Options.
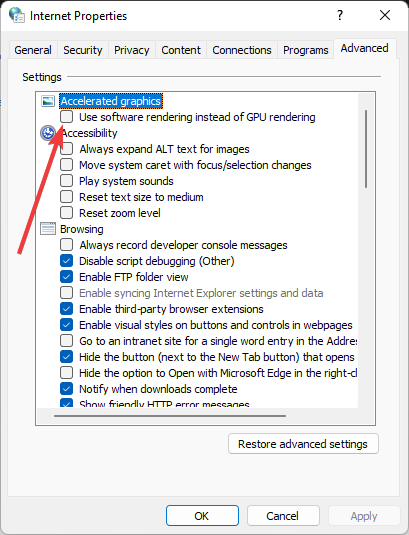
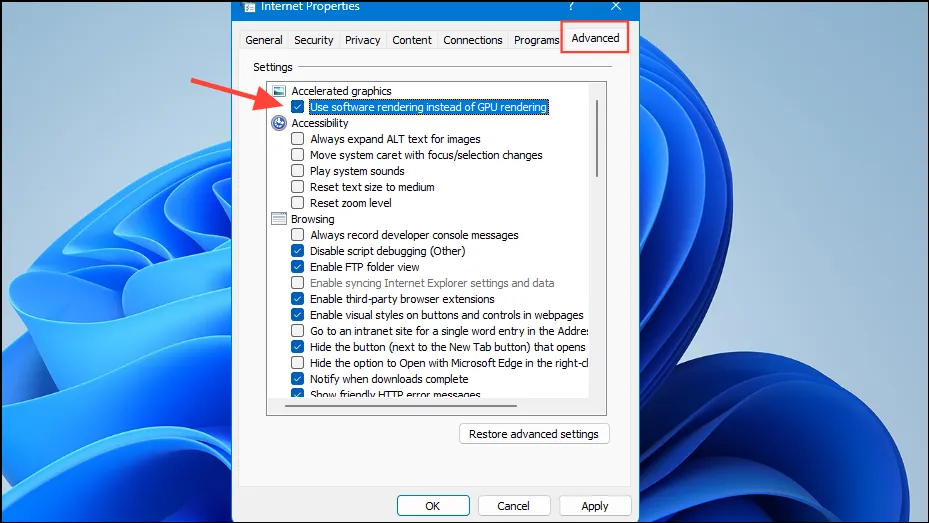
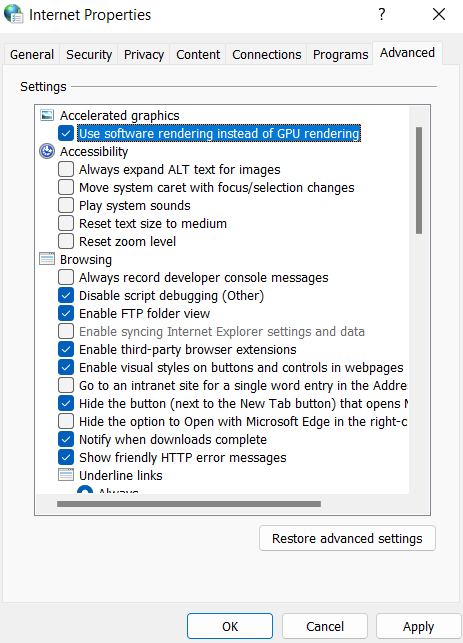
- Select the Advanced tab from the Internet Options window’s navigation bar. Under Accelerated graphics, tick the box that says Use software rendering instead of GPU rendering.
- Finally, click OK after selecting Apply.
6. Update Windows
Windows 11 gets new features, improvements, and bug fixes with each update. However, you can use an older version of Windows 11 if you don’t routinely update Windows. You should, therefore, check for and install any pending Windows updates as soon as possible.
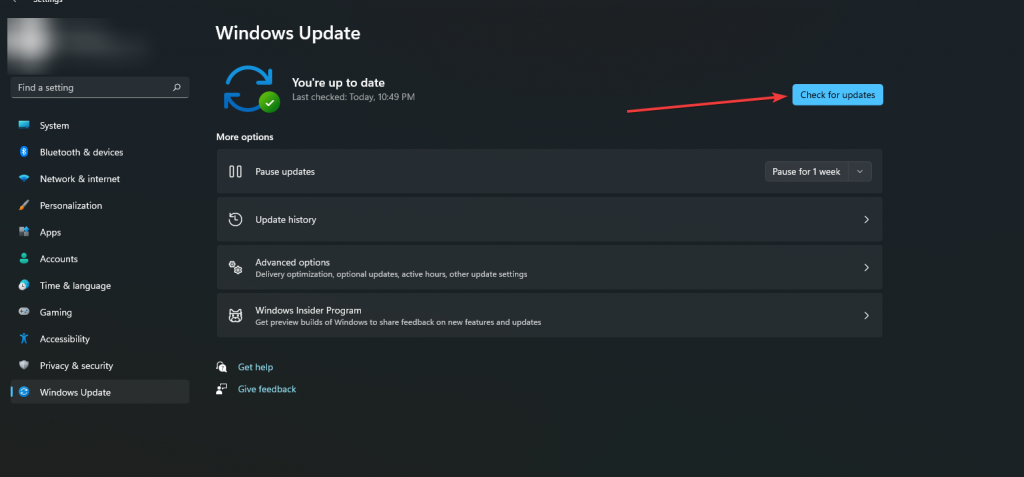
- To check for updates on Windows, open the Settings app.
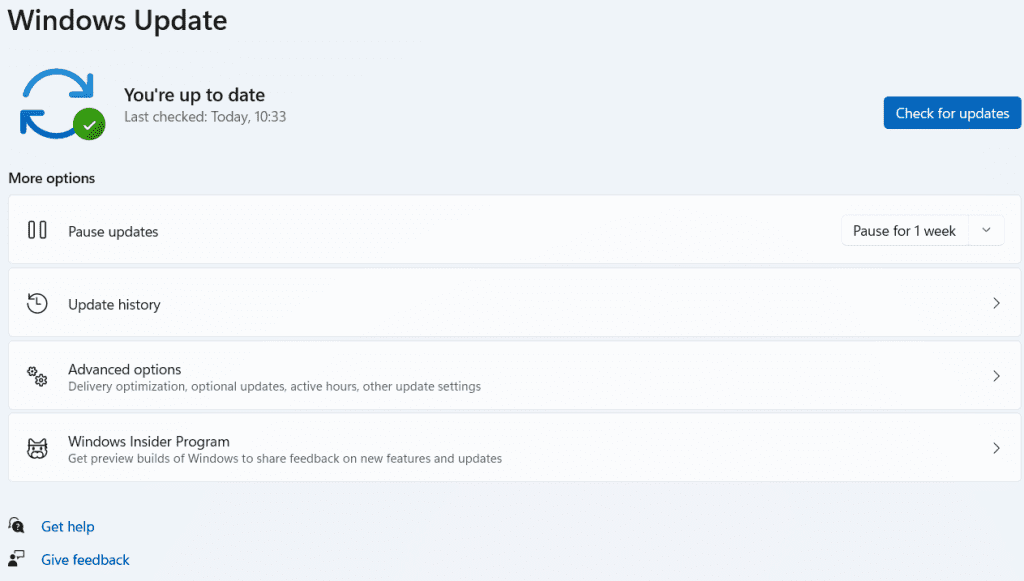
- On the Windows Update tab, click the Check for Updates icon in the top-right corner.
7. Disable Hardware Acceleration
If you’re having trouble with Netflix or YouTube video lag, try turning off hardware acceleration in your browser.
- Go to Settings of your browser and type hardware acceleration into the Search box.
- Turn off hardware acceleration and restart your browser.
What to do if the solutions don’t work?
You can try two workarounds, but as these aren’t fixed, they might only be effective in certain situations.
- Disable background processes: Low-spec PCs sometimes struggle to run many programs at once, especially when viewing multimedia content. To free up additional system resources for playing videos, close all the unwanted programs that are currently operating in the background. You can use Task Manager to list and force-stop background apps.
- Reduce Video Resolution: The experience of watching high-quality videos might often be jerky or choppy. Try lowering the 1080p video resolution to 720p or even 480p. Using any third-party software, you can compress a big video file that is having problems playing.
Conclusion! Smooth video playback with Stellar Repair for Video
Since Microsoft usually updates Windows to fix any potential bugs or issues, and these updates usually contain driver updates, the chances that your OS is the root of the issue are slim. That is why we suspect that the issue is with your video file, and you should try using Stellar Repair for Video before attempting any other fixes mentioned in the list.
You can download the free version of the software and use the free trial to see if it can fix video playback stuttering on Windows 11. The demo version will fix 20% of the total video size and provide you with a preview. This way, you can ensure that you are paying for a genuine service that will eliminate video stuttering.
How much does the Stellar Repair for Video subscription plan cost?
You will have to pay a subscription, ranging from $49.99 for the Standard version to $69.99 for the more feature-rich premium edition. If you intend to use the program frequently and for more than a year, there are additional 2-year subscription options available. These are more expensive, but overall, you’ll end up saving money.
Can I fix the videos stored on my smartphone?
The program cannot be installed on a smartphone, but you may transfer the files to a computer and then use Stellar Repair for Video software to fix them.
How much time does Stellar Repair for Video take to repair a file?
The time it takes for the program to fix your files will depend on the severity of the damage and the number of files in the repair queue because you can add several videos to be fixed at once. However, the program often needs a few seconds to fix a single file.
Was this article helpful?
YES1
NO
Если вы обнаружили, что видео зависает или тормозит на вашем ПК с Windows 11, возможно, системные настройки настроены неправильно. Это также может вызвать другие проблемы с воспроизведением видео, не позволяя вам наслаждаться фильмами и шоу на вашем устройстве. К счастью, вы можете справиться с такими проблемами и наслаждаться плавным воспроизведением видео в приложениях для воспроизведения мультимедиа, а также в потоковых сервисах, изменив системные настройки на вашем ПК следующими способами.
Настройте параметры воспроизведения видео.
Приложения для воспроизведения мультимедиа на базе универсальной платформы Windows (UWP), такие как Windows Media Player, Photos и даже сторонние опции, такие как Netflix и Hulu, полагаются на видеоплатформу, встроенную в ОС. Таким образом, вы можете найти различные настройки в самой Windows, которые могут помочь настроить воспроизведение видео в этих приложениях.
- Откройте приложение «Параметры» из меню «Пуск» или с помощью
Win+Iярлыка и нажмите «Приложения» слева.
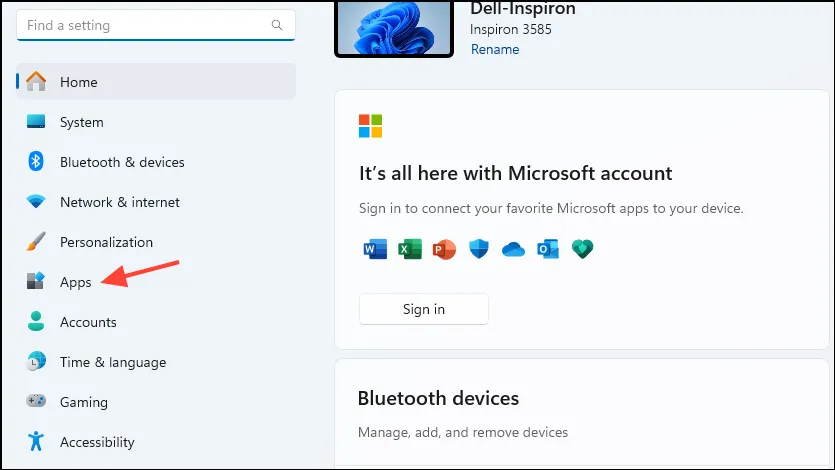
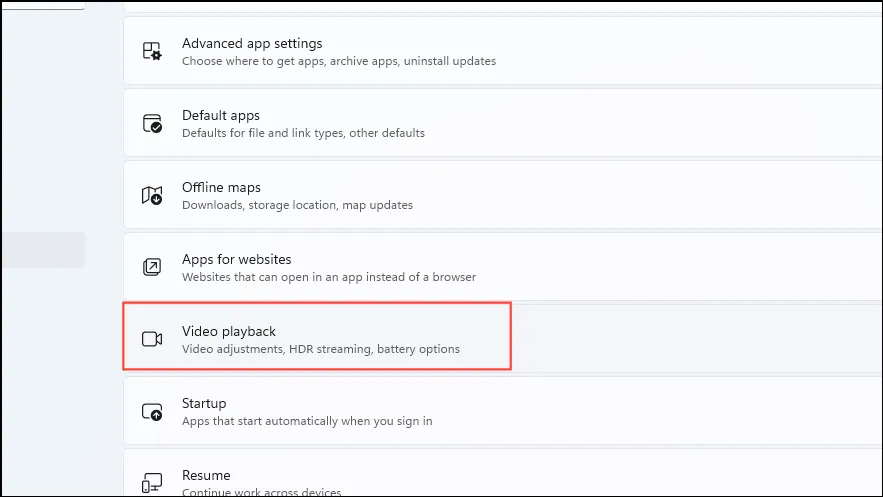
- На странице приложений нажмите «Воспроизведение видео».
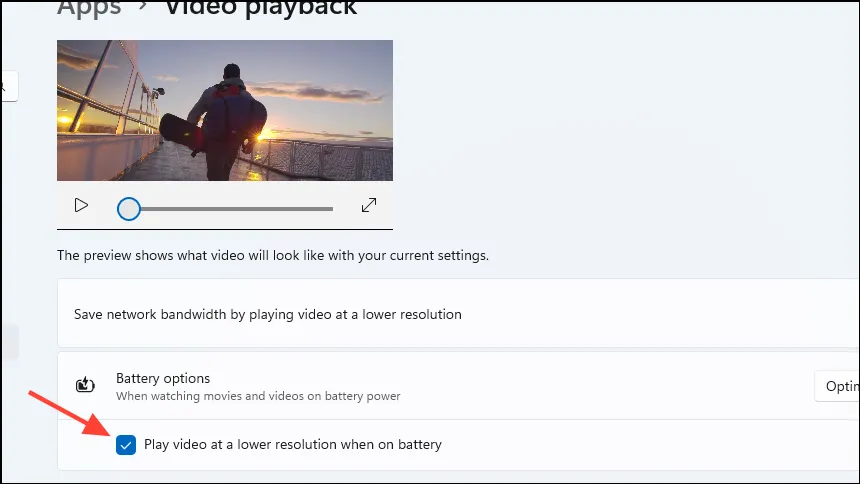
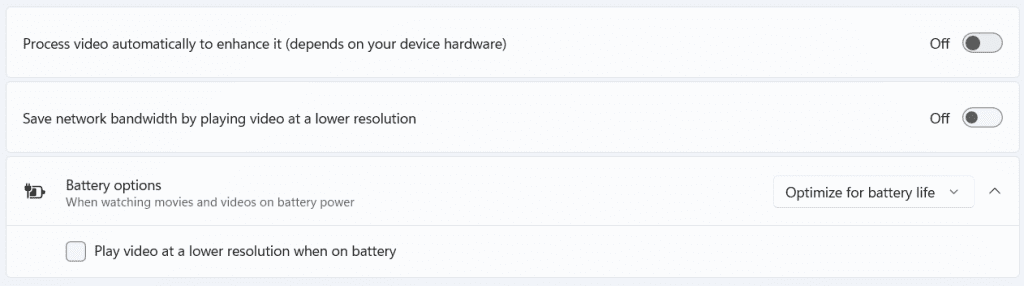
- Здесь вы можете выбрать, воспроизводить ли видео с более высоким или более низким разрешением. Первый вариант будет использовать большую пропускную способность, а второй может быть полезен, когда вы хотите сэкономить пропускную способность. Если скорость вашей сети низкая, включение этой опции путем нажатия на переключатель может предотвратить буферизацию и задержку видео.

- В качестве альтернативы, если вы отключите эту опцию, вы увидите другую опцию, которая позволяет вам экономить электроэнергию, снижая разрешение видео, когда ваш ноутбук работает от батареи. Это также может помочь предотвратить задержку видео.
- Вы также можете найти другую опцию, которая автоматически регулирует видео в зависимости от окружающего освещения. Отключение этой опции также может обеспечить более плавное воспроизведение.
Примечание: В некоторых системах вы можете найти опцию, которая позволяет Windows 11 автоматически обрабатывать видео и улучшать их. Отключение этой опции также может помочь улучшить воспроизведение видео.
Измените настройки батареи
Если вы используете ноутбук с Windows 11 для просмотра видео и часто делаете это, когда устройство работает от аккумулятора, вы можете изменить настройки, чтобы улучшить воспроизведение видео или продлить срок службы аккумулятора.
- Если вы хотите максимально продлить срок службы аккумулятора вашего устройства, вы можете отключить опцию, которая регулирует видео в зависимости от внешнего освещения, когда ваше устройство работает от аккумулятора.
- Кроме того, вы можете снизить разрешение видео, чтобы продлить срок службы аккумулятора вашего ноутбука.
Примечание: Windows 11 также предлагает поддержку High Dynamic Range (HDR) на определенном оборудовании. Если у вас есть эта опция, вы можете включить ее, чтобы получить более живое и яркое видео в программах, видео и играх. Параметр HDR присутствует в разделе «Дисплей» в приложении «Параметры».
Несколько полезных советов
Вы также можете воспользоваться некоторыми из этих советов, чтобы добиться более плавного воспроизведения видео на вашем ПК с Windows 11.
Совет 1: Включите программный рендеринг
Если у вас проблемы только при потоковой передаче онлайн-видео, включение программного рендеринга может помочь решить проблему. Это может быть особенно удобно, если ваш графический процессор довольно старый.
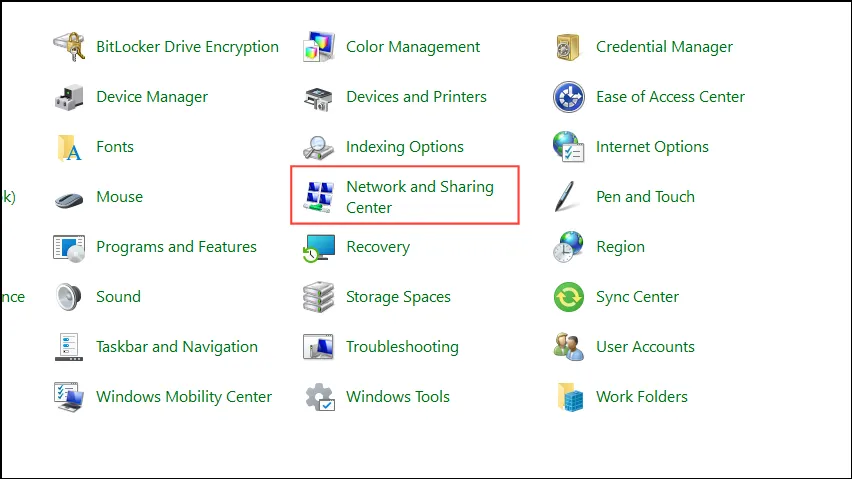
- Откройте Панель управления из меню «Пуск» и выберите «Центр управления сетями и общим доступом».
- Затем нажмите «Свойства обозревателя» в левом нижнем углу.
- Когда откроется диалоговое окно «Свойства обозревателя», перейдите на вкладку «Дополнительно» и установите флажок «Использовать программный рендеринг вместо рендеринга GPU», чтобы включить его. Затем нажмите кнопку «ОК».
Совет 2: Измените настройки графики для медиаприложений
Windows 11 также позволяет вам настраивать графические параметры для отдельных программ, например, для приложений воспроизведения мультимедиа. Вы можете изменить настройки, чтобы ОС отдавала приоритет производительности, что обеспечивает плавное воспроизведение видео.
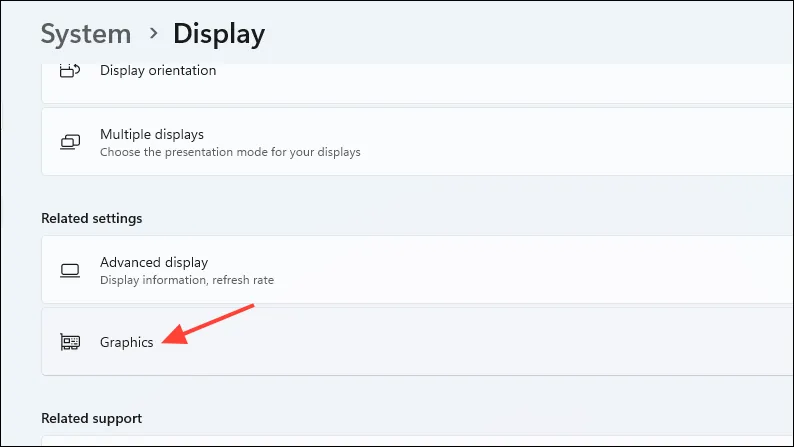
- Откройте приложение «Настройки» и нажмите «Система» слева.
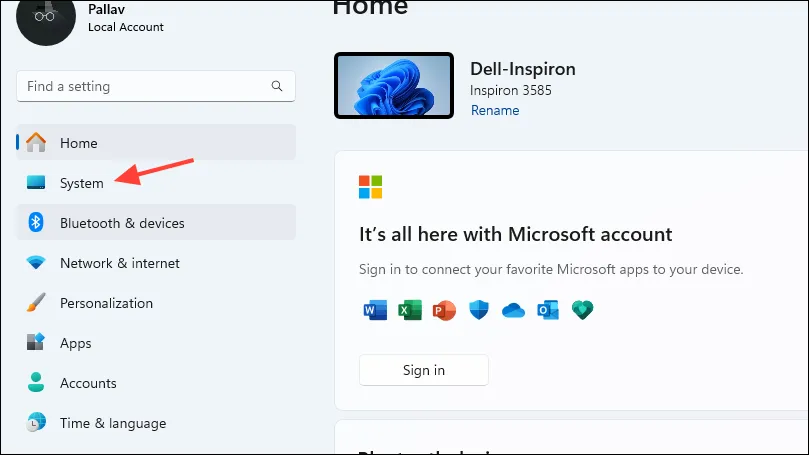
- На странице «Система» нажмите «Дисплей».
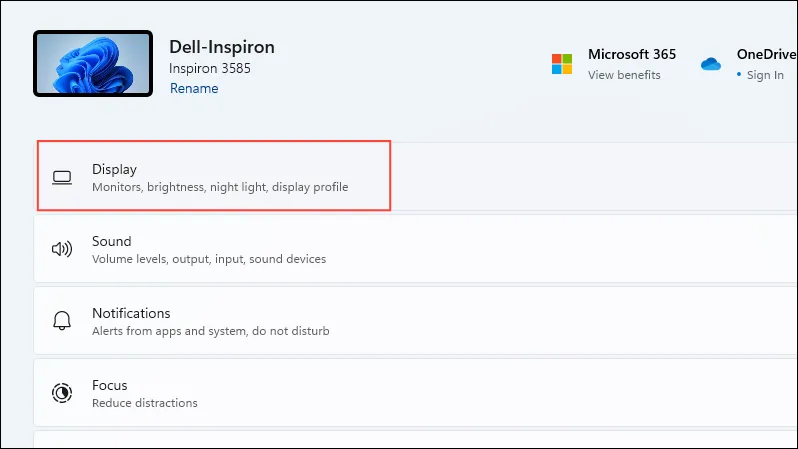
- Прокрутите страницу вниз до раздела «Сопутствующие настройки» и нажмите «Графика».
- Теперь вы увидите несколько приложений на этой странице. Нажмите на приложение, например, на ваше приложение для воспроизведения мультимедиа, чтобы развернуть раскрывающийся список.
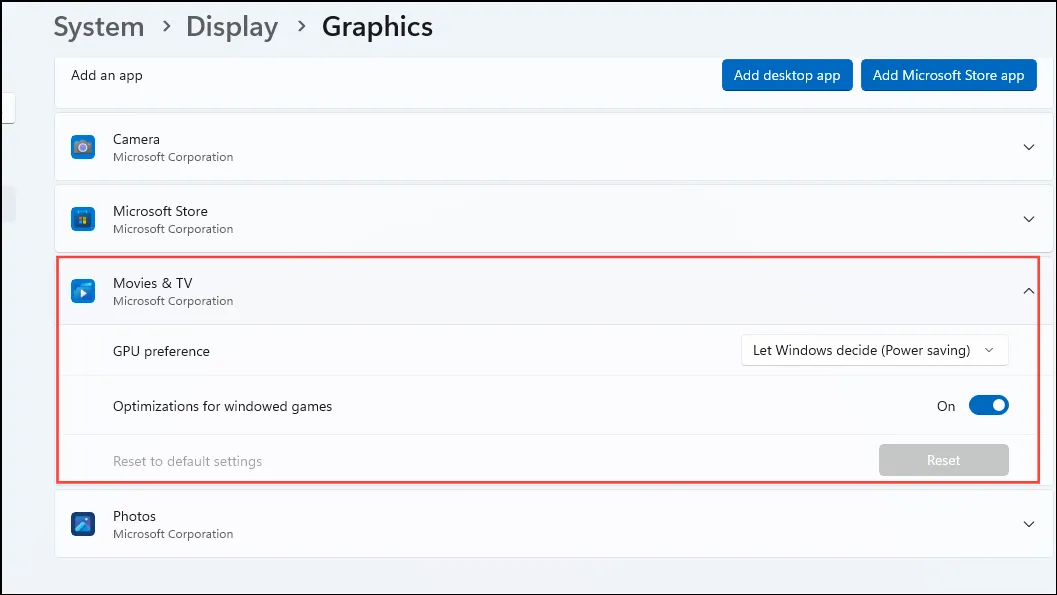
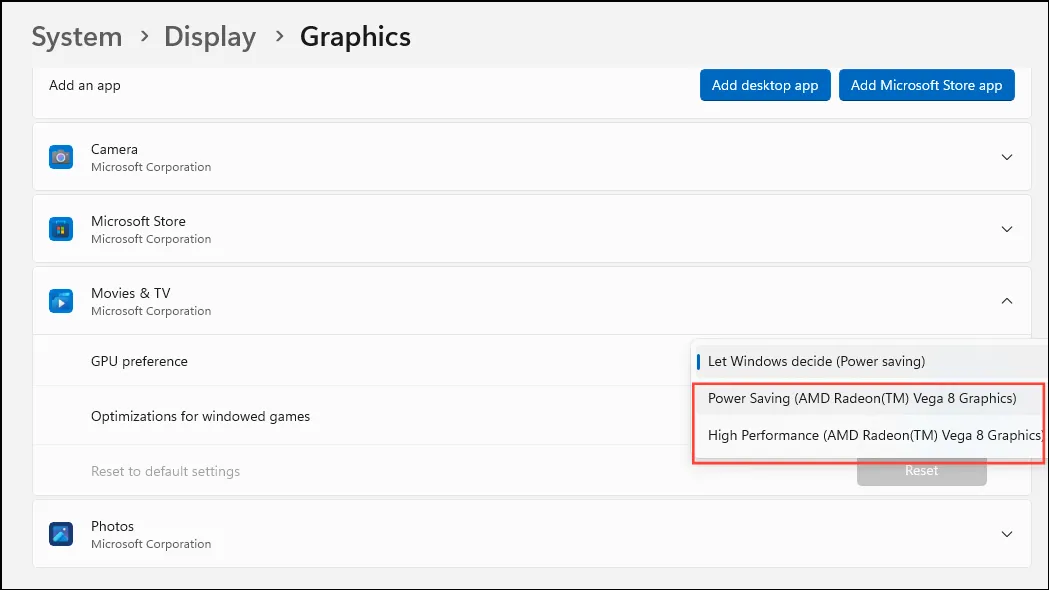
- Нажмите на раскрывающееся меню «Предпочтения графического процессора» и выберите «Энергосбережение», если ваше устройство работает от батареи. С другой стороны, если вы хотите повысить производительность, выберите «Высокая производительность».
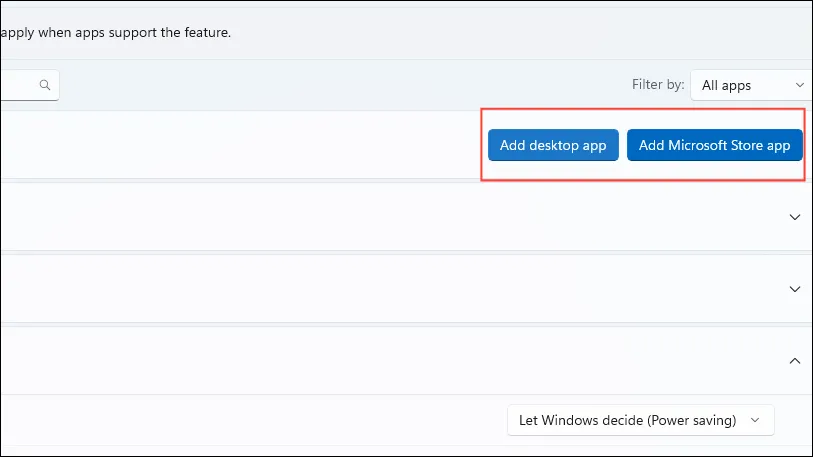
- Вы также можете добавить дополнительные приложения, для которых вы хотите настроить параметры графики, нажав кнопку «Добавить приложение для рабочего стола» или «Добавить приложение Microsoft Store» вверху. Это позволяет вам добавлять другие приложения, которые вы используете для воспроизведения мультимедиа, и управлять их параметрами графики отсюда.
Совет 3: Отключите аппаратное ускорение
Аппаратное ускорение позволяет программам разгружать определенные процессы, такие как декодирование и рендеринг, на GPU или графический процессор, поскольку он может выполнять эти процессы более эффективно, чем CPU. Это освобождает CPU для других задач и может помочь повысить производительность. Однако, поскольку аппаратное ускорение не всегда стабильно, его отключение иногда может помочь добиться более плавного воспроизведения.
В зависимости от приложения, которое вы используете для просмотра видео, существуют различные способы отключения аппаратного ускорения. В большинстве случаев для этого вам потребуется зайти на страницу настроек приложения.
Что нужно знать
- Вам также следует проверить видеофайлы, которые вы пытаетесь воспроизвести. Попробуйте воспроизвести те же файлы с помощью разных приложений. Если все приложения испытывают проблемы при воспроизведении этих видеофайлов, проблема может быть в самих файлах. Они могли быть повреждены, в этом случае вам придется заменить их.
- Убедитесь, что ваше приложение для воспроизведения мультимедиа обновлено до последней версии. Старые приложения могут содержать ошибки или по иным причинам не воспроизводить определенные форматы видео. В качестве альтернативы попробуйте сбросить его, что может помочь избавиться от сбоев, влияющих на воспроизведение видео.
- Вы можете найти сторонние инструменты для восстановления поврежденных или испорченных видеофайлов, а затем попробовать воспроизвести файлы снова после их восстановления.
- Другие действия, которые вы можете предпринять для улучшения воспроизведения видео, включают обновление Windows до последней версии, проверку и установку обновлений графических драйверов, отключение ненужных фоновых приложений и запуск сканирования ПК на наличие вредоносных программ.
Просмотров: 252
As we see, many Windows users have upgraded their older versions to Windows 11, to take advantage of the latest and most advanced features. One cannot deny that the UI of Windows 11 is far superior to that of any other existing Windows version.
However, the latest OS version is not free from issues. Video playback problems have been widely reported by users after upgrading to Windows 11. Here’s how you can fix Windows 11 playback or stuttering issues.
- What are the Possible causes behind the video lag or stutter issue
- How do I get my videos to stop lagging on Windows 11?
- Method 1. Run Video Playback Troubleshooter on Windows 11
- Method 2. Try to disable video processing on Windows 11
- Method 3. Make changes to video playback settings
- Method 4. Update the Display Drivers
- Method 5. Use software rendering to fix Windows video lag
- Method 6. Check for new Windows updates
- Method 7. Use Professional Video Repair software
- Conclusion:
What are the Possible causes behind the video lag or stutter issue
- Outdated graphics drivers
- Windows is not updated with the latest updates
- Playing video with an obsolete media player
- Video file corruption
- Improper System Configuration
- Incorrect Media player settings
- Malware Infection
How do I get my videos to stop lagging on Windows 11?
To fix the video stuttering issue in Windows 11, you can try the following methods:
Method 1. Run Video Playback Troubleshooter on Windows 11
The first thing you can do is try to play the videos on other media players. If you are having similar problems with other media players, you can seek assistance from Windows troubleshooters. You can let Windows detect and resolve any playback issues by running the video playback troubleshooter. Here’s how you can do it:
- Press the Windows key + I and open the Settings app. Select Troubleshoot from the System tab.
- Navigate to Other Troubleshooters.
- Run the Video Playback Troubleshooter.

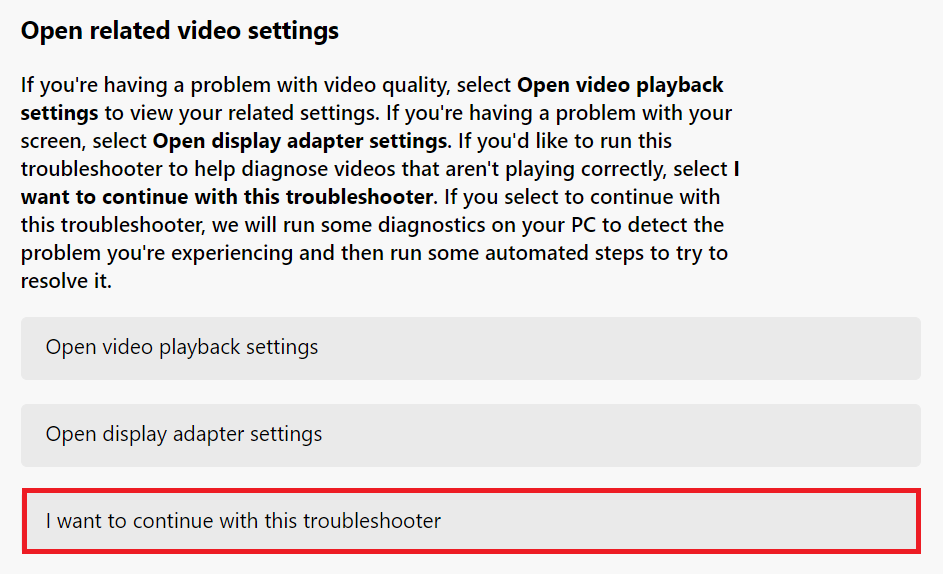
- A prompt will show up, click on I want to continue with this Troubleshooter.
Method 2. Try to disable video processing on Windows 11
To improve your video playback experience, your Windows 11 PC includes a video enhancement feature. However, if your hardware is incompatible with those enhancements, you may have difficulty playing videos. Hence, it’s best to avoid using it.
- Open the Start Menu and select Settings from the drop-down menu.

- On the left, select the Apps tab. Then, navigate to the Video playback settings.
- Deactivate the switch next to ‘Process video automatically to enhance it.’
Method 3. Make changes to video playback settings
If you’re experiencing video lag or audio delay while watching videos, try to lower the bitrate on Windows and see if that aids. Open the video playback settings and follow the steps below
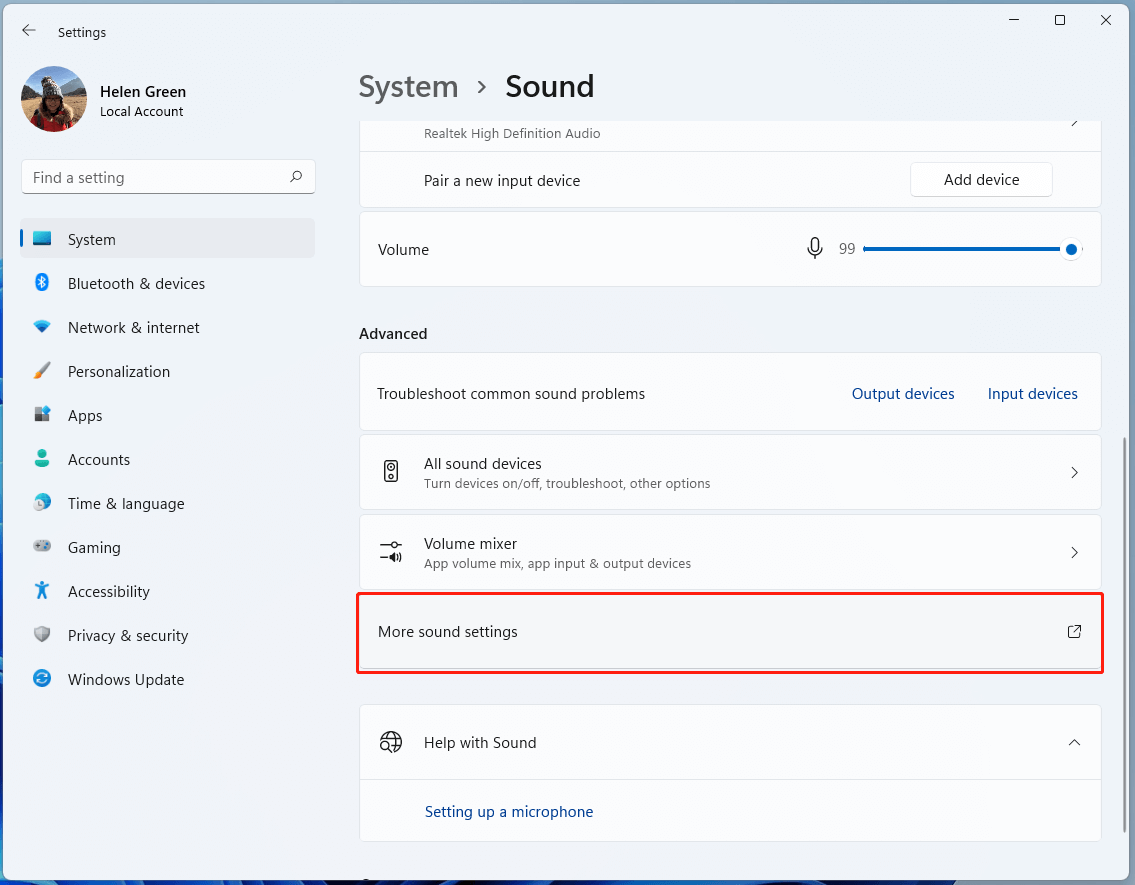
- To open Sound settings, right-click on the sound icon in the bottom right corner and navigate to Advanced settings.
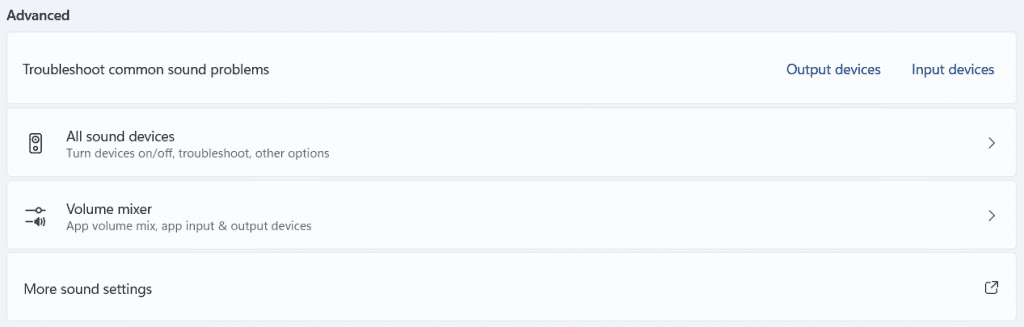
- Scroll down to reveal More sound settings.
- Right-click on your audio playback device and select Properties.
- Under Advanced, set the audio rate to 16-bit, 44100 Hz (CD Quality), and then click Apply and OK.

Method 4. Update the Display Drivers
Display drivers are in charge of displaying the graphical interface and videos in the best-supported format. Inevitably, if your PC’s display drivers aren’t working properly, it can cause issues like screen stuttering or videos not playing on Windows 11.
In such cases, updating your display drivers may be beneficial. Here’s how to do that.
- Click on the Windows key + X to bring up the Device Manager menu.
- Expand the Display adapter, then right-click on your graphics driver, and choose Update driver.
Restart your computer to make the changes take effect, and then check to see if the videos are playing properly.
Note: Check out the article, If you’re experiencing lag while playing videos in VLC player on Windows.
Method 5. Use software rendering to fix Windows video lag
If the problem with video playback is limited to streaming, you should enable software rendering on Windows. It makes sense, especially if your PC’s GPU chip is a little old. Follow the steps outlined below.
- In the Taskbar, click the Search icon, type in the control panel, and press Enter.
- Search for Internet options. Then select Internet Options.
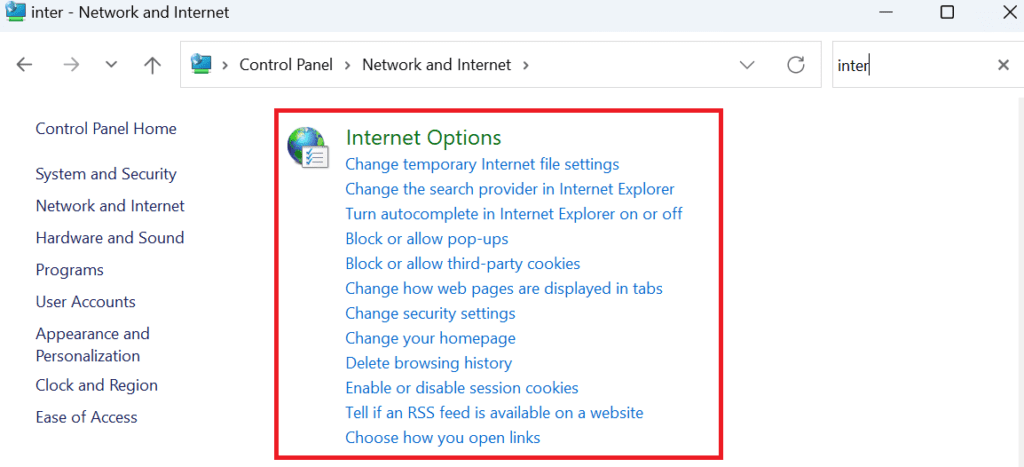
- Navigate to the Advanced tab in the Internet Options window. Mark the checkbox that says ‘Use software rendering instead of GPU rendering‘ under Accelerated Graphics.
- Finally, press Apply and click on OK.
Method 6. Check for new Windows updates
Windows 11 receives new features, advancements, and bug fixes with each update. However, if you do not regularly update Windows, you may be running an older version of Windows 11. As a result, you should check for and install any awaiting Windows updates as soon as possible.
- Open the Settings app and click on Windows Update.
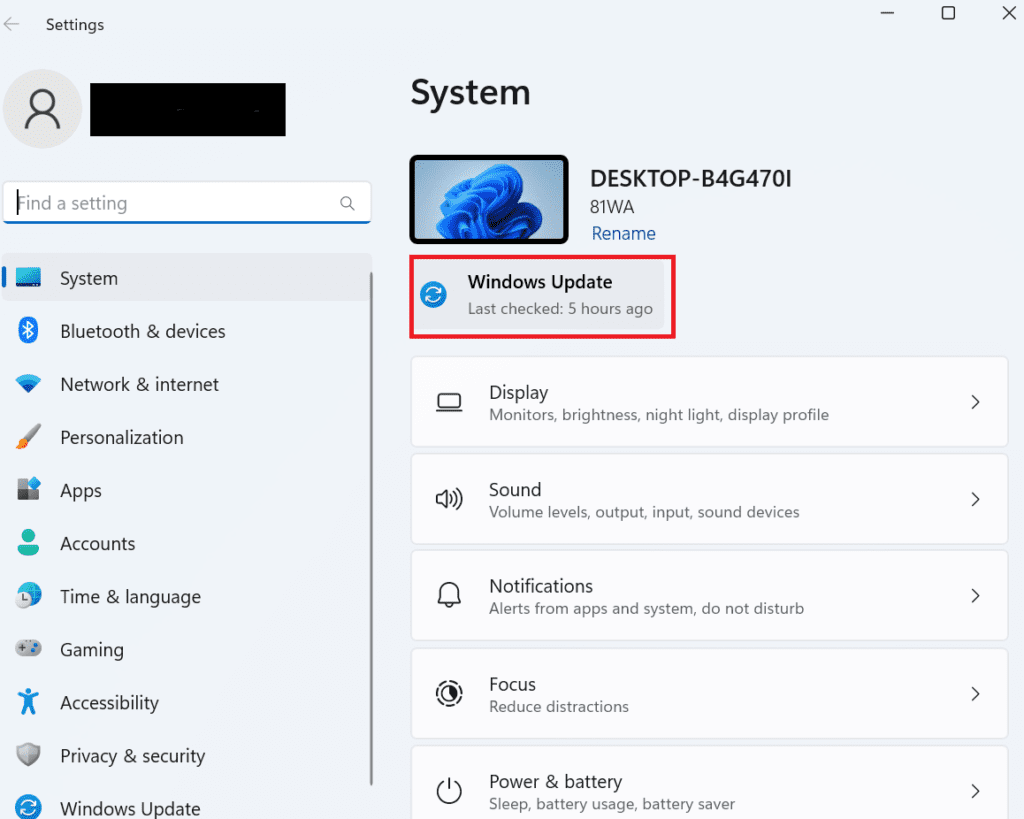
- Click the Check for Updates button in the upper right corner of the Windows update tab.
Similarly, if you’ve signed up for the Windows Insider Program to get newer Windows builds when they’re available, you’re likely to encounter issues because these builds are highly unstable. To avoid such problems, consider switching to a stable build.
The methods listed above will assist you in fixing the video playback issues in Windows 11. When the issue is only with one video or several videos, even after modifying the drivers or software rendering, the problem is with the videos themselves. Hence, you need a reliable video repair tool to fix choppy or corrupt videos.
Method 7. Use Professional Video Repair software
Remo Video Repair is a sophisticated tool designed to repair any corrupted video. It can repair any video file format, including MOV, AVI, MP4, DVIX, and many others. It includes a three-click methodology that allows you to repair any videos.
You can also repair 4k and 8k videos, as well as videos shot on drones and CCTV. Remo Video Repair is available for both Mac and Windows, including the most recent versions of Windows 11 and macOS Ventura. Download now to resolve video playback issues quickly.
- Download Now For Windows
- Download Now For Mac
You can download and install Remo Video Repair Tool and follow the methods to fix videos lagging on Windows 11:
1. Click on Select File for the video that needs to be repaired.
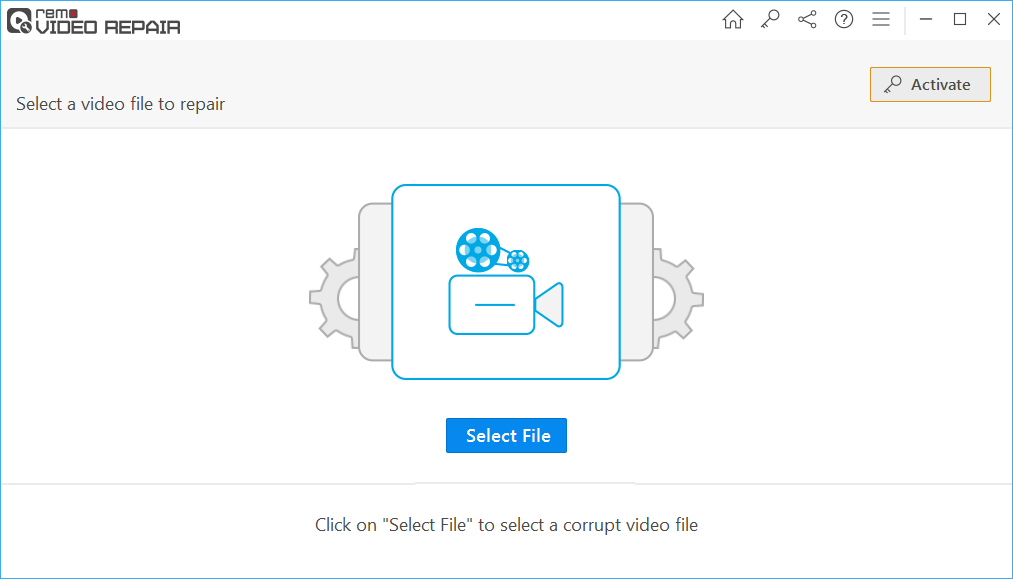
2. To begin repairing a corrupted or damaged video, click the Repair button.

3. Once the repair process is completed, click the Save button to restore the healthy video file. This will resolve the video lagging on Windows 11.
Conclusion:
The methods listed above will resolve video lag issues on Windows 11. If you still have videos that aren’t playable or corrupt, use the Remo video repair tool to help you fix them. If you have any questions, please leave them in the comments section below.
About the Author: Molly Owen
Molly is the Lead Technical Specialist with distinguished knowledge and understanding of Mac computers and operating systems. Being a veteran photographer and video recovery specialist, Molly’s expertise in video formats and file repair has helped restore a lot of videos and cherished memories of users. As a technical specialist, she also believes in learning and…
Quick Tips
- Run the Windows Media Player troubleshooter from the Settings app.
- Search for Turn Windows Features On or Off from the Start menu, and turn on Media Features.
- Re-install or Reset Windows Media Player to get rid of corrupted files.
Fix 1: Check the File Format
The latest Windows Media Player is built to work with all the popular audio and video formats. Unfortunately, it doesn’t support all of them. The possibility is high that the Media Player doesn’t support the media file you are trying to play.
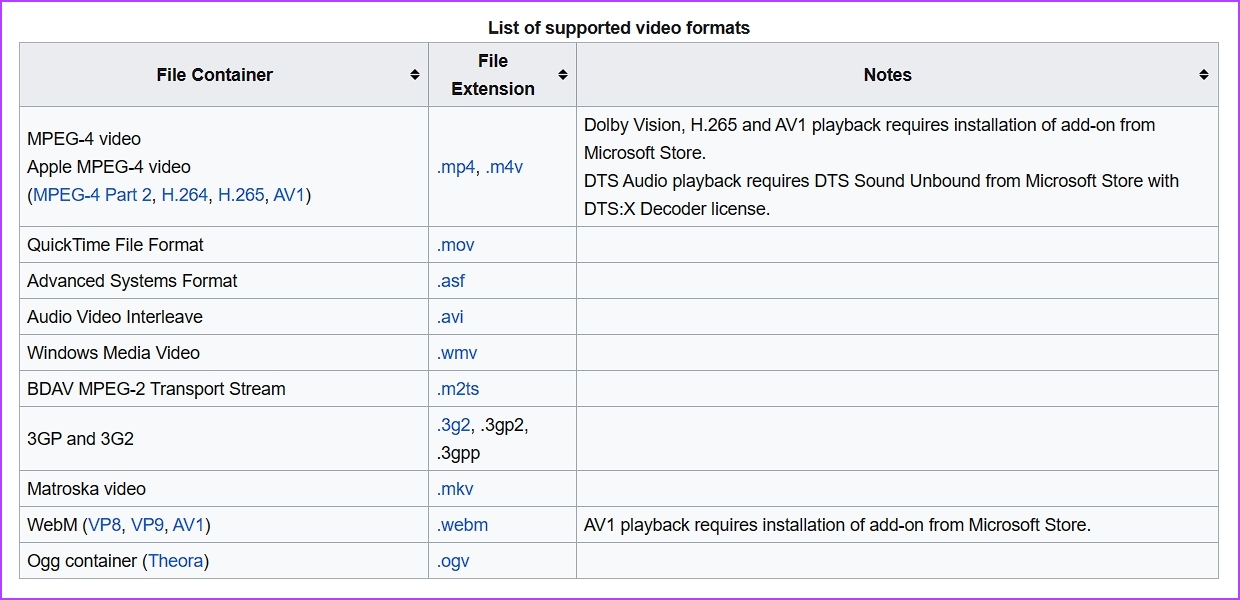
To check for that possibility, check the Windows Media Player file compatibility list and ensure your file is compatible. If it isn’t, change the file type to a compatible format.
Windows Media Player is a new application, so it is common to encounter issues. Fortunately, you can eliminate most of its issues, including the one at hand, using the Windows Media Player troubleshooter.
Step 1: Press the Windows + I keyboard shortcut to open the Settings app.
Step 2: Choose System from the left sidebar and Troubleshoot from the right pane.
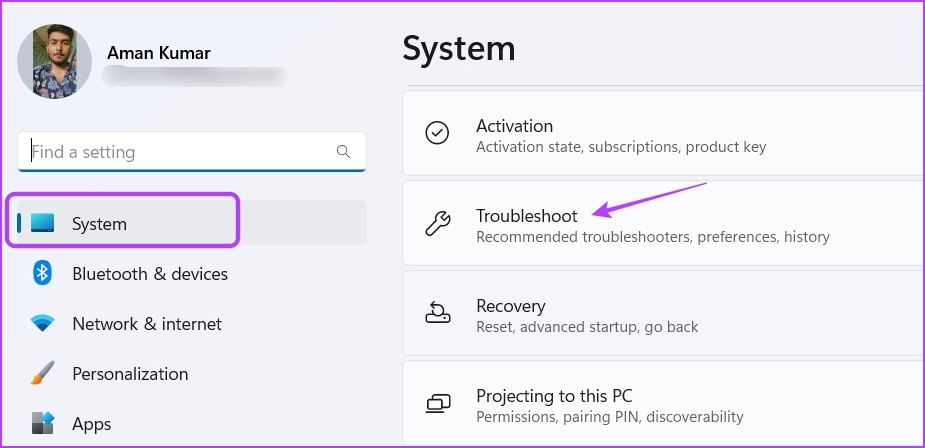
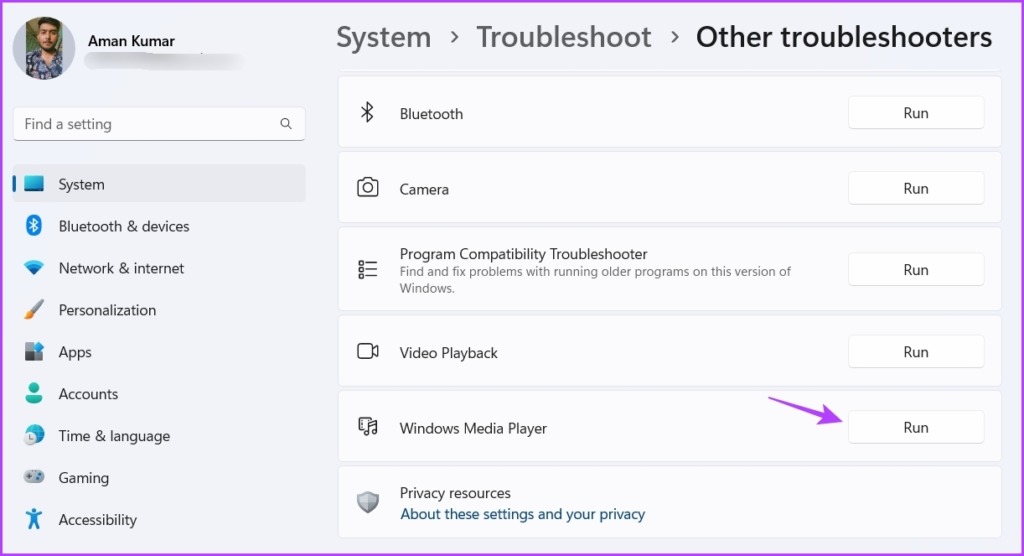
Step 3: Choose Other troubleshooters.

Step 4: Click the Run button next to Windows Media Player.
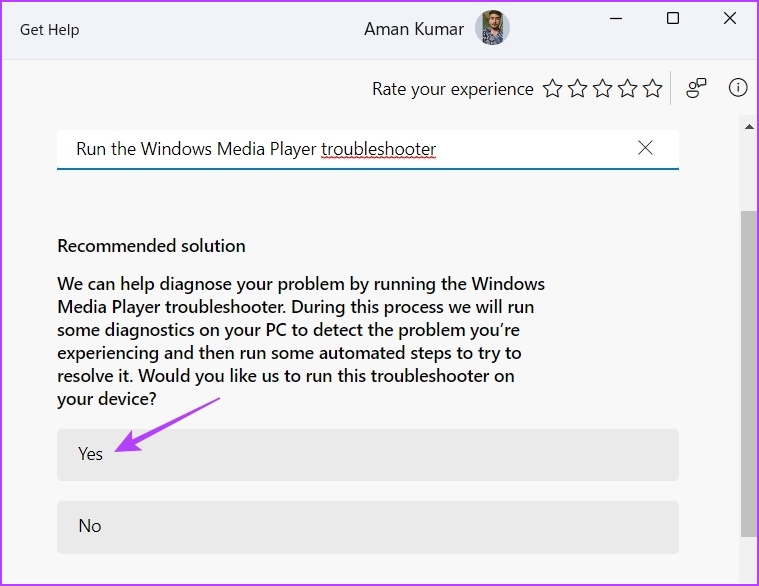
Step 5: In the Get Help window, click Yes to allow Windows to repair the found problems automatically.
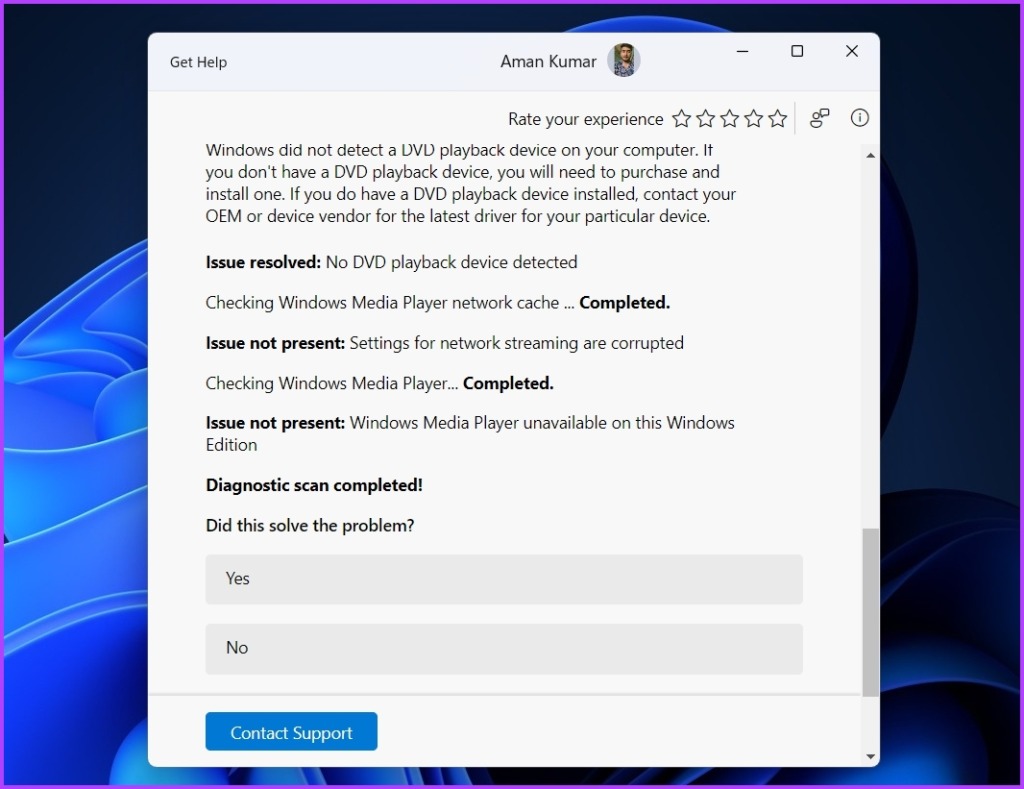
The Windows Media Player will look for any available issues and automatically fix them without much user input. After that, restart your computer and check for the problem.
Fix 3: Re-Register DLL Files
Dynamic Link Libraries (DLL) files are important to ensure programs perform their task properly. If the DLL files associated with the Windows Media Player get corrupt or missing, the app will struggle to work properly. The only way to fix these files is to re-register them.
Step 1: Press the Windows key to open the Start Menu.
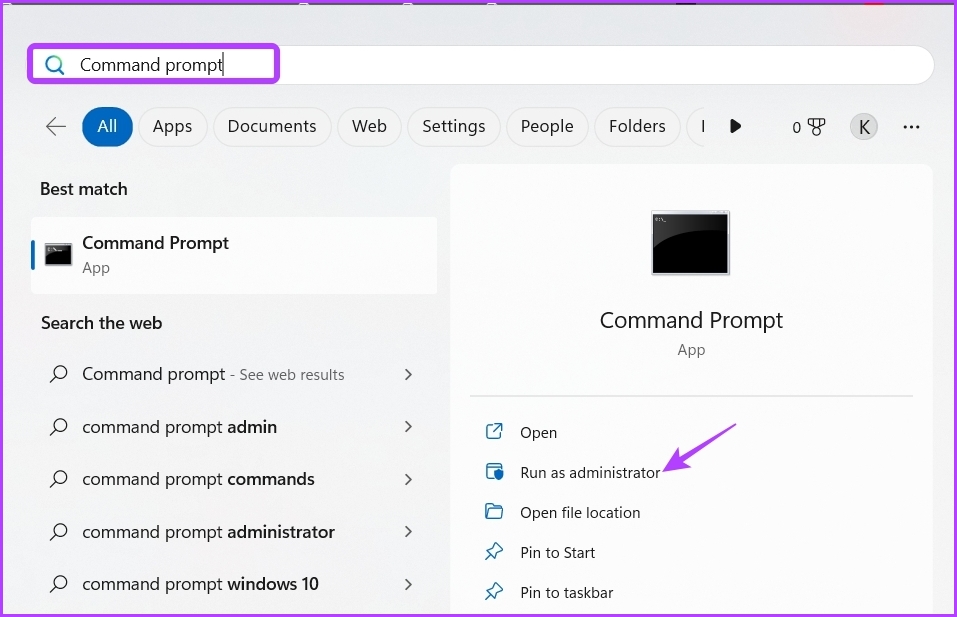
Step 2: Type Command Prompt in the search bar and choose Run as administrator from the right pane.
Step 3: Execute the following commands one by one:
regsvr32 vbscript.dll
regsvr32 jscript.dll
regsvr32 wmp.dll

After that, restart your computer and check for the issue. If it continues, try the next solution on the list.
If Windows Media Player is not functioning, it may be disabled in Windows Features. You’ll have to access Windows Features and enable Windows Media Player to fix the issue.
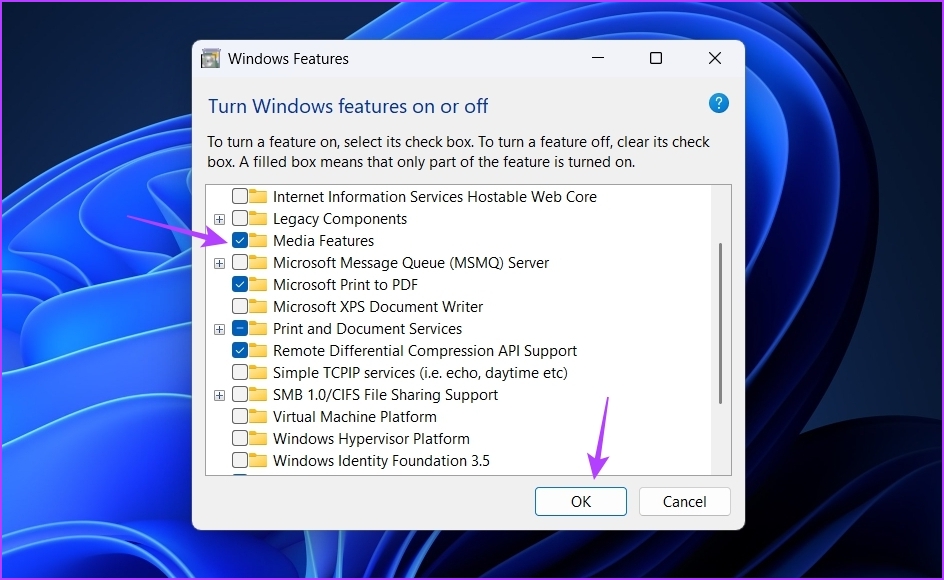
Step 1: Press the Windows key to open the Start Menu, type Turn Windows Features on or off, and press Enter.

Step 2: Check the Media Features box and click OK.
Another possible reason Windows Media Player is not working in Windows 11 is file corruption. You can quickly detect and eliminate corruption using the Windows repair feature.
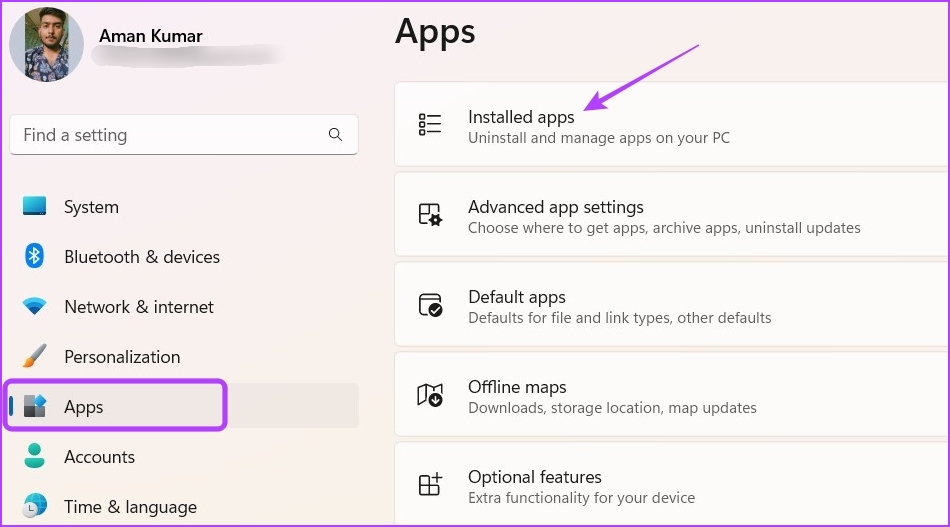
Step 1: Press the Windows + I keyboard shortcut to open the Settings app, choose Apps from the left sidebar, and then Installed Apps from the right pane.
Step 2: Click the three horizontal dots next to Media Player and choose Advanced options.

Step 3: Click the Repair button.
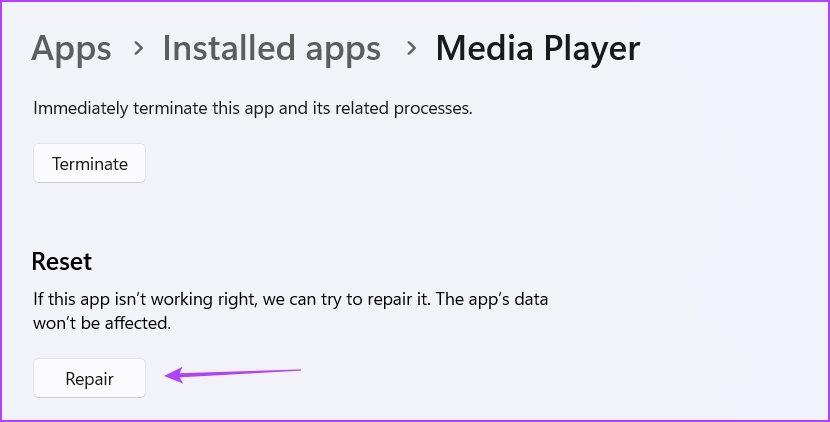
Wait till the repair process is complete. Once done, you’ll see a checkmark next to the Repair button. Now, check if the problem is resolved.
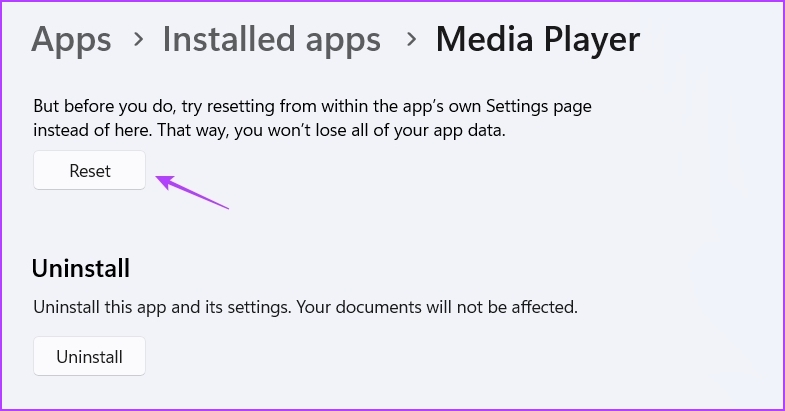
If not, you’ll have to reset the app, which will clear all its data. To reset the Media Player, open the Advanced options of the Media Player and click the Reset button.
Is the Windows Media Player still not working on Windows 11? Perhaps there’s corruption in installation files that is causing the issue.
Step 1: Press Windows + I keyboard shortcut to open the Settings app, select Apps from the left sidebar, and select Installed apps from the right pane.
Step 2: Click the three dots next to Media Player and choose Uninstall. Then, choose Uninstall again to confirm your selection.
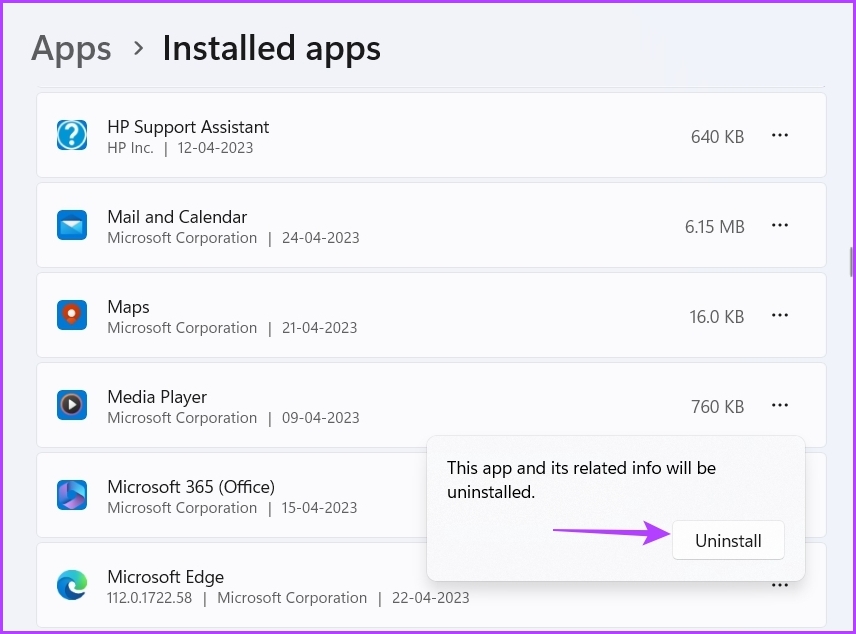
Now, restart your computer and download the Windows Media Player from the Microsoft Store.
Was this helpful?
Thanks for your feedback!
The article above may contain affiliate links which help support Guiding Tech. The content remains unbiased and authentic and will never affect our editorial integrity.
This article stated by videoconvert.minitool.com provides multiple ways to deal with the Media Player app not working issue in Windows 11. No matter you are using the new Win11 Media Player or the legacy Window Media Player, you will find a solution below.
You may encounter problems while using the Windows built-in media player such as the new Media Player in the latest Windows 11. You may receive an error message without any specific information explaining the issue.
If you are stuck in a playback problem, you may solve your problem with one of the below solutions.
1. Convert the Video to a Supported Format
It may due to the lack of the right codec on your computer to play the target media file. If so, you can either search/find, download and install the corresponding codec on your device, or convert the codec of the target file to a codec that is supported by Windows Media Player.
There is not much technical requirement for downloading and installing the correct codec. But if you can’t find it, you have to resort to codec conversion. To do that, you need to rely on professional and reliable media file-converting software like MiniTool Video Converter, which can convert most kinds of codecs to common codec types.
MiniTool Video ConverterClick to Download100%Clean & Safe
Just download and install this charge-free and limit-free program on your PC. Then, you can start your conversion and complete it in a few seconds.
2. Enable Software Rendering
If the video playback problem is limited to streaming, you may try to enable software rendering to fix the issue, especially when the GPU chip is a little bit old.
- Open Windows 11 Control Panel.
- Set to view its items by icons in the upper right corner.
- Find and click Internet Options.
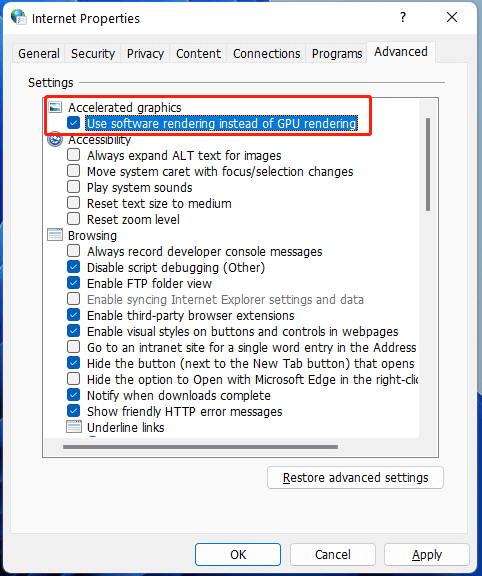
- In the Internet Properties popup, go to the Advanced There, tick the checkbox for “Use software rendering instead of GPU rendering” under the Advanced graphics section.
- Click Apply and then OK to save the settings.
3. Repair the Corrupted Video
You can’t play a video if it is damaged! If so, you need to repair it before you can view it. Thus, you need a video repair app like MiniTool Video Repair. Once repaired, you can play the video in your media player.
If you are unable to burn a CD or DVD with the self-contained media player, first of all, please make sure that the target disc has no content on it currently. If not and the optical disc is rewritable, you need to wipe out the data on the disc before you can burn new content onto it.
If Windows Media Player stops working right after updating your Windows OS, you can verify and fix this problem by restoring the system to its previous healthy state by relying on System Restore.
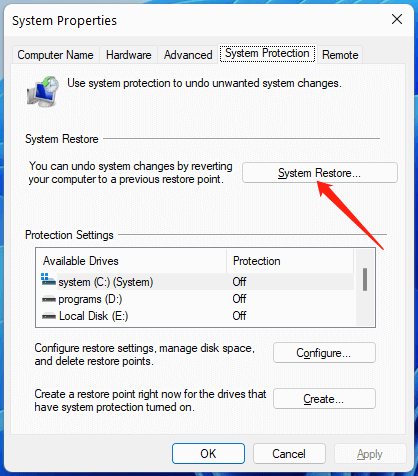
- Search “create a restore point” in the Windows Search box.
- Find the matched search result and open it.
- In the default System Protection tab of the new popup, click System Restore.
- Follow the instruction to choose the latest restore point right before the Windows Media Player update issue to restore to your PC.
- Then, carry out the restoration.
Wait patiently until the process completes. Then, just check whether the problem is solved or not.
If you fail to launch the Microsoft media player, you can handle the problem using one of the following ways.
1. Run Windows Media Player Troubleshooters
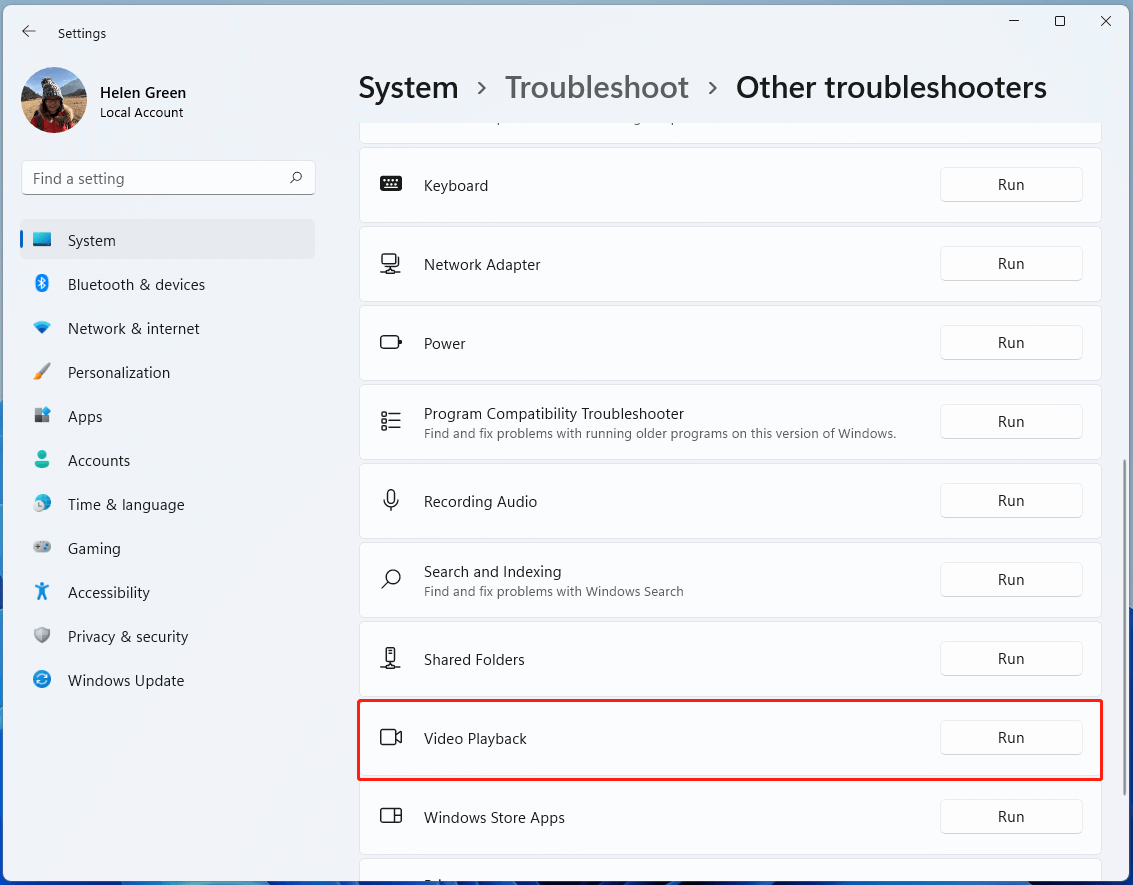
Navigate to Start > Settings > System > Troubleshoot > Other troubleshooters. Scroll down to find Video Playback and click the Run button on it. Then, just follow the onscreen instructions to finish.
Or, you can troubleshoot Windows Media Player-related utilities in Control Panel.
- Launch Windows 11 Control Panel.
- Find and choose Troubleshooting.
- Click View all in the left panel.
- Select Windows Media Player Library to start troubleshooting.
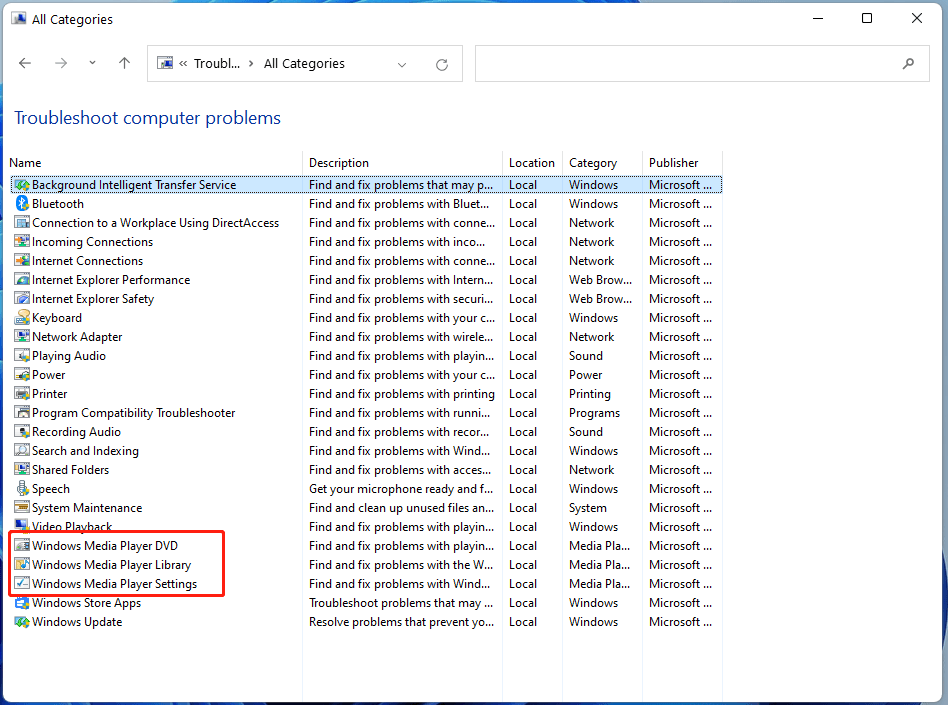
Follow the guide to complete the troubleshooting. If this process doesn’t fix your issue, you can use the same way to troubleshoot Windows Media Player Settings and Windows Media Player DVD.
2. Re-register Some DLL Files
In the second place, you can try to re-register some DLL files to resolve the problem. To achieve that, just run these commands in a command prompt (admin) one by one.
regsvr32 vbscript.dll
regsvr32 jscript.dll
regsvr32 wmp.dll
you are recommended to restart the PC after the process.
3. Remove Windows Media Player Library
The guide is below.
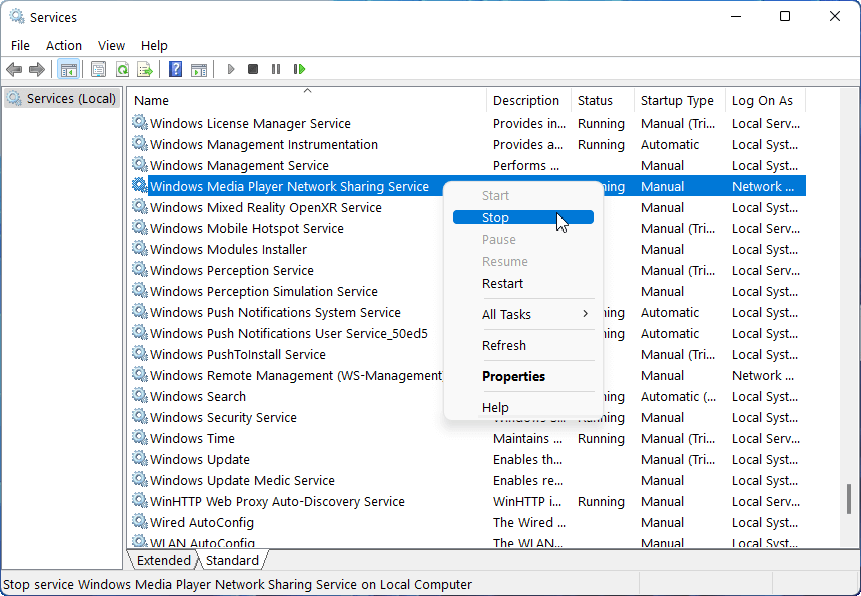
Step 1. Open Windows 11 Services app.
Step 2. Find Windows Media Player Network Sharing Service, right-click on it, and select Stop.
Step 3. Open Windows File Explorer and go to the location where you have installed the media player. Usually, it should be C:Users[Username]AppDataLocalMicrosoftMedia Player.
Step 4. Delete all the Windows media library (with a file extension of .wmdb) types of files.
Tips:
- If you can’t find the above address, just show the hidden files in file explorer. Click View > Show > Hidden items in the toolbar of the explorer.
- If you are not sure which file belongs to the Windows media library (.wmdb), just click View > Show > File name extensions.
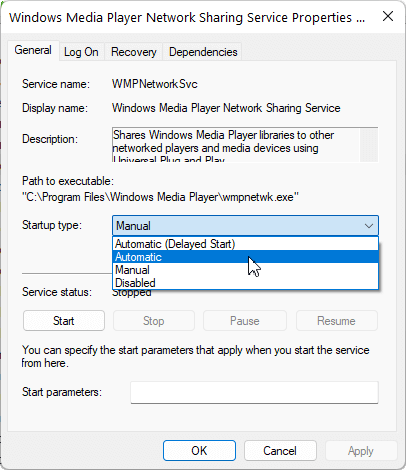
Or, you can double-click on the Windows Media Player Network Sharing Service in the Services app and set its startup type to Automatic in the next window. Then, click Apply > OK to save the changes.
4. Enable Windows Media Player in Windows Features
In a few cases, you may not enable the Windows Media Player feature on your computer. So, you can’t open and make use of it. If so, just turn it on and the problem will disappear.
- In Control Panel, choose Programs and Features.
- Select Turn Windows features on or off in the left menu.
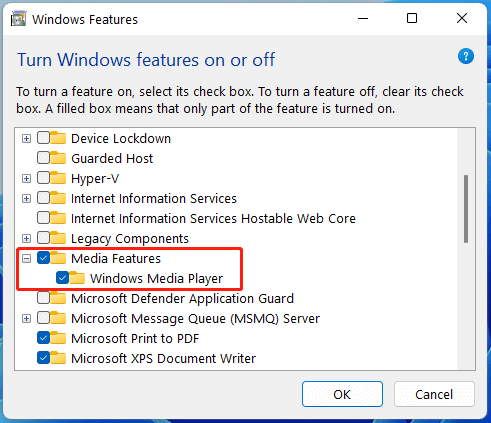
- In the new pop-up Windows Features window, scroll down to find Media Features and unfold it.
- In the expanded list, check Windows Media Player.
In general, there are several situations.
1. Disable Video Enhancement
If you have enabled the video enhancement feature on your computer but your hardware is not compatible with those enhancements, you might have trouble playing videos with a media player. So. You need to disable the utility to deal with the problem.
Just move to Settings > Apps > Video Playback and turn off “Process video automatically to enhance it (depends on your device hardware).
2. Update Graphics Driver
Graphics drivers are responsible to show the images in the videos. If there is an error with your computer’s display drivers, you will probably not be able to play video on Windows 11, at least you will get a bad viewing experience.
Therefore, make sure you have the latest graphics drivers installed on your device.
- Open Windows 11 Device Manager.
- Find and expand Display adapters.
- Right-click on your graphics driver in the sub-list and select Update driver.
- Then, follow the instructions to complete the task.
If your media player plays videos (has sounds) without any sound or with sound lag/delay, you can fix the problem with this method.
1. Right-click on the sound icon on the taskbar in the bottom right of your screen and choose Sound settings.
2. In the Sound Settings popup, scroll down to find and select More sound settings.
3. In the new window, click on your audio playback device and choose Properties.
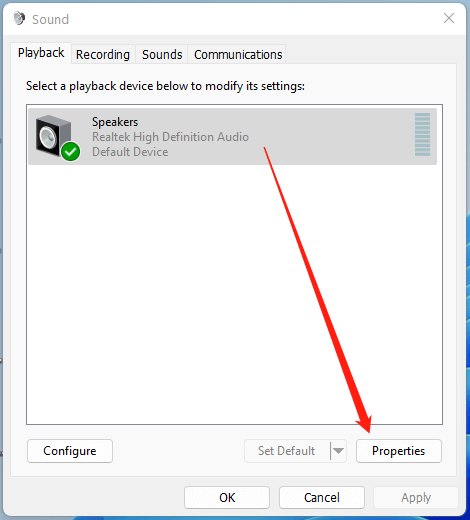
4. In the next Speakers Properties window, switch to the Advanced There, alter the sample rate and bit depth of the default sound to lower 16 bit, 44100 Hz (CD Quality).
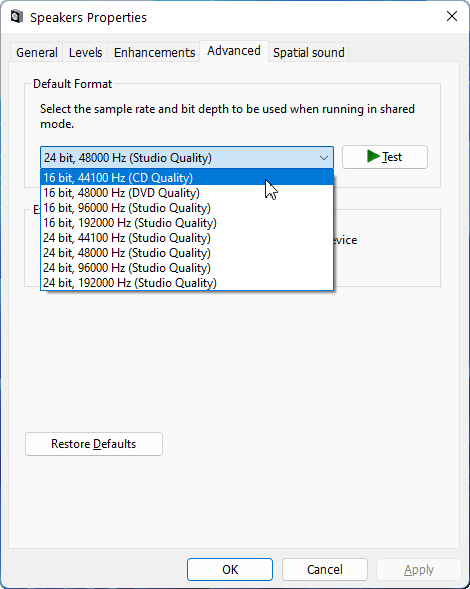
5. Click Apply > OK.
Or, you can refer to this article to find more solutions: Windows Media Player No Sound? Here Are Effective Solutions
In addition to the above specific solutions for specific situations, there are some other “all-mighty” methods that can be tried in any case.
1. Restart Media Player or Your Device
No matter which problem you encounter with Windows Media Player, you can stop your process and restart the app. Once restarted, just try again. Also, if only restarting the target program isn’t enough and the problem persists, you can try to restart your machine. That will close all the other apps and services and give you a new start, which will exclude the interference from other programs on your computer.
2. Reset and Repair Windows 11 Media Player
Secondly, you can try to reset the software to its default setting to stop the influences coming from your customized settings. That may repair the software features and make them work again.
3. Update Media Player
If you are not using the newest version of Windows Media Player, it is recommended that you update your program and get the bugs fixed for older versions. You can achieve that by checking app updates in Microsoft Store or updating your operating system.
However, in some cases, you may need to downgrade your player to a former stable version since there are new errors in the latest edition. To downgrade Media Player, you can find an installation package either by searching online or by asking for help from a friend who is still using an old version.
4. Reinstall Windows Media Player
Fourthly, you can try to uninstall and reinstall your app to get a completely new start. That can deal with the problems caused by incomplete/wrong installation, missing/damaged installation files, as well as possible virus attacks. Thus, you can get the media player to work smoothly again.
5. Scan the PC for Viruses
It is also possible that your computer is infected by malware or viruses and your system files are damaged. So, just carry out an SFC scan to detect and repair the corrupted files with previous backed copies. Just type sfc /scannow in a command prompt. When it finishes, don’t forget to restart your machine.
6. Use Media Player Alternative
Finally, if none of the above solutions work for you, you should abandon Windows 11 Media Player and take advantage of one of its replacements like the legacy Windows Media Player (which is still embedded in Win11), Groove Music, or a third-party media player such as VLC Media Player.
Also read:
- Does Windows 11 Have Media Player & What Are They + Alternatives
- Windows 11 New Media Player & Legacy Media Player Release Date
- [FIXED!] Windows Media Player Not Playing Video Only Sound
- 4 Methods to Fix Windows Media Player Not Working on Windows 10
- Windows Media Player Issues in Latest Windows 10 Updates