
В этой публикации, друзья, поговорим о том, как установить для программы или игры отдельный от всей Windows масштаб. В Windows мы можем использовать разный масштаб изображения. Но оптимальный для самой среды операционной системы, многих программ и игр масштаб не всегда приемлем в отдельных программах и играх, подчиняющихся системным настройкам экрана. В этих программах и играх увеличенный масштаб может отображаться размыто или перекошено, изображение может быть обрезанным. Современные версии Windows — 10 и 11 – предусматривают решение для таких случаев. Это решение – переопределение режима масштабирования. Также можно прибегнуть к масштабированию в панелях управления драйверов видеокарт.
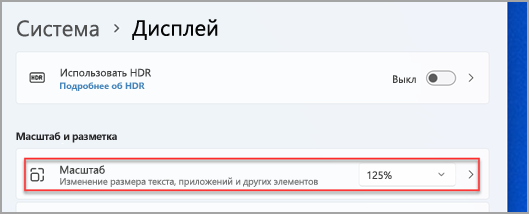
Итак, друзья, в Windows мы можем использовать не только исходный 100%-ный масштаб изображения, но также увеличенный. В Windows 10 и 11 системный масштаб настраивается в приложении «Параметры» по пути:
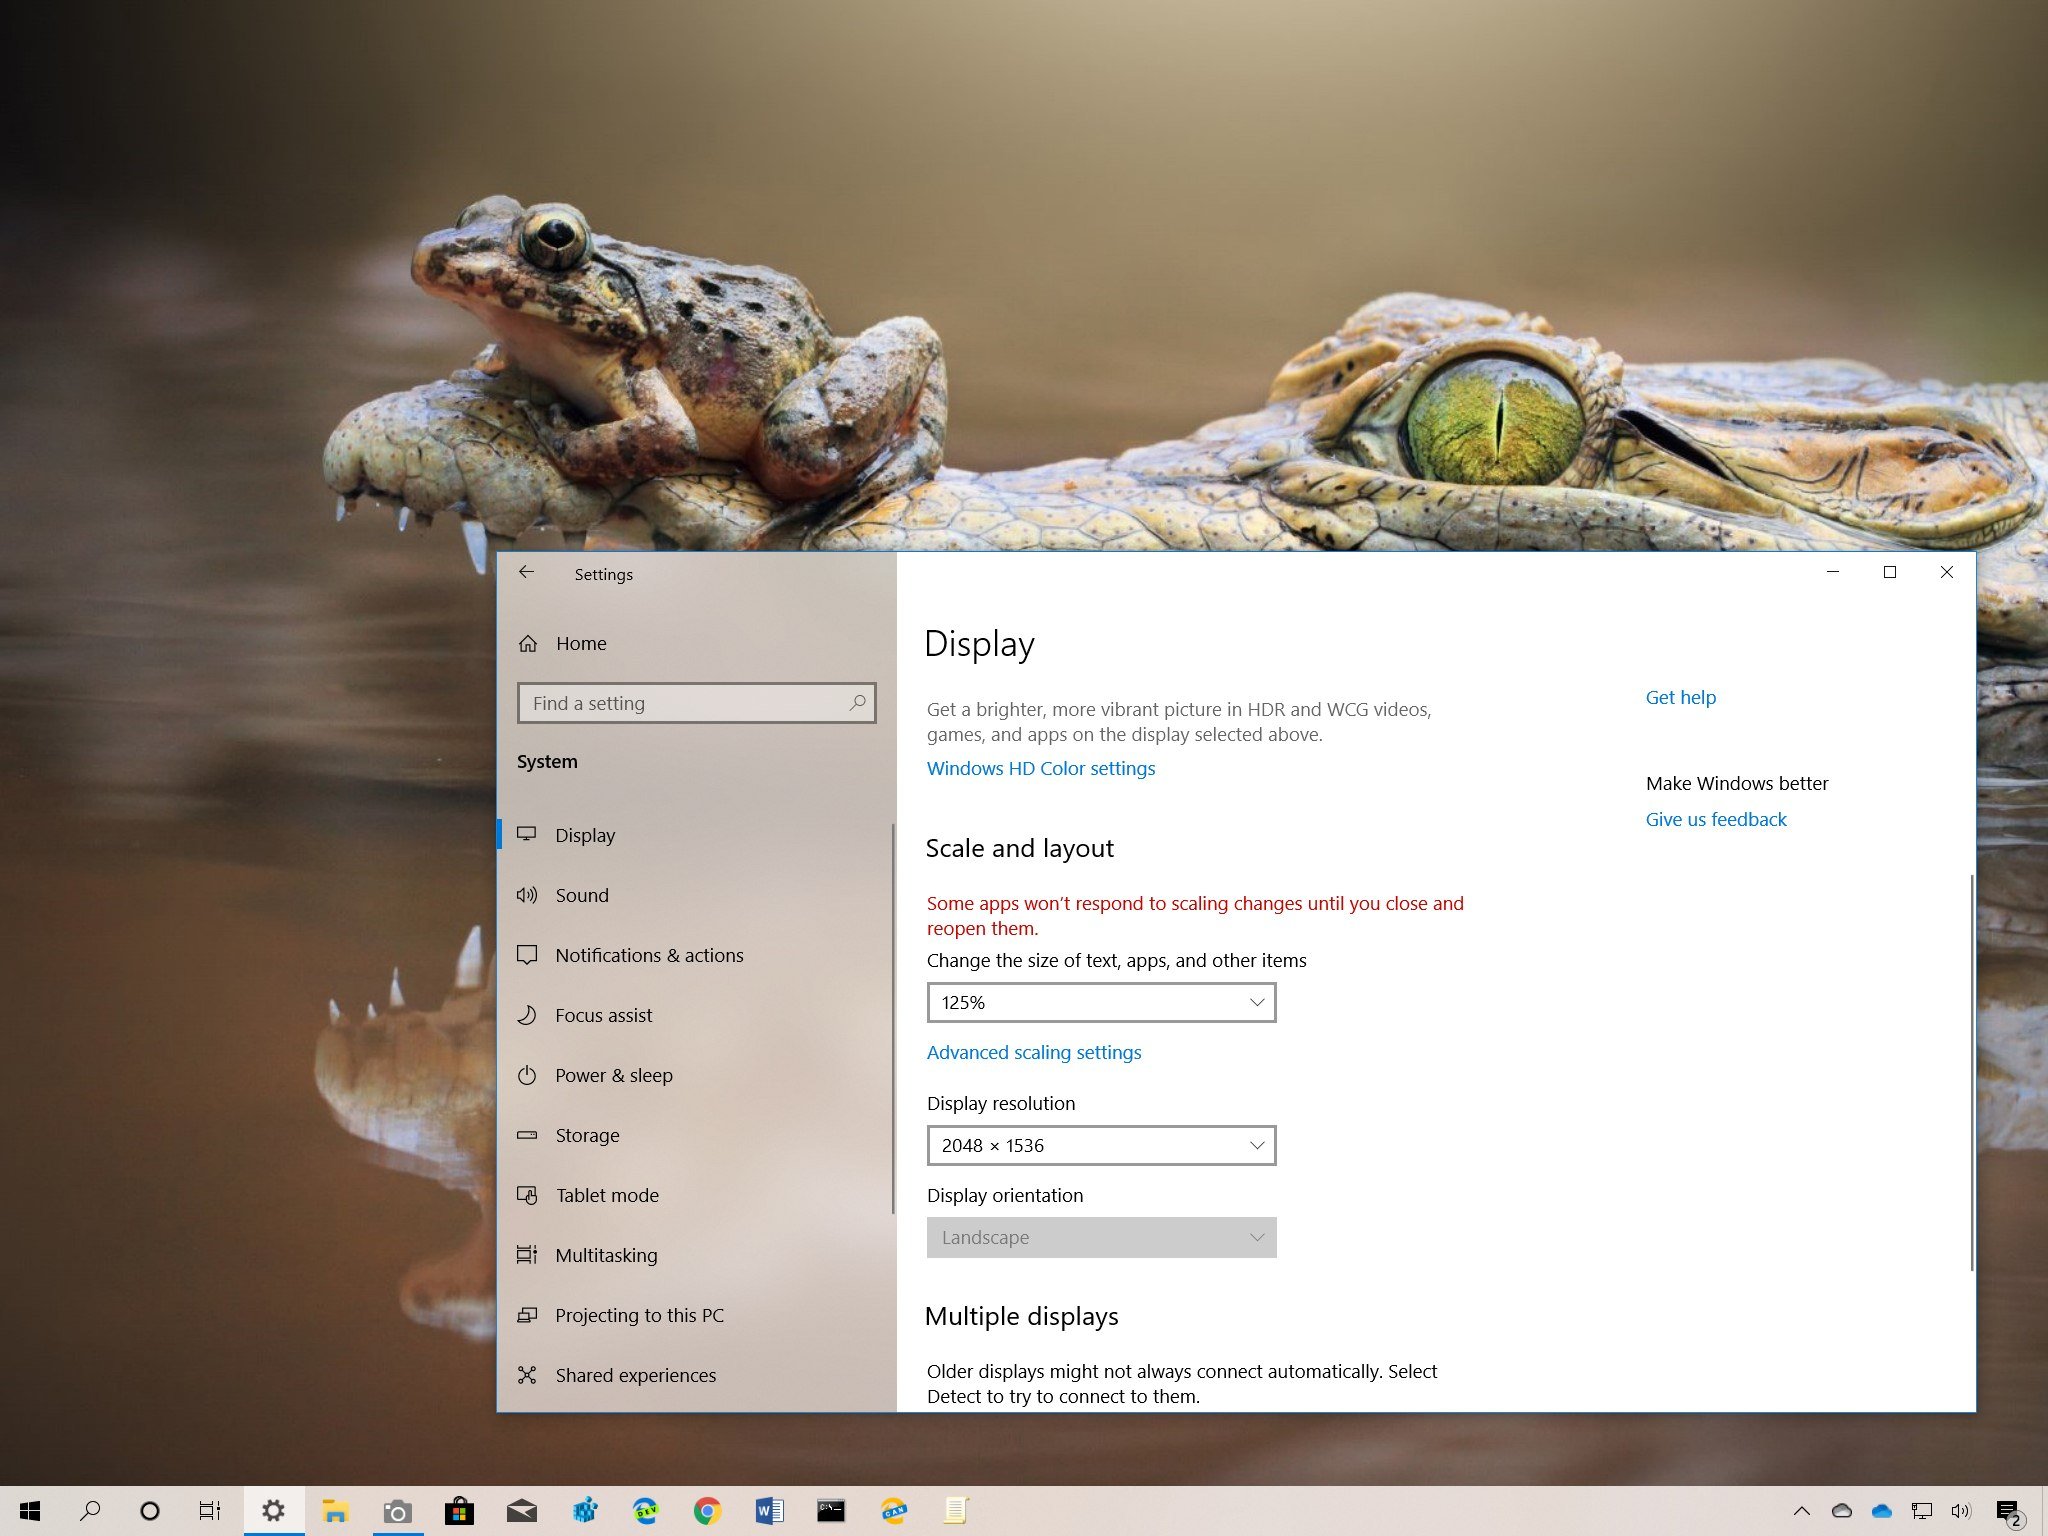
Здесь нам доступны стандартные значения увеличения масштаба — 100%, 125%, 150%, 175%. И мы можем выбрать дополнительные настройки масштабирования.
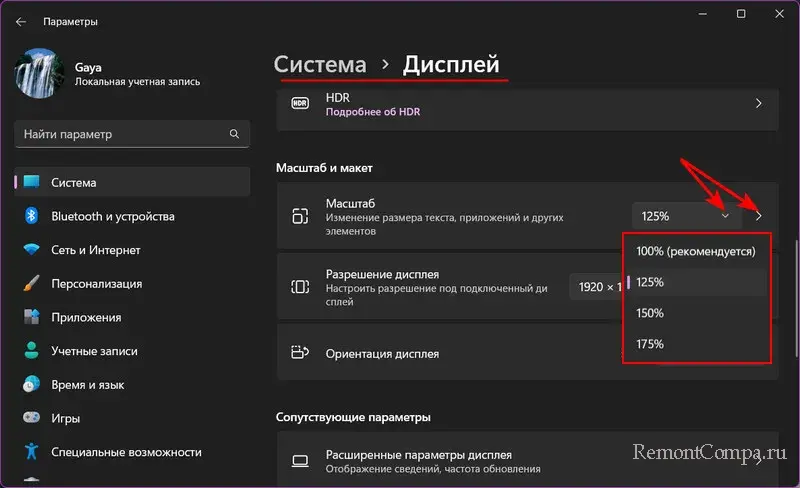
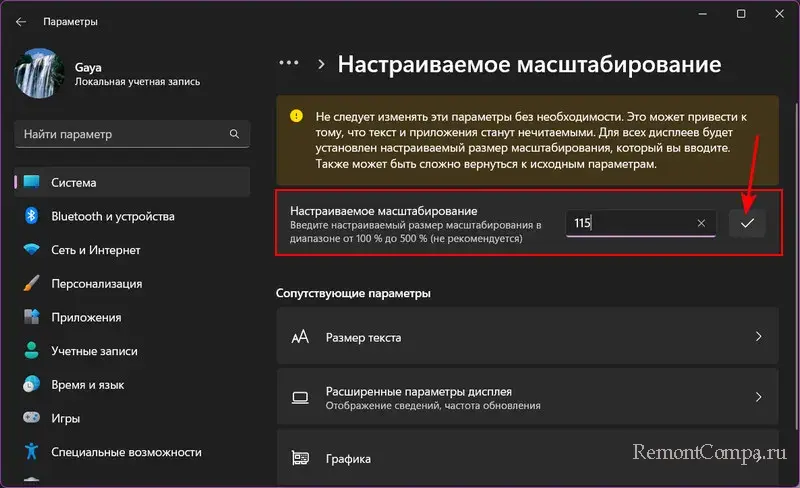
В дополнительных настройкам нам предоставляется возможность установить любое значение увеличения масштаба, вплоть до шага в 1%.
Настроенный таким образом масштаб применяется для всей операционной системы Windows и установленных в ней программ и игр, за исключением тех, у которых своя среда 2D или 3D, и работает своё разрешение и масштабирование экрана. Однако не все программы и игры, подчиняющиеся системным настройкам экрана, оптимизированы под увеличение системного масштаба Windows. И при увеличенном масштабе могут отображаться некорректно. Для таких программ и игр лучше оставить исходный 100%-ный масштаб, и тогда их интерфейс будет выглядеть чётче и качественнее. А, возможно, их изображение будет лучше с альтернативным режимом масштабирования Windows.
Установить для программы или игры отдельный масштаб можно в Windows 10 и 11 с помощью функции изменения параметров высокого DPI. Она предусматривает переопределение режима масштабирования высокого разрешения – изменение способа, которым операционная система масштабирует изображение конкретной программы или игры. При задействовании этой возможности Windows либо не будет масштабировать, либо будет использовать другой алгоритм масштабирования, который может устранить проблемы типа размытия, искажения или обрезки изображения.
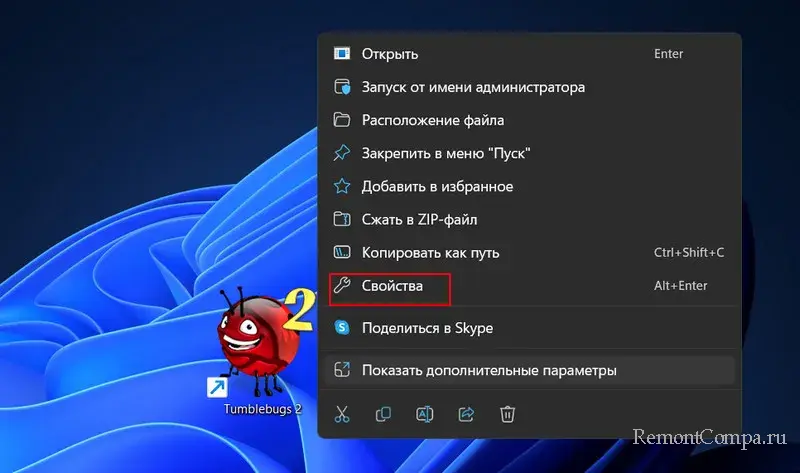
Давайте используем эту возможность Windows 10 и 11. Открываем свойства ярлыка нужной программы или игры – в контекстном меню на ярлыке жмём «Свойства».
Переходим на вкладку «Совместимость». Кликаем «Изменить параметры высокого DPI».
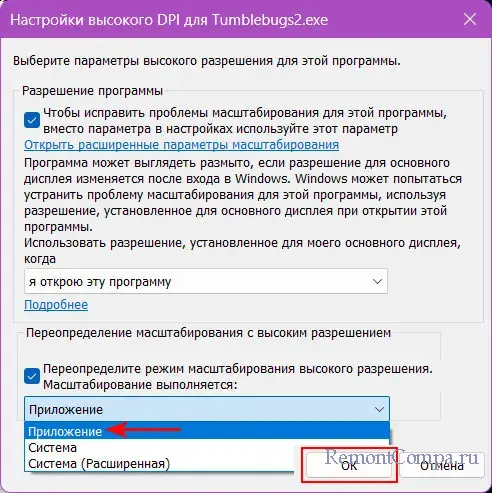
Устанавливаем галочку блока «Разрешение программы». Выбираем в выпадающем списке «Когда я открою эту программу».
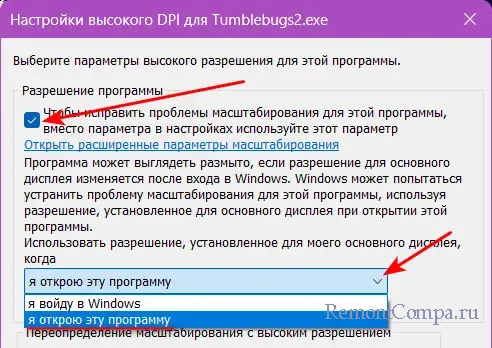
Ниже в блоке «Переопределите режим масштабирования высокого разрешения», в его выпадающем списке выбираем, собственно, режим. Их нам предлагается три:
- Приложение: этот режим означает, что Windows не будет масштабировать изображение программы или игры, а оставит его исходным, т.е. 100%-ным;
- Система: этот режим означает, что Windows будет масштабировать изображение программы или игры с помощью системного алгоритма, который растягивает изображение до нужного размера;
- Система (Расширенная): этот режим означает, что Windows будет масштабировать изображение приложения с помощью расширенного алгоритма, который учитывает DPI экрана и программы или игры.
В общем системном масштабировании Windows 10 и 11 применяется режим «Система (Расширенная)». Соответственно, друзья, если он вам не подходит, экспериментируйте с двумя другими режимами. И смотрите, какой лучше решает и решает ли вообще вашу проблему. В нашем примере нужен исходный 100%-ный масштаб. Потому мы выбираем режим «Приложение». И жмём «Ок».
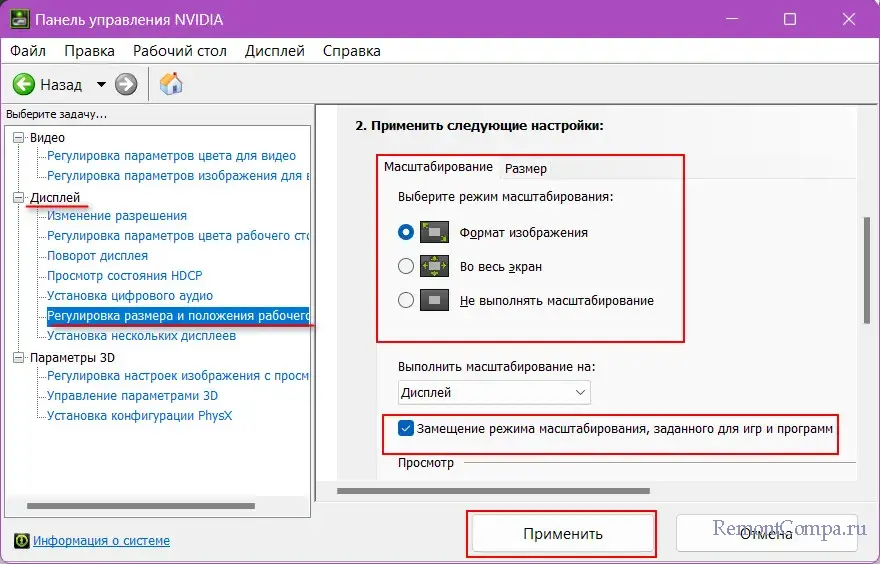
Также, друзья, настройка масштабирования есть в панелях управления драйверов видеокарт. Например, в панели управления Nvidia такая настройка находится по пути:
Дисплей →Регулировка размера и положения рабочего стола
Здесь можно поэкспериментировать с разными режимами масштабирования. И попробовать задействовать опцию замещения режима масштабирования, заданного для игр и программ. Последняя позволяет заставить программы и игры использовать режим масштабирования Nvidia, а не тот, который они сами задают.
Вот так, друзья, можно установить для программы или игры отдельный от всей Windows 10 или 11 масштаб.
-
Разница между изменением масштаба и разрешения
-
Как поменять масштаб интерфейса в Windows
-
Как поменять масштаб веб-страниц в браузере?
-
Изменение разрешения экрана
Каждому из нас рано или поздно понадобится данная функция. Иногда контент сайта «вылезает» за пределы видимой области, а информация нам нужна срочно. Именно в данном случае к нам на помощь приходит опция масштабируемости, чтоб ознакомится с нужным фрагментом контента и оценить разметку веб-ресурса. Ниже вы найдете ответ на вопрос: как уменьшить масштаб экрана на компьютере?
Разница между изменением масштаба и разрешения
Существует два вида изменения графического представления информации на мониторе: изменение масштаба и разрешения.
При изменении разрешения меняются абсолютно все элементы операционной системы: окна, ярлыки и т.д. В случае с масштабируемостью изменению подлежат только некоторые элементы: иконки, текст, списки и т.д., не влияя на отображение и качество изображений и медиафайлов.
Существует два варианта изменения размера элементов.
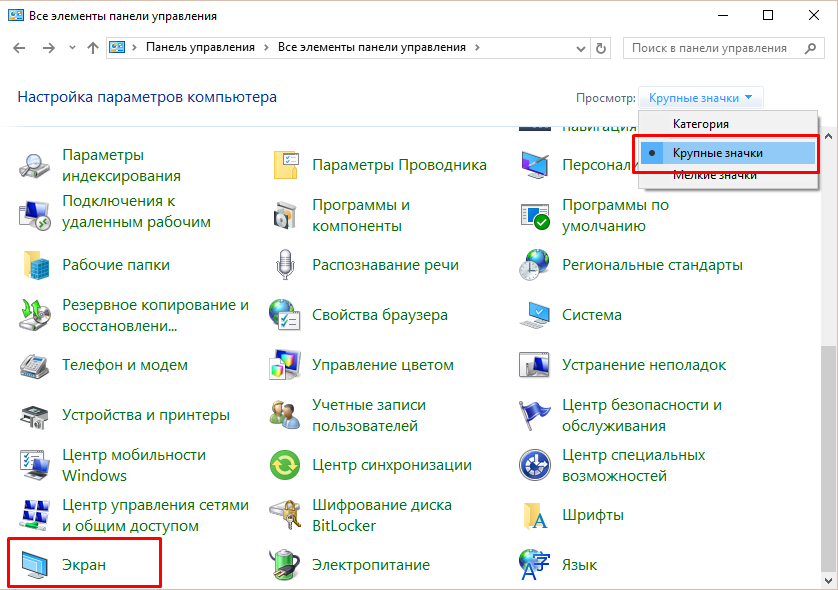
- Для реализации первого способа необходимо нажать ПКМ на кнопку «Пуск» и выбрать «Панель управления».
Далее кликните на «Категории» и выберите «Крупные значки». Ниже отобразится элемент меню «Экран».
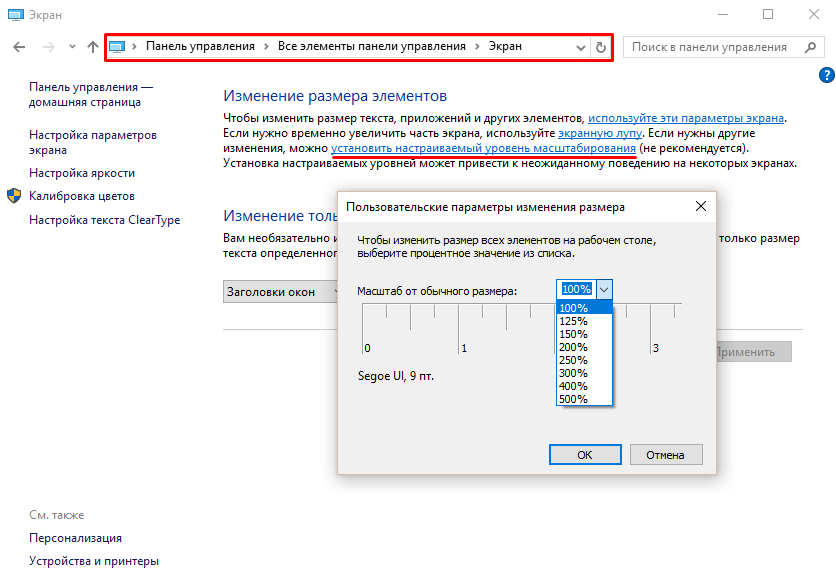
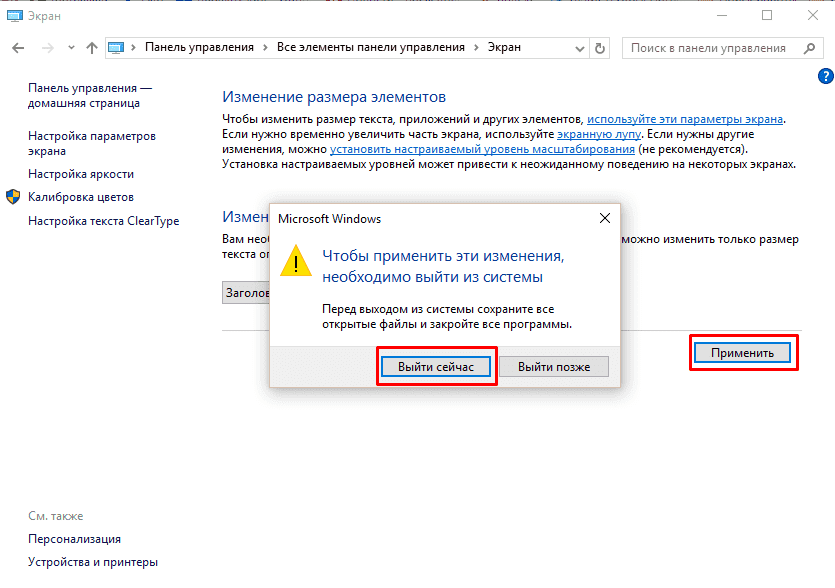
После этого нажмите на ссылку «установить настраиваемый уровень масштабирования», выберите масштаб и нажмите кнопку «ОК».

Осталось лишь подтвердить действие выходом из системы.

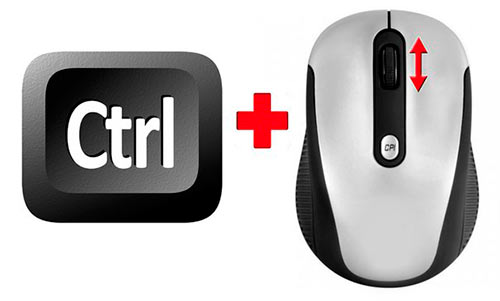
- Второй способ заключается в работе с мышкой. Или в нужном окне, или на рабочем столе вам нужно лишь зажать клавишу Ctrl и прокрутить колесико мыши в нужном направлении. Итог: размер иконок и ярлыков изменится.
Совет! Данным способом можно не только изменить размер иконок файлов, а и поменять режим отображения (плитка, список, таблица и т.д.).
Как поменять масштаб веб-страниц в браузере?
Здесь всё намного проще.
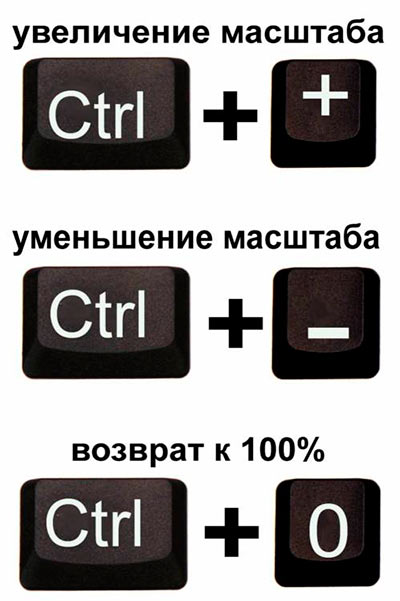
- Ctrl + колесико мыши.
- Ctrl + клавиши «+», «–» и «0», где Ctrl+0 возвращение масштаба к 100%.
- Средствами браузера.
Внимание! Изменение масштаба распространяется только на одну страницу и не сохранится при следующем посещении сайта.
Изменение разрешения экрана
Если вышеперечисленные манипуляции не удовлетворили ваши потребности, попробуйте изменить разрешение. Для этого:
- кликните на меню «Пуск»;
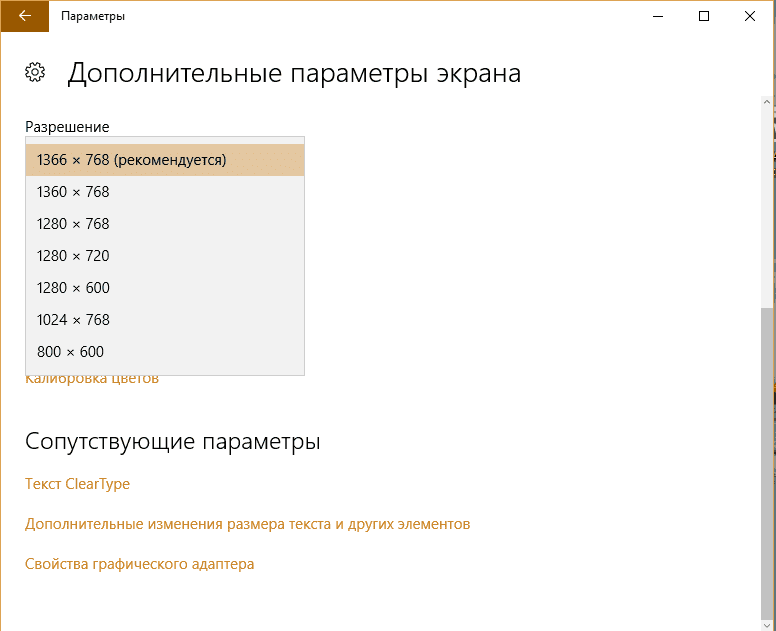
- зайдите в «Параметры» – «Система» – «Экран» – «Дополнительные параметры экрана»;
- выберите необходимое разрешение из выпадающего списка и нажмите кнопку «Применить»;
- подтвердите изменения.
Надеюсь, данная статья ответила на вопрос как уменьшить масштаб экрана на компьютере и удовлетворила ваши потребности.
As a technical blogger, changing the size of applications on Windows 10 involves adjusting the scaling settings of the display. This can be done by right-clicking on the desktop and selecting «Display settings,» followed by adjusting the percentage of scaling under the «Scale and layout» section. Additionally, some applications may have their own scaling options within their settings. It’s important to note that changing the scaling settings can affect the overall display and may require restarting the computer for the changes to take effect.
Video Tutorial:How do I resize apps in Windows 10?
How do I change the size of a Windows application?
If you’re working on a Windows computer and want to change the size of a particular application, there are a few ways to approach it. Here are some options:
1. Use the maximize and minimize buttons: Every application window should have a «—» button that minimizes the window and an expand button that maximizes it. Clicking the «Maximize» button makes the window full-screen while the «Minimize» button makes it disappear entirely.
2. Use the Resize handle: Click and drag the left-hand or right-hand edge of the window to make it smaller or wider. Similarly click and drag the top or bottom edge of the window to make it shorter or taller.
3. Use the keyboard shortcut: You can use the keyboard shortcut «Alt+Spacebar» to open up the window menu. From here, you’ll see options to resize, move, minimize, maximize, or even close the window. Choose «Size» or «Resize» to change the size of the particular application window.
4. Change the screen resolution: If you want to change the size of everything on your screen, including application windows, you can adjust the screen resolution. You can do this by going to the «Display Settings» in your Windows settings and adjust the resolution.
Overall, there are a variety of quick and easy ways to adjust the size of your Windows application windows, depending on your preferences and what works best for you.
How do I resize apps on my desktop?
Resizing apps on your desktop can depend on the operating system you are using. If you are on a Windows computer, you can easily resize apps by clicking and dragging the edge or corner of the app window. On a Mac computer, you can also click and drag the edge or corner of the app window, or use Mission Control to resize and arrange multiple apps on the desktop. For mobile devices such as iPhone or Android phones, you can use pinch-to-zoom gestures to adjust the size of the app on your screen. Additionally, there may be options within each respective app’s settings to adjust the app size or view.
Why are all my apps so big Windows 10?
There can be several reasons why the apps on your Windows 10 system are taking up a lot of storage space. One reason could be the evolution of software and the incorporation of new features in applications. As software evolves, applications tend to get bigger.
Another reason could be that these apps are designed to provide a better user experience by offering a higher level of detail and resolution, which in turn requires additional space. Additionally, some apps may store large amounts of temporary files, cache data, and other user-specific information that can contribute to their size.
You can reduce the size of the apps by uninstalling the applications that you don’t use frequently, or by deleting temporary files and clearing caches. To avoid issues with limited storage space in the future, you can invest in a computer with more storage, or consider using cloud storage or external hard drives to store some of your data.
How do I control app size?
Controlling app size is an important consideration for any mobile app developer. There are several steps you can take to ensure that your app is as lean and efficient as possible.
Firstly, you can optimize all of the app’s assets such as images, videos, and audio files for size. This can be done by reducing their resolution or compressing them to reduce their file size without compromising on quality.
Secondly, you can use minification and tree shaking techniques to reduce the size of the app’s code. This involves removing unnecessary code, comments, and whitespace from the app’s codebase.
Thirdly, you can use resources like libraries and frameworks to minimize the amount of code you need to write and include in your app.
Lastly, you can use modularization to divide the app’s codebase into smaller pieces, making the app easier to maintain, test and debug.
By utilizing these steps, you can help to ensure that your app is as small and efficient as possible, leading to faster app downloads, smoother performance, and happier users.
How do I resize an application that is too big?
If an application on your iPhone 14, iPhone 14 Pro, or iPhone 14 Plus is too big, the easiest way to resize it is by using the zoom feature. To enable zoom, go to Settings > Accessibility > Zoom, and toggle the switch to turn it on. Once zoom is enabled, you can use the pinch gesture to zoom in and out of the screen, or hold down on the screen with three fingers and drag to move the magnified view around the screen.
Alternatively, you can try adjusting the app’s content size within the app itself. Go to Settings > Display & Brightness > Text Size, and drag the slider to adjust the size of on-screen text. This may make the content within the app more readable, but it may not necessarily resize the app itself.
If neither of these solutions work, you may need to uninstall and reinstall the app, making sure to download the correct version for your device. Some apps may only be optimized for certain screen sizes, and resizing them may not be possible without impacting their functionality.
Applies ToWindows 11 Windows 10
Вот как изменить размер текста, изображений и приложений в Windows.
Чтобы изменить параметры отображения в Windows, выберите Пуск > Параметры > Специальные возможности > Размер текста. Чтобы увеличить только текст на экране, перетащите ползунок возле пункта Размер текста. Чтобы увеличить все, включая изображения и приложения, выберите Экран , а затем выберите вариант из раскрывающегося меню возле пункта Масштаб.
Чтобы увеличить или уменьшить масштаб фрагментов экрана в Windows, используйте экранную лупу. Для включения экранной лупы, нажмите клавишу Windows + клавишу «плюс» (+). Увеличьте масштаб, продолжая удерживать клавишу Windows + клавишу «плюс» (+). Для уменьшения масштаба нажмите клавишу Windows + клавишу «минус» (-). Чтобы выключить экранную лупу, нажмите клавиша Windows + клавишу ESC.
Нужна дополнительная помощь?
Нужны дополнительные параметры?
Изучите преимущества подписки, просмотрите учебные курсы, узнайте, как защитить свое устройство и т. д.
On its own, Windows 10 does a pretty good job detecting and adjusting the display scaling settings based on various factors (such as screen size and resolution) to ensure that elements (text, icons, navigations, and other items) on the screens are big enough to make apps easier to use.
However, it’s not a flawless system, and as a result, Windows 10 also allows you to adjust the scaling settings manually on a per-monitor basis, which can come in handy in many scenarios. For example, if you’re pairing your device with a different size external monitor, specifying a custom scaling value can help to match the size of text and elements across all monitors. If you don’t have perfect vision, scaling can increase the size of elements to make everything easier to see and use without forcing your eyes. Or adjusting the scaling settings may also improve the viewing of a presentation when projecting to a larger screen.
In this Windows 10 guide, we’ll walk you through the steps to change the scaling settings for a standalone monitor or laptop display.
- How to change display scaling settings using recommended values
- How to change display scaling settings using custom values
- How to make text bigger without changing scaling settings
How to change display scaling settings using recommended values
To change a display scaling size using the recommended settings, use these steps:
- Open Settings.
- Click on System.
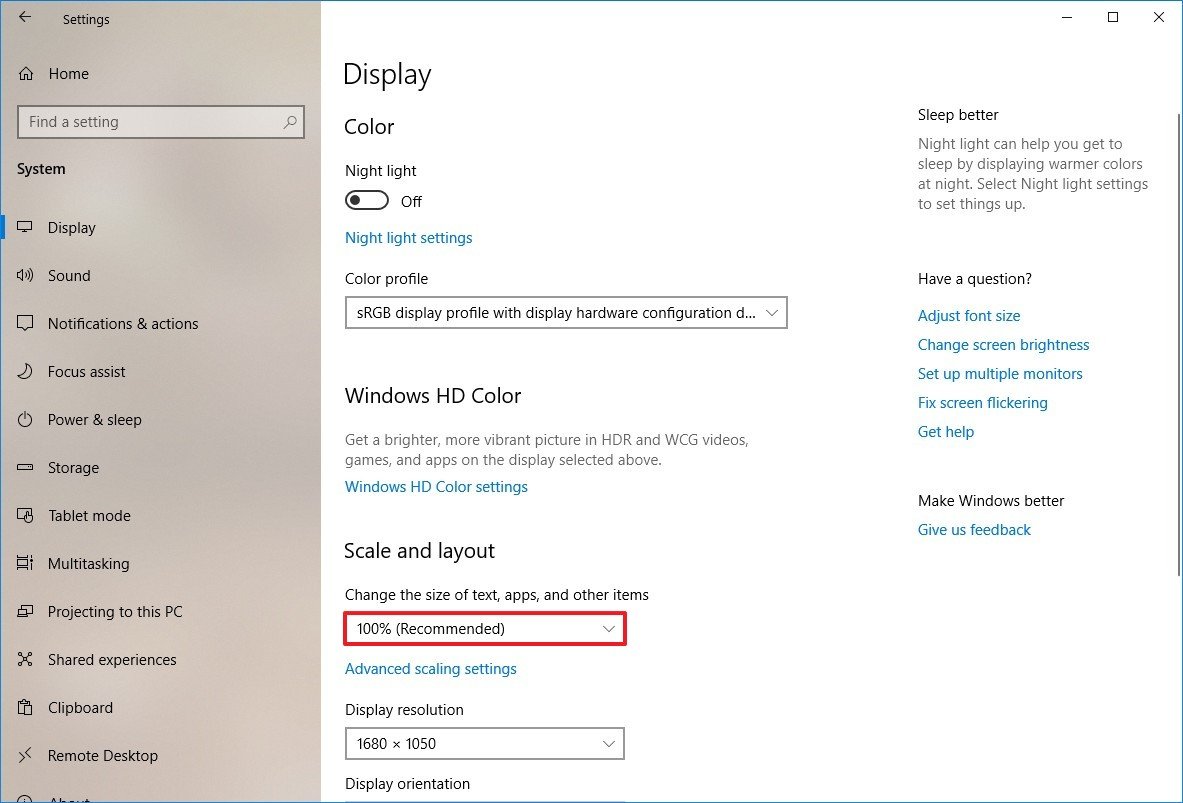
- Click on Display.
- Under the «Scale and layout» section, use the drop-down menu and select the scale settings that suit your needs. Options available include 100, 125, 150, and 175 percent.
Once you complete the steps, you don’t need to sign out and sign back in, but it’s recommended to restart your computer to make sure that the new settings apply correctly across the desktop and apps.
How to change display scaling settings using custom values
If the recommended scaling settings are not suited for your display, you can specify a custom scaling size.
To set a custom size for scaling a display on Windows 10, use these steps:
All the latest news, reviews, and guides for Windows and Xbox diehards.
- Open Settings.
- Click on System.
- Click on Display.
- Under the «Scale and layout» section, click the Advanced scaling settings option.
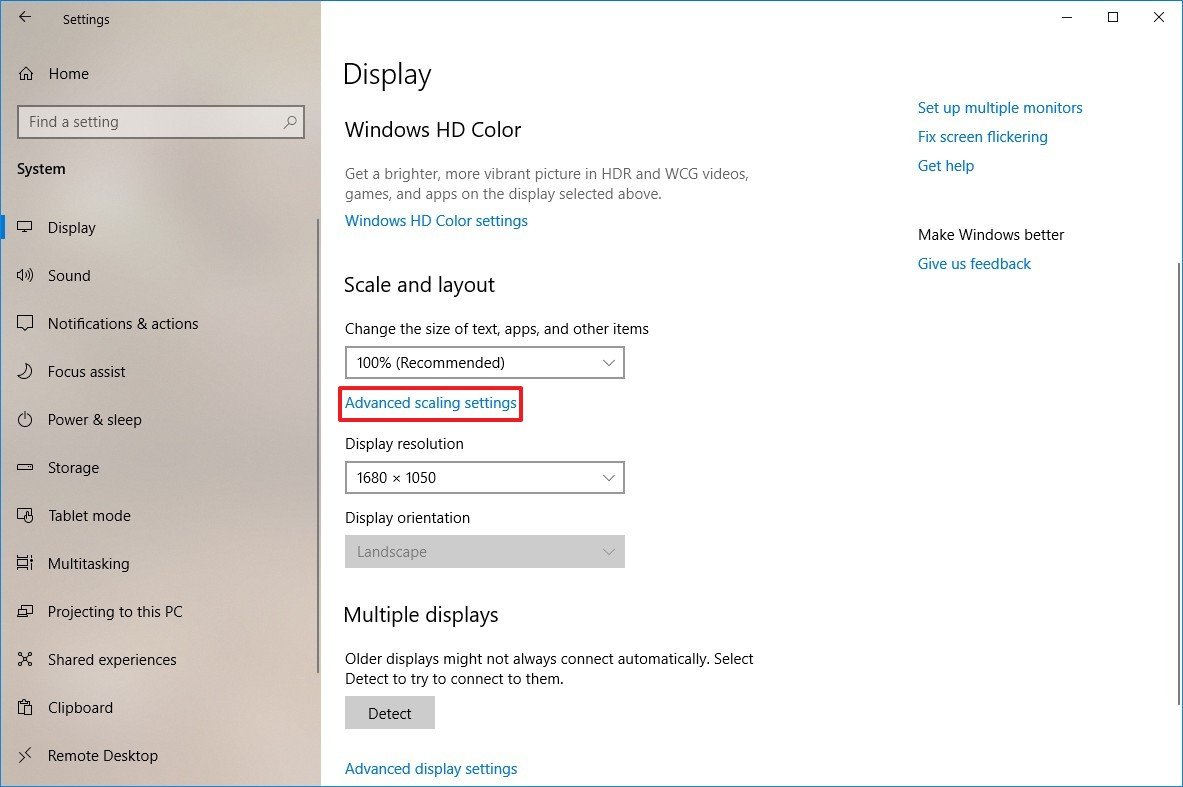
- Under the Custom scaling section, specify a custom scaling size between 100 to 500 percent.Quick tip: If you need to make the size of text, apps, and other items just a little bigger, you can try using 110 as the new scaling value.
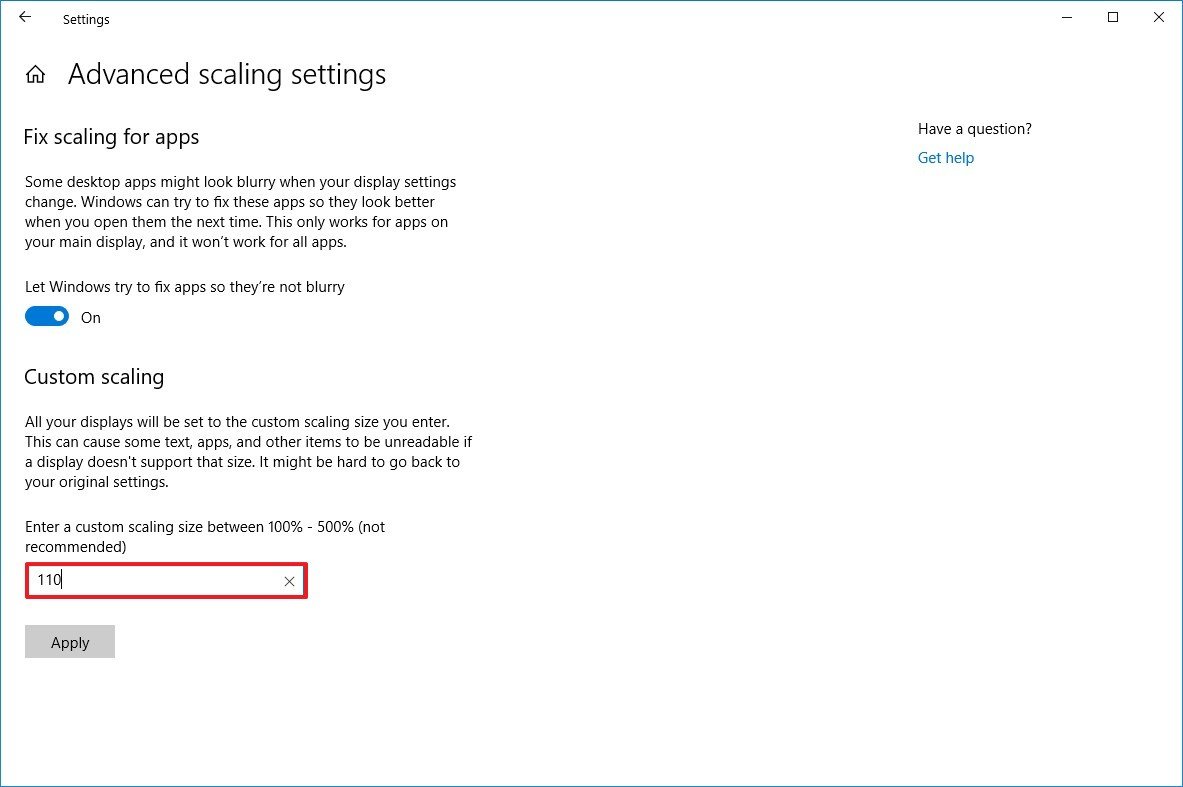
- Click the Apply button.
- Click the Sign out now button.
- Sign back into your account.
After you complete the steps, text, apps, and other items should scale to the size that you specified.
If icon and other items are not scaling correctly on the desktop, use the same instructions outlined above to slightly increase or decrease the scaling size number until you find a right balance.
At any time, you can remove the custom size using the steps, but on step No. 4, click the Turn off custom scaling and sign out option.
How to make text bigger without changing scaling settings
If you’re looking to make only the text more readable, you don’t need to change the scaling settings. Instead, you should change the font size globally.
To make text bigger on Windows 10, use these steps:
- Open Settings.
- Click on Ease of Access.
- Click on Display.
- Under the «Make text bigger» section, use the slider to select the new font size that makes text easy to read.
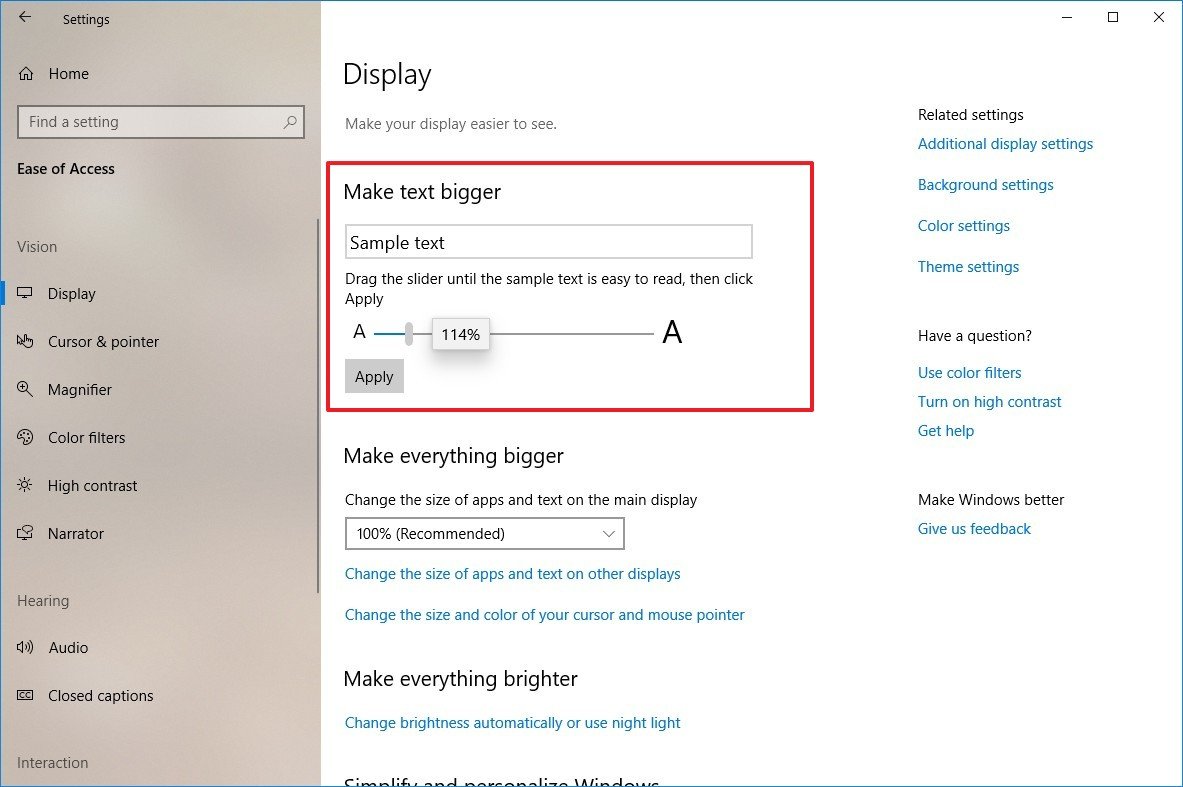
- Click the Apply button.
Once you complete the steps, the screen will flash a «Please wait» screen to apply the new text size.
Mauro recommends all these affordable accessories
Hi, I’m Mauro Huculak, Windows Central’s help and how-to guru. I wrote the post you’re reading now, and I know the Windows OS inside and out. But I’m also a bit of a hardware geek. These are some of the affordable gadgets on my desk today.
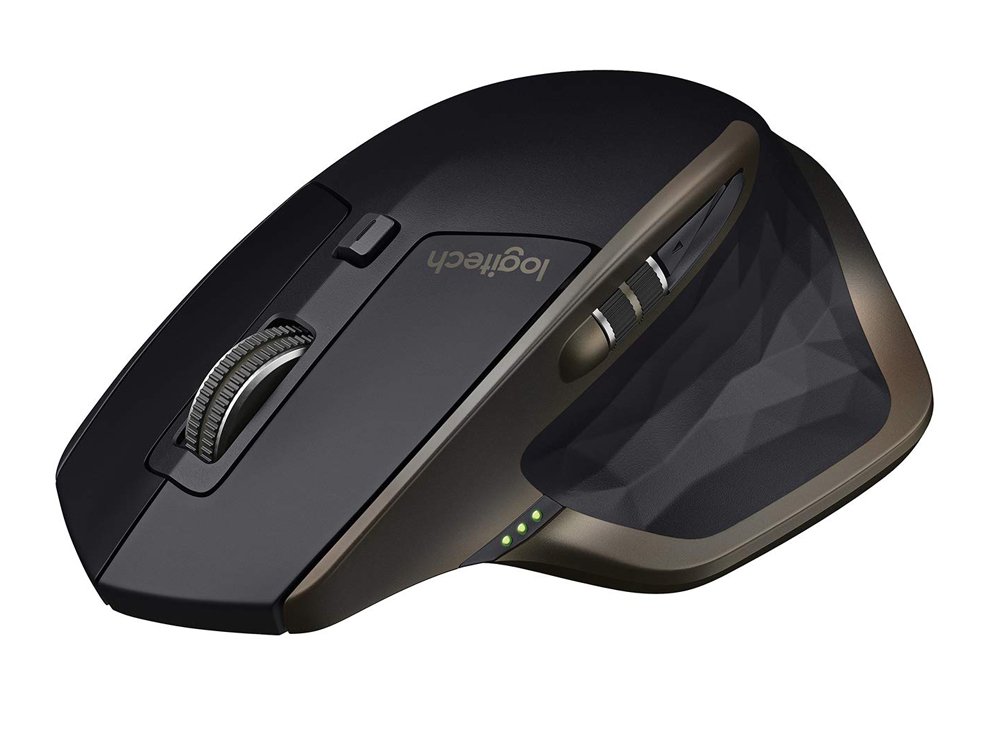
Logitech MX Master Wireless Mouse ($72 at Amazon)
I know mice, and this is the one I use every day. The MX Master is a wireless high-precision mouse that’s very comfortable to use and has many great features, including the ability to connect with multiple devices, an infinite scroll wheel, back and forward buttons, all of which you can customize.
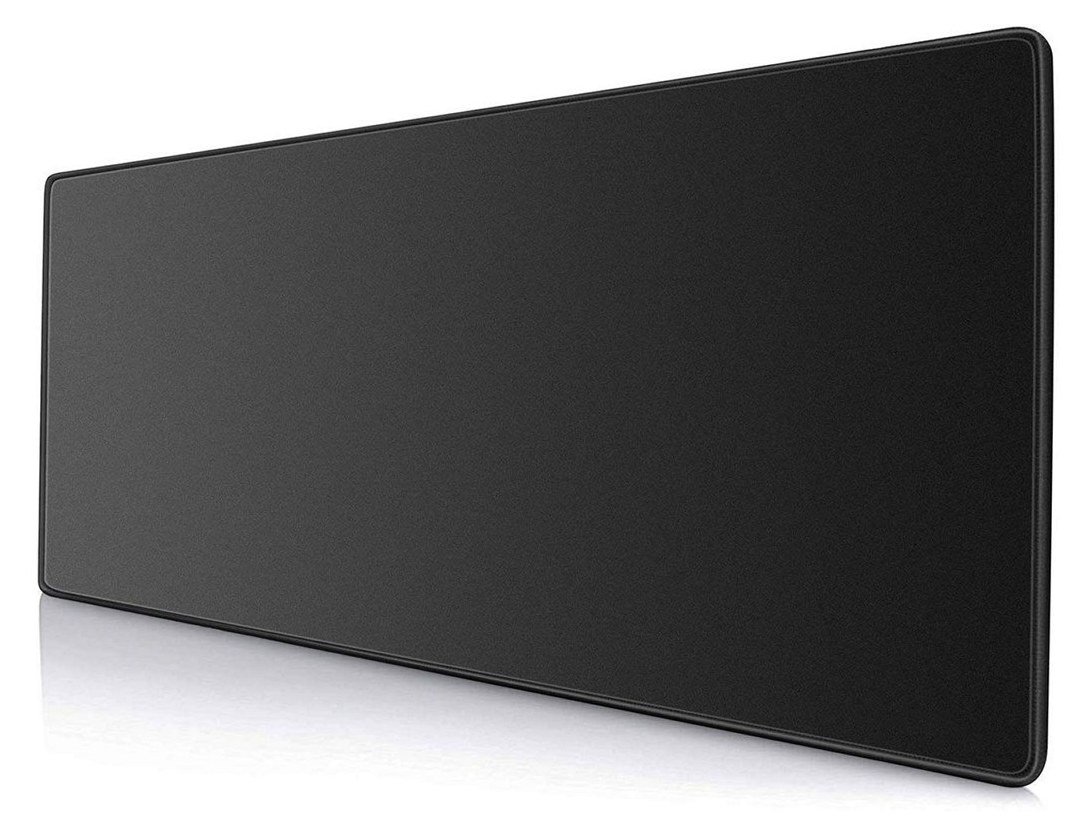
Ktrio Extended Gaming Mouse Pad ($12 at Amazon)
If you spend a lot of time typing, your palms and mouse will leave tracks on your desk. My solution was to start using gaming mouse pads, which are big enough for you to use the keyboard and the mouse comfortably. This is the one I use and recommend.
Supernight LED light strip ($20 at Amazon)
You could just use a regular light bulb in your office, but if you want to add some ambient lighting with different colors, an RGB LED strip is the way to go. This one is Mauro-approved.
Mauro Huculak has been a Windows How-To Expert contributor for WindowsCentral.com for nearly a decade and has over 15 years of experience writing comprehensive guides. He also has an IT background and has achieved different professional certifications from Microsoft, Cisco, VMware, and CompTIA. He has been recognized as a Microsoft MVP for many years.