Table of Contents
-
Installation Guide
-
Amazon Web Services
-
Docker image
-
Running
-
Why host networking?
-
-
Docker Upgrade
-
-
Local Installation
-
Running
-
Local Upgrade
-
-
STUN/TURN server install
-
Check your installation
-
Checking RTP port connectivity
-
-
Kurento Media Server (KMS) is compiled and provided for installation by the Kurento team members, in a variety of forms. The only officially supported processor architecture is 64-bit x86, so for other platforms (such as ARM) you will have to build from sources.
-
Using an EC2 instance in the Amazon Web Services (AWS) cloud service is suggested to users who don’t want to worry about properly configuring a server and all software packages, because the provided template does all this automatically.
-
The Kurento Docker image allows to run KMS on top of any host machine, for example Fedora or CentOS. In theory it could even be possible to run under Windows, but so far that possibility hasn’t been explored by the Kurento team, so you would be at your own risk.
-
Setting up a local installation with
apt-get installallows to have total control of the installation process. It also means that it’s easier to make mistakes, so we don’t recommend this installation method. Do this only if you are a seasoned System Administrator.
Besides installing KMS, a common need is also installing a STUN/TURN server, especially if KMS or any of its clients are located behind a NAT router or firewall.
If you want to try nightly builds of KMS, then head to the section Installing Nightly Builds.
Amazon Web Services
The AWS CloudFormation template file for Amazon Web Services (AWS) can be used to create an EC2 instance that comes with everything needed and totally pre-configured to run KMS, including a Coturn server.
Follow these steps to use it:
-
Access the AWS CloudFormation Console.
-
Click on Create Stack.
-
Now provide this Amazon S3 URL for the template:
https://s3-eu-west-1.amazonaws.com/aws.kurento.org/KMS-Coturn-cfn-7.2.0.yaml
-
Follow through the steps of the configuration wizard:
4.1. Stack name: A descriptive name for your Stack.
4.2. InstanceType: Choose an appropriate size for your instance. Check the different ones.
4.3. KeyName: You need to create an RSA key beforehand in order to access the instance. Check AWS documentation on how to create one.
4.4. SSHLocation: For security reasons you may need to restrict SSH traffic to allow connections only from specific locations. For example, from your home or office.
4.5. TurnUser: User name for the TURN relay.
4.6. TurnPassword: Password required to use the TURN relay.
Note
The template file includes Coturn as a STUN server and TURN relay. The default user/password for this server is kurento/kurento. You can optionally change the username, but make sure to change the default password.
-
Finish the Stack creation process. Wait until the status of the newly created Stack reads CREATE_COMPLETE.
-
Select the Stack and then open the Outputs tab, where you’ll find the instance’s public IP address, and the Kurento Media Server endpoint URL that must be used by Application Servers.
Note
The Kurento CF template is written to deploy on the default VPC (see the Amazon Virtual Private Cloud docs). There is no VPC selector defined in this template, so you won’t see a choice for it during the AWS CF wizard. If you need more flexibility than what this template offers, you have two options:
-
Manually create an EC2 instance, assigning all the resources as needed, and then using the other installation methods to set Kurento Media Server up on it: Docker image, Local Installation.
-
Download the current CF from the link above, and edit it to create your own custom version with everything you need from it.
Docker image
The kurento-media-server Docker image is a nice all-in-one package for an easy quick start. It comes with all the default settings, which is enough to let you try the Tutorials.
If you need to insert or extract files from a Docker container, there is a variety of methods: You could use a bind mount; a volume; cp some files from an already existing container; change your ENTRYPOINT to generate or copy the files at startup; or base FROM this Docker image and build a new one with your own customizations. Check Kurento in Docker for an example of how to use bind-mounts to provide your own configuration files.
These are the exact contents of the image:
-
A local
apt-getinstallation of KMS, as described in Local Installation, plus all its extra plugins (chroma, platedetector, etc). -
Debug symbols installed, as described in Install debug symbols. This allows getting useful stack traces in case the KMS process crashes. If this happens, please report a bug.
-
All default settings from the local installation, as found in
/etc/kurento/. For details, see Configuration.
Running
Docker allows to fine-tune how a container runs, so you’ll want to read the Docker run reference and find out the command options that are needed for your project.
This is a good starting point, which runs the latest Kurento Media Server image with default options:
docker pull kurento/kurento-media-server:7.2.0

docker run -d --name kurento --network host \
    kurento/kurento-media-server:7.2.0
By default, KMS listens on the port 8888. Clients wanting to control the media server using the Kurento Protocol should open a WebSocket connection to that port, either directly or by means of one of the provided Client API Reference SDKs.
The health checker script inside this Docker image does something very similar in order to check if the container is healthy.
Once the container is running, you can get its log output with the docker logs command:
docker logs --follow kms >"kms-$(date '+%Y%m%dT%H%M%S').log" 2>&1
For more details about KMS logs, check Debug Logging.
Why host networking?
Notice how our suggested docker run command uses --network host? Using Host Networking is recommended for software like proxies and media servers, because otherwise publishing large ranges of container ports would consume a lot of memory. You can read more about this issue in our Troubleshooting Guide.
The Host Networking driver only works on Linux hosts, so if you are using Docker for Mac or Windows then you’ll need to understand that the Docker network gateway acts as a NAT between your host and your container. To use KMS without STUN (e.g. if you are just testing some of the Tutorials) you’ll need to publish all required ports where KMS will listen for incoming data.
For example, if you use Docker for Mac and want to have KMS listening on the UDP port range [5000, 5050] (thus allowing incoming data on those ports), plus the TCP port 8888 for the Client API Reference, run:
docker run --rm \
    -p 8888:8888/tcp \
    -p 5000-5050:5000-5050/udp \
    -e KMS_MIN_PORT=5000 \
    -e KMS_MAX_PORT=5050 \
    kurento/kurento-media-server:7.2.0
Docker Upgrade
One of the nicest things about the Docker deployment method is that changing versions, or upgrading, is almost trivially easy. Just pull the new image version and use it to run your new container:
# Download the new image version:
docker pull kurento/kurento-media-server:7.2.0

# Create a new container based on the new version of KMS:
docker run [...] kurento/kurento-media-server:7.2.0
Local Installation
With this method, you will install Kurento Media Server from the native Ubuntu packages built by us.
Officially supported platforms: Ubuntu 24.04 (noble) (64-bits).
Open a terminal and run these commands:
-
Make sure that GnuPG is installed.
sudo apt-get update ; sudo apt-get install --no-install-recommends \
    gnupg
-
Add the Kurento repository to your system configuration.
Run these commands:
# Get DISTRIB_* env vars.
source /etc/upstream-release/lsb-release 2>/dev/null || source /etc/lsb-release

# Add Kurento repository key for apt-get.
sudo gpg -k
sudo gpg --no-default-keyring \
         --keyring /etc/apt/keyrings/kurento.gpg \
         --keyserver hkp://keyserver.ubuntu.com:80 \
         --recv-keys 234821A61B67740F89BFD669FC8A16625AFA7A83

# Add Kurento repository line for apt-get.
sudo tee "/etc/apt/sources.list.d/kurento.list" >/dev/null <<EOF
# Kurento Media Server - Release packages
deb [signed-by=/etc/apt/keyrings/kurento.gpg] http://ubuntu.openvidu.io/7.2.0 $DISTRIB_CODENAME main
EOF
-
Install KMS:
Note
This step applies only for a first time installation. If you already have installed Kurento and want to upgrade it, follow instead the steps described here: Local Upgrade.
sudo apt-get update ; sudo apt-get install --no-install-recommends \
    kurento-media-server
This will install the release version of Kurento Media Server.
Running
The server includes service files which integrate with the Ubuntu init system, so you can use the following commands to start and stop it:
sudo service kurento-media-server start
sudo service kurento-media-server stop
Log messages from KMS will be available in /var/log/kurento-media-server/. For more details about KMS logs, check Debug Logging.
Local Upgrade
To upgrade a local installation of Kurento Media Server, you have to write the new version number into the file /etc/apt/sources.list.d/kurento.list, which was created during Local Installation. After editing that file, you can choose between 2 options to actually apply the upgrade:
-
Upgrade all system packages.
This is the standard procedure expected by Debian & Ubuntu maintainer methodology. Upgrading all system packages is a way to ensure that everything is set to the latest version, and all bug fixes & security updates are applied too, so this is the most recommended method:
sudo apt-get update ; sudo apt-get dist-upgrade
However, don’t do this inside a Docker container. Running apt-get upgrade or apt-get dist-upgrade is frowned upon by the Docker best practices; instead, you should just move to a newer version of the Kurento Docker images.
-
Uninstall the old Kurento version, before installing the new one.
Note however that apt-get is not good enough to remove all of Kurento packages. We recommend that you use aptitude for this, which works much better than apt-get:
sudo aptitude remove '?installed?version(kurento)'

sudo apt-get update ; sudo apt-get install --no-install-recommends \
    kurento-media-server
Note
Be careful! If you fail to upgrade all Kurento packages, you will get wrong behaviors and crashes. Kurento is composed of several packages:
-
kurento-media-server
-
kurento-module-creator
-
kurento-module-core
-
kurento-module-elements
-
kurento-module-filters
-
libnice10
-
openh264
-
And more
To use a newer version you have to upgrade all Kurento packages, not only the first one.
STUN/TURN server install
Working with WebRTC requires developers to learn and have a good understanding about everything related to NAT, ICE, STUN, and TURN. If you don’t know about these, you should start reading here: NAT, ICE, STUN, TURN.
Kurento Media Server, just like any WebRTC endpoint, will work fine on its own, for LAN connections or for servers which have a public IP address assigned to them. However, sooner or later you will want to make your application work in a cloud environment with NAT firewalls, and allow KMS to connect with remote clients. At the same time, remote clients will probably want to connect from behind their own NAT router too, so your application needs to be prepared to perform NAT Traversal in both sides. This can be done by setting up a STUN server or a TURN relay, and configuring it in both KMS and the client browser.
These links contain the information needed to finish configuring your Kurento Media Server with a STUN/TURN server:
-
Configuration
-
How to install Coturn?
-
How to test my STUN/TURN server?
Check your installation
To verify that the Kurento process is up and running, use this command and look for the kurento-media-server process:
$ ps -fC kurento-media-server
UID        PID  PPID  C STIME TTY          TIME CMD
kurento   7688     1  0 13:36 ?        00:00:00 /usr/bin/kurento-media-server
Unless configured otherwise, KMS will listen on the port TCP 8888, to receive RPC Requests and send RPC Responses by means of the Kurento Protocol. Use this command to verify that this port is open and listening for incoming packets:
$ sudo netstat -tupln | grep -e kurento -e 8888
tcp6  0  0  :::8888  :::*  LISTEN  7688/kurento-media-
You can change these parameters in the file /etc/kurento/kurento.conf.json.
To check whether KMS is up and listening for connections, use the following command:
curl \
    --include \
    --header "Connection: Upgrade" \
    --header "Upgrade: websocket" \
    --header "Host: 127.0.0.1:8888" \
    --header "Origin: 127.0.0.1" \
    "http://127.0.0.1:8888/kurento"
You should get a response similar to this one:
HTTP/1.1 500 Internal Server Error
Server: WebSocket++/0.8.1
Ignore the “Server Error” message: this is expected because we didn’t send any actual message, but it is enough to prove that Kurento is up and listening for WebSocketconnections.
If you need to automate this, you could write a script similar to healthchecker.sh, the one we use in Kurento Docker images.
Checking RTP port connectivity
This section explains how you can verify that Kurento Media Server can be reached from a remote client machine, in scenarios where the media server is not behind a NAT.
You will take the role of an end user application, such as a web browser, wanting to send audio and video to the media server. For that, we’ll use Netcat in the server, and either Netcat or Ncat in the client (because Ncat has more installation choices for Linux, Windows, and Mac clients).
The check proposed here will not work if the media server sits behind a NAT, because we are not punching holes in it (e.g. with STUN, see When are STUN and TURN needed?); doing so is outside of the scope for this section, but you could also do it by hand if needed (like shown in Do-It-Yourself hole punching).
First part: Server
Follow these steps on the machine where Kurento Media Server is running.
-
First, install Netcat, which is available for most Linux distributions. For example:
# For Debian/Ubuntu:
sudo apt-get update ; sudo apt-get install netcat-openbsd
-
Then, start a Netcat server, listening on any port of your choice:
# To test a TCP port:
nc -vnl <server_port>

# To test an UDP port:
nc -vnul <server_port>
Second part: Client
Now move to a client machine, and follow the next steps.
-
Install either of Netcat or Ncat. On Linux, Netcat is probably available as a package. On MacOS and Windows, it might be easier to download a prebuilt installer from the Ncat downloads page.
-
Now, run Netcat or Ncat to connect with the server and send some test data. These examples use
ncat, but the options are the same if you usenc:# Linux, MacOS: ncat -vn -p <client_port> <server_ip> <server_port> # TCP ncat -vnu -p <client_port> <server_ip> <server_port> # UDP # Windows: ncat.exe -vn -p <client_port> <server_ip> <server_port> # TCP ncat.exe -vnu -p <client_port> <server_ip> <server_port> # UDP
Note
The
-p <client_port>is optional. We’re using it here so the source port is well known, allowing us to expect it on the server’s Ncat output, or in the IP packet headers if packet analysis is being done (e.g. with Wireshark or tcpdump). Otherwise, the O.S. would assign a random source port for our client. -
When the connection has been established, try typing some words and press Return or Enter. If you see the text appearing on the server side of the connection, the test has been successful.
-
If the test is successful, you will see the client’s source port in the server output. If this number is different than the
<client_port>you used, this means that the client is behind a Symmetric NAT, and a TURN relay will be required for WebRTC. -
If the test data is not reaching the server, or the client command fails with a message such as
Ncat: Connection refused, it means the connection has failed. You should review the network configuration to make sure that a firewall or some other filtering device is not blocking the connection. This is an indication that there are some issues in the network, which gives you a head start to troubleshoot missing media in your application.
For example: Assume you want to connect from the port 3000 of a client whose public IP is 198.51.100.2, to the port 55000 of your server at 203.0.113.2. This is what both client and server terminals could look like:
# CLIENT

$ ncat -vn -p 3000 203.0.113.2 55000
Ncat: Connected to 203.0.113.2:55000
(input) THIS IS SOME TEST DATA
# SERVER

$ nc -vnl 55000
Listening on 0.0.0.0 55000
Connection received on 198.51.100.2 3000
(output) THIS IS SOME TEST DATA
Notice how the server claims to have received a connection from the client’s IP (198.51.100.2) and port (3000). This means that the client’s NAT, if any, does not alter the source port of its outbound packets. If we saw here a different port, it would mean that the client’s NAT is Symmetric, which usually requires using a TURN relay for WebRTC.
Kurento Media Server
| 🏠Homepage | 📚Documentation | |
|---|---|---|
Kurento Media Server is responsible for media transmission, processing, loading and recording. It is implemented in low level technologies based on the GStreamer multimedia toolkit, and provides the following features:
- Networked streaming protocols, including HTTP, RTP and WebRTC.
- Group communications (MCU and SFU functionality) supporting both media mixing and media routing/dispatching.
- Generic support for Computer Vision and Augmented Reality filters (OpenCV).
- Media storage supporting writing operations for WebM and MP4 and playback in all formats supported by GStreamer.
- Automatic media transcoding between any of the codecs supported by GStreamer including VP8, H.264, H.263, AMR, OPUS, Speex, G.711, etc.
FIWARE Platform
| 🎓 FIWARE Academy |
|---|
The Kurento project is part of FIWARE. For more information check the FIWARE documentation for Real-Time Media Stream Processing.
Kurento has been rated within FIWARE as follows:
Kurento is also part of the NUBOMEDIA research initiative.
The Open API specification, also known as Kurento Protocol, is available at Stream-oriented Open API.
Documentation
Kurento provides detailed Documentation including tutorials, installation and development guides.
Useful Links
Usage:
- Installation Guide
- Docker Image
- Contribution Guide
- Developer Guide
Issues:
- Bug Tracker
- Support
News:
- Kurento Blog
- Community Discussion
Training:
- Kurento tutorials
Testing
Kurento has a full set of different tests mainly focused in the integrated and system tests, more specifically e2e tests that anyone can run to assess different parts of Kurento, namely functional, stability, tutorials, and API.
In order to assess properly Kurento from a final user perspective, a rich suite of E2E tests has been designed and implemented. To that aim, the Kurento Testing Framework (KTF) has been created. KTF is a part of the Kurento project aimed to carry out end-to-end (E2E) tests for Kurento. KTF has been implemented on the top of two well-known open-source testing frameworks: JUnit and Selenium.
If you want to know more about the Kurento Testing Framework and how to run all the available tests for Kurento you will find more information in Kurento developers documentation > Testing.
License
Copyright 2023 Kurento

Licensed under the Apache License, Version 2.0 (the "License");
you may not use this file except in compliance with the License.
You may obtain a copy of the License at

    http://www.apache.org/licenses/LICENSE-2.0

Unless required by applicable law or agreed to in writing, software
distributed under the License is distributed on an "AS IS" BASIS,
WITHOUT WARRANTIES OR CONDITIONS OF ANY KIND, either express or implied.
See the License for the specific language governing permissions and
limitations under the License.

В этой статье я поделюсь опытом работы с технологией WebRTC и медиасервером Kurento на этапе тестирования и внедрения. Расскажу с какими проблемами я столкнулся и как их решил. Я не расскажу о том как разработать приложение с нуля, но приведу много полезных ссылок. Уверен, что мой рассказ будет полезен тем, кто собирается работать с WebRTC.
Введение
Медицинская Информационная Система (МИС), которую разрабатывает наша компания, уже разрослась до огромного энтерпрайз-проекта со множеством микросервисов, шинами обмена сообщениями, мобильными клиентами и так далее. Некоторые части системы приходится отдавать на разработку и поддержку в сторонние организации, так как они не являются нашим профилем.
Сервис “Телемедицина” один из таких модулей МИС. Опыта разработки видеоконференций и использования WebRTC не было и заказ был делегирован. Но спустя какое-то время, в силу различных обстоятельств эта компания прекратила поддержку видеоконференции. Без поддержки этот сервис был отключен и “пылился” в репозитории.
И вот наступило время оживлять этот микро сервис. Было принято решение попробовать перезапустить Телемедицину своими силами. Наша компания выросла, появилось больше специалистов — можно и нужно осваивать новые темы к разработке. Я раньше не занимался передачей видео, но было очень интересно разобраться и изучить столь перспективную технологию, как WebRTC.
Приведу очень полезные ссылки по технологии WebRTC и сервера Kurento, которые мне помогли на старте:
- Java, Spring, Kurento и медиасервисы
- WebRTC: как два браузера договариваются о голосовых и видеозвонках
- Разрабатываем видеочат между браузером и мобильным приложением
Начало работы
Задача стояла простая: восстановить существующую систему видеоконференций, провести инвентаризацию уже сделанного ранее и, при необходимости, доработать по желаниям пользователей. Первые тесты на виртуальных машинах и реальных компьютерах прошли успешно. Но развертывание системы у клиента принесло немало хлопот.
Напомню, что у клиента уже функционирует медицинская информационная система (МИС), покрывающая огромное количество задач: от электронной очереди, рабочего места доктора, документооборота и PACS до подсистемы управления медицинским оборудованием.
Когда появилась необходимость разработать функционал видеоконференций для связи медицинского персонала диагностических центров (далее — ДЦ) с удаленными пациентами, было поставлено два обязательных условия:
Все конференции должны записываться и храниться на сервере.
Пациенты не должны устанавливать на свои устройства никакие дополнительные программы, кроме браузера, который в большинстве случаев уже предустановлен.
WebRTC работает из браузера без дополнительных программ или плагинов. А Kurento умеет записывать всё, то что проходит через него. И к тому же данный медиасервер обладает хорошим набором готовых библиотек для работы с его API посредством Java и JavaScript, что значительно упрощает разработку.
Разработка серверной части, а точнее её базиса, ещё до того, как я приступил к задаче, была передана клиентом на аутсорс в стороннюю компанию. Так появился “Управляющий сервер” (УС) — готовая серверная основа, которая и досталась мне на внедрение.
Общая идея взаимодействия изначально выглядела так:

Но в процессе дальнейшей работы, вся система сильно изменилась и усложнилась.
Первый опыт реанимации
После развертывания в тестовой сети на виртуальных машинах и на нескольких “живых” компах, было проведено много испытаний и экспериментов — всё прекрасно работало. Соответственно наступила пора внедрения в реальную, работающую сеть.
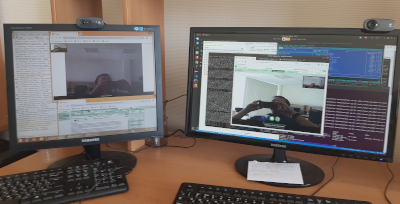
Для тестирования мне в помощь была назначена ответственная жертва в виде доктора и его рабочего места. И второй же звонок через микросервис телемедицины привел к сбою!
Хорошо, что это произошло во время бета-теста и кроме меня и довольного приключениями доктора, этого никто не видел.
Что происходит и почему связь не налаживается понять было очень сложно. WebRTC не показывает отказа — она просто ждет, что вот-вот появится сигнал. По незнанию было очень сложно как-то отлаживаться: серверная часть работает хорошо, Kurento в логах молчит, клиенты ждут потока, но ничего не происходит.
Помог Хабр (хвала ему):
- Как отлаживать WebRTC.
- 5 ошибок при разработке WebRTC звонков из браузера
- Опыт использования WebRTC. Лекция Яндекса
Очень жаль, что я не знал этих инструментов раньше.
Проанализировав данные логов и наблюдая за состояниями подключений, стало понятно, что и серверной части и клиентским скриптам не хватает реакции на события в системе WebRTC. А где эти события взять?
Разработчики сервера kurento предоставляют очень удобную библиотеку для работы с WebRTC на JavaScript: kurento-utils.js.
Для быстрого старта достаточно создать объект:
new kurentoUtils.WebRtcPeer.WebRtcPeerRecvonly(options, callback());А чтобы получить доступ к событиям, надо переопределять внутренние методы библиотеки. Я максимально упростил код, чтобы было понятнее:
// Настройка параметров для WebRtcPeerRecvonly
var options = {
    //генерация класса с переопределенными внутри методами
    peerConnection: getRTCPeerConnection(videoId),
    remoteVideo: videoElement, //идентификатор
    //метод на ICE кандидатов
    onicecandidate: function (candidate) {
         onIceCandidate(candidate, videoId, true);
    },
    onerror: onError, //метод на ошибки
    mediaConstraints: {
        // настройки
        video: true,
        audio: true}
};

// Создание WebRTC
incomeWebRtc[videoId] = new kurentoUtils.WebRtcPeer.WebRtcPeerRecvonly(
    options,
    function (error) {
        if (error) {
   	    return console.error(error);
        }
        this.generateOffer(
        function (error, sdpOffer) {
            //Обработка результата
        });
});

// Пробиваемся к методам обратной связи
function getRTCPeerConnection( videoId ){
    var configuration = {
        "iceServers": [
            {"url": "stun:" + stunServer},
            {"url": "turn:" + turnServer, credential: turnCredential, username: turnUsername}
        ]
    };

    var mypc = new RTCPeerConnection(configuration);

    // Переопределяем методы для обработки событий
    mypc.oniceconnectionstatechange = function(){
        state = this.iceConnectionState;
        console.info("### iceConnectionState " + videoId + " > " + this.iceConnectionState);
    };

    mypc.onsignalingstatechange = function(){
        state = this.signalingState || this.readyState;
        console.info("### SignalingState " + videoId + " > " + state);
    };

    mypc.onconnectionstatechange = function(){
        console.info("### ConnectionState " + videoId + " > " + this.connectionState);
    };

return mypc;
}
Кстати о сертификатах
Раз уж статья про мой опыт, то поделюсь информацией о том, что современные браузеры стали очень строго следить за безопасностью. Если у ресурса самоподписанный сертификат, то даже с особым разрешением, браузер запрещает доступ к периферийным устройствам компьютера.
Можно создать сертификат на бесплатных ресурсах в Интернете и настроить локальную сеть под его использование, а можно скачать Firefox версии не выше 65. В этой версии, достаточно нажать кнопку, что я соглашаюсь с рисками самоподписанных сертификатов и получить доступ к камерам и микрофонам.
Этот путь показался мне проще.
Второе тестирование (уже осторожное)
Мне показалось, что доктор побежит за попкорном, когда он увидел меня на следующем тестировании. Он явно получал удовольствие от наблюдения за моей борьбой с современными технологиями.
По сути это обновление системы не было релизом, т. к. я ничего не починил, я даже причины проблем не знал. Повторюсь, что в офисе всё работало прекрасно. В код были добавлены реакции на все события, которые генерировали WebRTC и Kurento, до которых я дотянулся, и всё это очень подробно писалось в логи. Я даже вывел мои логи в отдельные файлы, чтобы они не путались с основными в МИС.
Вместе с увлеченным доктором и системным администратором клиента мы пытали систему. Даже не тестировали, а именно “пытали”. Создавали видеоконференции во всех возможных режимах и со всех доступных устройств. Привлекали в эту игру других врачей и часть персонала из удаленного офиса.
Главное было не проверить систему (она не работала), а собрать как можно больше данных. В результате выяснилось, что:
- Примерно 80% попыток создать видеоконференцию проходят успешно.
- Часть подключений с использованием ICE кандидатов на IPv6 не работают.
- Из 5-ти мобильных операторов работали только 2.
Всё оказалось просто — на одном Google далеко не уехать
Анализ собранной информации показал, что нестабильно работает подключение через TURN сервера от Google. То ли нагрузка на них большая, то ли это просто демо-сервера для тех, кто только начинает изучать технологию. Но как факт: очень частые отказы. Нужен свой TURN/STUN сервер!
Вторая причина сбоев — это адреса IPv6.local. Сервер kurento не принимает ICE- кандидаты с этими адресами. Хорошо, что перед отправкой все ICE-кандидаты проходят через код в моих руках и IPv6.local я просто отфильтровал.
Проблема мобильных операторов решается, опять же, своим TURN/STUN сервером.
У трёх из пяти мобильных операторов NAT симметричен, и WebRTC пробиться не может. Подробнее можно почитать здесь: Так ли страшен Symmetric NAT.
Обидно, что мой личный мобильник работает на симке оператора, который не озаботился симметричной защитой. Поэтому моё первоначальное тестирование не выявило этой проблемы.
TURN/STUN сервер
В качестве своего сервера был выбран пакет resiprocate-turn-server.
Долго не выбирали — он есть в стандартном репозитории ubuntu — простая установка и автоматические обновления. Но не очень удобная работа с аккаунтами для подключения: логины и пароли берутся только из файла, из-за чего приходится делать дополнительную утилиту или скрипт для экспорта из базы данных основного сервера.
В данный момент этот файл сгенерирован руками и аккаунты раздаются через простой пул паролей. Авторизация реализована через главный сервер МИС, так что безопасность не нарушена. Но общая структура всей системы выглядит некрасиво. В планах переделка этого момента.
Третий поход к клиенту
Поправил код, установил и настроил свой TURN/STUN сервер, разработал пул паролей и их раздачу клиентам при старте видеоконференции, и, после обновления продакшн-серверов, я пошел к уже знакомому доктору.
Оно работает! Ура! Все запуски конференций успешны со всех устройств и во всех режимах: пациент из личного кабинета может позвонить доктору, терапевт во время приема может позвонить функциональному диагносту для дополнительной консультации, да и сами доктора могут устроить многопользовательскую видеоконференцию из разных филиалов со всего города.
Уже наученные горьким опытом, мы занялись придирчивым тестированием с искусственным созданием нештатных ситуаций. Из того, что касается темы этой статьи, выделю необходимость устанавливать ограничение на время ожидания подключения. WebRTC вместе с Kurento ждут начала вещания бесконечно долго и надеются, что вот-вот пойдут байтики видео. Пришлось ставить таймер на 10 секунд, который выдаёт ошибку управляющему серверу, если байты так и не пришли.
После всех доработок
Наконец, система функционирует и хорошо работает. Пошли первые отзывы от пользователей на местах. И сразу появилось огромное количество пожеланий и предложений по дизайну, дополнительным функциям и прочим планам к дальнейшей разработке. Работа закипела с новой силой!
Сейчас полная топология системы выглядит так:

ИТОГИ:
В завершении хочется сказать следующее:
Во-первых, WebRTC отличная технология с огромными перспективами, но тестировать и отлаживать её очень сложно. Перед началом разработки обязательно разворачивать сеть со всеми видами подключений, которые могут быть у клиента. Да и отладка через информационное окно браузера — не очень удобный инструмент.
Во-вторых, хвала Хабру! Работая над этим проектом, много информации я нашел на этом ресурсе. Все ссылки в этой статье ведут на него.
Сам же проект видеоконференций “Телемедицина” решено оставить на поддержке и развитии у нашей организации, мы не будет его отдавать на аутсорсинг. В перспективе еще очень много работы:
- Предстоит доработка склейки записанных видео. Буду опять обращаться к Хабру, уже нашел статью для начала: Объединение видеофрагментов с нескольких камер и синхронизация их по времени.
- Надо переработать систему регистрации пользователей на управляющем сервере, сервере основной МИС и turn-сервере.
- И открыт вопрос с пропускной способностью всей системы в целом. Стресс-тестов ещё не проводилось. Подготавливаюсь, читаю опять же Хабр: Сколько участников может быть в WebRTC-звонке?
ВСЁ
Уверен, что мой опыт будет полезен не только для разработчиков под WebRTC + Kurento, но и для тех, кто собирается приступить к внедрению столь же сложных проектов. Уделяйте больше внимания тестированию в максимально приближенных к реальности условиям.
И учитывайте риски того, что команды поддержки Ваших микросервисов могут внезапно “пропасть” — это очень неожиданные и неприятные хлопоты.
media-server
realtime-communication
webrtc
video-processing
A media server with advanced real-time communications capabilities, providing a rich set of media processing capabilities for web and smartphone applications via simple APIs.
What is Kurento?
Kurento is an open source software project led by the Kurento development community and supported by Naevatec providing a media server with advanced real-time communications capabilities. It features several core components:
— Media Server: Multiplatform media server providing the fundamental media processing capabilities used by the higher level components and application protocols. It provides a pluggable architecture supporting several media element modules for media capture, playback, encoding/decoding, recording, streaming, etc.
— Kurento Client: Client API allowing applications to access the media processing capabilities provided by the Media Server. It can be programmed in Java, JavaScript/Node.js, or C++.
— Kurento Protocol: Network protocol implementing the signaling plane for media communication among Kurento Clients and the Media Server. It allows negotiation of media capabilities and transport of raw media (audio, video and data) over networks using ICE, DTLS and RTP for security, continuity and quality of service.
Together, these components allow developers to build advanced real-time multimedia applications such as group video calls, web conferencing solutions, live video broadcasting platforms, video on demand services, augmented reality applications and more. Kurento can scale horizontally by adding more Media Servers.
Kurento Features
Features
- WebRTC media server
- Group communications
- Recording
- Playing media
- Transcoding
- Augmented reality filters
- Computer vision
- Custom media pipelines
Pros
Open source
Active community
Modular architecture
WebRTC support
Scalable
Easy to integrate
Cons
Steep learning curve
Limited documentation
Not beginner friendly
Requires other components like WebRTC clients
Lacks some advanced features
Official Links
The Best Kurento Alternatives
Top
Ai Tools & Services
and
Media Processing
and other similar apps like Kurento
OpenVCX
OpenVCX is an open-source, self-hosted video conferencing solution developed by Ribbon Communications. It allows users to make high-quality video and voice calls, screen share, chat, and collaborate in real-time.Some key features of OpenVCX include:End-to-end encryption for secure video meetingsSupport for up to 100 participants in a video callScreen sharing, chat,…
Red5
Red5 is an open source media server and streaming engine written in Java. It supports streaming protocols like RTMP, RTMPT, and HTTP for broadcasting and embedding live or recorded video, audio, and data in websites and applications.Some key features of Red5 include:Streaming support — Supports streaming of low-latency audio/video and…
Flumotion
Flumotion is an open source streaming media server software developed by Fluendo in Spain. It is designed for high-volume streaming of audio and video content over the internet or private networks.Some of the key features of Flumotion include:Supports both live streaming and video-on-demand streamingAdaptive streaming allows delivering content at different…
Nimble Streamer
Nimble Streamer is an open-source media server software designed specifically for streaming live and on-demand video content. It allows broadcasting video feeds to diverse platforms and devices like mobile, web browsers, media players, and set-top boxes.Some key features of Nimble Streamer include:Lightweight and customizable media server capable of handling thousands…
YouPHPTube
YouPHPTube is an open-source video sharing script written in PHP that allows users to upload and share videos online. It is designed to allow anyone to start their own video sharing platform similar to YouTube.Some key features of YouPHPTube include:Easy installation and setup — YouPHPTube can be installed on any…
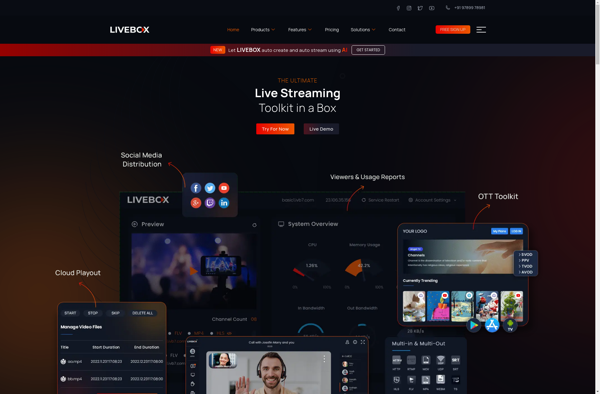
Livebox
Livebox is a comprehensive software suite for search engine optimization (SEO) and content marketing. It provides a variety of tools to help websites and blogs rank higher in search engines, drive more organic traffic, and increase conversions.Key features of Livebox include:SEO content creation — AI-powered tools to create optimized blog…
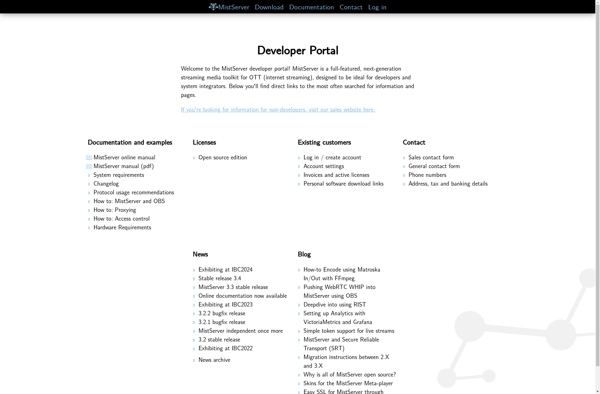
MistServer
MistServer is an open-source MQTT server written in pure ANSI C. It was designed from the ground up to be lightweight, fast, and scalable, ideal for use in IoT devices, embedded systems, and other resource-constrained environments. It is lightweight and has a small memory footprint, making it suitable even for…
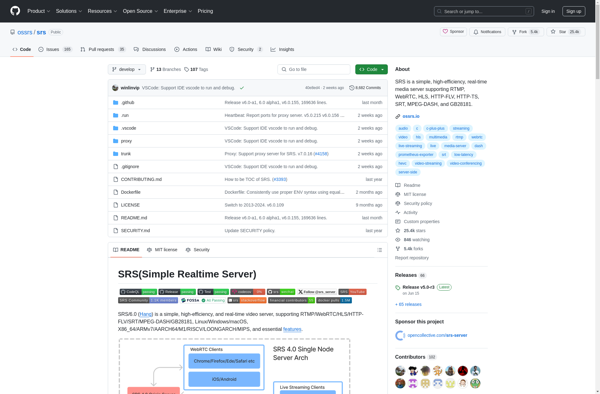
SRS
SRS (Spaced Repetition Software) is a type of software designed specifically for implementing spaced repetition, an evidence-based memorization technique where flashcards are reviewed at gradually increasing intervals of time. This technique takes advantage of the spacing effect and temporal decay of memory to dramatically improve knowledge retention over traditional memorization…
Crtmpserver
Crtmpserver is an open-source media streaming server software that supports the Real-Time Messaging Protocol (RTMP). It is designed to deliver live streams and on-demand streaming media to various clients such as media players, websites, mobiles devices, and set-top boxes.Some key features of Crtmpserver include:Support for streaming protocols like RTMP, RTSP,…